All pages referring or tutorials for Intune.
This is the multi-page printable view of this section. Click here to print.
Microsoft Intune
- 10 scripts for Ubuntu MDM with Microsoft Intune
- Important action: Configure additional authentication for Bitlocker leaks
- Adding Ubuntu endpoints to Microsoft Intune
- Automatically start Windows App at startup
- Deploy Google Chrome Single Sign On with Intune
- Disable Windows Taskbar Widgets through Intune
- Using and configuring Windows Backup for Organizations in Intune
- Remove Pre-installed Windows Store Apps with Intune
10 scripts for Ubuntu MDM with Microsoft Intune
In this post I will share 10 simple scripts for basic device administration tasks on Ubuntu endpoints.
Last week I described how to add Ubuntu endpoints to Microsoft Intune and improve their manageability. This guide can be found here: https://justinverstijnen.nl/adding-ubuntu-endpoints-to-intune
This guide is a sort of “Part 2” and covers additional customization options for Ubuntu endpoints enrolled in Microsoft Intune, building on the configuration described in the first guide.
The scripts
You can find the scripts I used in this guide here on GitHub:
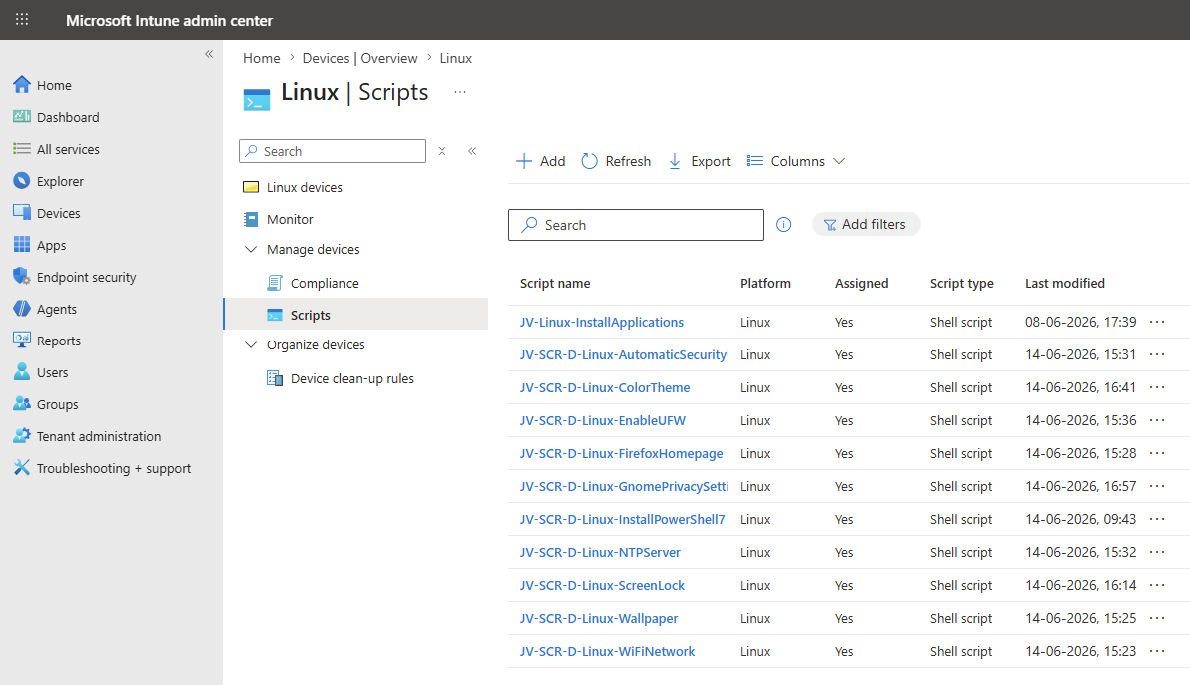
After a few clicks, I manually imported the scripts into Microsoft Intune and assigned them to my Ubuntu device:
Adding a custom script to Microsoft Intune
As all 10 scripts in this post must be added in exactly the same way, I will explain the process once. The process is really simple.
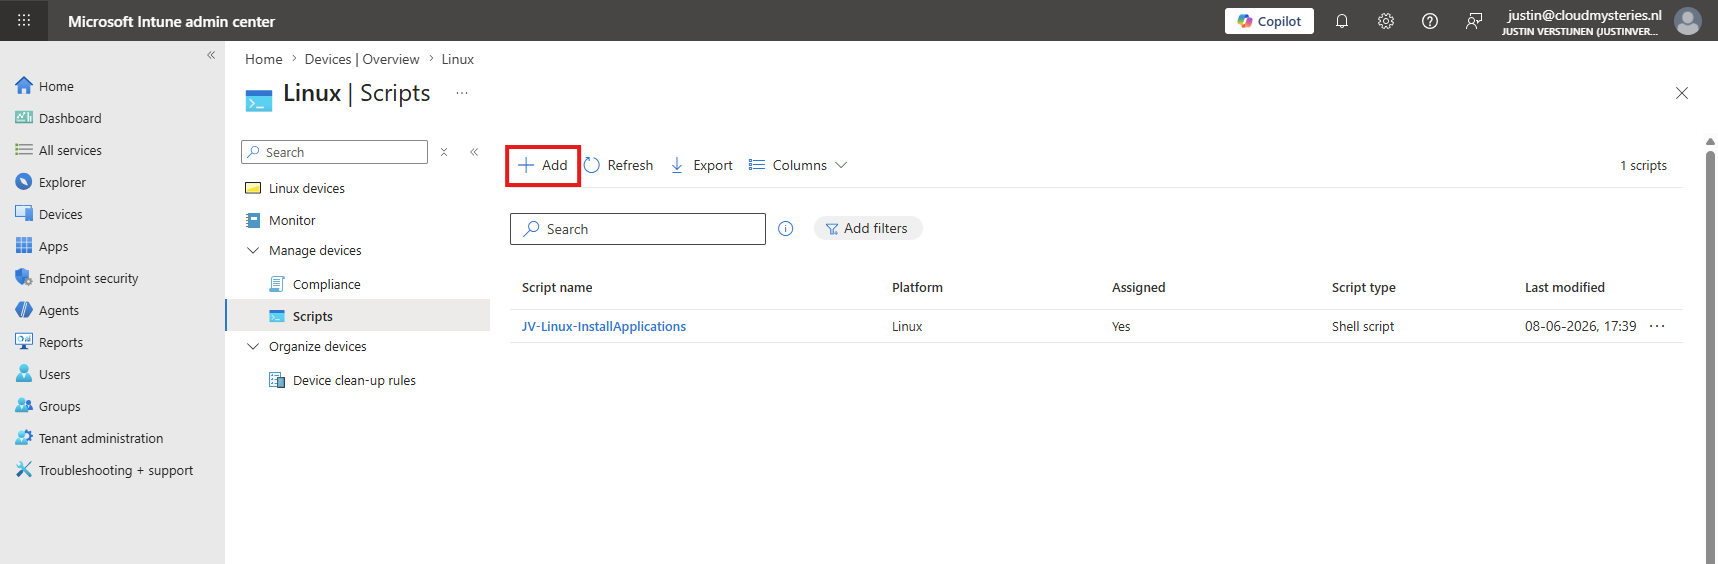
Open Microsoft Intune at https://intune.microsoft.com and navigate to “Devices”, then to “Linux”, and finally to “Scripts”. Here, click “+ Add” to add a new script.
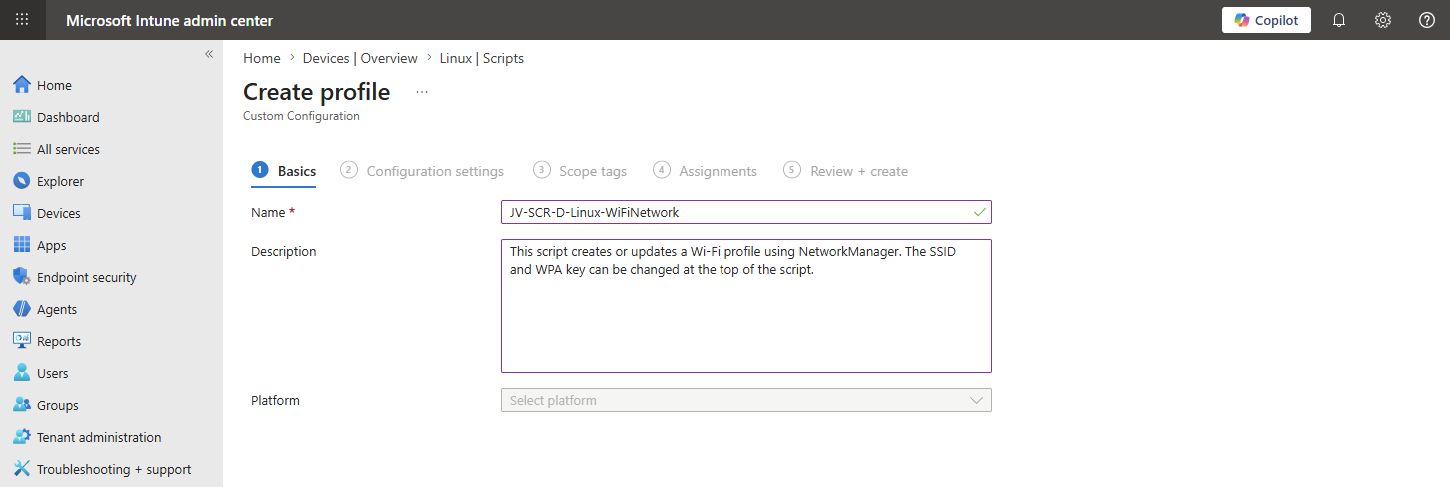
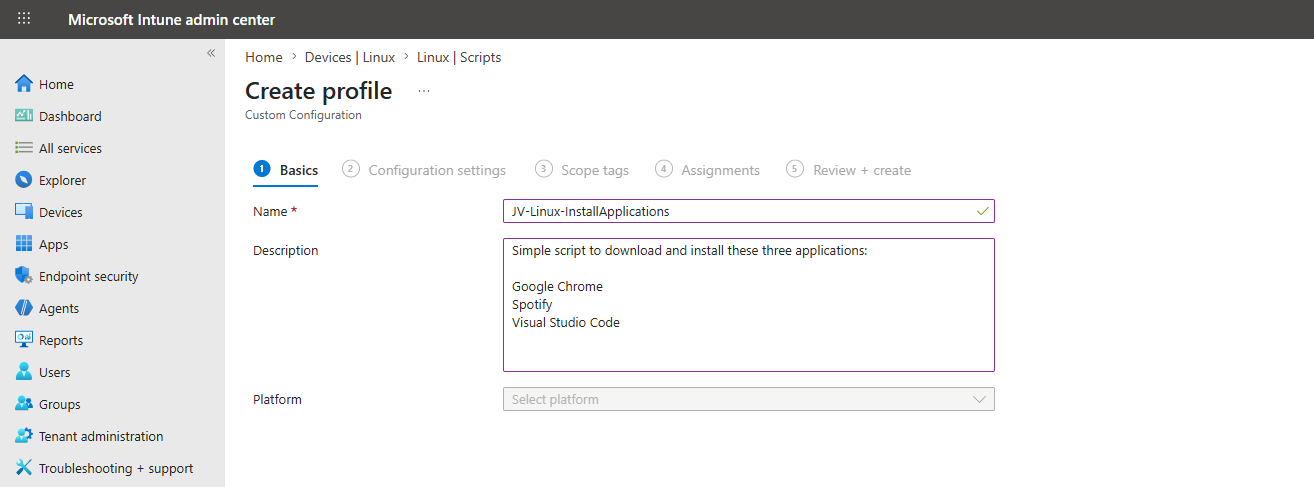
Then fill in the details of your script for documentation purposes in Microsoft Intune.
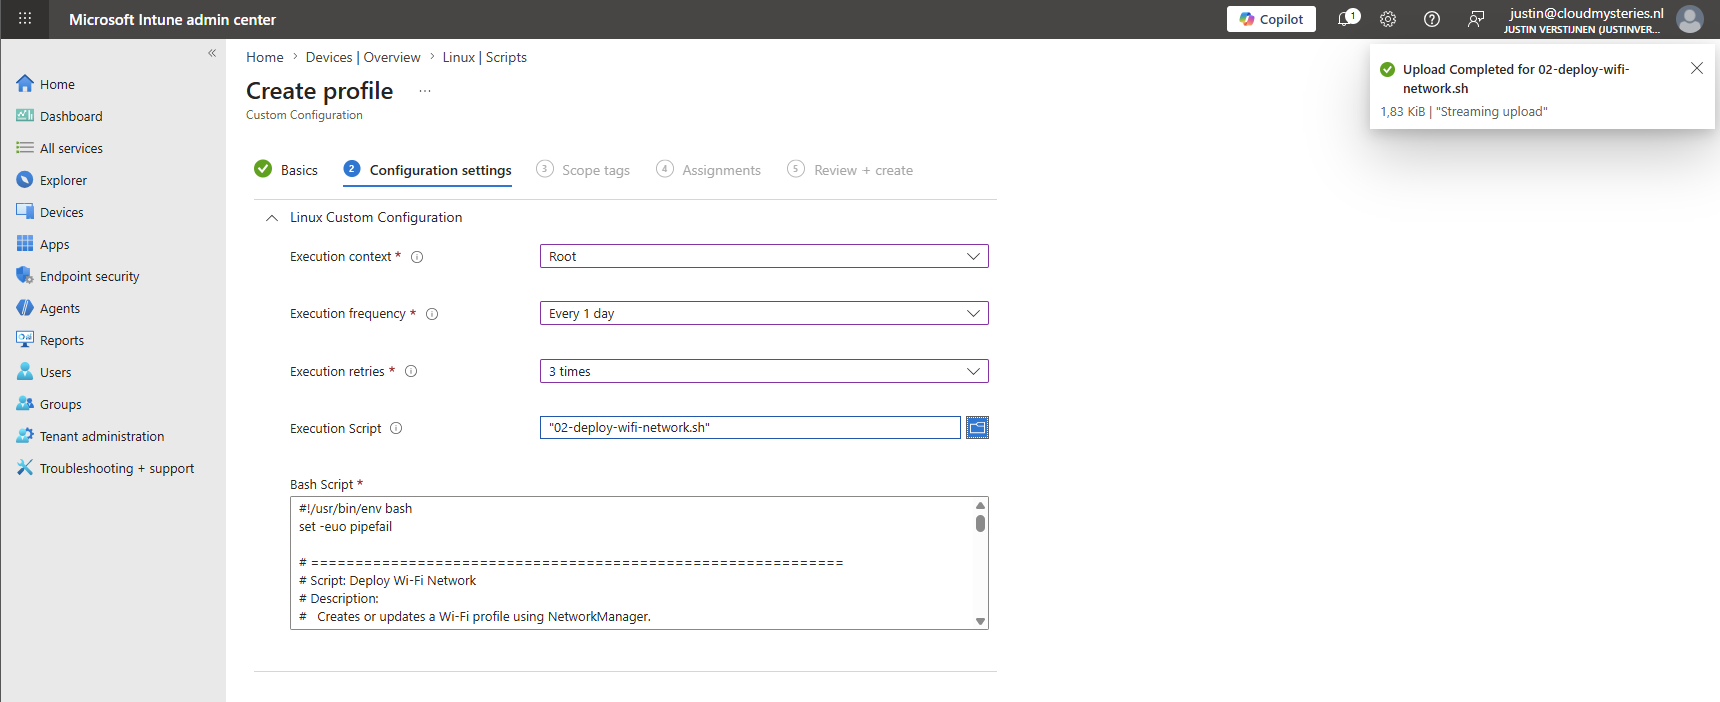
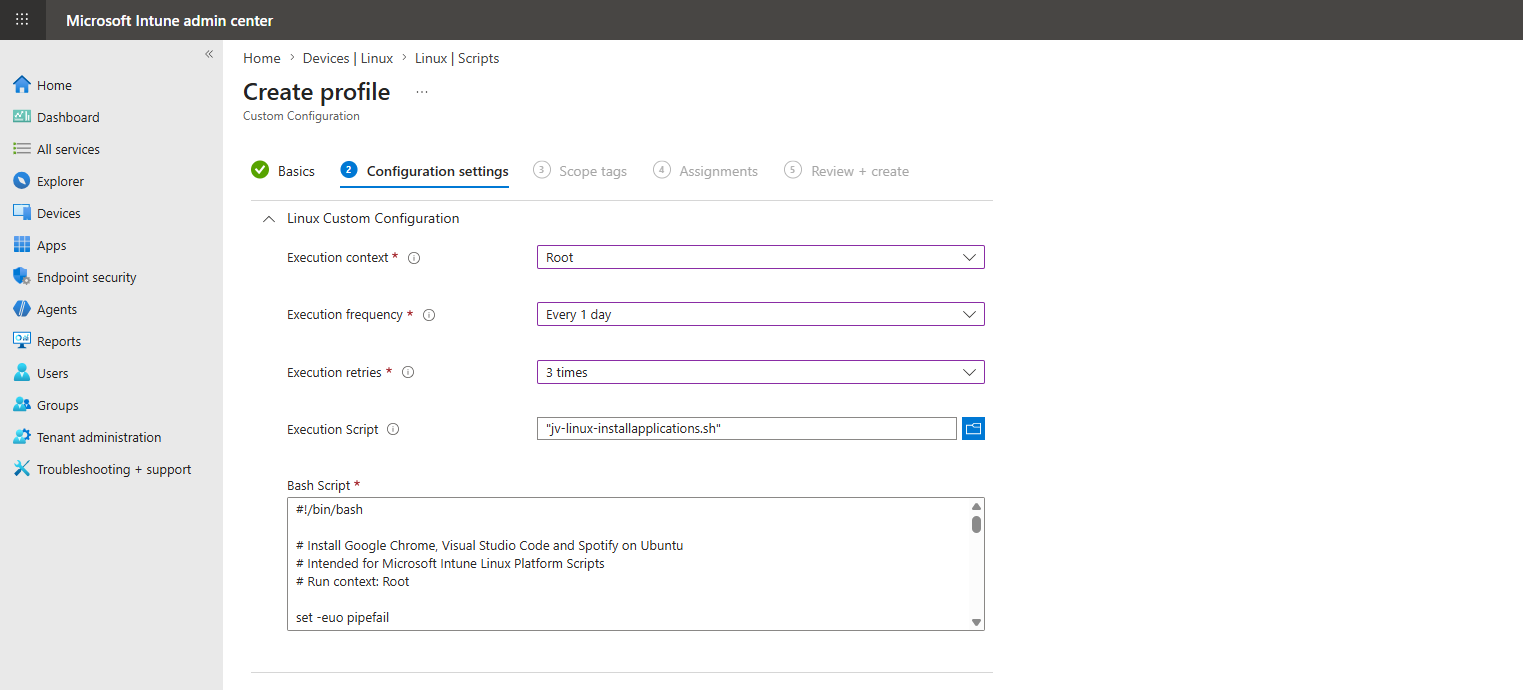
On the “Configuration settings” tab, expand the Linux Custom Configuration blade and configure the following:
| Option | Set this |
|---|---|
| Execution context | Root |
| Execution frequency | Every 1 day |
| Execution retries | 3 times |
Then upload the script after making any necessary adjustments. It should appear in the text box below. It should look similar to this, although you can change the settings depending on your situation, of course:
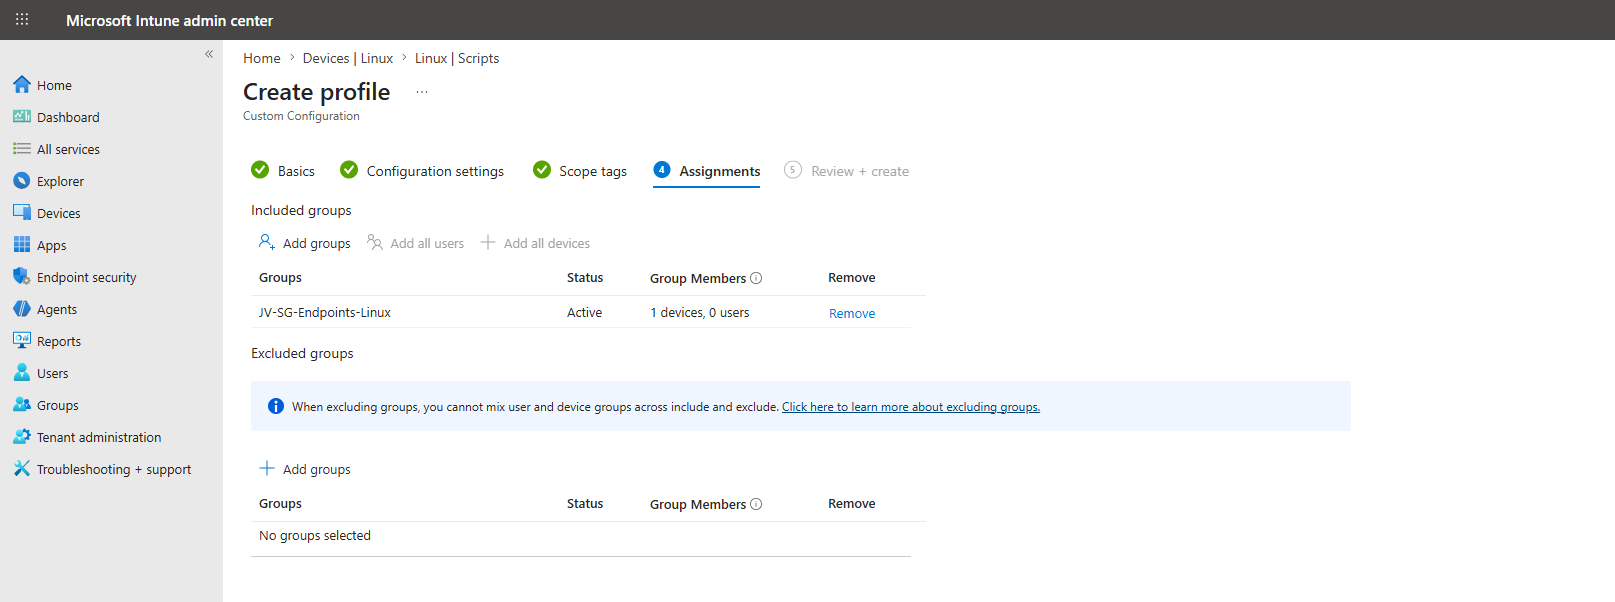
Then advance to the “Assignments” tab and select your group containing the Linux endpoints:
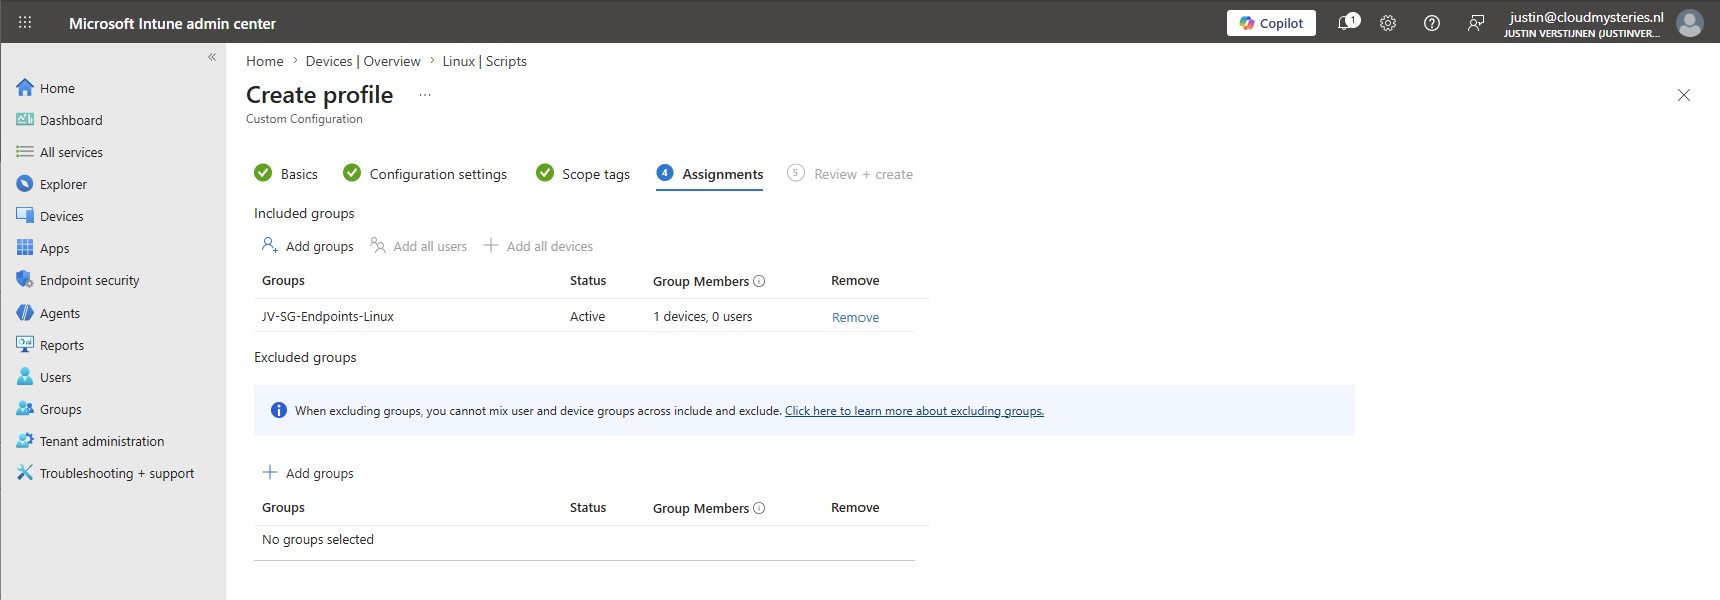
Then finish the assignment, and the script will be executed on the endpoint during the first sync.
Changing script settings
The scripts that have custom settings can be configured at the top. There, you will find several variables that you can adjust to your needs:
Download the script, change the variables in your favorite text editor, and then upload it to Microsoft Intune. You will then be ready to go.
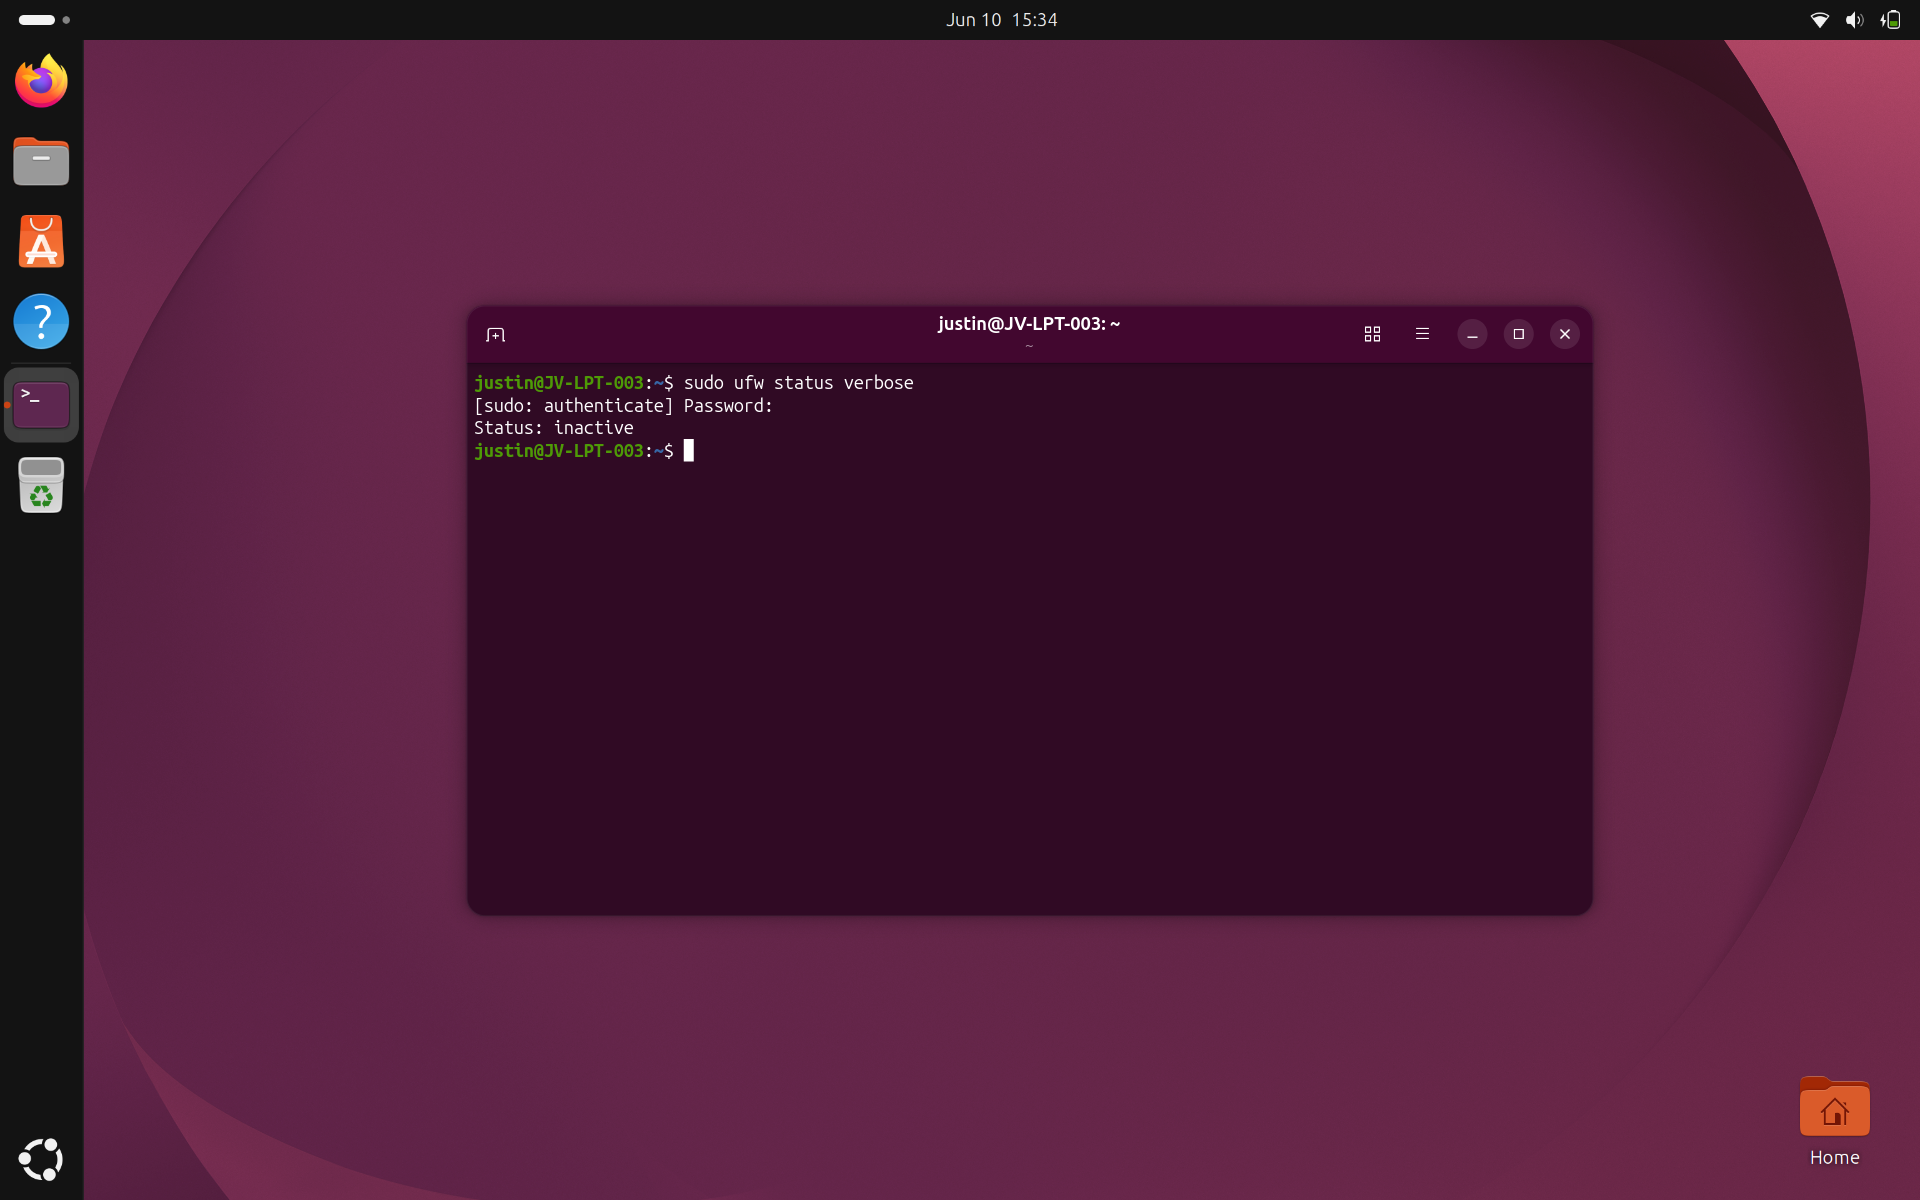
1. Enable Ubuntu Firewall (UFW)
The first script will enable the Ubuntu firewall. This is because Ubuntu has the firewall disabled by default:
Enabling the firewall will block incoming connections that are not defined by a rule and keep your device a bit more secure. After the script has run to enable the firewall, it will be enabled automatically with no need for manual configuration:
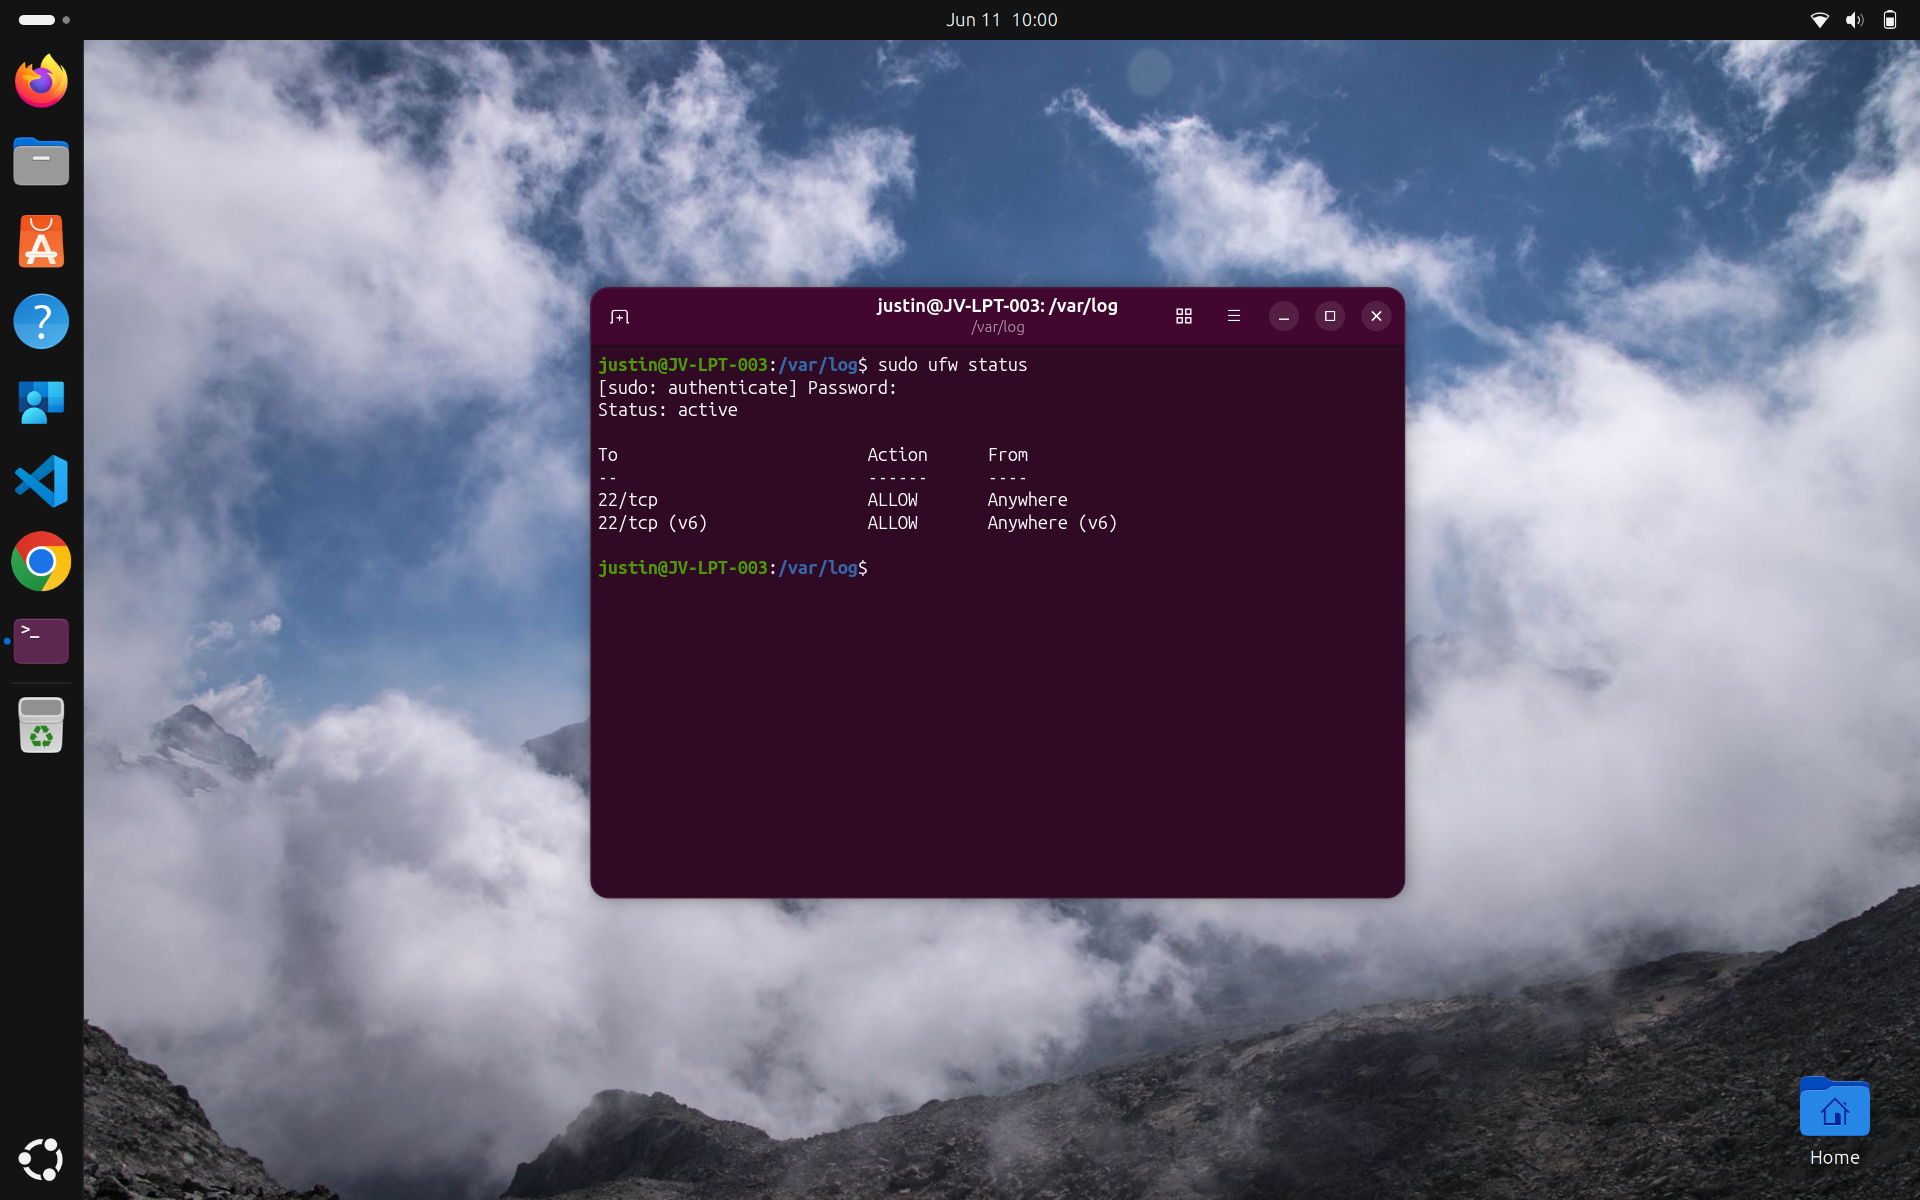
As you can see, the status is now “active”.
2. Deploy a Wi-Fi network
Deploying a Wi-Fi network is also something we often do with Microsoft Intune and generic MDM solutions. This speeds up deployment and eliminates the need to distribute keys throughout the organization.
You can set your own network:
- SSID (Network name): Line 17
- WPA-PSK (Network password): Line 18
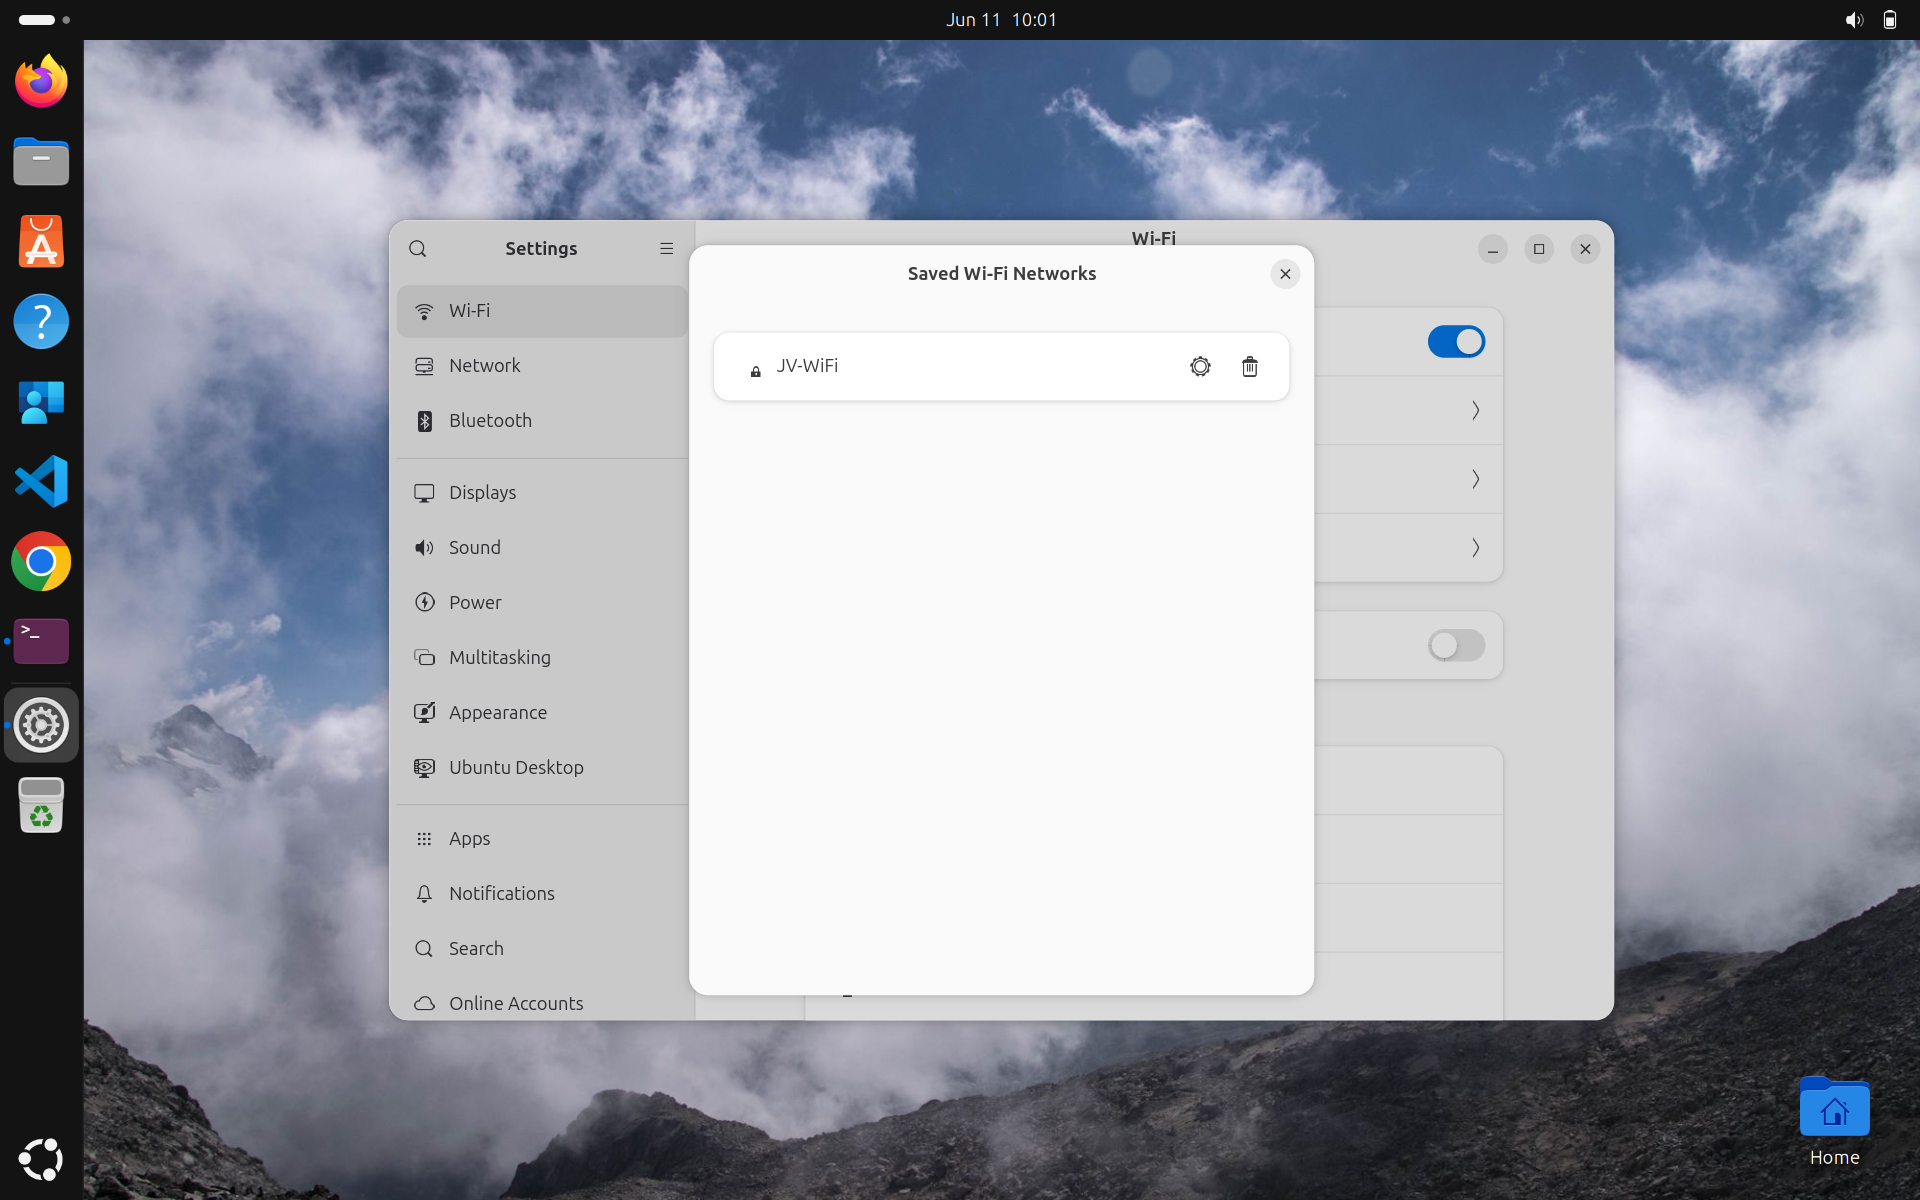
The connection name on Line 19 is a display name in Ubuntu that you can change if you want, but it is not required for the script to work. You could upload this script to Microsoft Intune multiple times when using multiple networks.

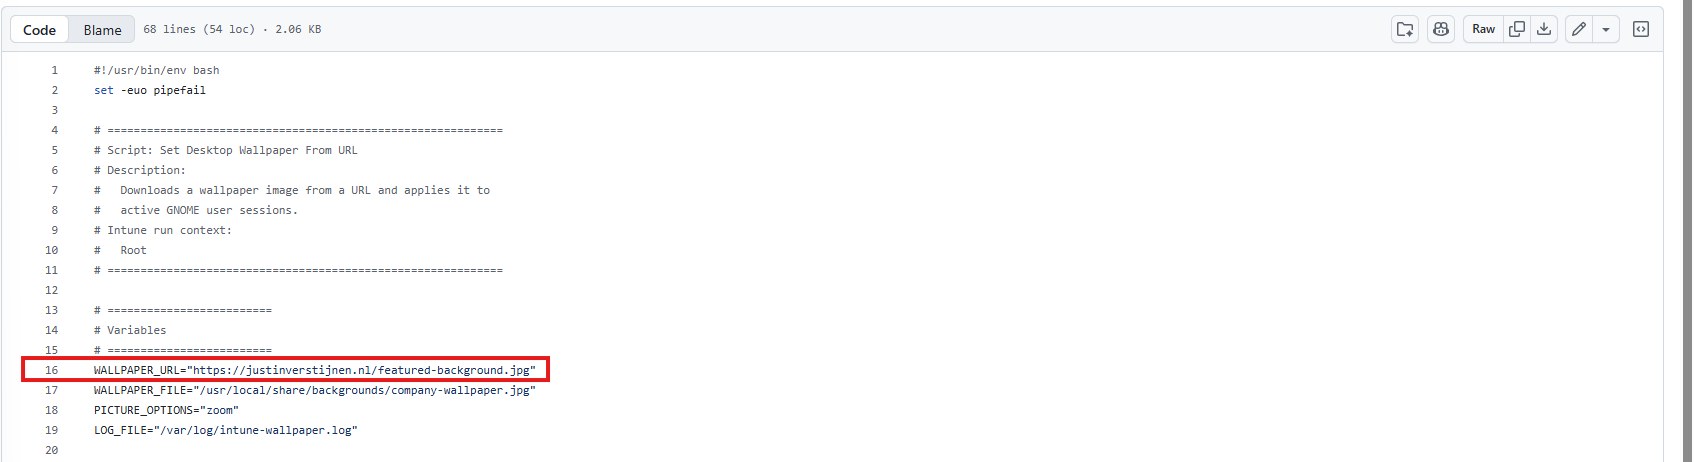
3. Deploy wallpaper
Deploying a wallpaper is also something we often do with Microsoft Intune. In this script, we set a wallpaper URL that must be accessible to the device and configure it as the desktop wallpaper by saving it locally. Updating the wallpaper server-side will also result in a wallpaper update on the endpoints, which is very convenient.
You can change the wallpaper on Line 16 of the script.
4. Install PowerShell 7
It is also possible to install PowerShell 7 from the Ubuntu App Center with a script. This method can also be used to install any application from there.

This way you can also run PowerShell modules and scripts to manage cloud services.
5. GNOME Privacy Settings
This script has various configurable settings for the GNOME Desktop Environment. The table below shows the available options:
| Options | Default value | Supported values | Notes |
|---|---|---|---|
| DISABLELOCATIONSERVICES | true | true, false | Uses the GNOME location setting where available. Some apps may behave differently depending on desktop environment and installed services |
| DISABLERECENTFILE_HISTORY | true | true, false | GNOME exposes file history controls in Privacy & Security settings |
| CLEAREXISTINGRECENTFILEHISTORY | true | true, false | This removes the existing recently-used.xbel file where present |
| DISABLELOCKSCREEN_NOTIFICATIONS | true | true, false | Ubuntu documents this as the dconf key /org/gnome/desktop/notifications/show-in-lock-screen |
| REMOVEOLDTEMP_FILES | true | true, false | Uses GNOME privacy settings where available |
| REMOVEOLDTRASH_FILES | true | true, false | Uses GNOME privacy settings where available |
| OLDFILESAGE_DAYS | 30 | Number of days, for example 7, 14, 30 | Only relevant when old temp or trash cleanup is enabled |
| LOCKPRIVACYSETTINGS | false | true, false | Useful for strict policy enforcement. Leave disabled for a softer baseline |
| APPLYTOACTIVE_USERS | true | true, false | If no GNOME session is active, system defaults still apply on next login |
The settings can be configured at the start of the script, on Lines 4 through 12.
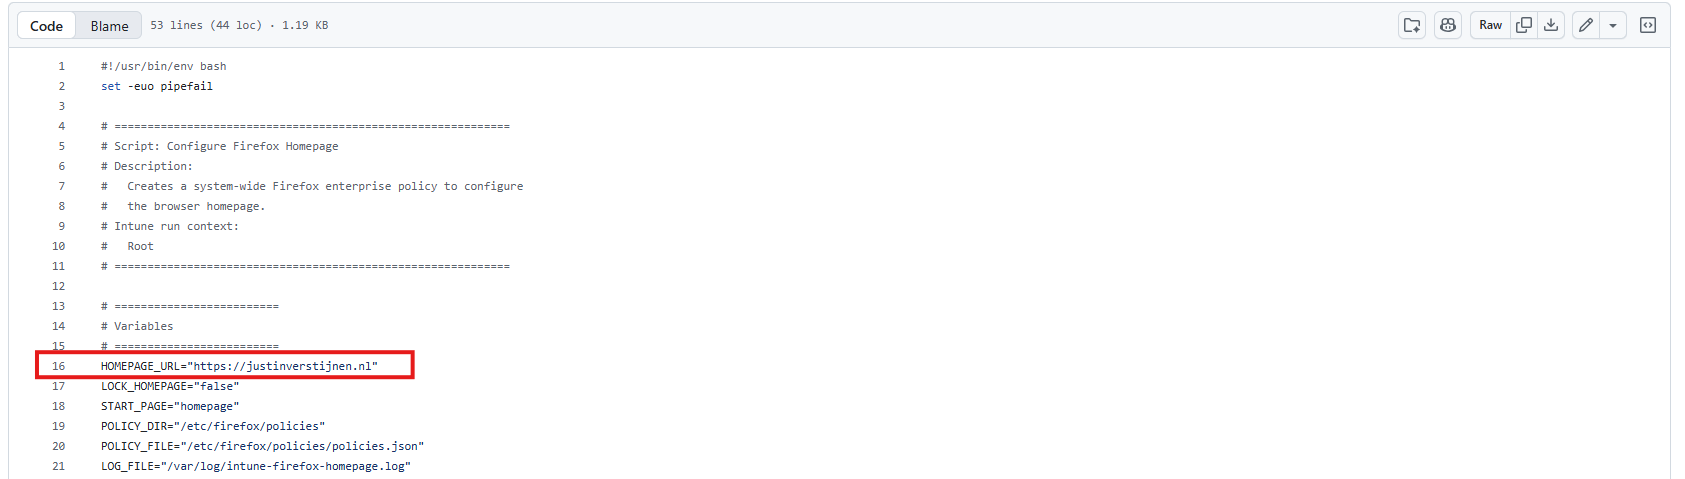
6. Configure homepage for Firefox
As Firefox is the default browser on Ubuntu, we can also configure a default homepage and set it to a particular URL.
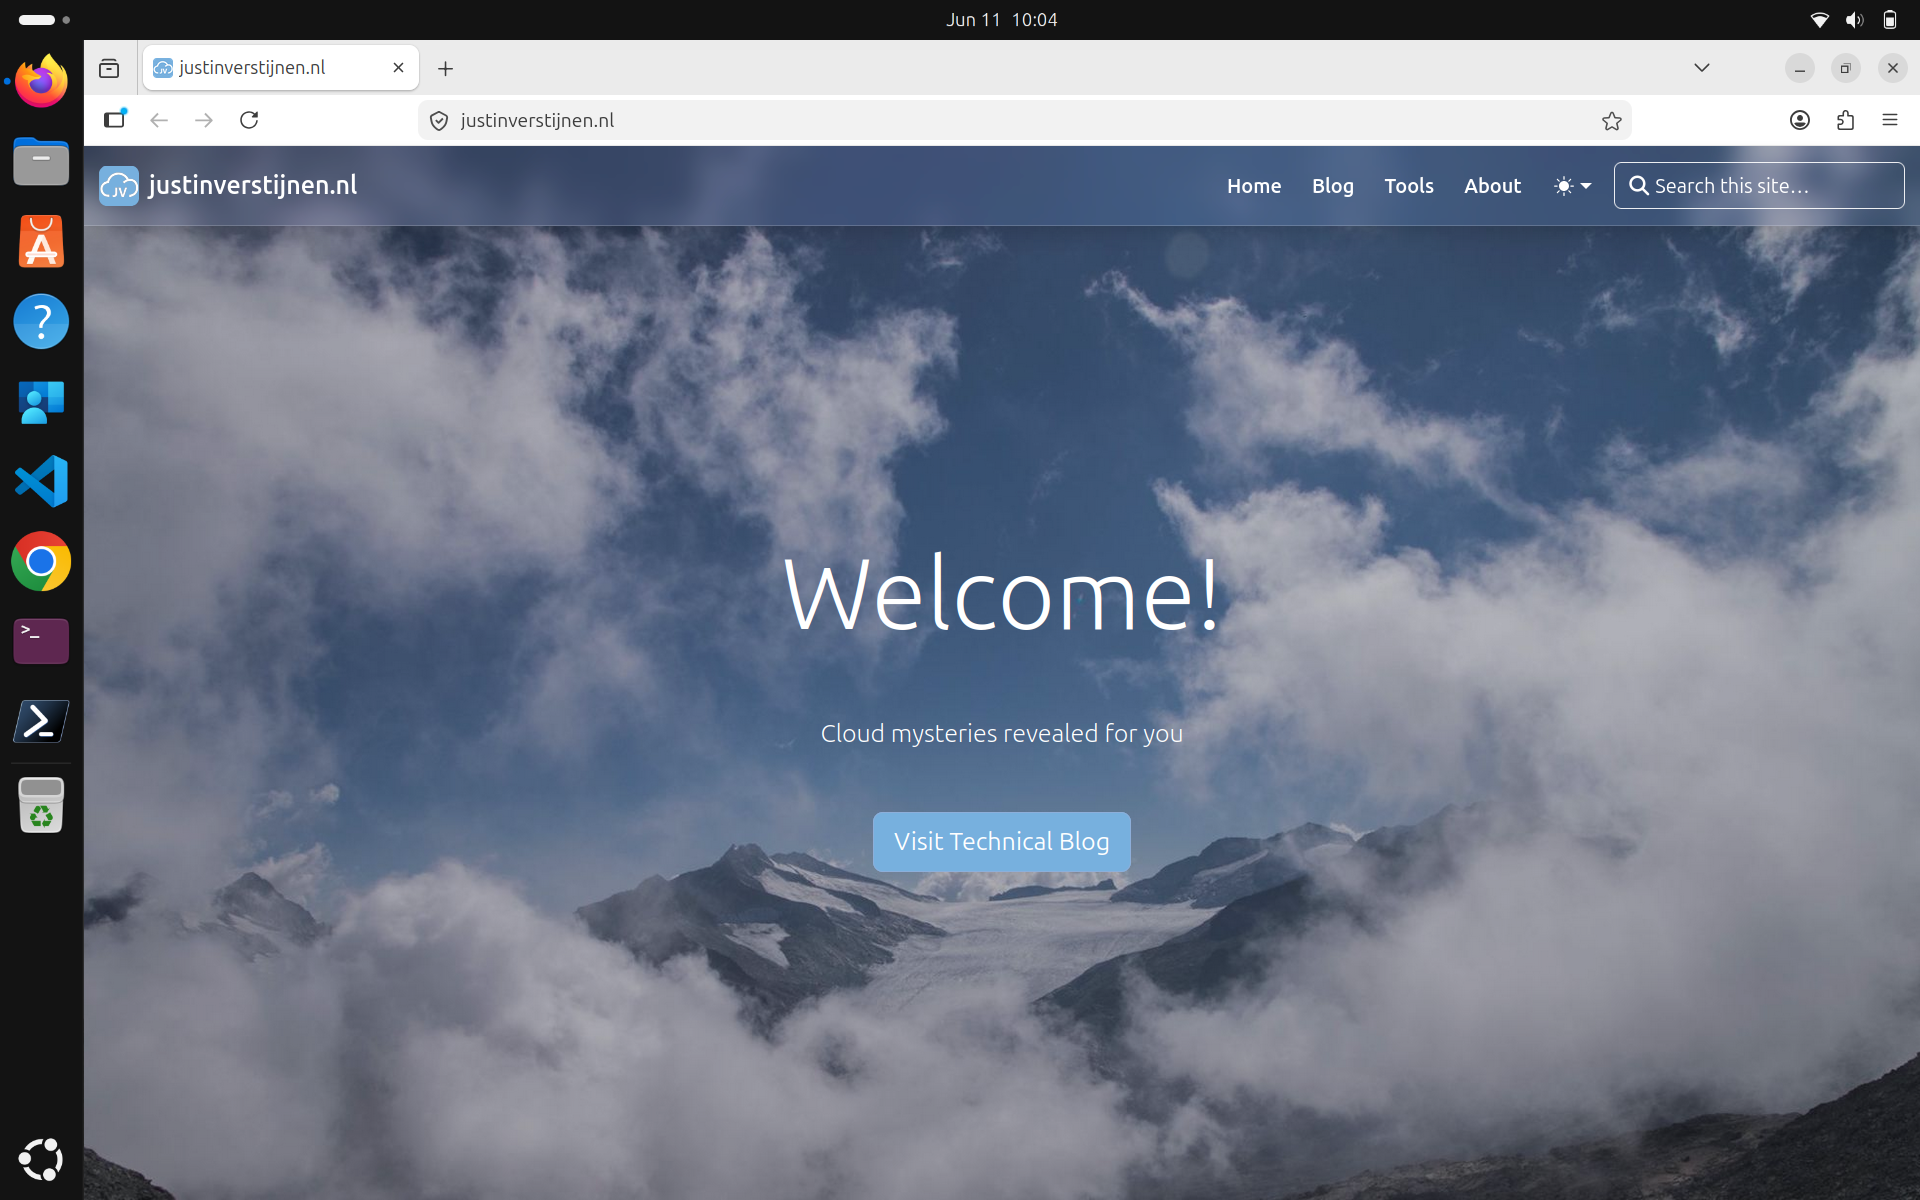
You can change this URL on Line 16 of this script.
7. Set color theme
We can also set the color theme of Ubuntu with this script. You must first select a hex color in the #FFFFFF format, paste it into the script, and then upload it to Microsoft Intune.
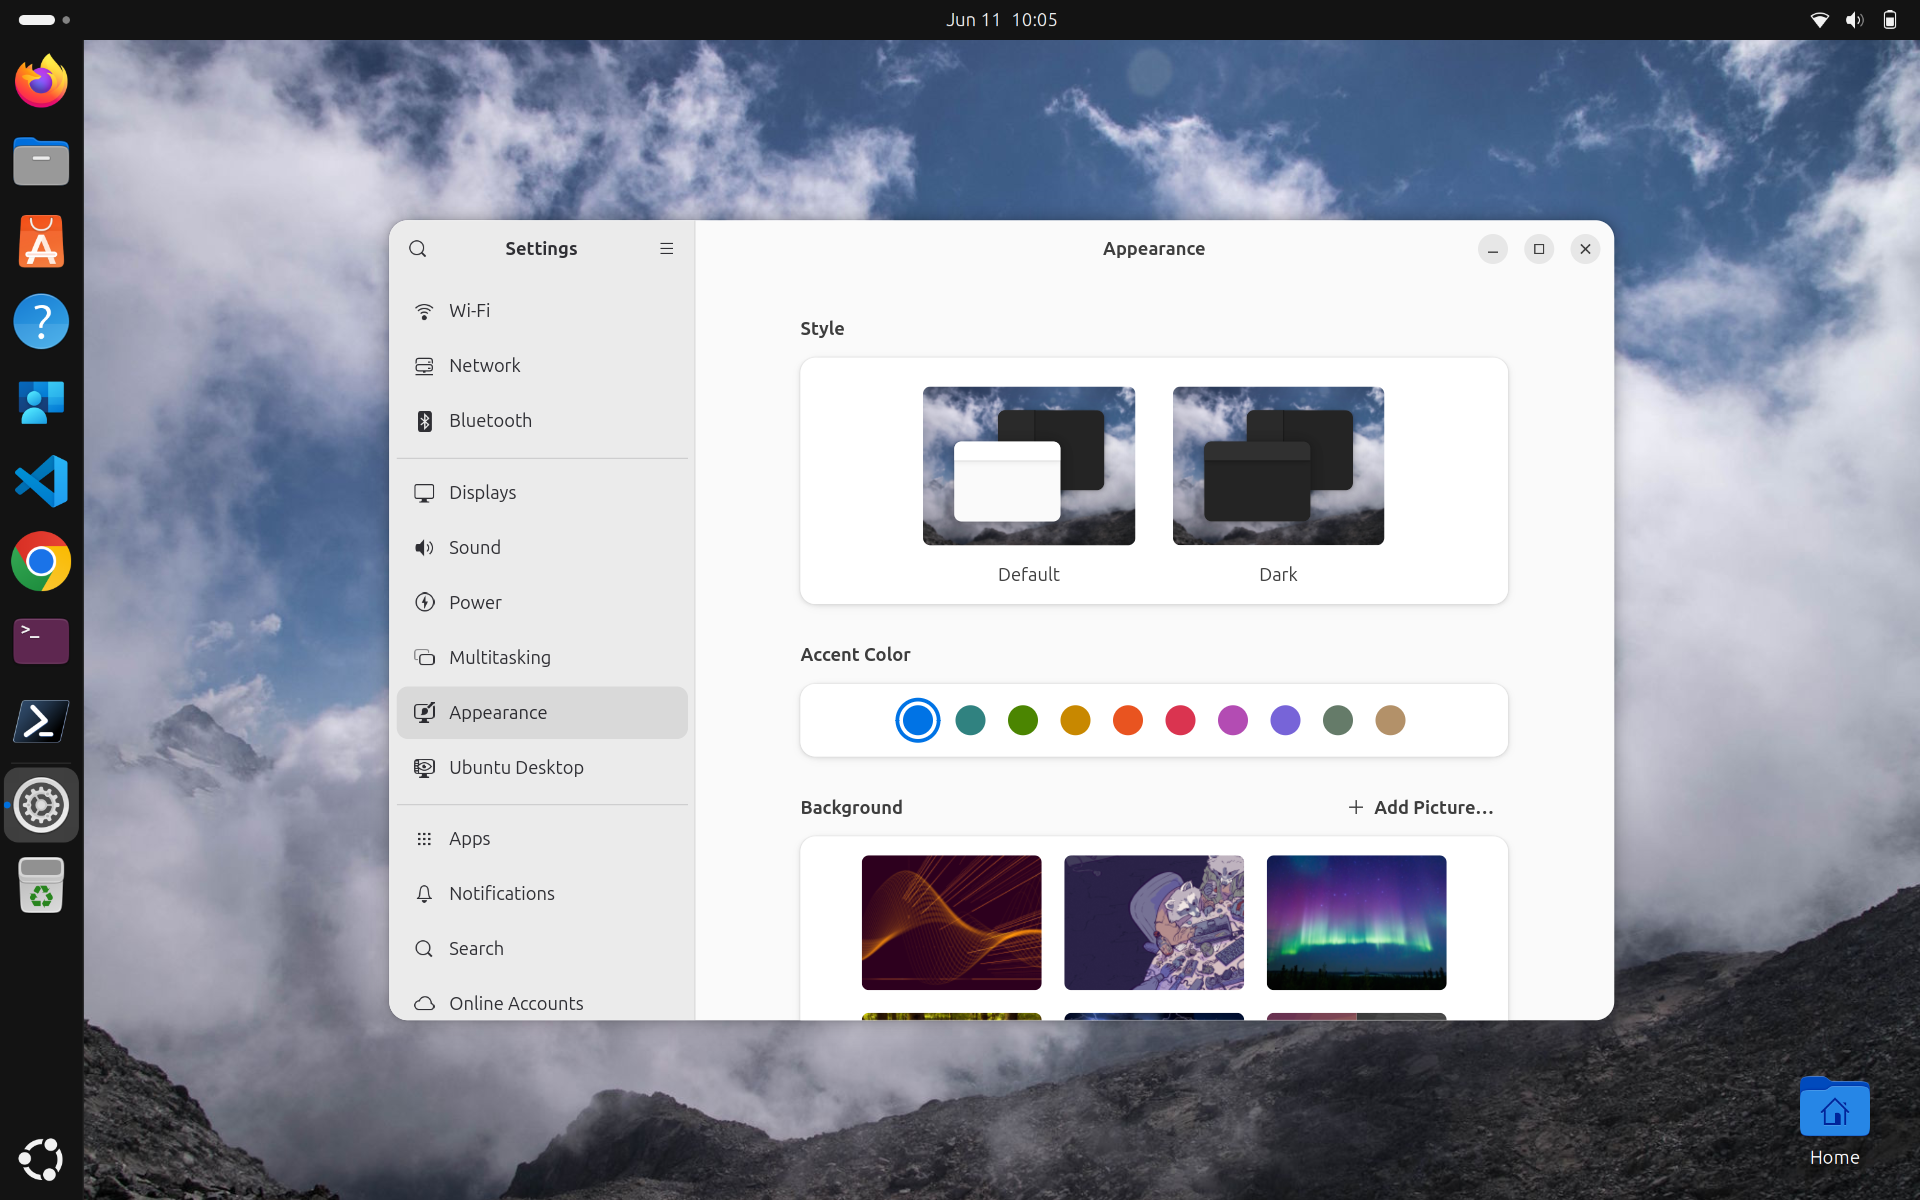
This must be set on Line 4, where you can select one of these options:
- Blue
- Teal
- Green
- Yellow
- Orange
- Red
- Pink
- Purple
- Slate

8. Configure screen timeout/lock
Something we often configure with Microsoft Intune is the screen timeout and locking options. When we walk away from the device and no input is received, the device will lock after 5 minutes. This value can be changed in the script.
You can change this value in seconds on Line 15. The default is 5 minutes, or 300 seconds.
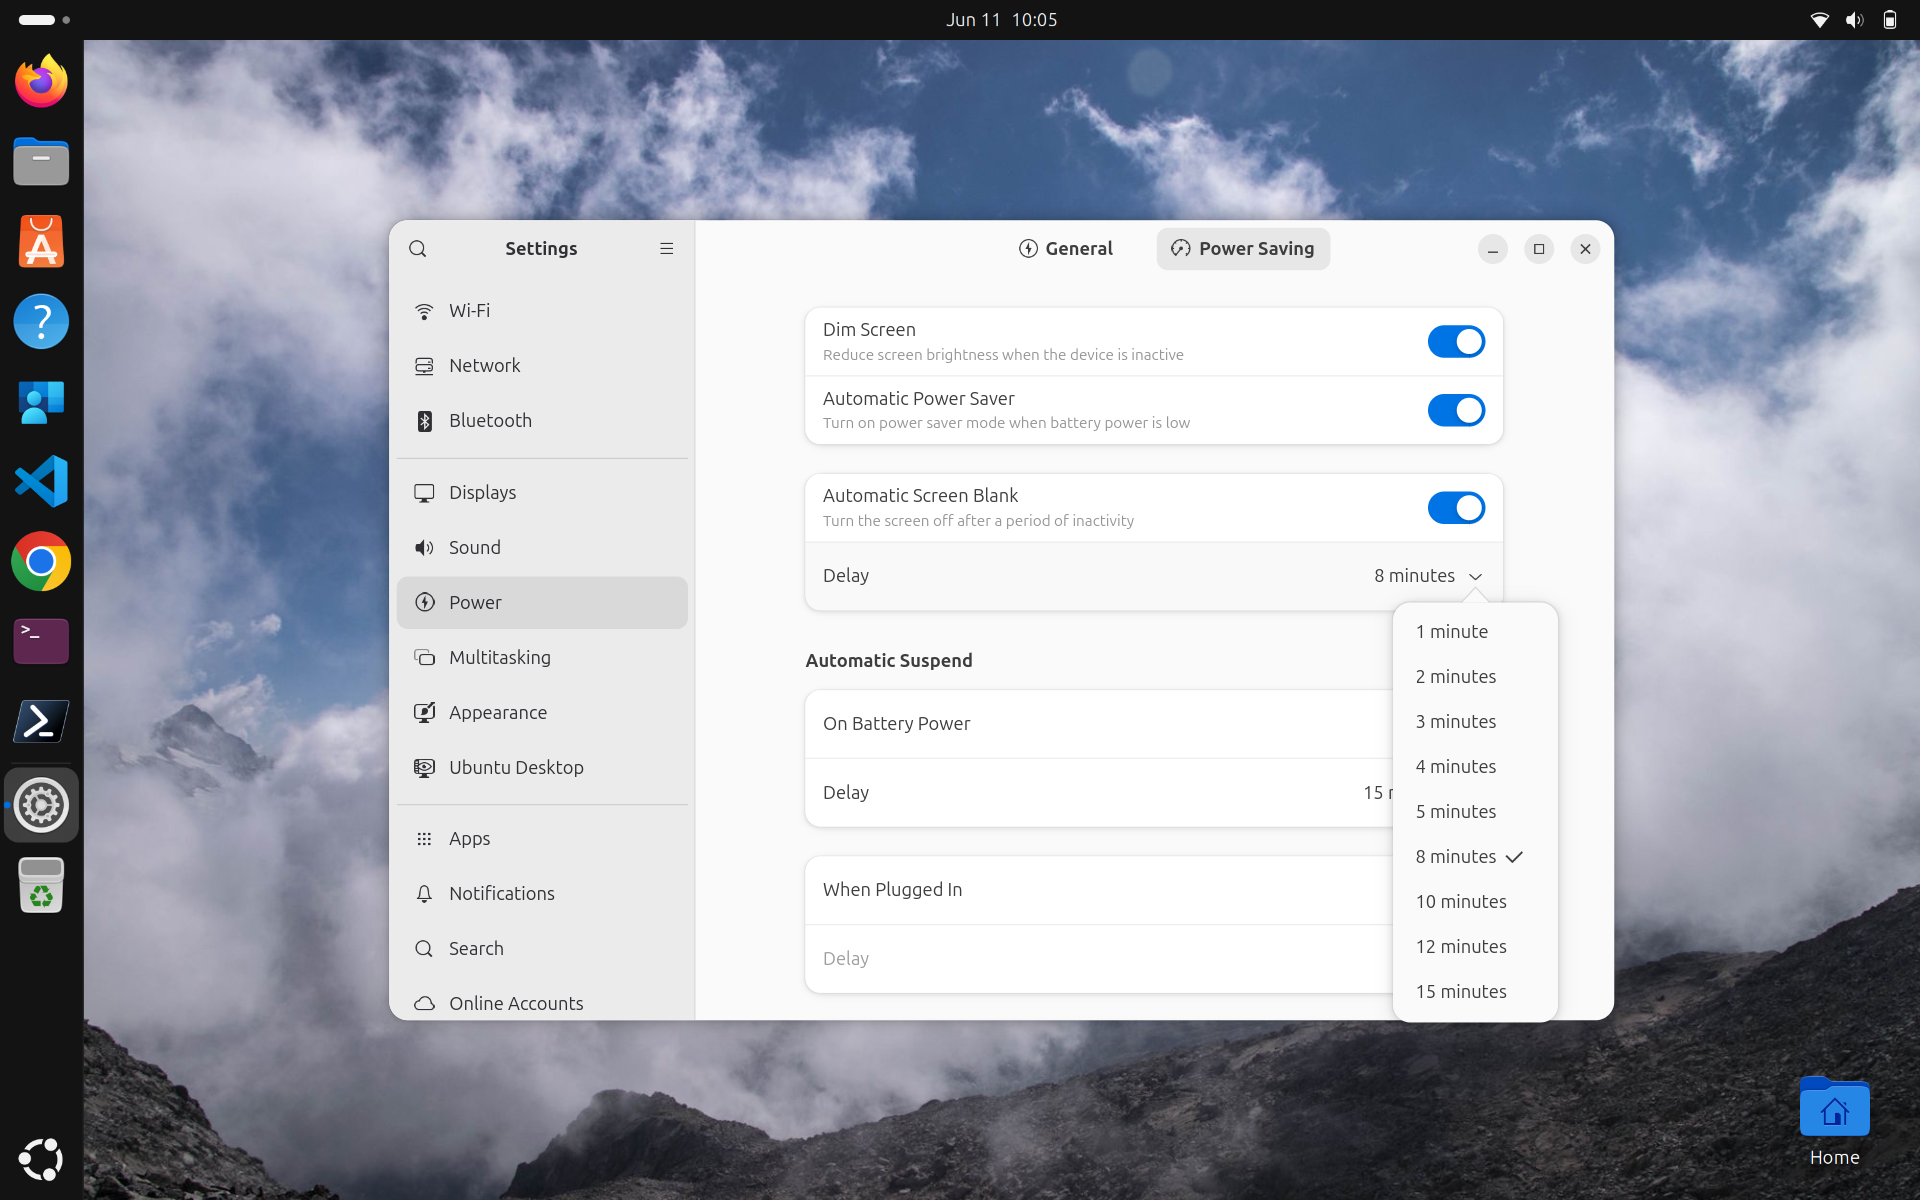
For demonstration purposes, I have set the timeout to 8 minutes, as 5 minutes was the default option.
9. Enable Automatic Security Updates
This script enables automatic security updates on an Ubuntu device. It installs unattended-upgrades, configures the system to check for package updates daily, and automatically installs security-related updates. It also removes unused dependencies and writes the output to a log file for troubleshooting. Automatic rebooting is disabled to prevent unexpected restarts, but a reboot time has already been configured in case this option is enabled later.
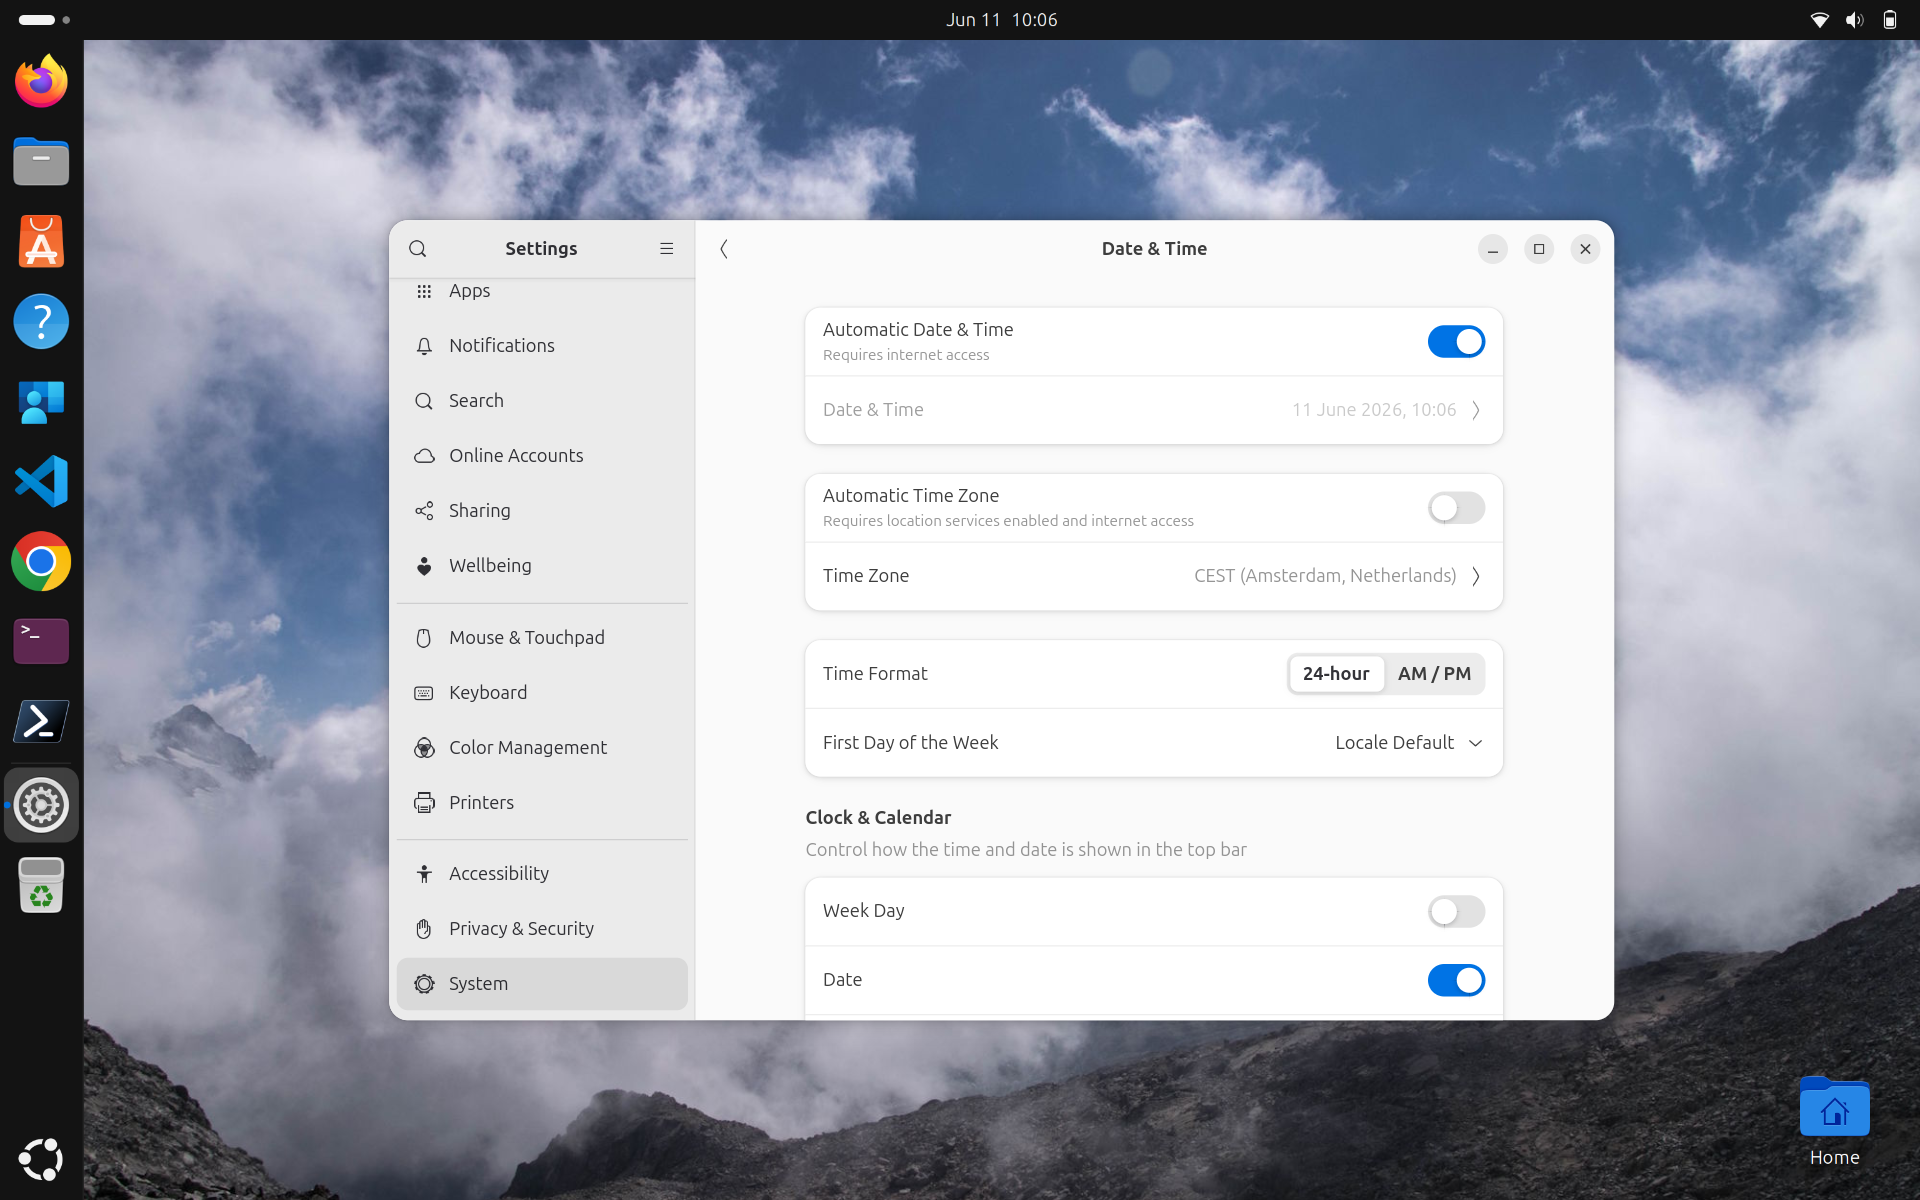
10. Set timezone/NTP
We can set the timezone and NTP server with this script. This ensures the time and date are synchronized with time servers on the internet and minimizes the risk of issues caused by time synchronization problems.
You can change the timezone on Line 16 of this script.
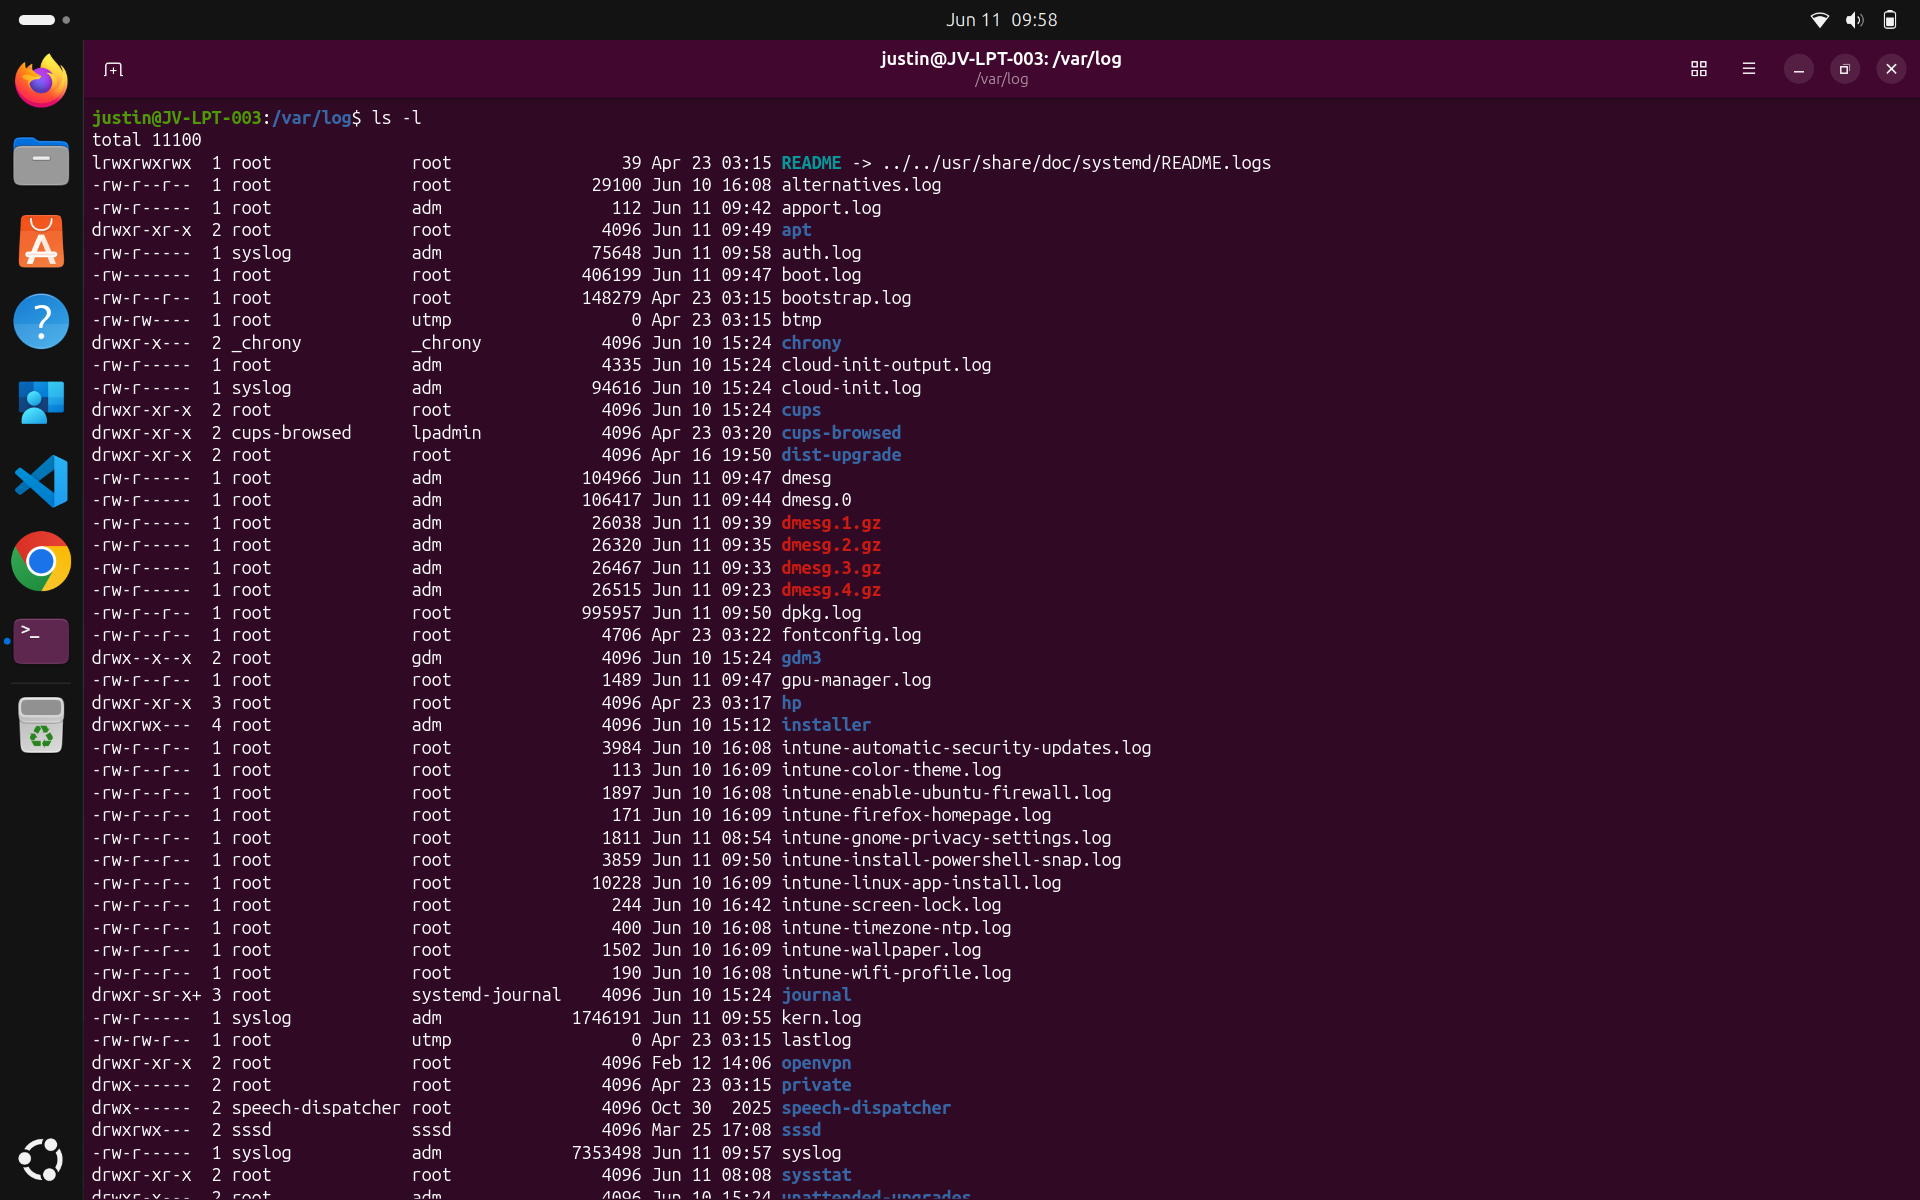
Troubleshooting
All scripts will write a log file to the /var/log folder. All scripts have been tested and are working on Ubuntu 26.04. However, if you encounter errors on your end, you can review the logs to identify the cause.
- /var/log
You can use these two built-in Ubuntu/Linux commands to review the contents:
- cat *filename.log (read)
- nano *filename.log (read/edit)
Downsides of Linux devices in Microsoft Intune
One of the downsides I find with Ubuntu devices in Intune is that users must confirm everything themselves by entering their password. When new scripts are uploaded and assigned, they see this window:
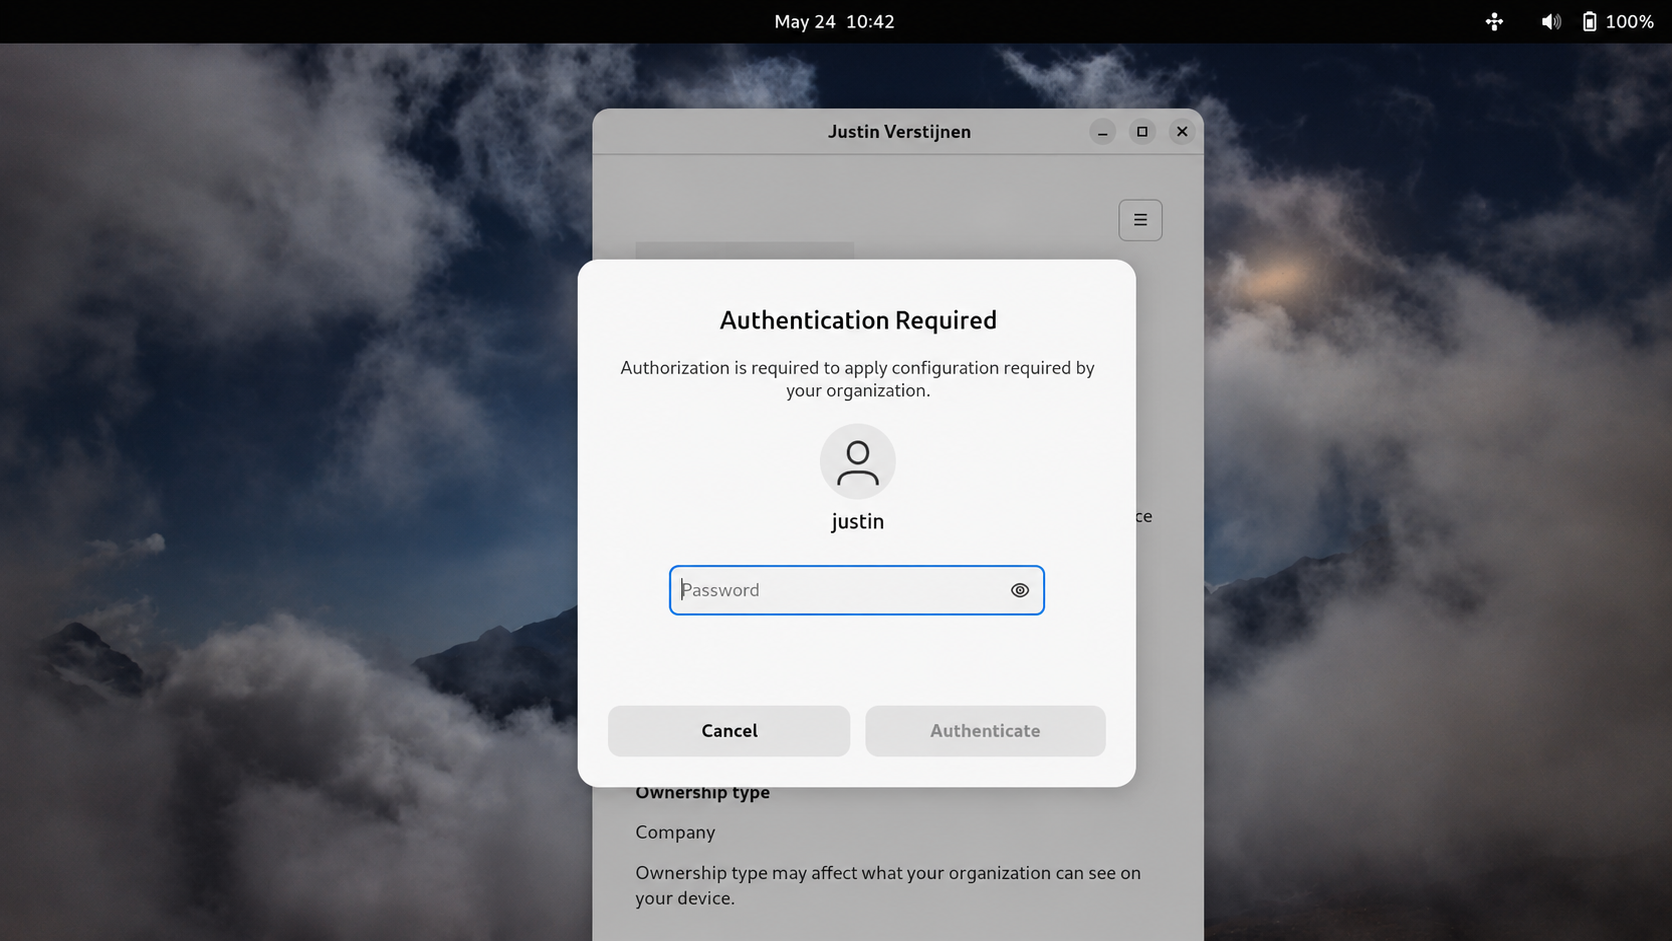
This is not a major problem, but it differs from device management on Windows devices. There, we can update policies and install applications without user interaction.
Another downside is that management is very limited. We cannot wipe devices from the portal and support is limited to Ubuntu only. Most people who use Linux distributions do not use only Ubuntu and may want more customization with other distros, but these are not yet supported.
Sources
These sources helped me with the writing and research for this post:
- https://learn.microsoft.com/en-us/intune/device-security/compliance/custom-settings
- https://learn.microsoft.com/en-us/intune/user-help/enrollment/enroll-linux
- https://learn.microsoft.com/en-us/intune/user-help/enrollment/enroll-linux#system-requirements
End of the page 🎉
You have reached the end of the page. You can navigate through other blog posts as well, share this post on X, LinkedIn and Reddit or return to the blog posts collection page. Thank you for visiting this post.
If you find this page and blog very useful and you want to leave a donation, you can use the button below to buy me a beer. Hosting and maintaining a website takes a lot of time and money. Thank you in advance and cheers :)

The terms and conditions apply to this post.
Important action: Configure additional authentication for Bitlocker leaks
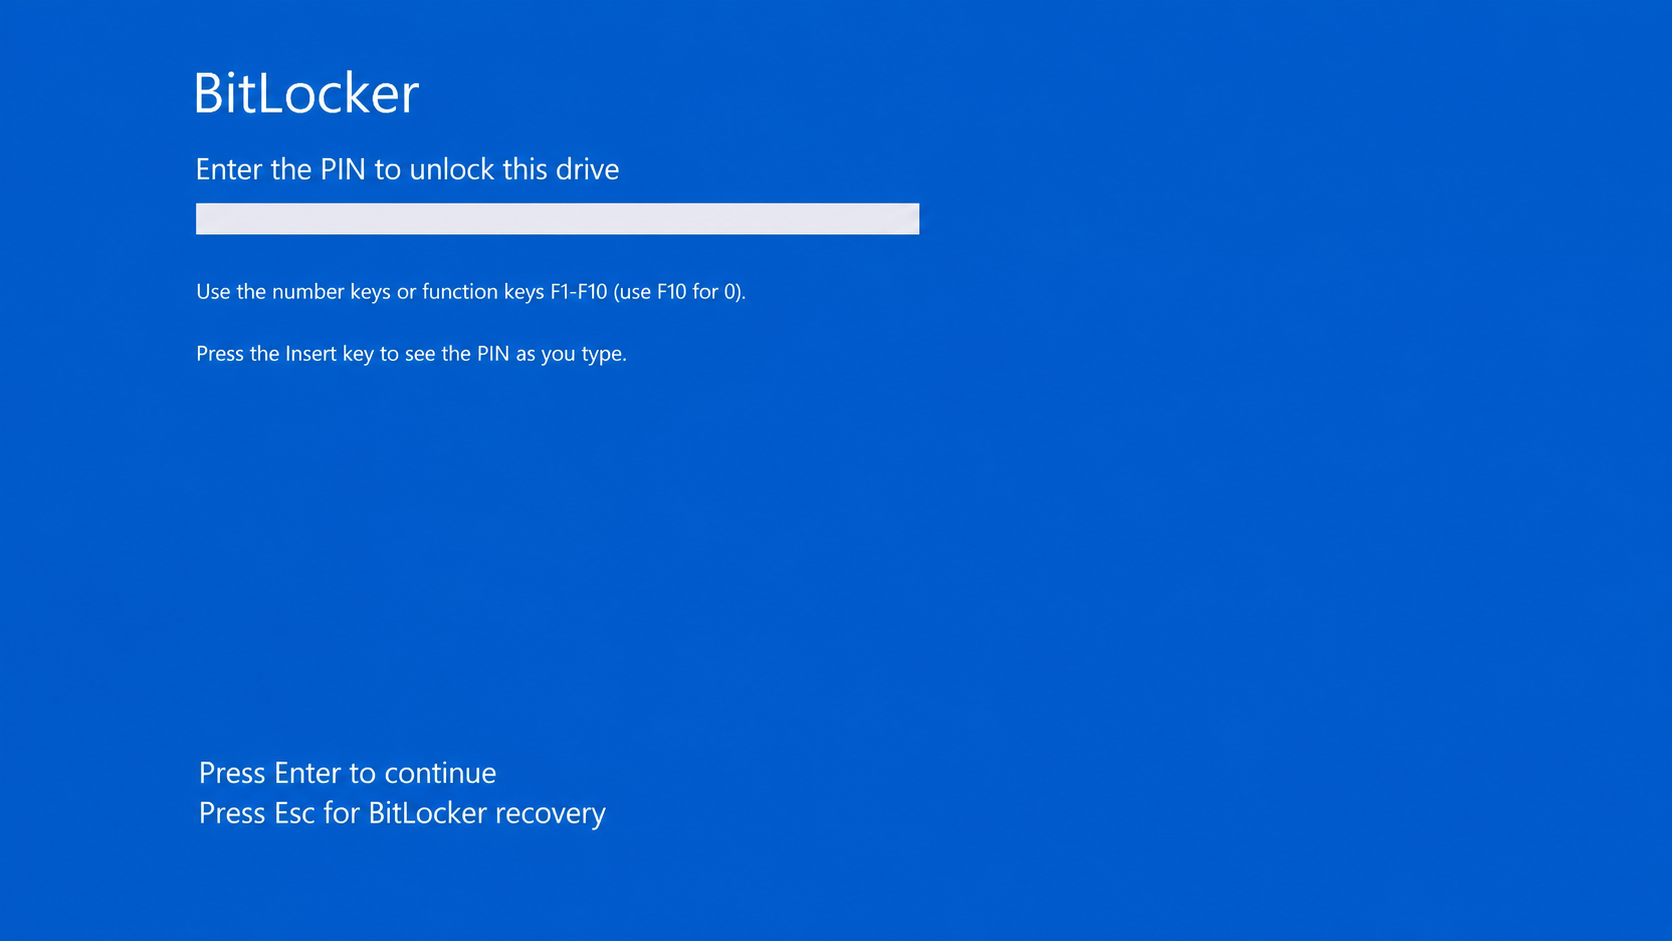
For years, Bitlocker was a relatively secure protocol to encrypt your hard drives of your computer. However,recent multiple reports surfaced around attacks targeting BitLocker protected devices. Techniques like YellowKey and GreatXML focus on extracting BitLocker secrets from memory or abusing the boot process when devices are protected with TPM-only authentication.
When Bitlocker is configured to only unlock with the TPM, we create an attack path which allows access to the unencrypted data. This is because you only need the disk and the TPM module to unlock by default.
In the Bitlocker settings, there is an option “Require startup PIN with TPM”. This will show an extra PIN code window to the end user at startup, and then Bitlocker can only be unlocked after the PIN and then with the TPM module, instead of only the TPM module. It also makes you a lot less vulnerable to Bitlocker leaks and directly exposing your cimportant personal and company data in any case your device is stolen.
In this guide I will show how to configure this “Require startup PIN with TPM” setting through Microsoft Intune and on your current Windows device, as this cannot be deployed as the user must set a PIN. I will show on how to configure this for new devices through policy and how to configure this for existing devices.
Requirements
- Basic knowledge of Microsoft Intune
- Basic knowledge of Bitlocker/Windows
- Around 20 minutes of your time
What changes when using a startup PIN?
By default with TPM-only protection, the TPM automatically releases the BitLocker key during startup when the boot environment looks trusted. The TPM is a hardware chip in your computer that has the Bitlocker code saved on it. If you replace the TPM or take one of the disks in another PC, you must enter the Bitlocker code first. This creates a sort of “trust”, as Bitlocker trusts the TPM module as long as its available.
With a startup PIN configured, the TPM will only release the key after the user enters the correct PIN before Windows boots. A sort of password for your Bitlocker key.
This means:
- Stolen devices become much harder to access
- Offline attacks become more difficult
- DMA and memory extraction style attacks are mitigated better
- Users must enter a PIN during every startup
The downside is that this slightly reduces user convenience because users now interact with BitLocker before Windows starts. However if we take a moment and think about the need of putting in an extra PIN code or having such an increasing attack vector with big risk of data loss, the choice will be made very easy.
The leaks described
The recent reported leaks leveraging the Bitlocker without additional verification are:
| CVE / Name | URL | Vulnerability Type | CVSS score | Published / Seen |
|---|---|---|---|---|
| CVE-2026-45658 | https://nvd.nist.gov/vuln/detail/CVE-2026-45658 | Security Feature Bypass | 7.8 | 2026-06-09 |
| CVE-2026-27913 | https://nvd.nist.gov/vuln/detail/CVE-2026-27913 | Security Feature Bypass | 7.7 | 2026-04-14 |
| CVE-2026-45585 | https://nvd.nist.gov/vuln/detail/CVE-2026-45585 | Security Feature Bypass / Command Injection | 6.8 | 2026-05-19 |
| CVE-2026-50507 | https://nvd.nist.gov/vuln/detail/CVE-2026-50507 | Security Feature Bypass | 6.8 | 2026-06-09 |
| CVE-2026-45655 | https://nvd.nist.gov/vuln/detail/CVE-2026-45655 | Security Feature Bypass | 5.3 | 2026-06-09 |
Exposure of your data by these leaks can be minimized by leveraging these rules:
- Endpoints up-to-date and require them to be up to date with Compliance Policies
- TPM+PIN verification on startup configured
- No local administrator access for normal users
- Set BIOS/UEFI passwords for administrative access
Option 1: Create/Update the BitLocker policy in Intune
We can configure the Bitlocker policy in Microsoft Intune for new deployed devices only. This will not apply to existing devices as an PIN code must be set.
To configure this option, Open the Microsoft Intune admin center at https://intune.microsoft.com and go to “Endpoint security”, then to “Disk encryption” and update your existing policy or create a new policy if not done already.
Info
Your BitLocker policy can also be under “Configuration Profiles” if its configured using the Administrative Templates.
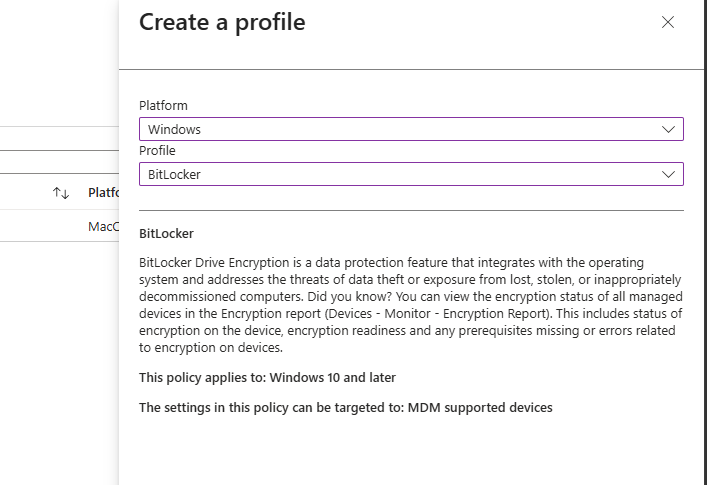
Configure the following:
- Platform : Windows
- Profile : BitLocker
Give the policy a name and description and advance to the tab “Configuration settings”.
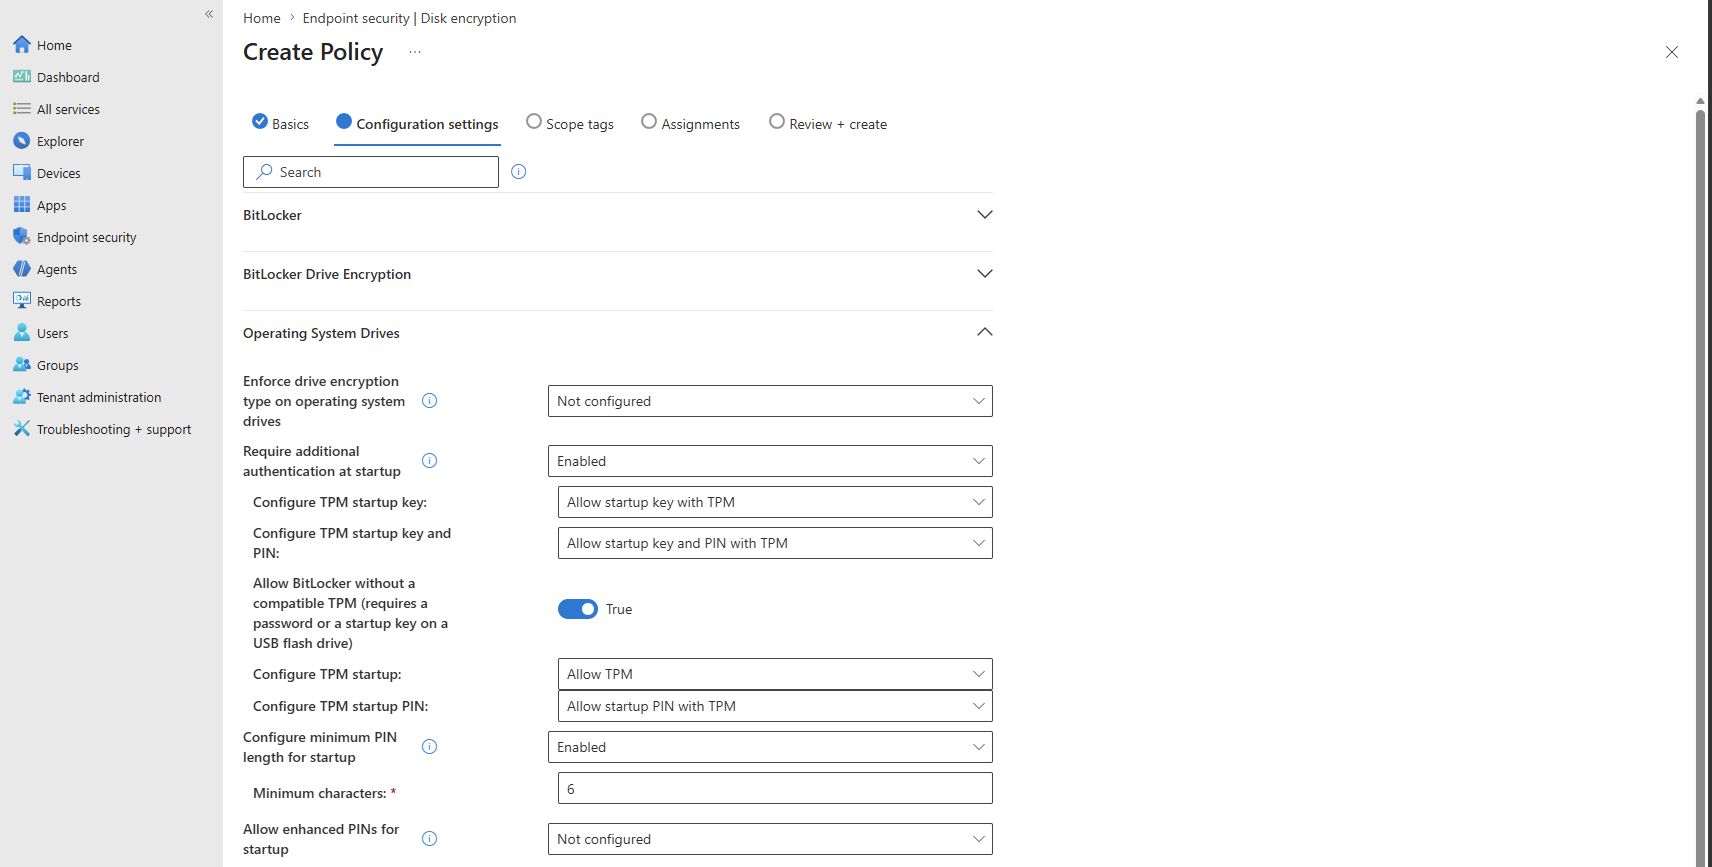
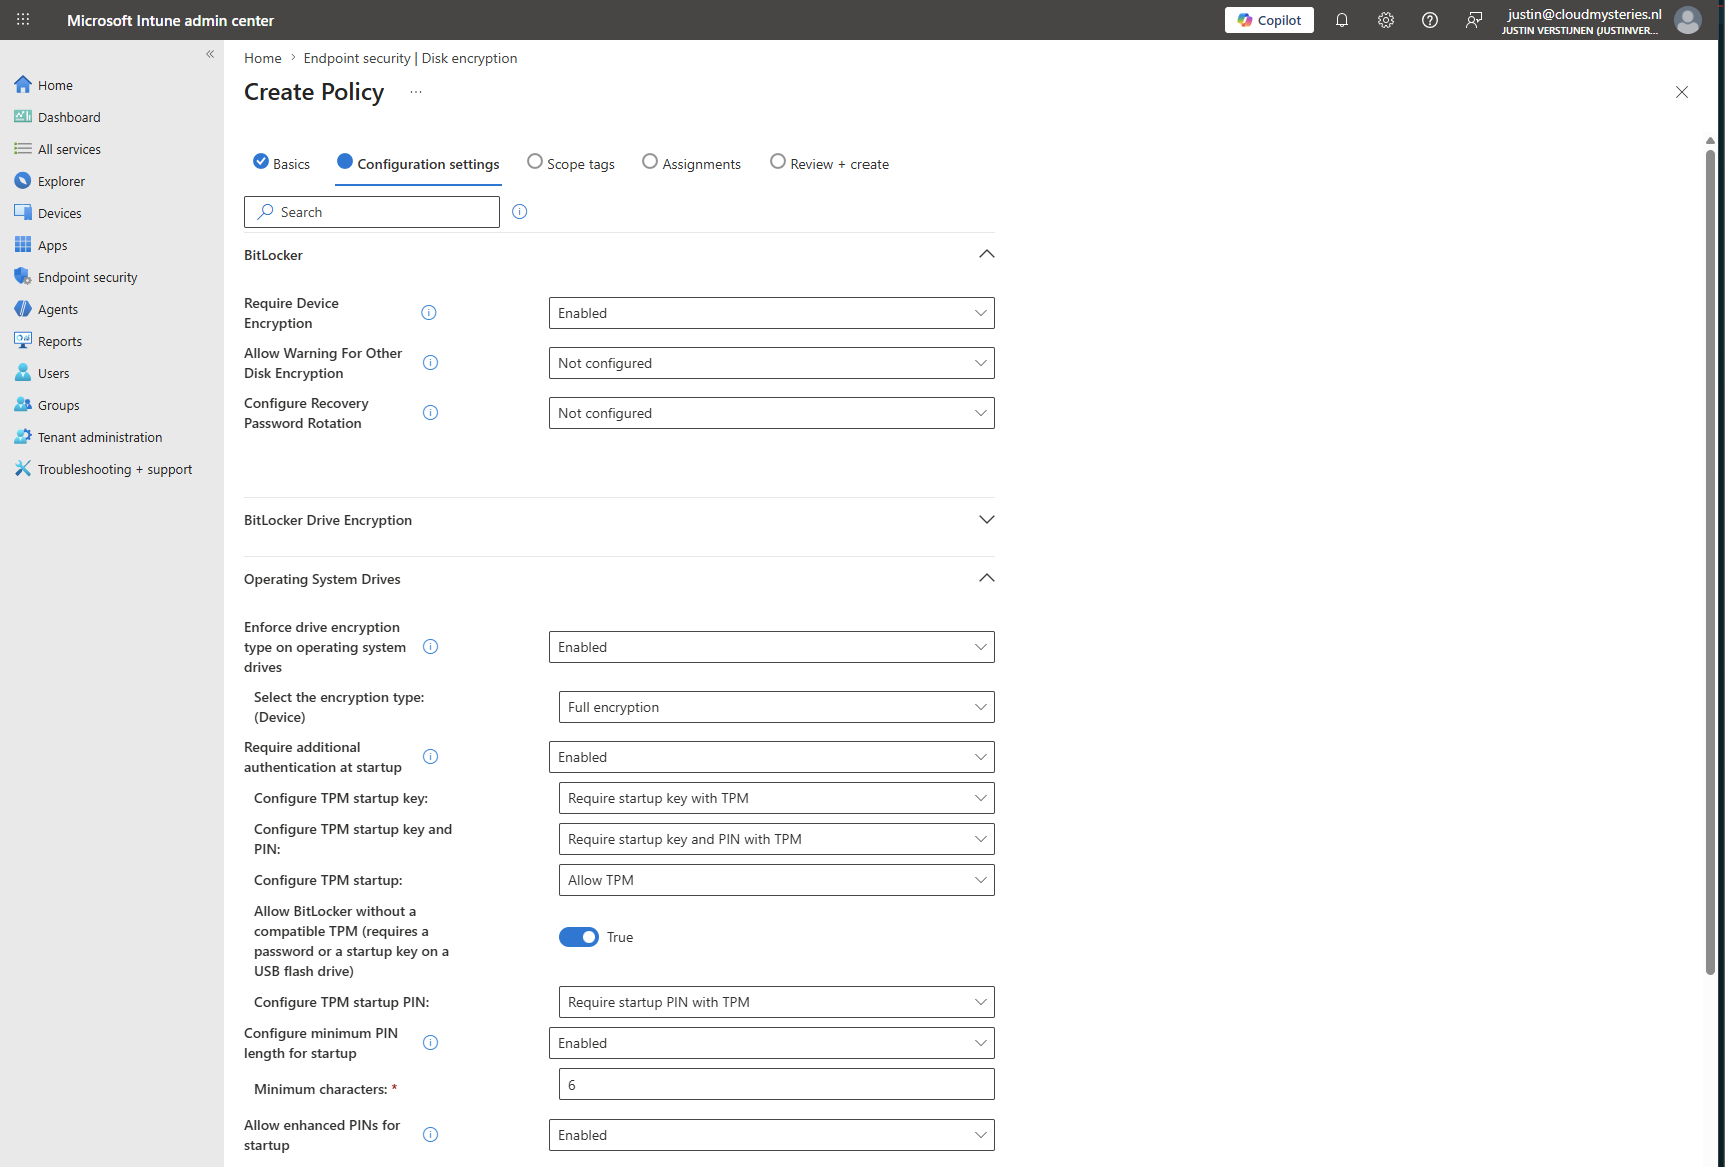
Configure these settings or change them to your own preferences. Starred settings must be set for this guide to work:
| Setting | Configure this: |
|---|---|
| *Require device encryption | *Enabled |
| Select the encryption type: (Device) | Full encryption |
| *Require additional authentication at startup | *Enabled |
| *Configure TPM startup key | *Do not allow startup key with TPM |
| *Configure TPM startup key and PIN | *Require startup key and PIN with TPM |
| Configure TPM at startup | Allow TPM |
| *Configure TPM startup PIN | *Require startup PIN with TPM |
| Configure minimum PIN length for startup | Enabled |
| Minimum characters | 6 |
| Allow enhanced PINs for startup | Enabled |
The enhanced PINs means that you can use symbols and letters in your PIN code, making a password of your PIN code.
Then save the policy and assign it to your devices scope.
Option 2: Configure the startup authentication settings in Windows
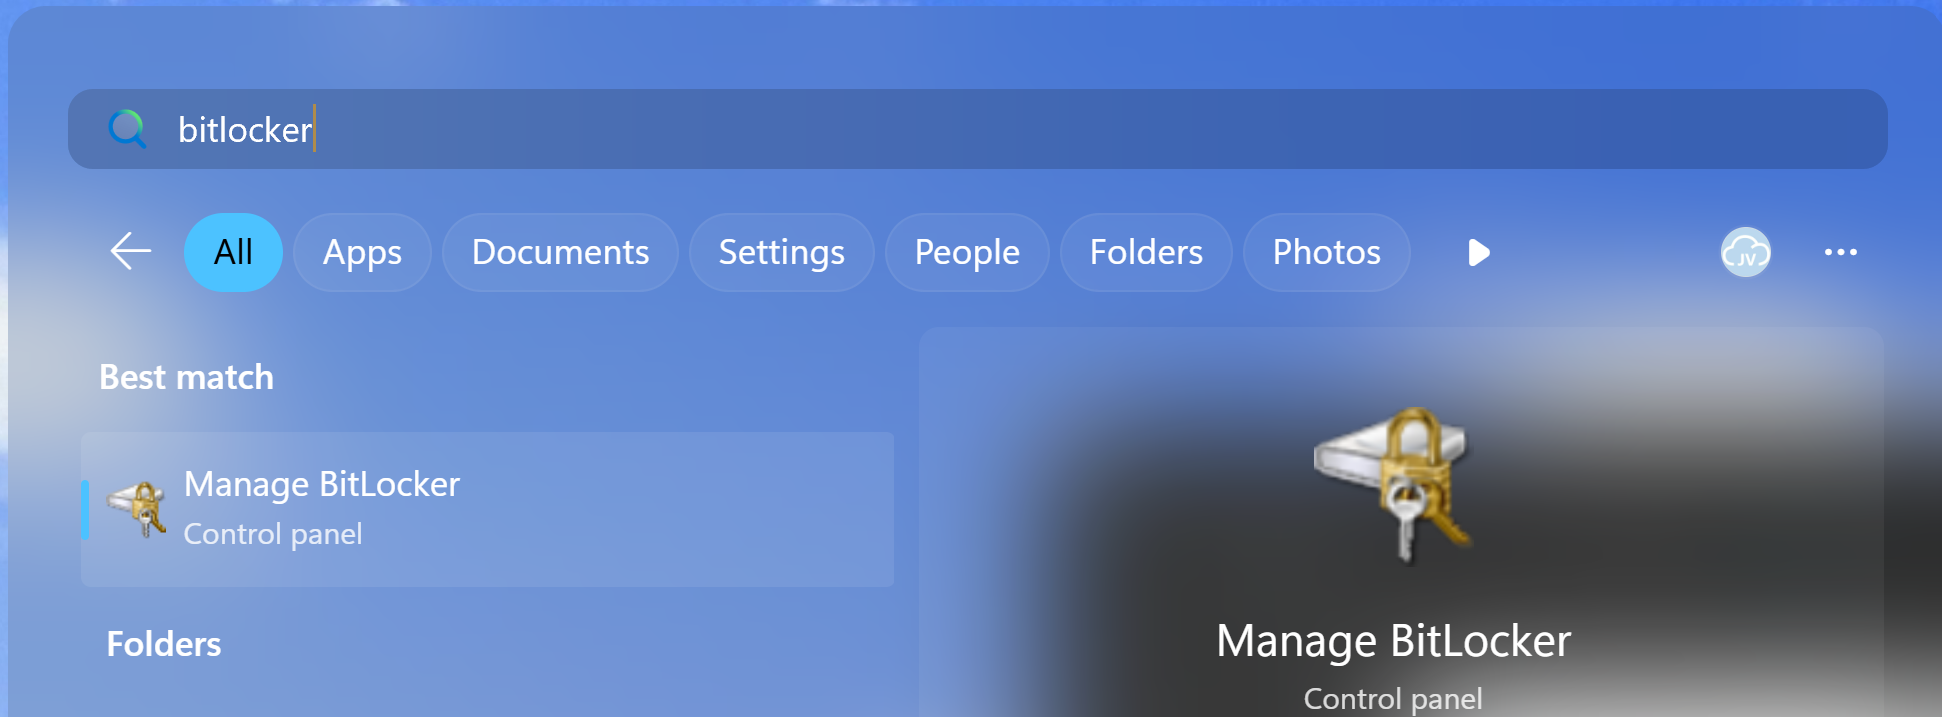
In Windows we can also set the startup authentication with a PIN code getting the same result as setting it for new devices in Intune. This can be found by searching for “Bitlocker” in the start menu:
From there we can click “Change how drive is unlocked at startup”, select the PIN code option and set a PIN.
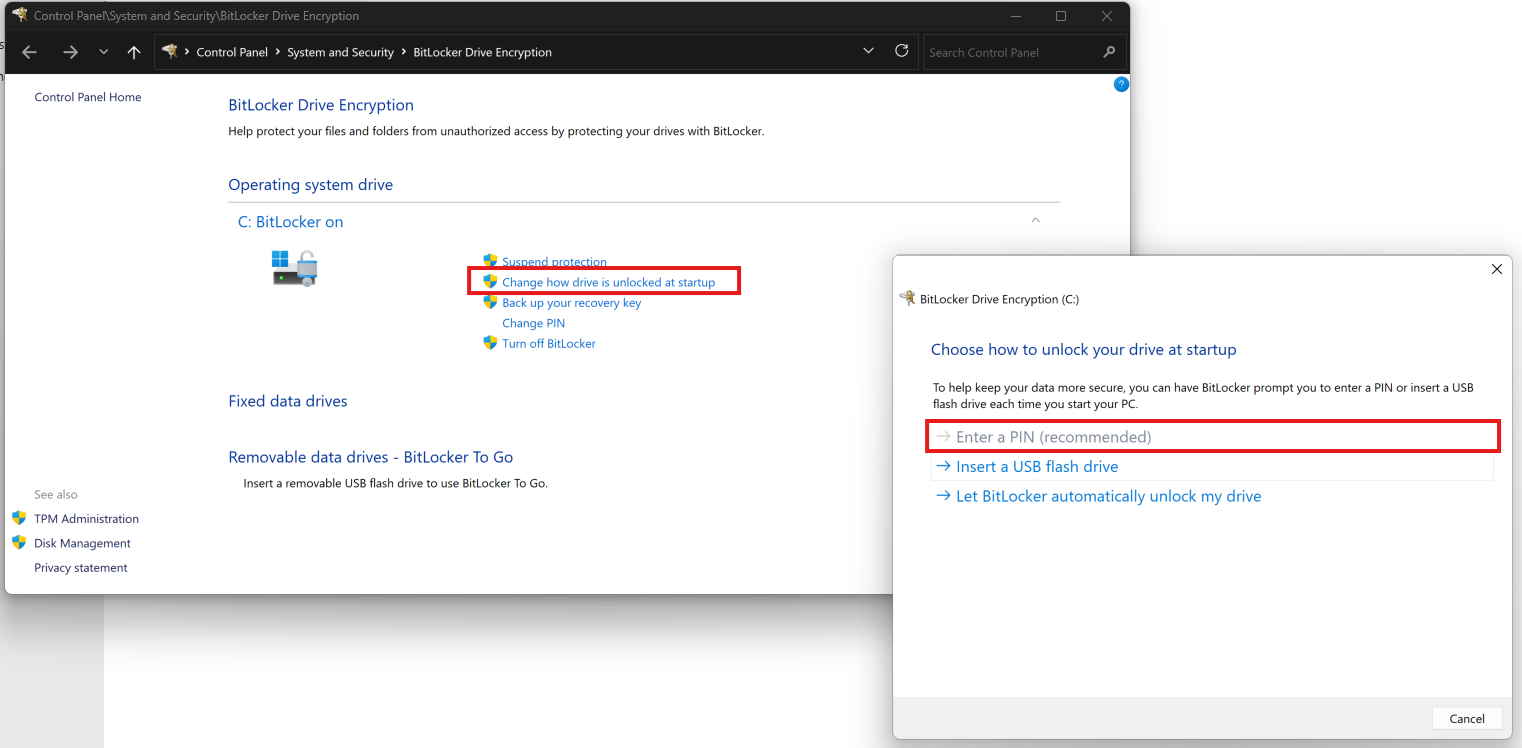
This will make you more secure immediately against the recent attacks and possibly more attacks in the future, leveraging this TPM and Bitlocker weakness.
Summary
BitLocker with TPM-only authentication is still much better than running devices without encryption, but attacks like YellowKey and GreatXML show why adding authentication to the TPM/Bitlocker key exchange is becoming increasingly important for data-sensitive environments. By requiring a startup PIN, we add another layer of protection before the BitLocker key is released. This makes offline attacks and physical theft scenarios much harder for attackers.
For organizations with mobile devices containing sensitive data, this is currently one of the most impactful BitLocker hardening steps you can deploy relatively quickly with Microsoft Intune.
Thank you for reading this post and I hope it was helpful!
Sources
These sources helped me by writing and research for this post;
- https://thehackernews.com/2026/06/new-greatxml-exploit-bypasses-windows.html
- https://thehackernews.com/2026/06/microsoft-patches-record-206-flaws.html
- https://thehackernews.com/2026/05/windows-zero-days-expose-bitlocker.html
- https://learn.microsoft.com/windows/security/operating-system-security/data-protection/bitlocker/configure
- https://learn.microsoft.com/windows/security/operating-system-security/data-protection/bitlocker/bitlocker-countermeasures
End of the page 🎉
You have reached the end of the page. You can navigate through other blog posts as well, share this post on X, LinkedIn and Reddit or return to the blog posts collection page. Thank you for visiting this post.
If you find this page and blog very useful and you want to leave a donation, you can use the button below to buy me a beer. Hosting and maintaining a website takes a lot of time and money. Thank you in advance and cheers :)
The terms and conditions apply to this post.
Adding Ubuntu endpoints to Microsoft Intune
In this post, I will be installing an Ubuntu Desktop instance and join it to Microsoft Intune to leverage Device Management on Ubuntu devices including some extra steps for proper device management.
Why add your Ubuntu endpoints to Microsoft Intune?
This question has a very simple answer: compliance, management, and security.
As IT professionals, we want to manage every endpoint from a single pane of glass while keeping compliance and security at a consistently high level. Linux endpoints are often overlooked in IT departments, especially compared to Windows and macOS devices. This makes them an interesting attack vector, because they are not always properly managed, monitored, or secured.
Some important reasons to manage Linux endpoints with Intune are:
- Centralized device visibility: IT teams can see which Linux devices are used within the organization and who is using them
- Compliance monitoring: Devices can be checked against compliance requirements, such as operating system version, encryption status, and security settings
- Conditional Access integration: Access to company resources can be based on device compliance. This means that only trusted and compliant devices can access sensitive data
- Support for audits and reporting: Having Linux devices enrolled in Intune makes it easier to prove that endpoints are known, monitored, and managed
- Reduced shadow IT risk: Linux devices are sometimes used by developers, administrators, or technical users without the same level of IT oversight. Intune helps bring these devices back into the managed environment
In this post, I will add an Ubuntu Desktop device to Microsoft Intune and apply some basic settings to make it a lot more secure.
Supported Linux versions
The Linux versions that are supported by Microsoft Intune are these:
| Linux distribution | Supported versions |
|---|---|
| Ubuntu Desktop / Ubuntu LTS | 24.04 LTS and 26.04 LTS |
| Red Hat Enterprise Linux | RHEL 9 and RHEL 10 |
The official support is listed here and could be updated in the future: https://learn.microsoft.com/en-us/intune/fundamentals/ref-supported-platforms#linux
What happens if we try to join unsupported Linux OS versions? I tried this just for fun with Zorin OS (which is based on Ubuntu) but an error is presented unfortunately:
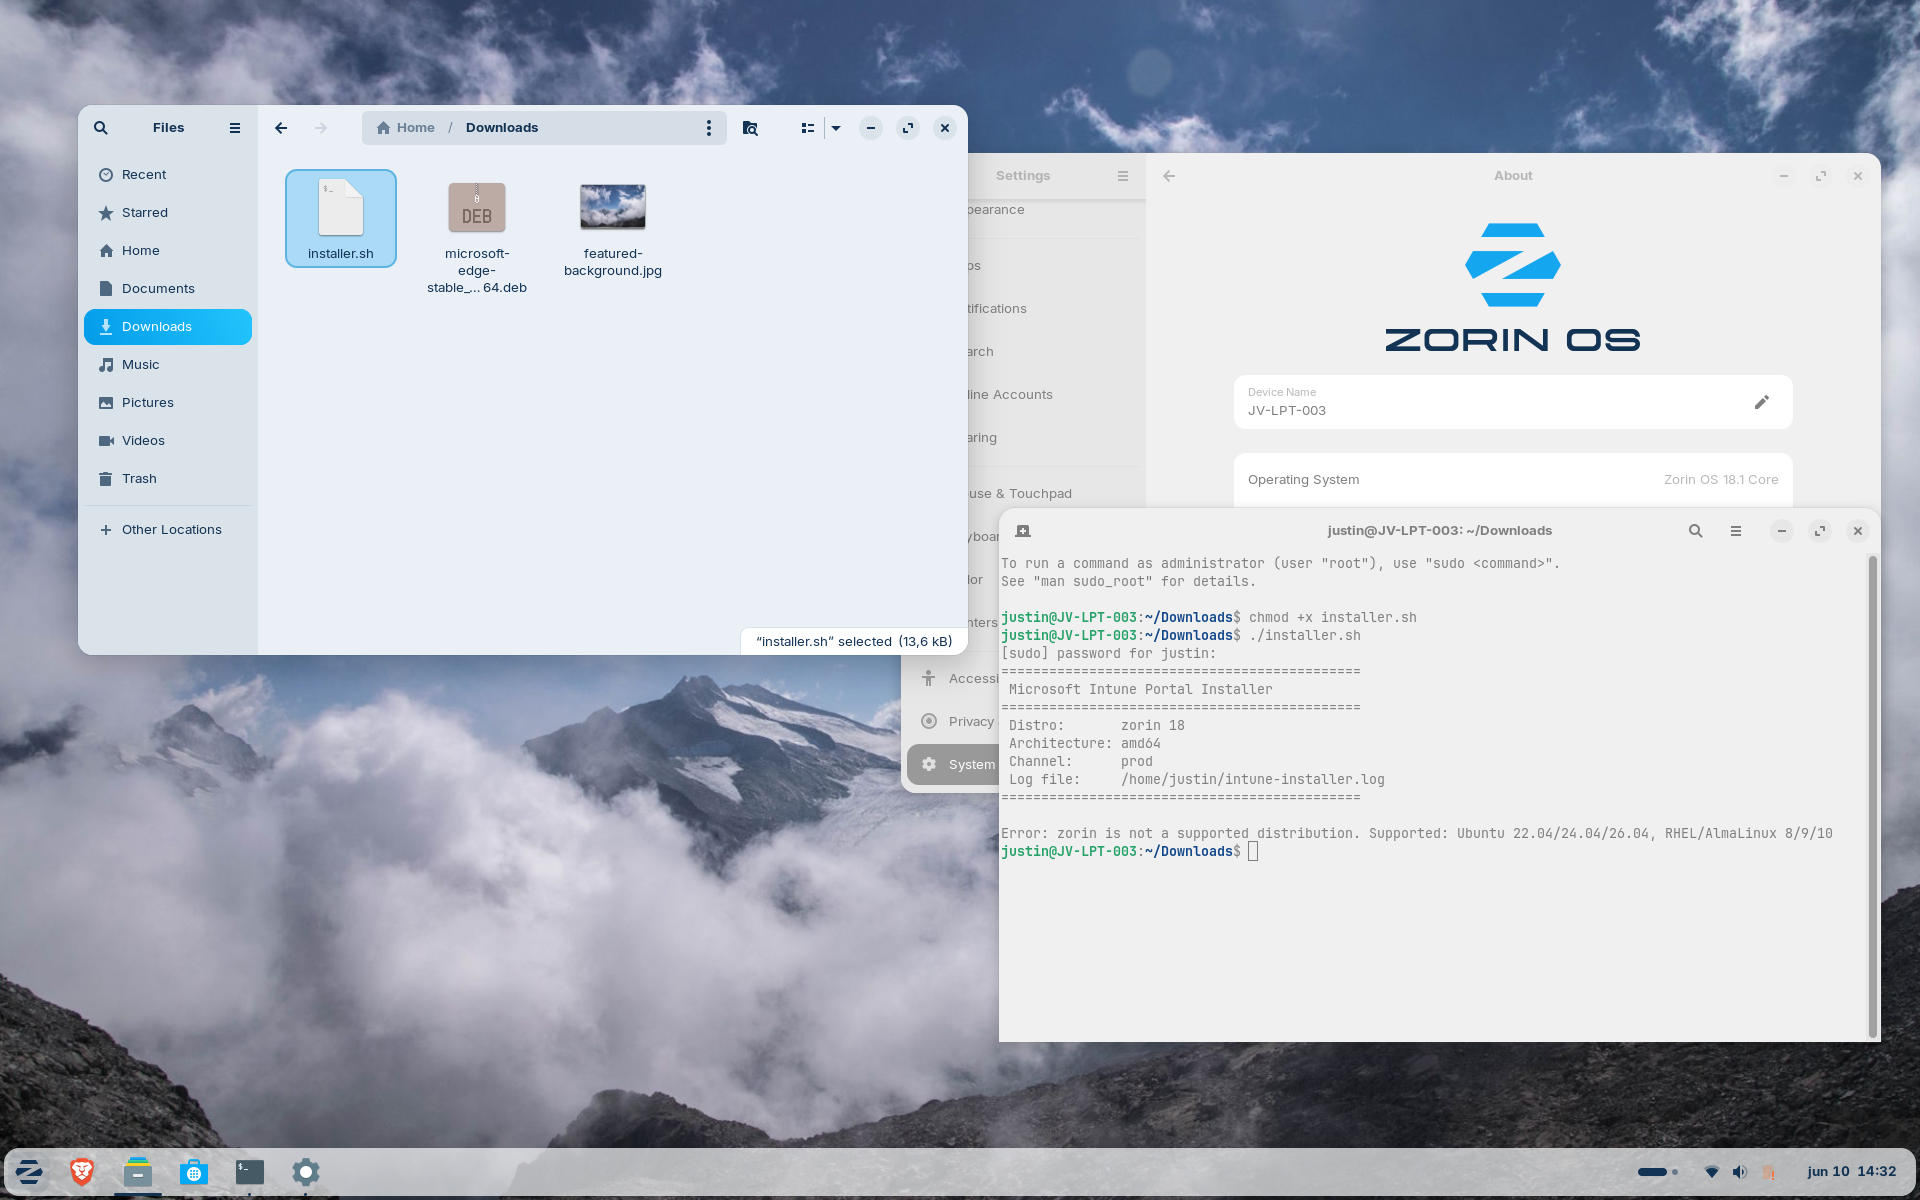
Error: zorin is not a supported distribution. Supported: Ubuntu 22.04/24.04/26.04, RHEL/AlmaLinux 8/9/10
So only supported OS versions and distributions can actually work with Microsoft Intune.
Supported options in Microsoft Intune
While support is available for Linux/Ubuntu devices, the functionality is very limited. The only options we have are:
- Compliance Policies
- Custom scripts
With the custom scripts option, it’s possible to basically do everything at root level which is nice but the end user has the permissions to block this potentially. I hope to see more features in the future like device encryption, wipe and locking down some users’ permissions on Linux.
Step 1: Installing Ubuntu Desktop (optional)
Assuming you might already have Ubuntu or a supported version installed already, this step will be optional. If not, you can also follow Step 1. Otherwise, skip this step.
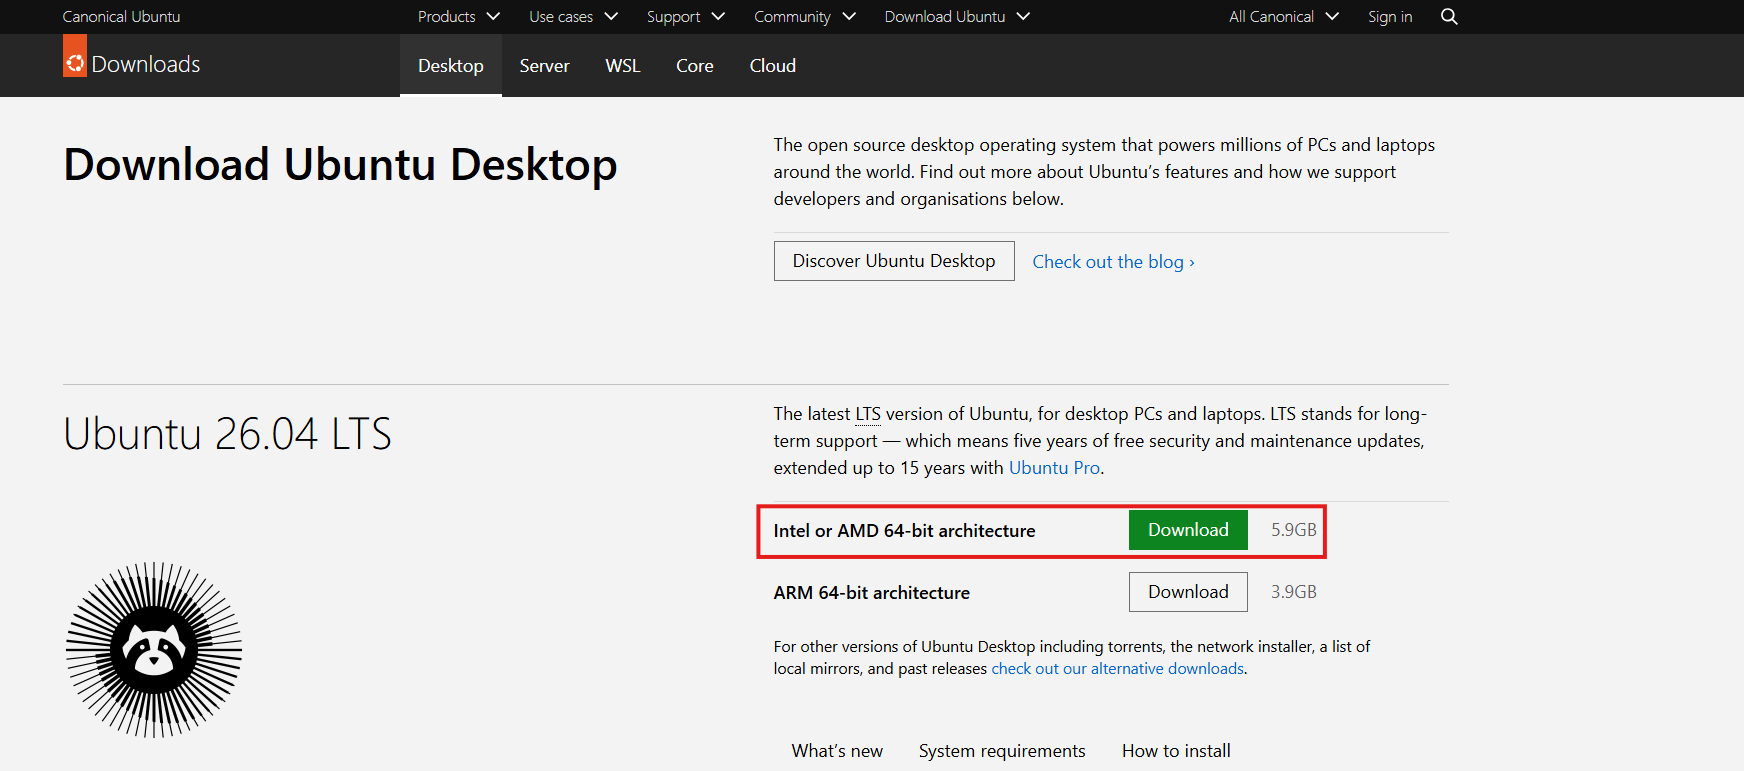
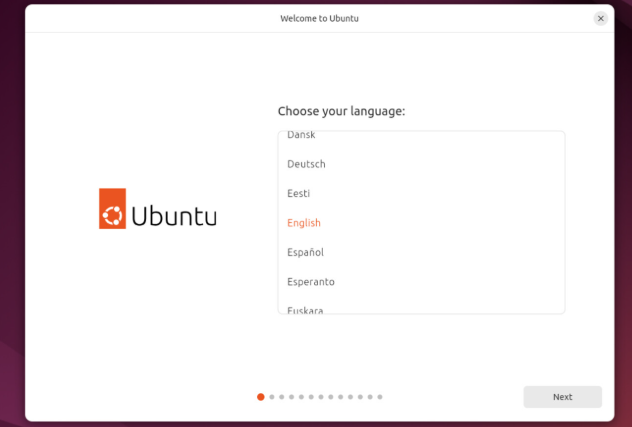
In the first step, I will be installing my demo laptop with Ubuntu Desktop 26.04. This can be installed from here: https://ubuntu.com/download/desktop
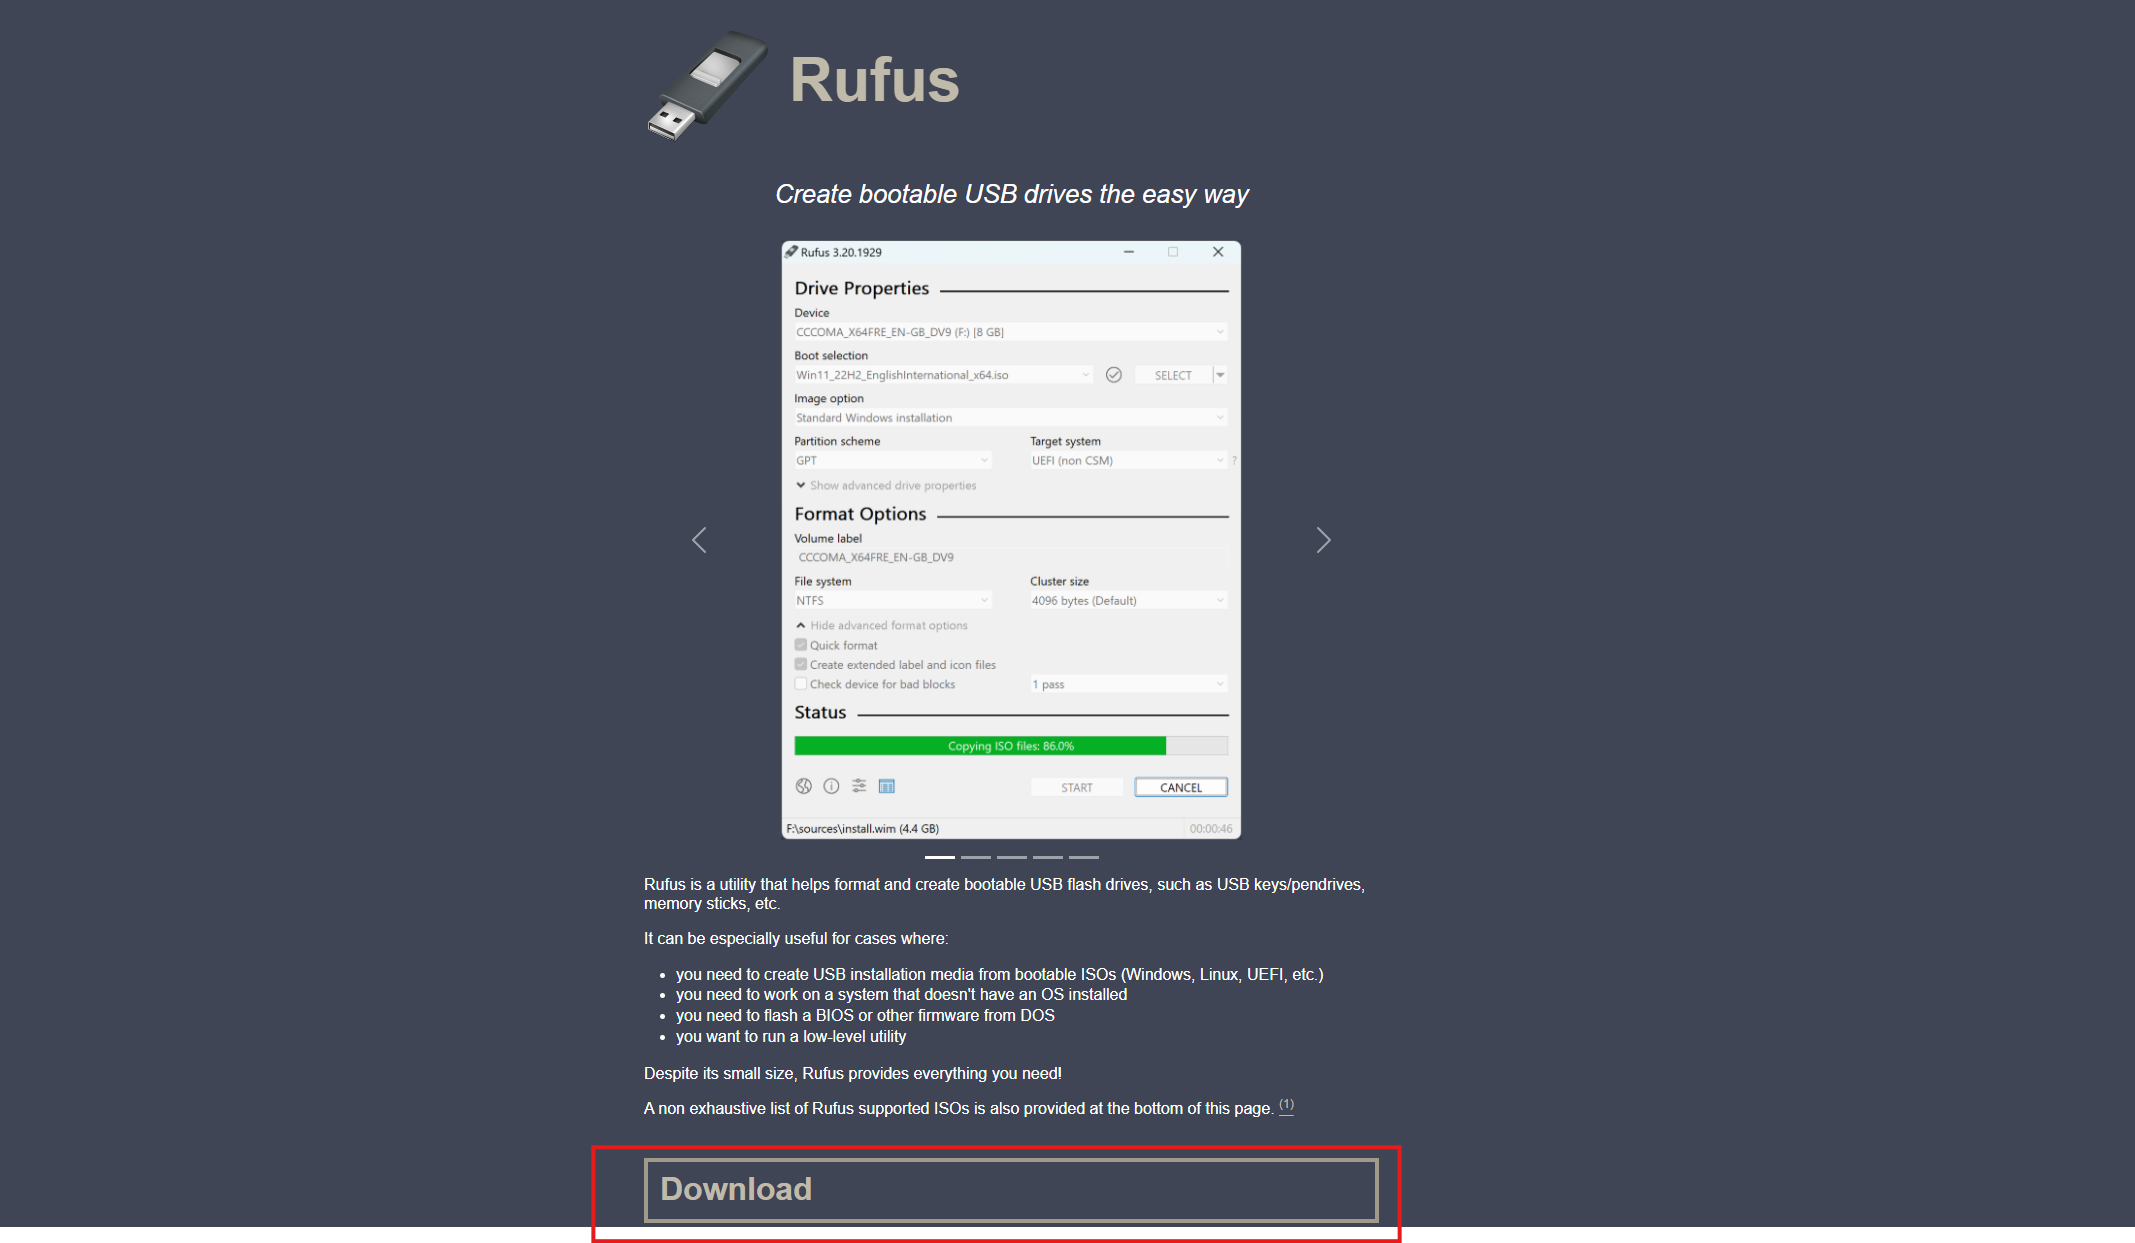
Then we must “burn” this ISO image in a USB drive. I have used Rufus for years for this purpose and will also do it now. You can download this simple, no nonsense tool here: https://rufus.ie/en/
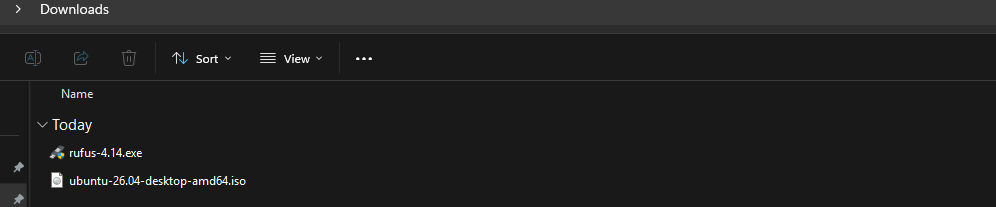
We should have those 2 files now:
Open Rufus and select the ISO image. Then hit Start and I selected the default ISO mode.
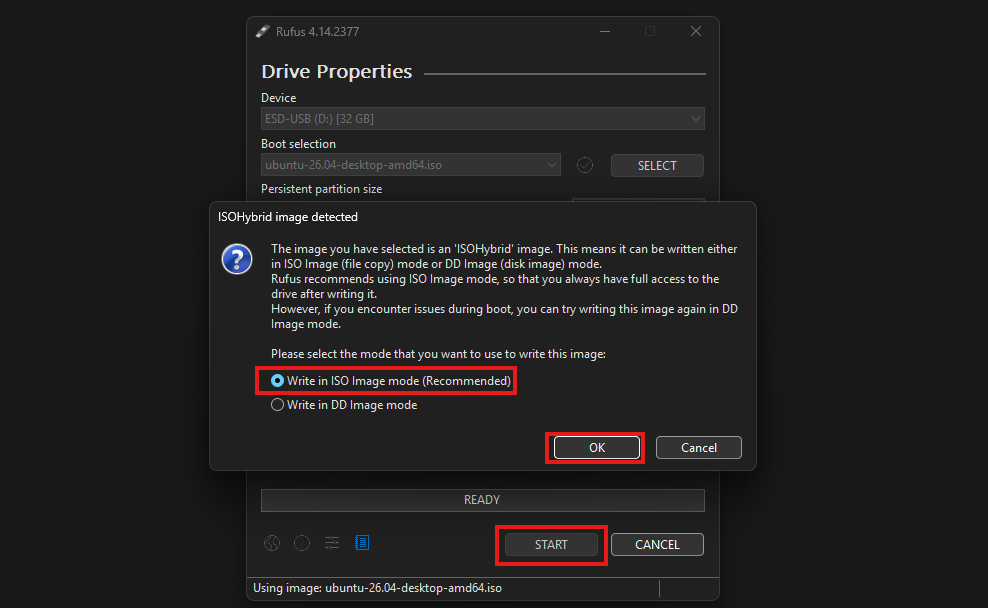
The ISO will now be “burned” to the USB drive, resulting in a full data loss of everything on the USB drive.
After the ISO has been written to the USB drive, I have connected it to the testing device and booted it from USB. Then I have followed the default installation of Ubuntu, which is pretty straightforward.
During the installation, you can proceed with Step 2, as we have to wait for a few minutes. This makes the process a bit more efficient.
Warning
During the installation, it’s recommended to enable Device Encryption as this cannot be done through Microsoft Intune Policies.
Step 2: Create dynamic device security group
We can prepare our Intune environment by creating a dynamic security group for Linux devices. I like dynamic security groups in Intune as assignments are done automatically and eliminating the need for us to manually add devices to groups. Policies and Compliance will also automatically apply.
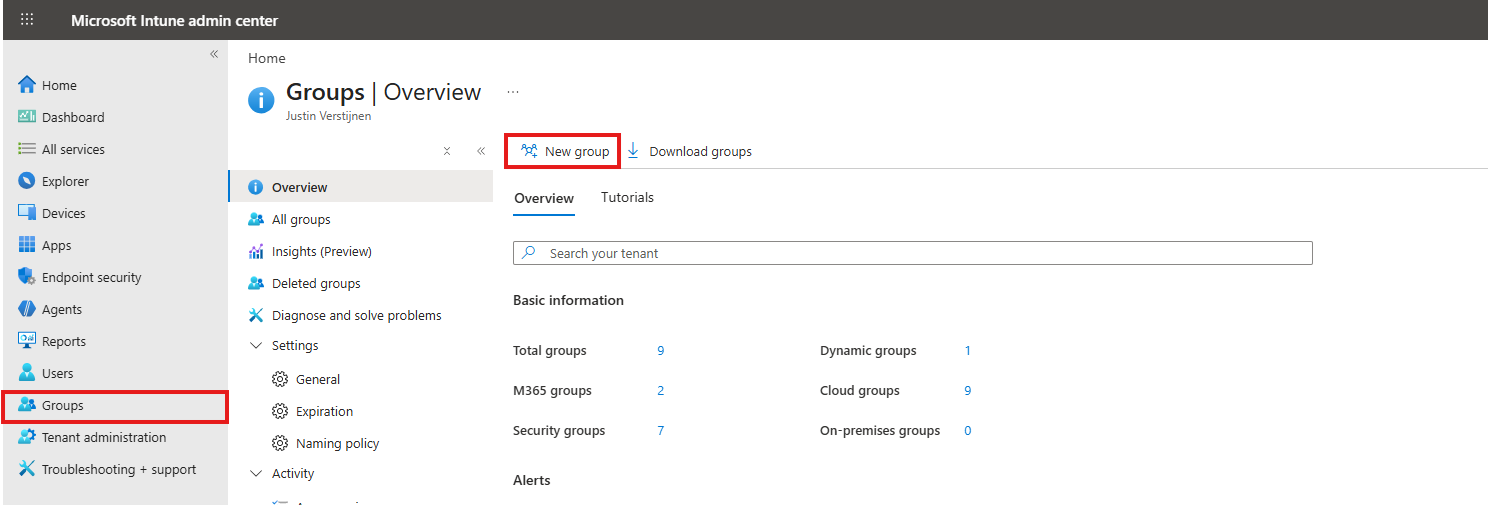
Open Microsoft Intune admin center on https://intune.microsoft.com and open up “Groups” from the left and then click “New group”.
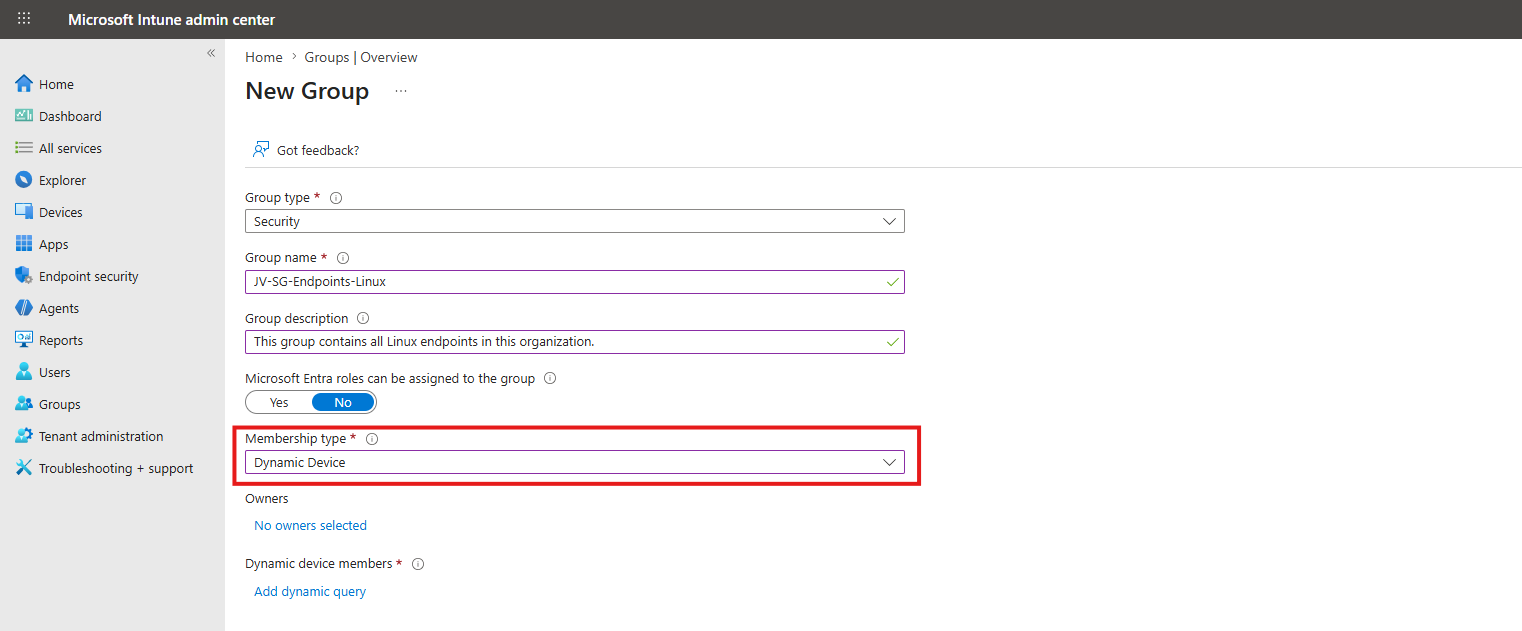
Fill in the details of the group and select the Membership type “Dynamic Device”.
Then click “Add dynamic query” to add filtering on what devices must be added to the group. First, select the deviceOSType to equal to Linux and then add another expression, called deviceManagementAppId to equal 0000000a-0000-0000-c000-000000000000. This means only Intune joined devices, which filters out Entra registered Linux devices. Check the screenshot below for reference.
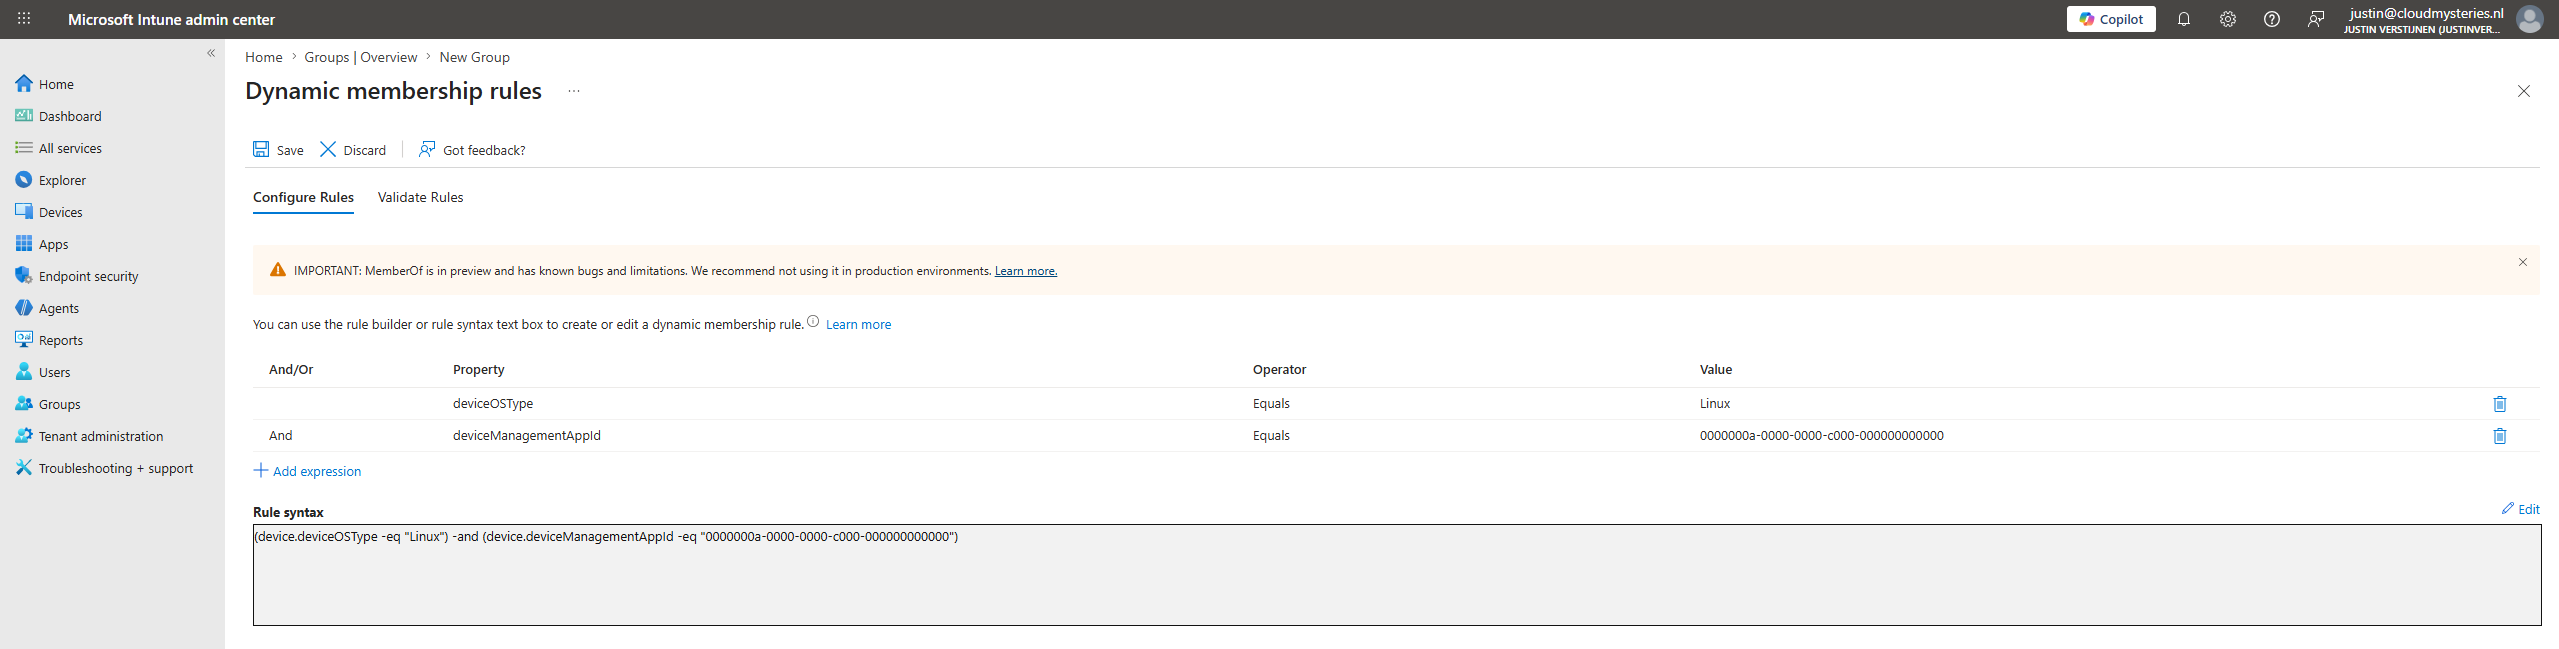
You can also walk the fast path and copy the complete Rule syntax below into your Dynamic rule syntax:
JSON
(device.deviceOSType -eq "Linux") and (device.deviceManagementAppId -eq "0000000a-0000-0000-c000-000000000000")Save the group and go to the next step.
Step 3: Join Ubuntu device to Microsoft Intune
After the installation is done of the Ubuntu device, we can now join the device to Microsoft Intune.
This can be done by performing these 3 actions:
- Install Microsoft Edge
- Install Microsoft Intune App with installer script
- Enroll device
Let’s go through these tasks in this step.
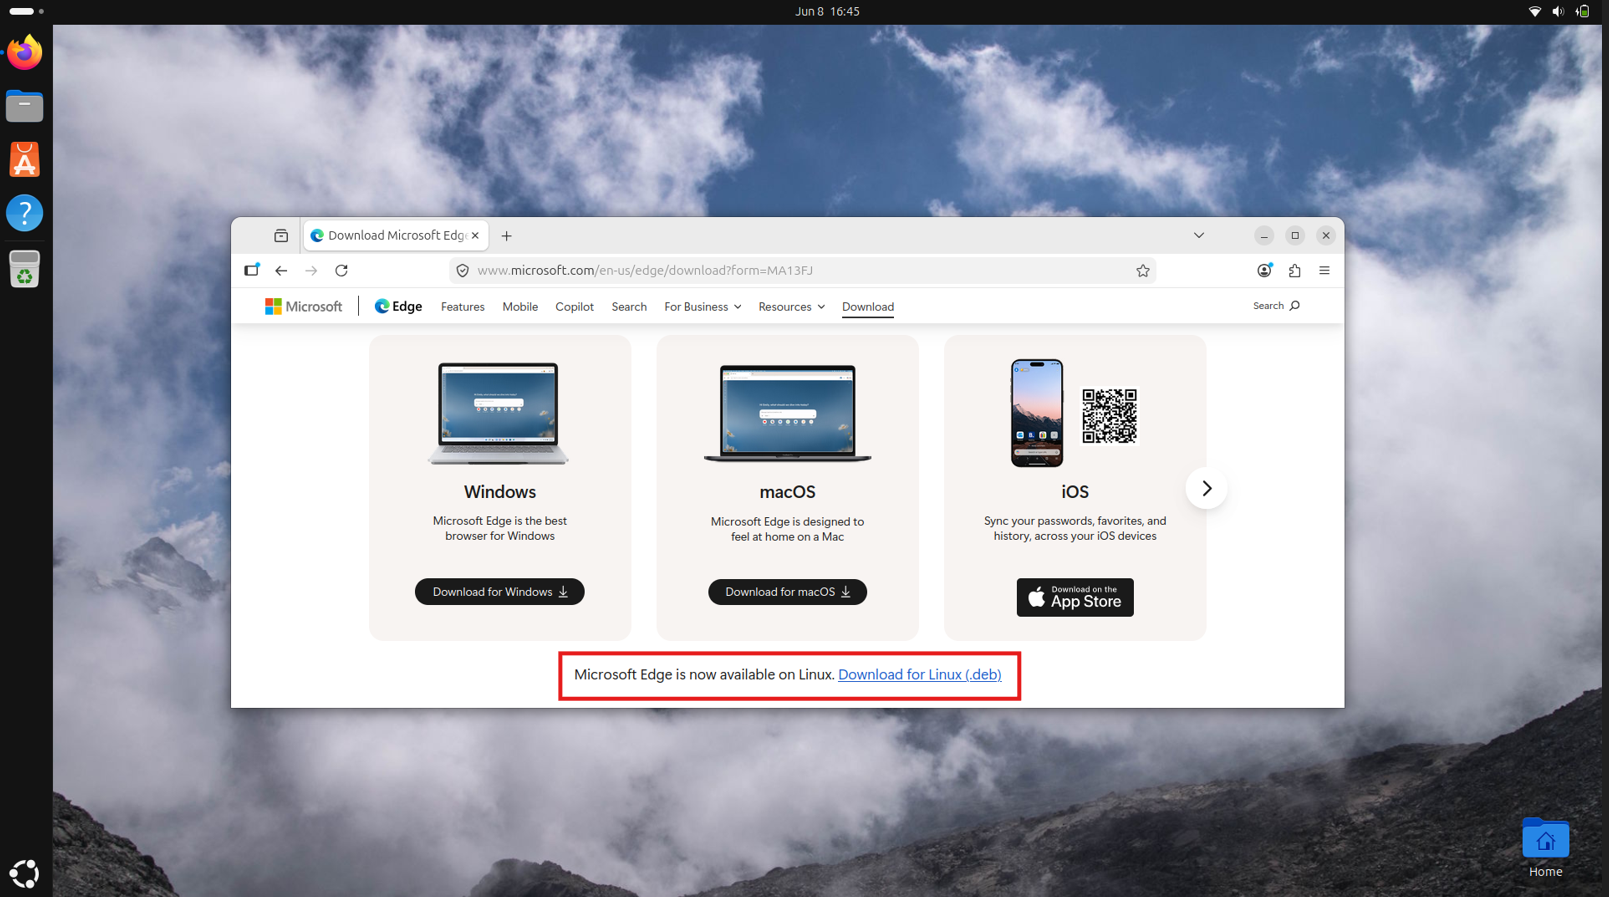
On the Ubuntu device, open up the web browser and download Microsoft Edge from this site: https://www.microsoft.com/en-us/edge/download. Here scroll down and click the link “Download for Linux (.deb)”.
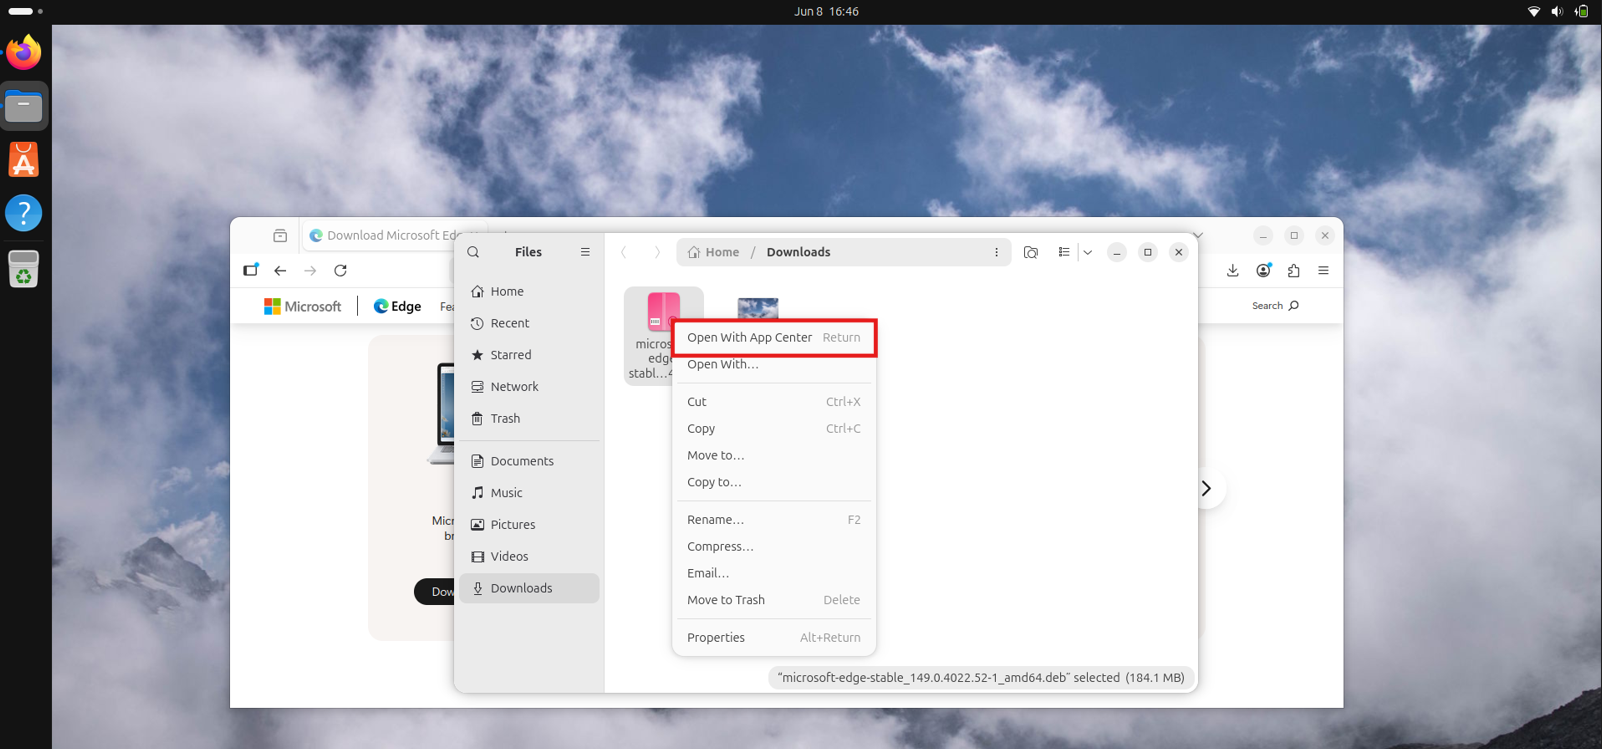
Then head to the “Downloads” folder on your device and right-click the just downloaded .deb file and open it with the App Center. This is a nice and easy way to install the package without the need to open the Terminal (just yet).
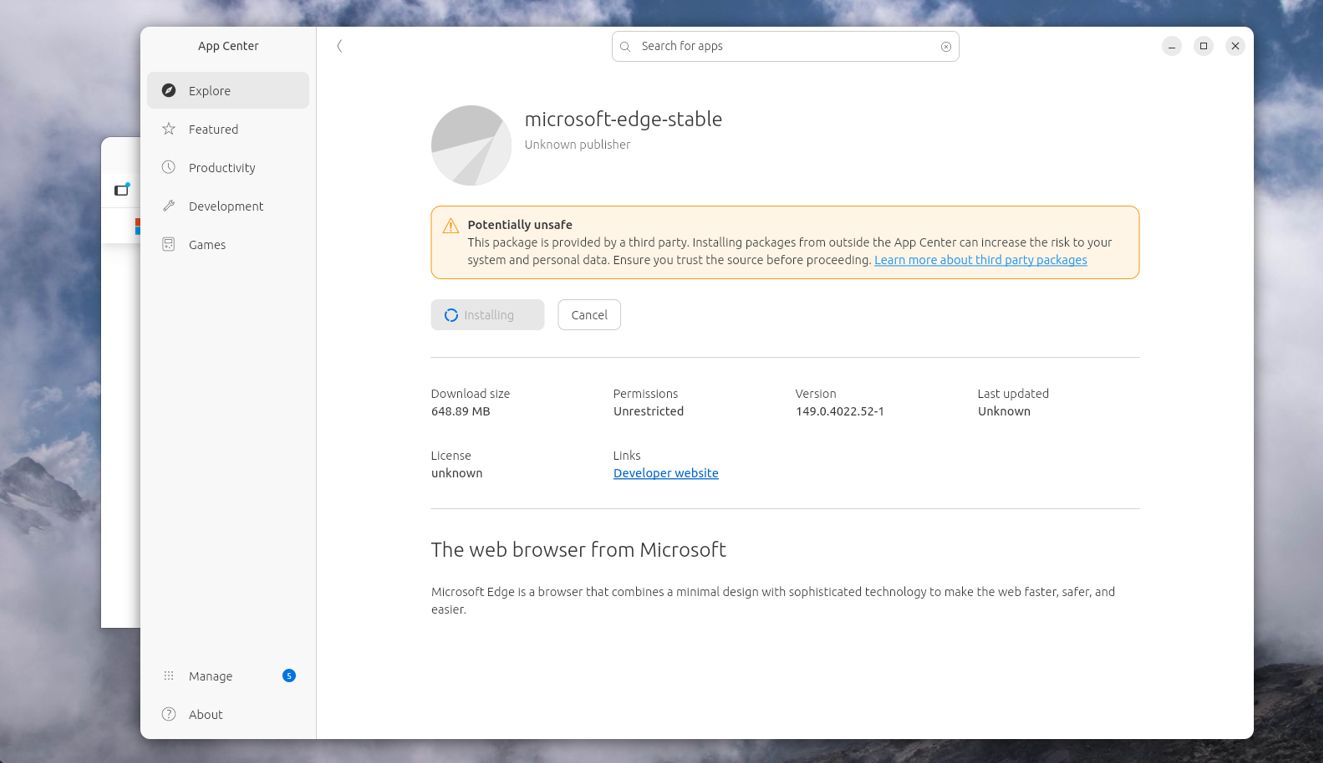
Click through the windows stating that it might be a potentially unsafe application and proceed.
After Microsoft Edge has been installed, open this GitHub repository and download the installer.sh script. This script installs the Microsoft Intune application used to register and enroll your device.
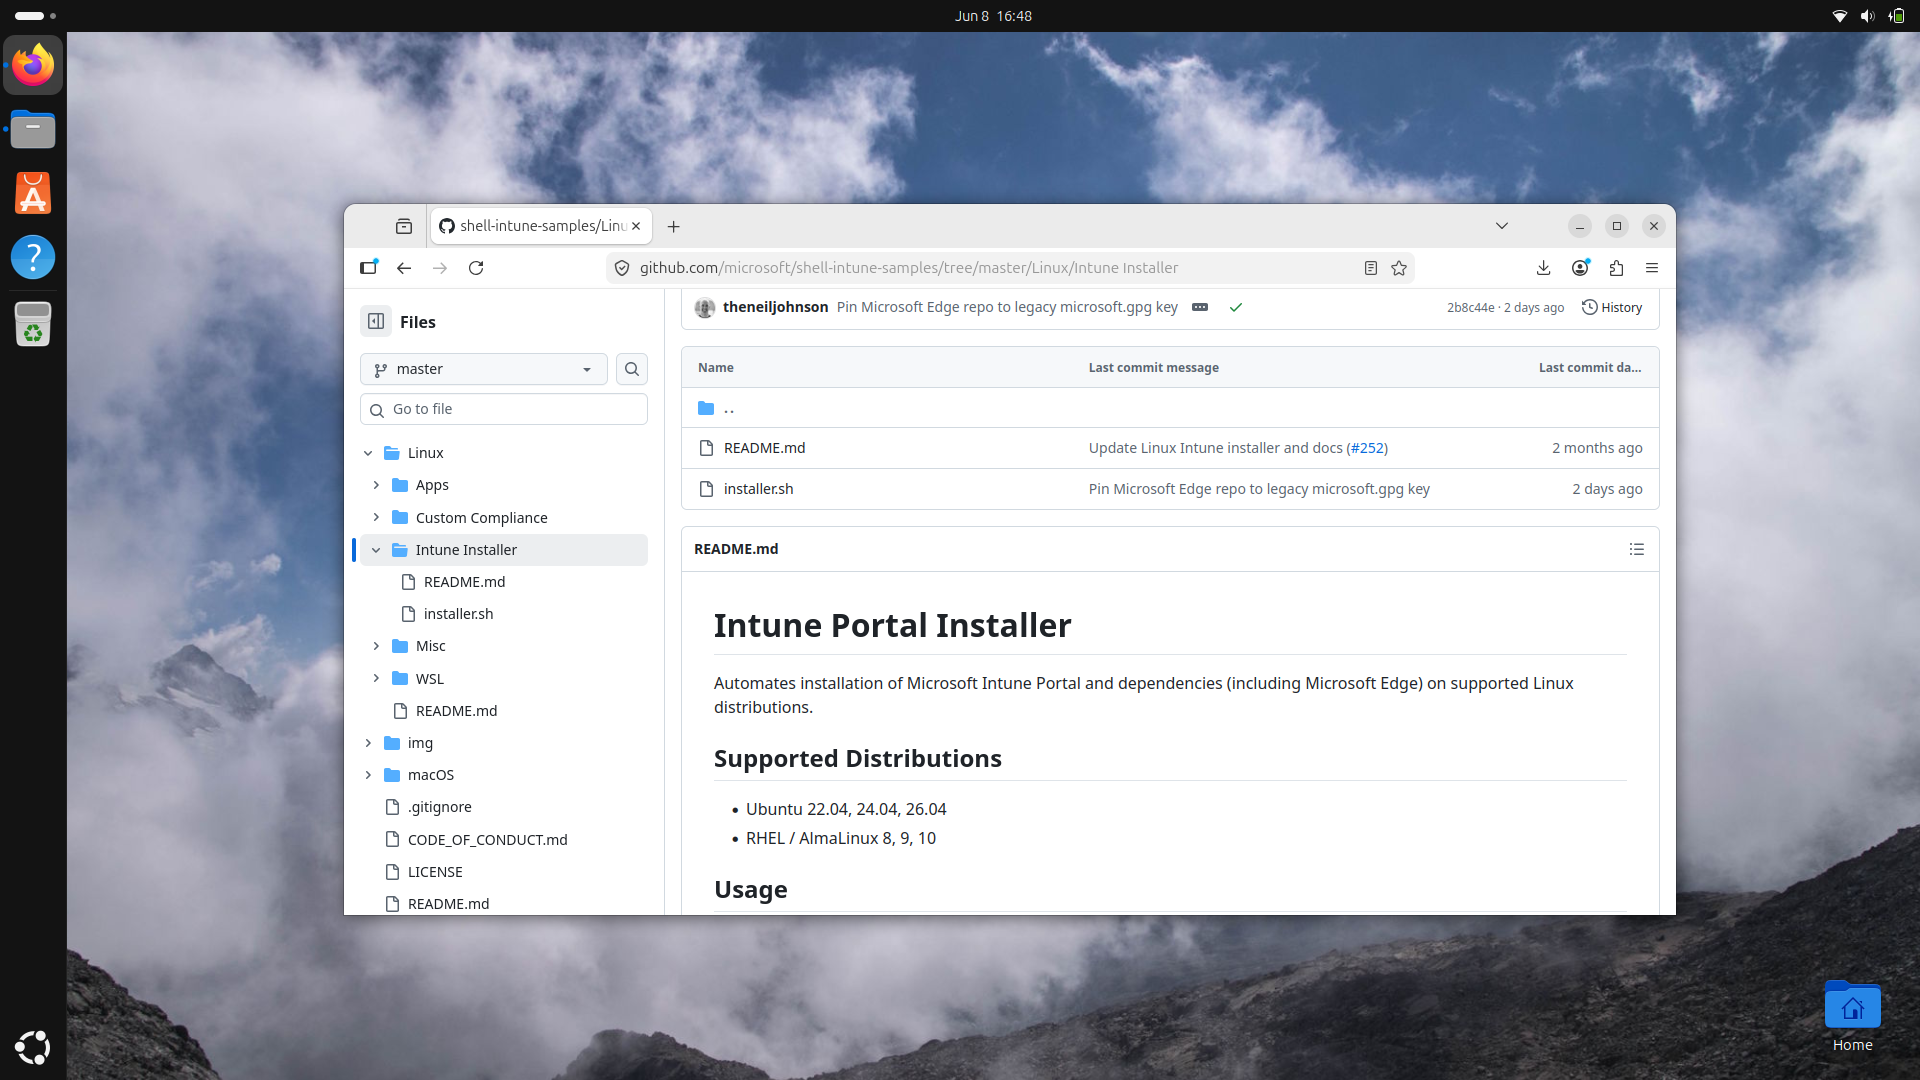
Click on the installer.sh script and then download the file. It will be logically saved into the Downloads folder, so again open up the File Explorer and open “Downloads”.
From there, right-click unused space and select “Open with Terminal” to open the Terminal app straight to this folder.

Now run this command in the Terminal to make the just downloaded script ready to be executed:
Bash
chmod +x installer.shThen run this command to actually run the script:
Bash
./installer.sh --verboseThen authenticate with your credentials and wait for the script to finish. This is mostly done within 45 seconds.
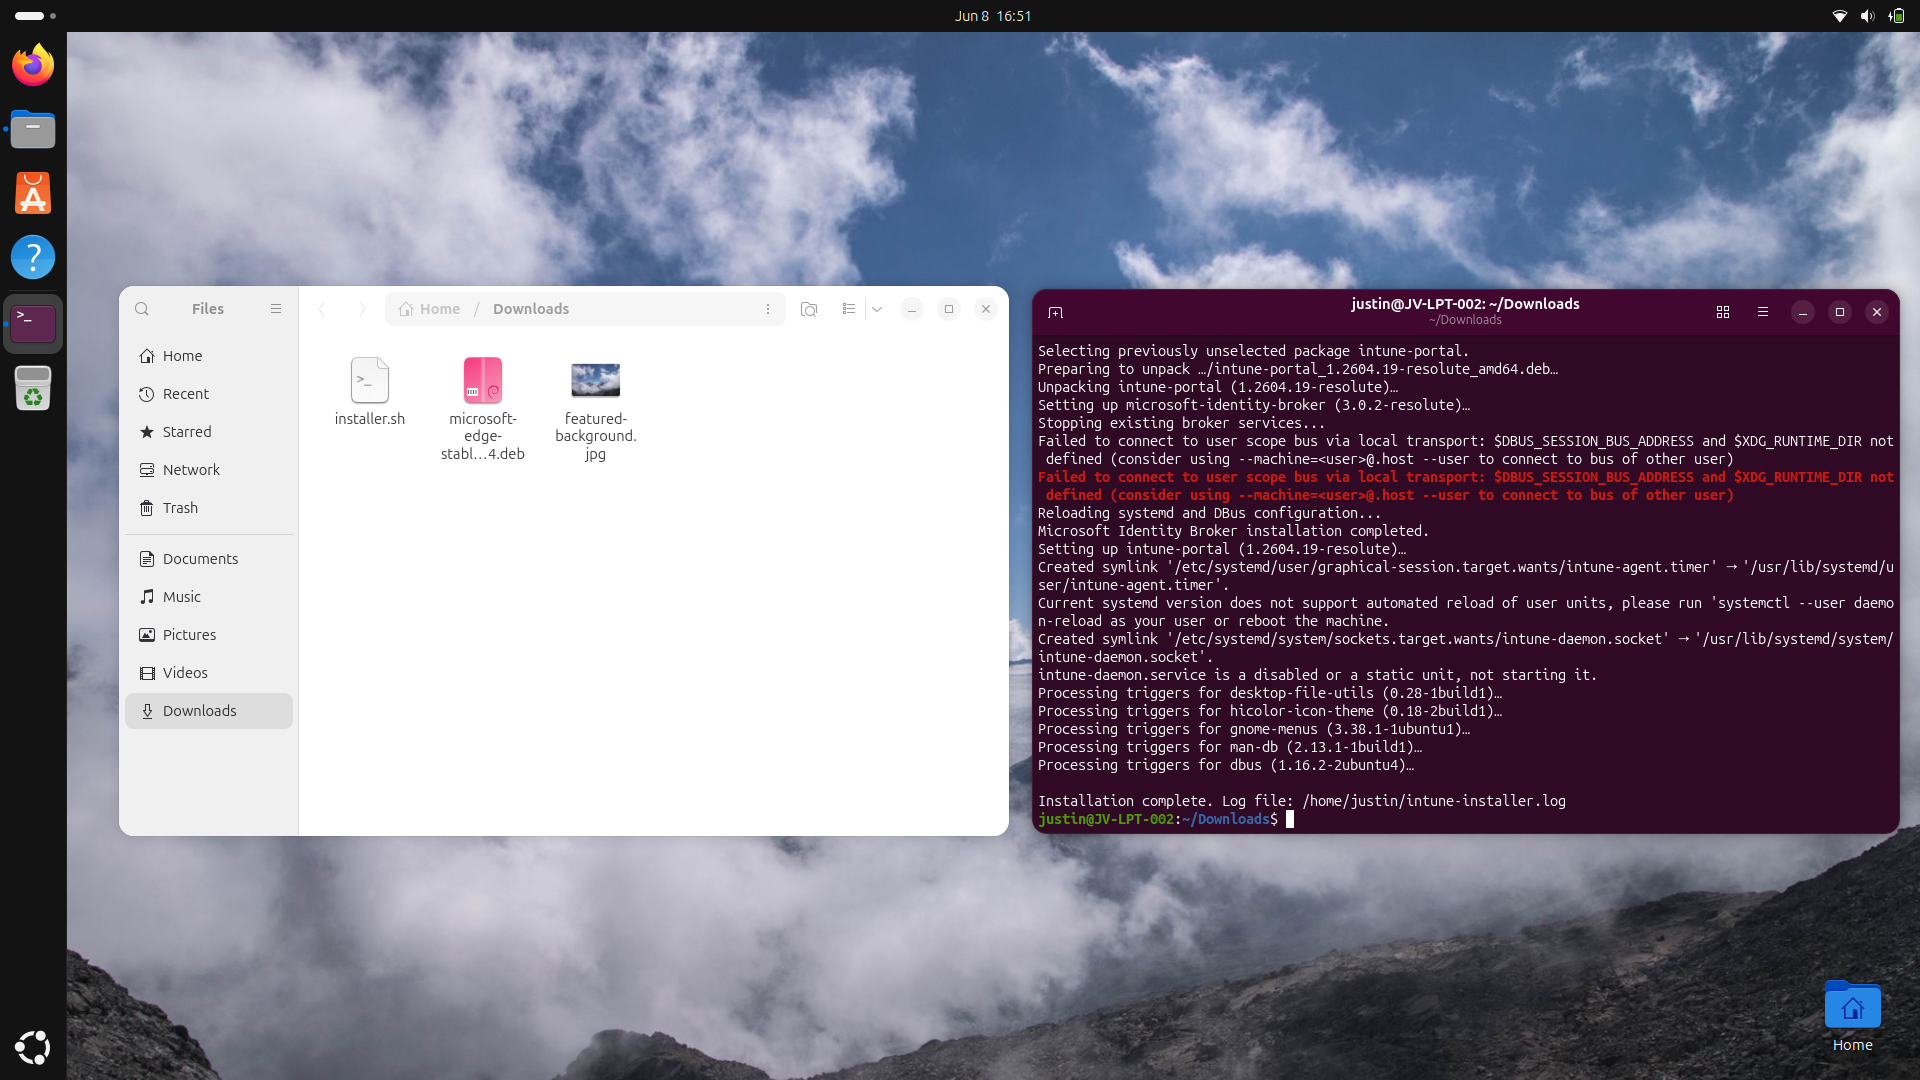
The script gave an error but proceeded and still finished, and everything was working as intended after that, so I chose to ignore it. The Intune Application was now ready to be used:
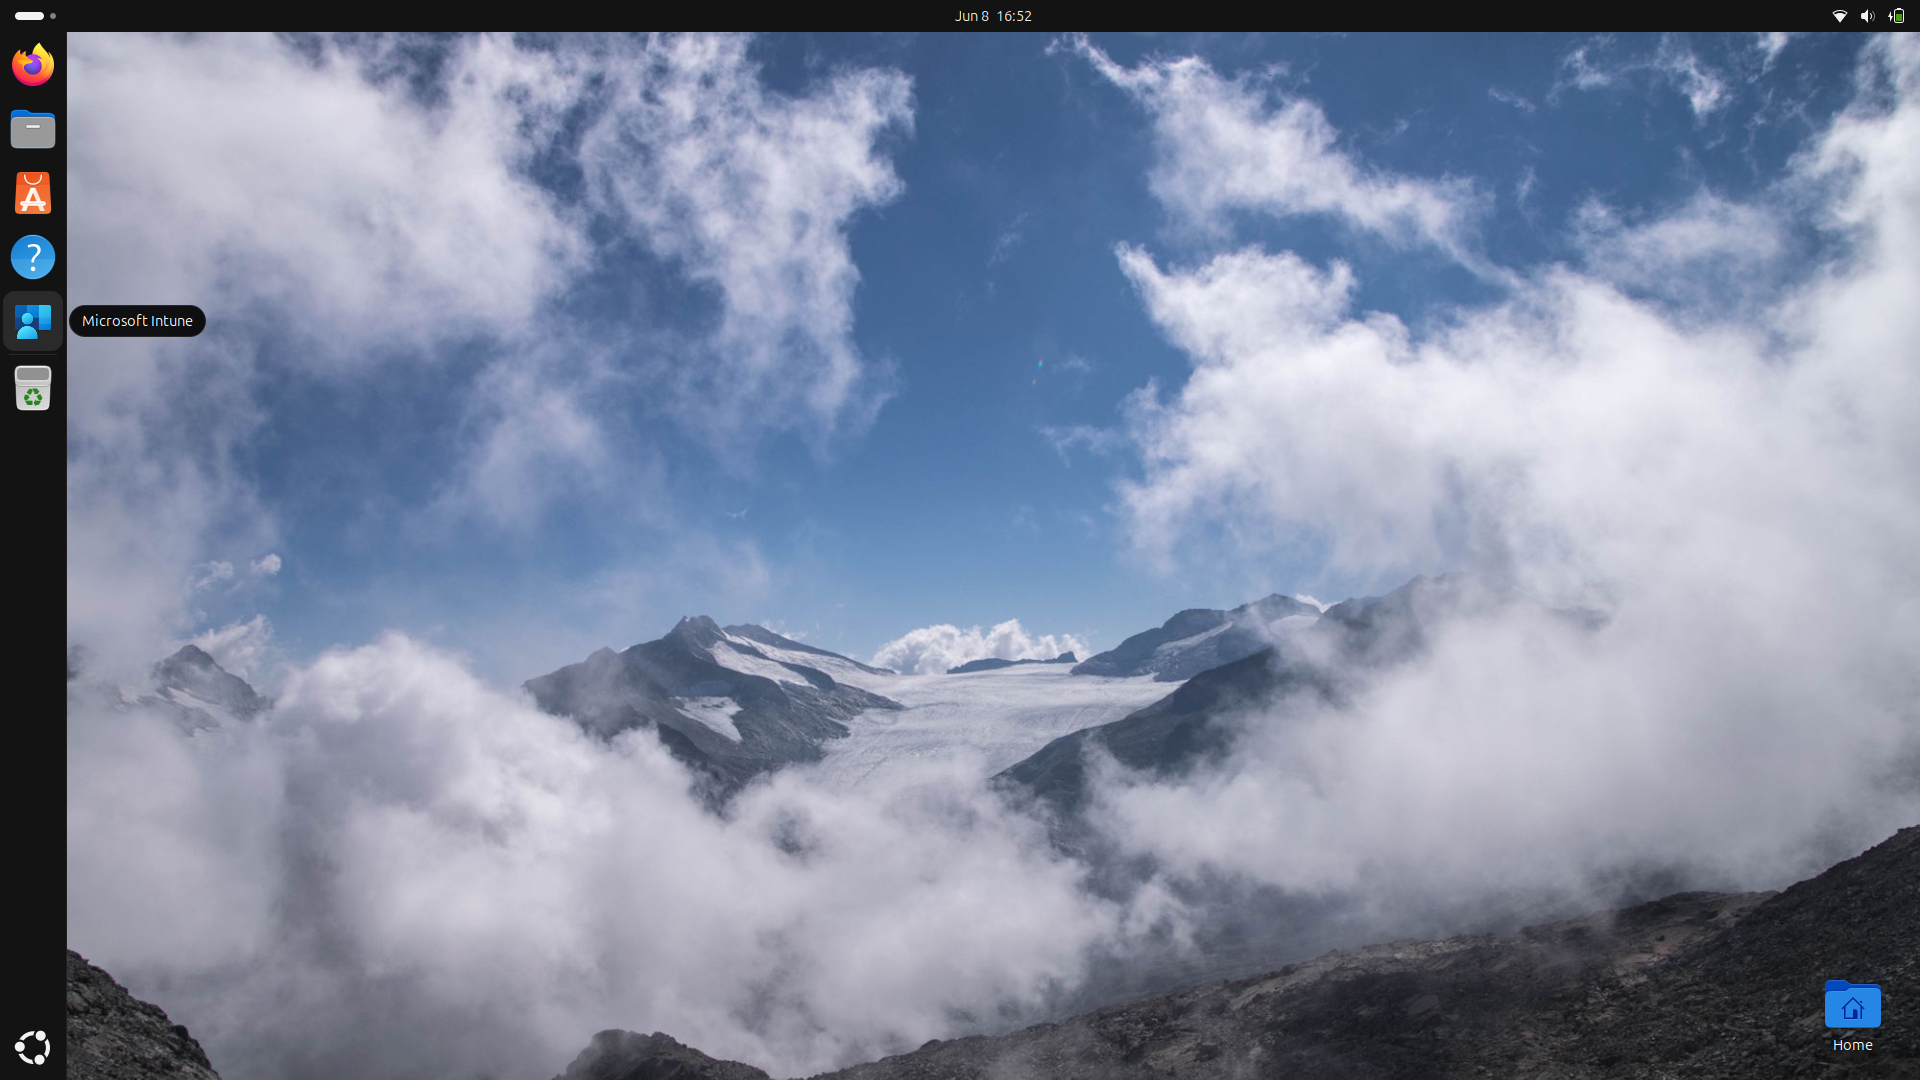
Open up the Microsoft Intune app, log in to your account and the rest will be pretty straightforward as shown in this animation:
All screenshots were taken within 30 seconds of each other, showing the simplicity of this process.
Step 4: Checking status in Microsoft Intune
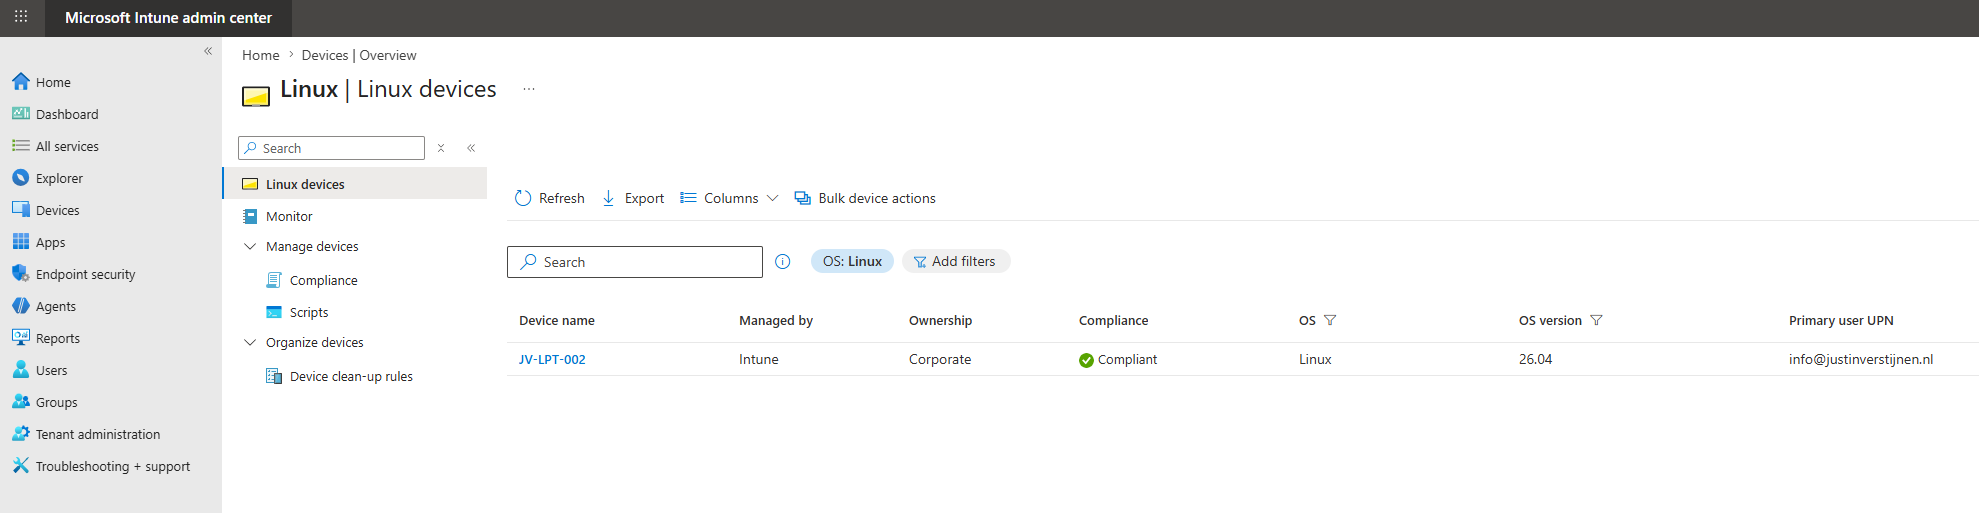
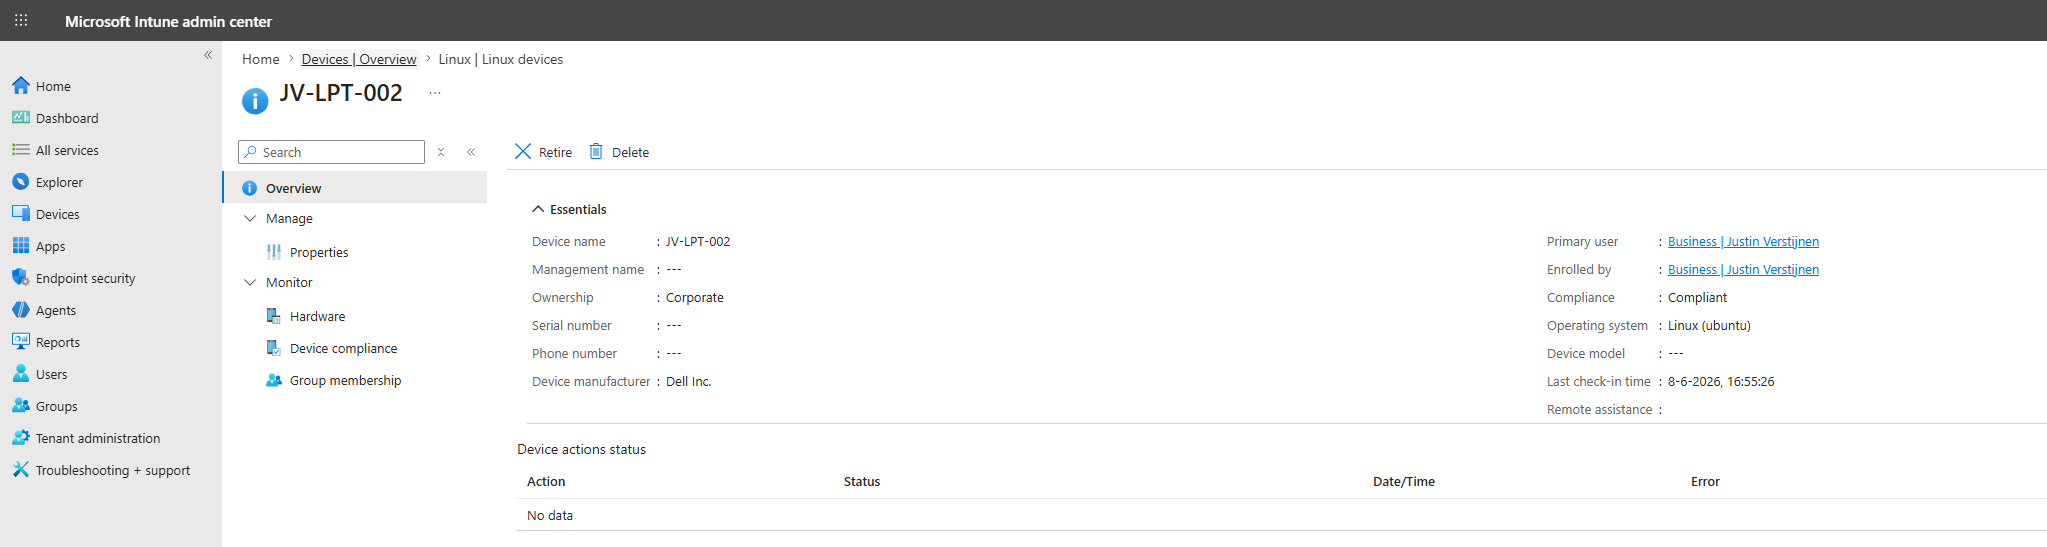
After the device has been enrolled, I waited for a few minutes (at max 10 minutes), and then checked the Microsoft Intune admin center:
The device has just been added to the list. Opening the device and checking the “Group memberships” also shows that the device is successfully added to our earlier created dynamic security group.
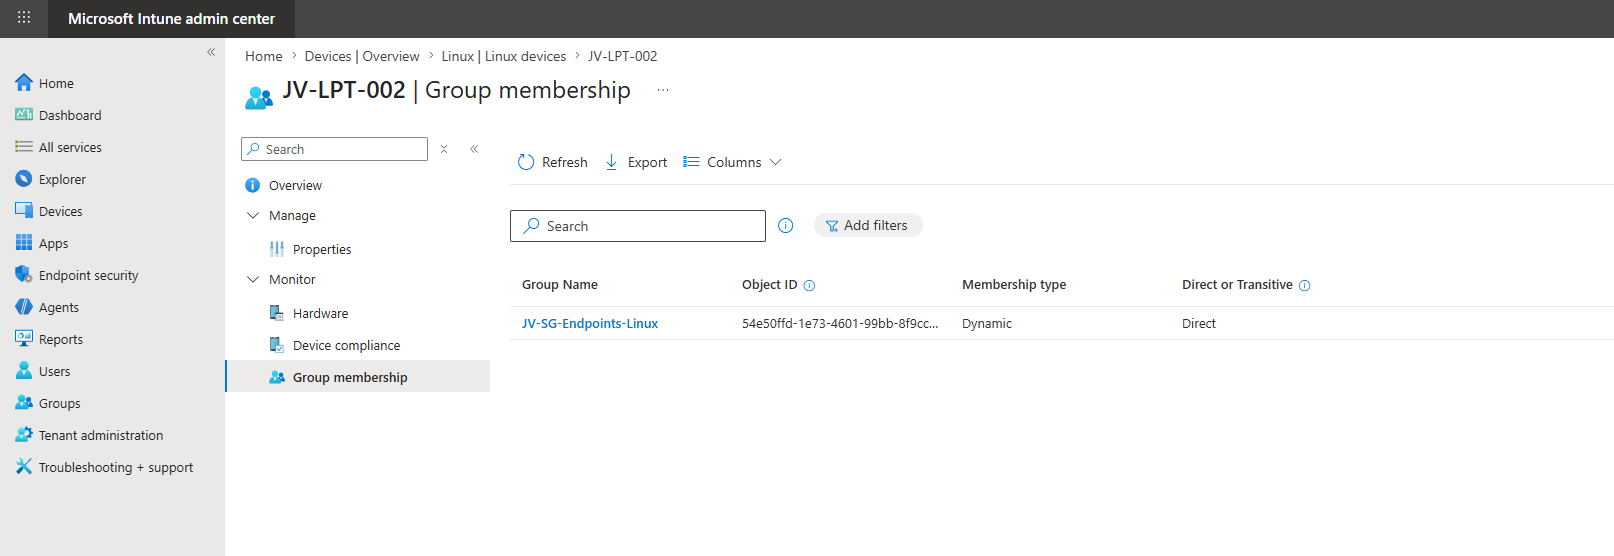
The device options and information are somewhat limited, as we cannot wipe the device from Intune and most basic information is also not filled which is somewhat disappointing.
Step 5: Creating a Compliance Policy for Linux
So let’s zoom in on the features that are available for Linux. Under “Linux devices”, open up “Compliance” and let’s create a Compliance policy:
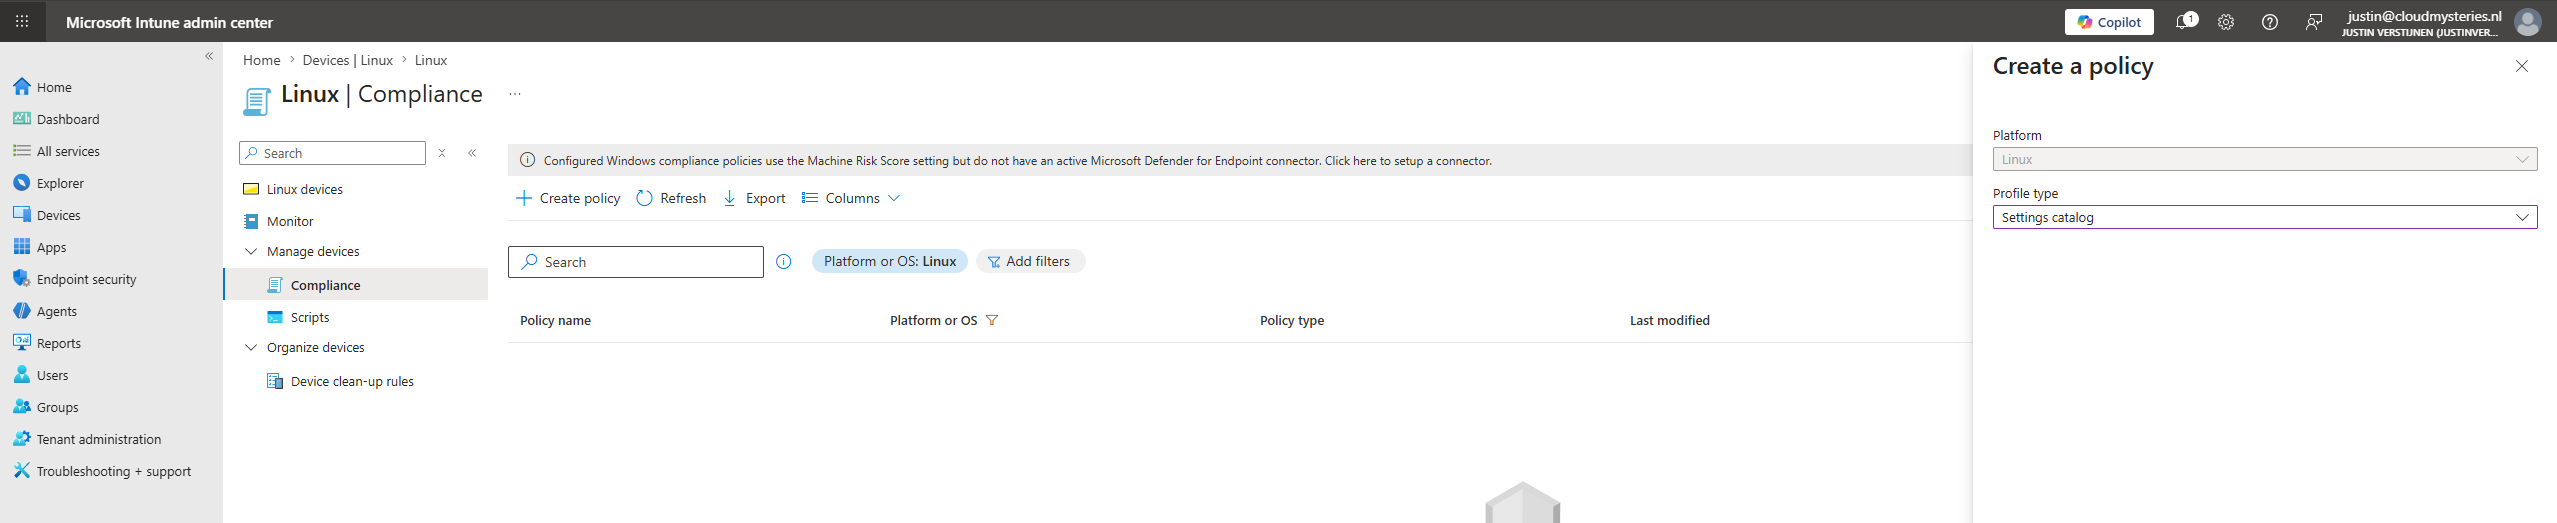
Don’t bother to select the profile type “Templates” as they are not available (yet). Select “Settings catalog”.
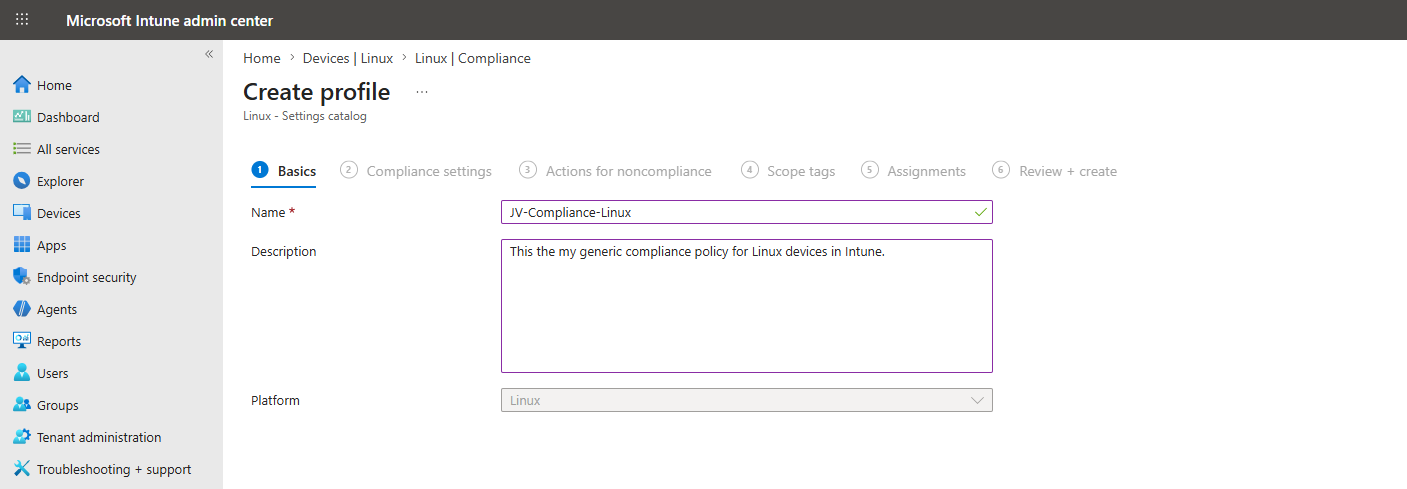
Give the policy a name and description and advance to the next tab.
These are the options we have, and I configured a basic set of them for the purpose of this guide:
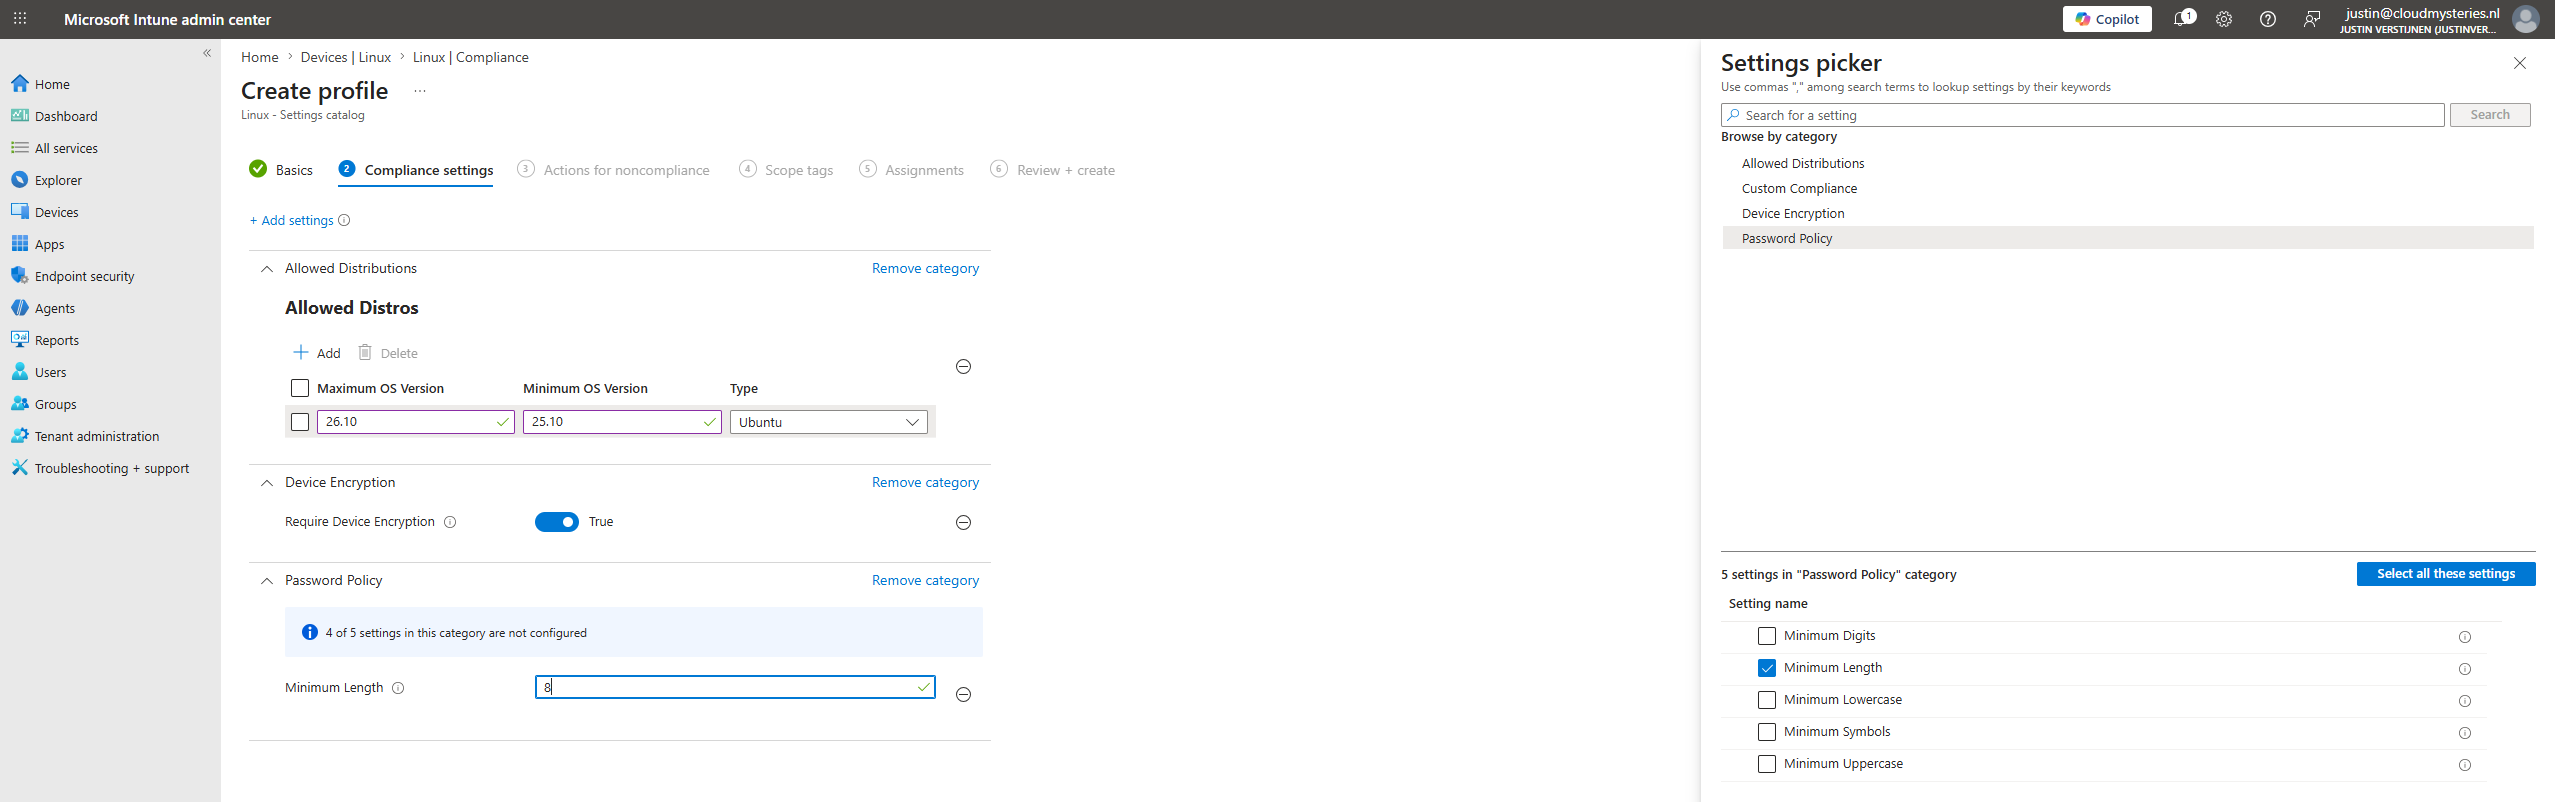
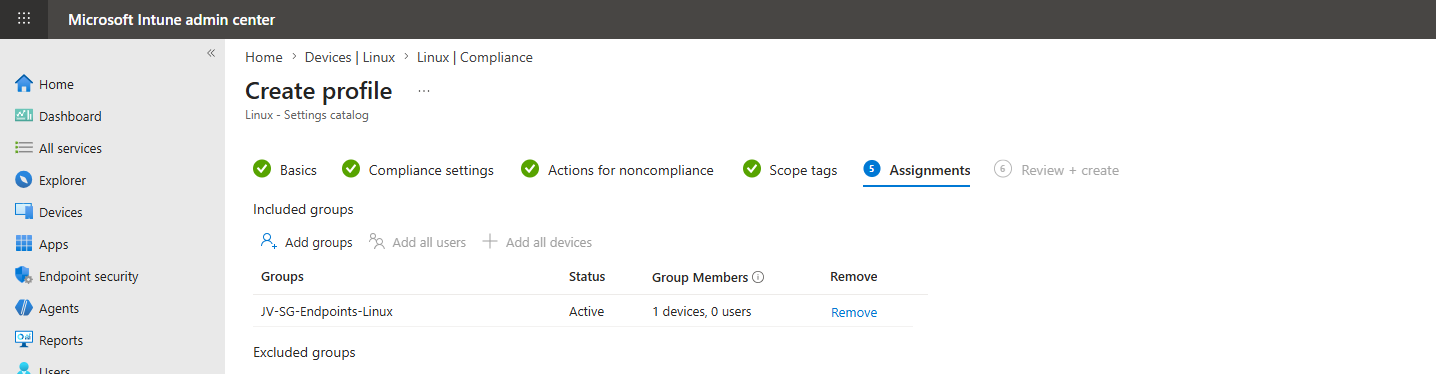
Then assign the policy to the created group and finish the wizard.
Intune will now scan the Linux devices if they are compliant with the rules we have configured here, but will not remediate them. This looks like this after around 15 minutes:
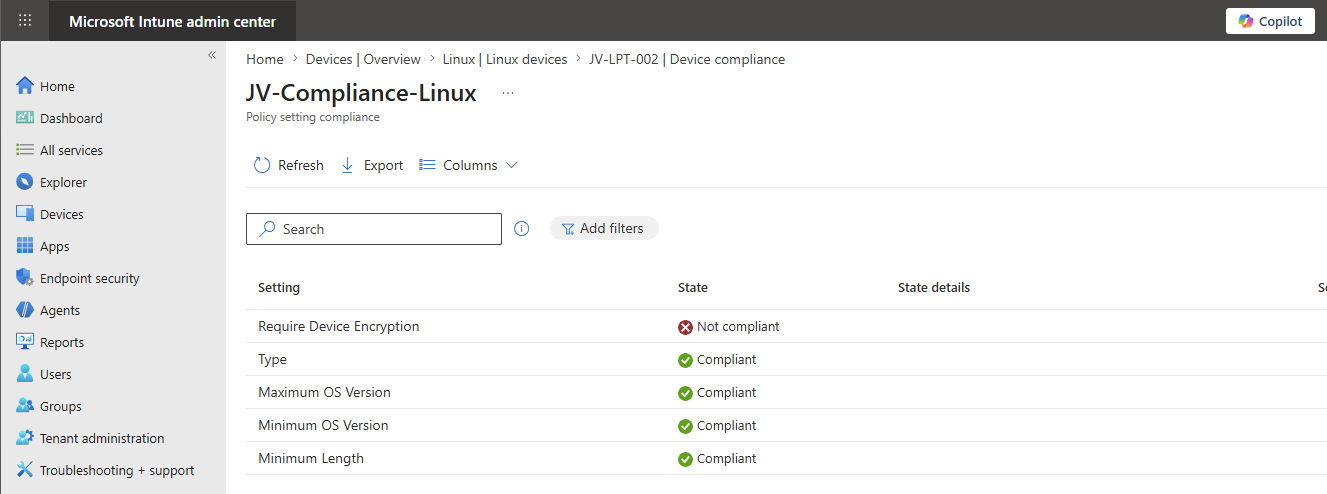
This is as intended as I did not enable encryption at the installation, just for checking if this will be found by Microsoft Intune.
Step 6: Deploy custom scripts
Another option we have for Linux devices is to deploy custom scripts, just like we can do with PowerShell scripts on Windows. We can do very advanced stuff with this which is nice, but requires some knowledge about Bash and Ubuntu itself.
For the purpose of this guide, I created a simple script to download and install these three applications:
- Google Chrome
- Spotify
- Visual Studio Code
Download the script below and let’s create the script in Microsoft Intune.
In Microsoft Intune, go to “Linux” and from there go to “Scripts” and click “+ Add”.
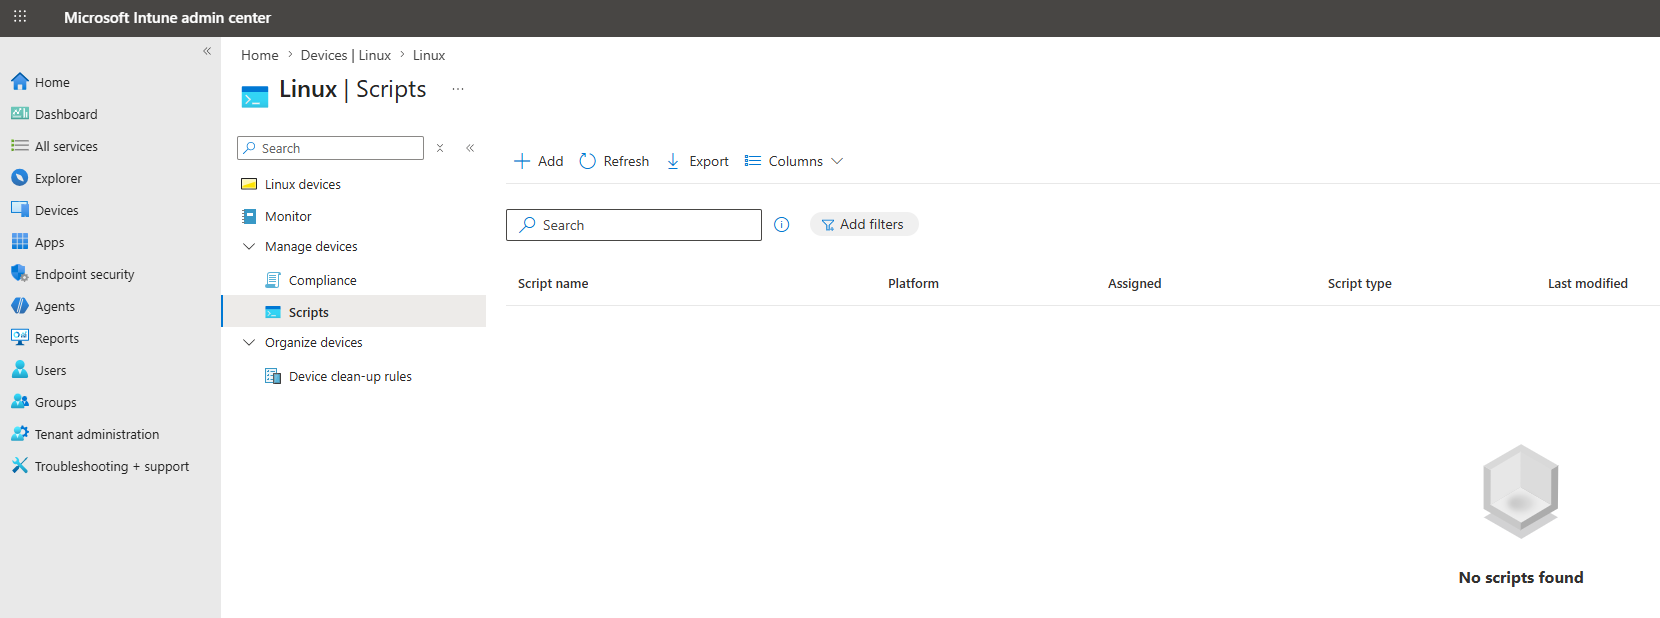
Give the script a name and clear description and advance to the next tab.
On the “Configuration settings” tab, unfold the Linux Custom Configuration blade and configure this:
| Option | Set this |
|---|---|
| Execution context | Root |
| Execution frequency | Every 1 day |
| Execution retries | 3 times |
| Execution Script | Select the downloaded script here |
This must look similar to this, where you can change your settings depending on your situation of course:
Once again, assign the custom script to your dynamic devices group:
Now we have to wait for a few minutes before the script will be pushed to Microsoft Intune. In my case, it took after one reboot and saving the policy for the script to actually apply on Ubuntu where I was surprised at the speed. Faster than on Windows in some cases.
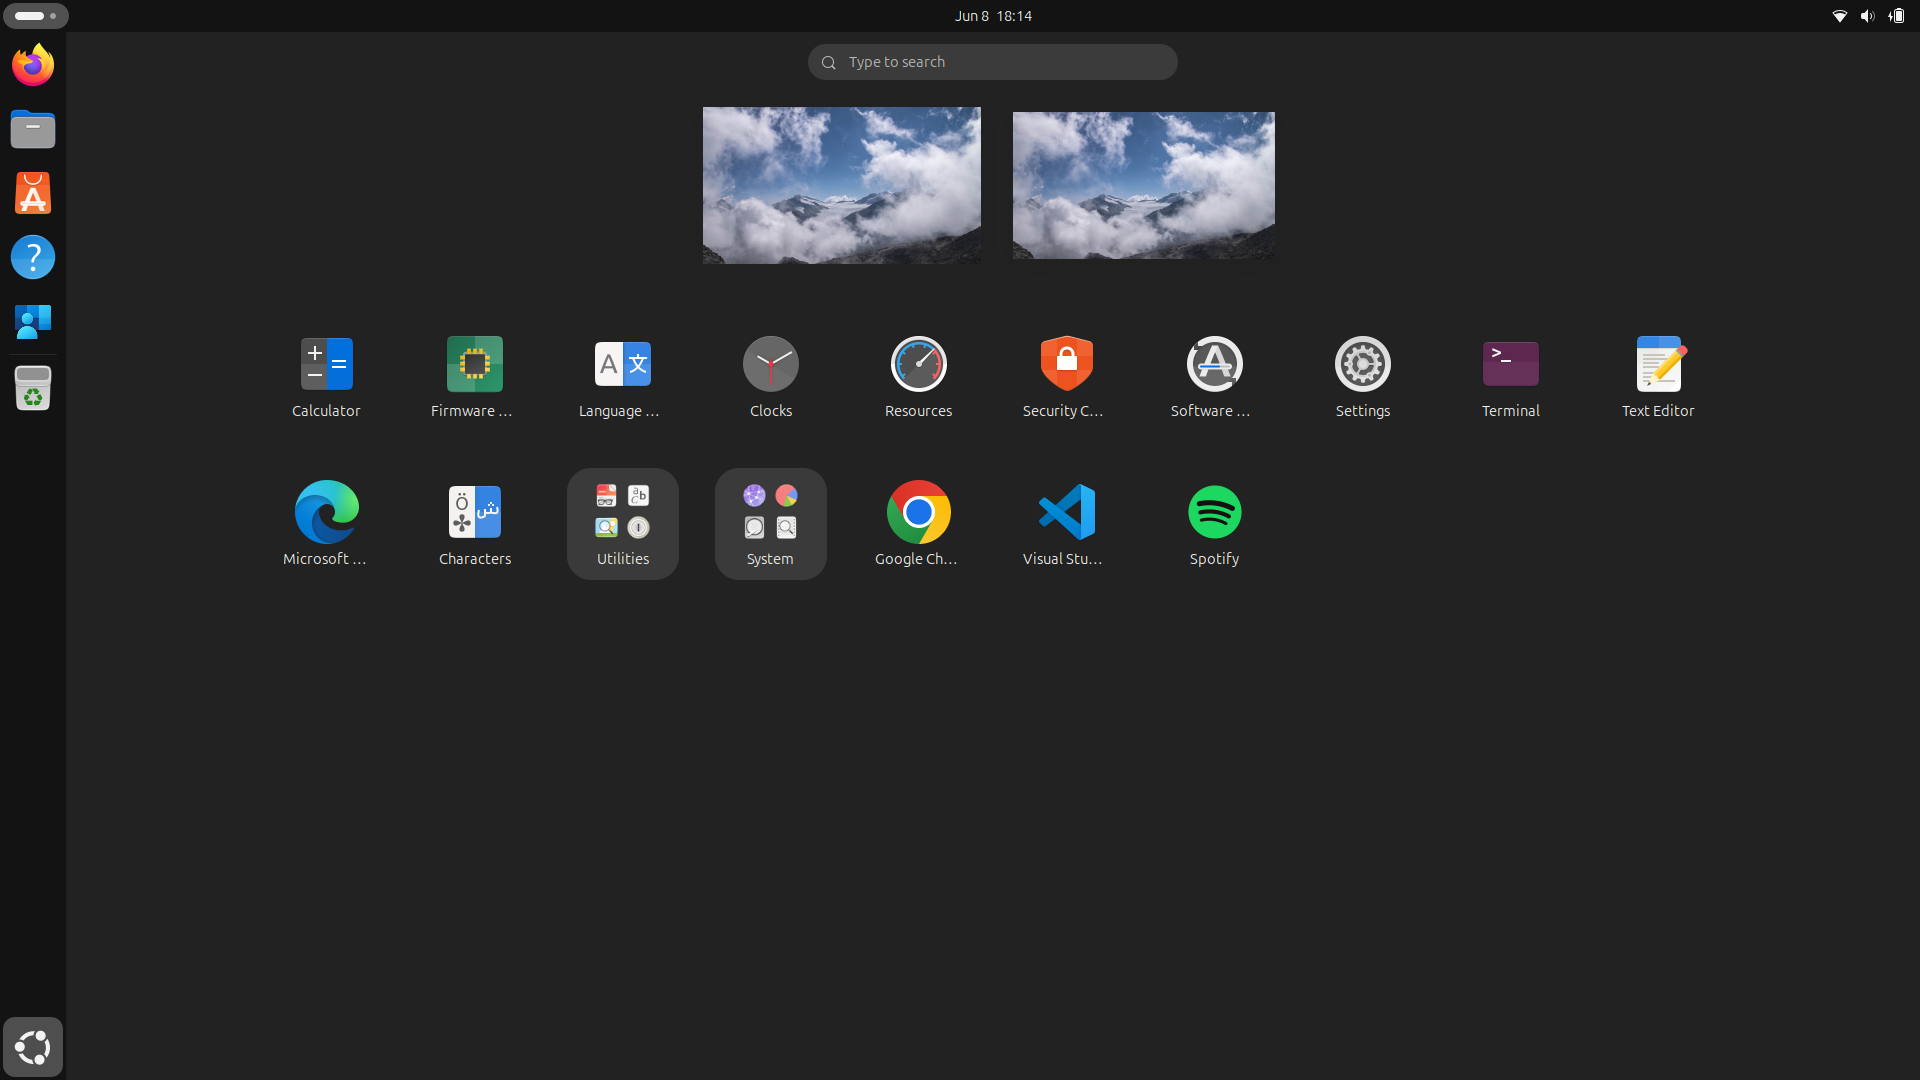
The applications are successfully installed after the first reboot.
Knowledge check
Knowledge check
This quiz needs JavaScript to show the questions and feedback.
This quiz needs JavaScript to show the questions and feedback.
Summary
Adding Ubuntu endpoints to Microsoft Intune is a simple but valuable step toward bringing Linux devices into the same endpoint management strategy as Windows, macOS, iOS, and Android devices. If we want to keep a high level of compliance and security, this is a must for your organization.
Hopefully, Microsoft will continue to expand Linux support in Intune with more configuration, encryption, and remote management options. But even with the current feature set, enrolling Ubuntu devices is a good first step toward a more complete and secure endpoint management approach. With the custom scripts option, we can have basically any option available with some deep knowledge.
Next week I have a new post going further in some management with Ubuntu devices using custom scripts.
I hope this post was helpful and thank you for reading!
Sources
- https://learn.microsoft.com/en-us/intune/fundamentals/ref-supported-platforms#linux
- https://rufus.ie/en/
- https://learn.microsoft.com/en-us/intune/device-enrollment/guide-linux
End of the page 🎉
You have reached the end of the page. You can navigate through other blog posts as well, share this post on X, LinkedIn and Reddit or return to the blog posts collection page. Thank you for visiting this post.
If you find this page and blog very useful and you want to leave a donation, you can use the button below to buy me a beer. Hosting and maintaining a website takes a lot of time and money. Thank you in advance and cheers :)
The terms and conditions apply to this post.
Automatically start Windows App at startup
In some cases we want to automatically start the Windows App for connections to AVD and Windows 365 at startup. We can achieve this through different ways which I will describe in this post.
Creating the Intune script
We can achieve this with Intune using a PowerShell script. As Intune doesn’t support login/startup scripts, we have to create a Platform script that creates a Scheduled Task in Windows for us. This is a great way, as this is visible at the client side and can be disabled pretty easily.
To create this task/script, go to the Intune Admin center: https://intune.microsoft.com
Go to Devices -> Windows -> Scripts and remediations, then open the tab “Platform scripts”.
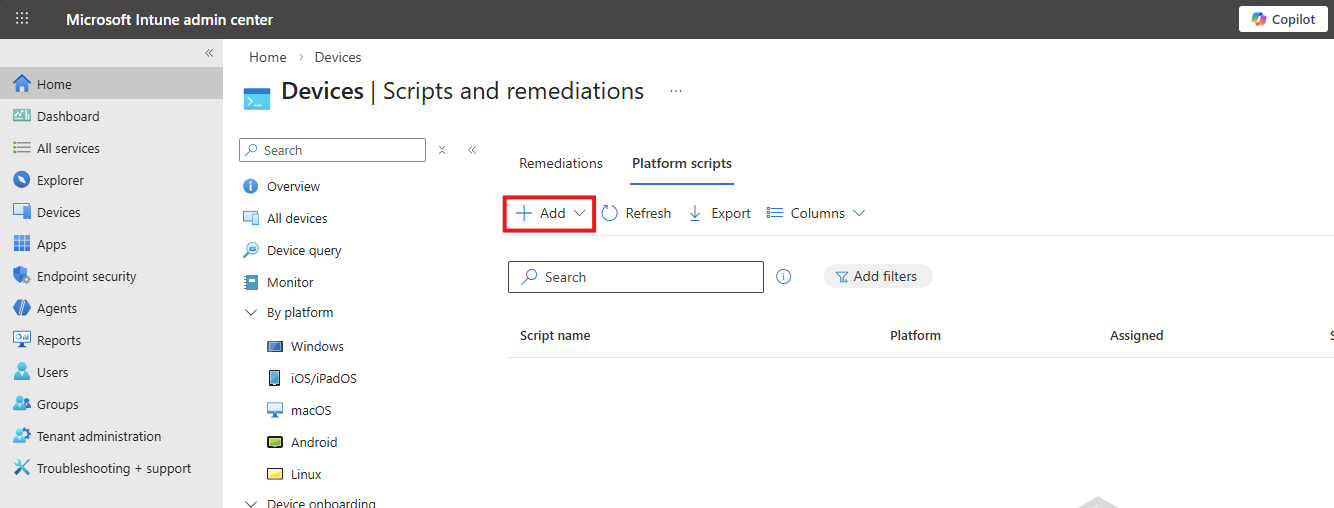
Click on “+ Add” and select “Windows 10 and later” to create a new script.
Click “Next”.
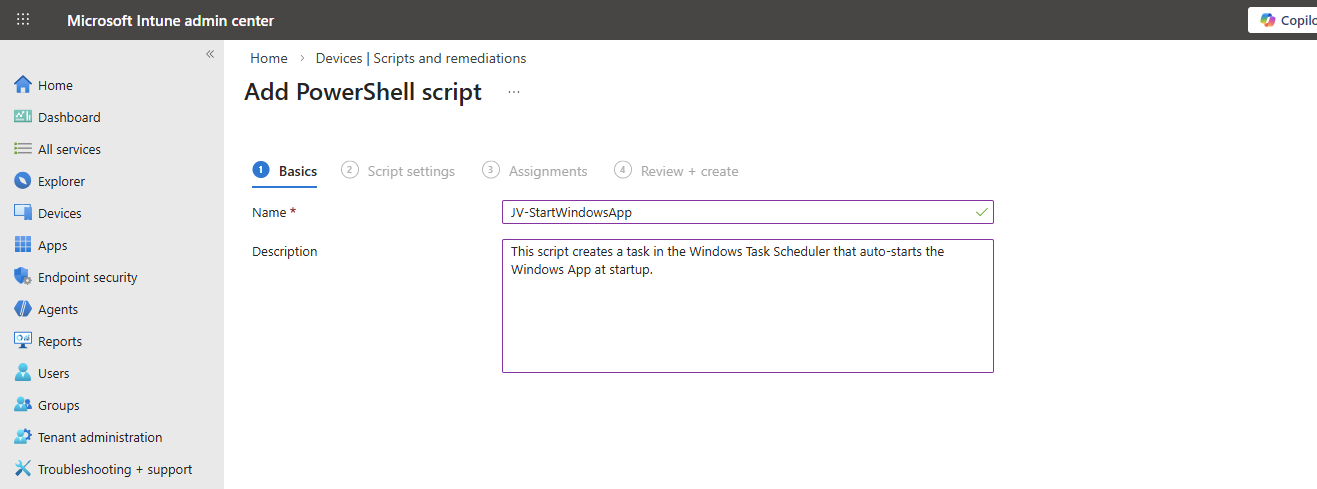
Then download my script here that does the magic for you:
Or create a new file in Windows and paste the contents below into a file save it to a .ps1 file.
POWERSHELL
$TaskName = "JV-StartWindowsApp"

$Action = New-ScheduledTaskAction `
    -Execute "explorer.exe" `
    -Argument "shell:AppsFolder\MicrosoftCorporationII.Windows365_8wekyb3d8bbwe!Windows365"

$Trigger = New-ScheduledTaskTrigger -AtLogOn

$Principal = New-ScheduledTaskPrincipal `
    -GroupId "BUILTIN\Users" `
    -RunLevel Limited

Register-ScheduledTask `
    -TaskName $TaskName `
    -Action $Action `
    -Trigger $Trigger `
    -Principal $Principal `
    -Force
Upload the script to Intune and set the following options:
- Run this script using the logged on credentials: No
- Enforce script signature check: No
- Run script in 64 bit PowerShell Host: Yes

Then click “Next”.
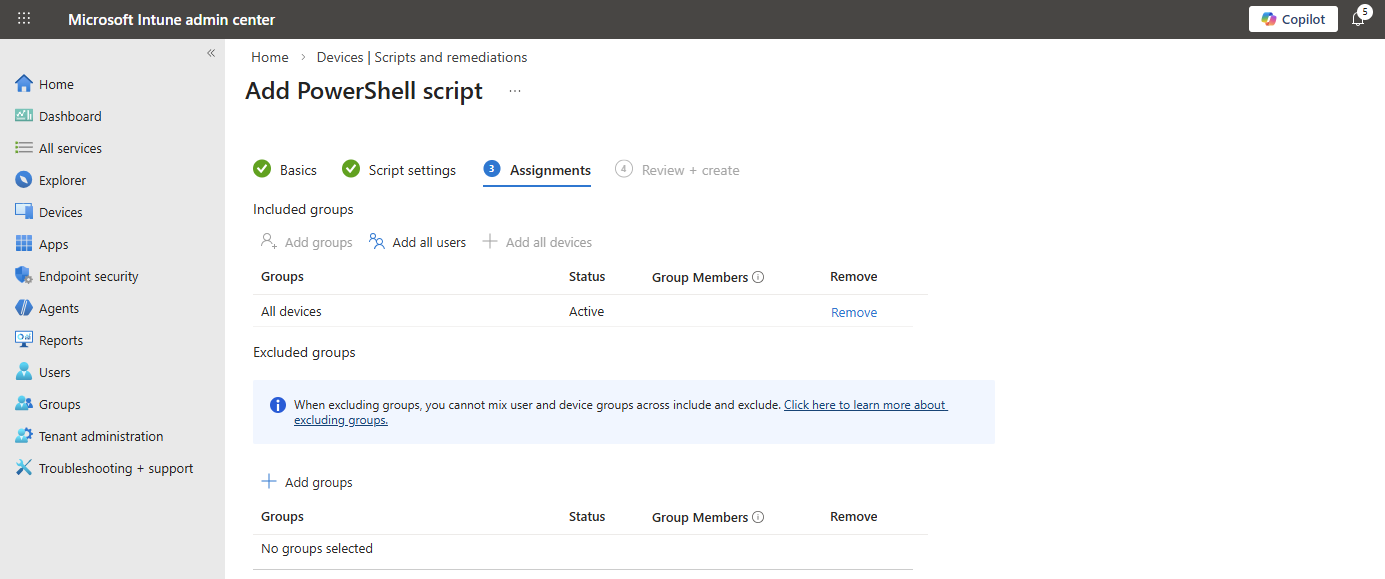
Assign the script to the group containing your devices where you want to autostart the Windows App. Then save the script.
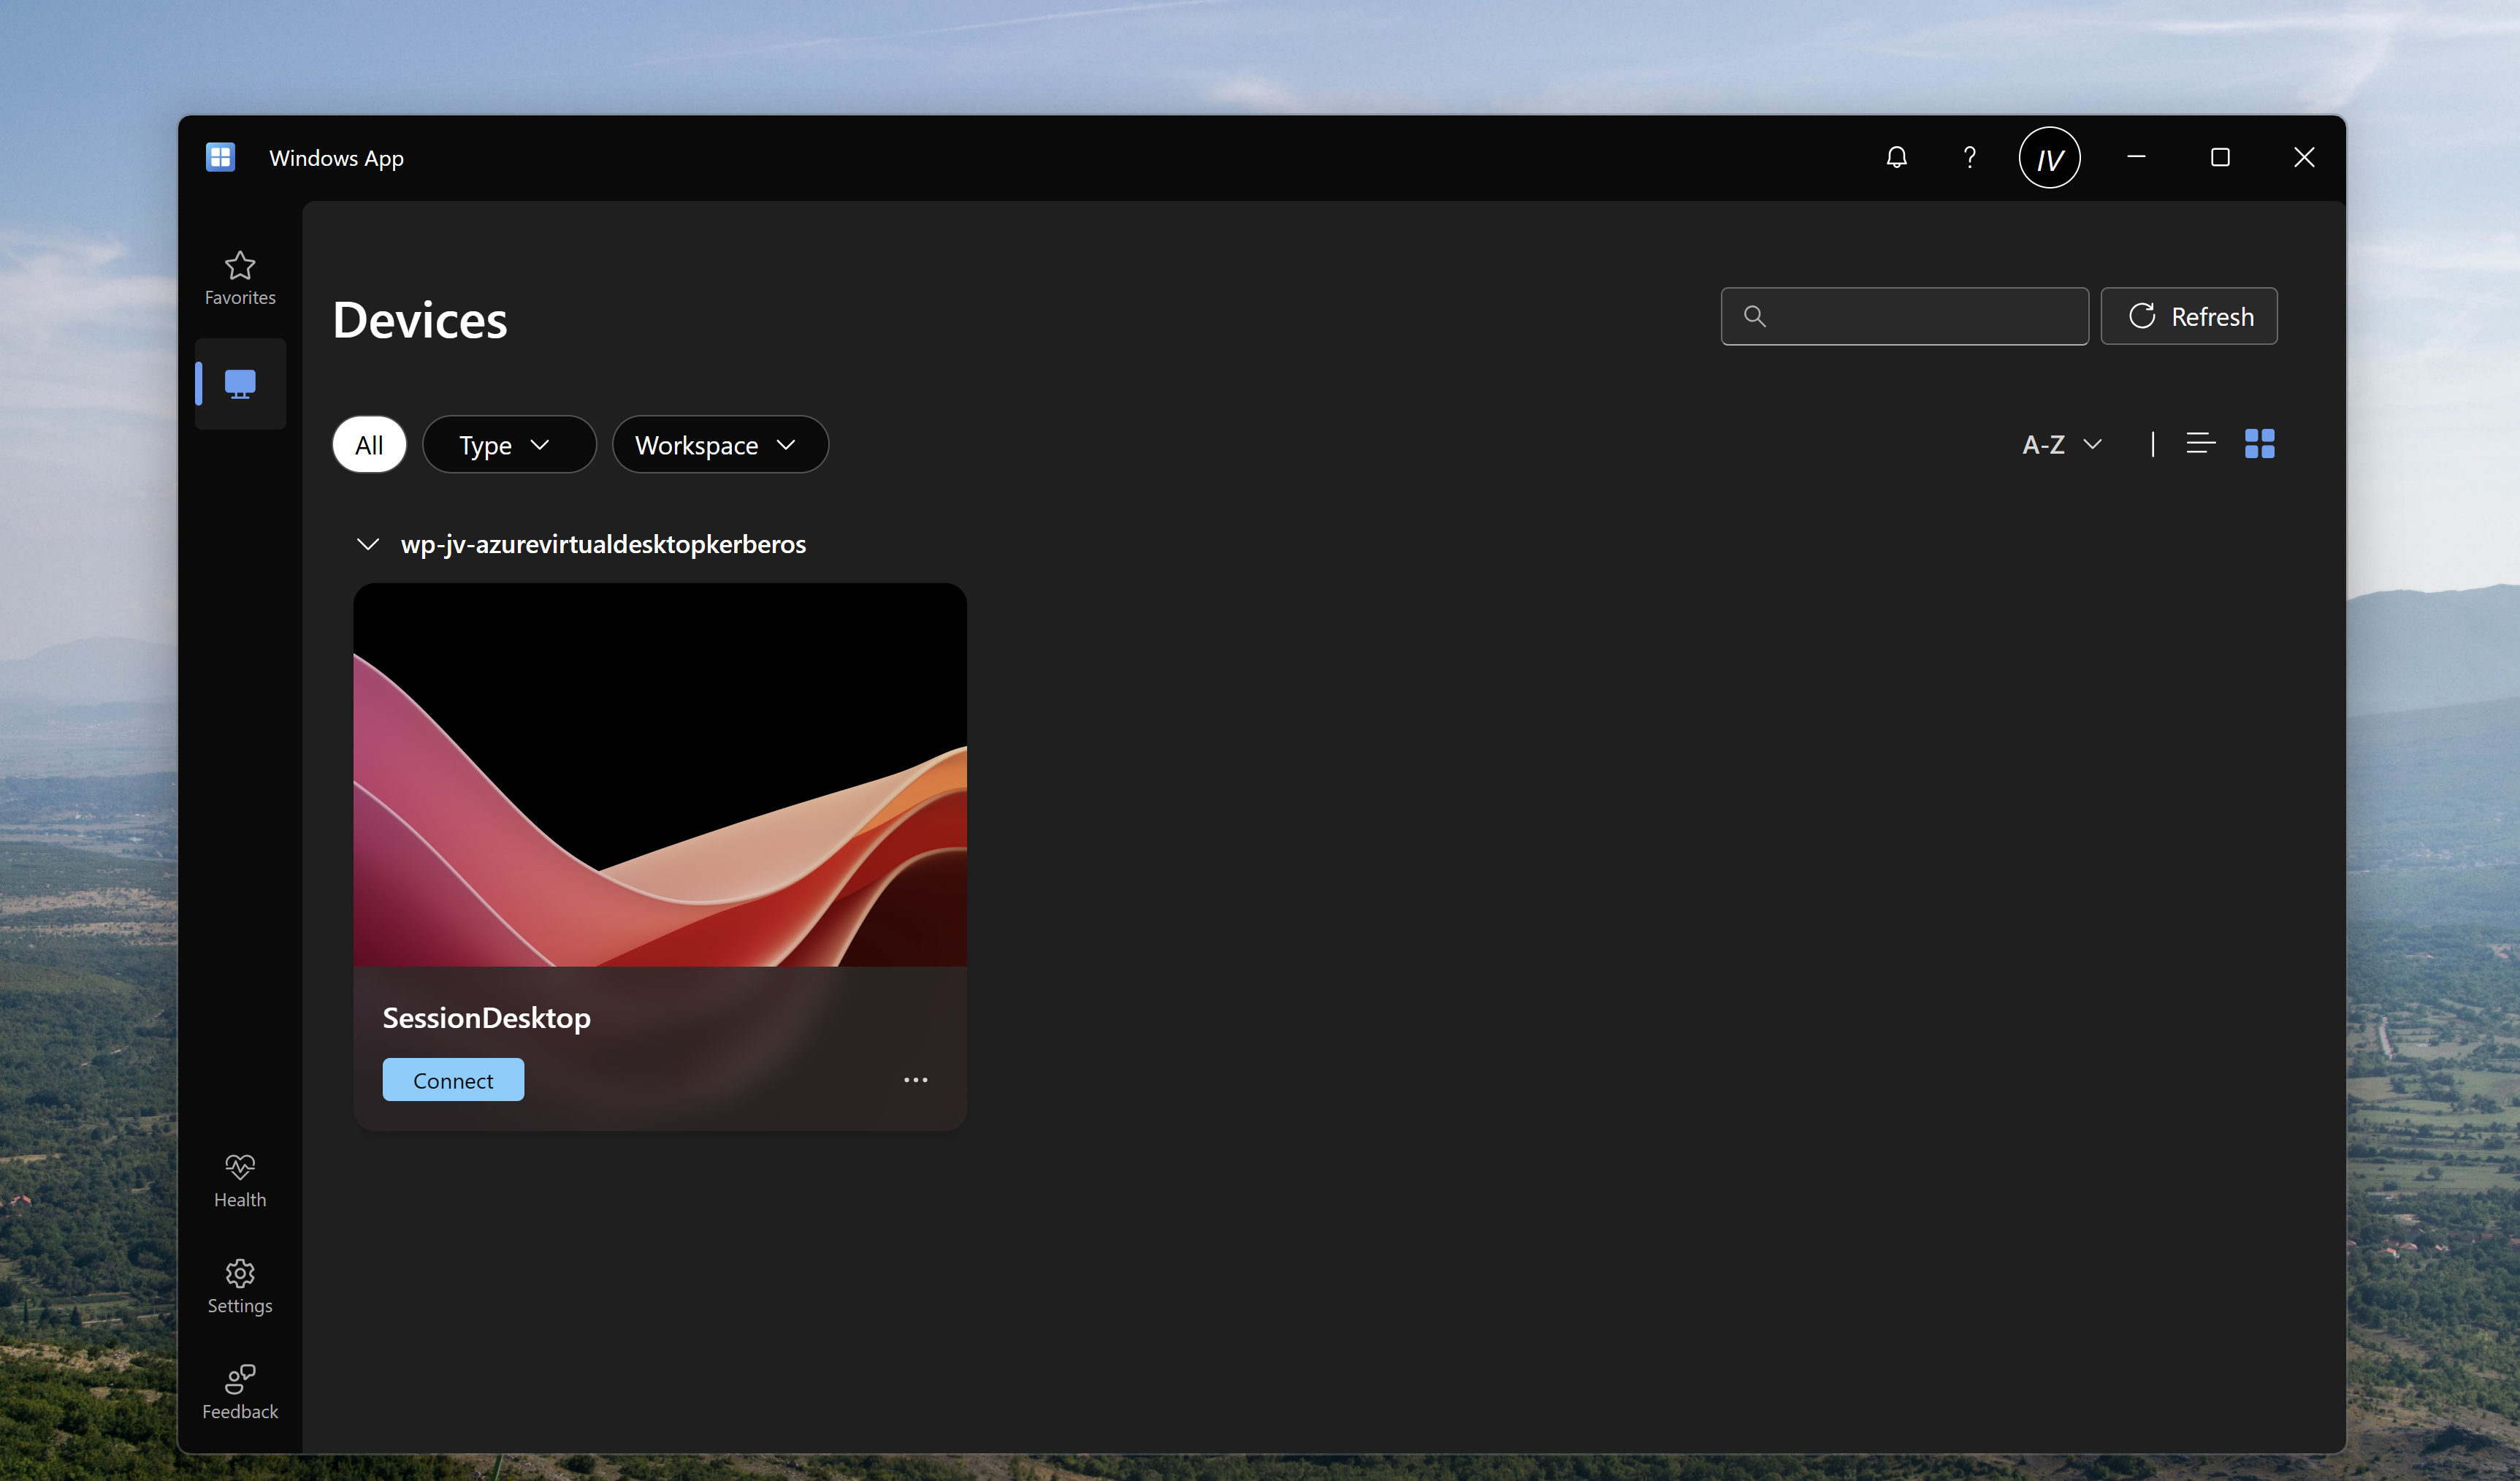
The results
After the script has been applied, which may take up to 30 minutes, and the computer has been restarted, the Windows app will start automatically when the user logs in, automating the process and eliminating the startup wait time.
Summary
Automatically startint the Windows App can help end users to automate a bit of their daily work. They don’t have to open it after turning on their PC and can sign-in directly to their cloud device.
Thank you for visiting my website and I hope it was helpful.
Sources
These sources helped me by writing and research for this post;
- None
End of the page 🎉
You have reached the end of the page. You can navigate through other blog posts as well, share this post on X, LinkedIn and Reddit or return to the blog posts collection page. Thank you for visiting this post.
If you find this page and blog very useful and you want to leave a donation, you can use the button below to buy me a beer. Hosting and maintaining a website takes a lot of time and money. Thank you in advance and cheers :)
The terms and conditions apply to this post.
Deploy Google Chrome Single Sign On with Intune
When deploying Google Chrome with Microsoft Intune, users still have to manually login with their credentials into Microsoft Online websites. Microsoft Edge has built-in Single Sign On (SSO) for users who already logged in with their Microsoft account to their computer. However, there is a Chrome extension published by Microsoft themselves which allows users to also have this Single Sign On experience into Google Chrome. On this page I will show how this extension works, what the advantages are and how we can deploy this with Microsoft Intune. I will share both a Configuration Policy and a PowerShell script option where you may choose which one to use.
How the extension works
The Microsoft SSO extension for Google Chrome uses the same token/session you already have when you have your device Entra ID joined. It will send that to every Microsoft Online webpage to show you are already authenticated and have a valid token. This makes the user experience a lot better as they don’t have to authenticate first before starting to use the web applications.
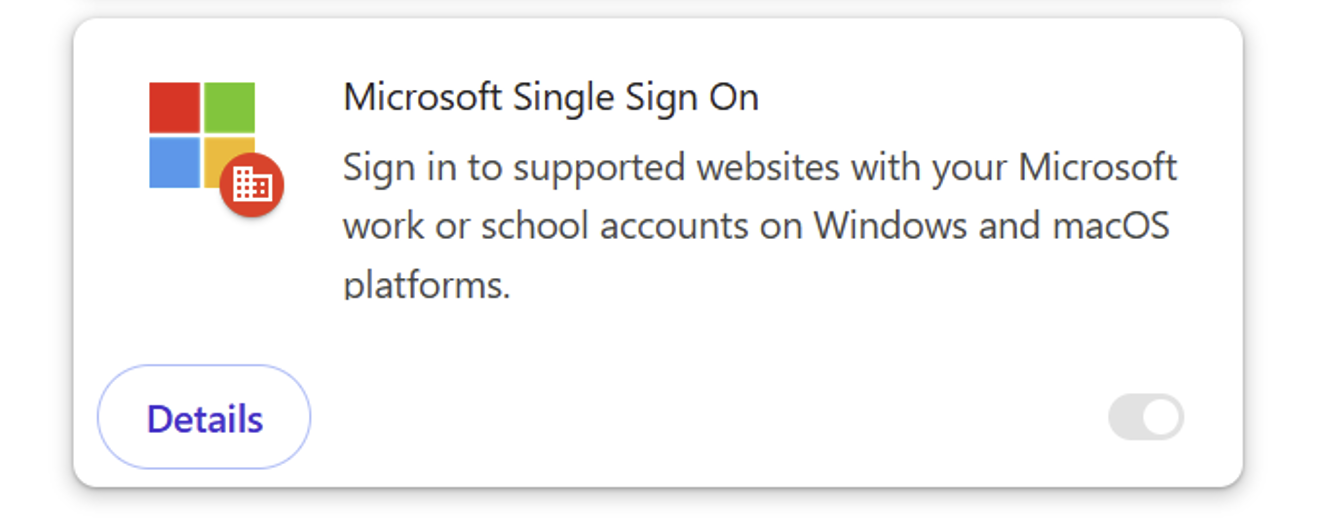
The extension can be manually downloaded from here: https://chromewebstore.google.com/detail/microsoft-single-sign-on/ppnbnpeolgkicgegkbkbjmhlideopiji?pli=1
The fast pass
I have both the Configuration Profile and PowerShell script for you to download and implement easily on my Github page. You can download them there:
Download Configuration Profile and Script
How to deploy the extension with Intune Configuration Policies
To deploy the extension with Intune, login to the Microsoft Intune Admin Center: https://intune.microsoft.com
From there, navigate to Devices -> Windows -> Configuration and create a new policy.
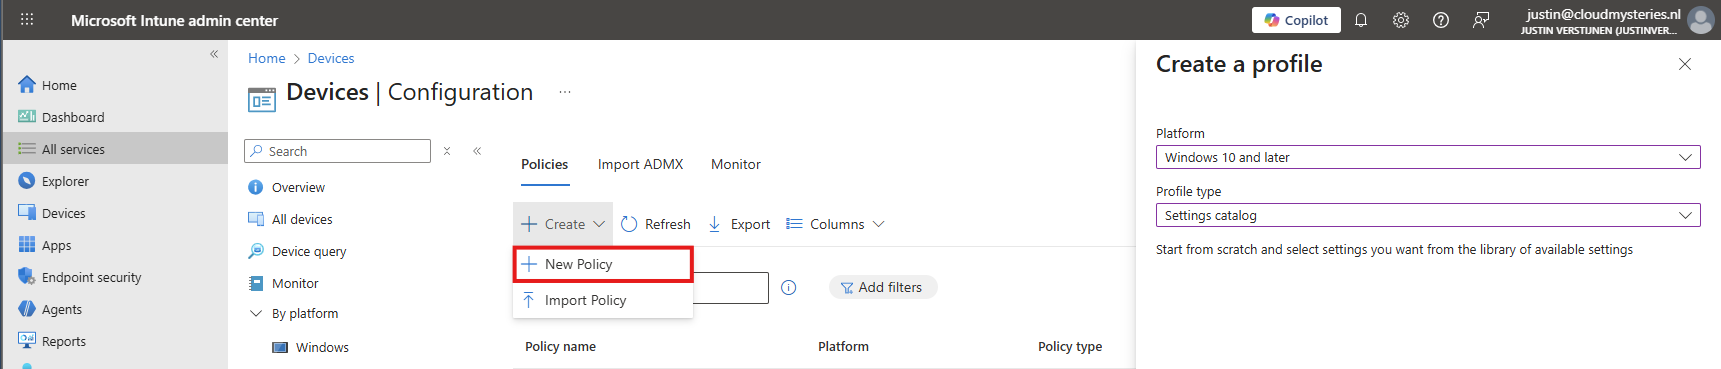
Select Windows 10 and later for “Platform” and use the “Settings catalog” profile type. Then click on “Create”.
Now define a name and description for this new policy, defining what this actually does.
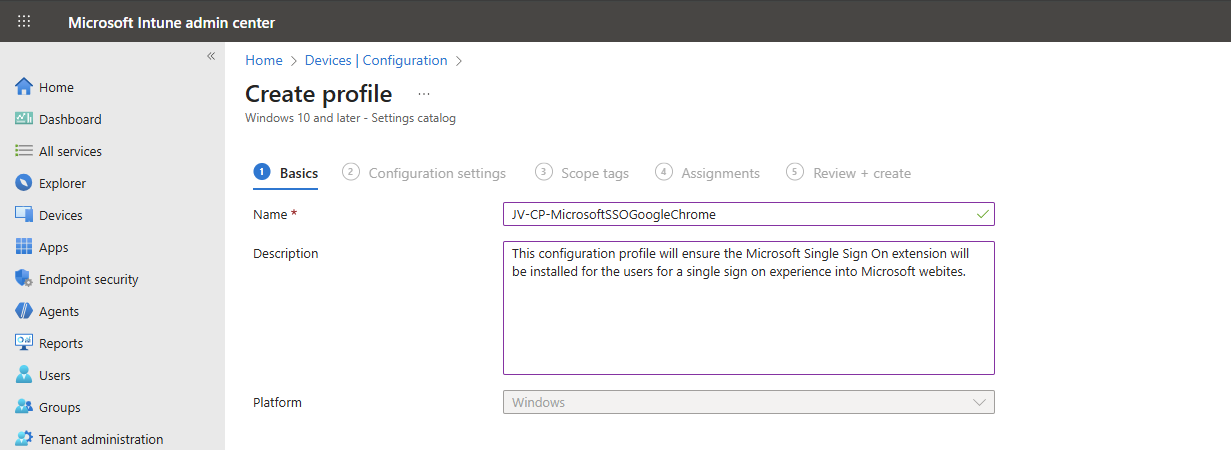
Then click on “Next”.
Now click on “+ Add settings”, search for Google. Click it open to go down to “Google Chrome” and then “Extensions”.
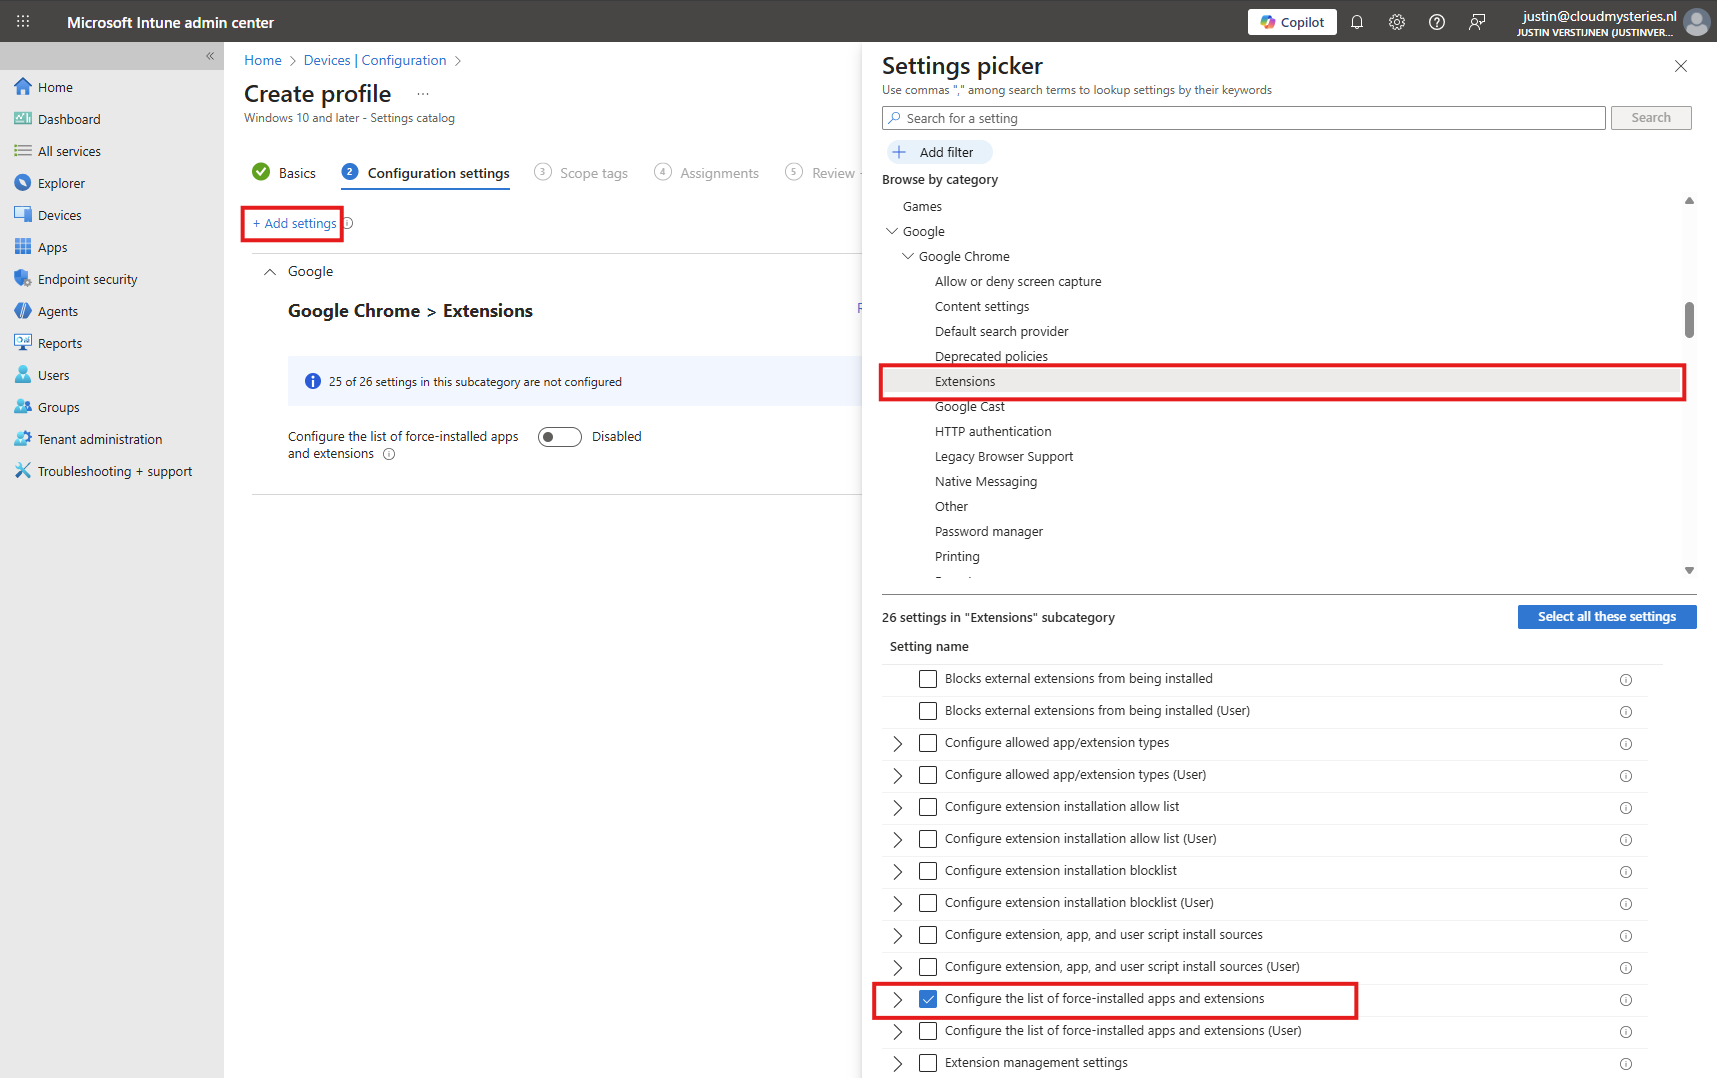
Select the option “Configure the list of force-installed apps and extensions”.
The same option exists with (User) attached, using that option means a user is able to delete the extension.
Now we can configure that option by setting the switch to “Enabled”.
We have to paste the Extension IDs here. You can find this in the Chrome Web Store in the URL (the part after the last /):
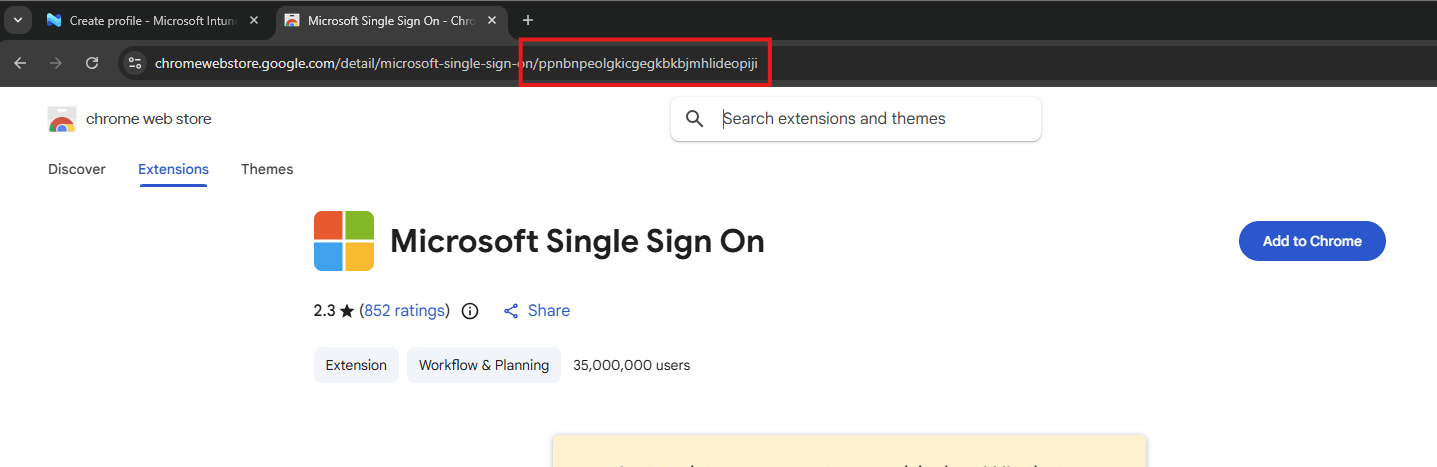
So we paste this value in the field, but you can add any extension, like ad blockers, password managers or others.
YAML
ppnbnpeolgkicgegkbkbjmhlideopiji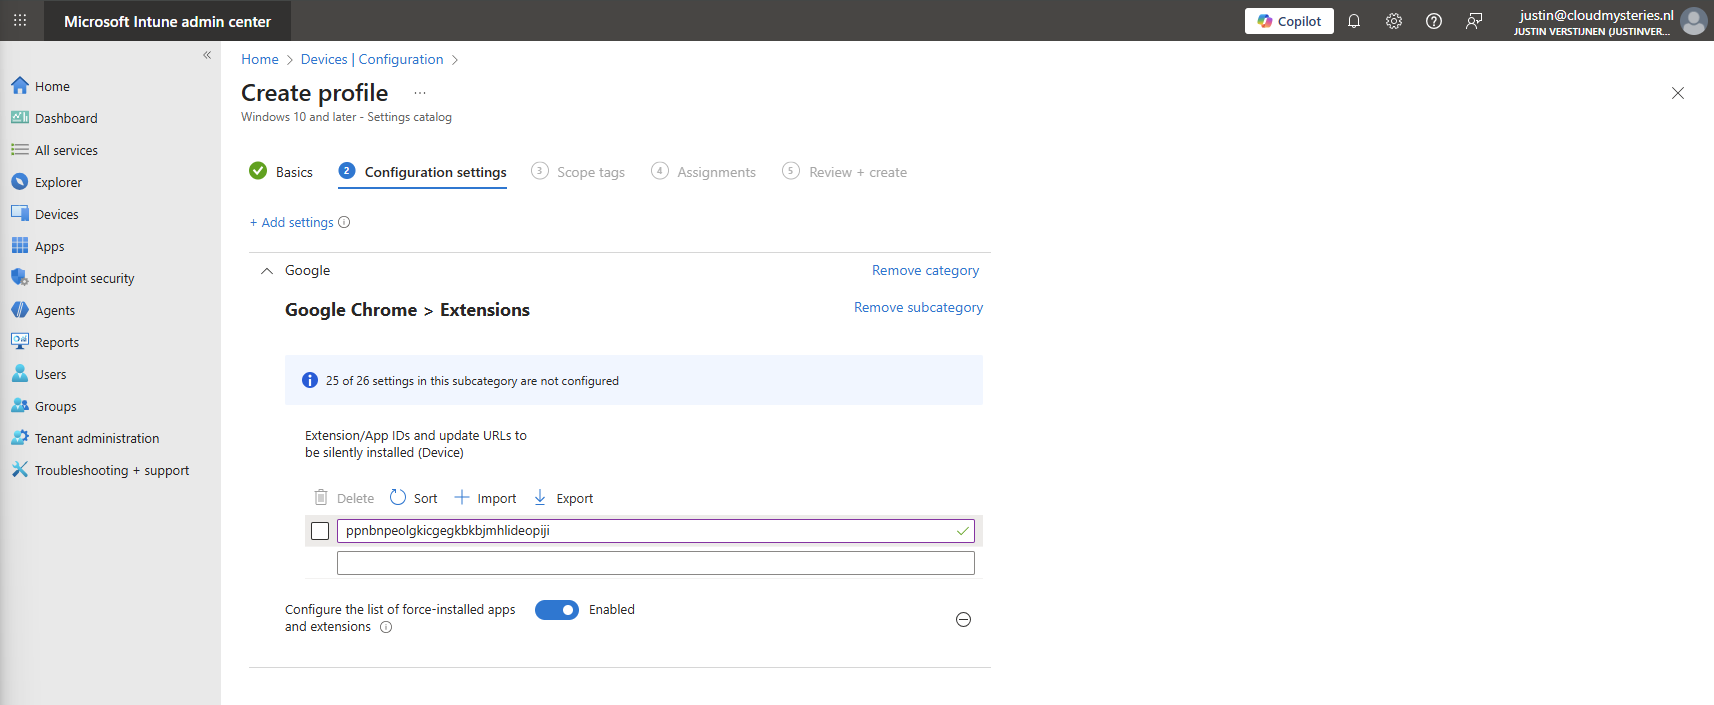
Click on “Next” twice. We can now assign this new policy to our devices. I picked the All Devices option here as I want this extension to be installed on all Windows devices.
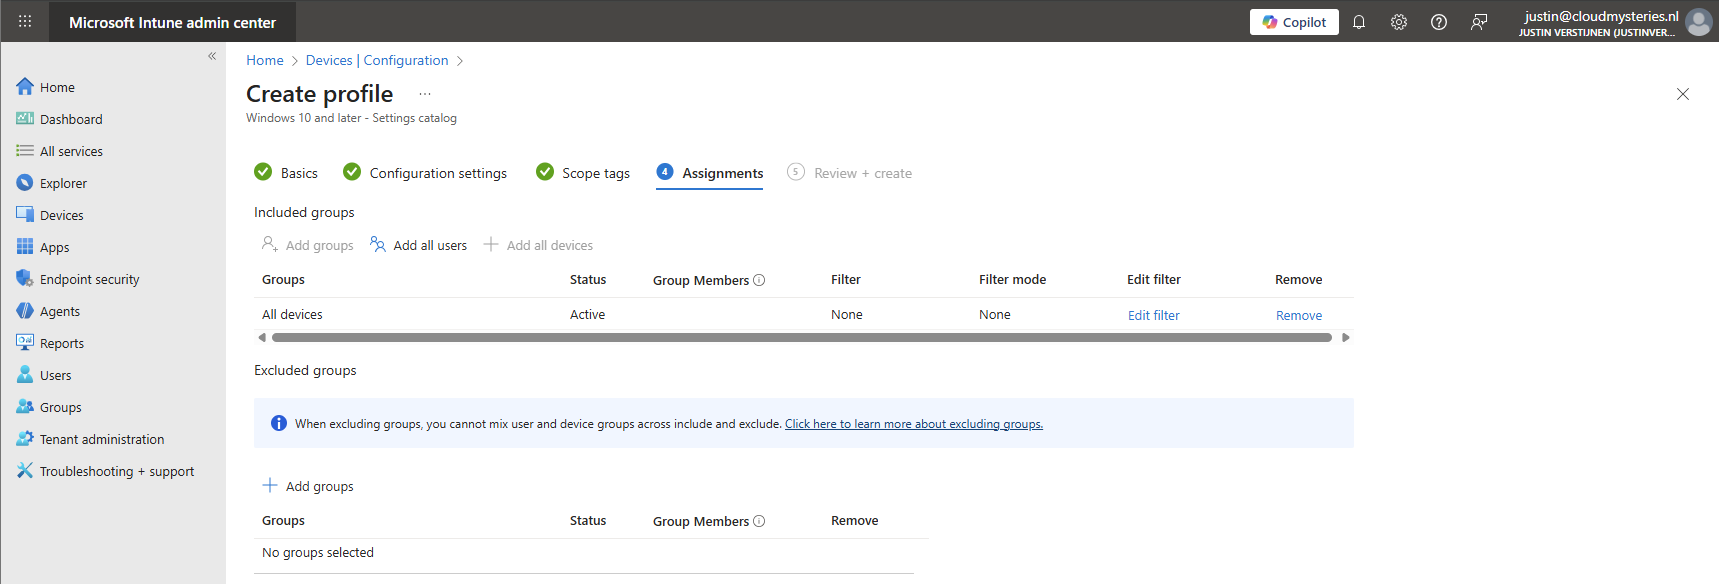
Create the policy by finishing the wizard. Let’s check the results here.
How to deploy the extension with Intune Platform Scripts
We can also deploy the extension through a PowerShell script. This is recommended if using other MDM solutions than Microsoft Intune. However, we can also deploy it in Intune as script by going to the Microsoft Intune Admin Center: https://intune.microsoft.com
From there, go to Devices -> Windows ->Scripts and remediations and then the tab “Platform scripts”. These are scripts that are automatically run once.
Create a new script for Windows 10 and later here.

Give it a name and description of the script:
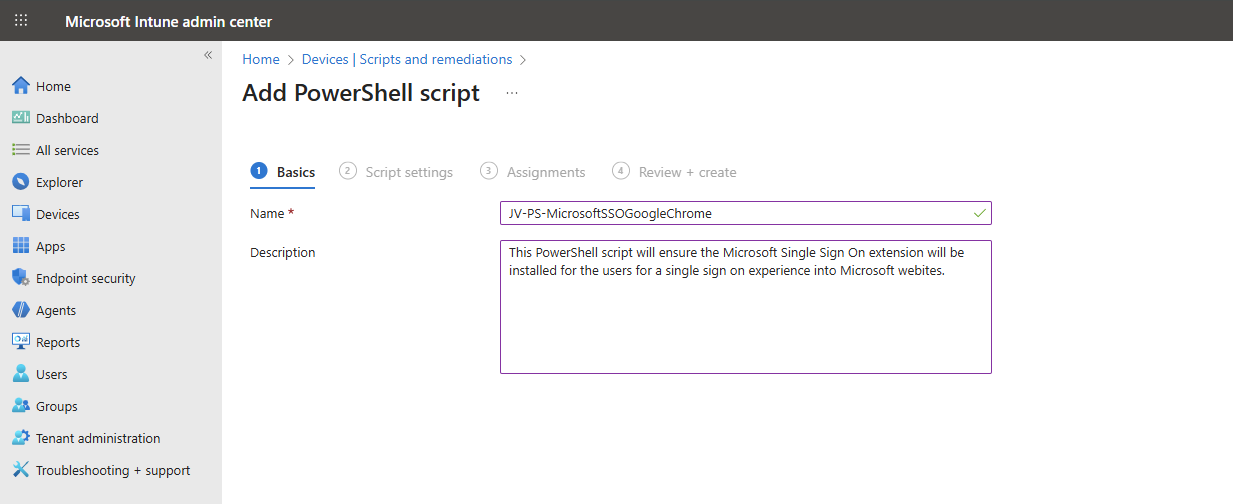
Click “Next” to open the script settings. To download my script, go to https://github.com/JustinVerstijnen/JV-CP-MicrosoftSSOGoogleChrome and download the .ps1 file.
Here import the script you just downloaded from my Github page.
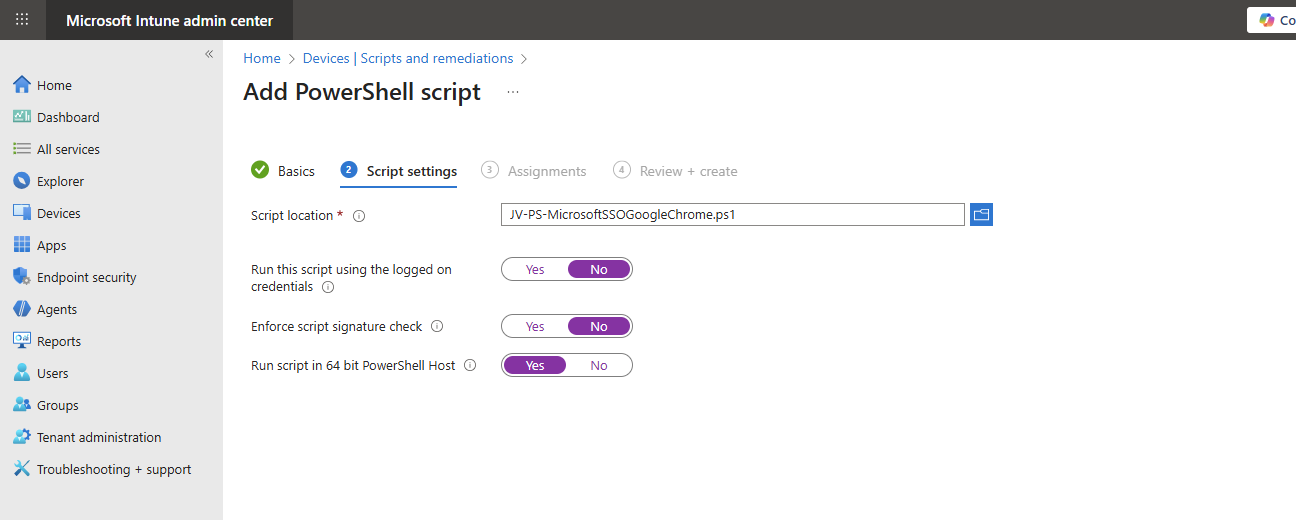
Then set the script options as this:
- Run this script using the logged on credentials: No
- Enforce script signature check: No
- Run script in 64 bit PowerShell Host: Yes
The script targets the whole machine by creating a registry key in the HKEY_LOCAL_MACHINE hive.
Then click “Next” and assign it to your devices. In my case, I selected “All devices”.
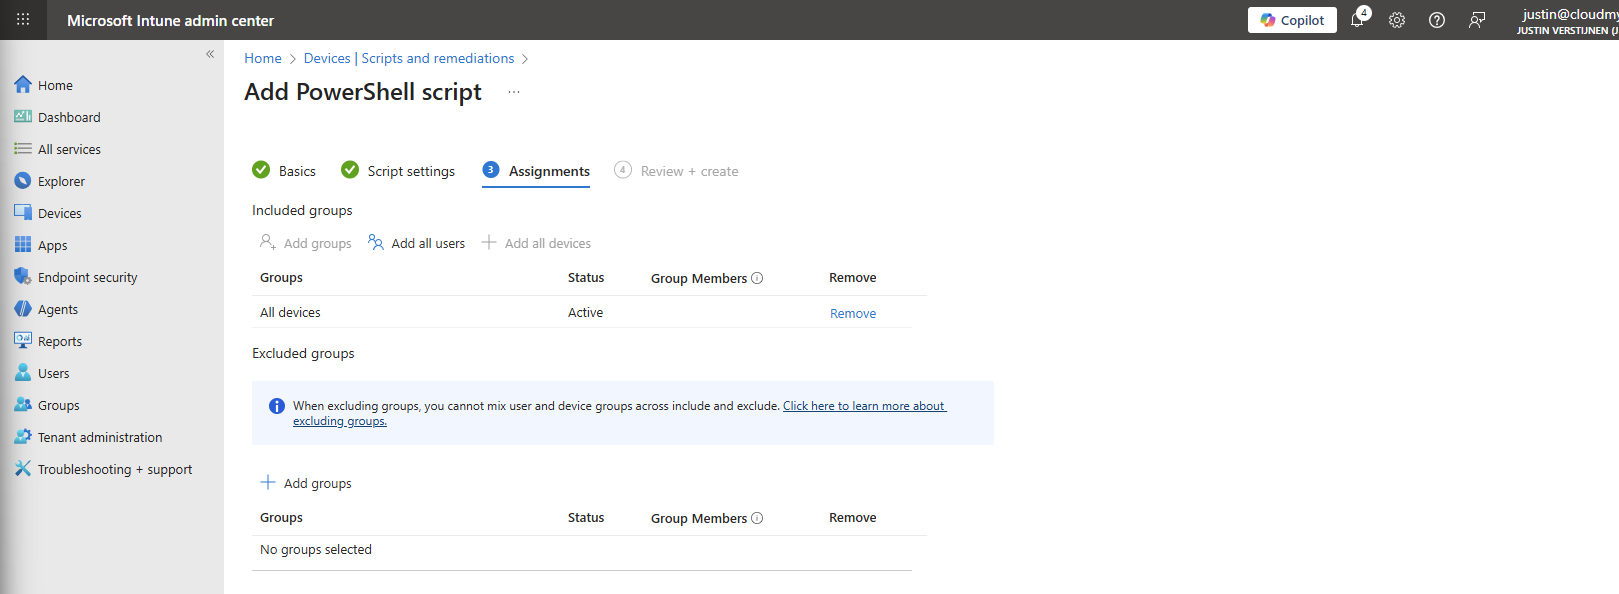
Click “Next” and then “Create” to deploy the script that will install the extension.
The results on the client machine
After assigning the configuration profile or PowerShell script to the machine, this will automatically be installed silently. After the processing is done, the extension will be available on the client machine:
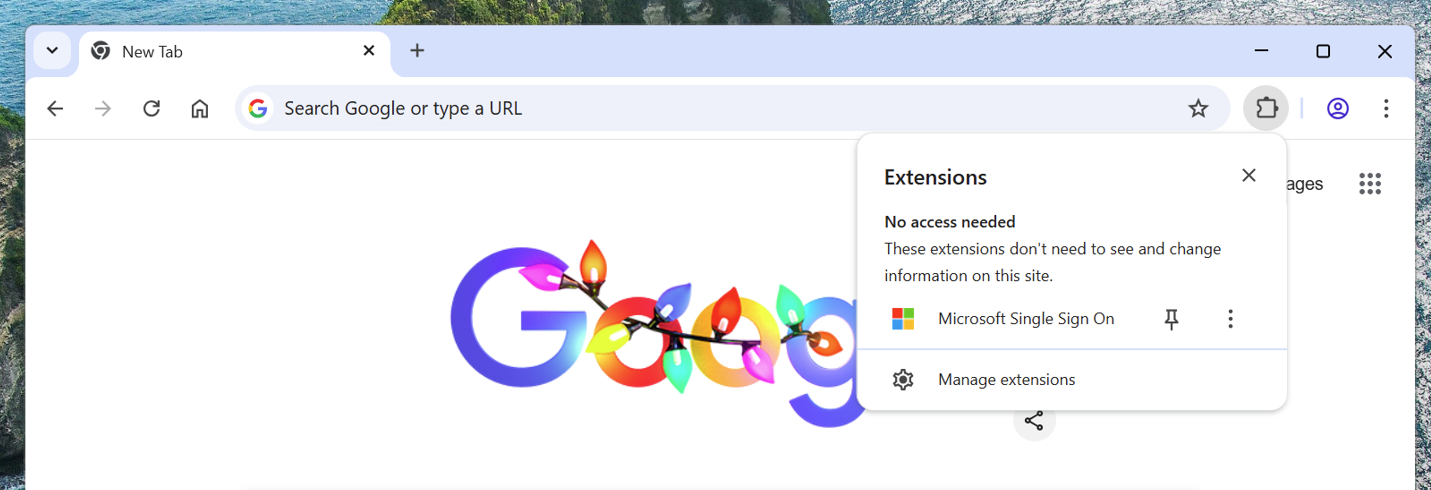
This doesn’t have to do much. We don’t need to configure it either, its only a pass of the token to certain Microsoft websites.
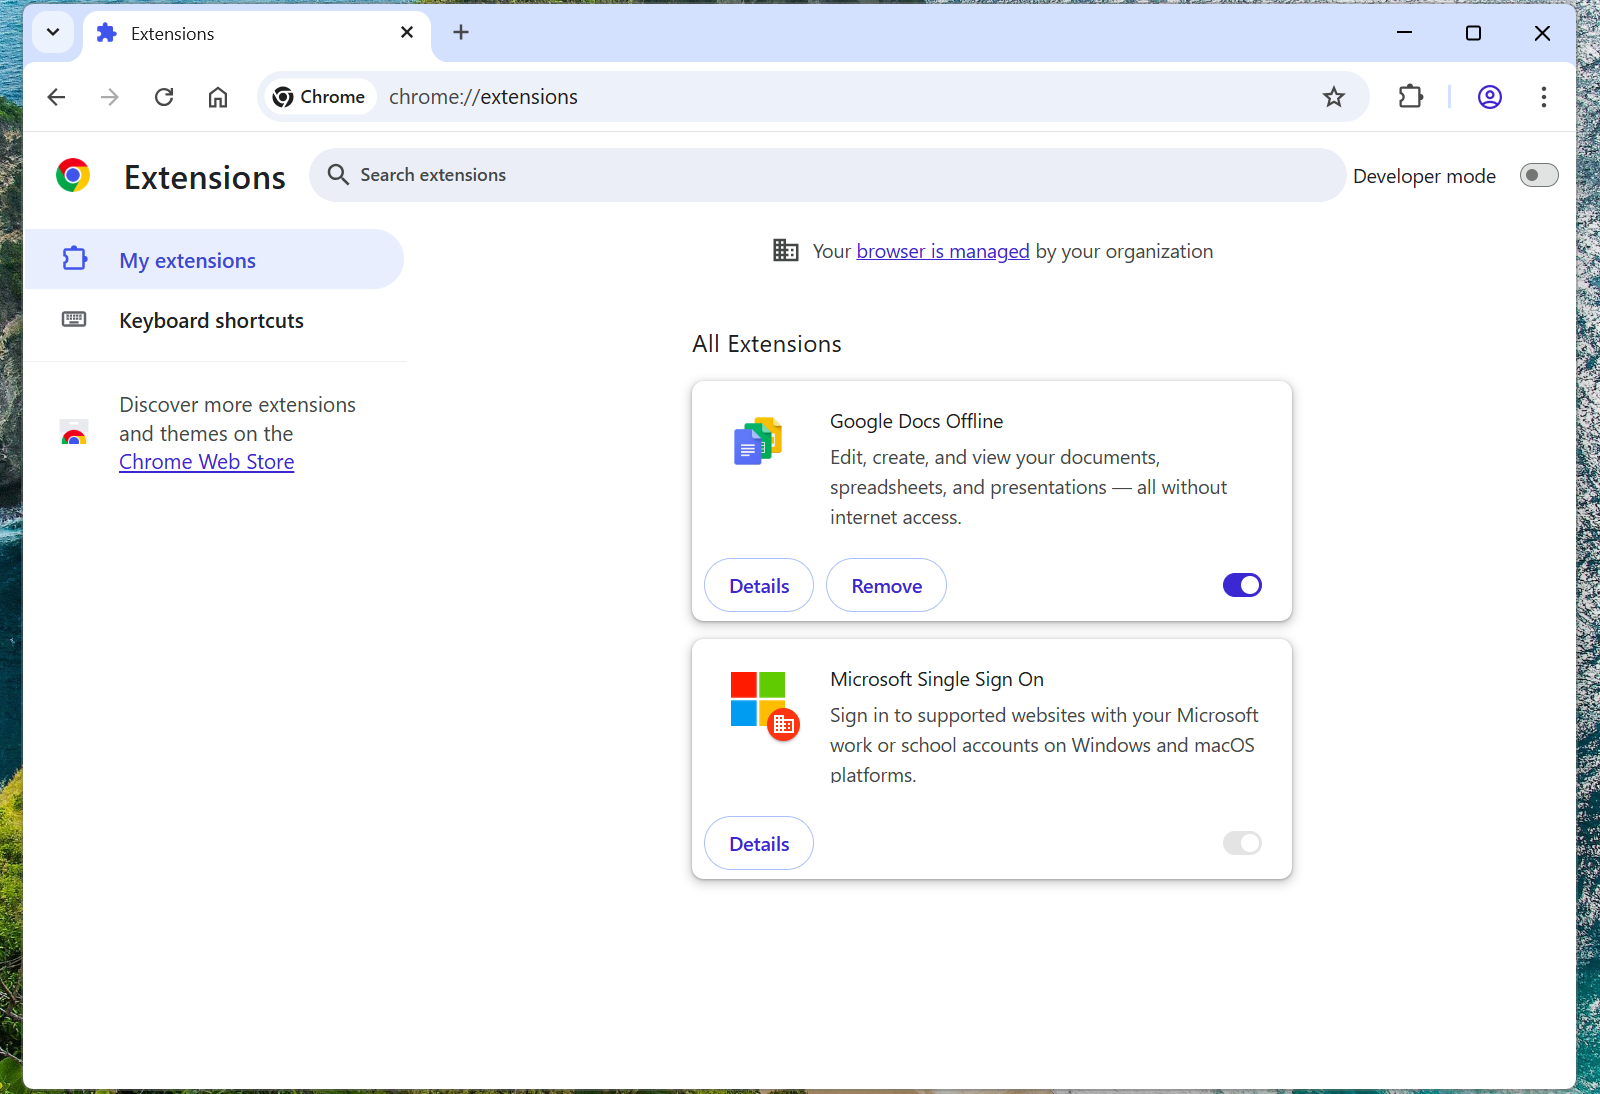
When going to the extensions, you see that it also cannot be deleted by the user:
Summary
The Google Chrome Microsoft SSO extension is a great way to enhance the user experience for end users. They now can login to Microsoft websites using their already received token and don’t need to get a new one by having to login again and doing MFA. We want to keep our systems secure, but too many authentication requests is annoying for the user.
Also the guide can be used to deploy other extensions for Google Chrome and Edge.
Thank you for reading this guide and I hope it was helpful.
Sources
These sources helped me by writing and research for this post;
End of the page 🎉
You have reached the end of the page. You can navigate through other blog posts as well, share this post on X, LinkedIn and Reddit or return to the blog posts collection page. Thank you for visiting this post.
If you find this page and blog very useful and you want to leave a donation, you can use the button below to buy me a beer. Hosting and maintaining a website takes a lot of time and money. Thank you in advance and cheers :)
The terms and conditions apply to this post.
Disable Windows Taskbar Widgets through Intune
Today a short guide on how to disable Windows Taskbar widgets through Intune. I mean this part of the Windows 11 taskbar.

Method 1: Settings Catalog
The easiest way to disable these widgets is through a Settings Catalog policy. Open up Microsoft Intune admin center and create a new policy through the Settings Catalog.
Search for “widget” and these options are available:
- News and Interests: Disable Widgets on Lockscreen
- News and Interests: Disable Widgets Board
- Widgets: Allow Widgets
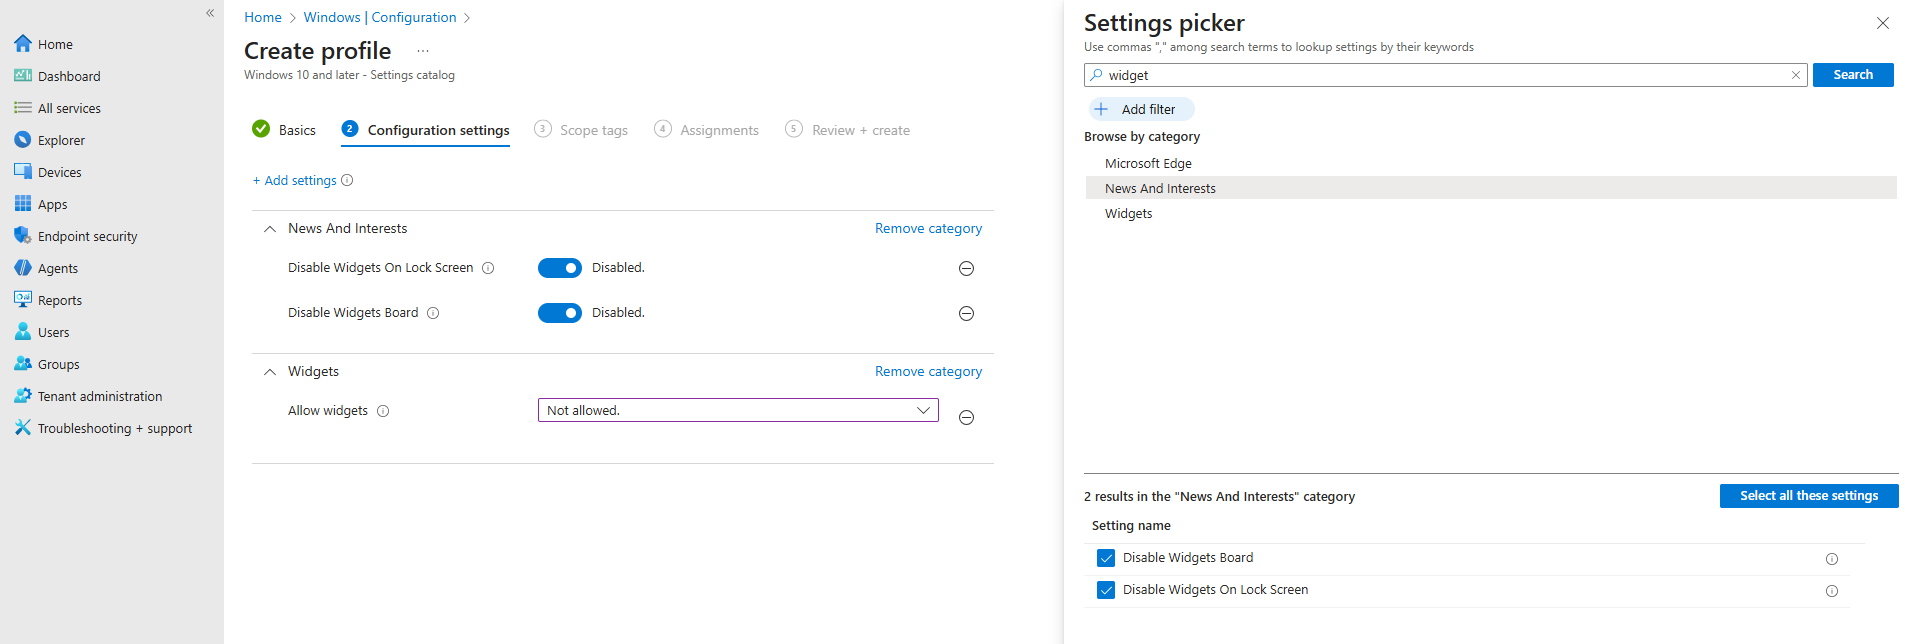
In my case, I have set all three options to disabled/Not allowed.
After you have assigned this to the device, all Widgets options are gone and the user experience will be a bit better. The endpoint must restart to apply the changes.
Method 2: Registry/PowerShell
You can achieve the settings also through PowerShell which does some registry changes. You can use this simple script:
POWERSHELL
$JVRegPath = "HKLM:\SOFTWARE\Policies\Microsoft\Dsh"

# Checking/creating path
If (!(Test-Path $JVRegPath)) {
    New-Item -Path $JVRegPath -Force | Out-Null
}

# 1. Disable Widgets Board
Set-ItemProperty -Path $JVRegPath -Name "AllowNewsAndInterests" -Type DWord -Value 0

# 2. Disable Widgets on Lock Screen
Set-ItemProperty -Path $JVRegPath -Name "AllowWidgetsOnLockscreen" -Type DWord -Value 0

# 3. Disable Widgets on Taskbar
Set-ItemProperty -Path $JVRegPath -Name "AllowWidgets" -Type DWord -Value 0
This sets 3 registry keys to the desired setting. In this case disabling widgets on the taskbar and lockscreen.
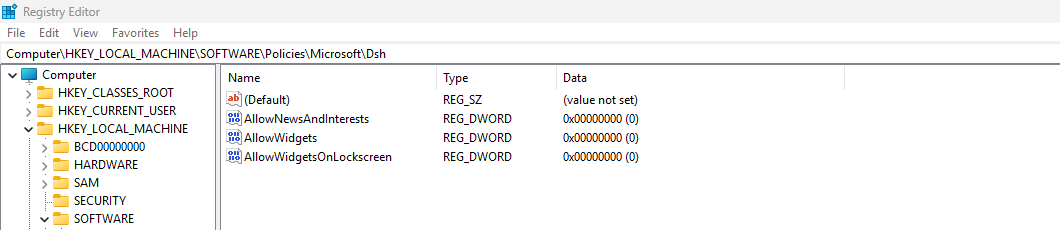
After these keys are set, the computer must reboot to apply the changes.
Summary
This short page explains 2 methods of disabling Widgets from the Windows Taskbar. This is something almost nobody uses and everyone dislikes.
Disabling this speeds up the device and enhances user experience.
Thank you for reading this guide and I hope it was helpful.
Sources
These sources helped me by writing and research for this post;
- None
End of the page 🎉
You have reached the end of the page. You can navigate through other blog posts as well, share this post on X, LinkedIn and Reddit or return to the blog posts collection page. Thank you for visiting this post.
If you find this page and blog very useful and you want to leave a donation, you can use the button below to buy me a beer. Hosting and maintaining a website takes a lot of time and money. Thank you in advance and cheers :)
The terms and conditions apply to this post.
Using and configuring Windows Backup for Organizations in Intune
Microsoft just released a new feature, Windows Backup for Organizations, which is a revolution on top of the older Enterprise State Roaming. Windows Backup for Organizations will help you and your users by saving different components of your Windows installation to make a the proces of a new installation or computer much easier. Especially when used with Windows Autopilot, this is a great addition to the whole Windows/Intune ecosystem. In this guide I will dive into how it works, what is backed up and excluded and how to configure and use it.
Requirements
- Windows 11 with the latest feature updates installed for both creating and restoring backups
- Entra ID joined or Entra Hybrid joined device
- Microsoft Intune-capable license
- Around 15 minutes of your time
What is Windows Backup for Organizations?
Windows Backup for Organizations is a feature where Windows creates a backup of your Windows settings and Windows Store applications every 8 days. This will be saved to your Microsoft business account. If ever having to re-install your device or to use a new device, you can easily restore your old configuration. This is a revolution on top of the older Enterprise State Roaming feature, who did around 20% of this.
Enterprise State Roaming vs. Windows Backup for Organizations
Let’s compare what is included in this new Windows Backup for Organizations feature versus Enterprise State Roaming
| Item | Windows Backup for Organizations | Enterprise State Roaming |
| Windows Settings | ✅ | ✅ |
| Windows Personalization | ✅ | ❌ |
| Windows Store apps and data | ✅ | ❌ |
| Windows Desktop applications (Win32) | ❌ | ❌ |
Step 1: Enable Windows Backup for Organizations
To configure this new and great setting, go to Microsoft Intune and create a new configuration policy for Windows devices:
Then select Windows 10 and later, and the profile type “Settings catalog”.
Then click on create. Give the policy a name and a good description for your own documentation.
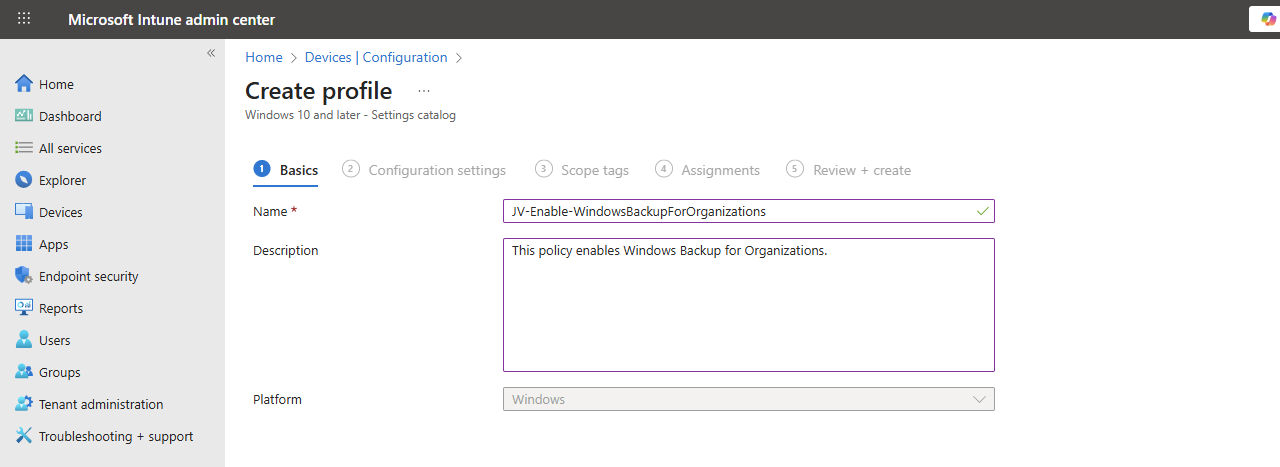
Click Next.
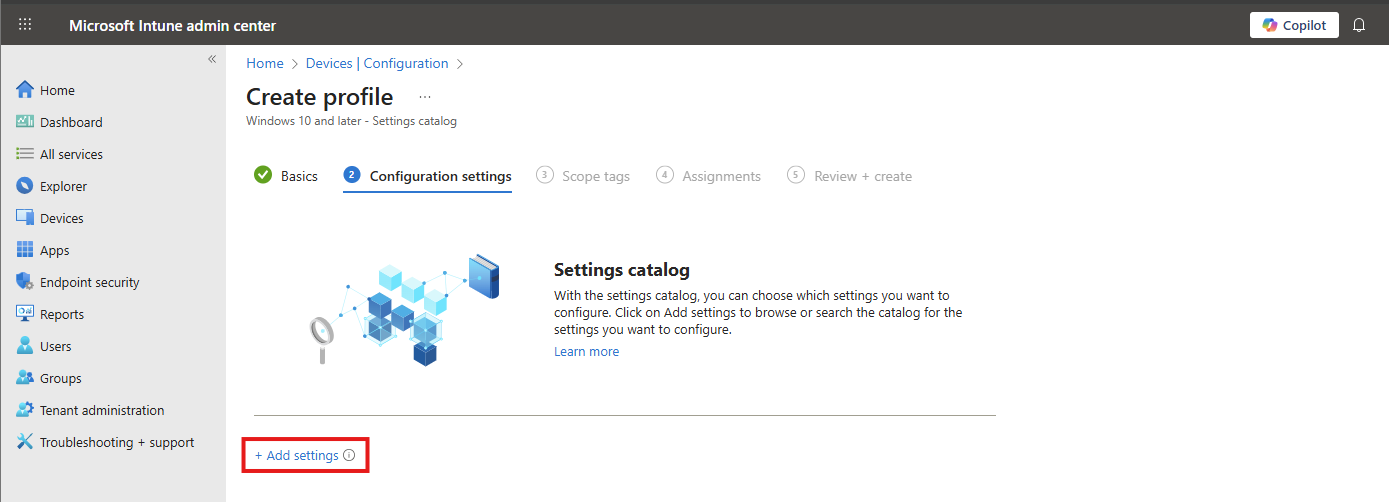
On the “Configuration settings” tab, click on “+ Add settings”. Navigate to this setting:
Administrative Templates -> Windows Components -> Sync your settings
Then lookup the setting-name: “Enable Windows Backup” and select it.
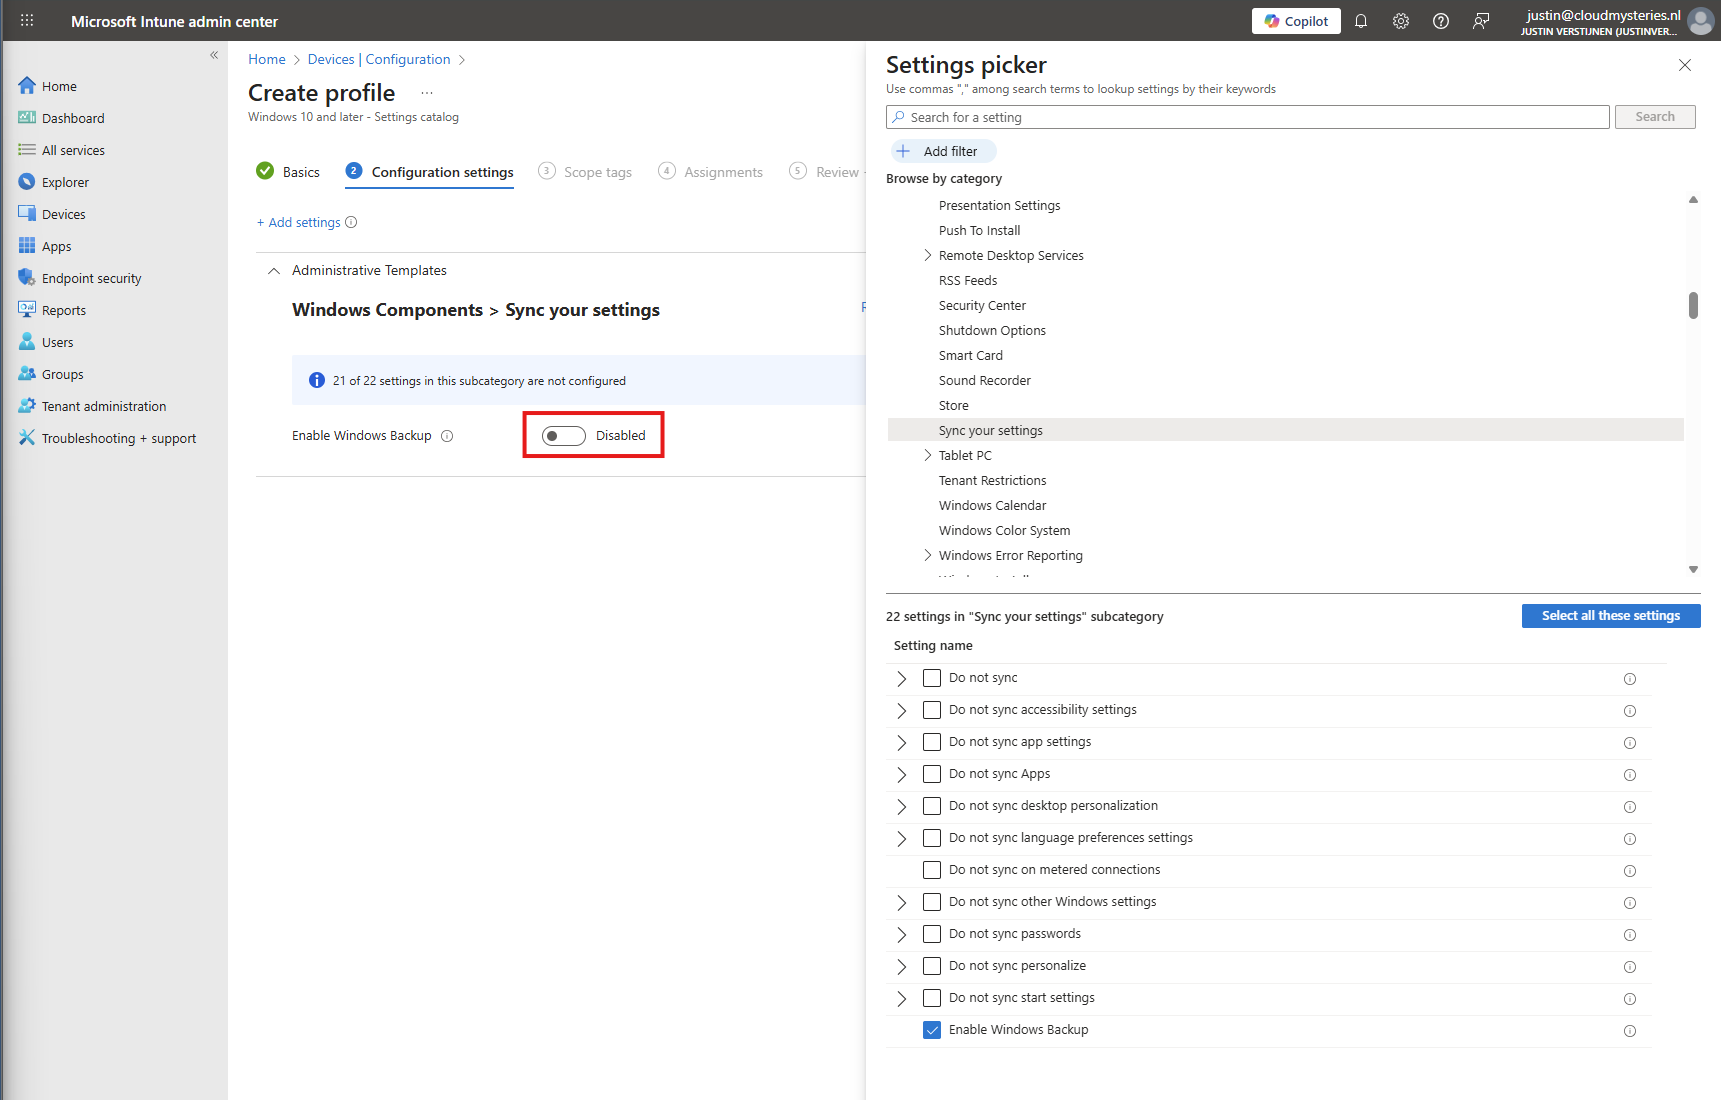
You can now enable the setting which will enable it on your device.
Then click “Next”, assign the policy to your devices.
Step 2: How to enable the restore of Windows Backup for Organizations
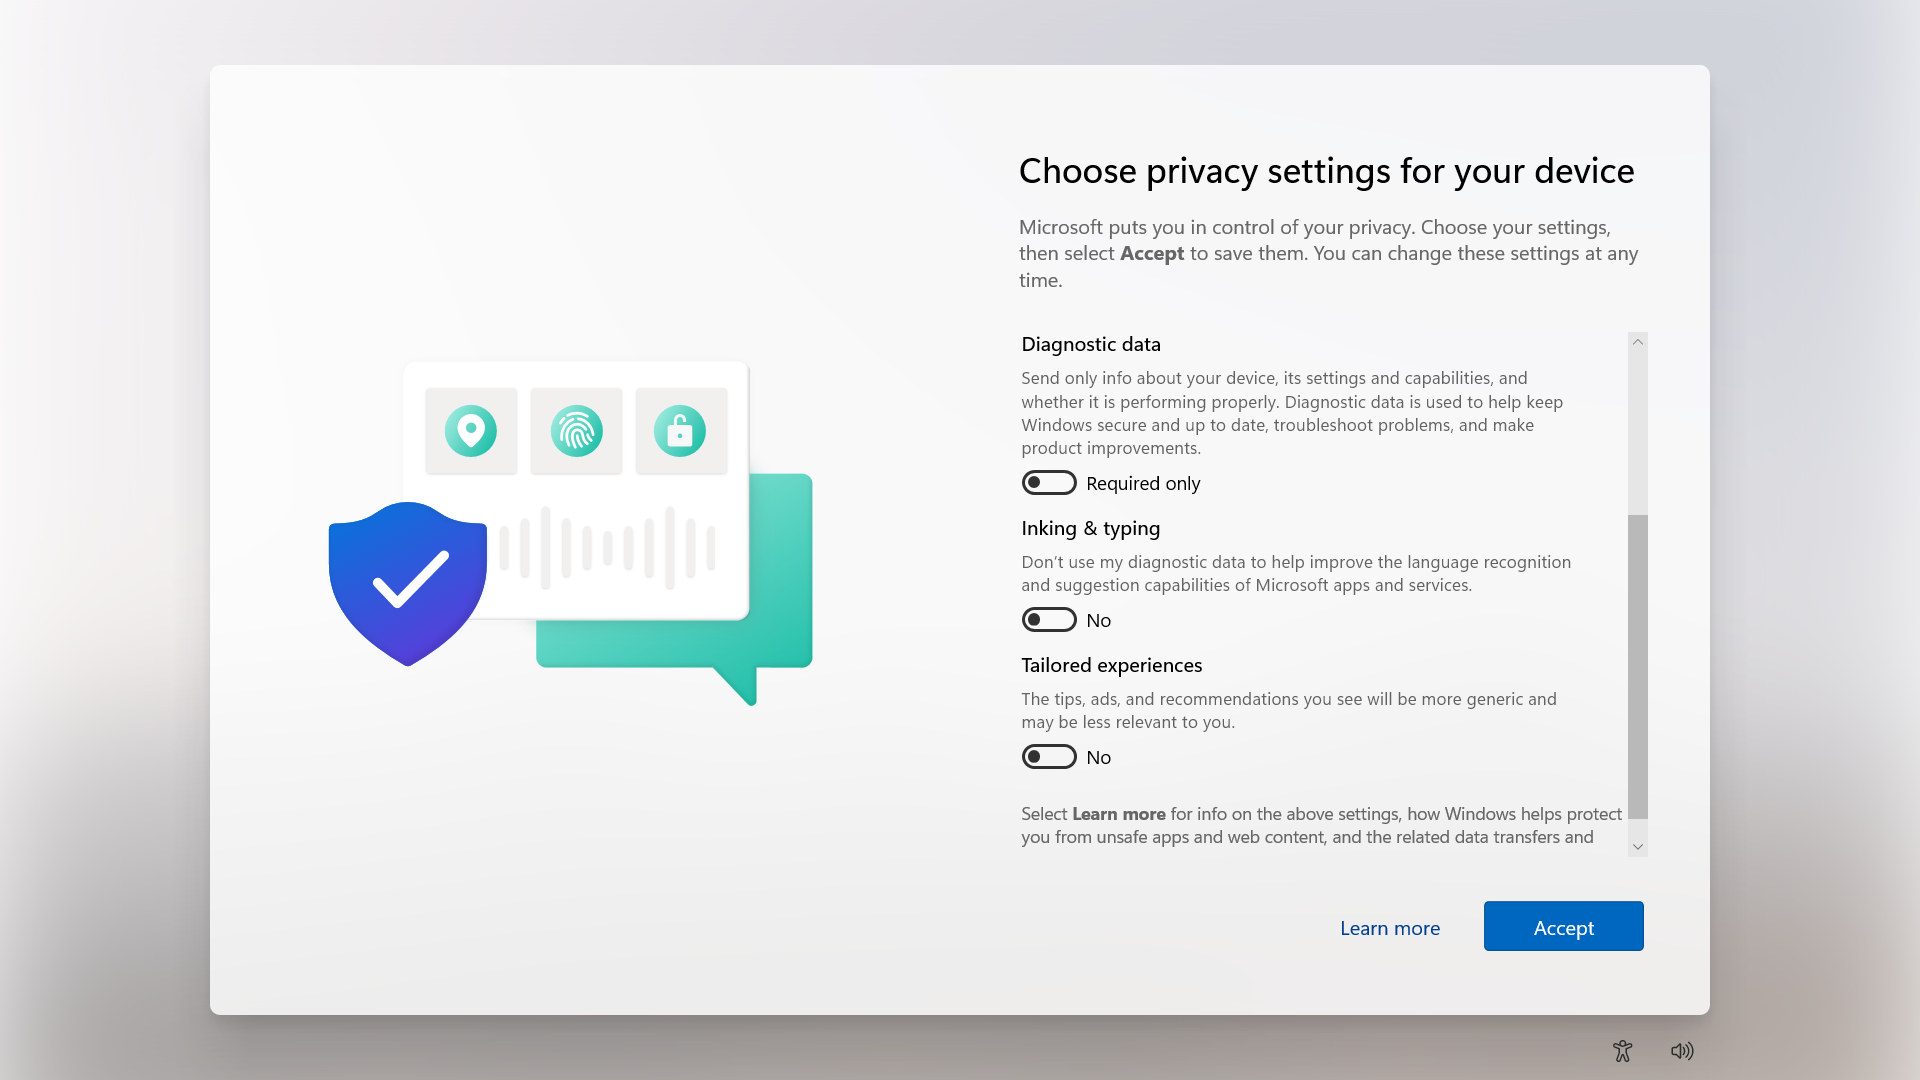
After enabling the the devices to make their back-up, we also need to configure that Windows shows automatically the older backups at the initial start (OOBE).
Head to Windows Devices -> Enrollment -> Windows Backup and Restore (preview)
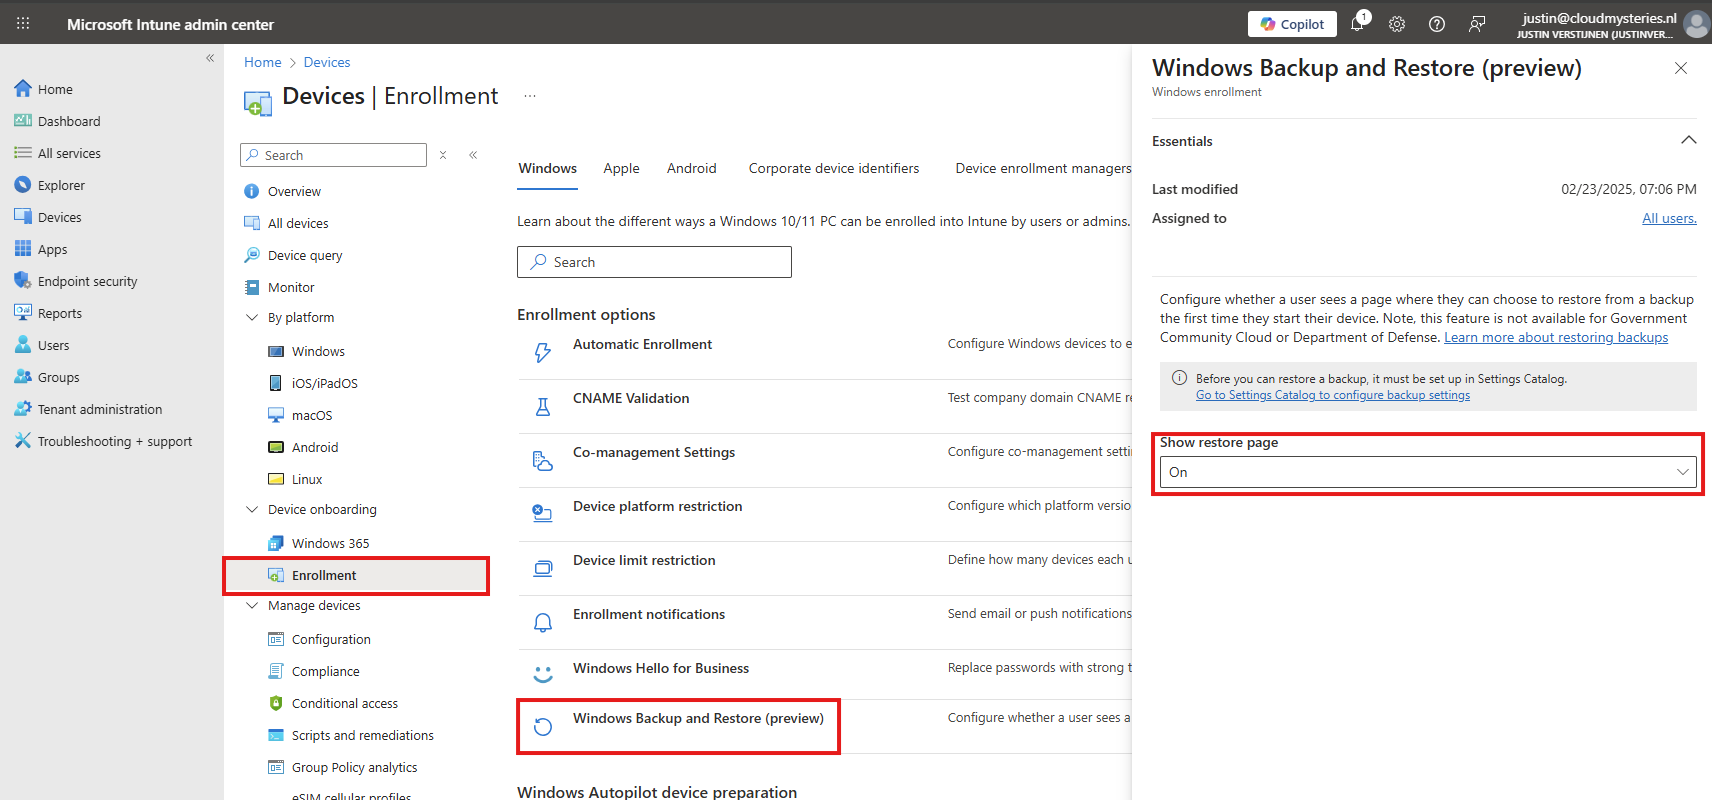
Select “On” to show the restore page. This will prompt the user (when an active backup is made) to restore their old configuration ath the Windows Out of the Box experience screen (OOBE)
Save the configuration to make this active.
Client-side configuration
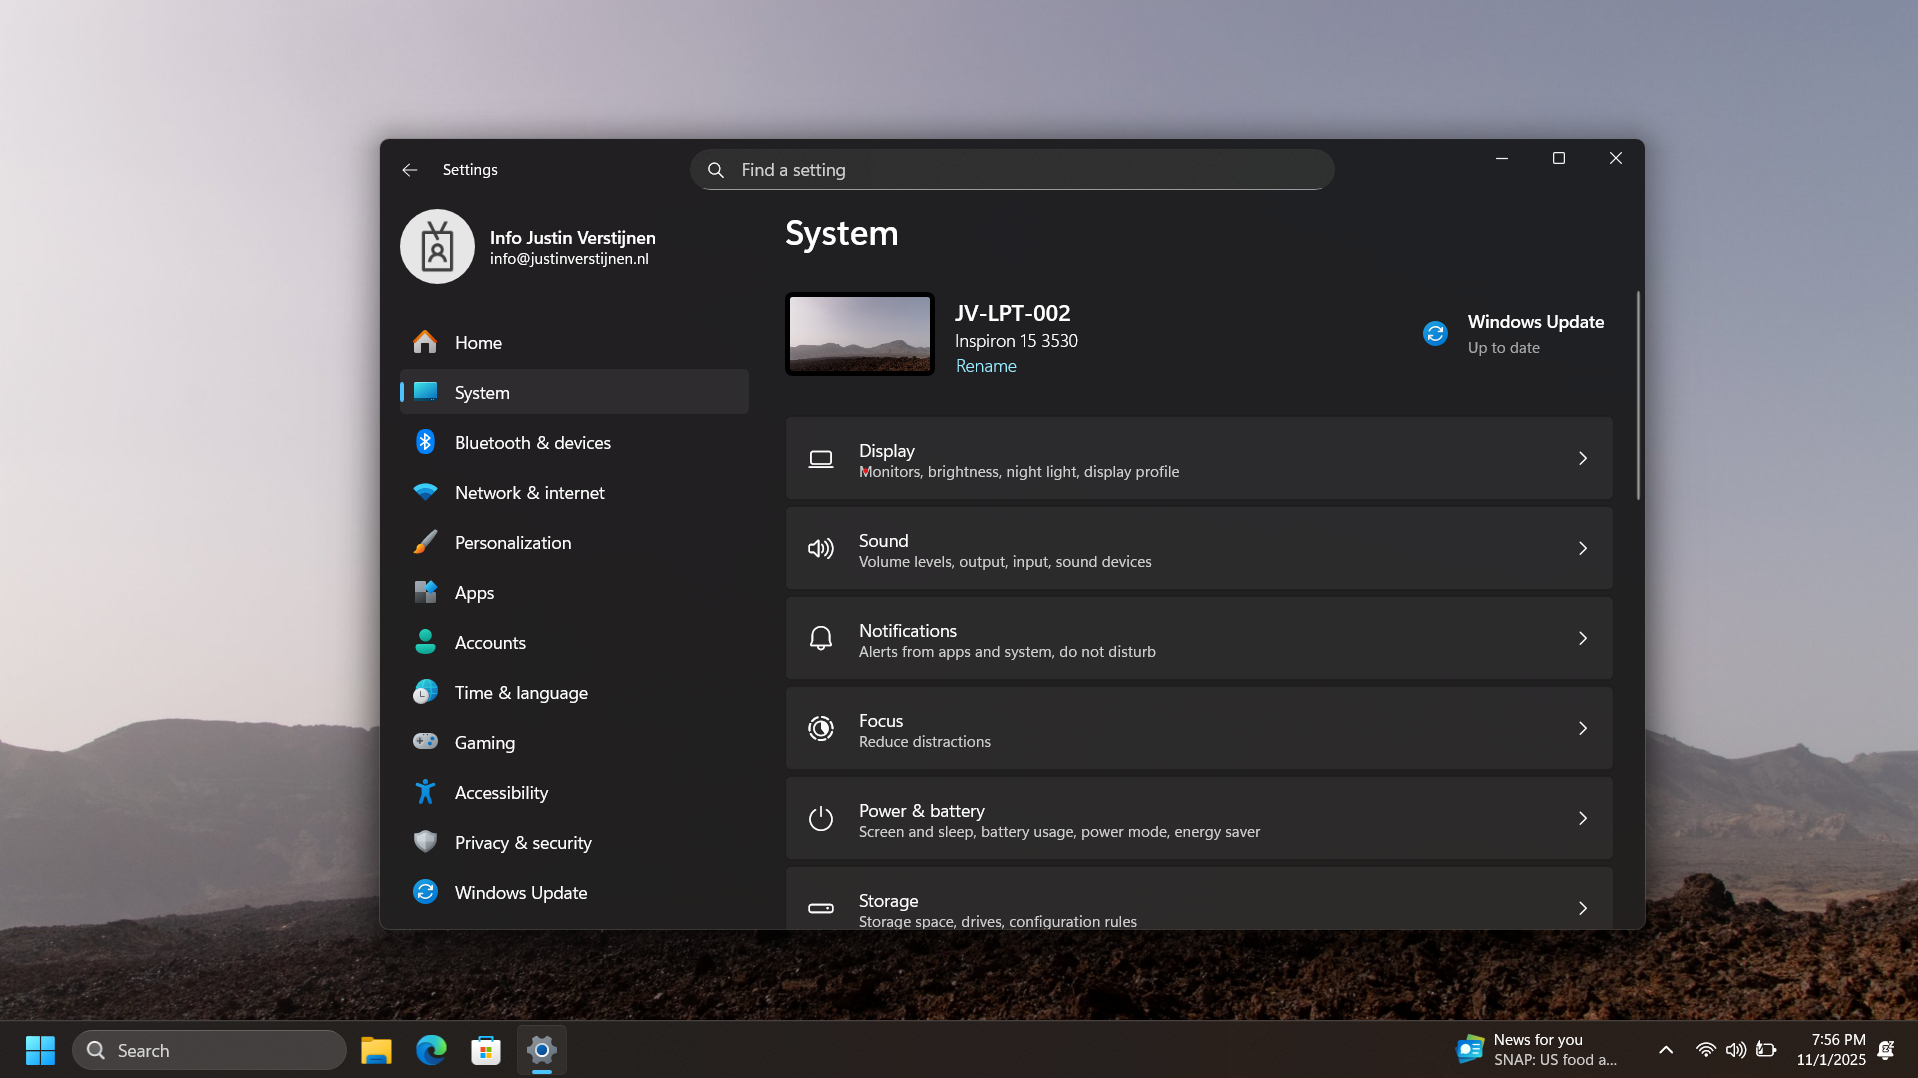
Users can also manually configure this new Backup in the Windows Settings:
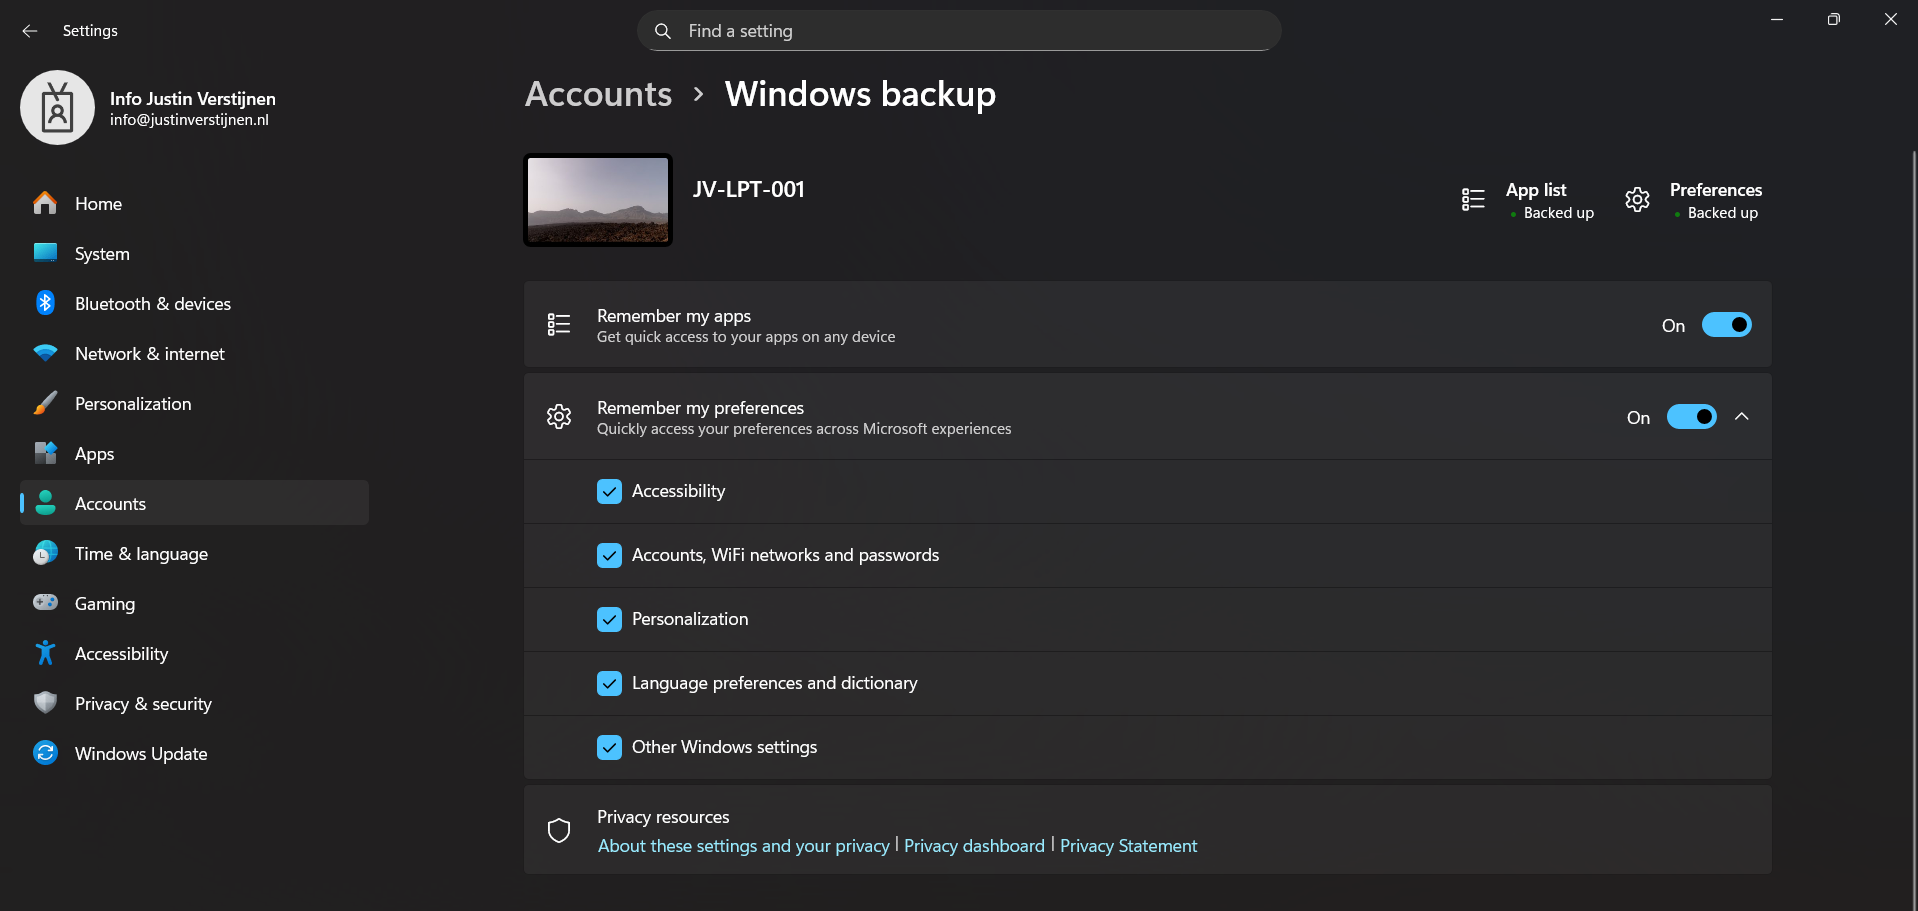
This is the overview after I have configured it in Intune and synced to my device. It automatically enabled the feature and should be ready to restore in case I’ll do a reinstall of my computer.
Step 3: Restoring a backup (Step-by-step)
To restore the back-up made by Windows Backup for Organizations, let’s install a second laptop (JV-LPT-002) with the latest Windows updates (25H2).
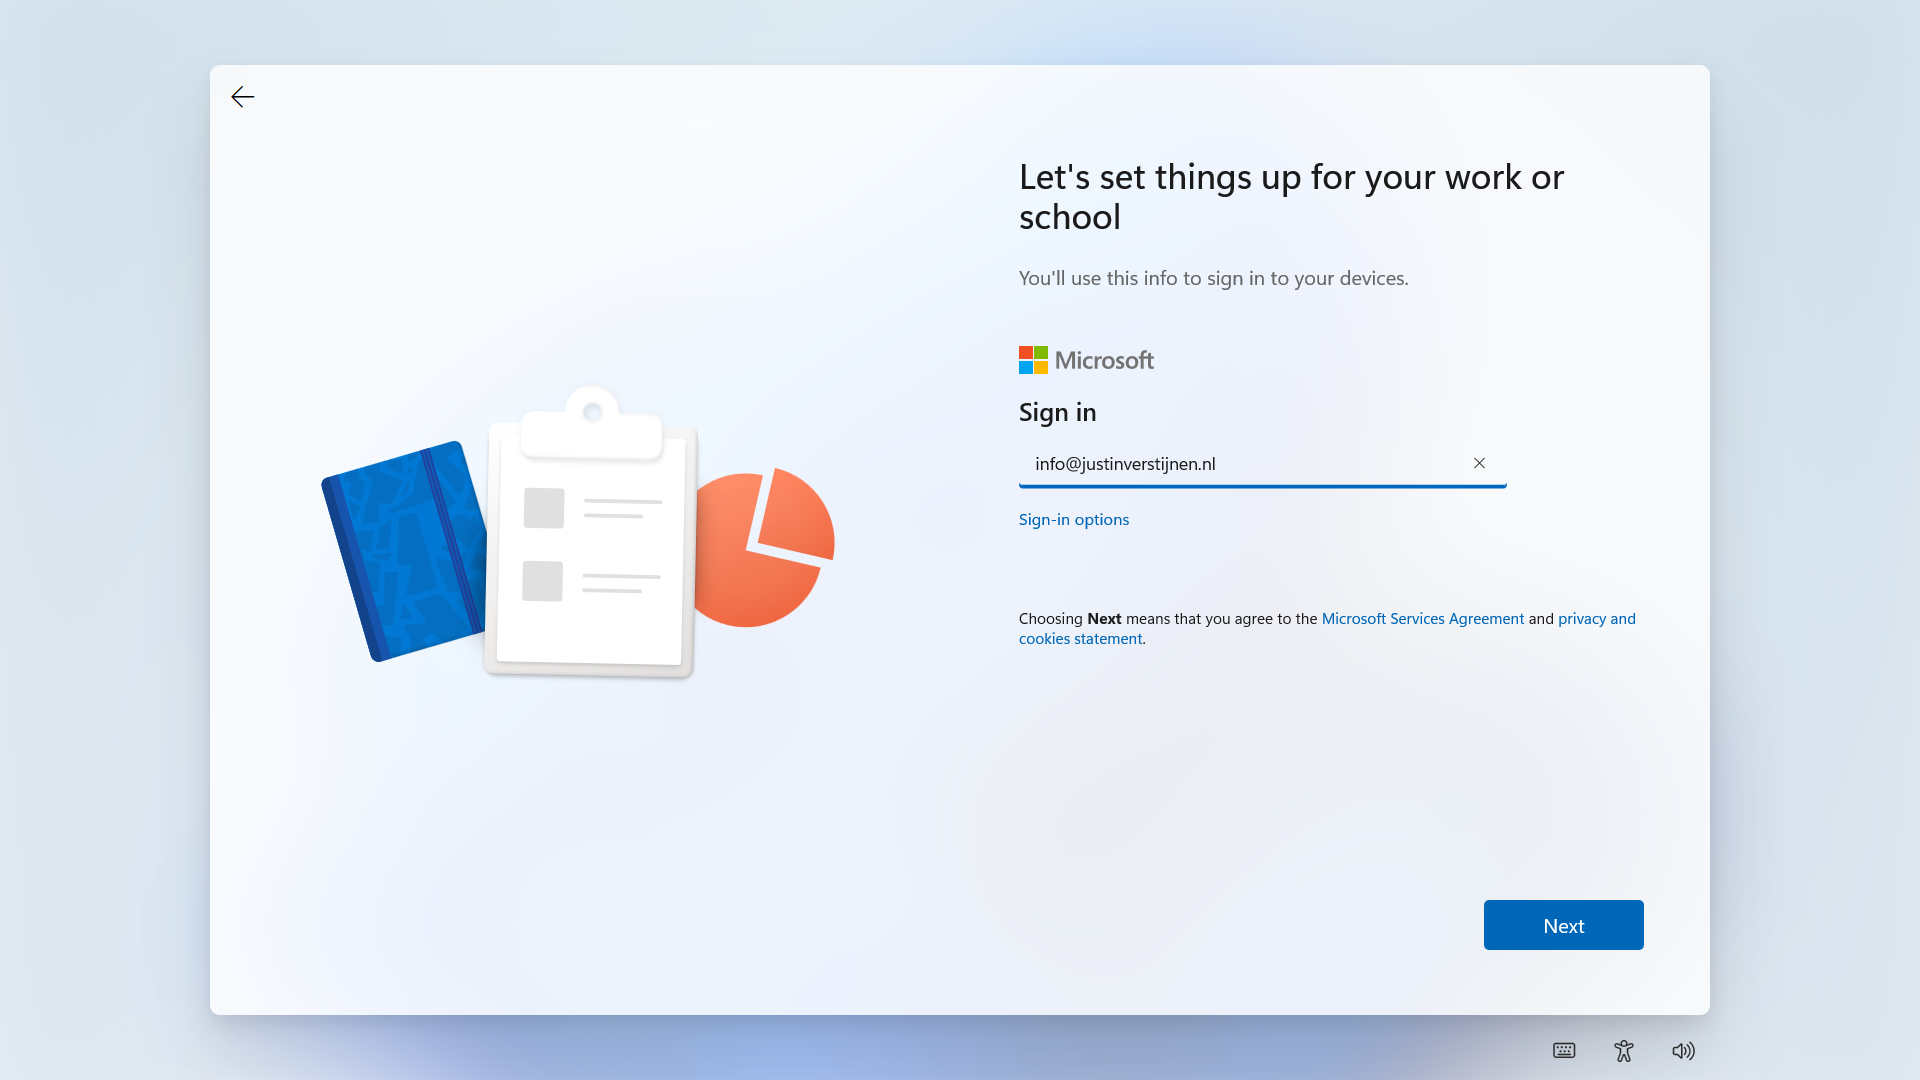
Now I will login to Windows with the same account as I logged in to the first laptop (JV-LPT-001).
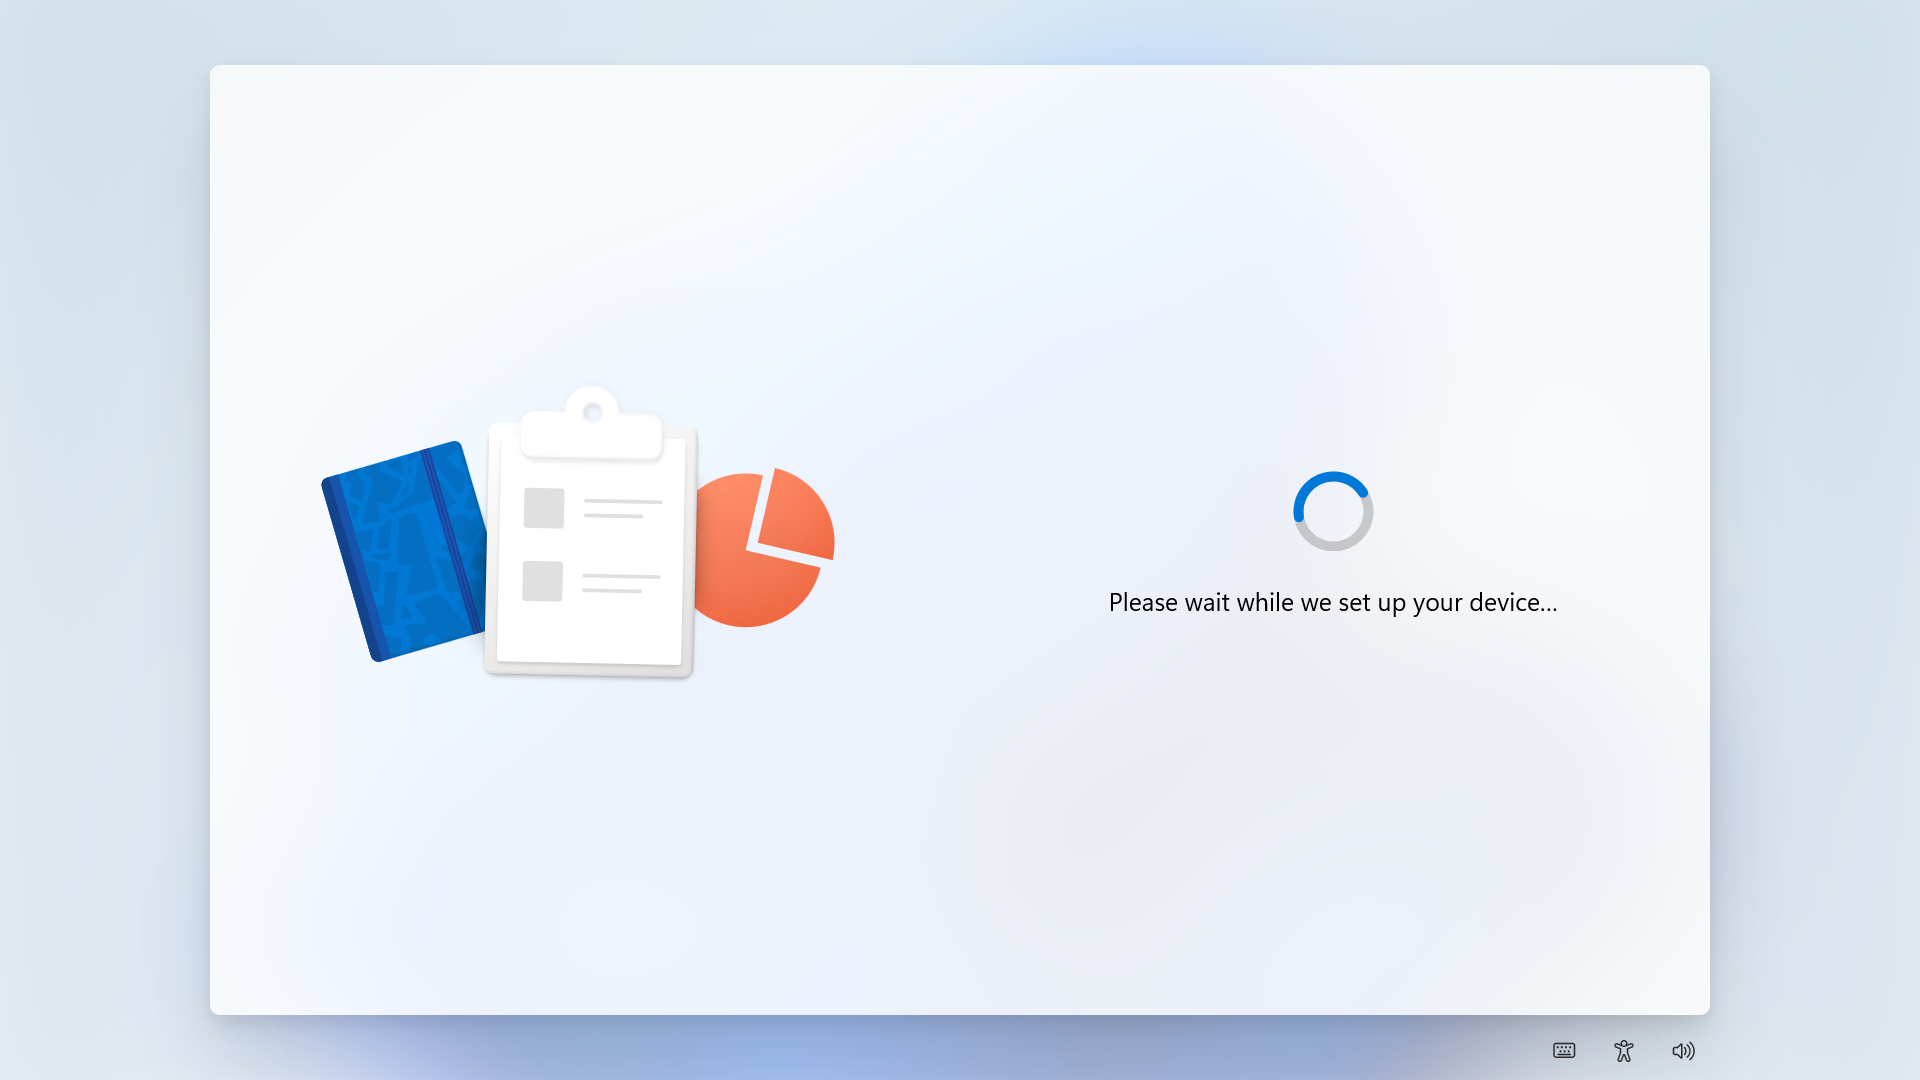
After succeeding the MFA challenge, Windows will process the changes and will get the additional information from our tenant.
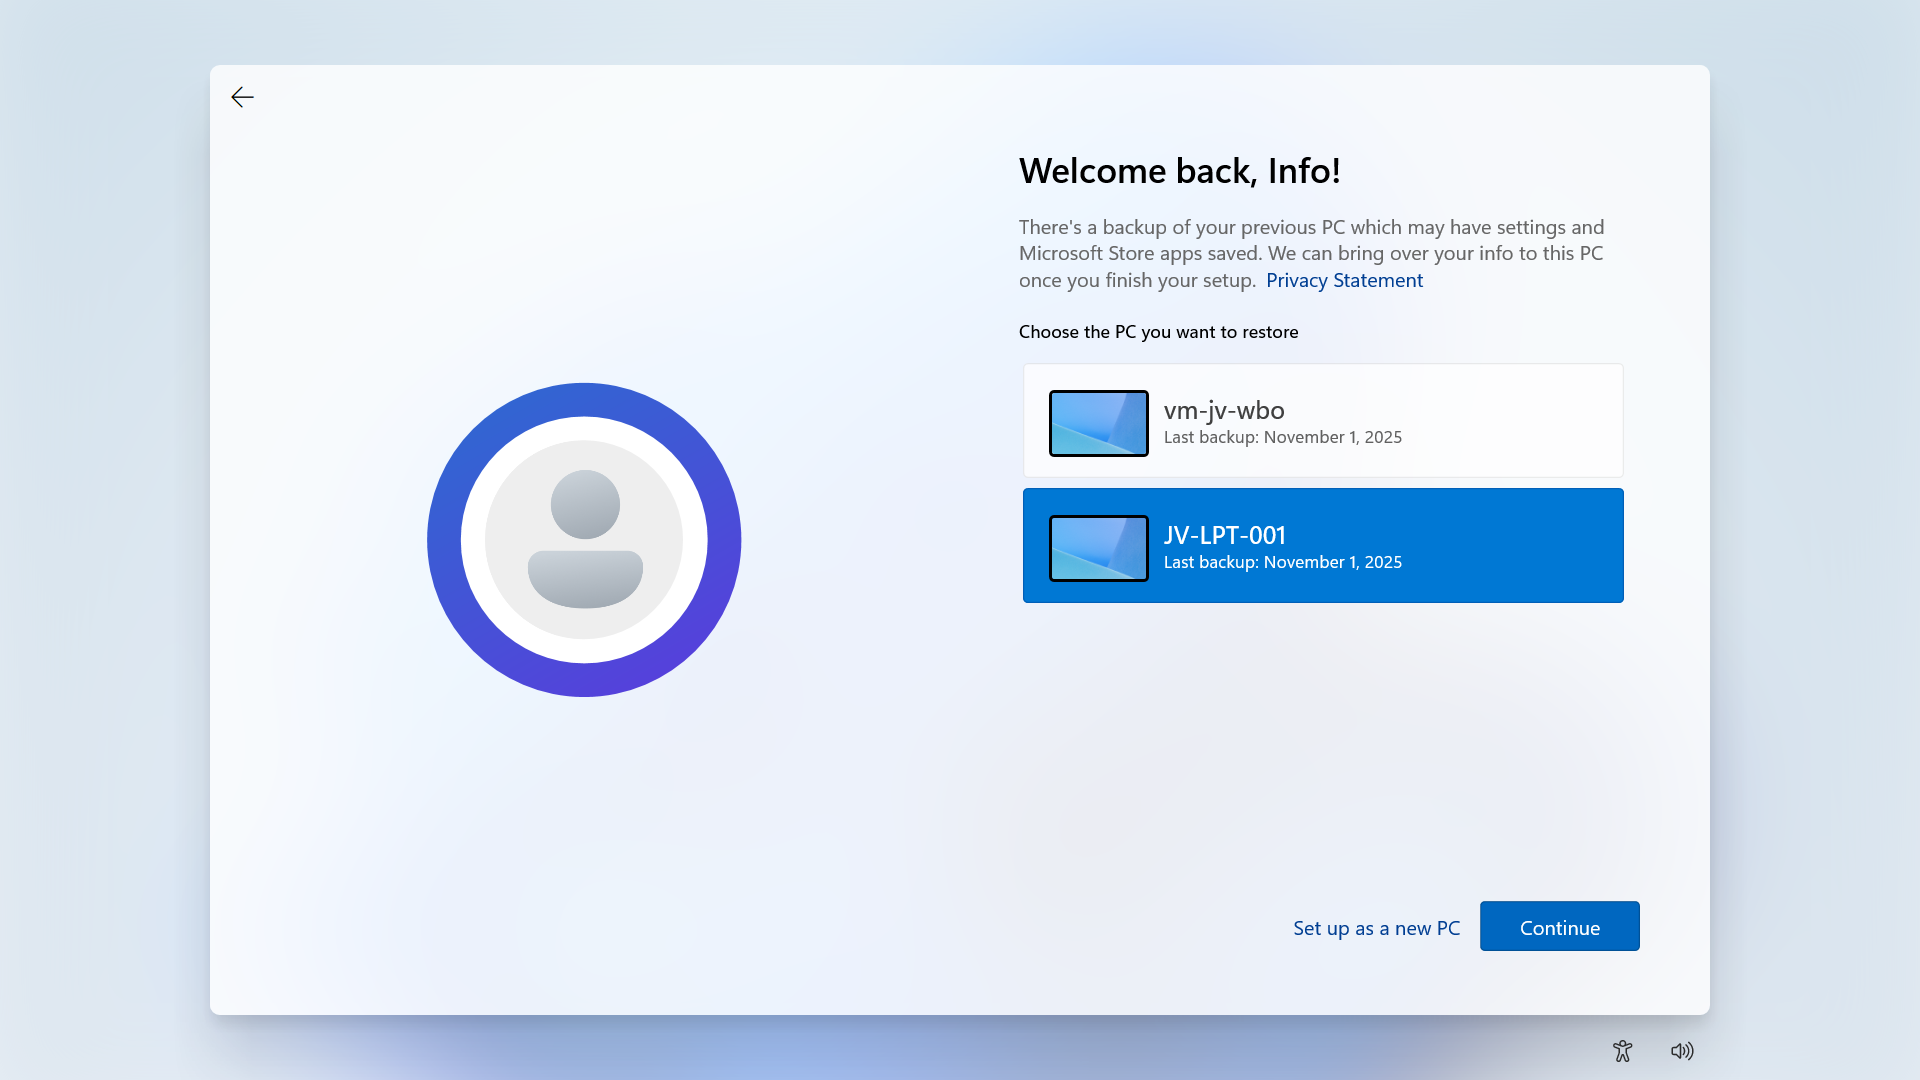
Then Windows will present you the options to restore a previously made backup. To get a better picture, I have made a second backup on a VM.
Now I will select the backup from the first laptop and click “Continue”.
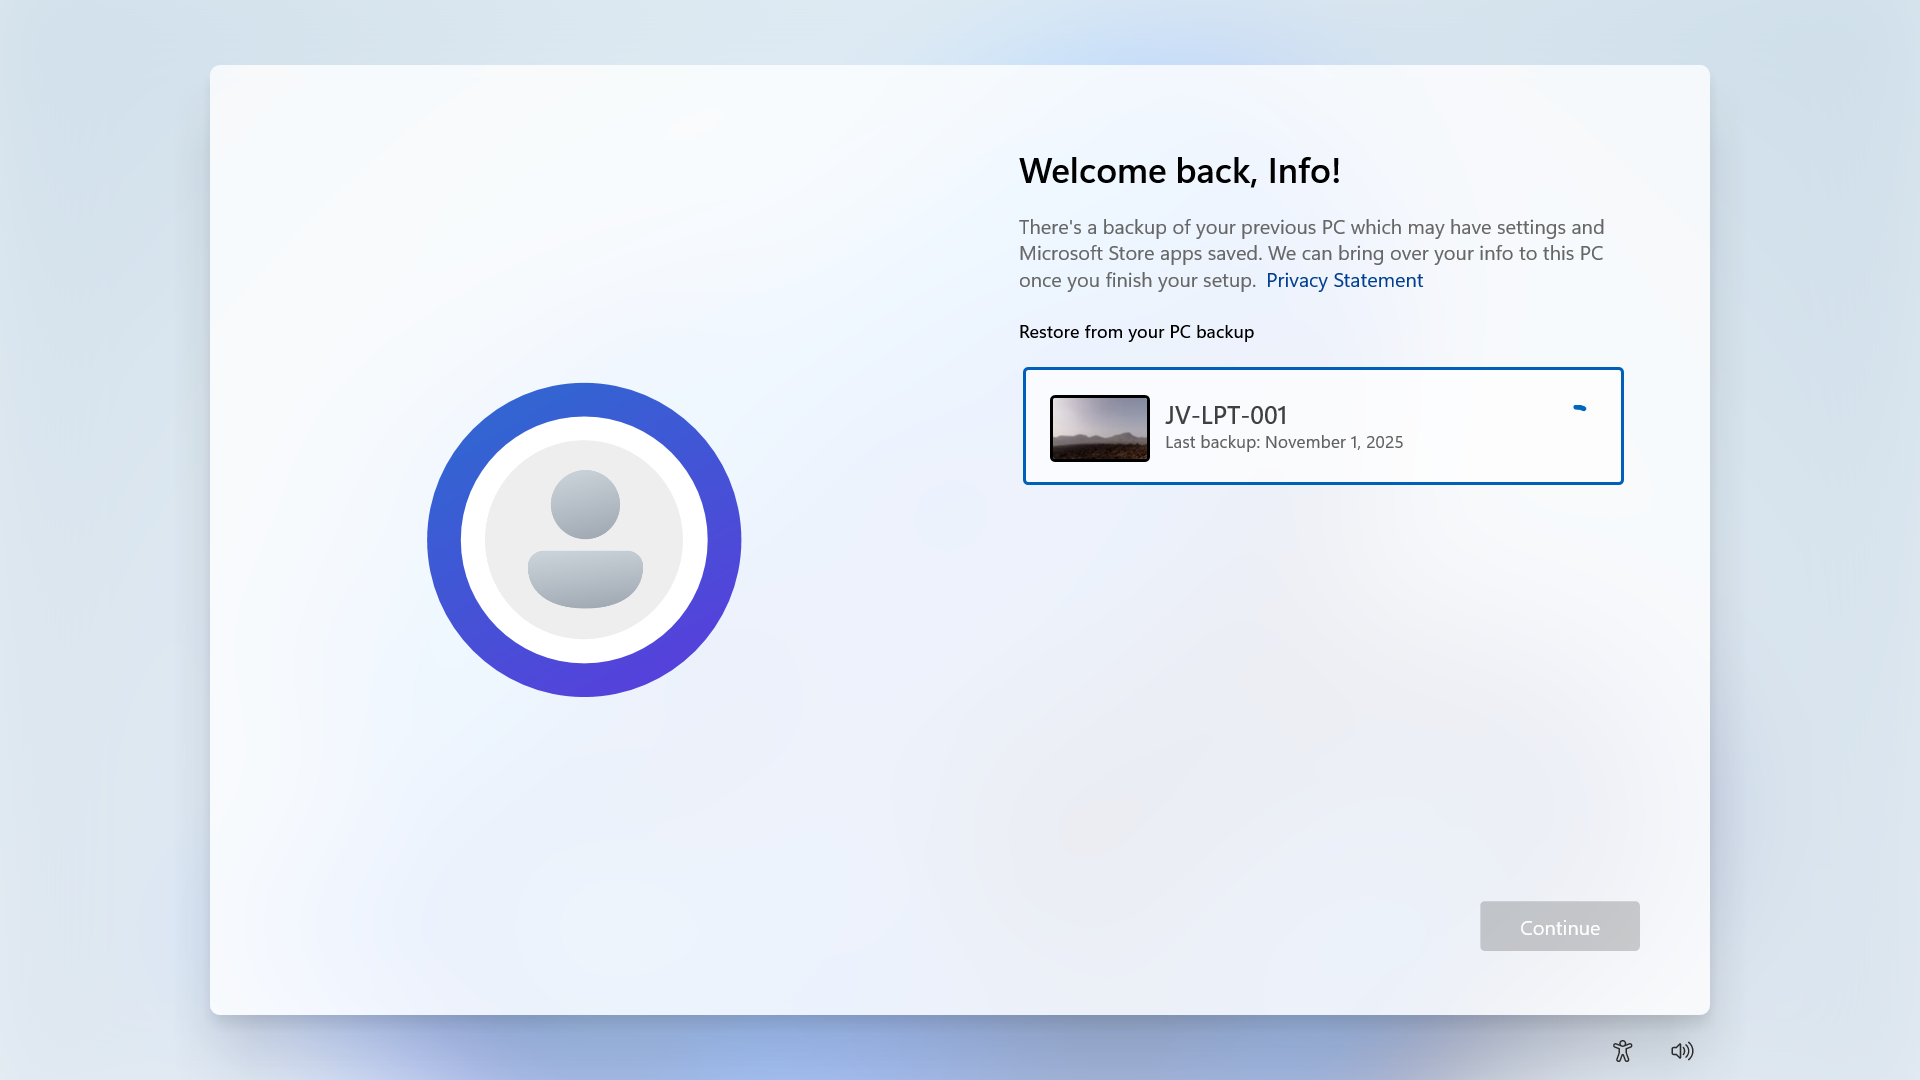
Now the backup will be restored.
Step 4: Result/after restoring backup
After the backup has been restored, this was the state on the laptop without any manual change. It synced the dark mode I configured, the installed Windows Store apps, the Windows taskbar to the left and my nice holiday picture. All without any manual action after restoring.
As you can see, installing an new computer is alot easier with this new feature. We can easily restore an this configuration and minimizes the configuration we need to do for our new computer or installation.
Bonus: Create screenshots at Windows OOBE
The Windows Out of the Box experience screen is the first you’ll see when going to a fresh Windows installation. We can take screenshots here but with a little difficult.
You can do this by pressing Shift + F10 or Shift + Fn + F10. A cmd window will the open.
Type in PowerShell, and the use this command to take a screenshot:
POWERSHELL
Add-Type -AssemblyName System.Windows.Forms; Add-Type -AssemblyName System.Drawing; $width = 1920; $height = 1080; $bmp = New-Object Drawing.Bitmap($width, $height); $graphics = [Drawing.Graphics]::FromImage($bmp); $graphics.CopyFromScreen(0,0,0,0,$bmp.Size); $bmp.Save("C:\OOBE.png")Screenshots will be saved to C:\ to be backed-up after the OOBE flow.
Summary
Windows Backup for Organizations is a great feature, especially for end users to keep their personal Windows Settings saved into their account. This in combination with OneDrive will make reinstalls pretty easy as we only have to install applications. The rest will be handled by Microsoft in this way.
Sources
These sources helped me by writing and research for this post;
End of the page 🎉
You have reached the end of the page. You can navigate through other blog posts as well, share this post on X, LinkedIn and Reddit or return to the blog posts collection page. Thank you for visiting this post.
If you find this page and blog very useful and you want to leave a donation, you can use the button below to buy me a beer. Hosting and maintaining a website takes a lot of time and money. Thank you in advance and cheers :)
The terms and conditions apply to this post.
Remove Pre-installed Windows Store Apps with Intune
Since the latest Windows 25H2 update, we have a great new feature. We can now remove pre-installed Windows Store Applications which we don’t want to ship with our devices. This helps us alot with both Windows 365 and Azure Virtual Desktop Personal deployments as with normal Intune-joined devices. The only downside is that Pooled Azure Virtual Desktop Deployments are not supported. In this guide I will dive into this new setting and explain how to configure this and why this is a great update. The step-by-step guide shows how I have configured a policy that removes most of the non-productive apps from my PC.
This new feature described
In Intune we can now select which default shipped apps must be removed from Windows clients. Before, this was a complete package we had to use or remove with custom scripts, but now we can select the apps to remove (and deselect to keep).
Keep in mind, we have the following requirements for this new feature:
- Windows 11 25H2
- Education or Enterprise version
Also worth mentioning, removing an application needs a manual reinstall, which is easy to do.
Step by step configuration
We can configure the removal of these apps with a configuration profile in Microsoft Intune. I will create this from A to Z in this guide to fully explain how this works:
Open up Microsoft Intune Admin center (intune.microsoft.com).
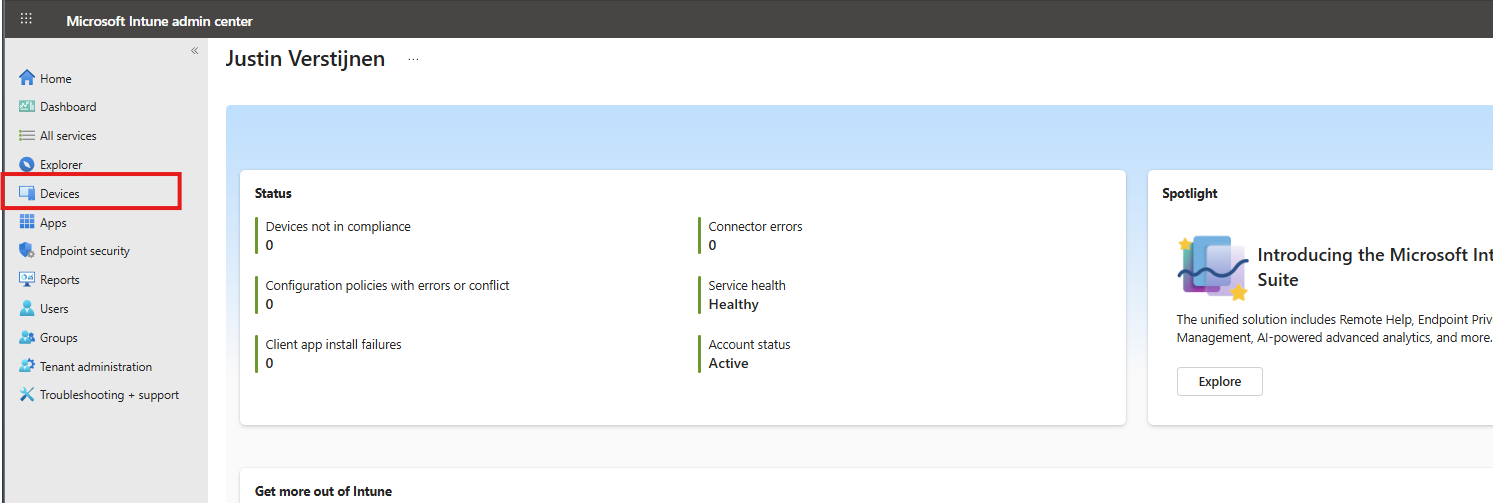
Then go to your Devices, and then Windows.
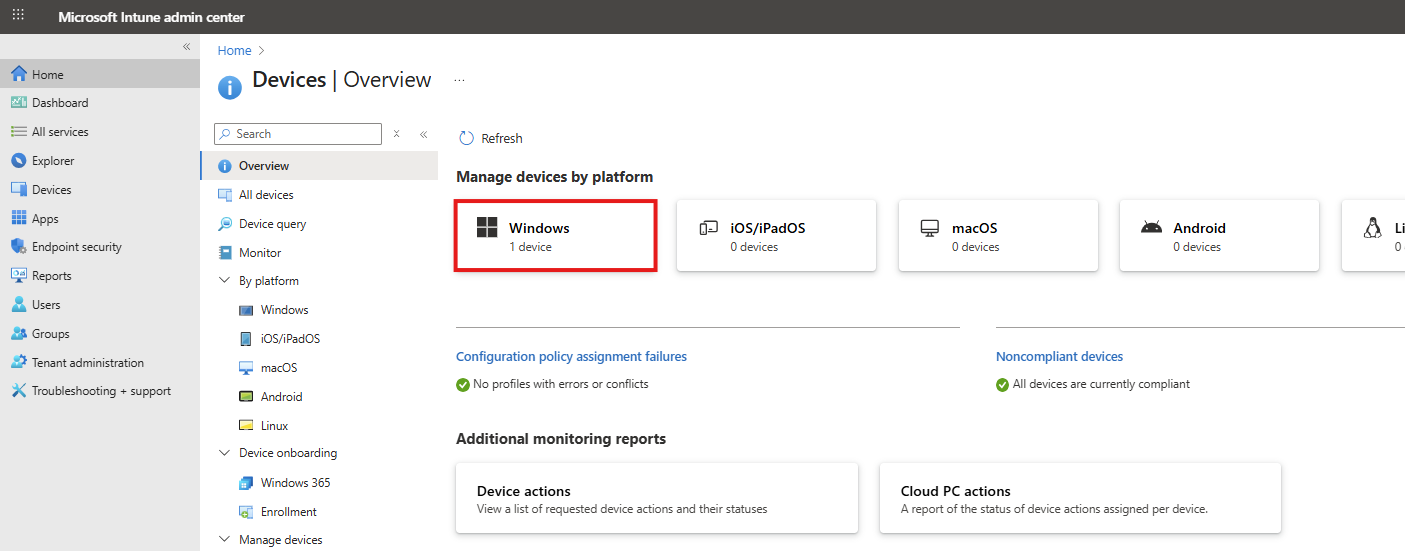
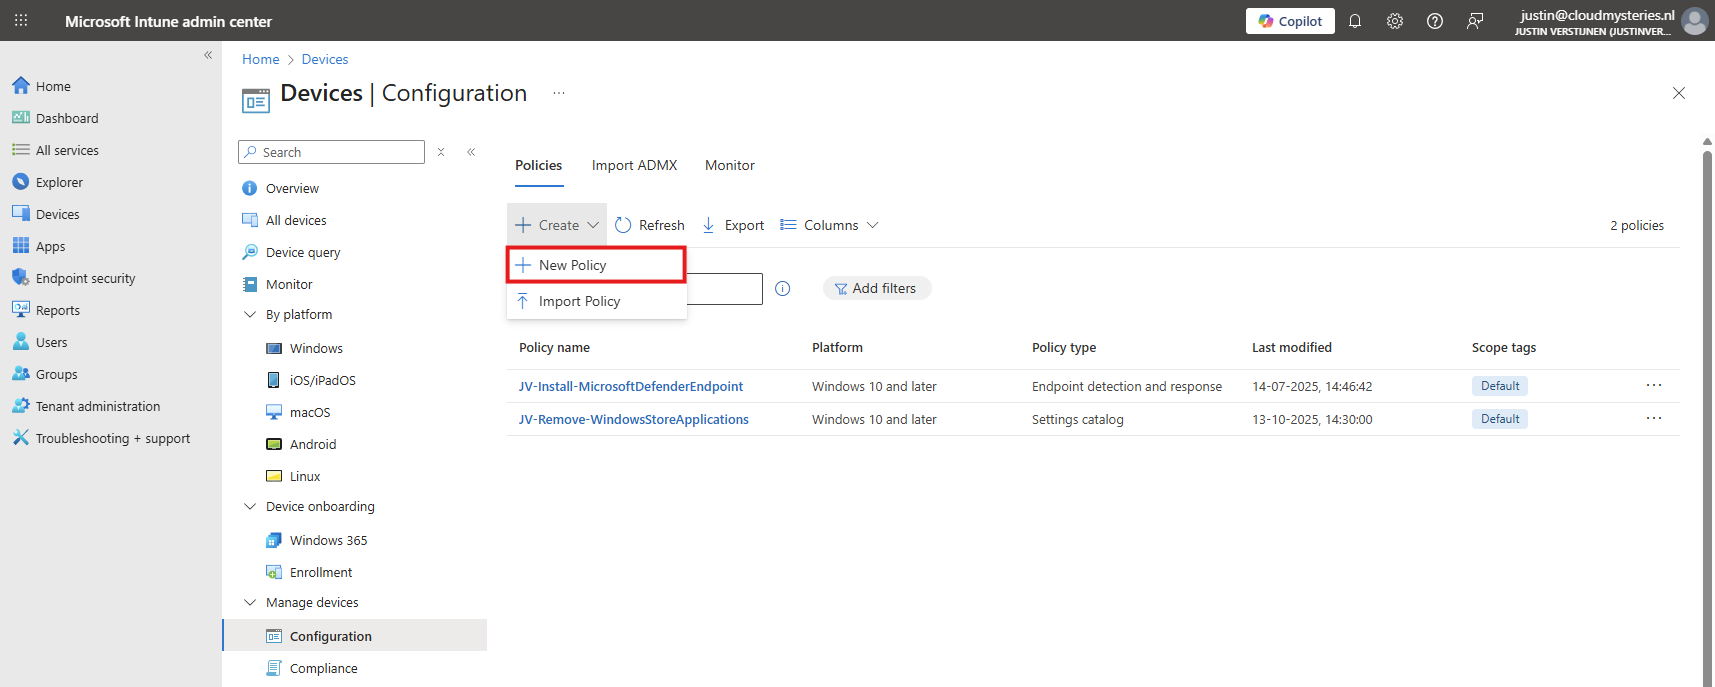
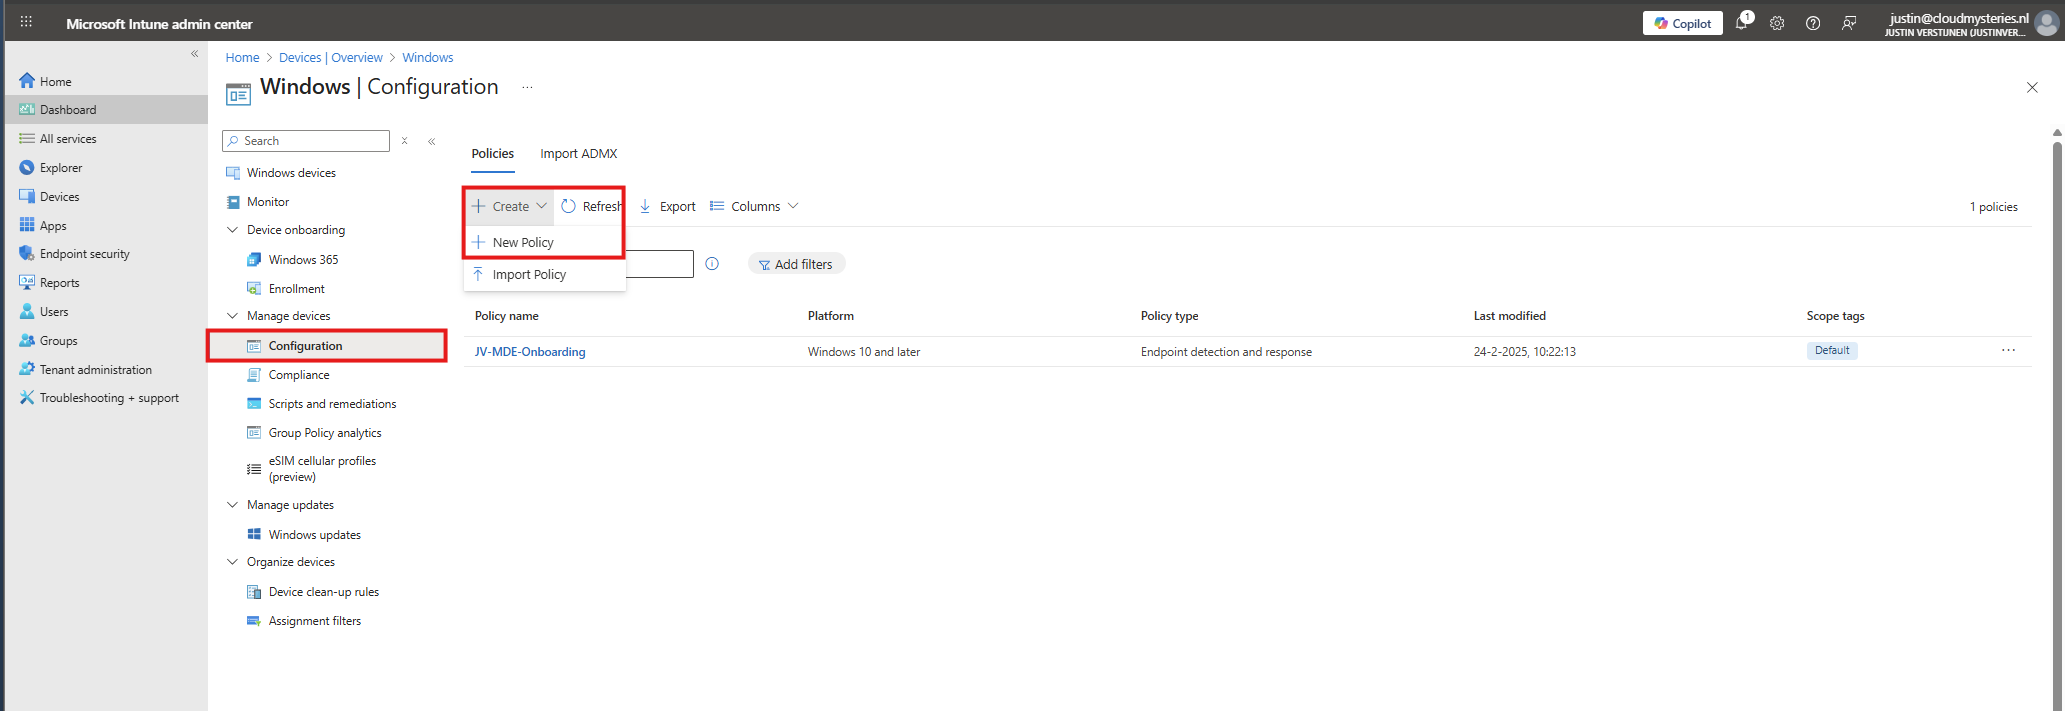
Then click on “Configuration” to view all the Windows-based Configuration Profiles. Here we can create a new profile for this setting. Click on “+ Create” and then “New Policy”.
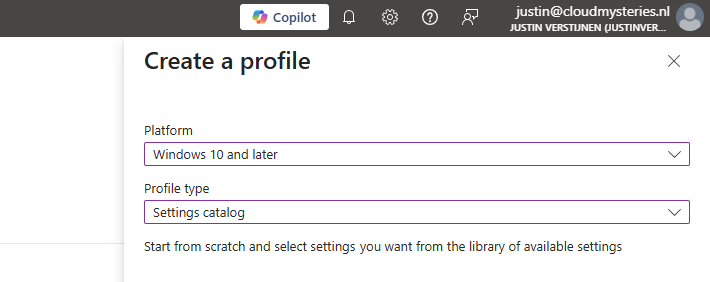
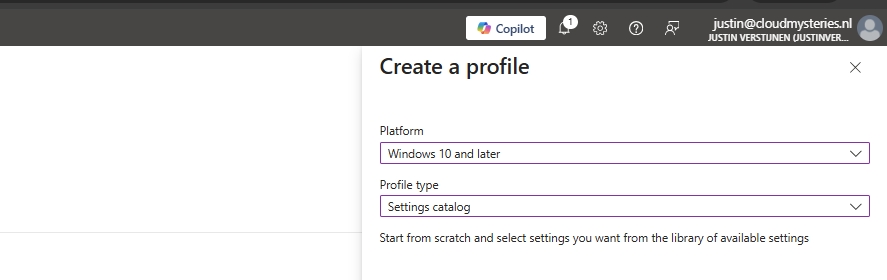
Select for Platform the “Windows 10 and later option”, and for Profile Type “Settings catalog”.
Then give the policy a recognizable name and description.

Then click “Next”. On the “Configuration settings” page, click on the “+ Add settings” button:
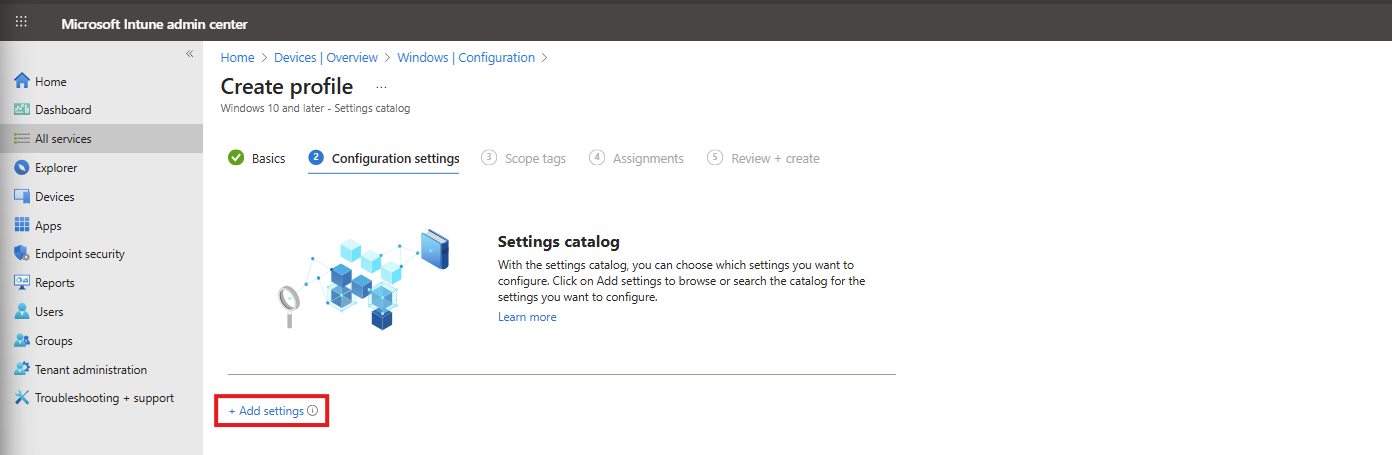
Then search for the setting in this location:
Administrative Templates -> Windows Components -> App Package Deployment
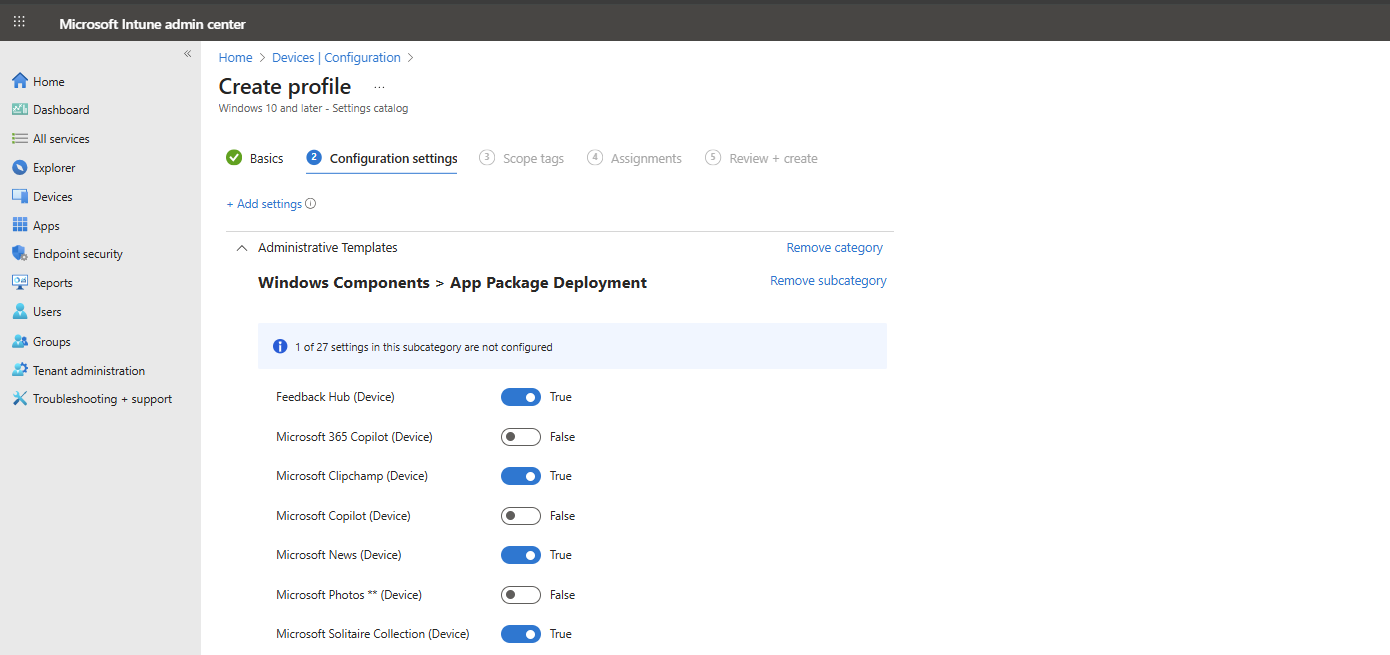
Then select the “Remove Default Microsoft Store packages from the system” option.
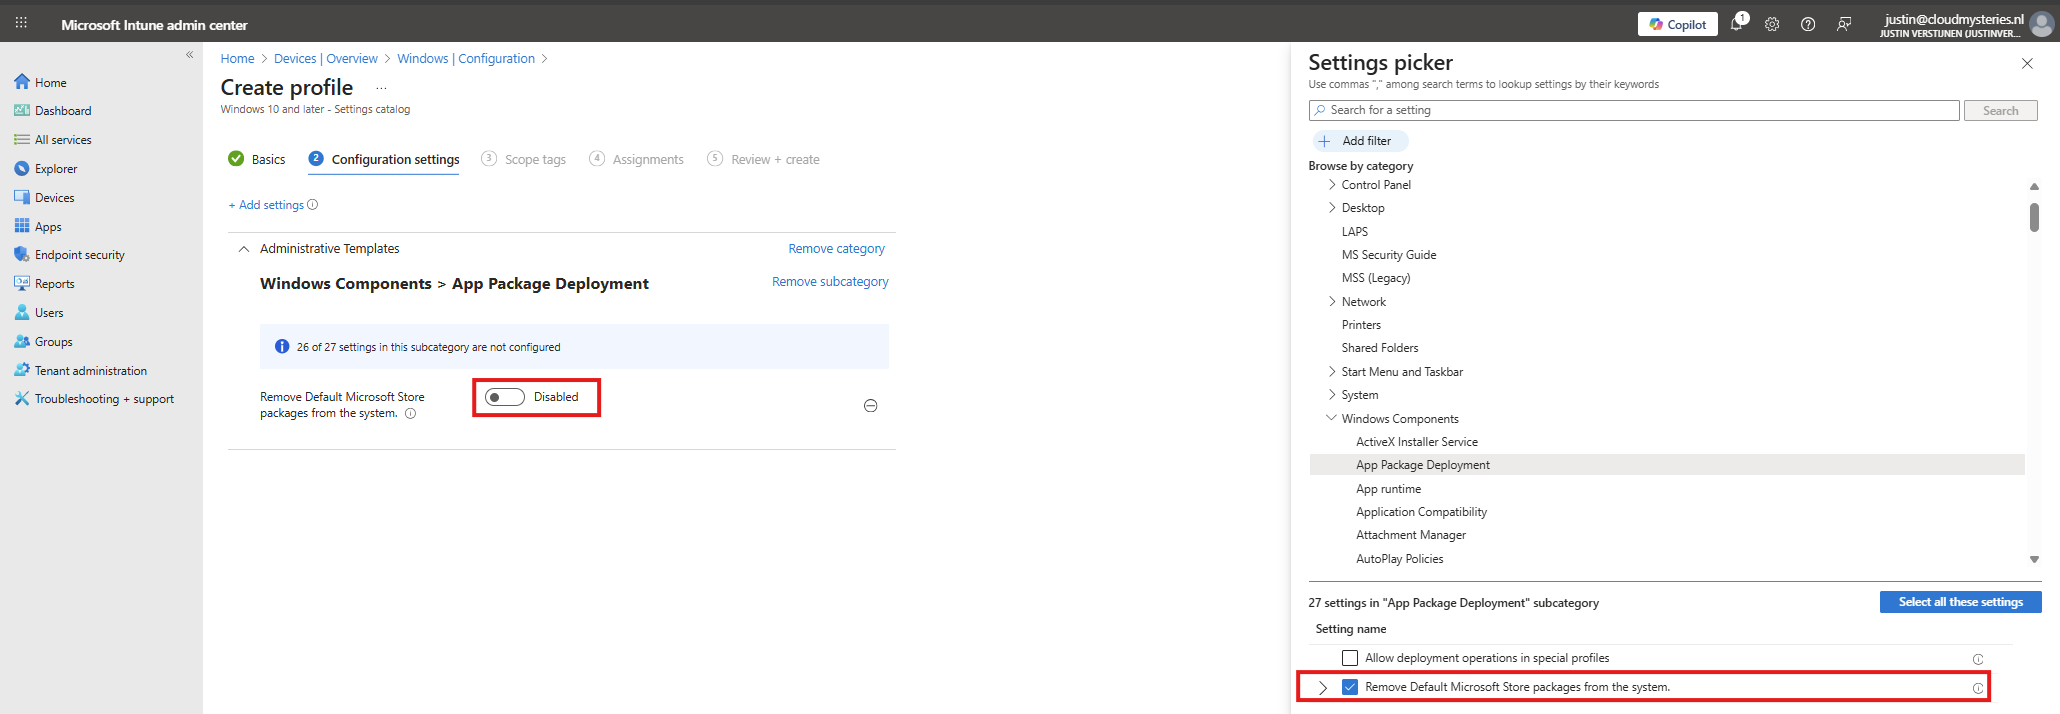
At the left side, flick the switch to “Enabled” and now we can select all apps to remove from Windows client devices.
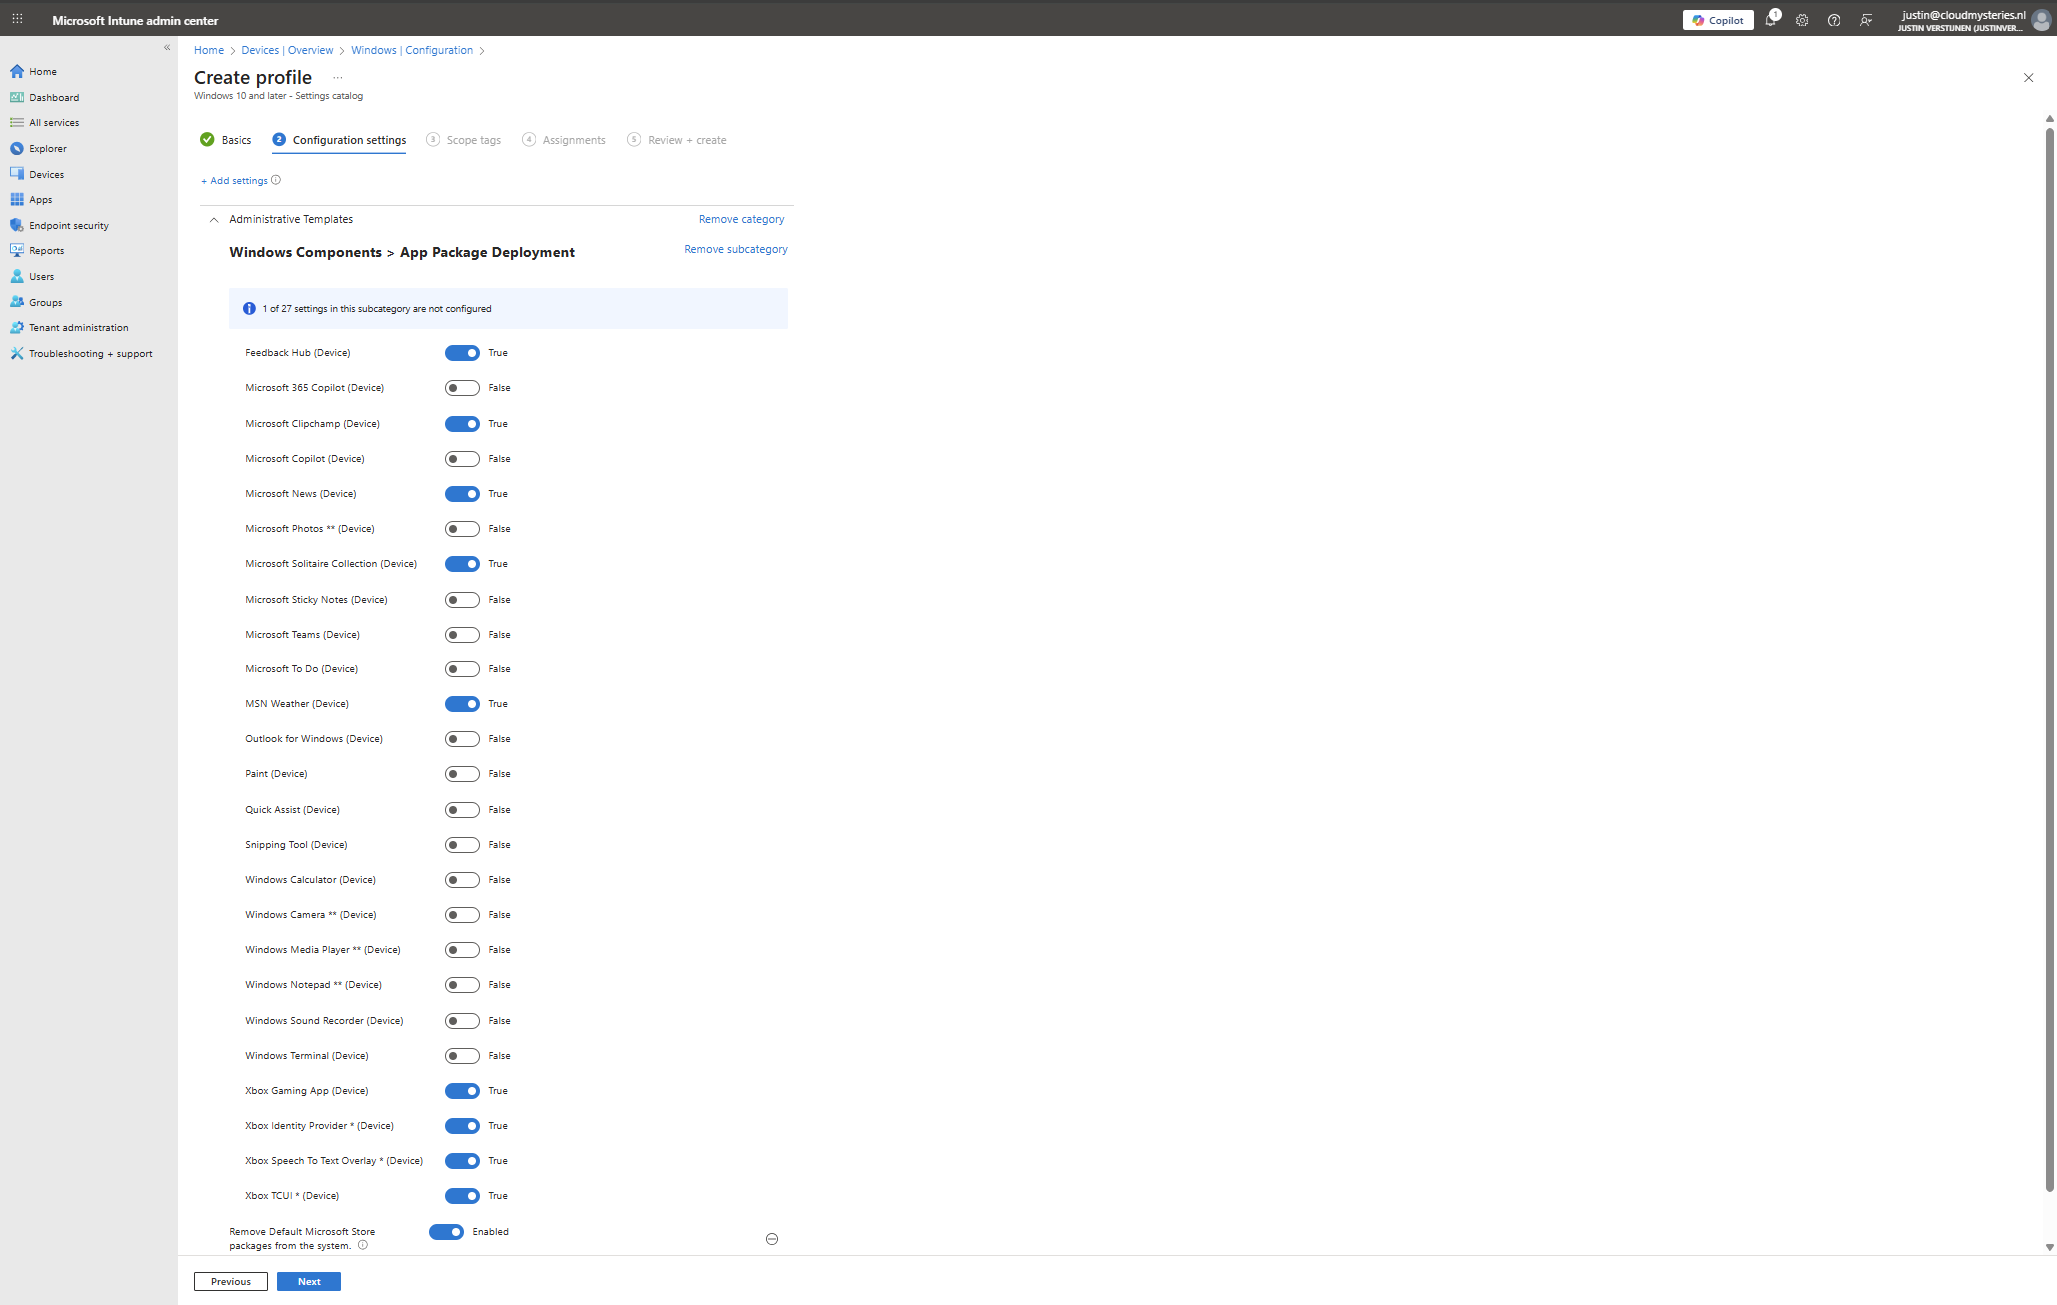
In this configuration, I want to leave all helpful tools installed, but want to remove non-business related applications like Xbox , Solitaire collection and Clipchamp.
You can make your own selection of course. After your apps to remove are selected, click “Next”. Then click “Next” again to assign the configuration profile to your devices. In my case, I select “All devices” but you can also use a manual or Dynamic group.
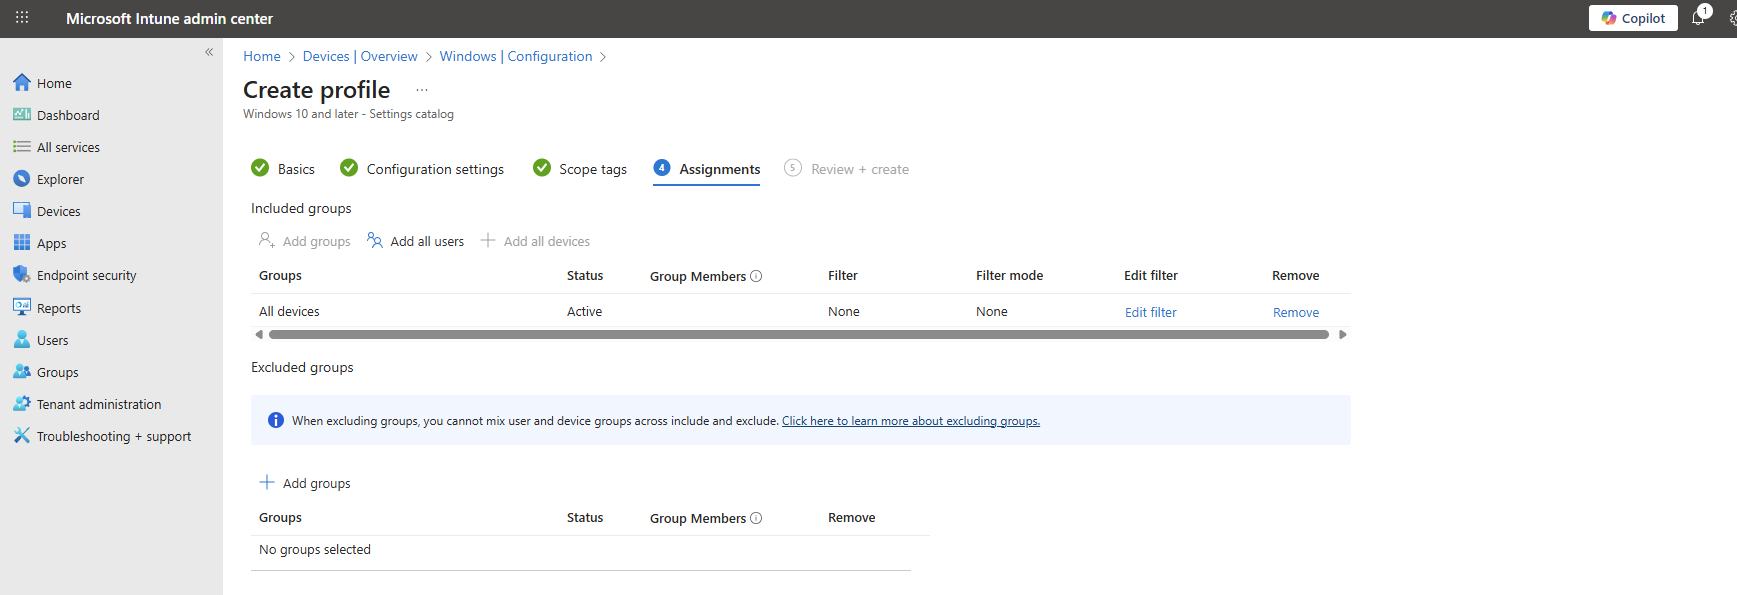
Now the policy is assigned and the actions will be applied the next time your device synchronizes with Microsoft Intune.
No Enterprise or Education?
In you don’t have Enterprise or Education licenses for Windows, I can highly recommend using this debloat script: https://github.com/Raphire/Win11Debloat
This script will help you in the Windows Experience by removing the selected apps, and helps with Windows Explorer settings.
Summary
This new feature is one of the greater updates to the Windows 11 operating system. Deleting applications you don’t need frees up some disk space and compute resources. Also, end-uders are not presented apps they should not use which makes the overall device experience alot better.
I hope I have made this clear to use and thank you for reading my post.
Sources
These sources helped me by writing and research for this post;
End of the page 🎉
You have reached the end of the page. You can navigate through other blog posts as well, share this post on X, LinkedIn and Reddit or return to the blog posts collection page. Thank you for visiting this post.
If you find this page and blog very useful and you want to leave a donation, you can use the button below to buy me a beer. Hosting and maintaining a website takes a lot of time and money. Thank you in advance and cheers :)
The terms and conditions apply to this post.