All pages referring or tutorials for Microsoft 365.
This is the multi-page printable view of this section. Click here to print.
Microsoft 365
- Cross-Tenant Message Recall in Exchange Online
- Encrypt your Microsoft 365 emails with S/MIME
- Disable Teams Premium Trial Button
- Getting started with Microsoft 365 Backup
- Disable users' self service license trials
- Disable DirectSend in Exchange Online
- Set a domain alias for every user in Microsoft 365
- Solved - Microsoft 365 tenant dehydrated
- Create a Catch all mailbox in Exchange Online
- Microsoft 365 create a shared mailbox with same alias
- Migrate data to SharePoint/OneDrive with SPMT
- Dynamic Distribution Groups in Microsoft 365
Cross-Tenant Message Recall in Exchange Online
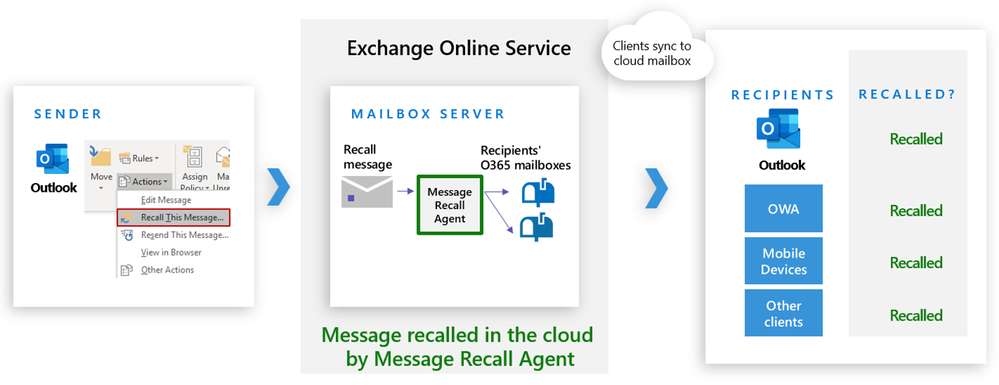
We have all been there. A email is sent and you forgot to add the attachment or the wrong recipient. Exchange Online already has the feature recall messages inside your own tenant but now the cross tenant recall feature is announced, meaning we can recall messages sent to external users which also use Microsoft 365.
How the message recall feature works
We have all been there. A email is sent and you forgot to add the attachment or the wrong recipient. Exchange Online already has the feature recall messages inside your own tenant but now the cross tenant recall feature is announced, meaning we can recall messages sent to external users which also use Microsoft 365.
Cross-Tenant Message Recall has two configuration steps:
- A switch to enable or disable the feature
- An allow list which controls which tenants can recall messages received in your tenant, where the advice is to only add tenants which you trust, like partners or sub-organizations. Like a whitelist of tenants you trust
According to Message Center notification MC1423106 from 10 July 2026, the rollout is expected to begin across all clouds from mid-August 2026 and should be completed by early September 2026.
However, the feature is and will still be disabled by default but when the update has been done we can enable this by using this small steps.
Step 1: Connect to Exchange Online PowerShell
We can connect to Exchange Online with Powershell using this command:
Bash
Connect-ExchangeOnlineIf you don’t have this PowerShell module yet, follow the steps on this page: https://www.powershellgallery.com/packages/ExchangeOnlineManagement
You also need to have the newest version available which will contain the new Cross-Tenant message recall cmdlets.
Step 2: Enable Cross-Tenant Message Recall
Warning
Enabling cross-tenant recall and configuring allow list tenants changes how Message Recall requests are honored for messages delivered to your users. Review the allow list carefully before enabling.
After connecting to Exchange Online PowerShell, we can execute this command:
PowerShell
Set-CrossTenantRecallConfiguration -CrossTenantRecallEnabled $trueTo disable the feature, run the command with the boolean at the end set to “false”:
PowerShell
Set-CrossTenantRecallConfiguration -CrossTenantRecallEnabled $falseCross-Tenant Message Recall is disabled by default, and no cross-tenant recall happens until an admin adds at least one tenant to the allow list.
Step 3: Add allowed sender tenants (the allow list)
To allow other Microsoft 365 tenants to request recall for messages delivered to your organization, add their tenant ids to your allow list. Let’s go through these steps.
To find the tenant ID of a tenant which sends email to your tenant (external) which can be done in multiple ways, but the most easiest is to visit https://entra.microsoft.com/. There you have the Tenant ID with a copy button next to it. Paste this tenant id in this command:
PowerShell
Set-CrossTenantRecallConfiguration -AllowedSenderTenantIds @{Add="d136fa27-8883-4bf0-a9d2-c126cc7e3990"}In this step you will need to add the tenant ids of the external organizations in your allowed configuration, which means the external organization can recall messages sent to your organization.
Summary
Cross-Tenant Message Recall lets us IT guys expand the Message Recall across Microsoft 365 tenant boundaries, but only when the receiving tenant explicitly allow-lists the sender’s tenant. The feature is disabled by default, so you must enable it and configure the allow list before partner tenants can successfully request recalls for messages delivered to your organization.
This way we can recall messages sent inter tenants to for example partners or sub organizations which is a pretty cool developement.
Thank you for reading this post and I hope it was helpful!
Sources
These sources helped me by writing and research for this post;
- https://techcommunity.microsoft.com/blog/exchange/cross-tenant-message-recall-in-exchange-online/4535800
- https://techcommunity.microsoft.com/blog/exchange/cloud-based-message-recall-in-exchange-online/3744714
End of the page 🎉
You have reached the end of the page. You can navigate through other blog posts as well, share this post on X, LinkedIn and Reddit or return to the blog posts collection page. Thank you for visiting this post.
If you think something is wrong with this post or you want to know more, you can send me a message to one of my social profiles at: https://justinverstijnen.nl/about/
If you find this page and blog very useful and you want to leave a donation, you can use the button below to buy me a beer. Hosting and maintaining a website takes a lot of time and money. Thank you in advance and cheers :)

The terms and conditions apply to this post.
Encrypt your Microsoft 365 emails with S/MIME
A great way to encrypt your Microsoft 365 outbound emails using a similar technique as SSL is to use S/MIME. In this guide I will show you how to get certificates and configure S/MIME for your mailboxes.
S/MIME explained
S/MIME means Secure / Multipurpose Internet Mail Extensions. It’s an email security standard defined by the Internet Engineering Task Force which allows you to encrypt your email messages and attachments sent. In simple terms:
It encrypts emails and attachments so only the intended recipient should read them
It digitally signs emails so the recipient knows:
- who sent the message
- that the content was not altered by an attacker in the middle (MitM attack)
S/MIME works using personal certificates (public/private keys), just like SSL certificates for web servers which will be handled automatically by most email clients.
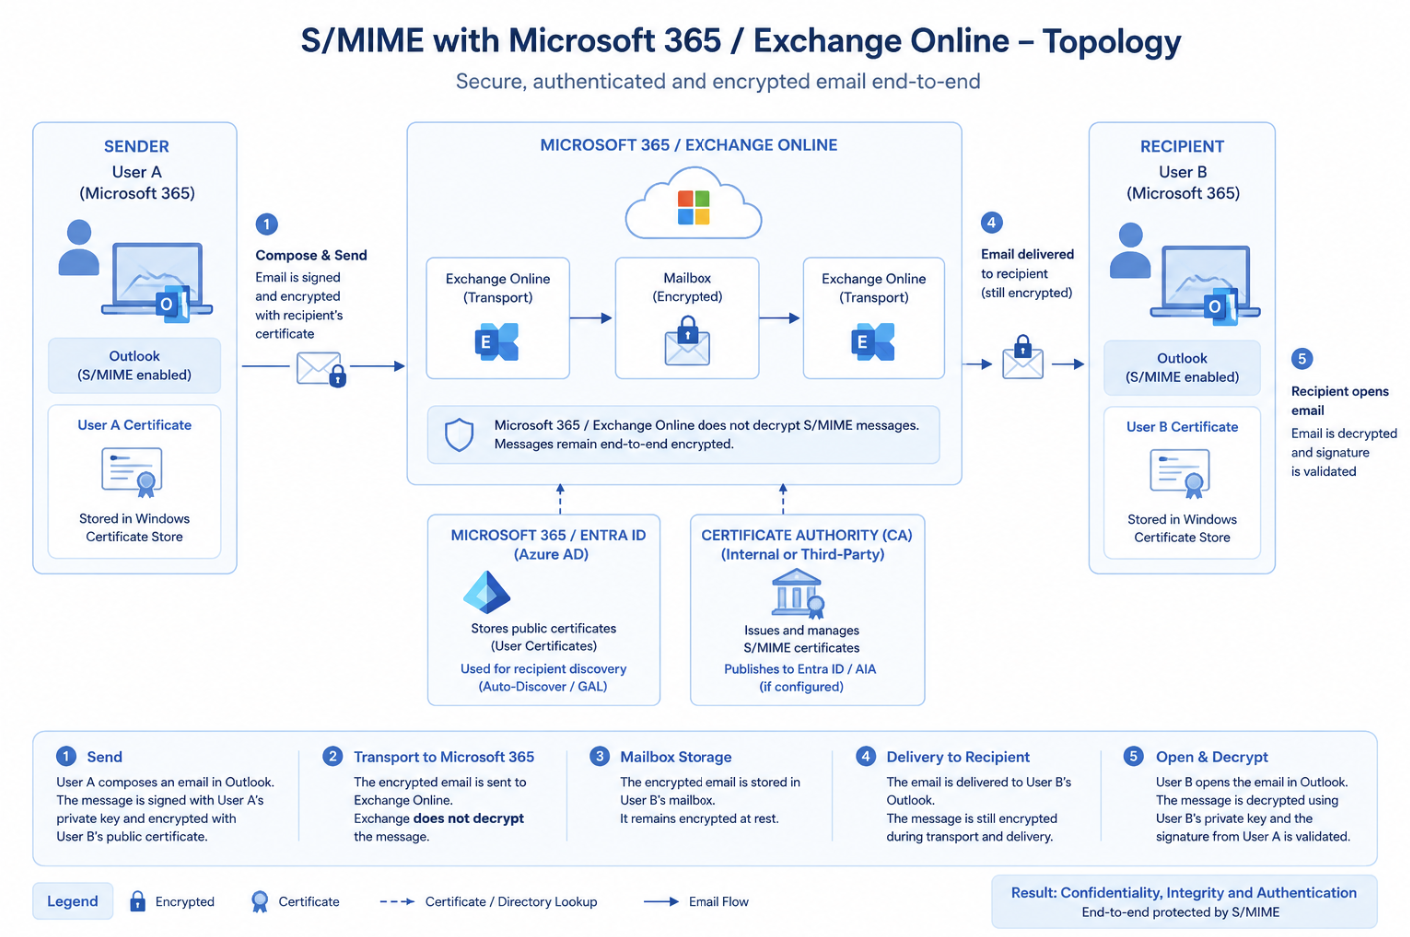
When the S/MIME certificates have been exchanged, S/MIME works like this:
- The sender has an S/MIME certificate installed in their email client. When sending an email, the message can be digitally signed with the sender’s private key. If the sender also has the recipient’s public key, the message can be encrypted for that recipient. (1)
- The signed and/or encrypted email flows through Exchange Online using the normal mail flow. Exchange Online transports and stores the message, but it does not decrypt the S/MIME-protected message content. The message is then delivered to the recipient’s mail environment through regular MX routing. (4)
- The recipient opens the email in their S/MIME-enabled email client. If the message is encrypted, it is decrypted using the recipient’s own private key. The sender’s public key is used to validate the digital signature and confirm that the message came from the sender and was not changed after it was sent. (5)
The different keys described:
| Component | What is it? | What is it used for? |
|---|---|---|
| Public key | The public part of someone’s S/MIME certificate | Used to encrypt email to that person or to verify that person’s digital signature |
| Private key | The secret part of the certificate, kept by the user | Used to decrypt email and to create a digital signature |
| Digital signature | A random cryptographic signature added to a specific email message | Used to prove that the email really came from the sender and that the content was not changed |
Requirements
- Around 30 minutes of your time
- Exchange Online Powershell module installed
- S/MIME certificate for your mailbox
- Microsoft 365 tenant/mailbox to configure S/MIME
S/MIME versus DKIM
When starting my research for S/MIME, I found S/MIME be really similar to what DKIM does, so I did a little research about the differences, and it has some clear takeaways:
- DKIM proves an email came from a specific domain/mailserver
- Keyword: Verification
- S/MIME proves an email came from a specific person and keeps the content private for Man in the middle attacks
- Keyword: Encryption
And I made a little overview about the features of both security protocols:
| Feature | S/MIME | DKIM |
|---|---|---|
| Encrypts email content | Yes | No |
| Digitally signs messages | Yes | Yes |
| Verifies individual sender | Yes | No |
| Verifies sending domain | No | Yes |
| End-to-end protection | Yes | No |
| Prevents mail server access to content | Yes | No |
| Detects content tampering | Yes | Yes |
| Protects message after delivery | Yes | No |
Step 1: Purchasing your S/MIME certificate(s)
The first thing we need to do is purchase an S/MIME certificate. This certificate is personal and linked to an email address. So if you want to use S/MIME for multiple users, you must request a certificate for every user/mailbox.
Then we must purchase a S/MIME certificate for every mailbox. In my case I used an S/MIME certificate from Actalis as this is a relatively cheap supplier, but you can also use another provider as long as they deliver a valid S/MIME certificate.
When purchasing the certificate, keep the following things in mind:
- Use the exact email address of the mailbox
- For example: user@domain.com
- Save the certificate password somewhere secure
- Download the certificate as a .pfx or .p12 file if possible
- Make sure the certificate includes the private key
The private key is important. Without the private key, Outlook can verify signed emails, but it cannot sign or decrypt emails for that mailbox.
After ordering the certificate, your certificate provider will usually send a validation email to the mailbox. Open the email and follow the steps from your provider to approve the certificate request.
Info
As the steps for aquiring the certificate can be different for various issuers, I describe the logical steps you need to take to get such certificate.
Step 2: Downloading your certificate
After the validation is completed, you can download the S/MIME certificate from your certificate provider.
Most providers will give you a couple of download options. For Windows and Outlook, choose the option that gives you a .pfx or .p12 file. This file contains the certificate and the private key. Save the certificate somewhere temporary, for example:
Plain text
C:\Temp\smime-certificate.pfxAlso save the certificate password. We need this password in the next step when importing the certificate into Windows.
If your provider also gives you the Root CA and Intermediate CA certificates, download those as well. We need the certificate chain later to configure Exchange Online.
Step 3: Installing the certificate
Now we have purchased and downloaded the S/MIME certificate, we need to install this on our Windows machine. You can also do this through Microsoft Intune, but I will do the manual option for the purpose of this guide.
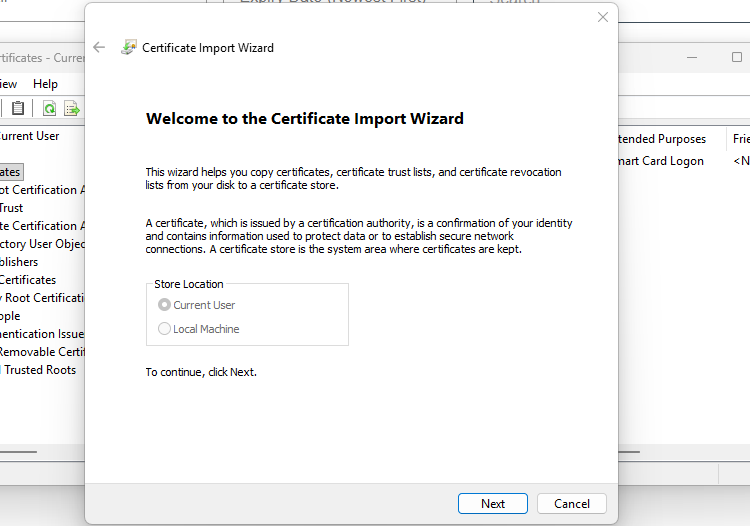
Open your local Certificates manager (certmgr.msc)
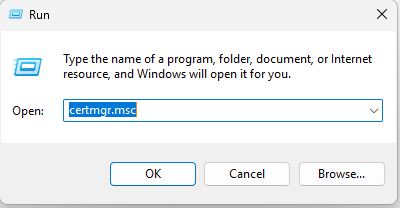
Open the application by hitting Enter or clicking OK.
Navigate to your Personal storage and click “Action -> All tasks -> Import…”
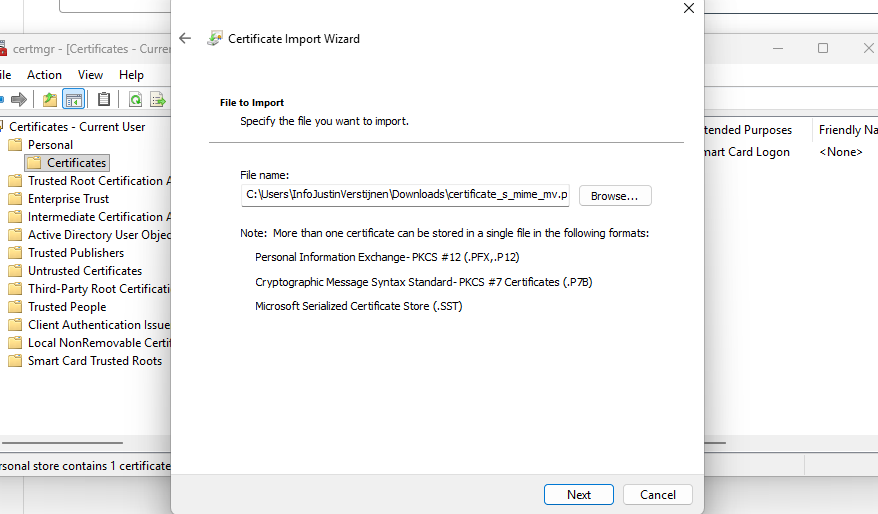
Click “Next”. Now select the certificate you downloaded and purchased.
Click “Next”. Now insert the password if you have received this. If you did not get a password from your certificate issuer, leave this blank.
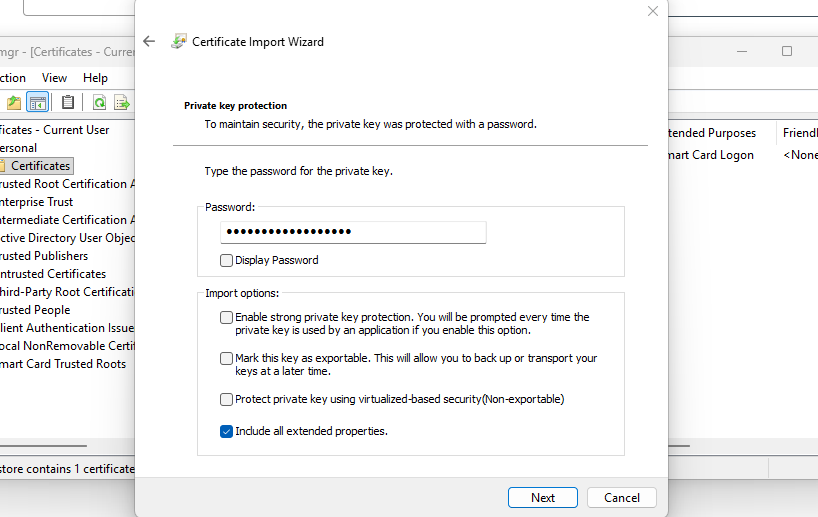
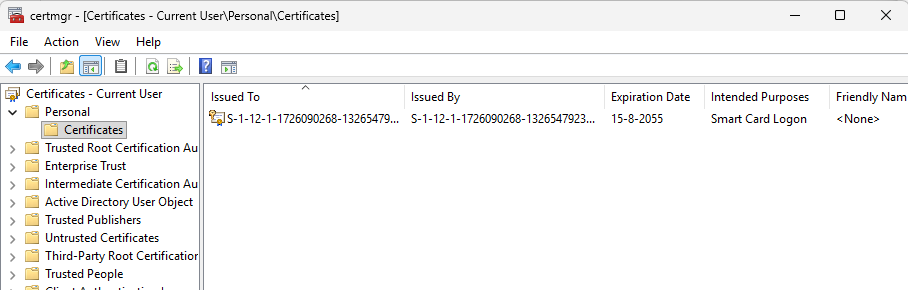
Click “Next” twice and then finish. The certificate should now be in your Personal certificate storage:

Step 4: Export certificate information to file
Info
You have to follow step 4 and 5 for every S/MIME certificate issuer you use. If you use 3 different issuers for example for 50 mailboxes in total, you need to perform step 4 and 5 logically 3 times.
We must now export our certificate provider information to a single file. We can use that file to give it to Exchange Online to trust our certificates and be able to setup the secure, encrypted connection.
On the computer where you just installed the S/MIME certificate, open PowerShell (ISE) as Administrator.
Then paste the simple script below and change the parameters on line 1 and 2:
- Line 1: The name of the certificate provider
- Line 2: The location where you want to save the single certificate file
PowerShell
$CertProviderName = "Actalis"
$SstPath = "C:\JV-Exported-Certs.sst"
$rootCertificates = Get-ChildItem Cert:\LocalMachine\Root |
    Where-Object { $_.Subject -like "*$CertProviderName*" }
$intermediateCertificates = Get-ChildItem Cert:\LocalMachine\CA |
    Where-Object { $_.Subject -like "*$CertProviderName*" }

if (-not $rootCertificates -and -not $intermediateCertificates) {
    Write-Host "No Root or Intermediate certificates found for provider: $CertProviderName"
    return
}

$collection = New-Object System.Security.Cryptography.X509Certificates.X509Certificate2Collection

foreach ($certificate in $rootCertificates) {
    $collection.Add($certificate) | Out-Null
}

foreach ($certificate in $intermediateCertificates) {
    $collection.Add($certificate) | Out-Null
}

$bytes = $collection.Export([System.Security.Cryptography.X509Certificates.X509ContentType]::SerializedStore)
[System.IO.File]::WriteAllBytes($SstPath, $bytes)
$verify = New-Object System.Security.Cryptography.X509Certificates.X509Certificate2Collection
$verify.Import($SstPath)
Write-Host "SST contains:"
$verify | Select-Object Subject, Issuer | Format-Table -AutoSize
Write-Host "Certificate count:" $verify.Count
Write-Host "Exported to:" $SstPath
This script exports all root and intermediate certificate information from your certificate provider to a single file. We must upload this file to Exchange Online so Microsoft trusts our certificates.
You can now find the file in the C:\ root directory:
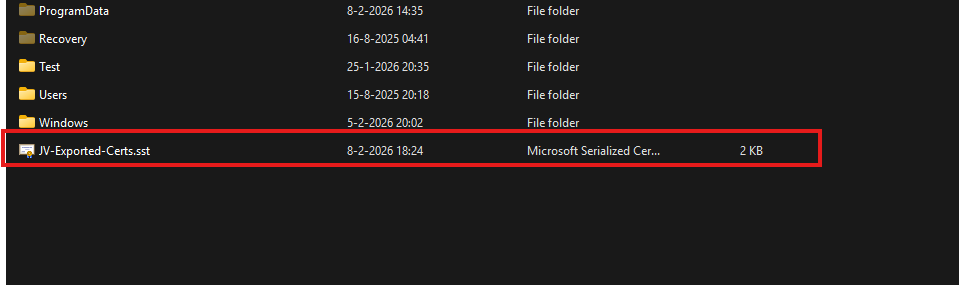
Now we are ready to go to the next step.
Step 5: Upload certificate provider information to Exchange Online
Now we have the file with all the information ready to be uploaded, let’s make a connection to Exchange Online with PowerShell. If you need to install the module, follow this guide: https://www.powershellgallery.com/packages/ExchangeOnlineManagement
PowerShell
Connect-ExchangeOnlineThen login to your tenant/account with at least Exchange administrator permissions. After a succesful login execute this command to tell Exchange Online which certificate provider you use.
PowerShell
Set-SmimeConfig -SMIMECertificateIssuingCA ([System.IO.File]::ReadAllBytes('C:\JV-Exported-Certs.sst'))This command should run without any output, which means it completed successfully.

After running that command, you can check if the certificate is added succesfully with these commands:
PowerShell
$cfg = Get-SmimeConfig
$col = New-Object System.Security.Cryptography.X509Certificates.X509Certificate2Collection
$col.Import($cfg.SMIMECertificateIssuingCA)
$col | Select Subject,Issuer | Format-Table -AutoSize
You will get the complete names of the certificates uploaded:

Wait for around 10 to 15 minutes before changing anything in your Email clients for this new configuration to propagate.
Step 6: Enable digital signatures in Outlook
Now we can go out of PowerShell and actually test if this email encryption works. Open your Outlook, go to Settings, and then Mail -> S/MIME.
First enable the “Digital signatures” option without enabling the Encrypt contents option yet. Enabling encryption by default will break your email sending capabilities if you do not have the public key of every receiver.
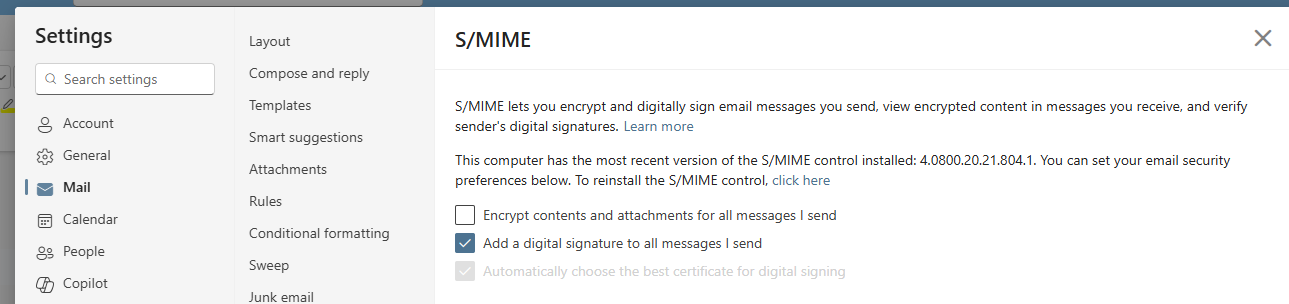
So for the first test email, only enable:
- Digitally sign messages I send
- Automatically choose the best certificate for digital signing
Do not enable this setting yet:
- Encrypt contents and attachments for messages I send
Save the settings and let’s test this in Step 5.
Info
When this is configured, create a new email and send it to another mailbox. This first email does not need to be encrypted. It only needs to be digitally signed.
This is important because the receiver can obtain your public certificate from the signed email. This certificate contains your public key. After this, the receiver can use your public key to send encrypted emails back to you, and a secure channel has been created.
Step 7: Send your first digitally signed email
Create a new email in Outlook and send it to a test recipient of choice.
When the receiver opens the email, they should see that the message is digitally signed. This means that the receiving side can verify the sender and check that the message was not changed after sending.
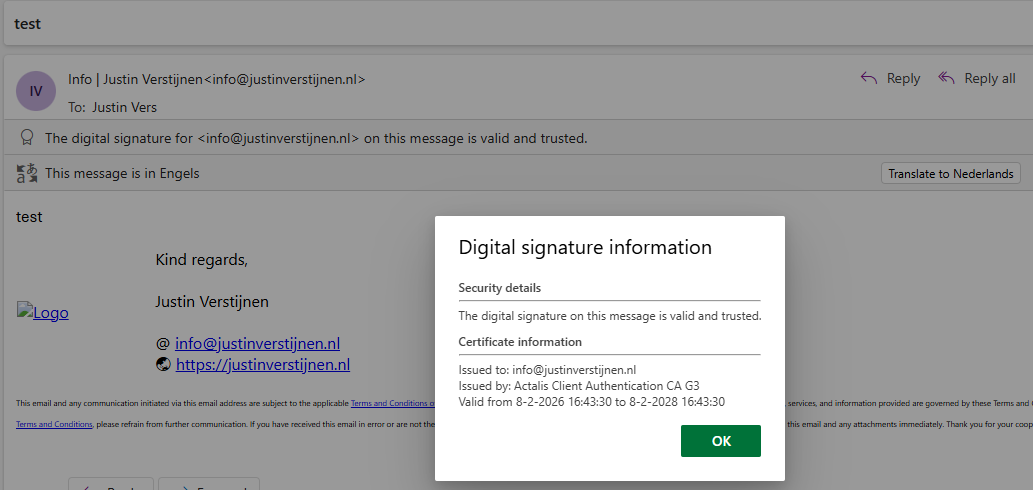
If this works, the signing part of S/MIME is configured correctly and this digital signature is now showed by Outlook on the recipient side:
Step 8: Send your first encrypted email
Now we can test the encryption part. Before you can send an encrypted email to anyone, your Outlook must know the public certificate of that receiver. The easiest way to do this is:
- Ask the receiver to send you a digitally signed email first
- Open that signed email in Outlook
- Save the contact if needed
- Reply to the message
- Enable encryption for this email
Now Outlook can use the public key of the receiver to encrypt the email.
If Outlook does not know the public key of the receiver, you will get an error saying that the message cannot be encrypted for one or more recipients.
When sending an encrypted email, the receiver needs their own private key to open the message. This is why S/MIME works great, but also needs some preparation when communicating with new recipients.
Step 9: Troubleshooting (optional)
The certificate is not trusted by your organization
If you get an error that the certificate is not trusted by your organization, check the certificate chain you uploaded to Exchange Online.
Run this command again:
PowerShell
$cfg = Get-SmimeConfig
$col = New-Object System.Security.Cryptography.X509Certificates.X509Certificate2Collection
$col.Import($cfg.SMIMECertificateIssuingCA)
$col | Select-Object Subject, Issuer | Format-Table -AutoSize
Check if both the Root CA and Intermediate CA from your certificate provider are visible.
If they are missing, export the .sst file again and upload it again:
PowerShell
Set-SmimeConfig -SMIMECertificateIssuingCA ([System.IO.File]::ReadAllBytes('C:\JV-Exported-Certs.sst'))After this, wait around 10 to 15 minutes before testing again.
Outlook cannot find a certificate
If Outlook cannot find your certificate, check if the certificate is installed in your Current User certificate store.
Open certmgr.msc and go to:
Personal -> Certificates
The certificate should be visible here and should contain your email address.
Also check if the certificate has a private key. You can see this when opening the certificate. It should say something like:
You have a private key that corresponds to this certificate.
If the private key is missing, you probably imported a .cer file instead of a .pfx or .p12 file.
You cannot send encrypted email to a recipient
This usually means Outlook does not have the public certificate of the receiver.
Ask the receiver to send you a digitally signed email first. Open that email and try to reply with encryption enabled.
If it still does not work, remove and recreate the Outlook contact, and then open the signed message again.
S/MIME is missing in Outlook on the web
If you use Outlook on the web, your browser may need the Microsoft S/MIME extension or control. This depends on the Outlook client and browser you are using.
For company managed devices, this can be configured with browser policies. In smaller environments it is often easier to use the Outlook desktop client for the first test.
Knowledge check
Knowledge check
This quiz needs JavaScript to show the questions and feedback.
This quiz needs JavaScript to show the questions and feedback.
Summary
In this guide we configured S/MIME for Microsoft 365 and Exchange Online. We purchased and installed a personal S/MIME certificate, exported the Root and Intermediate CA information to an .sst file and uploaded this to Exchange Online.
After that, we enabled digital signing in Outlook and tested the first signed email. The most important thing to remember is that signing and encryption are not the same thing.
Signing proves that the message came from you and that the content was not changed. Encryption makes the content private, but only works if you have the public certificate of the receiver. The first email we will send is therefore not encrypted.
S/MIME is not the easiest mail security feature to configure, but after the first setup it works very nice for sending sensitive information between trusted contacts.
Sources
These sources helped me by writing and research for this post;
- https://learn.microsoft.com/en-us/exchange/security-and-compliance/smime-exo/configure-smime-exo
- https://learn.microsoft.com/en-us/exchange/security-and-compliance/smime-exo/smime-exo
- https://learn.microsoft.com/en-us/powershell/module/exchange/set-smimeconfig
End of the page 🎉
You have reached the end of the page. You can navigate through other blog posts as well, share this post on X, LinkedIn and Reddit or return to the blog posts collection page. Thank you for visiting this post.
If you think something is wrong with this post or you want to know more, you can send me a message to one of my social profiles at: https://justinverstijnen.nl/about/
If you find this page and blog very useful and you want to leave a donation, you can use the button below to buy me a beer. Hosting and maintaining a website takes a lot of time and money. Thank you in advance and cheers :)
The terms and conditions apply to this post.
Disable Teams Premium Trial Button
If you see an “Unlock Teams Premium” button in Microsoft Teams, you’ll probably also have users who click it right away and start a trial. For most orgs, that’s not the experience you want. In this post, I’ll show you two ways to remove that button, through the 365 Admin Center and PowerShell
If we talk about the “Unlock Teams Premium” button, I mean this button which users get in their Teams client:
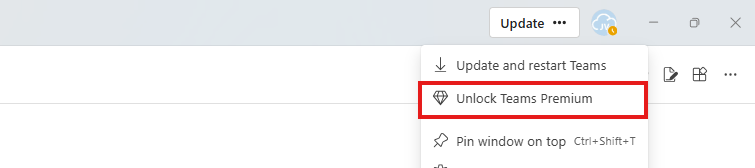
Let’s show how to disable this button. Disabling the button can take up to 48 hours to process and to see results at your end users’ clients, so a little patience is needed.
Option 1: Microsoft 365 Admin Center
Like I have already done in an earlier guide, we can disable self service licenses through the self-service trials menu in the Microsoft 365 admin center.
Open the Microsoft 365 admin center at https://admin.microsoft.com
Then go to “Settings”, then “Org settings” and search for “Self-service trials and purchases”. Then click on “Microsoft Teams Premium”
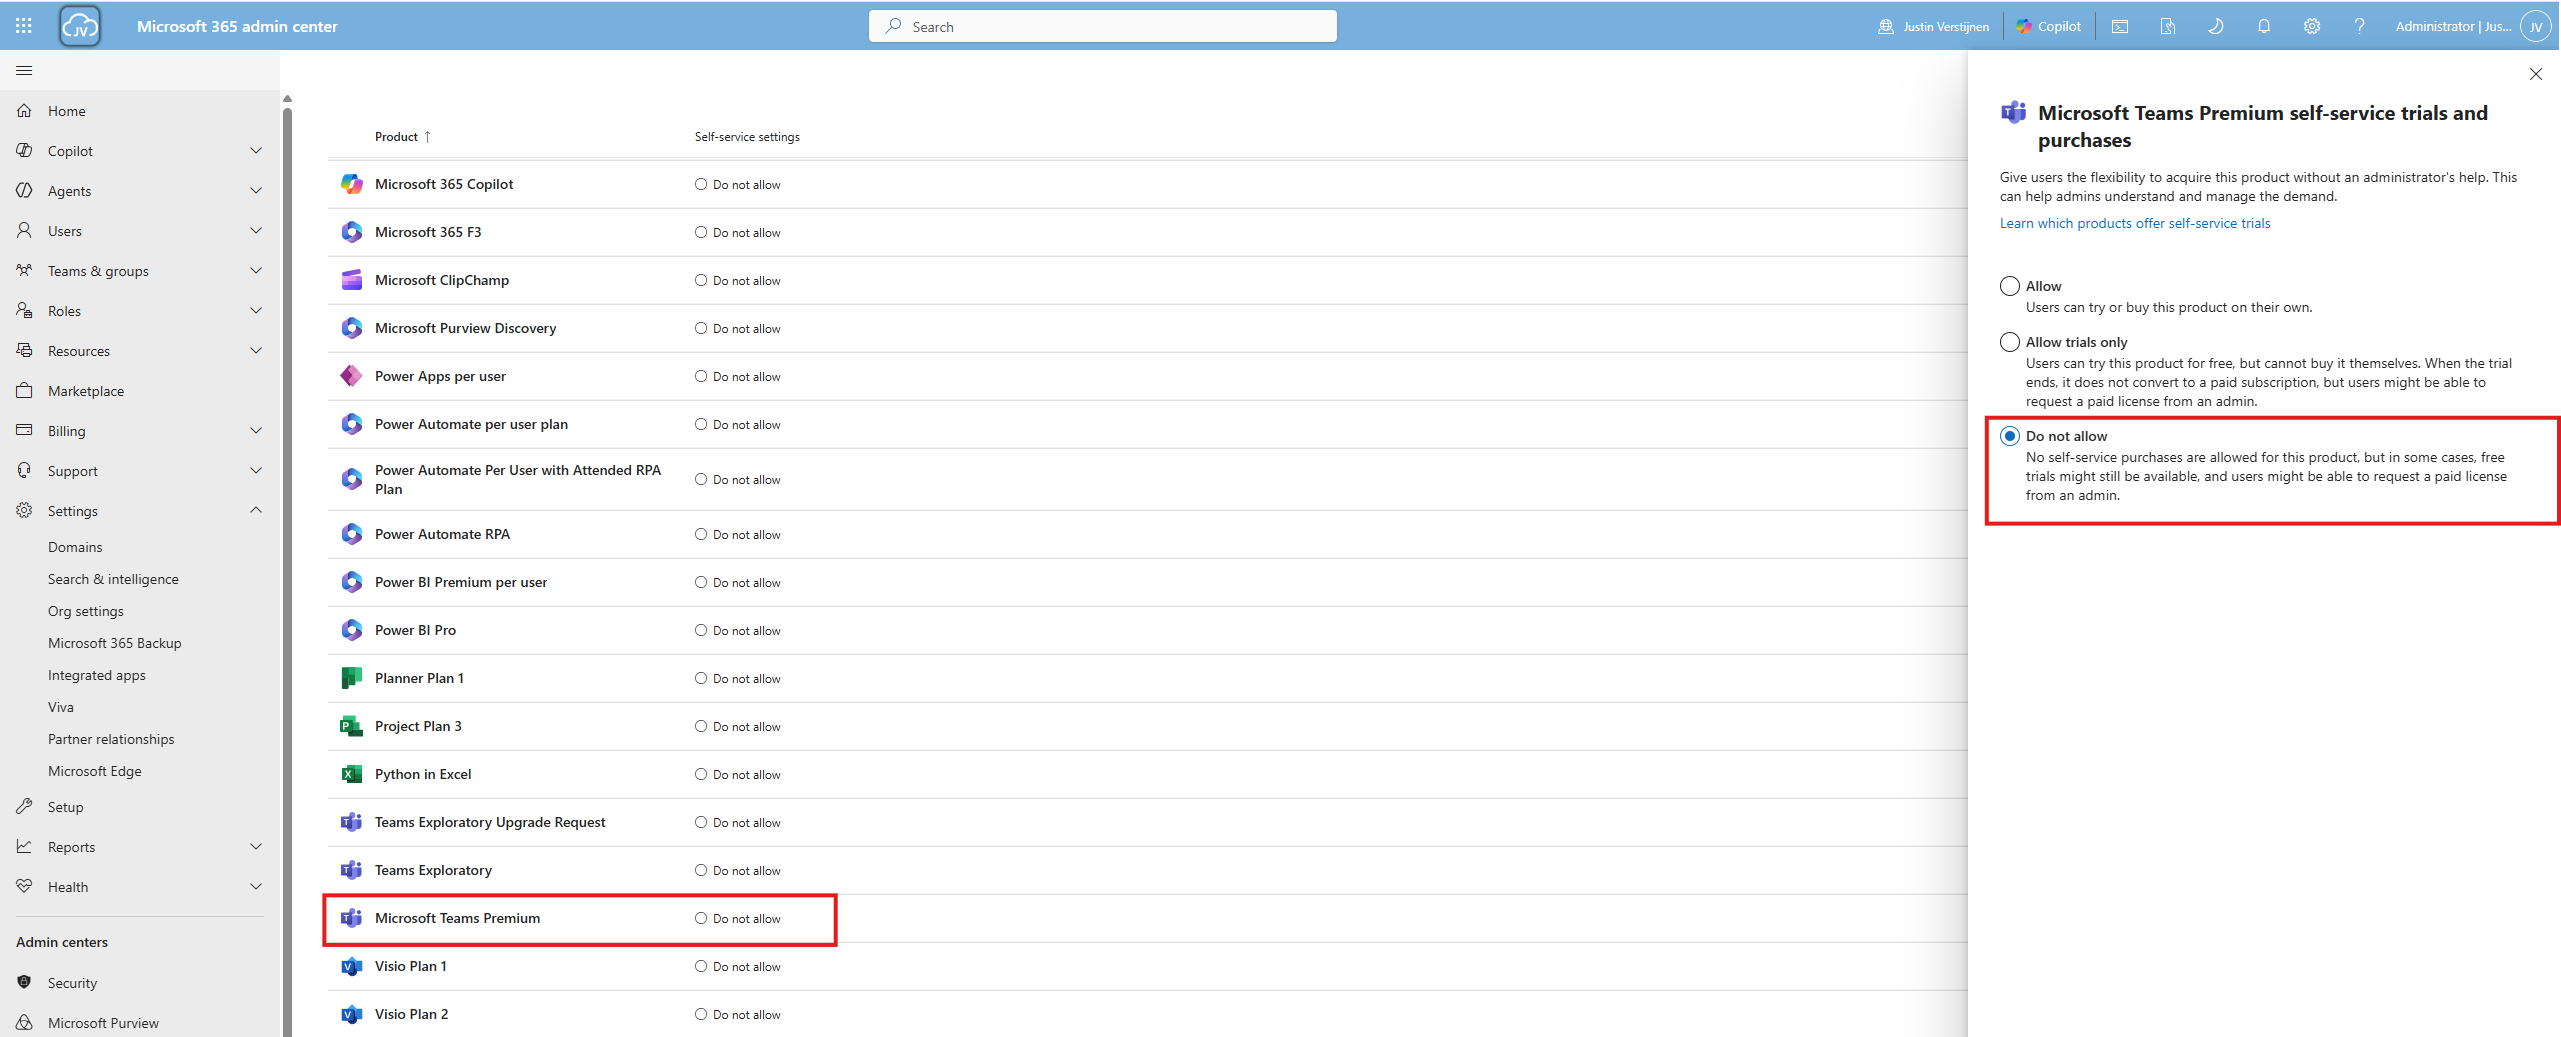
Then click on “Do not allow” and click “Save changes”. This will now be processed through your tenant.
Option 2: PowerShell
We can also disable this “Unlock Teams Premium” button with PowerShell and the MSCommerce module.
To install the MSCommerce PowerShell module, run:
PowerShell
Install-Module -Name MSCommerce -ForceAfter the installation has been completed, run this command to connect to your Microsoft 365 tenant:
PowerShell
Connect-MSCommerceAfter connecting to your tenant and finishing the authentication, run this block to set Teams Premium to Disabled:
PowerShell
Get-MSCommerceProductPolicies -PolicyId AllowSelfServicePurchase | Where-Object { $_.ProductName -like "*Teams Premium*" } | ForEach-Object { Update-MSCommerceProductPolicy -PolicyId AllowSelfServicePurchase -ProductId $_.ProductId -Enabled $false }Then you can check the current status again with PowerShell or in the Microsoft 365 Admin Center:
PowerShell
Get-MSCommerceProductPolicies -PolicyId AllowSelfServicePurchase | Where-Object { $_.ProductName -like "*Teams Premium*" }Again an note here that the processing time can take up to 48 hours for the button to be deleted in the Teams environment of end users.
Summary
Disabling self-service trials and purchases for Microsoft Teams Premium removes the “Unlock Teams Premium” button from Microsoft Teams for your users (or prevents it from appearing after refresh). It also helps you keep license trials from starting by accident and reduces support questions from users.
Thank you for reading this post and I hope it was helpful!
Sources
These sources helped me by writing and research for this post;
- https://learn.microsoft.com/en-us/microsoft-365/commerce/subscriptions/manage-self-service-purchases-admins?view=o365-worldwide
- https://learn.microsoft.com/en-us/microsoft-365/commerce/subscriptions/allowselfservicepurchase-powershell?view=o365-worldwide
- https://www.powershellgallery.com/packages/MSCommerce/3.0
End of the page 🎉
You have reached the end of the page. You can navigate through other blog posts as well, share this post on X, LinkedIn and Reddit or return to the blog posts collection page. Thank you for visiting this post.
If you think something is wrong with this post or you want to know more, you can send me a message to one of my social profiles at: https://justinverstijnen.nl/about/
If you find this page and blog very useful and you want to leave a donation, you can use the button below to buy me a beer. Hosting and maintaining a website takes a lot of time and money. Thank you in advance and cheers :)
The terms and conditions apply to this post.
Getting started with Microsoft 365 Backup
Microsoft 365 Backup ensures that your data, accounts and email is safe and backed up into a separate storage space. A good and reliable back-up solution is crucial for any cloud service, even when having versioning and recycle bin options. Data in SharePoint or OneDrive stays data in one central place and any minor error is made within seconds. In this guide, I will explain how Microsoft 365 Backup works and how you can start using it.
Requirements
- A Microsoft 365 environment with Global Administrator permissions
- An Azure Subscription with PAYG capabilities
- Around 30 minutes of your time
- Basic knowledge of Microsoft 365
What is Microsoft 365 Backup?
Microsoft 365 Backup is an integrated solution of Microsoft to backup Microsoft 365 items. This applies to these items:
- Exchange Mailboxes
- OneDrive accounts
- SharePoint sites/Teams
Microsoft 365 Backup can be used to extend the retention period of certain data. By default, spaces like SharePoint sites have a retention of 93 days if you count the recycle bin and versioning. But this is not really a backup, only some techniques to quicky restore a single file or folder. This doesn’t include things like permissions, which Microsoft 365 Backup does.
If having any site-wide problems, data loss or change in permissions, you will be doomed.
Microsoft 365 Backup has the following details:
- Retention up to 1 year
- 10 minute backup retention of 14 days
- Weekly backup retention of 365 days
- Backup frequency of every 10 minutes (RPO)
- 1TB to 3TB restore speed (RTO)
Microsoft 365 Backup Pricing
The pricing of Microsoft 365 Backup is $0,15 per month per stored gigabyte. This means every gigabyte that is protected is being billed. This is billed using the payment method of Azure and will be on that invoice. You could also create a separate subscription to receive a separate invoice.
For example:
- 5 Mailbox of 25GB including deleted items
You will pay 5 x 25 x $0,15 per month which is $18,75 per month. The duplicate data that is being saved is not billed, as deduplication techiques are being used: Incremental backups.
An example of forecasted costs for an environment with backups enabled can be (with low and heavy users):
| Type | SharePoint size | Onedrive size | Mailboxes size | Total costs/month* |
| 5 users (low) | 25GB | 32,5GB | 32,5GB | $ 13,50 ($2,70/user) |
| 5 users (heavy) | 100GB | 125GB | 125GB | $ 52,50 ($10,50/user) |
| 25 users (low) | 100GB | 125GB | 125GB | $ 52,50 ($2,10/user) |
| 25 users (heavy) | 500GB | 625GB | 625GB | $ 262,50 ($10,50/user) |
| 250 users (low) | 500GB | 625GB | 625GB | $ 262,50 ($1,05/user) |
| 250 users (heavy) | 5000GB | 6.250GB | 6.250GB | $ 2.625,- ($10,50/user) |
*$ 0,15 per GB/month
As you can see, it totally depends on how many data is backed up, and selecting only crucial sites/users is crucial. You have to create a cost estimate based on the items you need the extra retention for. Maybe for most of the users, like frontline workers or people with only an email address and some OneDrive, the recycle bin and versioning options with 93 days of retention is more than enough.
You can find currect usage easily through the Microsoft 365 Admin center (https://admin.cloud.microsoft) and then to “Reports” and then “Usage”:
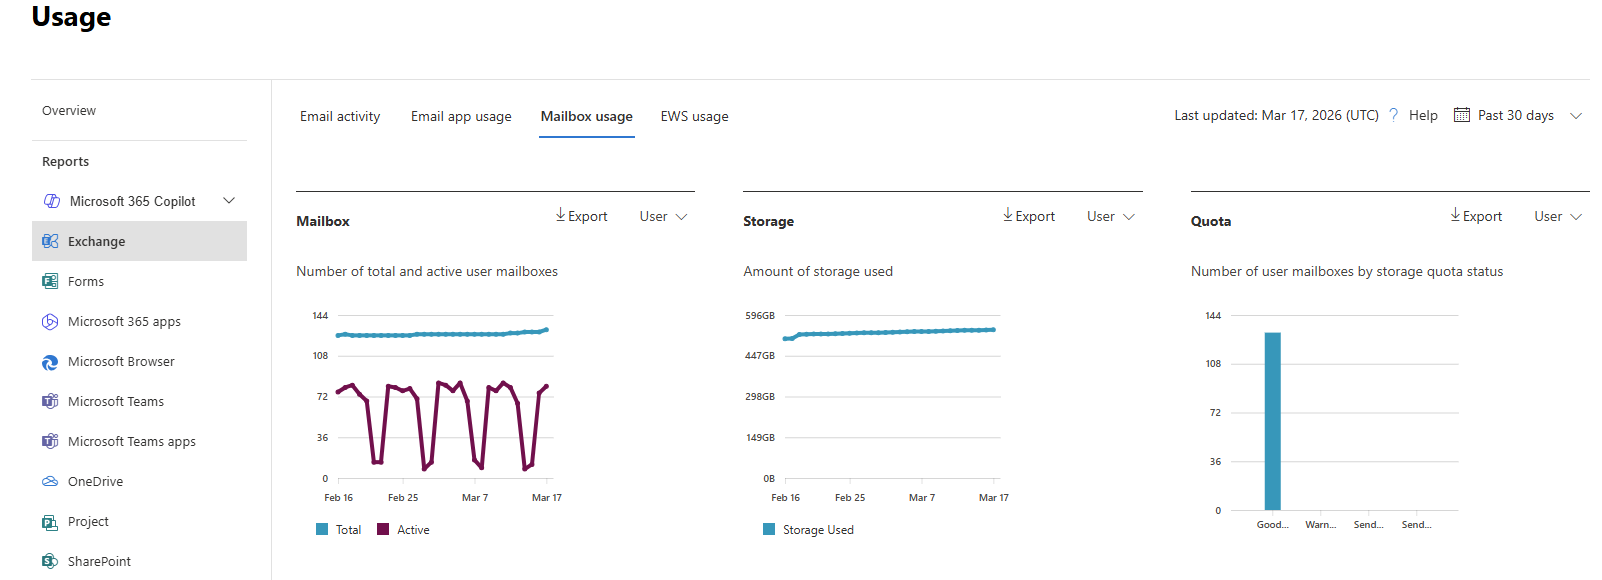
Tip: Calculate your actual data usage with this PowerShell scripts of Microsoft: https://learn.microsoft.com/en-us/microsoft-365/backup/backup-pricing?view=o365-worldwide#finding-the-sizes-of-stored-data
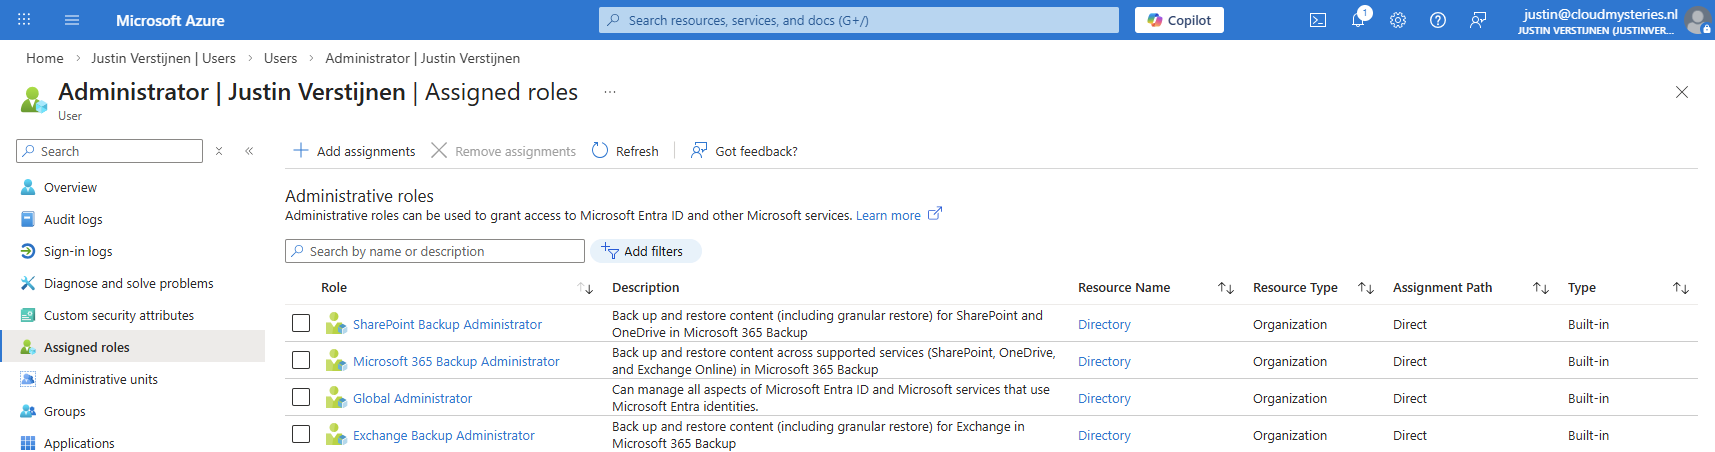
Required permissions for Microsoft 365 Backup
To be more prepared, let’s review the permissions/roles you need to configure and restore with Microsoft 365 Backup.
- SharePoint Administrator (least-privileged)
- Global Administrator (the boss of the tenant)
If you want to use the file level restore options, you need to have these roles assigned, even with Global Administrator permissions already assigned, keep this in mind:
- SharePoint Backup Administrator
- Exchange Backup Administrator
Step 1: Create a designated resource group
First we will creeate a separate resource group for our Microsoft 365 Backup policy. Go to the Azure Portal (https://portal.azure.com).
Then create a new resource group in your subscription:
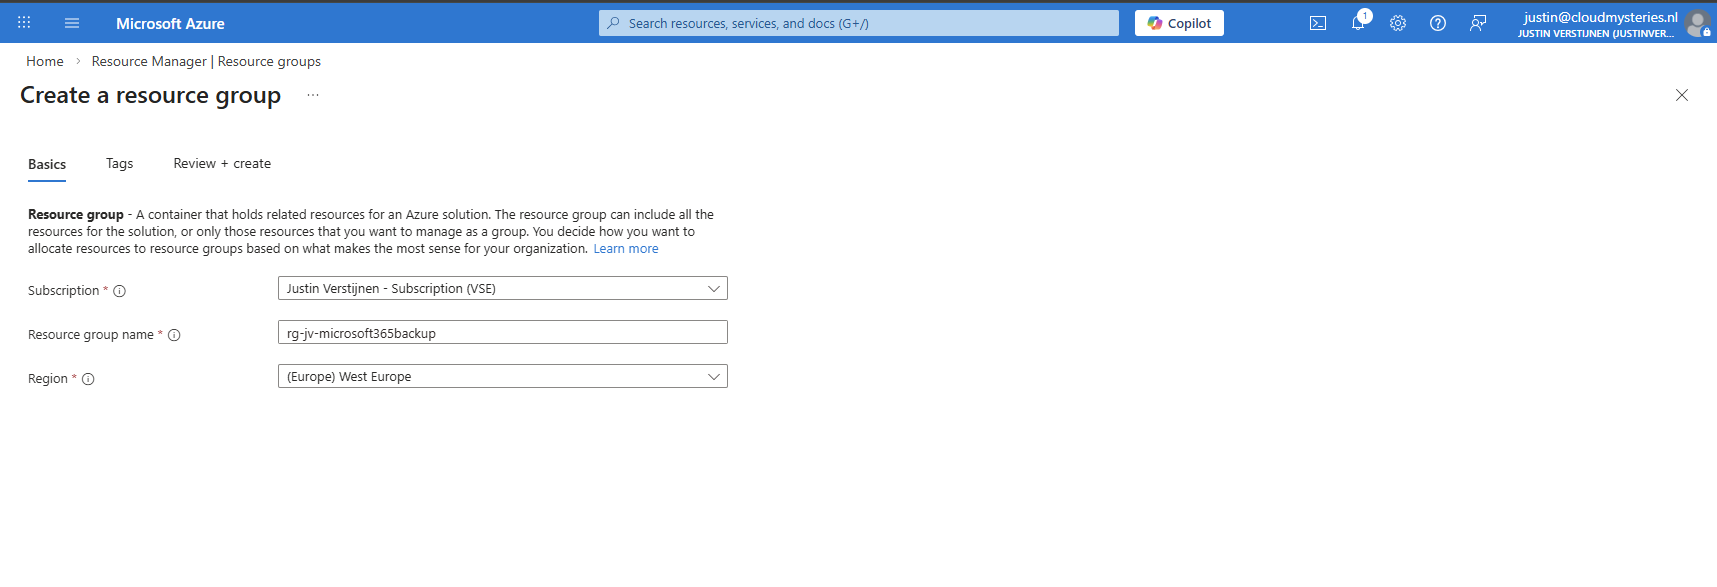
After creating the resource group, it will be ready to deploy resources into.
Step 2: Create a Billing policy
Now we can start by preparing Microsoft 365 Backup in your tenant. Go to the Microsoft 365 Admin center (or directly to: https://admin.cloud.microsoft/?#/Settings/enhancedRestore)
Then go to Settings -> Microsoft 365 Backup
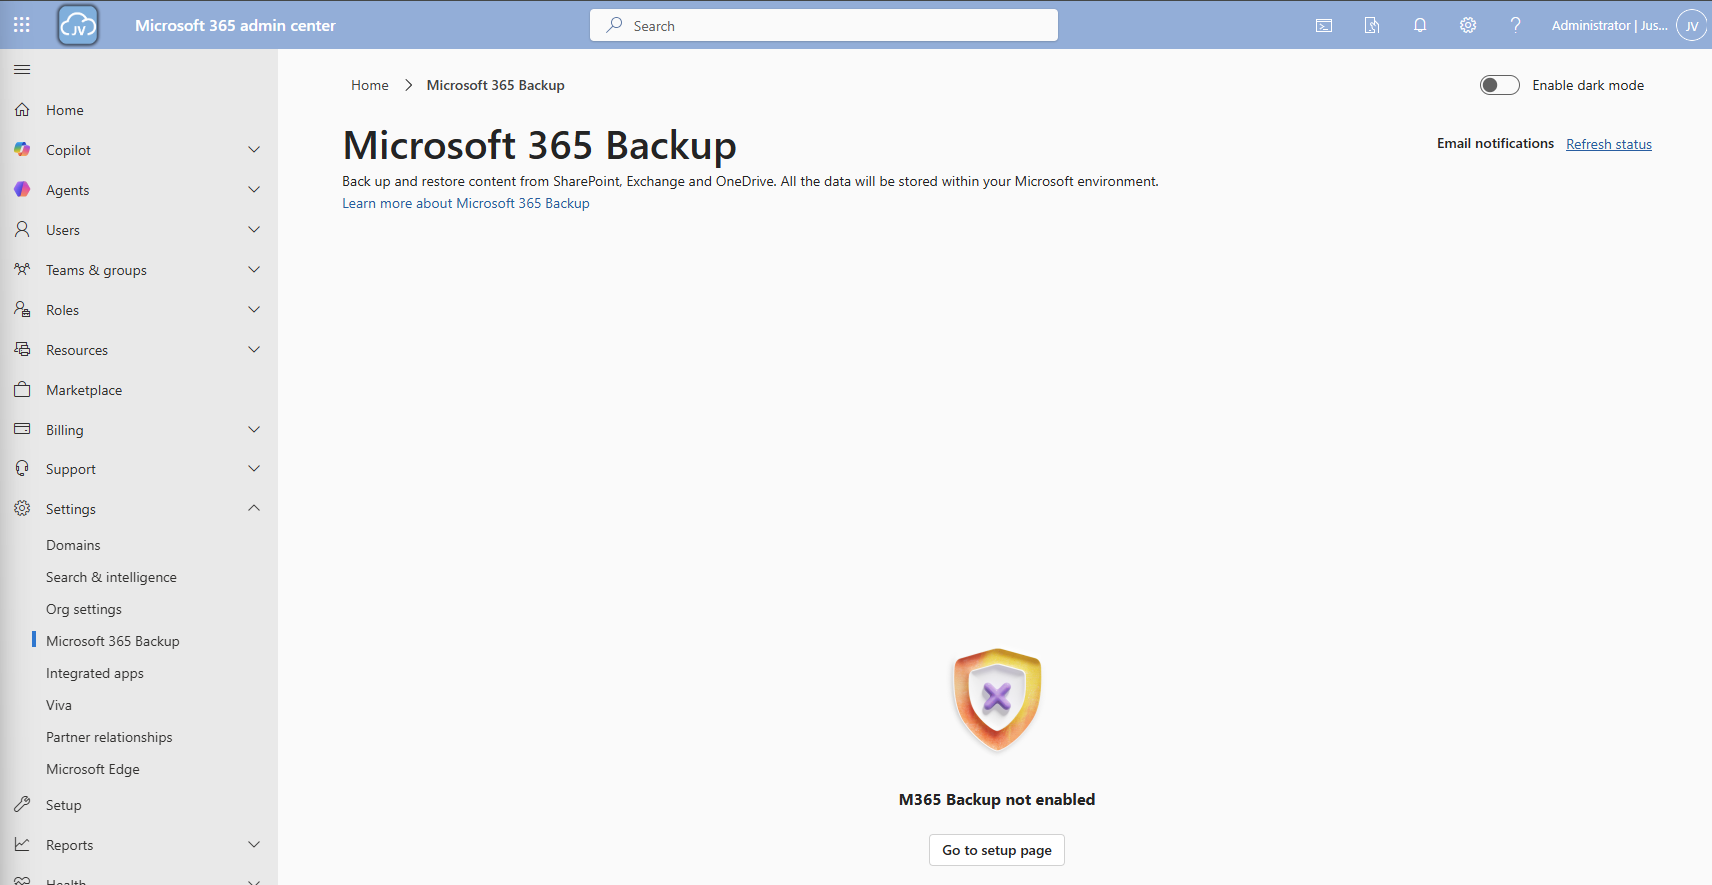
Then click on the “Go to setup page” button and you will be redirected to the billing options.
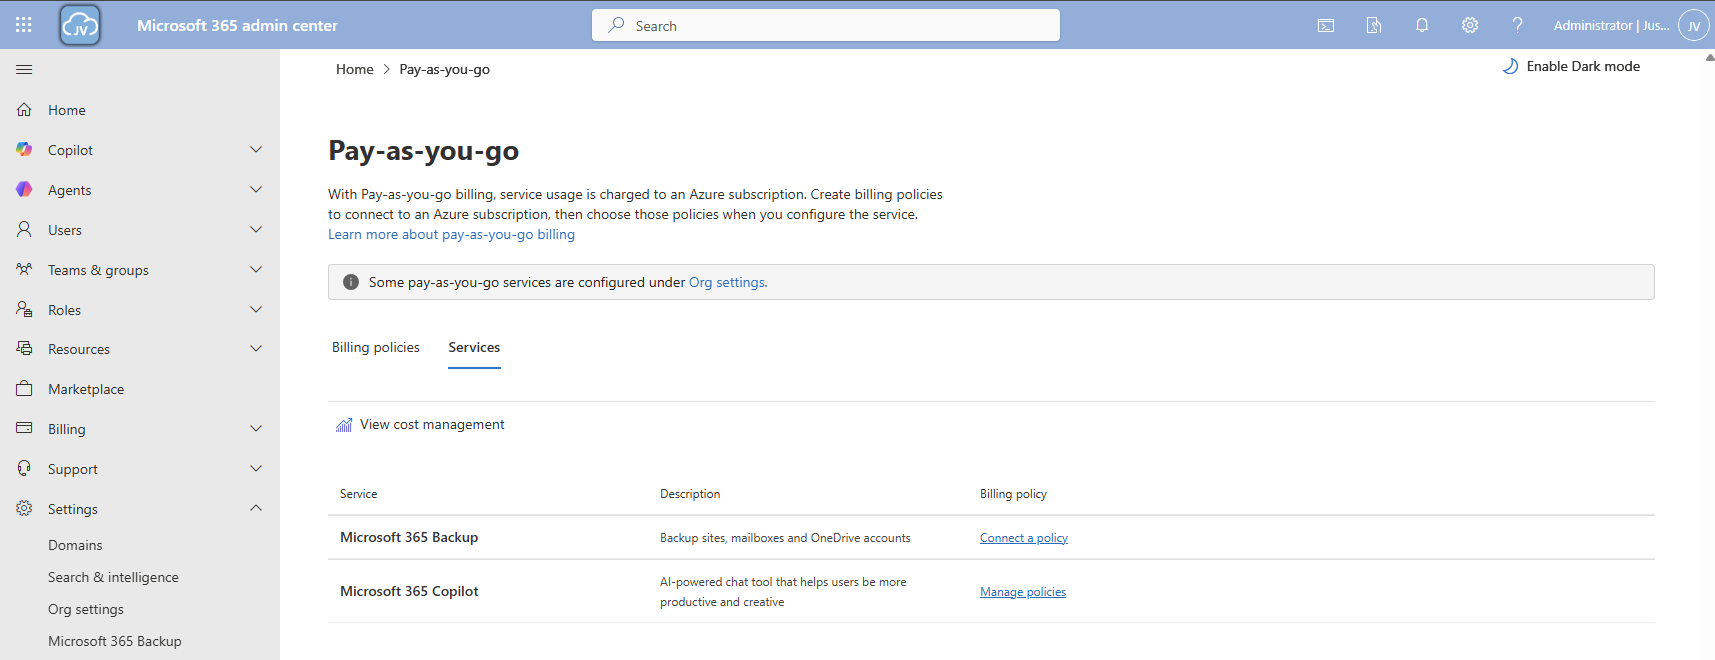
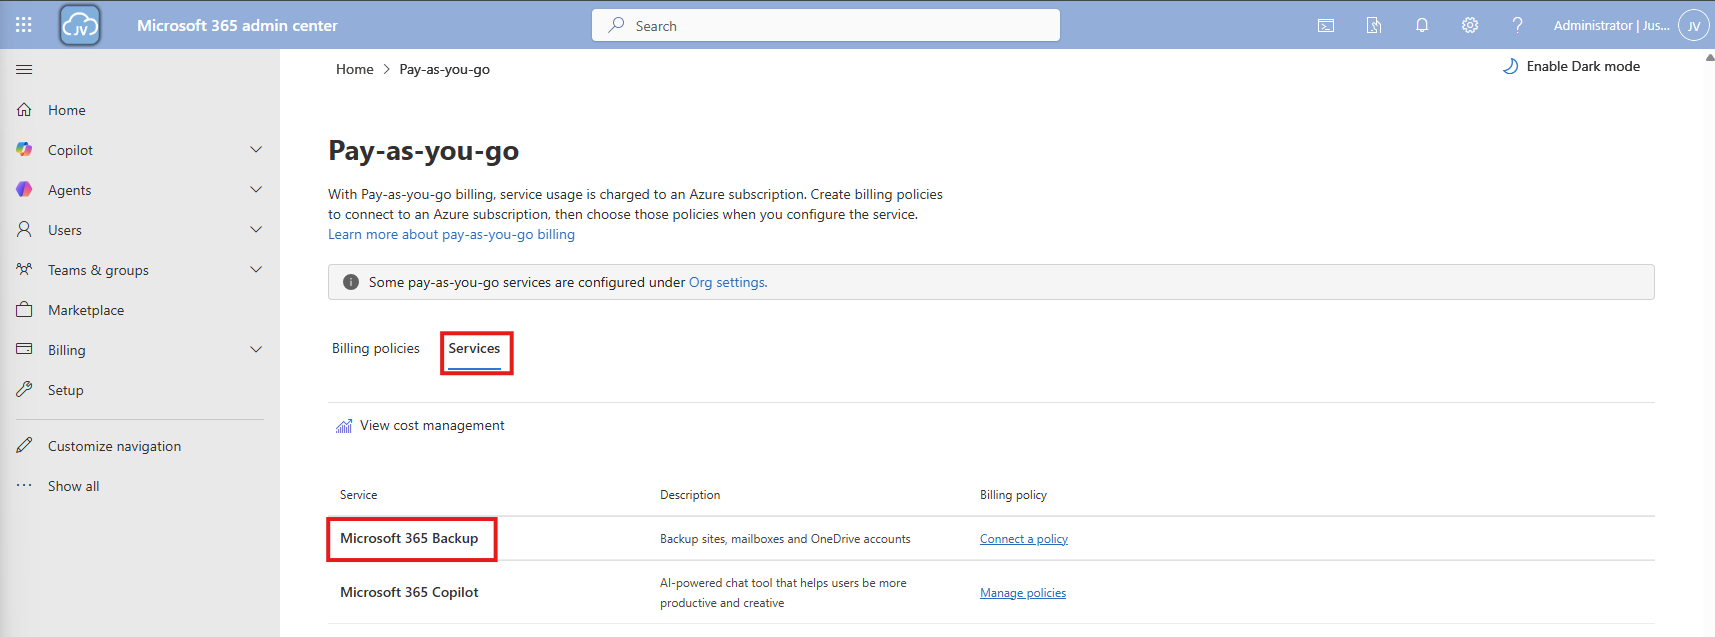
Click on the “Services” tab here and there we have Microsoft 365 Backup. To actually use Microsoft 365 Backup, we need to create a billing policy.
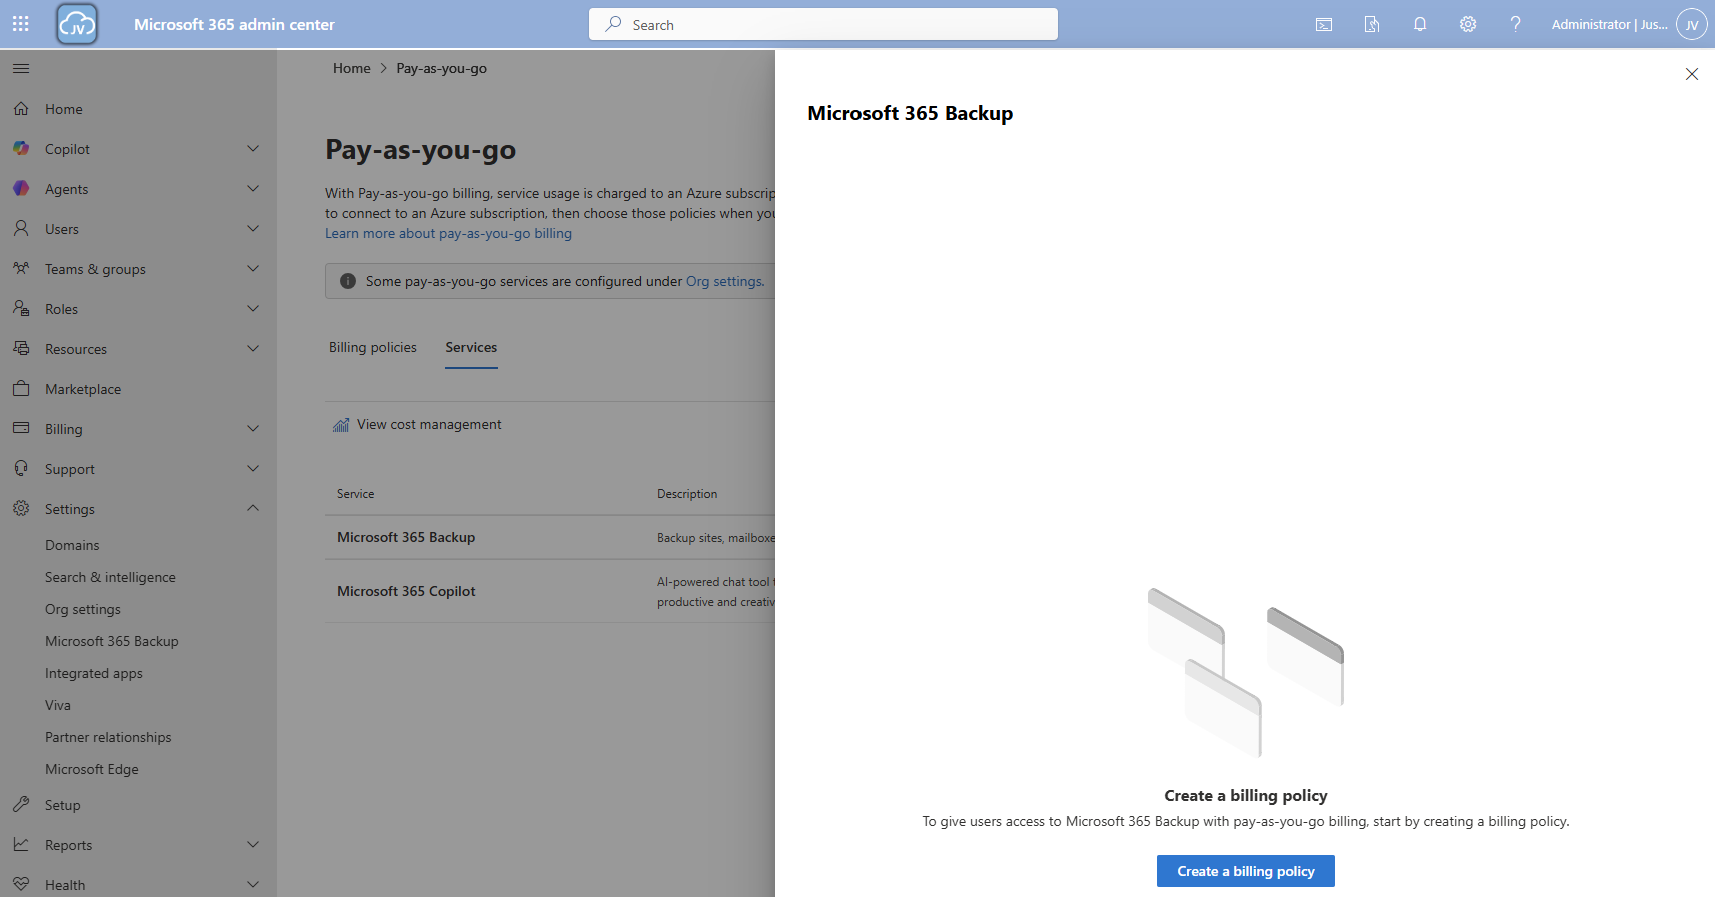
Click the “create a billing policy” button to create one.
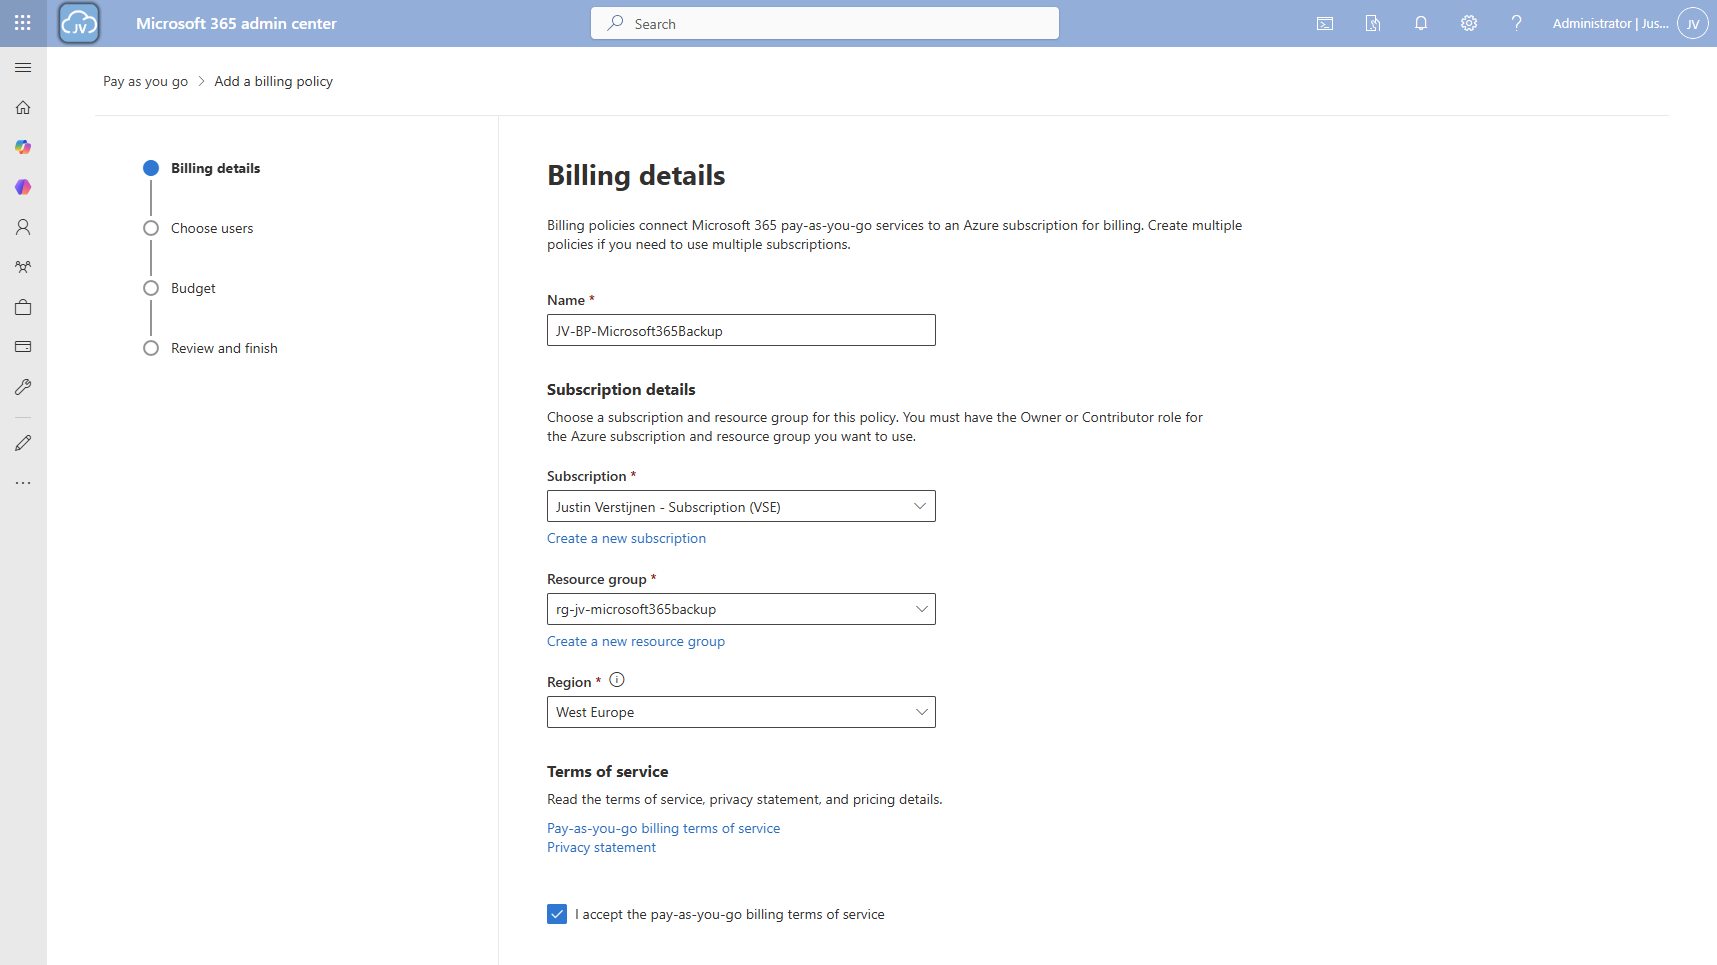
Fill in the details, and select your Azure subscription and just created resource group. The region can be any region of choice. Preferrably the closest one to you or what you need in terms of regulatory compliance.
Click “Next”.
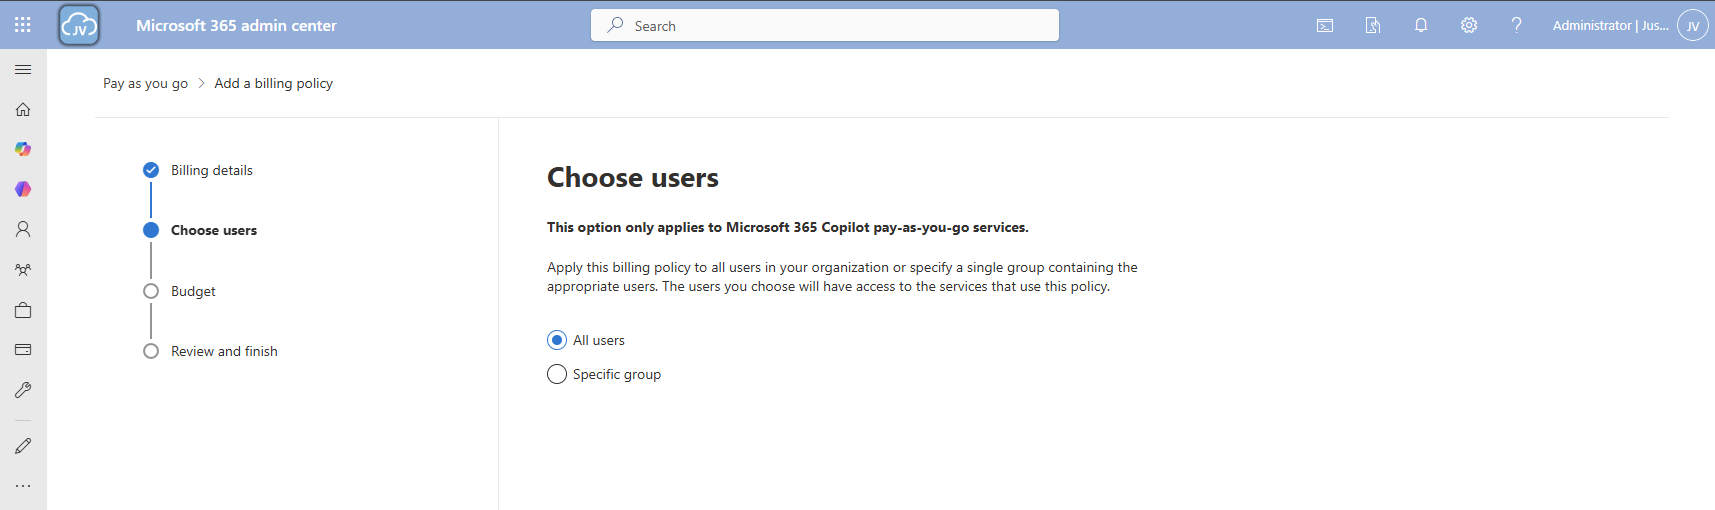
On the “Choose users” page choose one of the two options. I chose “All users”. Then click “Next”.
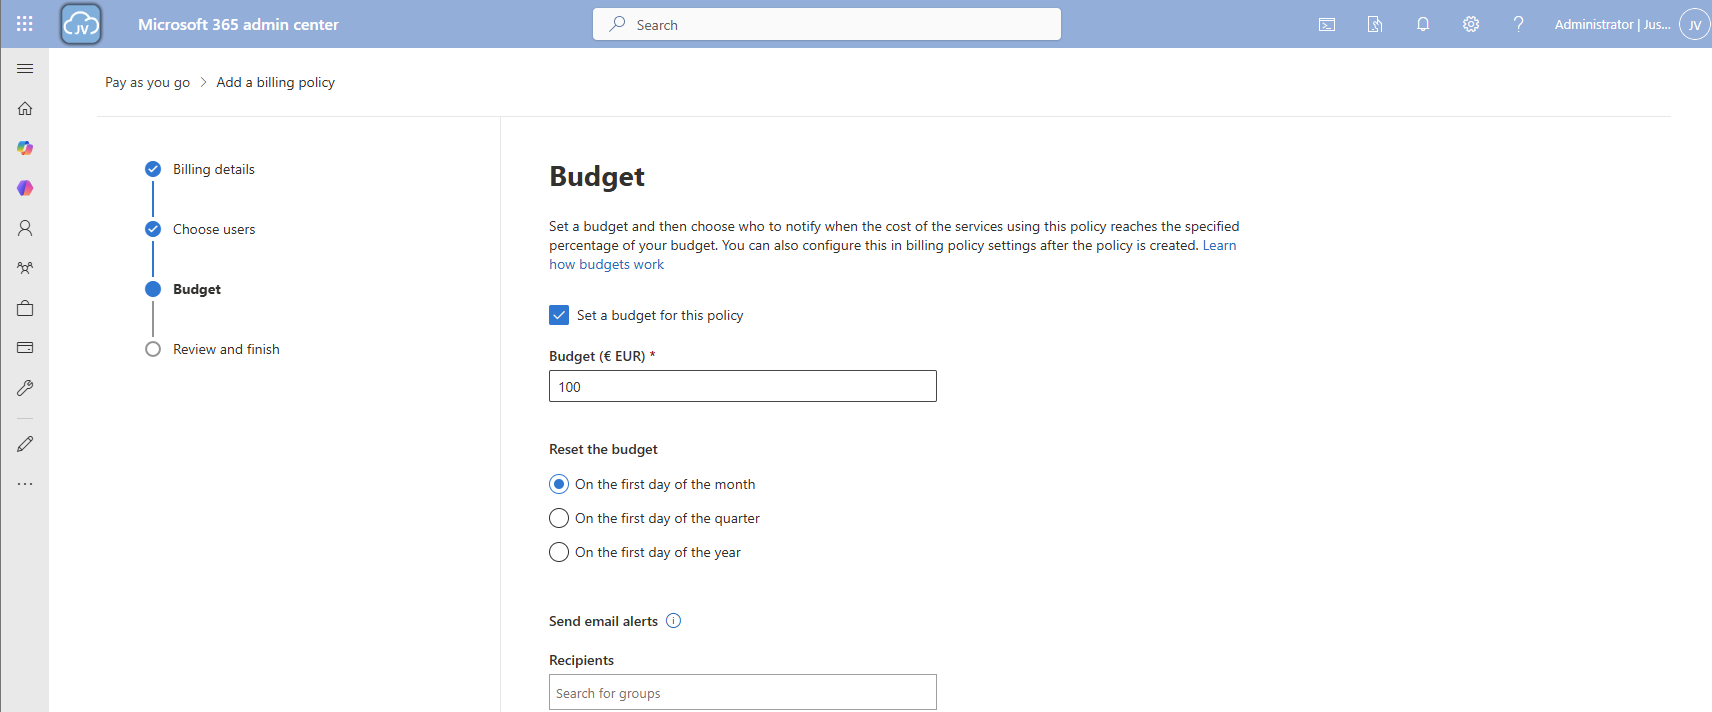
On the “Budget” page, you can set a budget, or maximum amount of money you want to spend on this solution.
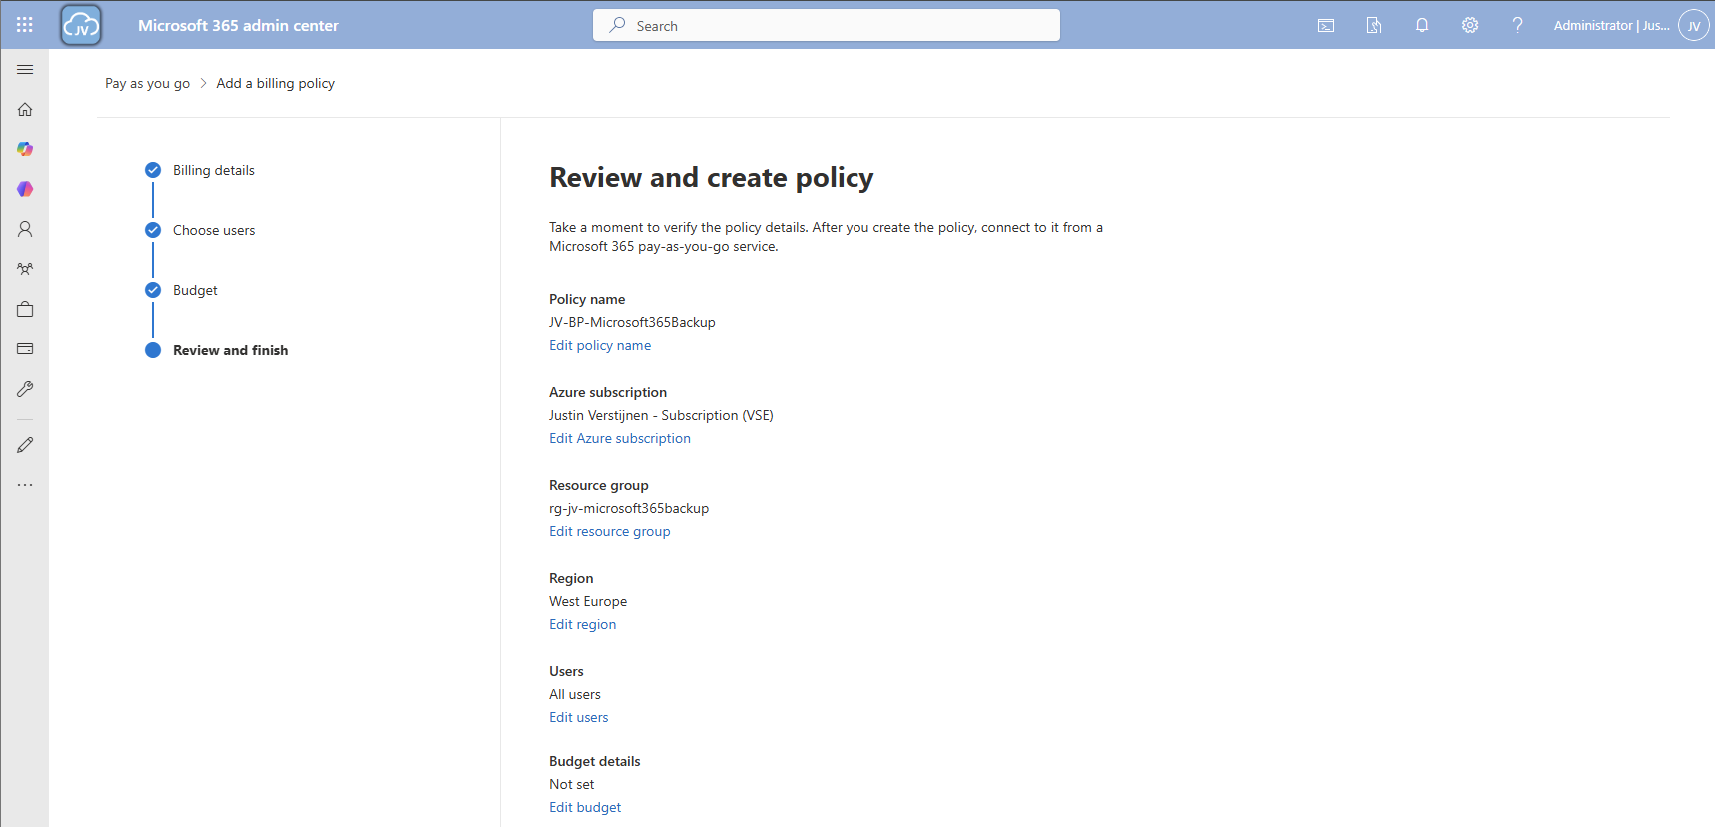
Finish the policy and we are ready to go.
Step 3: Connect Microsoft 365 Backup service to billing policy
Now that we have our billing policy in place, we can now connect the Microsoft 365 Backup service to this policy. On the “Billing policies page, click “Services” and then “Microsoft 365 Backup”.
A blade will now come from the right. Select the “Billing policies” tab there and enable the switch to connect the service to your created billing policy.
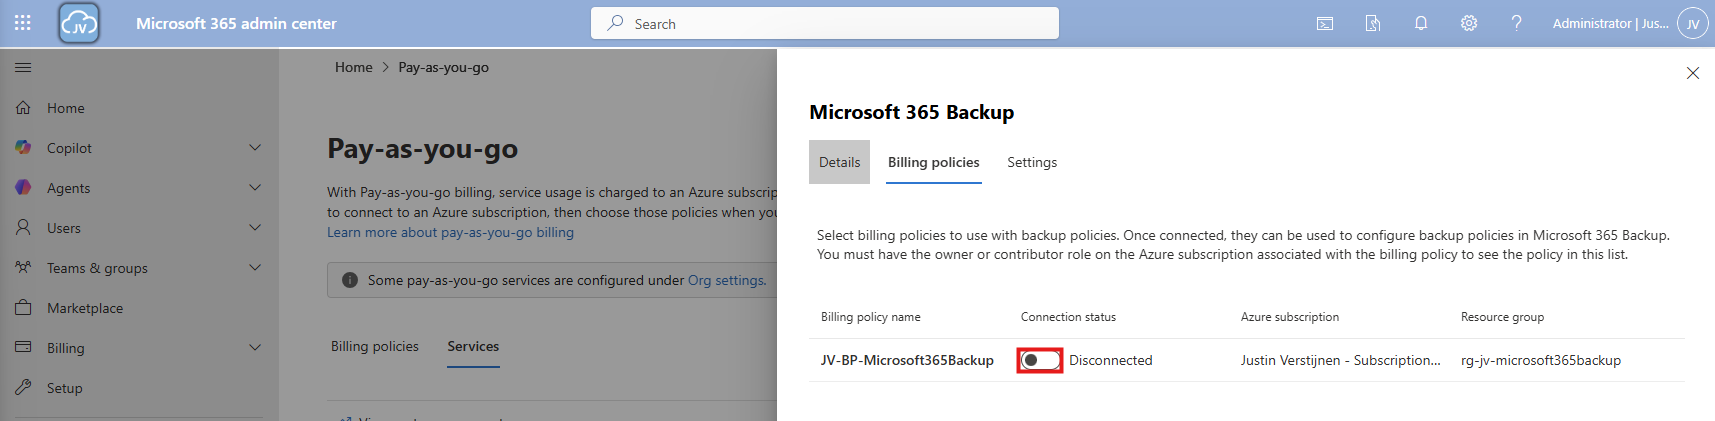
After enabling this and saving, the service is now linked to your billing policy.

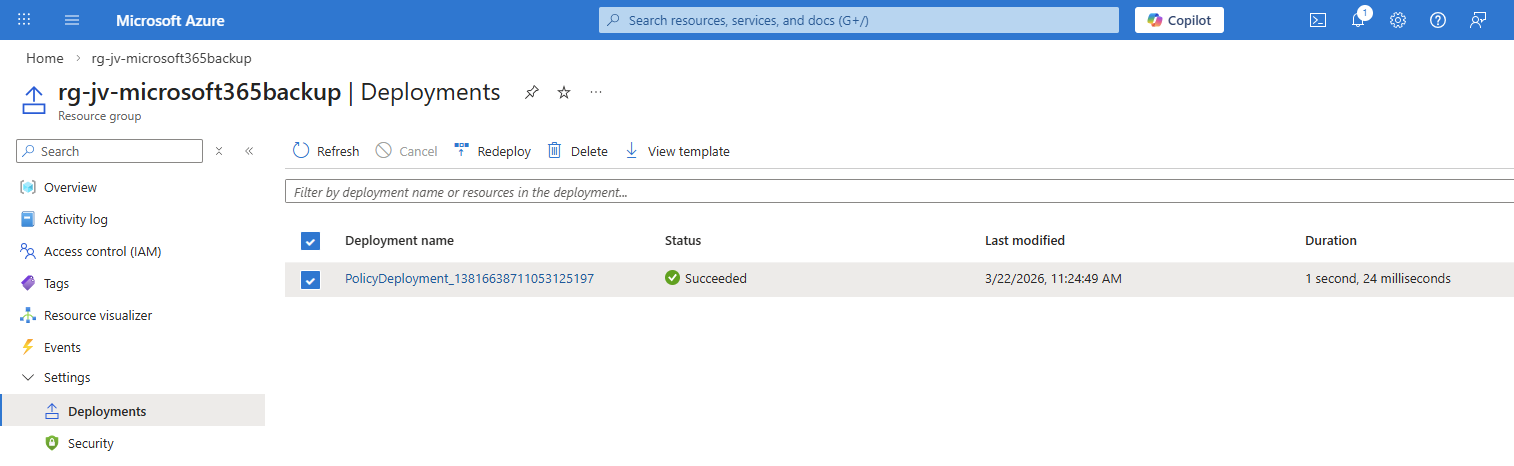
And as we can see in Azure, a policy is now deployed to our resource group:
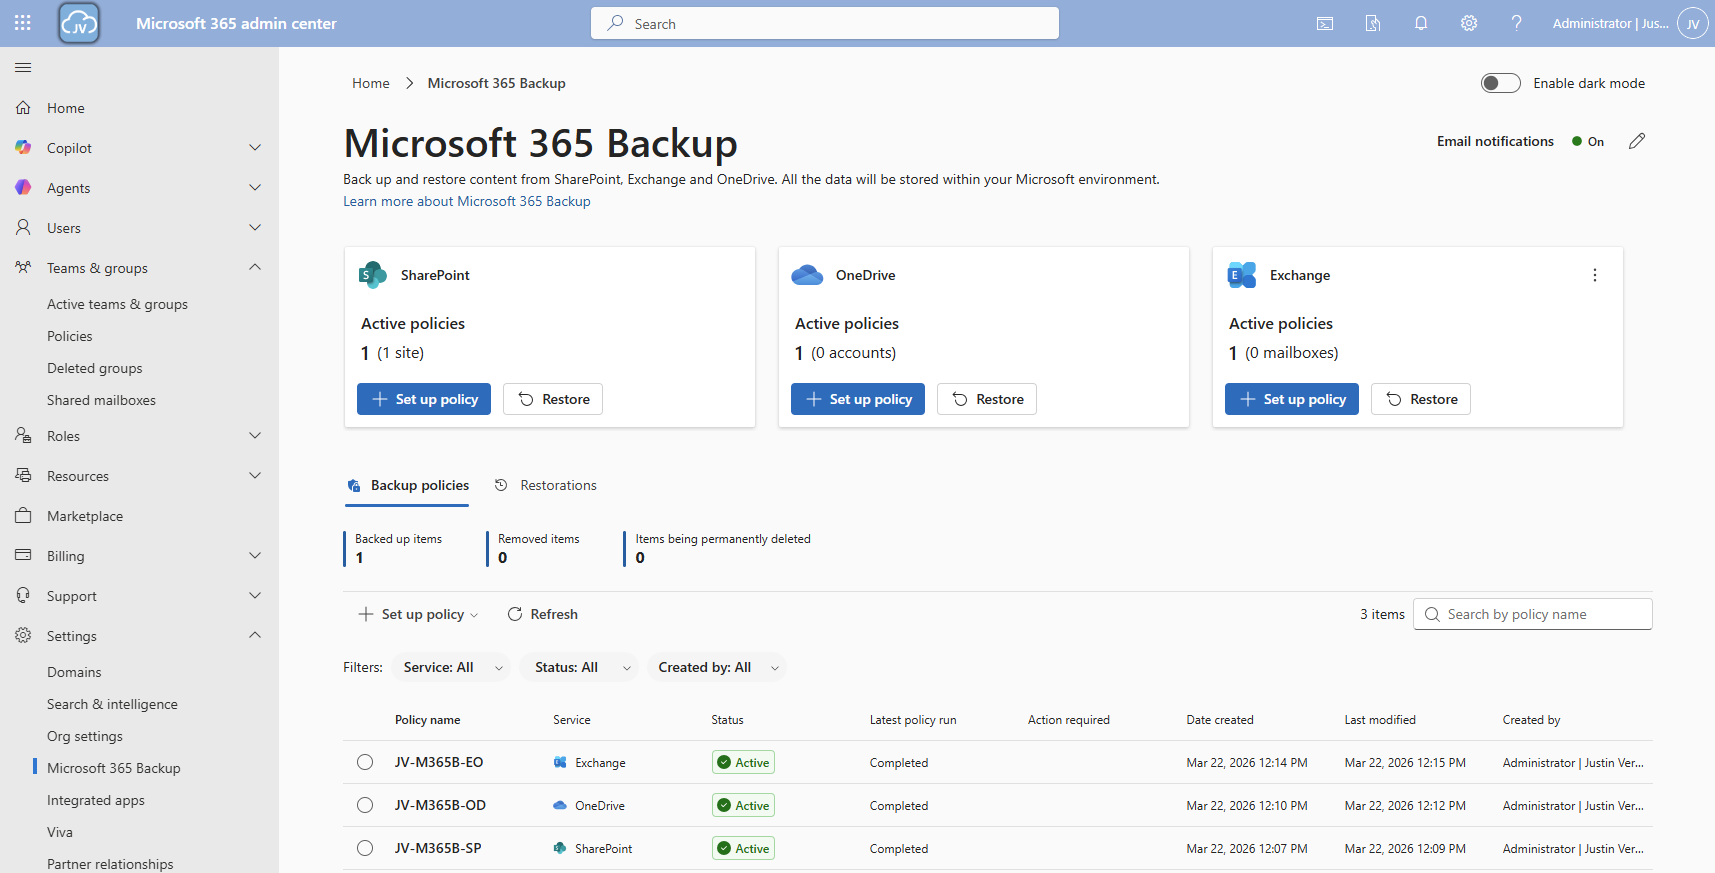
Step 4: Configure Microsoft 365 Backup for SharePoint
Now that we have connected the service to our Azure subscription, we actually enabled the service but without any configuration. By going again to the Microsoft 365 Backup blade, we will be shown this:
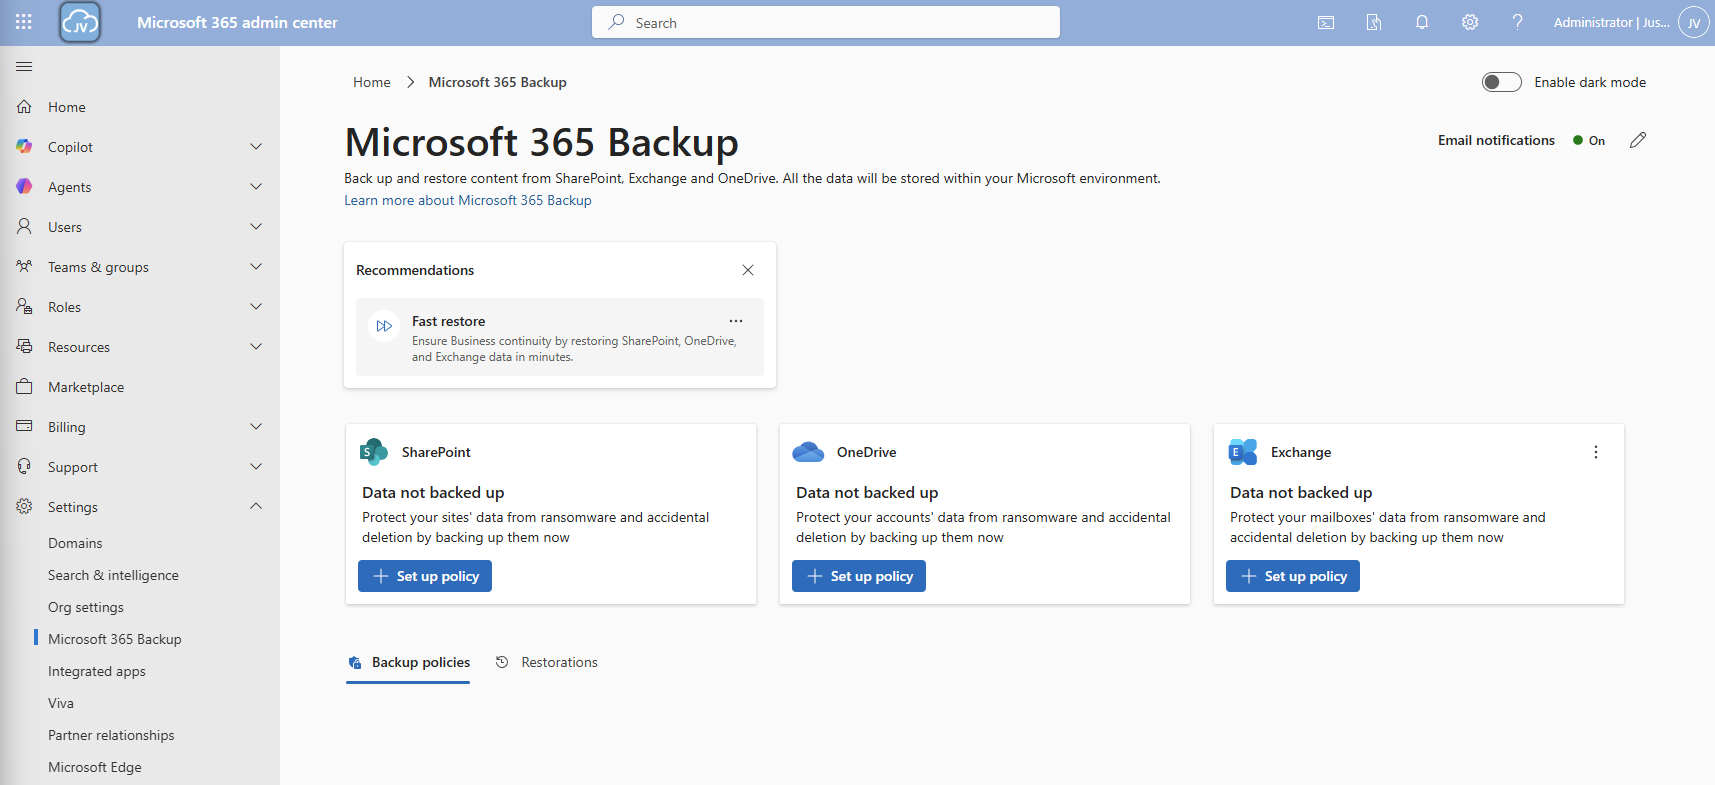
We will first configure a policy for SharePoint. Click on “+ Set up policy”. After that, click Next on the SharePoint backup policy page.

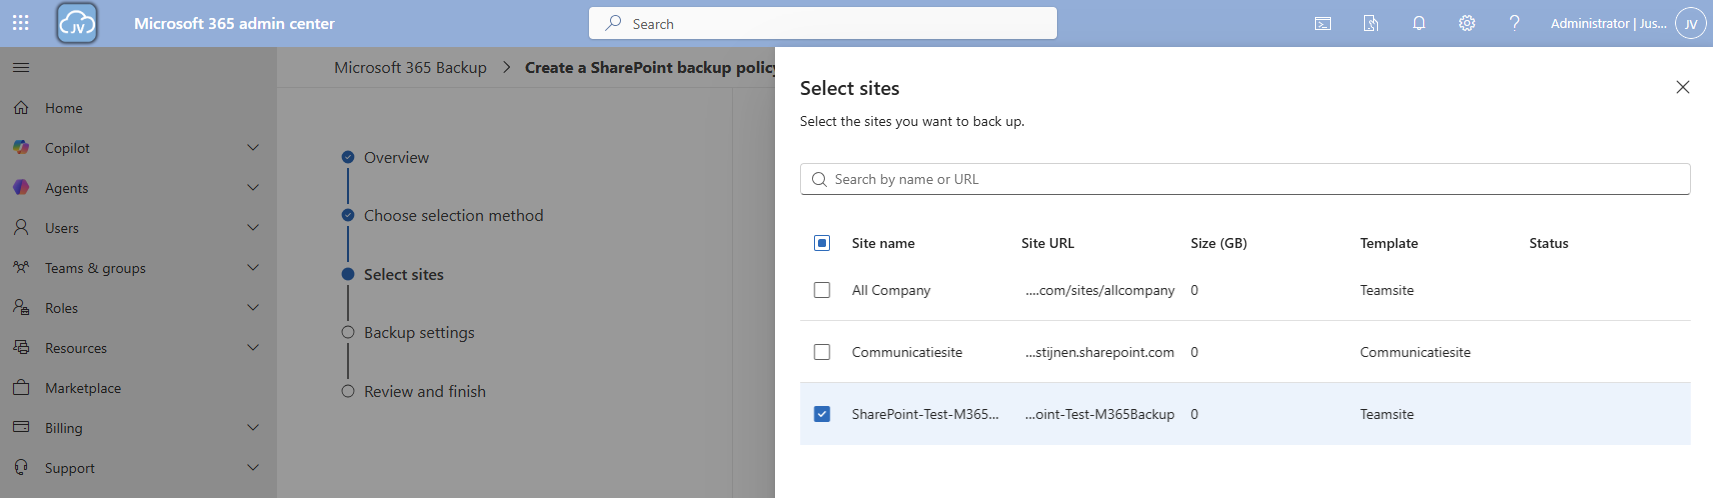
You can use the “filters” option, but you always need to add new sites manually. This is not a dynamic option. Therefore, the “Individual” option is more easy.
Here we can select how we want to select our SharePoint sites. I will use the “Individual” option here. Then select the sites you want to backup.
Then proceed to the “Backup settings” and give your policy a name.
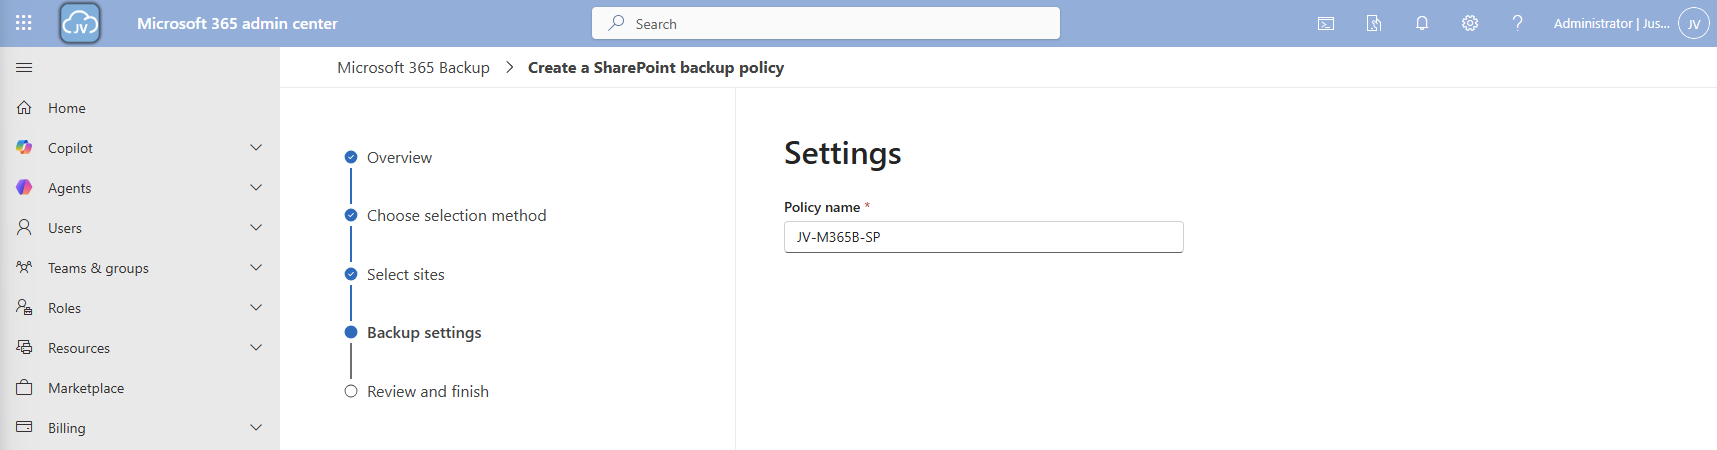
Then finish the wizard. The policy will directly start backing up your data:

Step 5: Configure Microsoft 365 Backup for OneDrive
Now we can configure the backup for OneDrive accounts. Click on the “+ Set up policy” button under “OneDrive”. Proceed to the wizard.
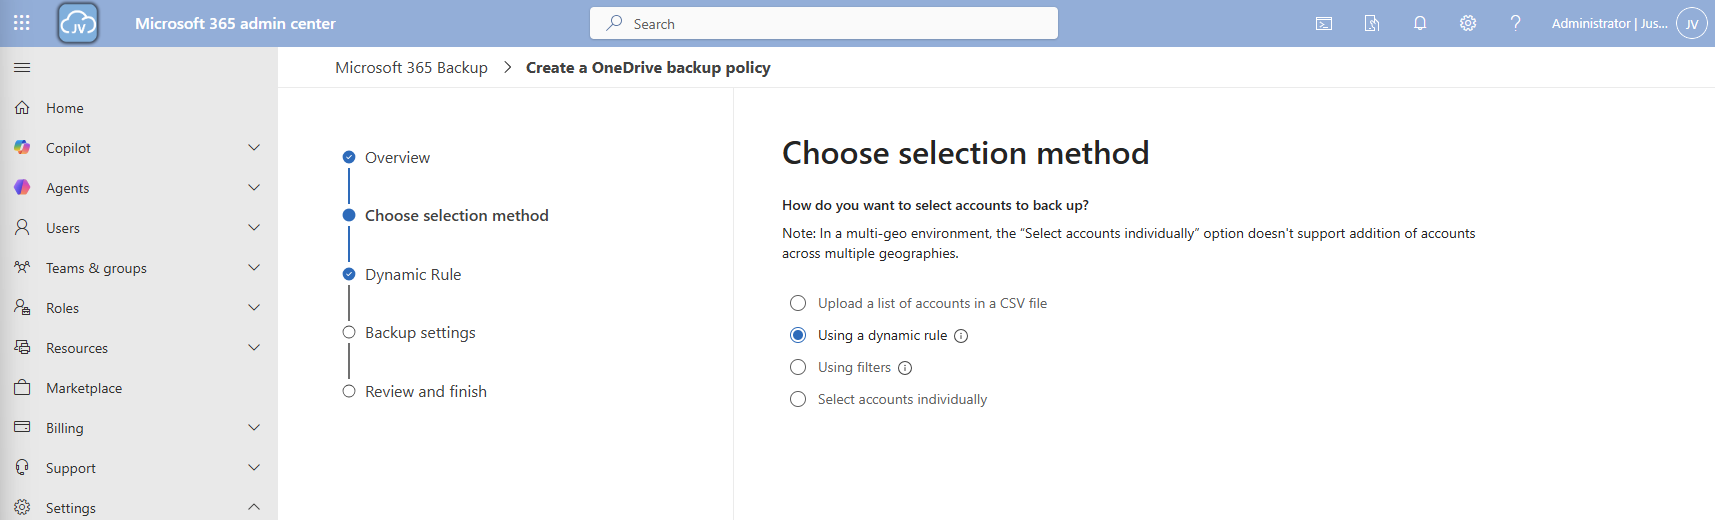
At the “Choose selection method” select the “Dynamic rule” option, as we want to automatically backup new accounts instead of changing the scope every time.
We can select two types here:
- Distribution lists
- Security groups

In my case, I created a dynamic security group containing all users. Then click “Next”.

Give the policy a name and finish the wizard.
Now we have 2 policies in place:

Step 6: Configure Microsoft 365 Backup for Exchange
Now we can configure the backup for Exchange accounts. Click on the “+ Set up policy” button under “Exchange”. Proceed to the wizard.
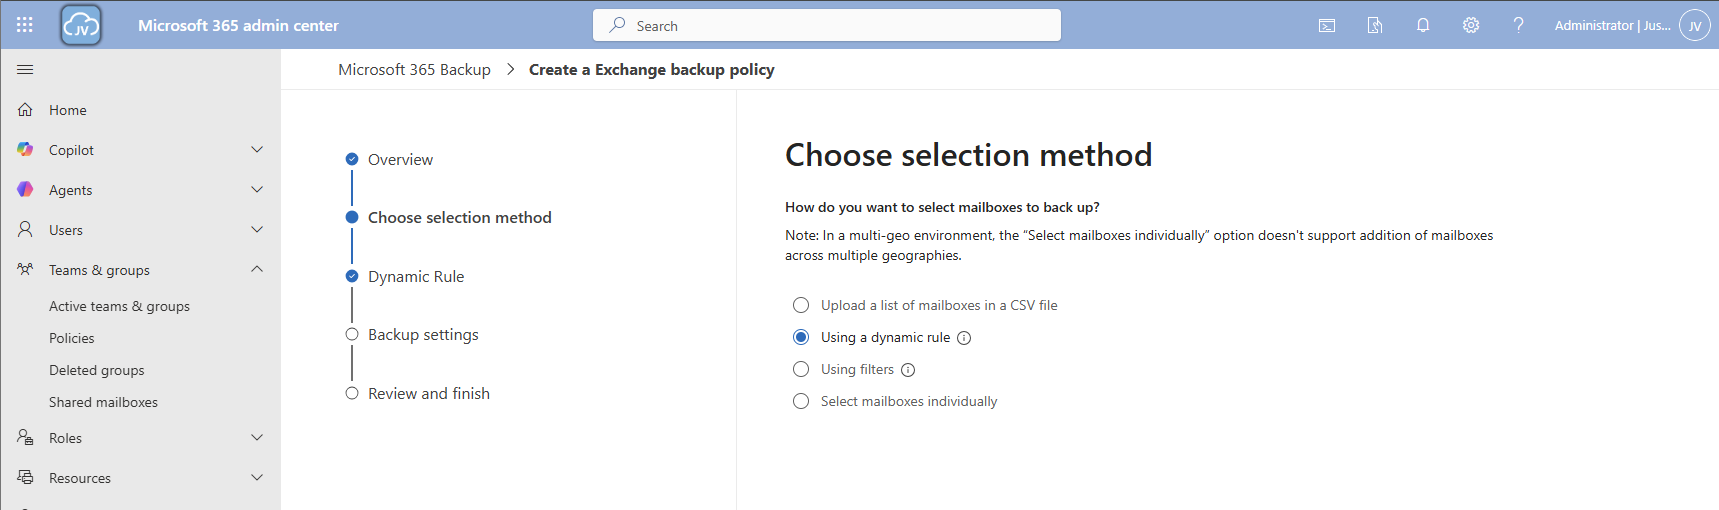
I once again use the dynamic rule option, to actually backup newly created accounts.
Here we can select two types of user sources similar to the OneDrive accounts:
- Distribution lists
- Security groups
In my case, I created a dynamic security group containing all users. Then click “Next”.
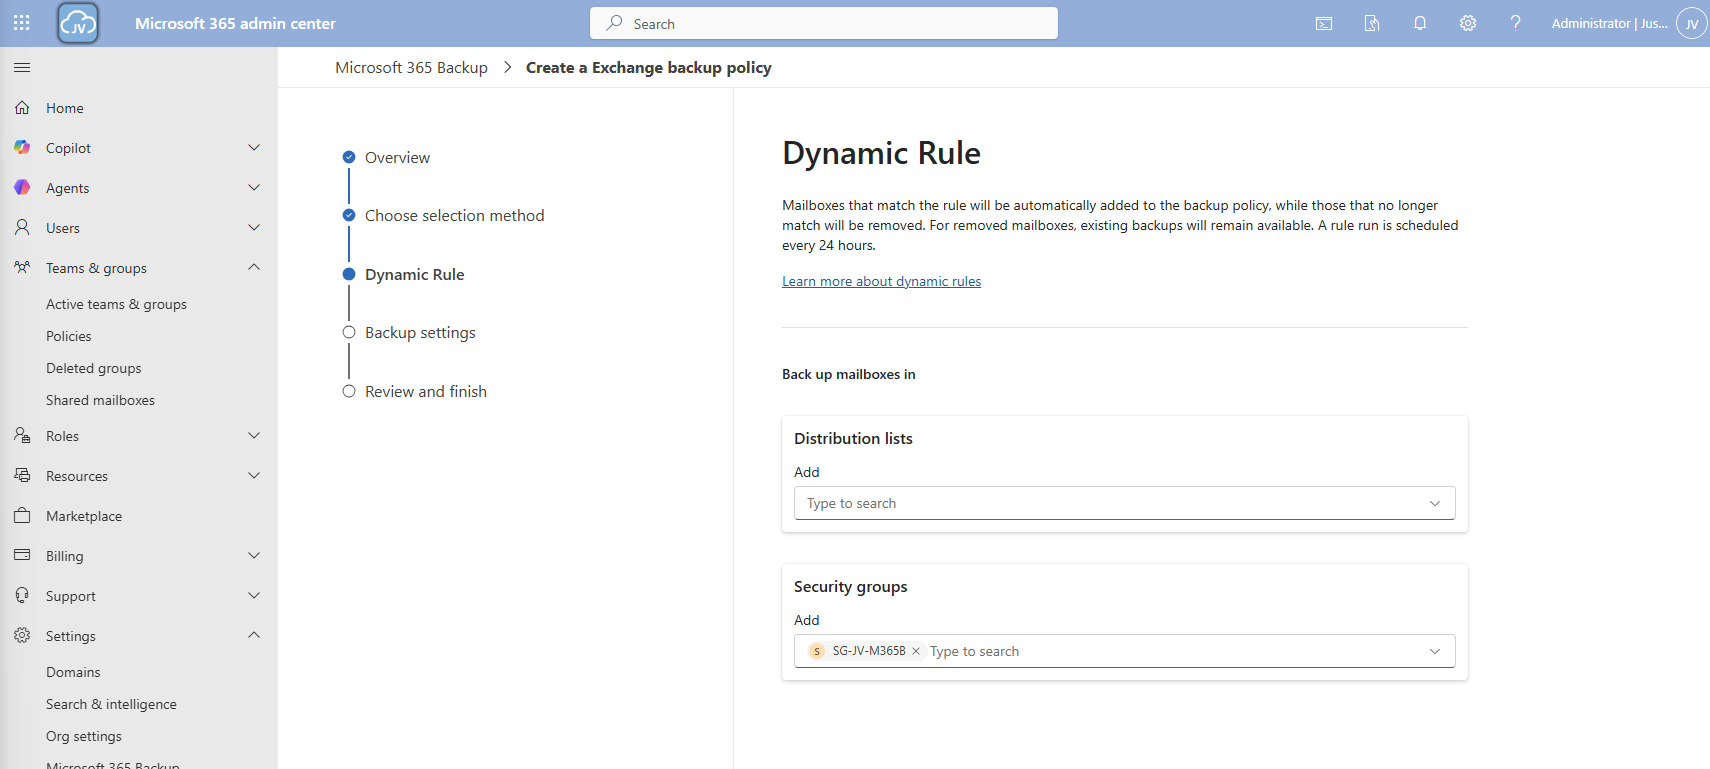
Click “Next”.
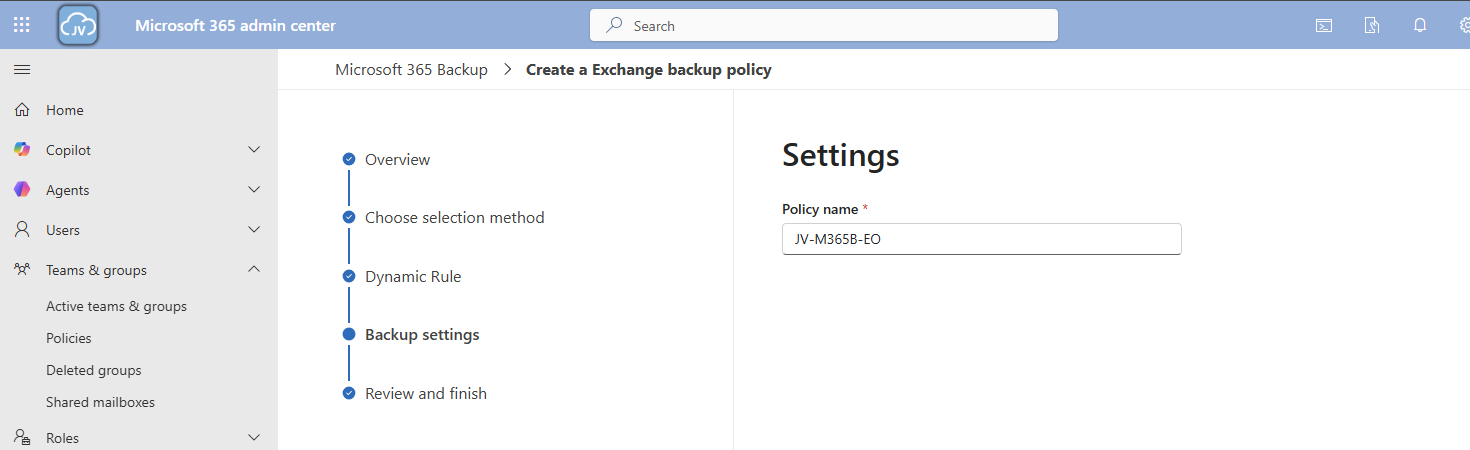
Give the policy a name and finish the wizard.
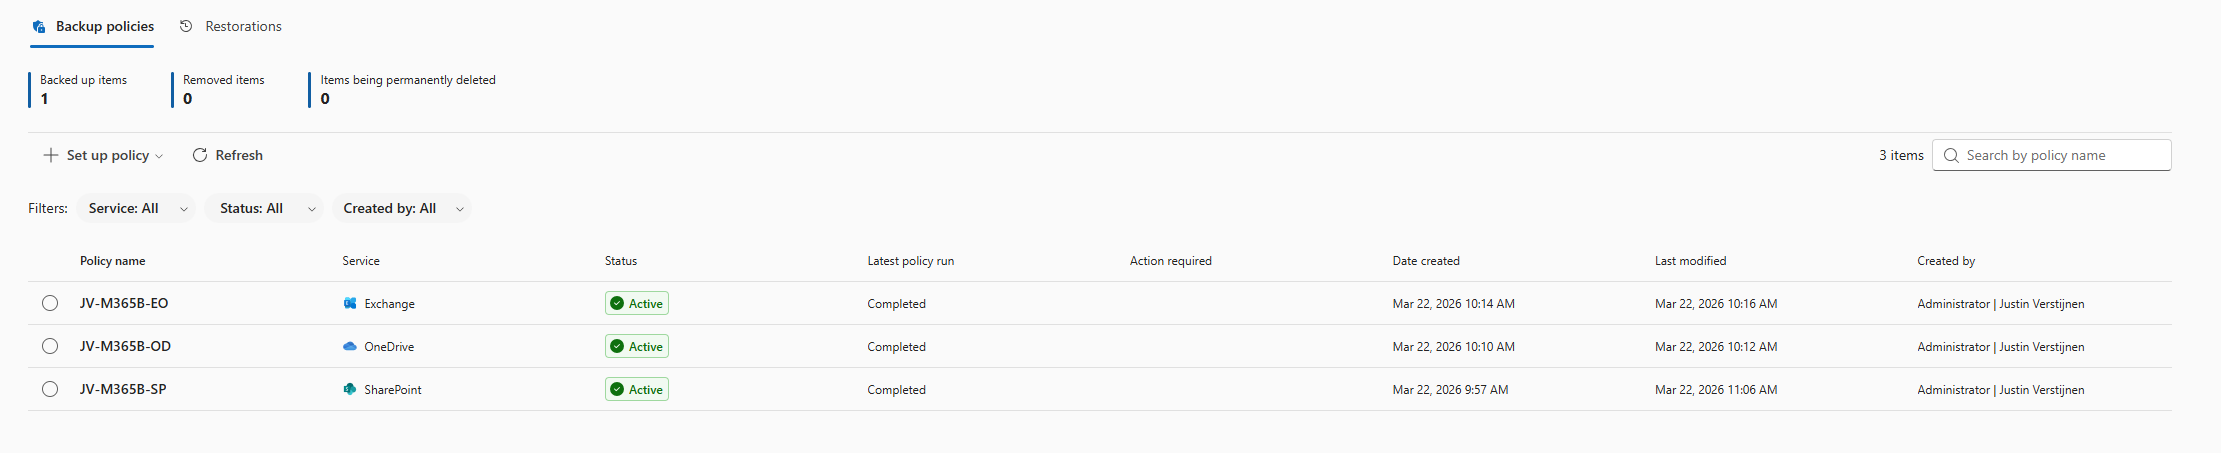
Now we have 3 policies in place:
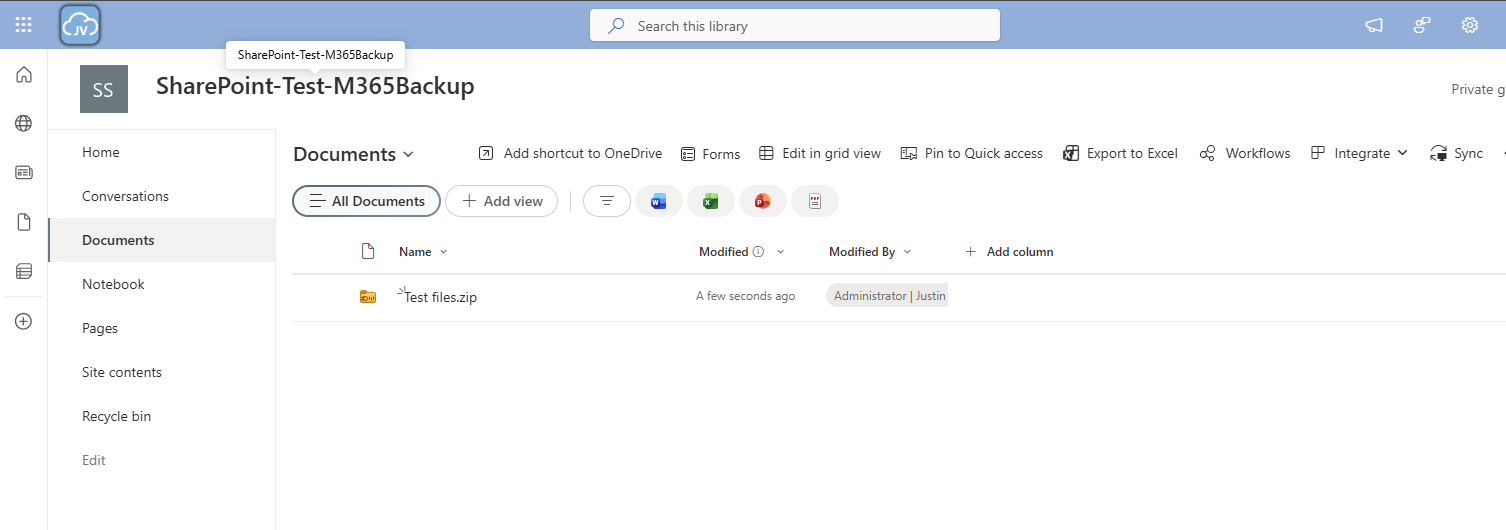
Step 7: Restoring a full SharePoint Site
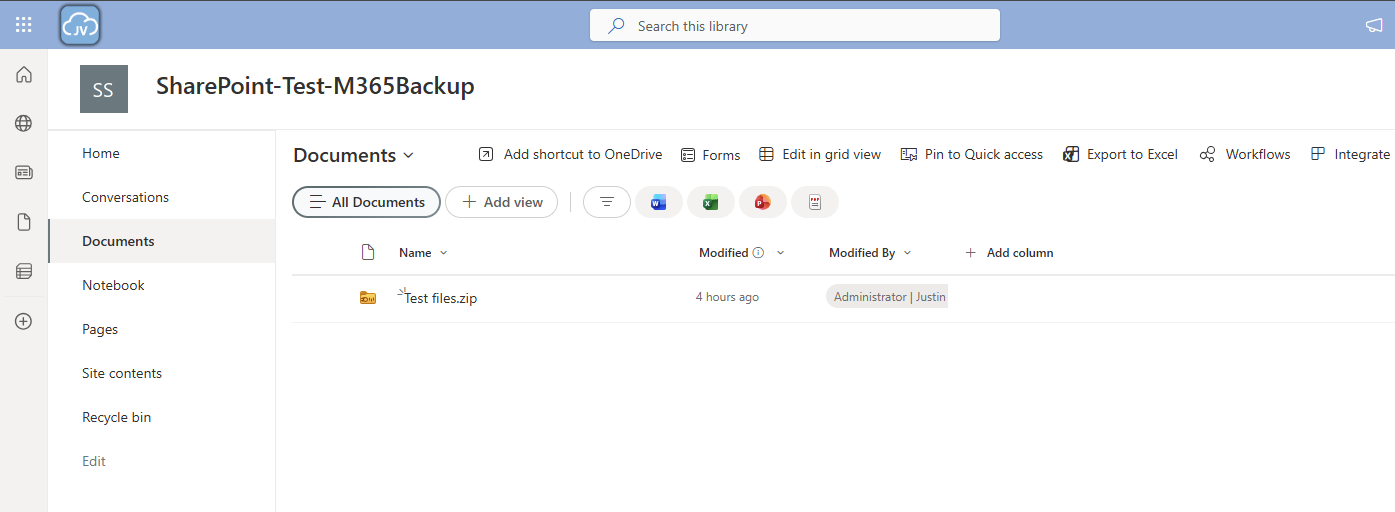
To actually test the backup method, we will place a file on the SharePoint site and restore the site. I placed a .zip file of around 200MB on the site I just selected and wait for Microsoft 365 Backup to backup the site:
After around 10 minutes, this starts backing up:

And waiting for a few minutes will ensure the task has been completed:

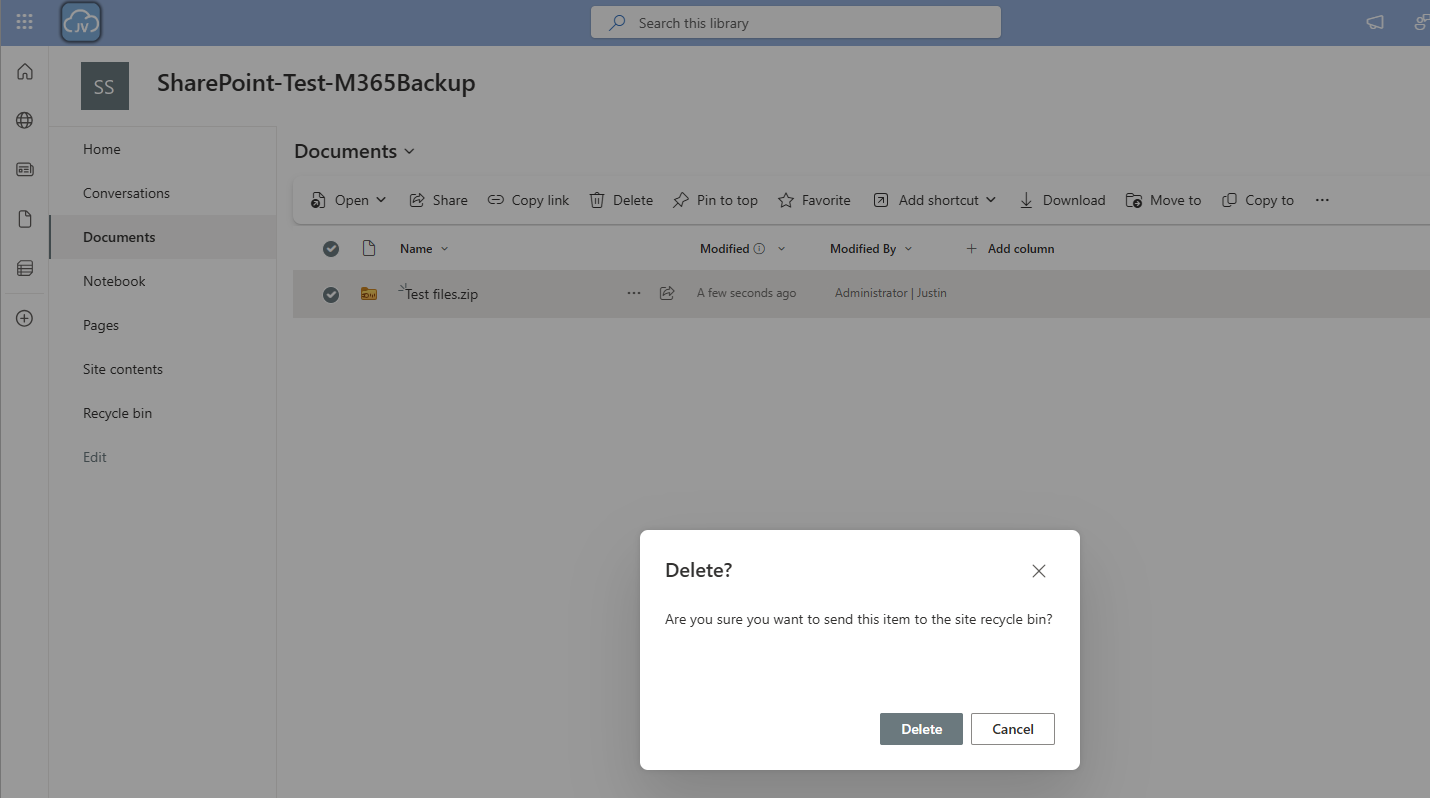
Now we will delete the file from the SharePoint site:

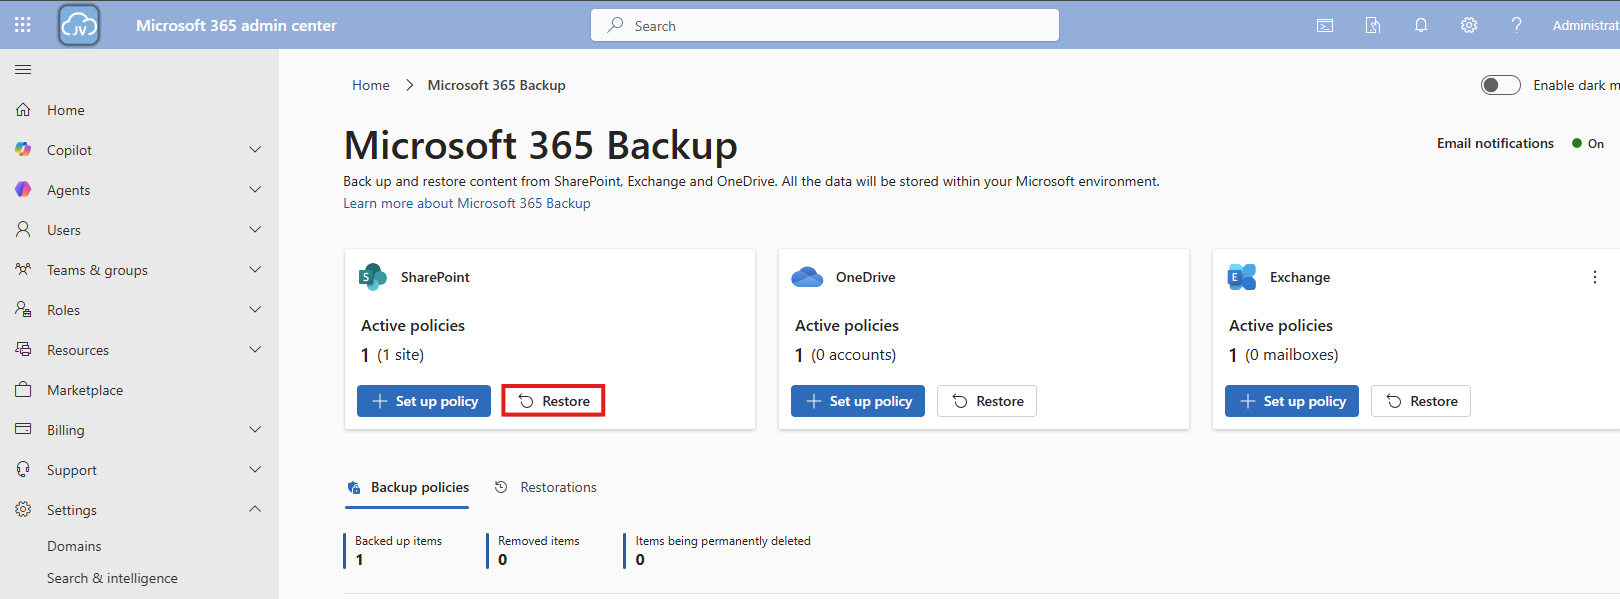
And let’s head back to Microsoft 365 Backup to actually restore the file. Under “SharePoint” I clicked on “Restore”
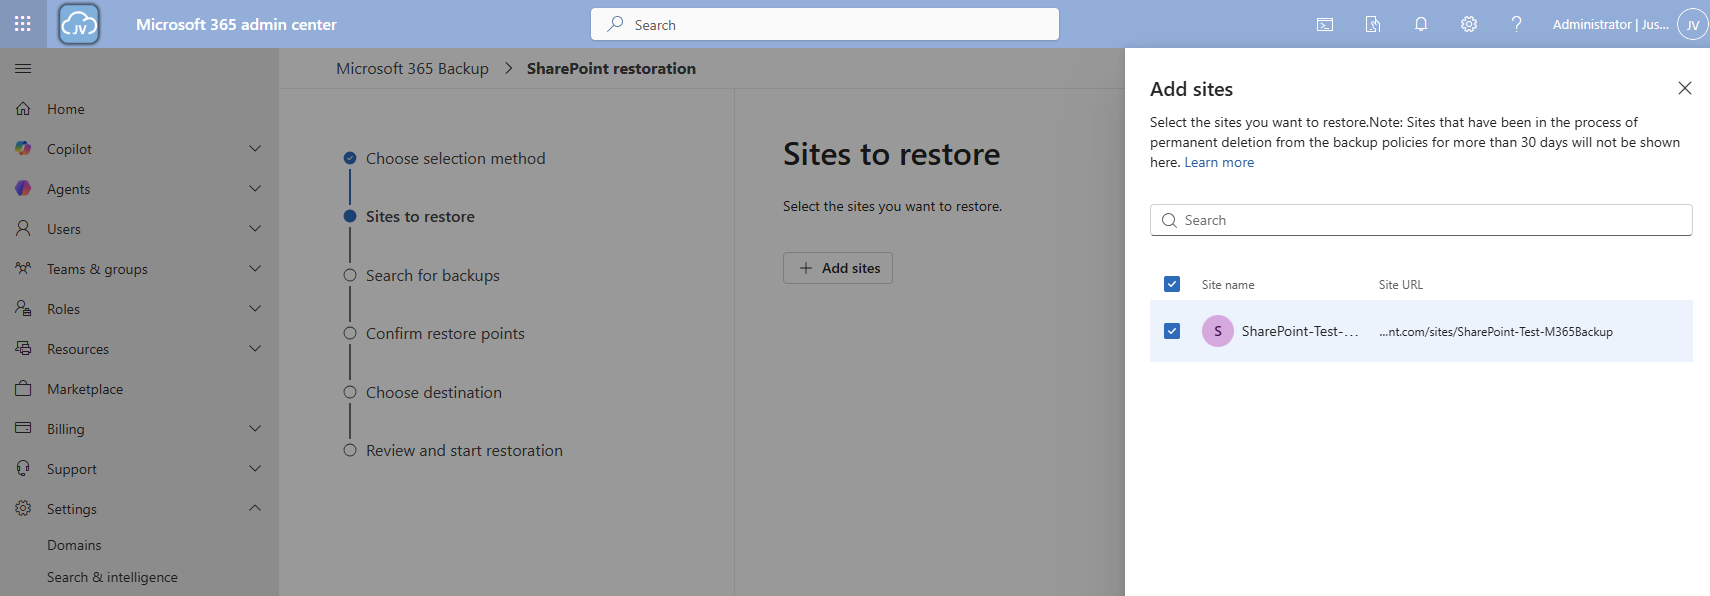
Follow the wizard by selecting your site where you want to recover files
Select your desired restore point, which will be obviously before any error or problem occurred. In my case, I deleted the file after 10:30 AM.
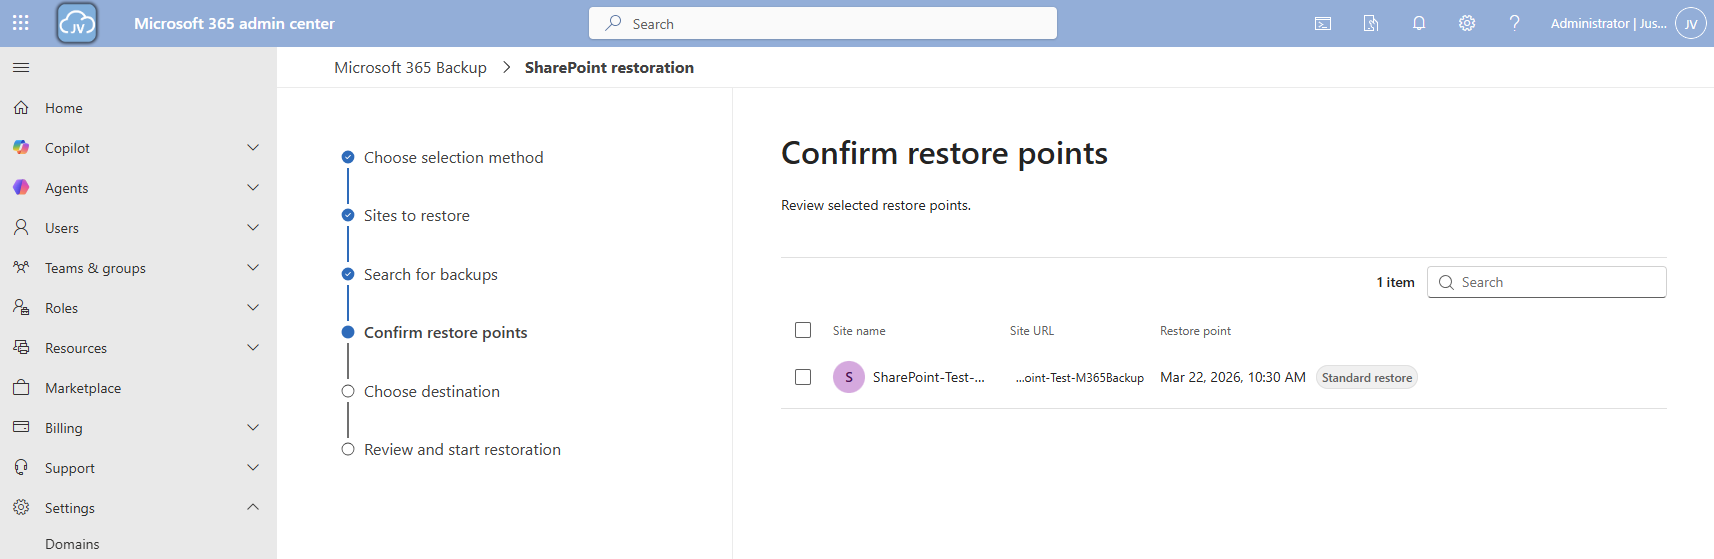
I selected this restore point and clicked “Next”.
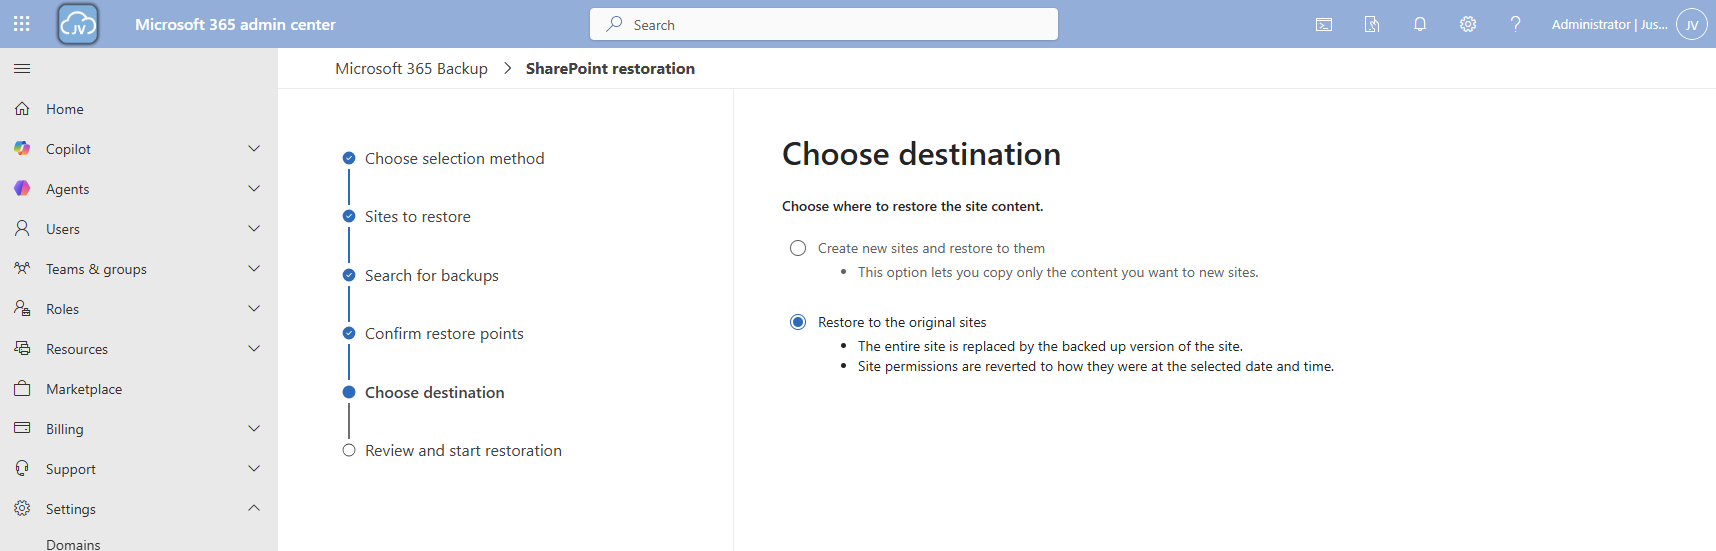
Now you can select to create a new copy SharePoint site with all the filed in it or to just restore it to the current site.
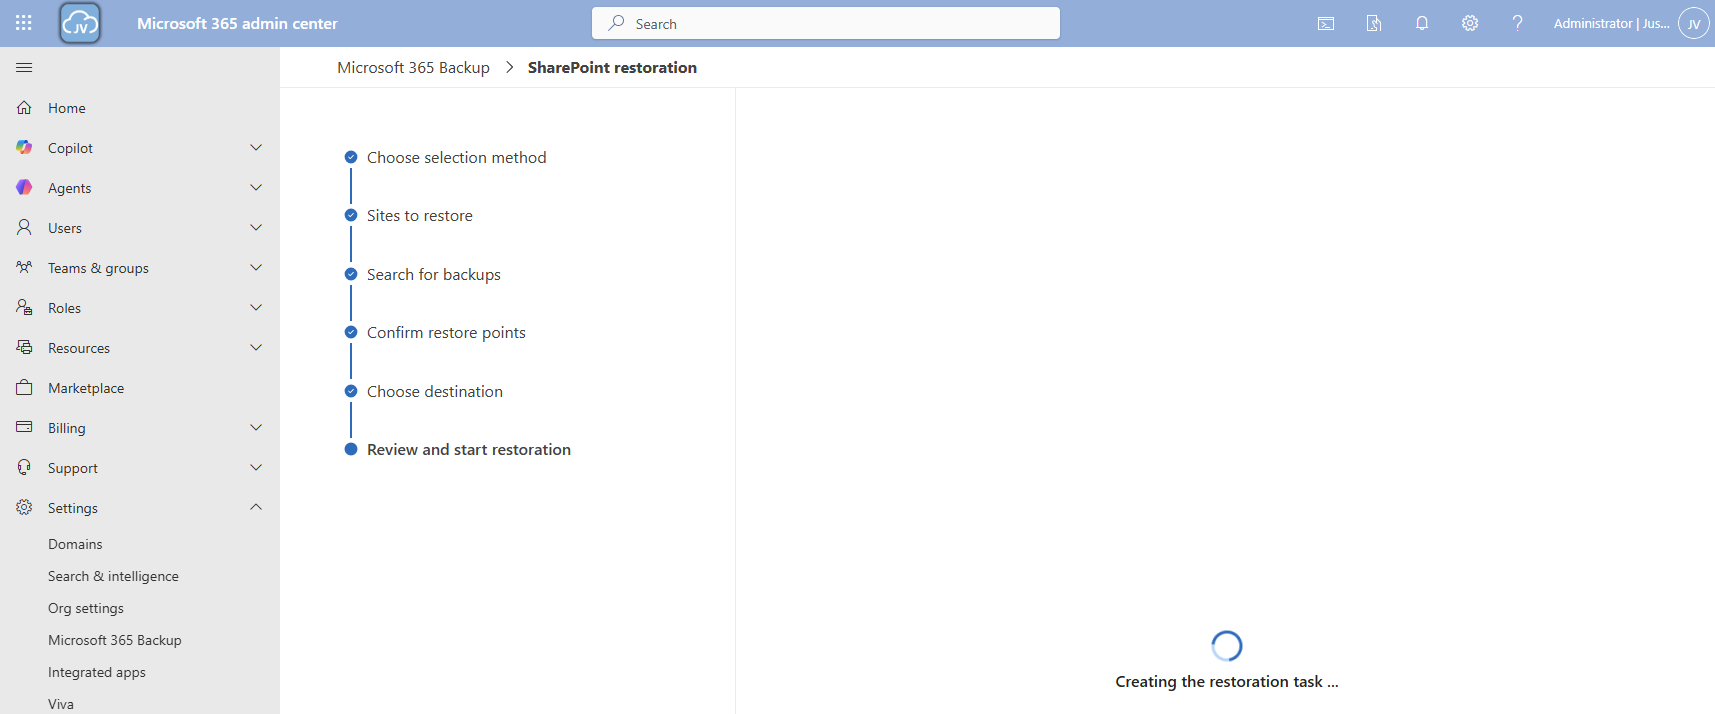
Now the restore action will be executed. In my case this took a while. Actually, around 3 hours:

And as you can see, the file is back:
Step 8: Restoring a single file on OneDrive
Because we want also be able to restore a single file, let’s try to restore one single file in a OneDrive folder either.
Once again the reminder that your account needs these permissions to perform single-file restore actions for OneDrive:
- SharePoint Backup Administrator
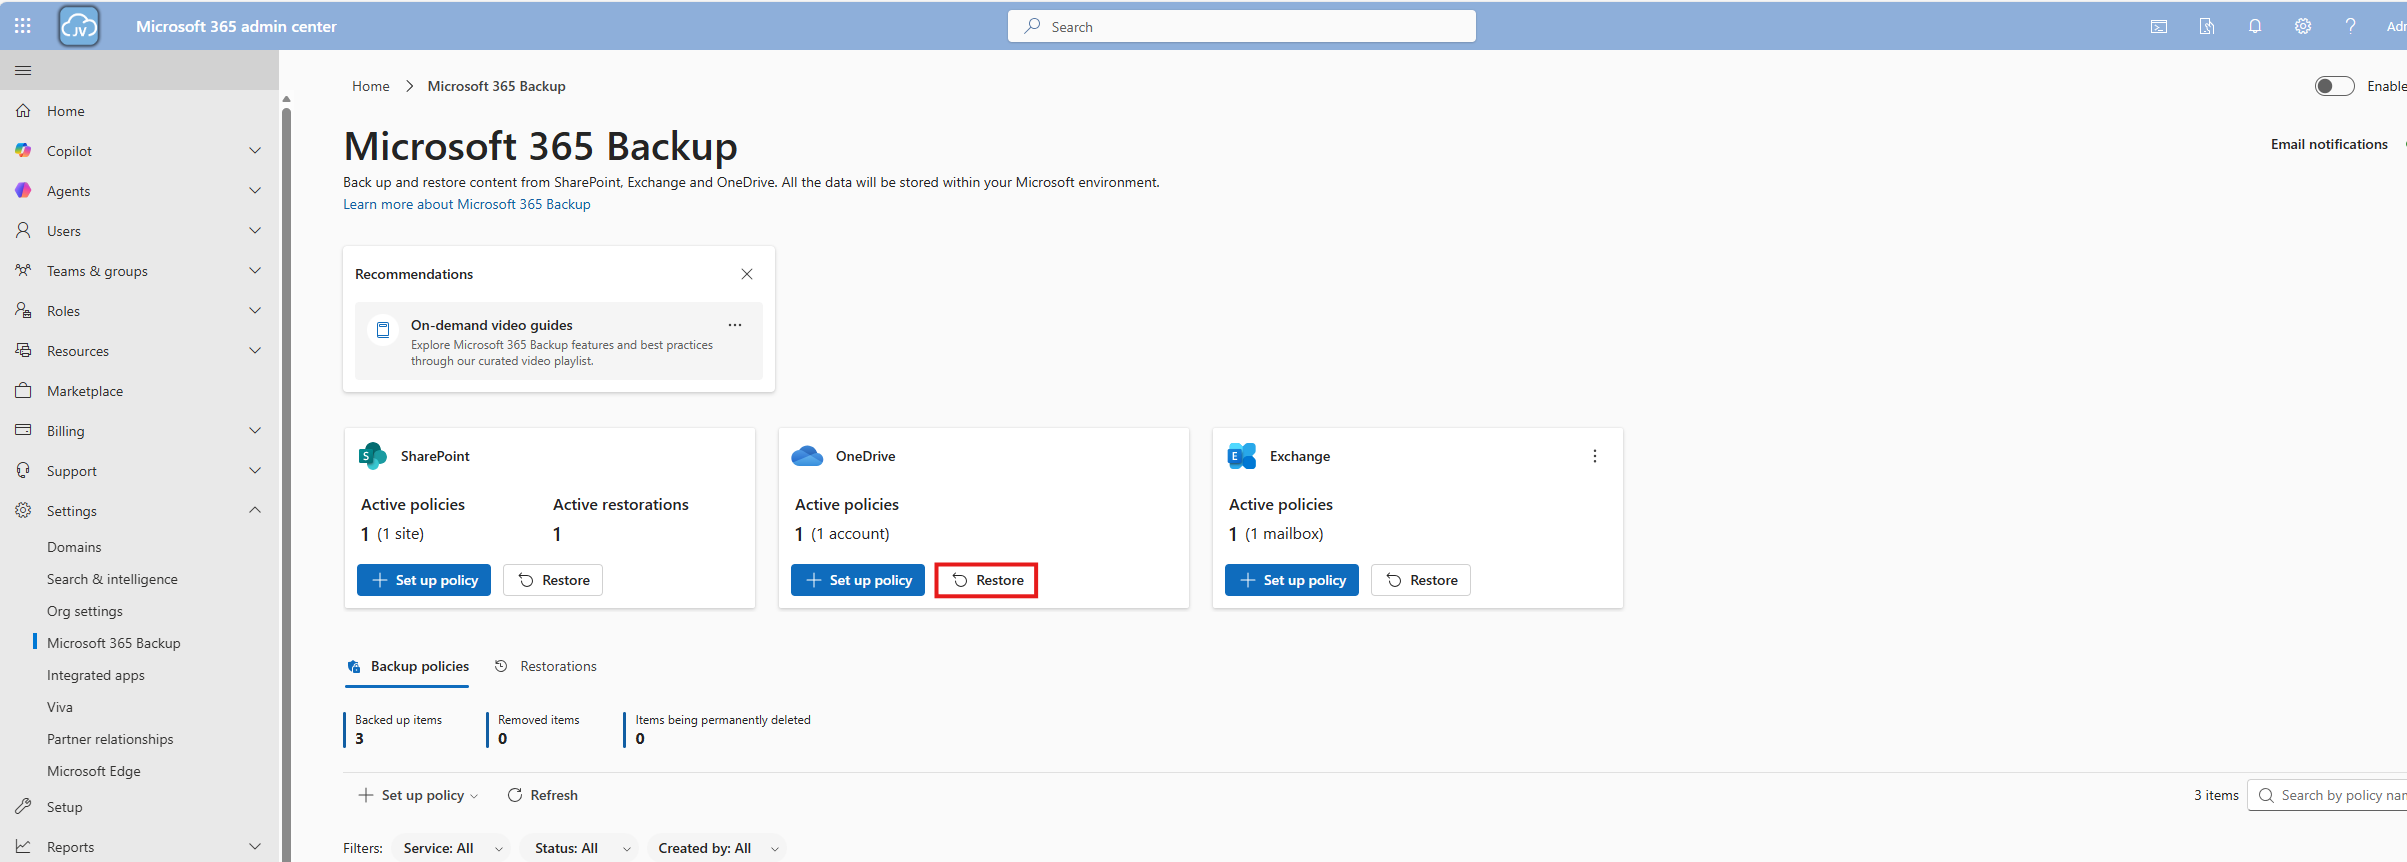
In the Microsoft 365 Backup pane, under “Onedrive” click on “Restore”:
Use the “Restore specific files or folders” option.
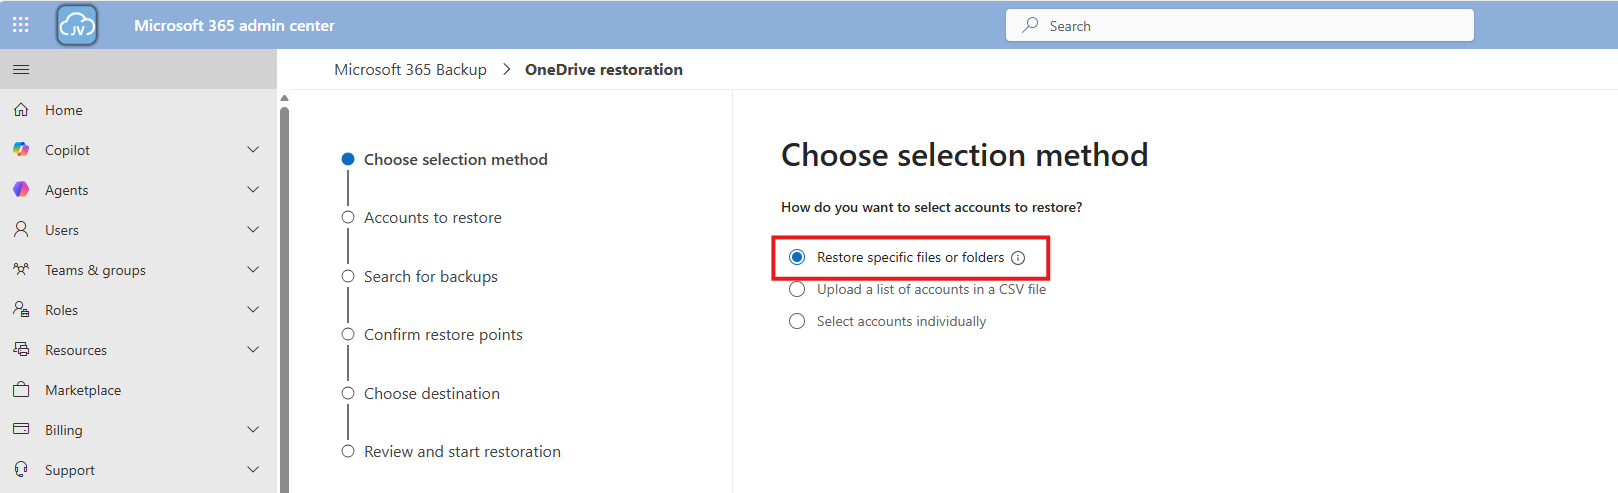
Then navigate to the account, desired restore point and file/folder. This would be pretty straight forward.
For the demonstration, I will delete the top folder (called Post 1462 - SPF-DKIM-DMARC), containing some files of an earlier blog post (around 40MB):
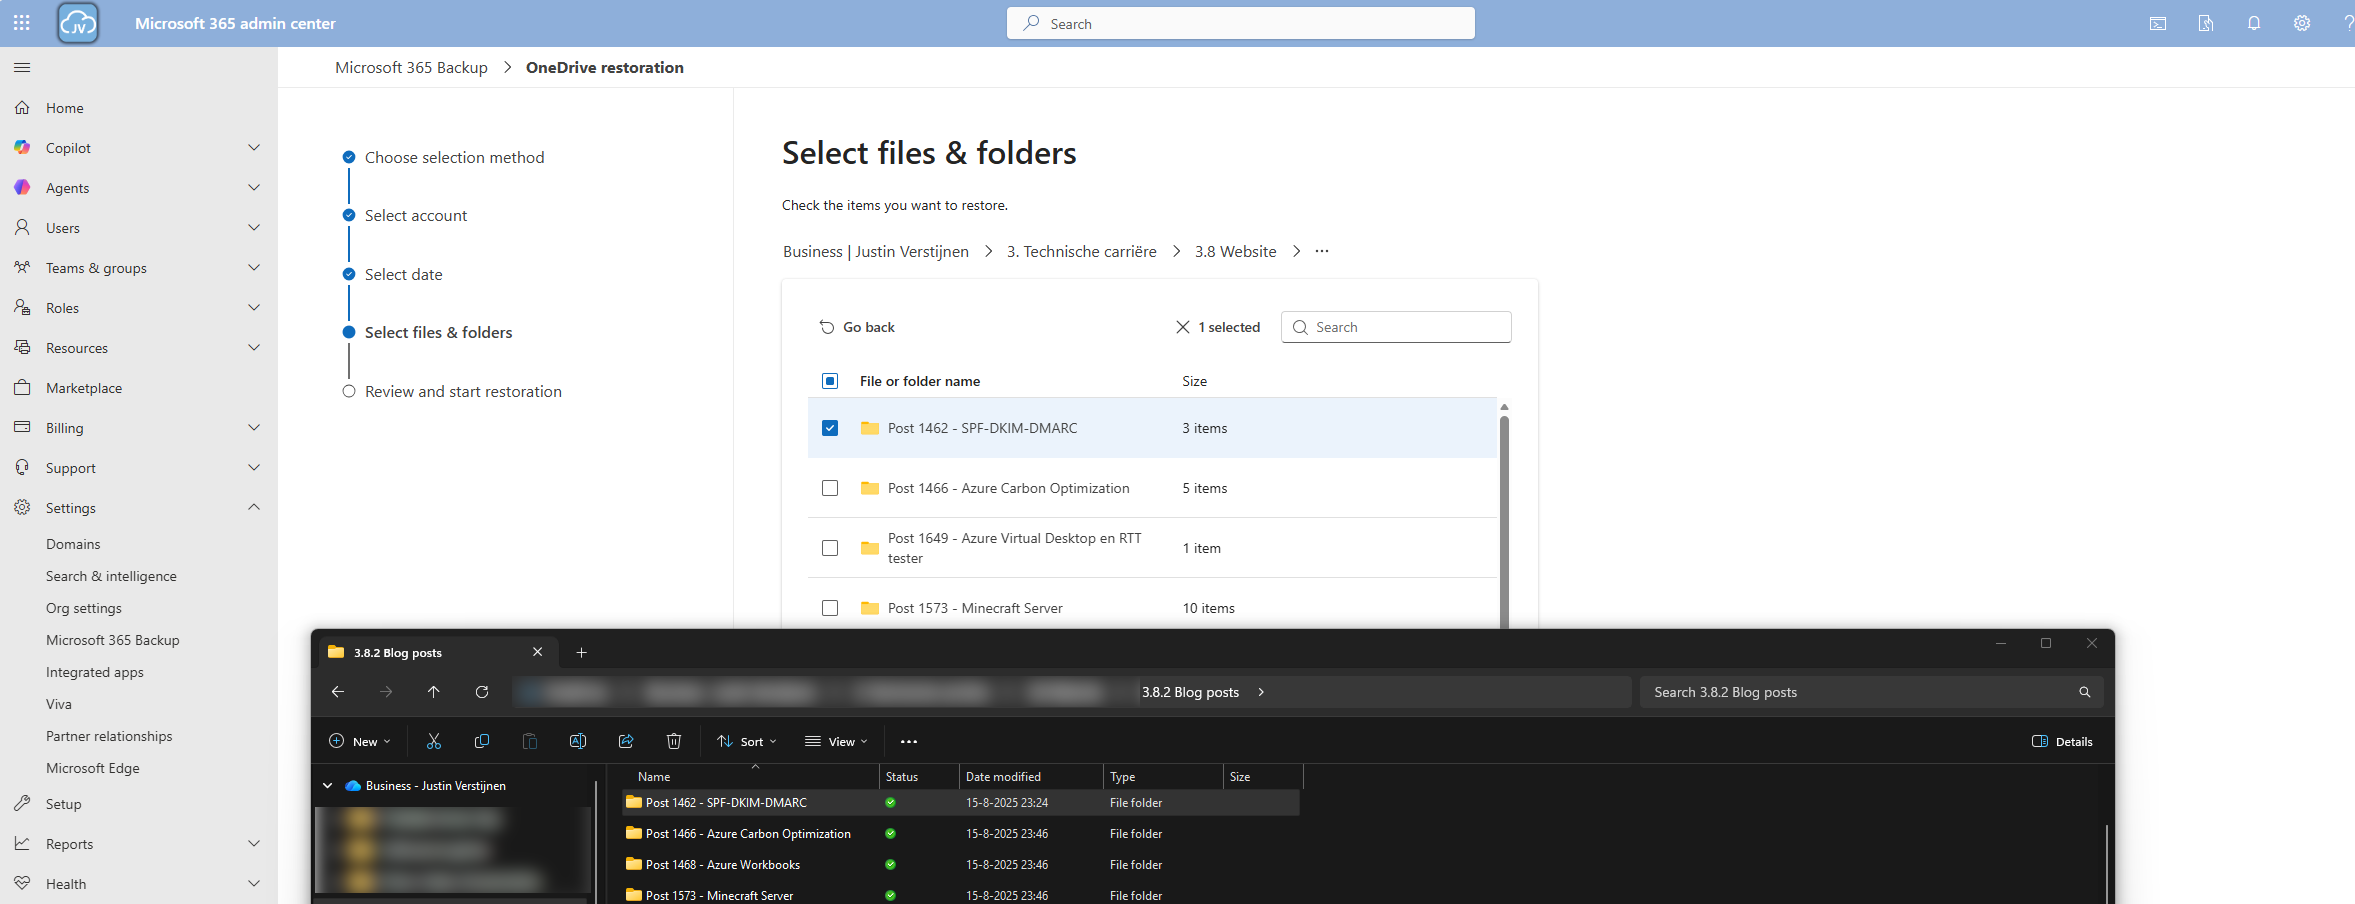
Thats gone.

Now let’s resume the restore action in the Microsoft 365 Backup portal.
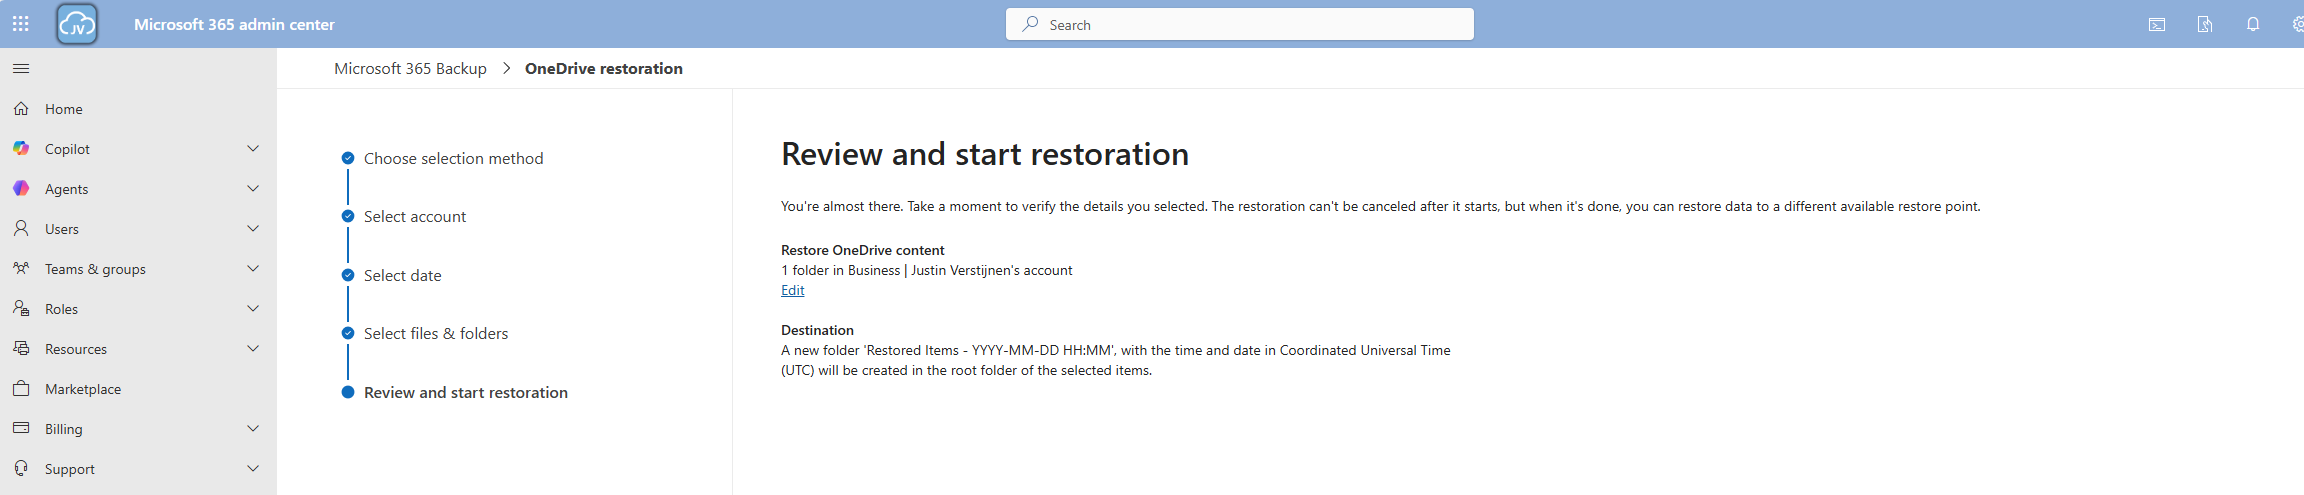
And the portal will inform us the restoration task has been started.

Now we can review the status of the restore action under the tab “Restorations”.
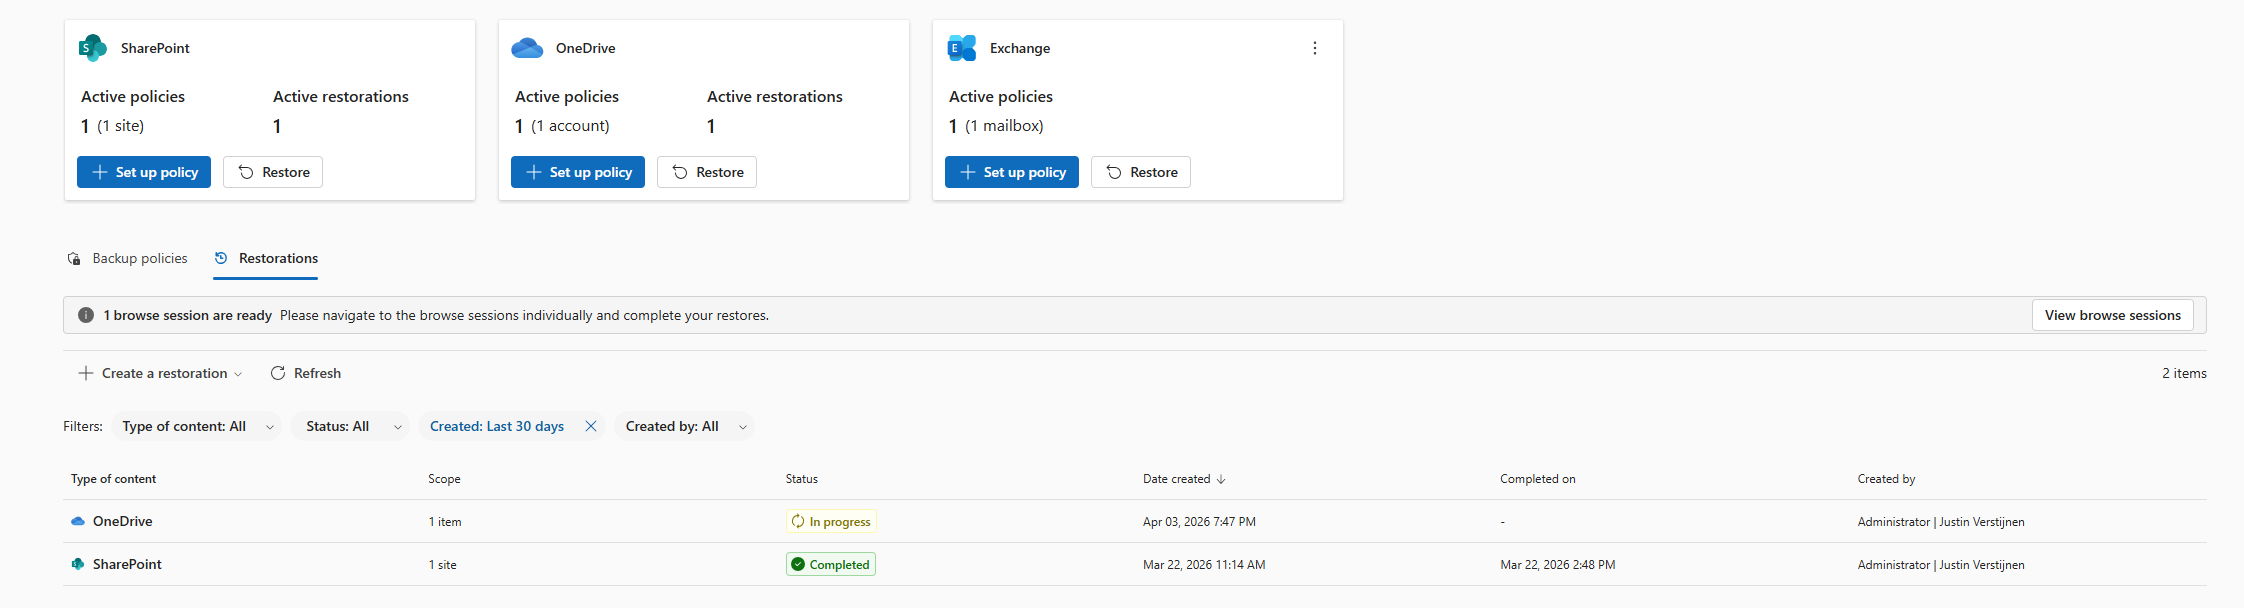
After a minute, the service has placed our files in a new folder in the root of the OneDrive folder, allowing us to manually place back the files. This is by design to prevent data loss.

And the folder contains our selected folder:

Downsides of Microsoft 365 Backup
As I researched this solution, I wanted to know the upsides and downsides of this solution. As no solution is perfect, you have to align with what you want and need for your workloads. I came with the following downsides of Microsoft 365 Backup:
- SharePoint sites must be selected manually, even when using dynamic filters
- Restore actions of a complete site are a bit slow
- Pricing is based on usage, where price per user would be more predictable
- This can be cheaper than 3rd party solutions but also more expensive
- As this is an integrated solution, this can be seen (by regulatory compliance) as single point of failure. Locked out of your tenant means no access to backups either
Summary
Microsoft 365 Backup is a great solution for organizations and people that need more restore options than the default recycle bin (93 days) and versioning. It greatly integrates with your Microsoft 365 environment and is easy to setup, using your current Azure subscription as billing method.
I honestly see this as a last resort, when actions are too destructive to rely on the built in recycle bin options where you want to restore a complete account/mailbox/site. If within 93 days of deletion, the recycle bin would be a much faster option. But its a great feature to extend the retention from 93 days to 365 days for organizations who need this.
Thank you for visiting this page and I hope it was helpful.
Sources
These sources helped me by writing and research for this post;
- https://learn.microsoft.com/en-us/microsoft-365/backup/backup-pricing?view=o365-worldwide
- https://learn.microsoft.com/en-us/microsoft-365/backup/backup-setup?view=o365-worldwide
- https://learn.microsoft.com/en-us/microsoft-365/backup/backup-restore-data?view=o365-worldwide&tabs=onedrive
End of the page 🎉
You have reached the end of the page. You can navigate through other blog posts as well, share this post on X, LinkedIn and Reddit or return to the blog posts collection page. Thank you for visiting this post.
If you think something is wrong with this post or you want to know more, you can send me a message to one of my social profiles at: https://justinverstijnen.nl/about/
If you find this page and blog very useful and you want to leave a donation, you can use the button below to buy me a beer. Hosting and maintaining a website takes a lot of time and money. Thank you in advance and cheers :)
The terms and conditions apply to this post.
Disable users' self service license trials
One day I came across an option in Microsoft 365 to disable the users’ self service trials. You must have seen it happening in your tenants, users with free licenses for Power Automate, Teams or Power BI. I will show you how to disable those and only let administrators buy and assign new licenses.
Why should you disable trial licenses?
You can disable self service trial licenses if you want to avoid users to use un-accepted apps. This could result in shadow-it happening in your environment.
Let’s say, your company uses Zoom to call with each other, and users are starting to use Microsoft Teams. Teams then is an application not accepted by your organization and users then should not be able to use it. If you give them the possibility, they will. This all of course assuming you don’t have paid licenses for Microsoft Teams.
How to disable self service purchases - GUI
To disable those purchases from happening in the GUI, open up Microsoft 365 admin center.
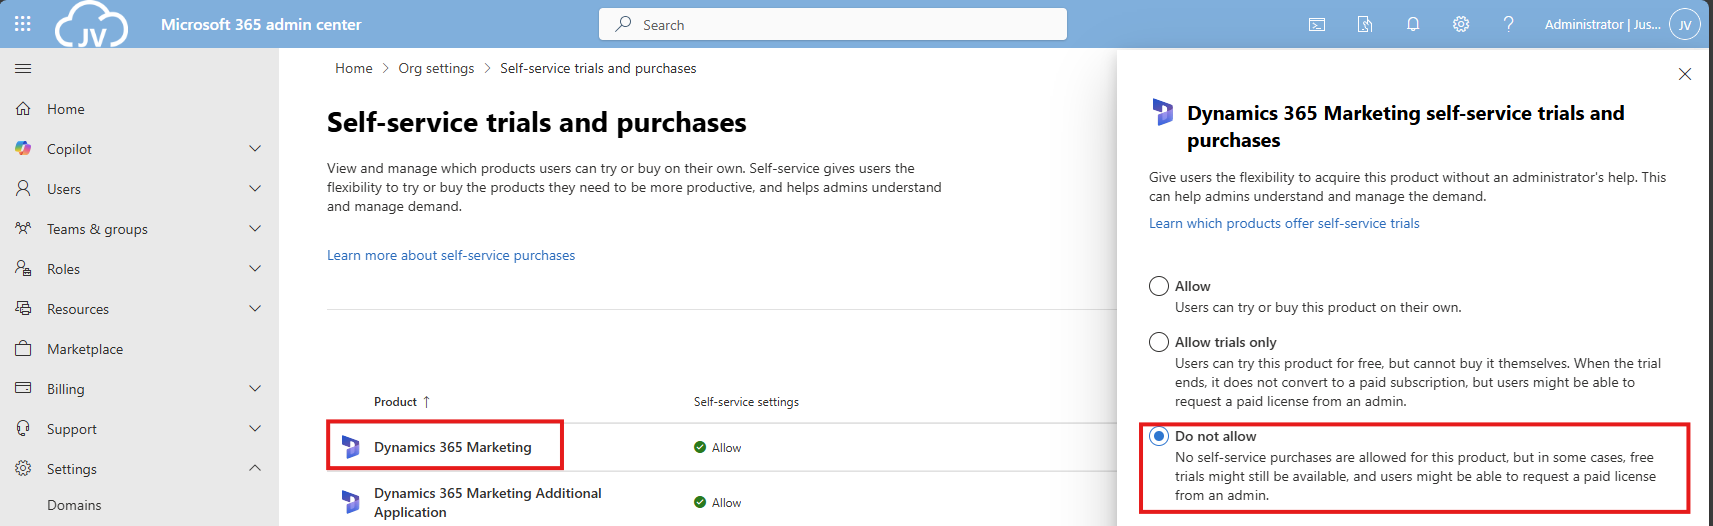
Then go to “Settings”, “Org settings” and then “Self-service trials and purchases”.

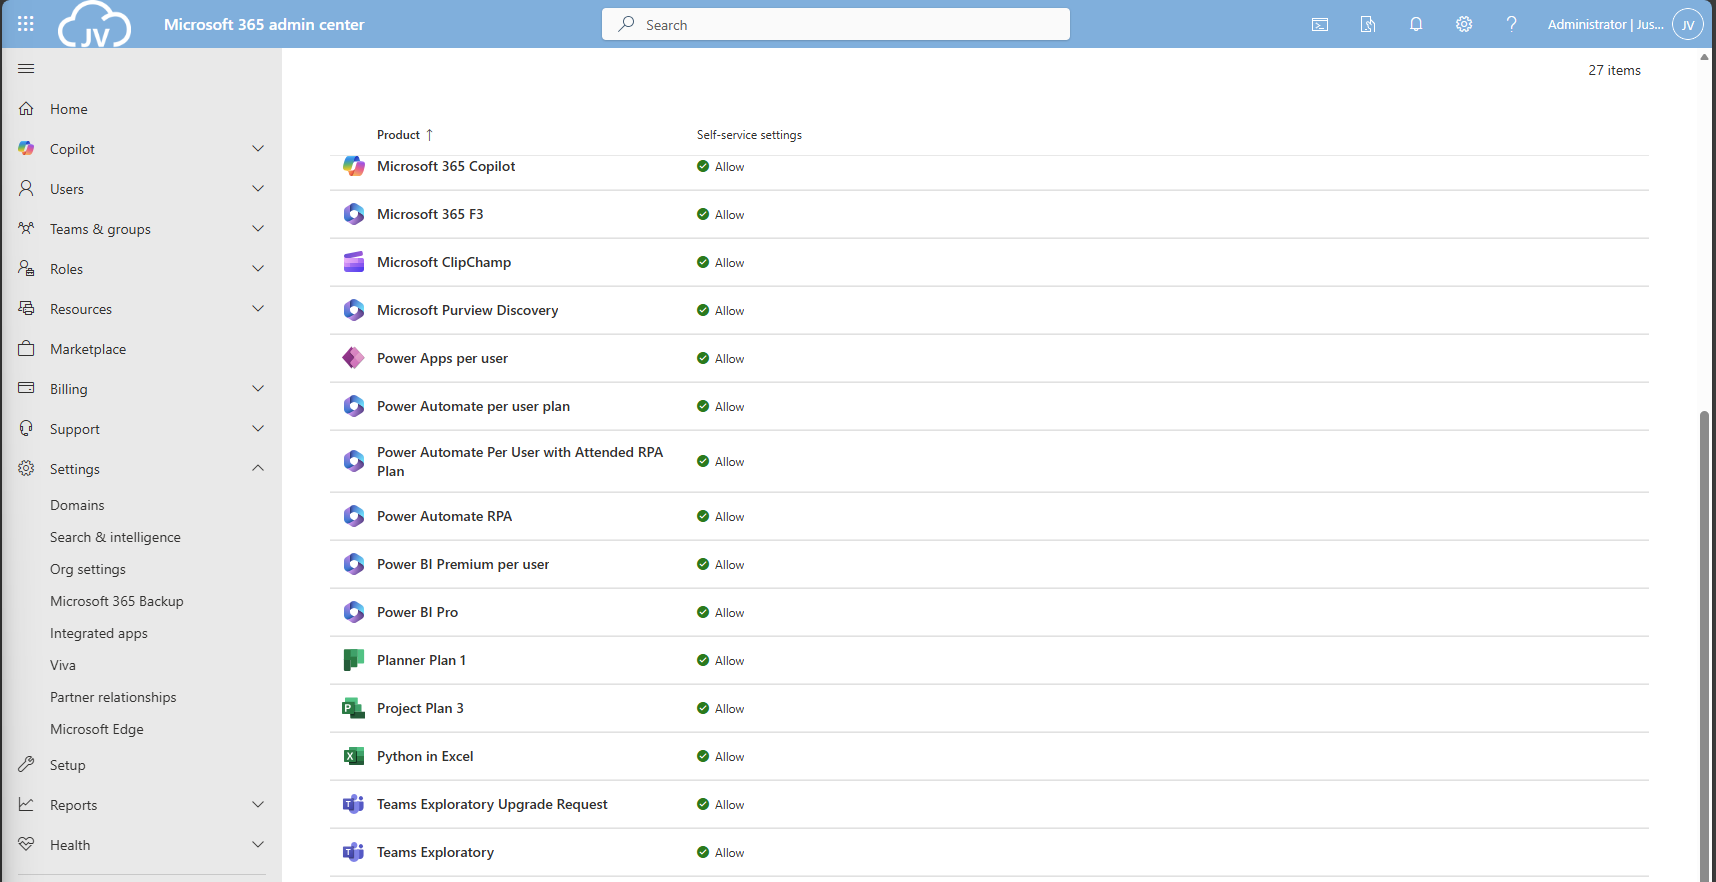
Here you get a list of all the possible products you could disable individually. Unfortunately, for disabling everything, you must do this manually for all (at the moment 27) items. The good thing is, PowerShell can actually do this for us.
Click on your license to be disabled, and click on “Do not allow”. Then save the setting to apply it to your users.
How to disable self service purchases - PowerShell
There is a PowerShell module available that contains multiple options for billing and commerce options. This is the MSCommerce module, and can be installed using ths command:
POWERSHELL
Install-Module -Name MSCommerceAfter this module is installed, run this commando to login into your environment:
POWERSHELL
Connect-MSCommerceThen login to your environment, complete the MFA challenge and you should be logged in.
Run this command to get all the trial license options:
POWERSHELL
Get-MSCommerceProductPolicies -PolicyId AllowSelfServicePurchaseThis will return the list of all possible trial licenses, just like you got in the GUI.
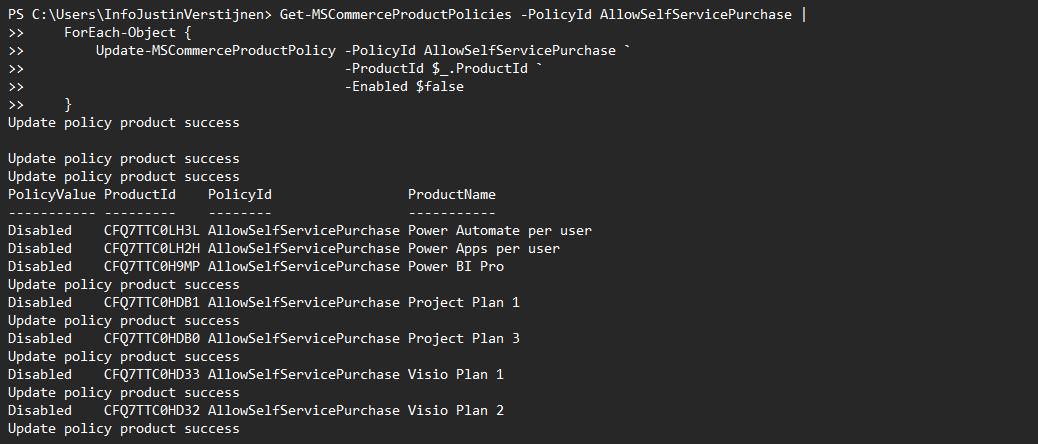
To disable all trial licenses at once, run this:
POWERSHELL
Get-MSCommerceProductPolicies -PolicyId AllowSelfServicePurchase |
    ForEach-Object {
        Update-MSCommerceProductPolicy -PolicyId AllowSelfServicePurchase `
                                       -ProductId $_.ProductId `
                                       -Enabled $false
    }
PowerShell will now initiate a loop that sets the status of every license to “Disabled”:
After the simple script has run succesfully, all trial license options should be disabled in the Microsoft 365 Portal:
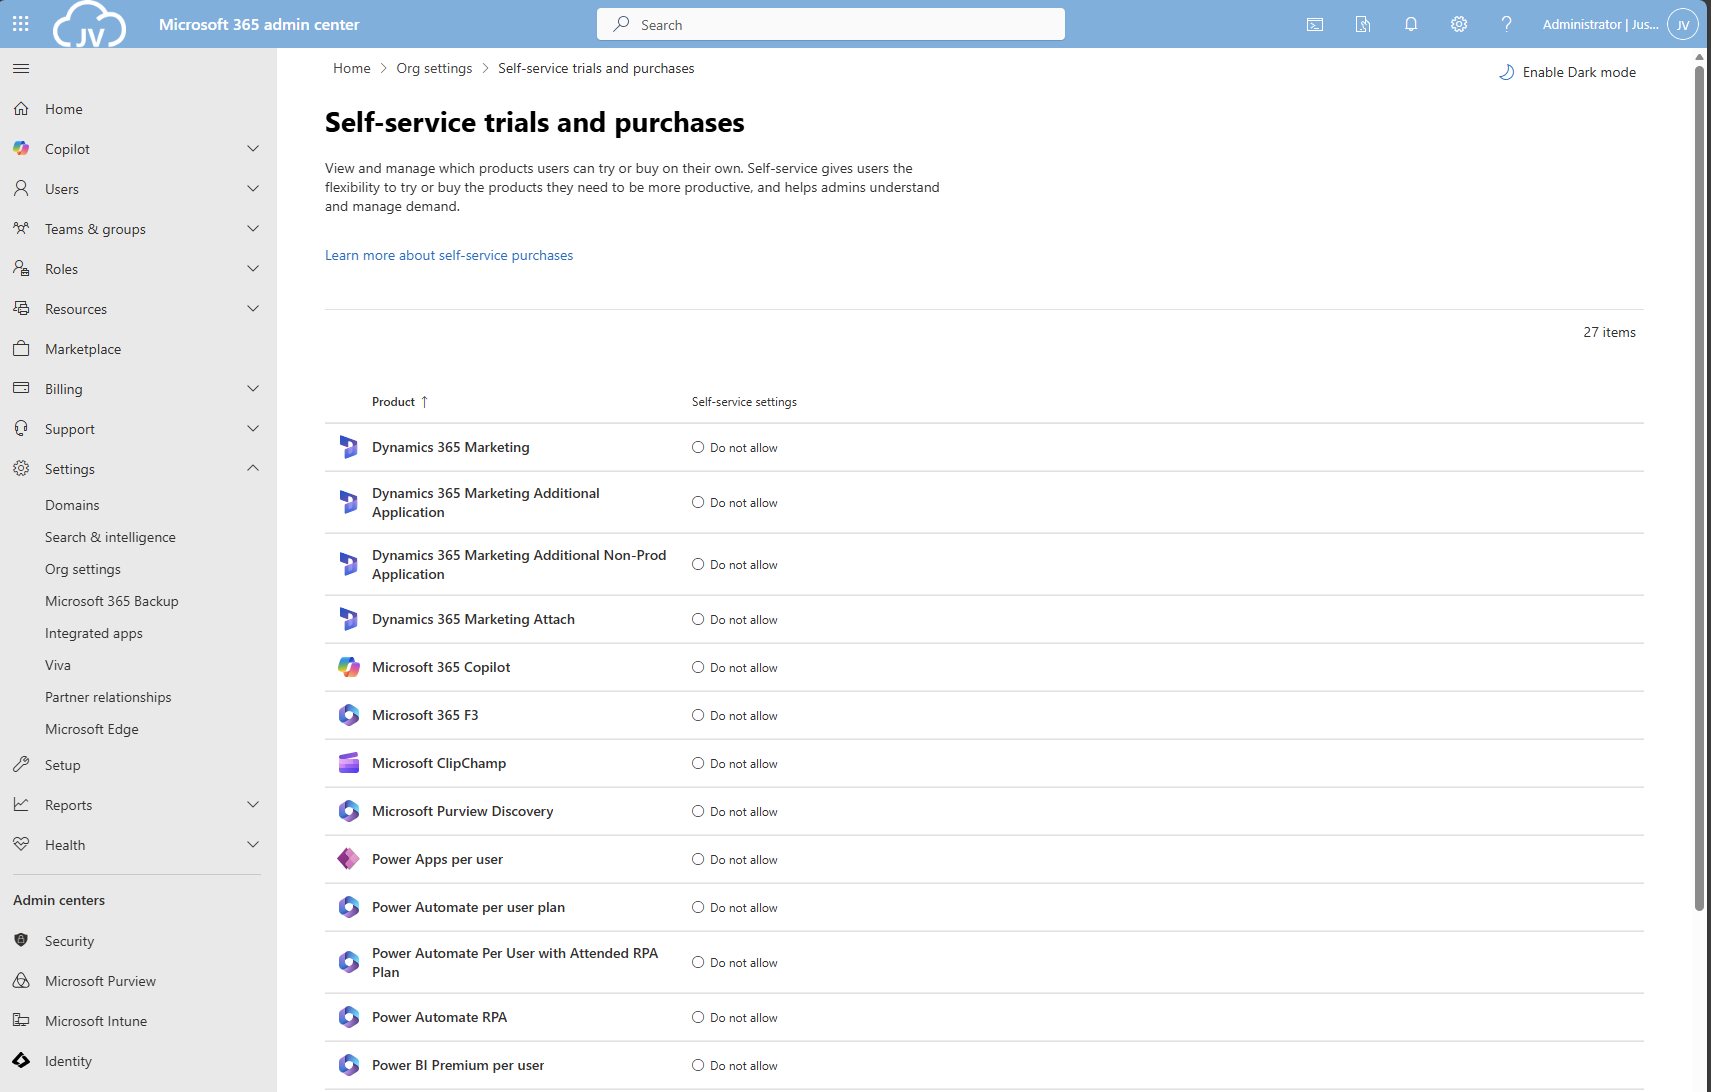
And thank you once again PowerShell for saving a ton of clicks :)
Summary
Disabling the trial licenses is generally a good idea to avoid users from using services you don’t generally accept. You can technically still get trial licenses but an administrator has to approve them now by changing the status of the license.
Most of the time it’s better to use a paid license as trial, because you would have access to all features.
Thank you for reading this guide and I hope it was helpful.
Sources
These sources helped me by writing and research for this post;
- https://learn.microsoft.com/en-us/microsoft-365/commerce/subscriptions/manage-self-service-purchases-admins?view=o365-worldwide
- https://learn.microsoft.com/en-us/powershell/module/microsoft.powershell.core/foreach-object?view=powershell-7.5
End of the page 🎉
You have reached the end of the page. You can navigate through other blog posts as well, share this post on X, LinkedIn and Reddit or return to the blog posts collection page. Thank you for visiting this post.
If you think something is wrong with this post or you want to know more, you can send me a message to one of my social profiles at: https://justinverstijnen.nl/about/
If you find this page and blog very useful and you want to leave a donation, you can use the button below to buy me a beer. Hosting and maintaining a website takes a lot of time and money. Thank you in advance and cheers :)
The terms and conditions apply to this post.
Disable DirectSend in Exchange Online
Microsoft has published a new command to completely disable the unsafe DirectSend protocol in your Microsoft 365 environment. In this guide I will explain what DirectSend is, why you should disable this and how we can achieve this.
What is DirectSend?
DirectSend (Microsoft 365) lets devices or applications (like printers, scanners, or internal apps) send email directly to users inside your organization without authentication. Instead of using authentication, it uses your MX record directly with port 25.
Some details about DirectSend:
- Only works for internal recipients (same tenant)
- No mailbox or license required for the sending device/app
- Uses SMTP to your tenant’s MX endpoint
- Commonly used for scanners, alerts, and legacy systems
- Does not support sending to external email addresses
- Possibly exposing public IP addresses in your DNS records
We can see it like a internal relay, possible to send email to all users in your tenant, which is actively used to distribute malicious activity. This consists of sending mailware or credential harvesting, bypassing different security controls active on normal email.
Why DirectSend is a security risk
Lets take a look into DirectSend en why this is a security risk, and a protocol which we must have disabled:
- No authentication is required, so any device or system that can reach your MX endpoint may be able to send email as your domain
- This makes it easier to spoof internal senders, which can be abused for phishing or social-engineering attacks
- Compromised devices (printers, scanners, servers) can be used to send malicious emails internally without triggering normal account protections
- There’s no user identity, so auditing and tracing who actually sent a message is harder
- It bypasses protections like MFA and Conditional Access, since no sign-in happens
- If network access is misconfigured, outsiders could potentially abuse Direct Send
Disable DirectSend with Exchange Online PowerShell
Let’s get into the part of disabling DirectSend for Exchange Online. First, ensure you have the Exchange Online Management PowerShell module installed.
Let’s connect to your Microsoft 365 environment using the command below:
POWERSHELL
Connect-ExchangeOnlineLogin to your account with Global Administrator permissions.
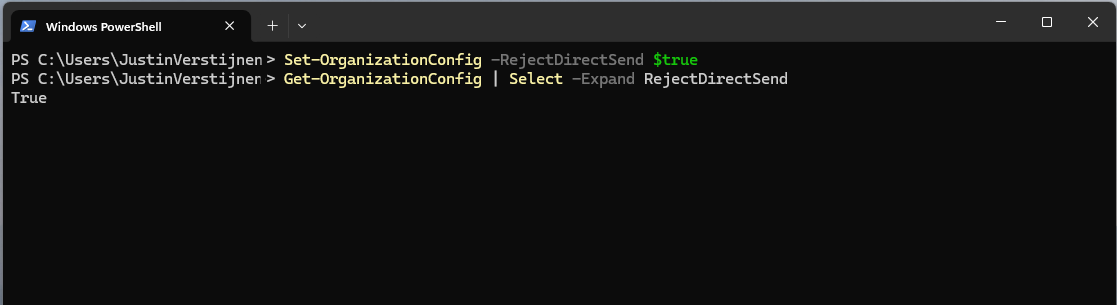
Then execute this command to disable DirectSend tenant-wide:
POWERSHELL
Set-OrganizationConfig -RejectDirectSend $trueTo re-enable DirectSend, just change the $true boolean to $false.
If you want to check the status before or after the set command, you can use this command:
POWERSHELL
Get-OrganizationConfig | Select -Expand RejectDirectSendThats all. :)
If an email is now sent using DirectSend, the following error will occur:
550 5.7.68 TenantInboundAttribution; Direct Send not allowed for this organization from unauthorized sources
Exactly what we wanted to achieve.
Summary
Disabling DirectSend on your Microsoft 365 tenant enhances your email security for a bit, and helps your users being secure. If you are planning on disabling DirectSend, I recommend doing this outside of business hours, giving you time to fix possible email disruptions.
We cannot disable DirectSend on specific users first, this is because its an tenant-wide setting. Because we have no authentication, this would theoretically impossible.
Thank you for reading this guide and I hope it was helpful.
Sources
These sources helped me by writing and research for this post;
End of the page 🎉
You have reached the end of the page. You can navigate through other blog posts as well, share this post on X, LinkedIn and Reddit or return to the blog posts collection page. Thank you for visiting this post.
If you think something is wrong with this post or you want to know more, you can send me a message to one of my social profiles at: https://justinverstijnen.nl/about/
If you find this page and blog very useful and you want to leave a donation, you can use the button below to buy me a beer. Hosting and maintaining a website takes a lot of time and money. Thank you in advance and cheers :)
The terms and conditions apply to this post.
Set a domain alias for every user in Microsoft 365
Sometimes, we add a new domain to Microsoft 365 and we want to have a domain alias for multiple or every user when acquiring a new domain in some cases. This post explains how to add a new alias with another domain to every user in your Microsoft 365 tenant.
Logging in Exchange Online Powershell
To configure a alias for every user, we need to login into Exchange Online Powershell:
POWERSHELL
Connect-ExchangeOnlineIf you don’t have the module already installed on your computer, run the following command on an elevated window:
POWERSHELL
Install-Module ExchangeOnlineManagementSource: https://www.powershellgallery.com/packages/ExchangeOnlineManagement/3.7.2
Adding the 365 domain alias to every user
After succesfully logged in, run the following command:
POWERSHELL
$users=Get-Mailbox | Where-Object{$_.PrimarySMTPAddress -match "justinverstijnen.nl"}Here our current domain is “justinverstijnen.nl” but let’s say that we want to add “justinverstijnen.com”. Run the following command to do this:
POWERSHELL
foreach($user in $users){Set-Mailbox $user.PrimarySmtpAddress -EmailAddresses @{add="$($user.Alias)@justinverstijnen.com"}}Now we have added the alias to every user. To check if everything is configured correctly, run the following command:
POWERSHELL
$users | ft PrimarySmtpAddress, EmailAddresses
End of the page 🎉
You have reached the end of the page. You can navigate through other blog posts as well, share this post on X, LinkedIn and Reddit or return to the blog posts collection page. Thank you for visiting this post.
If you think something is wrong with this post or you want to know more, you can send me a message to one of my social profiles at: https://justinverstijnen.nl/about/
If you find this page and blog very useful and you want to leave a donation, you can use the button below to buy me a beer. Hosting and maintaining a website takes a lot of time and money. Thank you in advance and cheers :)
The terms and conditions apply to this post.
Solved - Microsoft 365 tenant dehydrated
Microsoft will sometimes “pause” tenants with minor activity to reduce infrastructure costs. You will then get an error which contains “tenant dehydrated”. What this means and how to solve it, I will explain in this post.
What is “Tenant dehydrated”?
Microsoft sometimes will dehydrate Microsoft 365 tenants where things will not often change to the tenant. This closes some parts of the tenant for changing, even if you have Global Administrator permissions.
The cause of this is for Microsoft to save on infrastructure cost. They will set the tenant in this sort of “sleep mode” where everything works properly but some configuration changes cannot be done. You can get this error with all sorts of changes:
- Creating a new group
- Creating a new management role assignment
- Creating a new role assignment policy
- Modifying a built-in role assignment policy
- Creating a new Outlook mailbox policy
- Creating a new sharing policy
- Creating a new retention policy
How to undo this dehydration
Fortunately, we can undo this with some Powershell commands, which I will show you:
Start by logging into Exchange Online PowerShell. If you don’t have this installed, click here for instructions.
POWERSHELL
Connect-ExchangeOnlineThen fill in your credentials and finish MFA.
Check status
When logged in, we can check the tenant dehydration status with this command:
POWERSHELL
Get-OrganizationConfig | ft Identity,IsDehydratedThis will show something like this:
POWERSHELL
Get-OrganizationConfig | ft Identity,IsDehydrated

Identity                               IsDehydrated
--------                               ------------
justinverstijnen.onmicrosoft.com       True
This outputs the status “True”, which means we cannot change some settings in our tenant and is in a sleep mode.
Disable dehydration
The following command disables this mode and makes us able to change things again (when still logged in to Exchange Online Powershell):
POWERSHELL
Enable-OrganizationCustomizationThis command takes a few seconds to process, and after this commando we can check the ststua again:
POWERSHELL
Get-OrganizationConfig | ft Identity,IsDehydrated

Identity                               IsDehydrated
--------                               ------------
justinverstijnen.onmicrosoft.com       False
Summary
Sometimes, this error will occur what is very unfortunate but it’s not a really complex fix. We have to agree with Microsoft. They host millions of tenants which will almost never get any changes so putting them in this sleep mode is completely acceptable.
Thank you for reading this guide and I hope I helped you out fixing this problem.
End of the page 🎉
You have reached the end of the page. You can navigate through other blog posts as well, share this post on X, LinkedIn and Reddit or return to the blog posts collection page. Thank you for visiting this post.
If you think something is wrong with this post or you want to know more, you can send me a message to one of my social profiles at: https://justinverstijnen.nl/about/
If you find this page and blog very useful and you want to leave a donation, you can use the button below to buy me a beer. Hosting and maintaining a website takes a lot of time and money. Thank you in advance and cheers :)
The terms and conditions apply to this post.
Create a Catch all mailbox in Exchange Online
Sometimes a company wants to receive all email, even when addresses don’t really exist in Exchange. Now we call this a Catch all mailbox, where all inbound email is being catched that is not pointed to a known recipient. Think of a sort of *@domain.com. In this guide I will explain how to configure this in Exchange Online and how to maintain this by limiting our administrative effort.
I also created a full customizable PowerShell script for this task which you can find here:
This way you can skip the guide for a faster solution. Otherwise, follow the steps below to do everything by hand and get a better understanding of the relevant steps needed.
Requirements
- Around 20 minutes of your time
- A Microsoft 365 environment
- Basic knowledge of Exchange Online
- Basic knowledge of PowerShell
How does this solution work?
The solution described in this guide works with 3 components:
- A mailbox or shared mailbox
- Dynamic Distribution List
- Mailflow rule
We create a standalone mailbox that is the catch all mailbox, this is the mailbox where everything will be stored. This must have a license for mailflow rules to work. This can also be a free shared mailbox to give multiple users permissions.
Then we create a Dynamic Distribution list which contains all of our users and is automatically refreshed when new users are created. We don’t want the rule of the Catch all superseding our users and all of our email redirected to the catch all mailbox with users not receiving anything.
After the group is created, this will be used as a exception in our created Mailflow rule which states: “Mail to address, member of distribution list, deliver to user. Not member of the list? Deliver to Catch all mailbox.” To have a more clear understanding, I created a diagram of the process:
Note that internal messages will not be hit by this rule, as there is no point of catching internal messages, but you can change this in your rule to suit your needs.
Step 1: Create the Catch all mailbox using Microsoft 365
Now we have to create a mailbox in Microsoft 365. Login to https://admin.microsoft.com
Go to Users and create a new user, and make it clear that this is the Catch-All user:
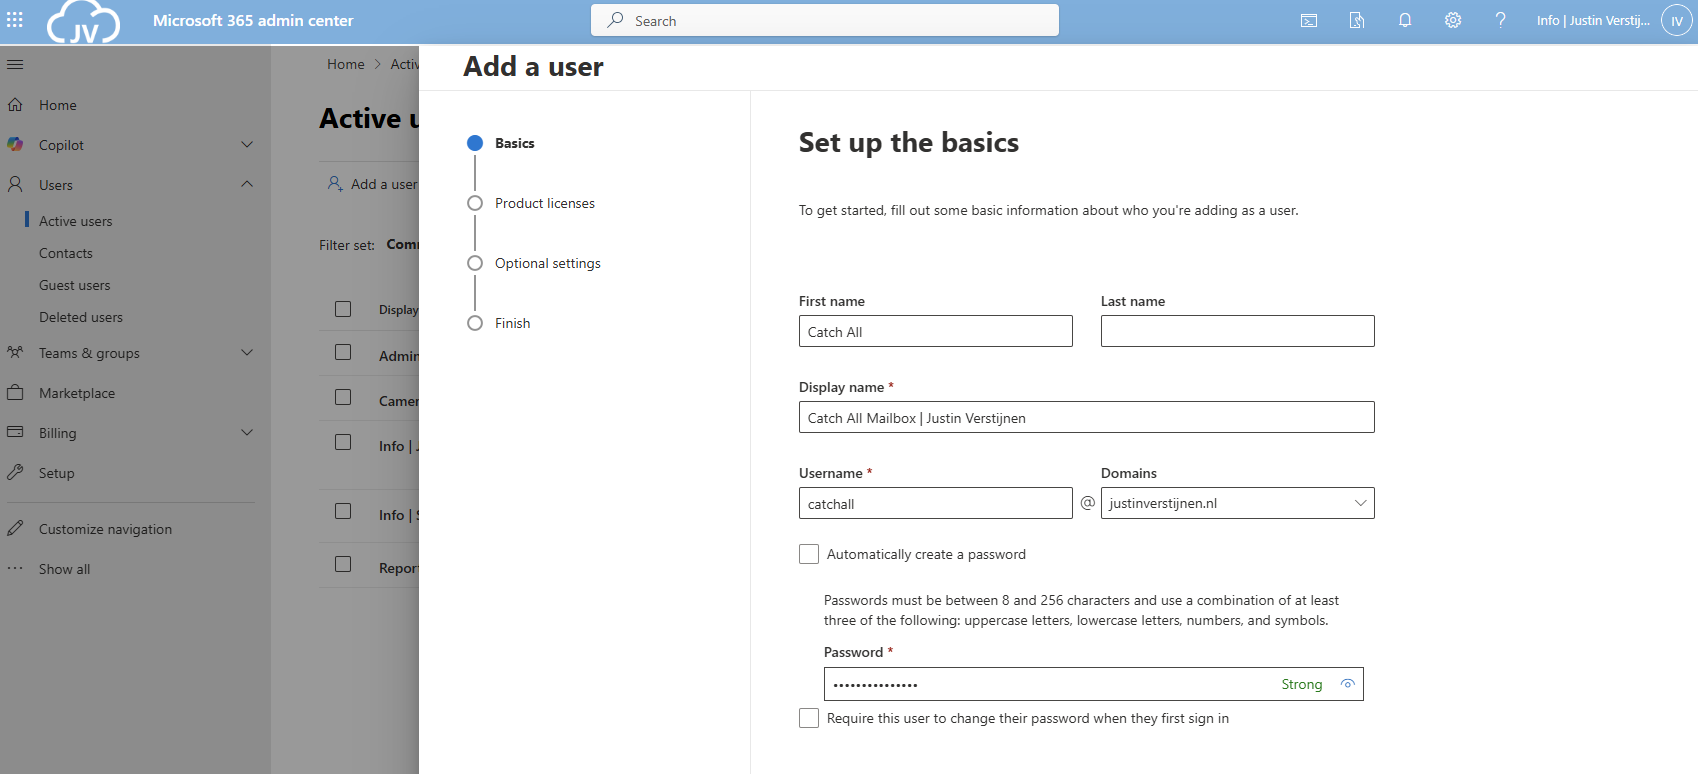
Advance to the next tab and assign at least a Exchange Online P1 license and finish creating the user.
Create the Catch all mailbox using Powershell
You can also create the mailbox with Exchange PowerShell with this simple script:
POWERSHELL
$catchalladdress = "catchall@domain.com"
$displayName = "New User"
$password = ConvertTo-SecureString -String "Password01" -AsPlainText -Force

# Create mailbox itself
New-Mailbox -UserPrincipalName $catchalladdress `
            -DisplayName $displayName `
            -Password $password `
            -FirstName "New" `
            -LastName "User"
Fill in the parameters on line 1, 2 and 3 and execute the script in Exchange Online Powershell. Make sure to first login to your tenant.
If you want to go with the free non-license option, then we can create a shared mailbox instead:
Step 2: Create the Dynamic Distribution Group
Now we have to create the Dynamic Distribution Group. Go to Exchange Admin Center (as this option only exists there). https://admin.exchange.microsoft.com
In my guide, I create one group for excluding only. You can also create a group for all@domain.com for a internal mailing list with all employees.
Go to “Recipients” and then “Groups”. Then open the tab “Dynamic distribution list”
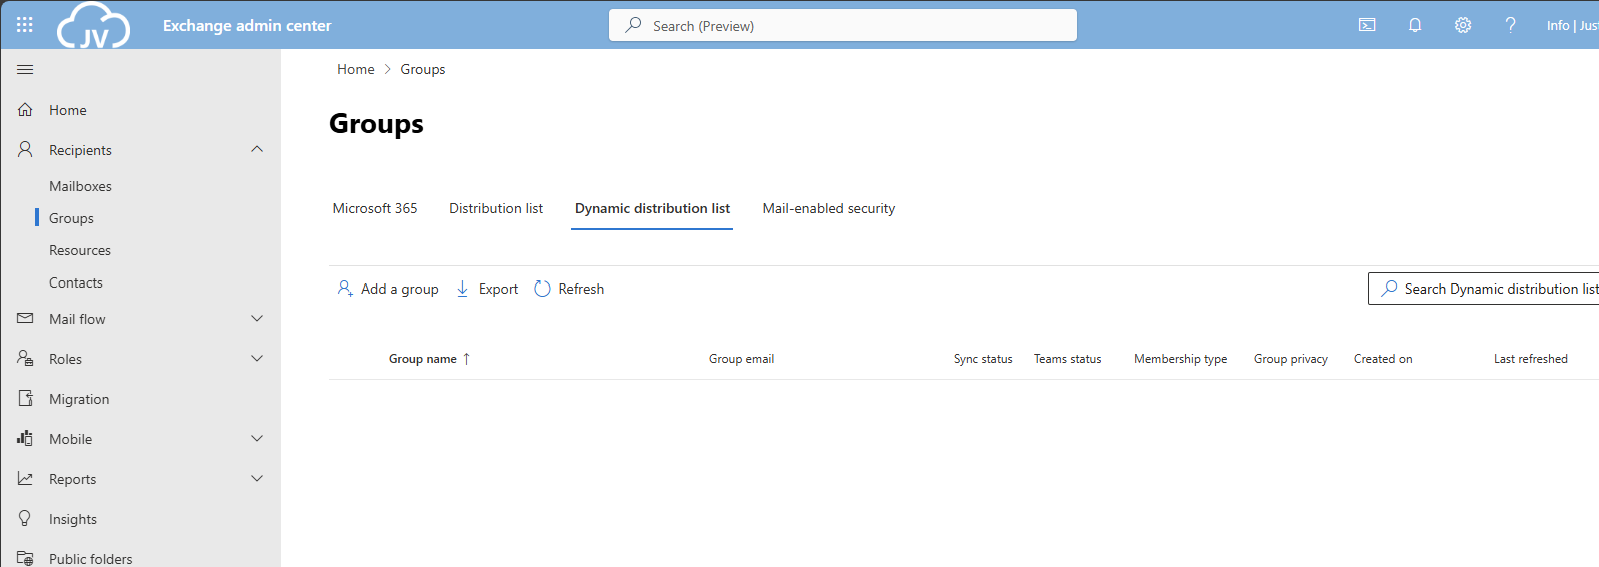
Click on “Add a group” to create a new group.
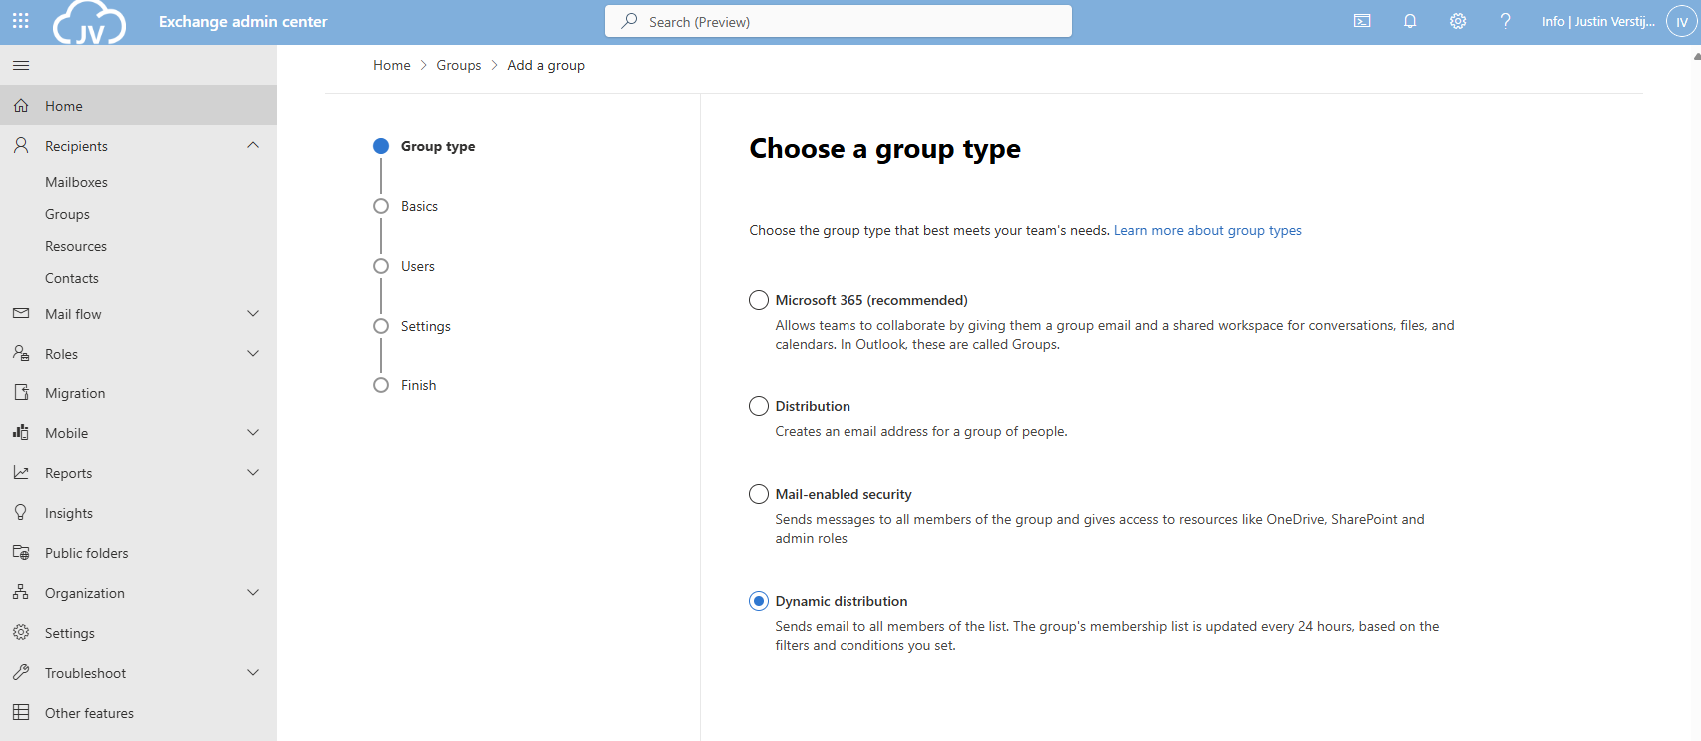
Select the option “Dynamic distribution” and click on “Next”.
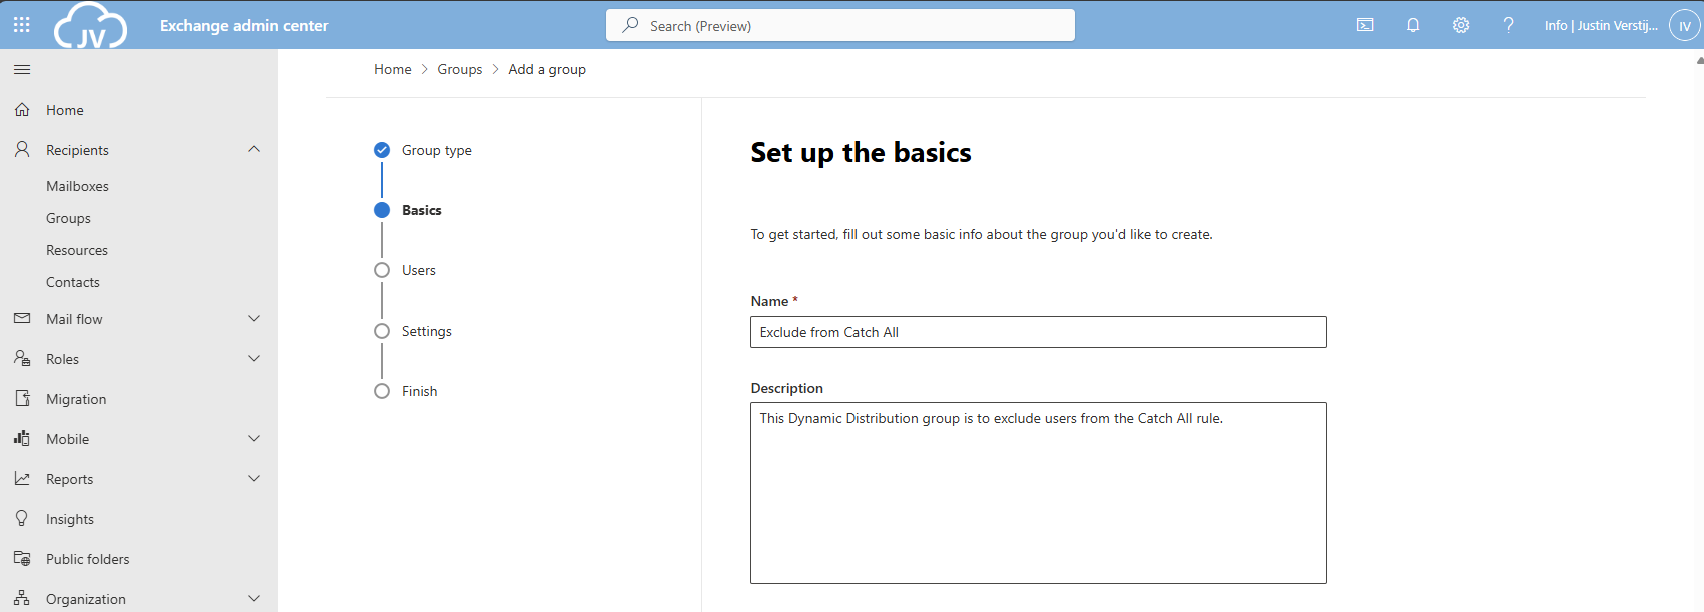
Fill in a good name and description for the Dynamic distribution group.
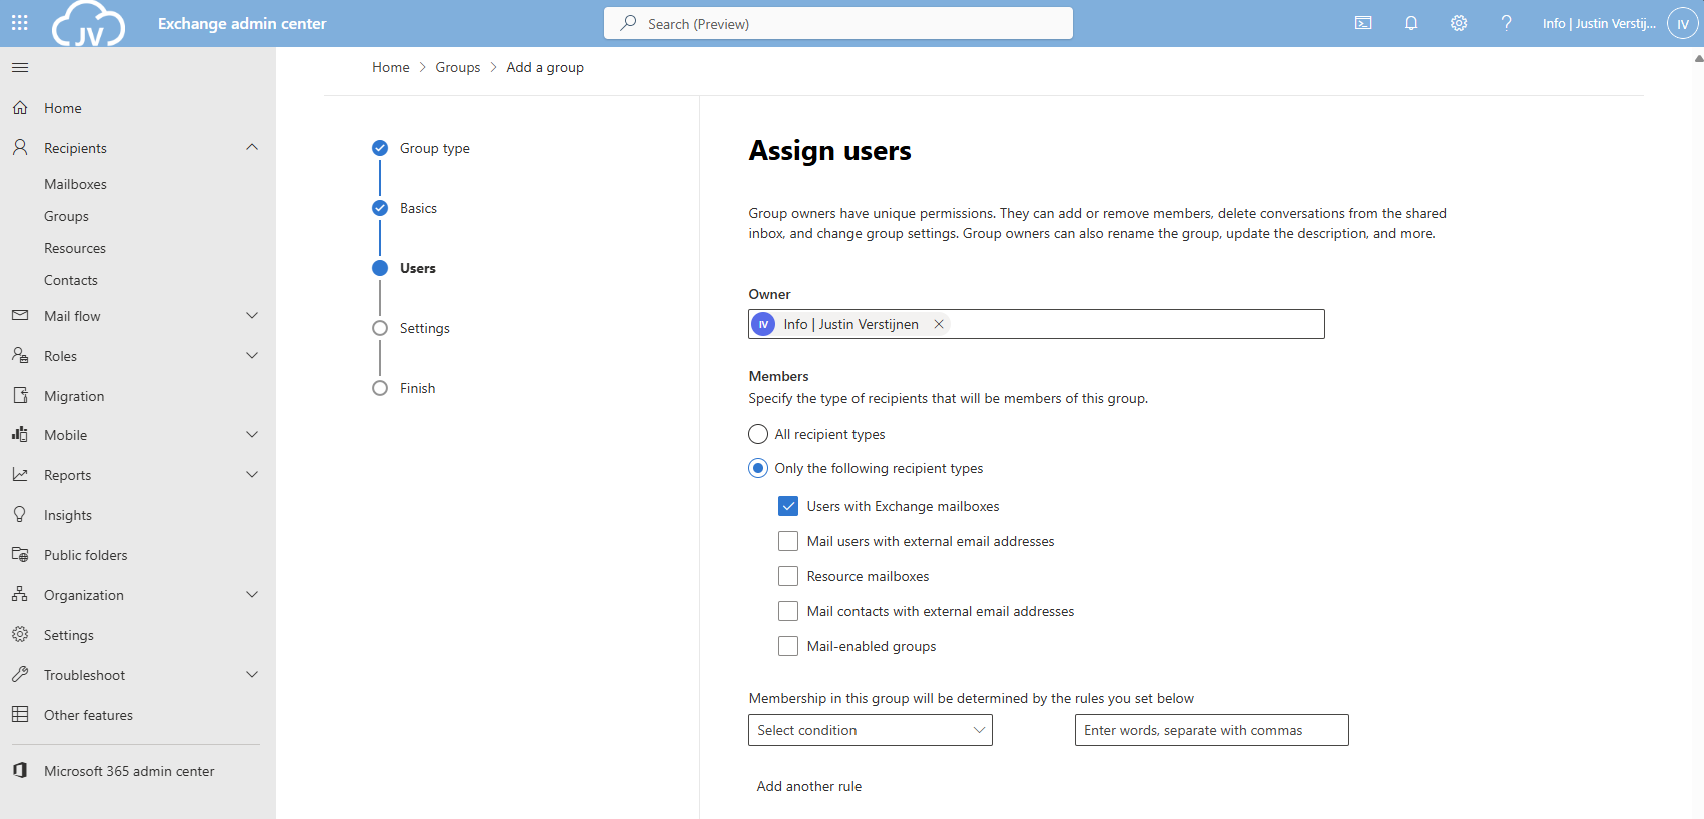
Now for the owner select your admin account(s) and for the members define which types of addresses you want to include. In my case, I only selected Users with Exchange mailboxes. Then click on “Next”.
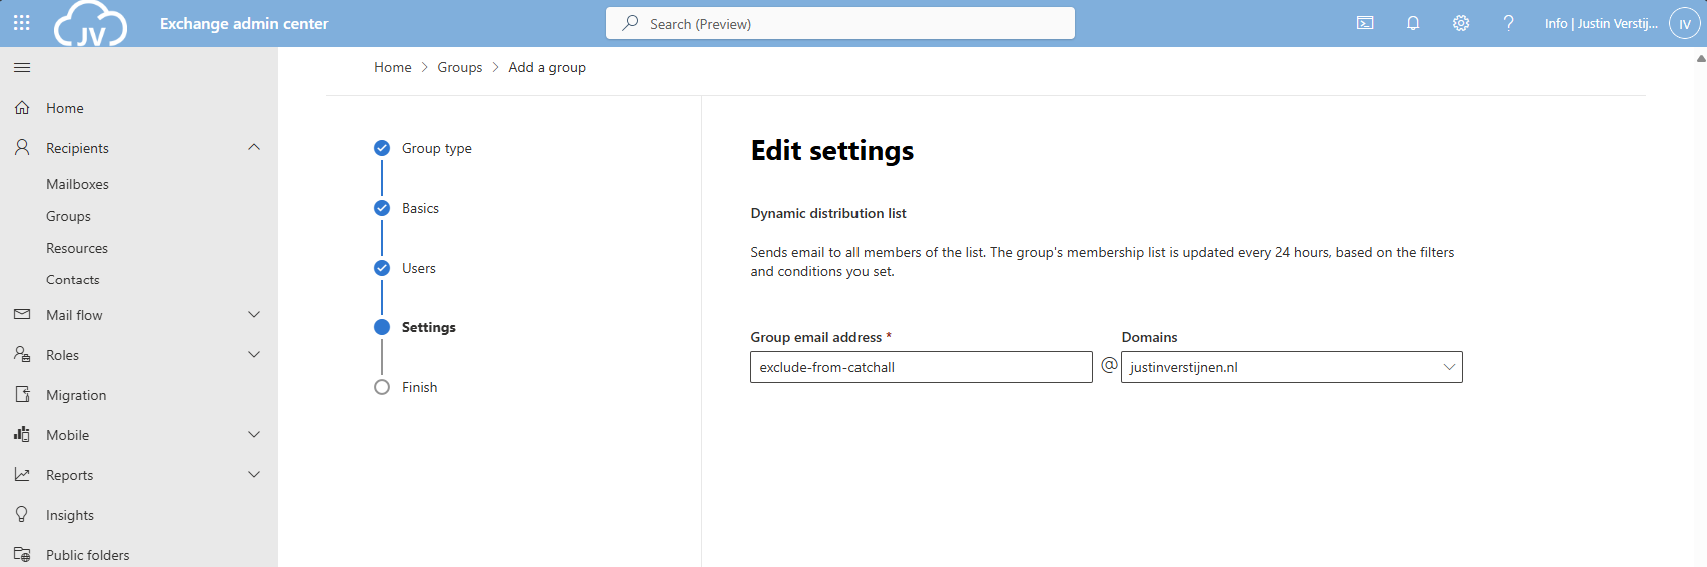
Now define the email address name of the Dynamic Distribution group.
Finish the wizard to create the group.
Create the exclusion Dynamic Distribution group with PowerShell
You can also create this Dynamic Distribution Group with PowerShell by using this simple script;
POWERSHELL
$distributiongroup = "Exclude from Catch All"
$aliasdistributiongroup = "exclude-from-catchall"

New-DynamicDistributionGroup -Name '$distributiongroup' -Alias '$aliasdistributiongroup' -OrganizationalUnit $null -IncludedRecipients 'MailboxUsers'
Step 3: Create the Mailflow Rule
Now we have to create the Mailflow rule in Exchange Admin Center. Go to “Mail flow” and then to “Rules”.
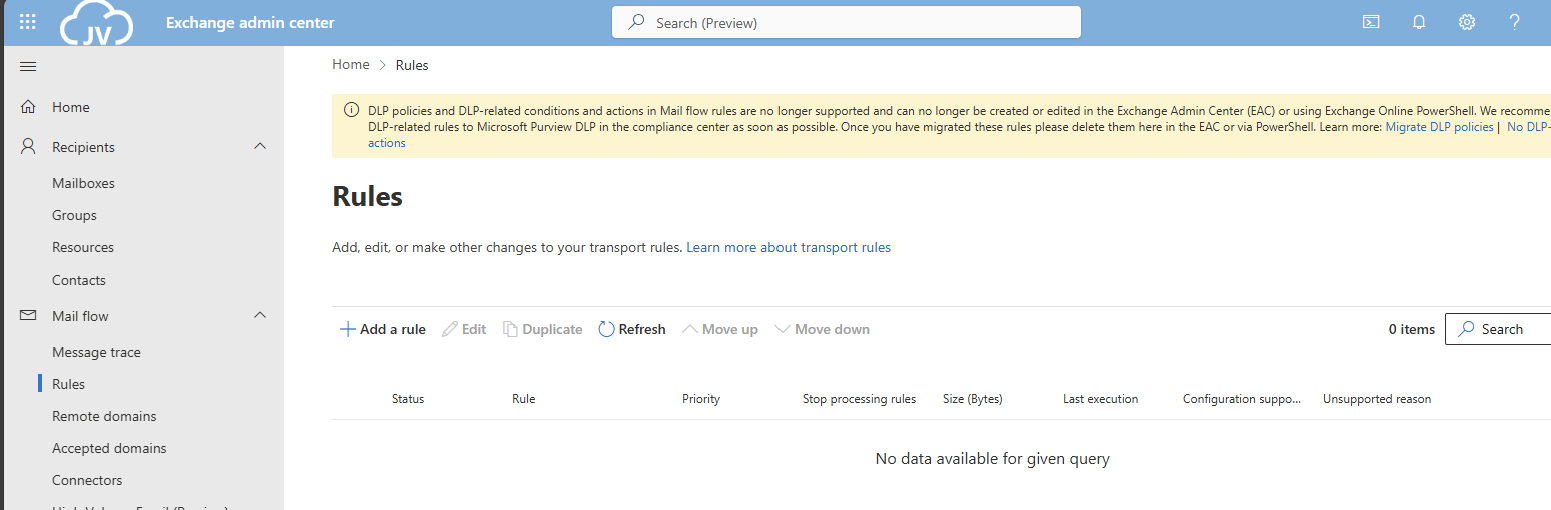
Click on “+ Add a rule” and then on “Create a new rule” to create a new rule from scratch.
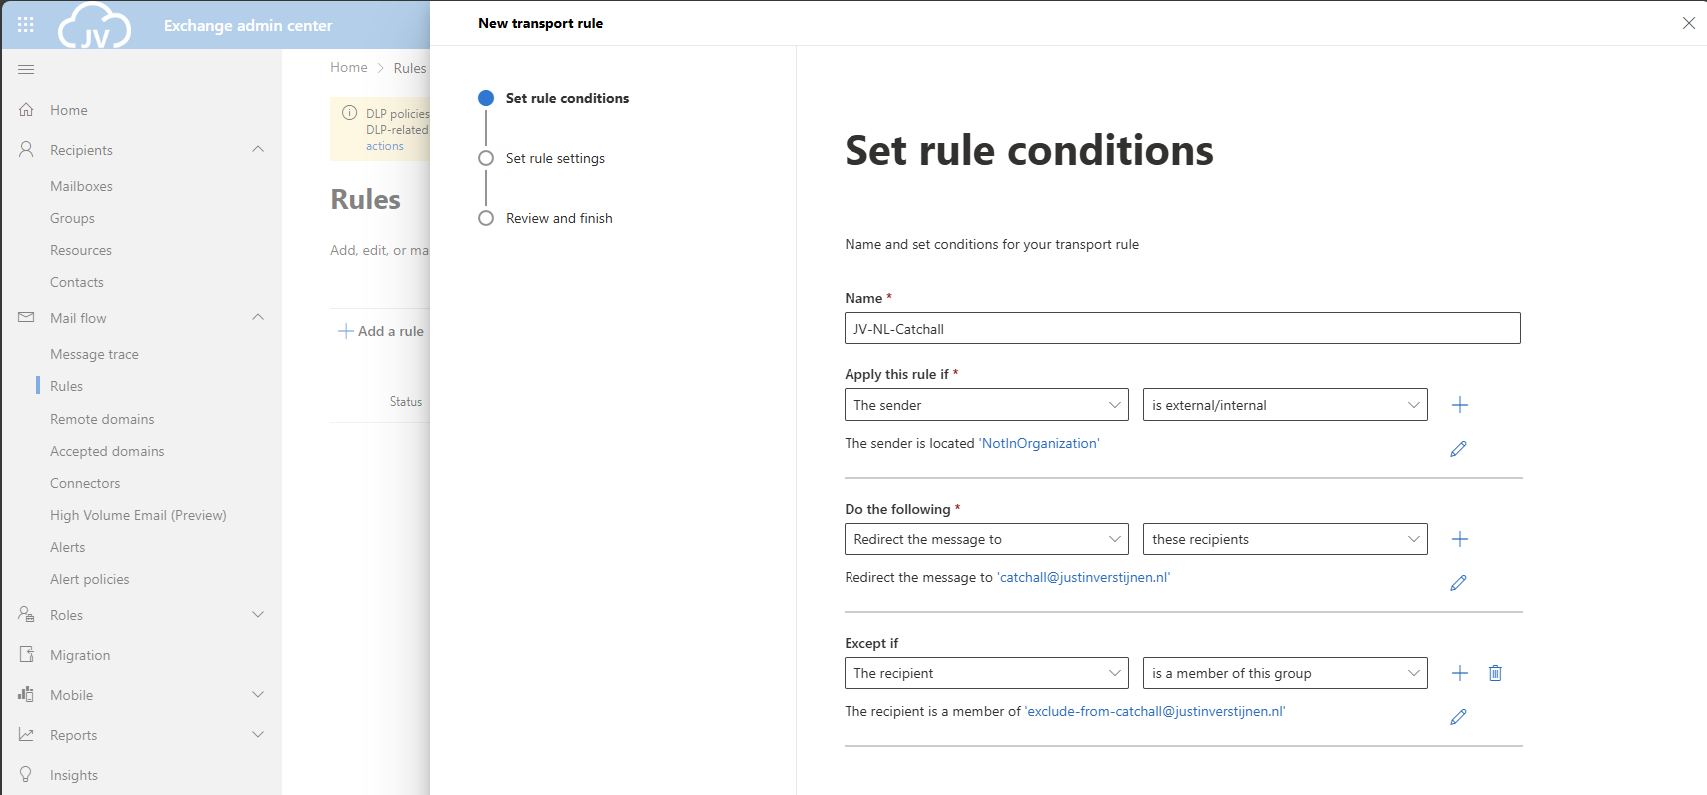
Now we have to define the rule by hand:
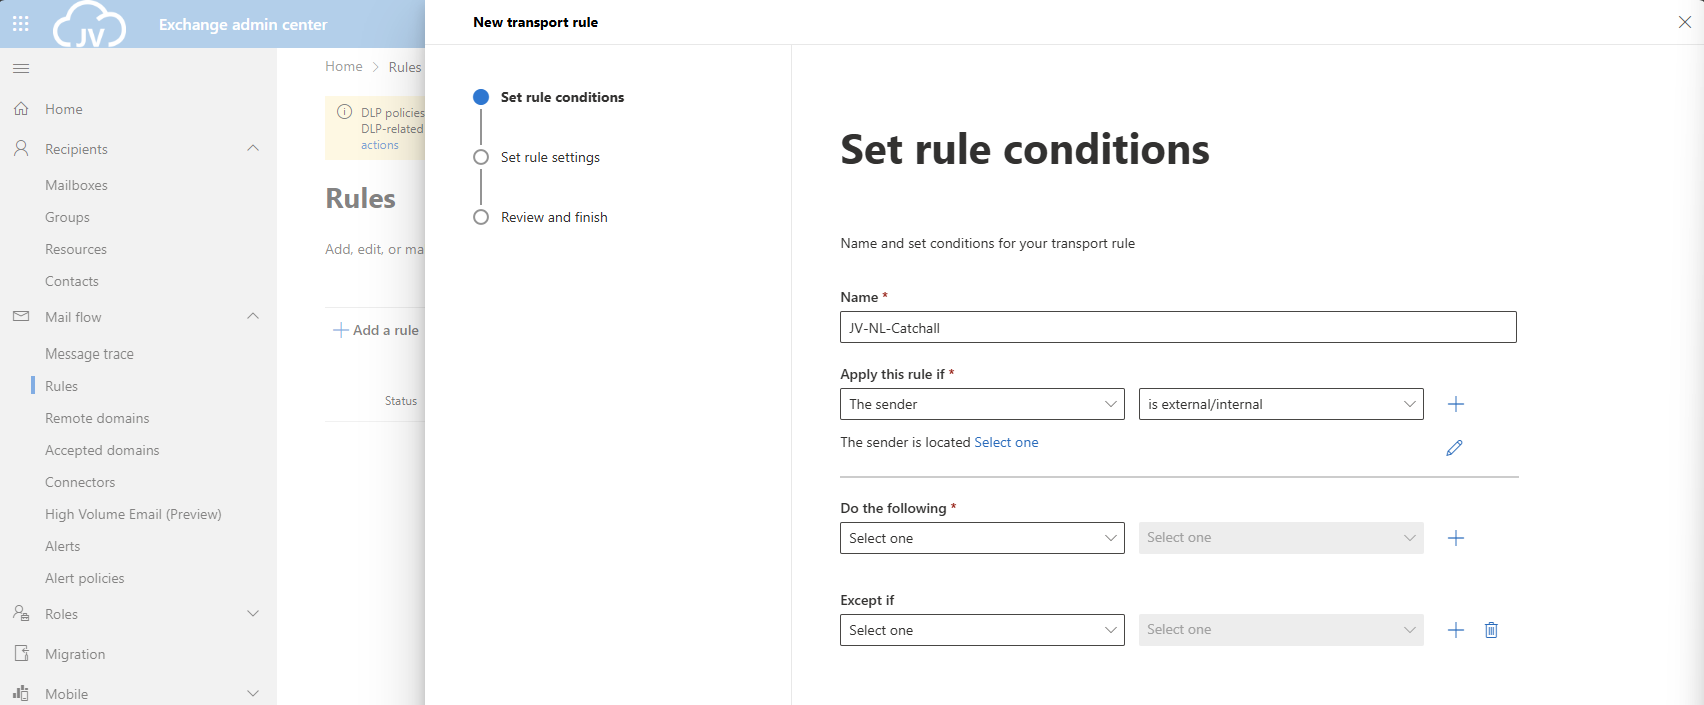
Give the rule a clear name. I called the rule “JV-NL-Catchall” which contains the domain abbreviation and the TLD of the domain. Then specified that its a Catchall rule.
- For the first part: “Apply this rule if”, select The sender, and then “is external/internal”. You can then select “Not in the Organization”.
- For the second part: “Do the following”, select “Do the following” and select “these recipients”. Then select your Catch all mailbox.
- For the third part: “Except if”, select “The recipient” and then “Member of this group”, and select the distribution group we created earlier.
The rule must look like this:
Click on “Next”.
Now for the rule settings, select “Stop processing more rules” to ensure this rule is hit.
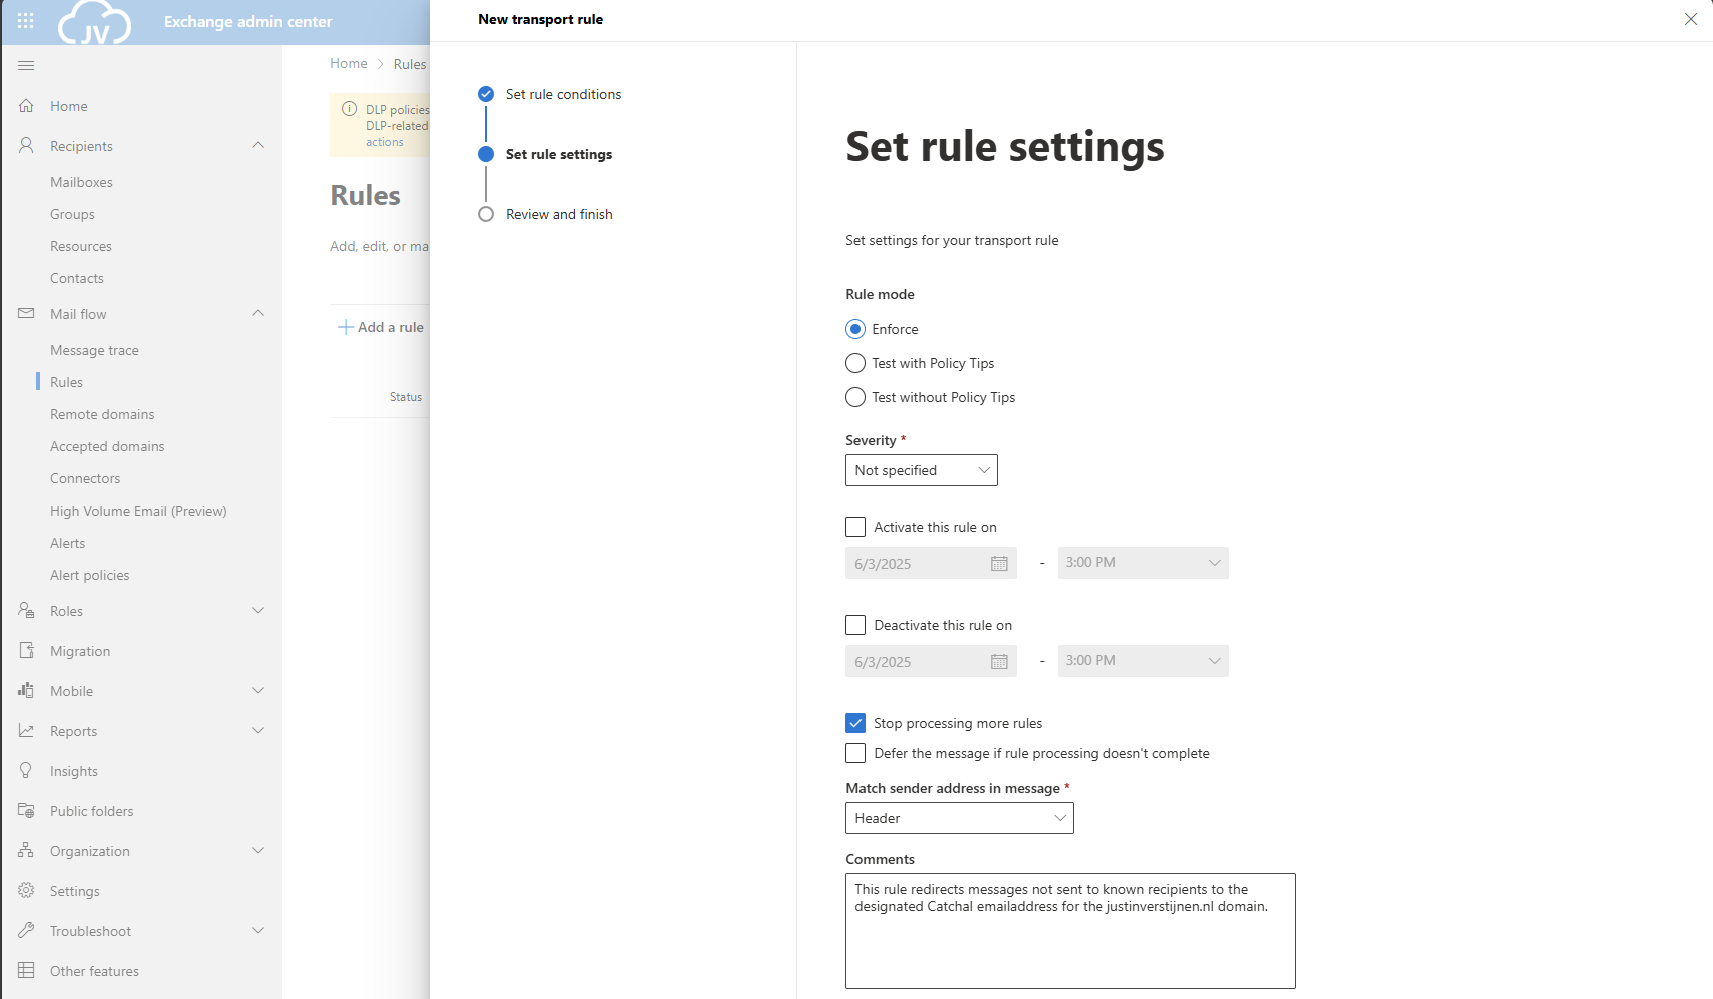
Then give the rule a good description/comment and save the rule.
After creating the rule, we can activate the rule if not already done. Click on the “Disabled” part of the rule and click on the switch to enable the rule.
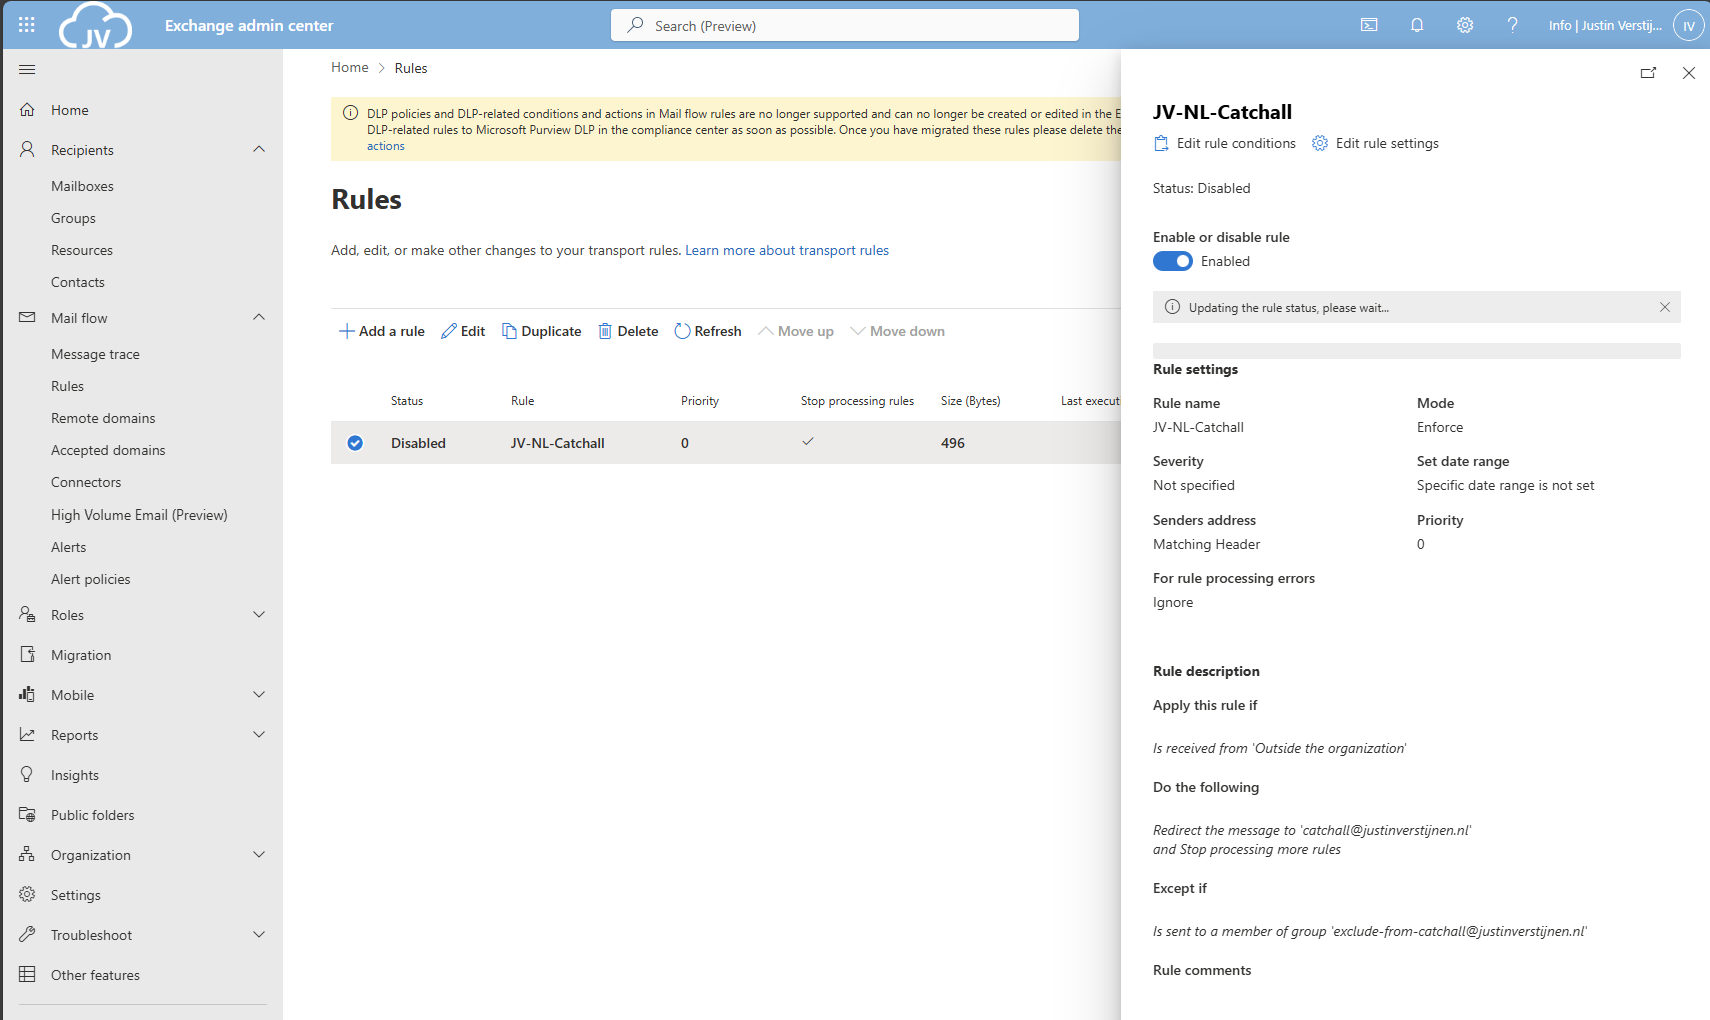
As you can see, my rule is enabled.
Create the Mailflow Rule with PowerShell
With this PowerShell script you can create the Mailflow rule with Powershell.
POWERSHELL
$catchalladdress = "catchall@domain.com"
$distributiongroup = "Exclude from Catch All"
$aliasdistributiongroup = "exclude-from-catchall"
$catchallalias = (Get-EXOMailbox -Identity $catchalladdress).Alias
$flowruletitle = "JV-NL-Catchall"
$flowruledesc = "Your rule description"

### Create the rule itself with given parameters
New-TransportRule -FromScope 'NotInOrganization' -RedirectMessageTo '$doelalias' -ExceptIfSentToMemberOf $distributiongroup -Name 'AllMailboxes' -StopRuleProcessing:$false -Mode 'Enforce' -Comments $flowruledesc -RuleErrorAction 'Ignore' -SenderAddressLocation 'Header'
Make sure to change all parameters. I have added the parameters from earlier tasks above, you can exclude them if already specified in your command window. The command is built on the settings shown in the GUI part.
Step 4: Set the domain as Internal Relay
For Exchange be able to redirect messages to a email addresses that doesn’t really exist, we must enable “Internal Relay” for every domain that must do a Catch all configuration.
You can enable this in Exchange Admin Center, by going to “Mail flow” and then to “Accepted domains”:
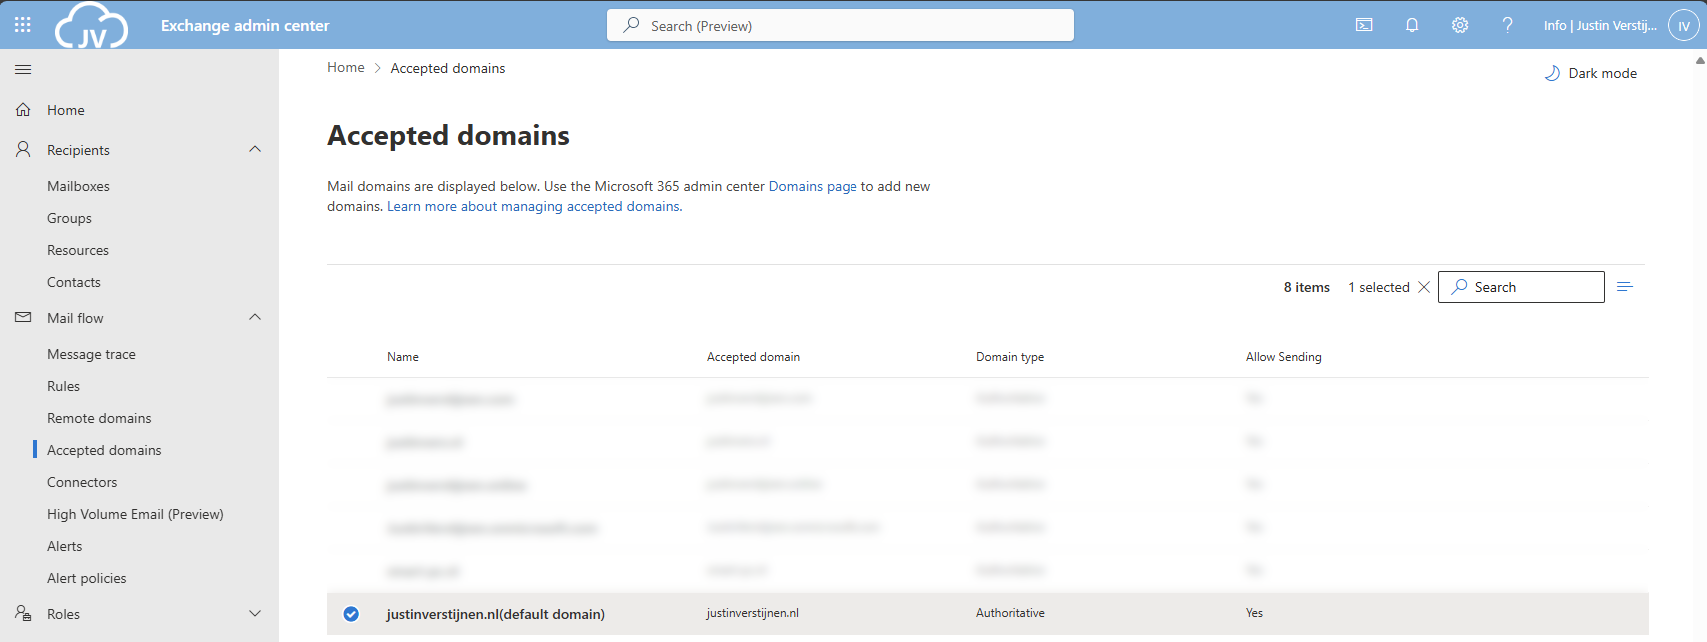
Select your domain and click on it. A window will be opened to the right:
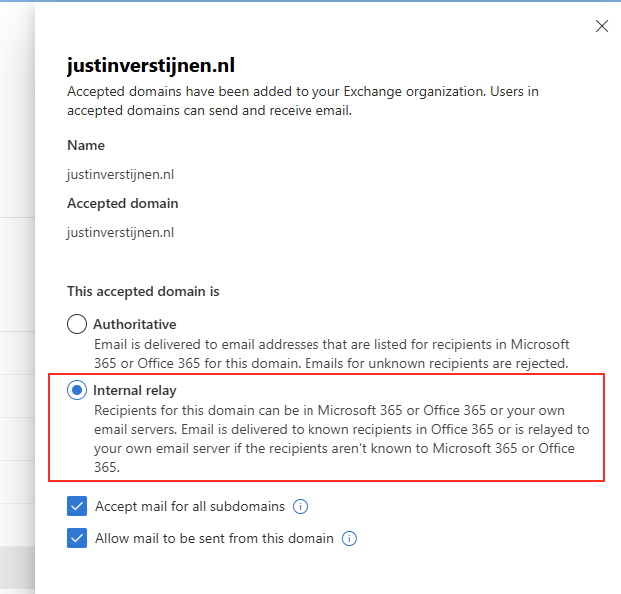
Select the option “Internal Relay” and save the configuration.
Set the domain as Internal Relay with Powershell
This simple Powershell script will set the relay option of the domain to internal.
POWERSHELL
$catchalldomain = "Your domainname"

# Set the relay of Internal
Set-AcceptedDomain -Identity $catchalldomain -DomainType InternalRelay
Step 5: Testing the configuration
We will now test the configuration. Let’s test from an emailaddress outside of your Microsoft 365 tenant (such as Gmail or Hotmail/Outlook.com)
I have sent a message from Hotmail to no-reply@justinverstijnen.nl which is a non-existent emailaddress in my tenant. This message should be delivered to my Catch All mailbox.
And it did!
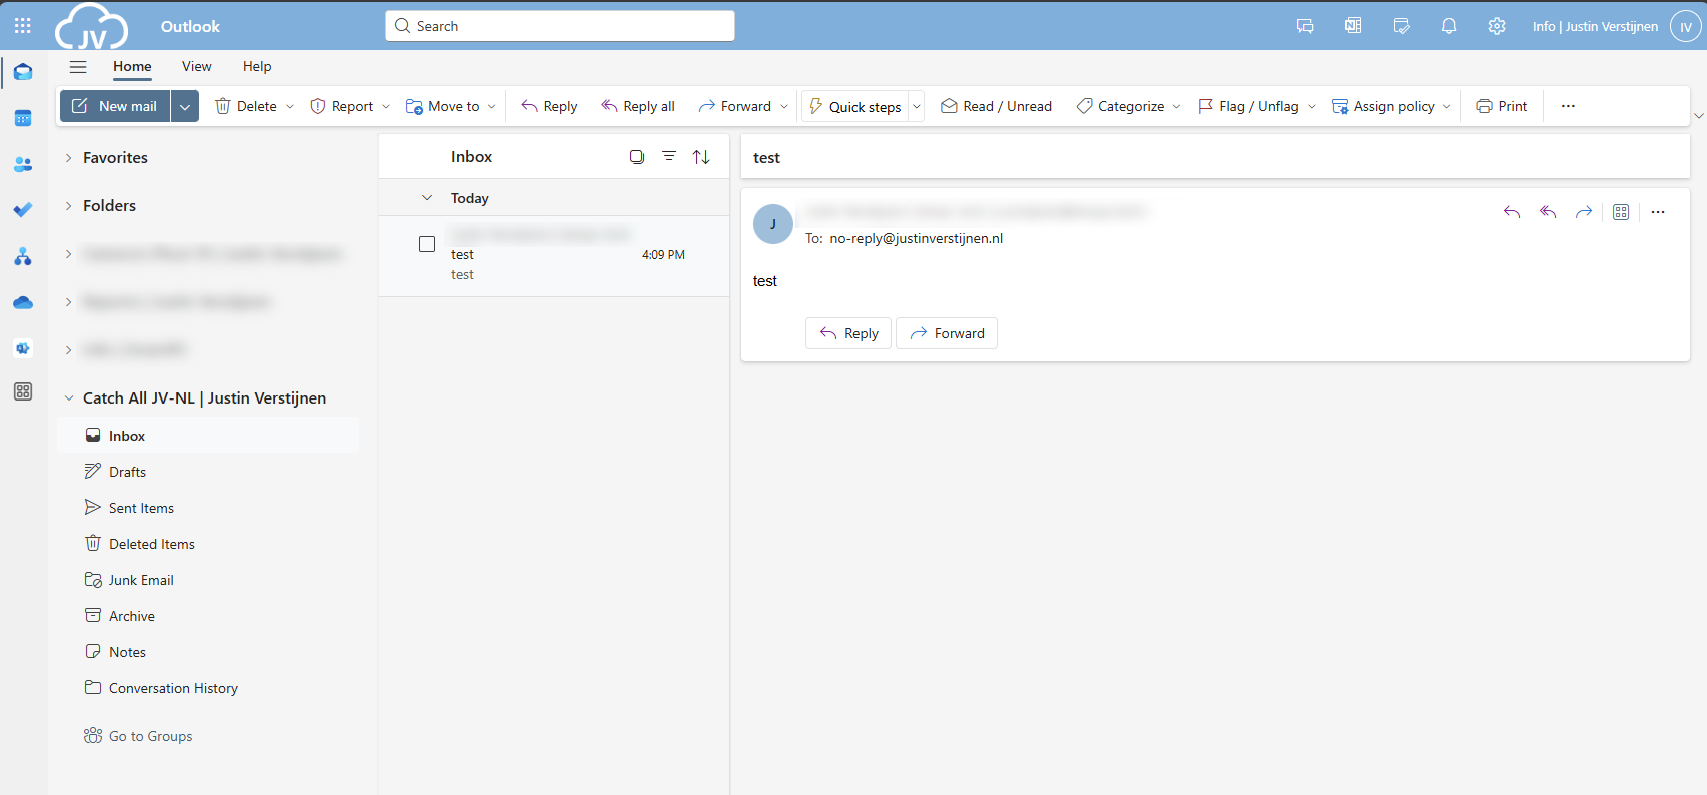
Now you should test normal email flow too, and ensure not all email is sent to your catch all mailbox. If this works, then the solution is working 100%.
Summary
This solution is a great way for having a catch all mailbox in your Microsoft 365 environment. I also added a PowerShell script for performing this task correctly, because one simple mistake can disrupt the complete mailflow.
Thank you for following this guide and I hope it was helpful.
End of the page 🎉
You have reached the end of the page. You can navigate through other blog posts as well, share this post on X, LinkedIn and Reddit or return to the blog posts collection page. Thank you for visiting this post.
If you think something is wrong with this post or you want to know more, you can send me a message to one of my social profiles at: https://justinverstijnen.nl/about/
If you find this page and blog very useful and you want to leave a donation, you can use the button below to buy me a beer. Hosting and maintaining a website takes a lot of time and money. Thank you in advance and cheers :)
The terms and conditions apply to this post.
Microsoft 365 create a shared mailbox with same alias
When using Microsoft 365 and using multiple custom domains, sometimes you are unable to create a shared mailbox that uses the same alias as an existing mailbox. In this guide I will explain this problem and show how to still get the job done.
The problem of multiple shared mailboxes with same alias
Let’s say, we have a Microsoft 365 tenant with 3 domains;
- domain1.com
- domain2.com
- domain3.com
When you already have a mailbox called “info@domain1.com” you are unable to create a “info@domain2.com” in the portal. The cause of this problem is that every mailbox has a underlying “alias” and that this alias is the same when created in the portal. I have tried this in the Microsoft 365 admin center, Exchange Online admin center and Powershell. I get the following error:
MARKDOWN
Write-ErrorMessage: ExB10BE9|Microsoft.Exchange.Management.Tasks.WLCDManagedMemberExistsException|The proxy address "SMTP:info@domain1.com" is already being used by the proxy addresses or LegacyExchangeDN. Please choose another proxy address.The cause of this problem
The cause of the problem is that even if you select another domain in the shared mailbox creation wizard, it wants to create a underlying UPN in your default domain.
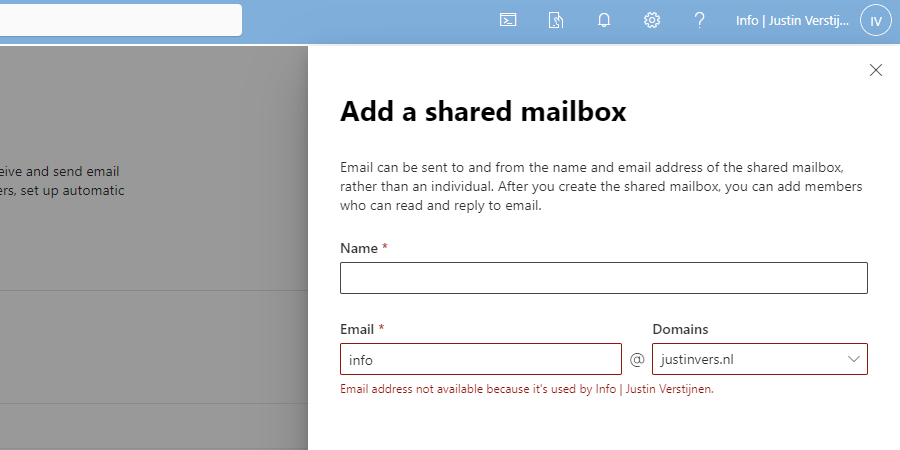
We get an error stating: Email address not available because it’s used by XXX, which is actually true.
How to create those mailboxes?
Luckily I found out that the solution is very easy and that is to create the new mailbox using the Exchange Online Powershell module. I will explain how this works.
For my tutorial, i stick to the example given above, where i described 3 domains, domain1, domain2 and domain3.
First, ensure that you have installed the Exchange Online Powershell module by running the following command in an elevated Windows Powershell window:
POWERSHELL
Install-Module ExchangeOnlineManagementAfter around 30 seconds, you are ready to login into Exchange Online by using th efollowing command:
POWERSHELL
Connect-ExchangeOnlineLog in into your account which has sufficient permissions to manage mailboxes.
After logging in, you have to run the following command:
POWERSHELL
New-Mailbox -Shared -Name "NAME" -DisplayName "DISPLAYNAME" -PrimarySMTPAddress "info@domain.com" -Alias "info_domainname"Here, we create a new shared mailbox:
- Name: Name of the mailbox (everything before the @domain.com)
- Displayname: The displayname of the mailbox how it is shown for contacts, users and in the portal
- PrimarySMTPAddress: The primary emailaddress for the mailbox
- Alias: A internal name for the mailbox which has to be unique (I often use info_domainname)
You can create all mailboxes like this, and we have to tell Exchange Online exactly how to create the mailbox. After creating the mailbox, it looks like this in Exchange Admin center;
Summary
So creating multiple shared mailboxes with the same alias is not possible in the admin portals which is very stupid. It looks like a way Microsoft wants you to still use their Powershell modules.
I hope Microsoft publishes a new solution for this where we can create those mailboxes in the admin portals and not having to create them using Powershell.
End of the page 🎉
You have reached the end of the page. You can navigate through other blog posts as well, share this post on X, LinkedIn and Reddit or return to the blog posts collection page. Thank you for visiting this post.
If you think something is wrong with this post or you want to know more, you can send me a message to one of my social profiles at: https://justinverstijnen.nl/about/
If you find this page and blog very useful and you want to leave a donation, you can use the button below to buy me a beer. Hosting and maintaining a website takes a lot of time and money. Thank you in advance and cheers :)
The terms and conditions apply to this post.
Migrate data to SharePoint/OneDrive with SPMT
When still managing on-premises environments, but shifting your focus to the cloud you sometimes need to do a migration. This page helps you to migrate to SharePoint or Onedrive according to your needs.
At the moment, SharePoint is a better option to store your files because it has the following benefits over a traditional SMB share:
- Single permissions system (No SMB/NTFS permissions)
- High available by default
- No server infrastructure needed
- Users can work at the same file simultaneously
- Integration with Microsoft Teams
The Microsoft SharePoint Migration Tool
Microsoft has a tool available which is free and which can migrate your local data to SharePoint. The targets you can specify are:
- SharePoint
- OneDrive
- Microsoft Teams
Download the tool here: https://learn.microsoft.com/en-us/sharepointmigration/how-to-use-the-sharepoint-migration-tool
When using in a production environment, my advice is to use the “General Availability” option, this version is proven to work like expected.
Using the SharePoint Migration Tool (SPMT)
Install the SharePoint Migration tool on a computer with access to the source fileshare, or on the fileserver itself. How closer to the source, how faster the migration will perform. Also, please check the system requirements: https://learn.microsoft.com/en-us/sharepointmigration/spmt-prerequisites
When the tool is installed, you will get on the landing page:
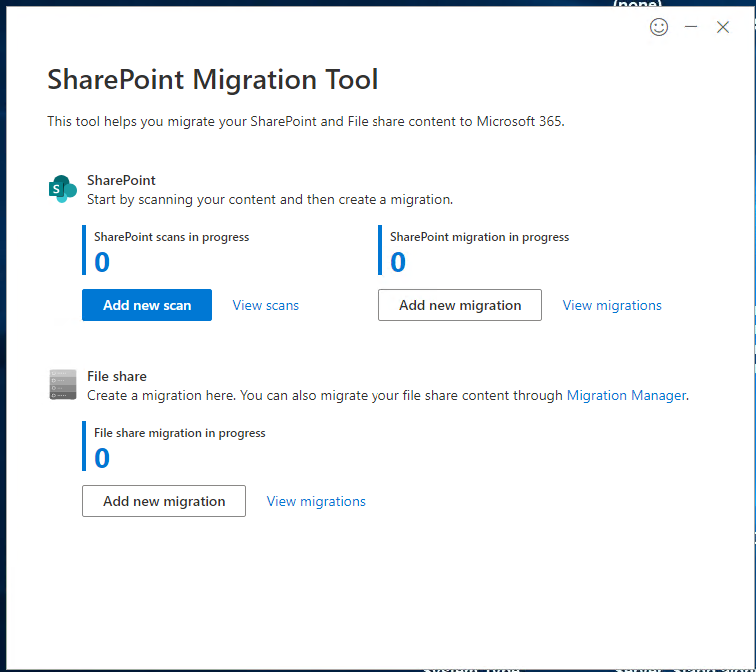
Here you can configure the fileshare (source) and then the destination in SharePoint.
After configuring the task, the tool will take over the hard work and migrates your data to your SharePoint site:

Summary
The SharePoint Migration Tool is a great tool to automate your SharePoint migration and phase out local network folders. It supports resyncing to first do a bulk migration, and later syncing the changes.
Thank you for reading this post and I hope it was helpful.
End of the page 🎉
You have reached the end of the page. You can navigate through other blog posts as well, share this post on X, LinkedIn and Reddit or return to the blog posts collection page. Thank you for visiting this post.
If you think something is wrong with this post or you want to know more, you can send me a message to one of my social profiles at: https://justinverstijnen.nl/about/
If you find this page and blog very useful and you want to leave a donation, you can use the button below to buy me a beer. Hosting and maintaining a website takes a lot of time and money. Thank you in advance and cheers :)
The terms and conditions apply to this post.
Dynamic Distribution Groups in Microsoft 365
This guide explains how Exchange Online Dynamic Distribution Groups work, how to create and maintain them with Microsoft 365.
Sometimes you want to have a distribution group with all your known mailboxes in it. For example an employees@justinverstijnen.nl or all@justinverstijnen.nl address to send a mail company wide. A normal distribution group is possible, but requires a lot of manual maintenance, like adding and removing users.
To apply a little more automation you can use the Dynamic Distribution Group feature of Exchange Online. This is a feature like the Dynamic groups feature of Microsoft Entra which automatically adds new user mailboxes after they are created to make sure every new employee is added automatically.
Requirements
- Around 15 minutes
- Exchange Online Powershell module
Creating a Dynamic Distribution Group
To create a dynamic distribution group, go to the Exchange Online Admin center (admin.exchange.microsoft.com)
When you create a group, select the option “Dynamic distribution” and fill in the details.
At the step “Users” you have to select “Users with Exchange mailboxes” to only include users, no shared mailboxes, external/guest users or resource mailboxes.
Define an email address and finish the wizard.
Delivery Management whitelist
To define which users are allowed to email to the group, you can configure delivery management which acts as a whitelist for the dynamic distribution group. Only the users defined may send to the group.
After creating the mailbox, go to Groups and then Dynamic distribution list and select the group.
Go to the tab “Settings” and click “edit delivery management”.
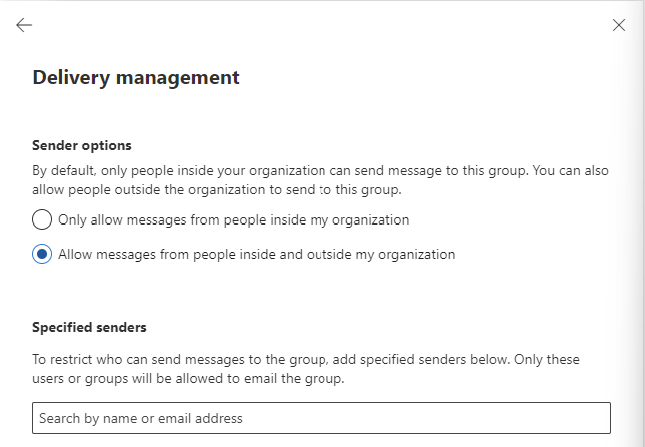
Here you can define the users who may send and a general advice to restrict mailing only from the same orgainzation.
How to exclude mailboxes from the dynamic
It is possible to exclude mailboxes from the dynamic distribution group, but it is not possible in the Admin center. This is possible with Powershell.
My way to do it is to use the attribute field CustomAttribute1 and put “exclude_from_employees” in it without the quotes. In the filter of the dynamic distribution group we select all user mailboxes but not when they have the attribute “exclude_from_employees”.
To configure the attribute filter, we login into Exchange Online Powershell:
POWERSHELL
Connect-ExchangeOnlineTo configure the filter itself, we run the following script:
POWERSHELL
$employees = "Name of distributiongroup"
Set-DynamicDistributionGroup -Identity $employees -RecipientFilter "(Recip
ientTypeDetails -eq 'UserMailbox') -and (CustomAttribute1 -ne 'exclude_from_employees')"
After running these commands succesfully you can add the attribute from the Exchange Online admin center in a mailbox. To add this attribute, open a mailbox;
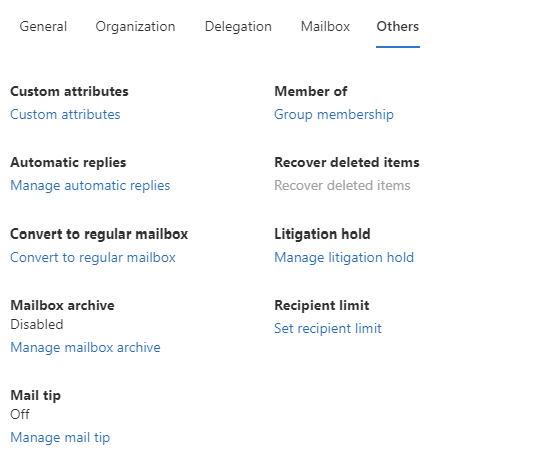
Go to “Custom Attributes” and add the attribute like shown below;

When a mailbox had this attribute in field 1, it will be excluded from the dynamic distribution group.
Check recipients of dynamic distribution group
To check all recipients of the distribution group, you can run the following command when logged in into Exchange Online Powershell:
POWERSHELL
$employees = Get-DynamicDistributionGroup -Identity *EMAILADDRESS*
Get-Recipient -RecipientPreviewFilter ($employees.RecipientFilter)
Just change the Email Address to your own created dynamic distribution group and all recipients will show. Now you have the list of all email addresses the system considers as “members”.
Check excluded recipients of dynamic distribution group
To check which mailboxes does not receive email from the dynamic distribution group, you can run the following;
POWERSHELL
Get-Mailbox | where {$_.CustomAttribute1 -eq "exclude_from_employees"}This command will return all users with the created attribute and who does not receive the email.
Summary
Dynamic Distribution Groups are an excellent way to minimize administrative effort while maintaining some internal addresses for users to send mail to. It is really good as a “all-employees” distribution group where you never have to add or remove users from when employees come and leave. The more automation, the better.
I hope this guide was helpful and thank you for reading!
End of the page 🎉
You have reached the end of the page. You can navigate through other blog posts as well, share this post on X, LinkedIn and Reddit or return to the blog posts collection page. Thank you for visiting this post.
If you think something is wrong with this post or you want to know more, you can send me a message to one of my social profiles at: https://justinverstijnen.nl/about/
If you find this page and blog very useful and you want to leave a donation, you can use the button below to buy me a beer. Hosting and maintaining a website takes a lot of time and money. Thank you in advance and cheers :)
The terms and conditions apply to this post.