All pages referring or tutorials for Microsoft Azure.
This is the multi-page printable view of this section. Click here to print.
Microsoft Azure
- Getting started with Terraform
- Automatically clean up inactive Entra ID devices using Azure Automation
- Useful Azure links/tools
- Create HTTPS 301 redirects with Azure Front Door
- Everything you need to know about Azure Bastion
- I tried running Active Directory DNS on Azure Private DNS
- ARM templates and Azure VM + Script deployment
- Automatic Azure Boot diagnostics monitoring with Azure Policy
- Wordpress on Azure
- New: Azure Service Groups
- In-Place upgrade to Windows Server 2025 on Azure
- Installing Windows Updates through PowerShell (script)
- Use Ephemeral OS Disks in Azure
- Use Azure Logic Apps to automatically start and stop VMs
- How to implement Azure Firewall to secure your Azure environment
- What is Azure Firewall?
- Azure Default VM Outbound access deprecated
- Microsoft Azure certifications for Developers
- Creating Static Web Apps on Azure the easy way
- Create custom Azure Workbooks for detailed monitoring
- Setup a Minecraft server on Azure
- Deploy Resource Group locks automatically with Azure Policy
- Monitor and reduce carbon emissions (CO2) in Azure
- Migrate servers with Azure Migrate in 7 steps
- Save Azure costs on Virtual Machines with Start/Stop
- Deep dive into IPv6 with Microsoft Azure
- Using Azure Update Manager to manage updates at scale
- 10 ways to use tags in Microsoft Azure
- My Azure Naming Framework
- Azure VPN Gateway Maintenance - How to configure
- Azure Stack HCI - Host your Virtual Desktops locally
- How to learn Azure - My learning resources
- Introduction to Azure roles and permissions (RBAC/IAM)
- Network security in Azure with NSG and ASG
- Rename name-tags to resource groups and resources
Getting started with Terraform
In this guide, I show the path from install to deployment: I install Terraform, I prepare my Azure login using Azure CLI, and then I run a “single server” Terraform setup so you can see the process end-to-end.
Terraform described
Terraform is a framework built by Hashicorp that lets you manage cloud infrastructure for Azure and Amazon Web Services using text files only. This does it by talking with the Azure Resource Manager API, the underlying system that manages Azure Environments, Azure CLI and Azure PowerShell.
Terraform code is declarative code, which means you describe the desired end result instead of writing every step the system needs to take, like you would often do in a PowerShell script. In this case, we tell ARM to create a Virtual Machine with the name, IP address, and other settings we specify. It is a bit like telling a chef which dish you want and which ingredients to use, and then letting the chef prepare it for you.
In simple words:
- You write what you want (for example: “make a server, with a IP linked and a NSG”).
- Terraform creates a “plan” to show what it will do before touching your cloud environment
- Then Terraform applies the plan using Azure CLI to build (or change) the Azure resources according to your plan
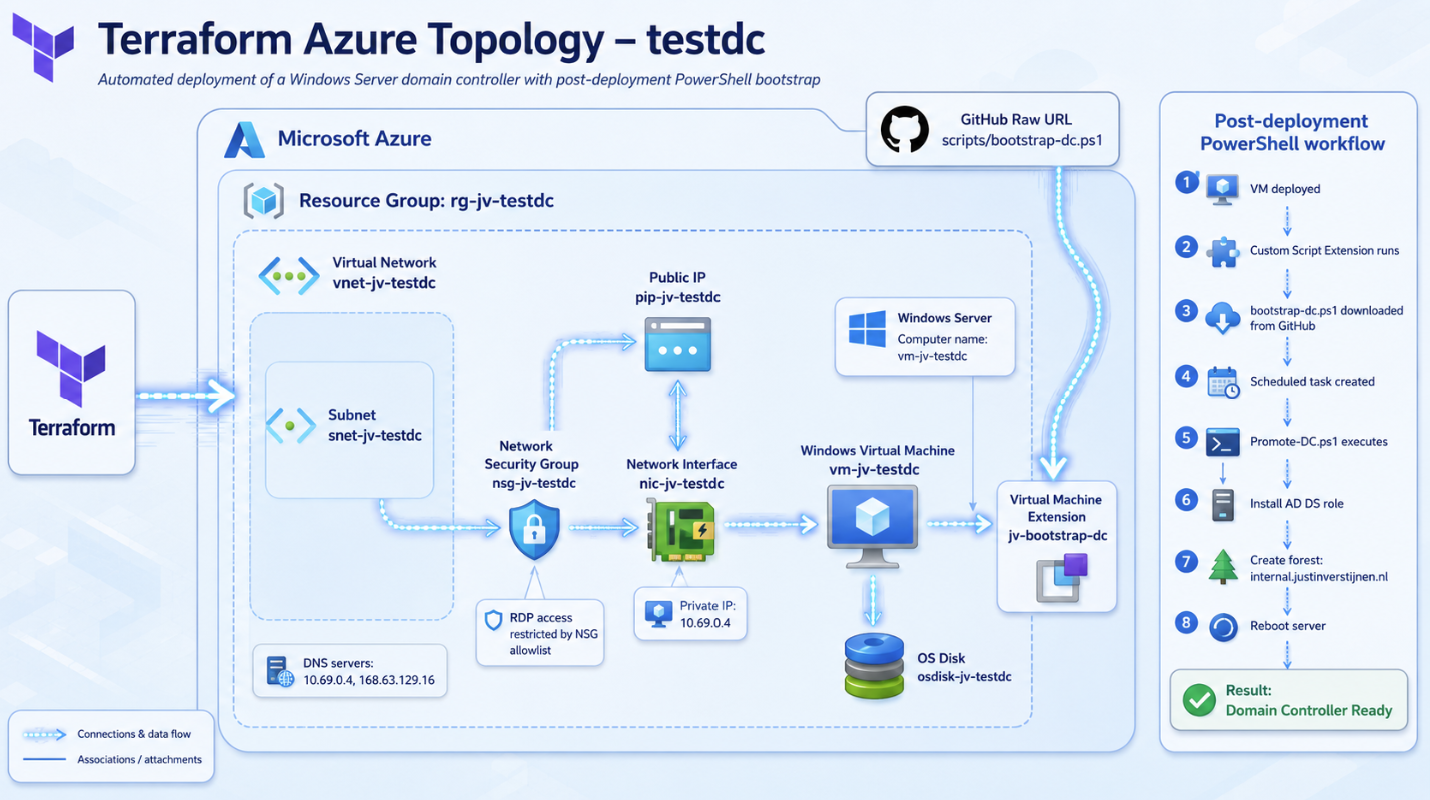
The topology of the resources we will deploy in this guide is:
| Resource type | Resource name |
|---|---|
| Resource group | rg-jv- |
| OS disk | osdisk-jv- |
| VNET | vnet-jv- |
| NIC | nic-jv- |
| Public IP | pip-jv- |
| NSG | nsg-jv- |
| VM | vm-jv- |
After the resources are deployed, a PowerShell script is executed in the VM to install the Active Directory role and to configure it.
In this guide, I will show how to install Terraform, prepare your Azure login, start using Terraform and run a single server Terraform setup I have made with the needed dependencies and security.
Requirements
- Around 30 minutes of your time
- Moderate knowledge of Azure and PowerShell
- Basic knowledge of Terraform and Infrastructure as Code
- Visual Studio Code
- Terraform
- Azure CLI
Step 1: Installation of Terraform
In this step, I will install Terraform on my local computer. First, go to the official Terraform installation page.
https://developer.hashicorp.com/terraform/install

On this Terraform installation page, download the Windows version of Terraform.
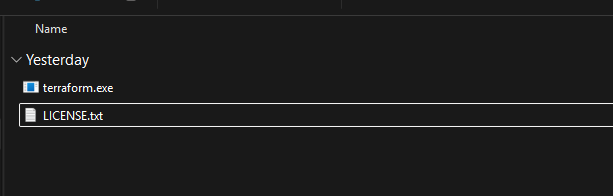
After downloading the ZIP file, extract the file. Inside the ZIP file you will find the terraform.exe file. For this guide, I place the Terraform binary in the folder below. Create the folder below if it does not already exist.
- C:\Tools\Terraform
Then place terraform.exe inside this folder.
Now Terraform is installed on the computer, but Windows still needs to know where it can find terraform.exe.
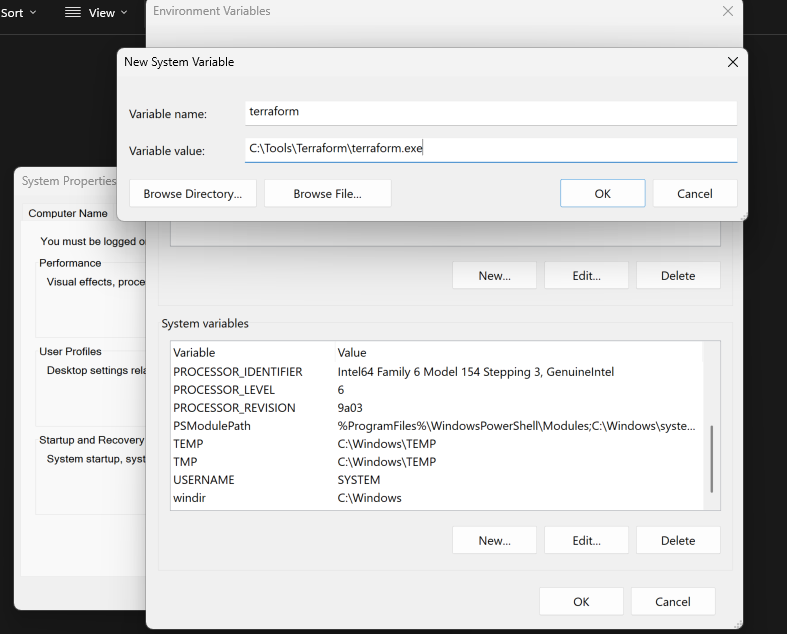
To make this work from every PowerShell window, I add the Terraform folder to the Windows user Path. If you have a other location, change the location.
PowerShell
$terraformlocation = "C:\Tools\Terraform"
$userPath = [Environment]::GetEnvironmentVariable("Path", "User")

if ($userPath -notlike "*$terraformlocation*") {
    [Environment]::SetEnvironmentVariable("Path", "$userPath;$terraformlocation", "User")
}
This action sets the variable in the Windows known variables. This is similar to this GUI option.
After changing the Path, close all open PowerShell and Visual Studio Code windows. Then open a new PowerShell window and check if Terraform is working:
PowerShell
terraform -versionIf Terraform is installed correctly, the Terraform version will be shown in the terminal.
PowerShell
PS C:\Users\InfoJustinVerstijnen> terraform -version
Terraform v1.15.2
on windows_amd64
Terraform is now installed and ready to use.
Step 2: Installation of Azure CLI
We can now install the Azure CLI shell if not already installed, as Terraform needs a way to authenticate to Microsoft Azure. The most easy way to install Azure CLI is through with winget.
Open PowerShell as Administrator and run the command below:
PowerShell
winget install --exact --id Microsoft.AzureCLI
The installation can take some time, so please have a little patience. This process can take up to 15 minutes.
After the installation is completed, close all open PowerShell and Visual Studio Code windows. This is needed so Windows can reload the new environment variables and initializing the commands needed.
Then open a new PowerShell window and check if Azure CLI is working:
PowerShell
az versionIf Azure CLI is installed correctly, the Azure CLI version information will be shown in the terminal.
PowerShell
PS C:\Users\InfoJustinVerstijnen> az version
{
  "azure-cli": "2.86.0",
  "azure-cli-core": "2.86.0",
  "azure-cli-telemetry": "1.1.0",
  "extensions": {
    "account": "0.2.5",
    "logic": "1.1.0"
  }
}
Azure CLI is now also installed and ready to use.
Step 3: Downloading my Single Server Terraform setup
For the ease of this guide, I have a full template available that deploys the resources as stated in the description at the top of the page. We only need to change some variables to your likings.
Go to my GitHub repository to download the simple 1 server setup:
Download Terraform setup from GitHub
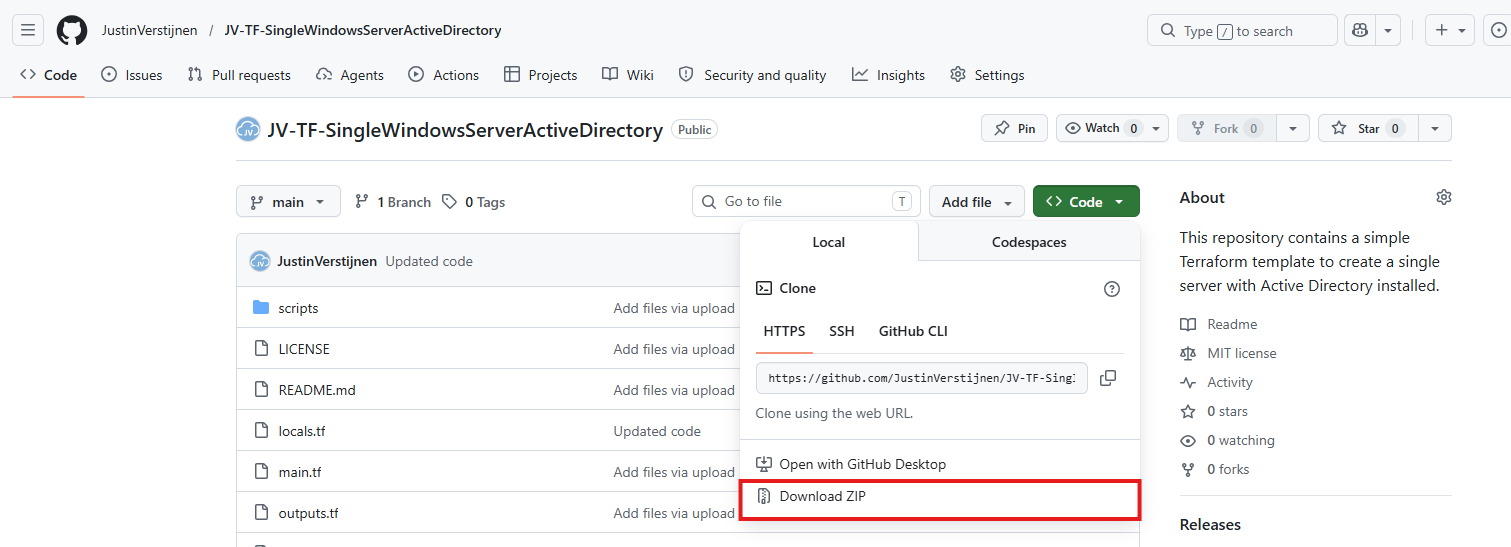
Click on “Code” and click Download ZIP and place it on your computer on a known place. This folder contains the Terraform setup, with some preconfigured files. For this guide we only need to change information in the terraform.tfvars file.
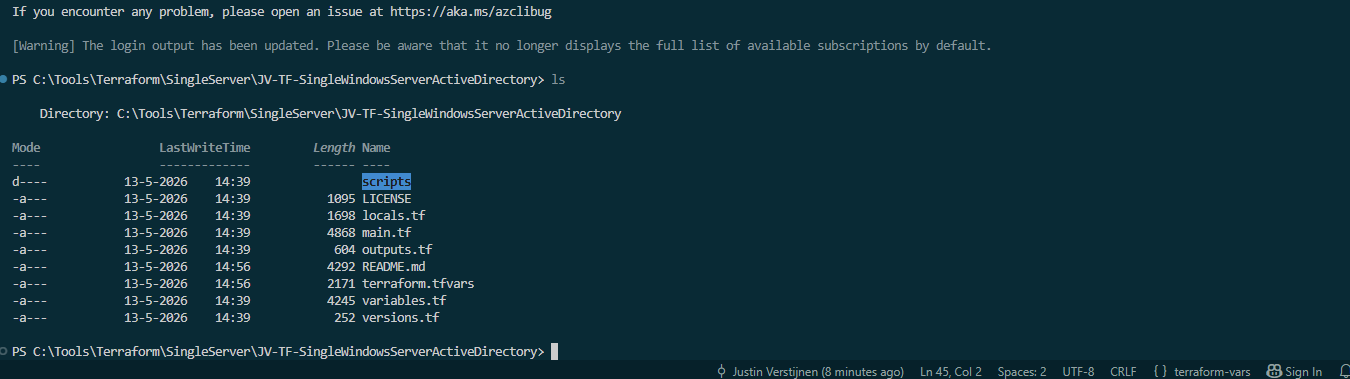
In the ZIP file we can find 9 files which all have their own purpose:
| File name | Contains |
|---|---|
| scripts/bootstrap-dc.ps1 | The after deployment PowerShell script |
| LICENSE | The license of the GitHub Repo |
| README.md | The instructions of the repo, superseded if you follow this guide |
| locals.tf | The naming scheme of the deployment |
| main.tf | The resources which all will be deployed using the set variables. We can see this as the full recipe |
| outputs.tf | The outputs like names of resources |
| terraform.tfvars | The project specific variables which we can configure to our likings |
| variables.tf | All possible renameable fields |
| versions.tf | All versions of dependencies |
Now we are ready to change the project to your likings.
Step 4: Changing the project variables
In the file terraform.tfvars, you can change the project variables. This file is where you set values like names, IP addresses, and other settings for your deployment. Review everything before saving.
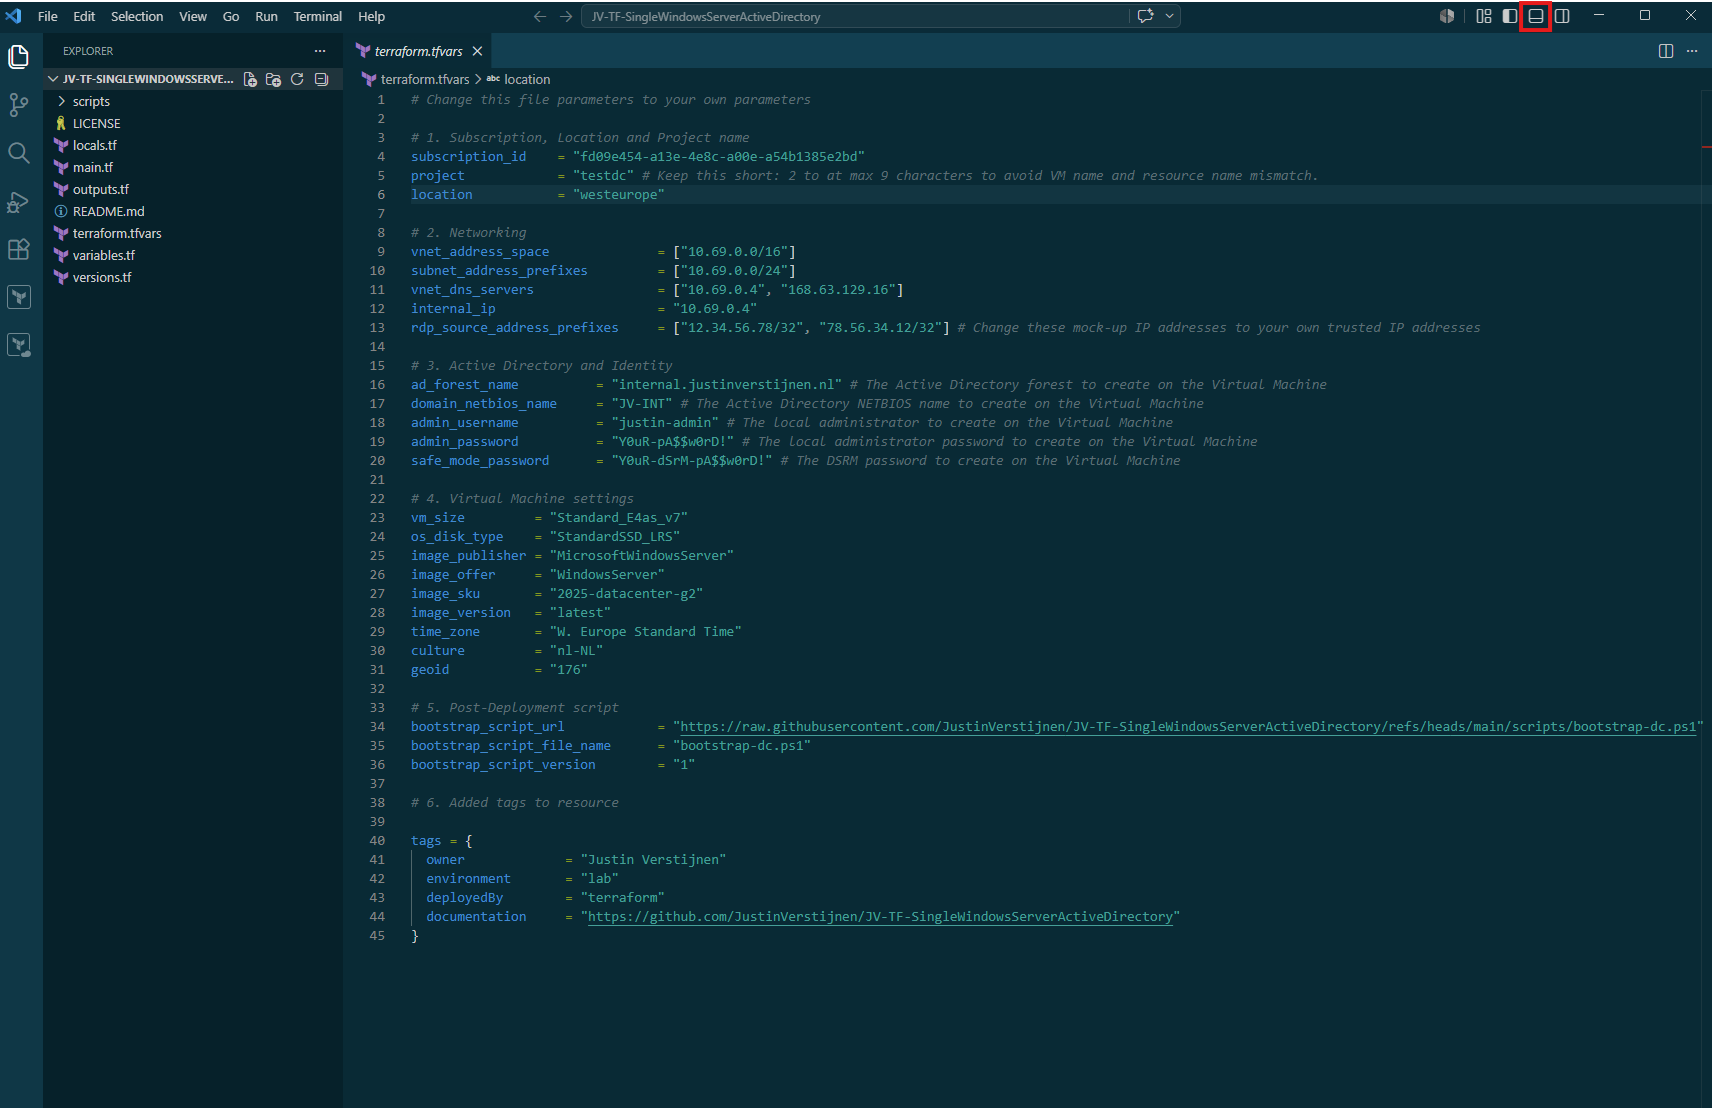
Change the information to your likings. The things you are required to change are:
- Line 4: Subscription ID
- Line 5: Project name
- Line 13: Your IP address for whitelisting purposes
- Line 16, 17, 18, 19, 20: Your Active Directory details
After changing this information, save the file and we are now ready to go.
Step 5: Deploying the Terraform project
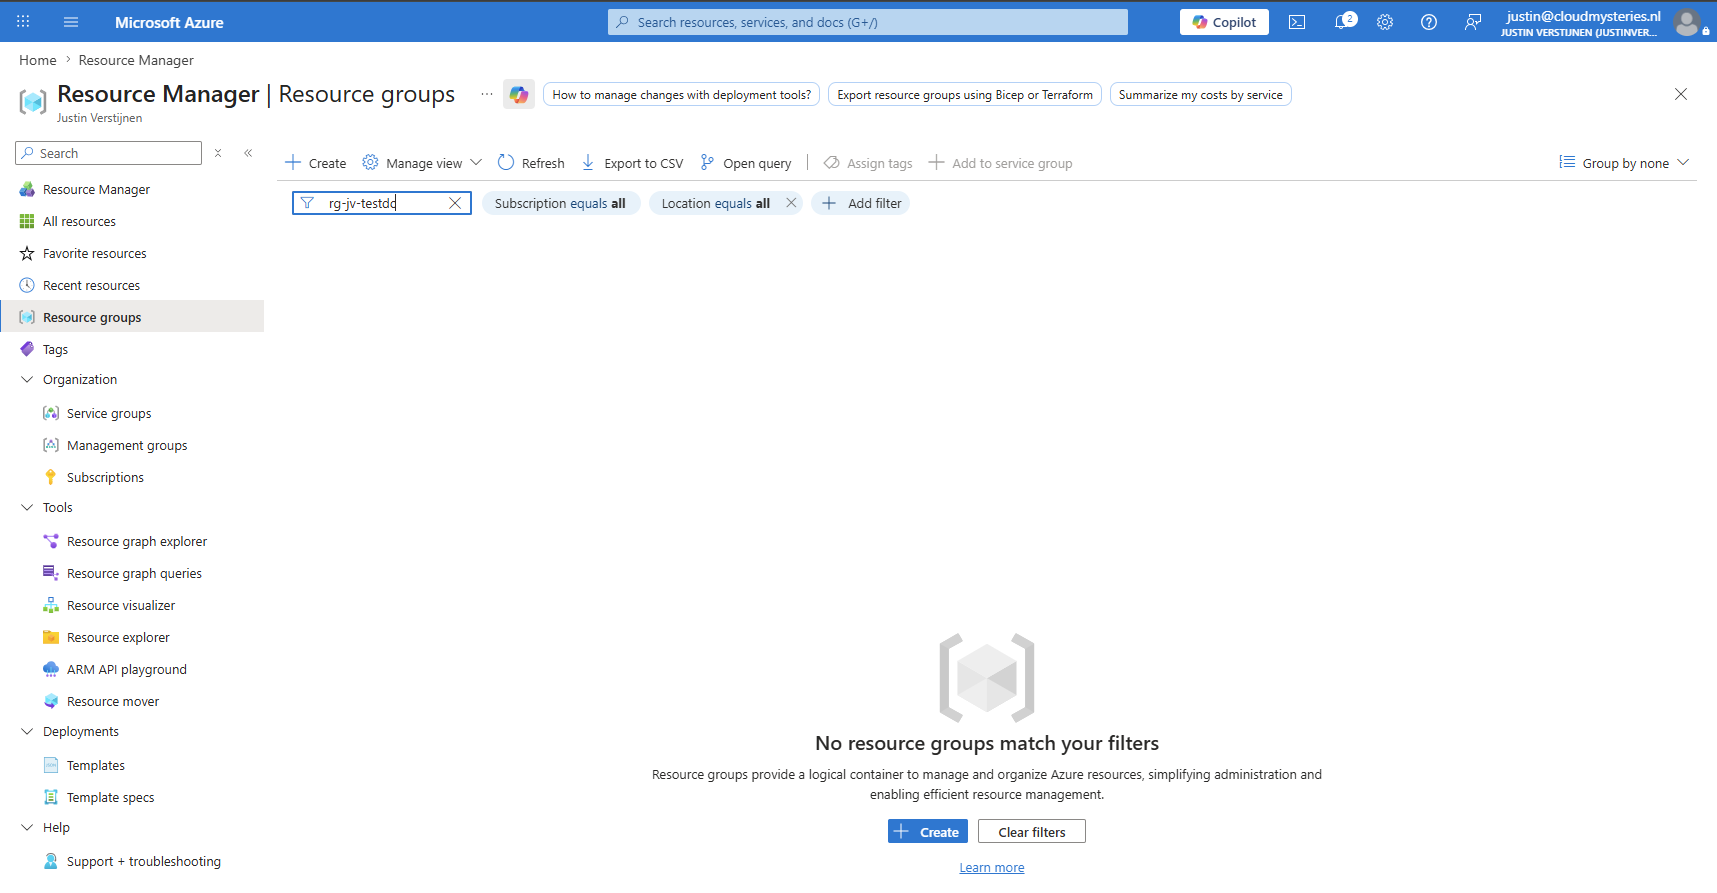
Now we are finally ready to deploy our Terraform project to Azure. We will login to Azure CLI and then prepare Terraform for the deployment. In my Azure Environment, nothing is available using the projects’ names:
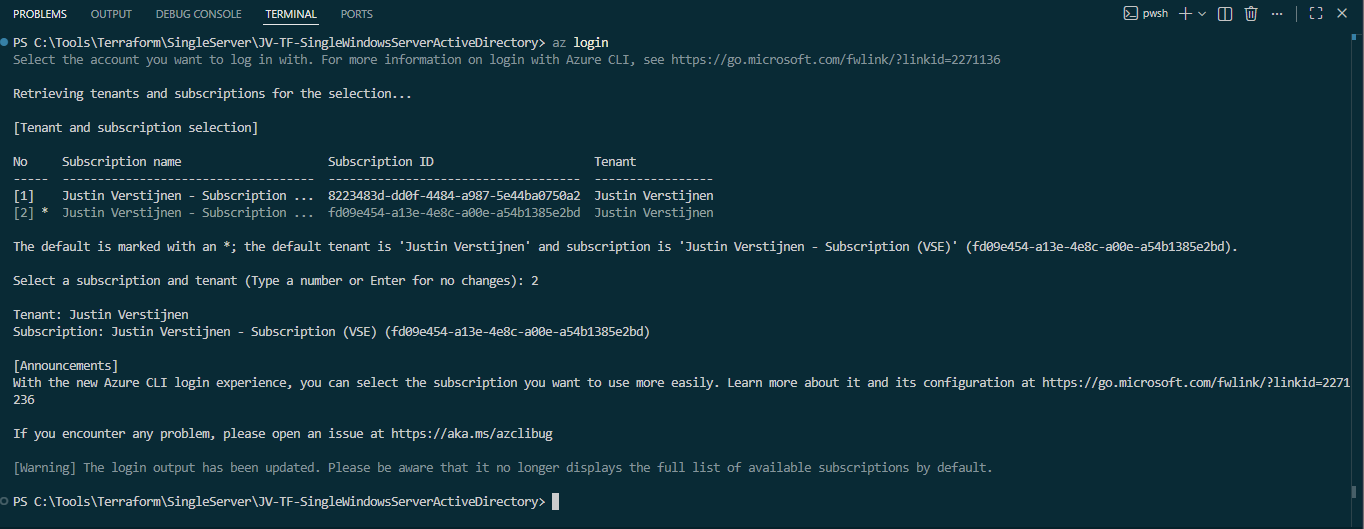
Let’s sign in to Azure CLI using this command:
PowerShell
az loginThen login to your Azure account where the deployment must be done. Also be sure to perform the additional verification steps.
After that, Azure CLI can ask for additional information like the subscription you want to deploy the resources into. If you no have already done so, copy the Subscription ID and paste this into line 4 of the terraform.tfvars file.
Now navigate to the folder of your Terraform project in Visual Studio Code terminal.
Then we can perform these commands:
PowerShell
terraform init
Now Terraform is initialized, creating some temporary files. Then validate the configuration:
PowerShell
terraform validate
After validation with zero errors, create a plan. This command (Terraform plan) creates a file that shows what will be added to the Azure Environment.
PowerShell
terraform plan -out main.tfplan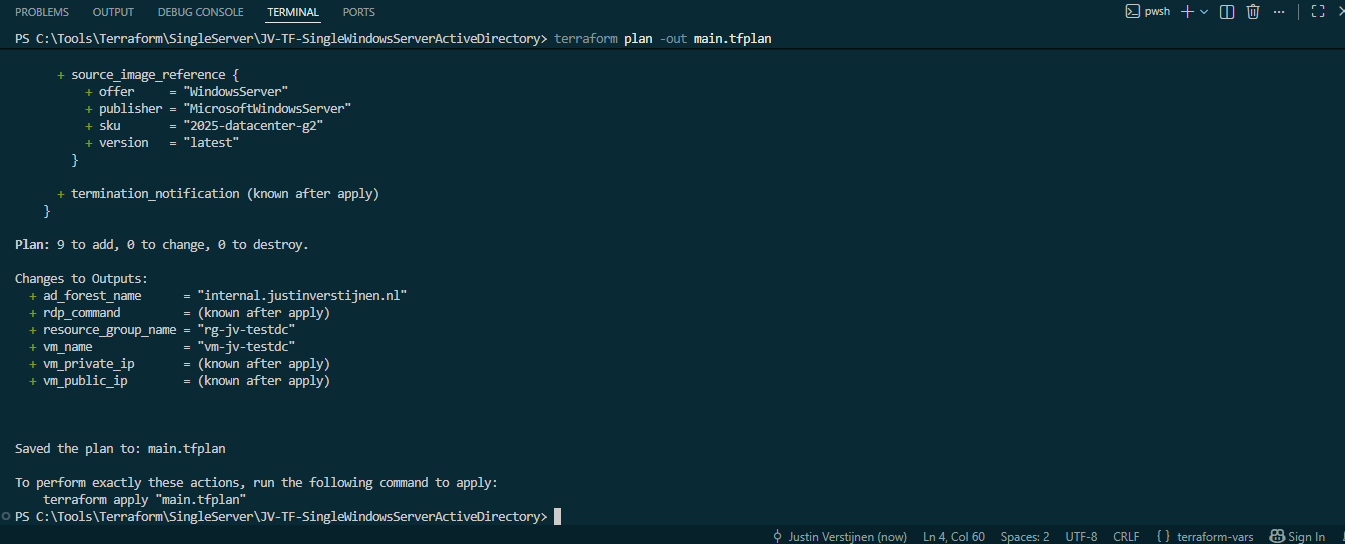
Finally, apply the plan:
PowerShell
terraform apply main.tfplanTerraform will now start the full deployment based on your Terraform variables and plan.
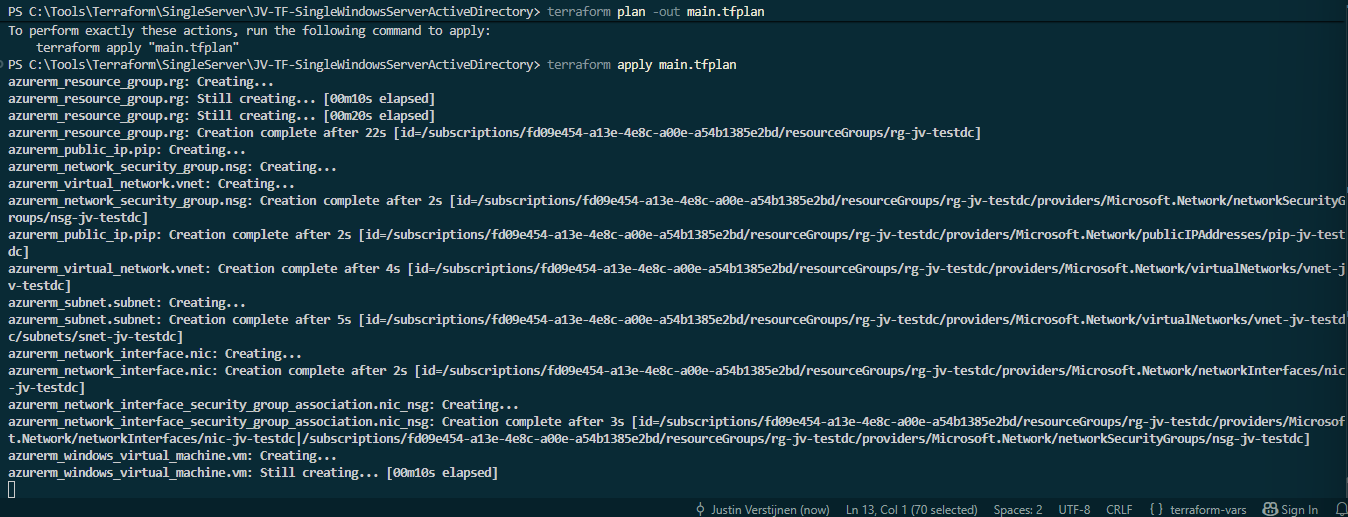
Now the complete deployment will be executed and built in Azure. In the Terminal Window you can review the status. The complete deployment will take around 5 minutes.
After some seconds, still in deployment, we can already see the resource group being created:

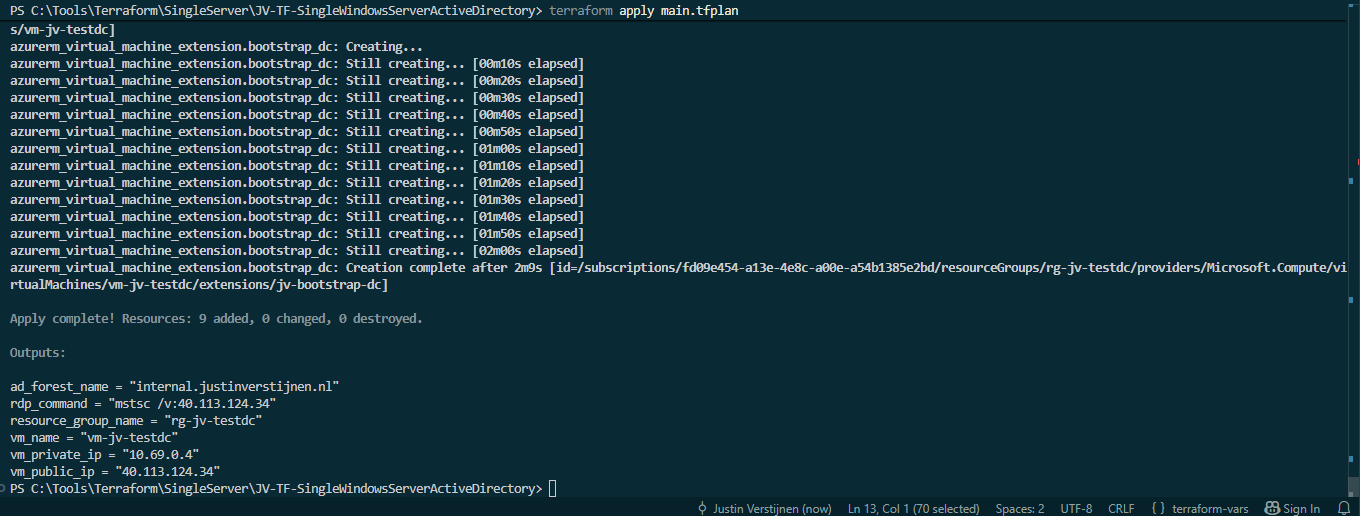
After around 5 minutes, Terraform will inform us that the deployment is finished, giving us information about what has been done, like the IP address to connect with RDP.
If you need to remove all the resources Terraform created, you can run:
PowerShell
terraform destroy -auto-approveThis willautomatically destroy every resource created by the Terraform plan, skipping the extra approval step.
Step 6: The results
After terraform apply finishes, Terraform has built the resources defined in the Terraform setup. In my case, this took around 5-6 minutes and after that, the virtual machine will be restarted to apply the Active Directory installation. Let’s check the results:
- check the output shown by Terraform in your terminal, and
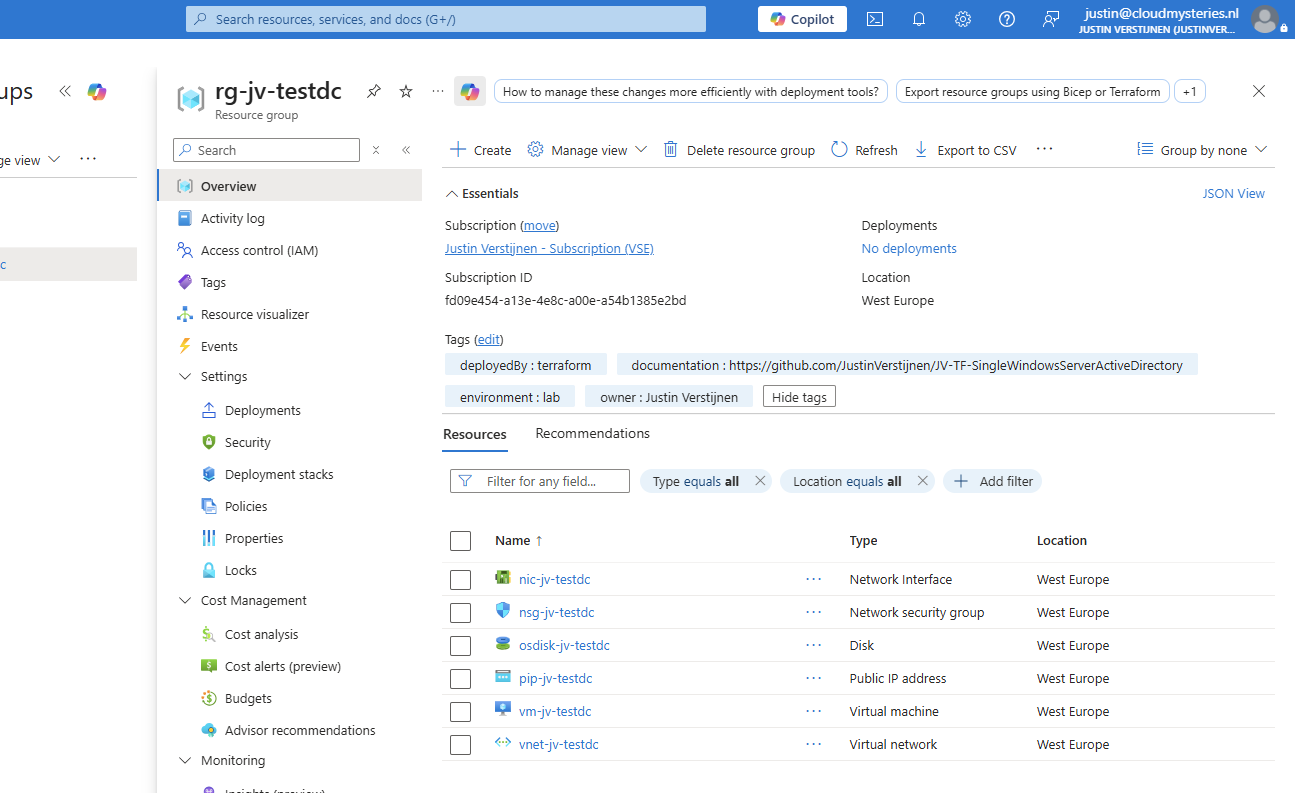
- check the Azure resources in the Azure Portal for the resource group that was created/used by this Terraform setup
This is the newly created resource group for example. All dependent resources are created.
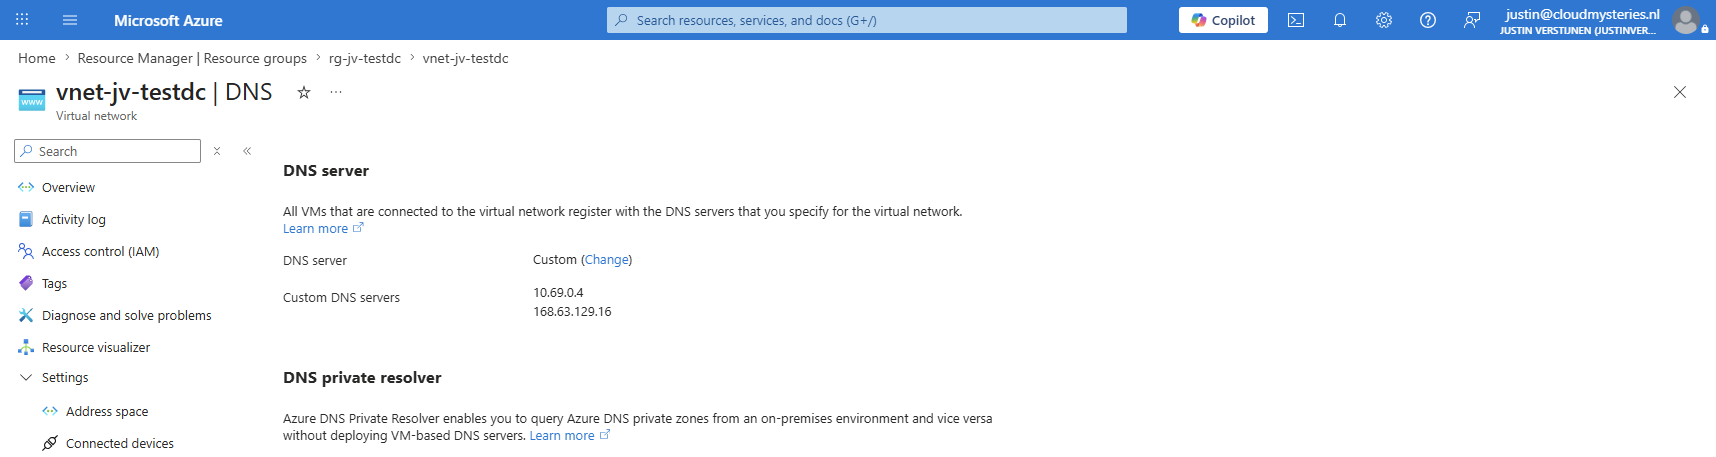
And in the VNET, the DNS server is also changed to get new servers into the DNS/Active Directory of the created servers.
And in the VM, everything is configured according to plan:
Pretty cool and much faster and more according to plan than deploying everything by hand.
Step 7: Changes to Terraform project (optional)
If you change something in the Terraform setup (for example in terraform.tfvars), you can update Azure again by running these commands:
PowerShell
terraform plan -out main.tfplan
terraform apply main.tfplan
Terraform will compare what it wants (new plan) with what already exists, and then apply the changes.
If you want to remove everything completely, use the terraform destroy command first.
PowerShell
terraform destroy -auto-approveKnowledge check
Knowledge check
This quiz needs JavaScript to show the questions and feedback.
This quiz needs JavaScript to show the questions and feedback.
Summary
Terraform helps you deploy Azure resources in a repeatable way using Infrastructure as Code. With the steps above, you installed Terraform and Azure CLI, prepared your settings in terraform.tfvars, then used terraform init, terraform validate, terraform plan, and terraform apply to deploy your single server setup. This structured format follows the same blog layout pattern from my post template.
The advantages of Terraform are fast deployment, modular setup in code, and easy scalable deployment.
Thank you for reading this post and I hope it was helpful!
Sources
These sources helped me by writing and research for this post;
End of the page 🎉
You have reached the end of the page. You can navigate through other blog posts as well, share this post on X, LinkedIn and Reddit or return to the blog posts collection page. Thank you for visiting this post.
If you think something is wrong with this post or you want to know more, you can send me a message to one of my social profiles at: https://justinverstijnen.nl/about/
If you find this page and blog very useful and you want to leave a donation, you can use the button below to buy me a beer. Hosting and maintaining a website takes a lot of time and money. Thank you in advance and cheers :)

The terms and conditions apply to this post.
Automatically clean up inactive Entra ID devices using Azure Automation
Over time, Microsoft Entra ID environments often become filled with old and inactive devices. Cleaning up these devices manually takes time and is easy to forget. By using Azure Automation, we can fully automate this process and remove devices that have been inactive for more than 180 days.
Requirements
- An Azure subscription
- PowerShell 7 installed
- Microsoft Graph PowerShell module installed
- Basic knowledge of PowerShell
- Basic knowledge of Microsoft Graph
- Around 30 minutes of your time
Azure Automation vs. Logic Apps
Azure Automation looks similar to Logic Apps. Personally, I think Azure Automation is better for more complex tasks. Logic Apps are very good for quickly creating smaller workflows by using connectors and predefined actions. However, you are more limited in customization. With Azure Automation you can fully design and test your own scripts and use custom PowerShell modules but also Python. This gives you much more flexibility and control.
How does Azure Automation work?
Azure Automation works by creating an Automation Account in Azure. This acts as a container where different runbooks can run.
The runbooks are the actual scripts or tasks which can run manually or based on a schedule.
In this guide we will use:
- An Automation Account
- A PowerShell runbook
- A Managed Identity
- Microsoft Graph permissions
- A schedule to run automation automatically
The script will check all Entra ID devices and delete devices that have been inactive for more than 180 days.
The scripts and description
I already created the preparation files and scripts which can be found here:
https://github.com/JustinVerstijnen/JV-AA-CleanEntraIDDevices/tree/main
Here are two scripts:
- Setup-script: This is the script needed for the setup of the automation account, only the first time after creating an Automation Account
- Clean-script: This is the script that runs on schedule
- The script connects to Microsoft Entra ID using the Microsoft Graph PowerShell module
- It looks for devices that have been inactive for more than 180 days based on their Last activity date shown in Entra ID
- Devices that do not have a Last activity / Last sign-in date are ignored and will not be disabled or deleted because the setting
$SkipDevicesWithoutLastSignIn = $trueis enabled - Hybrid Azure AD joined devices are skipped and will not be processed
- The script generates a list of stale devices that meet the criteria
- With the current setting (
$Action = "Report"), the script only creates a report and does not make any changes to devices - If the action is changed to Disable, the matching stale devices will be disabled
- If the action is changed to Delete, only devices that are already disabled can be deleted, providing an additional safety measure. This is the default option for now
Step 1: Create an Automation Account:
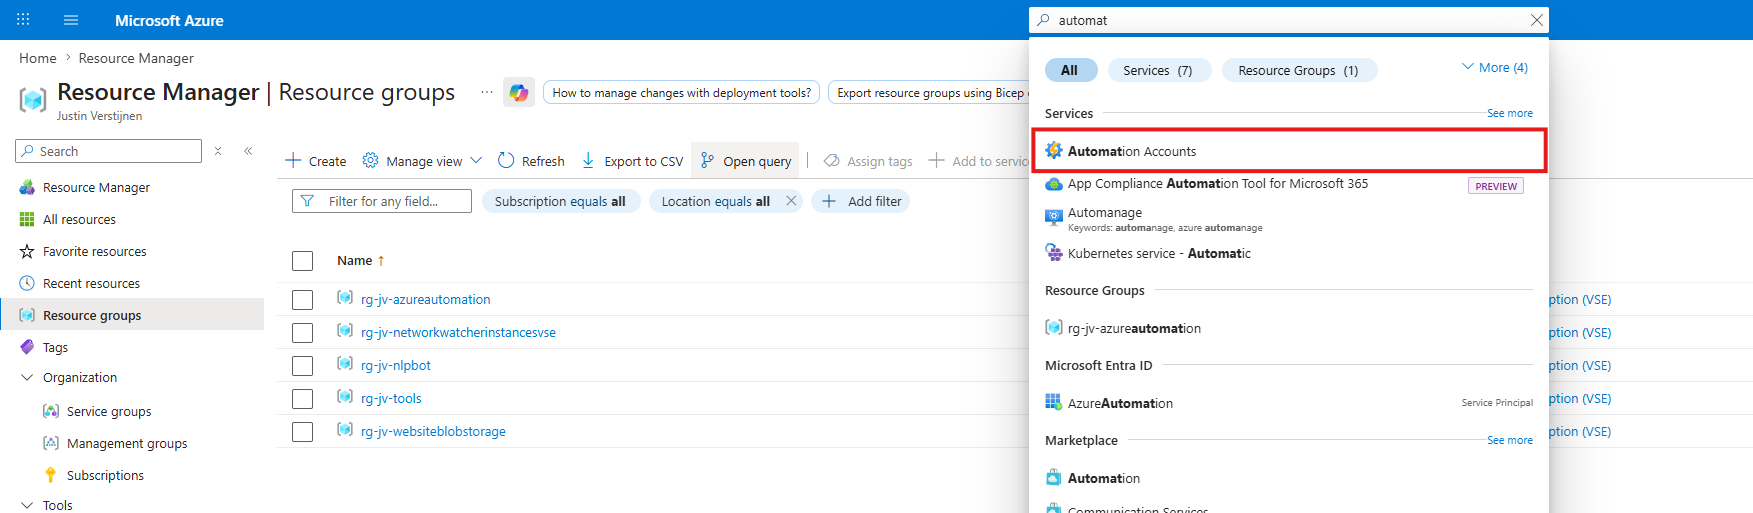
Open the Azure Portal and navigate to: “Automation Accounts”. Then create a new Automation Account.
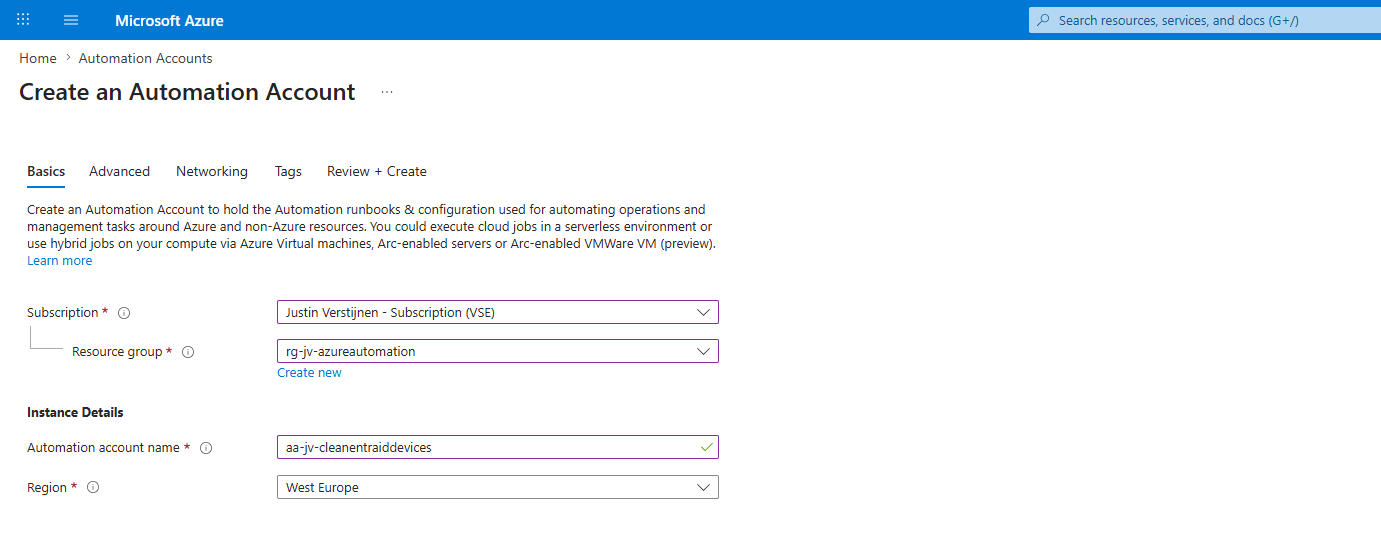
Give the Automation Account a name and place it in your desired resource group.
Then advance to the “Advanced” page.
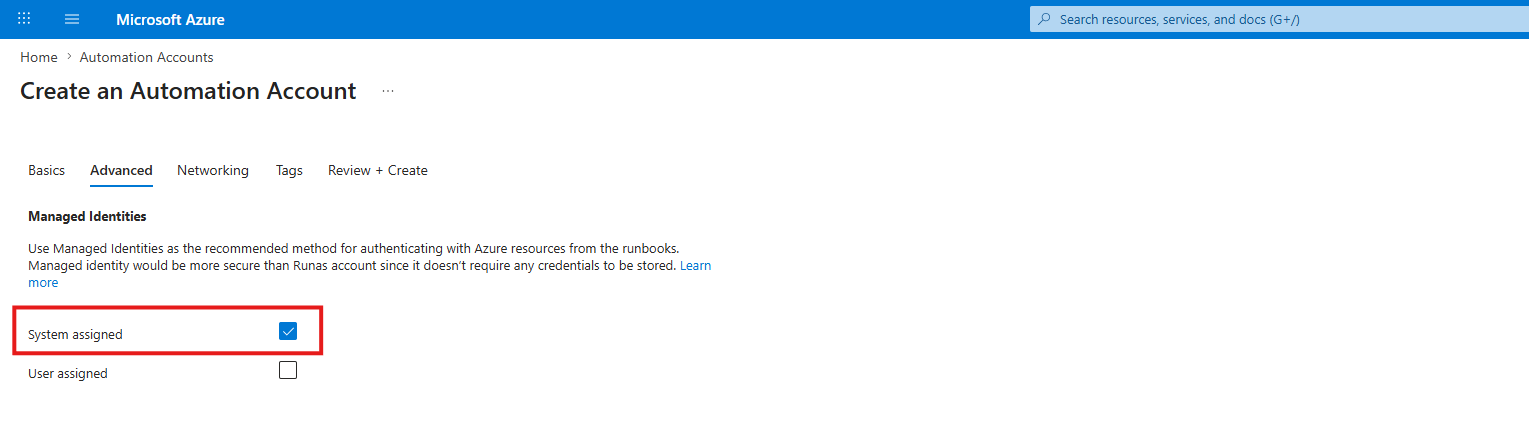
Here enable the “System assigned” identity option to enable an identity for the Automation Account.
Leave the rest of the wizard as-is and complete it to create the Automation Account.

Step 2: Configure the Managed Identity
Now we have to configure the managed identity for this solution to work. This is a sort of service account the script uses to gain least privileges and having access to your Entra ID from the Azure platform.
Go to your Automation Account, then open up “Identity” from the left:
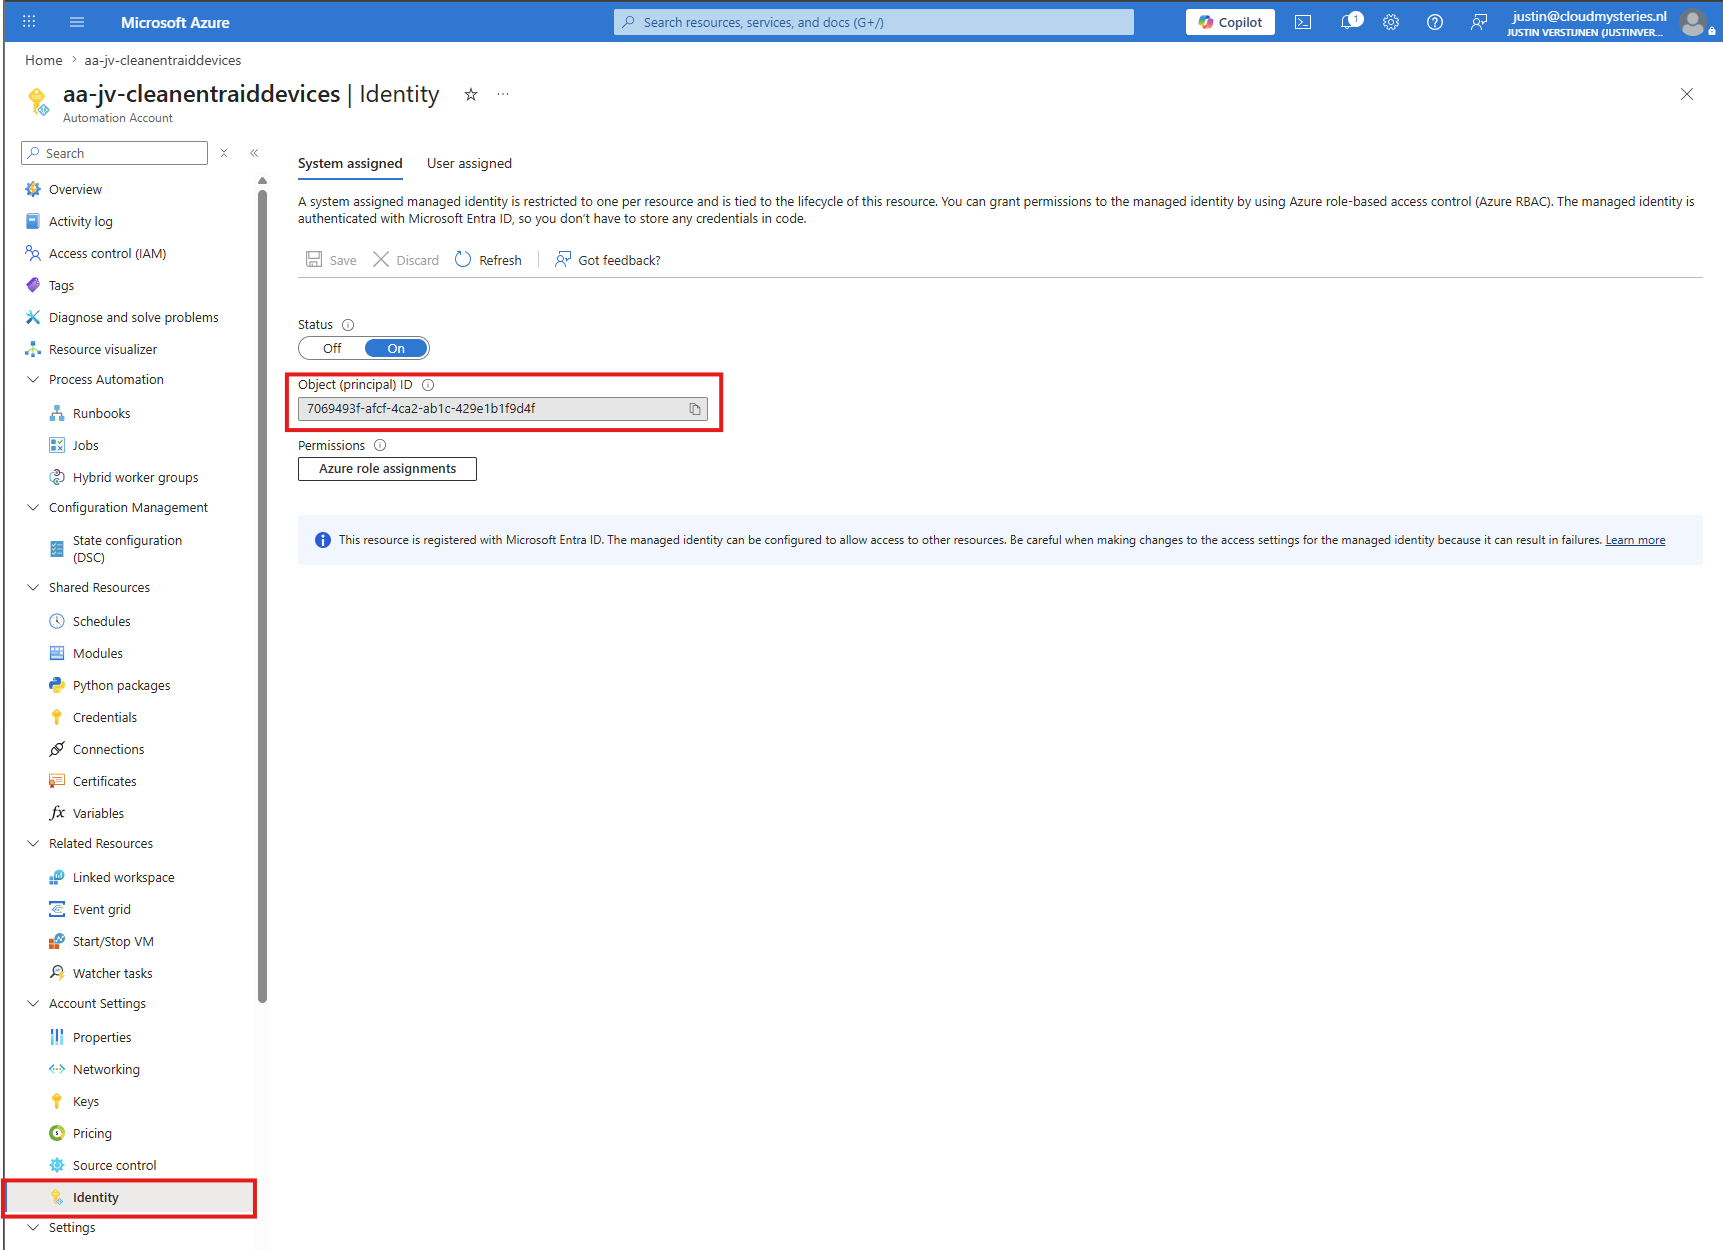
Here we must copy the Object ID of the Managed Identity, as we need this in our script to give the required permissions. As we need to provide permissions to a Service Principal, this must be done through PowerShell. A Managed Identity is not managed through the portal like a normal App Registration.
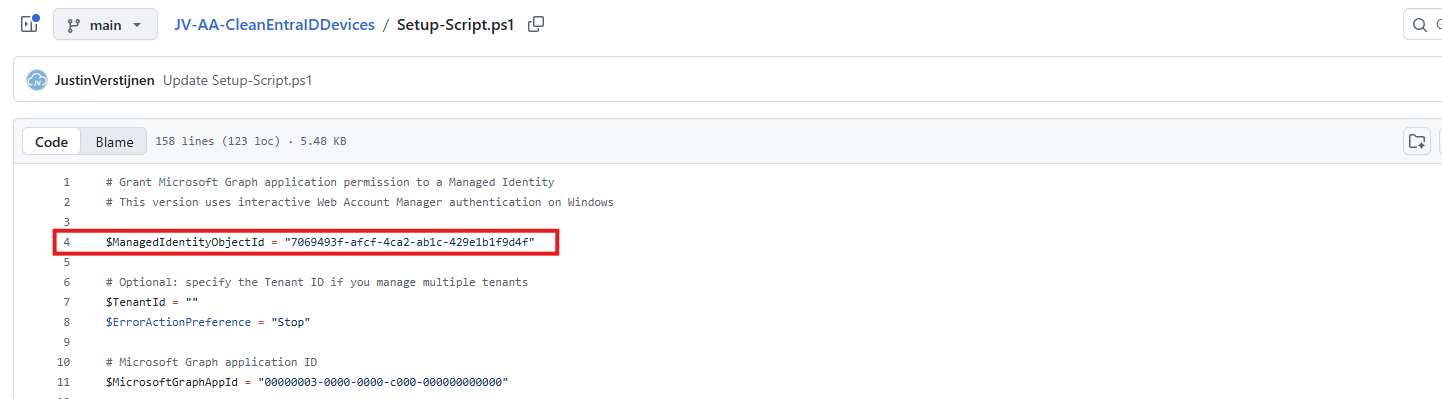
On the GitHub page, you can find the “Setup-Script.ps1”. Download this as we have to run it with PowerShell 7.
https://github.com/JustinVerstijnen/JV-AA-CleanEntraIDDevices/tree/main
Change the Managed Identity ID on line 4:
Now we can run the script in PowerShell 7 by executing it and then logging in to the tenant where you placed the automation account.
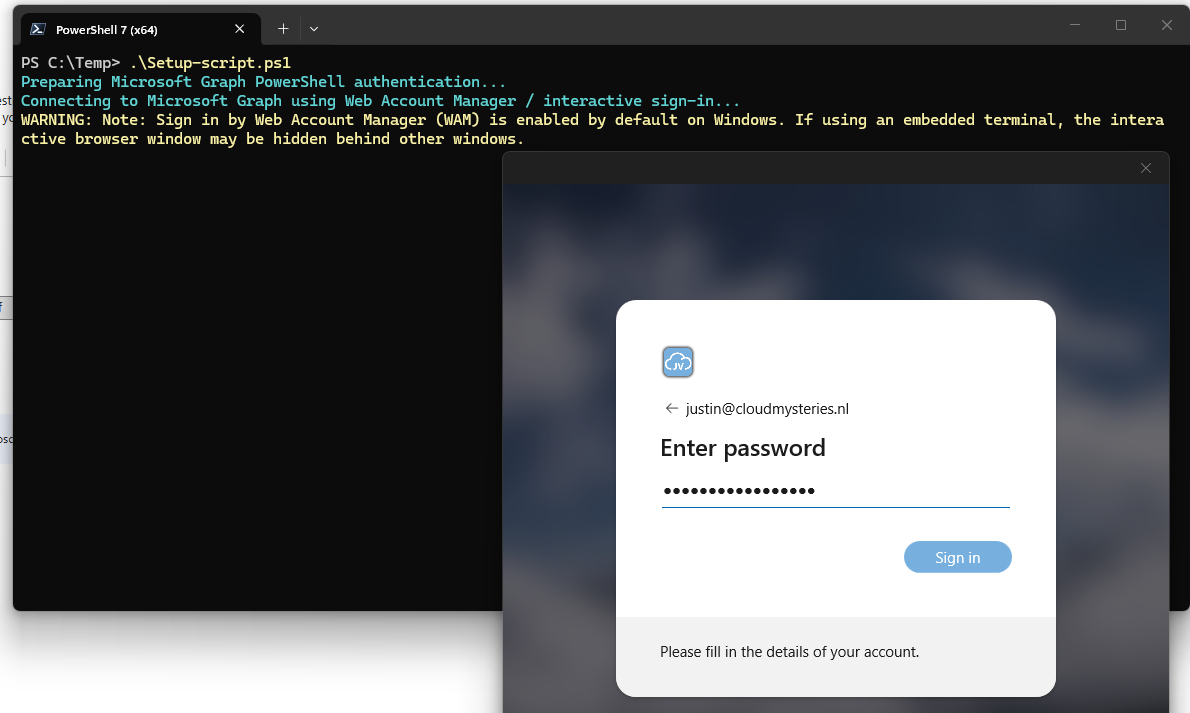
After logging in successfully, the correct permissions are assigned to the Managed Identity and the Automation Account can now be tested.
- Device.ReadWrite.All
Step 3: Install the needed modules
Now we have to install some PowerShell modules on our Automation Account. The script uses some modules which are not shipped by default on the Automation Account PowerShell runtime, but we can install this manually through the Azure Portal.
Navigate to the Automation Account in Azure and open up “Modules” from the left. From there, click on “Browse gallery” to add new PowerShell modules directly from the PowerShell Gallery into your Automation Account.
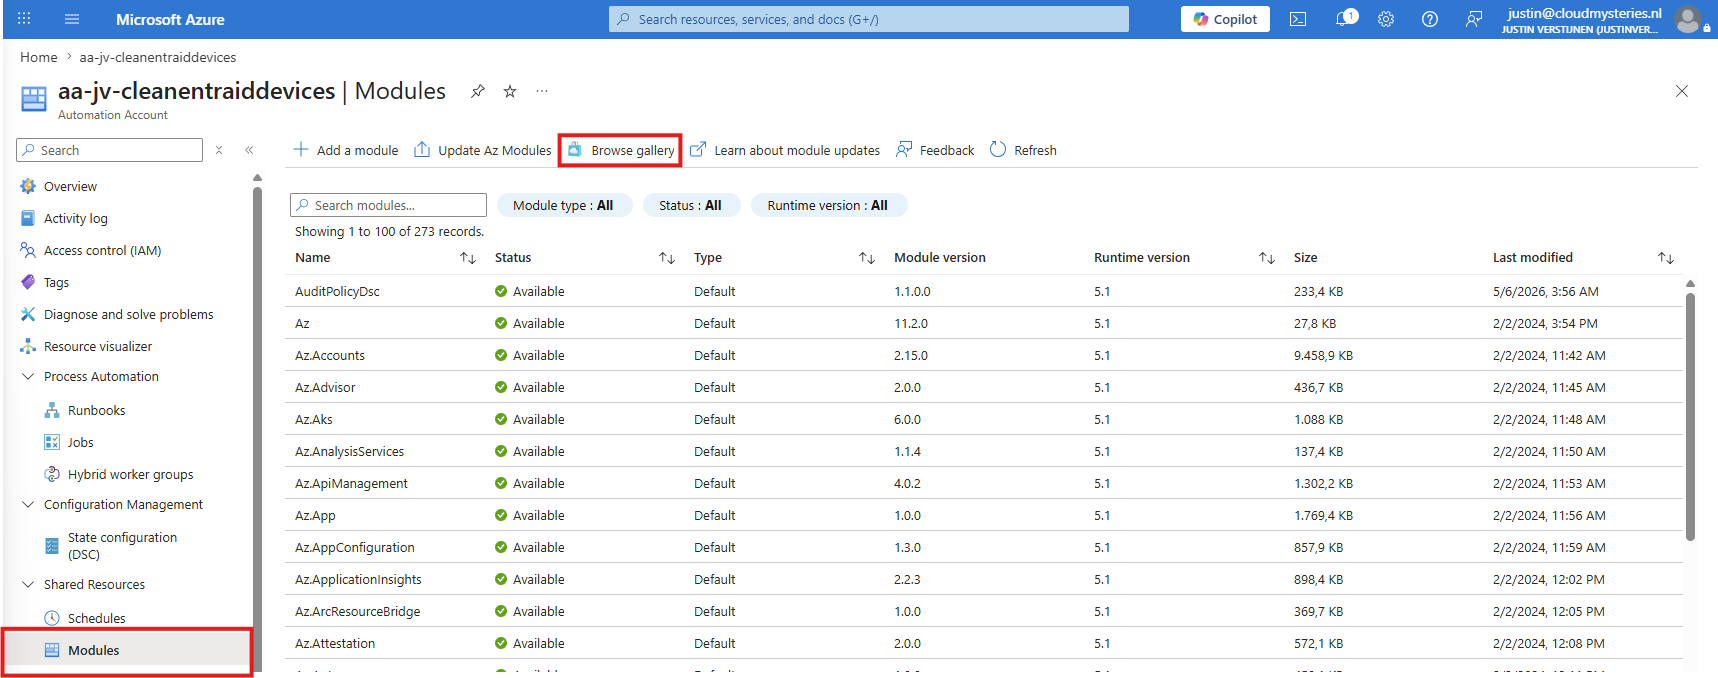
Here we need to install these two modules:
- Microsoft.Graph.Authentication
- Microsoft.Graph.Identity.DirectoryManagement
We can find them by searching for their names in the search bar:
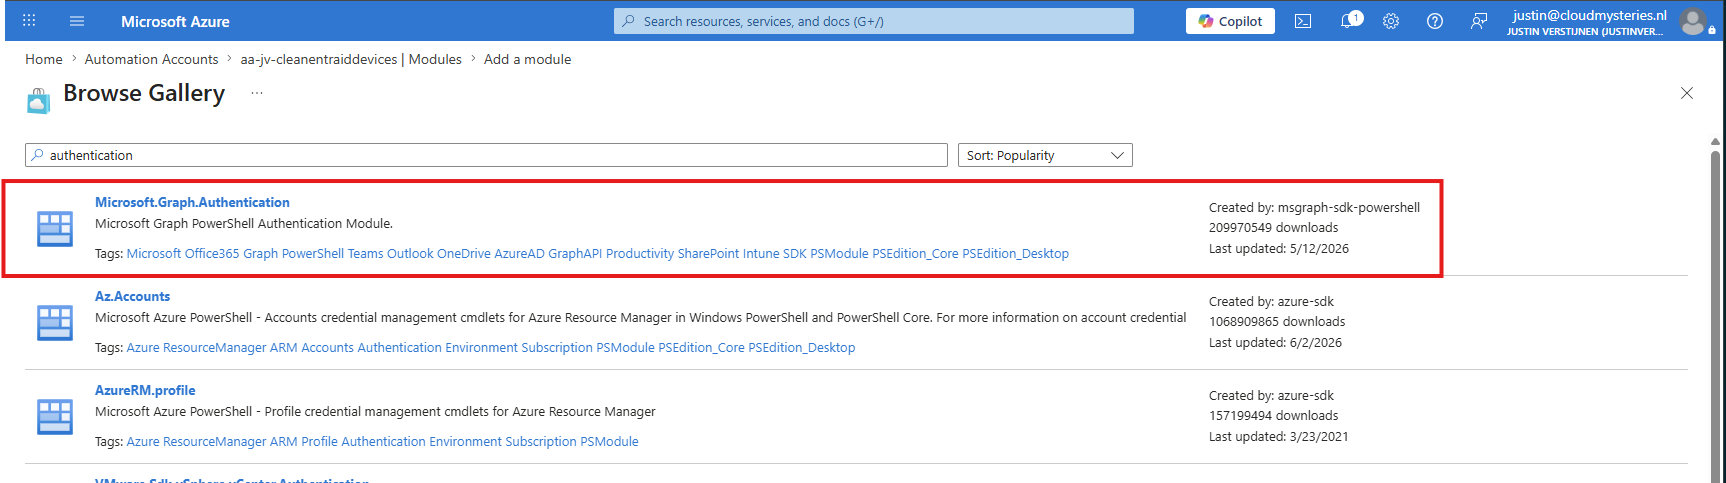
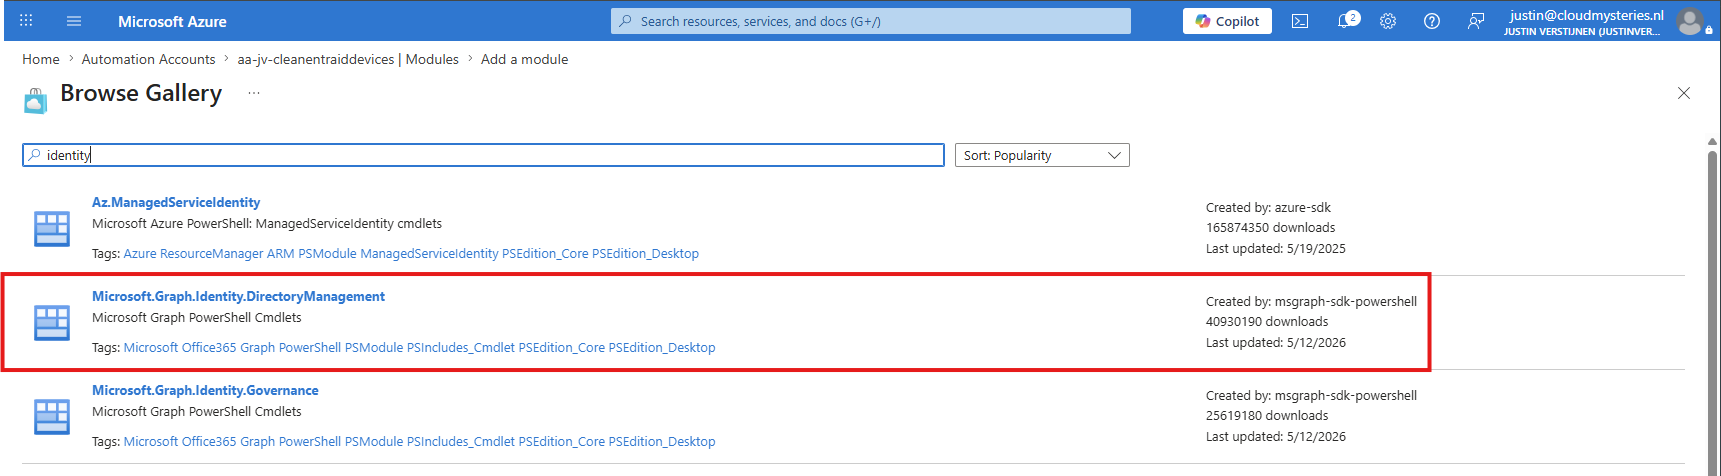
And then select the PowerShell 7.2 runtime version for both modules:

Then click “Next” to install the modules into the Automation Account. After a few minutes the modules should be ready to use:
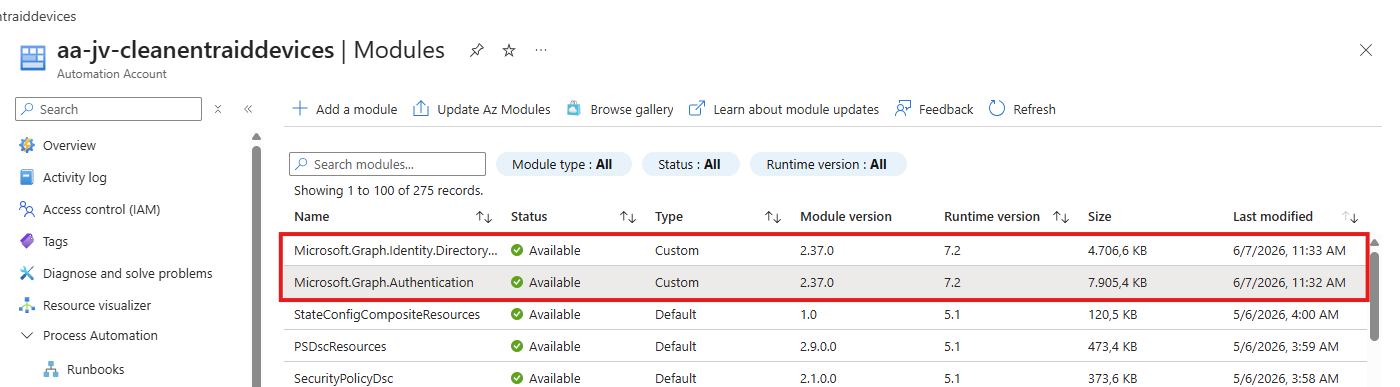
Now we can proceed to Step 4 where we create the task itself.
Step 4: Create the PowerShell Runbook
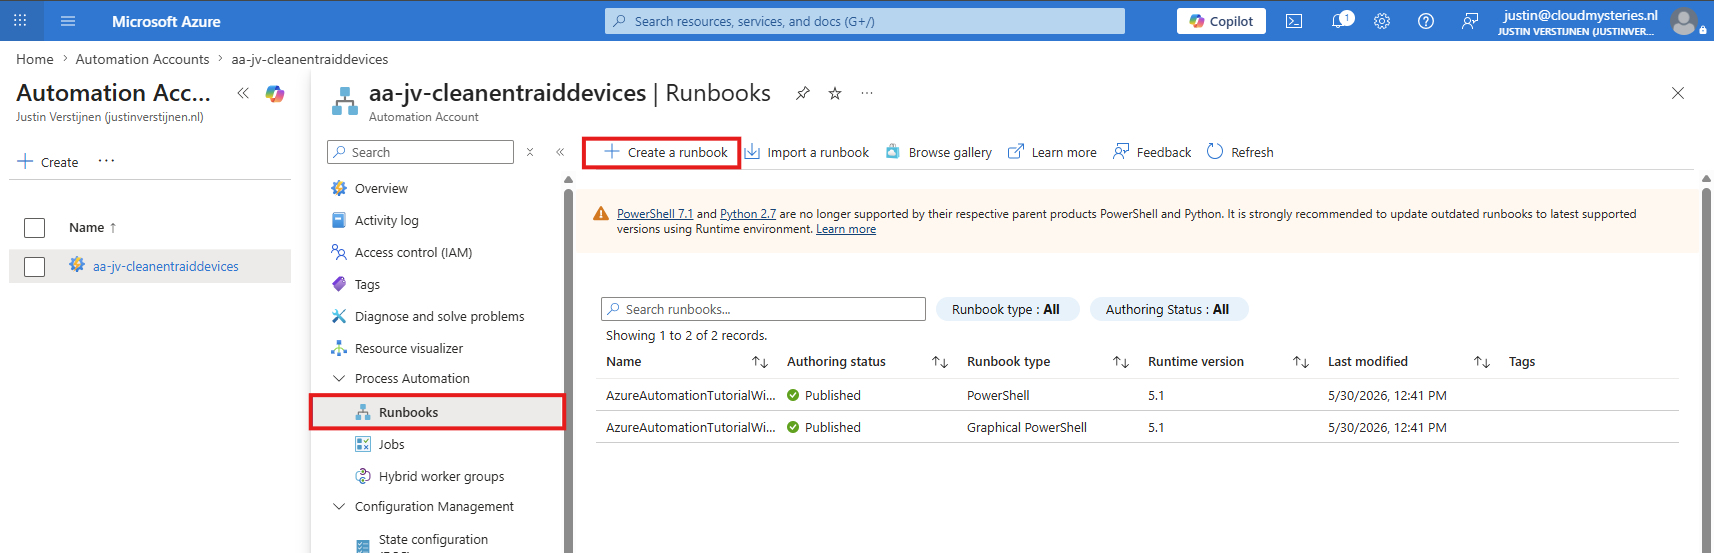
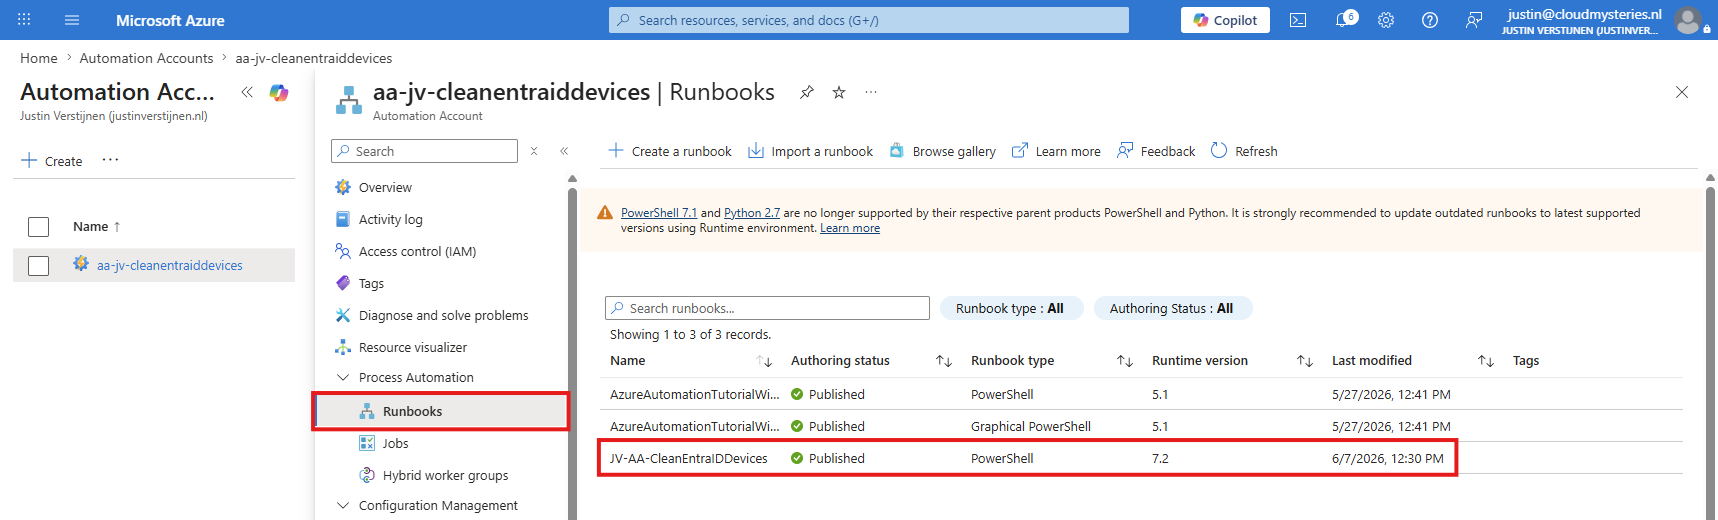
In this step we can create the PowerShell runbook itself. This is the task where the script is launched to clean the Entra ID devices. Navigate to your Automation Account and open up “Runbooks” from the left. From there, click on “+ Create a runbook” to create a new runbook with our desired settings.
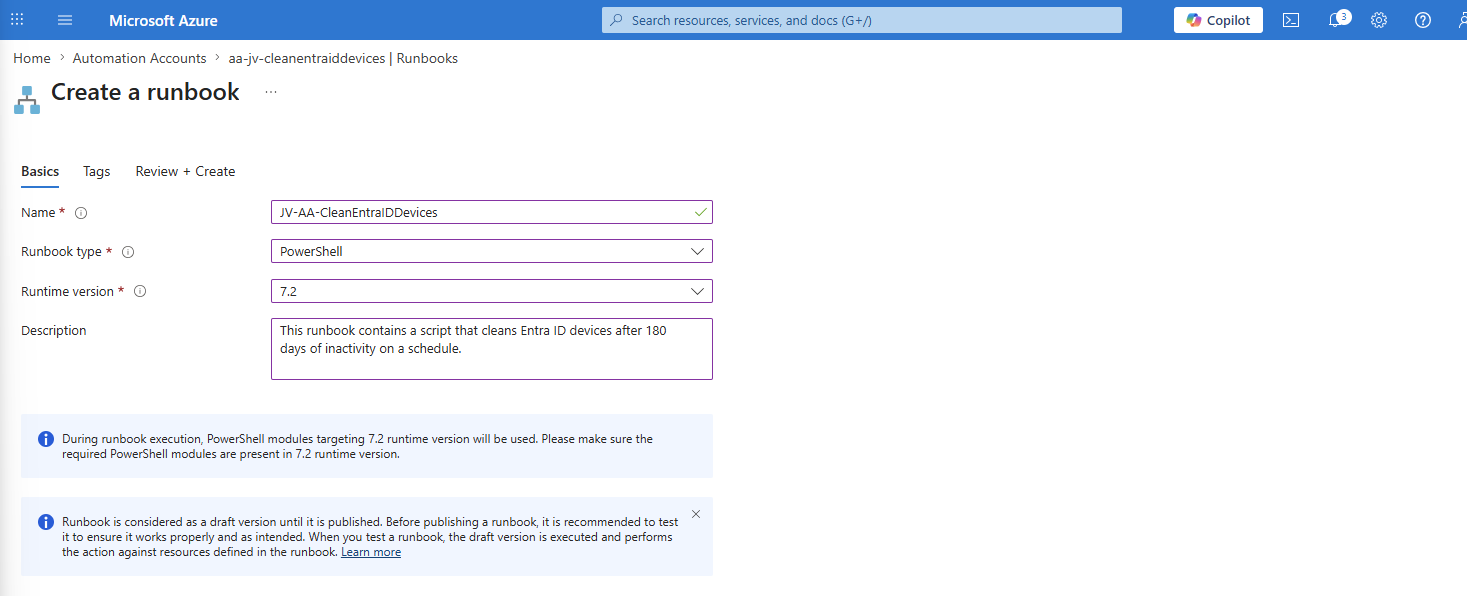
Create a new Runbook by giving it a name and description and select these properties:
- Runbook type: PowerShell
- Runtime version : 7.2
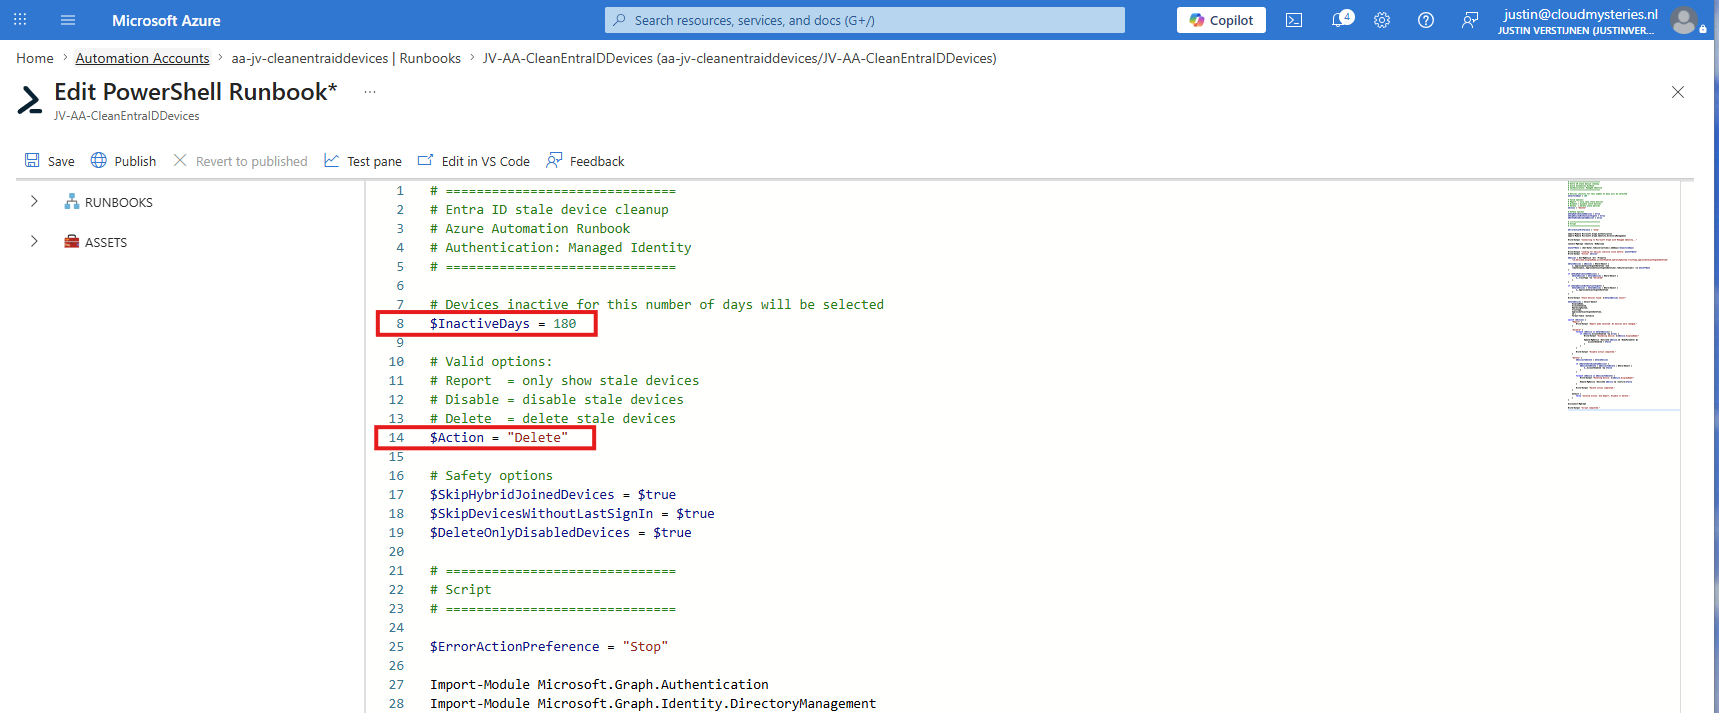
Then finish the create Runbook wizard. We will now be presented a online code editor where we can place the PowerShell script itself. Here paste the contents of the “Clean-scipt.ps1” file from the GitHub Repo:
Here we can change two parameters for the script based on your preferences:
- Line 8: The amount of days for a device to be inactive
- Line 14: The action, if it must only report or directly delete the devices
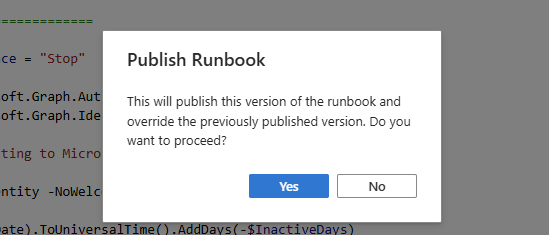
After you have changed the script to your preferences, save the script and then publish it to the Automation Account.
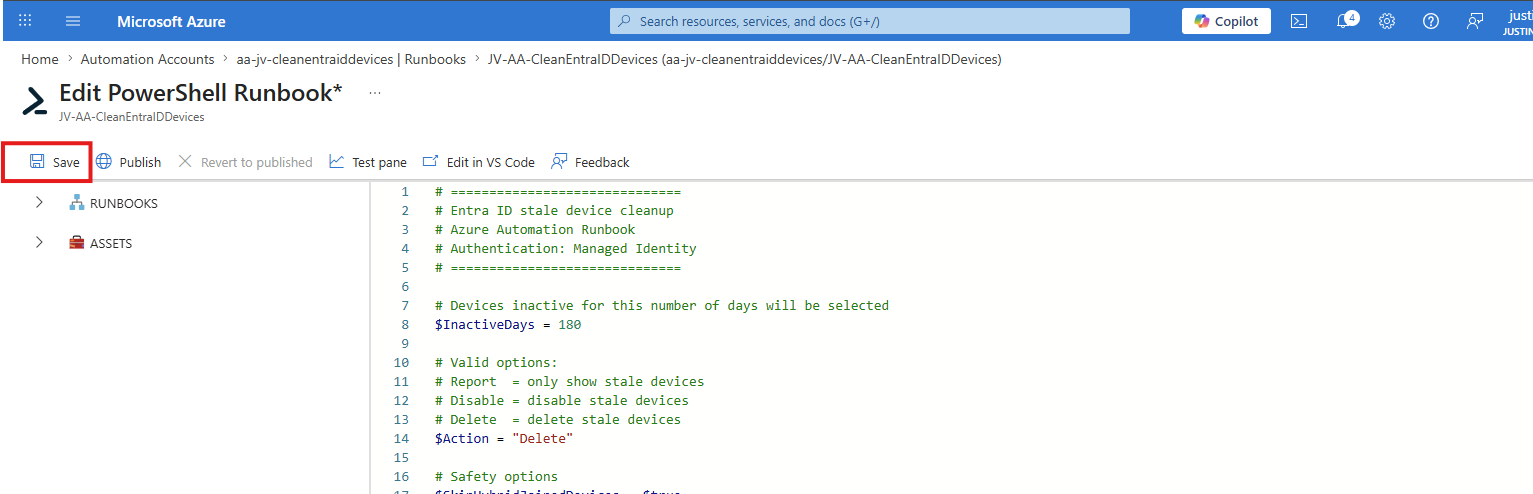
And then publish it by clicking “Publish”.
Step 5: Testing the Runbook script
Before we can fully automate the process, we must test the Runbook manually. We must verify if the script works and if we have configured the account, runbook and permissions correctly for the script to run unattended.
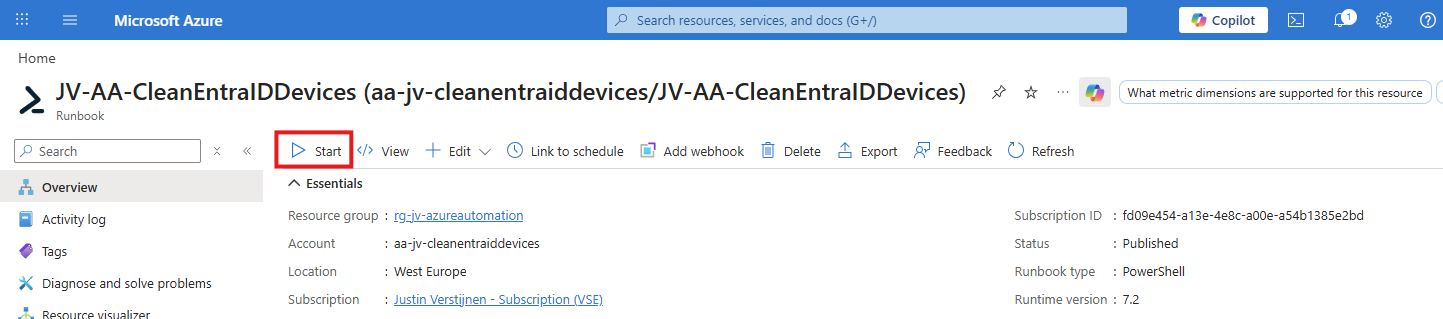
Open the Runbook from the Automation Account:
From there, start the Runbook manually by clicking the “Start” button:
We will now be redirected to a new pane where we can check the state of the script:
- Input : This shows possible customizable parameters you gave the script (not applicable for this script)
- Output : This shows the output PowerShell gave just like how you get the information when performing the tasks manually
- Errors and Warnings : This shows possible errors and warnings during performing the script
- All logs : Here you can view a verbose-like view of the automation account
As you can see, the script has ran successfully:
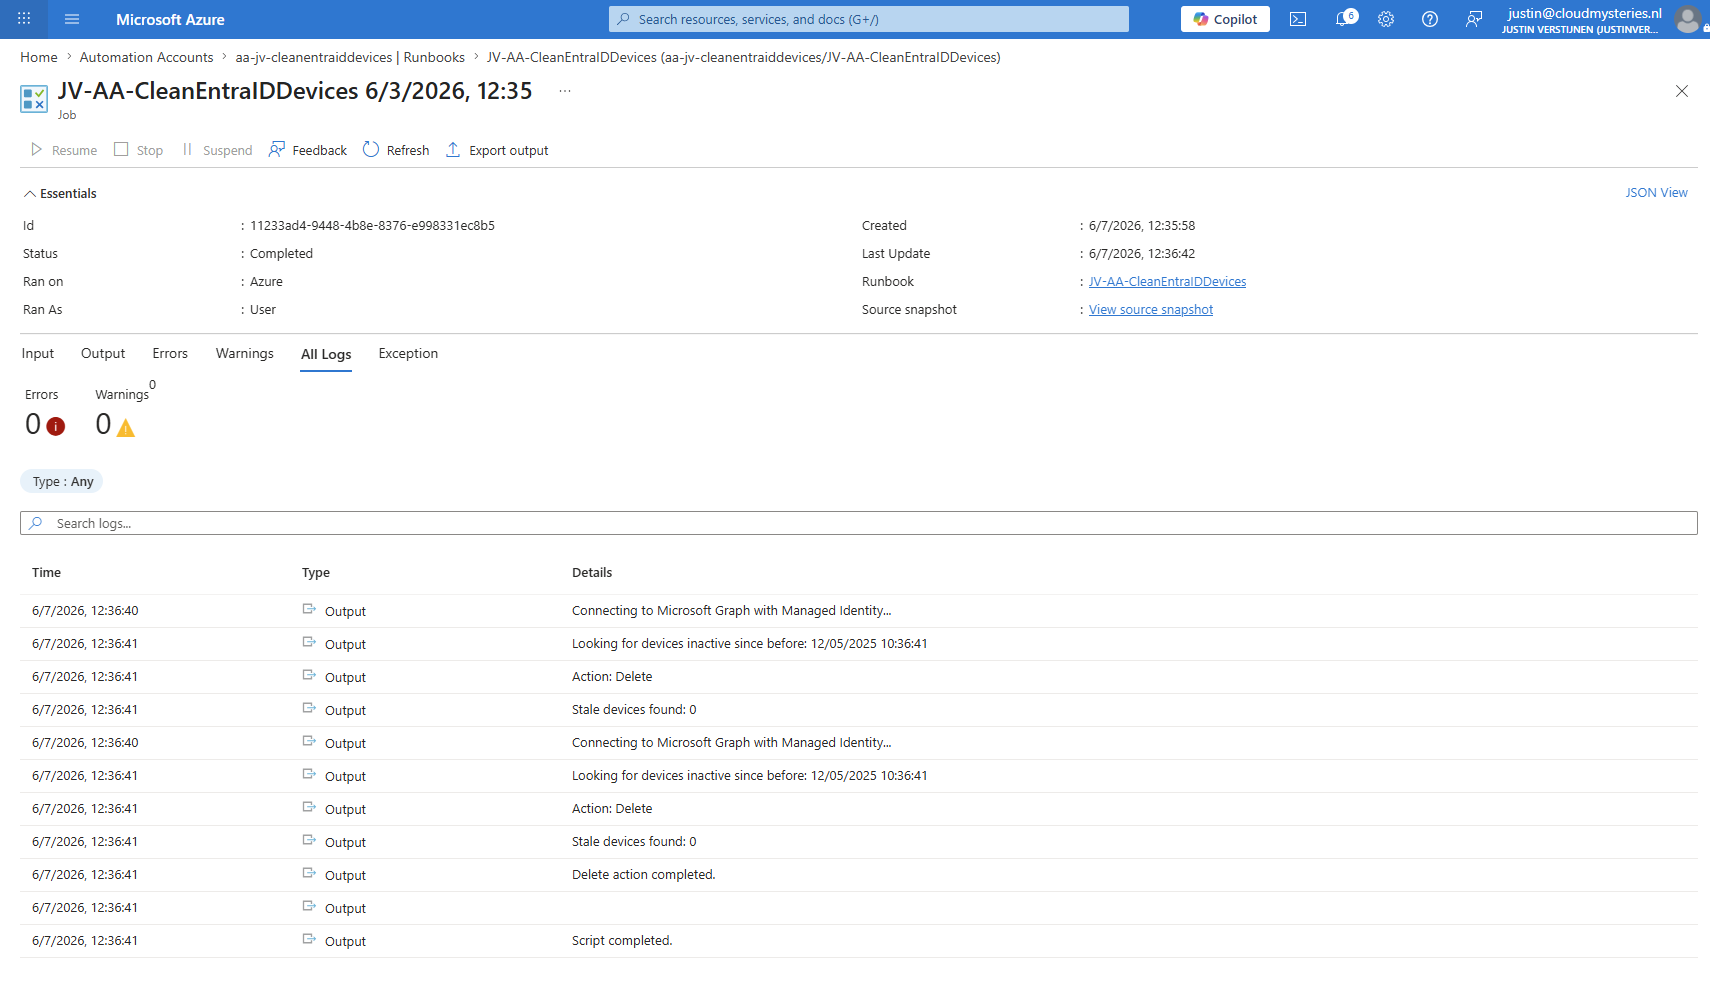
On the “Output” tab, all devices that has been deleted with this task will be shown:
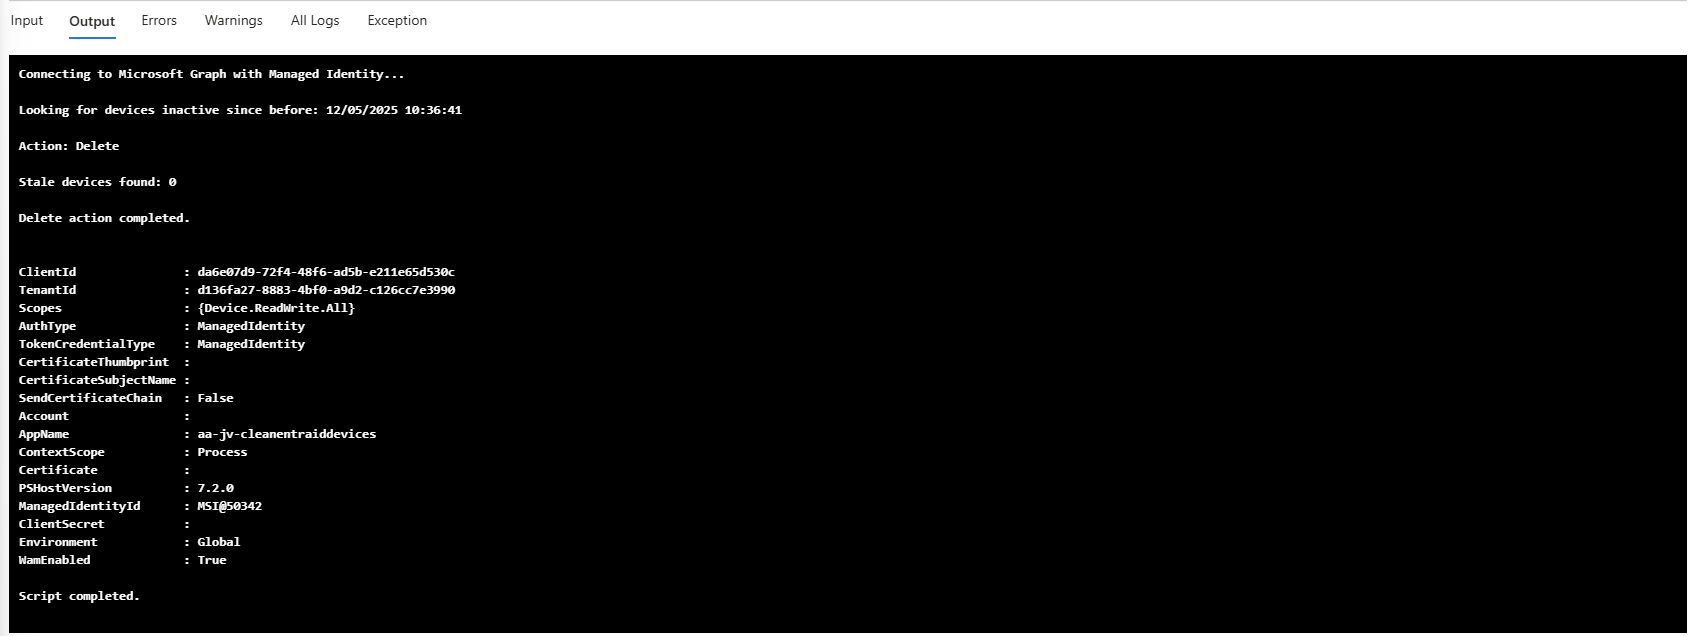
In this case, no stale/inactive devices are available which is being shown by PowerShell. Let’s try with 120 days:
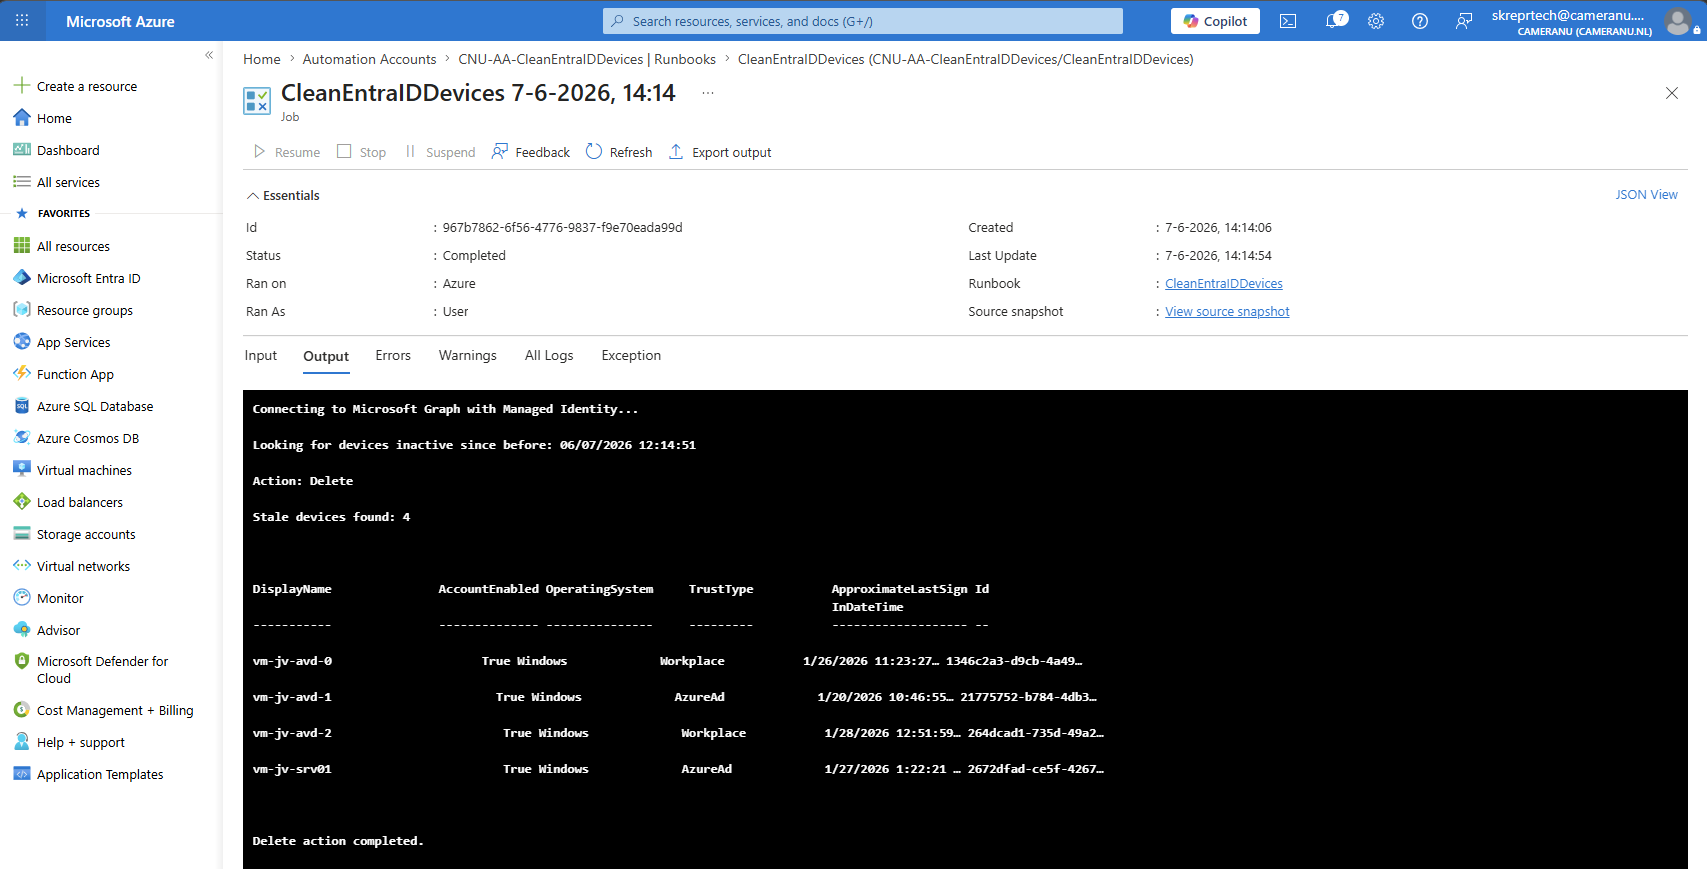
The script now deleted 4 stale devices.
Step 6: Create a schedule and link it to the Runbook
Once our test is completed successfully, we can schedule our script to perform this task on a schedule. As this task checks for devices inactive for 180 days, we can run this script once per month. This gives us a maximum of 30 days on top of the 180 days of the script. This can be changed to your preferences of course.
To create a schedule, navigate to the Automation Account and open up “Schedules” from the left:
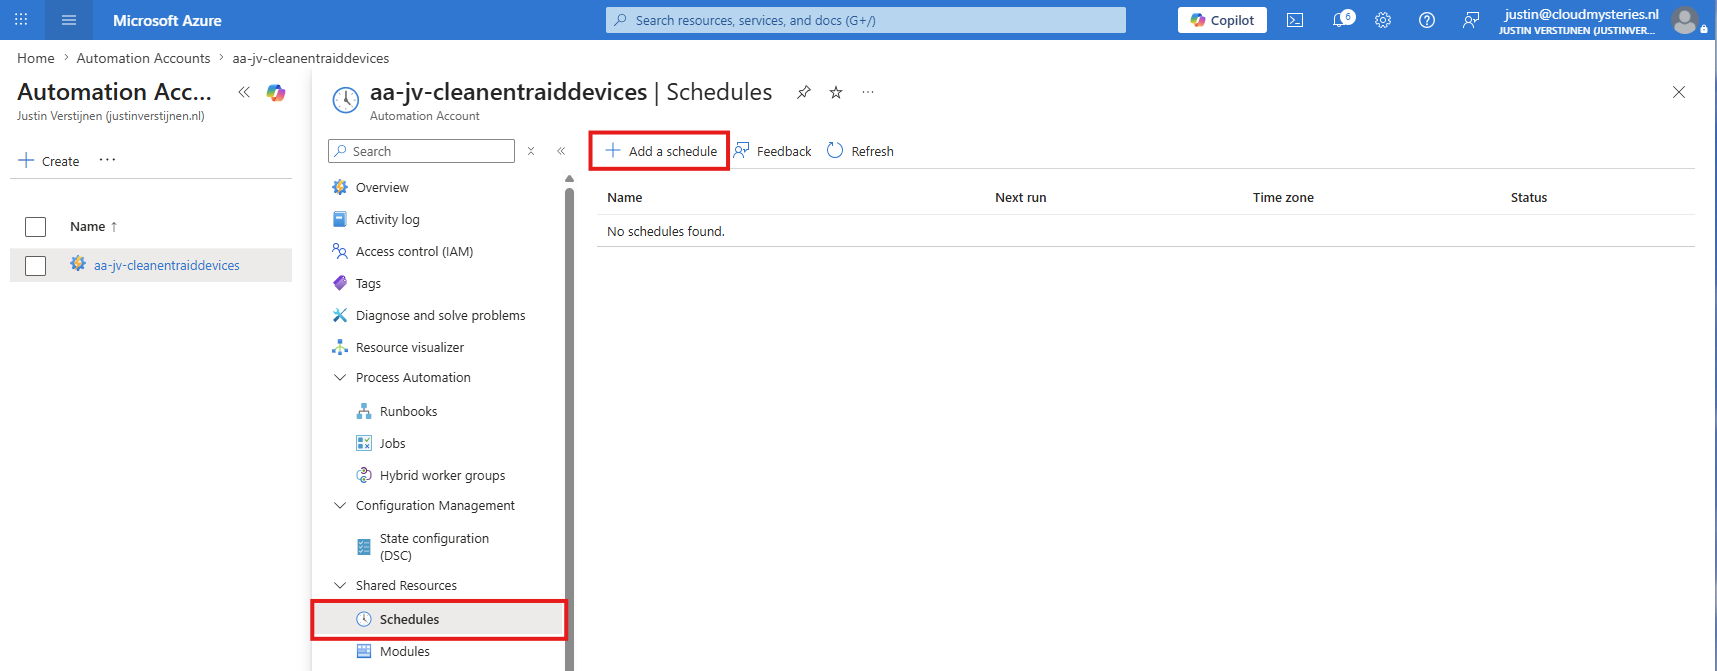
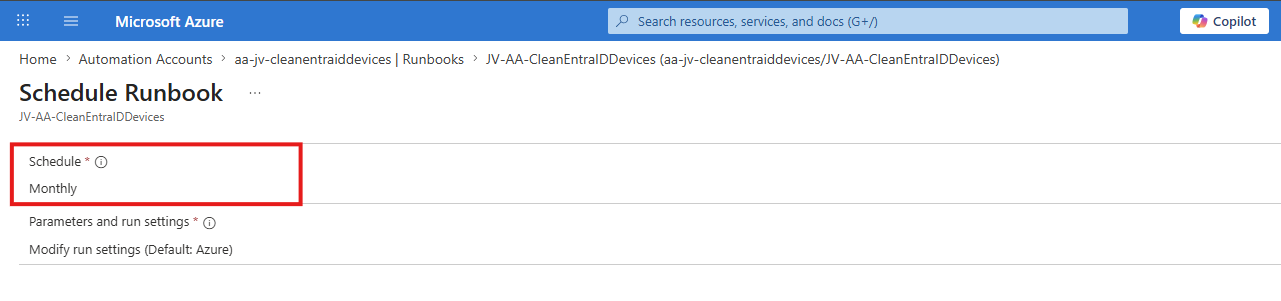
Then click on “+ Add a schedule” to add a new schedule. I will demonstrate a schedule for the first day of the month.
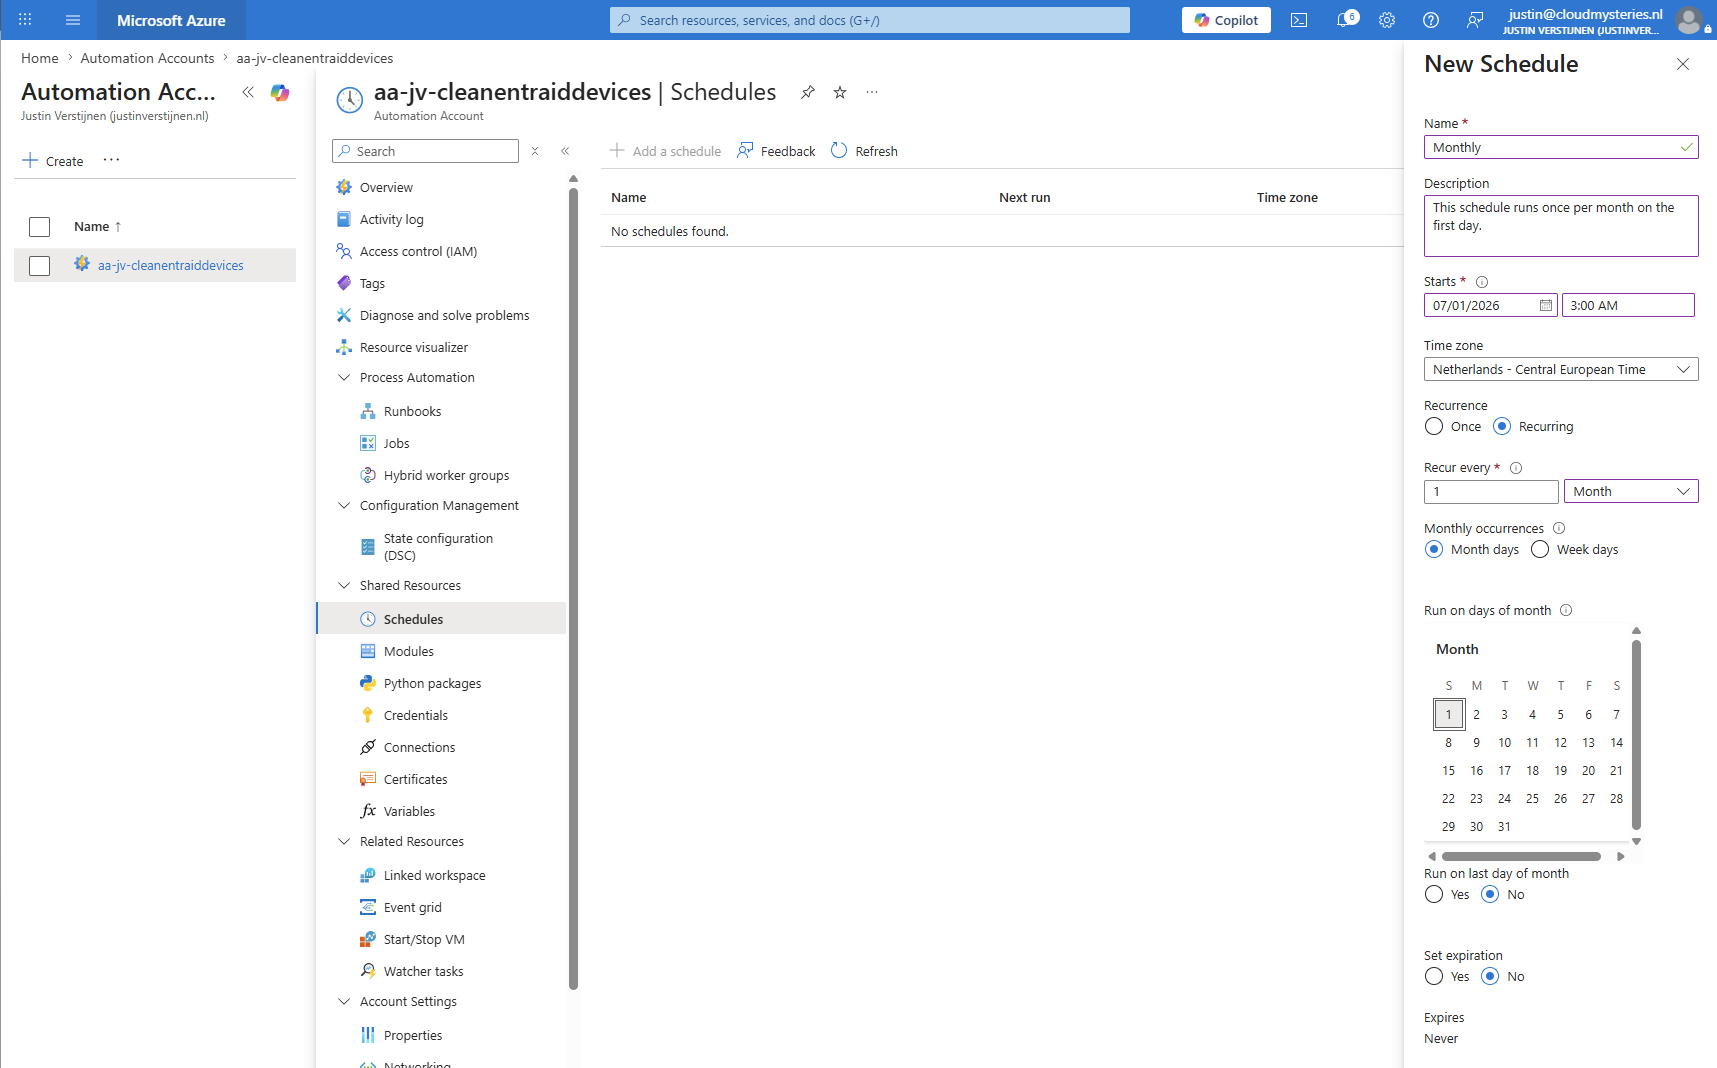
Give the schedule a name and description. Then configure the schedule to when you want the runbook/script to clean the devices. I have set the first day of the month at 3:00 AM, and set it to repeat every month.
Then click “Create” to create the schedule. We must now link the schedule to the runbook, so the task will actually run on your configured schedule. Re-open the “Runbooks” from the Automation Account again and open up your created Runbook.
Click on “Link to schedule” in your Runbook.

From there select your just created schedule and save the configuration.
Then click “OK” to apply the configuration and set the runbook to run on a schedule. We are now done with the configuration work.
Knowledge check
Knowledge check
This quiz needs JavaScript to show the questions and feedback.
This quiz needs JavaScript to show the questions and feedback.
Summary
Using Azure Automation together with Microsoft Graph is a powerful and clean way to automatically remove inactive Entra ID devices. Using Azure Automation for device cleanup provides several benefits:
- No servers required
- Fully automated process
- Uses Managed Identity instead of service accounts
- Easy to maintain
- Scalable
- Low operational overhead
Because the solution runs fully in Azure and uses Managed Identity authentication, there is no need for extra infrastructure or service accounts. This keeps the solution secure, modern and easy to maintain. Automatically deleting devices can have impact if devices are still in use. Before enabling automatic cleanup:
- Validate your inactivity period
- Exclude special devices if needed
- Test carefully
- Monitor logs regularly
180 days is often a safe balance for many environments, but of course every organization is different and in special cases, devices can be offline for 180+ days before coming online again.
Thank you for reading this post and I hope it was helpful!
Sources
These sources helped me by writing and research for this post;
- https://learn.microsoft.com/en-us/azure/automation/overview
- https://learn.microsoft.com/en-us/powershell/microsoftgraph/overview
- https://learn.microsoft.com/en-us/entra/identity/devices/manage-stale-devices
- https://github.com/JustinVerstijnen/JV-AA-CleanEntraIDDevices/tree/main
- https://learn.microsoft.com/en-us/azure/automation/enable-managed-identity-for-automation
Useful Azure links/tools
Working with Azure and related services is easier when you use the right tools. Alongside the Azure Portal its highly recommended to make use of various other tools, which we can use for topics like cost management, architecture, designing, documentation and monitoring. In this guide, I will explain 10 tools I use regularly and we can use with Azure and its related services.
Introduction to page and tools
I mostly use these tools regularly to check the latest Azure updates, watch service health, calculate costs, build diagrams, create documentation, run commands easily, learn new skills, and manage your resources better.
In this page, I therefore not focussed on a single category but selected some tools for multiple categories.
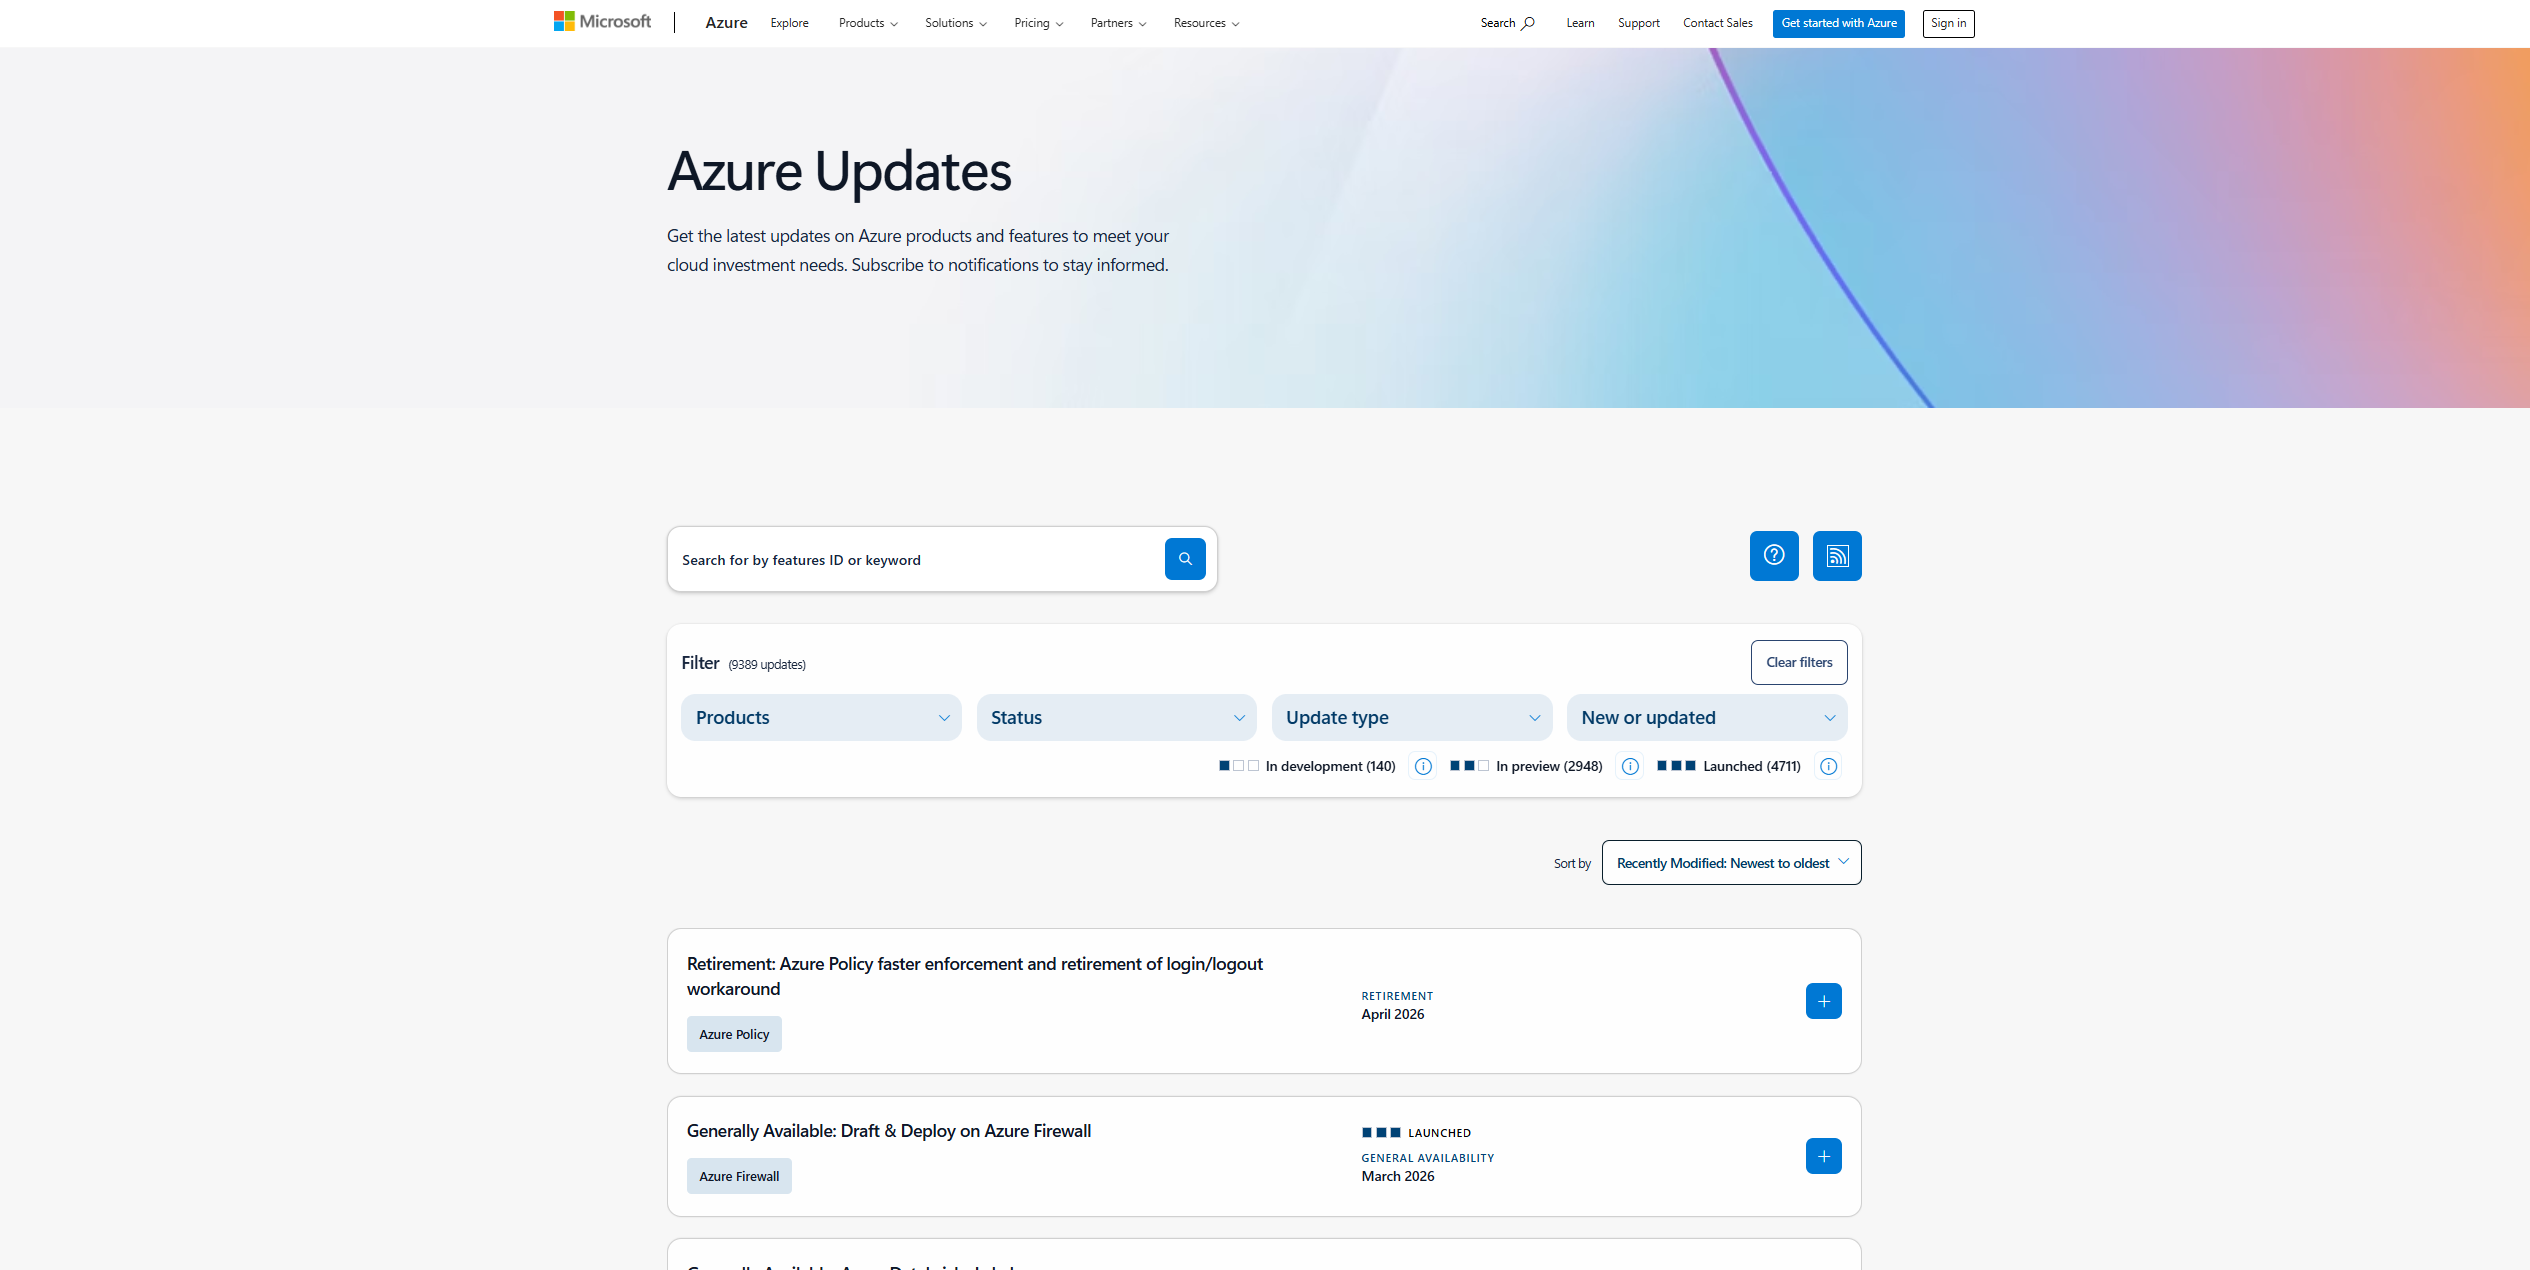
1. Azure Updates
This website shows all new features, fixes, and announcements from Azure. It helps you stay informed about important changes, like retiring services or previews transitioning to generally available options.
https://azure.microsoft.com/en-us/updates
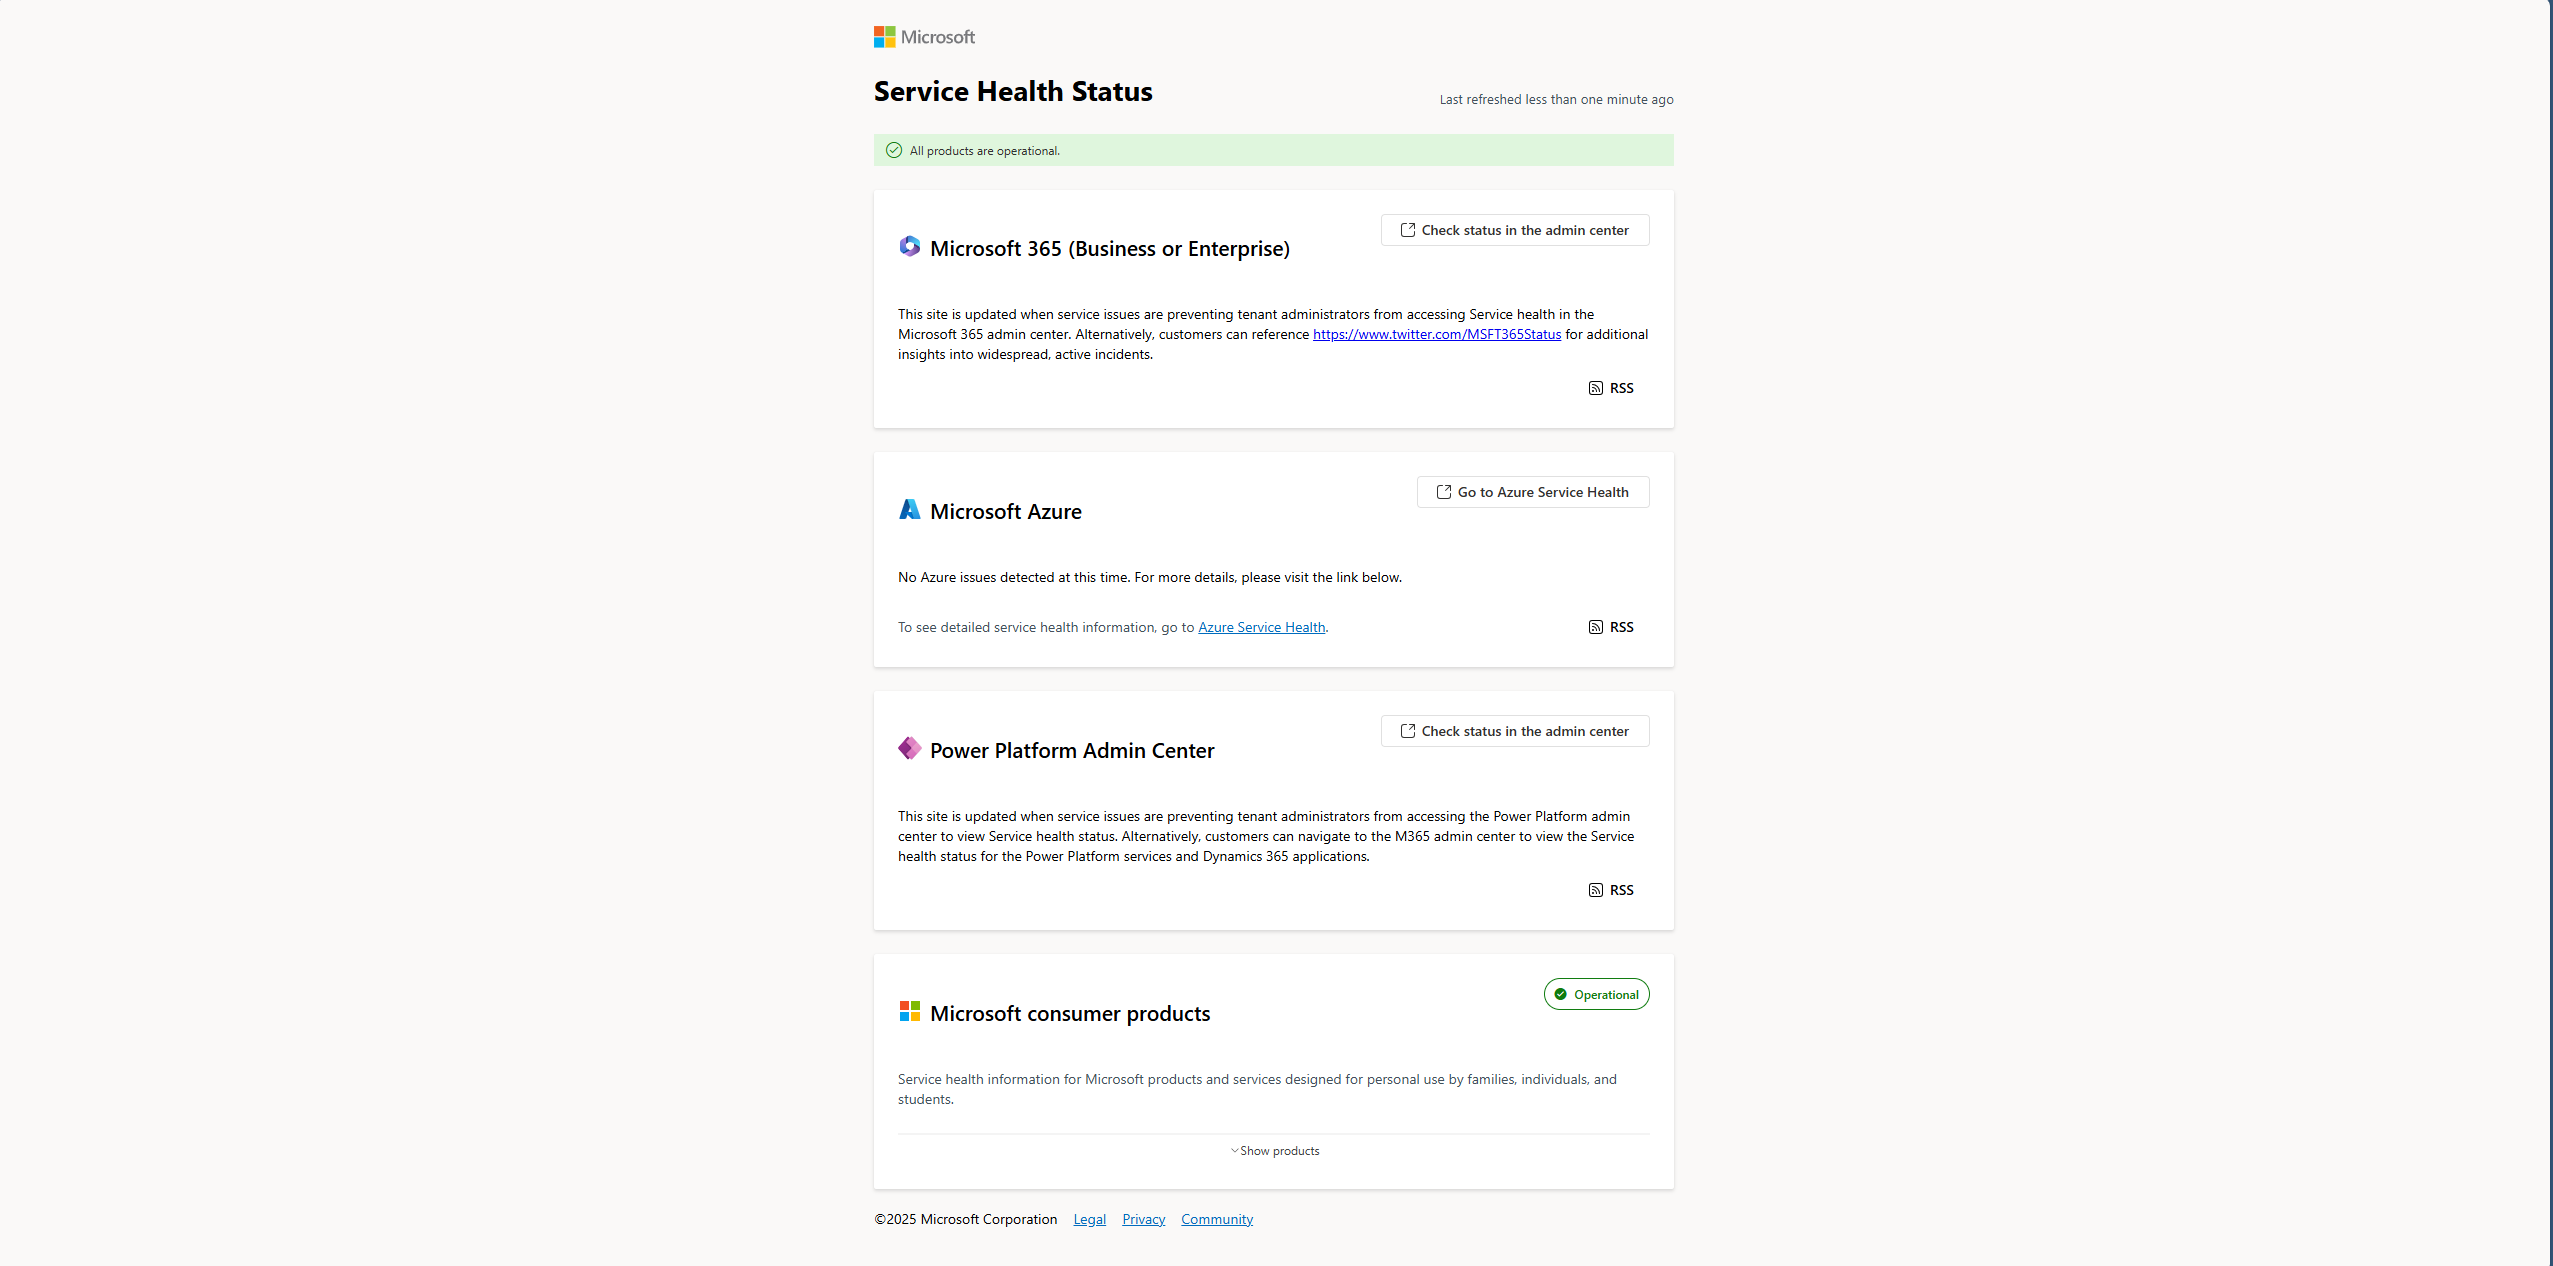
2. Microsoft Cloud Service Status (Overview/Azure)
These two sites, status.cloud.microsoft.com and status.azure.com, show the current health of Microsoft cloud services. You can use the first site to get an overview of all Microsoft Services, and the Azure Status page for only Azure services.
https://status.cloud.microsoft.com
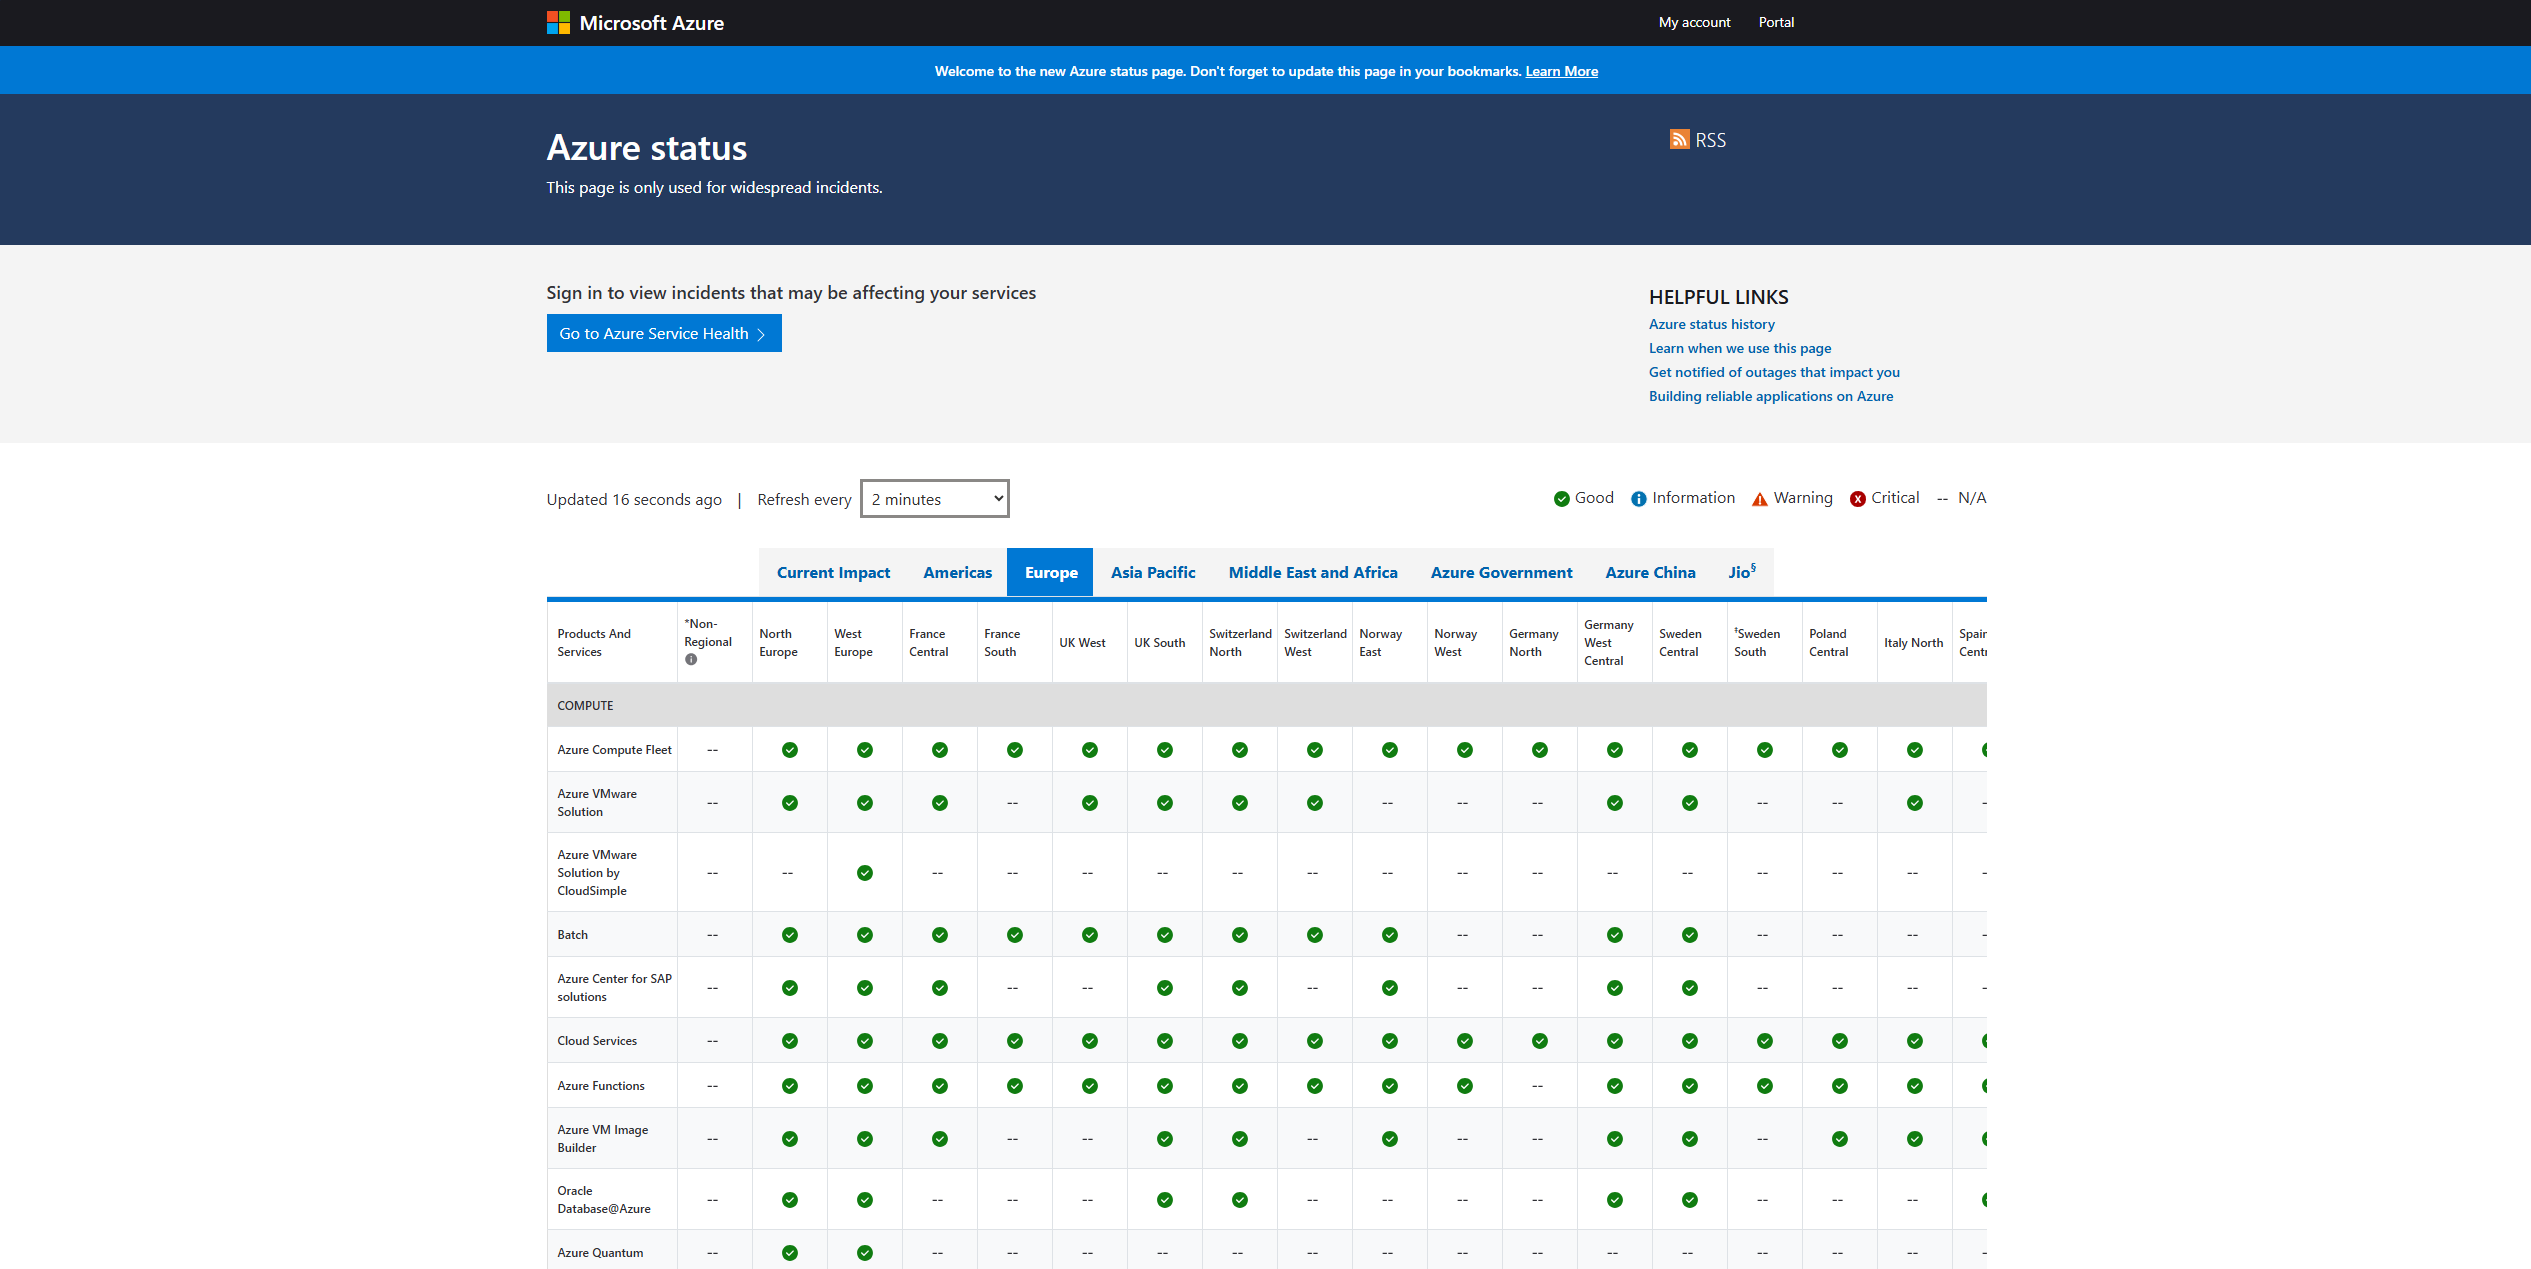
You can also check on Azure Service Health if there are any issues which impacts your environment through this link:
https://portal.azure.com/#view/Microsoft_Azure_Health/AzureHealthBrowseBlade/~/serviceIssues
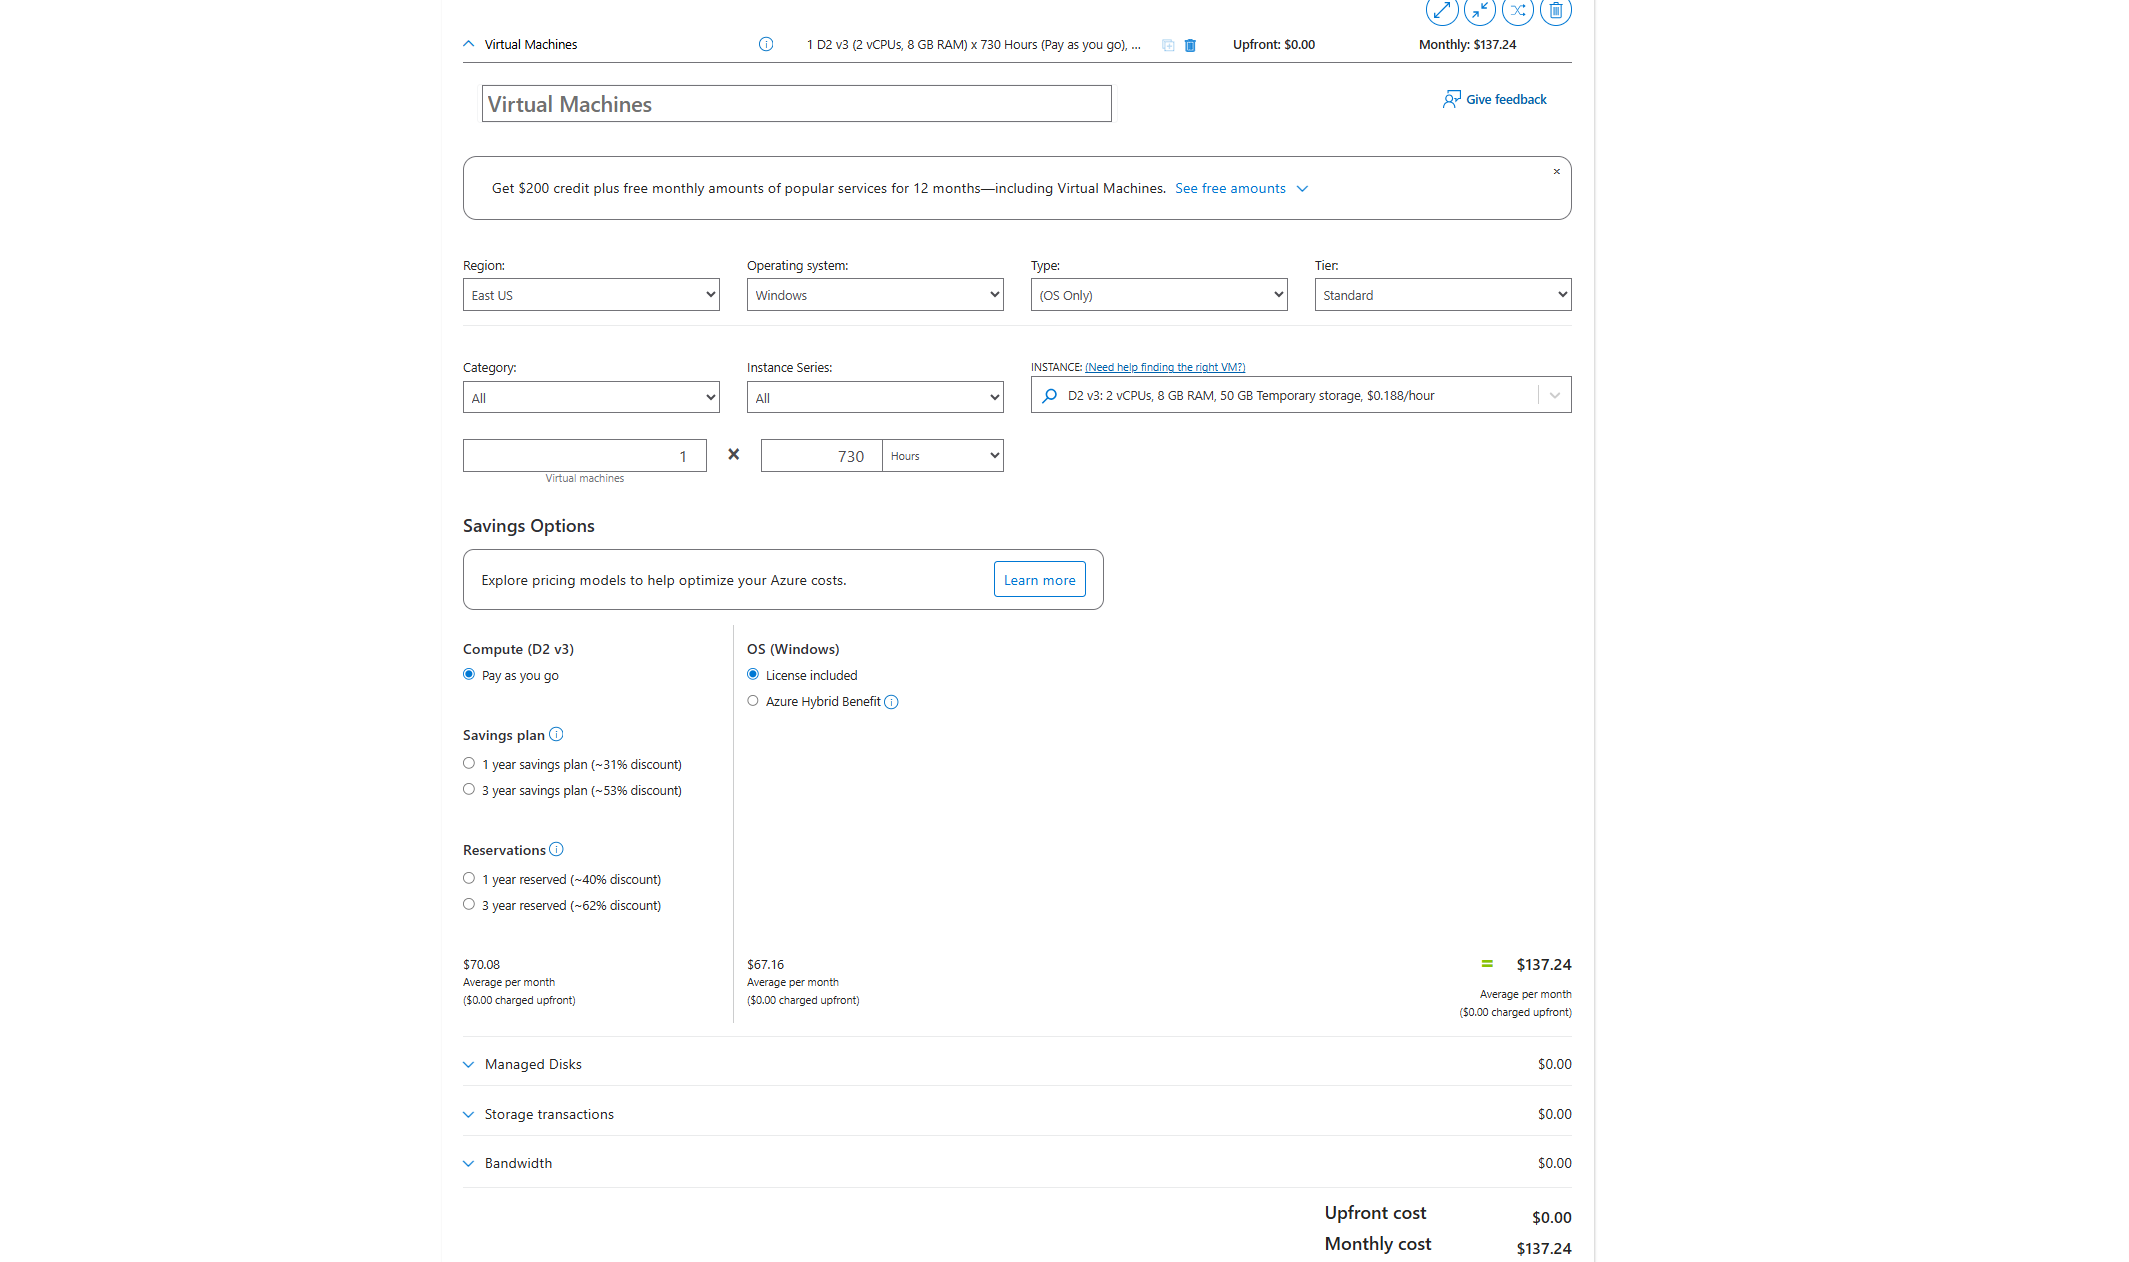
3. Azure Pricing Calculator
This tool helps you estimate how much your Azure services will cost. You can choose different resources and get an easy-to-understand price before building your environment. Very useful tool when designing an environment and making a quote for your customer.
https://azure.microsoft.com/en-us/pricing/calculator
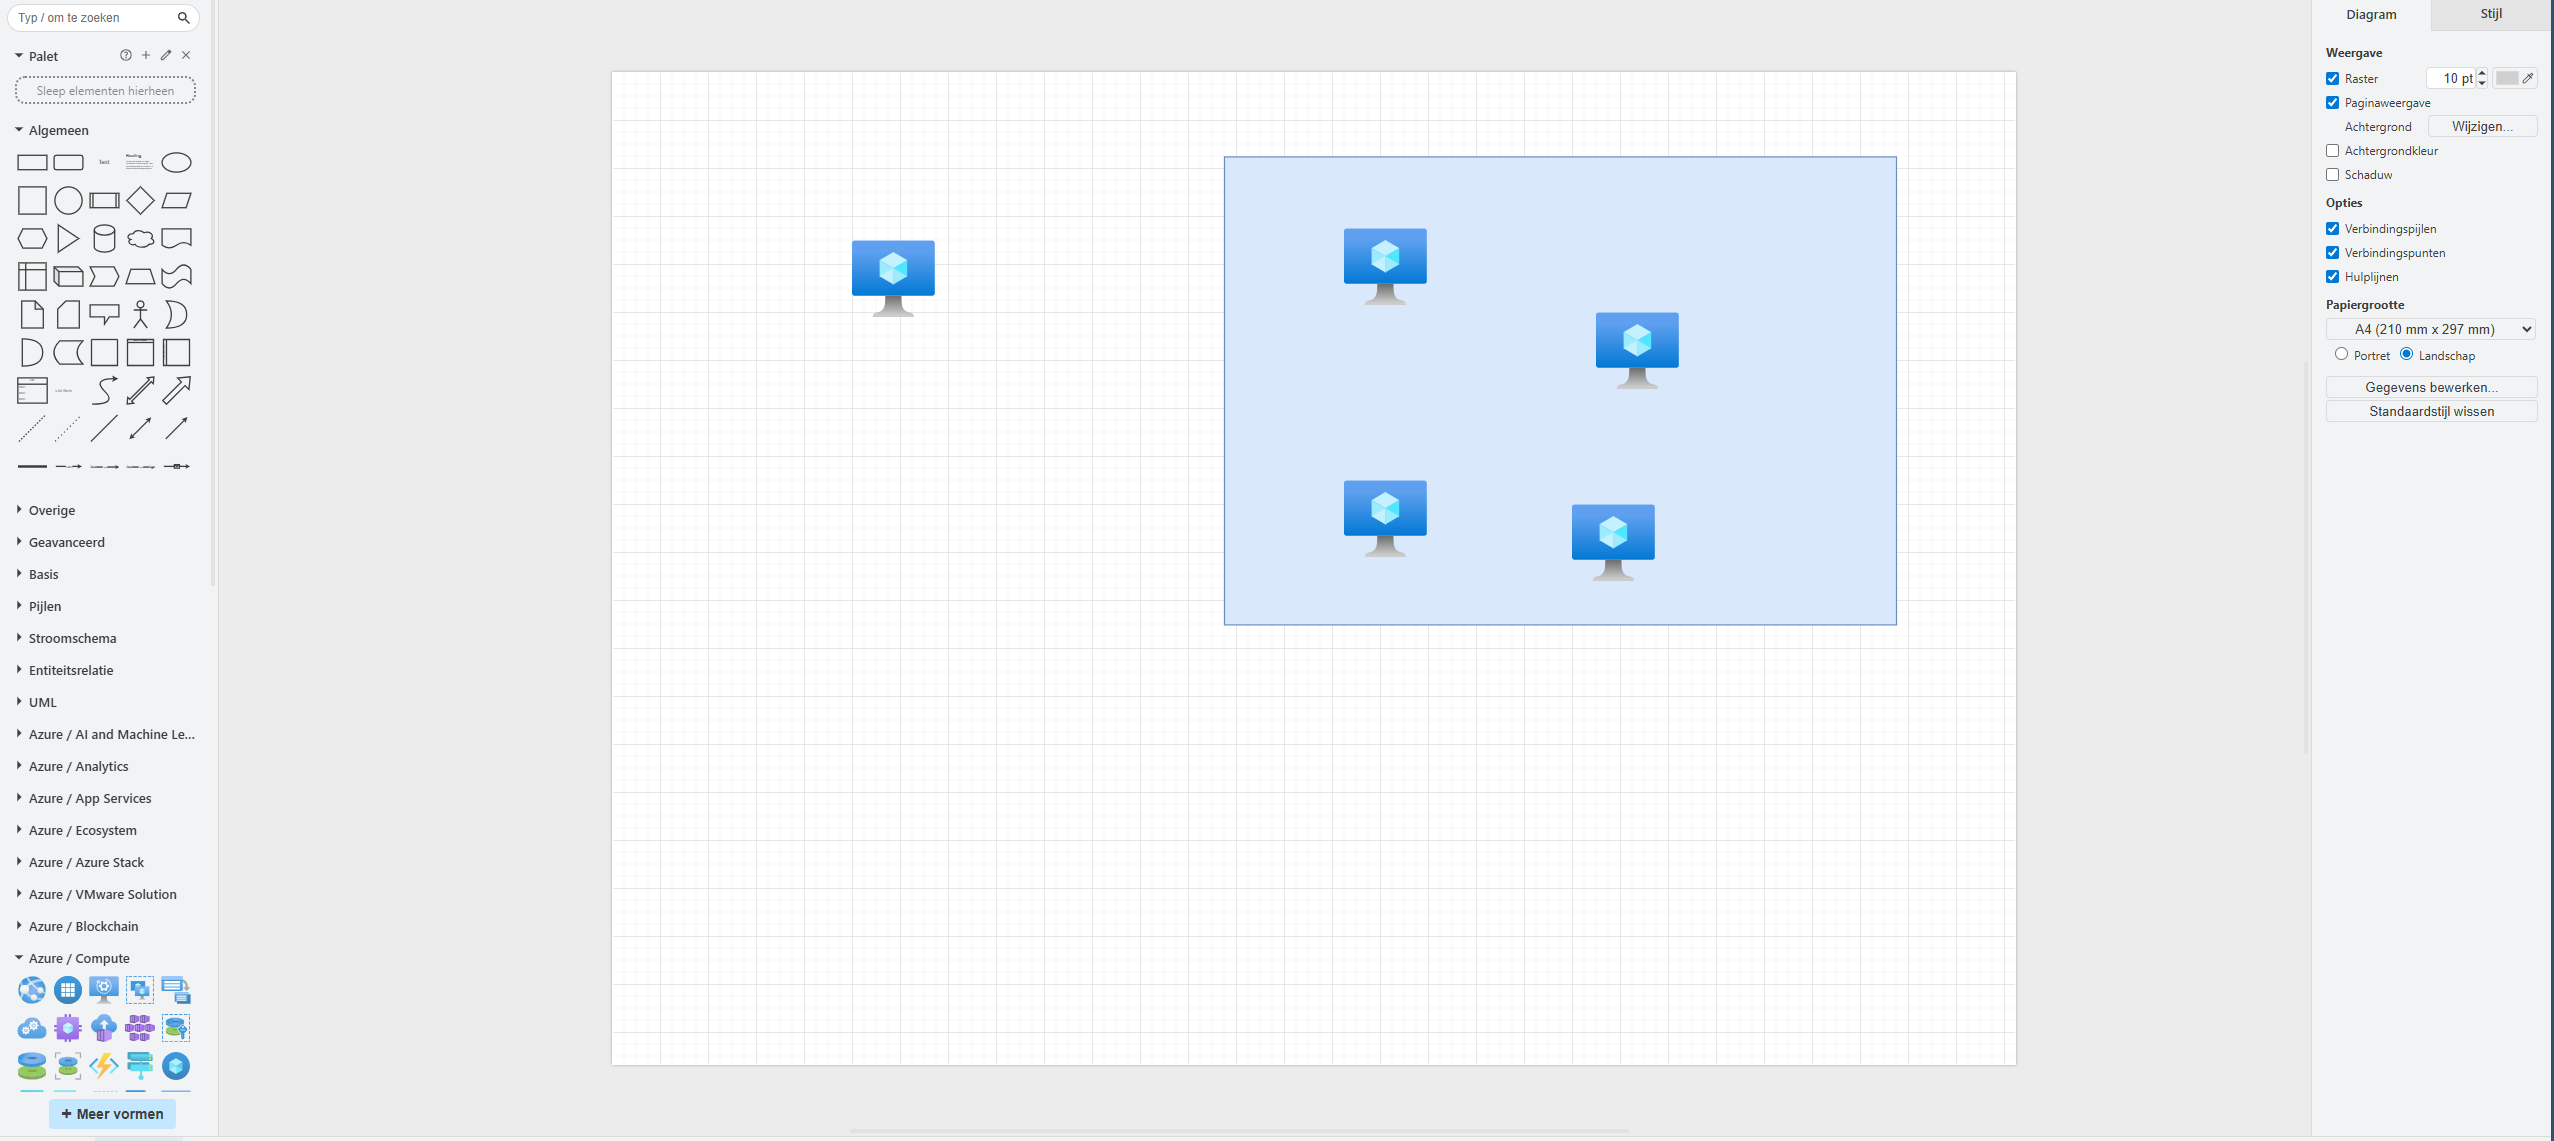
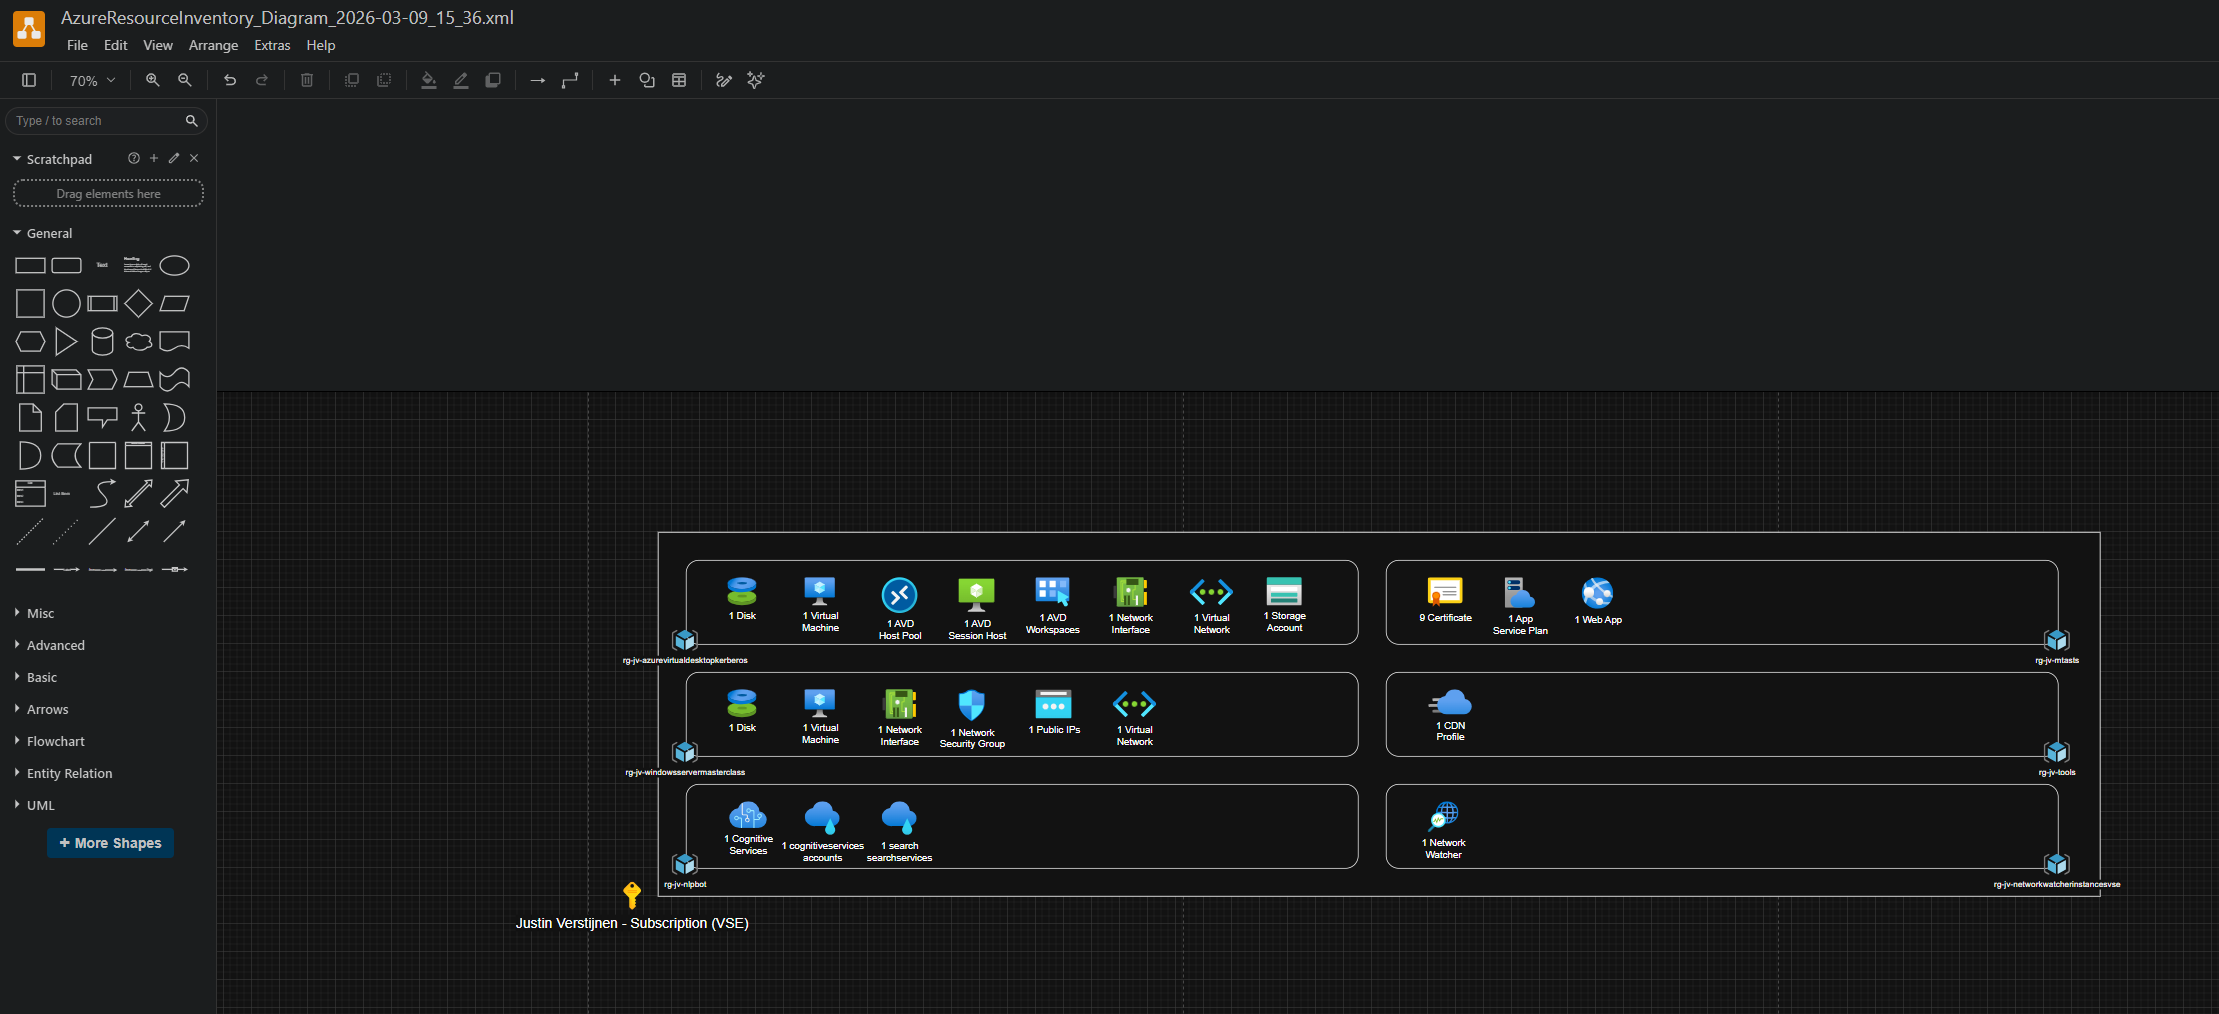
4. draw.io
draw.io is an amazing online tool for drawing diagrams. You can create network maps, architecture diagrams, or flowcharts for your Azure environment without installing software. It has almost all icons for Azure natively built-in for easy charts and diagrams.
Every time you see a nice moving and interactive diagram on my website, I have used Draw.io to create it.
5. Microsoft Visio Azure Diagrams
Visio is a popular Microsoft tool to draw professional diagrams. With its Azure template, you can build detailed Azure diagrams using official icons and symbols easily. However, Visio is software you have to pay for and it must be installed. But it works great.

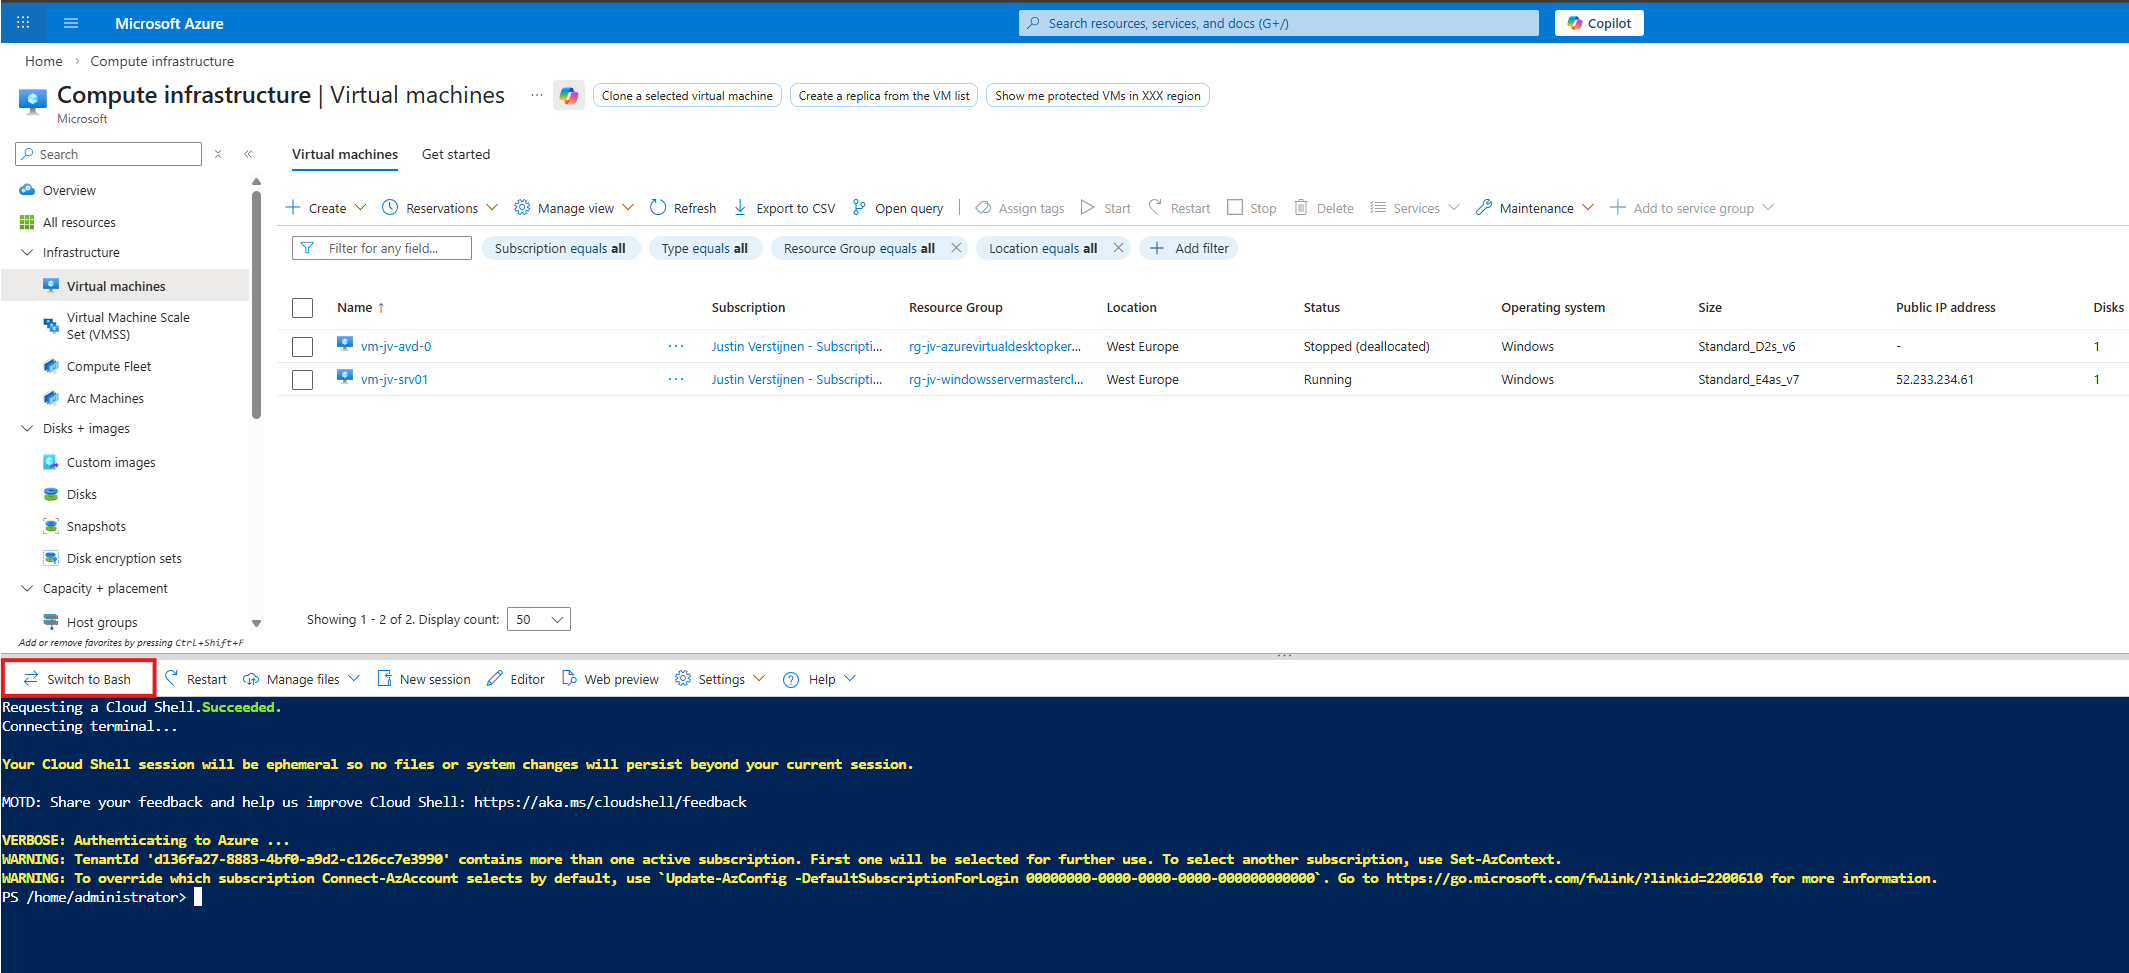
6. Azure CLI and Azure PowerShell
Azure CLI and PowerShell let you manage Azure using commands in a terminal. These tools are great for automation and managing resources faster than using the portal. We have the CLI and PowerShell directly in the Portal available using the “Cloud shell” button:
On Windows 11, you already have Azure CLI ready to use on your device. You only need to login to the tenant itself:
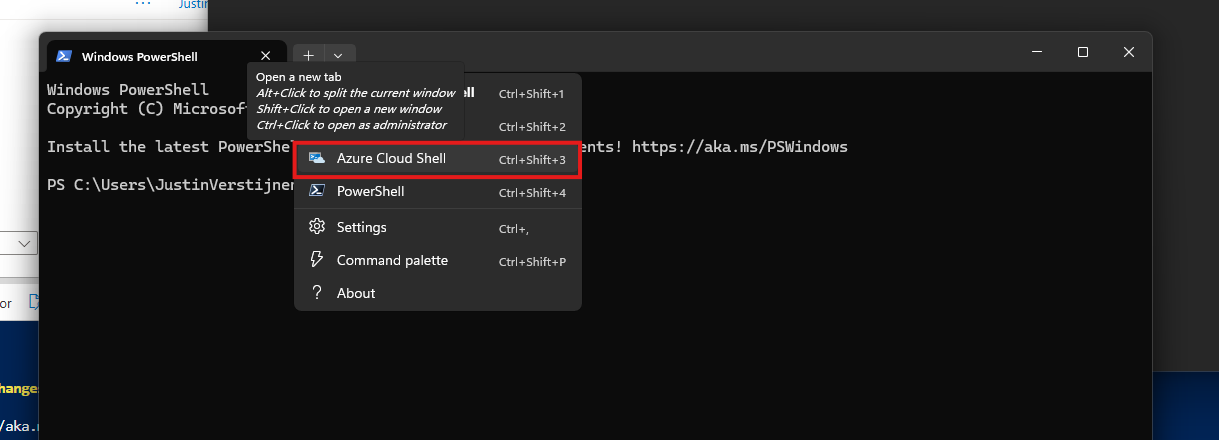
To use Azure PowerShell, you need to open PowerShell on your endpoint and install the needed modules:
POWERSHELL
Install-Module -Name Az.Accounts -Scope CurrentUser -AllowClobber -Force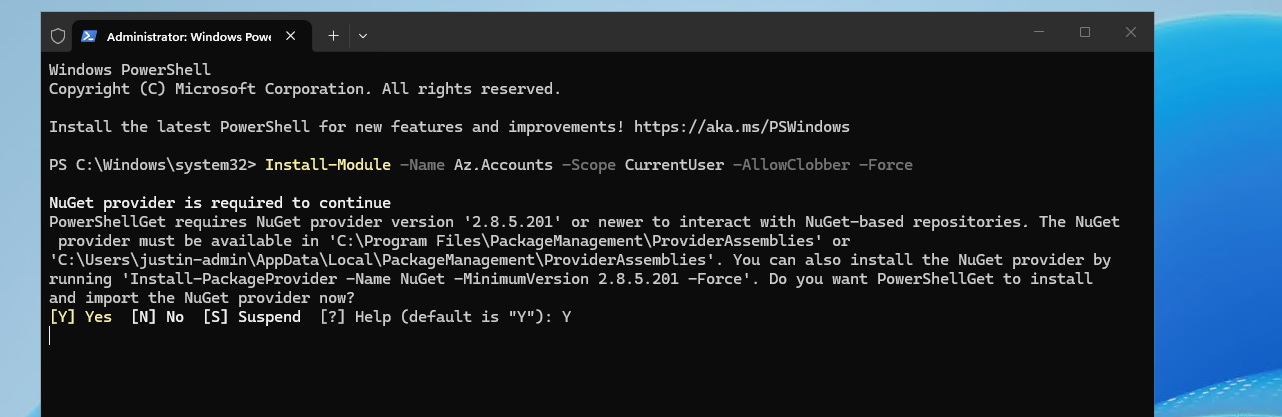
Then connect to your tenant using this command:
POWERSHELL
Connect-AzAccount7. Azure Cloud Shell
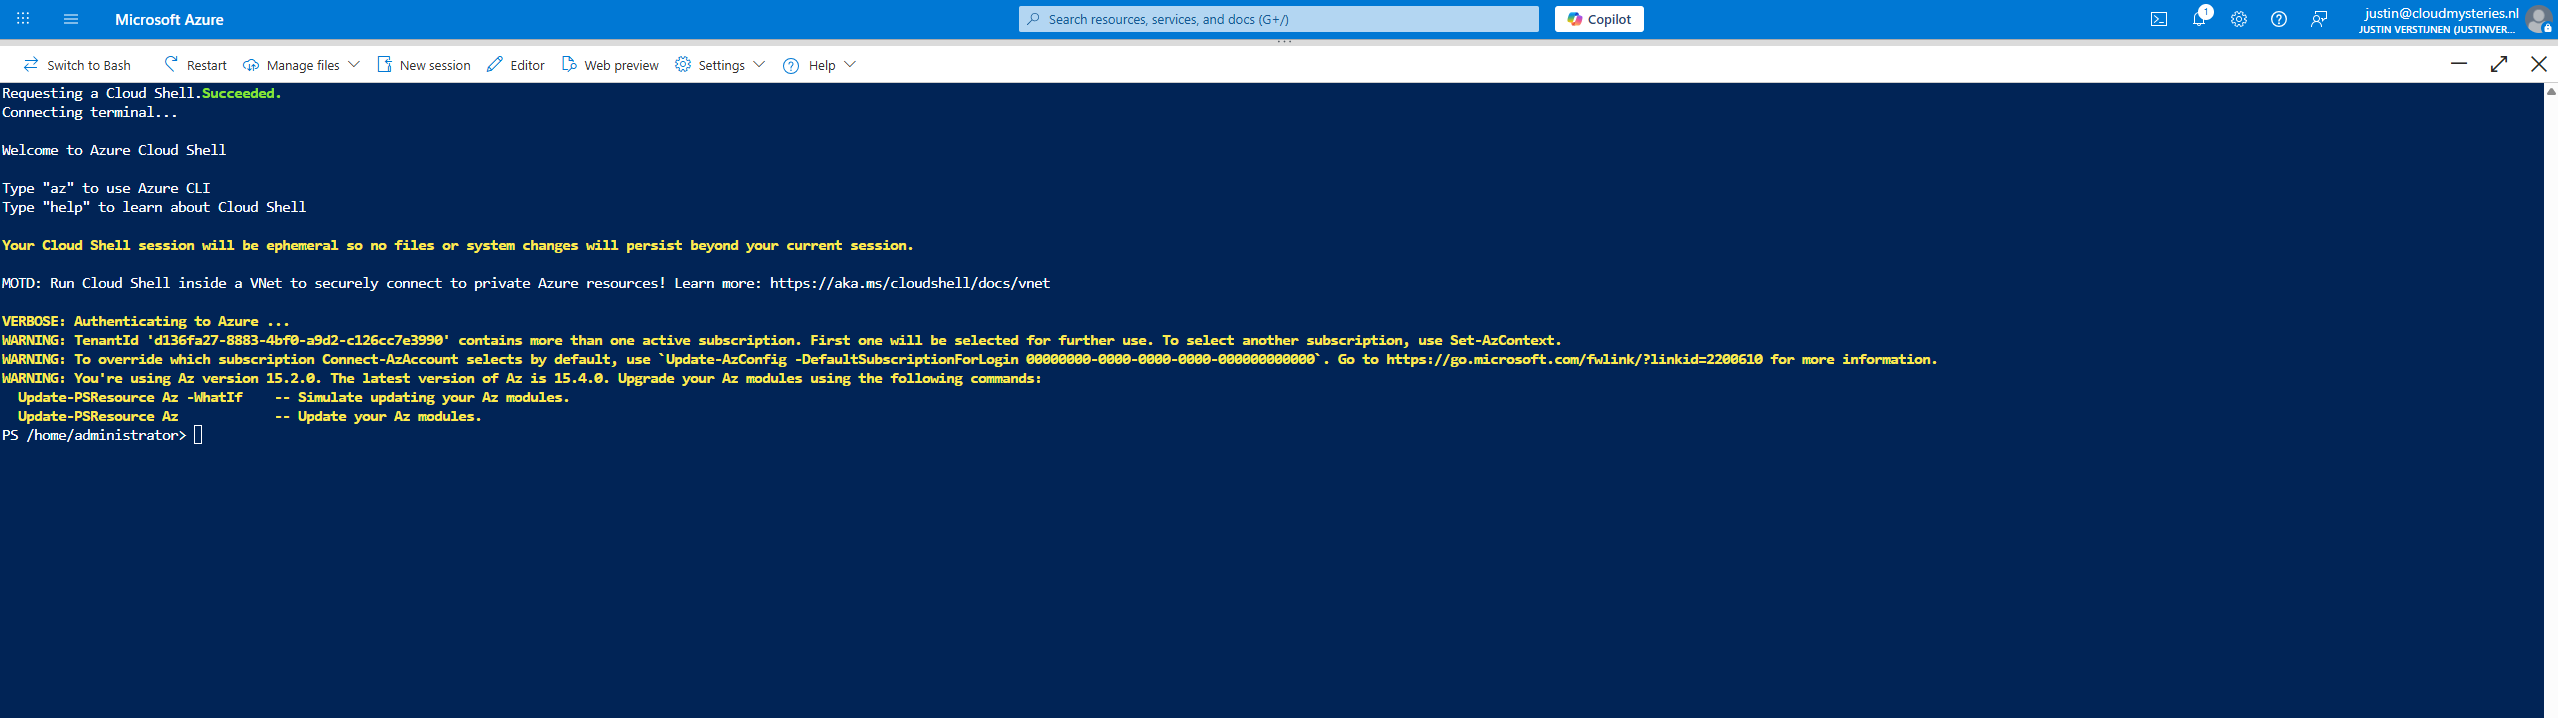
Cloud Shell is an online command-line environment you can use directly in your browser. It includes Azure CLI and PowerShell, so you don’t need to install anything locally. Very useful for fast tasks like deallocating a hung virtual machine or removing a resource that’s not visible in the Portal.
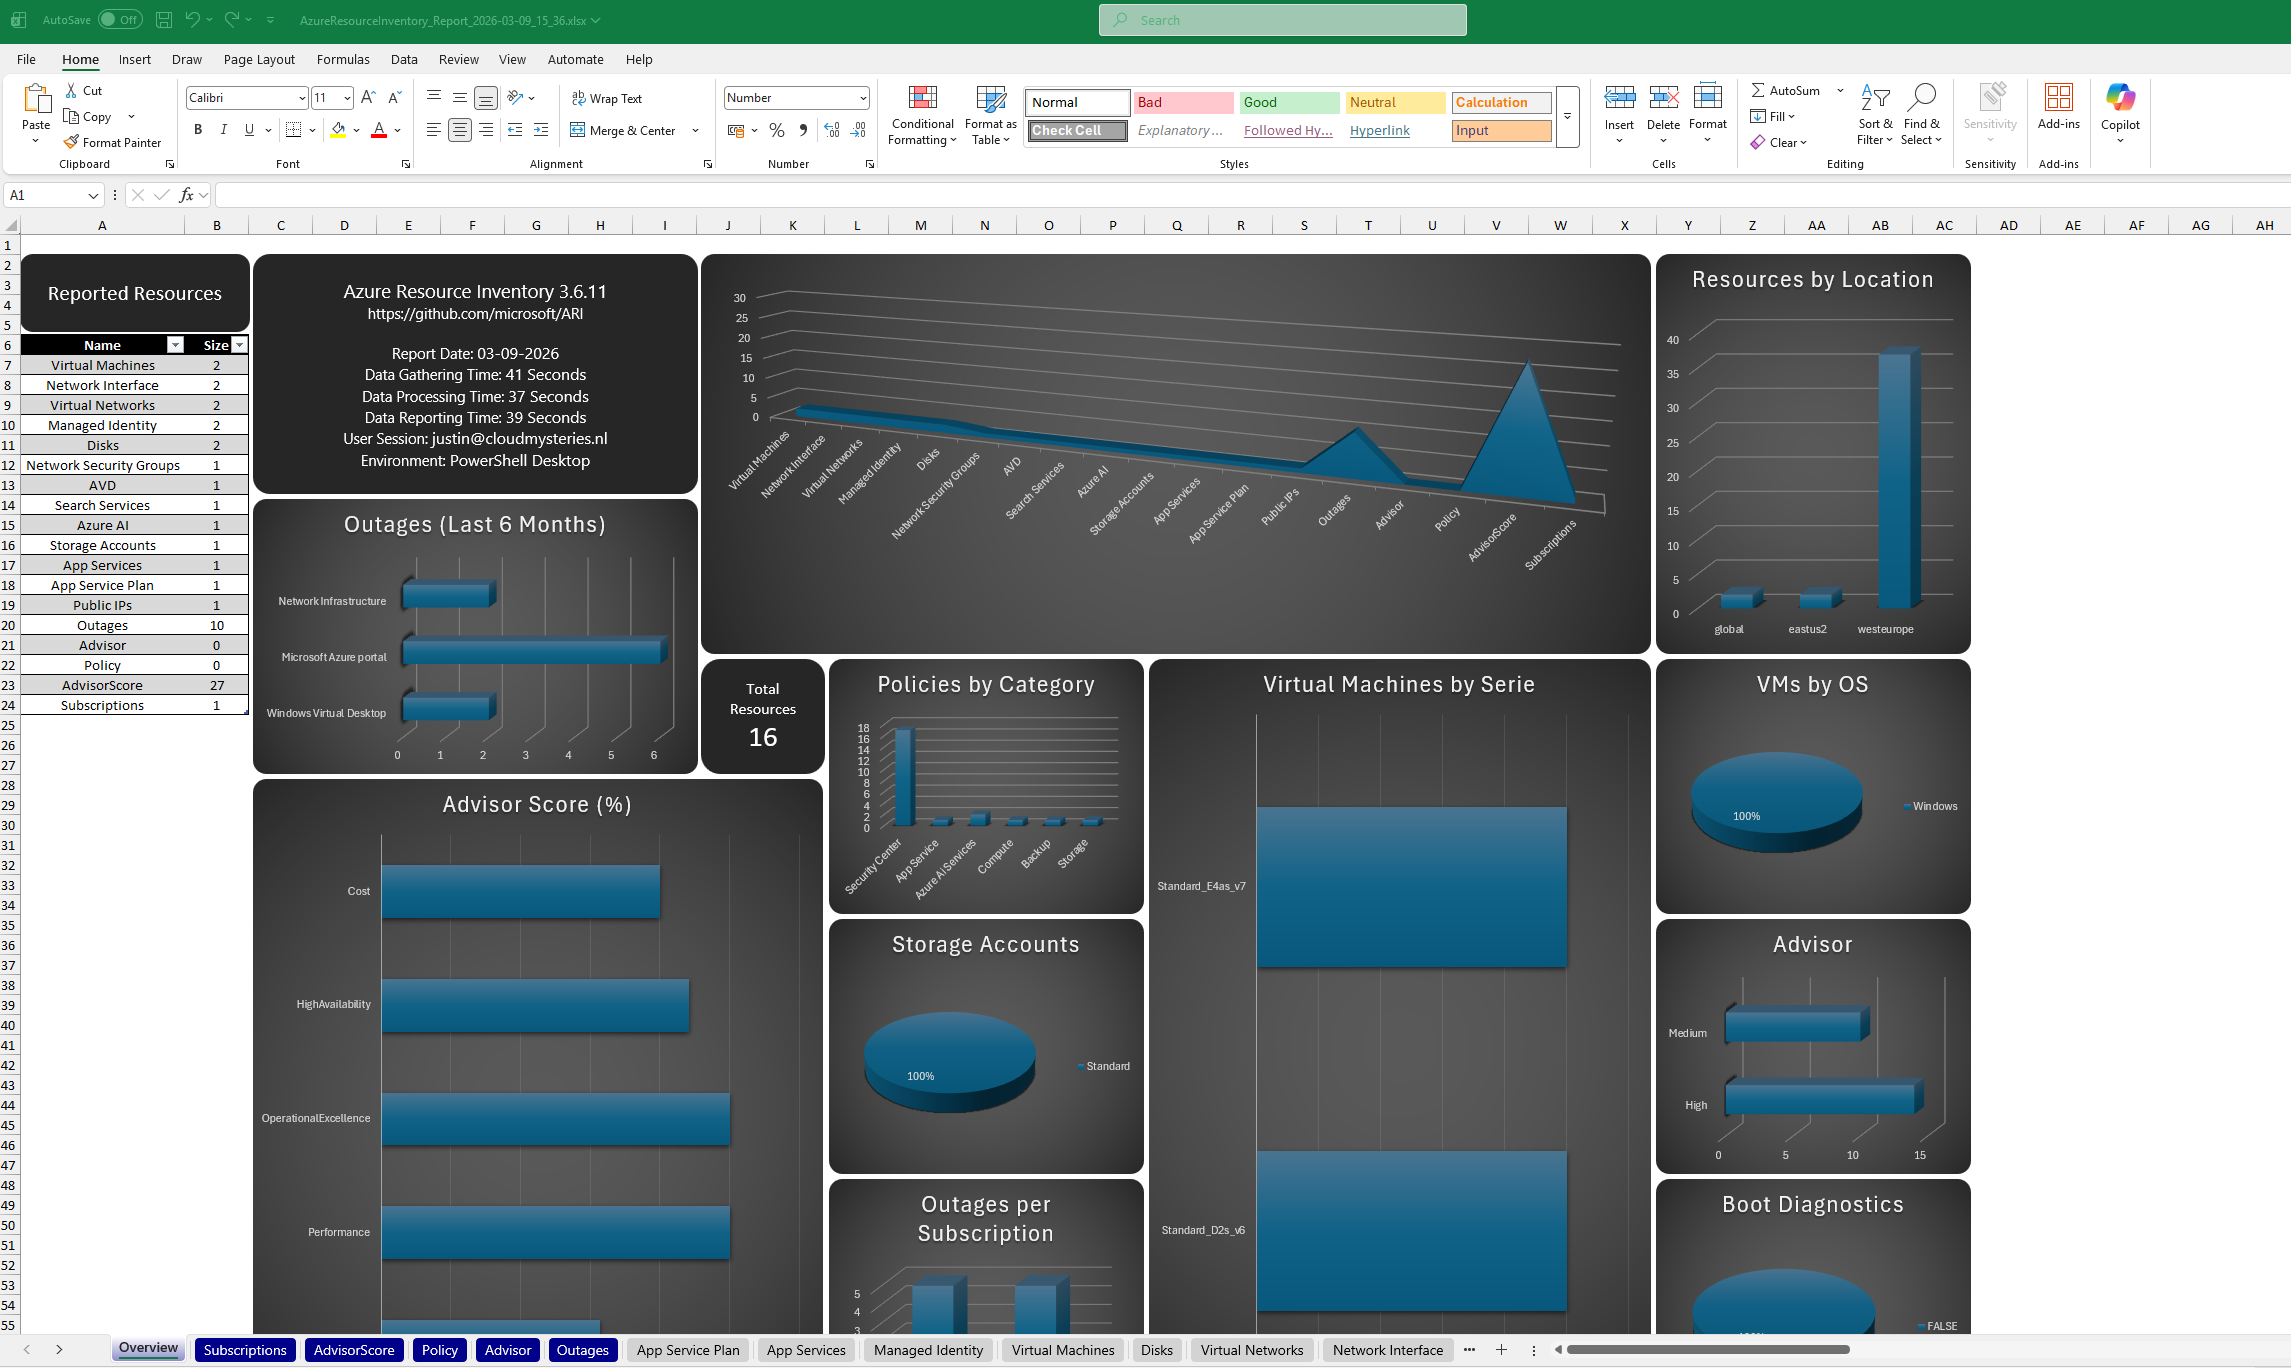
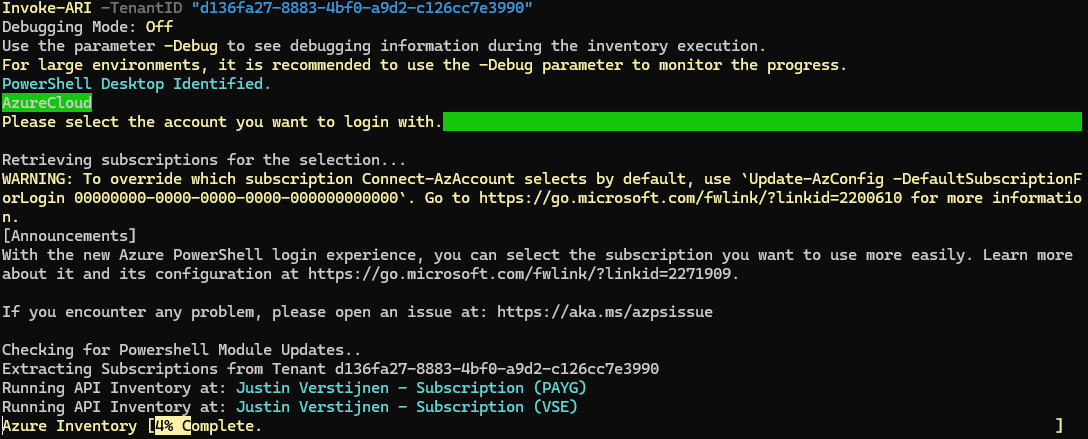
8. Azure Resource Indexer (ARI)
ARI is a tool from Microsoft on GitHub that helps find and visualize your Azure resources and their relations with each other. It is a useful to document your cloud setup or discover a new environment. It also has a export option to Draw.io, further helping you creating nice documentation.
https://github.com/microsoft/ARI
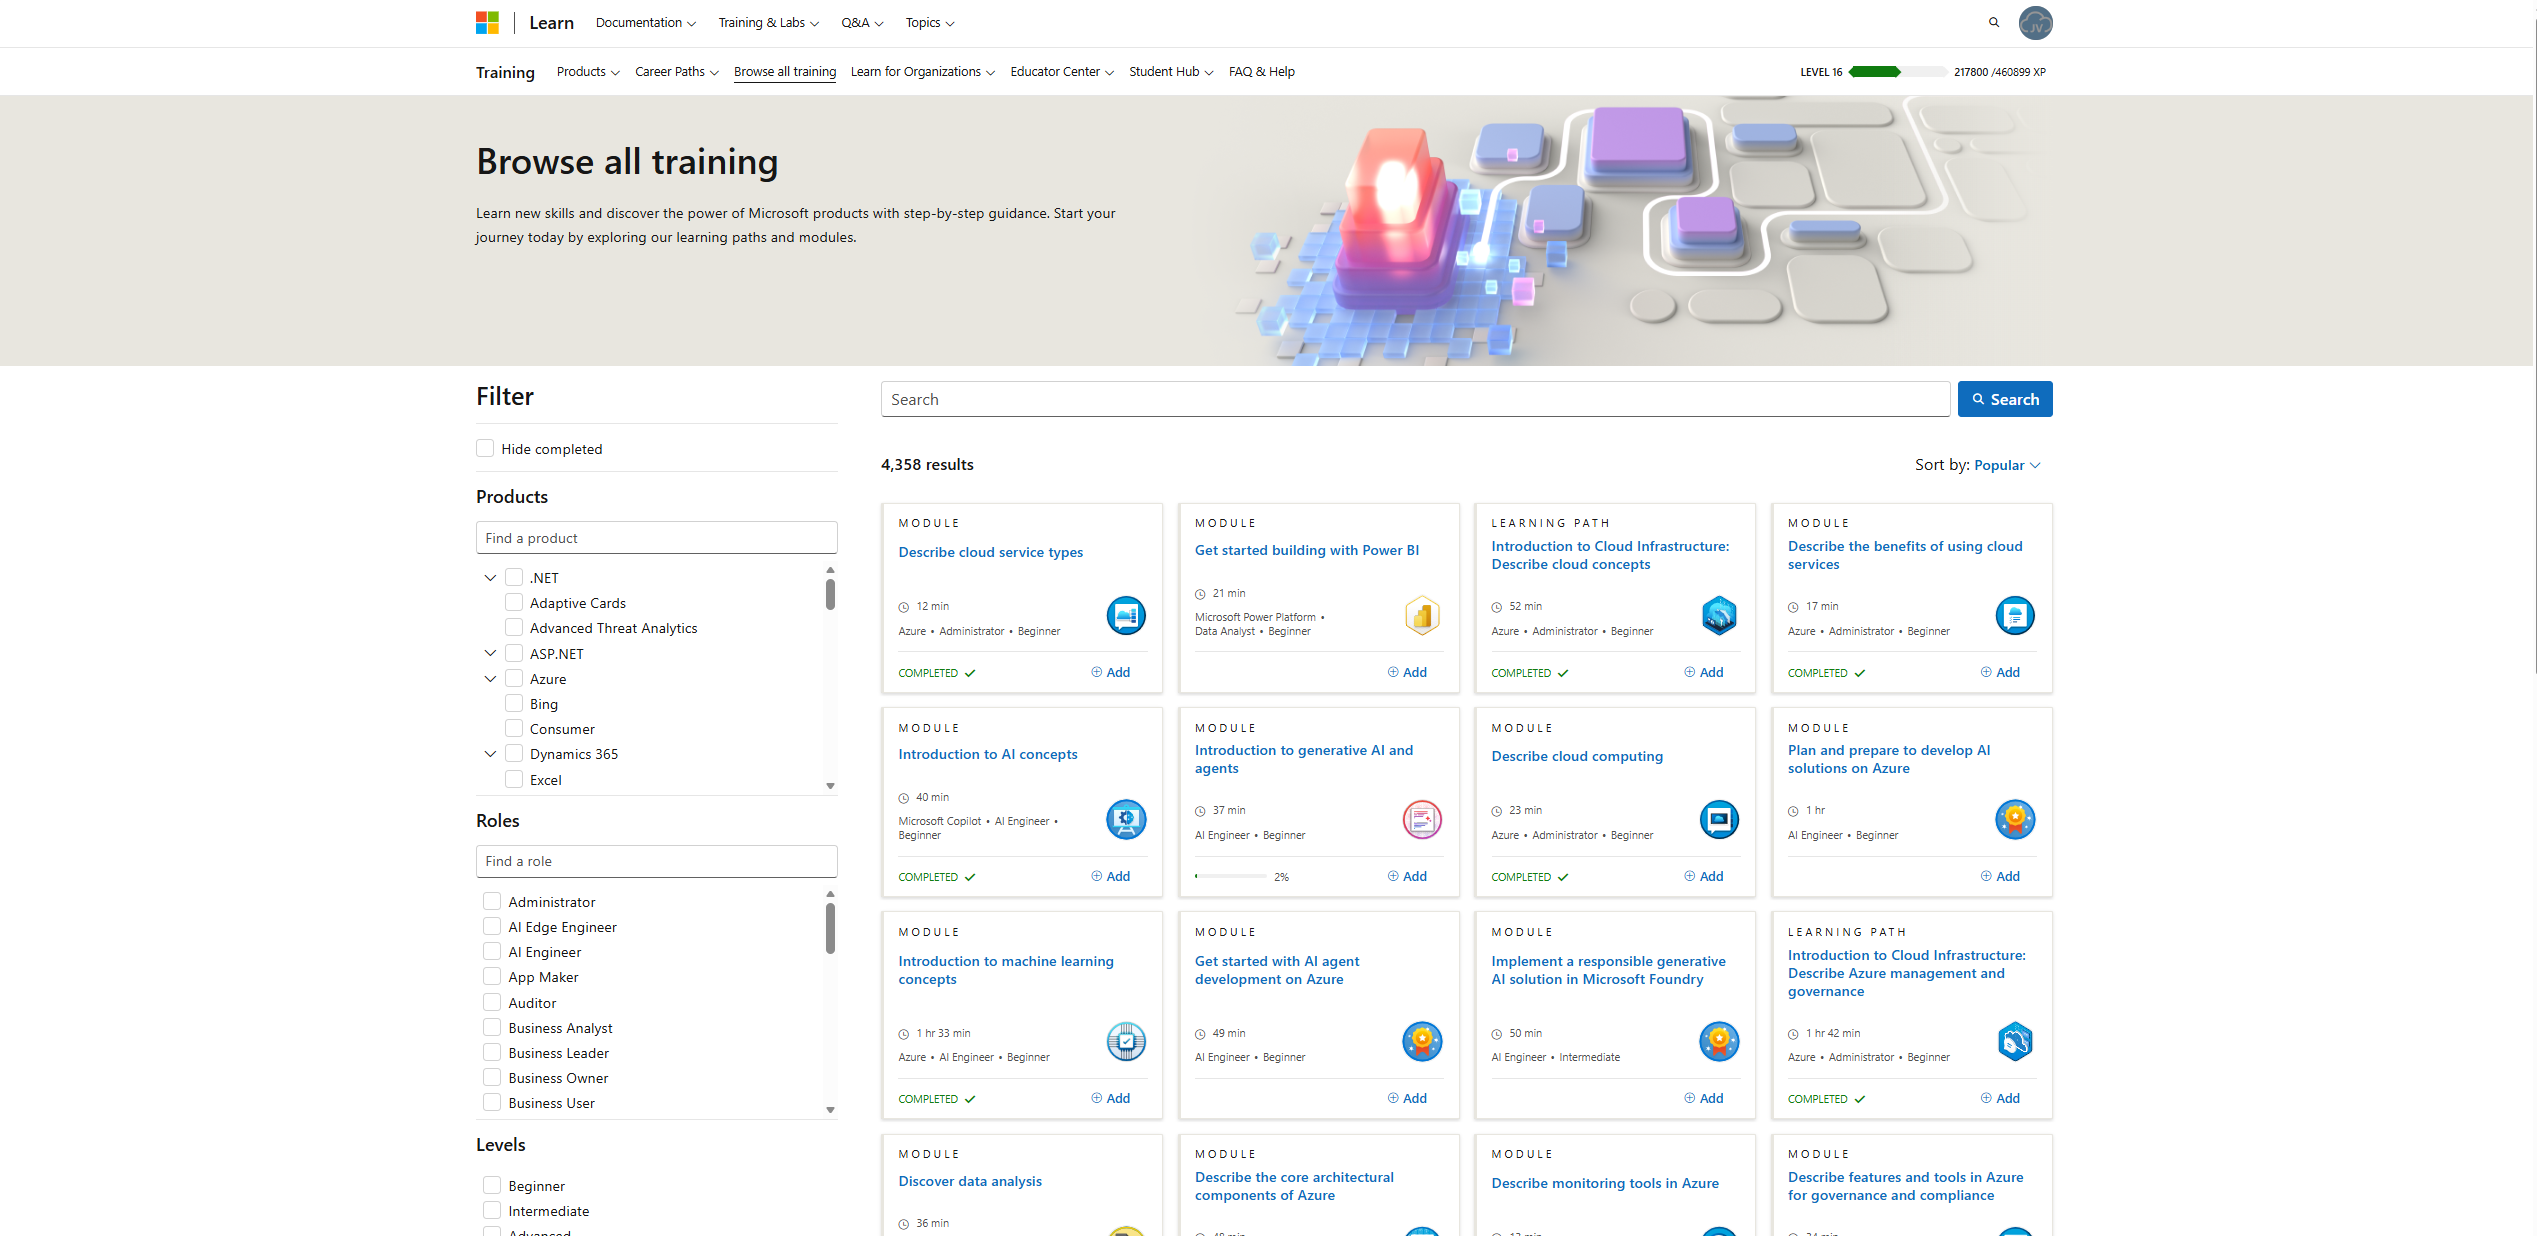
9. Microsoft Learn
Microsoft Learn offers free, step-by-step learning paths for Azure and many other Microsoft products. It helps you build skills and to introduce you to the stuff needed to learn for a certification. It also contains a lot of Microsoft documentation like how PowerShell scripts and modules work or licensing requirements.
https://learn.microsoft.com/en-us/credentials/browse
https://learn.microsoft.com/en-us/credentials/browse/?credential_types=applied%20skills
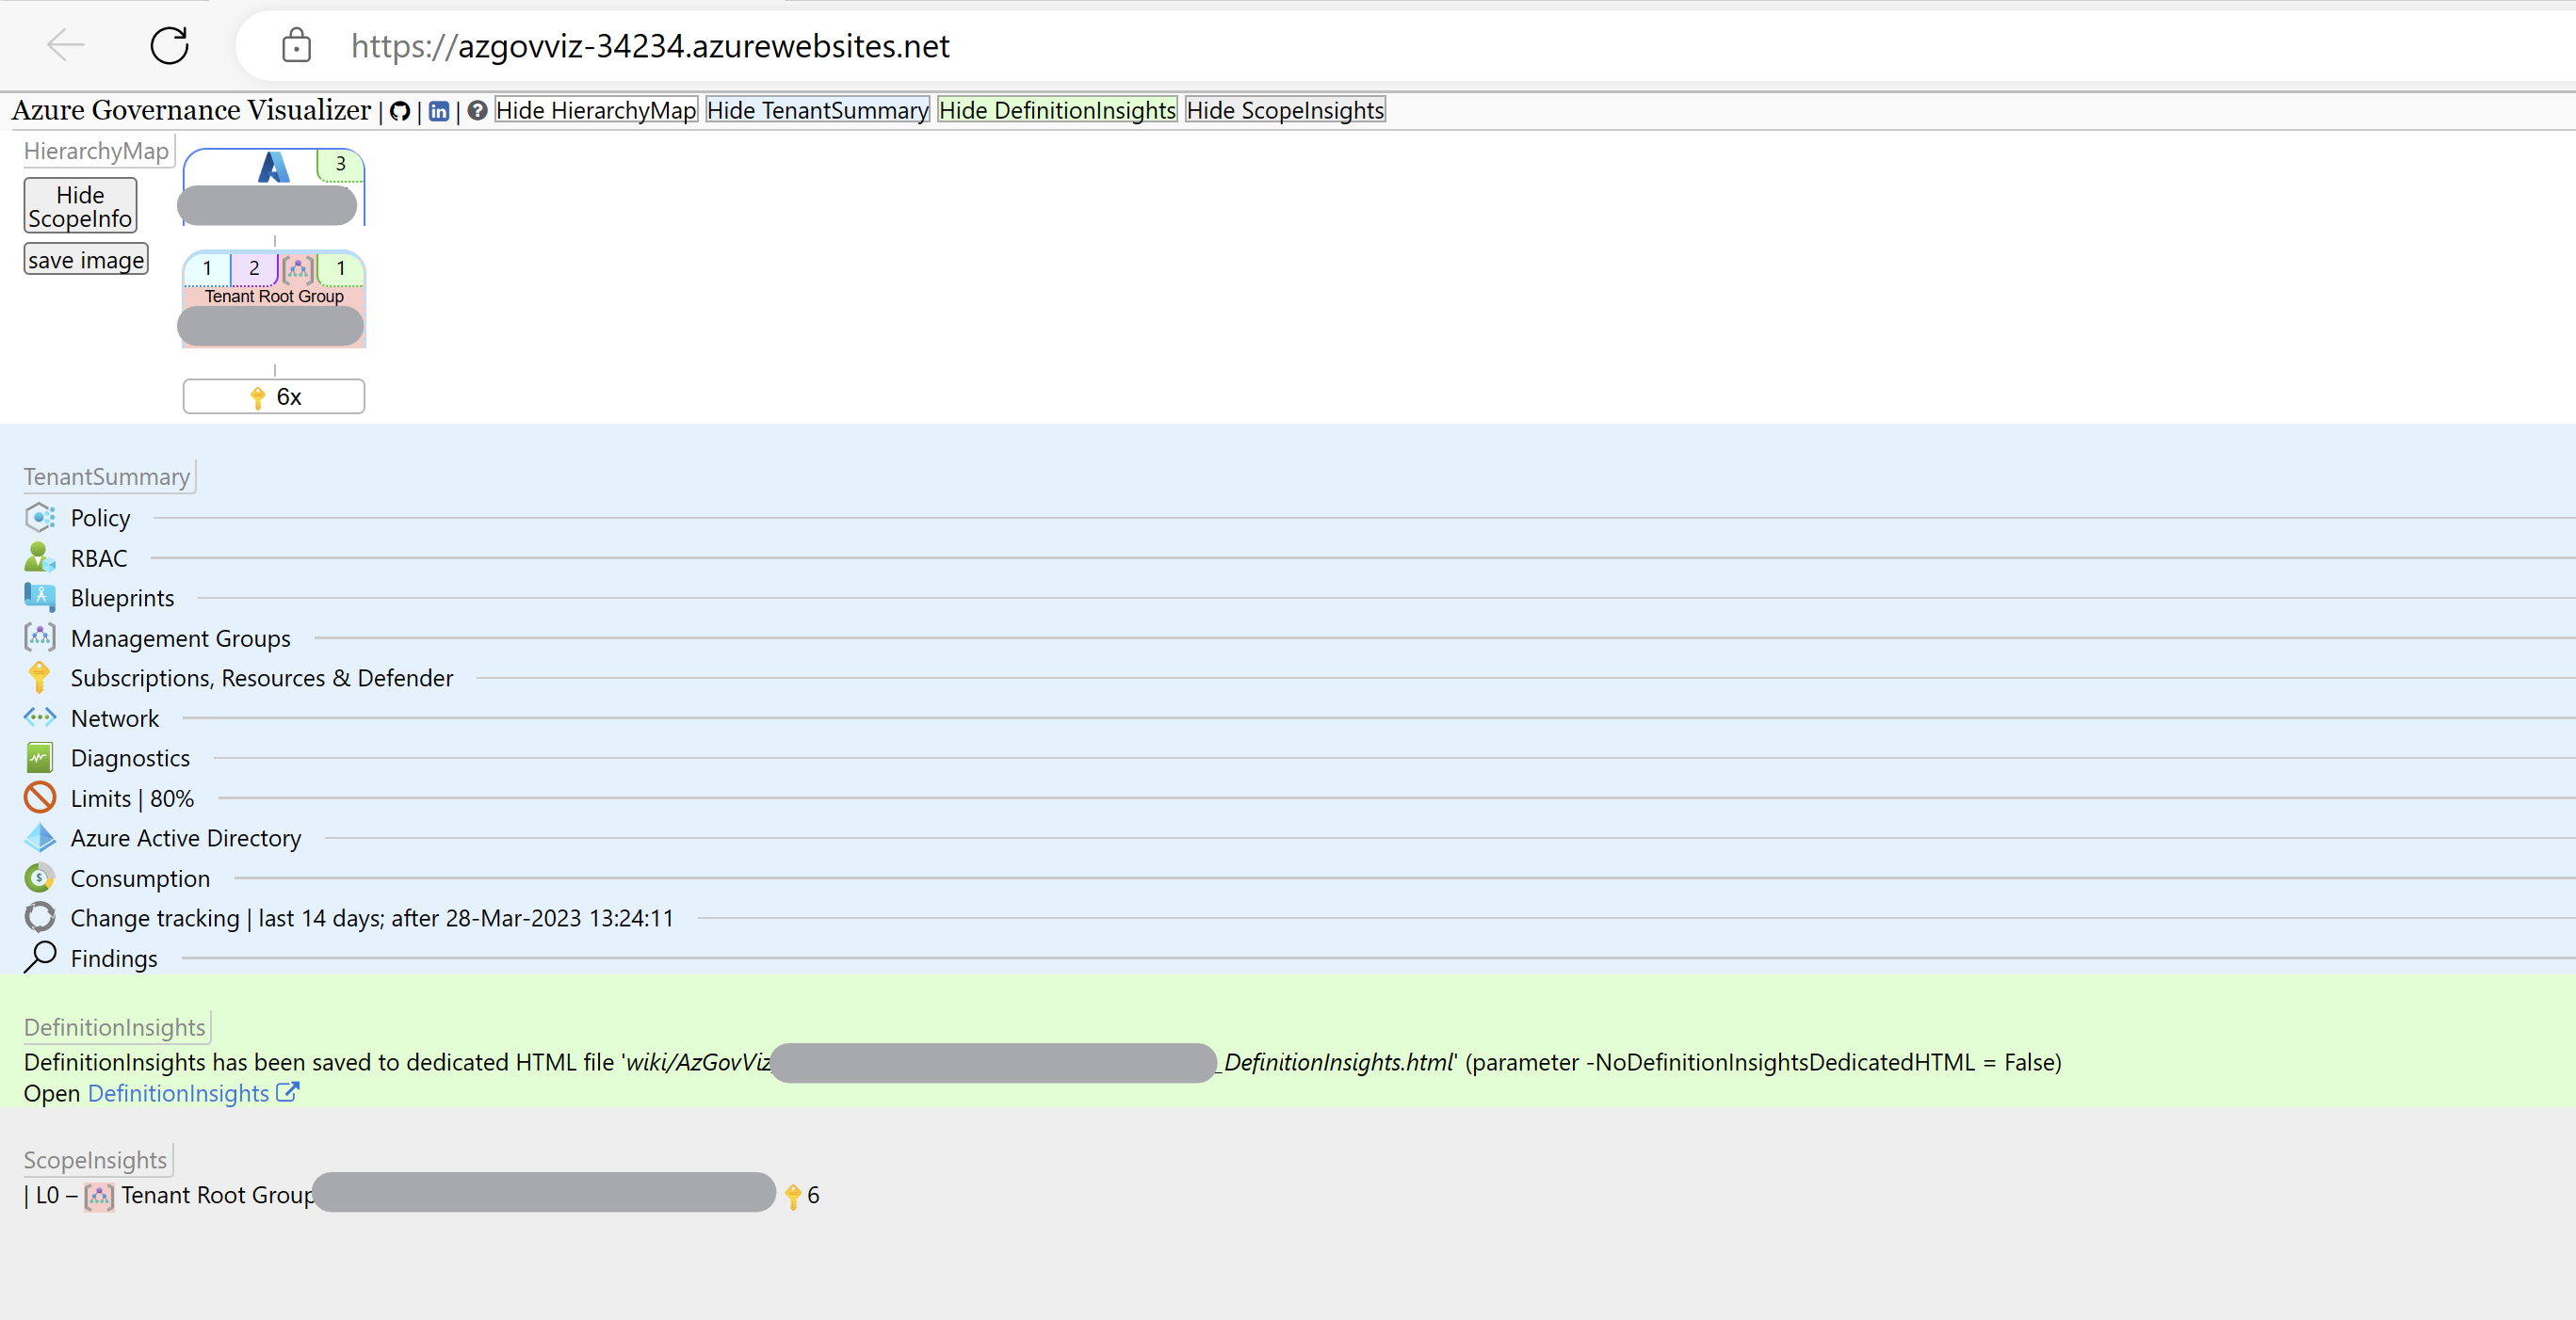
10. Azure Governance Visualizer Accelerator
This is a comprehensive tool that helps you see and understand how governance policies affect your Azure environment. It shows things like resource access rules visually, helping keep your setup secure and compliant. The setup will take some time but is really useful.
https://github.com/Azure/Azure-Governance-Visualizer-Accelerator
Summary
These 10 tools cover many aspects of working with Azure and related services. From staying updated to managing costs, drawing diagrams, running commands, automating tasks and learning new skills. They all make cloud management easier and more efficient.
Thank you for reading this post and I hope it was helpful!
End of the page 🎉
You have reached the end of the page. You can navigate through other blog posts as well, share this post on X, LinkedIn and Reddit or return to the blog posts collection page. Thank you for visiting this post.
If you think something is wrong with this post or you want to know more, you can send me a message to one of my social profiles at: https://justinverstijnen.nl/about/
If you find this page and blog very useful and you want to leave a donation, you can use the button below to buy me a beer. Hosting and maintaining a website takes a lot of time and money. Thank you in advance and cheers :)
The terms and conditions apply to this post.
Create HTTPS 301 redirects with Azure Front Door
In this post, I will explain how I redirect my domains and subdomains to websites and parts of my website. If you ever visited my tools page at https://justinverstijnen.nl/tools, you will see I have shortcuts to my tools themselves, although they are not directly linked to the instances. In this post I will explain how this is done, how to setup Azure Front Door to do this and how to create your own redirects from the Azure Portal.
Requirements
For this solution, you need the following stuff:
- An Azure Subscription
- A domain name or multiple domain names, which may also be subdomains (subdomain.domain.com)
- Some HTTPS knowledge
- Some Azure knowledge
The solution explained
I will explain how I have made the shortcuts to my tools at https://justinverstijnen.nl/tools, as this is something what Azure Front Door can do for you.
In short, Azure Front Door is a load balancer/CDN application with a lot of load balancing options to distribute load onto your backend. In this guide we will use a simple part, only redirecting traffic using 301 rules, but if interested, its a very nice application.
- Our client is our desktop, laptop or mobile phone with an internet browser
- This client will request the URL dnsmegatool.jvapp.nl
- A simple DNS lookup explains this (sub)domain can be found on Azure (jvshortcuts-to-jvtools-eha7cua0hqhnd4gk.z01.azurefd.net)
- The client will lookup Azure as he now knows the address
- Azure Front Door accepted the request and will route the request to the rule set
- The rule set will be checked if any rule exists with this parameters
- The rule has been found and the client will get a HTTPS 301 redirect to the correct URL: tools.justinverstijnen.nl/dnsmegatool.nl
This effectively results in this (check the URL being changed automatically):
Now that we know what happens under the hood, let’s configure this cool stuff.
Step 1: Create Azure Front Door
At first we must configure our Azure Front Door instance as this will be our hub and configuration plane for 301 redirects and managing our load distribution.
Open up the Azure Portal and go to “Azure Front Door”. Create a new instance there.
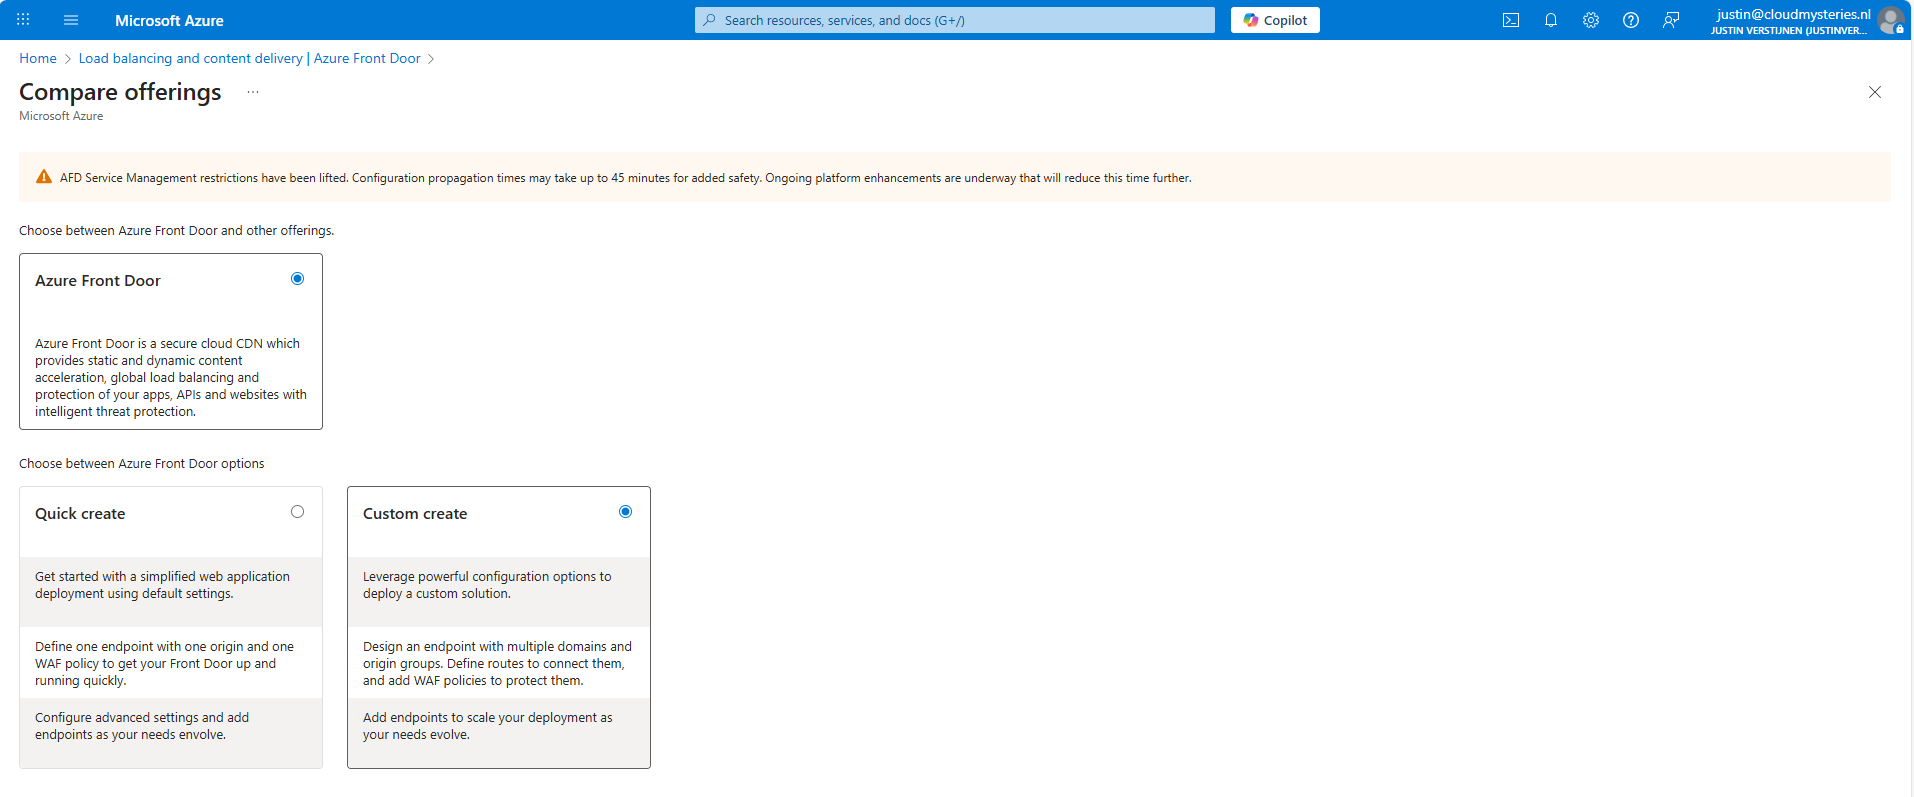
As the note describes, every change will take up to 45 minutes to be effective. This was also the case when I was configuring it, so we must have a little patience but it will be worth it.
I selected the “Custom create” option here, as we need a minimal instance.
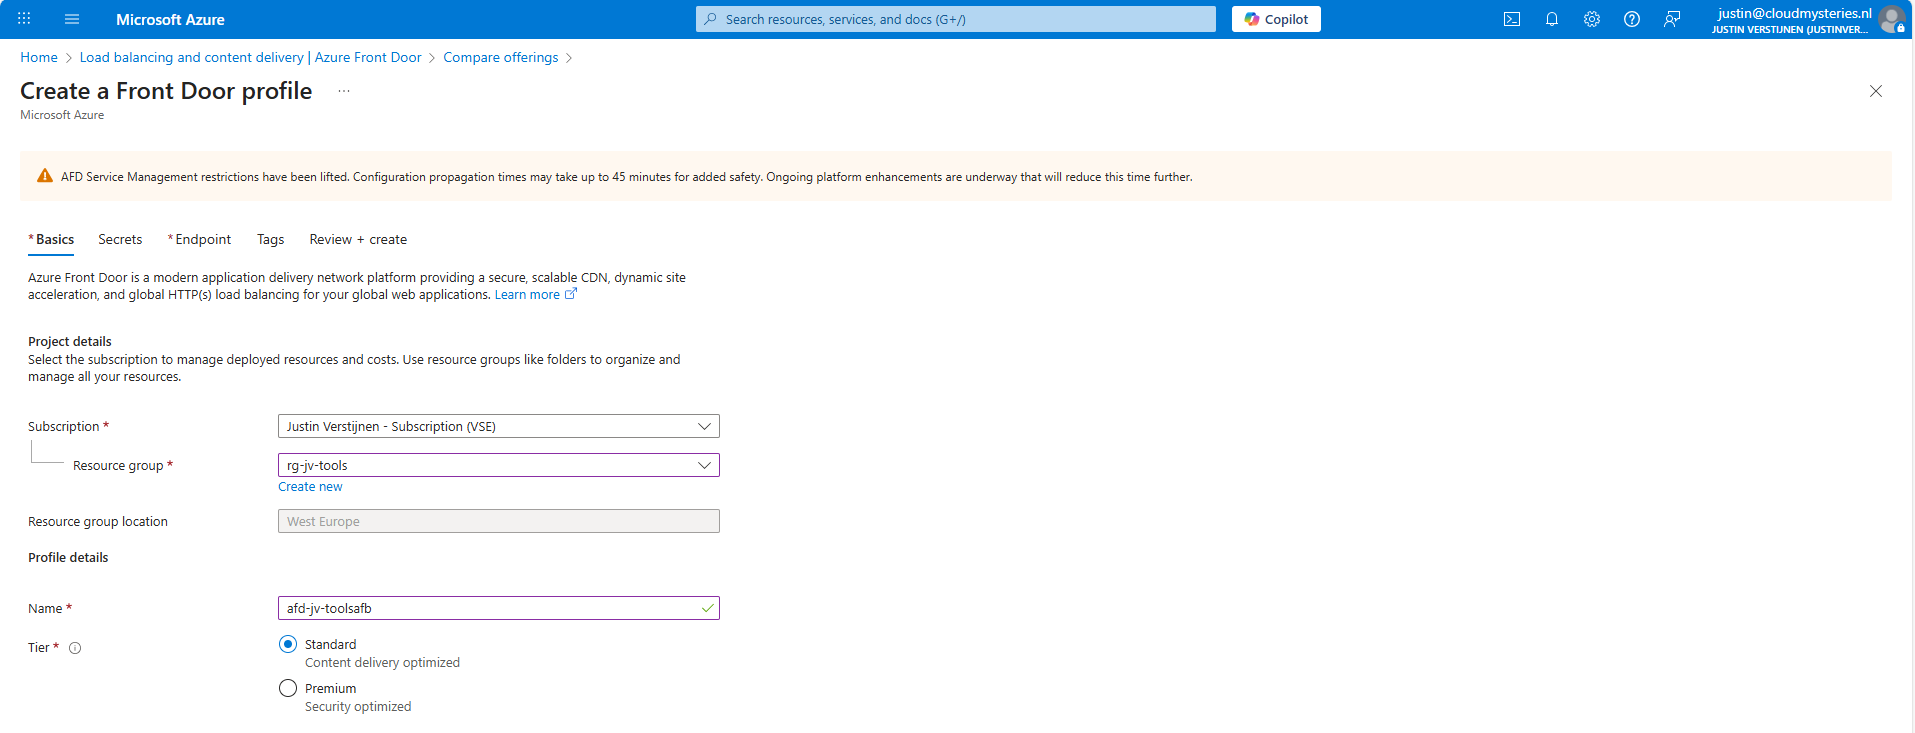
At the first page, fill in your details and select a Tier. I will use the Standard tier. The costs will be around:
- 35$ per month for Standard
- 330$ per month for Premium
Go to the “Endpoint” tab.

Give your Endpoint a name. This is the name you will redirect your hostname (CNAME) records to.
After creating the Endpoint, we must create a route.

Click “+ Add a route” to create a new route.
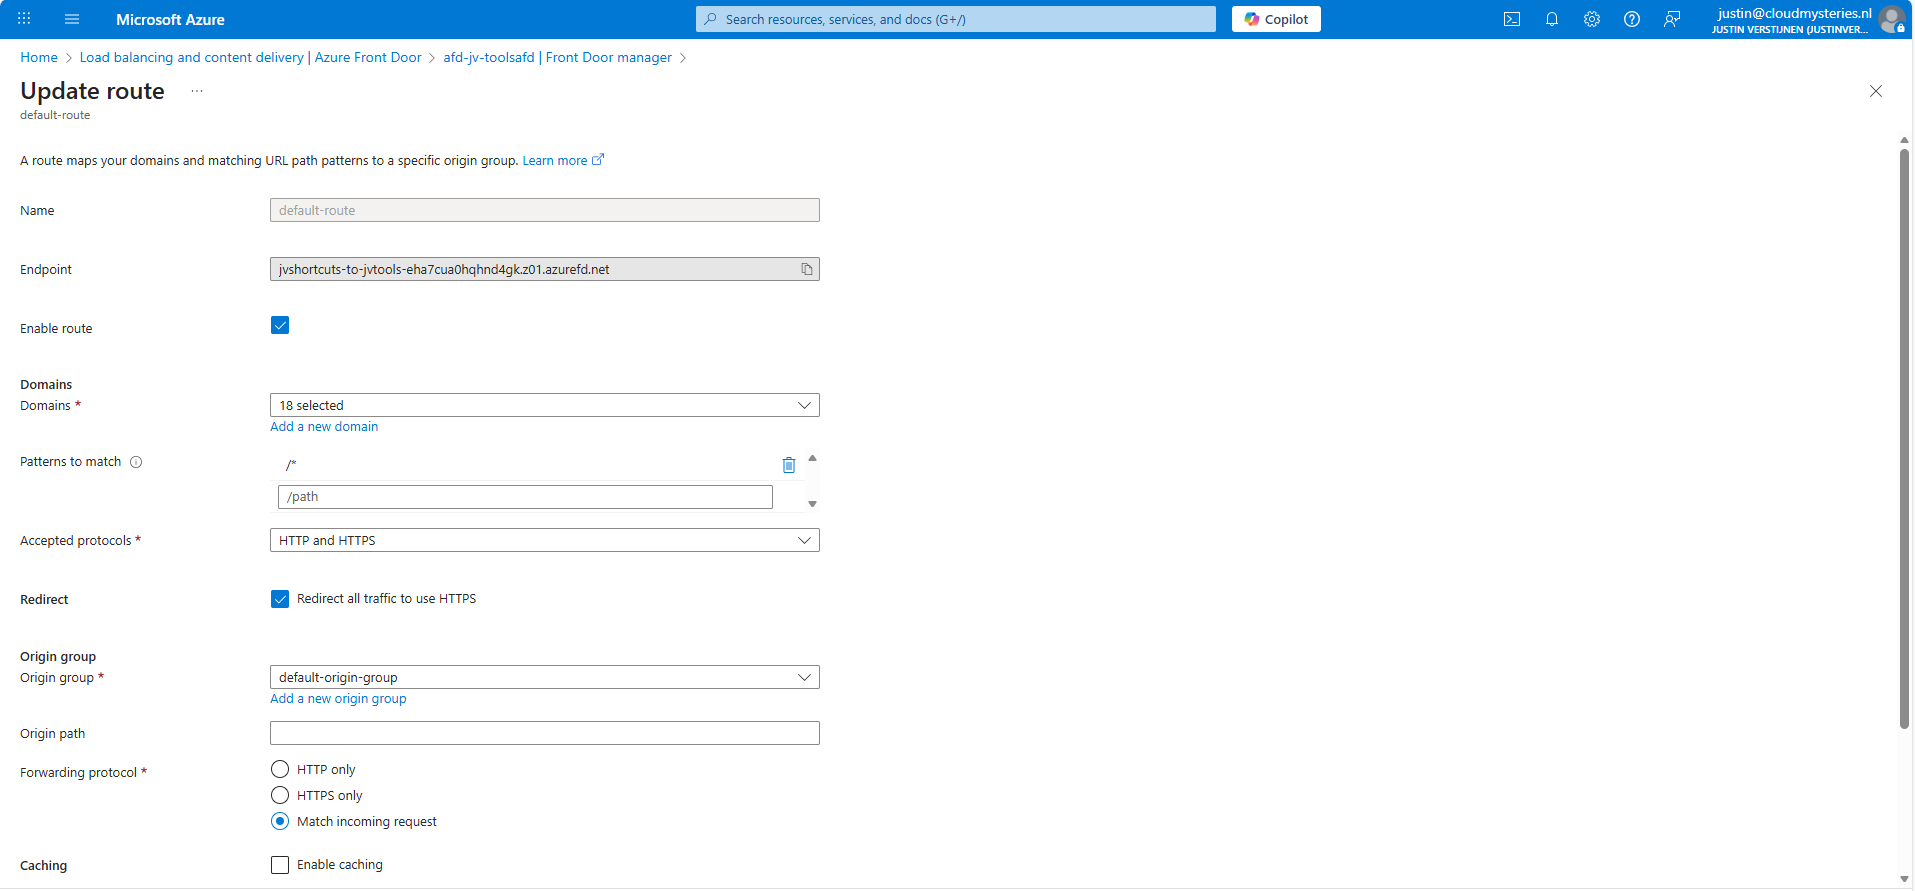
Give the route a name and fill in the following fields:
- Patterns to match: /*
- Accepted protocols: HTTP and HTTPS
- Redirect all traffic to use HTTPS: Enabled
Then create a new origin group. This doesn’t do anything in our case but must be created.
After creating the origin group, finish the wizard to create the Azure Front Door instance, and we will be ready to go.
Step 2: Configure the rule set
After the Azure Front Door instance has finished deploying, we can create a Rule set. This can be found in the Azure Portal under your instance:
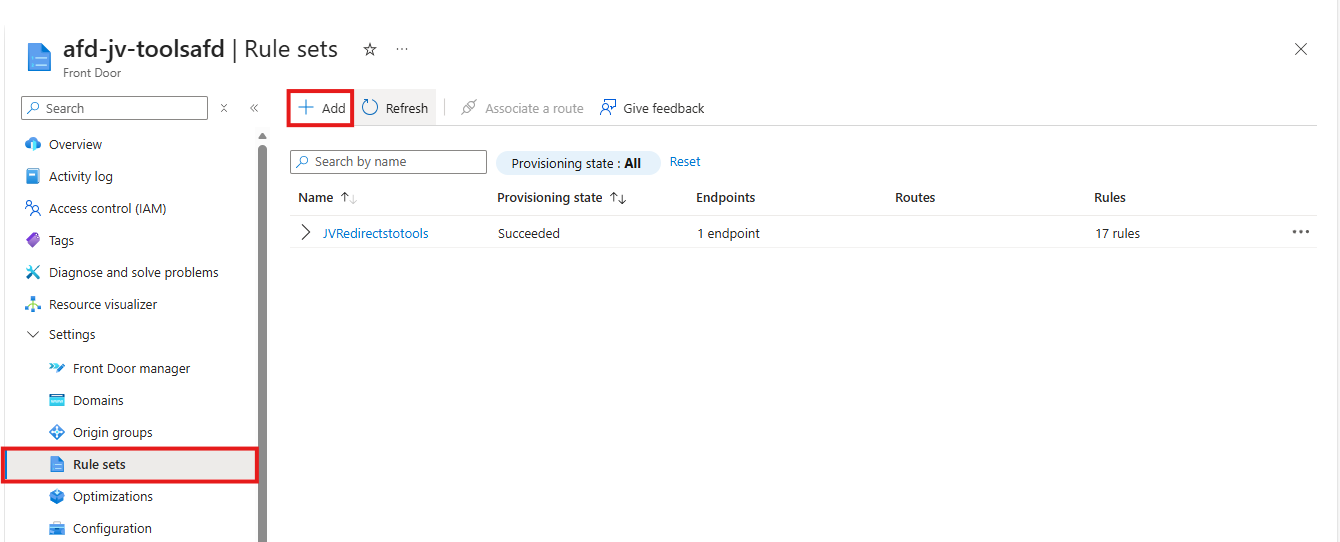
Create a new rule set here by clicking “+ Add”. Give the set a name after that.
The rule set is exactly what it is called, a set of rules your load balancing solution will follow. We will create the redirection rules here by basically saying:
- Client request: dnsmegatool.jvapp.nl
- Redirect to: tools.justinverstijnen.nl/dnsmegatool
Basically a if-then (do that) strategy. Let’s create such rule step by step.
Click the “+ Add rule” button. A new block will appear.

Now click the “Add a condition” button to add a trigger, which will be “Request header”
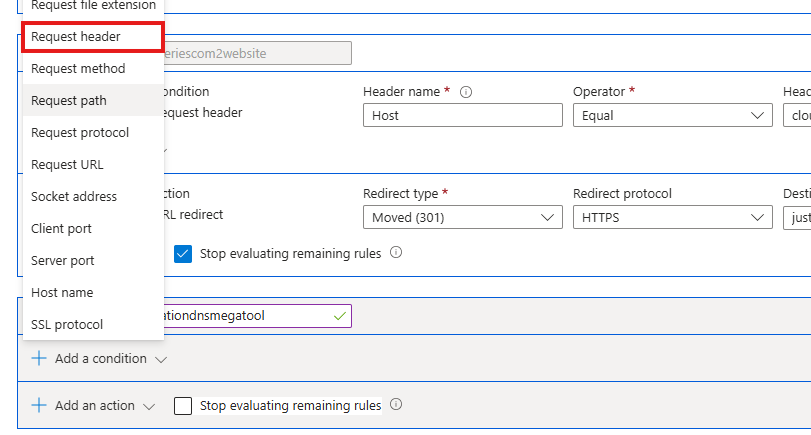
Fill in the fields as following:
- Header name: Host
- Operator: Equal
- Header value: dnsmegatool.jvapp.nl (the URL before redirect)
It will look like this:

The click the “+ Add an action” button to decide on what to do when a client requests your URL:

Select the “URL redirect” option and fill in the fields:
- Redirect type: Moved (301)
- Redirect protocol: HTTPS
- Destination host: tools.justinverstijnen.nl
- Destination path: /dnsmegatool (only use this if the site is not at the top level of the domain)
Then enable the “Stop evaluating remaining rules” option to stop processing after this rule has applied.
The full rule looks like this:

Now we can update the rule/rule set and do the rest of the configurations.
Step 3: Custom domain configuration
How we have configured that we want domain A to link to domain B, but Azure requires us to validate the ownership of domain A before able to set redirections.
In the Azure Front Door instance, go to “Domains” and “+ Add” a domain here.
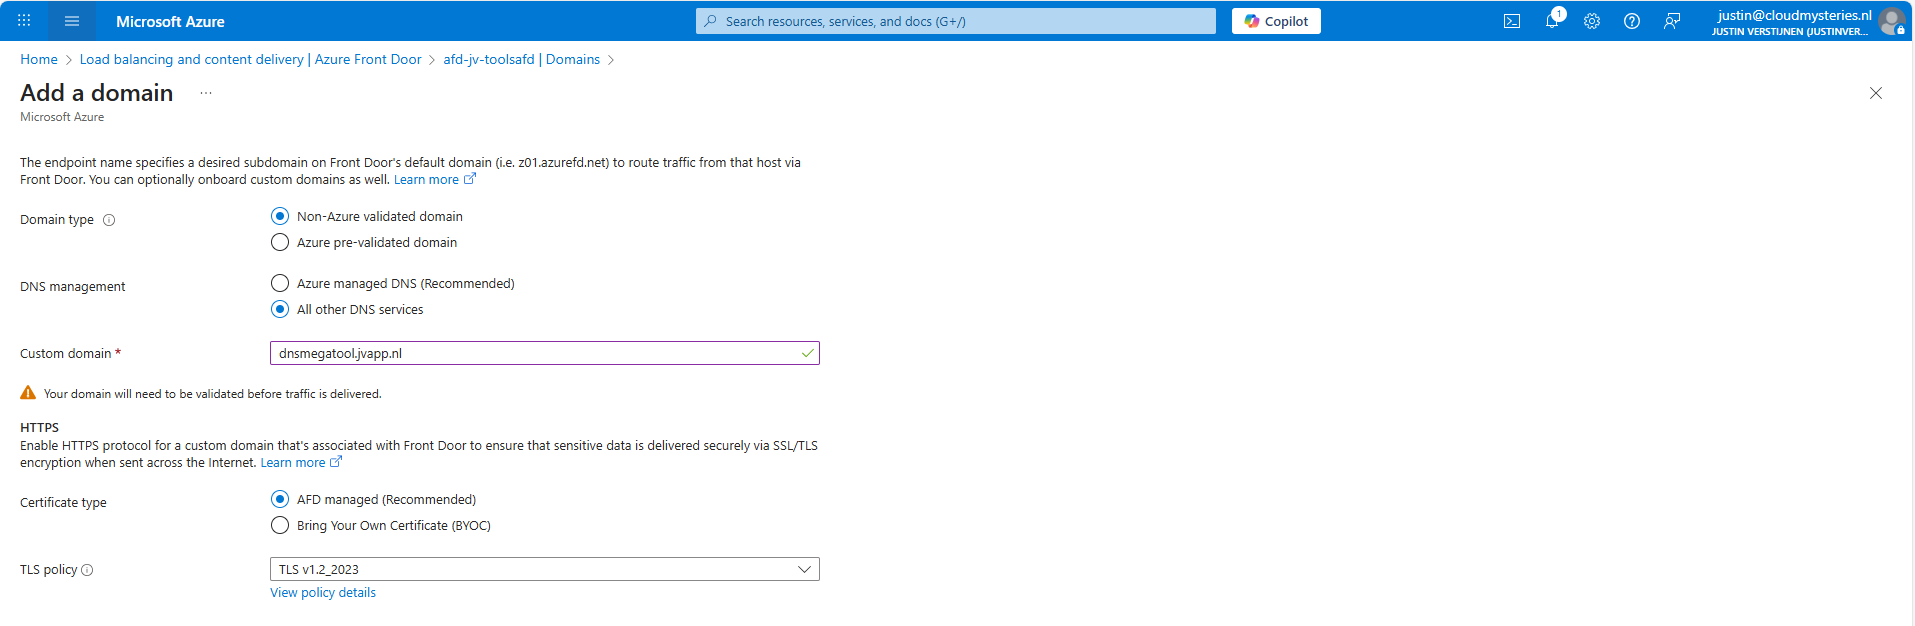
Fill in your desired domain name and click on “Add”. We now have to do a validation step on your domain by creating a TXT record.
Wait for a minute or so for the portal to complete the domain add action, and go to the “Domain validation section”:

Click on the Pending state to unveil the steps and information for the validation:
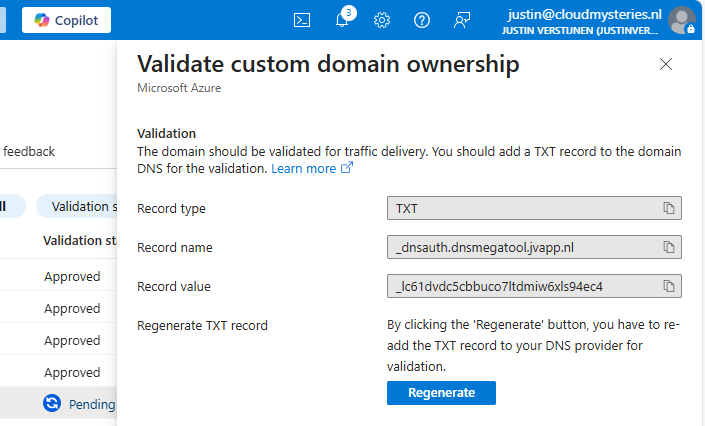
In this case, we must create a TXT record at our DNS hosting with this information:
- Record name: _dnsauth.dnsmegatool (domain will automatically be filled in)
- Record value: _lc61dvdc5cbbuco7ltdmiw6xls94ec4
Let’s do this:

Save the record, and wait for a few minutes. The Azure Portal will automatically validate your domain. This can take up to 24 hours.
In the meanwhile, now we have all our systems open, we can also create the CNAME record which will route our domain to Azure Front Door. In Azure Front Door collect your full Endpoint hostname, which is on the Overview page:
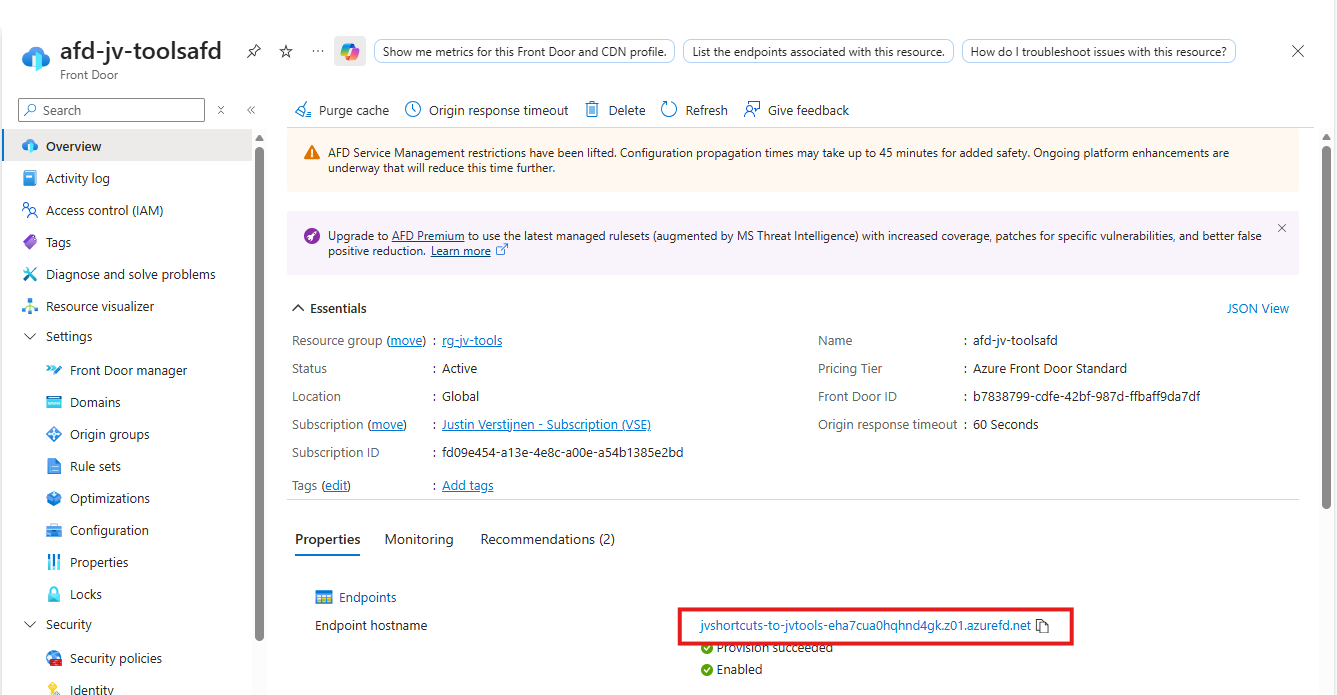
Copy that value and head back to your DNS hosting.
Create a new CNAME record with this information:
- Name: dnsmegatool
- Type: CNAME
- Value: jvshortcuts-to-jvtools-eha7cua0hqhnd4gk.z01.azurefd.net**.**
Make sure to end the value with a trailing dot (.), as this is a hostname externally to your DNS zone.

Save the DNS configuration, and your complete setup will now work in around 45 to 60 minutes.
This domain configuration has to be done for every domain and subdomain Azure Front Door must redirect. This is by design due to domain security.
Summary
Azure Front Door is a great solution for managing redirects for your webservers and tools in a central dashboard. Its a serverless solution so no patching or maintenance is needed. Only the configuration has to be done.
Azure Front Door does also manage your SSL certificates used in the redirections which is really nice.
Thank you for visiting this guide and I hope it wass helpful.
Sources
These sources helped me by writing and research for this post;
- https://azure.microsoft.com/en-in/pricing/details/frontdoor/?msockid=0e4eda4e5e6161d61121ccd95f0d60f5
- https://learn.microsoft.com/en-us/azure/frontdoor/front-door-url-redirect?pivots=front-door-standard-premium
End of the page 🎉
You have reached the end of the page. You can navigate through other blog posts as well, share this post on X, LinkedIn and Reddit or return to the blog posts collection page. Thank you for visiting this post.
If you think something is wrong with this post or you want to know more, you can send me a message to one of my social profiles at: https://justinverstijnen.nl/about/
If you find this page and blog very useful and you want to leave a donation, you can use the button below to buy me a beer. Hosting and maintaining a website takes a lot of time and money. Thank you in advance and cheers :)
The terms and conditions apply to this post.
Everything you need to know about Azure Bastion
Azure Bastion is a great tool in Azure to ensure your virtual machines are accessible in a fast, safe and easy way. This is cool if you want to embrace Zero Trust into your servers management layer and so a secure way to access your servers in Azure. In this guide I will explain more about Azure Bastion and I hope I can give you a good overview of the service, its features, pricing and some practice information.
How does Azure Bastion work?
Azure Bastion is a serverless instance you deploy in your Azure virtual network. It resides there waiting for users to connect with it. It acts like a Jump-server, a secured server from where an administrative user connects to another server.
The process of it looks like this:
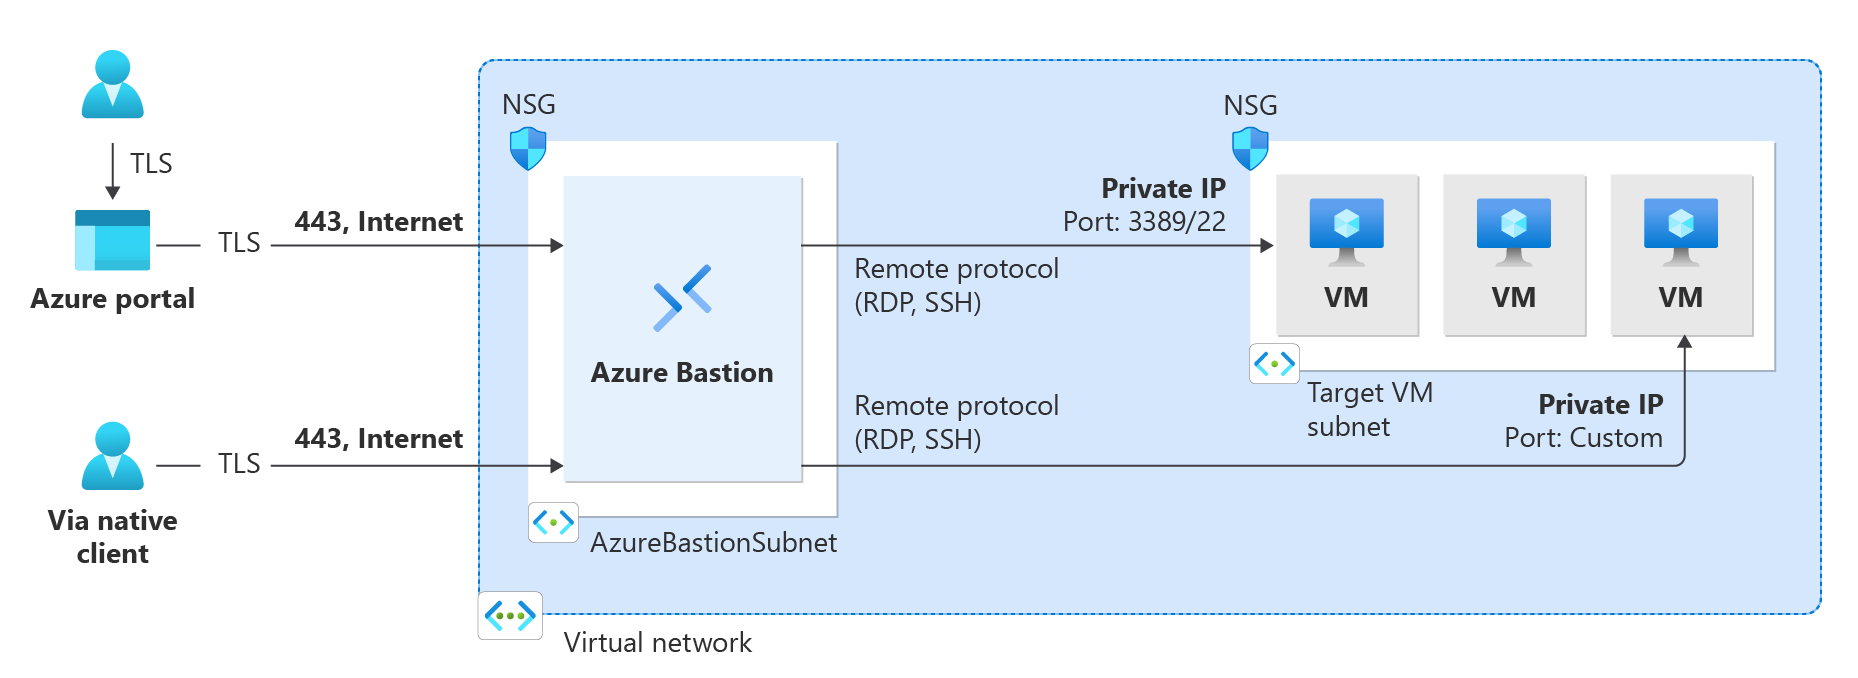
A user can choose to connect from the Azure Portal to Azure Bastion and from there to the destination server or use a native client, which can be:
- SSH for Linux-based virtual machines
- RDP for Windows virtual machines
Think of it as a layer between user and the server where we can apply extra security, monitoring and governance.
Azure Bastion is an instance which you deploy in a virtual network in Azure. You can choose to place an instance per virtual network or when using peered networks, you can place it in your hub network. Bastion supports connecting over VNET peerings, so you will save some money if you only place instances in one VNET.
Features of Azure Bastion
Azure Bastion has a lot of features today. Some years ago, it only was a method to connect to a server in the Azure Portal, but it is much more than that. I will highlight some key functionality of the service here:
| Feature | Basic | Standard | Premium |
| Connecting to Windows VMs | ✅ | ✅ | ✅ |
| Connecting to Linux VMs | ✅ | ✅ | ✅ |
| Concurrent connections | ✅ | ✅ | ✅ |
| Custom inbound port | ❌ | ✅ | ✅ |
| Shareable link | ❌ | ✅ | ✅ |
| Disable copy/paste | ❌ | ✅ | ✅ |
| Session recording | ❌ | ❌ | ✅ |
Now that we know more about the service and it’s features, let’s take a look at the pricing before configuring the service.
Pricing of Azure Bastion
Azure Bastion Instances are available in different tiers, as with most of the Azure services. The normal price is calculated based on the amounth of hours, but in my table I will pick 730 hours which is a full month. We want exactly know how much it cost, don’t we?
The fixed pricing is by default for 2 instances:
| SKU | Hourly price | Monthly price (730 hours) |
| Basic | $ 0,19 | $ 138,70 |
| Standard | $ 0,29 | $ 211,70 |
| Premium | $ 0,45 | $ 328,50 |
The cost is based on the time of existence in the Azure Subscription. We don’t pay for any data rates at all. The above prices are exactly what you will pay.
Extra instances
For the Standard and Premium SKUs of Azure Bastion, it is possible to get more than 2 instances which are a discounted price. These instances are half the prices of the base prices above and will cost you:
| SKU | Hourly price | Monthly price (730 hours) |
| Standard | $ 0,14 | $ 102,20 |
| Premium | $ 0,22 | $ 160,60 |
How to deploy Azure Bastion
We can deploy Azure Bastion through the Azure Portal. Search for “Bastions” and you will find it:

Create Azure Bastion subnet
Before we can deploy Azure Bastion to a network, we must create a subnet for this managed service. This can be done in the virtual network. Then go to “subnets”:
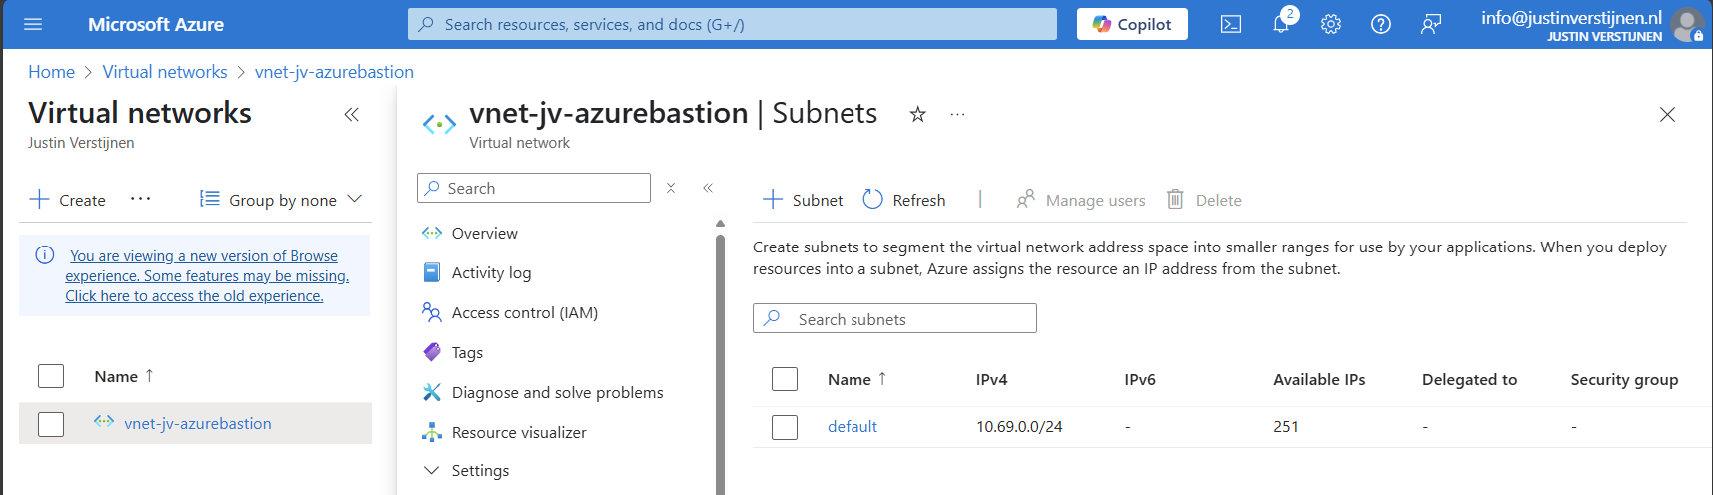
Click on “+ Subnet” to create a new subnet:
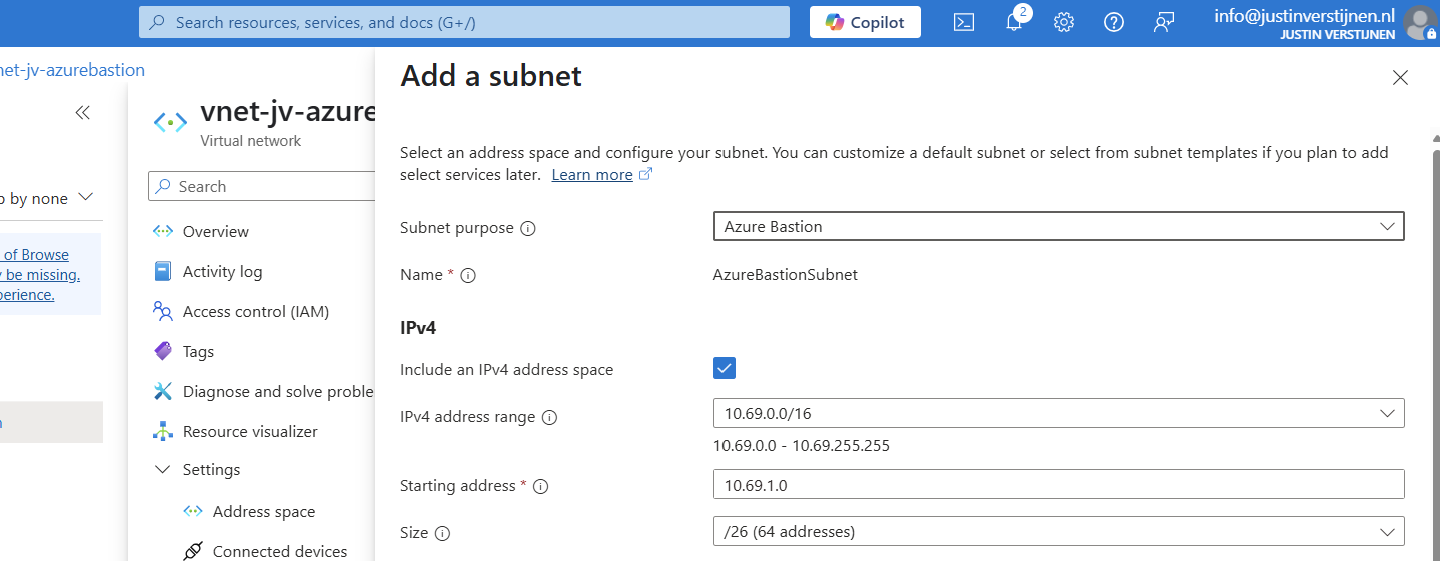
Select “Azure Bastion” at the subnet purpose field, this is a template for the network.
Click on “Add” to finish the creation of this subnet.
Deploy Azure Bastion instance
Now go back to “Bastions” and we can create a new instance:
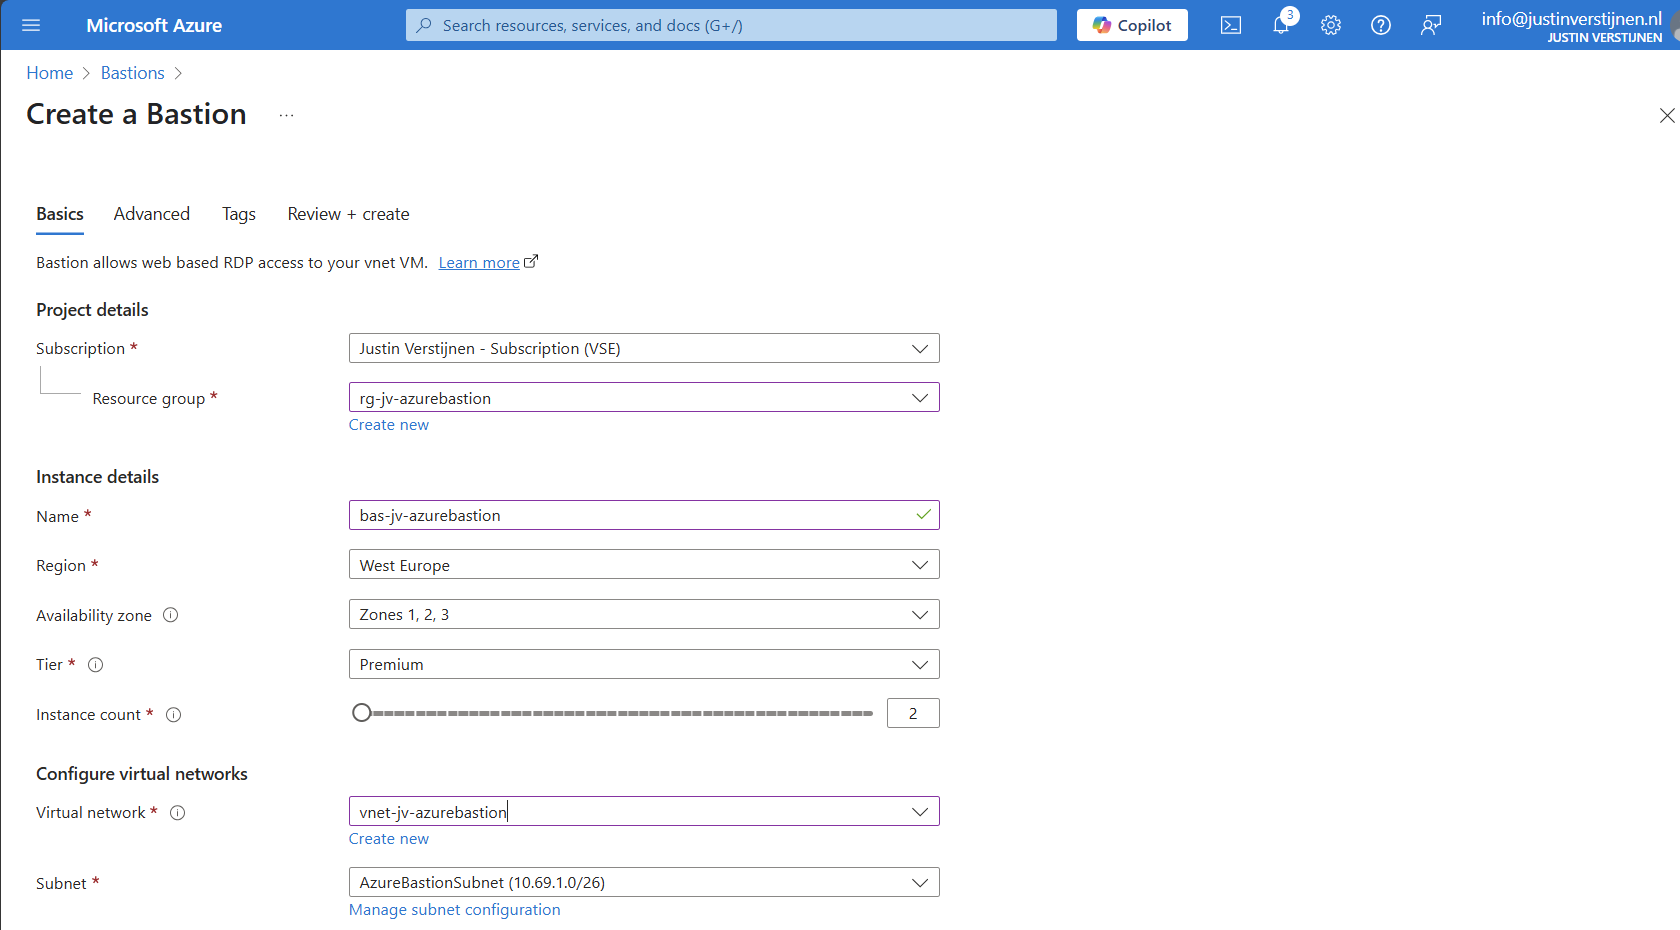
Fill in your details and select your Tier (SKU). Then choose the network to place the Bastion instance in. The virtual network and the basion instance must be in the same region.
Then create a public IP which the Azure Bastion service uses to form the bridge between internet and your virtual machines.
Now we advance to the tab “Advanced” where we can enable some Premium features:
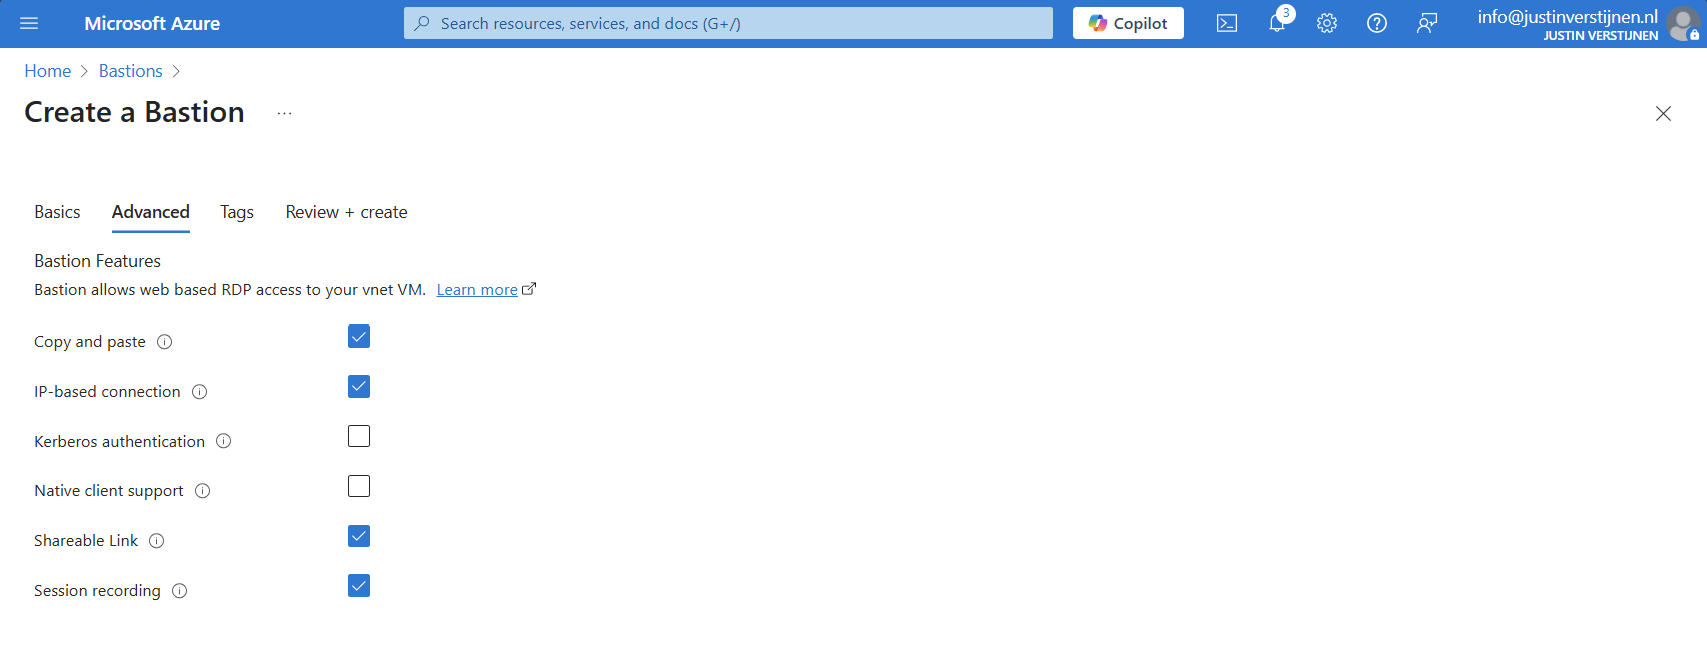
I selected these options for showcasing them in this post.
Now we can deploy the Bastion instance. This will take around 15 minutes.
Alternate way to deploy Bastions
You can also deploy Azure Bastion when creating a virtual network:

However, this option has less control over naming structure and placement. Something we don’t always want :)
Using Azure Bastion
We can now use Azure Bastion by going to the instance itself or going to the VM you want to connect with.
Via instance:
Via virtual machine:
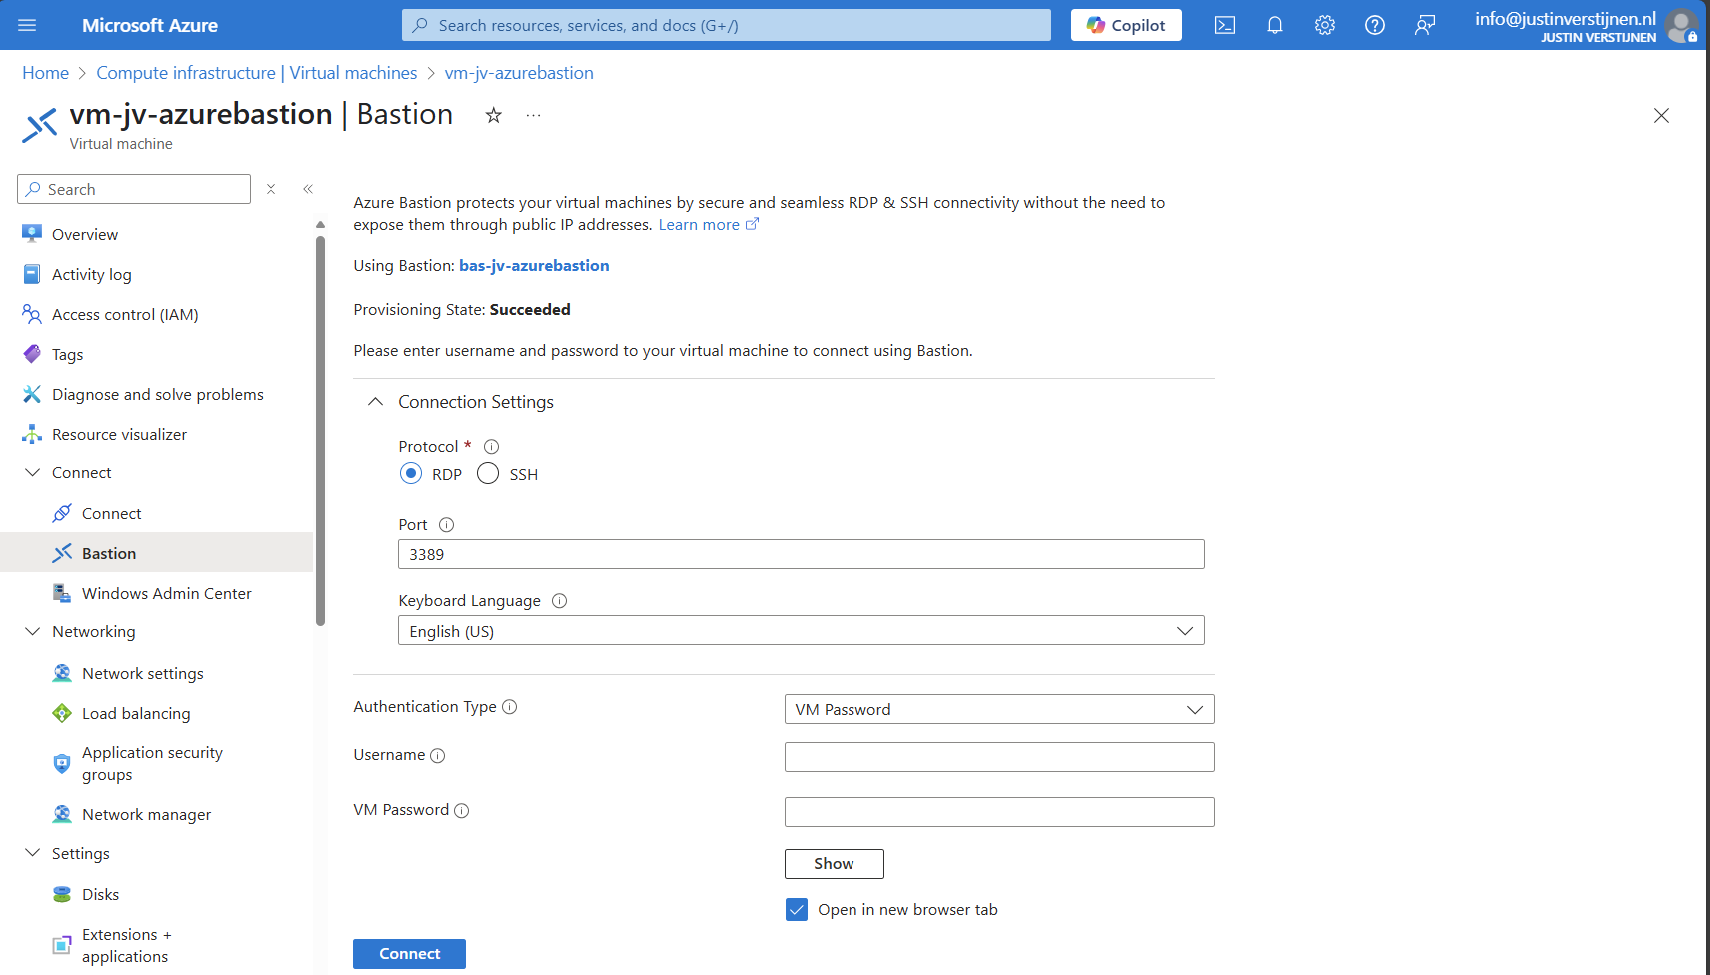
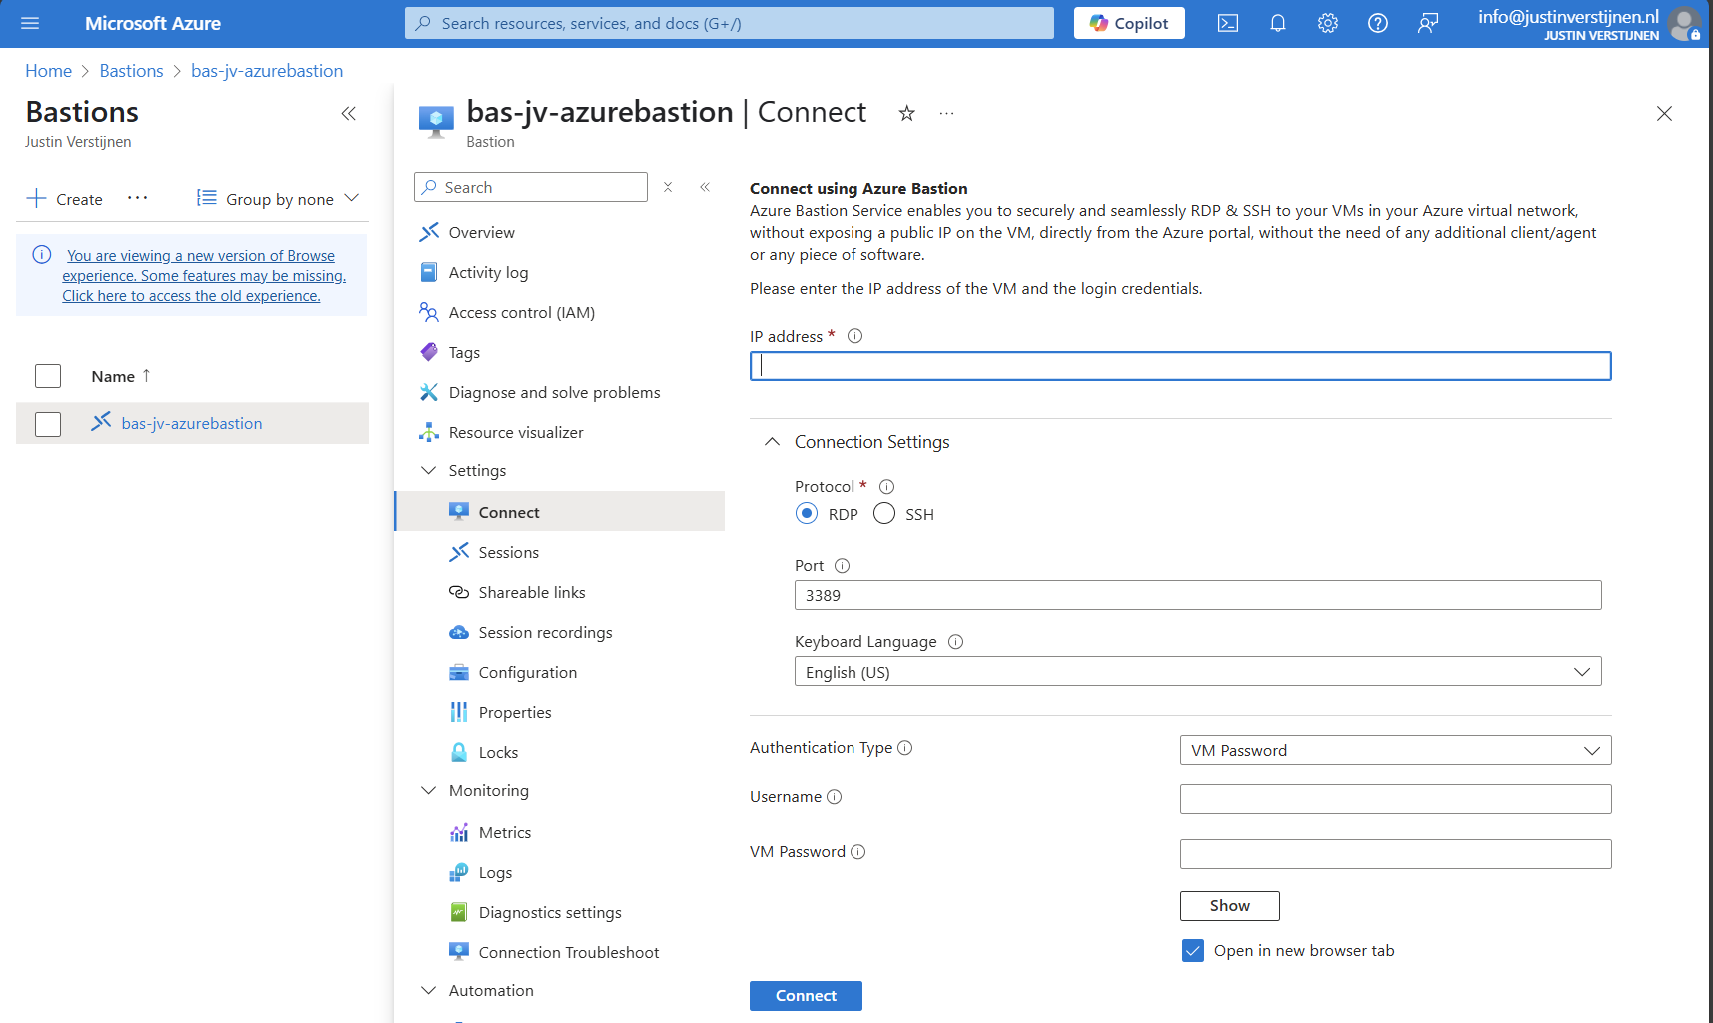
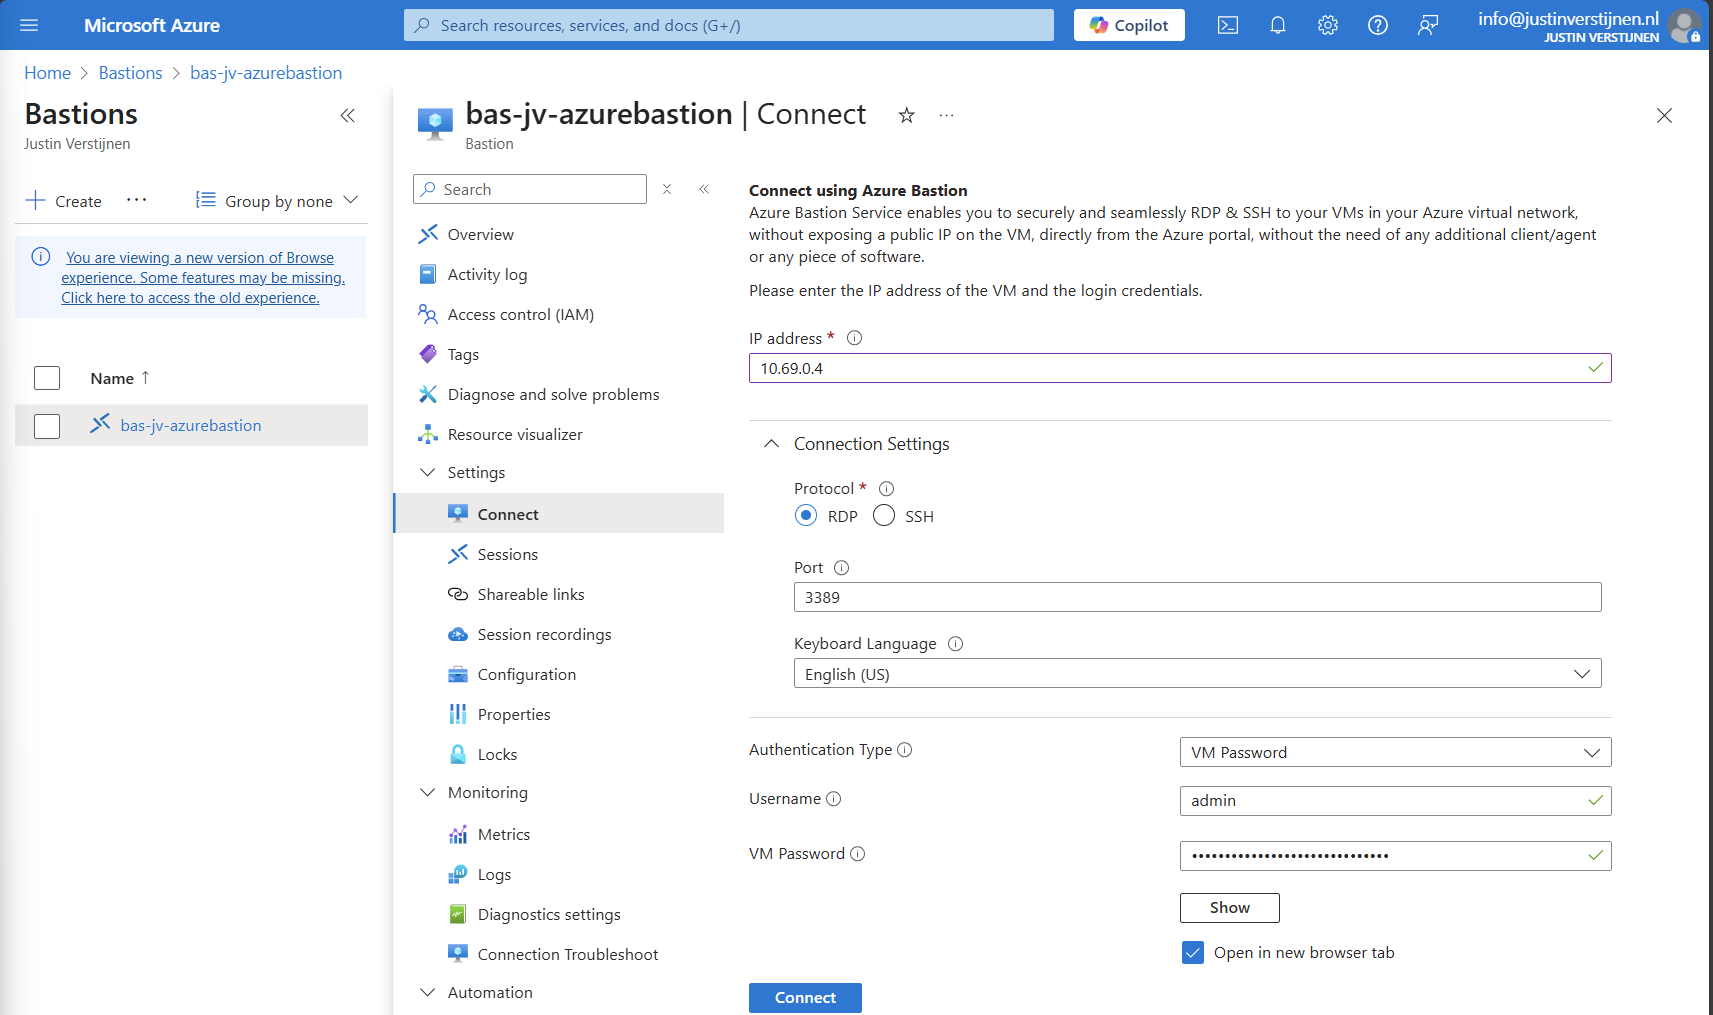
Connecting to virtual machine
We can now connect to a virtual machine. In this case I will use a Windows VM:

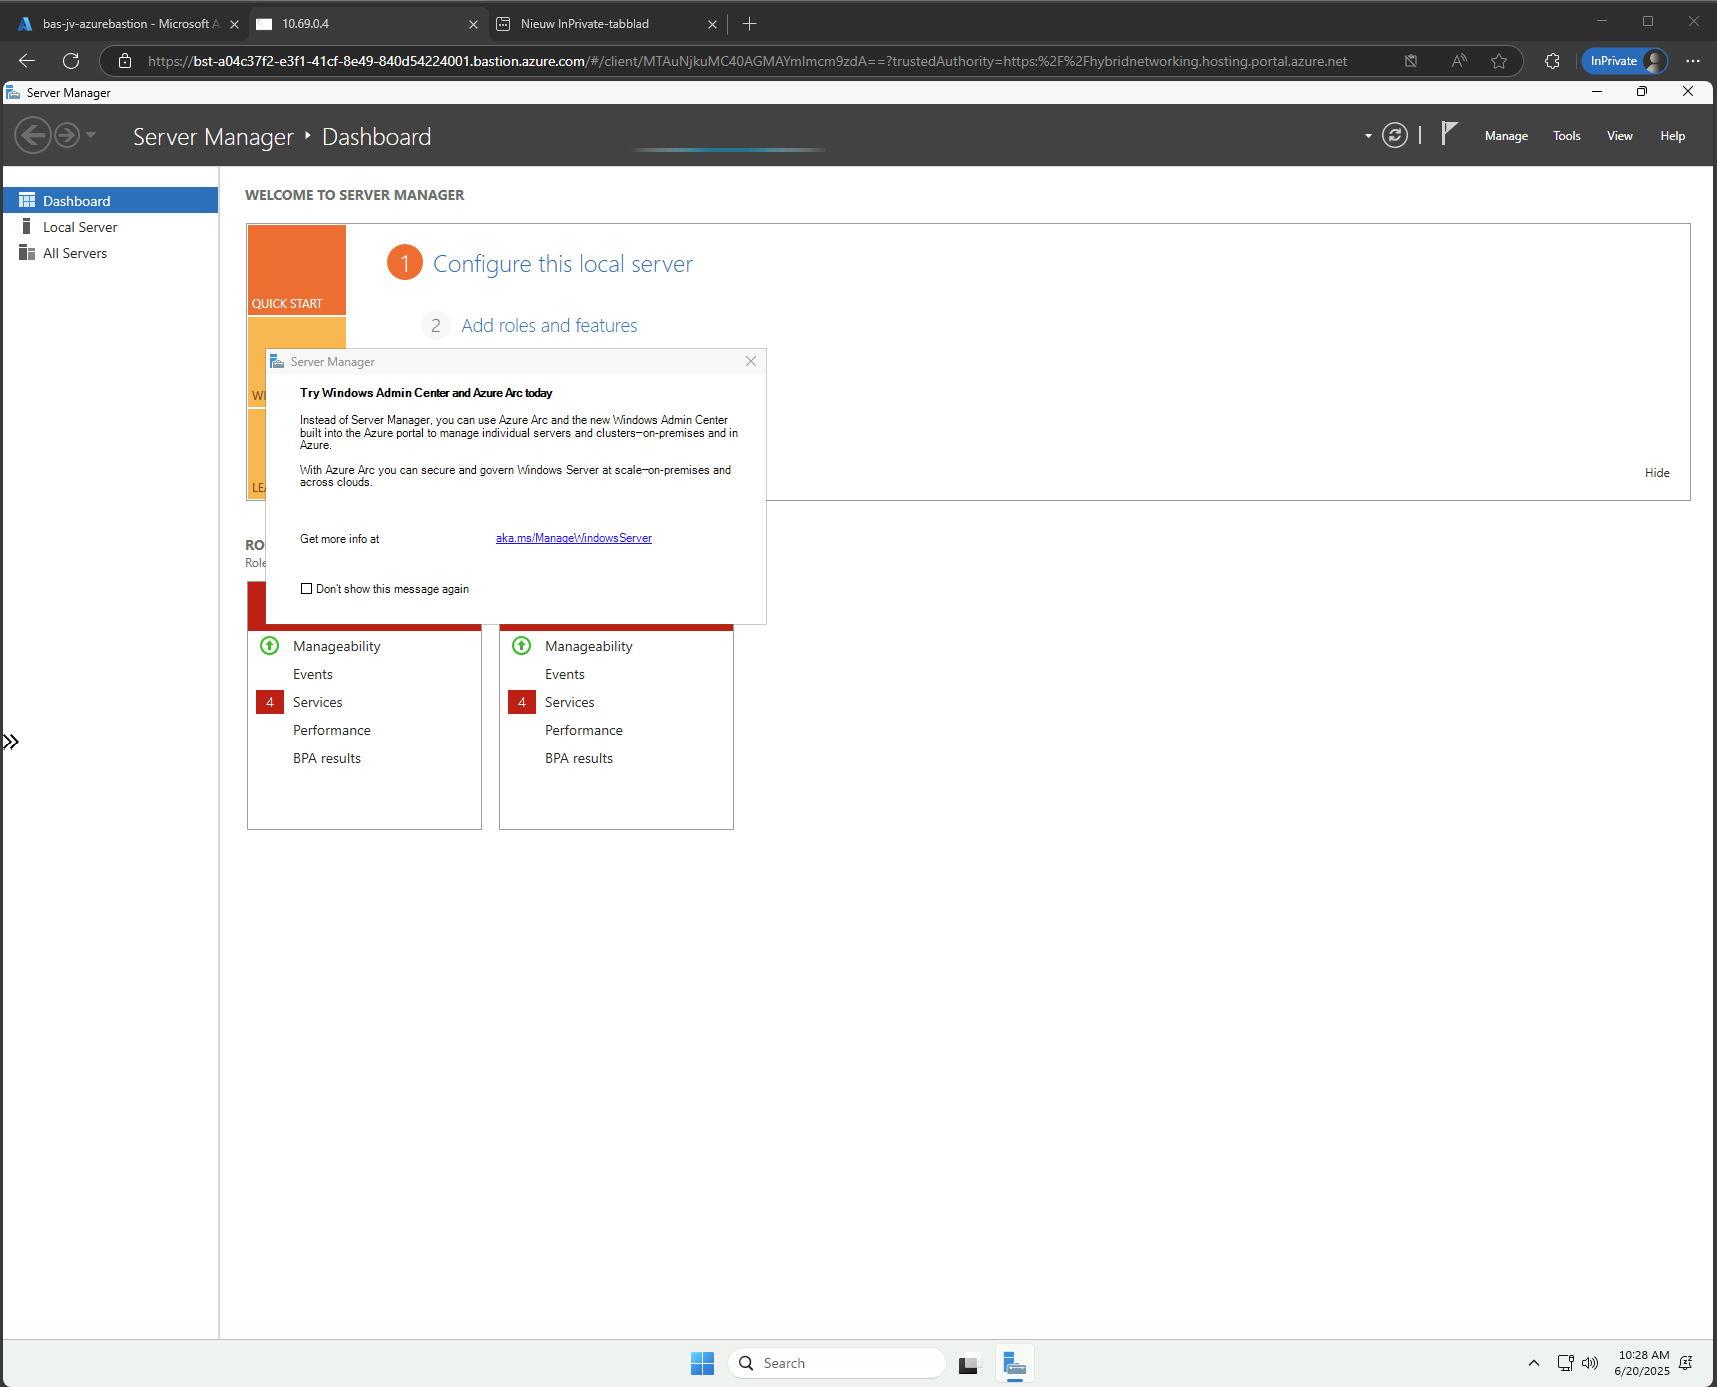
Fill in the details like the internal IP address and the username/password. Then click on “Connect”.
Now we are connected through the browser, without needing to open any ports or to install any applications:
Use shareable links with Azure Bastion (optional)
In Azure Bastion, it’s possible to have shareable links. With these links you can connect to the virtual machine directly from a URL, even without logging into the Azure Portal.
This may decrease the security, so be aware of how you store these links.
In the Azure Bastion instance, open the menu “Shareable links”:
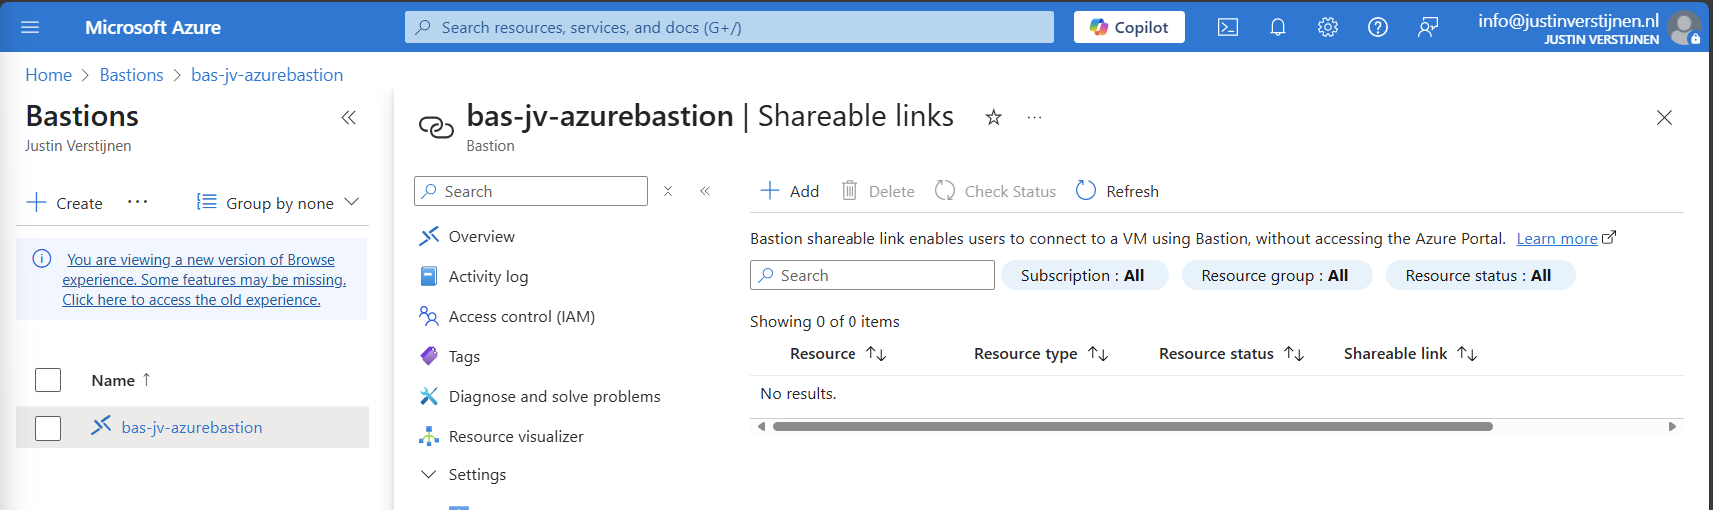
Click on “+ Add”
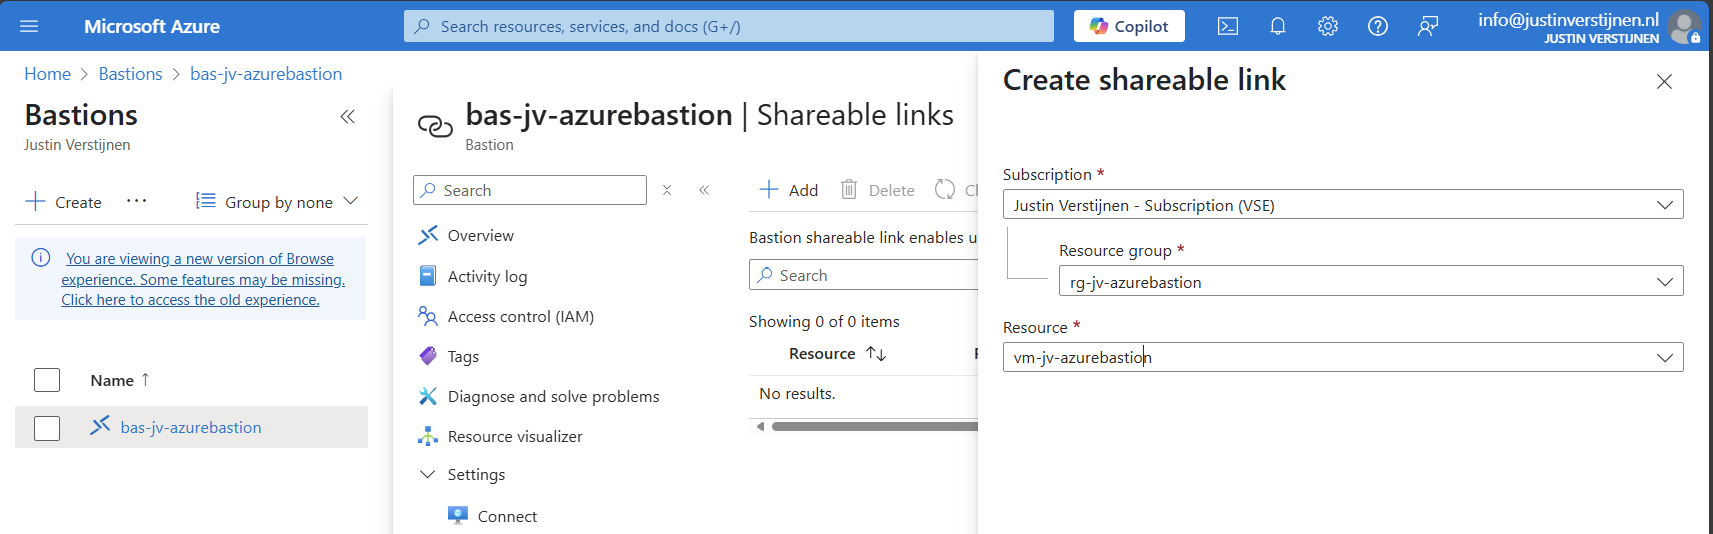
Select the resource group and then the virtual machine you want to share. Click on “Create”.
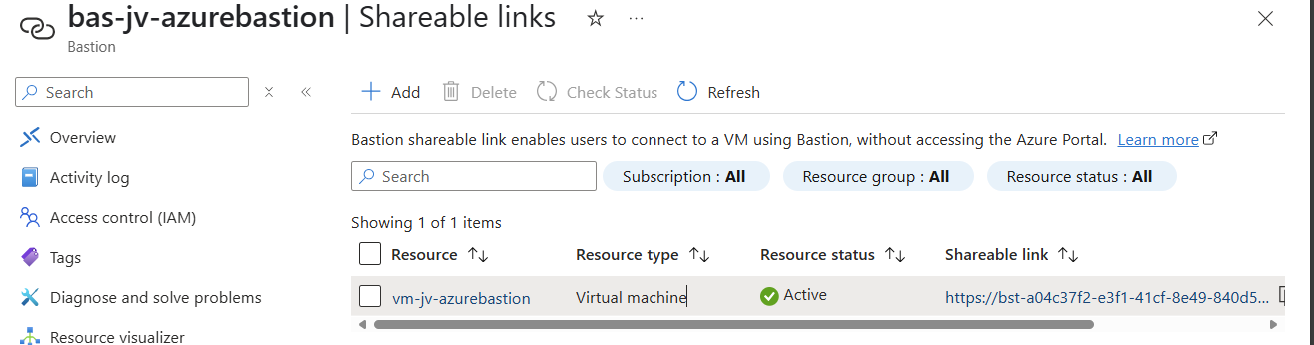
We can now connect to the machine using the shareable link. This looks like this:
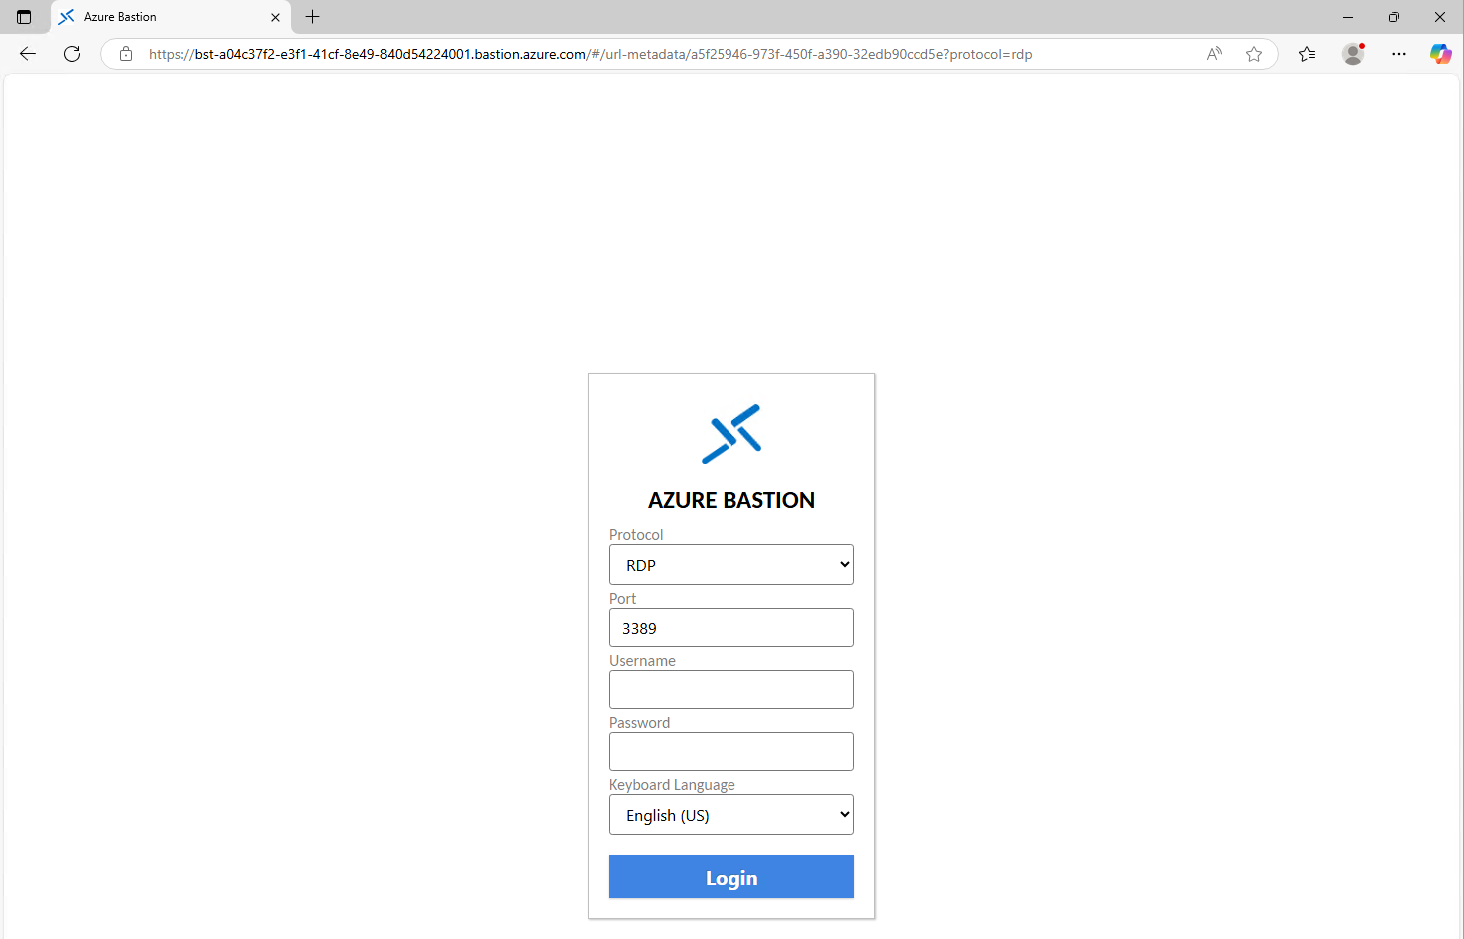
Of course you still need to have the credentials and the connection information, but this is less secure than accessing servers via the Azure Portal only. This will expose a login page to the internet, and with the right URL, its a matter of time for a hacker to breach your system.
Disable Copy/Paste in sessions (optional)
We also have the option to disable copy/paste functionality in the sessions. This improves the security while decreasing the user experience for the administrators.
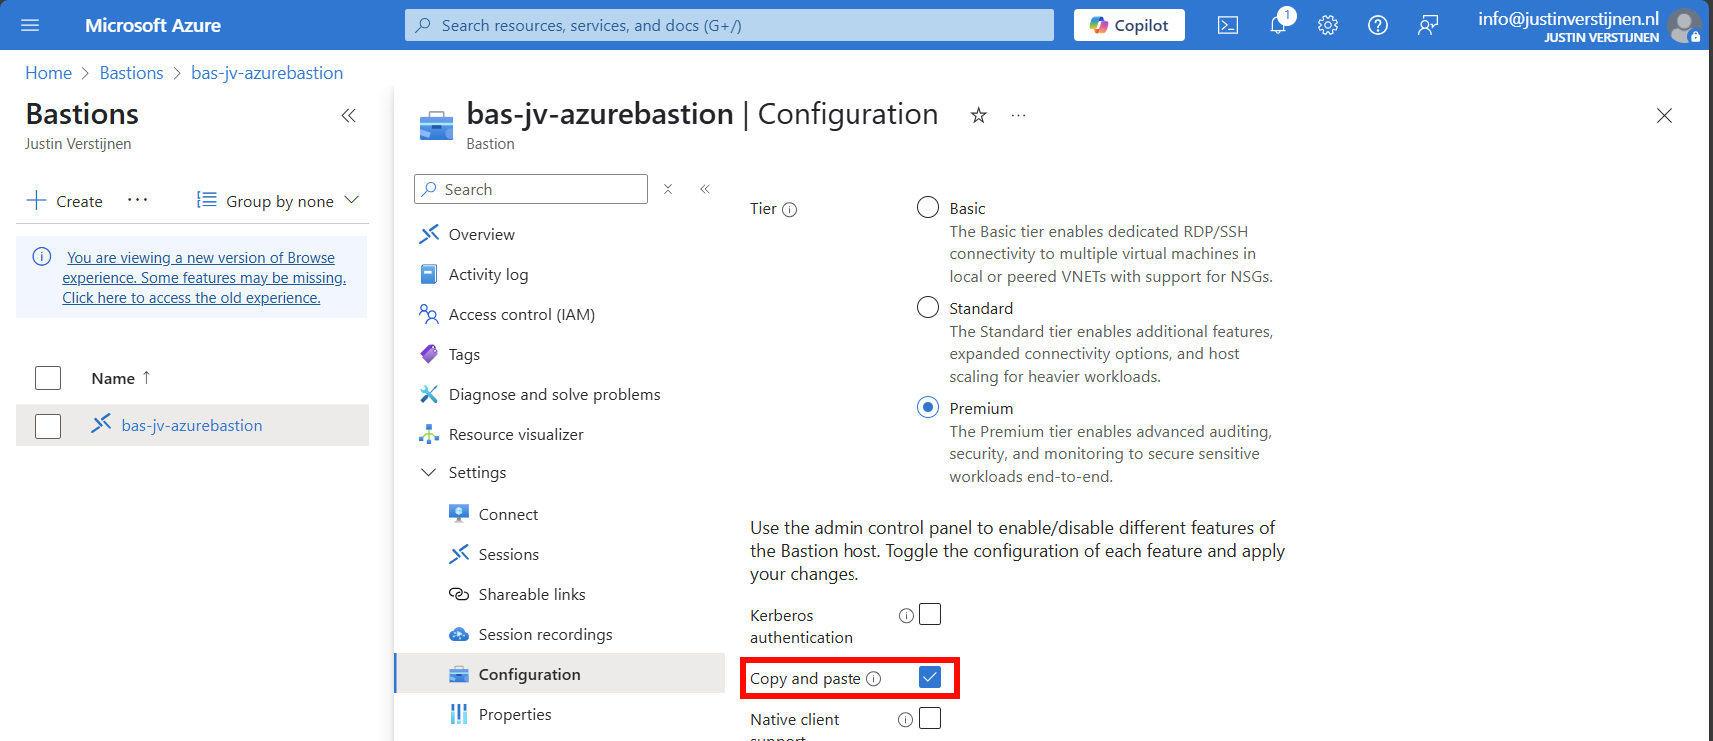
You can disable this by deselecting this option above.
Configure session recording (optional)
When you want to configure session recording, we have to create a storage account in Azure for the recordings to be saved. This must be configured in these steps, where I will guide you through:
- Create a Storage account
- Configure CORS resource sharing
- Create a container
- Create SAS token
- Configure Azure Bastion side
Let’s follow these steps:
Create storage account
Go to “Storage accounts” and create a new storage account:
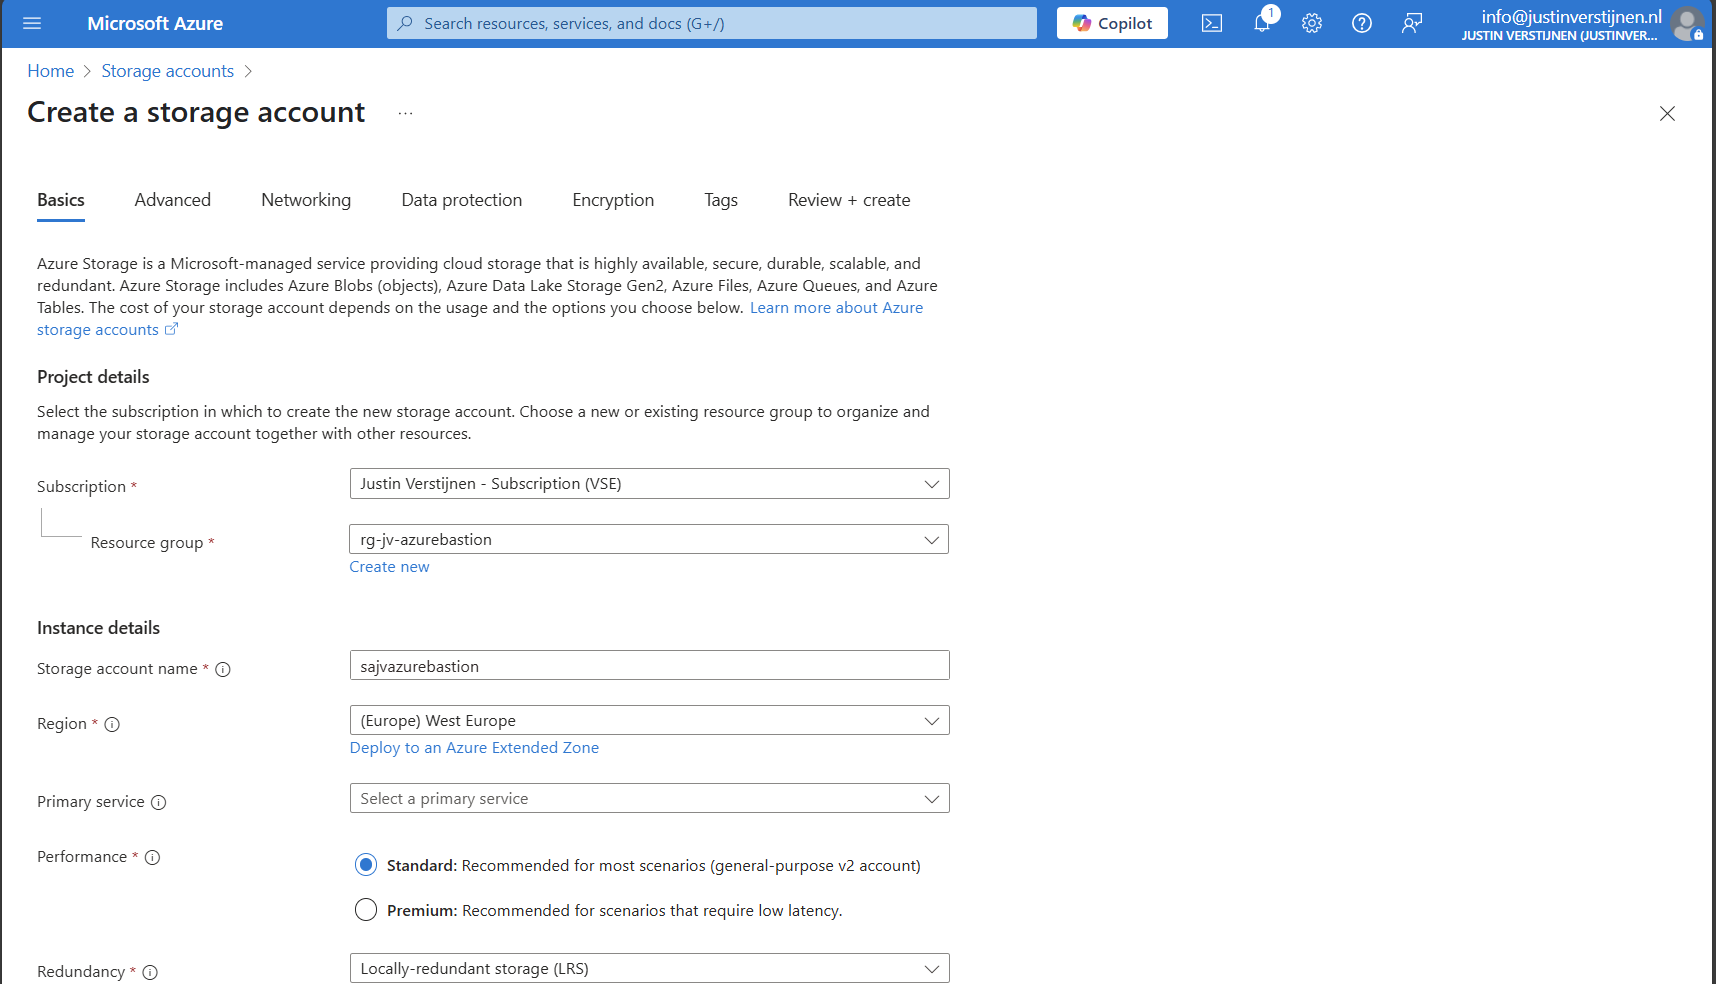
Fill in the details on the first page and skip to the deployment as we don’t need to change other settings.
We need to create a container on the storage account. A sort of folder/share when talking in Windows language. Go to the storage account.
Configure CORS resource sharing
We need to configure CORS resource sharing. This is a fancy way of permitting that the Blob container may be used by an endpoint. In our case, the endpoint is the bastion instance.
In the storage account, open the section “Resource sharing (CORS)”
Here fill in the following:
| Allowed Origins | Allowed methods | Allowed headers | Exposed headers | Max age |
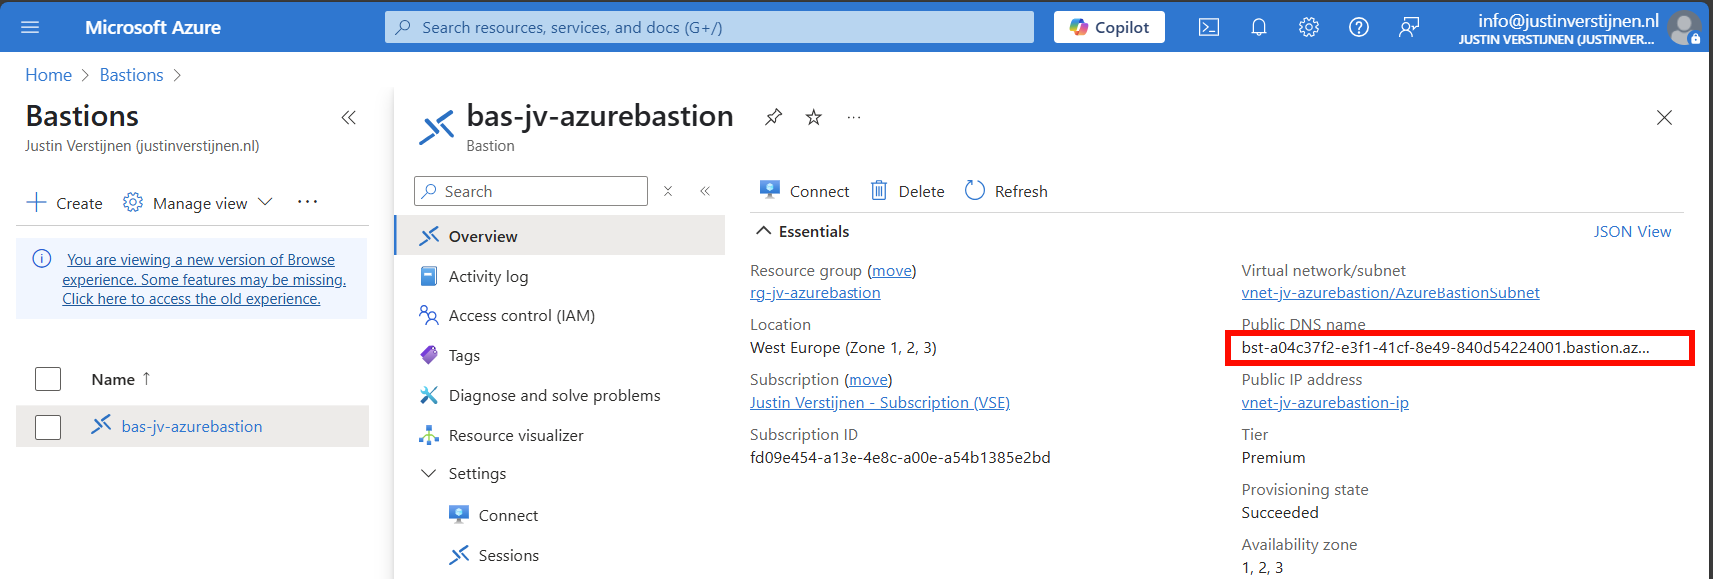
| Bastion DNS name* | GET | * | * | 86400 |
*in my case: https://bst-a04c37f2-e3f1-41cf-8e49-840d54224001.bastion.azure.com
The Bation DNS name can be found on the homepage of the Azure Bastion instance:
Ensure the CORS settings look like this:
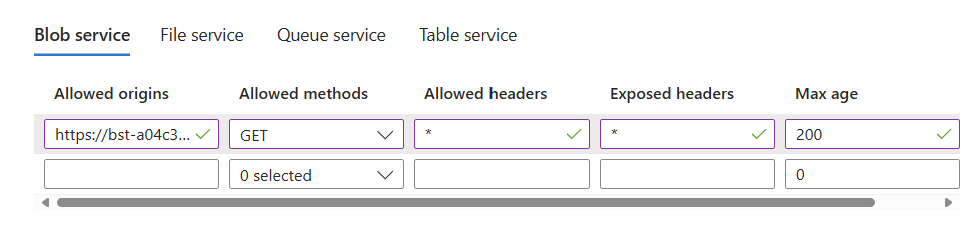
Click on “Save” and we are done with CORS.
Create container
Go to the storage account again and create a new container here:
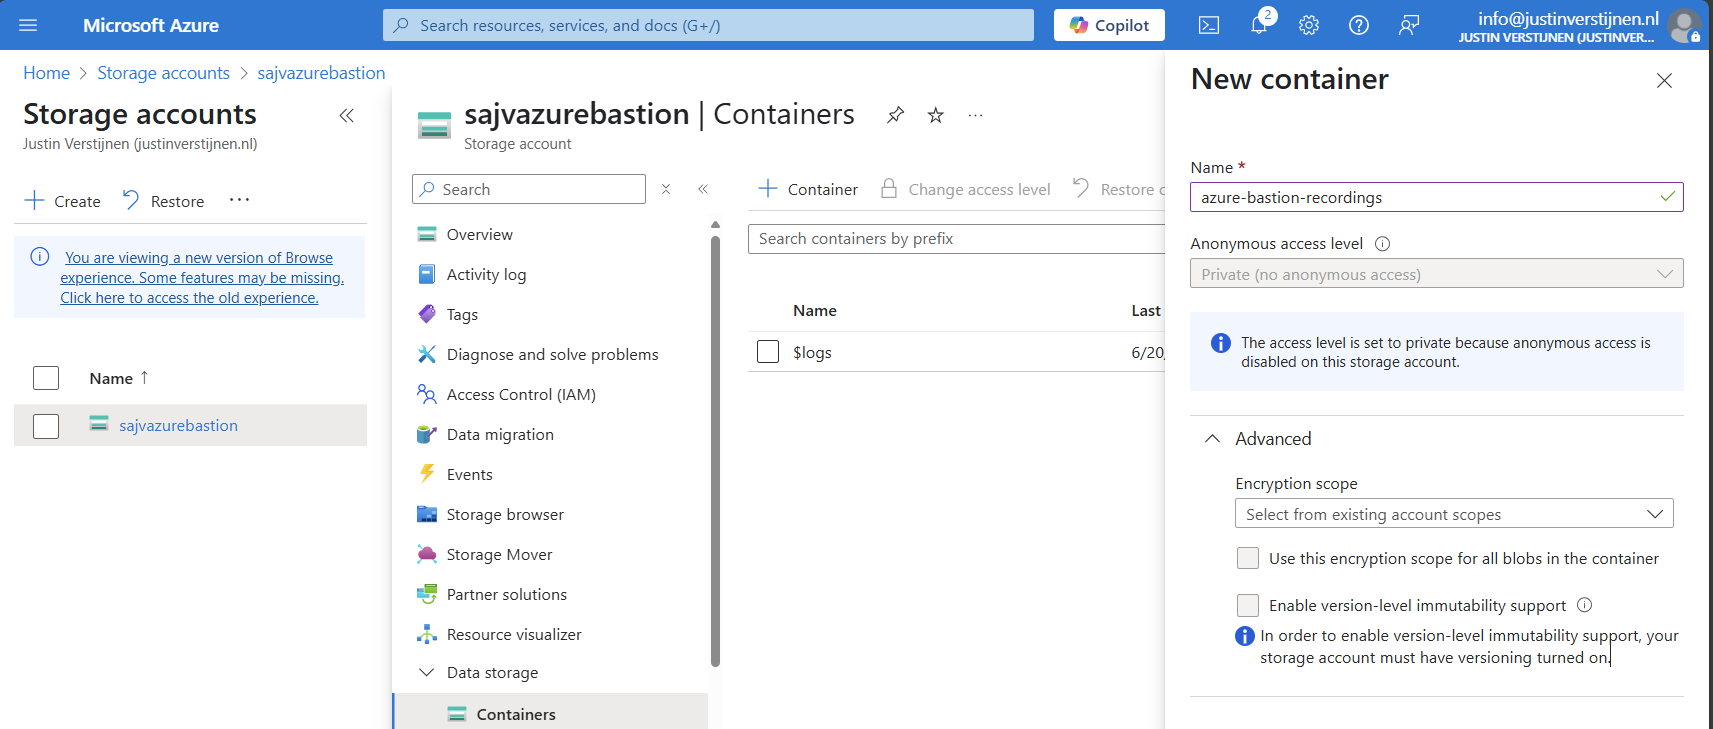
Create the container and open it.
Create SAS token
We need to create a Shared Access Signature for the Azure Bastion instance to access our newly created storage account and container.
A Shared Access Signature (SAS) is a granular token which permits limited access to a storage account. A limited token with limited permissions at suit your needs, while using least-privilege.
To learn more about SAS tokens: click here
When you have opened the container, open “Shared access tokens”:
- Under permissions, select:
- Read
- Create
- Write
- List
- Set your timeframe for the access to be active. This has to be active now so we can test the configuration
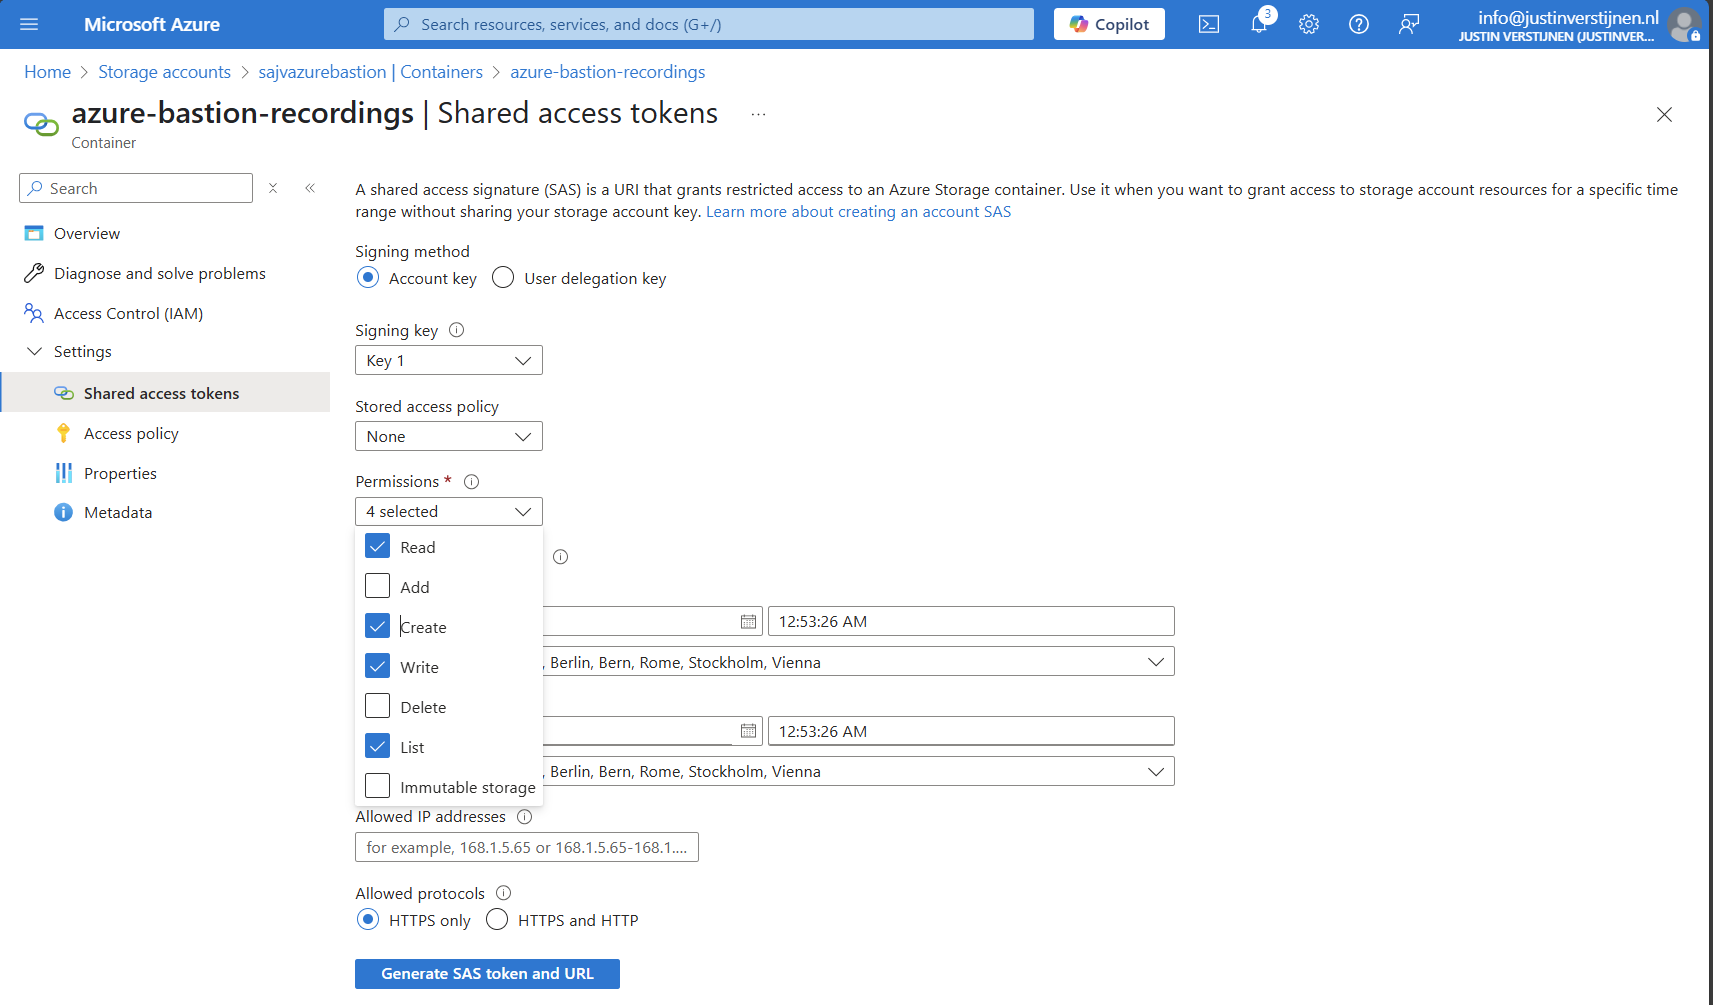
Then click on “Generate SAS token and URL” to generate a URL:

Copy the Blob SAS URL, as we need this in the next step.
Configure Azure Bastion-side for session recording
We need to paste this URL into Azure Bastion, as the instance can save the recordings there. Head to the Azure Bastion instance:
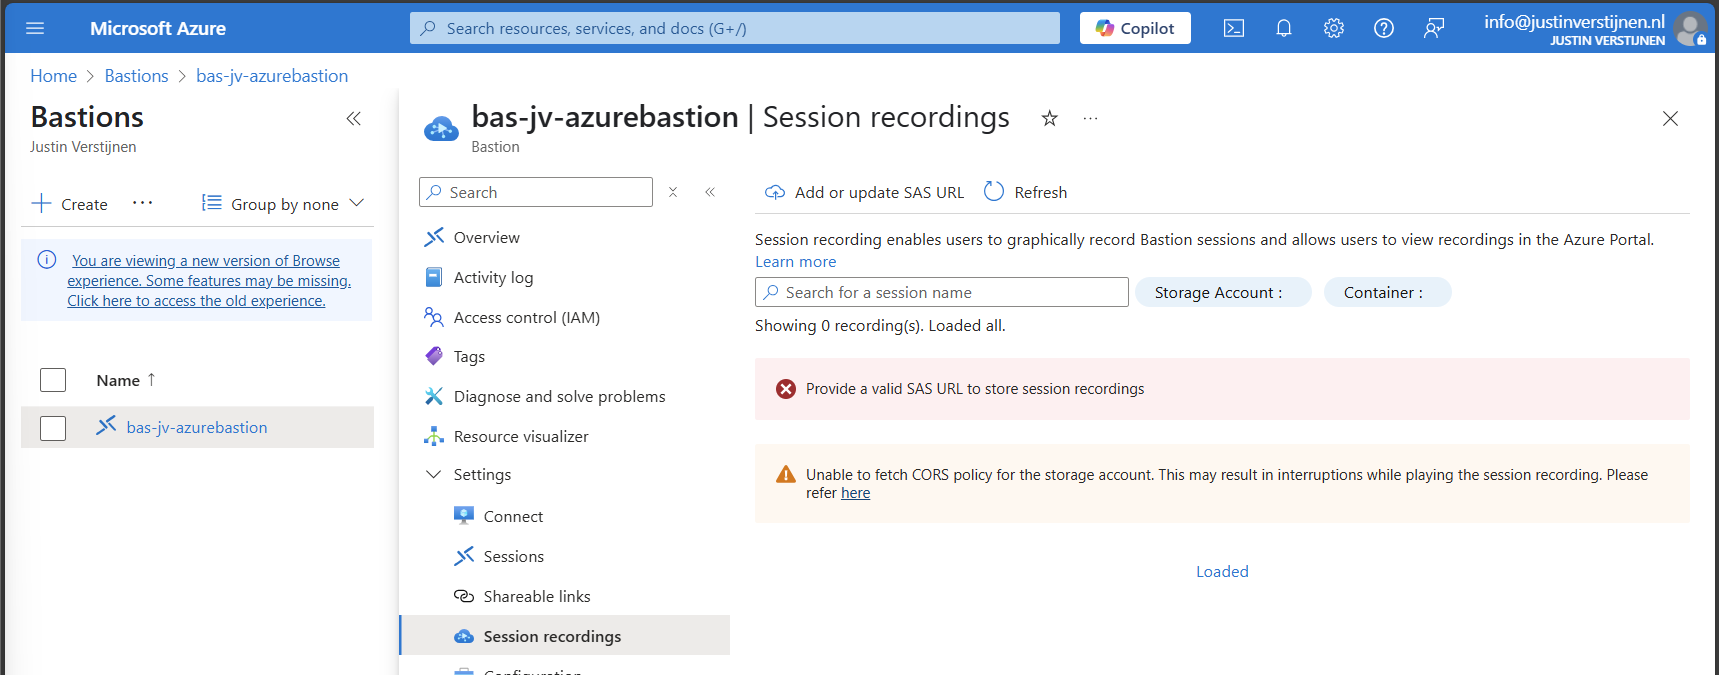
Then open the option “Session recordings” and click on “Add or update SAS URL”.
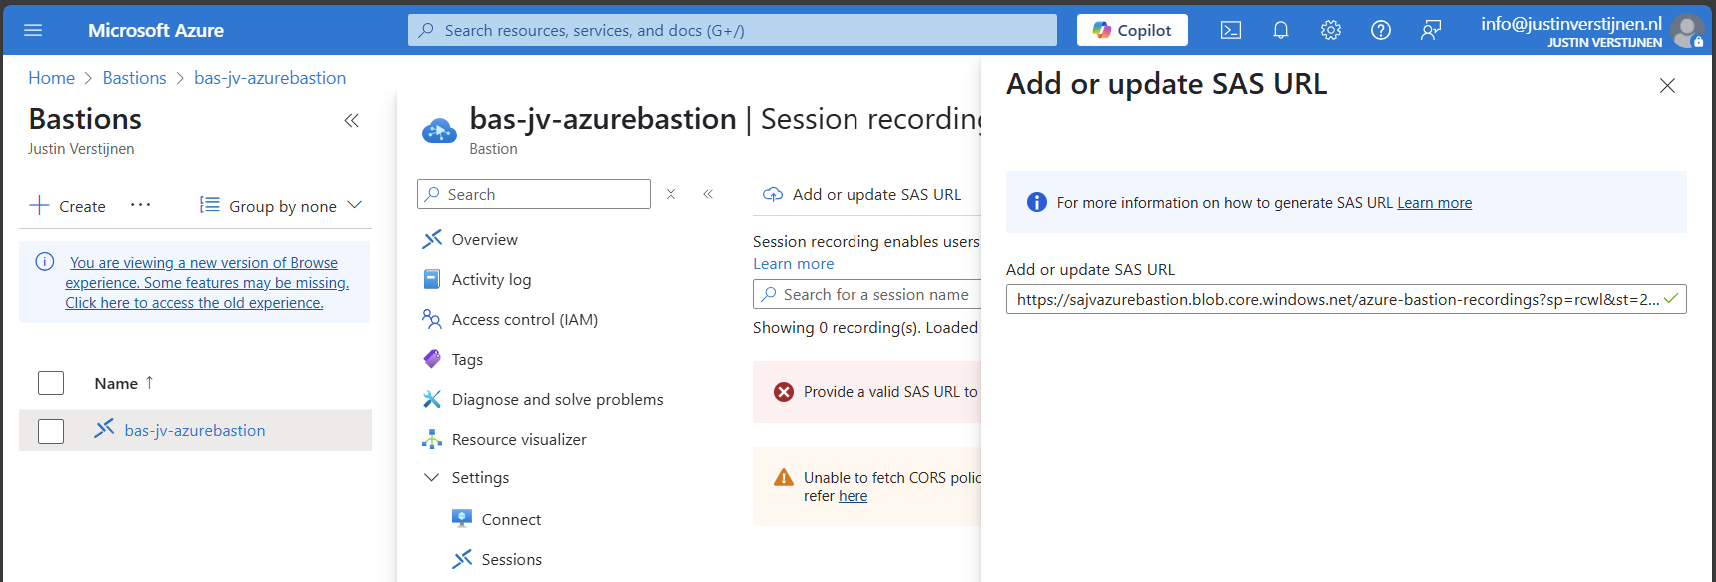
Paste the URL here and click on “Upload”.
Now the service is succesfully configured!

Testing Azure Bastion session recording
Now let’s connect again to a VM now by going to the instance:
Now fill in the credentials of the machine to connect with it.

We are once again connected, and this session will be recorded. You can find these recordings in the Session recordings section in the Azure portal. These will be saved after a session is closed.
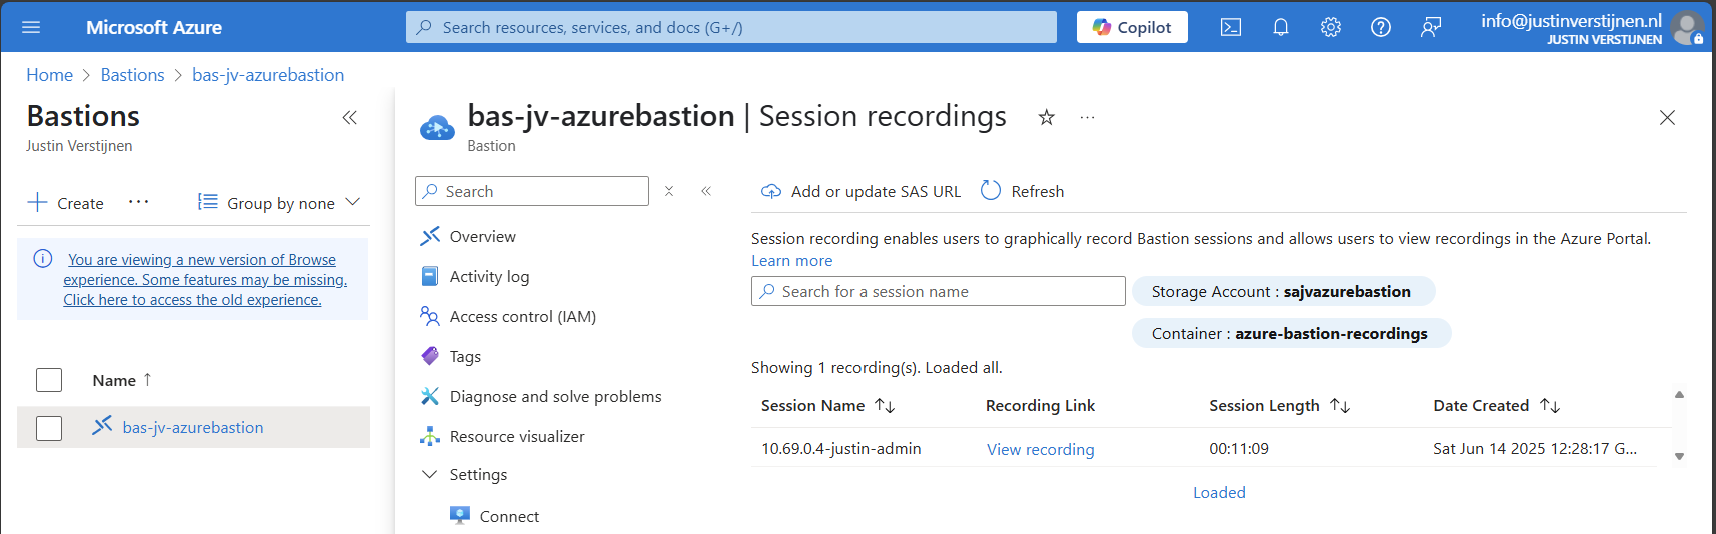
The recording looks like this, watch me installing the ISS role for demonstration of this function. This is a recording that Azure Bastion has made.
Summary
Azure Bastion is a great tool for managing your servers in the cloud without opening sensitive TCP/IP ports to the internet. It also can be really useful as Jump server.
In my opinion it is relatively expensive, especially for smaller environments because for the price of a basic instance we can configure a great Windows MGMT server where we have all our tools installed.
For bigger environments where security is a number one priority and money a much lower priority, this is a must-use tool and I really recommend it.
Sources:
- https://learn.microsoft.com/en-us/azure/bastion/bastion-overview
- https://azure.microsoft.com/nl-nl/pricing/details/azure-bastion?cdn=disable
- https://justinverstijnen.nl/amc-module-6-networking-in-microsoft-azure/#azure-bastion
Thank you for reading this post and I hope it was helpful.
End of the page 🎉
You have reached the end of the page. You can navigate through other blog posts as well, share this post on X, LinkedIn and Reddit or return to the blog posts collection page. Thank you for visiting this post.
If you think something is wrong with this post or you want to know more, you can send me a message to one of my social profiles at: https://justinverstijnen.nl/about/
If you find this page and blog very useful and you want to leave a donation, you can use the button below to buy me a beer. Hosting and maintaining a website takes a lot of time and money. Thank you in advance and cheers :)
The terms and conditions apply to this post.
I tried running Active Directory DNS on Azure Private DNS
In Azure we can configure private DNS zones for local domains. We can use this to resolve our resources in our virtual network by name instead of IP addresses, which can be helpful creating failover and redundancy. These could all help to achieve a higher availability for your end users. Especially because Private DNS Zones are free and globally redundant.I thought of myself; “Will this also work for Active Directory?”. In that case, DNS would still resolve if suddenly our domain controllers are offline and users are working in a solution like Azure Virtual Desktop. In this guide I will describe how I got this to work. Honestly, the setup with real DNS servers is better, but it’s worth giving this setup a chance.
The configuration explained
The configuration in this blog post is a virtual network with one server and one client. In the virtual network, we will deploy a Azure Private DNS instance and that instance will do everything DNS in our network.
This looks like this:
Deploying Azure Private DNS
Assuming you have everything already in plave, we will now deploy our Azure Private DNS zone. Open the Azure Portal and search for “Private DNS zones”.
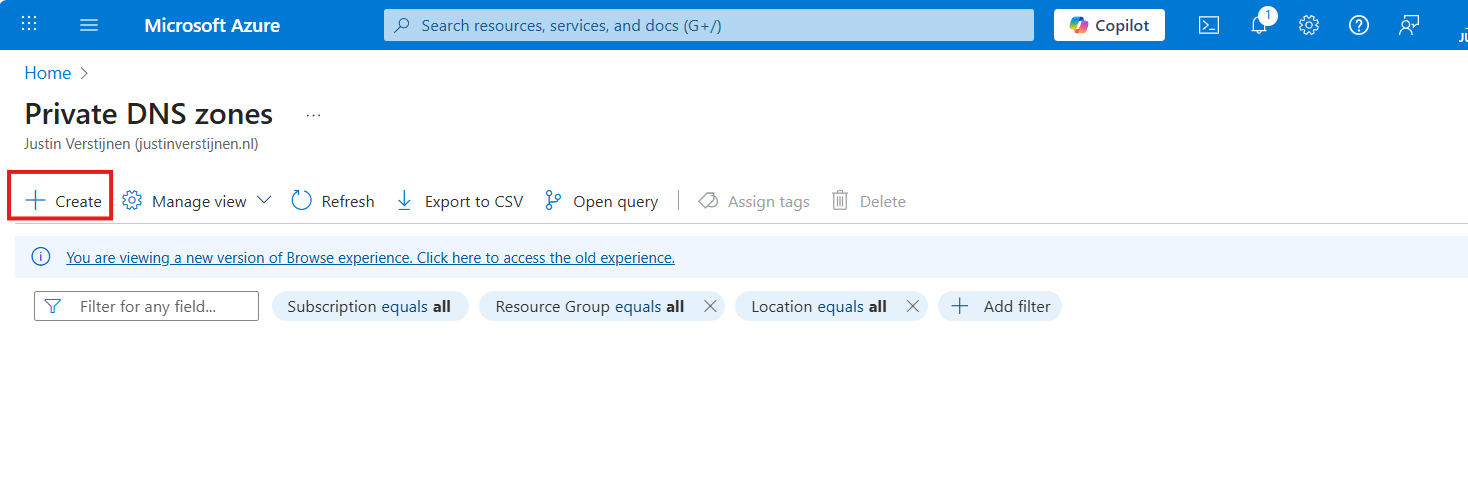
Create a new DNS zone here.
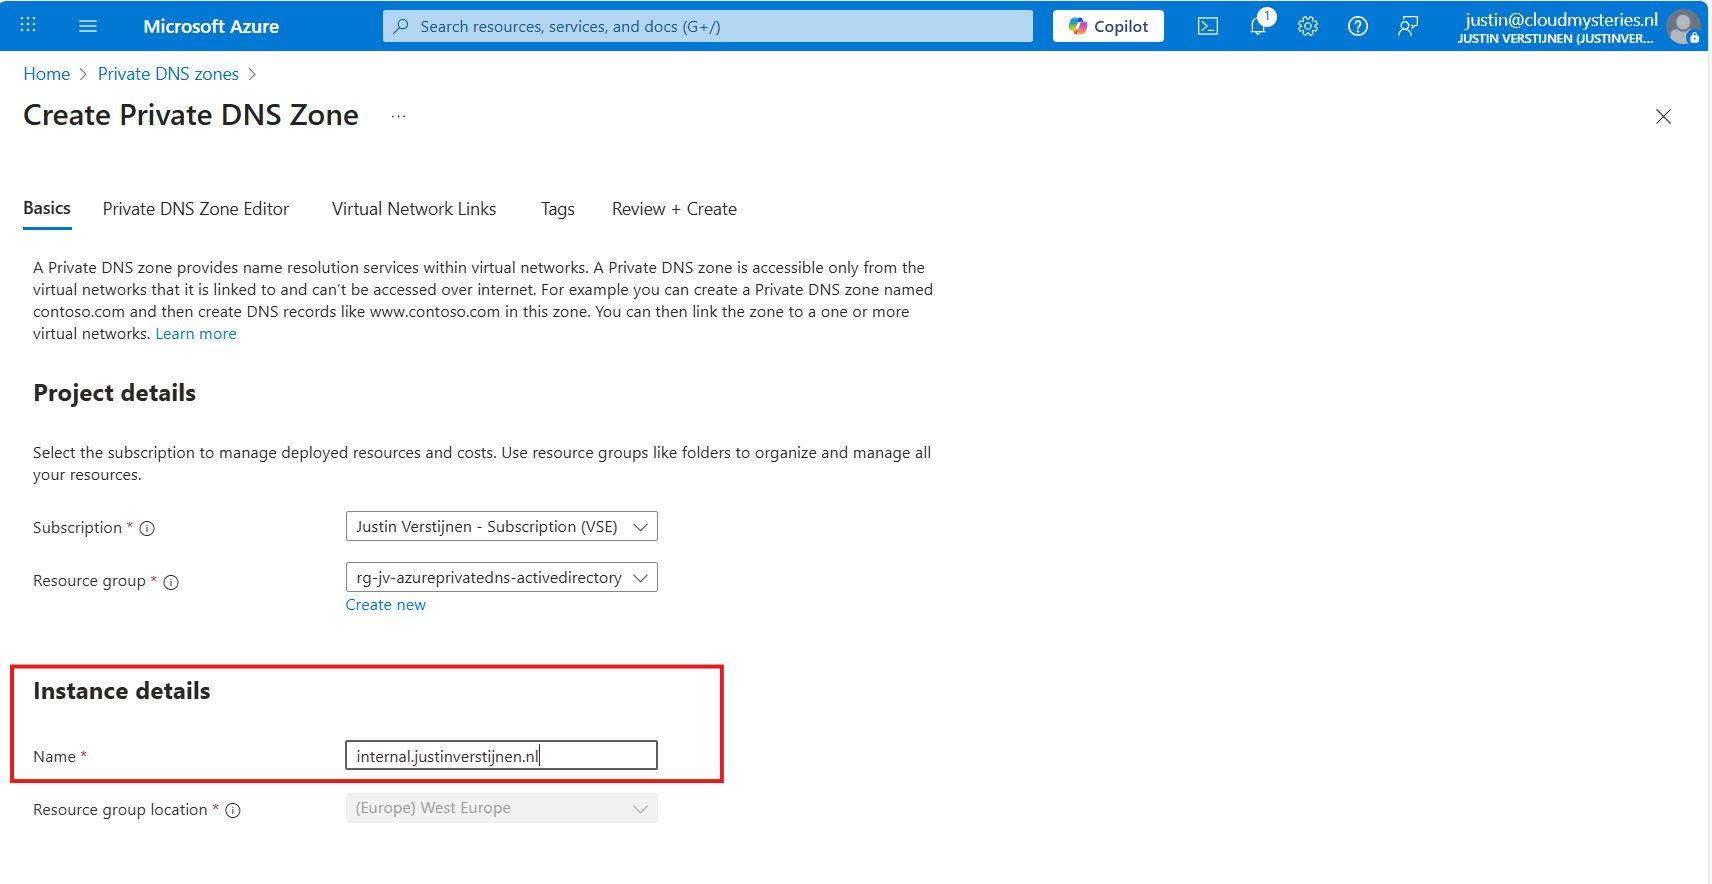
Place it in the right resource group and name the domain your desired domain name. If you actually want to link your Active Directory, this must be the same as your Active Directory domain name.
In my case, I will name it internal.justinverstijnen.nl
Link the DNS zone to your network
Advance to the tab “Virtual Network Links”, and we have to link our virtual network with Active Directory here:
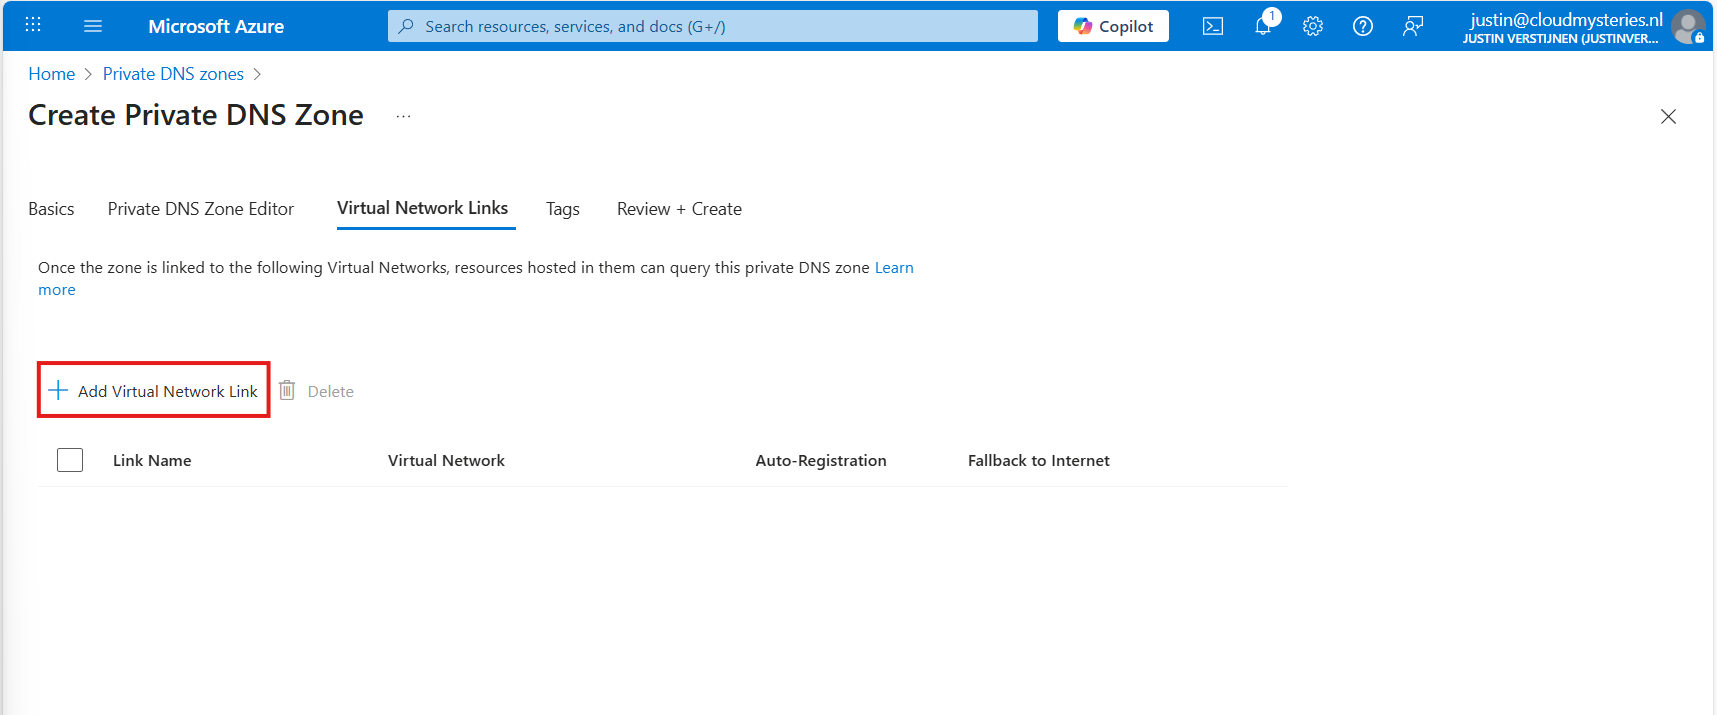
Give the link a name and select the right virtual network.

You can enable “Auto registration” here, this means every VM in the network will be automatically registered to this DNS zone. In my case, I enabled it. This saves us from having to create records by hand later on.

Advance to the “Review + create” tab and create the DNS zone.
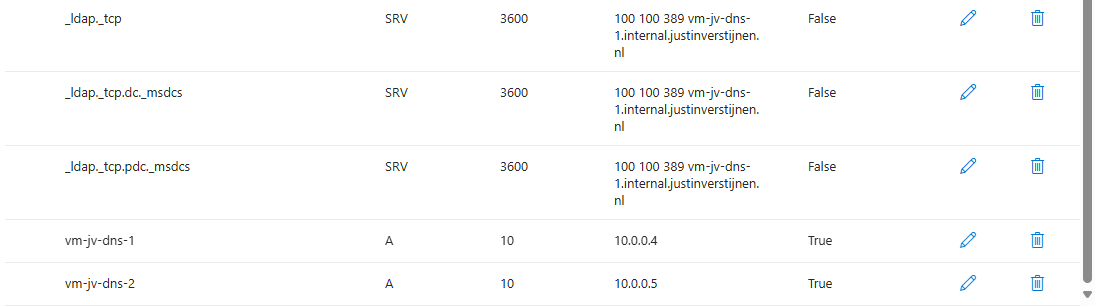
Creating the required DNS records
For Active Directory to work, we need to create a set of DNS records. Active Directory relies heavily on DNS, not only for A records but also for SRV and NS records. I used priority and weight 100 for all SRV records.
| Recordname | Type | Target | Poort | Protocol |
|---|---|---|---|---|
| _ldap._tcp.dc._msdcs.internal.justinverstijnen.nl | SRV | vm-jv-dns-1.internal.justinverstijnen.nl | 389 | TCP |
| _ldap._tcp.internal.justinverstijnen.nl | SRV | vm-jv-dns-1.internal.justinverstijnen.nl | 389 | TCP |
| _kerberos._tcp.dc._msdcs.internal.justinverstijnen.nl | SRV | vm-jv-dns-1.internal.justinverstijnen.nl | 88 | TCP |
| _kerberos._udp.dc._msdcs.internal.justinverstijnen.nl | SRV | vm-jv-dns-1.internal.justinverstijnen.nl | 88 | UDP |
| _kpasswd._udp.internal.justinverstijnen.nl | SRV | vm-jv-dns-1.internal.justinverstijnen.nl | 464 | UDP |
| _ldap._tcp.pdc._msdcs.internal.justinverstijnen.nl | SRV | vm-jv-dns-1.internal.justinverstijnen.nl | 389 | TCP |
| vm-jv-dns-1.internal.justinverstijnen.nl | A | 10.0.0.4 | - | - |
| @ | A | 10.0.0.4 | - | - |
After creating those records in Private DNS, the list looks like this:

Joining a second virtual machine to the domain
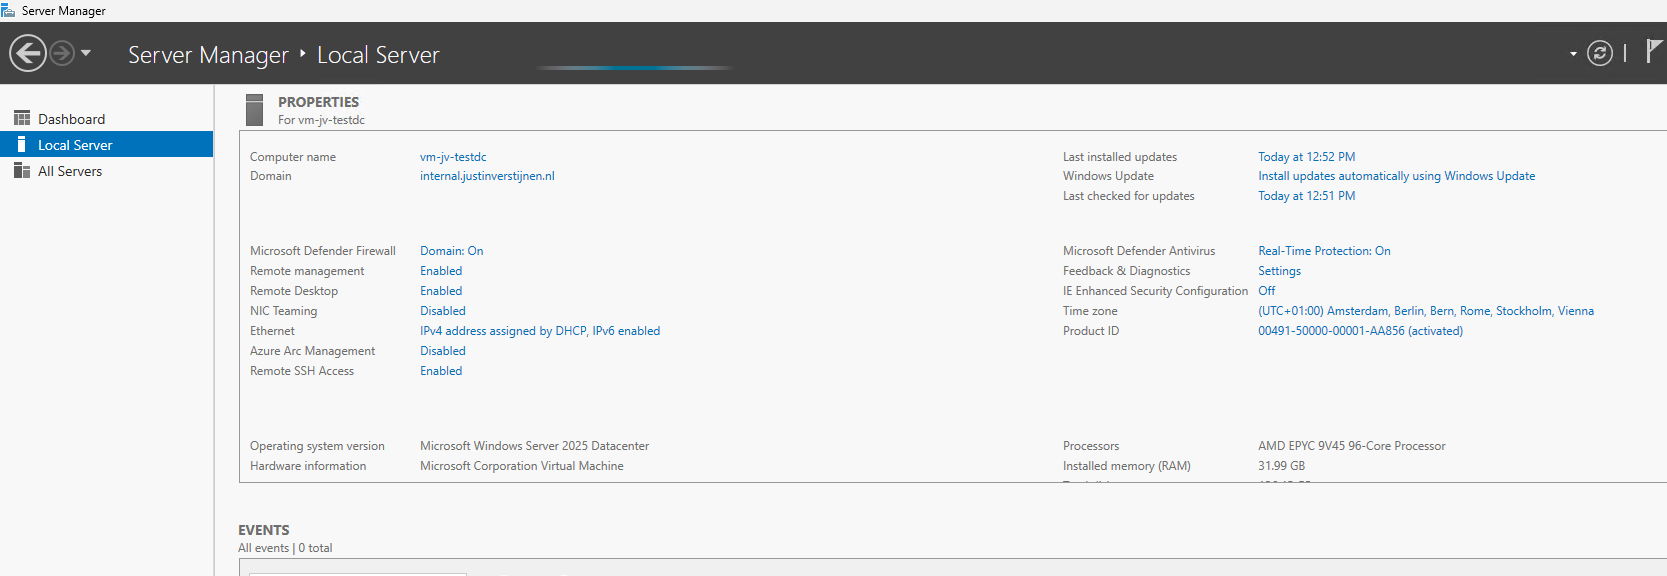
Now I headed over to my second machine, did some connectivity tests and tried to join the machine to the domain which instantly works:
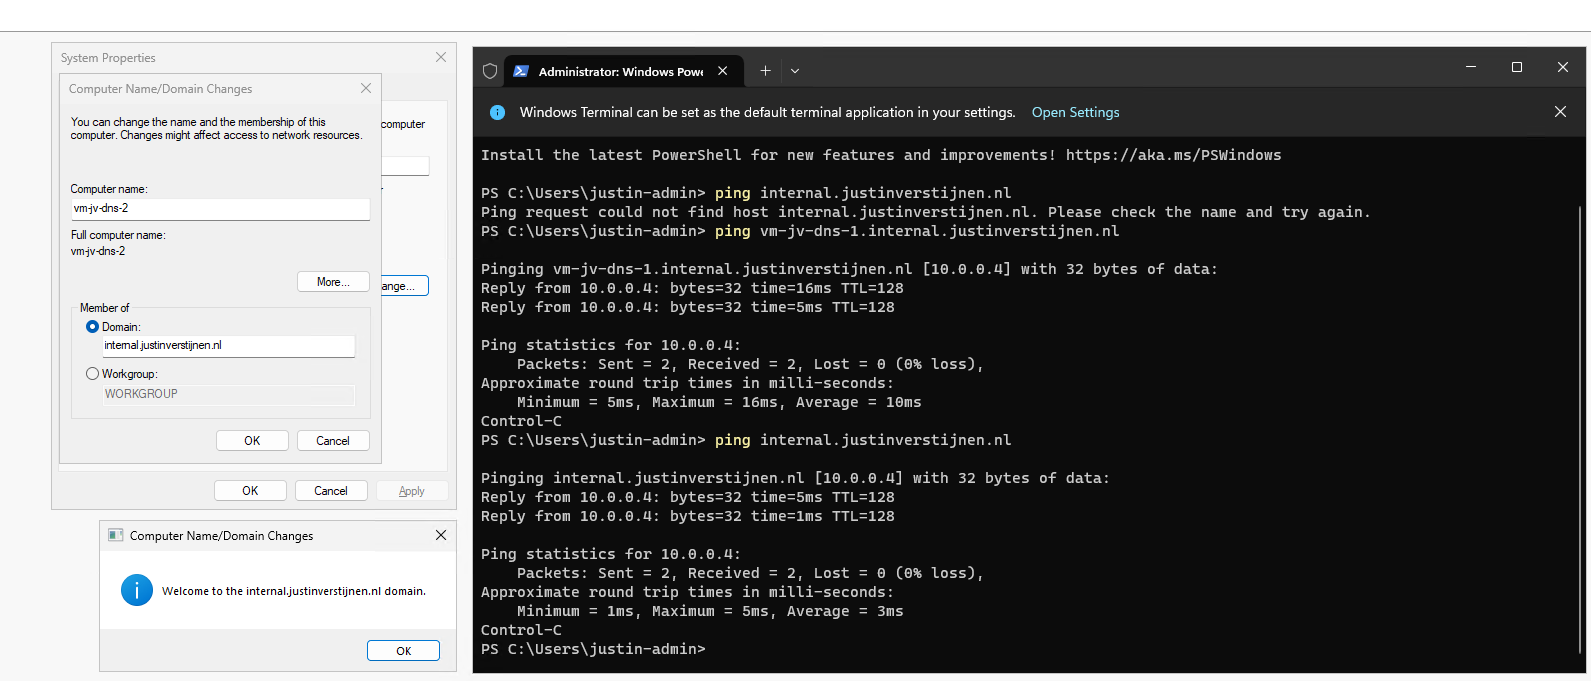
After restarting, no errors occured at this just domain joined machine and I was even able to fetch some Active Directory related services.
The ultimate test
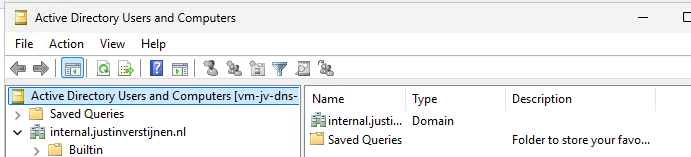
To 100% ensure that this works, I will install the Administration tools for Active Directory on the second server:

And I can create everything just like it is supposed. Really cool :)
Summary
This option may work flawlessly, I still don’t recommend it in any production environment. The extra redundancy is cool but it comes with extra administrative overhead. Every domain controller or DNS server for the domain must be added manually into the DNS zone.
The better option is to still use the Active Directory built-in DNS or Entra Domain Services and ensure this has the highest uptime possible by using availability zones.
Sources
These sources helped me by writing and research for this post;
- https://learn.microsoft.com/en-us/windows-server/identity/ad-ds/plan/integrating-ad-ds-into-an-existing-dns-infrastructure
- https://learn.microsoft.com/en-us/previous-versions/windows/it-pro/windows-server-2003/cc738266(v=ws.10)
- https://learn.microsoft.com/en-us/azure/dns/private-dns-overview
End of the page 🎉
You have reached the end of the page. You can navigate through other blog posts as well, share this post on X, LinkedIn and Reddit or return to the blog posts collection page. Thank you for visiting this post.
If you think something is wrong with this post or you want to know more, you can send me a message to one of my social profiles at: https://justinverstijnen.nl/about/
If you find this page and blog very useful and you want to leave a donation, you can use the button below to buy me a beer. Hosting and maintaining a website takes a lot of time and money. Thank you in advance and cheers :)
The terms and conditions apply to this post.
ARM templates and Azure VM + Script deployment
In Azure we can deploy ARM templates (+ script afterwards) to deploy resources on a big scale. This is like an easier version Terraform and Bicep, but without the great need to test every change and to learn a whole new language and convention. Also with less features indeed.
In this post I will show some examples of deploying with ARM templates and also will show you how to deploy a PowerShell script to run directly after the deployment of an virtual machine. This further helps automating your tasks.
Requirements
- Around 30 minutes of your time
- An Azure subscription to deploy resources (if wanting to follow the guide)
- A Github account, Azure Storage account or other hosting option to publish Powershell scripts to URL
- Basic knowledge of Azure
What is ARM?
ARM stands for Azure Resource Manager and is the underlying API for everything you deploy, change and manage in the Azure Portal, Azure PowerShell and Azure CLI. A basic understanding of ARM is in this picture:

I will not go very deep into Azure Resource Manager, as you can better read this in the Microsoft site: https://learn.microsoft.com/en-us/azure/azure-resource-manager/management/overview
Creating copies of an virtual machine with ARM
Now ARM allows us to create our own templates for deploying resources by defining a resource first, and then by clicking this link on the last page, just before deployment:
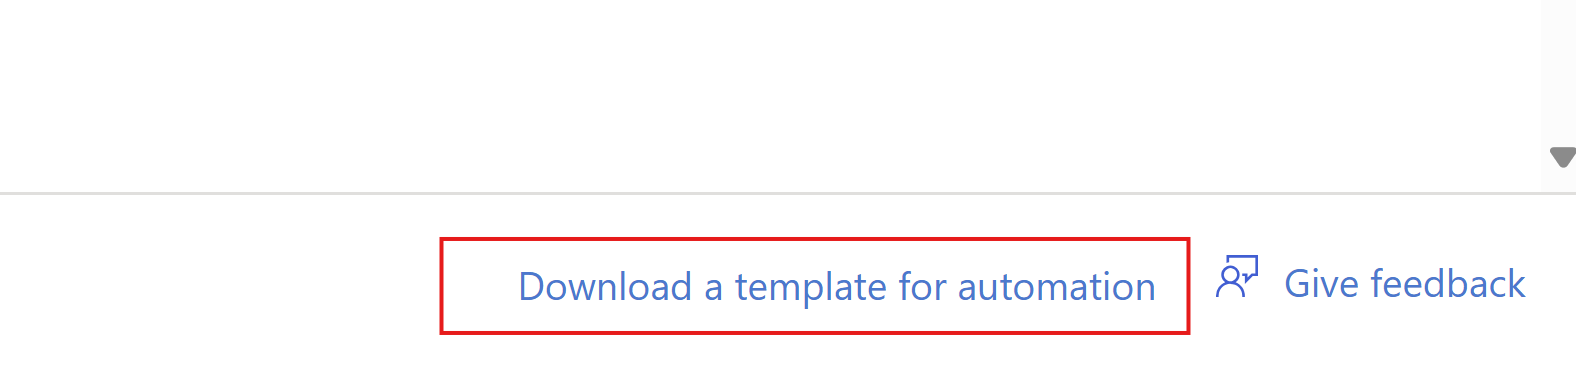
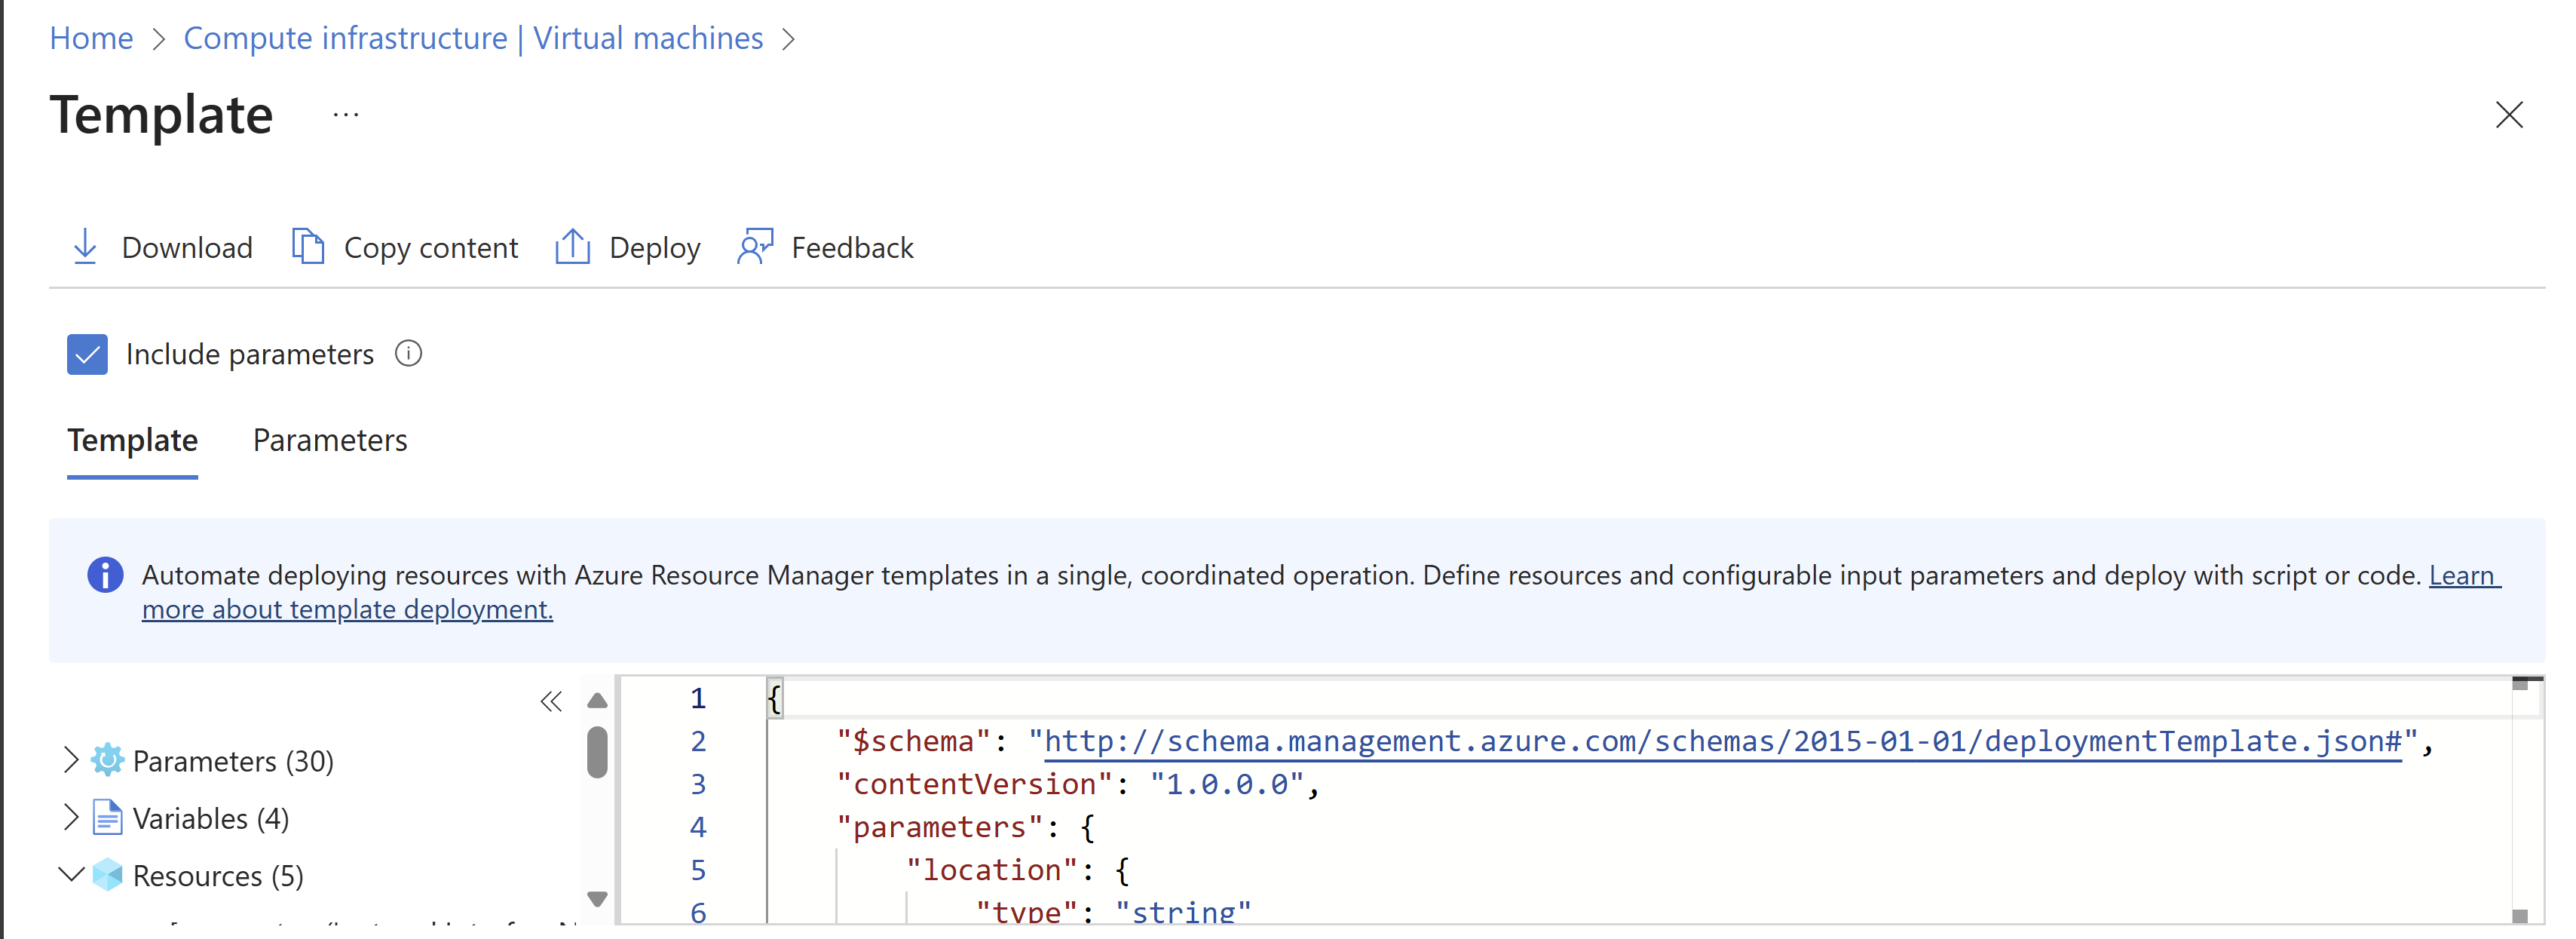
Then click “Download”.
This downloads a ZIP file with 2 files:
- Template.json
- This file contains what resources are going to deployed.
- Parameters.json
- This file contains the parameters of the resources are going to deployed like VM name, NIC name, NSG name etc.
These files can be changed easily to create duplicates and to deploy 5 similar VMs while minimizing effort and ensuring consistent VMs.
Changing ARM template parameters
After creating your ARM template by defining the wizard and downloading the files, you can change the parameters.json file to change specific settings. This contains the naming of the resources, the region, your administrator and such:
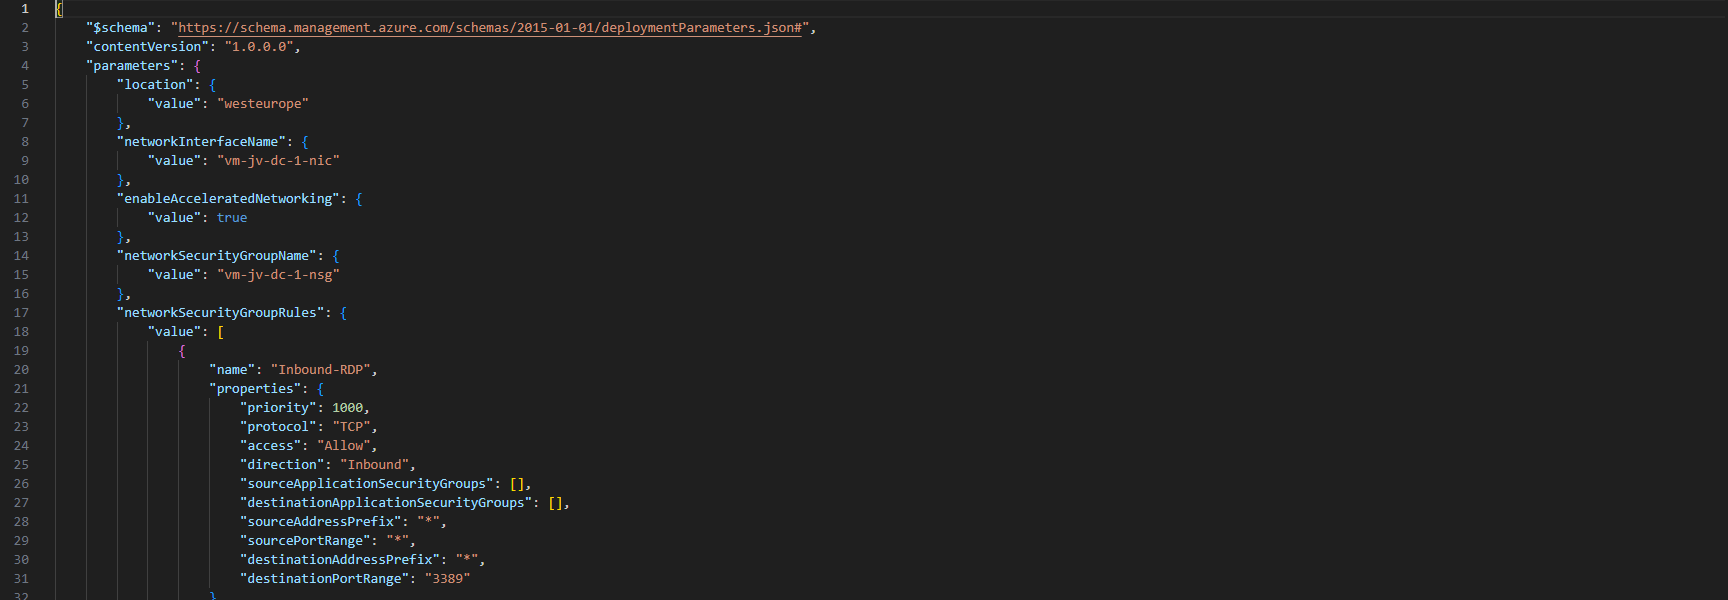
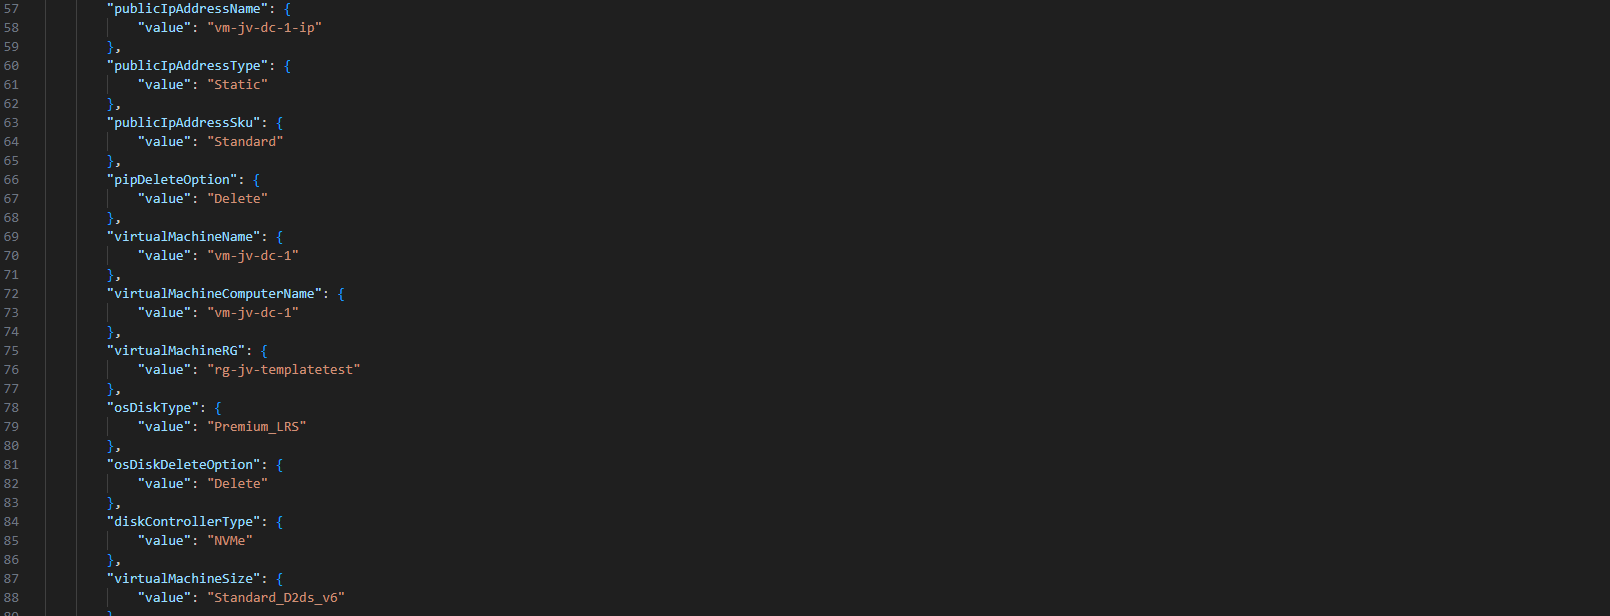
Ensure no templates contain the same names as that will instantly result in an error.
Deploying an ARM template using the Azure Portal
After you have changed your template and adjusted it to your needs, you can deploy it in the Azure Portal.
Open up the Azure Portal, and search for “Deploy a custom template”, and open that option.

Now you get on this page. Click on “Build your own template in the editor”:

You will get on this editor page now. Click on “Load file” to load our template.json file.
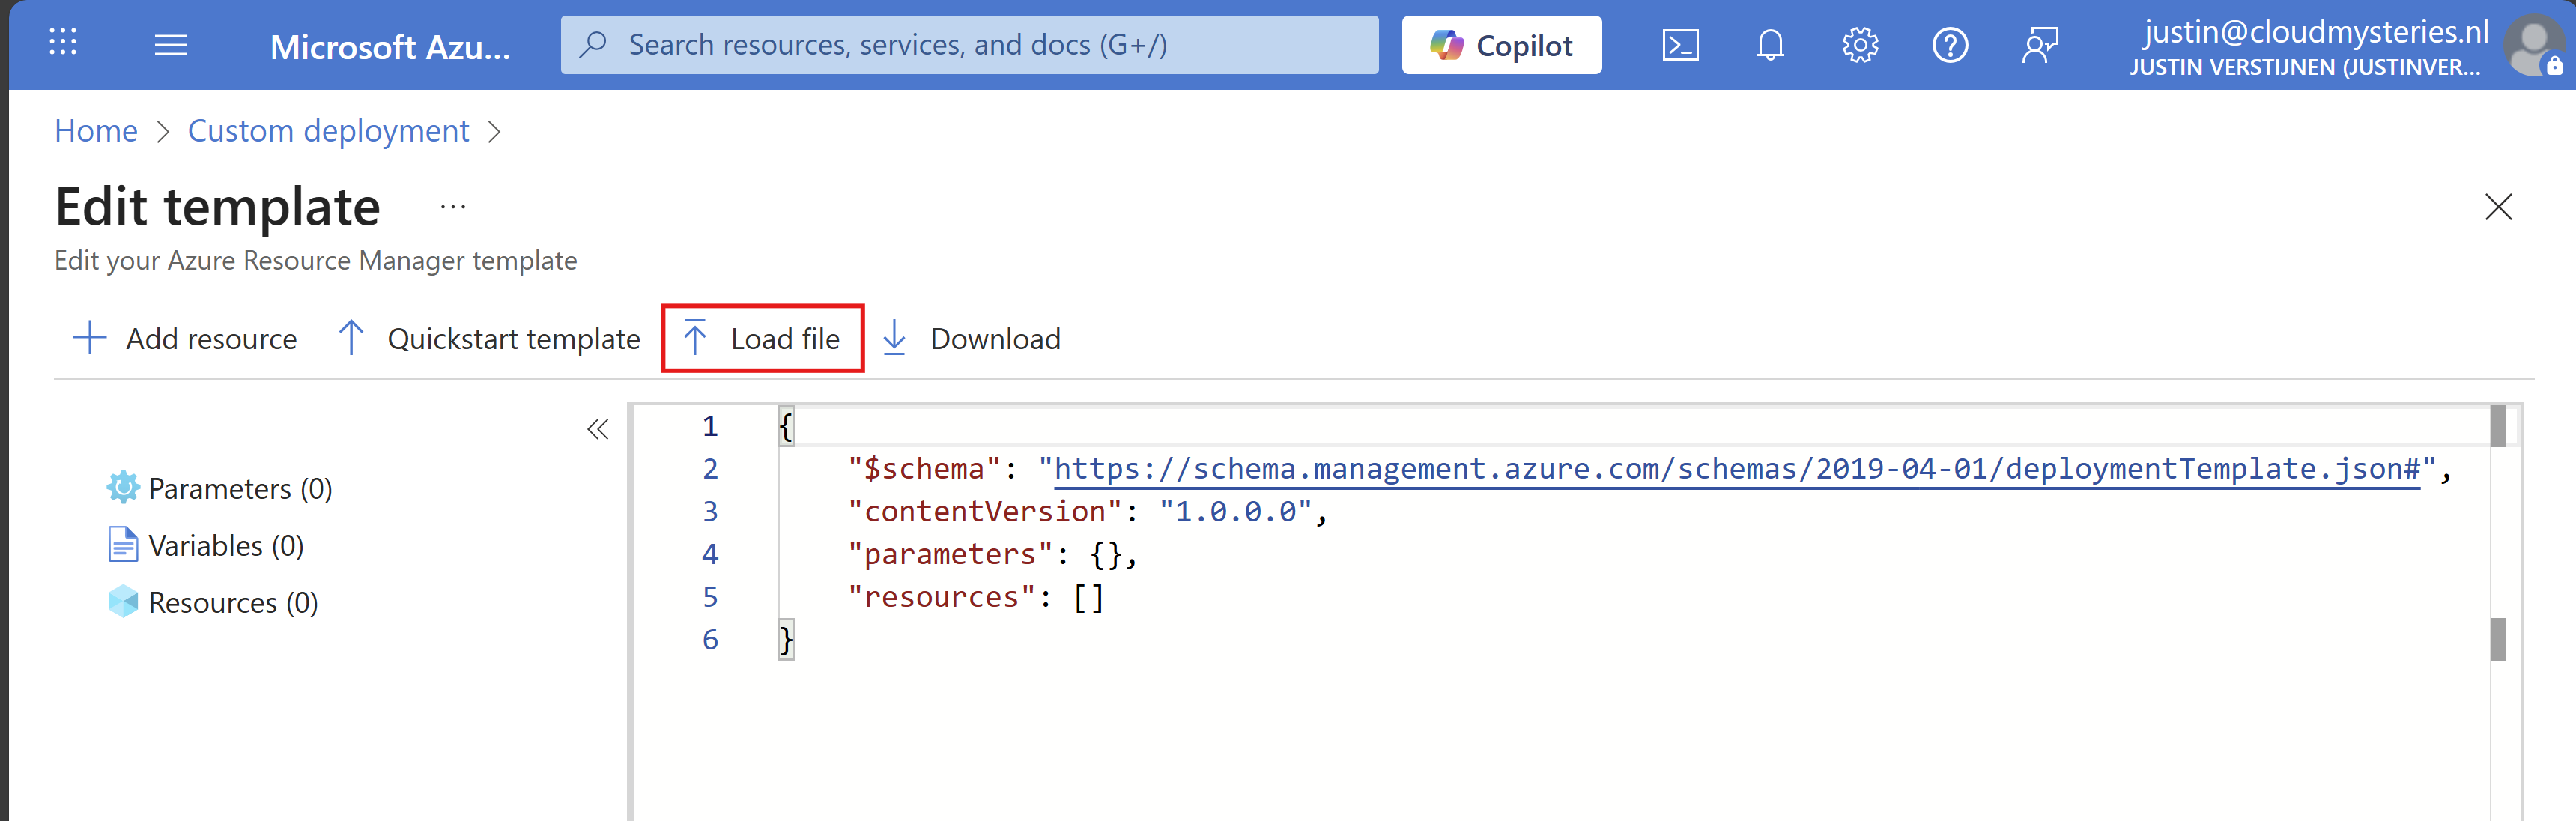
Now select the template.json file from your created and downloaded template.

It will now insert the template into the editor, and you can see on the left side what resource types are defined in the template:

Click on “Save”. Now we have to import the parameters file, otherwise all fields will be empty.
Click on “Edit parameters”, and we have to also upload the parameters.json file.
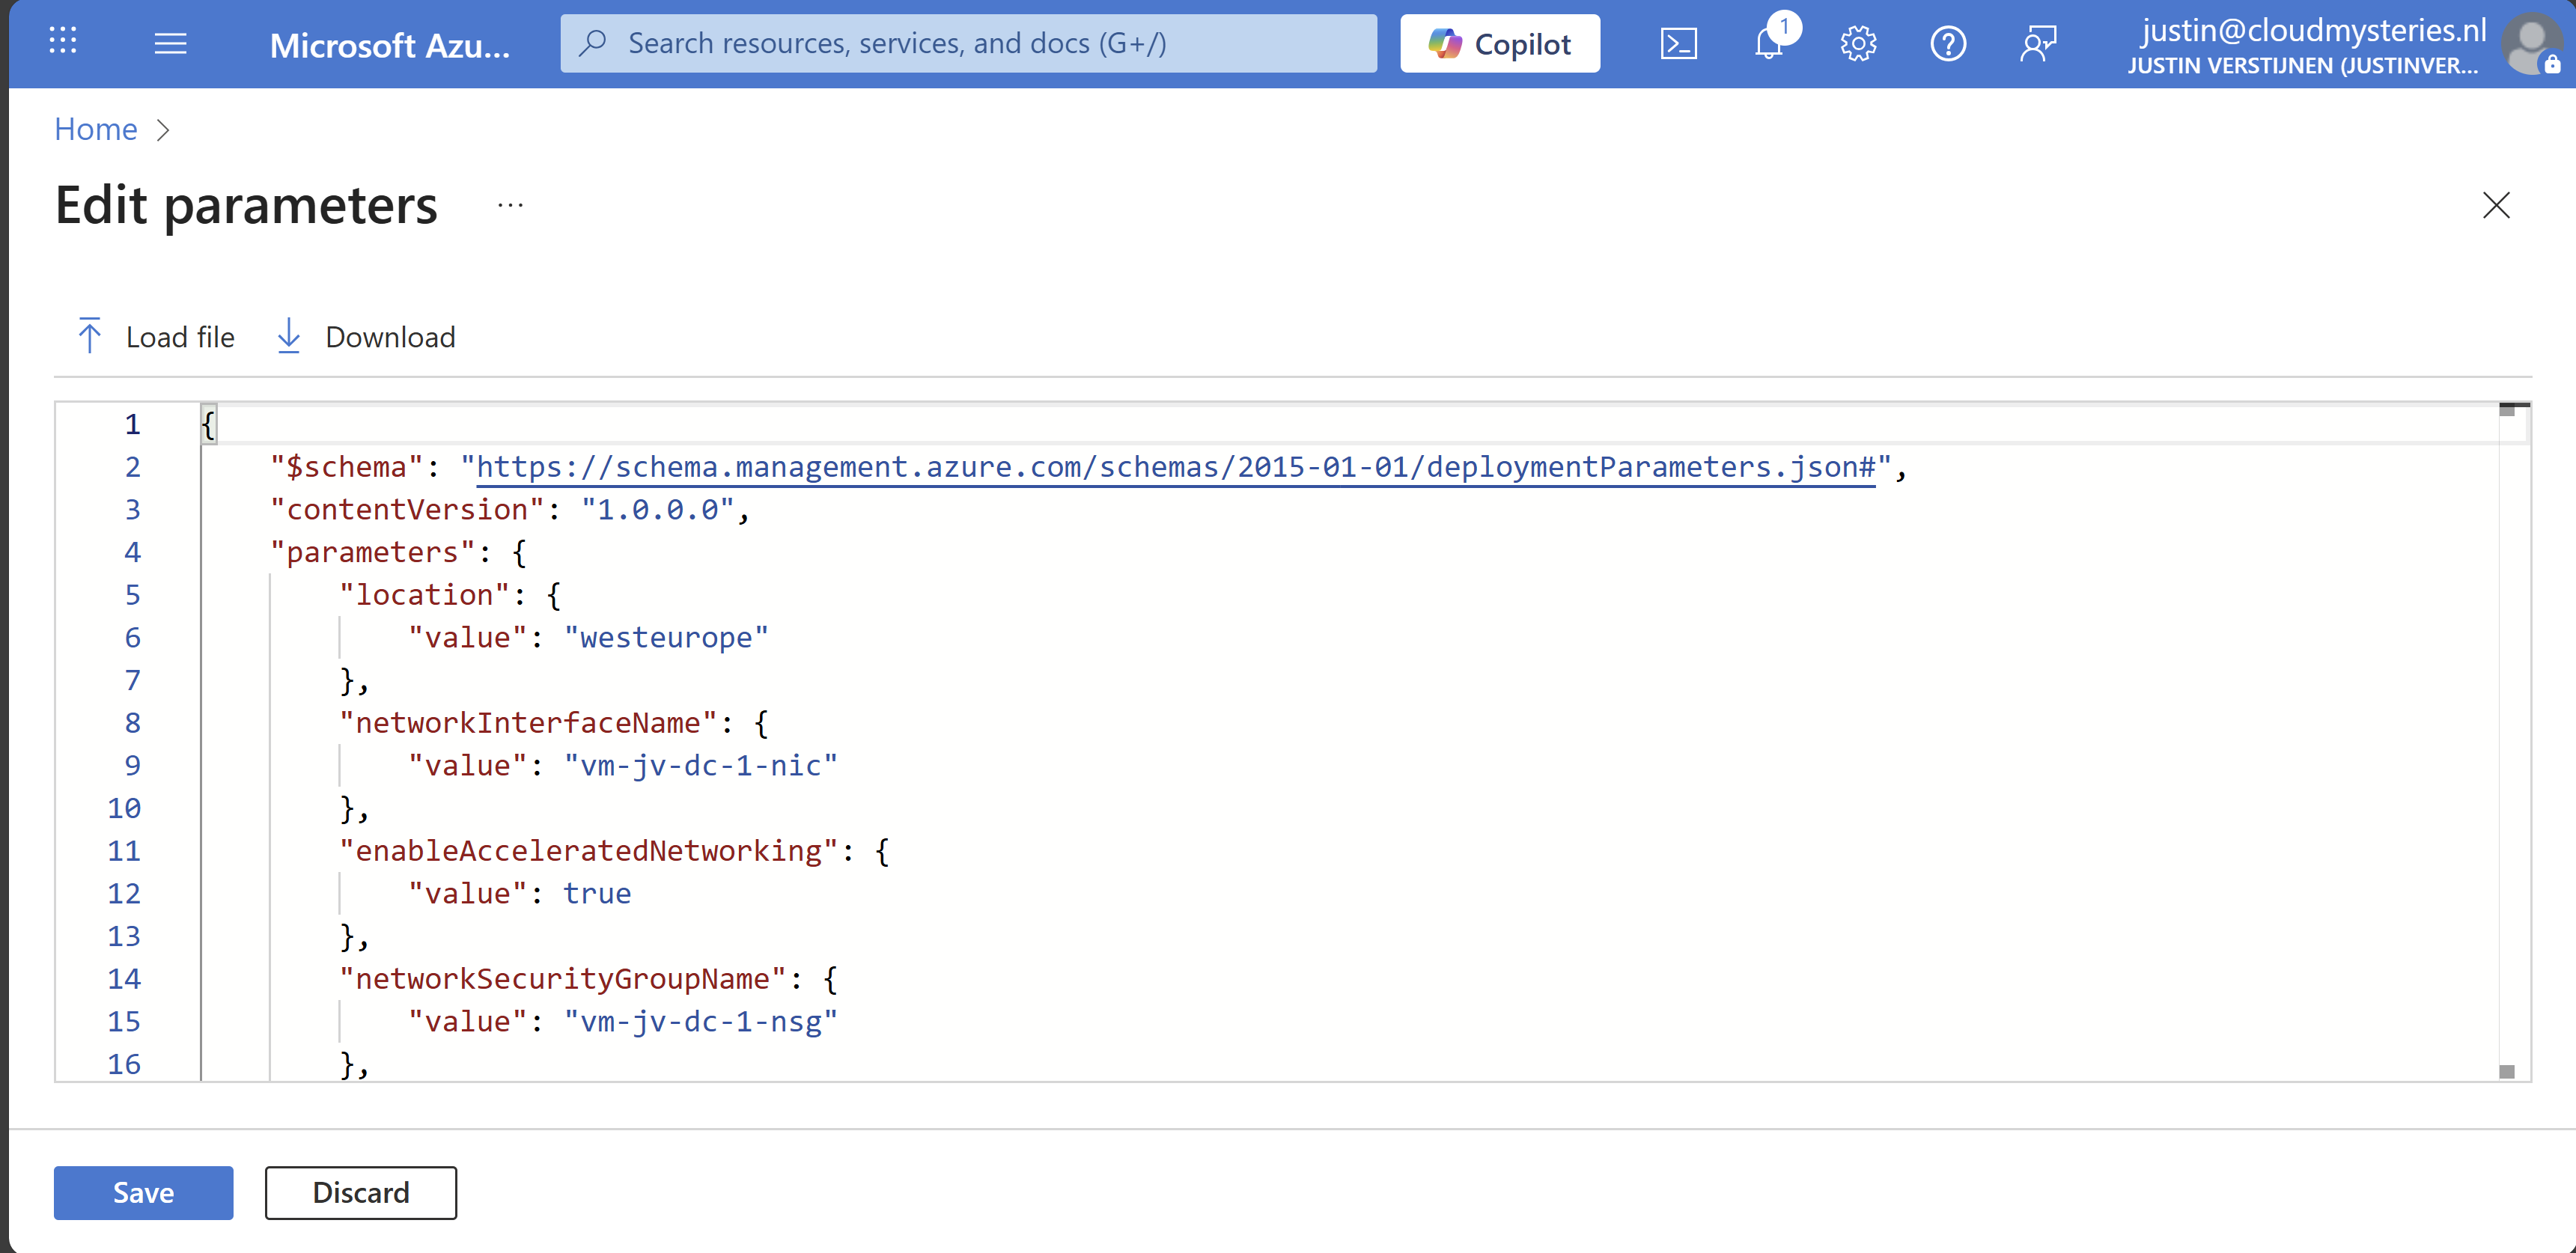
Click on “Save” and our template will be filled in for 85%. We only have to set the important information:
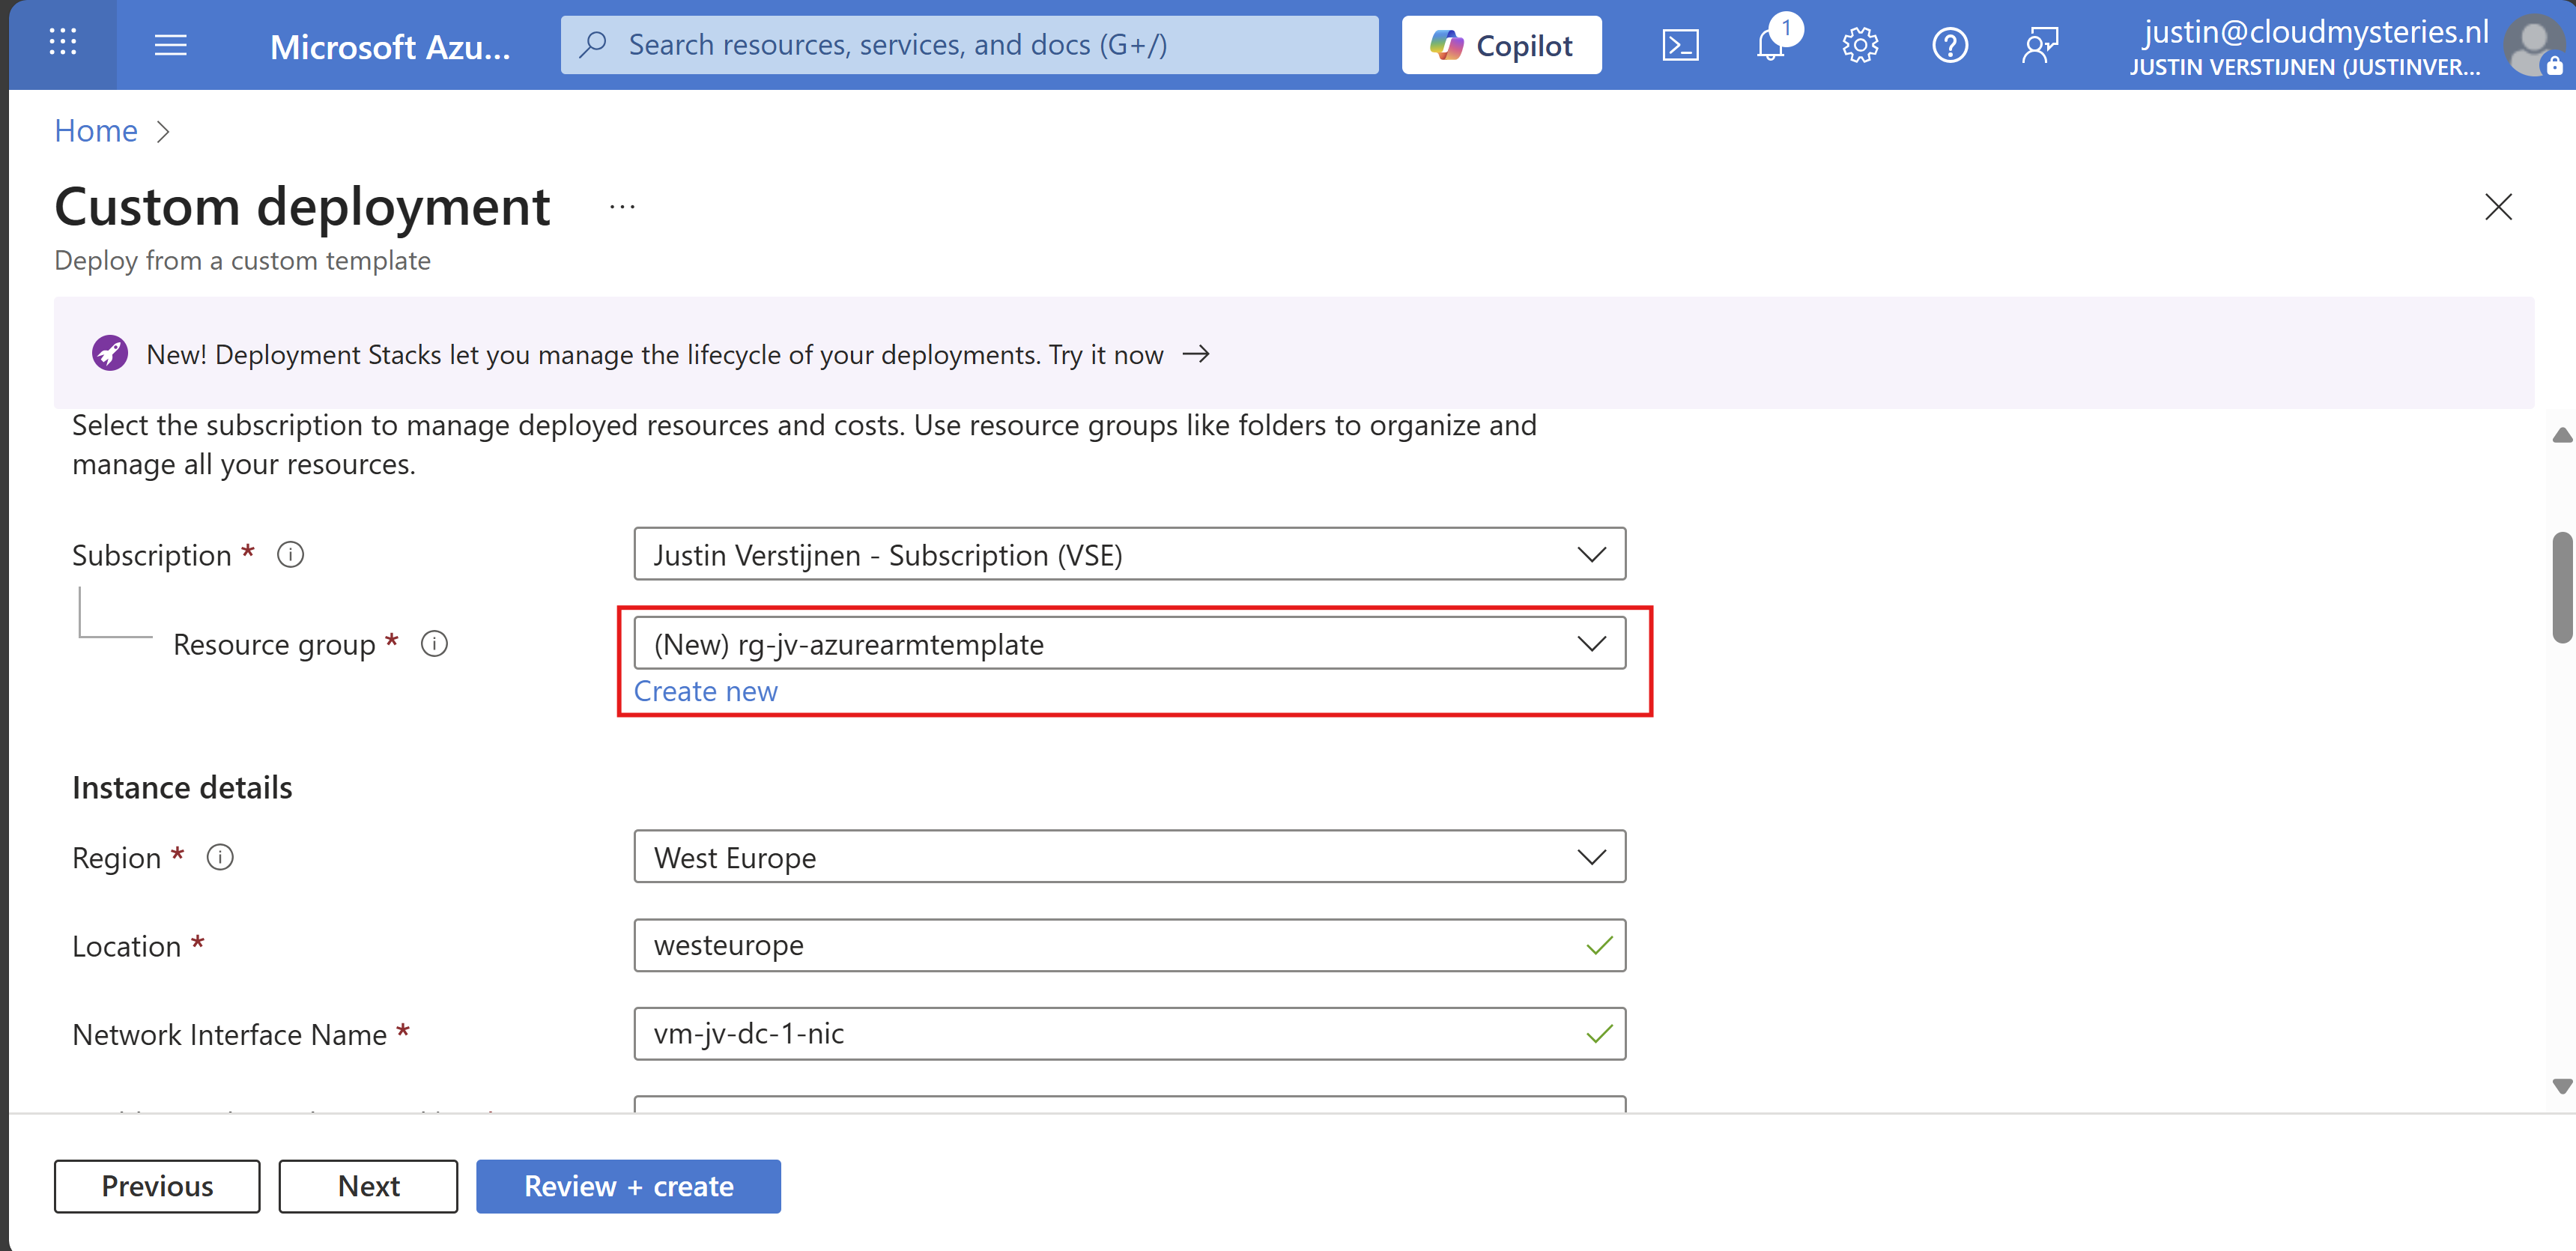
- Resource group
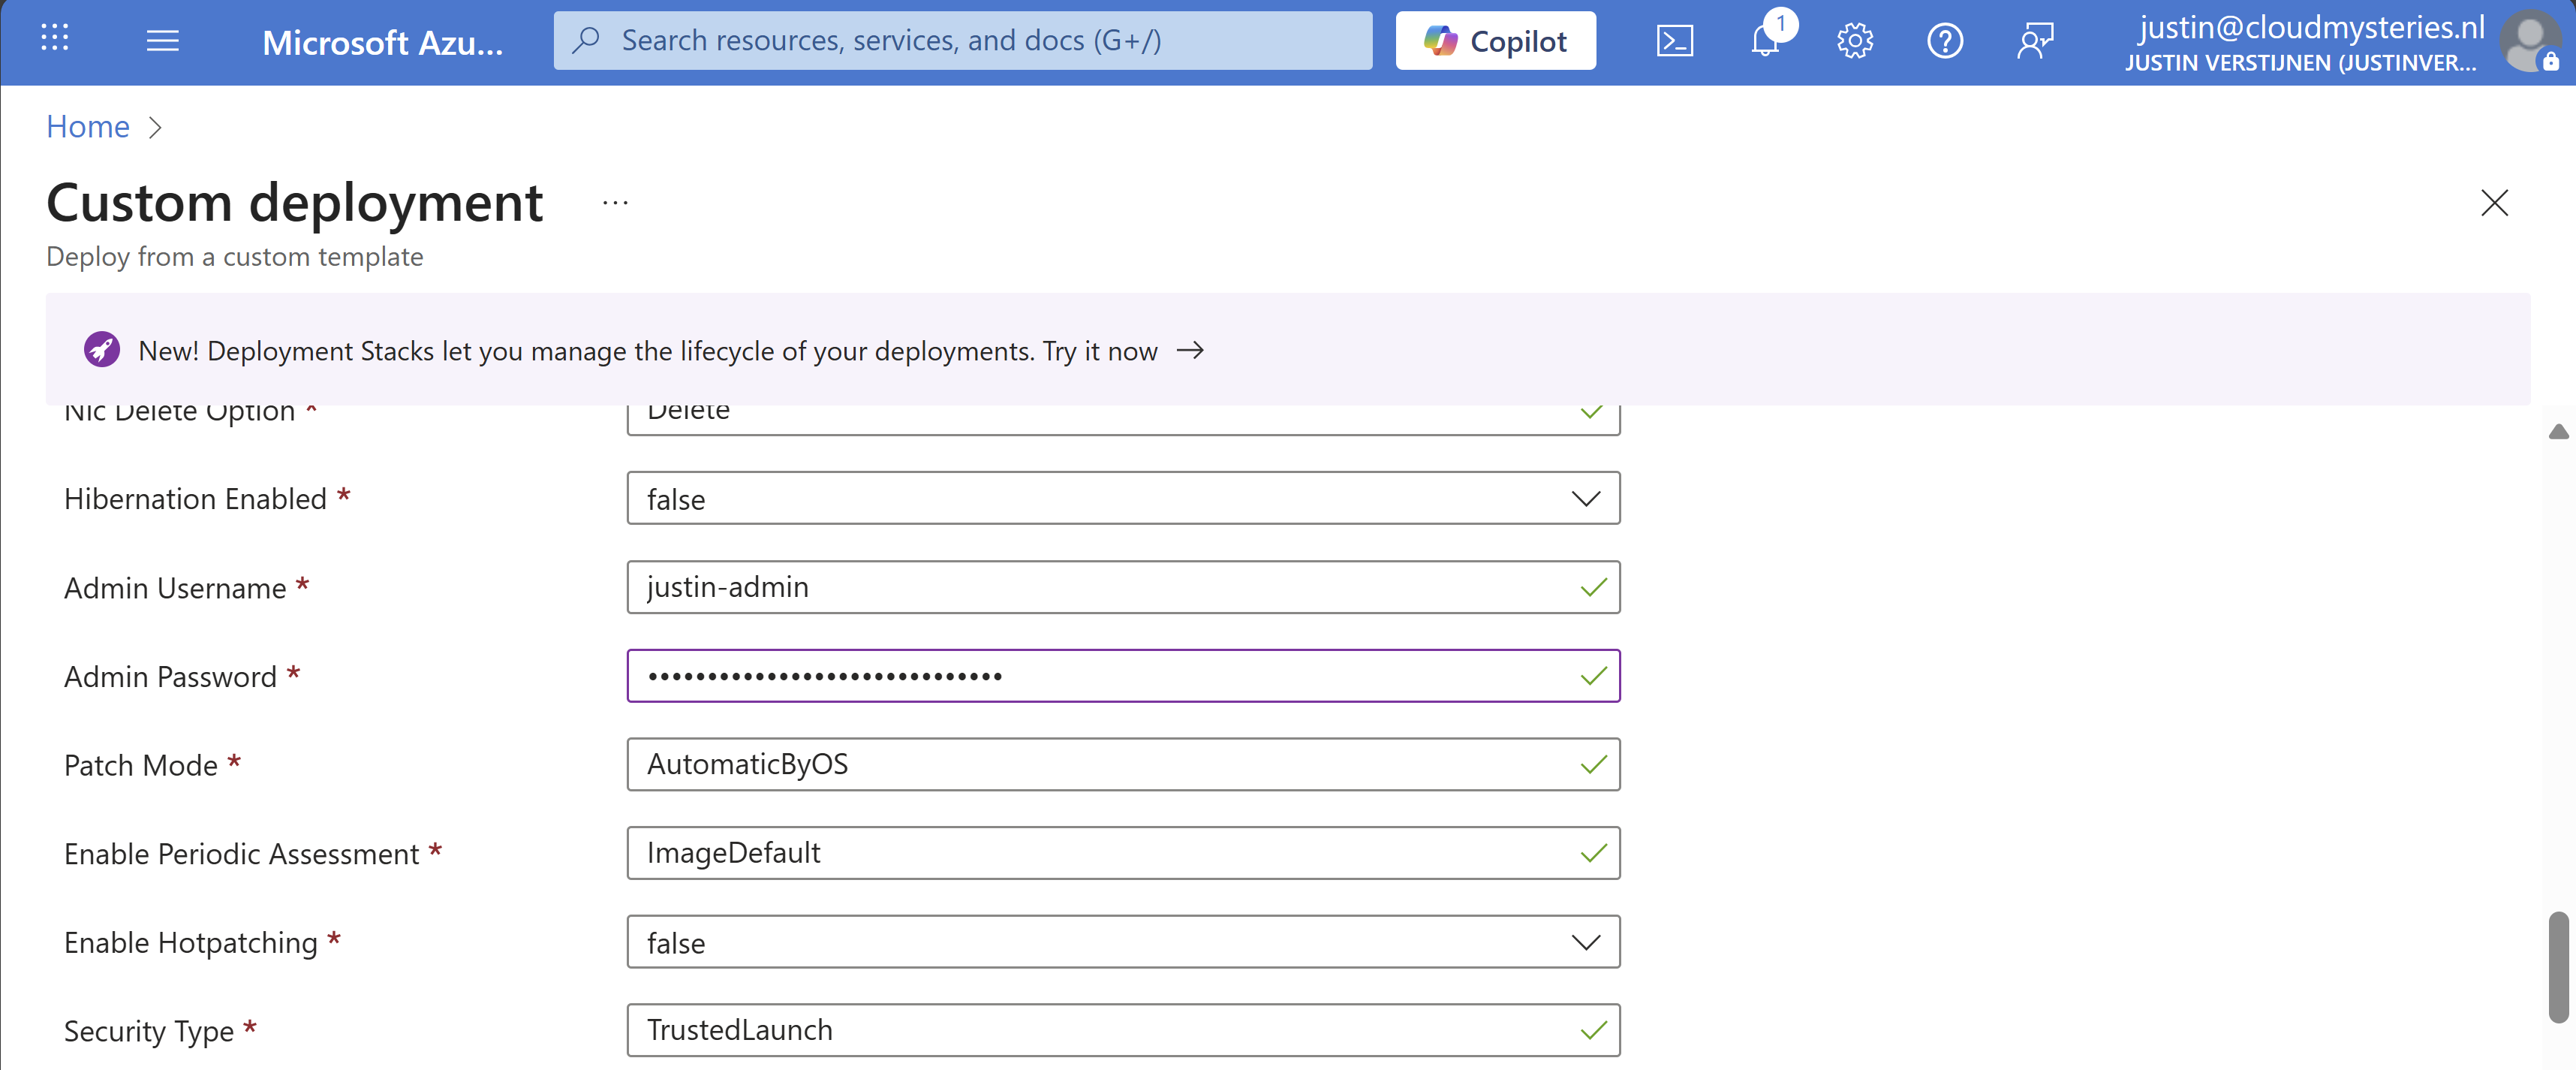
- Administrator password (as we don’t want this hardcoded in the template -> security)
Select your resource group to deploy all the resources in.
Then fill in your administrator password:
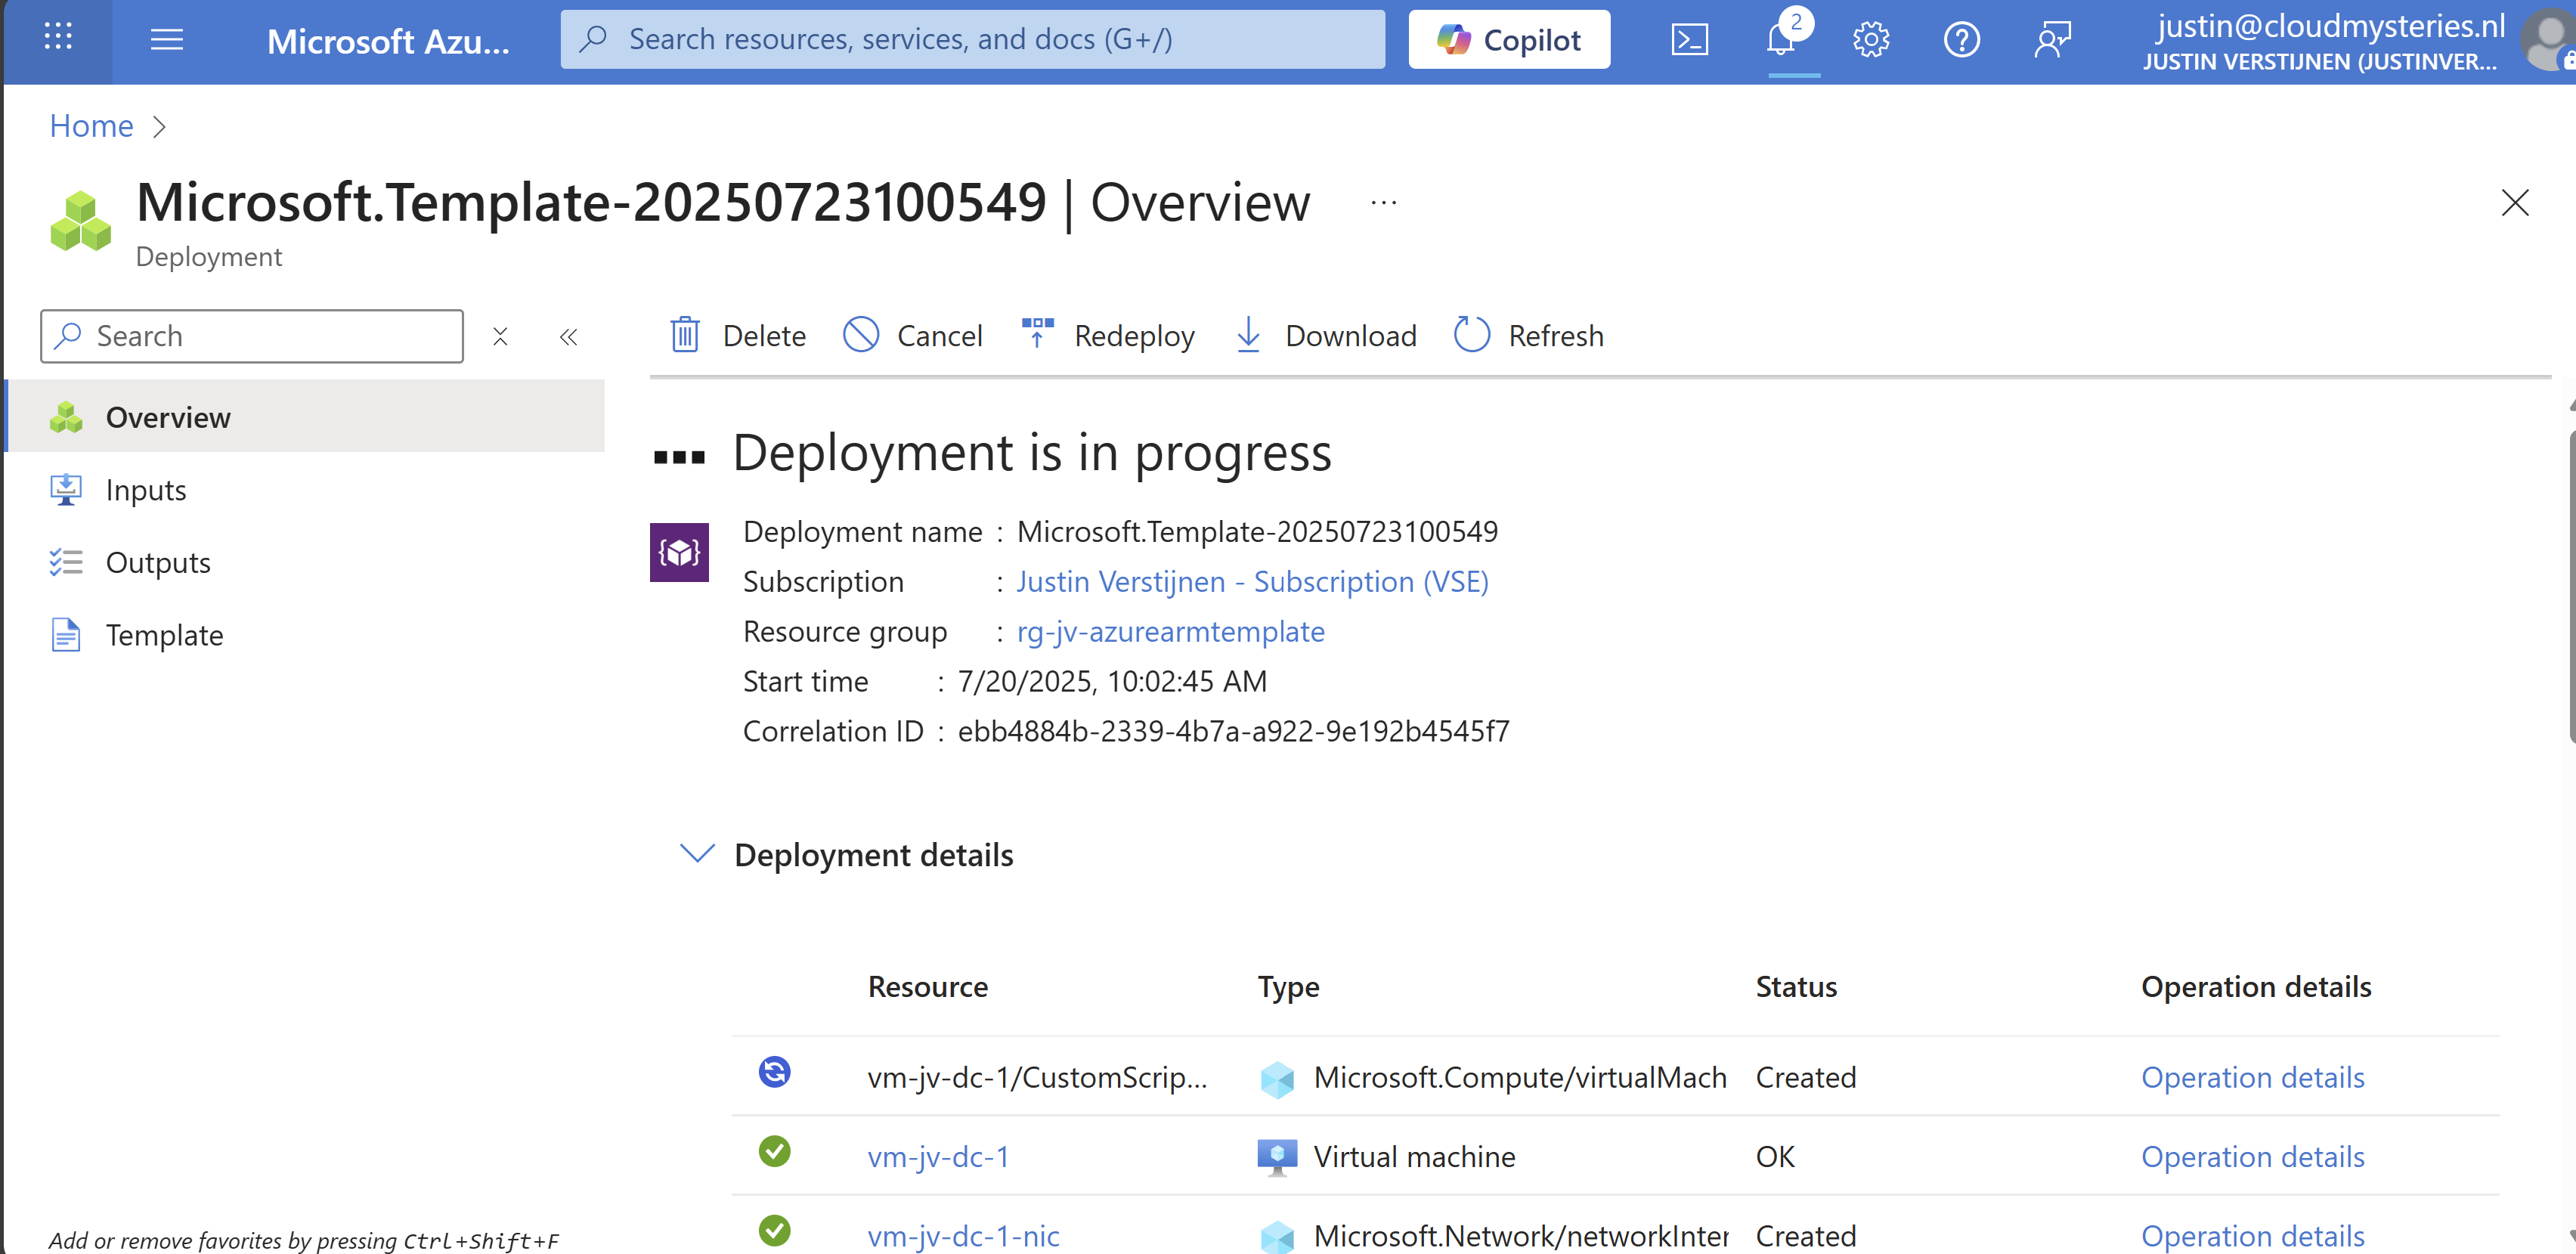
Review all of the settings and then advance to the deployment.
Now everything in your template will be deployed into Azure:
As you can see, you can repeat these steps if you need multiple similar virtual machines as we only need to load the files and change 2 settings. This saves a lot of time of everything in the normal VM wizard and this decreases human errors.
Add Powershell script to ARM template
We can also add a PowerShell script to an ARM template to directly run after deploying. Azure does this with an Custom Script Extenstion that will be automatically installed after deploying the VM. After installing the extension, the script will be running in the VM to change certain things.
I use a template to deploy an VM with Active Directory everytime I need an Active Directory to test certain things. So I have a modified version of my Windows Server initial installation script which also installs the Active Directory role and promotes the VM to my internal domain. This saves a lot of time configuring this by hand every time:

The Custom Script Extension block and monifying
We can add this Custom Script Extension block to our ARM template.json file:
JSON
{
  "type": "Microsoft.Compute/virtualMachines/extensions",
  "name": "[concat(parameters('virtualMachineName'), '/CustomScriptExtension')]",
  "apiVersion": "2021-03-01",
  "location": "[parameters('location')]",
  "dependsOn": [
    "[resourceId('Microsoft.Compute/virtualMachines', parameters('virtualMachineName'))]"
  ],
  "properties": {
    "publisher": "Microsoft.Compute",
    "type": "CustomScriptExtension",
    "typeHandlerVersion": "1.10",
    "autoUpgradeMinorVersion": true,
    "settings": {
      "fileUris": [
        "url to script"
      ]
    },
    "protectedSettings": {
      "commandToExecute": "powershell -ExecutionPolicy Unrestricted -Command ./script.ps1"
    }
  }
}
Then change the 2 parameters in the file to point it to your own script:
- fileUris: This is the public URL of your script (line 16)
- commandToExecute: This is the name of your script (line 20)


Placing the block into the existing ARM template
This block must be placed after the virtual machine, as the virtual machine must be running before we can run a script on it.

Search for the “Outputs” block and on the second line just above it, place a comma and hit Enter and on the new line paste the Custom Script Extension block. Watch this video as example where I show you how to do this:
Testing the custom script
After changing the template.json file, save it and then follow the custom template deployment step again of this guide to deploy the custom template which includes the PowerShell script. You will see it appear in the deployment after the virtual machine is deployed:
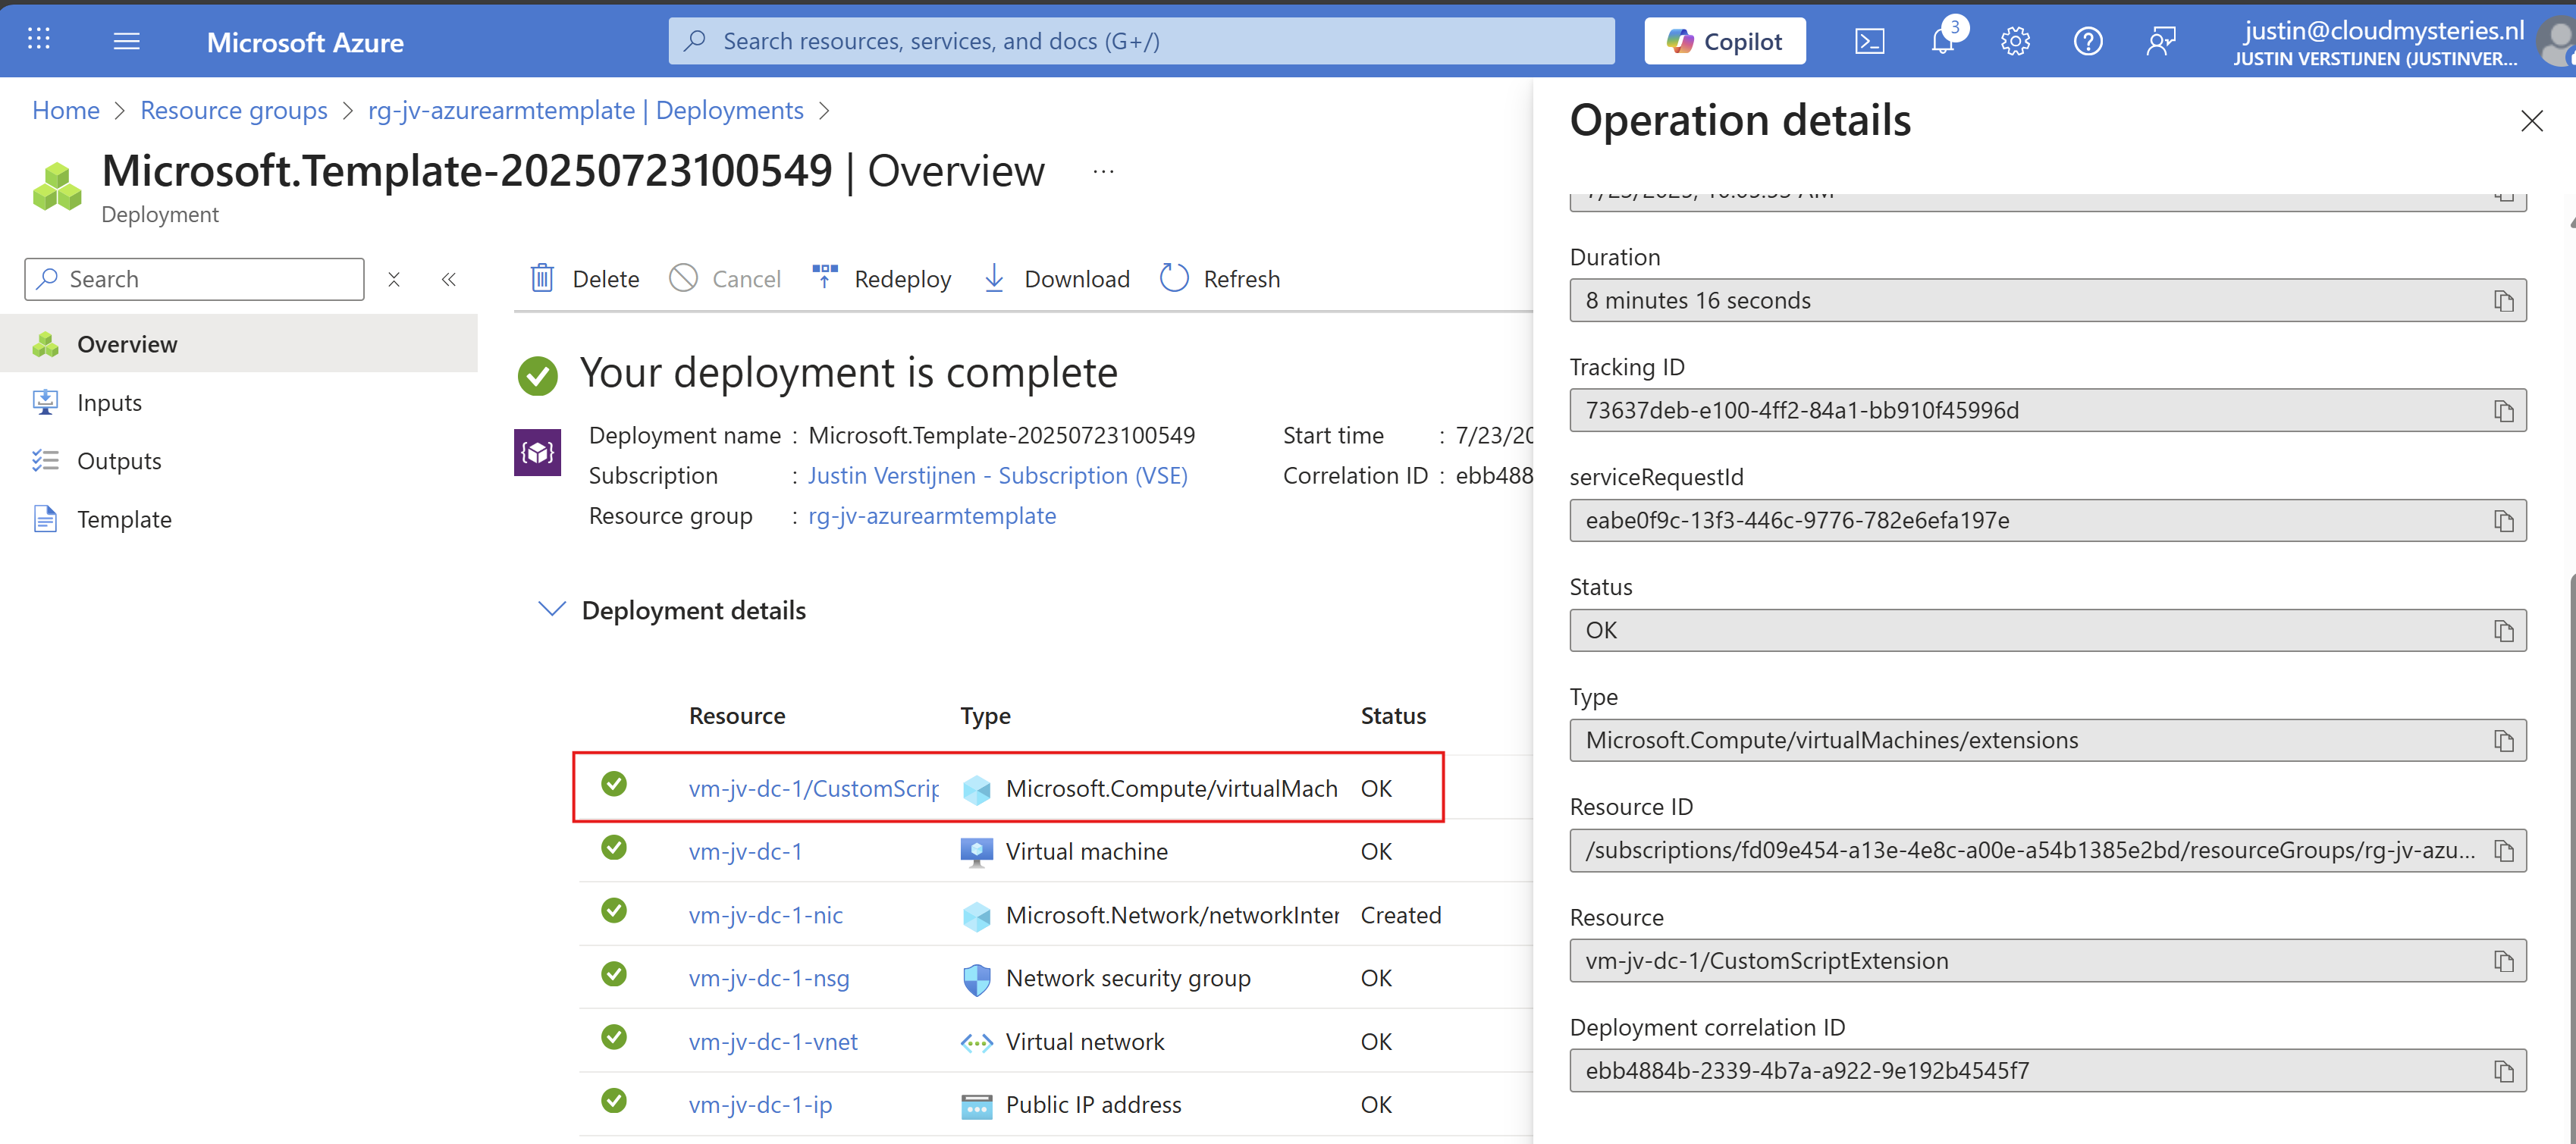
After the VM is deployed, I will login and check if the script has run:

The domain has been succesfully installed with management tools and such. This is really cool and saves a lot of time.
Summary
ARM templates are an great way to deploy multiple instances of resources and with extra customization like running a PowerShell script afterwards. This is really helpful if you deploy machines for every blog post like I do to always have the same, empty configuration available in a few minutes. The whole proces now takes like 8 minutes but when configuring by hand, this will take up to 45 minutes.
ARM is a great step between deploying resources completely by hand and IaC solutions like Terraform and Bicep.
Thank you for visiting this webpage and I hope this was helpful.
Sources
These sources helped me by writing and research for this post;
- https://learn.microsoft.com/en-us/azure/azure-resource-manager/management/overview
- https://learn.microsoft.com/en-us/azure/virtual-machines/extensions/custom-script-windows
End of the page 🎉
You have reached the end of the page. You can navigate through other blog posts as well, share this post on X, LinkedIn and Reddit or return to the blog posts collection page. Thank you for visiting this post.
If you think something is wrong with this post or you want to know more, you can send me a message to one of my social profiles at: https://justinverstijnen.nl/about/
If you find this page and blog very useful and you want to leave a donation, you can use the button below to buy me a beer. Hosting and maintaining a website takes a lot of time and money. Thank you in advance and cheers :)
The terms and conditions apply to this post.
Automatic Azure Boot diagnostics monitoring with Azure Policy
In Azure, we can configure Boot diagnostics to view the status of a virtual machine and connect to its serial console. However, this must be configured manually. The good part is that we can automate this process with Azure Policy. In this post I will explain step-by-step how to configure this and how to start using this in your own environment.
In short, Azure Policy is a compliance/governance tool in Azure with capabilities for automatically pushing your resources to be compliant with your stated policy. This means if we configure Azure Policy to automatically configure boot diagnostics and save the information to a storage account, this will be automatically done for all existing and new virtual machines.
Step 1: The configuration explained
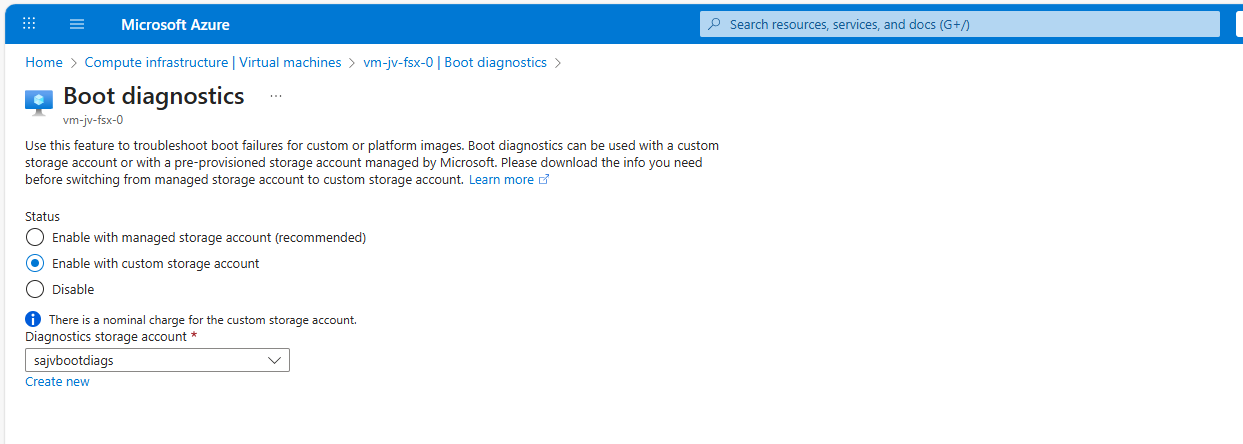
The boot diagnostics in Azure enables you to monitor the state of the virtual machine in the portal. By default, this will be enabled with a Microsoft managed storage account but we don’t have control over the storage account.
With using our custom storage account for saving the boot diagnostics, these options are available. We can control where our data is saved, which lifecycle management policies are active for retention of the data and we can use GRS storage for robust, datacenter-redundancy.
For saving the information in our custom storage account, we must tell the machines where to store it and we can automate this process with Azure Policy.
The solution we’re gonna configure in this guide consists of the following components in order:
- Storage Account: The place where serial logs and screenshots are actually stored
- Policy Definition: Where we define what Azure Policy must evaluate and check
- Policy Assignment: Here we assign a policy to a certain scope which can be subscriptions, resource groups and specific resources
- Remediation task: This is the task that kicks in if the policy definition returns with “non-compliant” status
Step 2: How to create your custom storage account for boot diagnostics
Assuming you want to use your own storage account for saving Boot diagnostics, we start with creating our own storage account for this purpose. If you want to use an existing managed storage account, you can skip this step.
Open the Azure Portal and search for “Storage Accounts”, click on it and create a new storage account. Then choose a globally unique name with lowercase characters only between 3 and 24 characters.
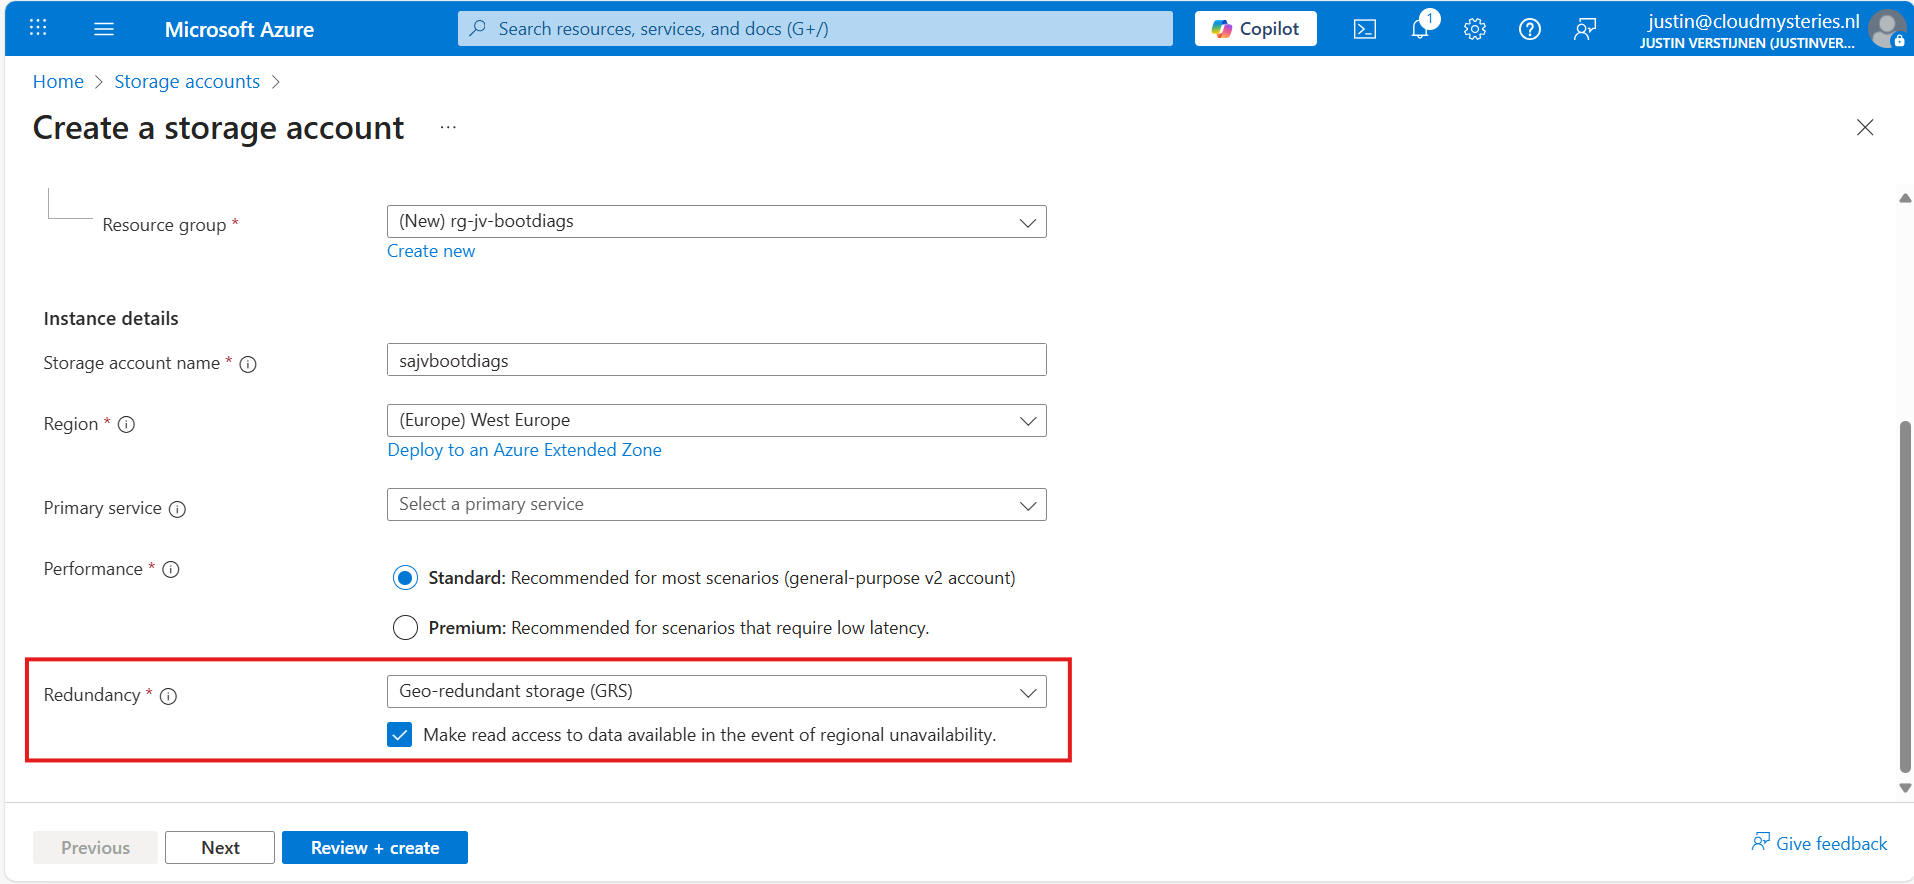
Make sure you select the correct level of redundancy at the bottom as we want to defend ourselves against datacenter failures. Also, don’t select a primary service as we need this storage account for multiple purposes.
At the “Advanced” tab, select “Hot” as storage tier, as we might ingest new information continueosly. We also leave the “storage account key access” enabled as this is required for the Azure Portal to access the data.
Advance to the “Networking” tab. Here we have the option to only enable public access for our own networks. This is highly recommended:
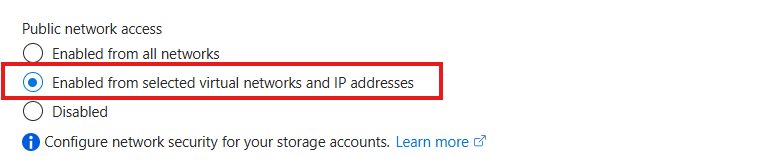
This way we expose the storage account access but only for our services that needs it. This defends our storage account from attackers outside of our environment.
For you actually able to see the data in the Azure Portal, you need to add the WAN IP address of your location/management server:
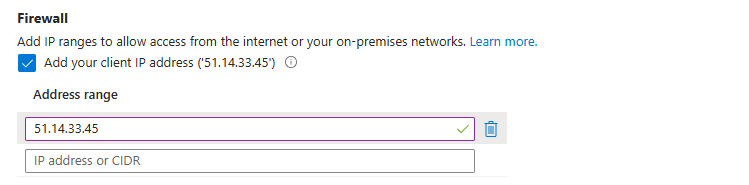
You can do that simply by checking the “Client IP address”. If you skip this step, you will get an error that the boot diagnostics cannot be found later on.
At the “Encryption” tab we can configure the encryption, if your company policies states this. For the simplicity of this guide, I leave everything on “default”.
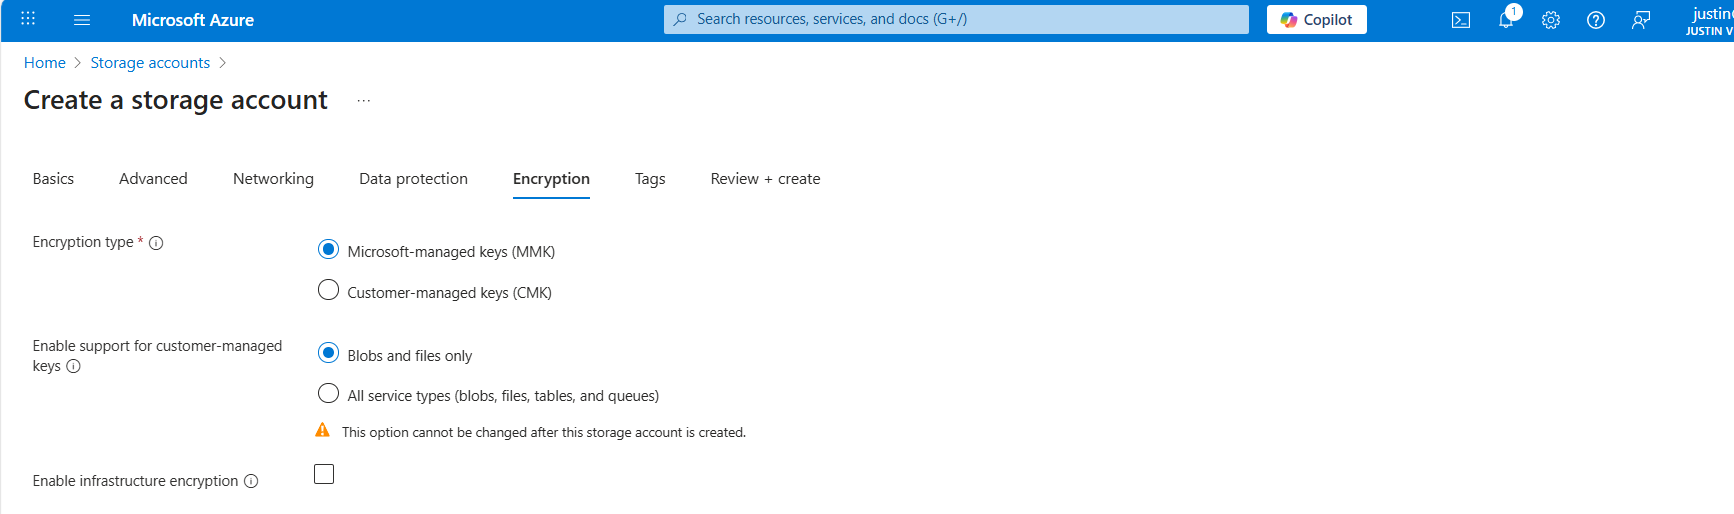
Create the storage account.
Step 3: How to create the Azure Policy definition
We can now create our Azure Policy that alters the virtual machine settings to save the diagnostics into the custom storage account. The policy overrides every other setting, like disabled or enabled with managed storage account. It 100% ensures all VMs in the scope will save their data in our custom storage account.
Open the Azure Portal and go to “Policy”. We will land on the Policy compliancy dashboard:
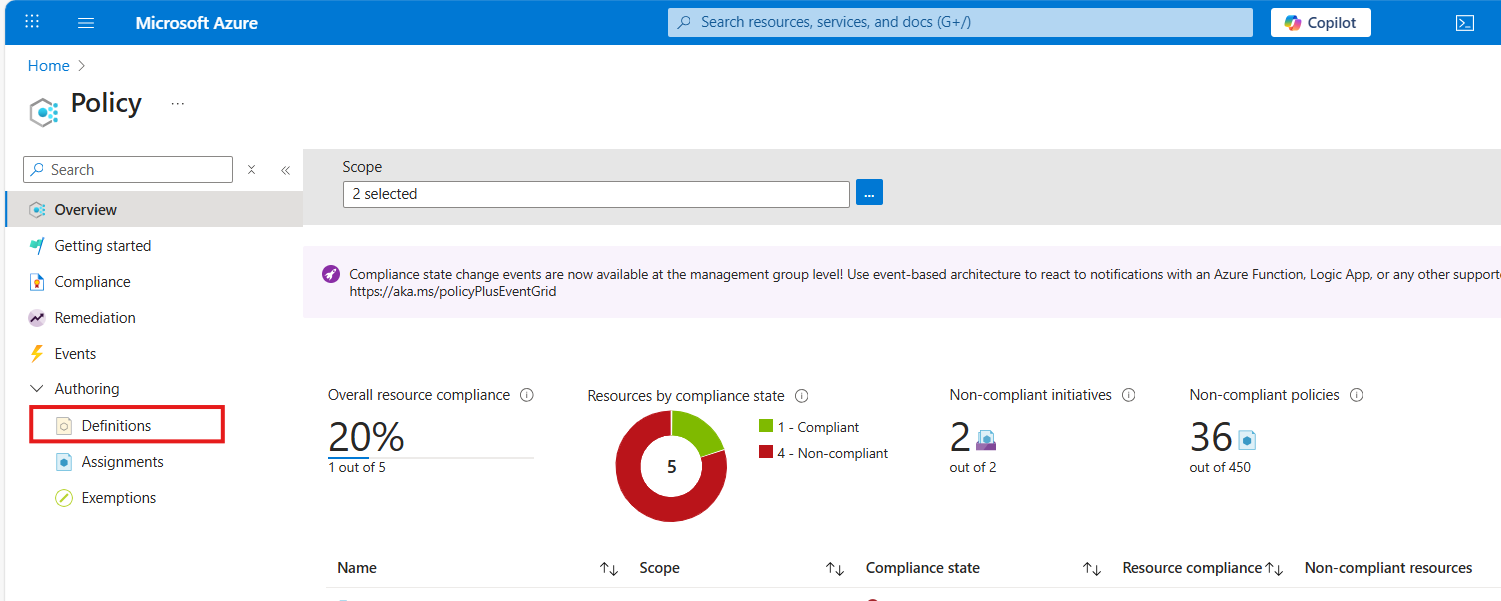
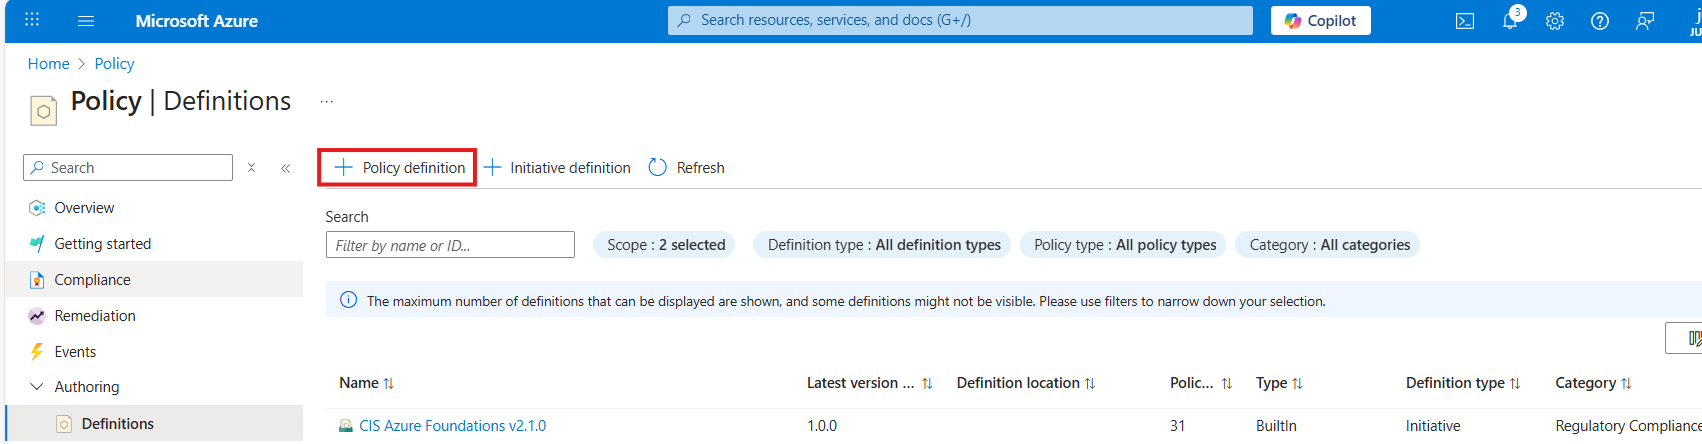
Click on “Definitions” as we are going to define a new policy. Then click on “+ Policy Definition” to create a new:
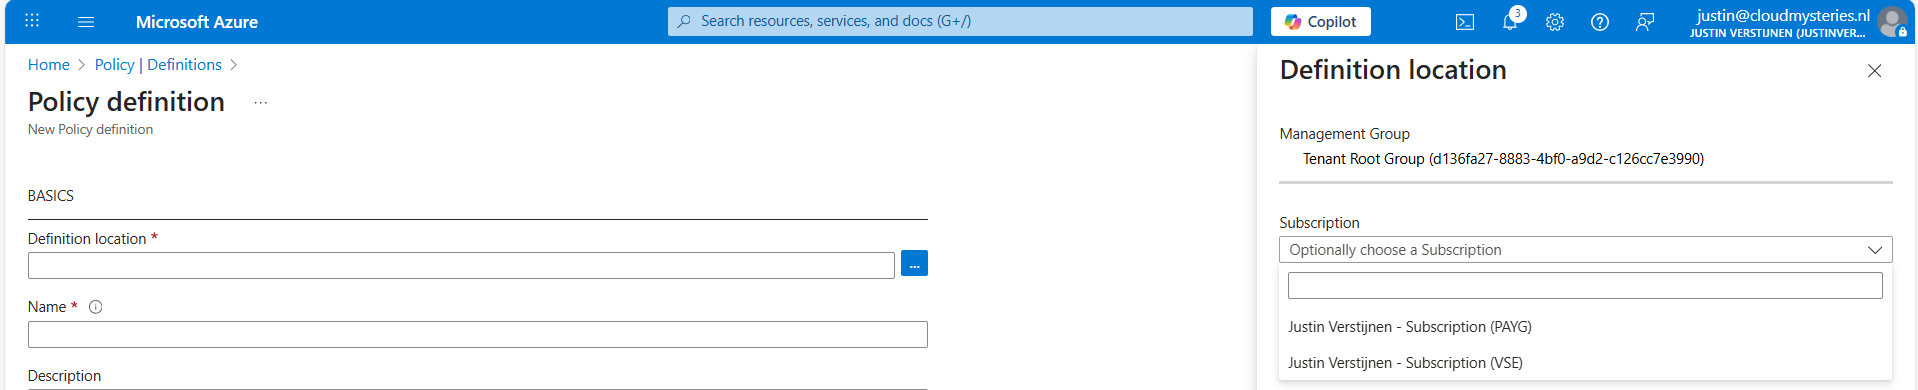
At the “definition location”, select your subscription where you want this configuration to be active. You can also select the tenant root management group, so this is enabled on all subscriptions. Caution with this of course.
Warning: Policies assigned to the Tenant Management Group cannot be assigned remediation tasks. Select one or more subscriptions instead.
Then give the policy a good name and description.
At the “Category” section we can assign the policy to a category. This changes nothing to the effect of the policy but is only for your own categorization and overview. You can also create custom categories if using multiple policies:

At the policy rule, we have to paste a custom rule in JSON format which I have here:
JSON
{
"mode": "All",
"parameters": {
"customStorageUrl": {
"type": "String",
"metadata": {
"displayName": "Custom Storage",
"description": "The custom Storage account used to write boot diagnostics to."
},
"defaultValue": "https://*your storage account name*.blob.core.windows.net"
}
},
"policyRule": {
"if": {
"allOf": [
{
"field": "type",
"equals": "Microsoft.Compute/virtualMachines"
},
{
"field": "Microsoft.Compute/virtualMachines/diagnosticsProfile.bootDiagnostics.storageUri",
"notContains": "[parameters('customStorageUrl')]"
},
{
"not": {
"field": "Microsoft.Compute/virtualMachines/diagnosticsProfile.bootDiagnostics.storageUri",
"equals": ""
}
}
]
},
"then": {
"effect": "modify",
"details": {
"roleDefinitionIds": [
"/providers/Microsoft.Authorization/roleDefinitions/9980e02c-c2be-4d73-94e8-173b1dc7cf3c"
],
"conflictEffect": "audit",
"operations": [
{
"operation": "addOrReplace",
"field": "Microsoft.Compute/virtualMachines/diagnosticsProfile.bootDiagnostics.storageUri",
"value": "[parameters('customStorageUrl')]"
},
{
"operation": "addOrReplace",
"field": "Microsoft.Compute/virtualMachines/diagnosticsProfile.bootDiagnostics.enabled",
"value": true
}
]
}
}
}
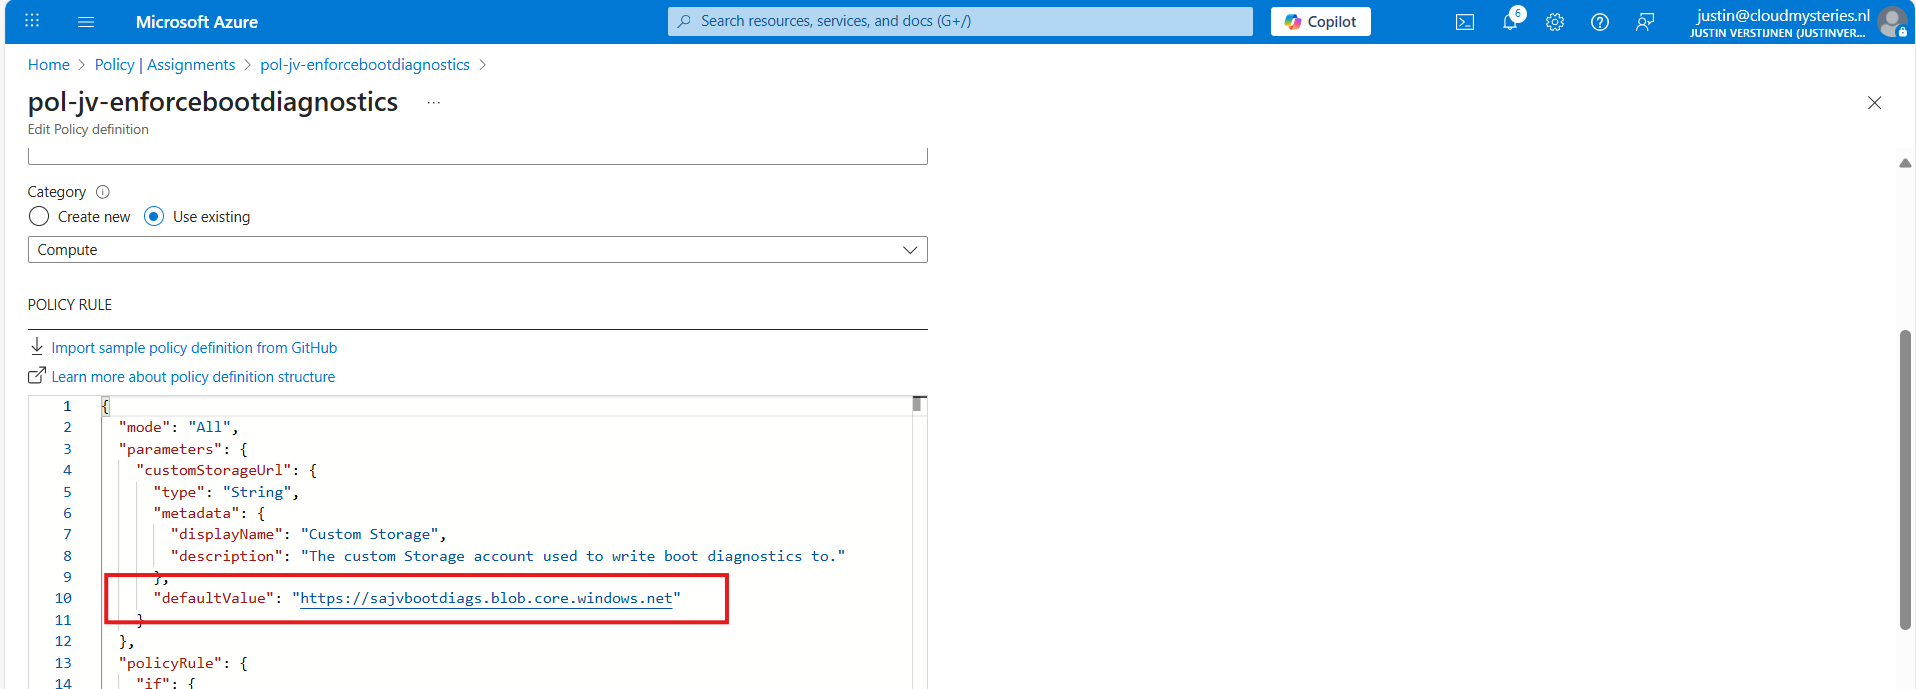
}Copy and paste the code into the “Policy Rule” field. Then make sure to change the storage account URI to your custom or managed storage account. You can find this in the Endpoints section of your storage account:
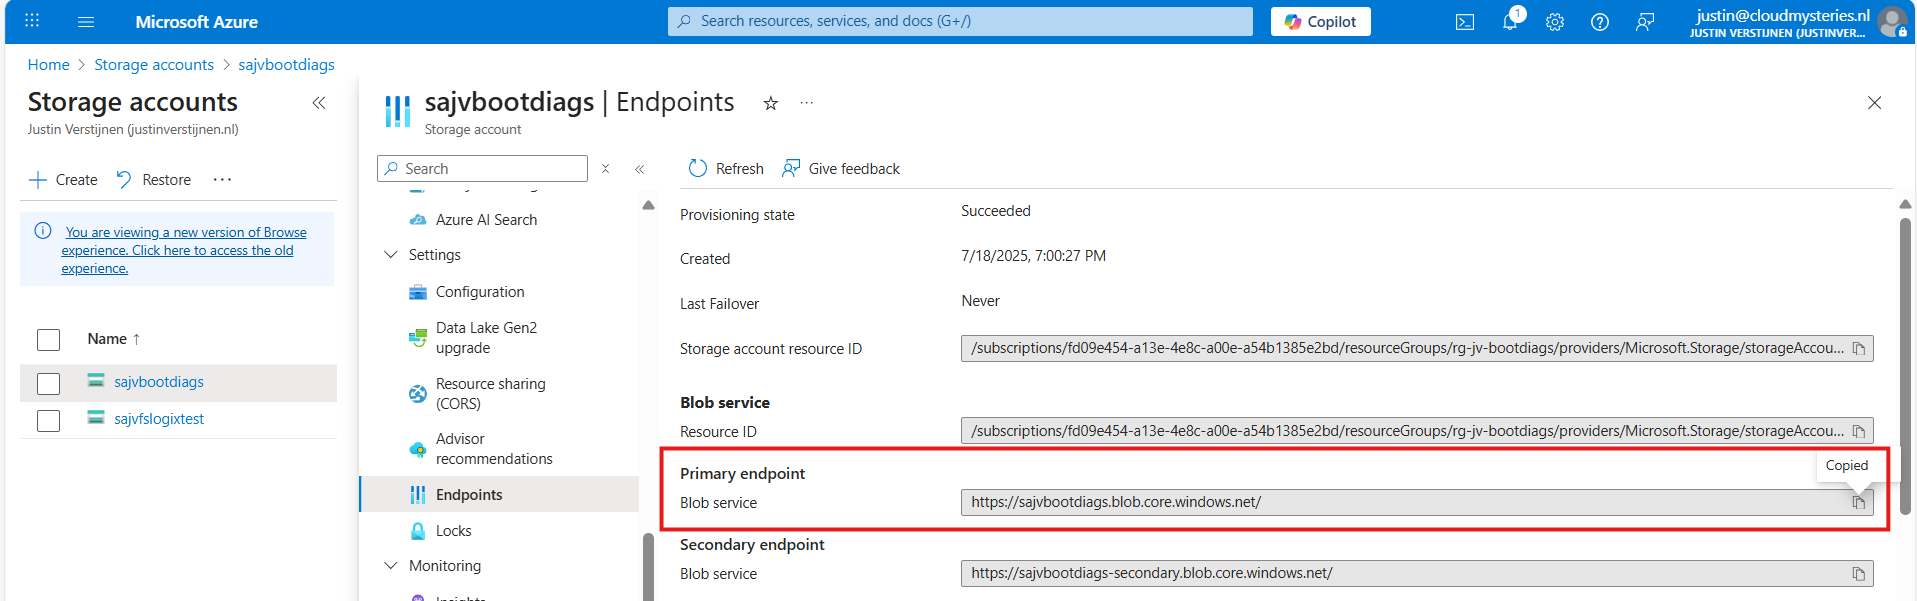
Paste that URL into the JSON definition at line 10, and if desired, change the displayname and description on line 7 and 8.
Leave the “Role definitions” field to the default setting and click on “Save”.
Step 4: Assigning the boot diagnostics policy definition
Now we have defined our policy, we can assign it to the scope where it must be active. After saving the policy you will get to the correct menu:
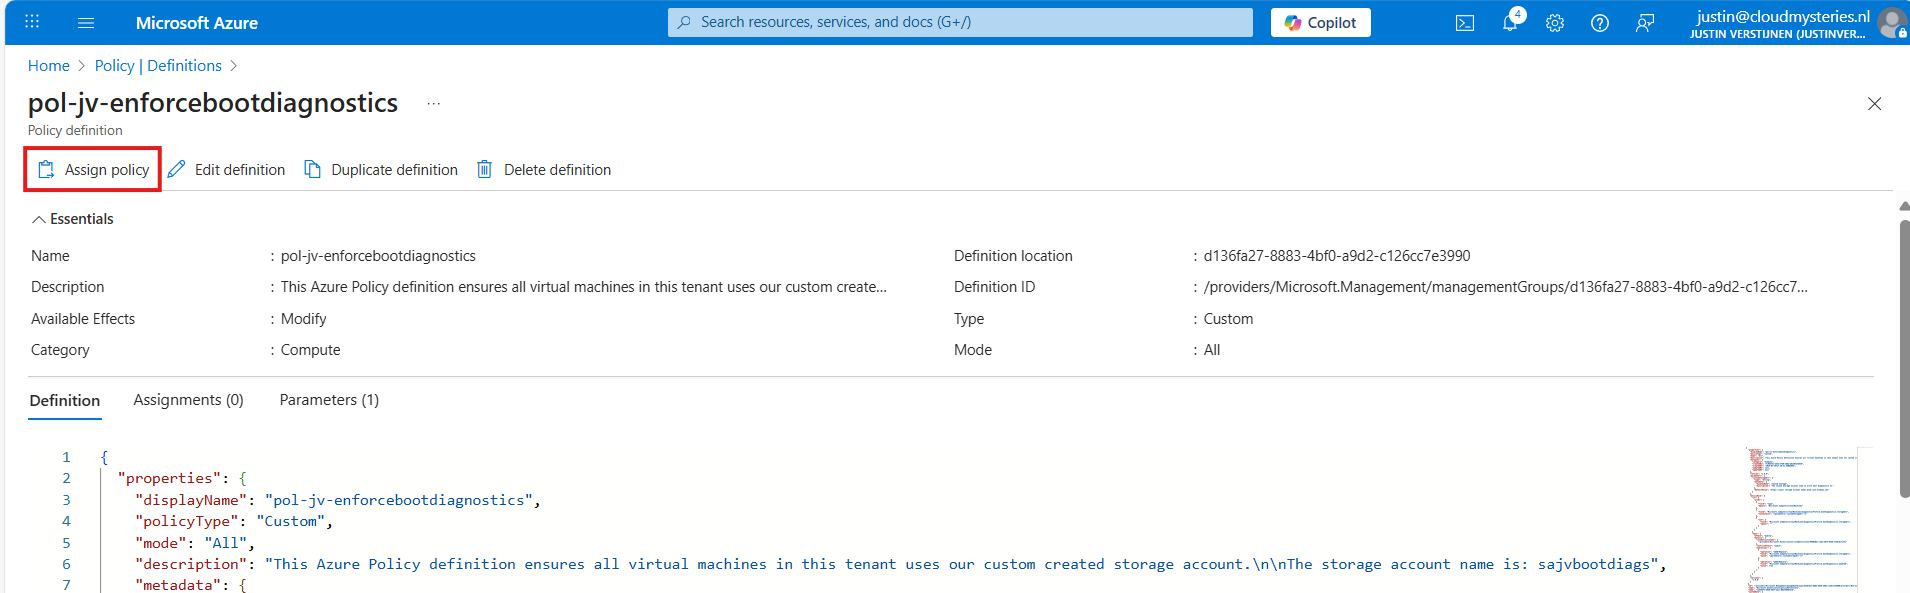
Otherwise, you can go to “Policy”, then to “Definitions” just like in step 3 and lookup your just created definition.
On the Assign policy page, we can once again define our scope. We can now set “Exclusions” to apply to all, but some according to your configurations. You can also select one or multiple specific resources to exclude from your Policy.
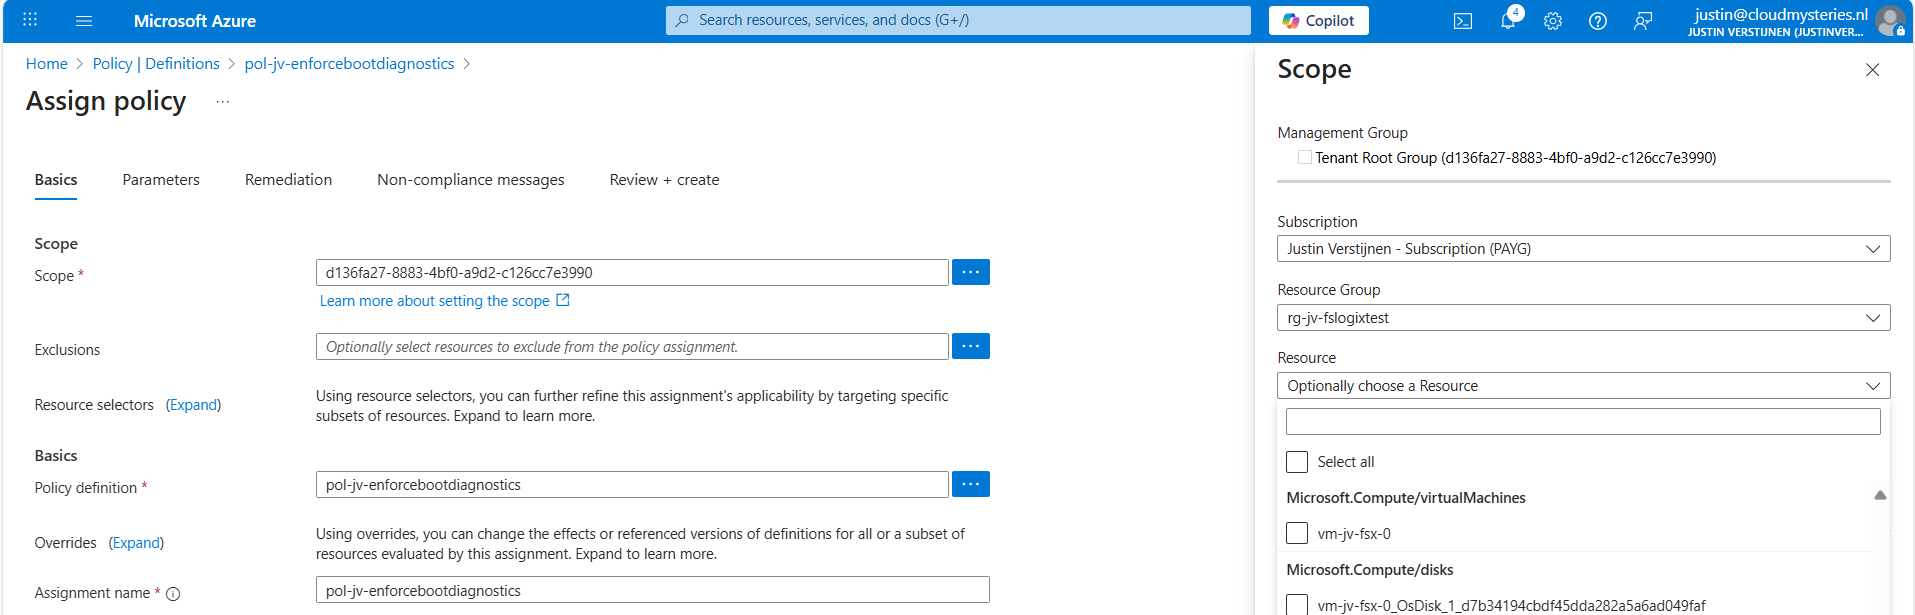
Leave the rest of the page as default and advance to the “Remediation” tab:
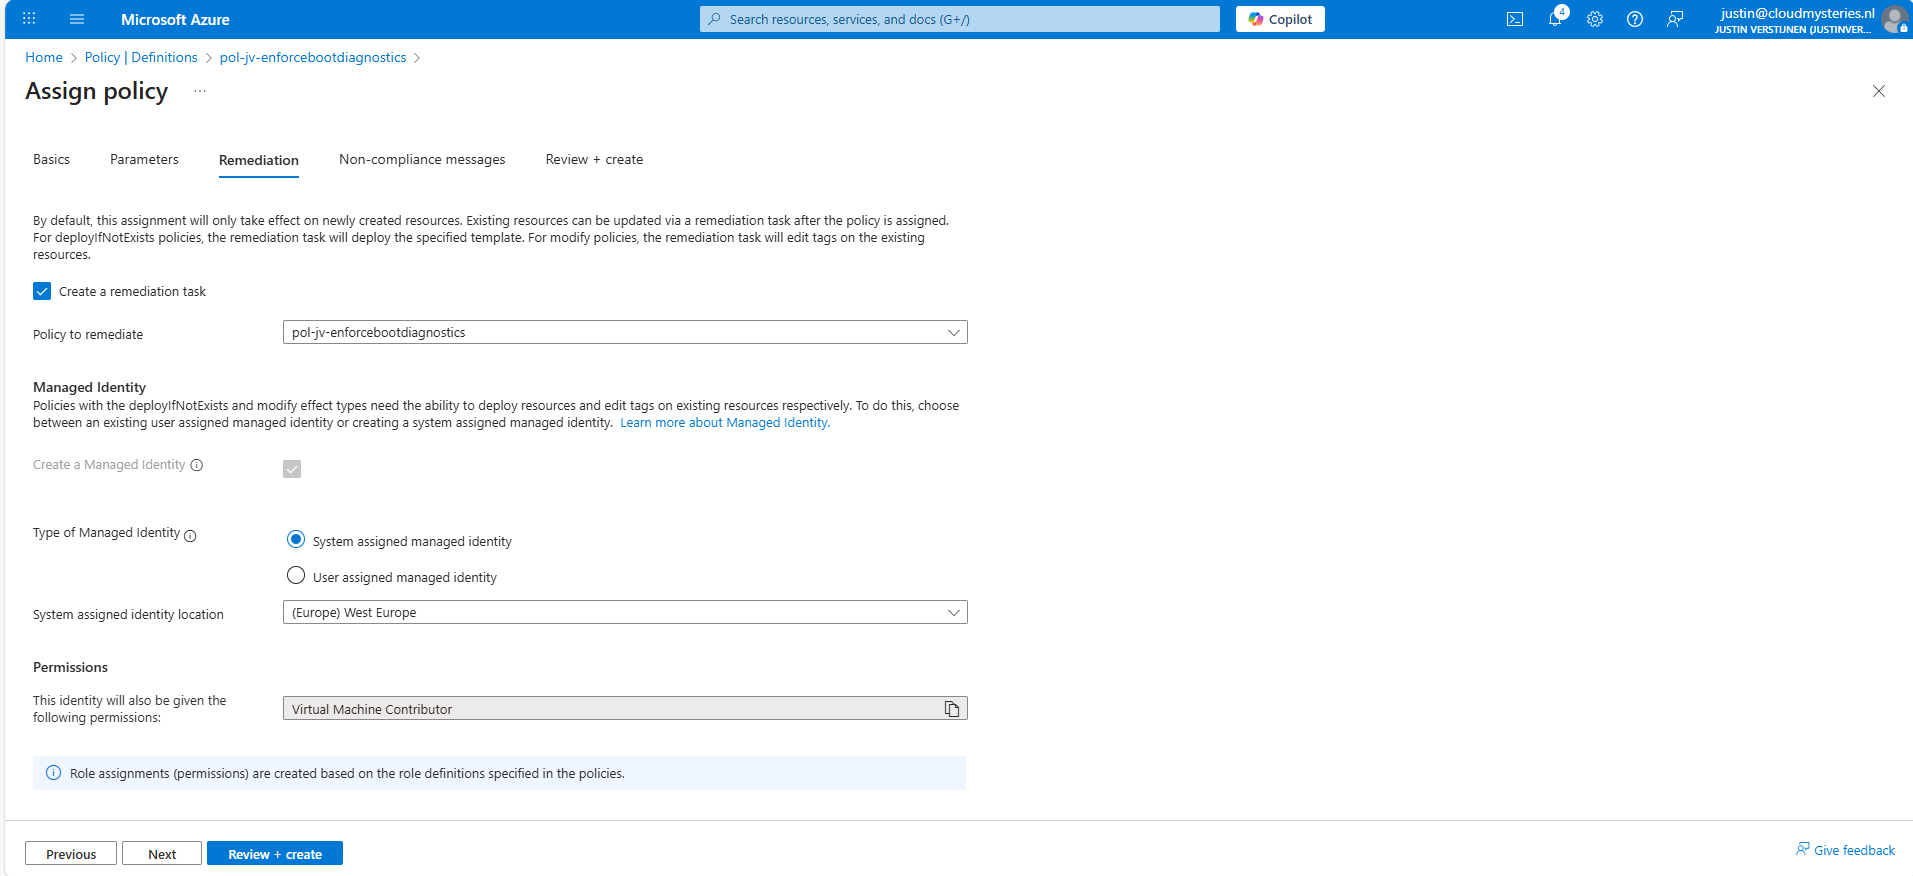
Enable “Create a remediation task” and select your policy if not already there.
Then we must create a system or user assigned managed identity because changing the boot diagnostics needs permissions. We can use the default system assiged here and that automatically selects the role with the least privileges.
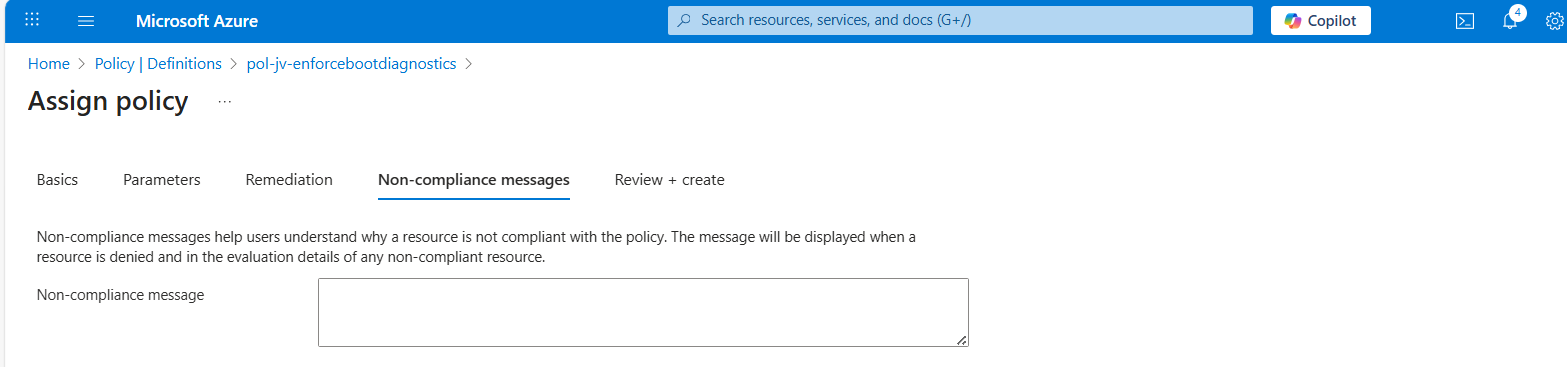
You could forbid the creation of non-compliant virtual machines and leave a custom message, like our documentation is here -> here. This then would show up when creating a virtual machine that is not configured to send boot diagnostics to our custom storage account.
Advance to the “Review + create” tab and finish the assignment of the policy.
Step 5: Test the configuration
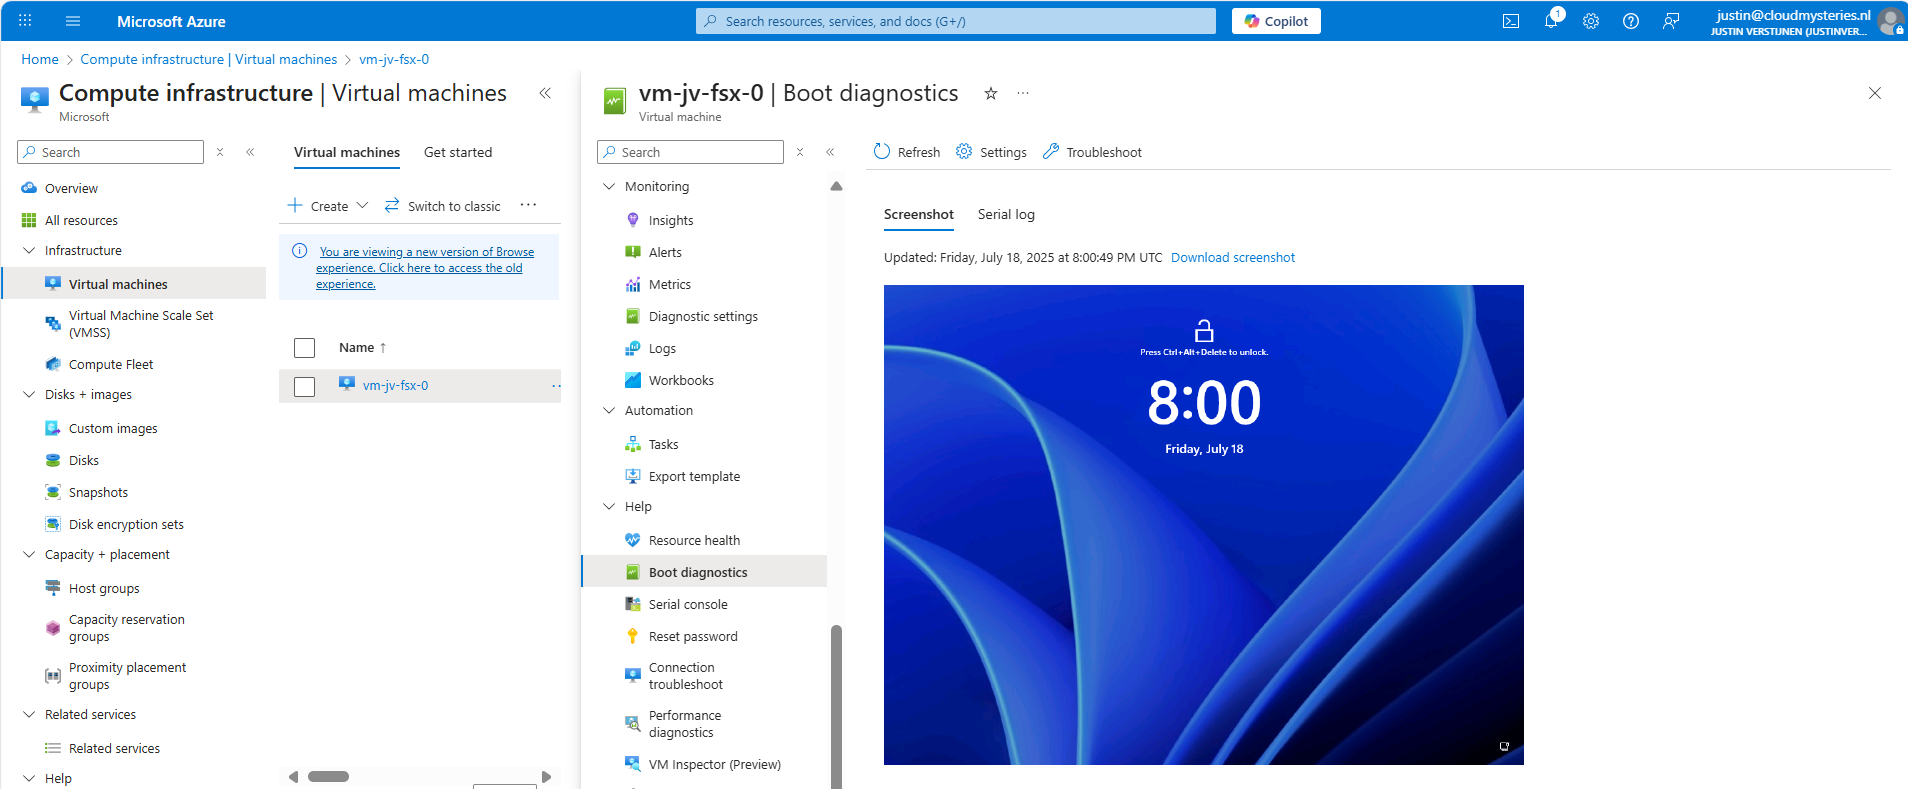
Now that we finished the configuration of our Azure Policy, we can now test the configuration. We have to wait for around 30 minutes when assigning the policy to become active. When the policy is active, the processing of Azure policies are much faster.
In my environment I have a test machine called vm-jv-fsx-0 with boot diagnostics disabled:
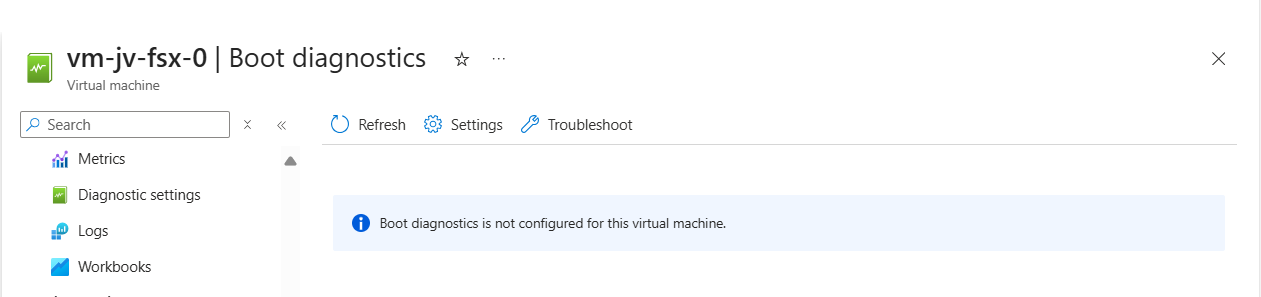
This is just after assigning the policy, so a little patience is needed. We can check the status of the policy evaluation at the policy assignment and then “Remediation”:
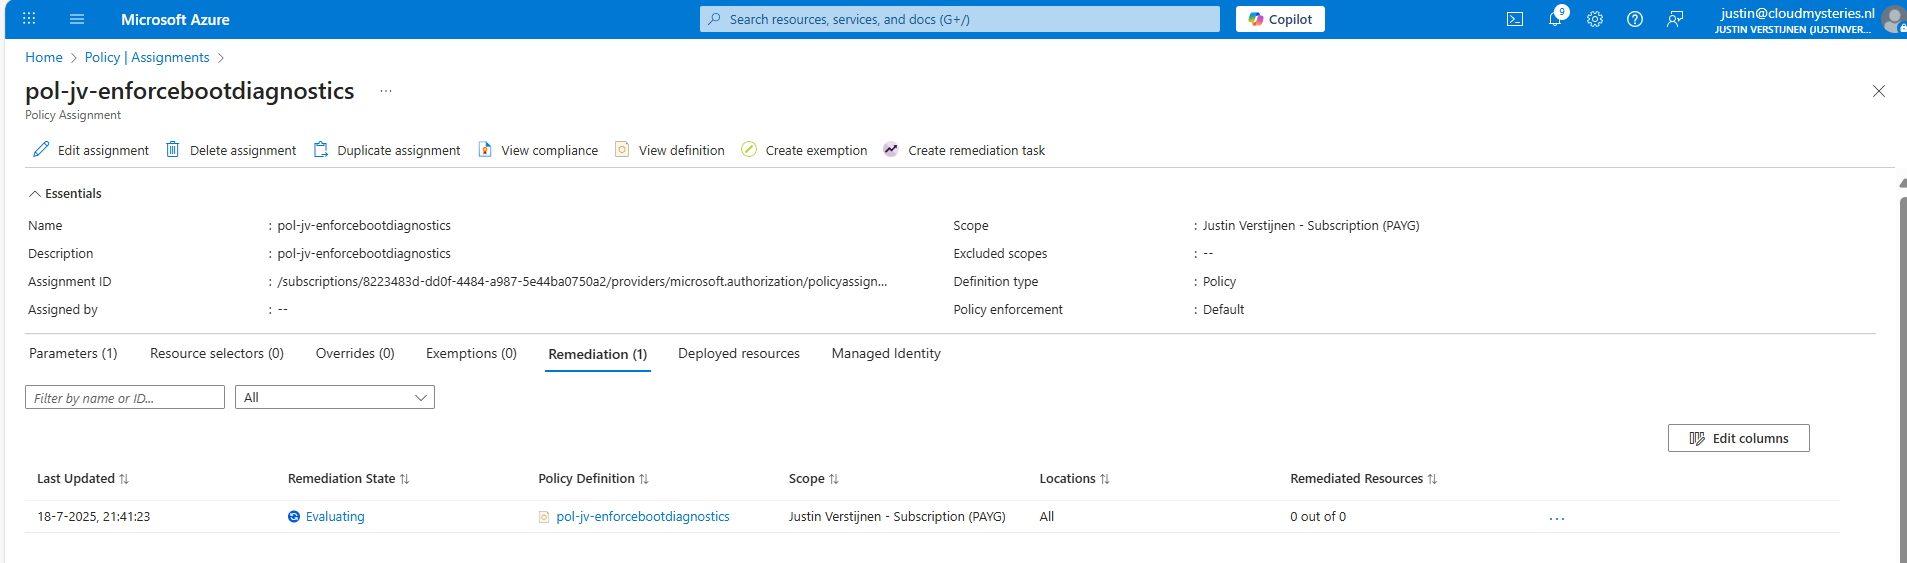
After 30 minutes or something, this will automatically be configured:
This took about 20 minutes in my case. Now we have access to the boot configuration:
Step 6: Monitor your policy compliance (optional)
You can monitor the compliance of the policy by going to “Policy” and search for your assignment:
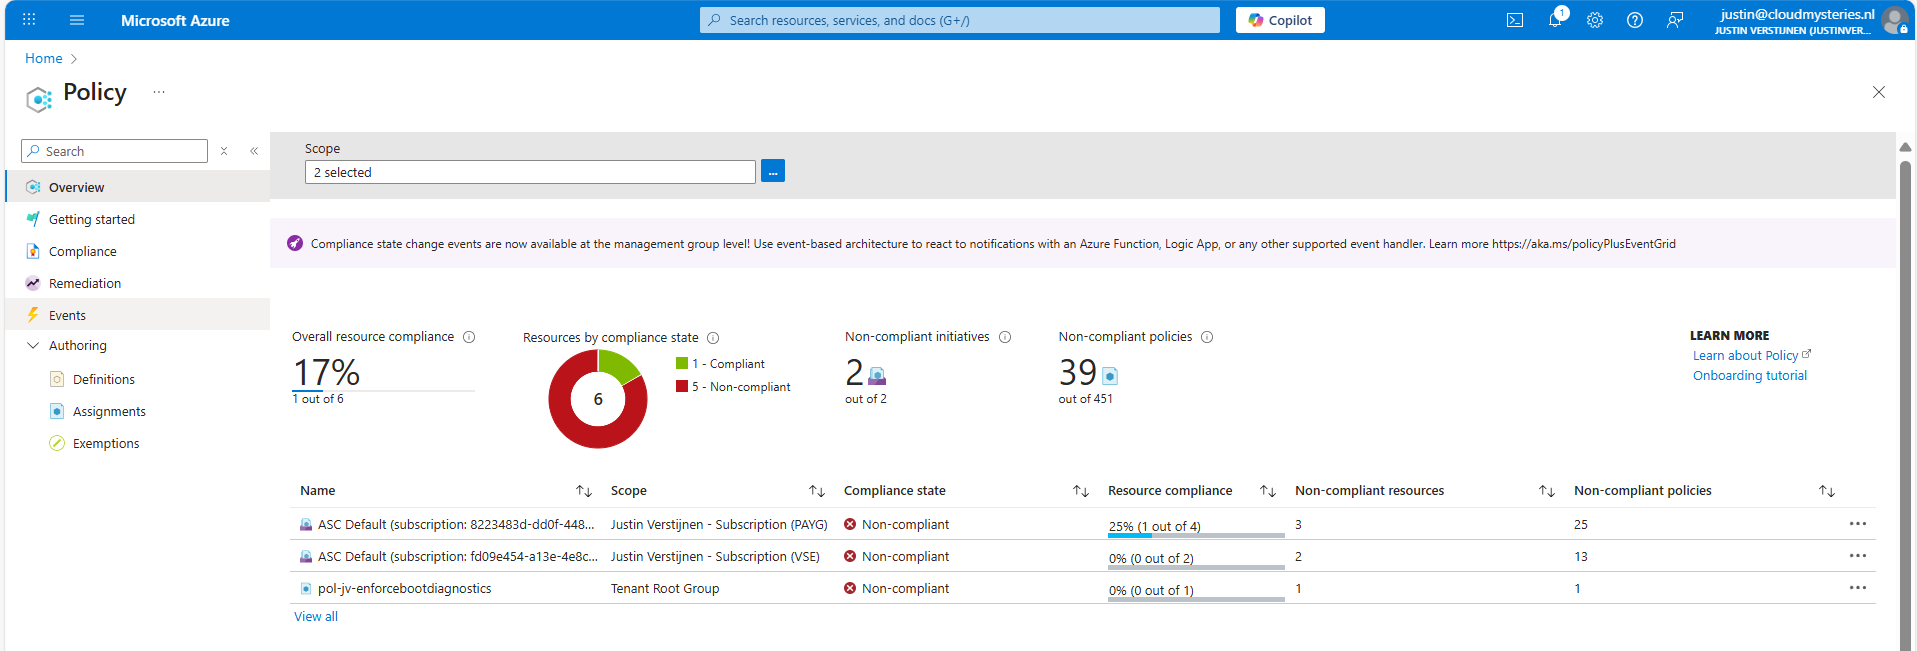
You will see the configuration of the definition, and you can click on “Deployed resources” to monitor the status and deployment.
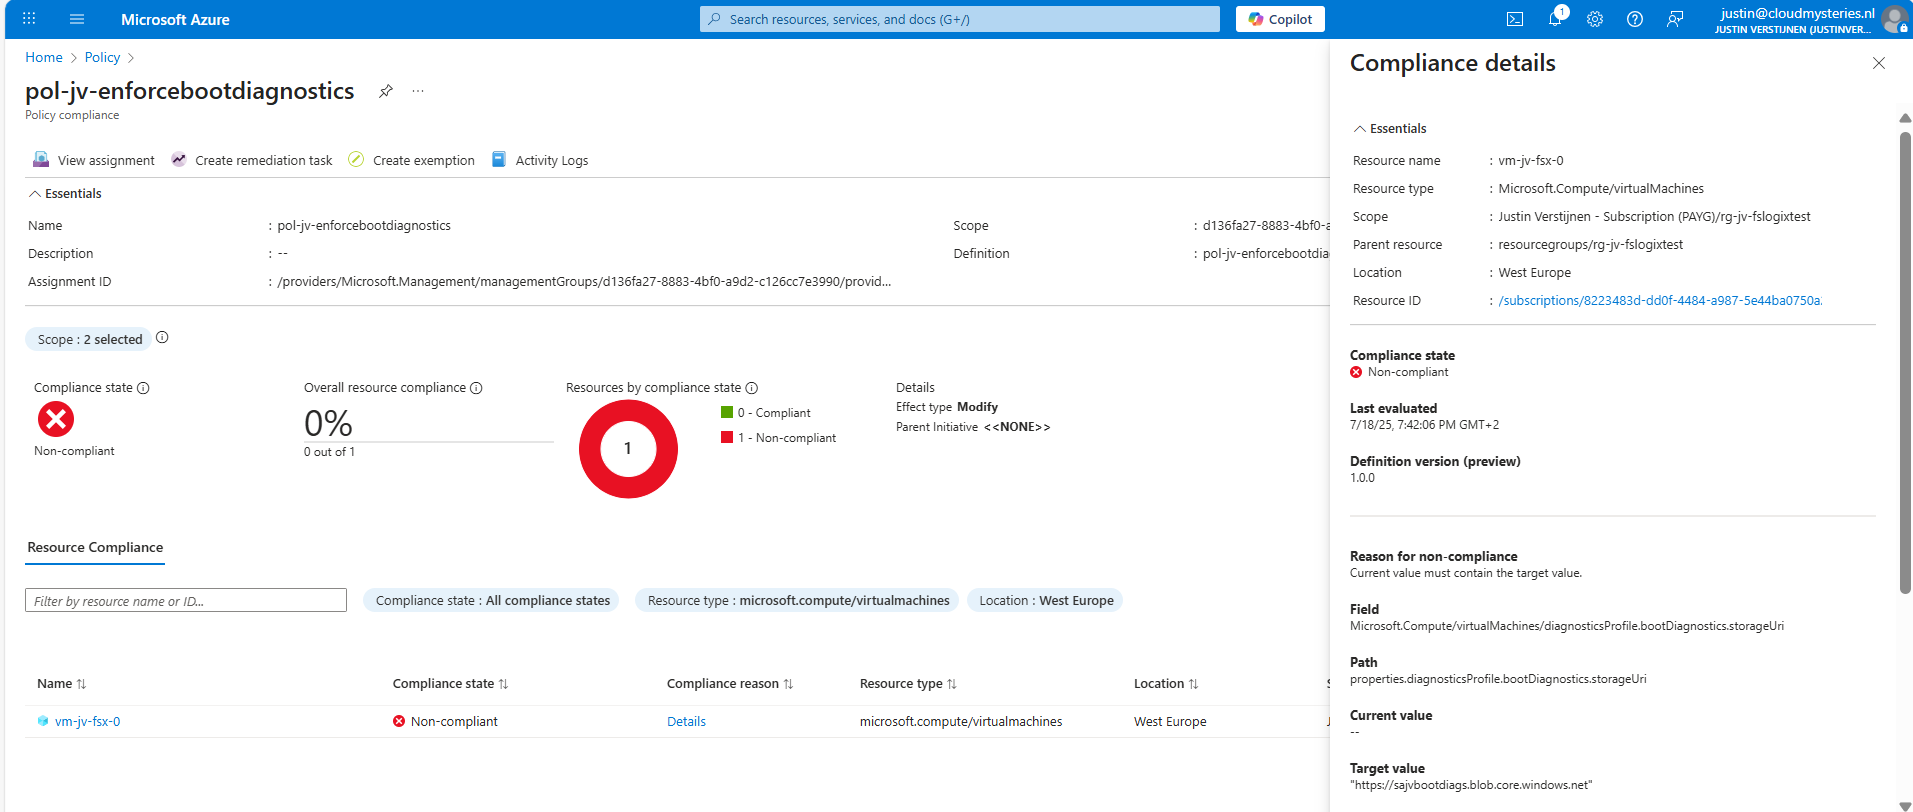
It will exactly show why the virtual machine is not compliant and what to do to make it compliant. If you have multiple resources, they will all show up.
Summary
Azure Policy is a great way to automate, monitor and ensure your Azure Resources remain compliant with your policies by remediating them automatically. This is only one possibility of using Policy but for many more options.
I hope I helped you with this guide and thank you for visiting my website.
Sources
These sources helped me by writing and research for this post;
- https://learn.microsoft.com/en-us/azure/governance/policy/overview
- https://learn.microsoft.com/en-us/azure/virtual-machines/boot-diagnostics
End of the page 🎉
You have reached the end of the page. You can navigate through other blog posts as well, share this post on X, LinkedIn and Reddit or return to the blog posts collection page. Thank you for visiting this post.
If you think something is wrong with this post or you want to know more, you can send me a message to one of my social profiles at: https://justinverstijnen.nl/about/
If you find this page and blog very useful and you want to leave a donation, you can use the button below to buy me a beer. Hosting and maintaining a website takes a lot of time and money. Thank you in advance and cheers :)
The terms and conditions apply to this post.
Wordpress on Azure
Wordpress. Its maybe the best and easiest way to maintain a website. This can be run on any server. In Azure, we also have great and serverless possibilities to run Wordpress. In this guide I will show you how to do this, how to enhance the experience and what steps are needed to build the solution. I will also tell more about the theoretical stuff to get a better understanding of what we are doing.
Requirements
- An Azure subscription
- A public domain name to run the website on (not required, but really nice)
- Some basic knowledge about Azure
- Some basic knowledge about IP addresses, DNS and websites
- Around 45 minutes of your time
What is Wordpress?
For the people who may not know what Wordpress is; Wordpress is a tool to create and manage websites, without needing to have knowledge of code. It is a so-called content management system (CMS) and has thousands of themes and plugins to play with. This website you see now is also running on Wordpress.
Different Azure Wordpress offerings
When we look at the Azure Marketplace, we have a lot of different Wordpress options available:
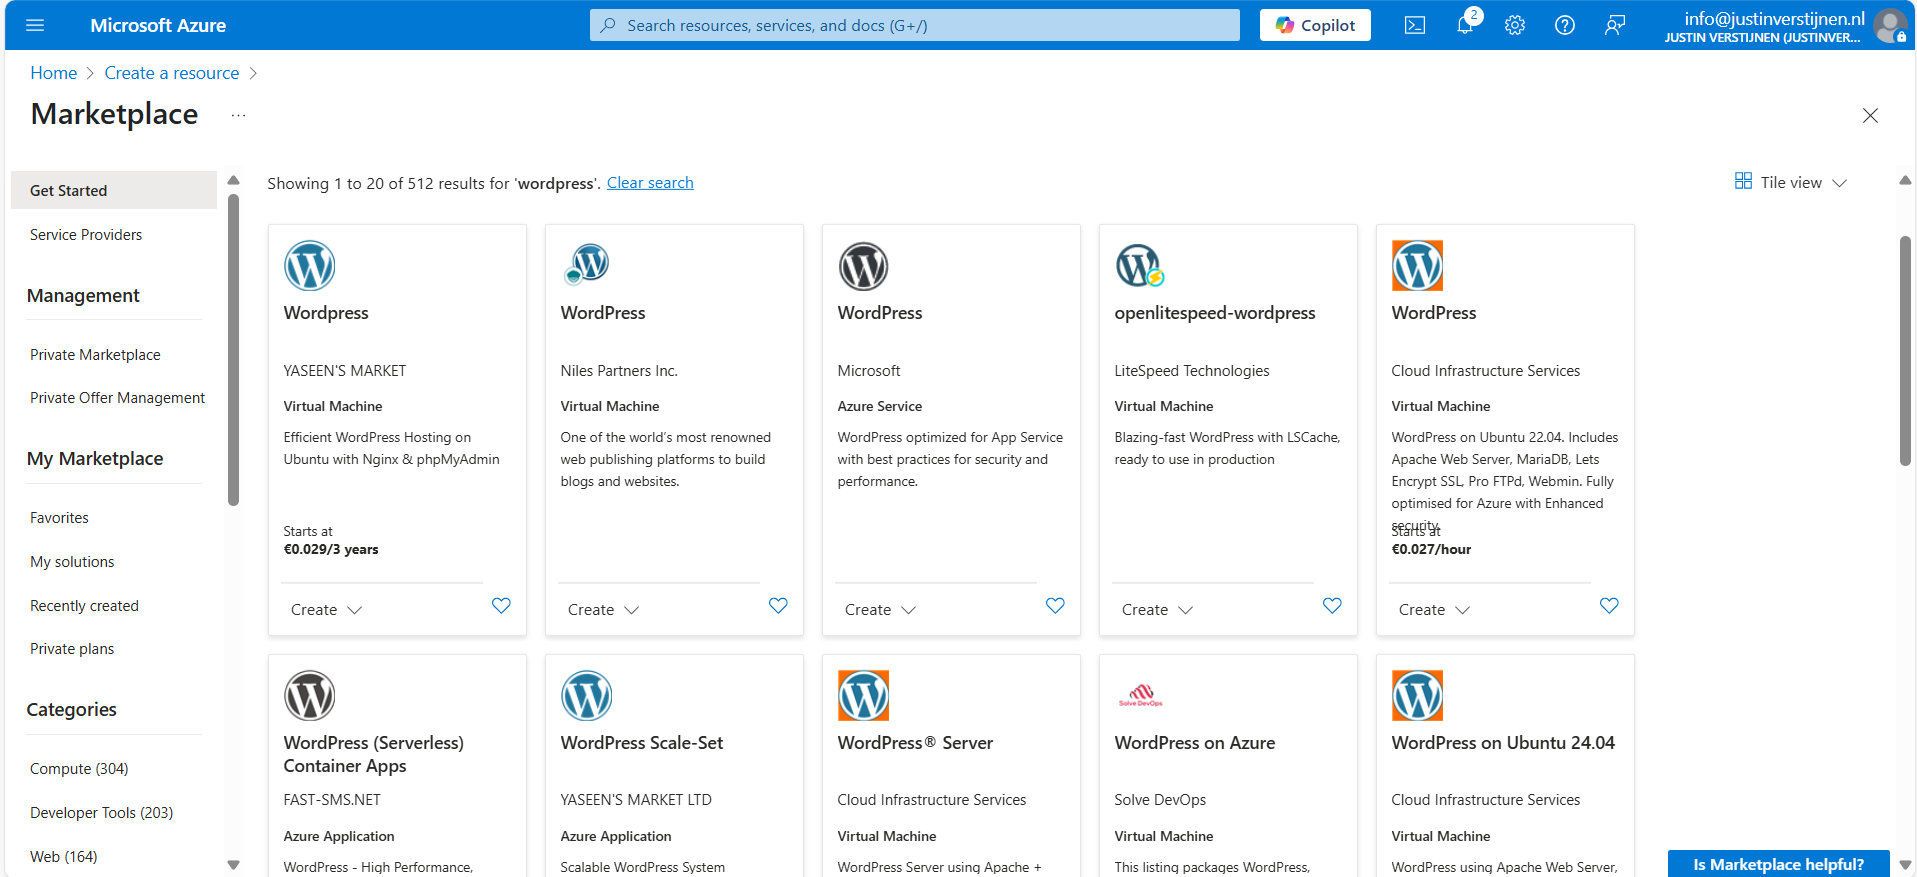
Now I want to highlight some different options, where some of these offerings will overlap or have the same features and architecture which is bold in the Azure Marketplace:
- Virtual Machine: This means Wordpress runs on a virtual machine which has to be maintained, updated and secured.
- Azure Service: This is the official offering of Microsoft, completely serverless and relying the most on Azure solutions
- Azure Application: This is an option to run Wordpress on containers or scale sets.
In this guide, we will go for the official Microsoft option, as this has the most support and we are Azure-minded.
Pricing of Wordpress on Azure (Linux)
We have the following plans and prices when running on Linux:
| Plan | Price per month | Specifications | Options and use |
| Free | 0$ | App: F1, 60 CPU minutes a day Database: B1ms | Not for production use, only for hobby projects. No custom domain and SSL support |
| Basic | ~ 25$ (consumption based) | App: B1 (1c 1,75RAM) Database: B1s (1c 1RAM) No autoscaling and CDN | Simple websites with same performance as free tier, but with custom domain and SSL support |
| Standard | ~ 85$ per instance (consumption based) | App: P1v2 (1c 3,5RAM) Database: B2s (2c 4RAM) | Simple websites who also need multiple instances for testing purposes. Also double the performance of the Basic plan. No autoscaling included. |
| Premium | ~ 125$ per instance (consumption based) | App: P1v3 (2c 8RAM) Database: D2ds_V4 (2c 16RAM) | Production websites with high traffic and option for autoscaling |
For the Standard and Premium offerings there is also an option to reserve your instance for a year for a 40% discount.
Architecture of the Wordpress solution
The Wordpress solution of Microsoft looks like this:
We start with Azure Front Door as load balancer and CDN, then we have our App service instances (1 to 3), they communicate with the private databases and thats it. The app service instances has their own delegated subnet (appsubnet) and the database instances have their own delegated subnet (dbsubnet).
This architecture is very flexible, scalable and focusses on high availability and security. It is indeed more complex than one virtual machine, but it’s better too.
Backups of Wordpress
Backups of the whole Wordpress solution is included with the monthly price. Every hour Azure will take a backup from the App Service instance and storage account, starting from the time of creation:
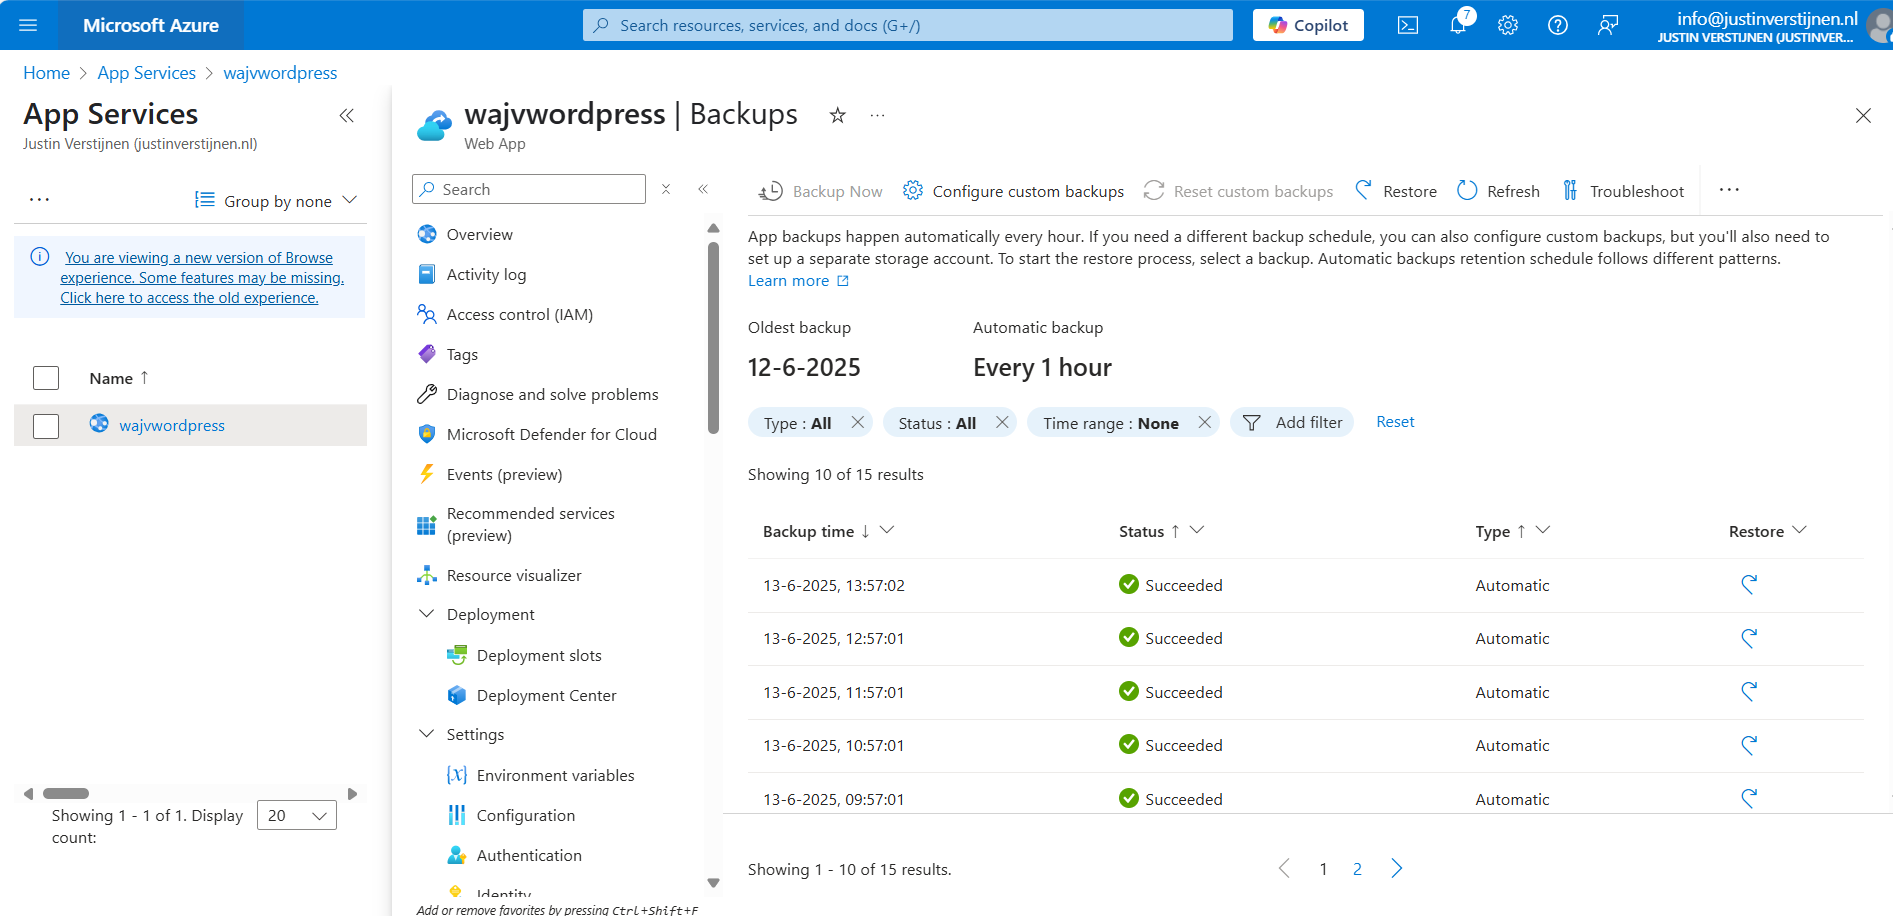
I think this is really cool and a great pro that this will not take an additional 10 dollars per month.
Step 1: Preparing Azure
We have to prepare our Azure environment for Wordpress. We begin by creating a resource group to throw in all the dependent resources of this Wordpress solution.
Login to Microsoft Azure (https://portal.azure.com) and create a new resource group:
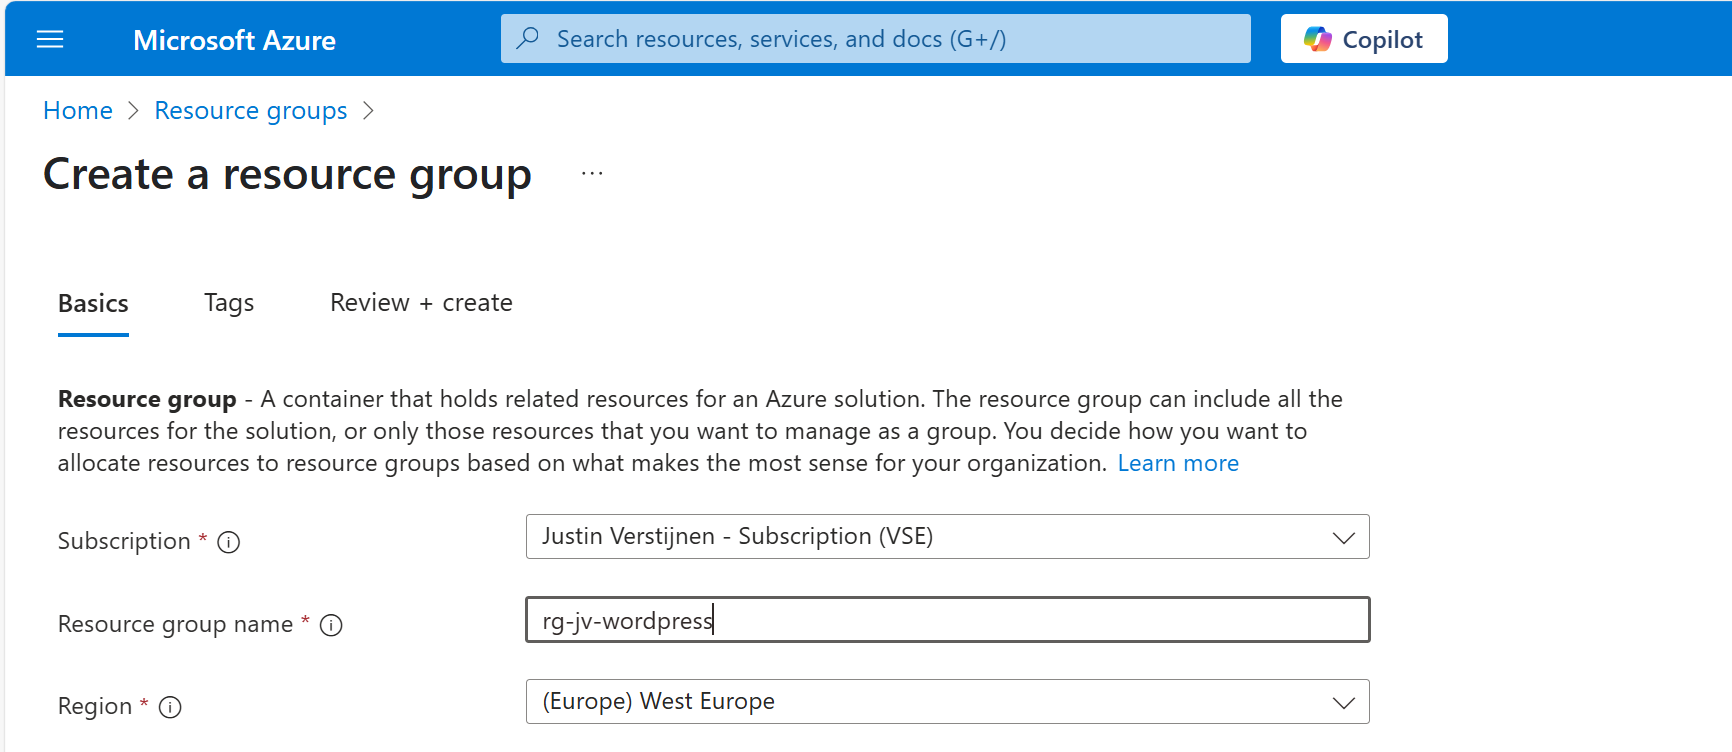
Finish the wizard. Now the resource group is created and we can advance to deploy the Wordpress solution.
Step 2: Deploy the Wordpress solution
We can go to the Azure Marketplace now to search for the Wordpress solution published by Microsoft:
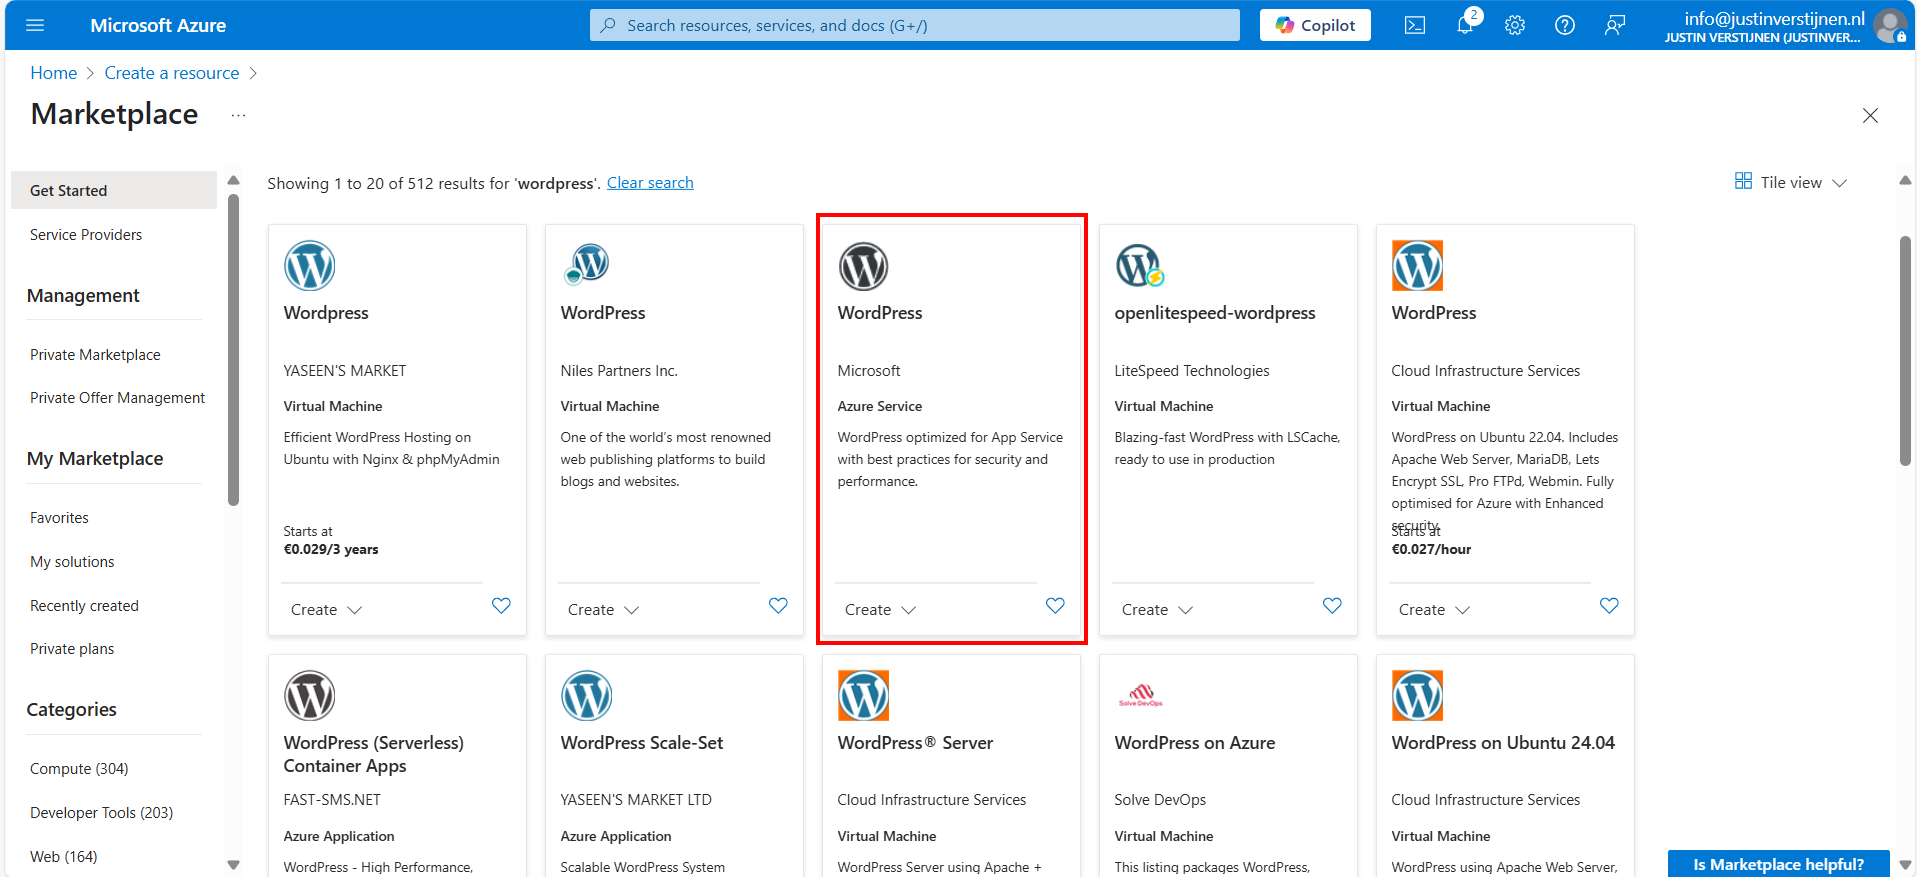
In this guide, we will use the Microsoft offering. You are free to choose other options, but some steps will not align with this guide.
Now after selecting the option, we have 4 different plans which we can choose. This mostly depends on how big you want your environment to be:
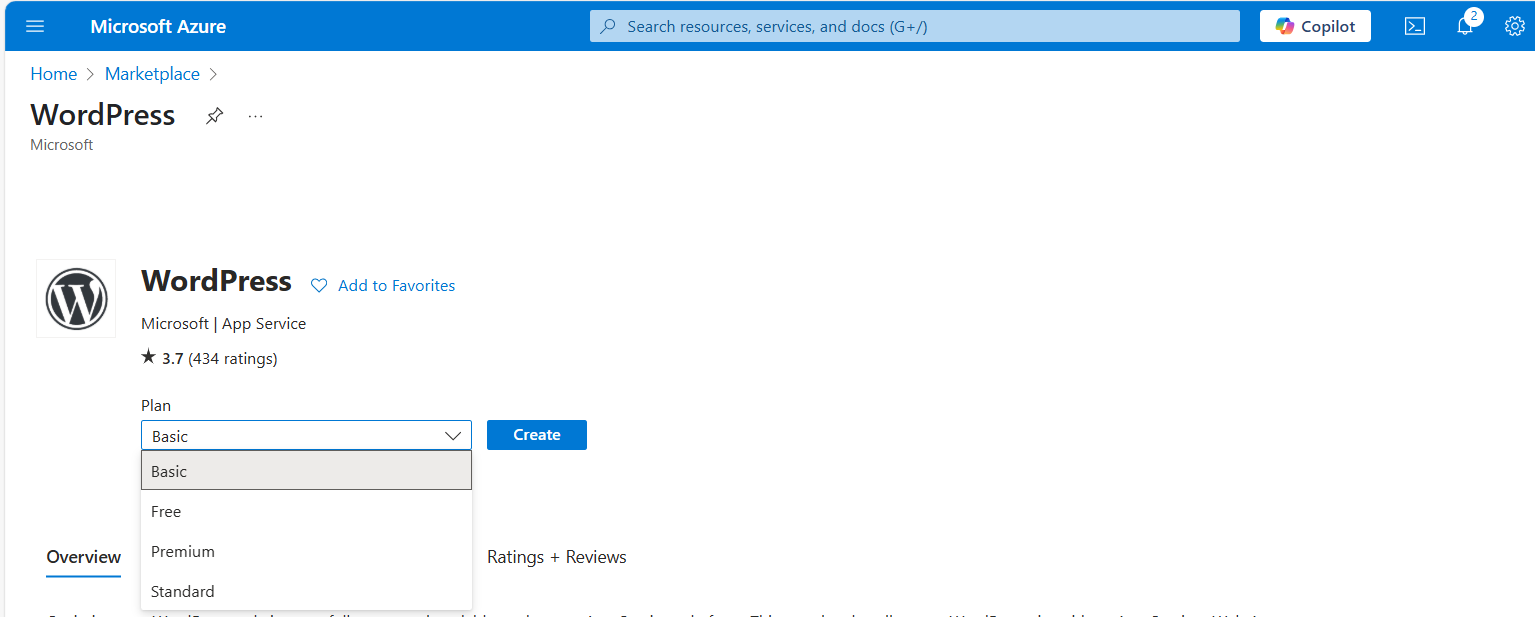
For this guide, we will choose the Basic as we want to actually host on a custom domain name. Select the free plan and continue.
Resource group and App Service plan
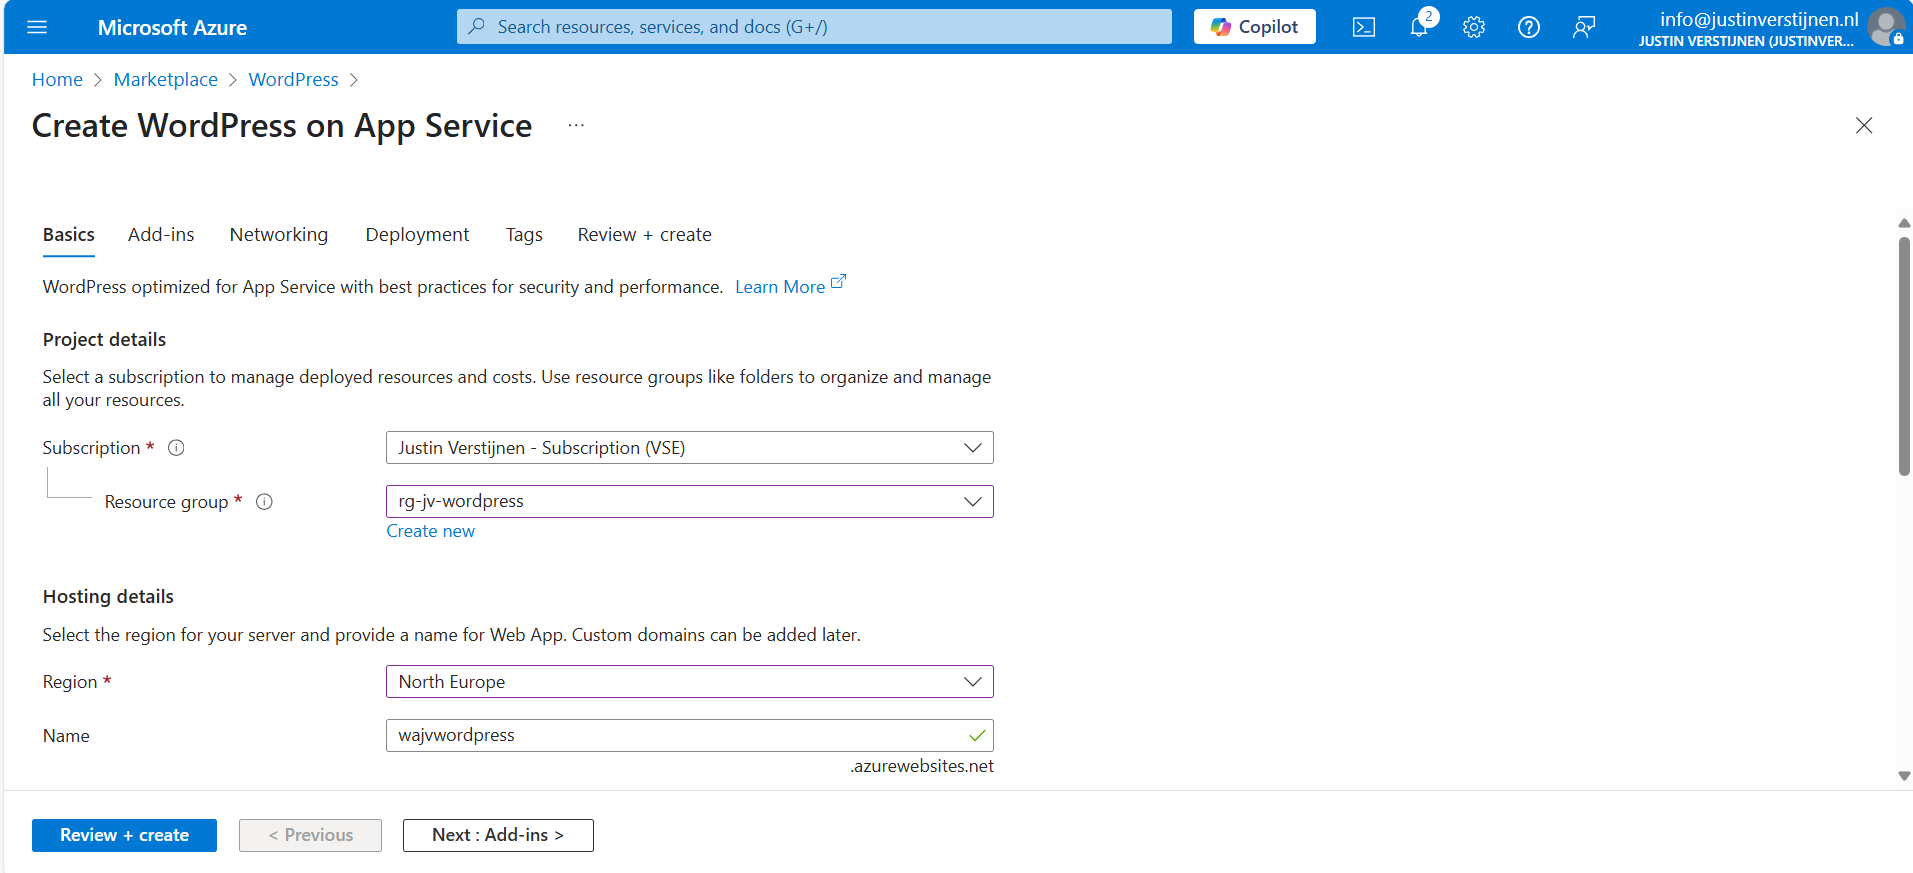
Choose your resource group and choose a resource name for the Web app. This is a URL so may contain only small letters and numbers and hyphens (not ending on hyphen).
Scroll down and choose the “Basic” hosting plan. This is for the Azure App Service that is being created under the hood.
Wordpress setup
Then fill in the Wordpress Setup menu, this is the admin account for Wordpress that will be created. Fill in your email address, username and use a good password. You can also generate one with my password generator tool: https://password.jvapp.nl/
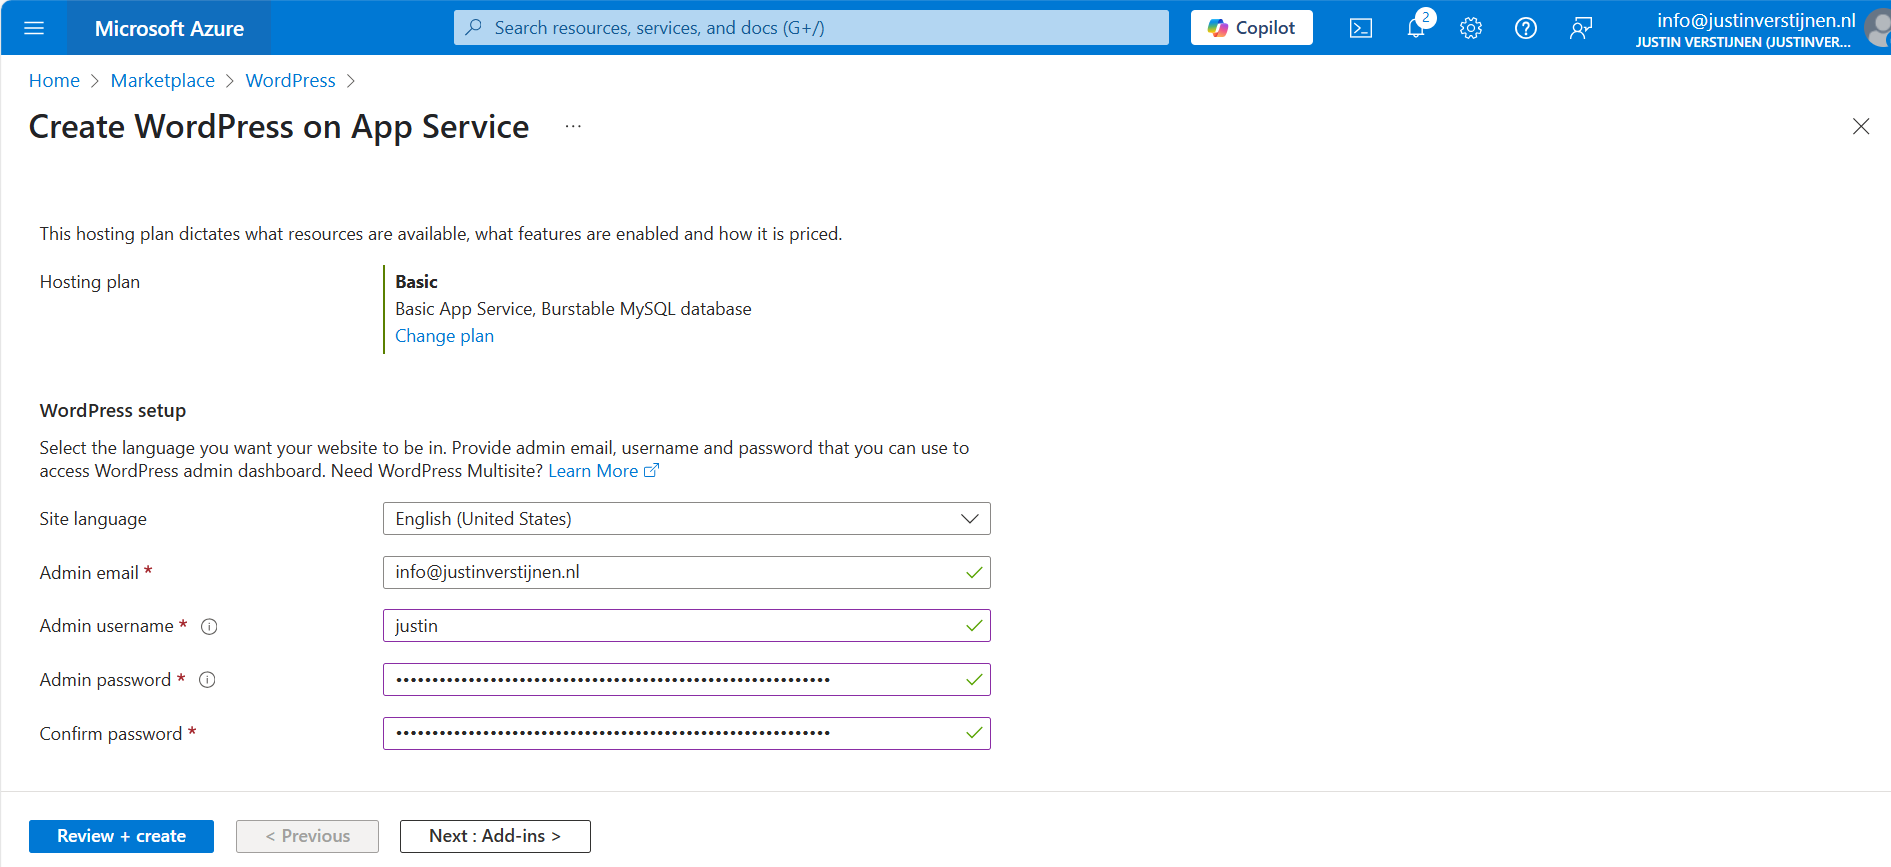
Click on “Next: Add ins >”
Add-ins
On the Add-ins page, I have all options as default but enabled the Azure Blob Storage. This is where the media files are stored like images, documents and stuff.

This automatically creates an storage account. Then go to the “Networking” tab.
Networking
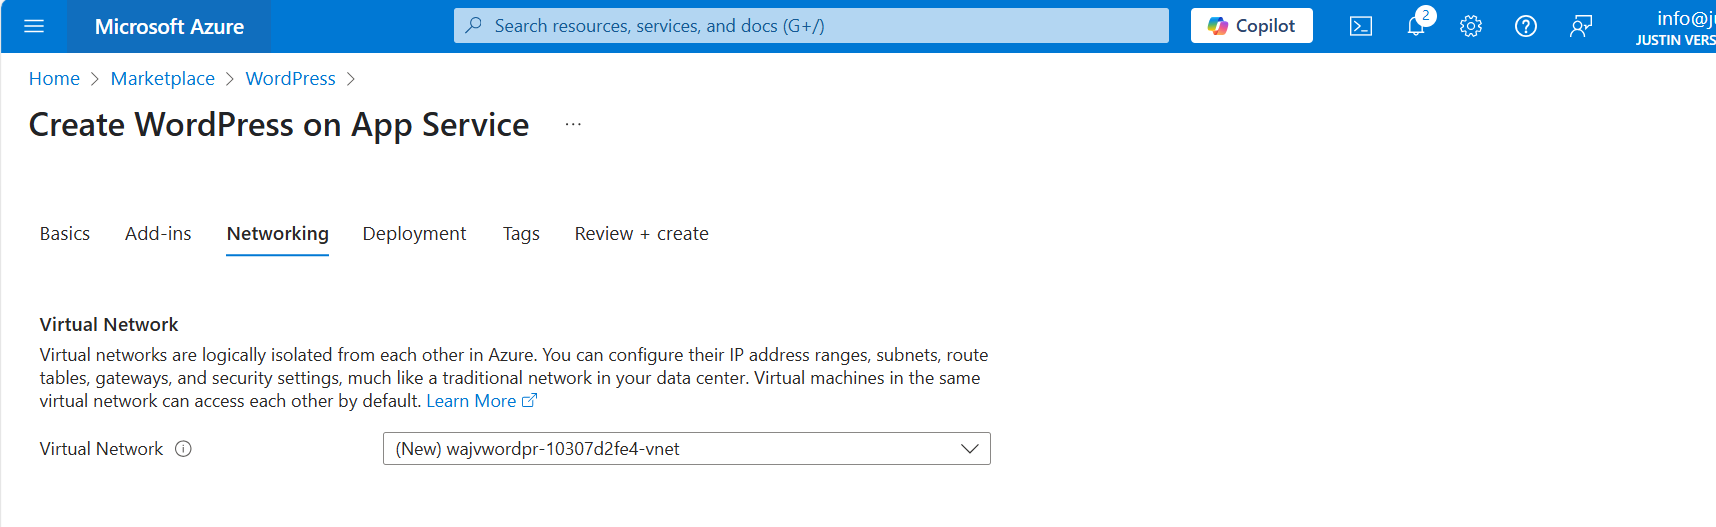
On the networking tab, we have to select a virtual network. This is because the database is hosted on a private, non public accessible network. When using a existing Azure network, select your own network. In my case, I stick to the automatic generated network.
When using your own network, you have to create 2 subnets:
- appsubnet
- dbsubnet
Click on “Next”. And finish the wizard. For the basic plan, there are no additional options available.
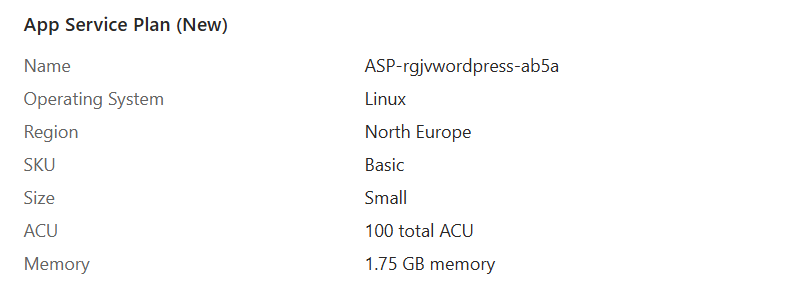
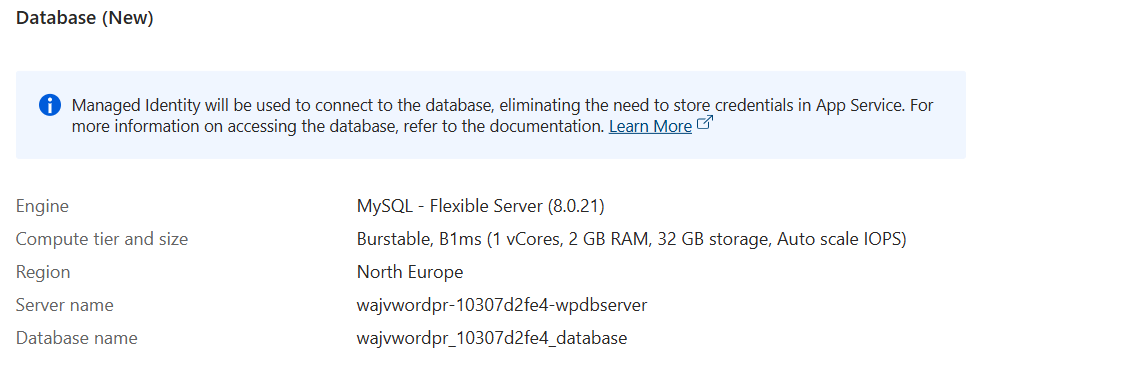
You will see at the review page that both the App service instance and the Database are being created.
Deployment in progress
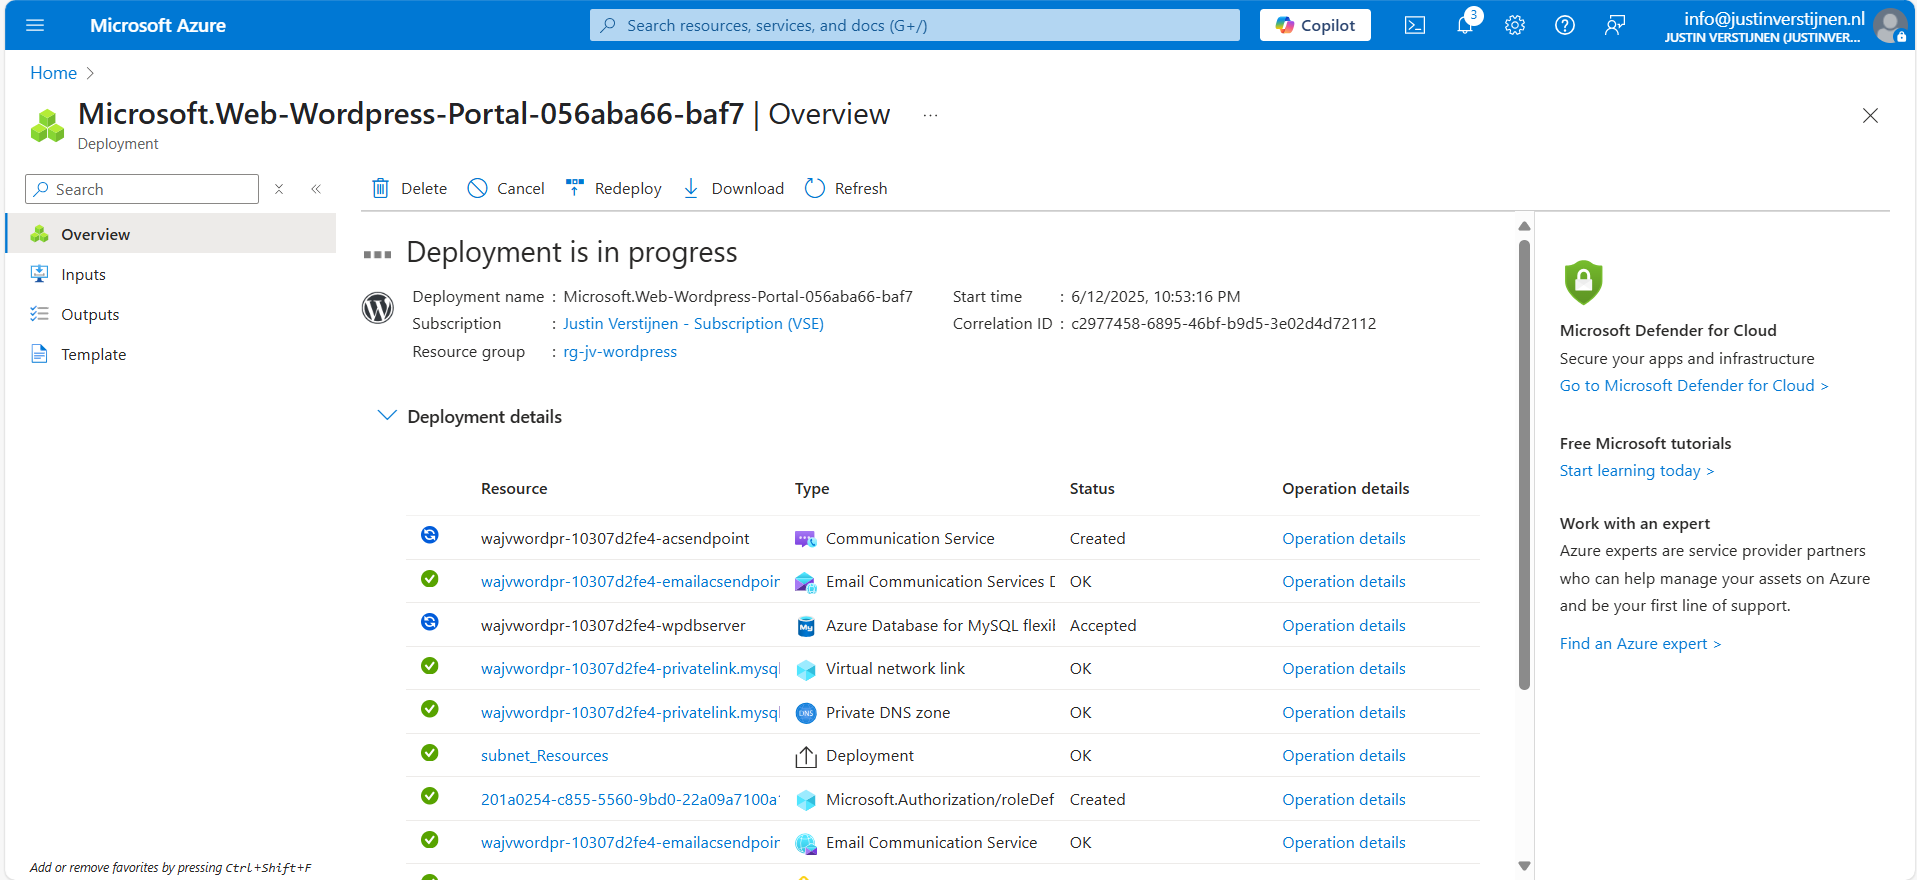
Now the deployment is in progress and you can see that a whole lot of resources are being created to make the Wordpress solution work. The nice thing about the Marketplace offerings is that they are pre-configured, and we only have to set some variables and settings like we did in Step 2.
The deployment took around 15 minutes in my case.
Step 3: Logging into Wordpress and configure the foundation
Now we are not going very deep into Wordpress itself, as this guide will only describe the process of building Wordpress on Azure. I have some post-installation recommendations for you to do which we will follow now.
Now that the solution is deployed, we can go to the App Service in Azure by typing it in the bar:

There you can find the freshly created App Service. Let’s open it.

Here you can find the Web App instance the wizard created and the URL of Azure with it. My URL is:
- wajvwordpress.azurewebsites.net
We will configure our custom domain in step 4.
Wordpress Website
We can navigate to this URL to get the template website Wordpress created for us:
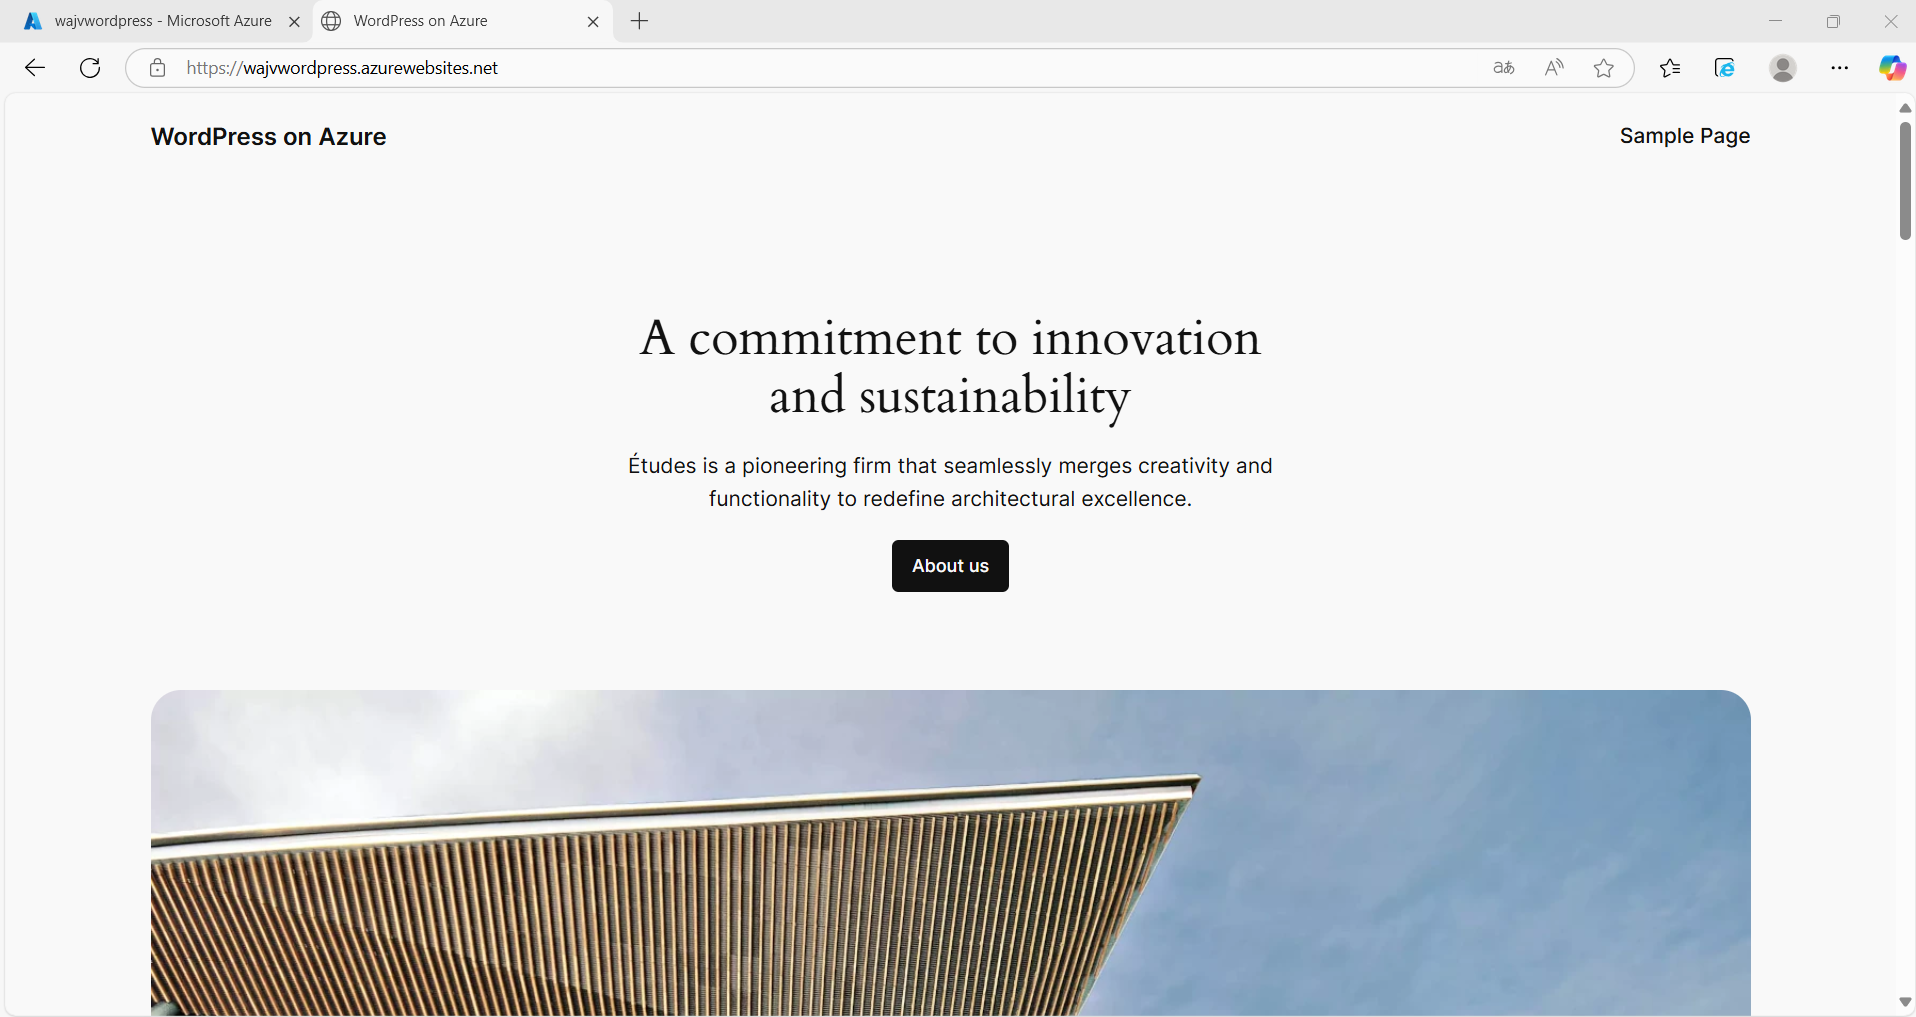
Wordpress Admin
We want to configure our website. This can be done by adding “/wp-admin” to our URL:
- wajvwordpress.azurewebsites.net/wp-admin
Now we will get the Administrator login of Wordpress:

Now we can login to Wordpress with the credentials of Step 1: Wordpress setup
After logging in, we are presented the Dashboard of Wordpress:
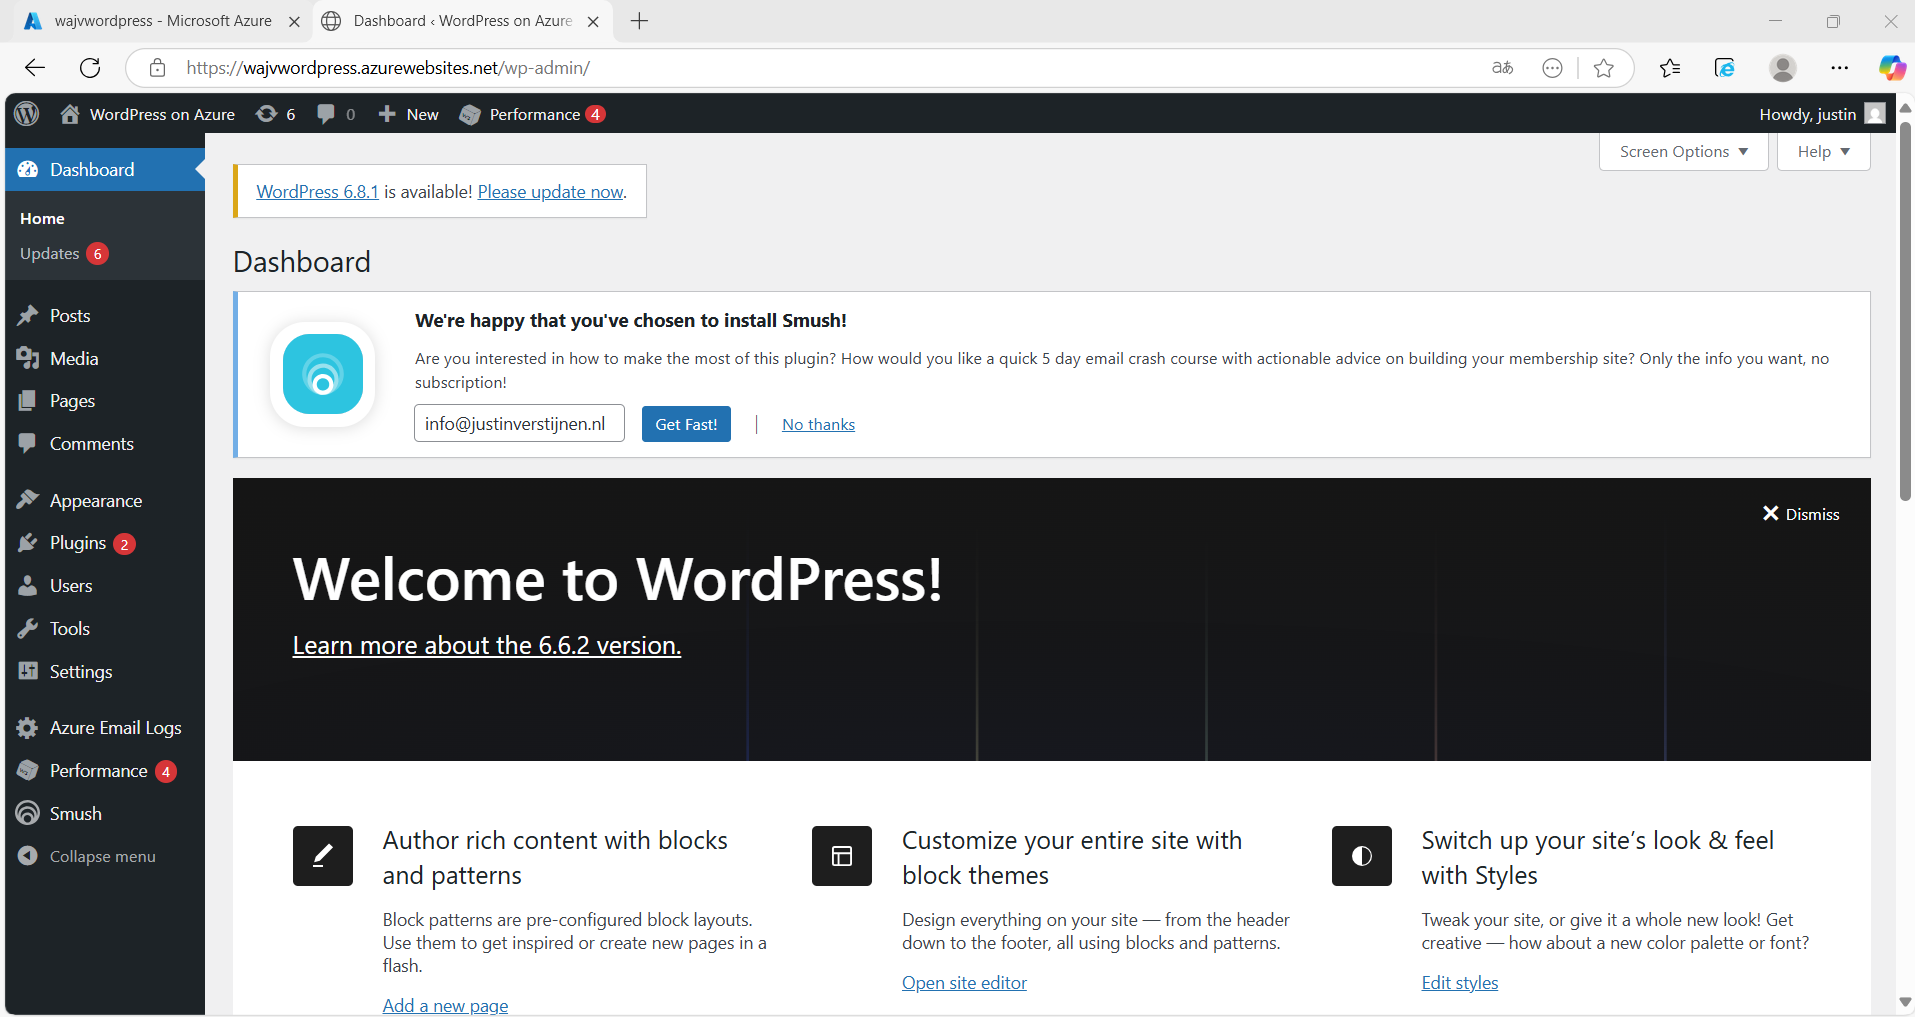
Updating to the latest version
As with every piece of software, my advice is to update directly to the latest version available. Click on the update icon in the left top corner:
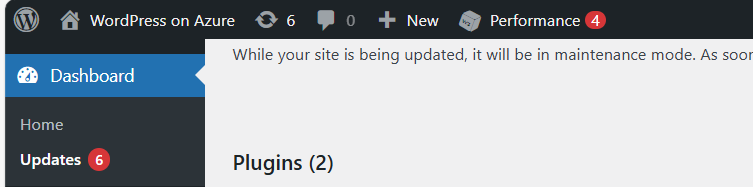
Now in my environment, there are 3 types of updates available:
- Wordpress itself
- Plugins
- Themes
Update everything by simply selecting all and clicking on the “Update” buttons:

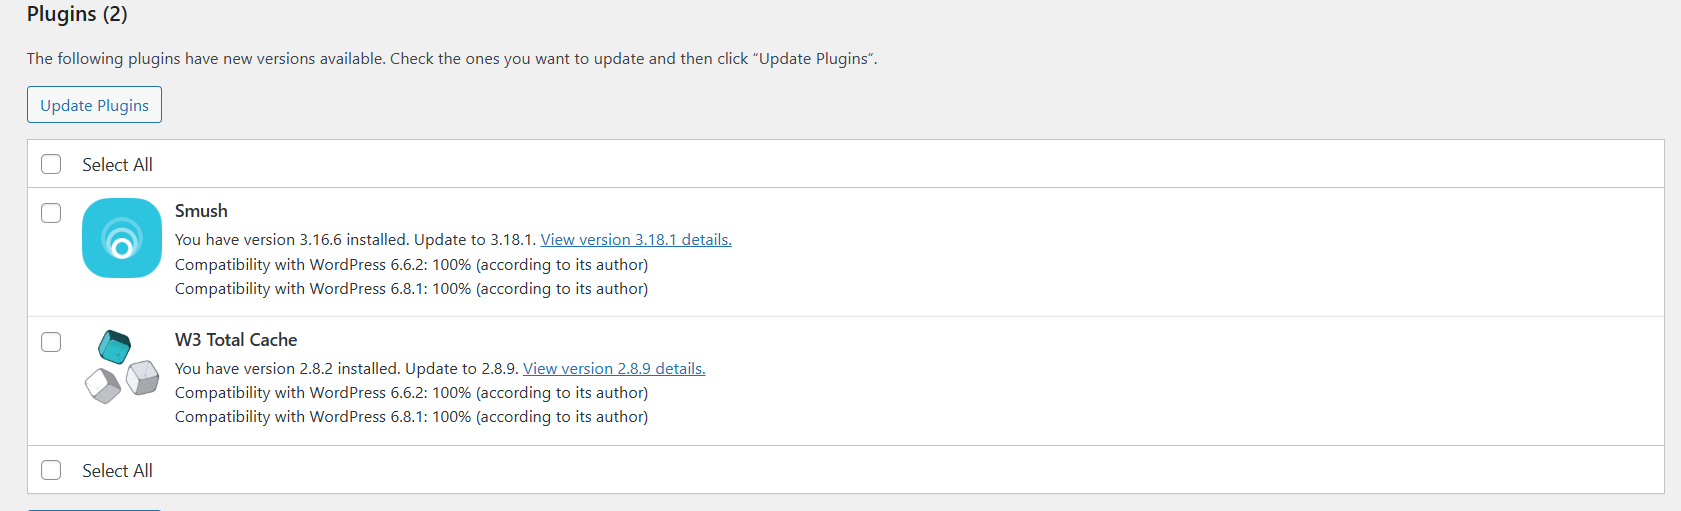
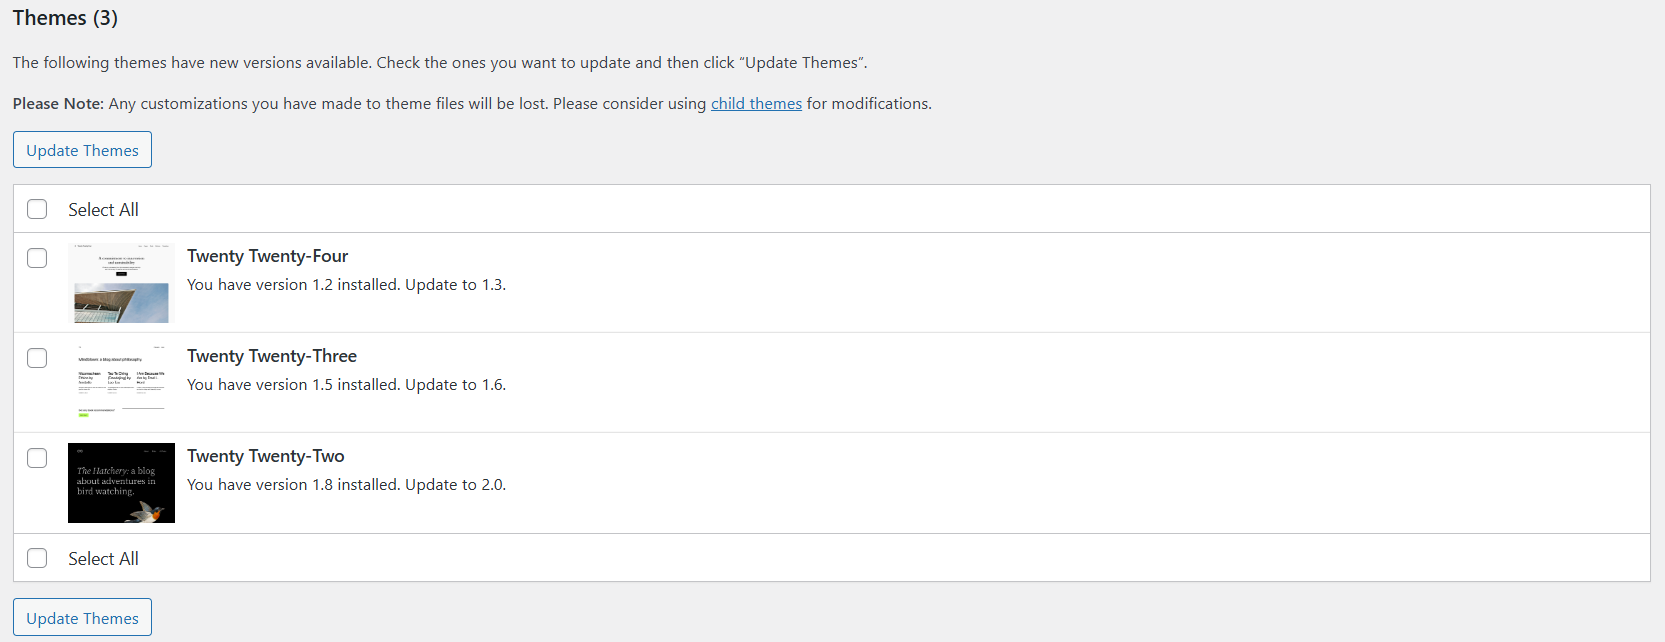
After every update, you will have to navigate back to the updates window. This process is done within 10 minutes, the environment will be completely up-to-date and ready to build your website.
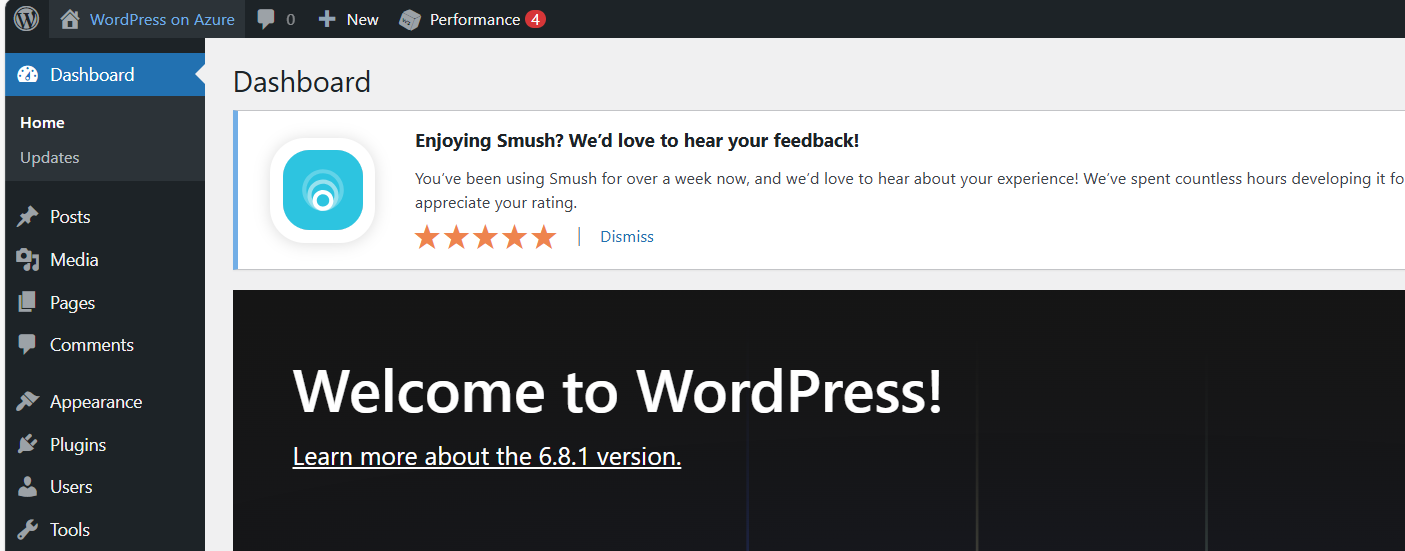
All updates are done now.
Step 4: Configure a custom domain
Now we can configure a custom, better readable domain for our Wordpress website. Lets get back to the Azure Portal and to the App Service.
Under “Settings” we have the “Custom domains” option. Open this:
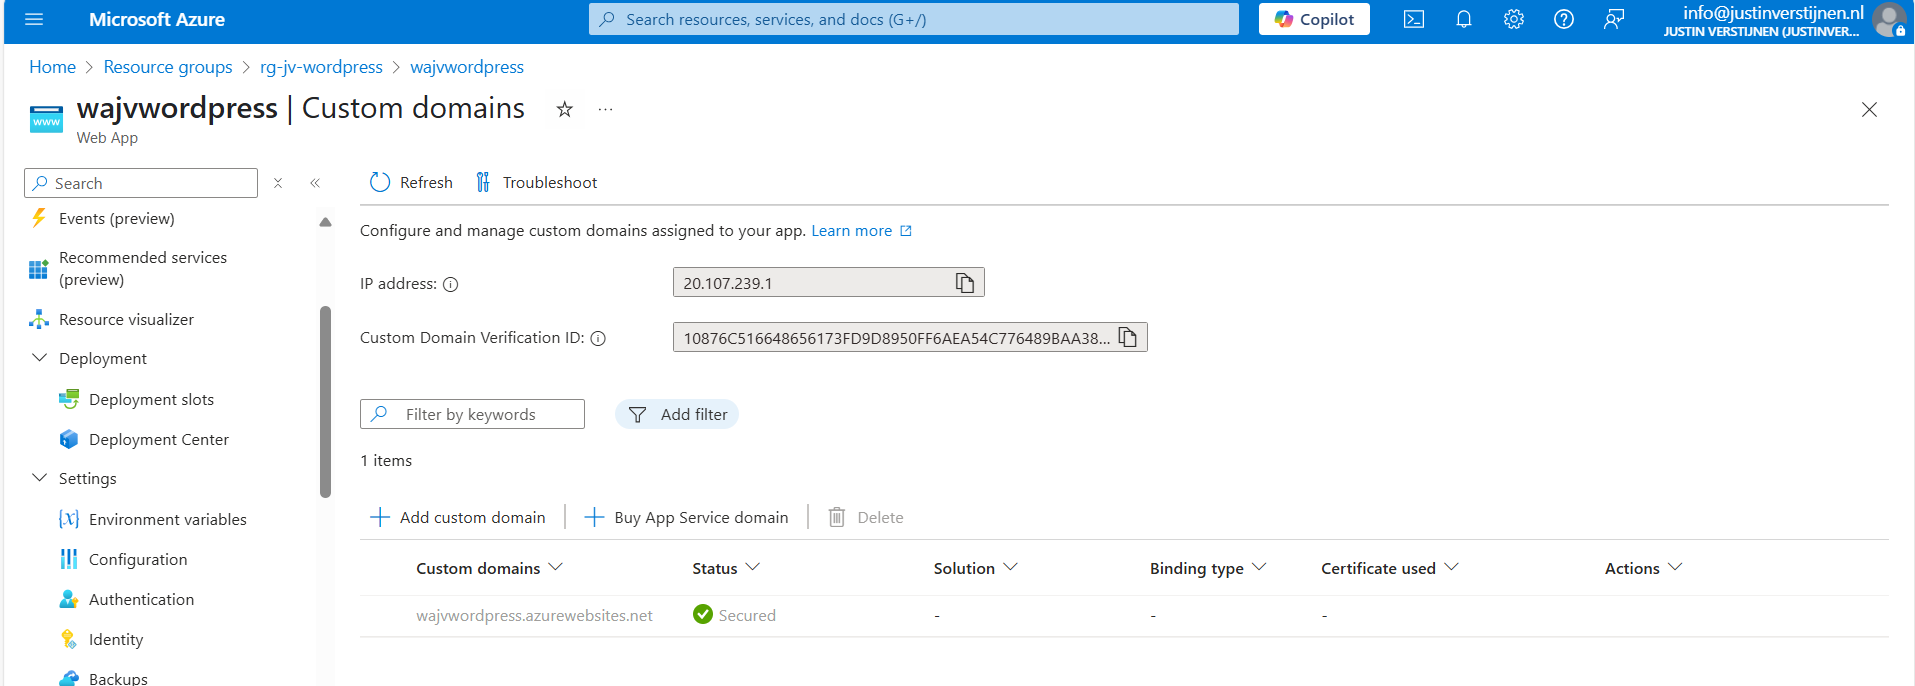
Click on “+ Add custom domain” to add a new domain to the app service instance. We now have to select some options in case we have a 3rd-party DNS provider:
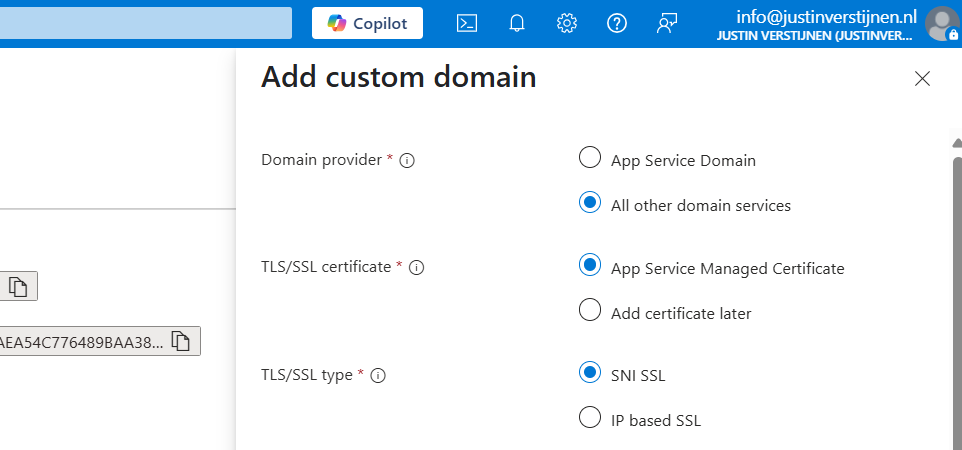
Then fill in your desired custom domain name:
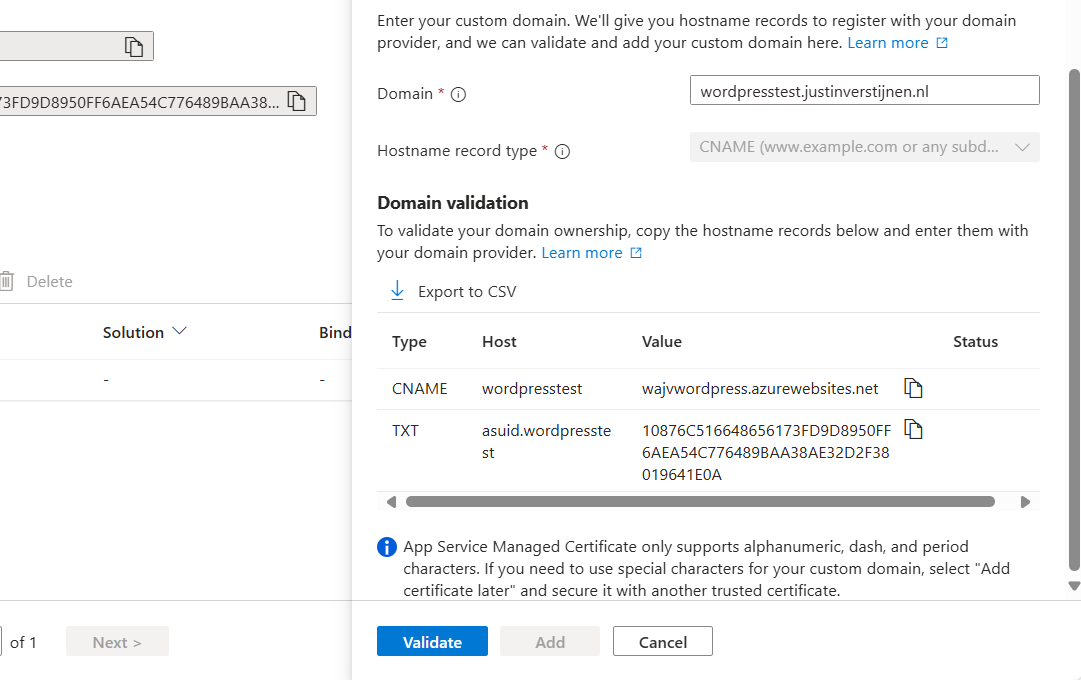
I selected the name:
- wordpresstest.justinverstijnen.nl
This because my domain already contains a website. Now we have to head over to our DNS hosting to verify our domain with the TXT record and we have to create a redirect to our Azure App Service. This can be done in 2 ways:
- When using a domain without subdomain: justinverstijnen.nl -> use a ALIAS record
- When using a subdomain: wordpresstest.justinverstijnen.nl -> use a CNAME record
In my case, I will create a CNAME record.

Make sure that the CNAME or ALIAS record has to end with a “.” dot, because this is a domain outside of your own domain.
In the DNS hosting, save the records. Then wait for around 2 minutes before validating the records in Azure. This should work instantly, but can take up to 24 hours for your records to be found.

After some seconds, the custom domain is ready:
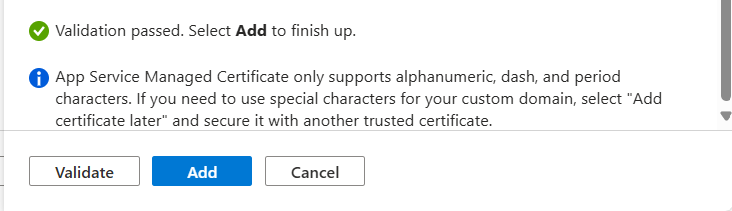
Click on “Add” to finish the wizard. After adding, a SSL certificate will be automatically added by Azure, which will take around a minute.
Now we are able to use our freshly created Wordpress solution on Azure with our custom domain name:

Let’s visit the website:
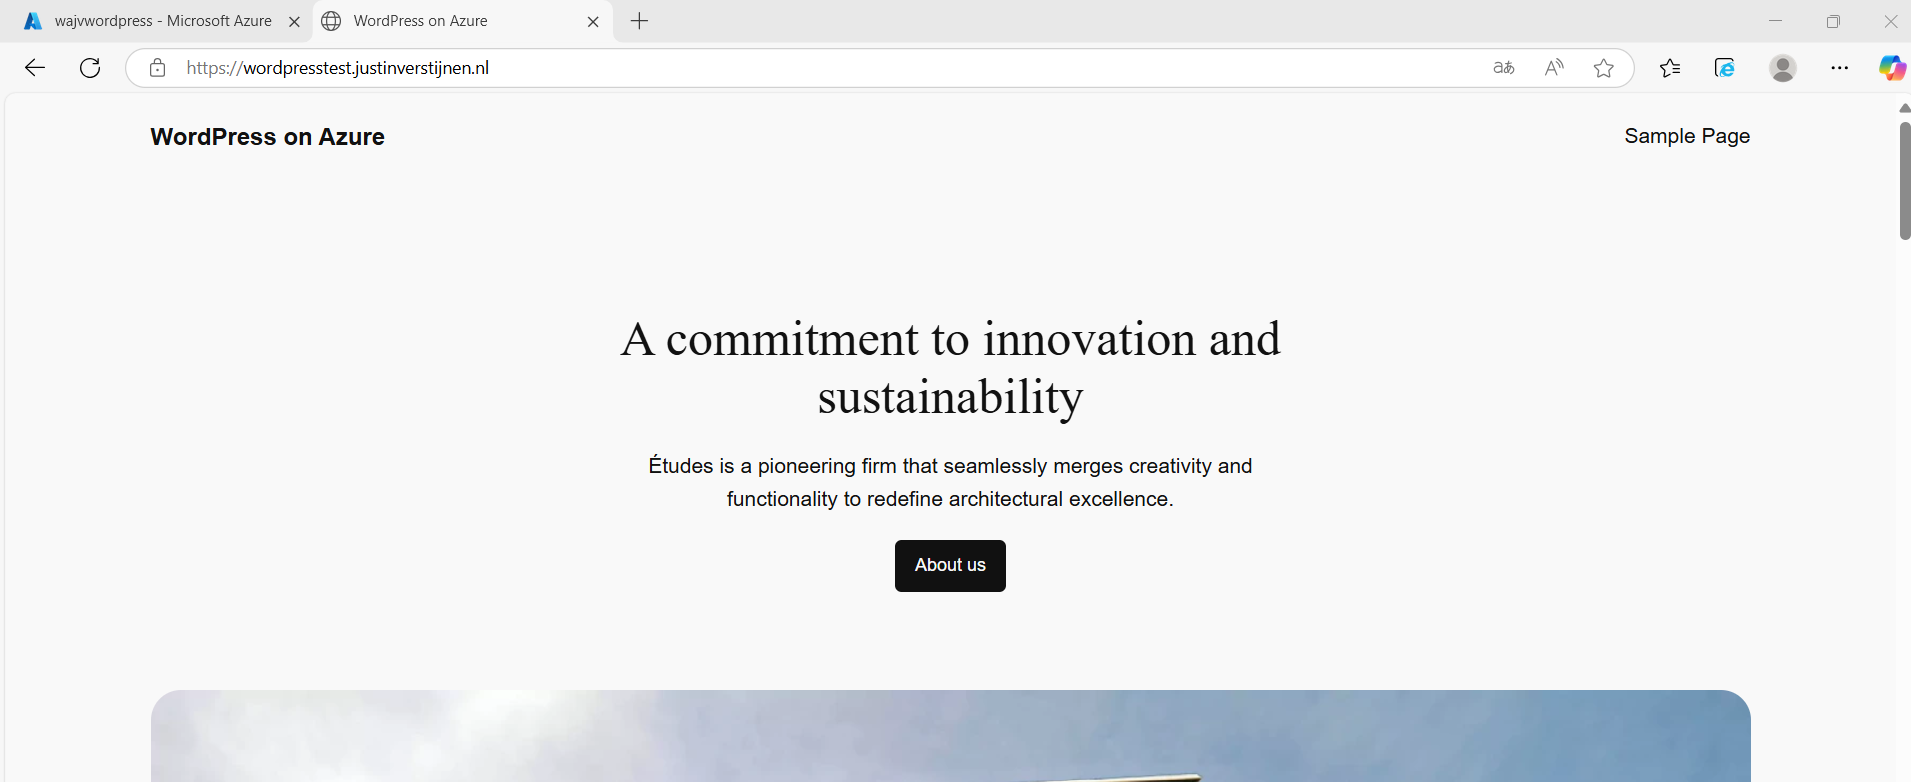
Works properly! :)
We can also visit the Wordpress admin panel on this URL now by adding /wp-admin:

Step 5: Configure Single Sign On with Entra ID
Now we can login to Wordpress but we have seperate logins for Wordpress and Azure/Microsoft. It’s possible to integrate Entra ID accounts with Wordpress by using this plugin:
- All-in-One Microsoft Office 365 Apps + Azure/EntraID Login
- https://wordpress.org/plugins/login-with-azure/
Head to Wordpress, go to “Plugins” and install this plugin:
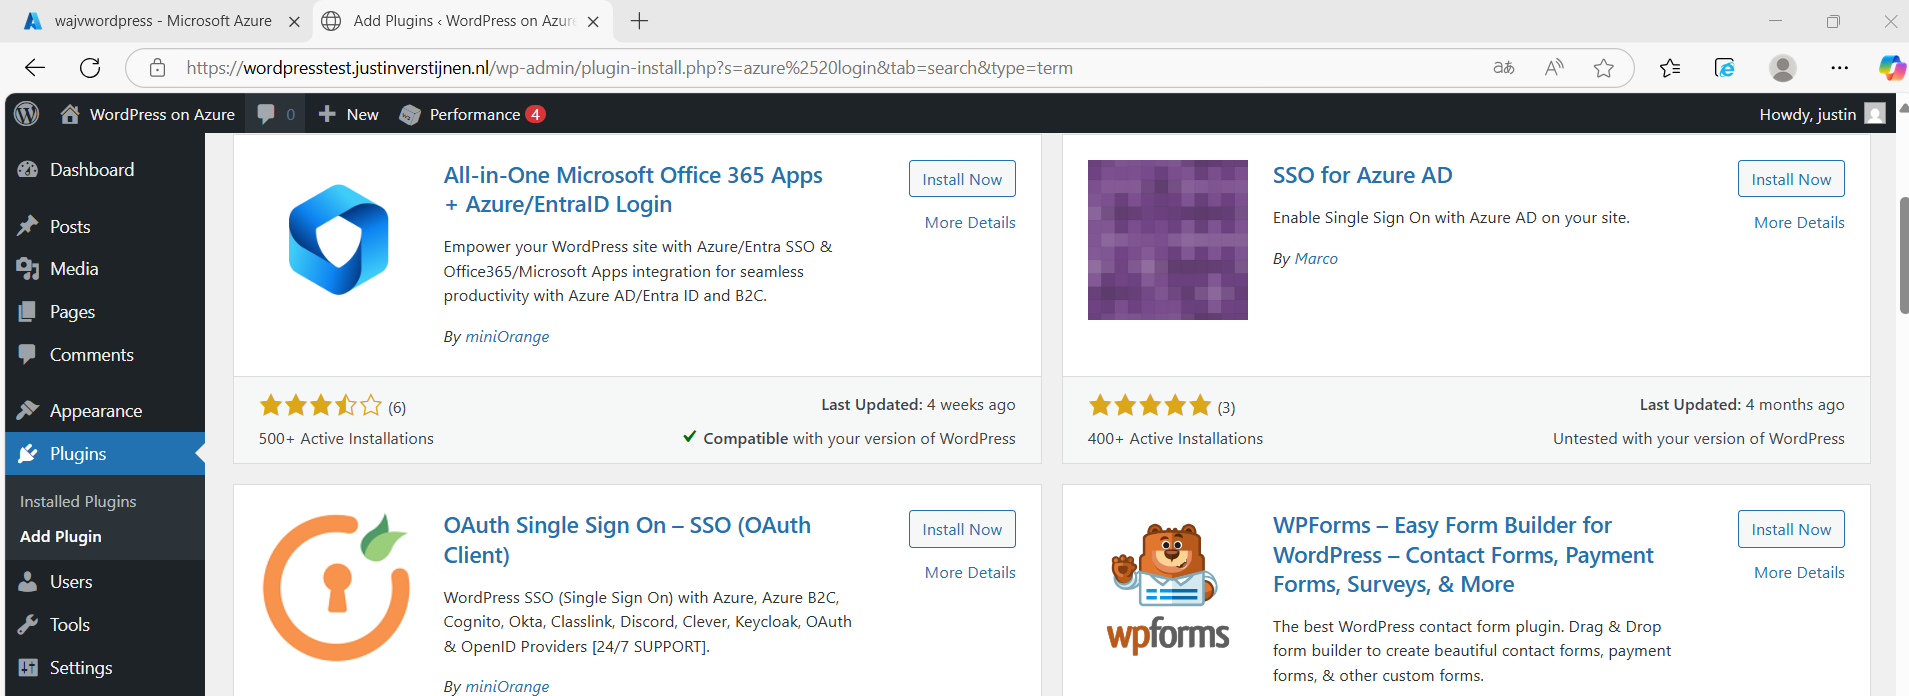
After installing the plugin and activating the plugin, we have an extra menu option in our navigation window on the left:
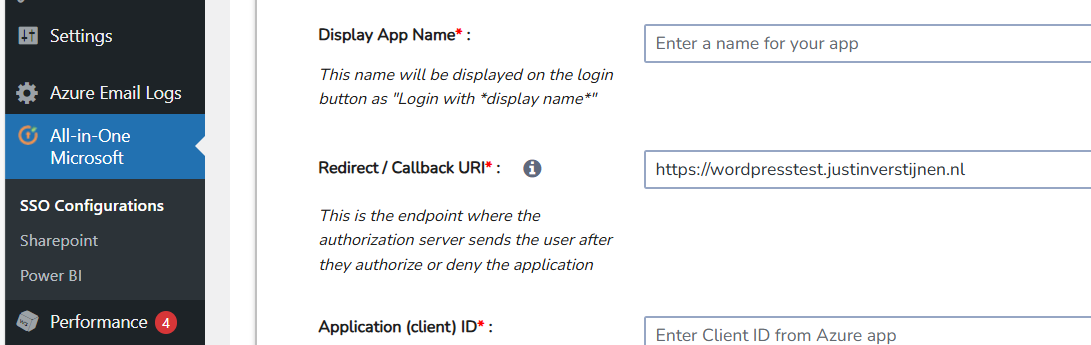
We now have to configure the Single Sign On with our Microsoft Entra ID tenant.
Create an Entra ID App registration
Start by going to Microsoft Entra ID, because we must generate the information to fill in into the plugin.
Go to Microsoft Entra ID and then to “App registrations”:
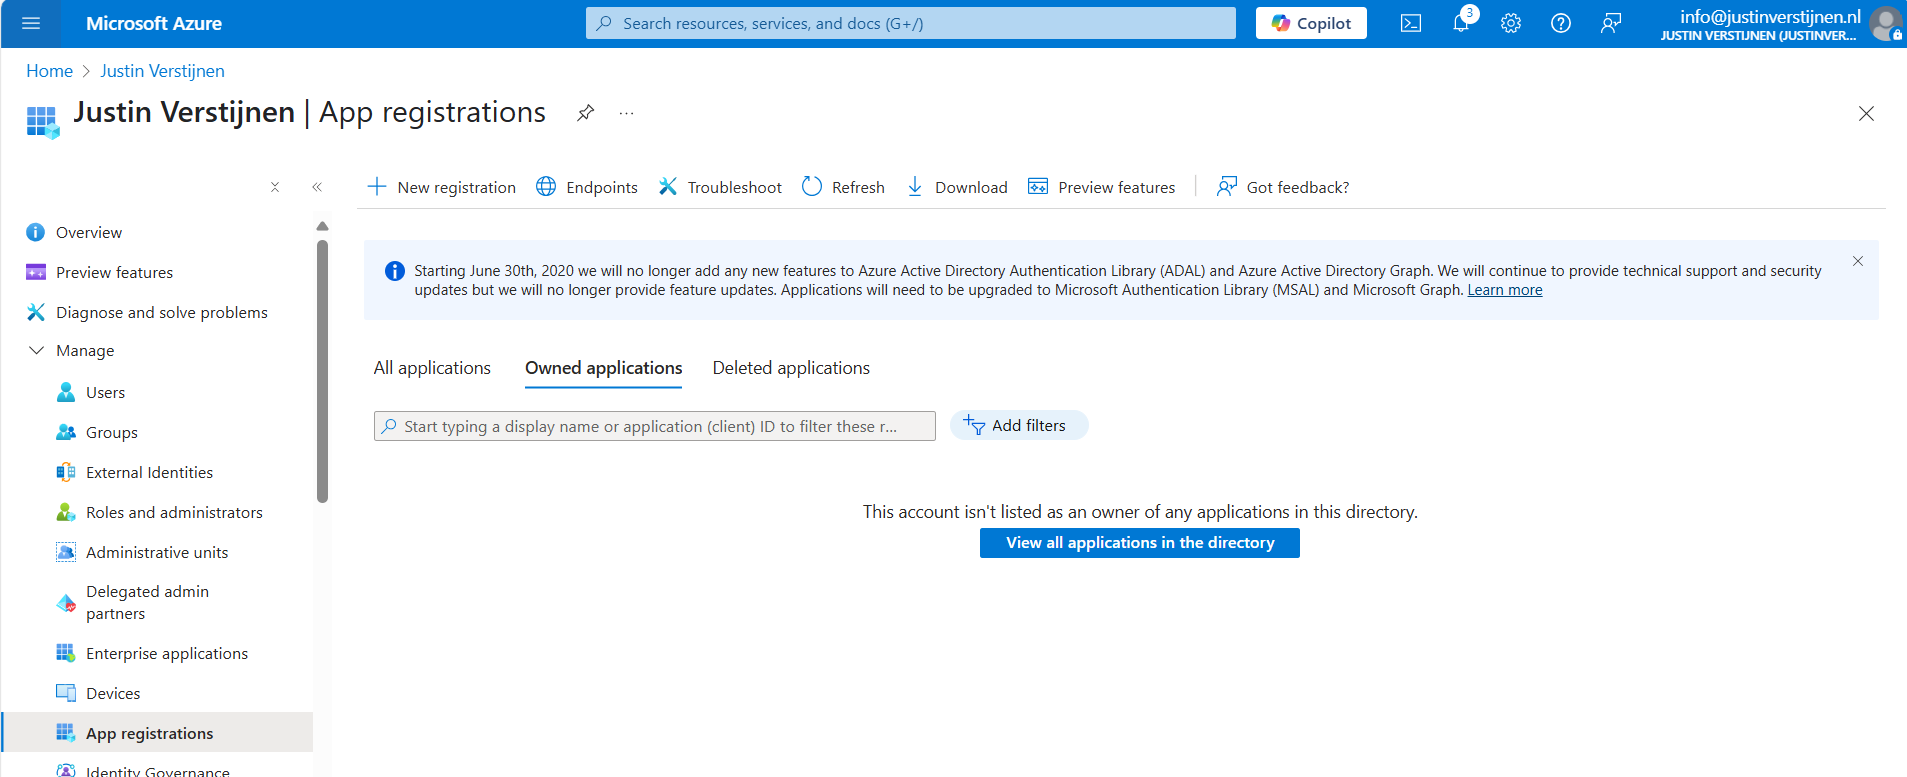
Click on “+ New registration” to create a new custom application.
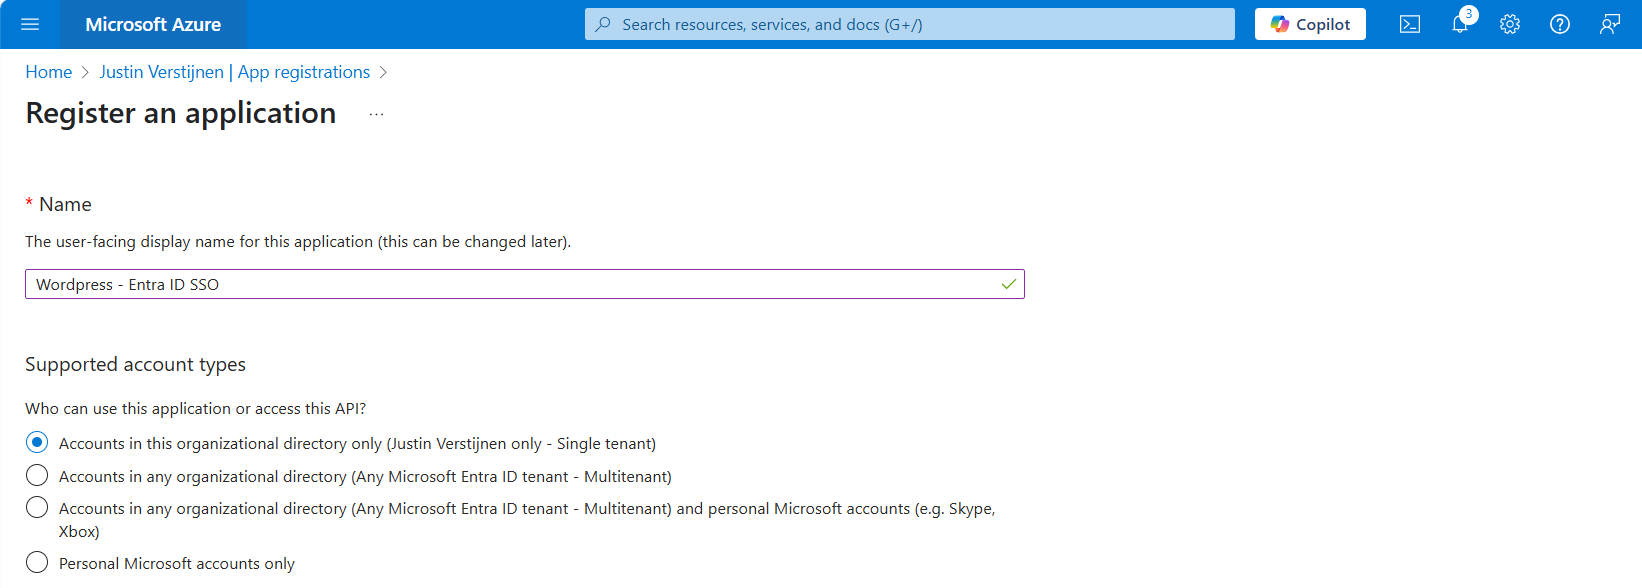
Choose a name for the application and select the supported account types. In my case, I only want to have accounts from my tenant to use SSO to the plugin. Otherwise you can choose the second option to support business accounts in other tenants or the third option to also include personal Microsoft accounts.
Scroll down on the page and configure the redirect URL which can be found in the plugin:
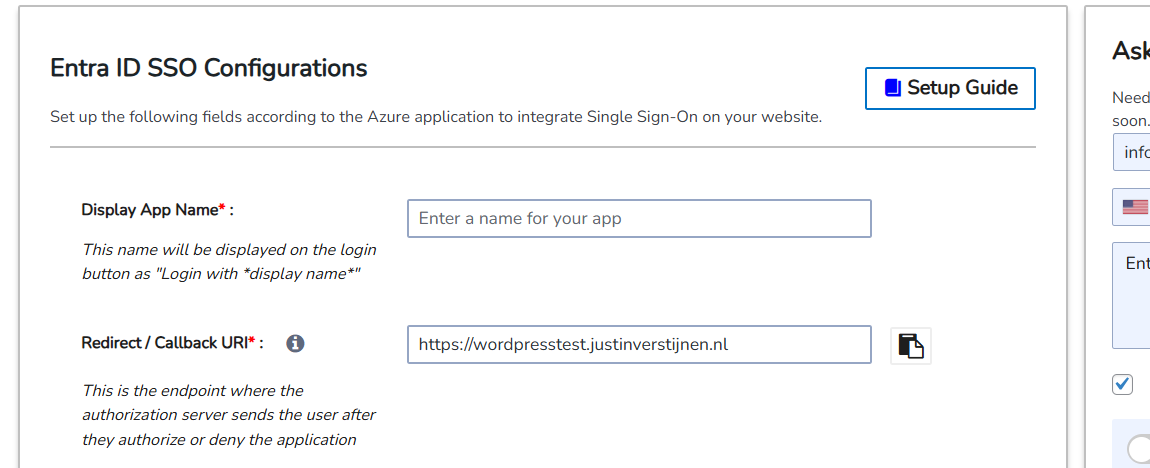
Copy this link, select type “Web” and paste this into Entra ID:
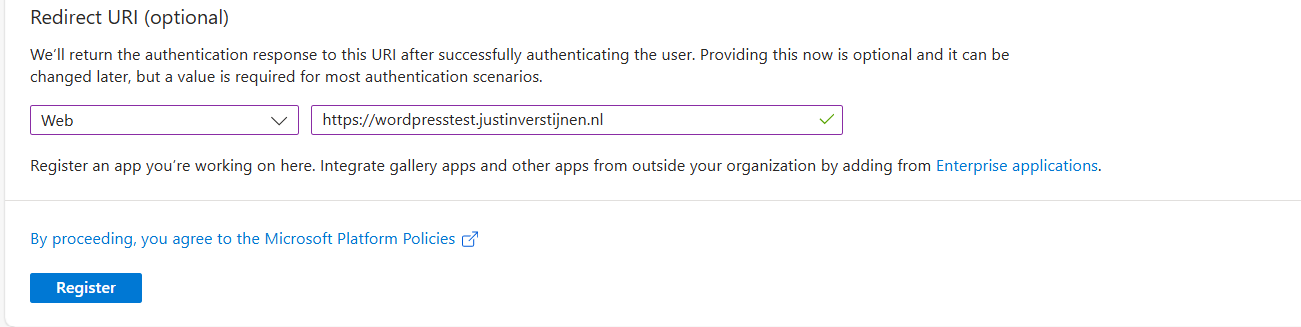
This is the URL which will be opened after succesfully authenticating to Entra ID.
Click register to finish the wizard.
Create a client secret
After creating the app registration, we can go to “Certificates & Secrets” to create a new secret:
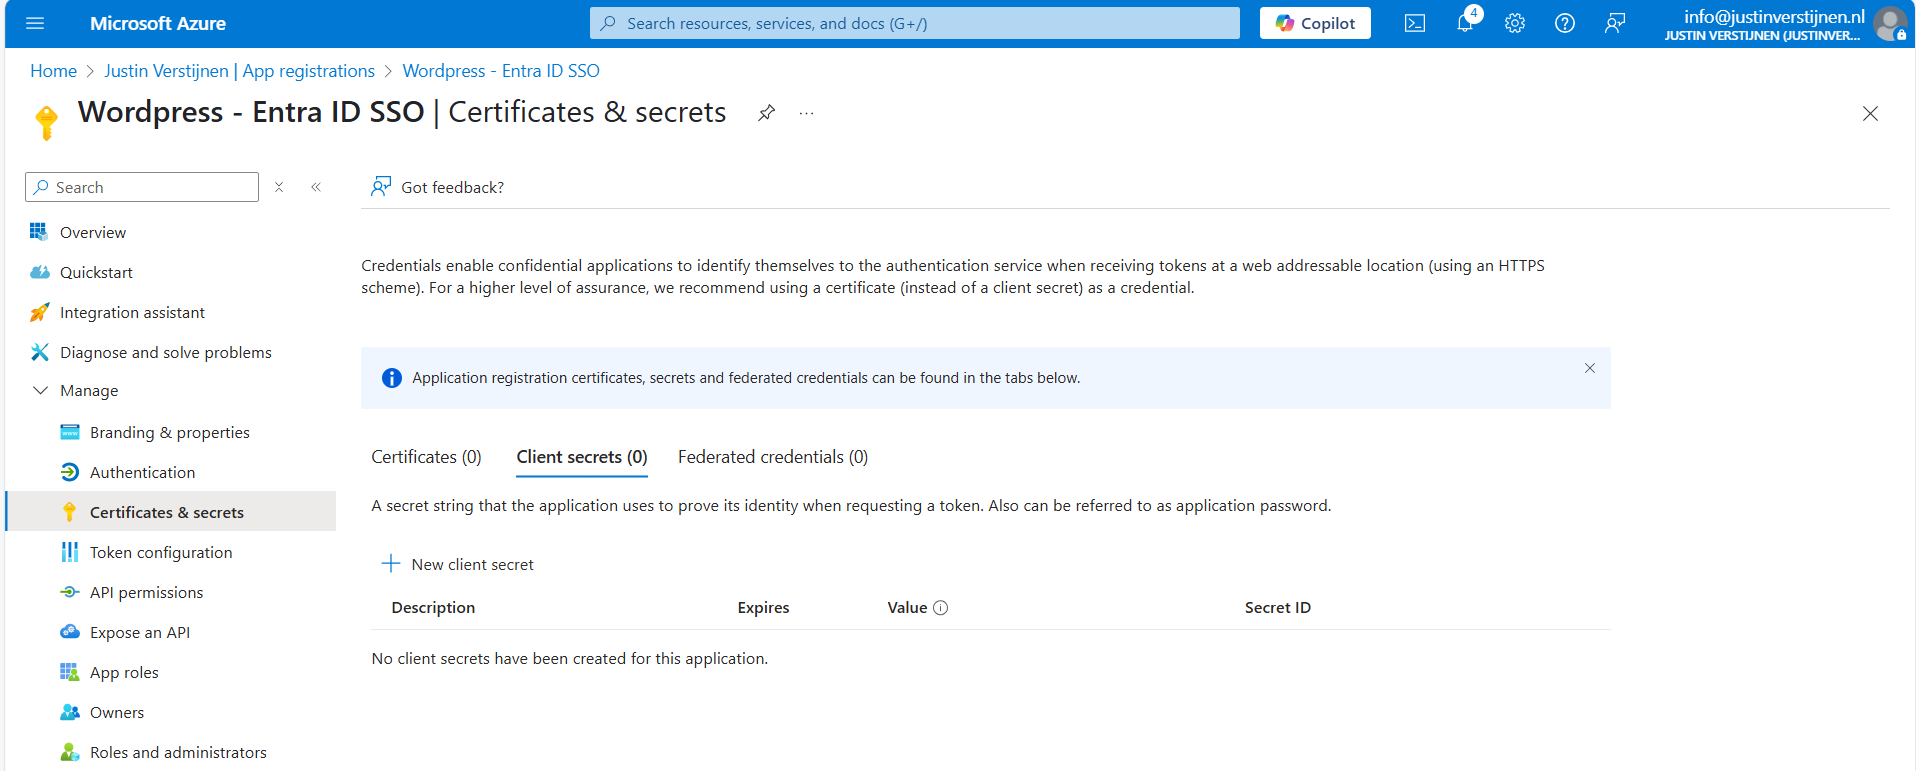
Click on “+ New client secret”.
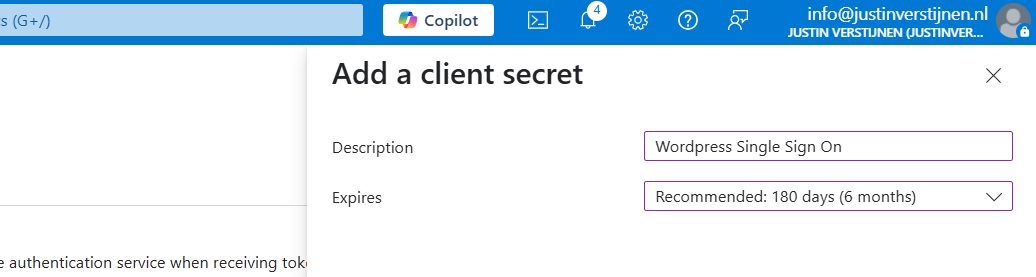
Type a good description and select the duration of the secret. This must be shorter than 730 days (2 years) because of security. In my case, I stick with the recommended duration. Click on “Add” to create the secret.
Now please copy the information and place it in a safe location, as this will be the last option to actually see the secret full. After some minutes/clicks this will be gone forever and a new one has to be created.
My advice is to always copy the Secret ID too, because you have a good identifier of which secret is used where, especially when you have like 20 app registrations.

Collect the information in Microsoft Entra ID
Now that we have finished the configuration in ENtra ID, we have to collect the information we need. This is:
- Client ID
- Tenant ID
- Client Secret
The Client ID (green) and Tenant ID (red) can be found on the overview page of the app registration. The secret is saved in the safe location from previous step.
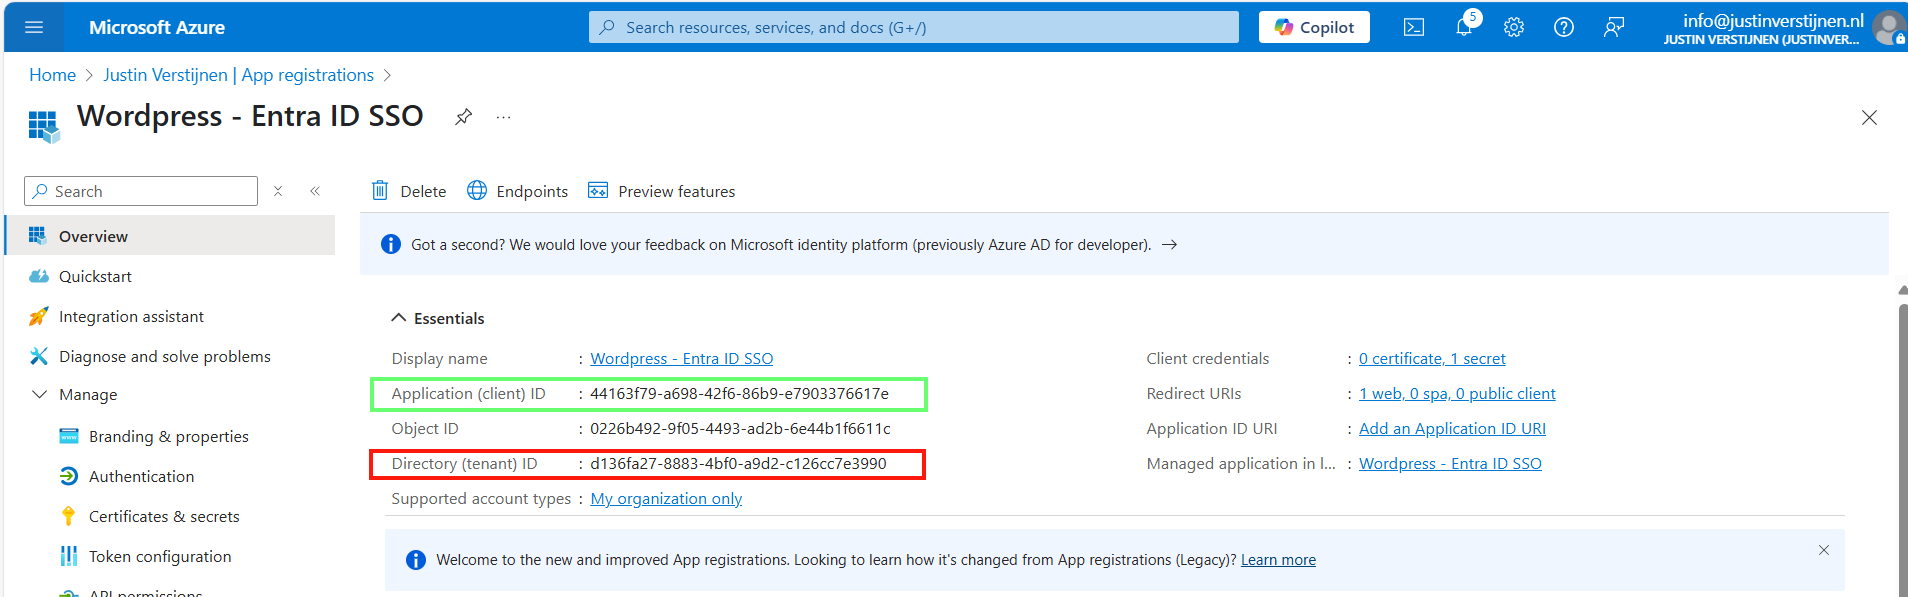
Configure Wordpress plugin
Now head back to Wordpress and we have to fill in all of the collected information from Microsoft Entra ID:
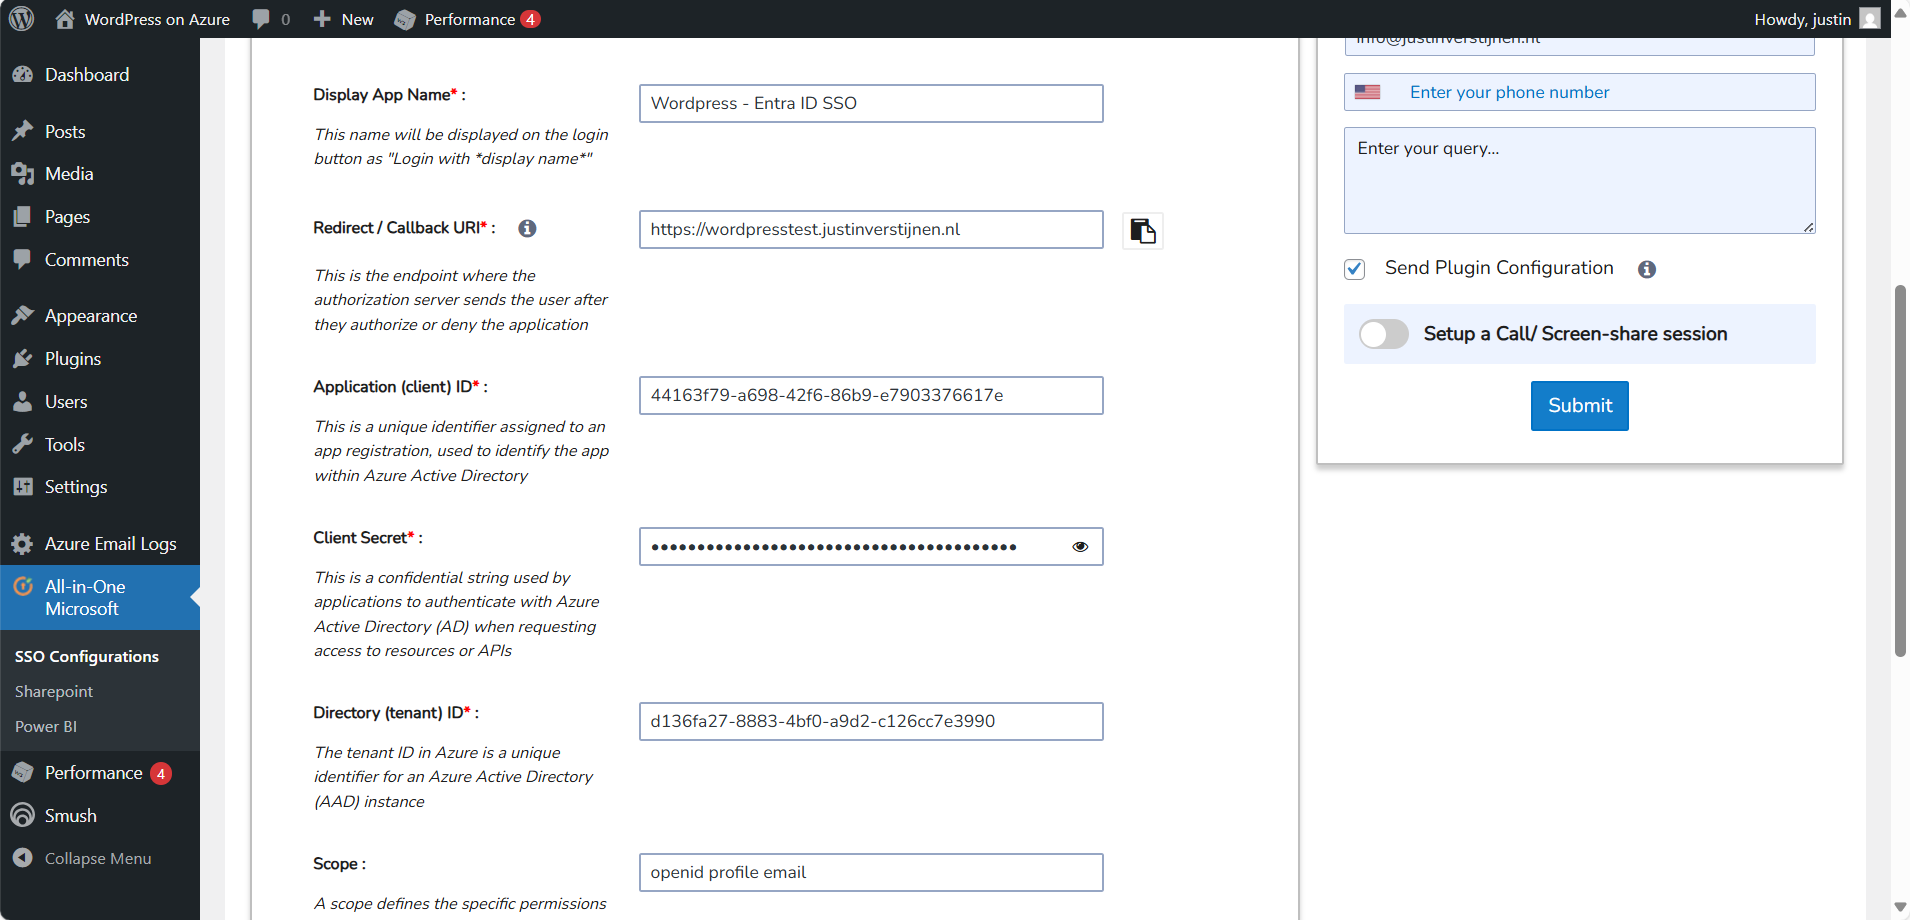
Fill in all of the collected information, make sure the “Scope” field contains “openid profile email” and click on “Save settings”. The scope determines the information it will request at the Identity Provider, this is Microsoft Entra ID in our case.
Then scroll down again and click on “Test Configuration” which is next to the Save button. An extra authentication window will be opened:
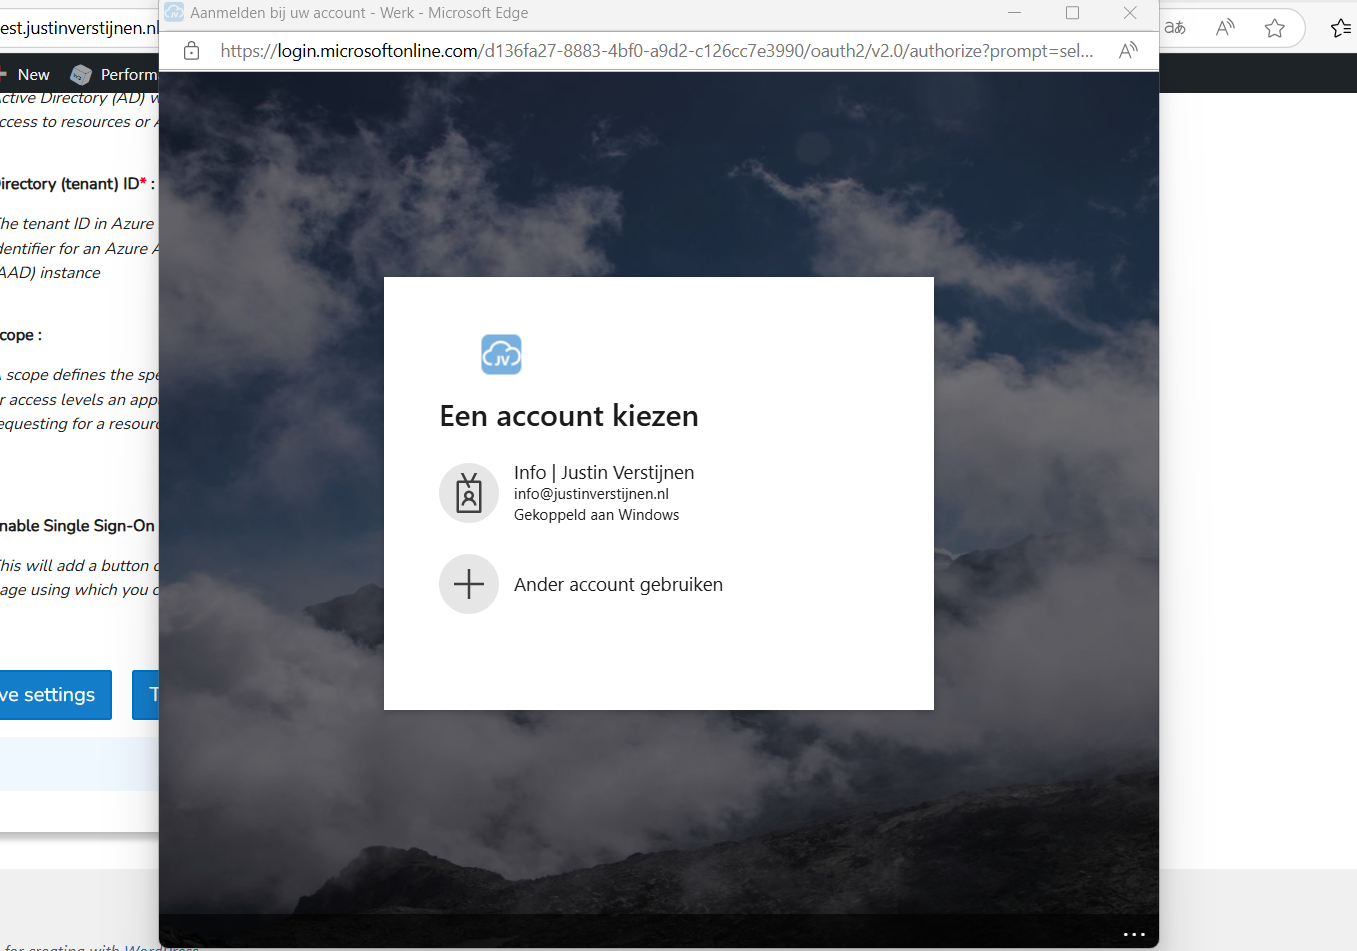
Select your account or login into your Entra ID account and go to the next step.
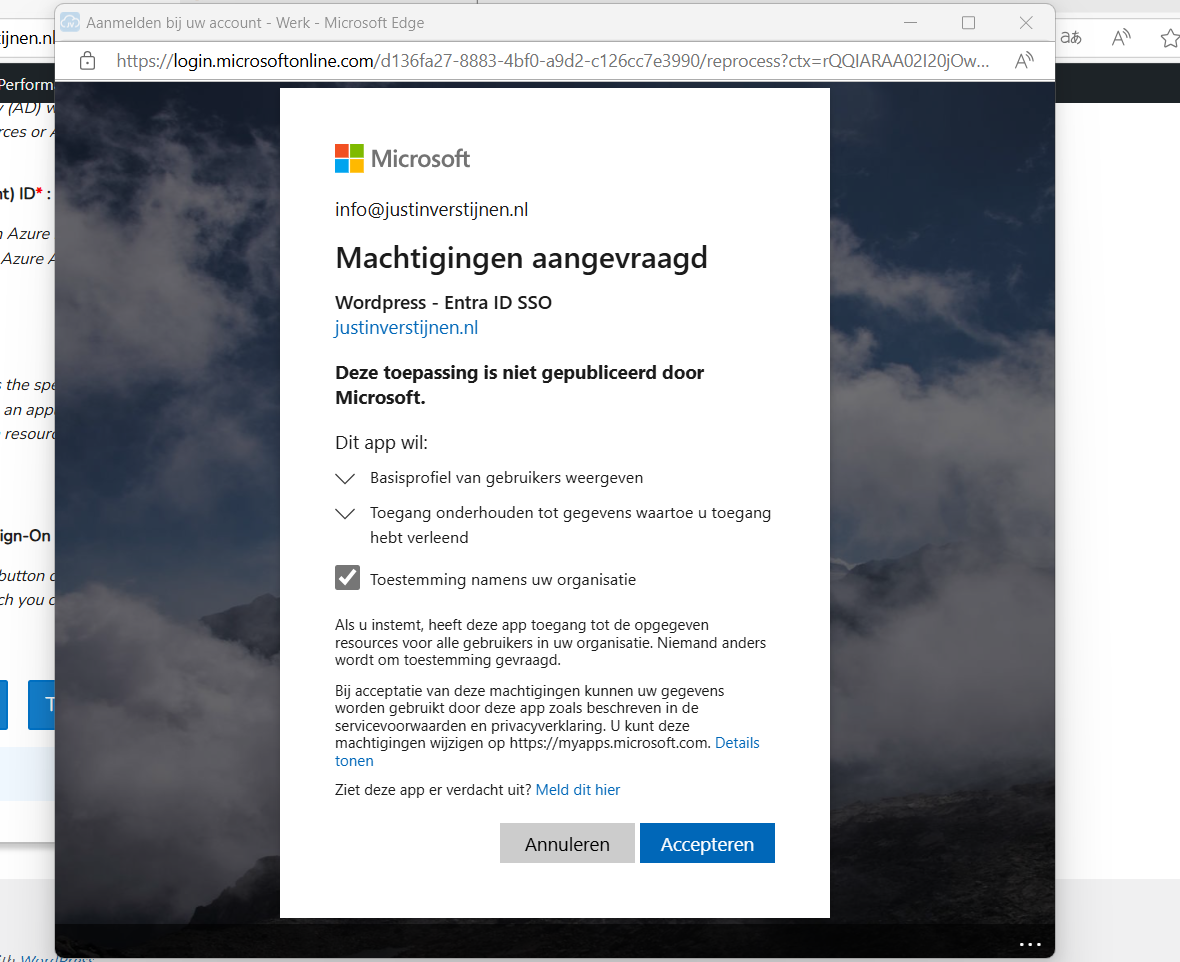
Now we have to accept the roles the application wants and to permit the application for the whole organization. For this step, you will need administrator rights in Entra ID. (Cloud Application Administrator or Application Administrator roles or higher).
Accept the application and the plugin will tell you the information it got from Entra ID:

Now we have to click on the “Configure Username” button or go the tab “Attribute/Role Mapping”.
In Entra ID, a user has several properties with can be configured. In identity, we call this attributes. We have to tell the plugin which attributes in Entra ID to use for what in the plugin.
Start by selecting “email” in the “Username field”:
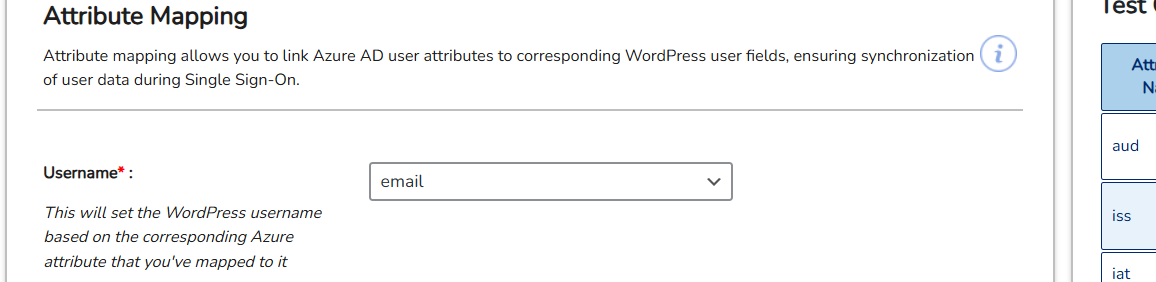
Then click on “Save settings”.
Configure Wordpress roles for SSO
Now we can configure which role we want to give users from this SSO configuration:
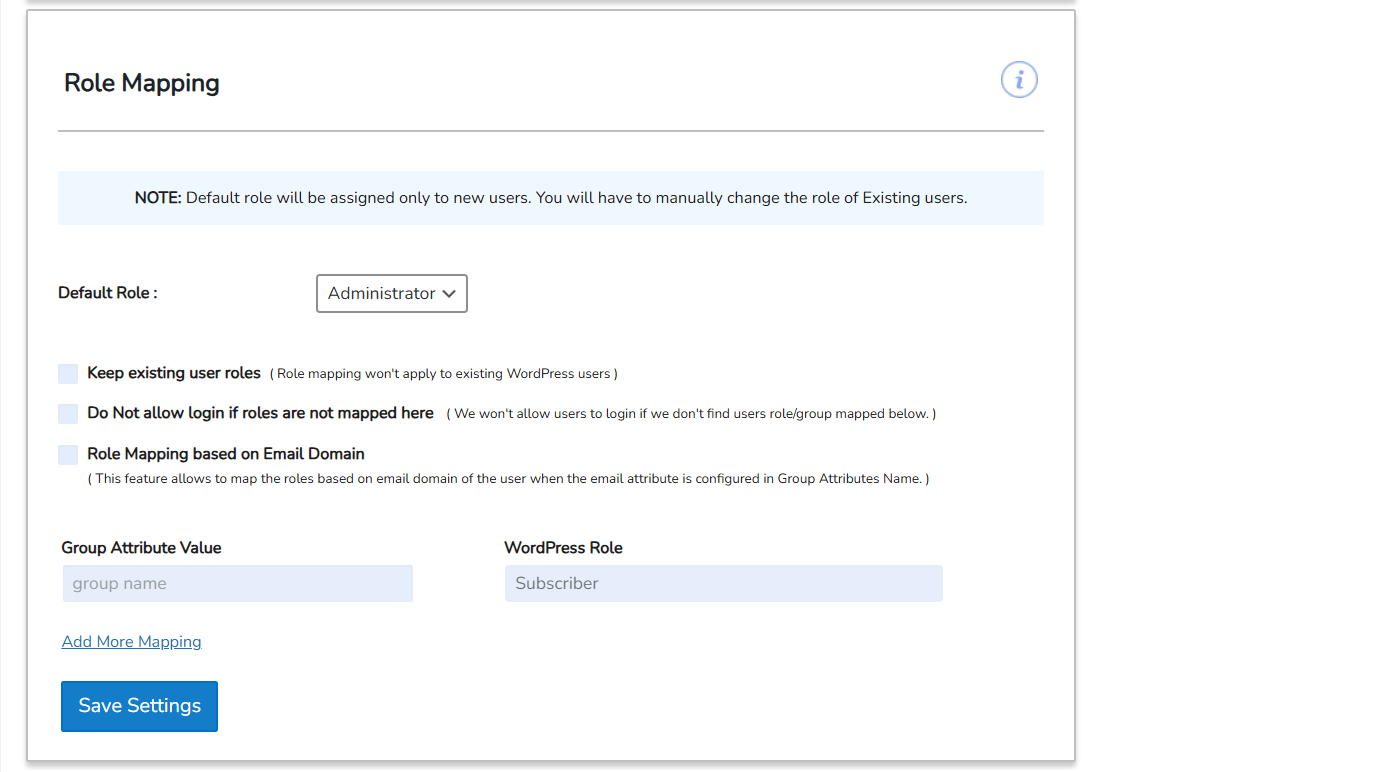
In my case, I selected “Administrator” to give myself the Administrator permissions but you can also chosse from all other built-in Wordpress roles. Be aware that all of the users who are able to SSO into Wordpress will bet this role by default.
Test Wordpress SSO
Now we can test SSO for Wordpress by loggin out and again going to our Wordpress admin panel:
We have the option to do SSO now:

Click on the blue button with “Login with Wordpress - Entra ID”. You will now have to login with your Microsoft account.
After that you will land on the homepage of the website. You can manually go to the admin panel to get there: (unfortunately we cannot configure to go directly to the admin panel, this is a paid plugin option).
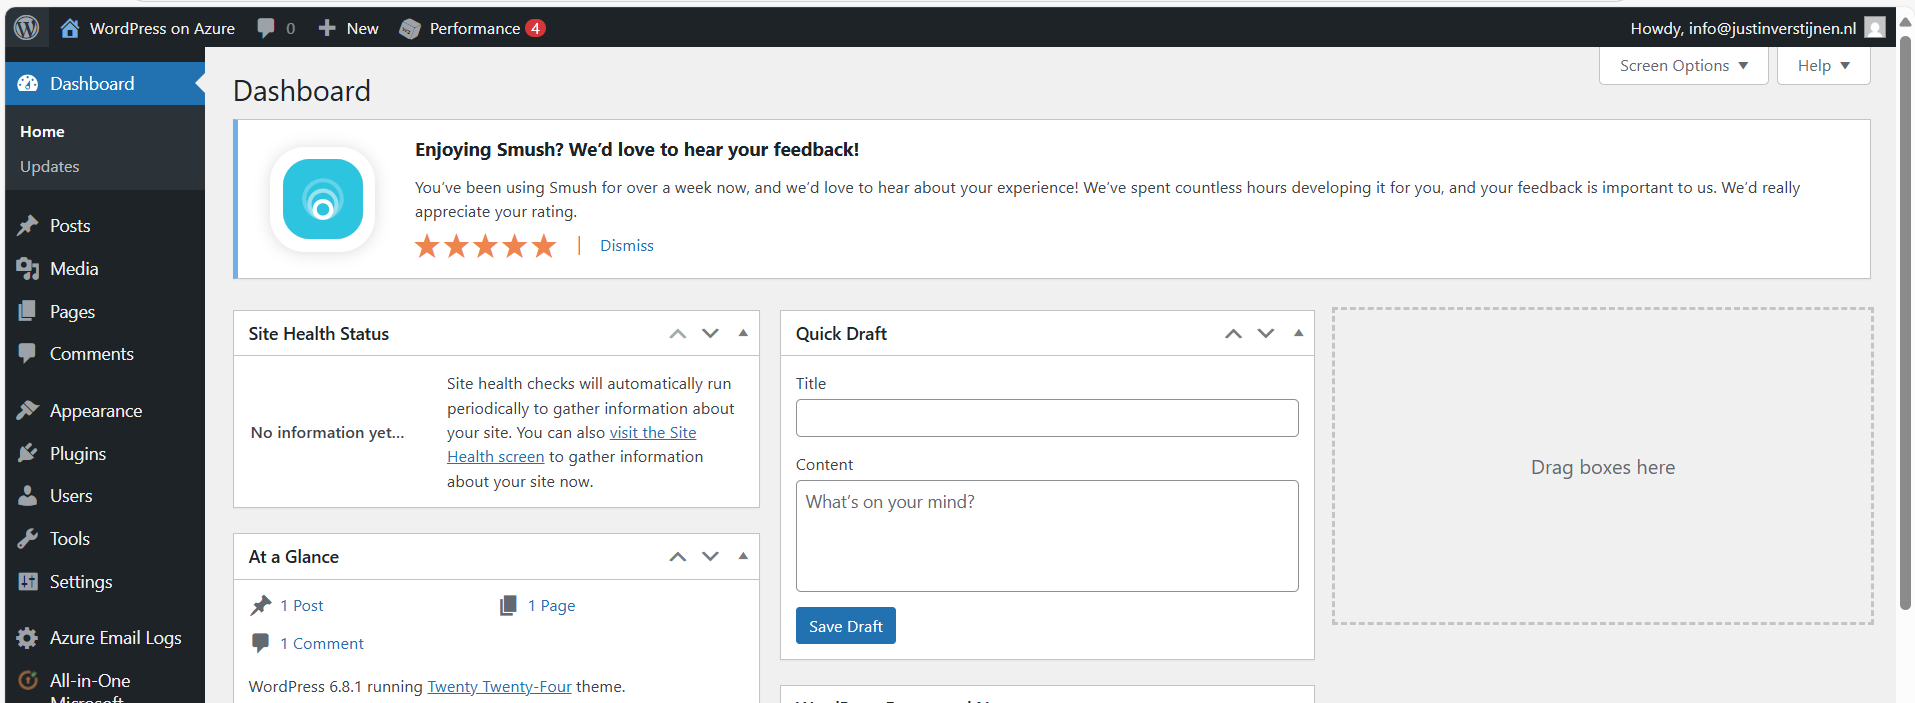
Knowledge check
Knowledge check
This quiz needs JavaScript to show the questions and feedback.
This quiz needs JavaScript to show the questions and feedback.
Summary
Wordpress on Azure is a great way to host a Wordpress environment in a modern and scalable way. It’s high available and secure by default without the need for hosting a complete server which has to be maintained and patched regularly.
The setup takes a few steps but it is worth it. Pricing is something to consider prior, but I think with the Basic plan, you have a great self hosted Wordpress environment for around 25 dollars a month and that is even with a hourly Backup included. Overall, great value for money.
Thank you for reading this guide and I hope it was helpful.
End of the page 🎉
You have reached the end of the page. You can navigate through other blog posts as well, share this post on X, LinkedIn and Reddit or return to the blog posts collection page. Thank you for visiting this post.
If you think something is wrong with this post or you want to know more, you can send me a message to one of my social profiles at: https://justinverstijnen.nl/about/
If you find this page and blog very useful and you want to leave a donation, you can use the button below to buy me a beer. Hosting and maintaining a website takes a lot of time and money. Thank you in advance and cheers :)
The terms and conditions apply to this post.
New: Azure Service Groups
A new feature in Microsoft Azure rised up on the Microsoft pages; Service Groups. In this guide, we will dive a bit deeper into Service Groups and what we can do with them in practice. At the time of writing, this feature is in public preview and anyone can use it now.
What are these new Service Groups in Azure?
Service Groups are a parralel type of group to group resources and separate permissions to them. In this manner we can assign multiple resources of different resource groups and put them into a overshadowing Service Group to apply permissions. This eliminates the need to move resources into specific resource groups with all broken links that comes with it.
This looks like this:
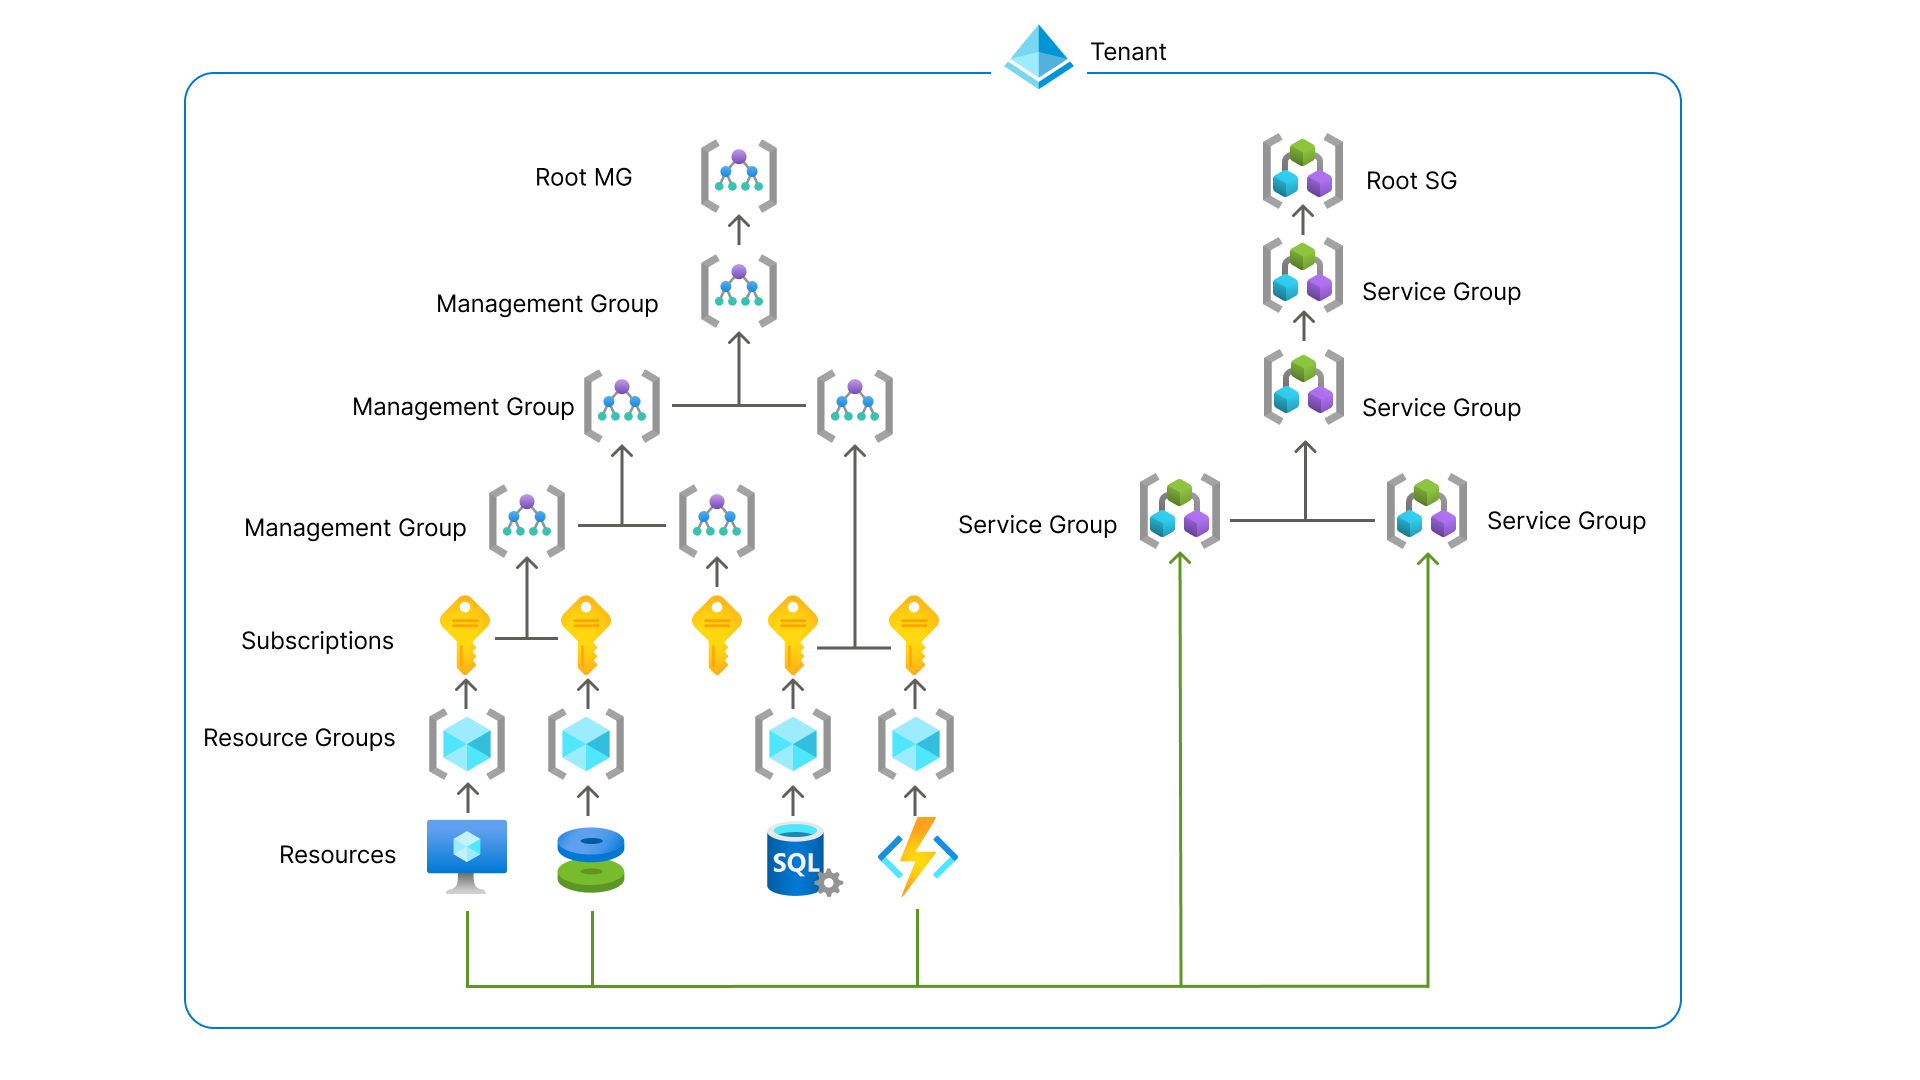
You can see these new service groups as a parallel Management Group, but then for resources.
Features
- Logical grouping of your Azure solutions
- Multiple hierarchies
- Flexible membership
- Least privileges
- Service Group Nesting (placing them in each other)
Service Groups in practice
Update 1 September 2025, the feature is in public preview, so I can do a little demonstration of this new feature.
In the Azure Portal, go to “Service Groups”:
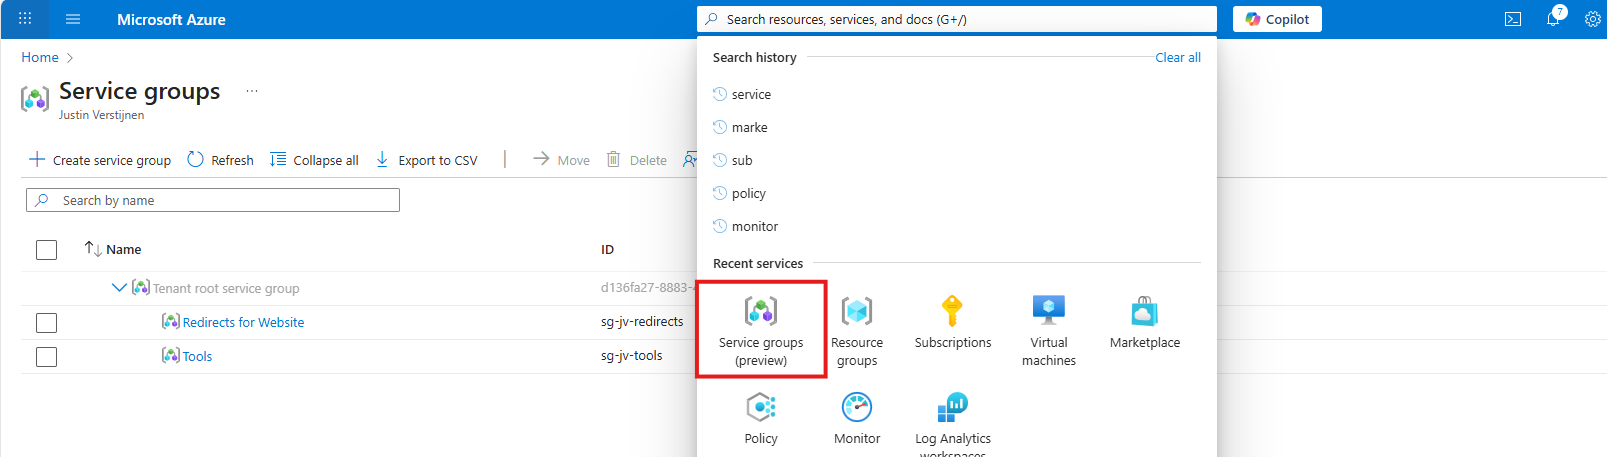
Then create a new Service Group.
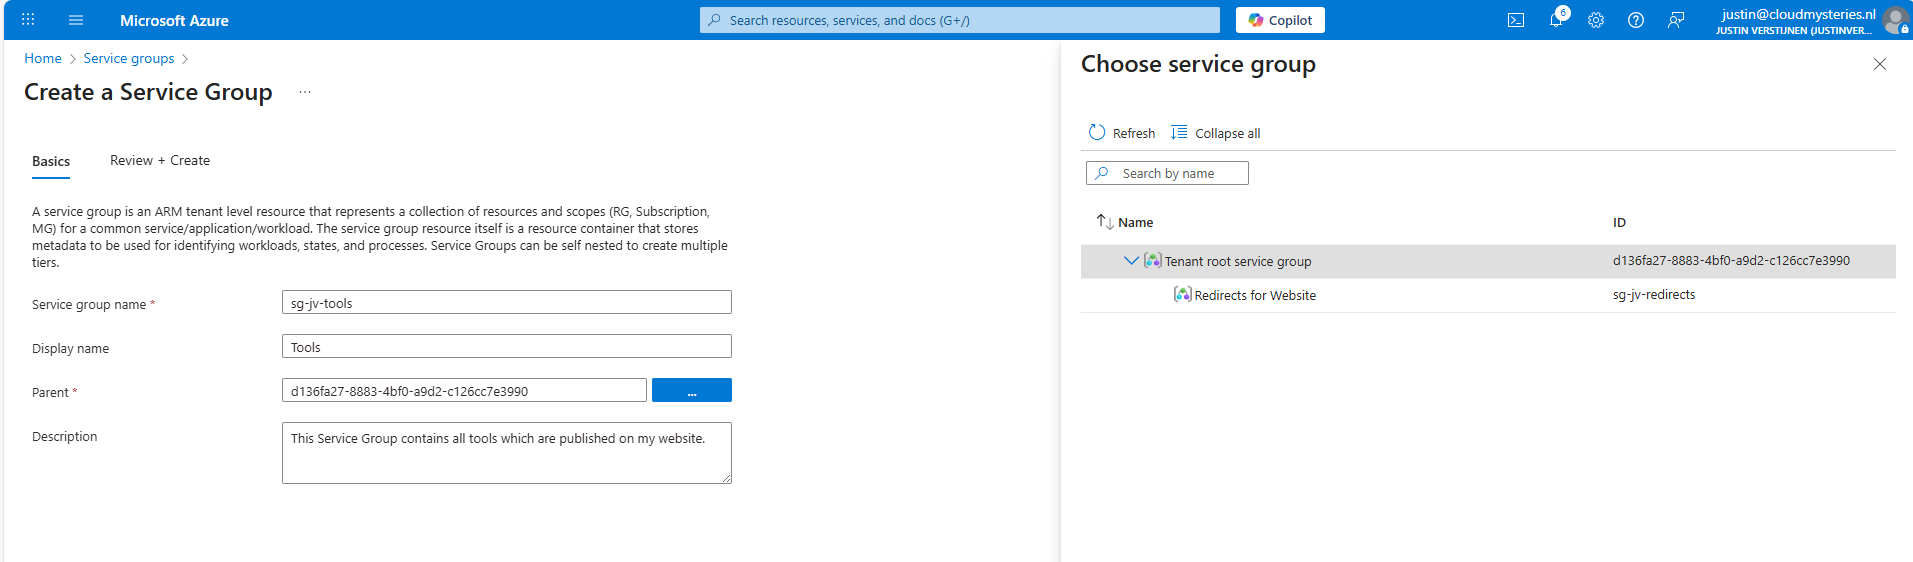
Here I have created a service group for my tools which are on my website. These reside in different resource groups so it’s a nice candidate to test with. The parent service group is the tenant service group which is the top level.
Now open your just created service group and add members to it, which can be subscriptions, resource groups and resources:
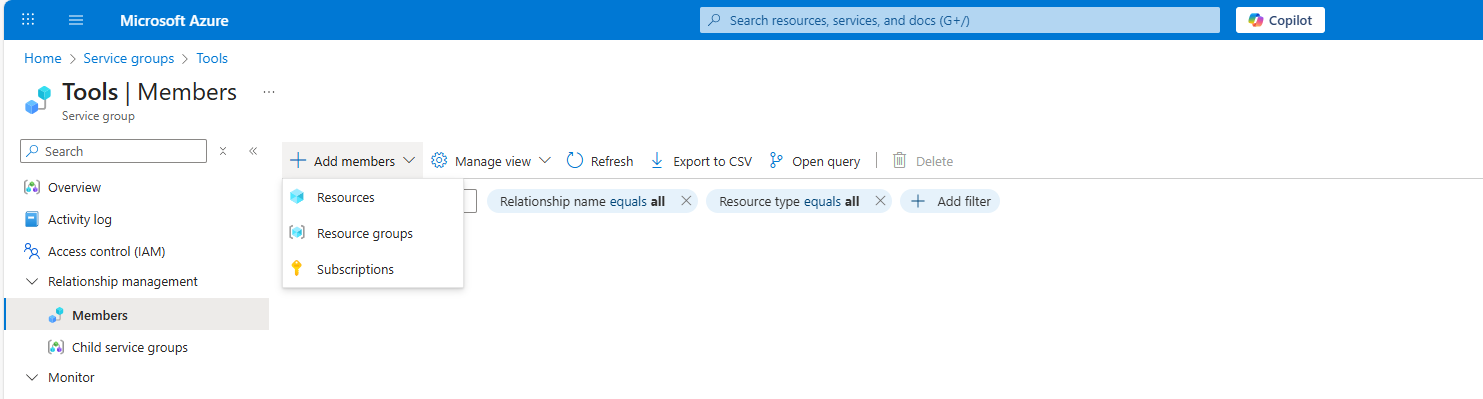
Like I did here:
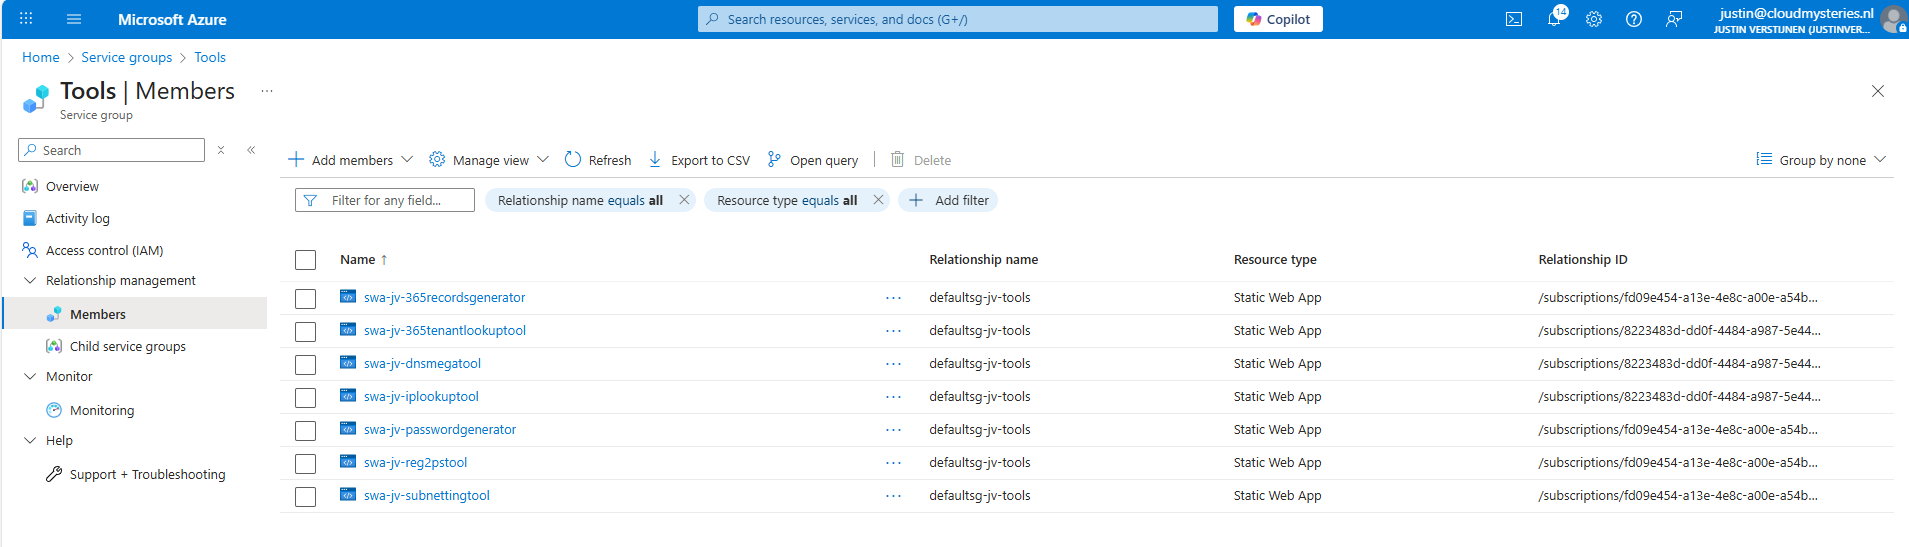
Summary
Service Groups are an great addition for managing permissions to our Azure resources. It delivers us a manner to give a person or group unified permissions across multiple resources that are not in the same resource group.
This can now be done, only with inheriting permissions flowing down, which means big privileges and big scopes. With this new function we can only select the underlying resources we want and so permit a limited set of permissions. This provider much more granular premissions assignments, and all of that free of charge!
Sources
These sources helped me by writing and research for this post;
End of the page 🎉
You have reached the end of the page. You can navigate through other blog posts as well, share this post on X, LinkedIn and Reddit or return to the blog posts collection page. Thank you for visiting this post.
If you think something is wrong with this post or you want to know more, you can send me a message to one of my social profiles at: https://justinverstijnen.nl/about/
If you find this page and blog very useful and you want to leave a donation, you can use the button below to buy me a beer. Hosting and maintaining a website takes a lot of time and money. Thank you in advance and cheers :)
The terms and conditions apply to this post.
In-Place upgrade to Windows Server 2025 on Azure
This guide explains how to perform a in-place upgrade Windows Server from 2022 to 2025 on Azure to leverage the newest version and stay secure.
Once every 3 to 4 years you want to be on the last version of Windows Server because of new features and of course to have the latest security updates. These security updates are the most important these days.
When having your server hosted on Microsoft Azure, this proces can look a bit complicated but it is relatively easy to upgrade your Windows Server to the last version, and I will explain how to on this page.
Because Windows Server 2025 is now out for almost a year and runs really stable, we will focus in this post on upgrading from 2022 to Windows Server 2025. If you don’t use Azure, you can exclude steps 2 and 3 but the rest of the guide still tells you how to upgrade on other systems like Amazon/Google or on-premise/virtualization.
Requirements
- The Azure Powershell module
- A machine running an older version of Windows Server to upgrade
- A backup to succesfully roll back to in case of emergency
- 45 minutes to 2 hours of your time
The process described
We will perform the upgrade by having a eligible server, and we will create an upgrade media for it. Then we will assign this upgrade media to the server, which will effectively put in the ISO. Then we can perform the upgrade from the guest OS itself and wait for around an hour.
Recommended is before you start, to perform this task in a maintenance window and to have a full server backup. Upgrading Windows Server isnt always a full waterproof process and errors will always occur if not having a plan b.
You’ll be happy to have followed my advice on this one if this goes wrong.
Step 1: Determine your upgrade-path
When you are planning an upgrade, it is good to determine your upgrade path beforehand. CHeck your current version and check which version you want to upgrade to.
The golden rule is that you can skip 1 version at a time. When you want to run Windows Server 2022 and you want to reach this in 1 upgrade, your minimum version is Windows Server 2016. To check all supported upgrade paths, check out the following table:
| Upgrade Path | Windows Server 2012 R2 | Windows Server 2016 | Windows Server 2019 | Windows Server 2022 | Windows Server 2025 |
|---|---|---|---|---|---|
| Windows Server 2012 | Yes | Yes | - | - | - |
| Windows Server 2012 R2 | - | Yes | Yes | - | - |
| Windows Server 2016 | - | - | Yes | Yes | - |
| Windows Server 2019 | - | - | - | Yes | Yes |
| Windows Server 2022 | - | - | - | - | Yes |
Horizontal: To Vertical: From
For more information about the supported upgrade paths, check this official Microsoft page: https://learn.microsoft.com/en-us/windows-server/get-started/upgrade-overview#which-version-of-windows-server-should-i-upgrade-to
Step 2: Create upgrade media in Microsoft Azure
When you have a virtual machine ready and you have determined your upgrade path, we have to create an upgrade media in Azure. We need to have a ISO with the new Windows Server version to start the upgrade.
To create this media, first login into Azure Powershell by using the following command;
POWERSHELL
Connect-AzAccountLog in with your Azure credentials which needs to have sufficient rights in the target resource group. This should be at least Contributor or use a custom role.
Select a subscription if needed:

Then after logging in succesfully, we need to execute a script to create a upgrade disk. This can be done through this script:
PowerShell
# -------- PARAMETERS --------
$resourceGroup = "rg-jv-upgrade2025"
$location = "WestEurope"
$zone = ""
$diskName = "WindowsServer2025UpgradeDisk"

# Target version: server2025Upgrade, server2022Upgrade, server2019Upgrade, server2016Upgrade or server2012Upgrade
$sku = "server2025Upgrade"

#--------END PARAMETERS --------
$publisher = "MicrosoftWindowsServer"
$offer = "WindowsServerUpgrade"
$managedDiskSKU = "Standard_LRS"

$versions = Get-AzVMImage -PublisherName $publisher -Location $location -Offer $offer -Skus $sku | sort-object -Descending {[version] $_.Version	}
$latestString = $versions[0].Version

$image = Get-AzVMImage -Location $location `
                       -PublisherName $publisher `
                       -Offer $offer `
                       -Skus $sku `
                       -Version $latestString

if (-not (Get-AzResourceGroup -Name $resourceGroup -ErrorAction SilentlyContinue)) {
    New-AzResourceGroup -Name $resourceGroup -Location $location
}

if ($zone){
    $diskConfig = New-AzDiskConfig -SkuName $managedDiskSKU `
                                   -CreateOption FromImage `
                                   -Zone $zone `
                                   -Location $location
} else {
    $diskConfig = New-AzDiskConfig -SkuName $managedDiskSKU `
                                   -CreateOption FromImage `
                                   -Location $location
}

Set-AzDiskImageReference -Disk $diskConfig -Id $image.Id -Lun 0

New-AzDisk -ResourceGroupName $resourceGroup `
           -DiskName $diskName `
           -Disk $diskConfig
Or download the script from GitHub:
View the script on my GitHub page
On line 8 of the script, you can decide which version of Windows Server to upgrade to. Refer to the table in step 1 before choosing your version. Then perform the script.
After the script has run successfully, I will give a summary of the performed action:
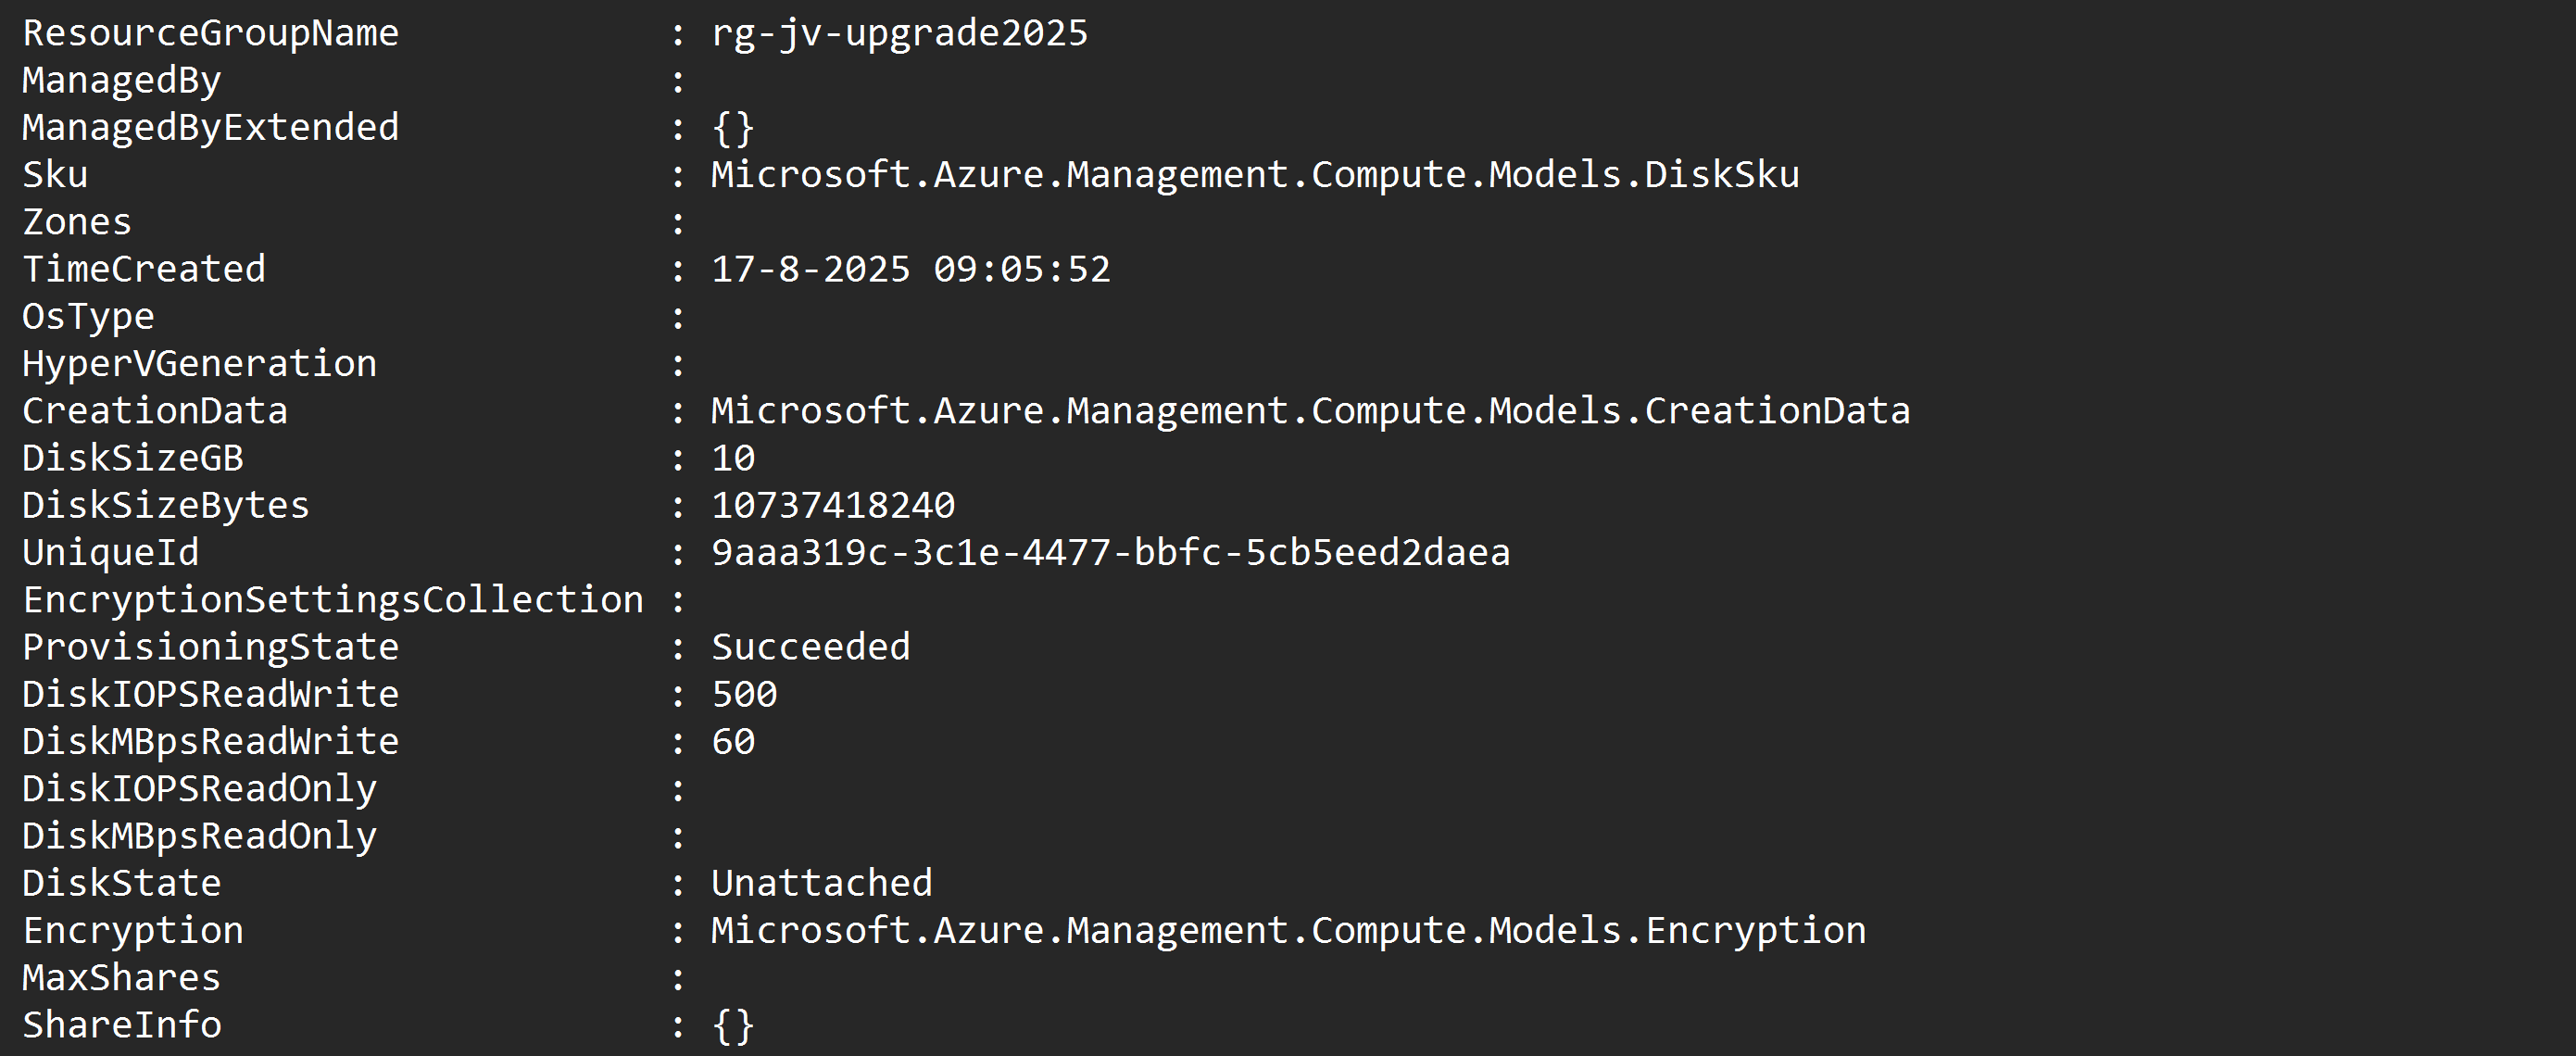
After running the script in the Azure Powershell window, the disk is available in the Azure Portal:
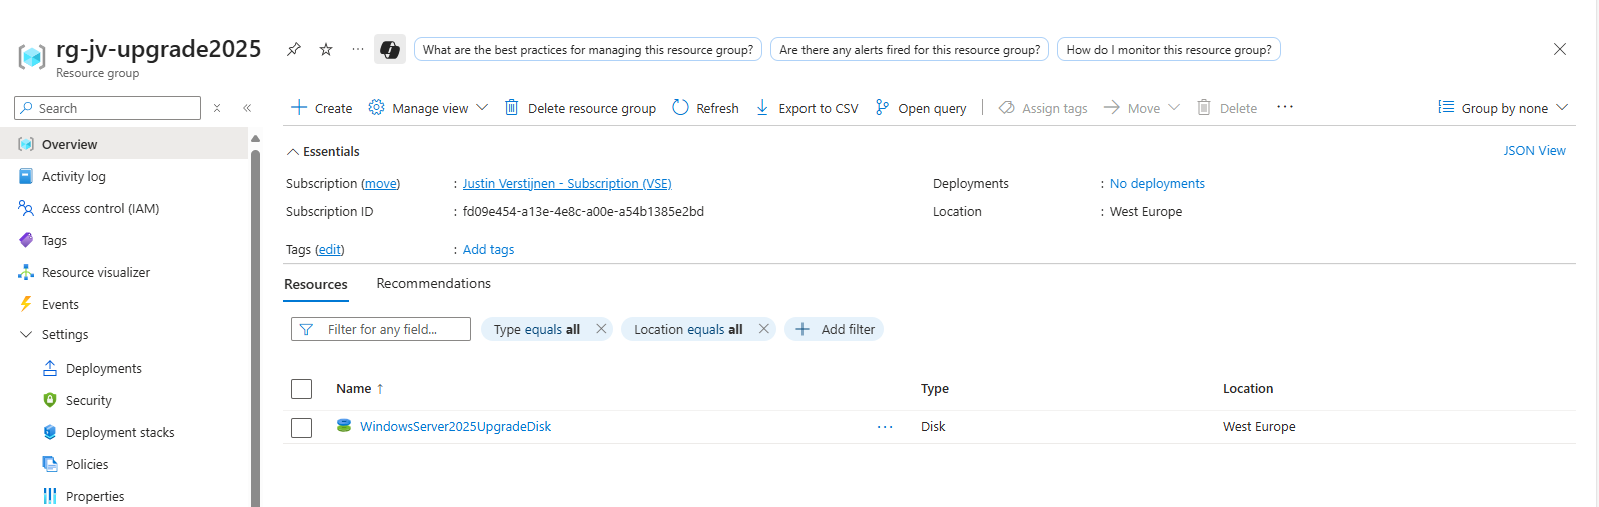
Step 3: Assign upgrade media to VM
After creating the upgrade media we have to assign it to the virtual machine we want to upgrade. You can do this in the Azure Portal by going to the virtual machine. After that, hit Disks.
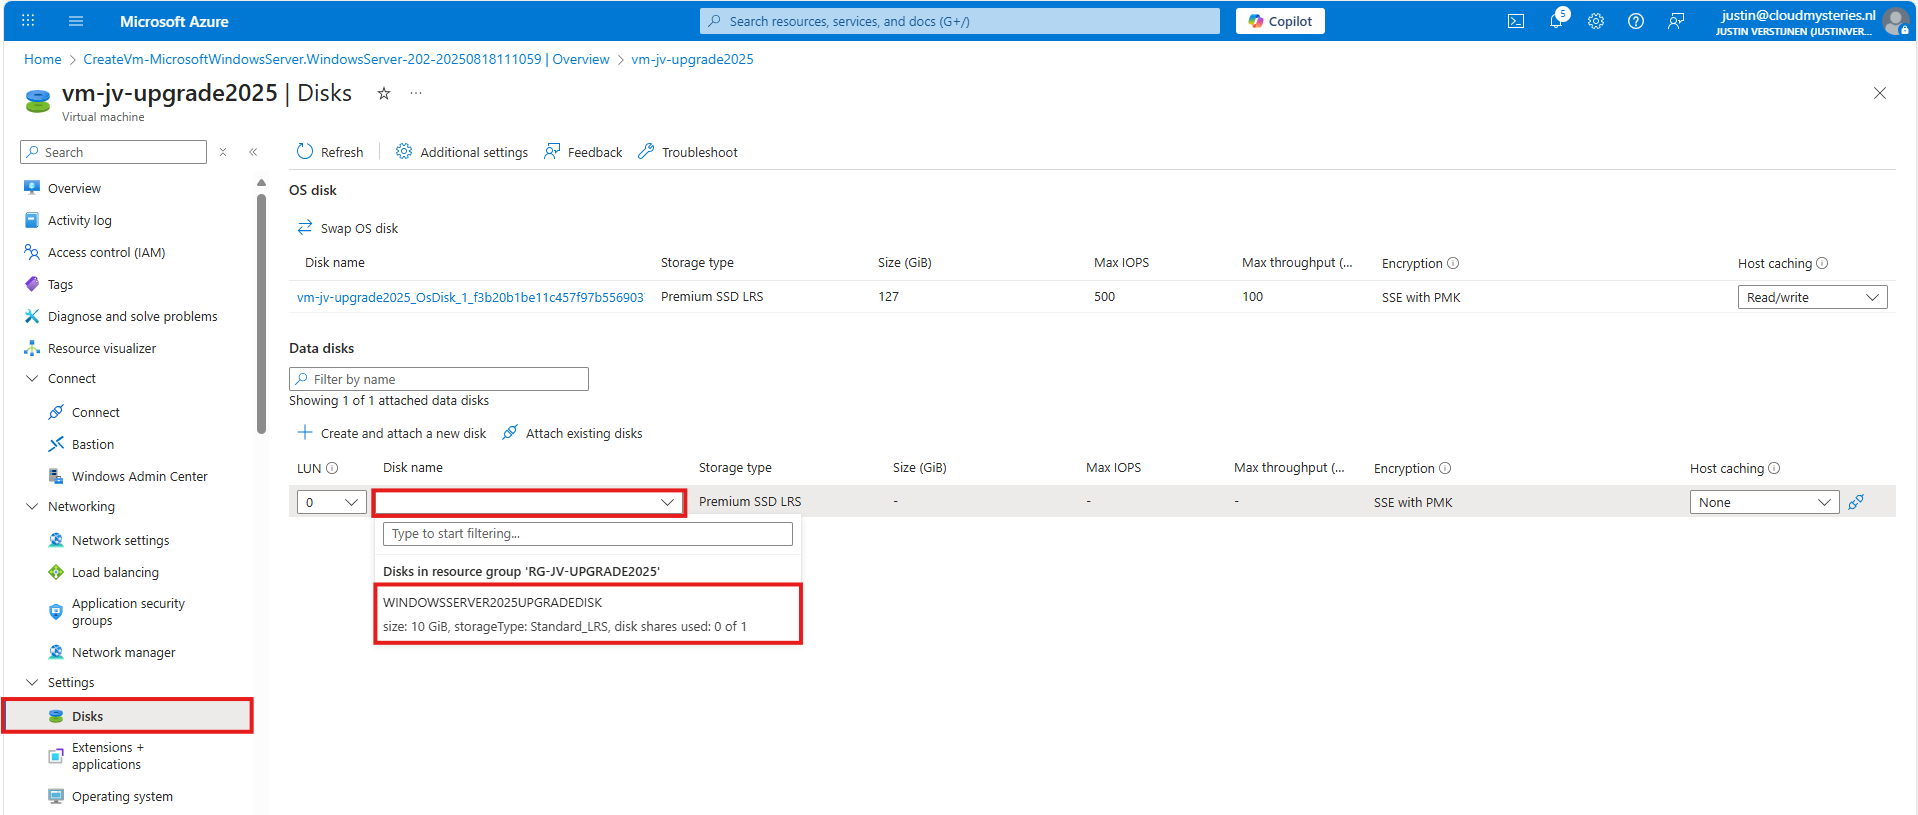
Then select to attach an existing disk, and select the upgrade media you have created through Powershell.
Note: The disk and virtual machine have to be in the same resource group to be attached.
Step 4: Start upgrade of Windows Server
Now we have prepared our environment for the upgrade of Windows Server, we can start the upgrade itself. For the purpose of this guide, I have quickly spun up a Windows Server 2022 machine to upgrade this to Windows Server 2025.
Login into the virtual machine and let’s do some pre-upgrade checks:
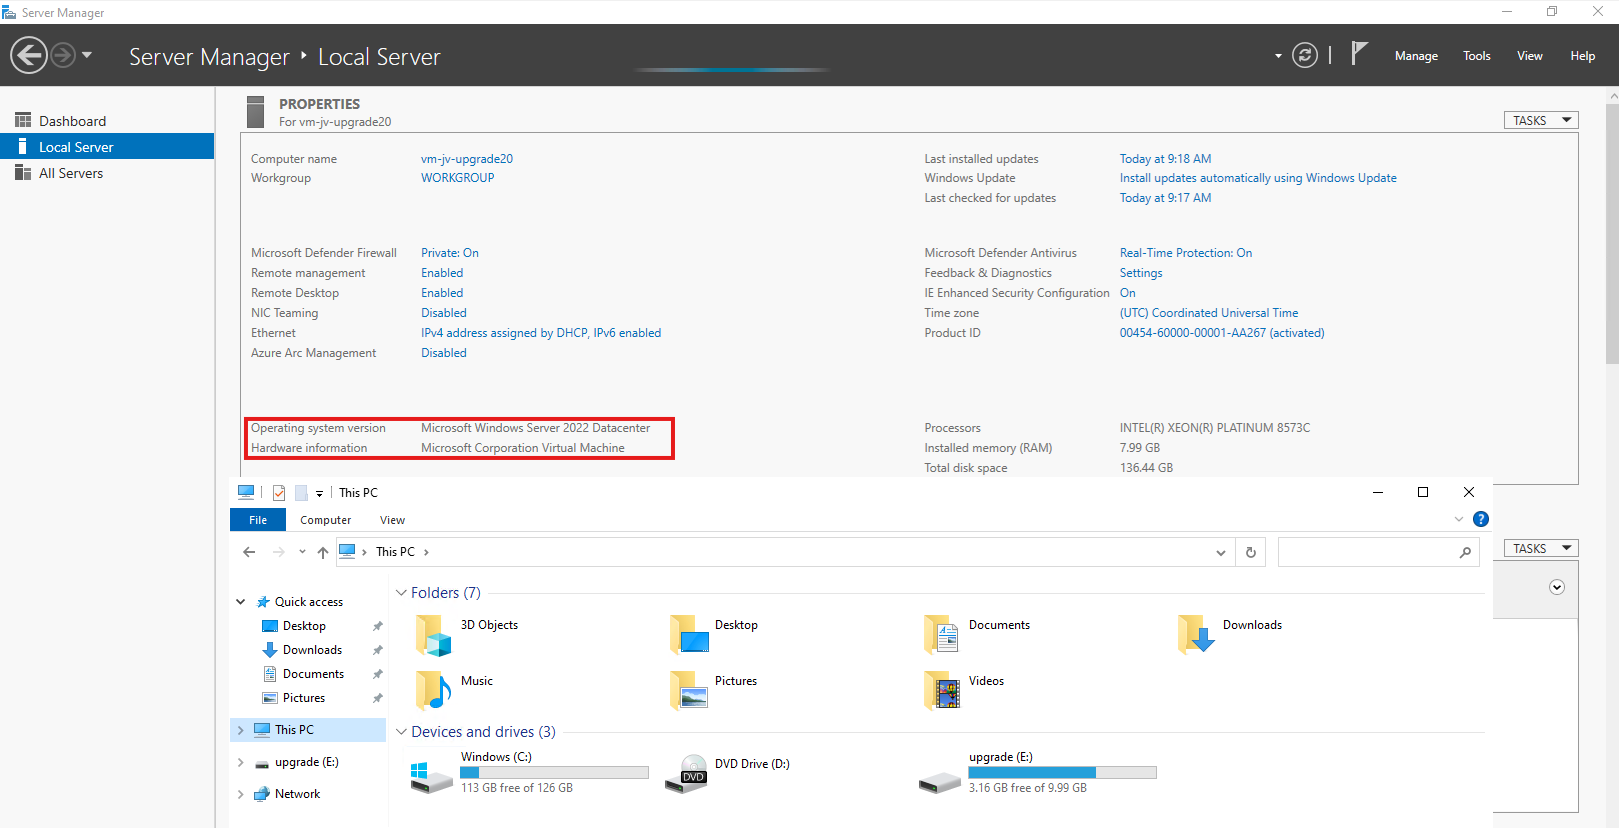
As you can see, the machine is on Windows Server 2022 Datacenter and we have enough disk space to perform this action. Now we can perform the upgrade through Windows Explorer, and then going to the upgrade disk we just created and assigned:
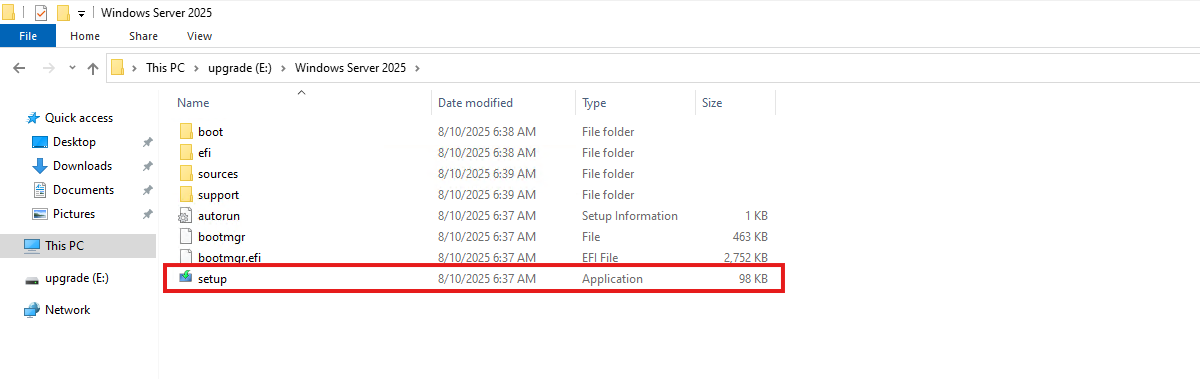
When the volume is not available in Windows Explorer, you first have to initialize the disk in Disk Management (diskmgmt.msc) in Windows. Then it will be available.
Open the volume upgrade and start setup.exe. The starup will take about 2 minutes.
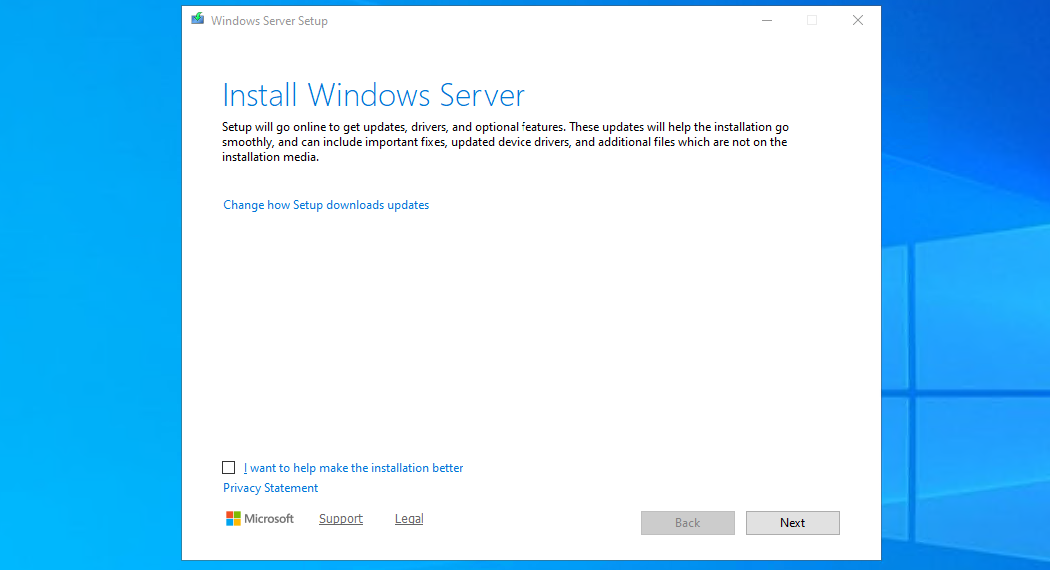
Click “Next”. Then there will be a short break of around 30 seconds for searching for updates.
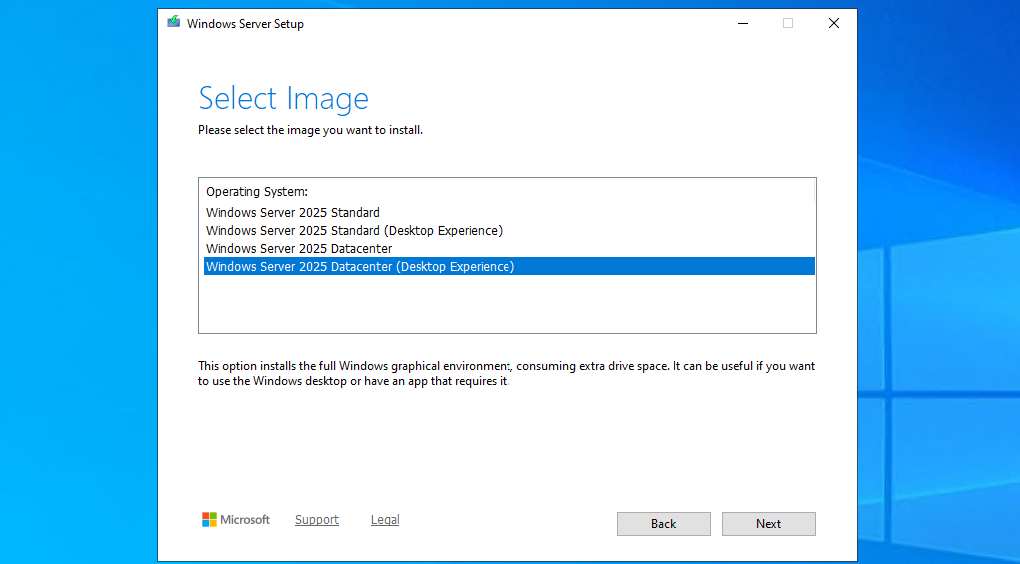
Then select you preferred version. Note that the default option is to install without graphical environment/Desktop Experience. Set this to your preferred version and click “Next”.
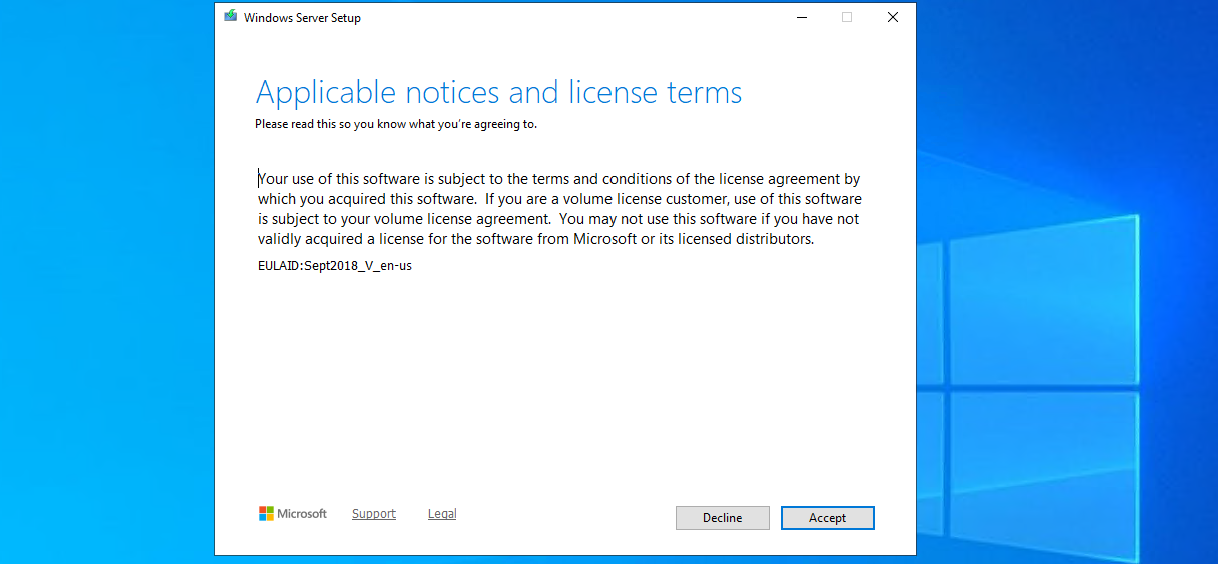
Ofcourse we have read those. Click Accept.
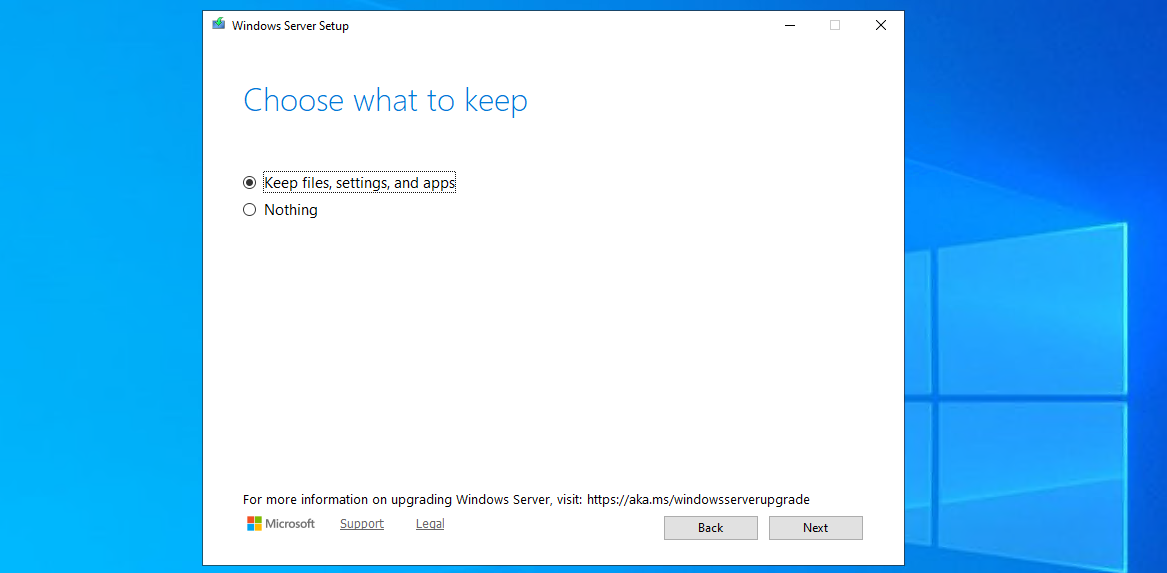
Choose here to keep files, settings and apps to make it an in-place upgrade. Click “Next”. There will be another short break of some minutes for the setup to download some updates.
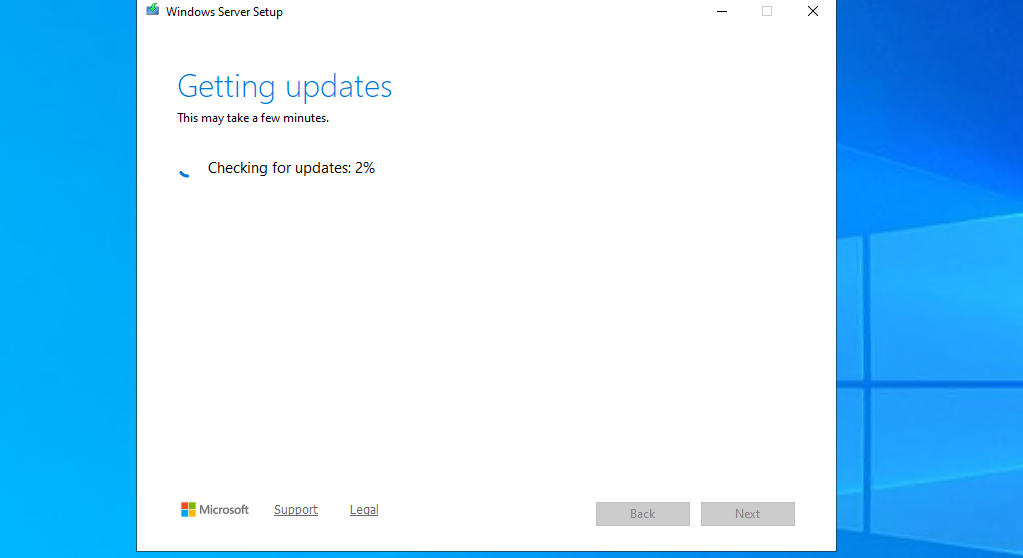
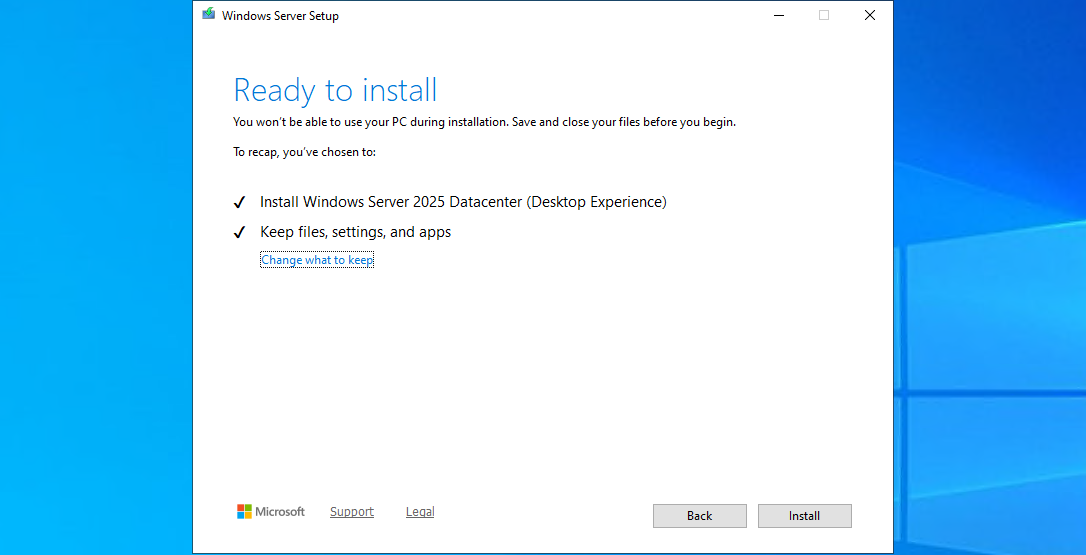
This process can take 45 minutes up to 2 hours, depending on the workload and the size of the virtual machine. Have a little patience during this upgrade.
Step 5: Check status during upgrade
After the machine will restart, RDP connection will be lost. However, you can check the status of the upgrade using the Azure Portal.
Go to the virtual machine you are upgrading, and go to: “Boot diagnostics”
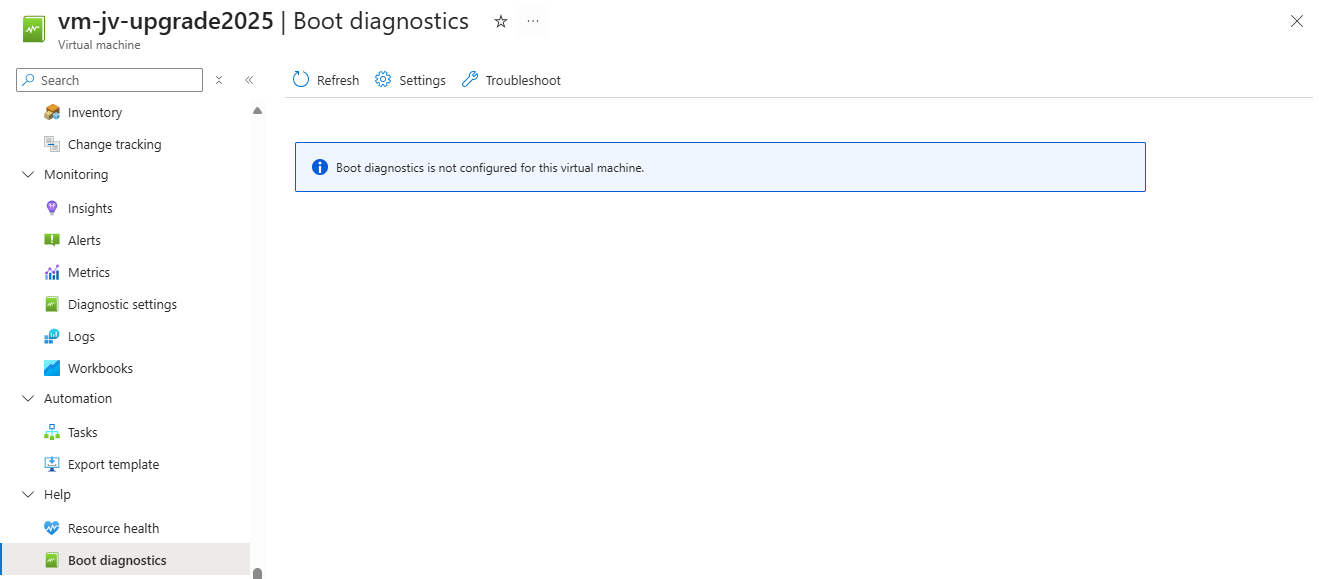
Then configure this for the time being if not already done. Click on “Settings”.
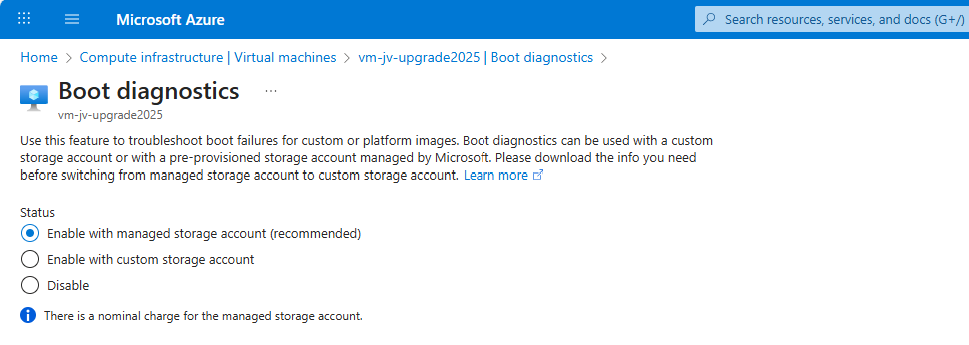
By default, select a managed storage account. If you use a custom storage account for this purpose, select the custom option and then your custom storage account.
We can check the status in the Azure Portal after the OS has restarted.
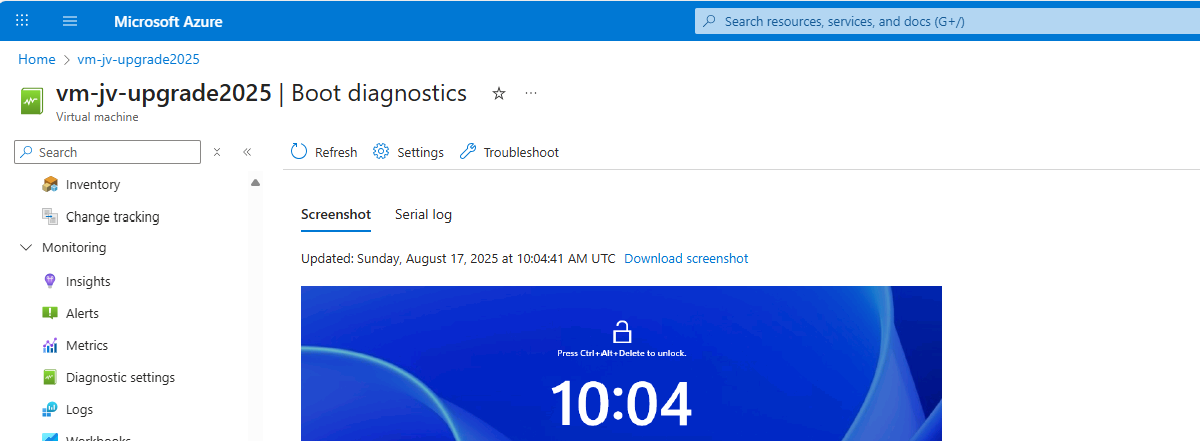
The upgrade went very fast in my case, within 30 minutes.
Step 6: After upgrading checks
After the upgrade process is completed I can recommend you to test the update before going into production. Every change in a machine can alter the working of the machine, especially in production workloads.
A checklist I can recommend for testing is:
- Check all Services for 3rd party applications
- Check if all disks and volumes are present in disk management
- Check all processes
- Check an application client side (like CRM/ERP/SQL)
- Check event logs in the virtual machine for possible errors
After these things are checked and no error occured, then the upgrade has been succeeded.
Summary
Upgrading a Windows Server to Server 2025 on Azure is relatively easy, although it can be somewhat challenging when starting out. It is no more than creating a upgrade disk, link to the machine and starting the upgrade like before with on-premises solutions.
The only downside is that Microsoft does not support upgrading Windows Server Azure Editions (ServerTurbine) yet, we are waiting with high hopes for this. Upgrading only works on the default Windows Server versions:
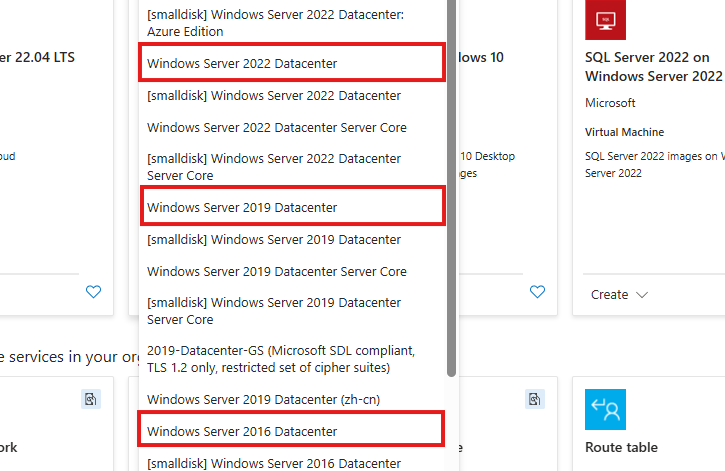
Thank you for reading ths guide and I hope it helped you out upgrading your server to the latest and most secured version.
Sources
These sources helped me by writing and research for this post;
End of the page 🎉
You have reached the end of the page. You can navigate through other blog posts as well, share this post on X, LinkedIn and Reddit or return to the blog posts collection page. Thank you for visiting this post.
If you think something is wrong with this post or you want to know more, you can send me a message to one of my social profiles at: https://justinverstijnen.nl/about/
If you find this page and blog very useful and you want to leave a donation, you can use the button below to buy me a beer. Hosting and maintaining a website takes a lot of time and money. Thank you in advance and cheers :)
The terms and conditions apply to this post.
Installing Windows Updates through PowerShell (script)
Sometimes we want to install updates by hand because of the need for fast patching. But logging into every server and installing them manually is a hell of a task and takes a lot of time.
I have made a very simple script to install Windows Updates by hand using PowerShell including logging to exactly know which updates there were installed for monitoring later on.
The good part about this script/PowerShell module is that it does support both Windows Client and Windows Server installations.
Where to download this script?
For the fast pass, my script can be downloaded here:
What does the Windows Updates script do?
The script I have made focusses primarily on searching for and installing the latest Windows Updates. It also creates a log file to exactly know what updates were installed for monitoring and documentation purposes.
The script itself has 6 steps:
- Ensuring it runs as Administrator
- Enable logging
- Saves a log file in the same directory and with 100KB limit
- Searching Windows Updates and installing them
- Rebooting server to apply latest updates
How to install the Windows Updates script automatically
For installation with Task Scheduler I included an installation script that, by default, configures a task in the Windows Task Scheduler that runs it;
- Every first day of the month
- At hour 03:00
If these settings are great for you, you can leave them as-is.
The Installation script creates a folder in C:\ named “Scripts” if not already there and places the cleaning script there.
Installation
Click on the blue button above. You now are on the Github page of the script.
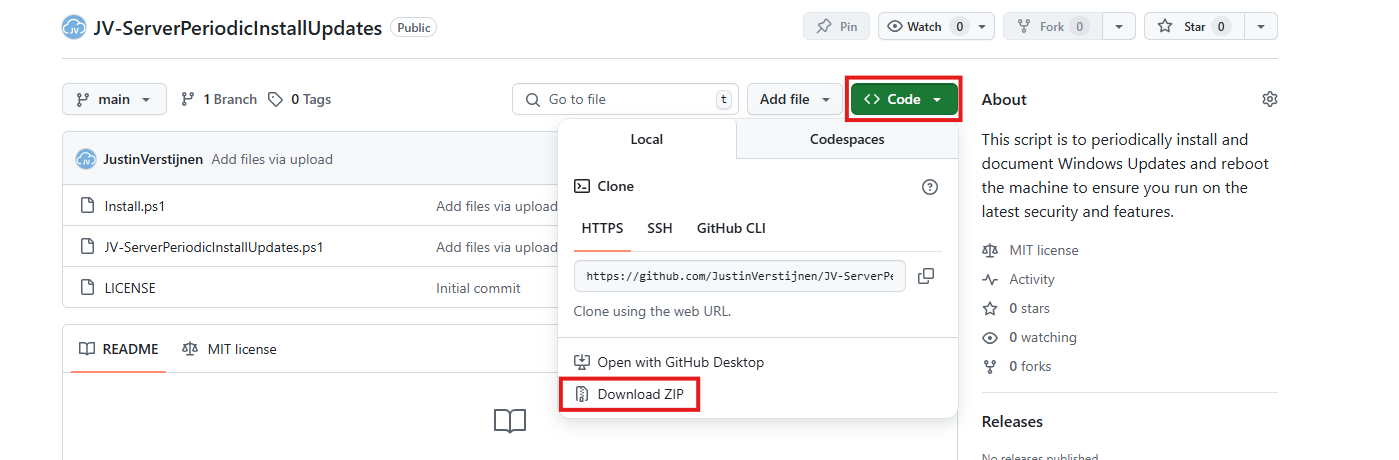
Click on “Code” and then “Download ZIP”.
Now place the files on the server where you want to install the script.
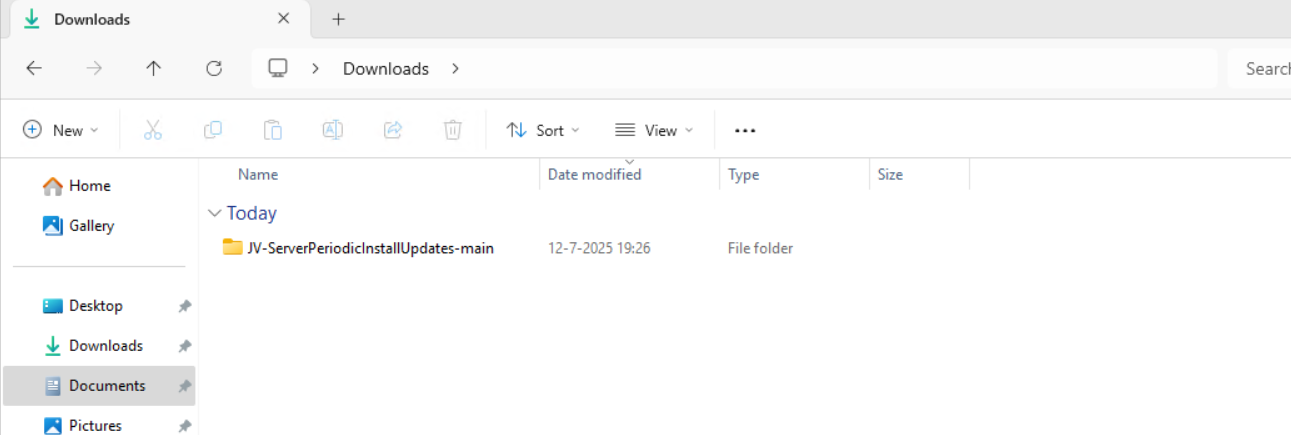
Unzip the file and then we can run the “Install” script. This must be run as administrator and temporarily without Execution Policy.
Open Powershell ISE as administrator.

Now open the “Install” script.
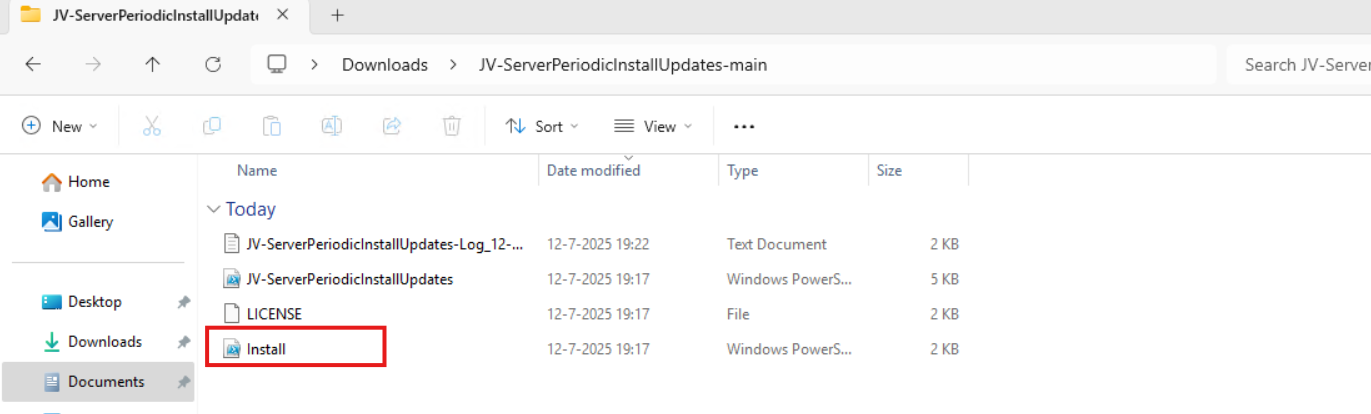
Review it’s default settings and if you feel at home in PowerShell, review the rest of the script to understand what it does.
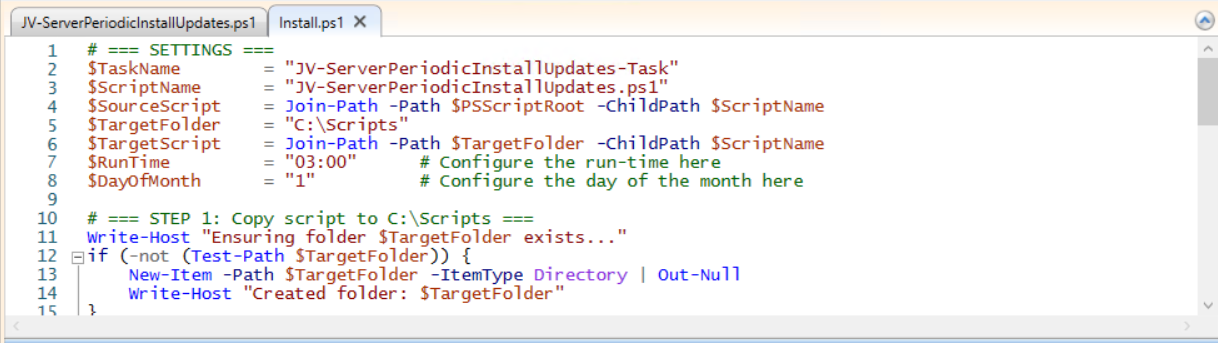
You can change the schedule very easily by changing the runtime: 0:00 till 23:59 and the day of month to specify the day number of the month (1-31).
After your schedule is ready, let’s ensure we temporarily bypass the Execution Policy by typing the command in the blue window below:
POWERSHELL
Set-ExecutionPolicy Unrestricted -Scope ProcessThis way the execution policy stays enabled but for this session only it’s been lowered. When you close the window, you have to type this again before be able to run scripts.
Execute the command, and when prompted to lower the policy, click Yes.

Now execute the Install script by clicking the green “Run” button:

After executing the script, we get the message that the task has been created succesfully:

Let’s check this in the Windows Task Scheduler:

As you can see, the script is succesfully installed to Task Scheduler. This ensures it runs every first of the month at 03:00 (or at your own defined schedule). Also, the script has been placed in C:\Scripts for a good overview of the scripts of the system.
How to install the Windows Update script manually
If you want to define your own schedule and script location, it can be better to install the script yourself or only using it when you need it.
Click on the blue Download button at the beginning of the page.
Click on “Code” and then “Download ZIP”.
Then place the ZIP file on the server where you want to install the disk cleanup script.
Move the script to the right location
Select the script and place it in your preferred location. My advice is to not install this in a user profile, but in a location accessible for all users. Like C:\Scripts.

I have placed the scipt into the correct folder. If you also want the script to run on a schedule, open up the “Task Scheduler” (taskschd.msc).
Creating the scheduled task

Do a “Right-mouse click” on the empty space and click on “Create New Task…”.
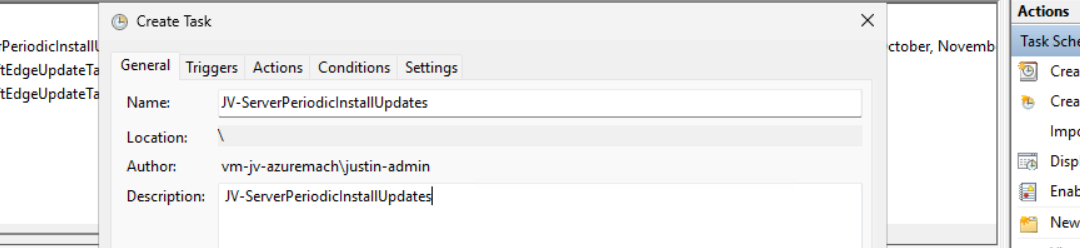
Give the task a name and description that alings with your documentation.
Then change the user to “SYSTEM” to run this in SYSTEM context for the highest privileges:

Then check the “Run with highest privileges” and select the highest OS possible in the “Configure for” dropdown menu.
Configure script trigger
Go to the “Triggers” tab and add a new trigger.

Select “Monthly” and select all months. Then change the “Days” field to 1 to run it on the first day.
You can defer from this schedule if your environment needs that. This is just an example.
Now the page looks like this:

Configure script action
Click “OK” and go to the “Actions” tab. Create a new action.
In the “Program/Script” field, type in the following:
POWERSHELL
powershell.exeIn the “Add arguments (optional):” field, type in the following:
POWERSHELL
-ExecutionPolicy Bypass -File C:\Scripts\JV-ServerPeriodicInstallUpdates.ps1
Now click on “OK” twice to create the task.
Testing the task
Now we can manually run the task to ensure it runs on a schedule too. Right click the task and click on “Run” to start the task.

As we can see, the script runs successfully as it still runs after 30 seconds. This means the task and permissions are correct.

The script can take up to several hours when cleaning everything, depending on the server size.
In the folder of the script, a log file is created:
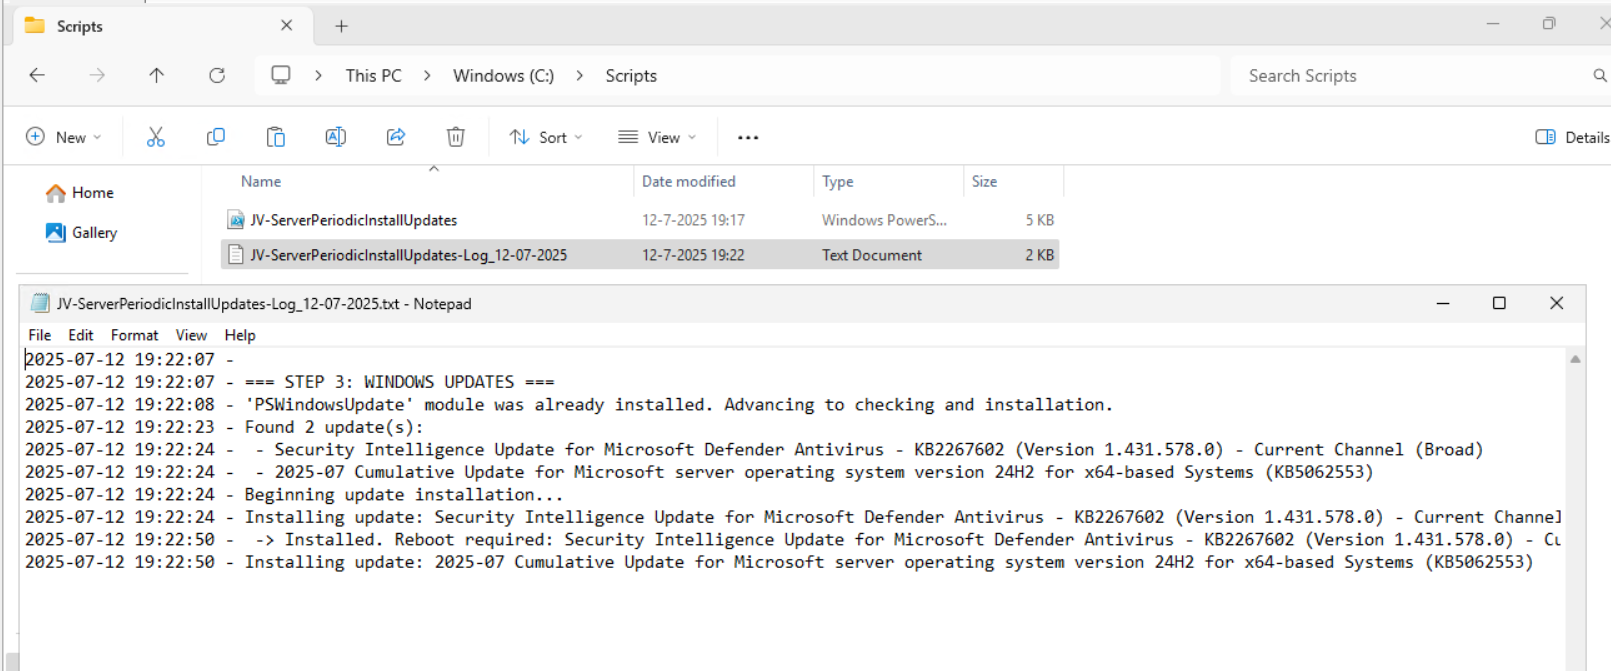
Every update installed will be logged for documentation and monitoring purposes. This can come in handy when an update unfortunately brings bugs with it so we can search for and remove this update.
Summary
Installing Windows Updates is critical for maintaining and securing your servers. In the history of IT, we did very often wait till we installed updates because of possible errors or misfunctioning with our applications but the price you pay with this approach, not being secured against zero day threats and vulnerabilities is much higher. We can’t install updates to much.
This script is useful when doing update installations by hand. When searching for automatic installation of Windows Updates in Azure, I would recommend using Azure Update Manager.
Sources
End of the page 🎉
You have reached the end of the page. You can navigate through other blog posts as well, share this post on X, LinkedIn and Reddit or return to the blog posts collection page. Thank you for visiting this post.
If you think something is wrong with this post or you want to know more, you can send me a message to one of my social profiles at: https://justinverstijnen.nl/about/
If you find this page and blog very useful and you want to leave a donation, you can use the button below to buy me a beer. Hosting and maintaining a website takes a lot of time and money. Thank you in advance and cheers :)
The terms and conditions apply to this post.
Use Ephemeral OS Disks in Azure
In Azure, you have the option to create Ephemeral OS disks for your machine. This sounds really cool but what is it actually, what pro’s and cons are coming with them, what is the pricing and how do we use them? I will do my best to explain everything in this guide.
Requirements
- Around 25 minutes of your time
- An Azure subscription (if wanting to deploy)
- Basic knowledge of Azure
- Basic knowledge of servers and infrastructure
What are Ephemeral OS Disks?
Ephemeral OS Disks are disks in Azure where the data is stored directly on the hypervisor itself, rather than having a managed disk which could be resided at the very other end of a datacenter. Every cable and step between the disk and the virtual machine creates latency which will result in your machine being slower.
Ephemeral OS Disk topology
Now this looks really how it normally should look.
Managed OS Disk topology
Now, let’s take a look at how normal, Managed disks work:
Topologies are simplified for more understanding.
As you can see, they could be stored anywhere in a datacenter or region. It could even be another datacenter. We can’t see this in the portal. We only see that a VM and disk are in a specific region and availability zone, but we don’t have further control.
Configuring Ephemeral OS Disks so mean much less latency and much more performance. Let’s dive into the pro’s and cons before being overjoyed.
Pro’s and Cons of Ephemeral OS Disks
Now let’s outline the pro’s and cons of Ephemeral OS Disks before jumping into the Azure Portal and configuring them:
| Pro | Con | Difference with managed disk |
| Very high disk performance and great user experience | Only support for VM sizes with local storage (includes non-capital “d” in size: D8dv4, E4ds_v6 | Managed disks support all VM sizes |
| No disk costs | Deallocation of VM not possible, VMs must be on 24/7 | Deallocation possible, saving money when VMs are shutdown and deallocated |
| Data storage is non-persistent, this means when a VM is redeployed or moved to another host, you data will be gone | Managed disks are persistent across a complete region | |
| No datacenter redundancy, VMs stay in the same datacenter for its lifetime | Datacenter redundancy and region redundancy possible with ZRS and GRS | |
| Resizing of disk not possible | Resizing possible (only increase) | |
| Backup, imaging or changing disk after deployment not possible | Backup, imaging and changing disks possible |
As you can see, this is exactly why I warned you for the cons, because these cons make it unusable for most workloads. However, there is at least one use-case where I can think of where the pros weigh up to the cons: Azure Virtual Desktop.
Theoretical performance difference
According to the Azure Portal, you have the following performance difference when using Ephemeral OS disks and Managed disks for the same VM size:
When using a E4ds_v6 VM size (and 128GB size disk);
| Disk type | IOPS | Throughput (Mbps) | |
| Ephemeral OS disk | 18000 | 238 | |
| Managed OS disk | 500 | 100 |
Let’s deploy a virtual machine with Ephemeral OS disk
To deploy a new virtual machine with a Ephemeral OS disk, follow these steps:
Login to the Azure Portal, and deploy a new virtual machine:
- Select a resource group
- Give it a name
- Disable availability zones (as this is not supported)
- Select your image (Windows 11 24H2 Multi-session in my case)
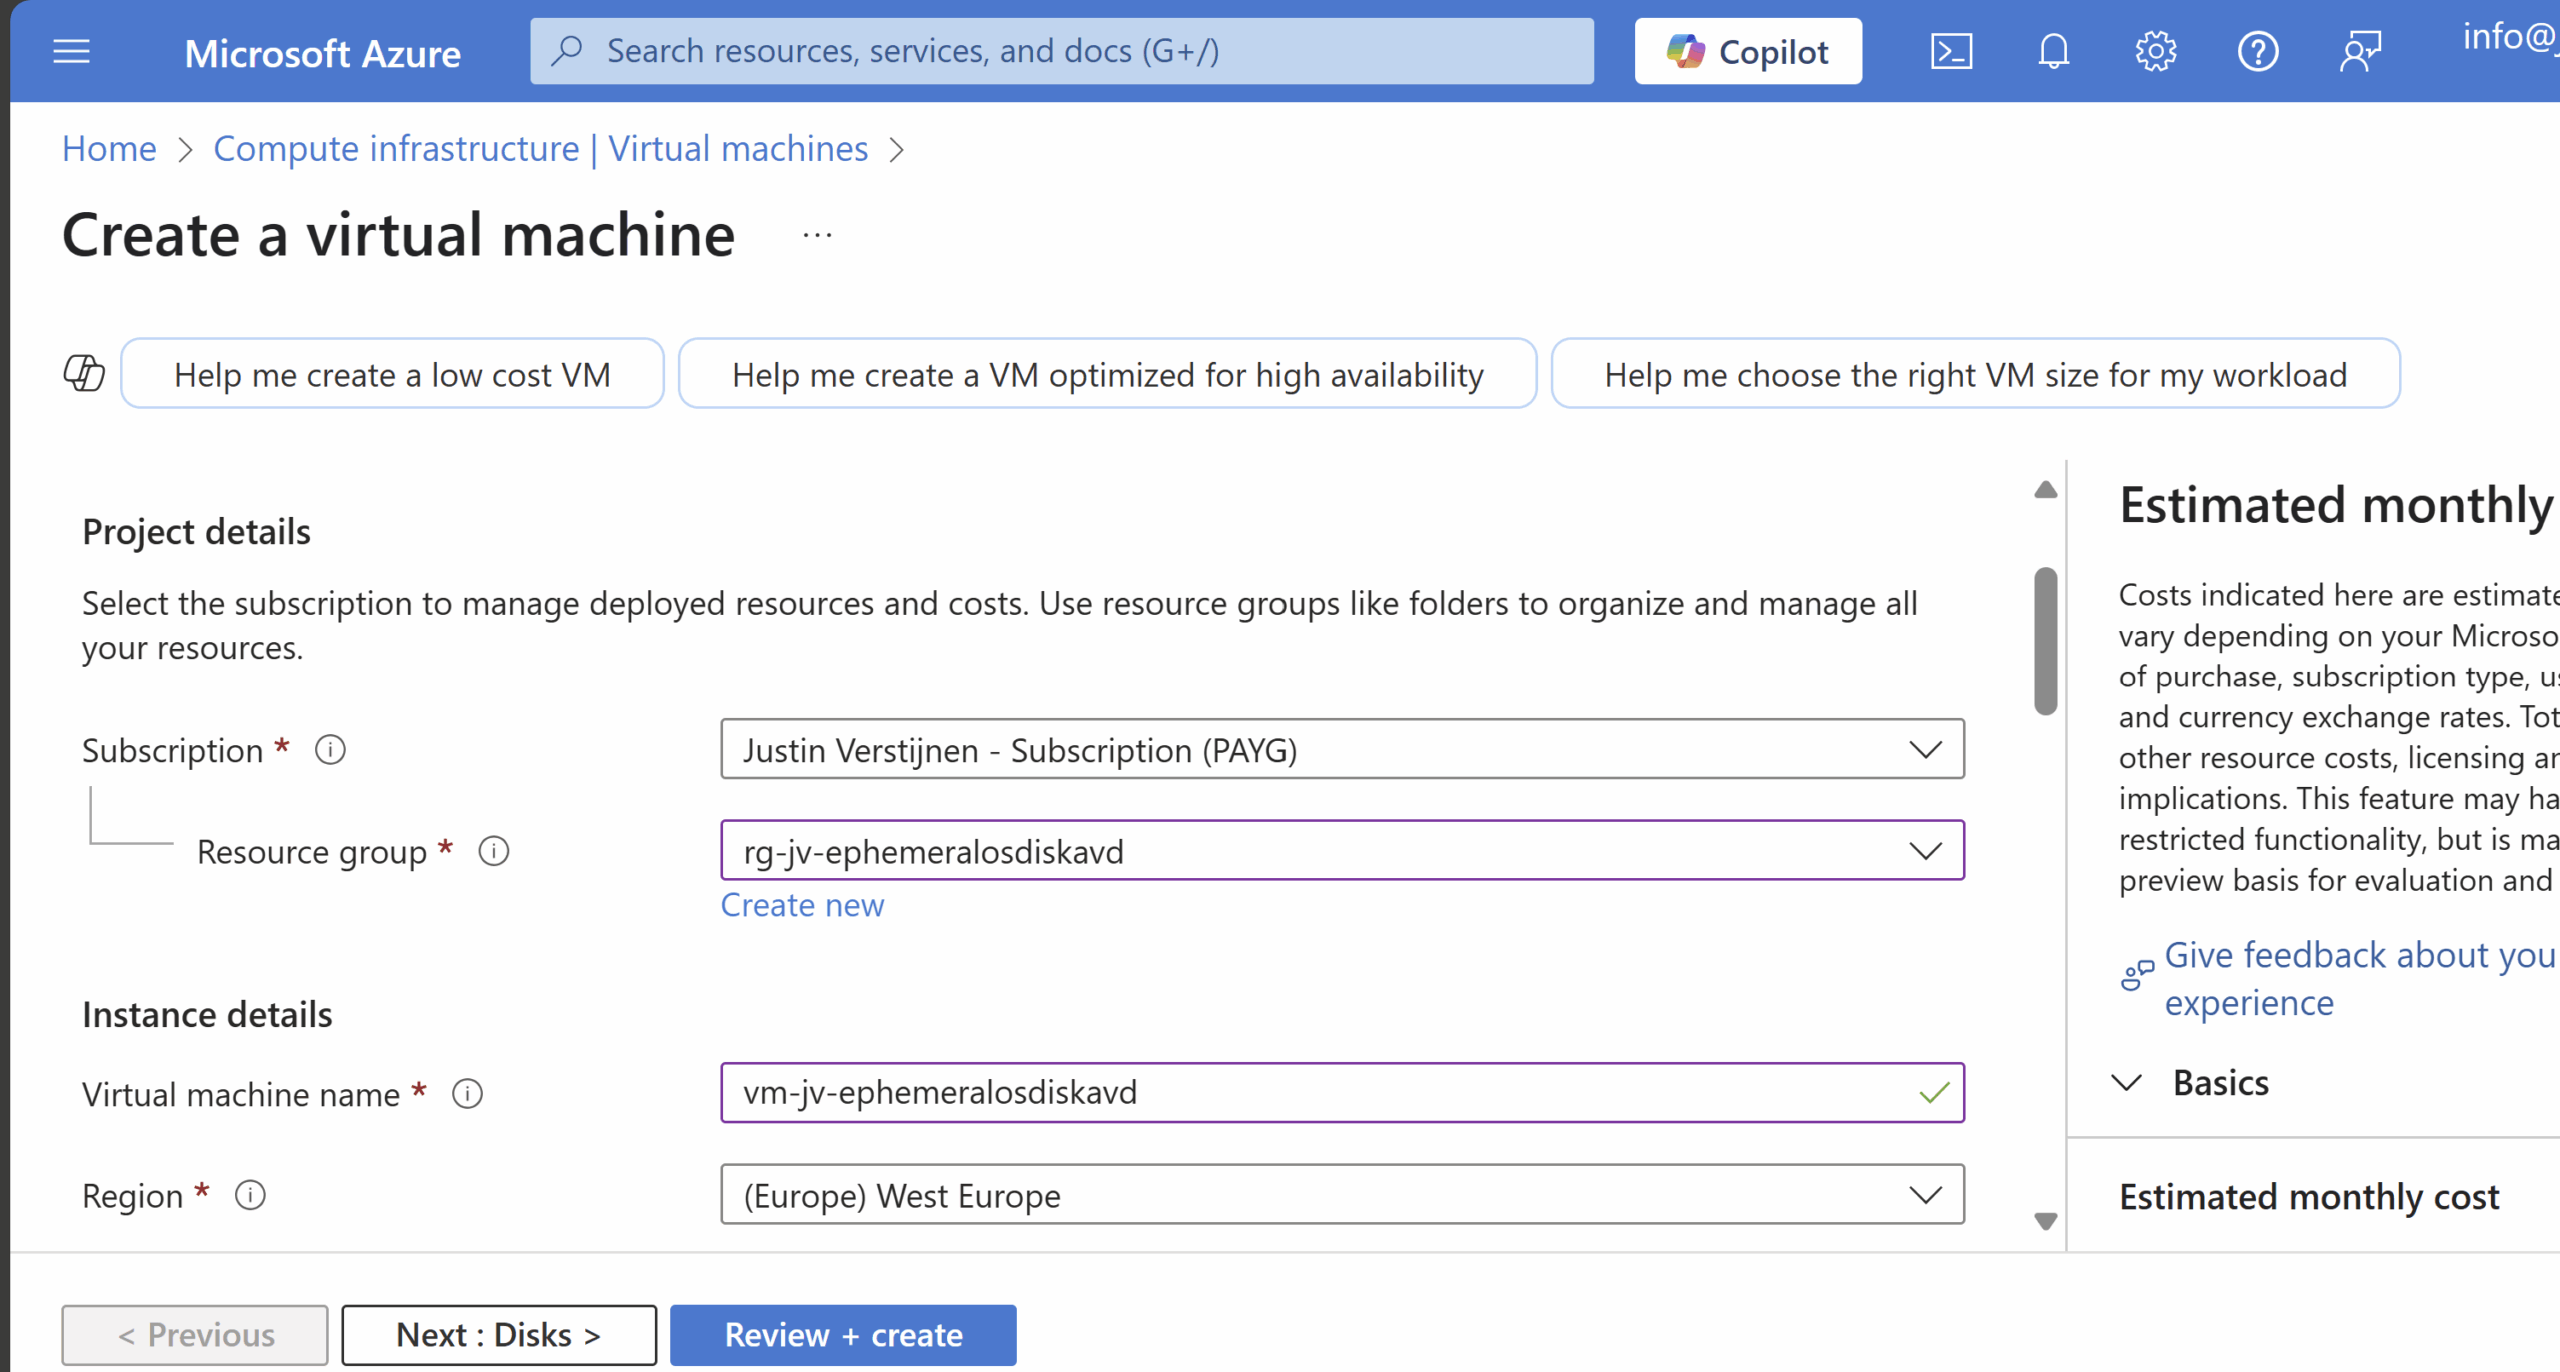
Now we have to select a size, which mus contain a non-capital “d”. This stands for having local NVME storage on the hypervisor which makes it bloody fast. In my case, I selected the vm size: “E4ds_v6”
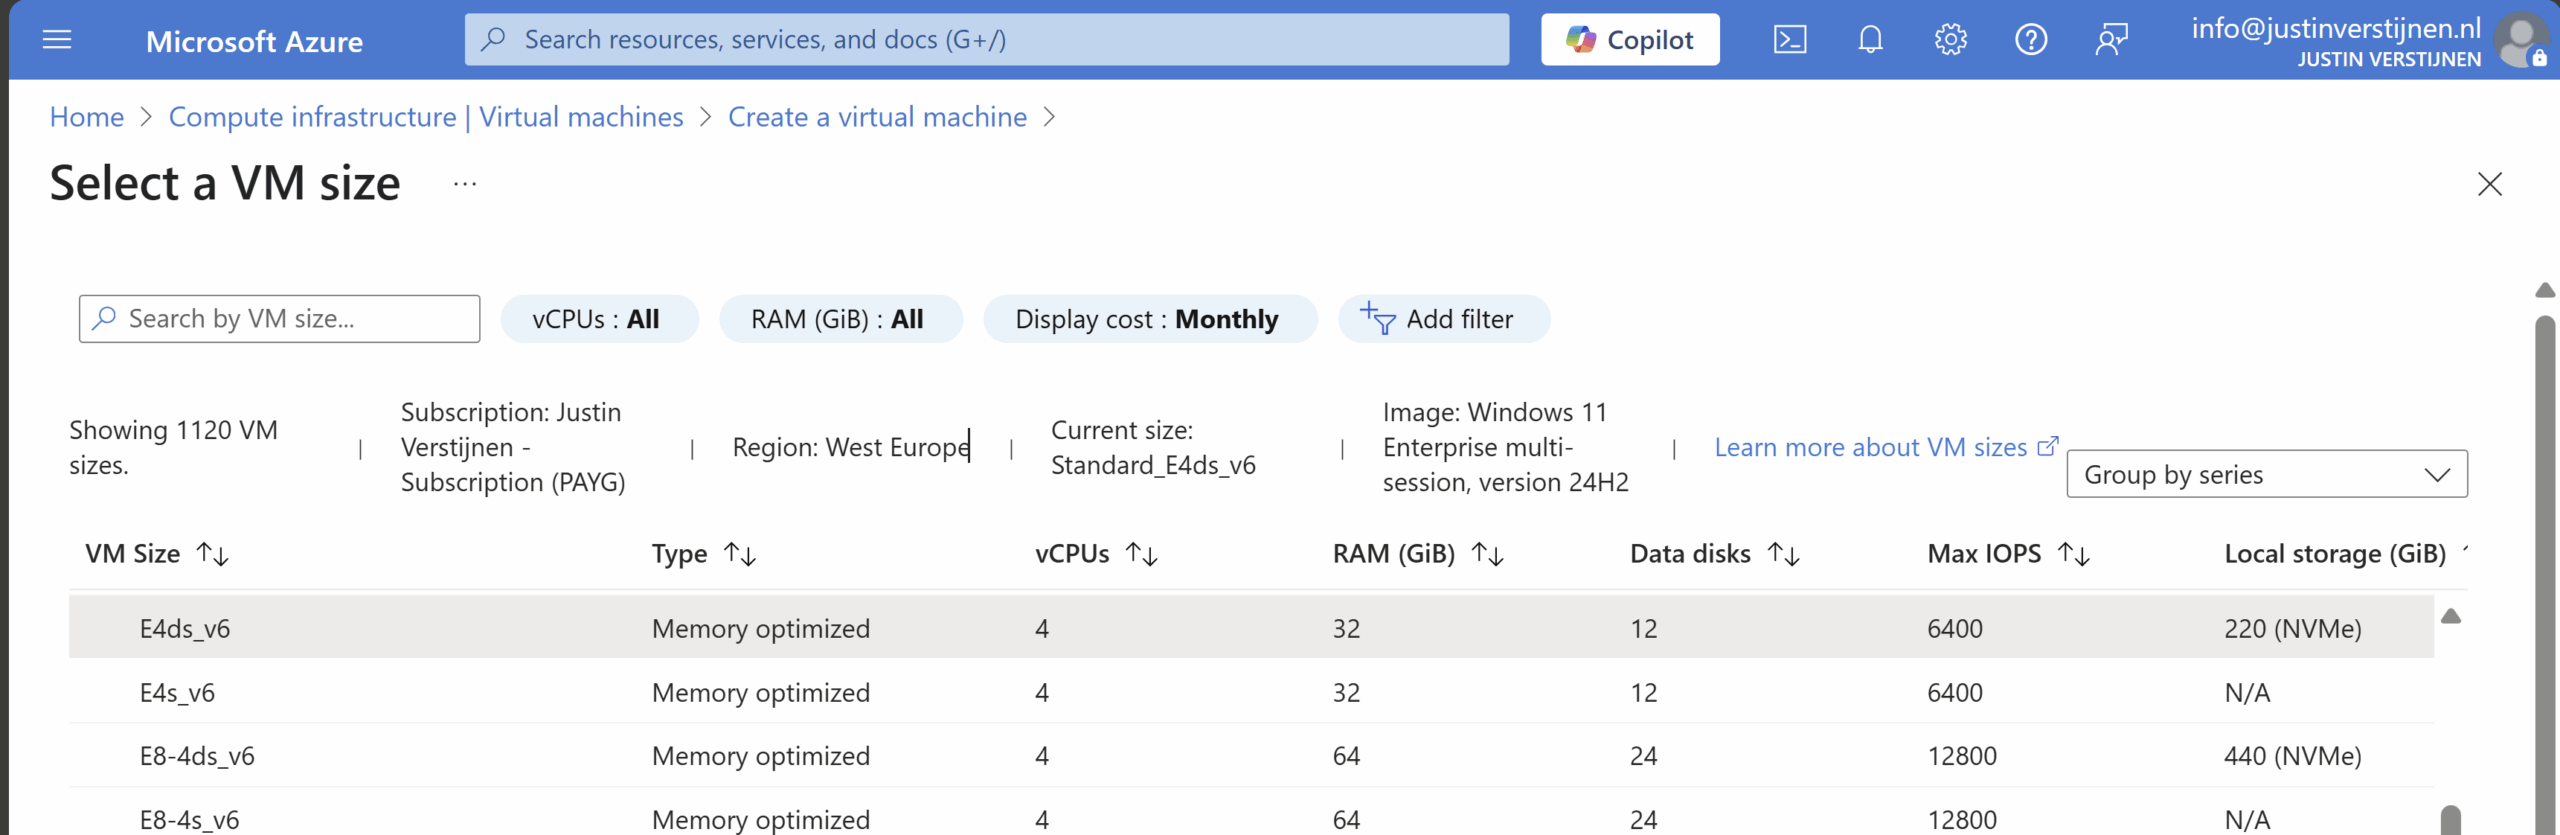
Now the wizard looks like this:
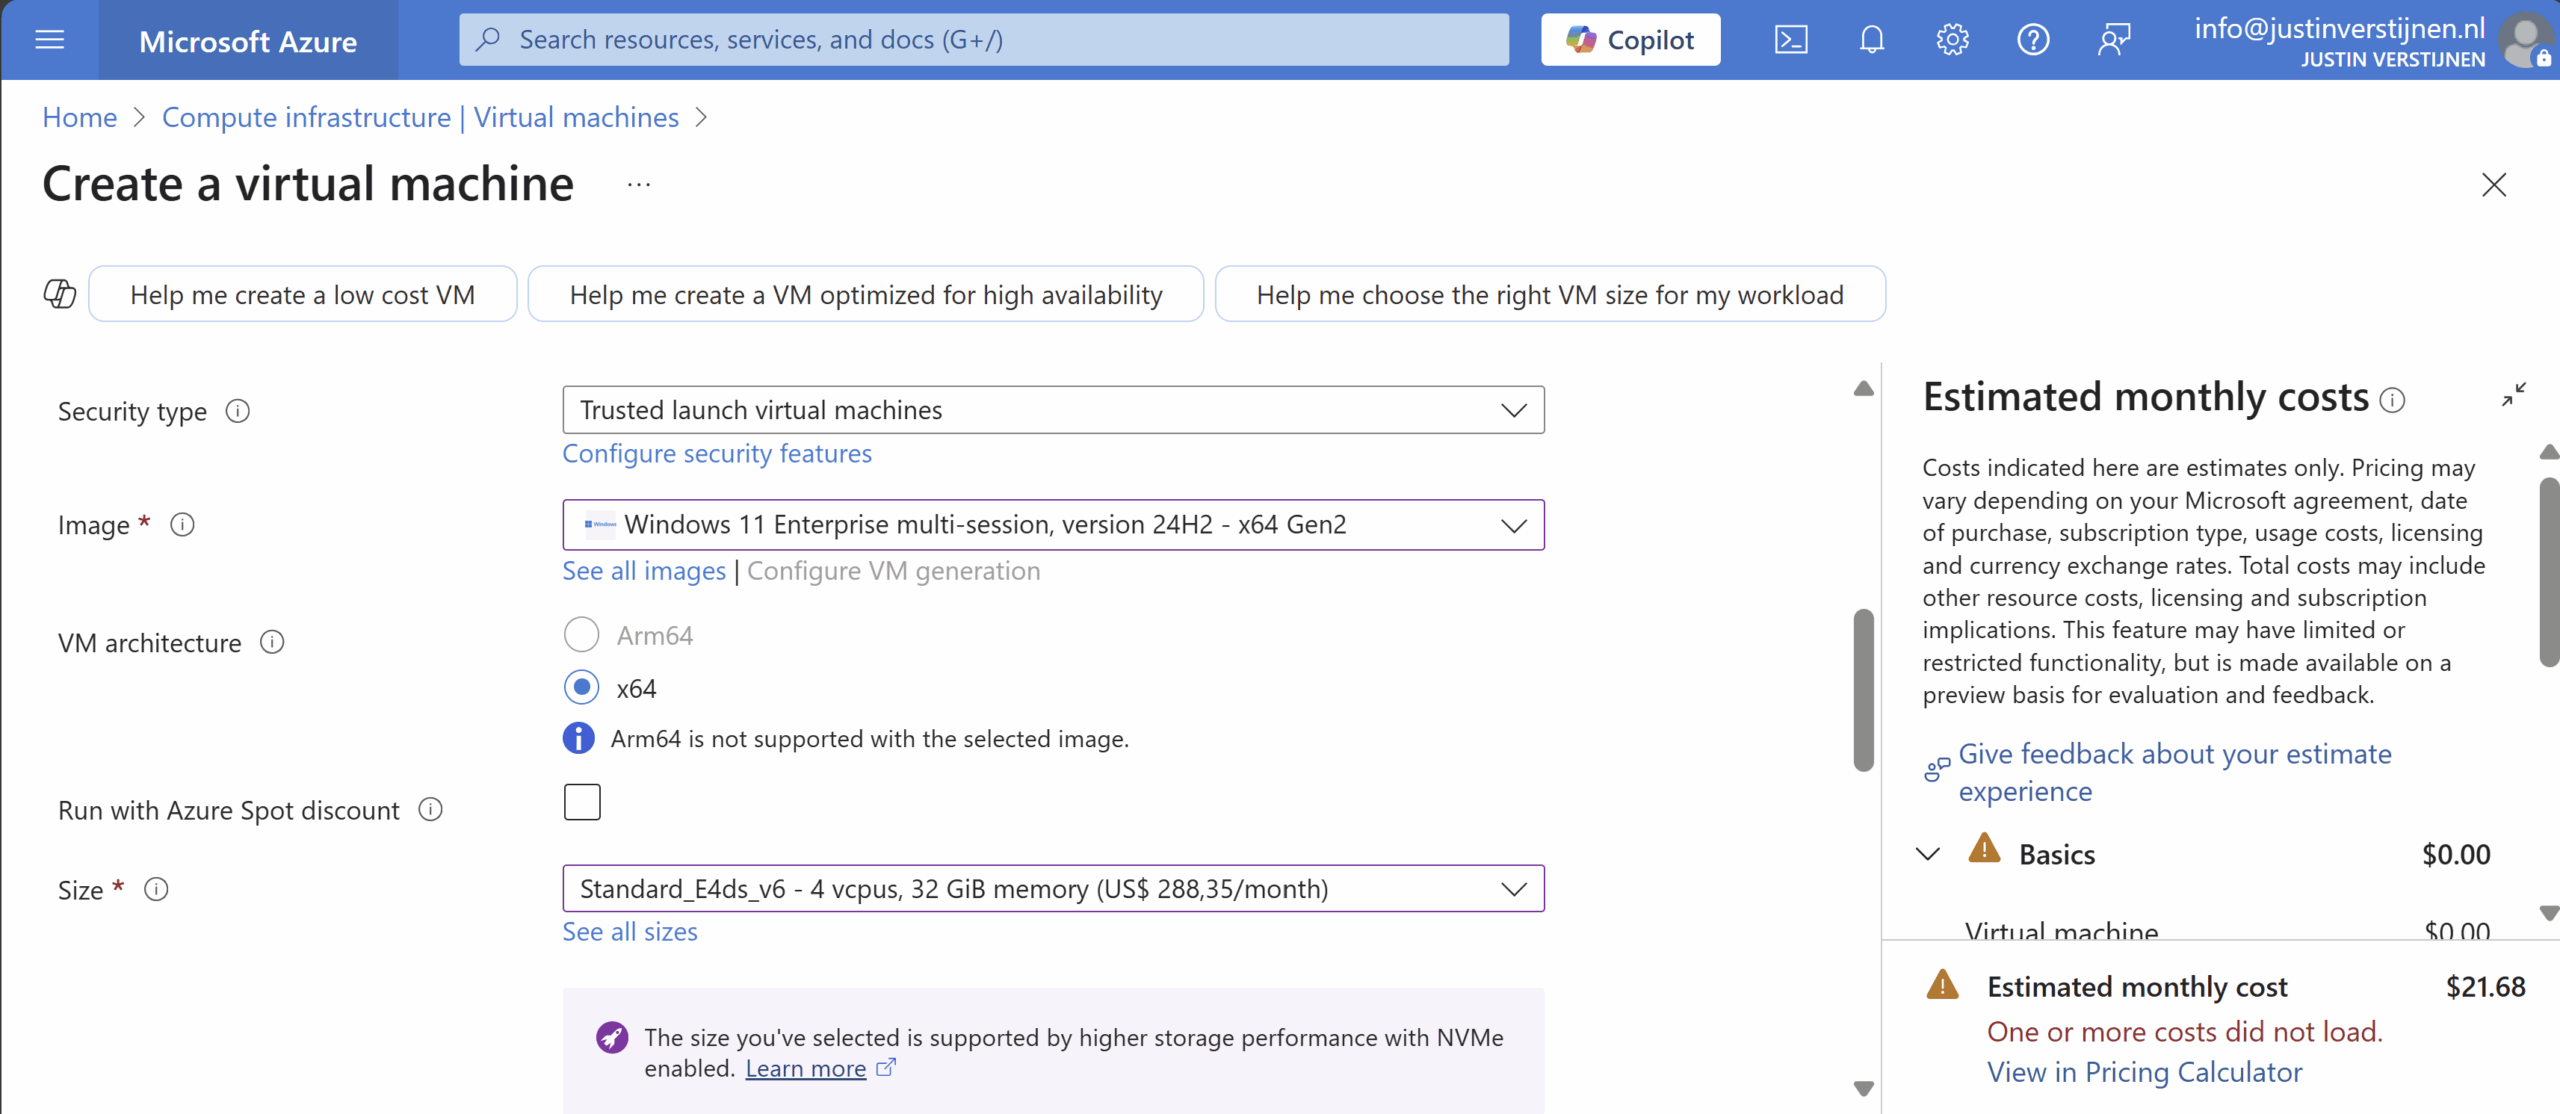
Proceed by creating your local account and advance to the tab “Disks”.
Here we have to scroll down to the “Advanced” section, expand it and here we have the hided options for having Ephemeral OS disks:
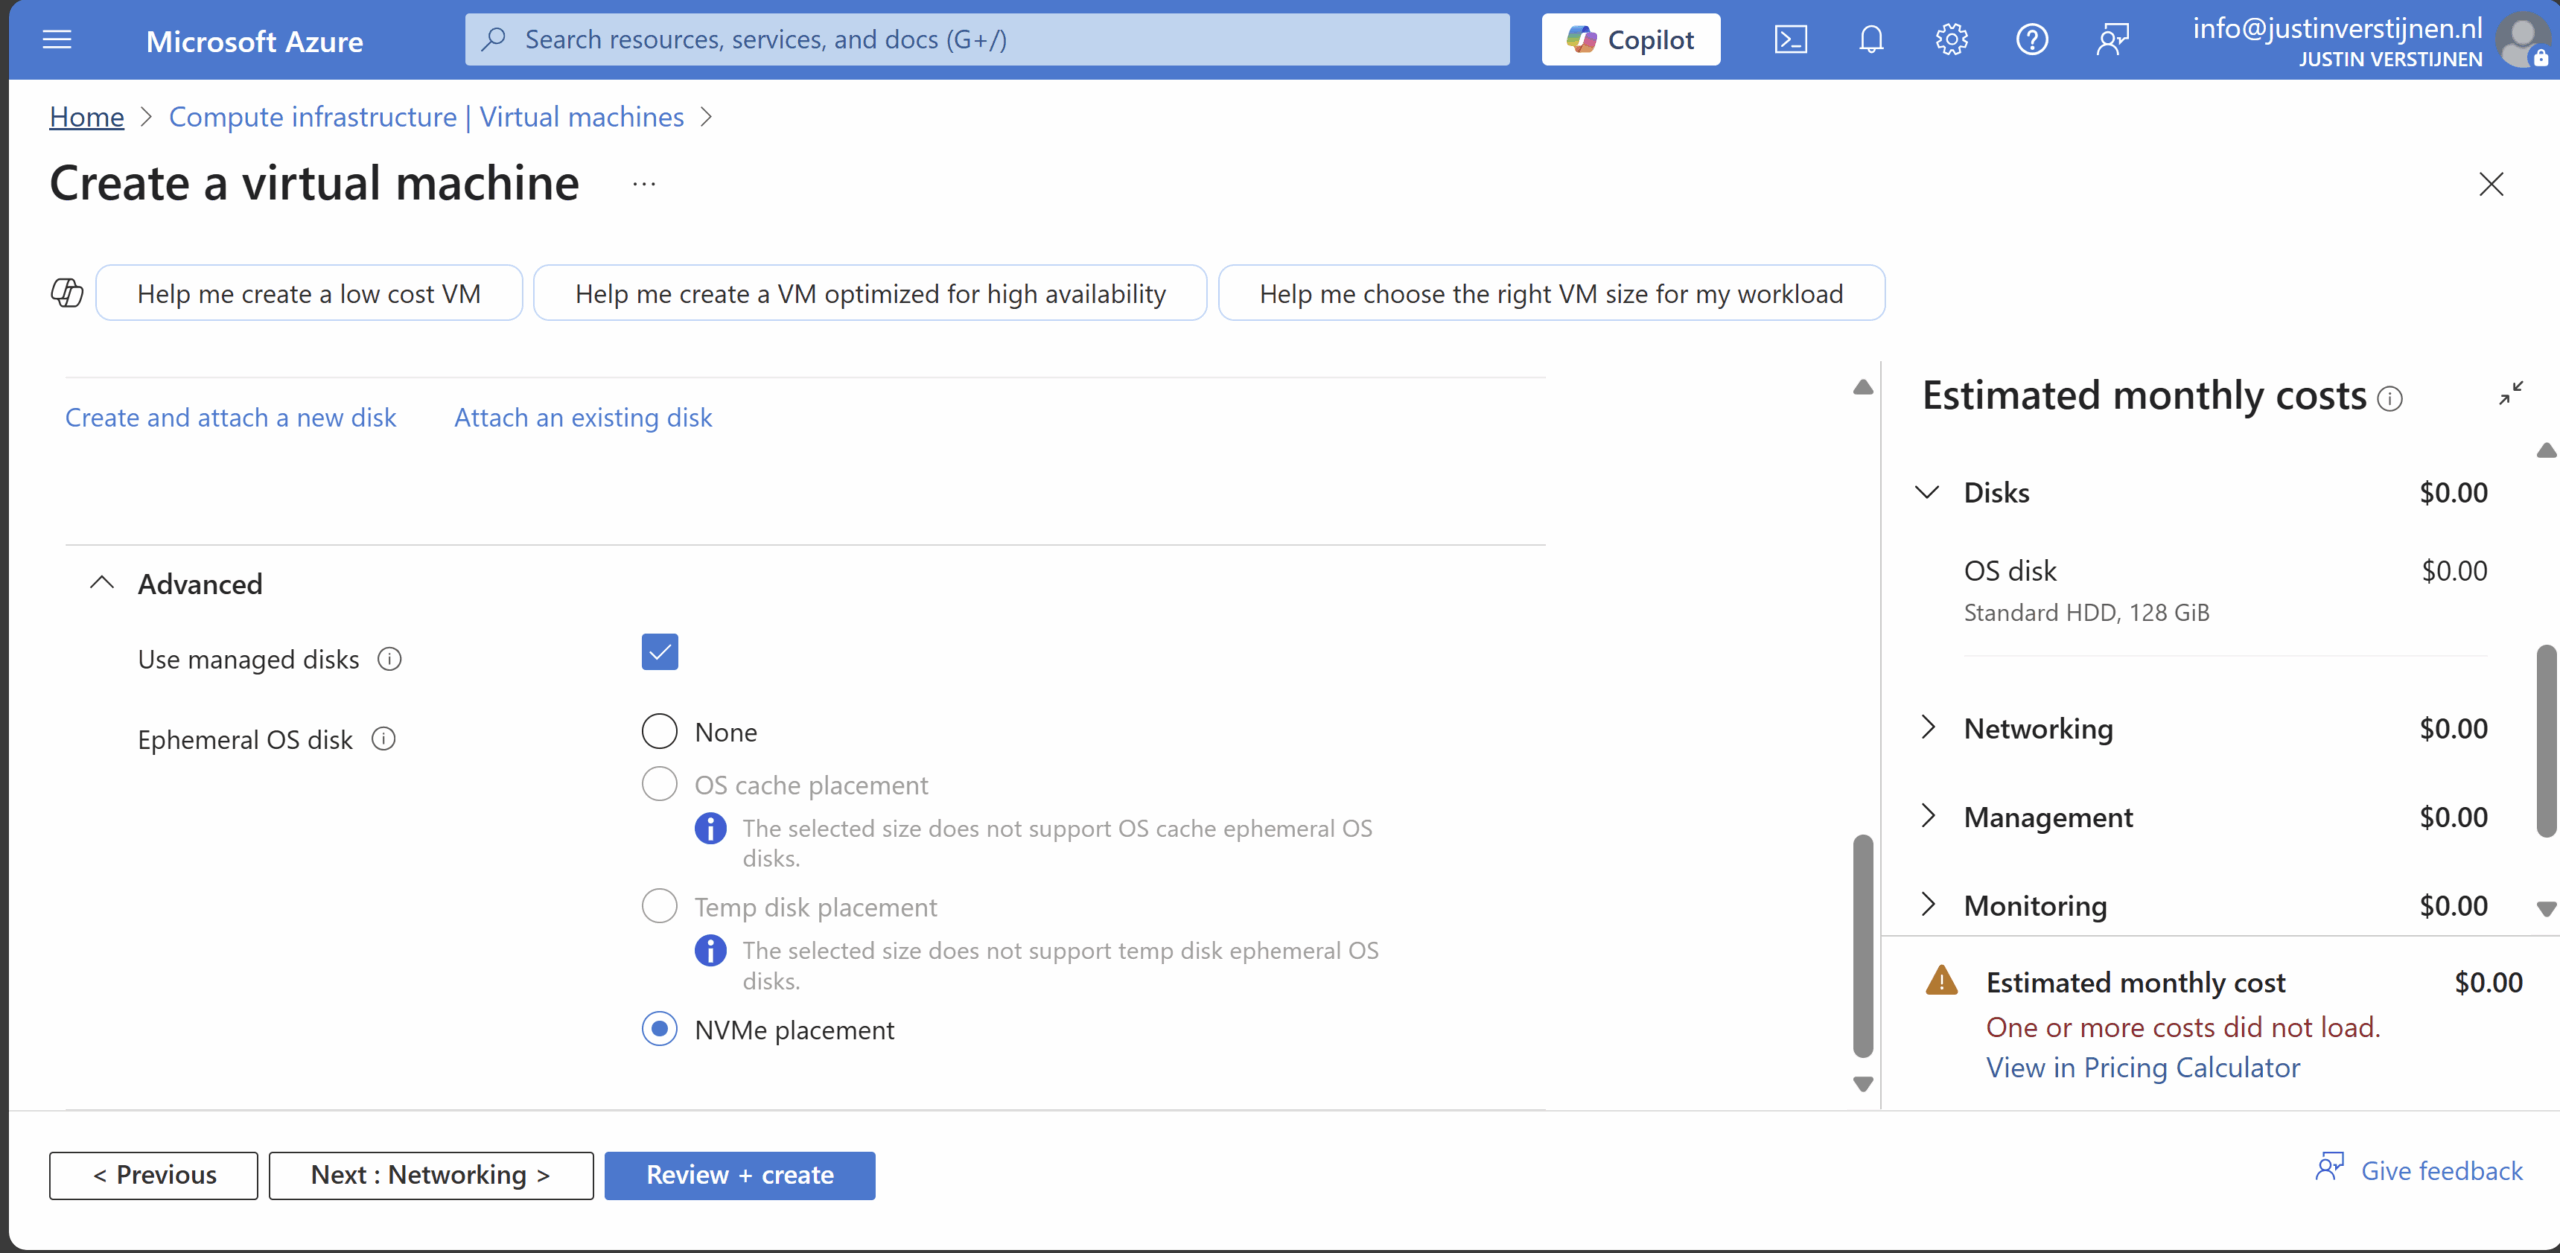
Select the “NVME placement” option and let the option “Use managed disks” checked. This is for additional data disks you link to the virtual machine. The Ephemeral OS disk option requires you to enable it.
Finish the rest of the wizard by selecting your needed options.
Testing Ephemeral OS disk performance
Now that the virtual machine is deployed, we can log into it with Remote Desktop Protocol:
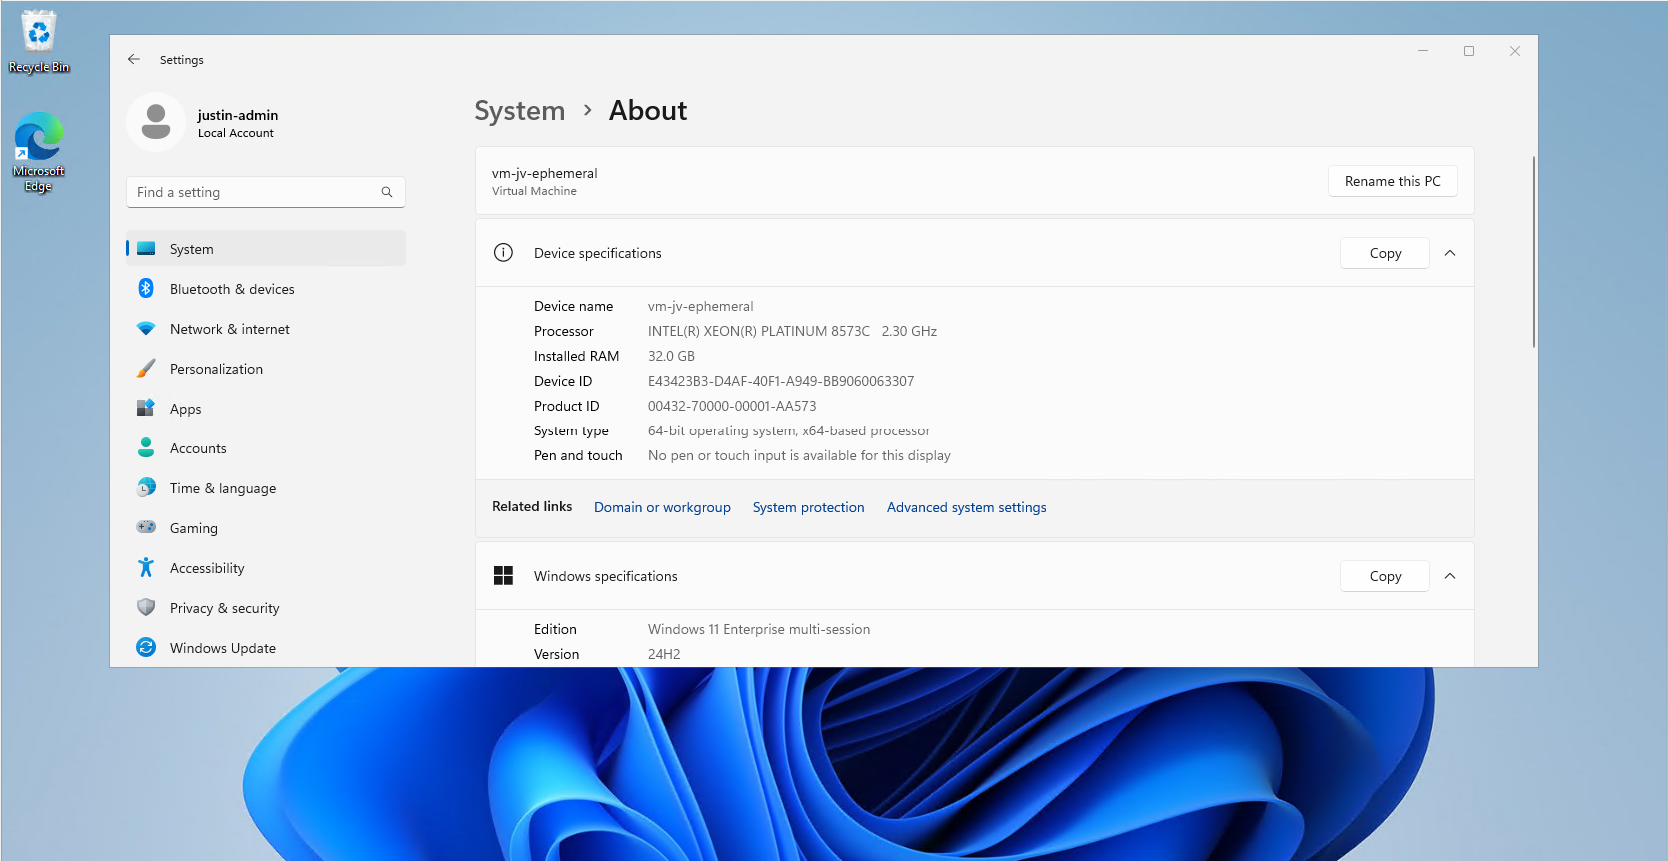
In my test period of about 15 minutes, the VM feels really snappy and fast.
Performance testing method
To further test the speed of the VM storage, I used a tool called Crystal Disk Mark. This is a generic tool which tests the disk speed of any Windows instance (physical or virtual).
Performance testing results
To have a great overview of the speeds, I have created a bar diagram to further display the test results of the different tests, each separated by read and write results:
Conclusion from test results
My conclusion from the test results is that Ephemeral OS disks does provide more speed when doing specific actions, like in the random 4KB tests, where it delivers 3 to 10 times te performance of managed disks. This is where you actually profit from the huge increase in Input Output operations Per Second (IOPS)
The sequential 1MB speeds are quite similar to the normal managed disks, in the read cases even slower. I think this has to do with traffic or bottlenecking. As my research goes, disk speed increases when the size of the VM increases, but I could not go for like D64 VMs due of quota limits.
Both of the test were conducted between 20 minutes of each other.
Raw data
Here is the raw data of the tests. 360/180 at the top is Ephemeral and 415/174 at the top are Managed disk results.
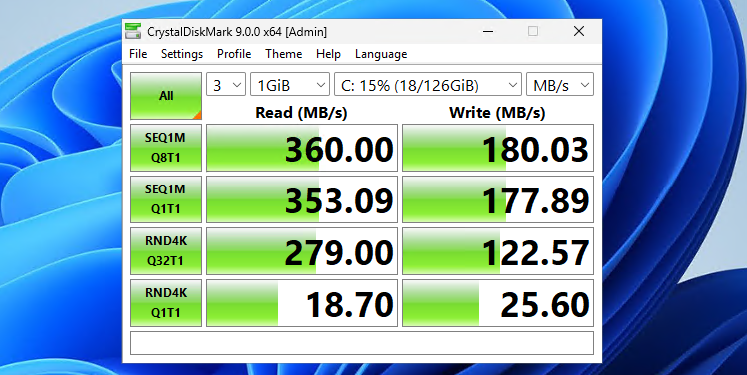
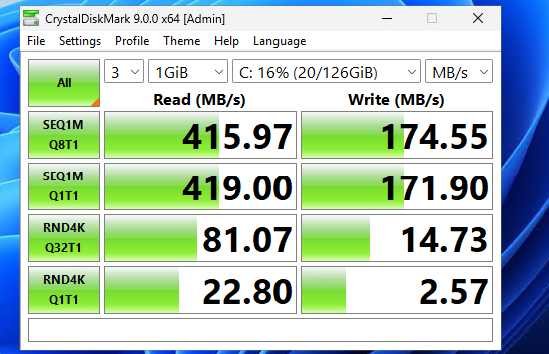
Summary
Ephemeral OS Disks ensure the VM is powered by great disk performance. Storage will not longer be a bottleneck when using the VM but it will be mostly CPU. However, it comes at the cost of not being able to perform some basic tasks like shutting down and deallocating the machine. Restarting is possible and these machines have an extra option, called “Reimage”, where they can be built again from a disk/image.

If using VMs with Ephemeral OS disks, use it for cases where data loss is no issue om the OS disk. All other data like data disks, data on storage account for FSLogix or outside of the VM is unharmed.
Sources
- https://learn.microsoft.com/en-us/azure/virtual-machines/ephemeral-os-disks
- https://justinverstijnen.nl/amc-module-7-virtual-machines-and-scale-sets/
Thank you for reading this guide and I hope it was helpful.
End of the page 🎉
You have reached the end of the page. You can navigate through other blog posts as well, share this post on X, LinkedIn and Reddit or return to the blog posts collection page. Thank you for visiting this post.
If you think something is wrong with this post or you want to know more, you can send me a message to one of my social profiles at: https://justinverstijnen.nl/about/
If you find this page and blog very useful and you want to leave a donation, you can use the button below to buy me a beer. Hosting and maintaining a website takes a lot of time and money. Thank you in advance and cheers :)
The terms and conditions apply to this post.
Use Azure Logic Apps to automatically start and stop VMs
With Azure Logic apps we can save some money on compute costs. Azure Logic apps are flow based tasks that can be run on schedule, or on a specific trigger like receiving a email message or Teams message. After the trigger has been started, we can choose what action to do. If you are familiar with Microsoft’s Power Automate, Logic Apps is almost exactly the same but then hosted in Azure. In this guide I will demonstrate some simple examples of what Logic Apps can do to save on compute costs.
Azure Logic Apps
Azure Logic Apps is a solution to automate flows that we can run based on a trigger. After a certain trigger is being met, the Logic App can then perform some certain steps, like;
- Get data from database/SharePoint
- Process data
- Send email
- Start or Stop VM
To keep it simple, such logic app can looks like this:
In Logic Apps there are templates to help you starting out what the possibilities are:
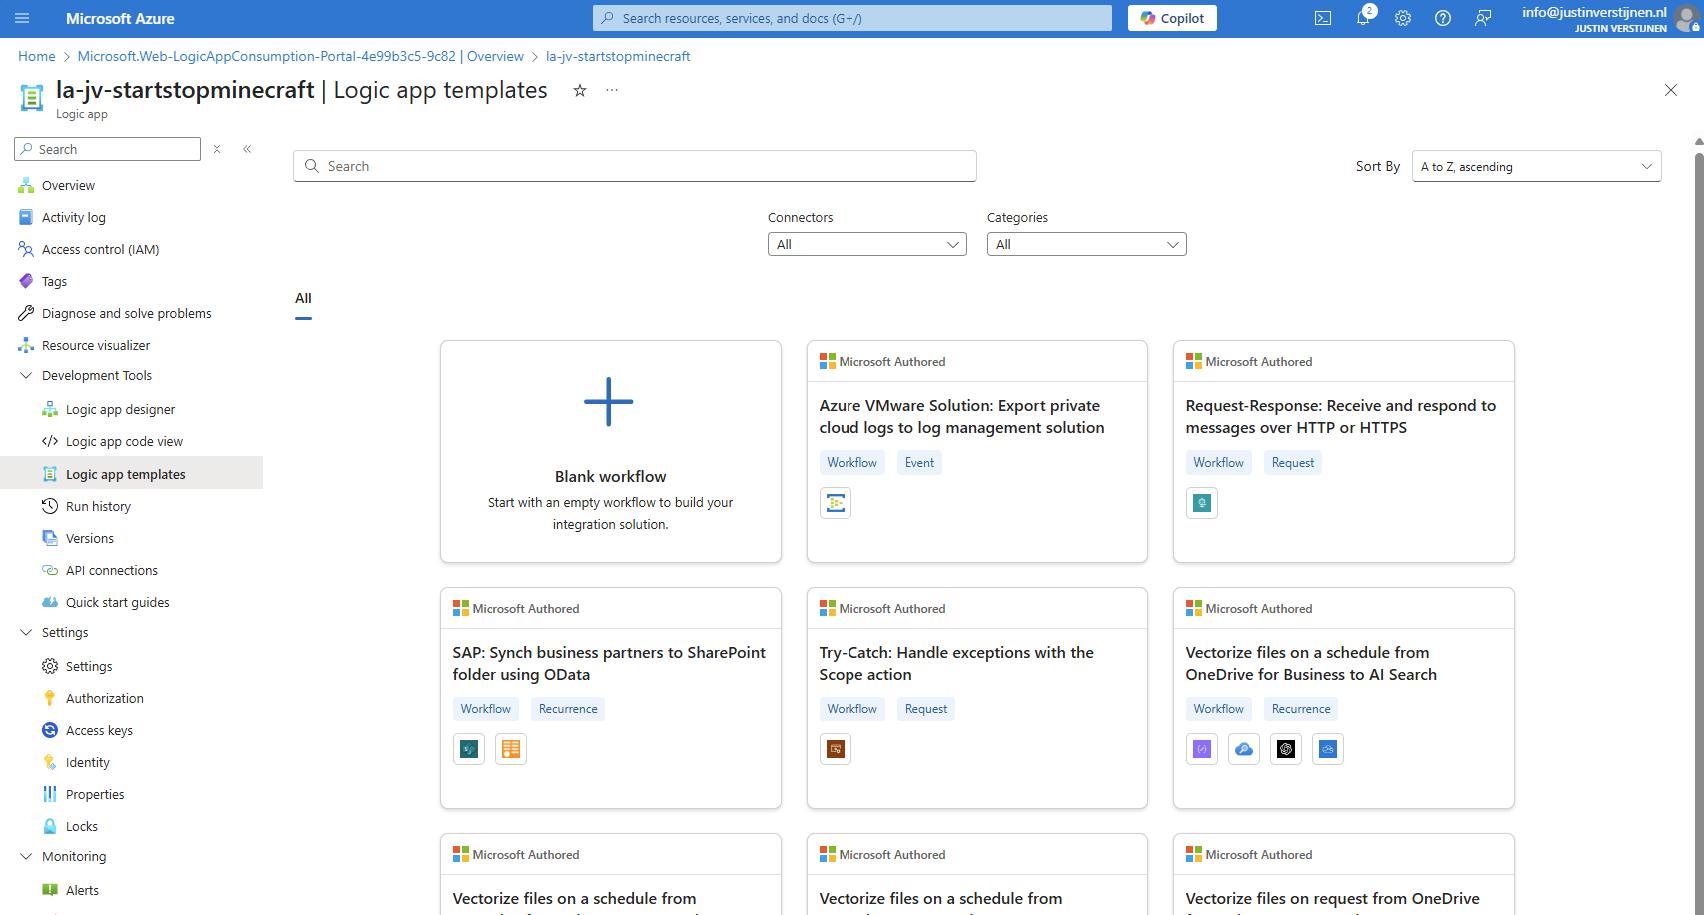
The Logic app to start and stop VMs
In this guide I will use a Logic app to start and stop the Minecraft Server VM from a previous guide. You can use any virtual machine in the Azure Portal with Logic Apps.
I will show some examples:
- Starting the machine at a scheduled time
- Starting the machine at a scheduled time and stop after X hours
- Starting the machine when receiving a certain email message
Creating the Logic App
In the Azure Portal, go to “Logic Apps” and create a new Logic app. I chose the multi-tenant option as this is the least we need and saves on processing costs.
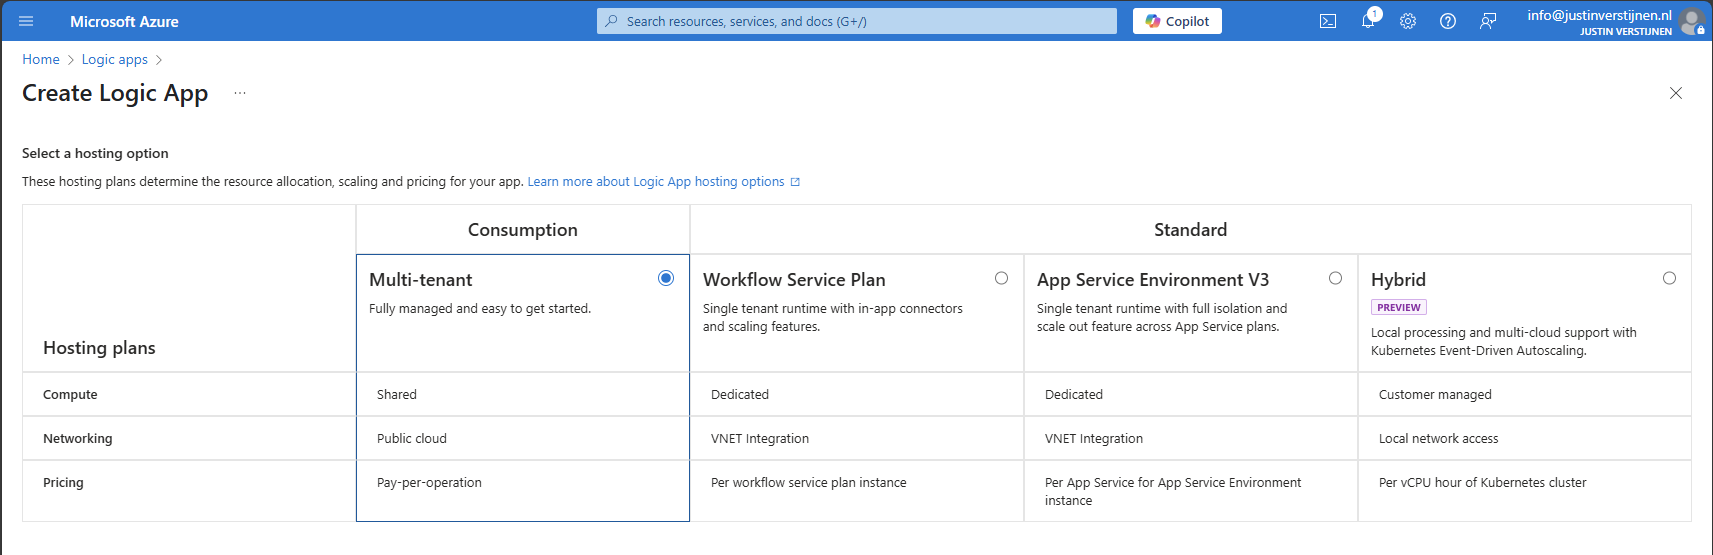
Logic Apps are relatively cheap, most of the time we can save a lot more money on compute costs than the costs of the Logic App.
Advance to the next step.
Create the app by filling in the details and finish the wizard.
After finishing the wizard, we have our Logic App in place, and now we can configure our “flows” and the 3 examples.
The Logic App designer
In every Logic App, we have a graphically designer to design our flow. Every flow has its own Logic App instance. If you need multiple flows, you have to create multiple Logic Apps, each for their own purpose.
When the Logic App is created, you can go to the “Logic App Designer” in your created Logic App to access the flow:
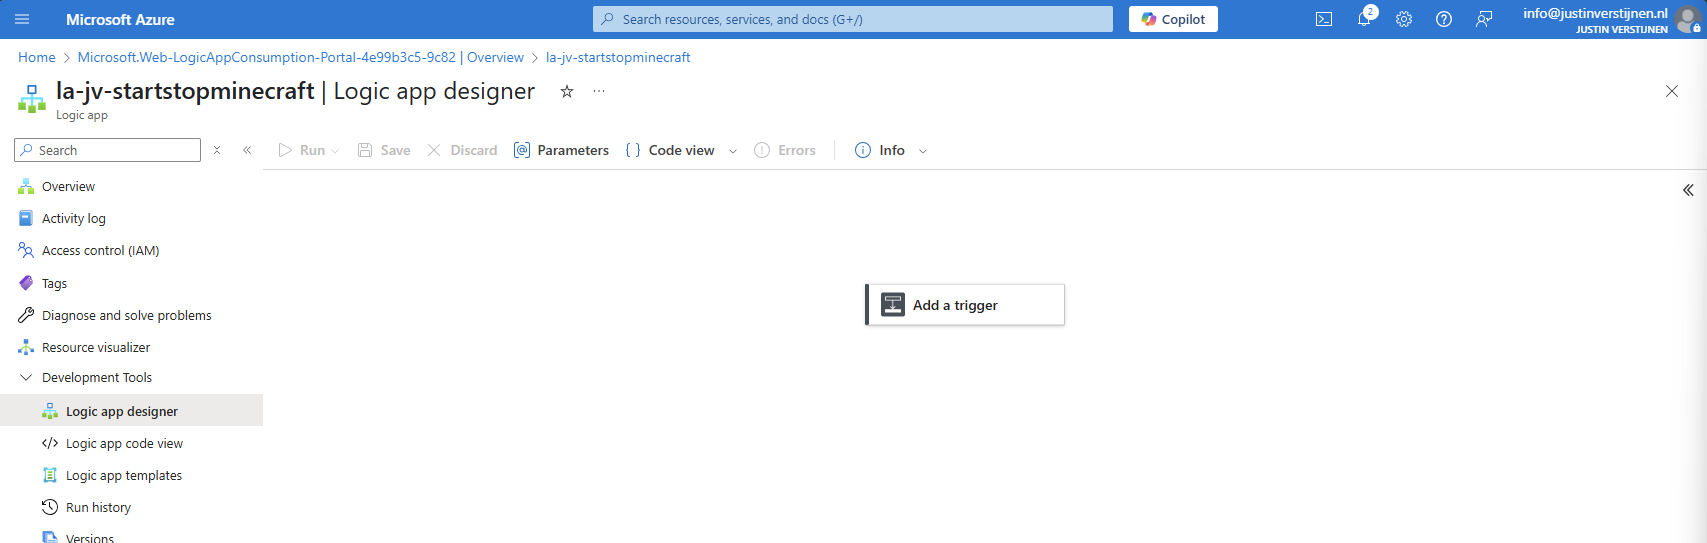
We always start with a trigger, this is the definition of when the flow starts.
Authentication from Logic App to Virtual Machines
We now have a Logic App created, but it cannot do something for us unless we give it permissions. My advice is to do this with a Managed Identity. This is a service-account like Identity that is linked to the Logic App. Then we will give it “Least-privilege” access to our resources.
In the Logic App, go to “Identity” and enable the System-assigned managed identity.
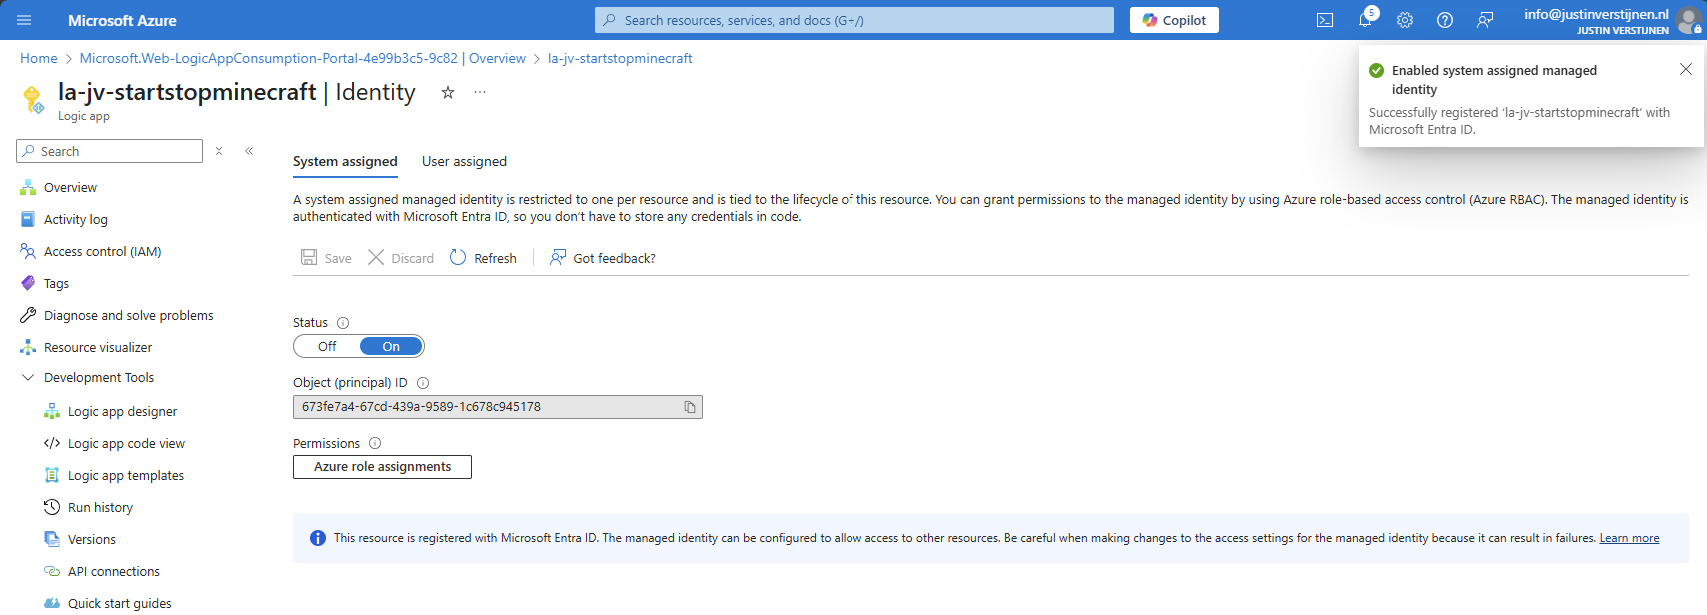
Now we have to give this Managed Identity permissions to a certain scope. Since my Minecraft server is in a specific Resource Group, I can assign the permissions there. If you create flows for one specific machine in a resource group with multiple machines, assign the permissions on the VM level instead.
In my example, I will assign the permissions at Resource Group level.
Go to the Resource group where your Virtual Machine resides, and open the option “Access Control (IAM)”.
Add a new Role assignment here:
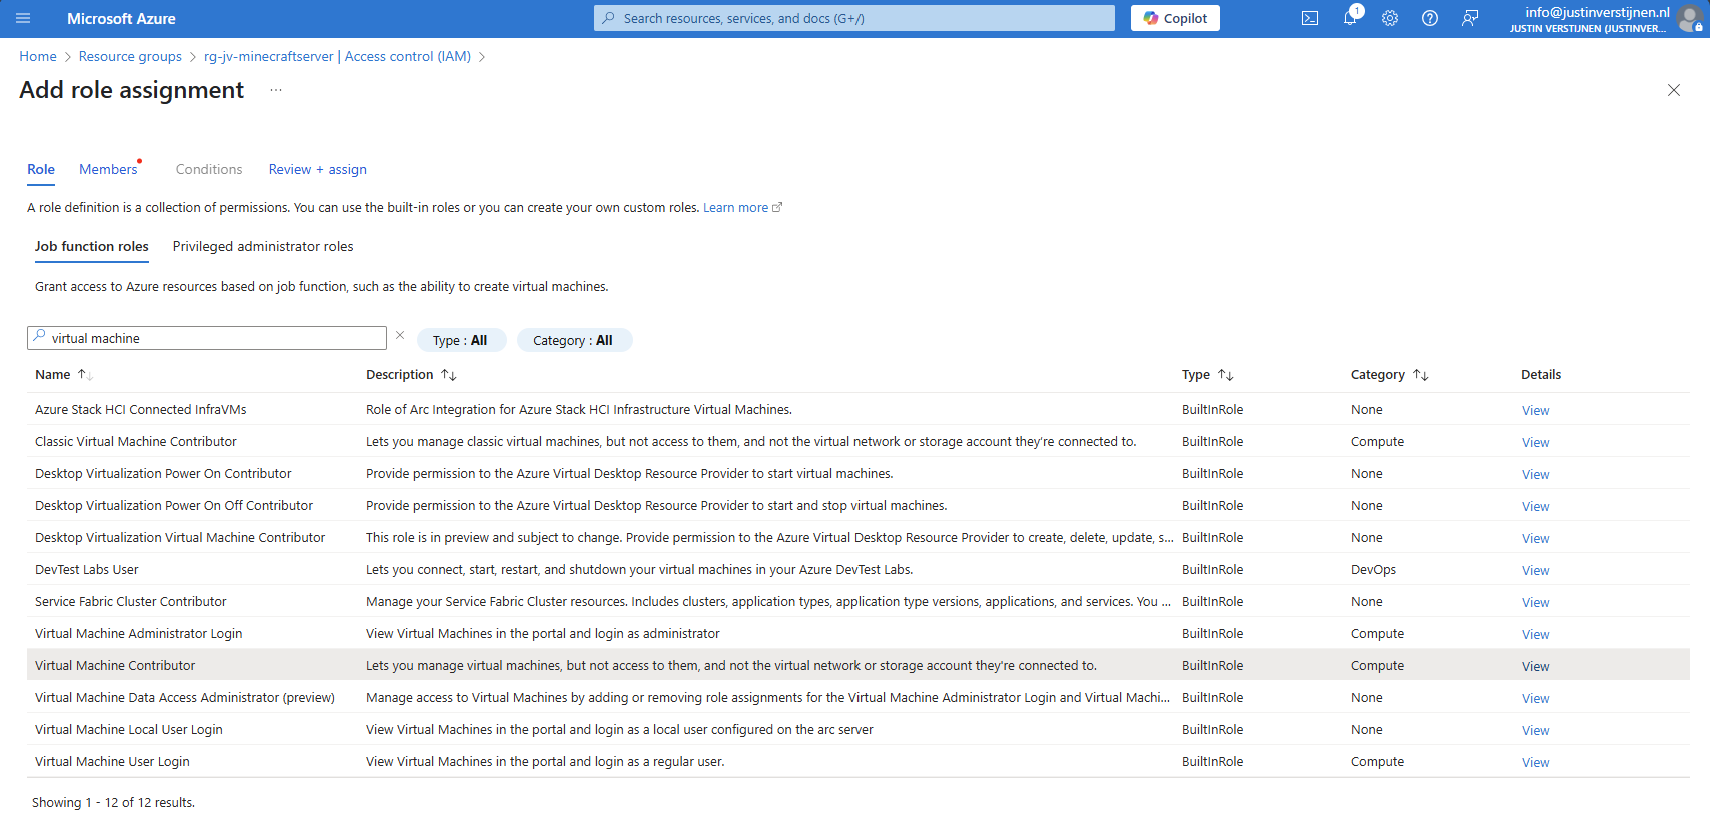
Select the role “Virtual Machine Contributor” or a custom role with the permissions:
- “Microsoft.Compute/*/read”
- “Microsoft.Compute/virtualMachines/start/action”
- “Microsoft.Compute/virtualMachines/deallocate/action”
Click on “Next”.
Select the option “Managed Identity” and select the Logic App identity:
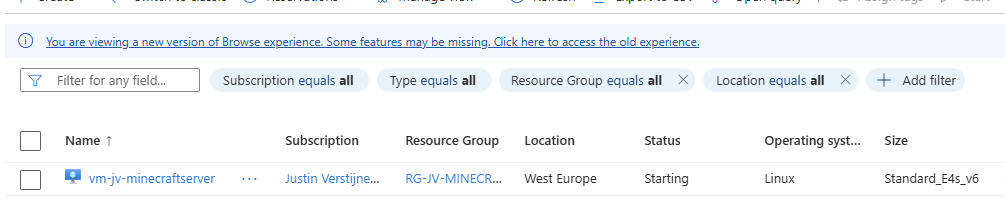
Select the Managed Identity that we created.
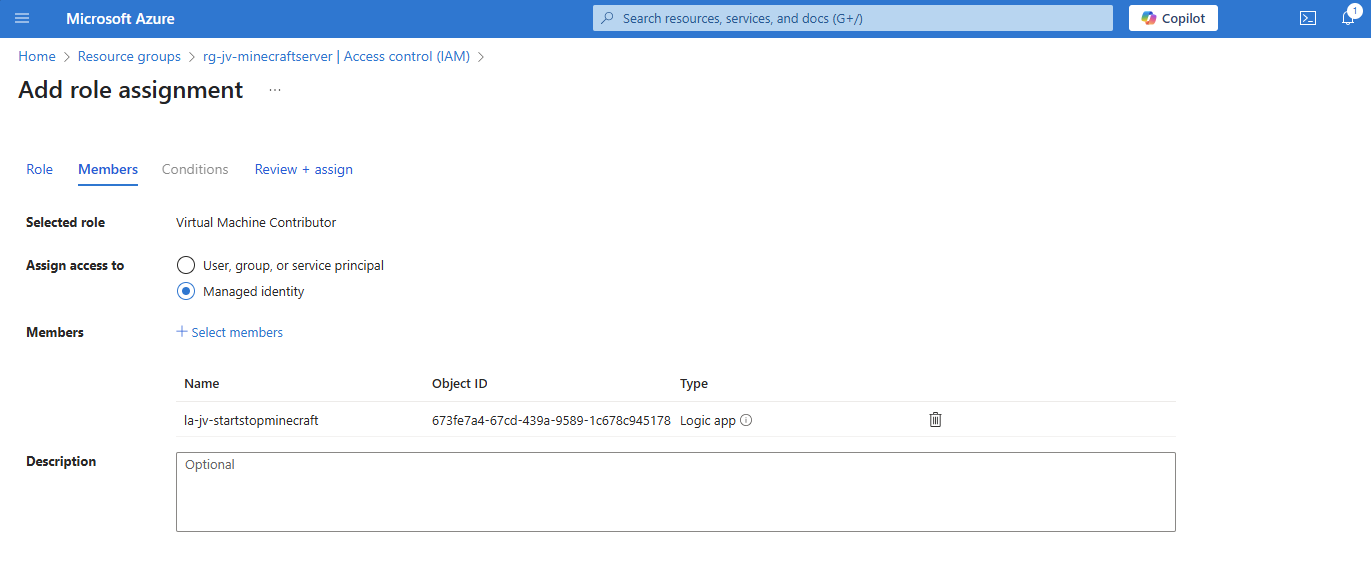
Assign the role and that concludes the permissions-part.
Example 1: Starting a Virtual Machine at a scheduled time
In Example 1, we will create a flow to automatically start one or more defined virtual machines at a scheduled time, without an action to shutdown a machine. You can use this in combination with the “Auto Shutdown” option in Azure.
Go to the Azure Logic App and then to the Designer;
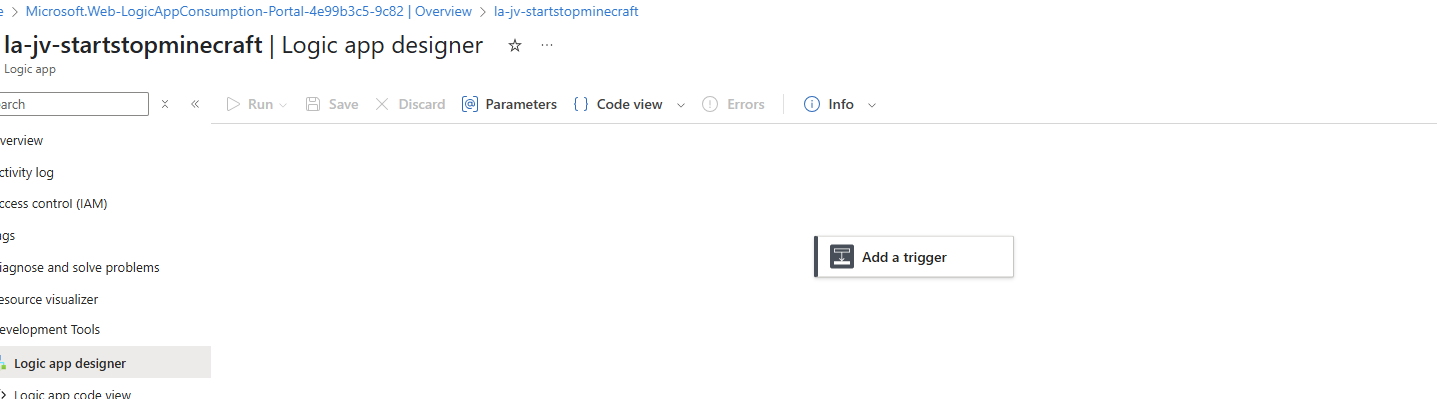
Click on “Add a trigger”.
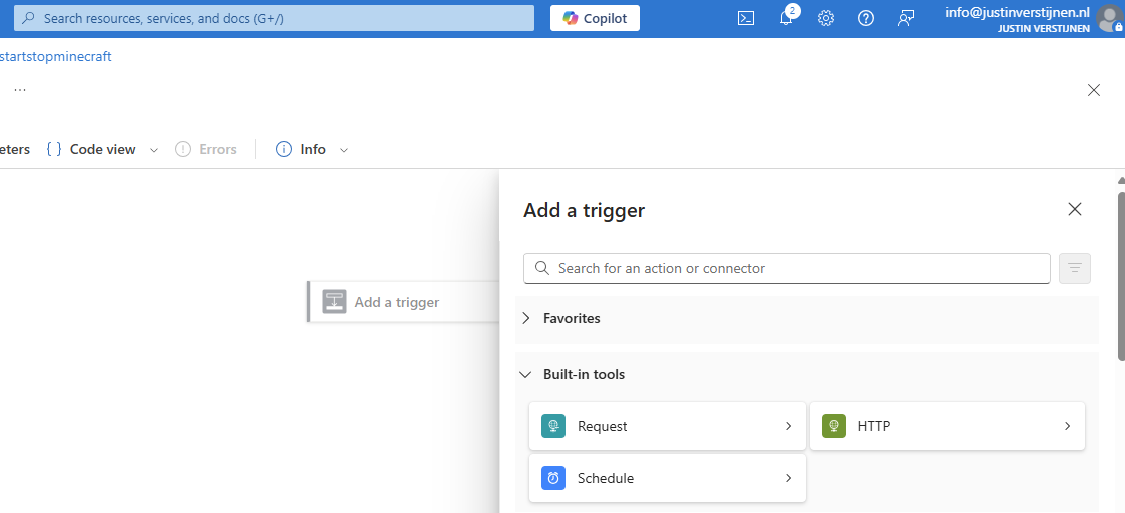
Select the “Schedule” option.
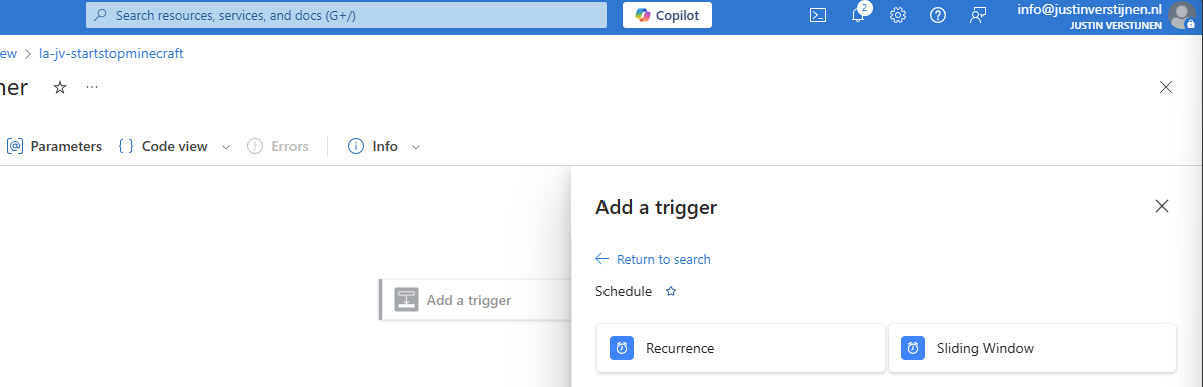
Select the “Recurrence” trigger option to let this task recur every 1 day:
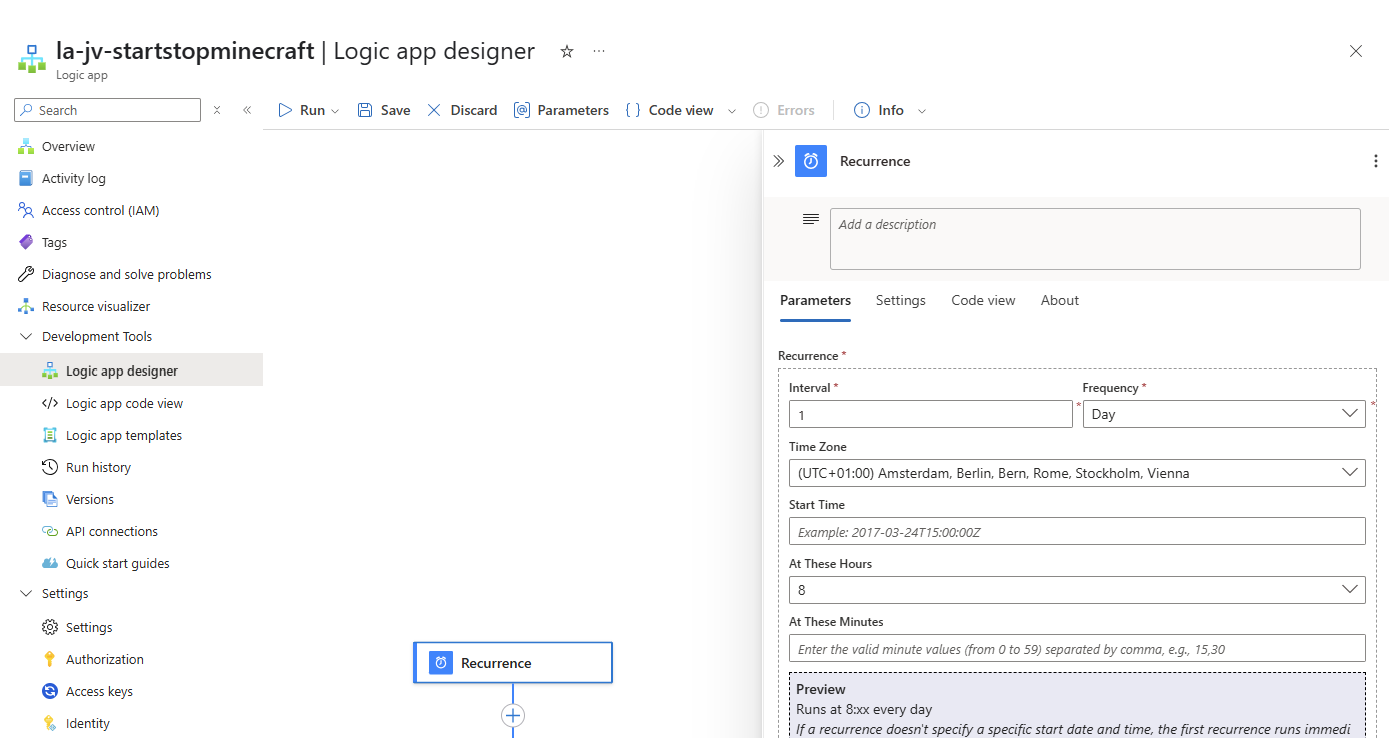
Then define the interval -> when must the task run, the timezone and the “At these Hours” to start the schedule on a set time, for example 8 o’clock. The blue block below it shows exactly when the schedule will run.
Save the trigger and now we have to add actions to perform after the trigger.

Click on the “+” under Recurrence and then “add a task” to link a task to the recurrence.
Search for: “virtual machine”
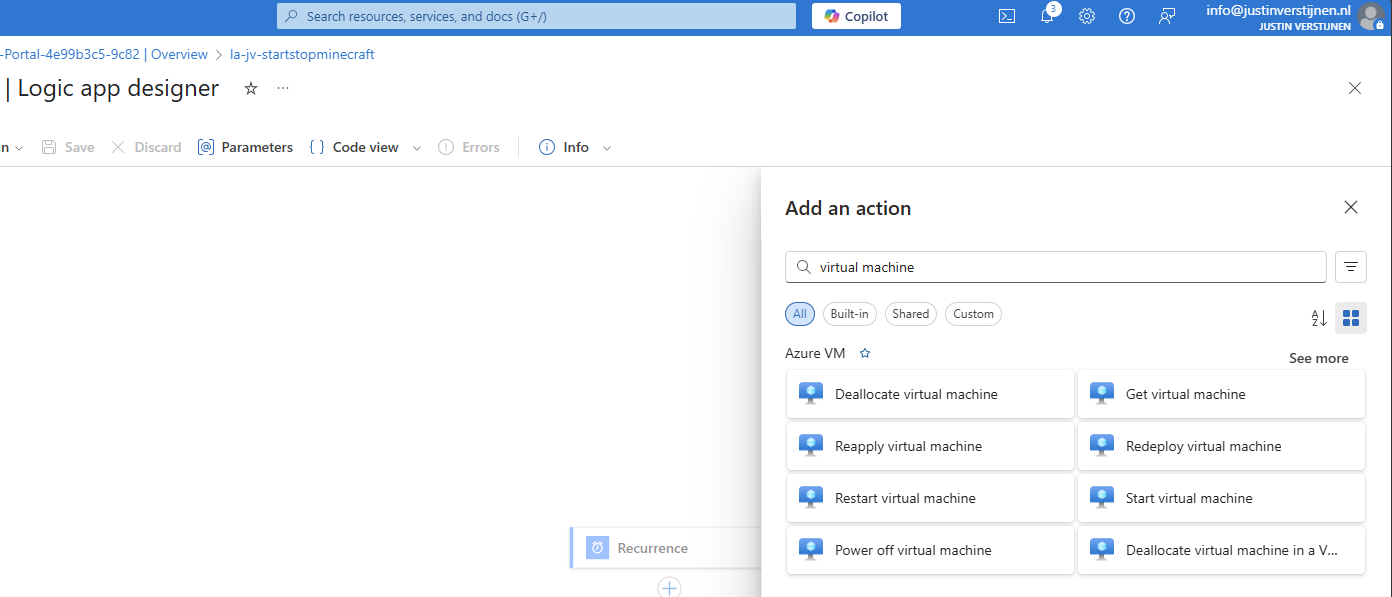
Select the option “Start virtual machine”.
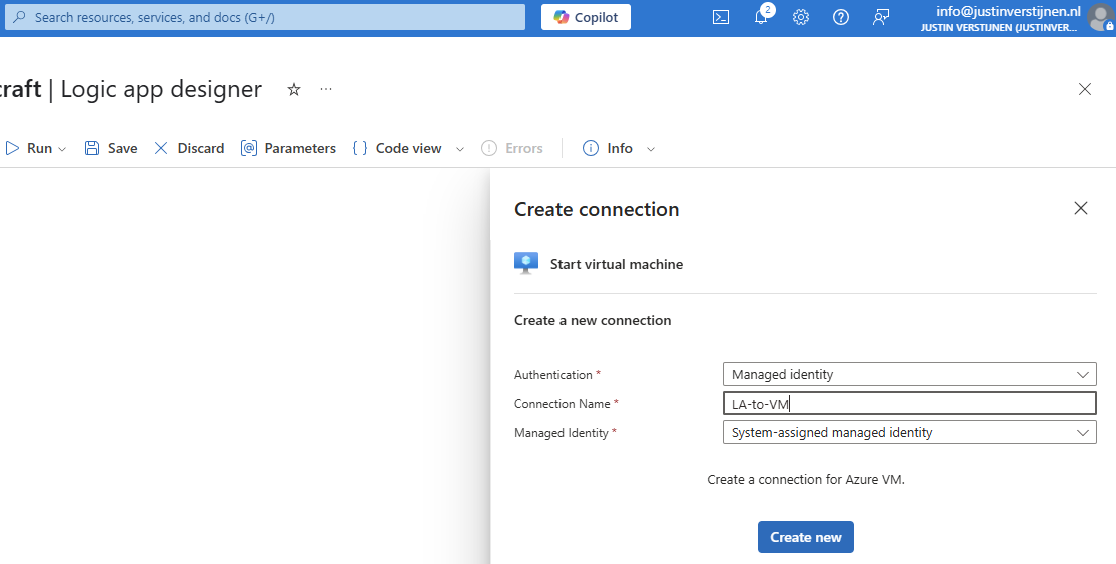
Select the Managed Identity and give the connection a name. Then click on “Create new”.
Now select the machine you want to start at your scheduled time:
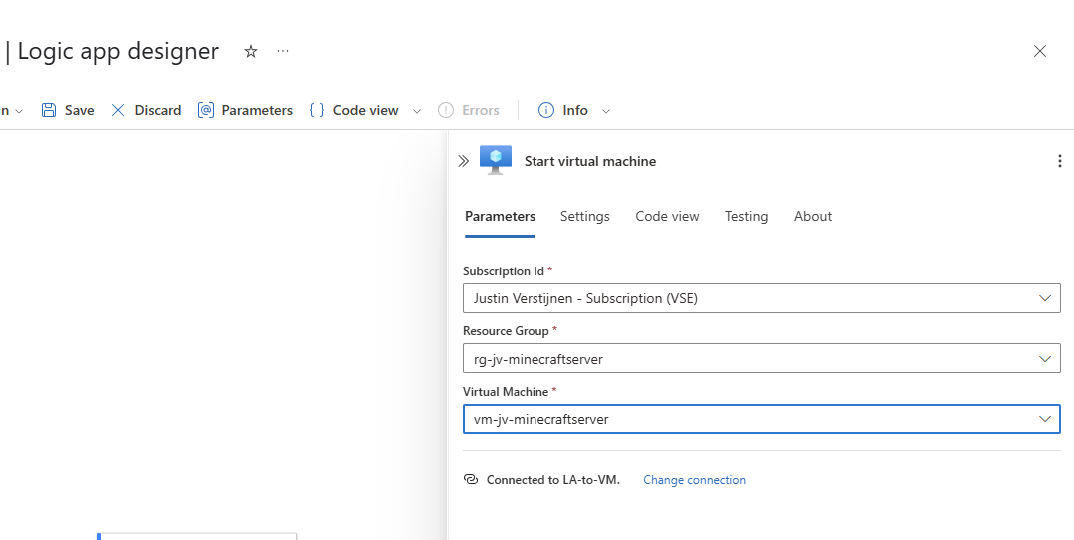
Save the Logic App and it should look like this:
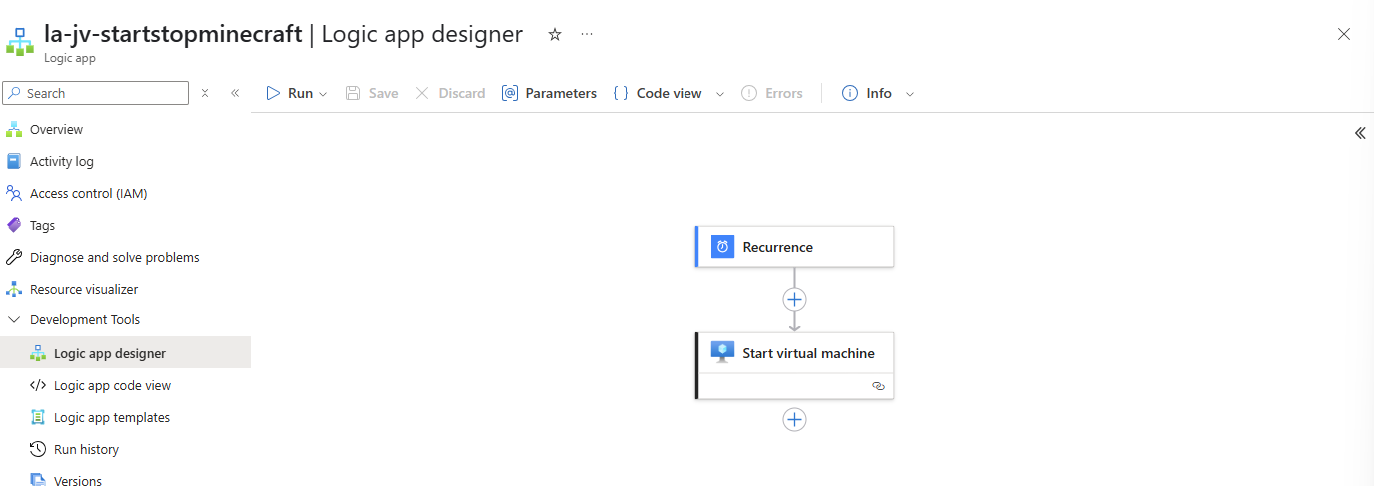
Testing the logic app
You can test in the portal with the “Run” option, or temporarily change the recurrence time to some minutes in the future.
Now we wait till the schedule has reached the defined time, and we will look what happens to the virtual machine:
The machine is starting according to our Logic App.
Example 2: Starting a Virtual Machine at a scheduled time and stopping it after X hours
Example 2 is an addition on Example 1, so follow Example 1 and then the steps below for the stop-action.
Go to the Logic app designer:
Under the “Start virtual machine” step, click on the “+” to add an action:

Search for “Delay” to add an delay to the flow.
In my example, I will shutdown the virtual machine after 4 hours:
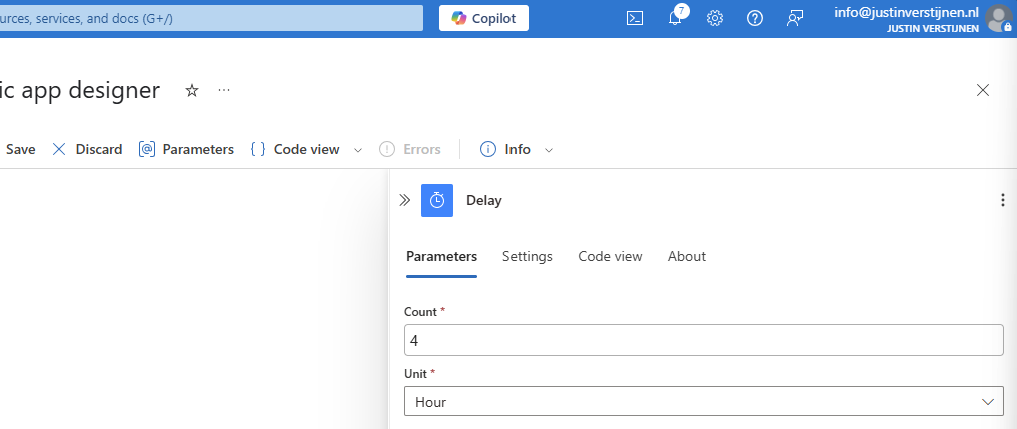
Fill in 4 and select hours or change to your preference.
Add another step under the Delay step:
Search for “Deallocate” and select the “Deallocate virtual machine”
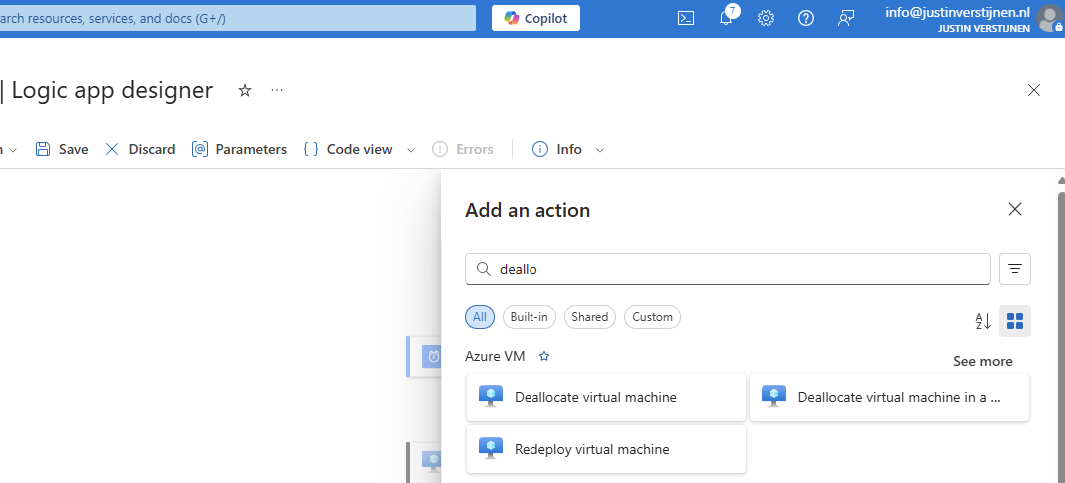
Fill in the form to select your virtual machine. It uses the same connection as the “Start” action:
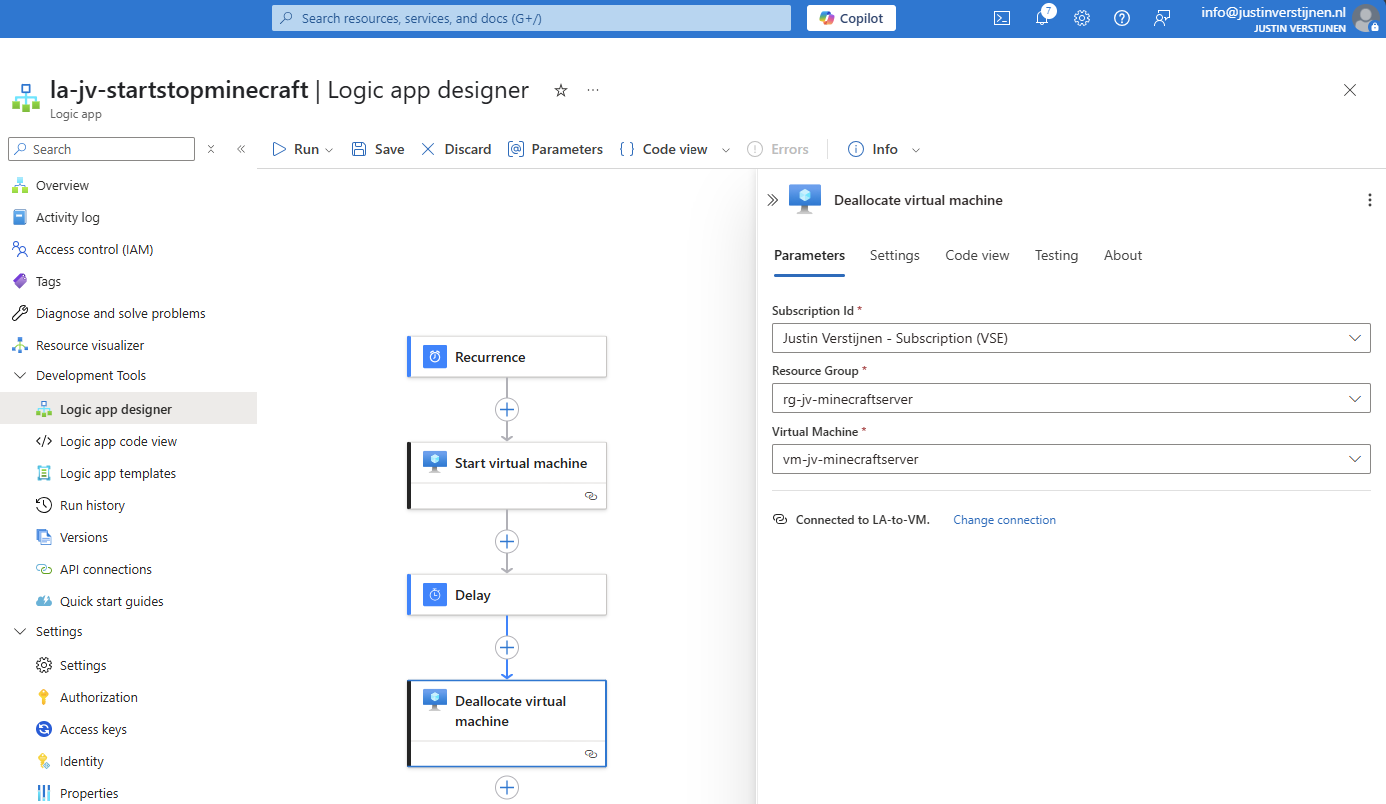
After this save the Logic app. Now the Logic App will start the virtual machine at 8:00 AM and after 4 hours it will stop the machine. I used the “Deallocate” action because this ensures the machine uses minimal costs. Stop will only stop the VM but keeps it allocated which means it still costs money.
Example 3: Start machine after receiving email
For Example 3 we start with a new flow. Add a new trigger:
Now search for “When a new email arrives (V3)” and choose the Office 365 Outlook option:

Now we must create a connection to a certain mailbox, we have to login to the mailbox.
We can define how the mail should look to trigger the events:
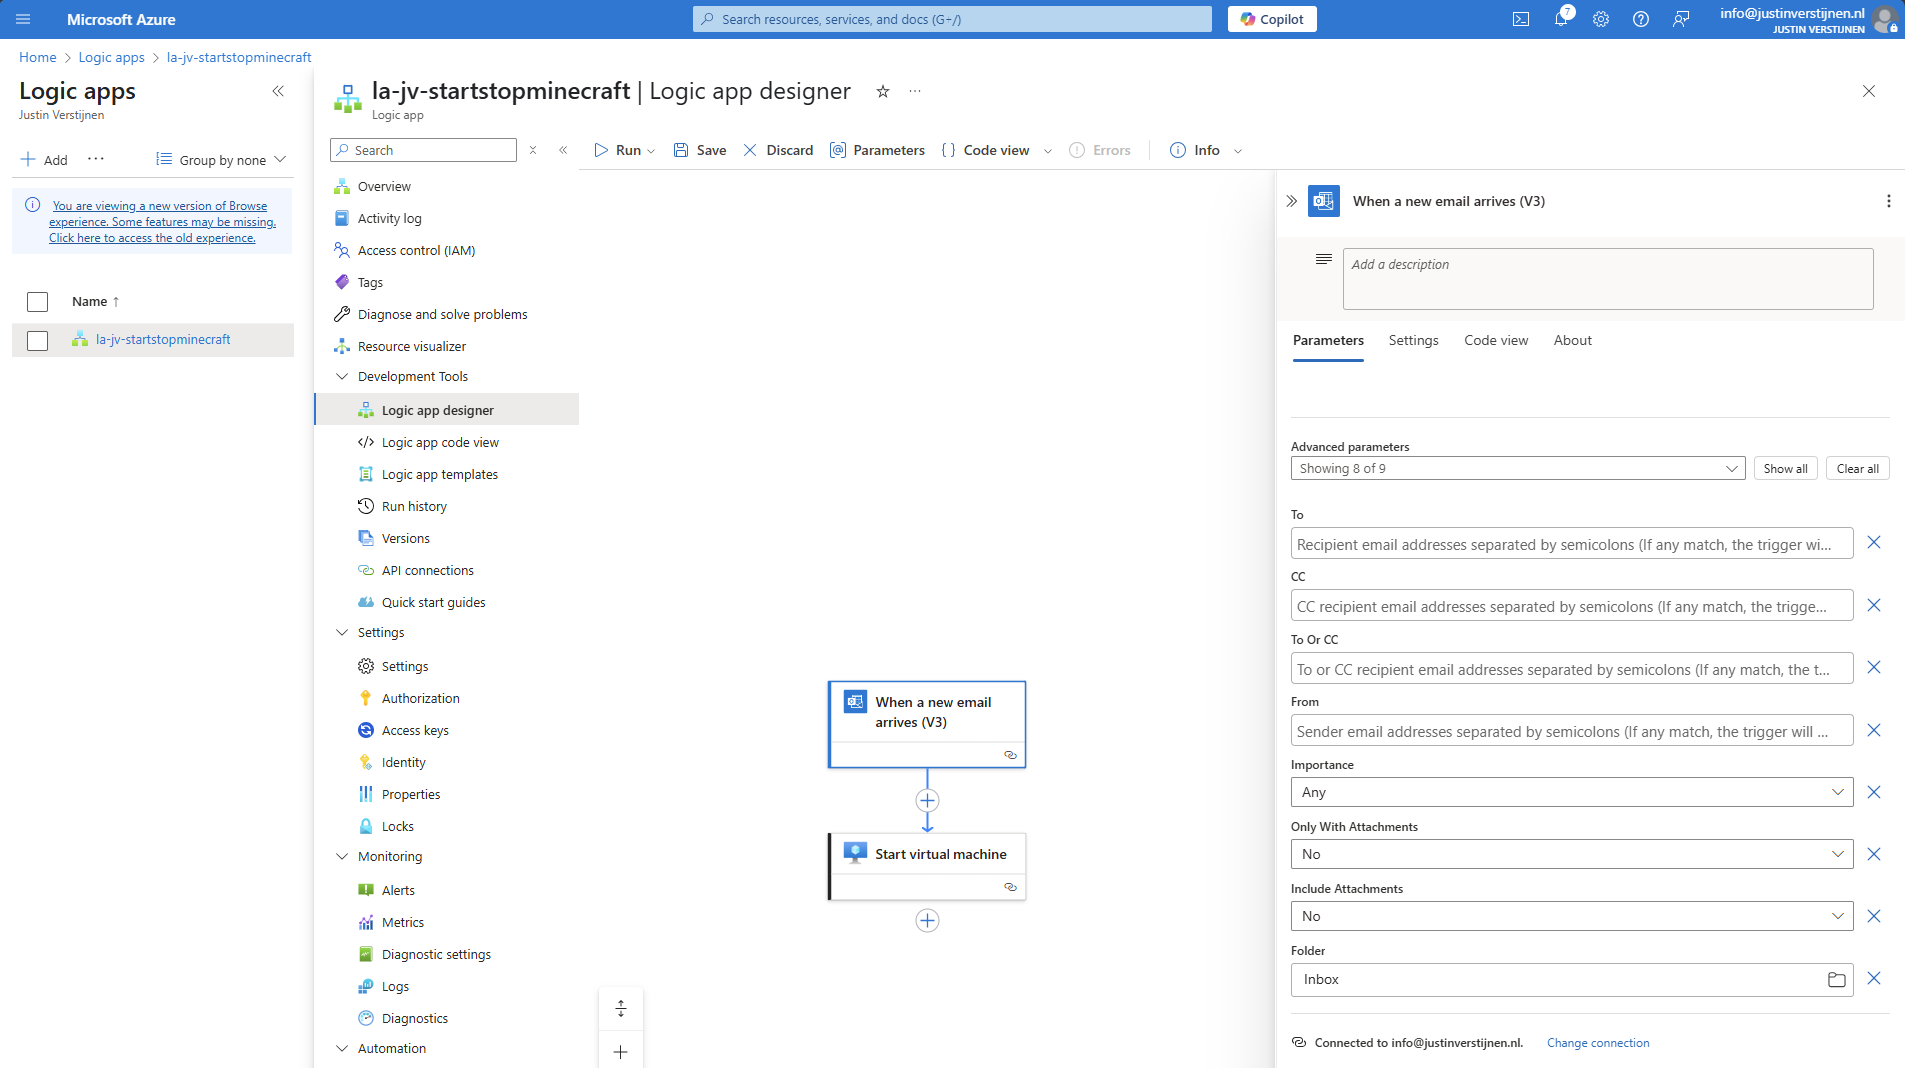
After the incoming email step, we can add an action with the “+” button:
Click on the “+” under Recurrence and then “add a task” to link a task to the recurrence.
Search for: “virtual machine”
Select the option “Start virtual machine”.
Select the Managed Identity and give the connection a name. Then click on “Create new”.
Now select the machine you want to start at your scheduled time:
Save the Logic App and it should look like this:
Now we have finished Example 3 and you can test the flow.
Summary
Azure Logic Apps are an excellent cloud-native way to automate recurring tasks in Azure. It is relatively easy to configure and can help limiting the uptime of virtual machines and so costs.
I hope this guide was very useful and thank you for reading.
End of the page 🎉
You have reached the end of the page. You can navigate through other blog posts as well, share this post on X, LinkedIn and Reddit or return to the blog posts collection page. Thank you for visiting this post.
If you think something is wrong with this post or you want to know more, you can send me a message to one of my social profiles at: https://justinverstijnen.nl/about/
If you find this page and blog very useful and you want to leave a donation, you can use the button below to buy me a beer. Hosting and maintaining a website takes a lot of time and money. Thank you in advance and cheers :)
The terms and conditions apply to this post.
How to implement Azure Firewall to secure your Azure environment
In this article, we are going to implement Azure Firewall in Azure. We are going to do this by building and architecting a new network and creating the basic rules to make everything work.
Requirements
- Around 60 minutes of your time
- An Azure subscription
- Basic knowledge of Azure
- Basic knowledge of Networking
- Basic knowledge of Azure Firewall
Overview
Before creating all resources, it is great to plan before we build. I mean planning your network before building and having different overlaps or too much/less addresses available. In most cases, Azure recommends building a Hub-and-Spoke network, where we connect all spoke networks to a big hub.
In this guide, we are going to build this network:
IP ranges
The details of the networks are:
| VNET Name | Address Space | Goal |
| jv-vnet-00-hub | 10.0.0.0/16 | Hub for the network, hosting the firewall |
| jv-vnet-01-infrastructure | 10.1.0.0/16 | Network for servers |
| jv-vnet-02-workstations | 10.2.0.0/16 | Network for workstations |
| jv-vnet-03-perimeter | 10.3.0.0/16 | Network for internet-facing servers Isolated network |
We will build these networks. The only exception is VNET03, which we will isolate from the test of our network to defend against internet-facing attacks. This because attacks cannot perform lateral movement from these servers to our internal network.
Creating the hub network in Azure
In Azure, search for “Virtual Networks”, select it and create a virtual network.
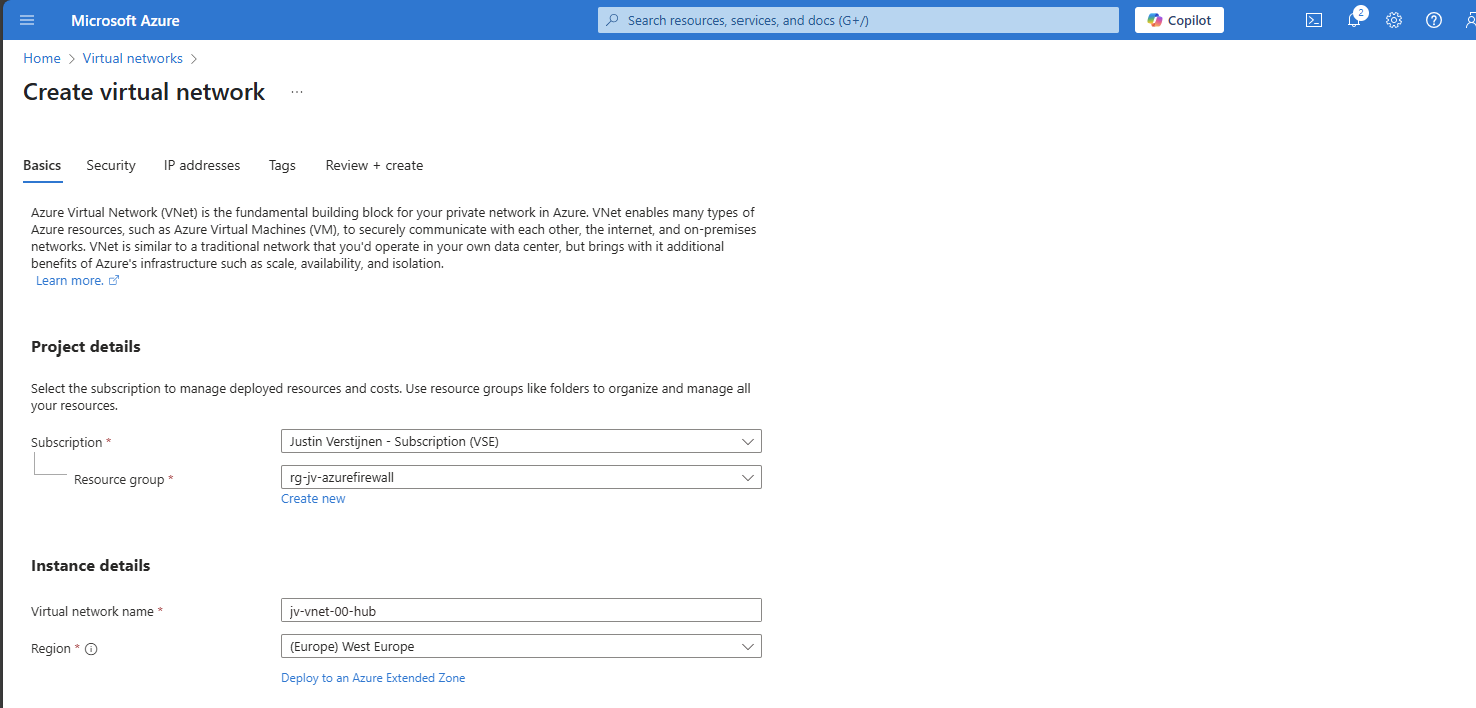
Create a new virtual network which we will configure as hub of our Azure network. This is a big network where the Azure Firewall instance will reside.
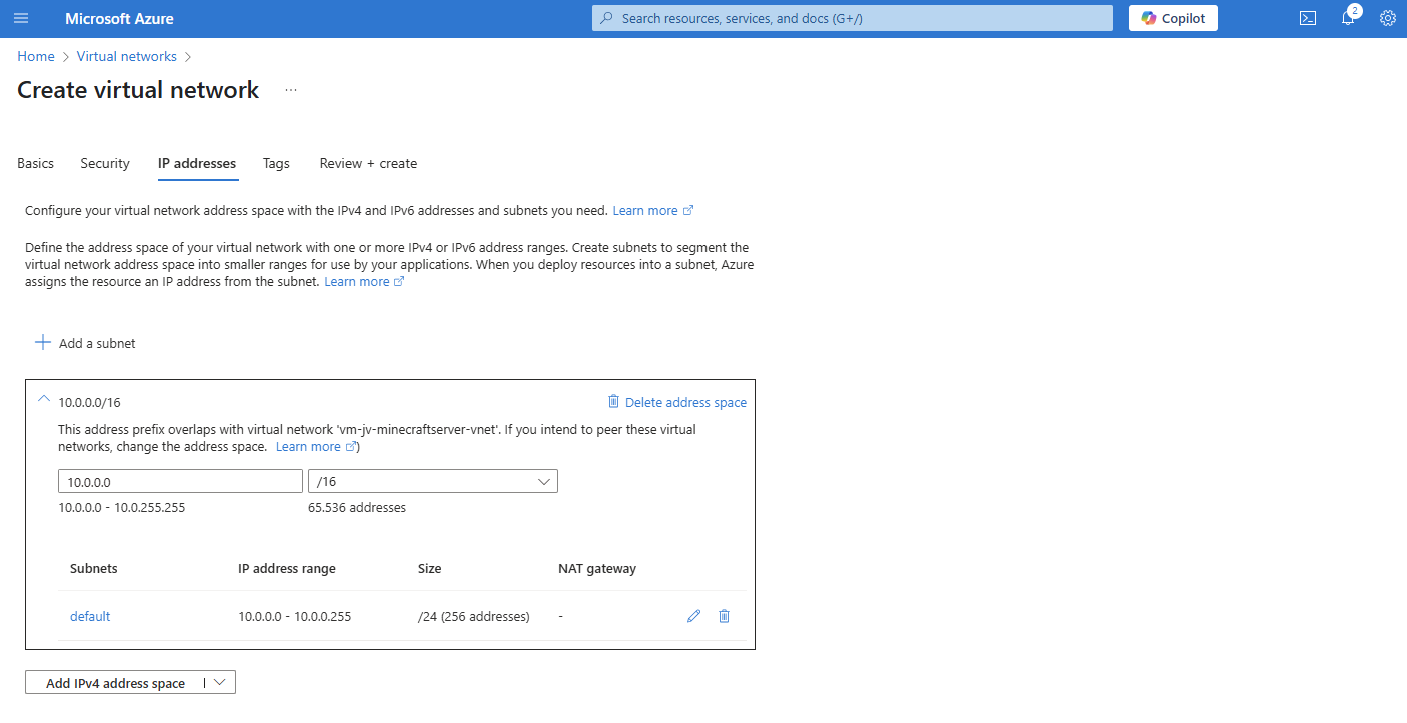
For the IP addresses, ensure you choose an address space that is big enough for your network. I chose for the default /16 which theoretically can host 65.000 addresses.
Finish the wizard and create the network.
Creating the spoke networks in Azure
Now we can create the other spoke networks in Azure where the servers, workstations or other devices can live.
Create the networks and select your preferred IP address ranges.
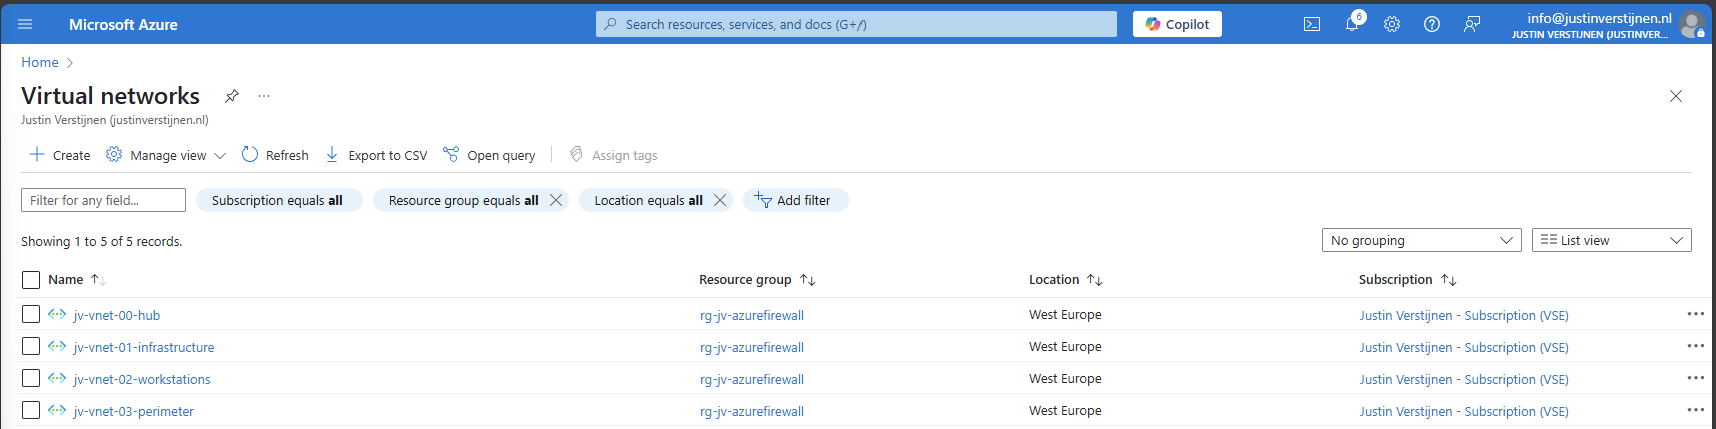
Peering the networks
Now that we have all our IP ranges in place, we can now peer all spoke networks with our hub. We can do this the most efficient way by going to the Hub network and creating the peers from there:
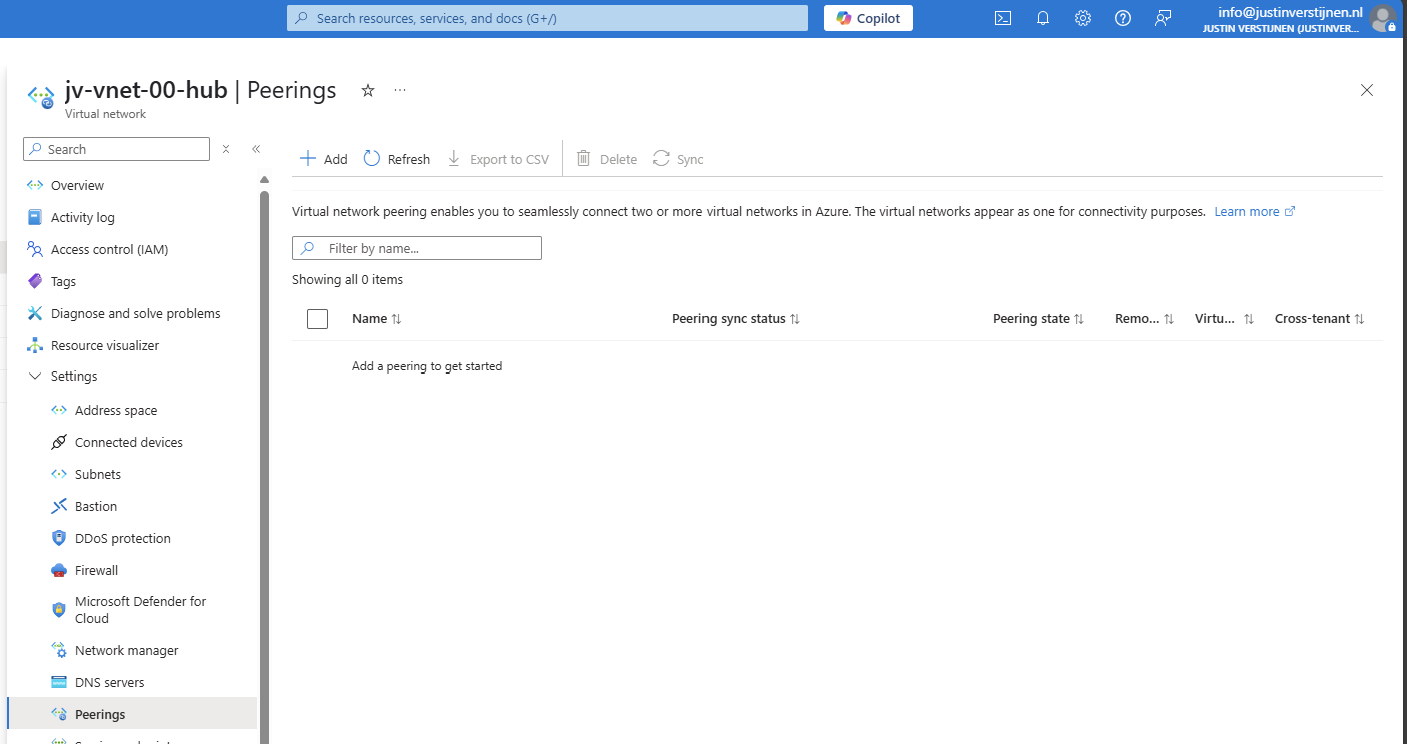
Create a new peering here.
Peering settings
The peerings are “cables” between the networks. By default, all networks in Azure are isolated and cannot communicate with each other. This by default would make it impossible to have a Firewall in another network as your servers and workstations.
We have to create peerings with the following settings:
| Setting name | Hub to Spoke | Spoke to Hub |
| Allow the peered virtual network to access *remote vnet* | Enabled | Enabled |
| Allow the peered virtual network to receive forwarded traffic from *remote vnet* | Enabled | Disabled |
| Allow gateway or route server in the peered virtual network to forward traffic to *remote vnet* | Disabled | Disabled |
| Enable the peered virtual network to use *remote vnet*’s remote gateway or route server | Disabled | Disabled |
Now we know how to configue the peerings, let’s bring this in practice.
Remote Network configuration (Spoke to Hub)
The wizard starts with the configuration of the peering for the remote network:
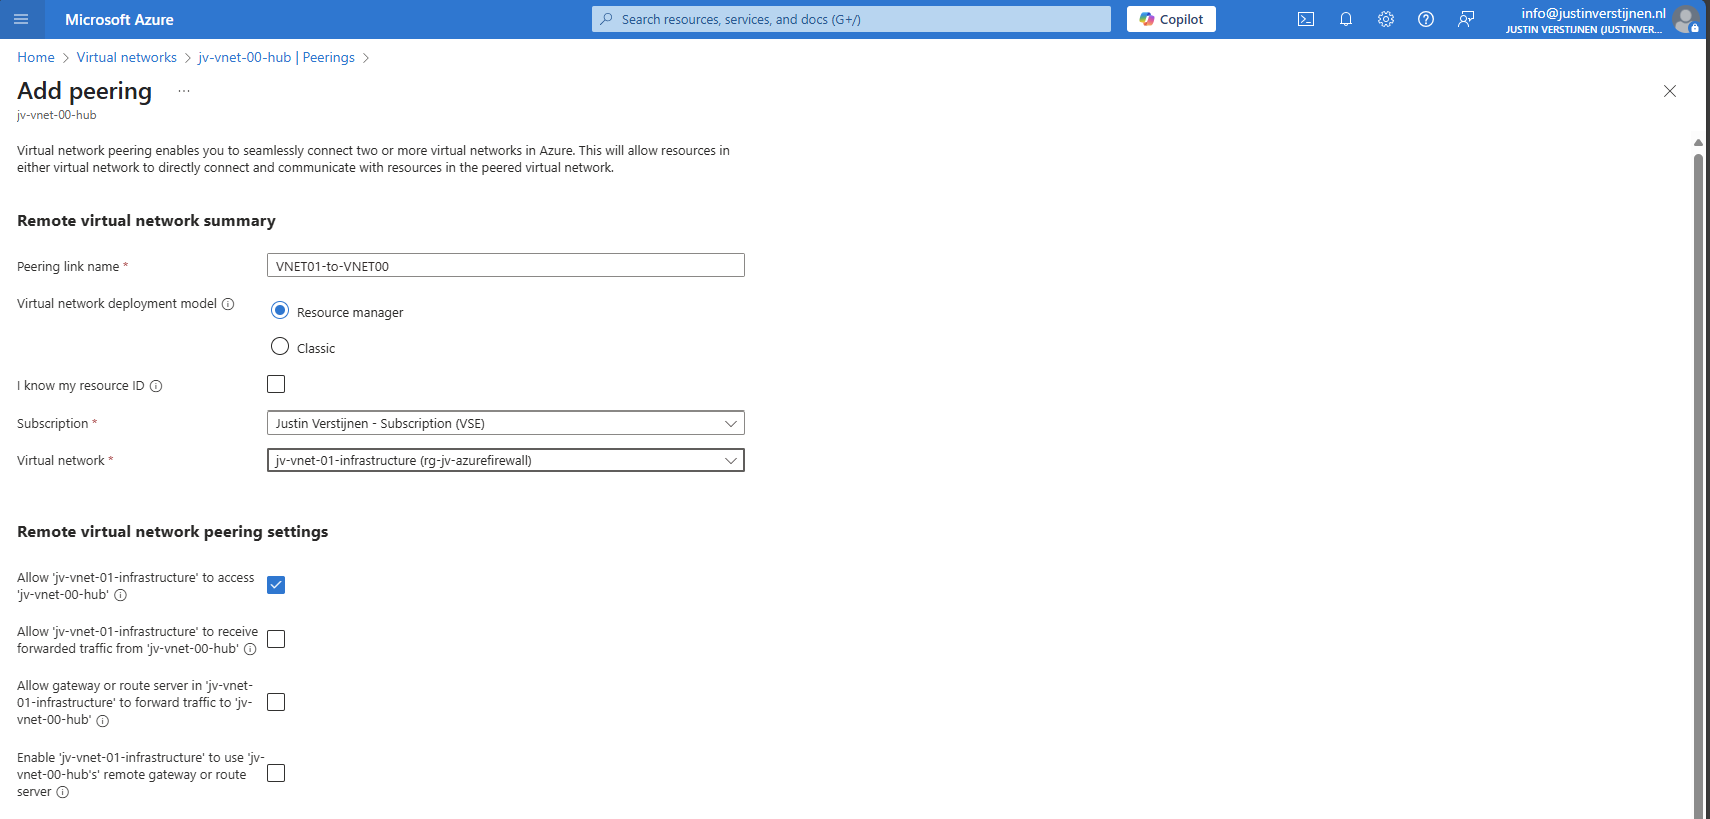
For the peering name, I advice you to simply use:
VNETxx-to-VNETxx
This makes it clear how the connections are. Azure will create the connection both ways by default when creating the peering from a virtual network.
Local Network configuration (Hub to Spoke)
Now we have to configure the peering for the local network. We do this according to the table:
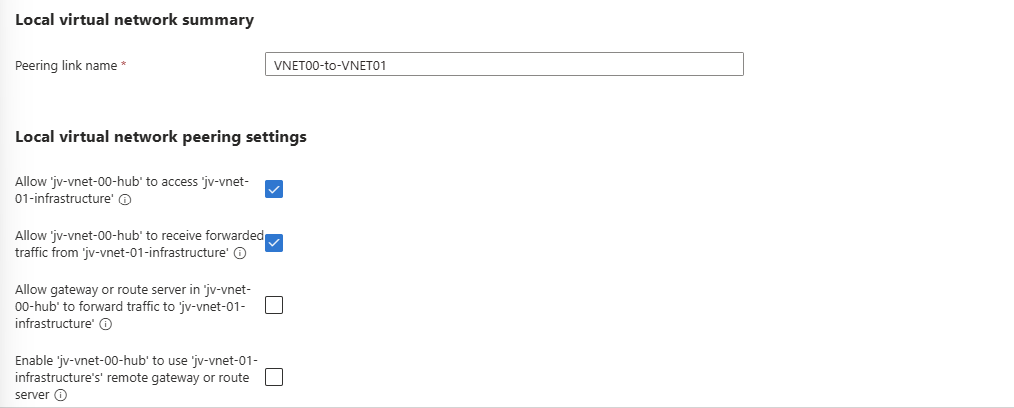
After these checks are marked correctly, we can create the peering by clicking on “Add”.
Do this configuration for each spoke network to connect it to the hub. The list of peered networks in your Hub network must look like this:
Now the foundation of our network is in place.
Creating the Azure Firewall subnet
Azure Firewall needs a subnet for management purposes which we have to create prior to creating the instance.
We can do this very easily by going to the Hub virtual network and then go to “Subnets”. Click on “+ Subnet” to create a subnet from template:
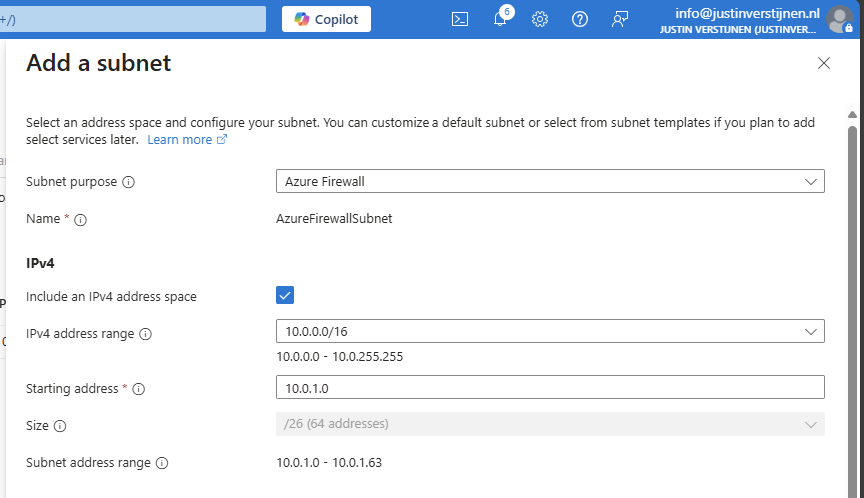
Select the “Azure Firewall” subnet purpose and everything will be completed automatically.
Creating a Azure Firewall Management Subnet
If you select the “Basic” SKU of Azure Firewall or use “Forced tunnling”, you also need to configure a Azure Firewall Management subnet. This works in the same way:
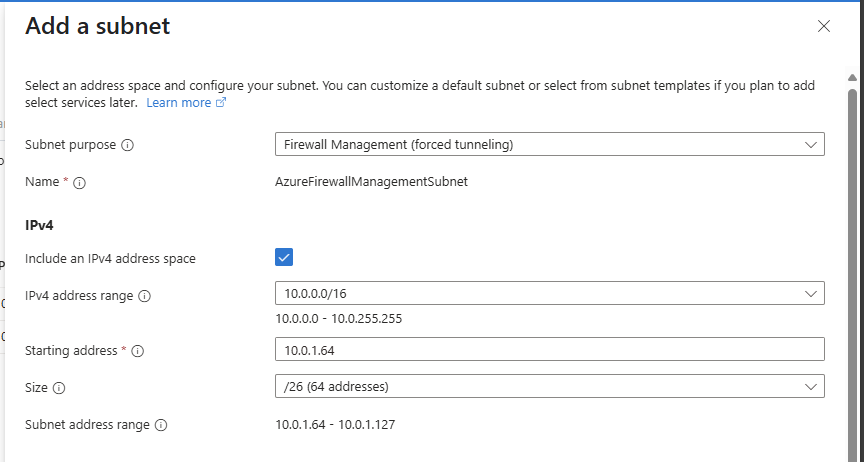
Select the “Firewall Management (forced tunneling)” option here and click on “Add” to create the subnet.
We are now done with the network configuration.
Creating the Azure Firewall instance
We can now start with Azure Firewall itself by creating the instance. Go to “Firewalls” and click on “+ Create” to create a new firewall. In this guide, I will create a Basic Firewall instance to show the bare minimum for its price.
Fill in the wizard, choose your preferred SKU and at the section of the virtual network choose to use an existing virtual network and select the created hub network.
After that create a new Firewall policy and give it a name:
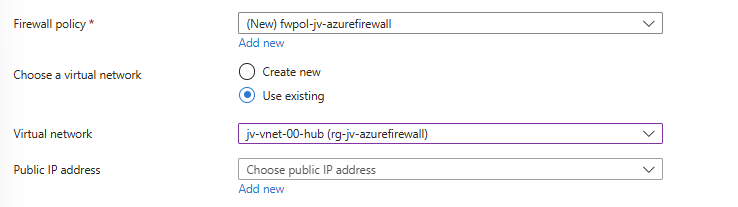
Now configure the public IP addresses for the firewall itself and the management IP address:
- Public IP address: This is used as the front door of your network, connecting to a server in your network means connecting to this IP
- Management Public IP address: This is the IP address used for management purposes
The complete configuration of my wizard looks like this:
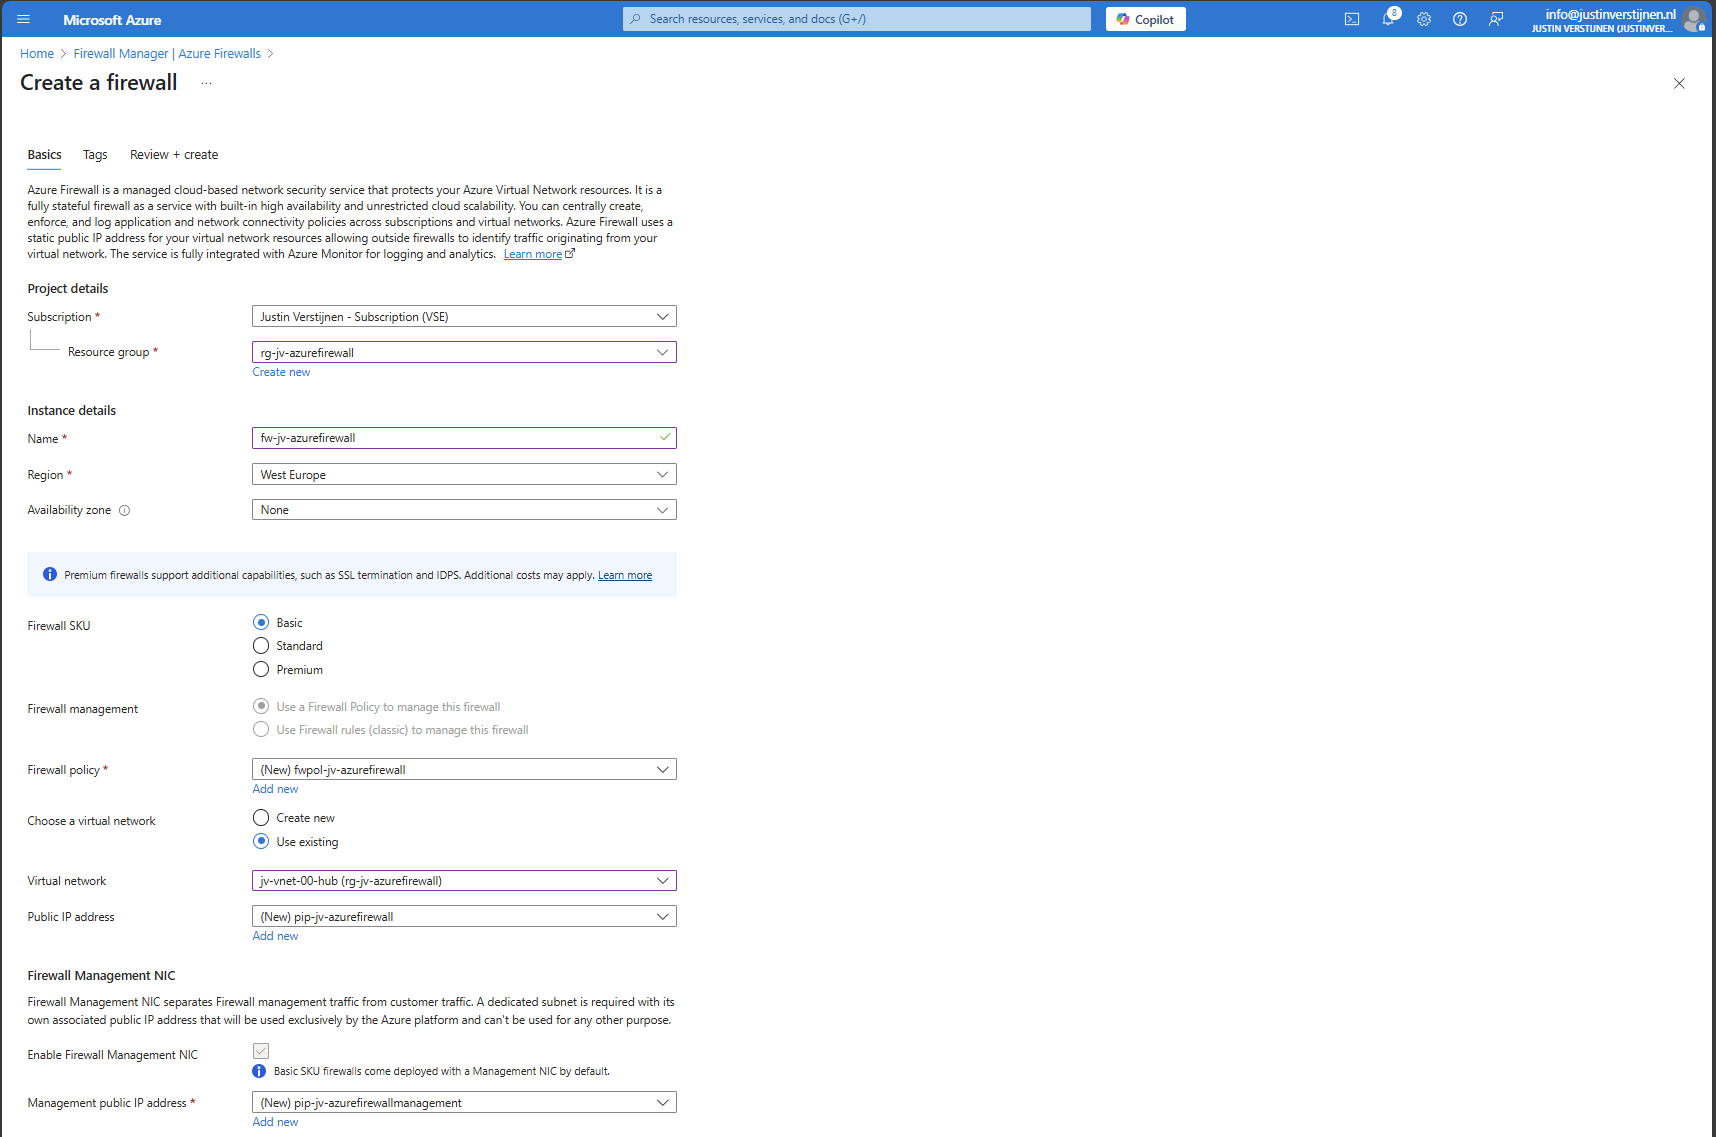
Now click on “Next” and then “Review and Create” to create the Firewall instance.
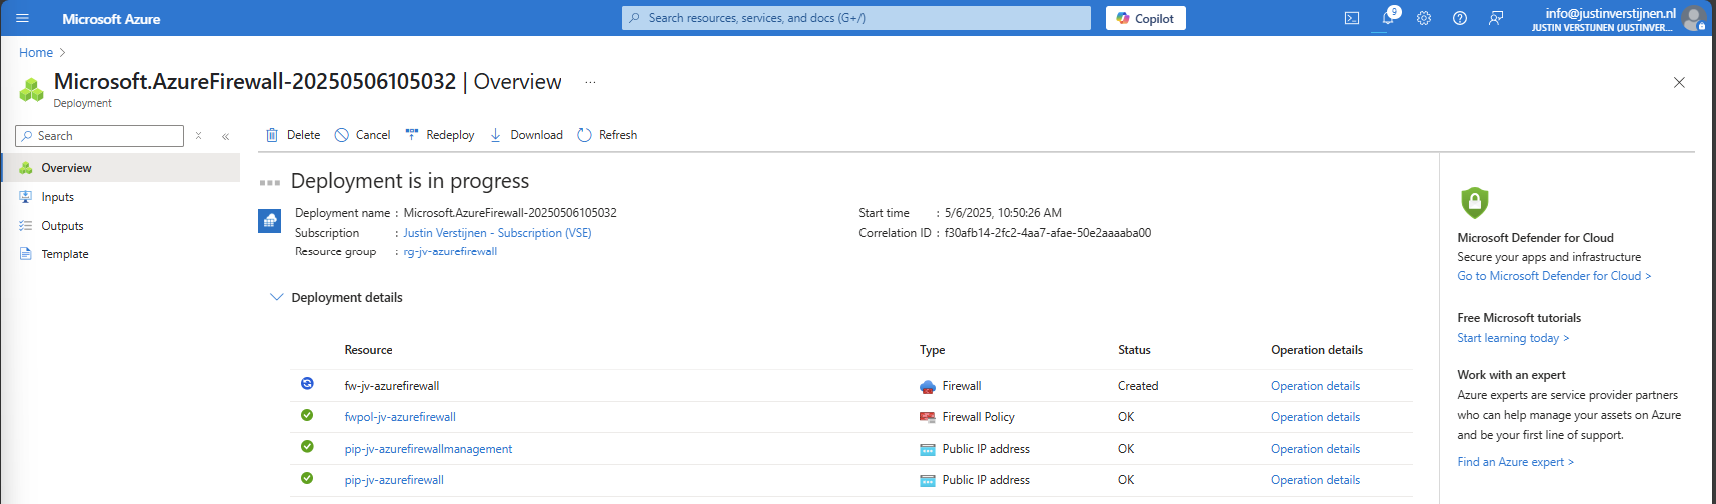
This will take around 5 to 10 minutes.
After the Firewall is created, we can check the status in the Firewall Manager:
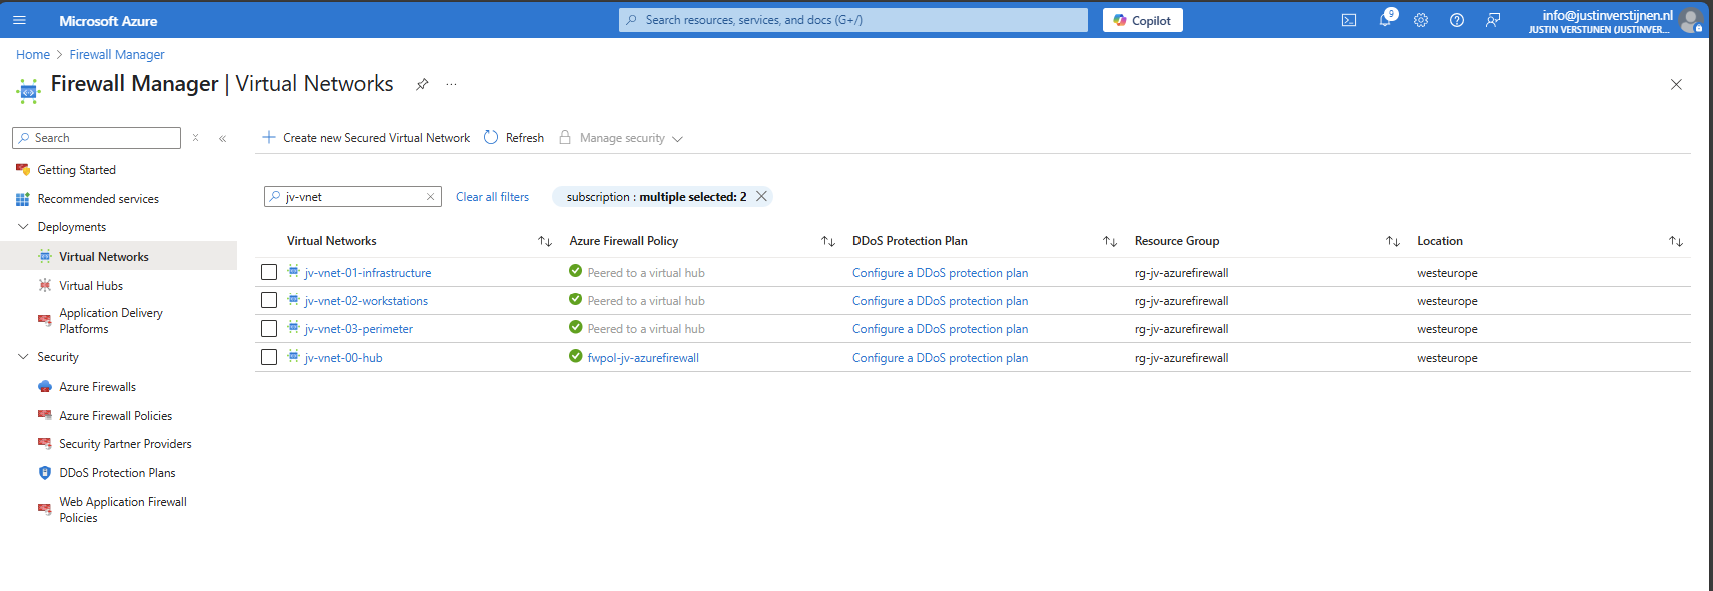
And in the Firewall policy:
Creating routing table to route traffic to Firewall
Now that we have created our Firewall, we know it’s internal IP address:
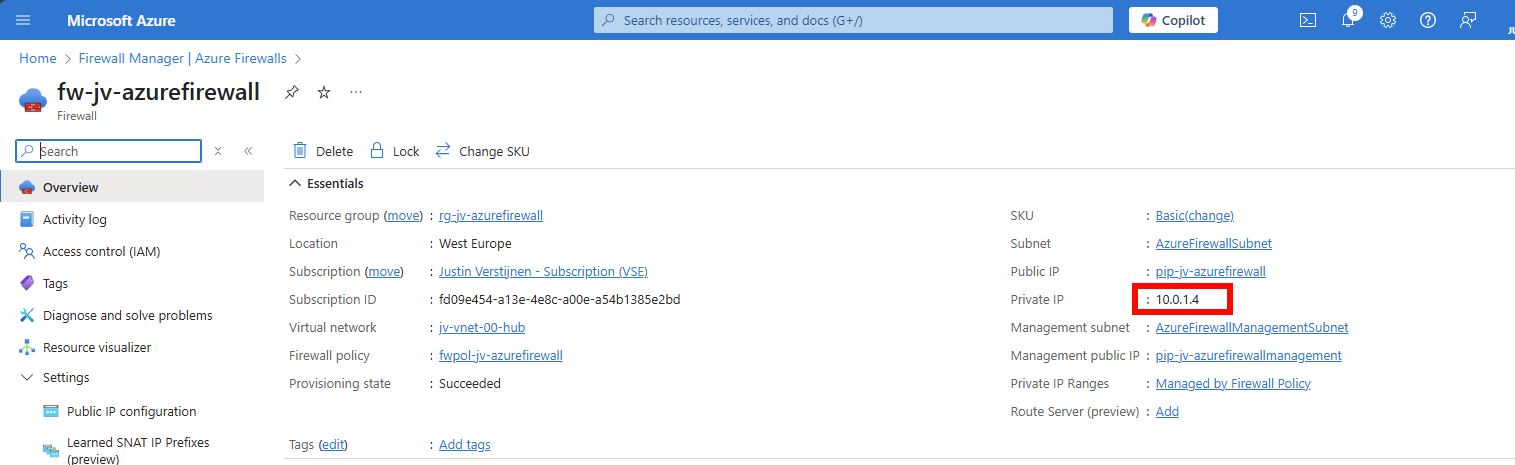
We have to tell all of our Spoke networks which gateway they can use to talk to the outside world. This is done by creating a route table, then a route and specifying the Azure Firewall instance.
Go to “Route Tables” and create a new route table. Give it a name and place it in the same region as your networks:
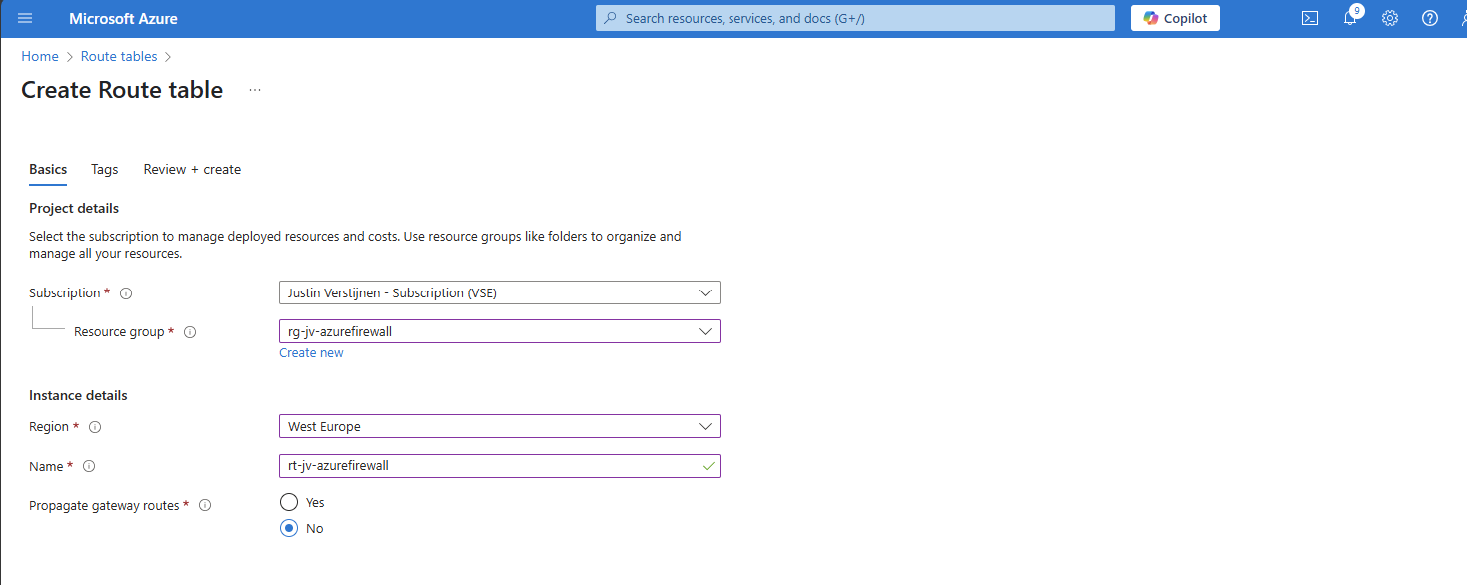
After this is done, we kan open the Route table and add a route in the Routes section:
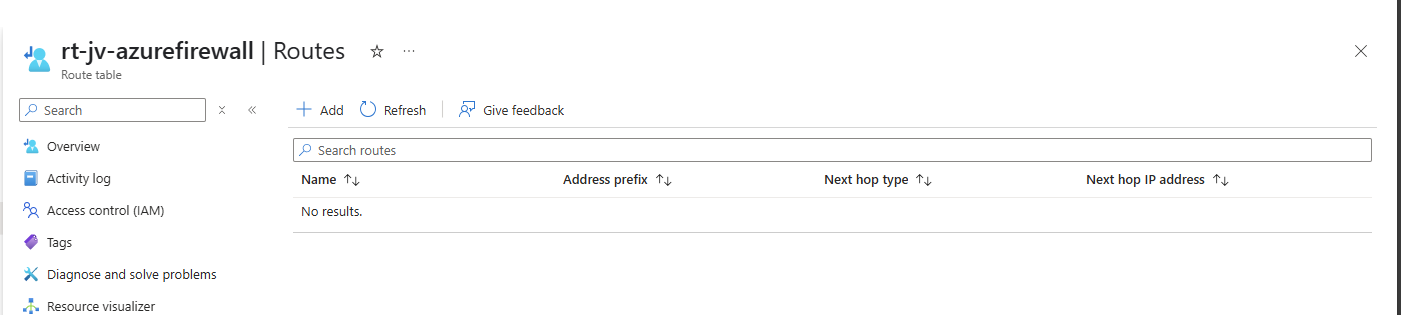
Configure the route:
- Route name: Can be something of your own choice
- Destination type: IP addresses
- Destination IP addresses/CIDR ranges: 0.0.0.0/0 (internet)
- Next hop type: Virtual Appliance
- Next hop address: Your private IP addresss of Azure Firewall
Create the route. Now go to the “Subnets” section, because after creating the route, we must speficy which networks will use it.
In “Subnets”, click on “+ Associate” and select your spoke networks only. After selecting, this should look like this:
Now outbound traffic of any resource in those spoke networks is routed through the firewall and we can start applying our own rules to it.
Creating Network Rule collection
We can now start with creating the network rules to start and allow traffic. Azure Firewall embraces a Zero Trust mechanism, so every type of traffic is dropped/blocked by default.
This means we have to allow traffic between networks. Traffic in the same subnet/network however does not travel through the firewall and is allowed by default.
Go to your Firewall policy and go to “Rule Collections”. All rules you create in Azure Firewall are placed in Rule collections which are basically groups of rules. Create a new Rule collection:
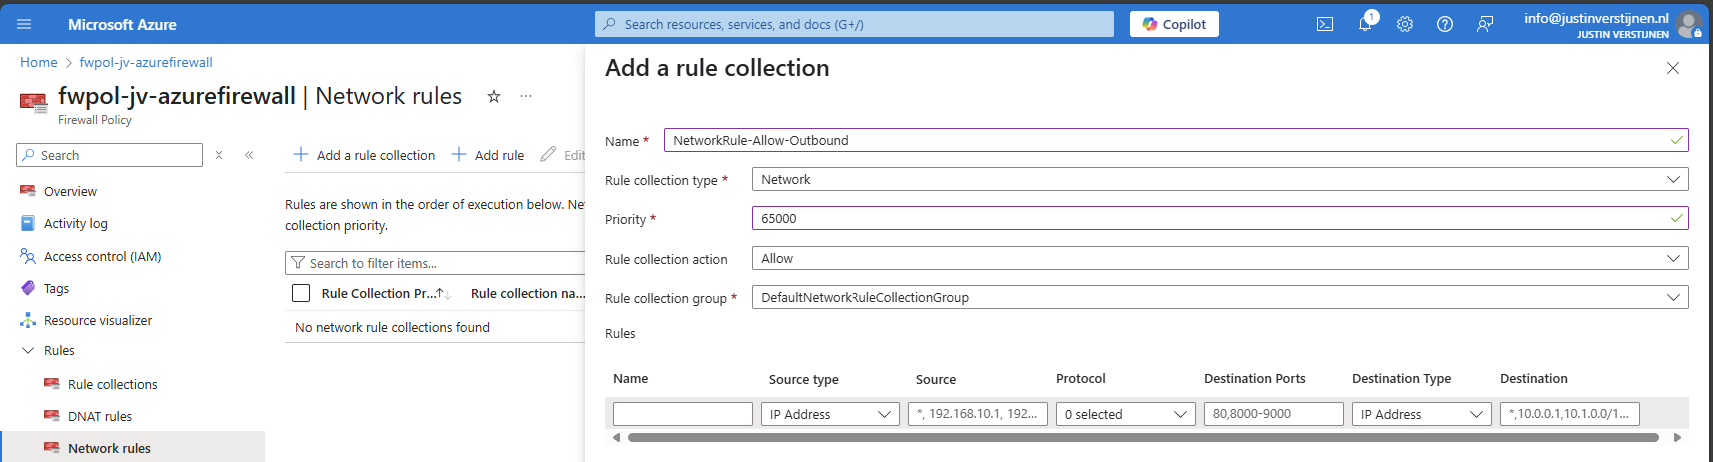
I create a network rule collection for all of my networks to allow outbound traffic. We can also put the rules of inter-network here, these are basically outbound in their own context.
The action of the rules is defined in the collection too, so you must create different collections for allowing and blocking traffic.
I also put the priority of this collection group on 65000, which means it is being processed as final. If we create rules with a number closer to 100, that is processed first.
Creating Network rules to allow outbound traffic
Now that we have our Network rule collection in place, we can create our rules to allow traffic between networks. The best way is to make rules per VNET, but you can specify the whole address space if you want. I stick with the recommend way.
Go to the Firewall Policy and then to “Network rules” and select your created network rule collection.
Create a rule to allow your created VNET01 outbound access to the internet.
| Name | Of your choice |
| Source type | 10.1.0.0/16 |
| Protocol | Any |
| Destination ports | * (all ports) |
| Destination type | IP Address |
| Destination | * (all IP addresses) |
Such rule looks like this:
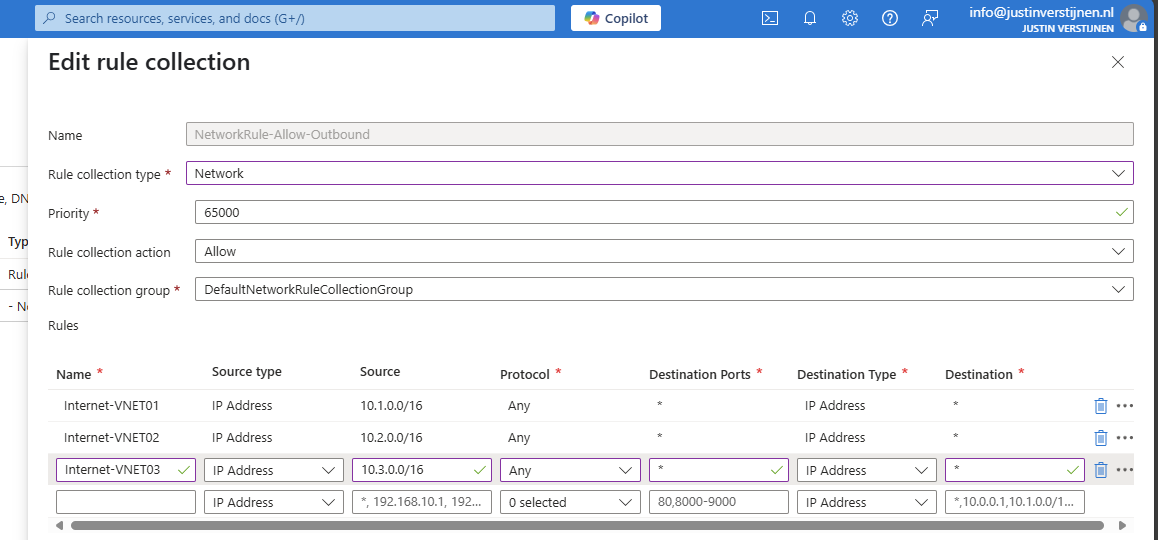
I created the rules for every spoke network (VNET01 to VNET03). Keep in mind you have to change the source to the address space of every network.
Save the rule to make it effective.
Creating Network rules to block Perimeter network
Now we can create a network rule to block the Perimeter network to access our internal network, which we specified in our architecture. We must create a rule collection for block-rules first:
Go to Rule collections and create a new rule collection:
- Name: Of your choice
- Rule collection type: Network
- Priority: 64000 (lower than our allow rules)
- Rule collection action: Deny
- Rule Collection Group: DefaultNetworkRuleCollectionGroup
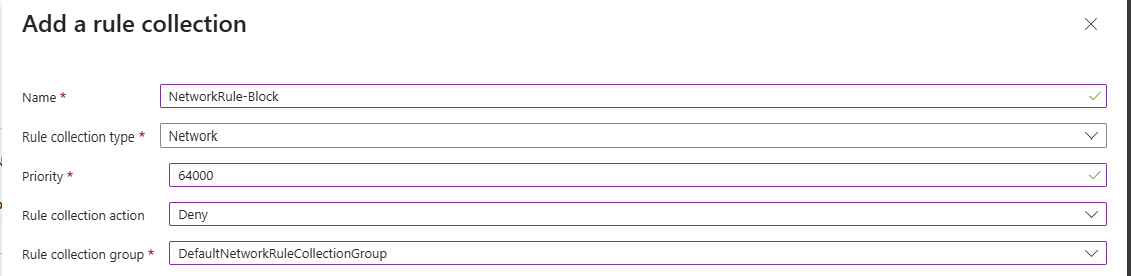
The most important are the priority and the action, where the priority must be closer to 100 to make it effective above the allow rules and the action to block the traffic.
Now create rules to block traffic from VNET03 to all of our spoke networks:
| Name | Of your choice |
| Source type | 10.3.0.0/16 |
| Protocol | Any |
| Destination ports | * (all ports) |
| Destination type | IP Address |
| Destination | 10.1.0.0/16 and 10.2.0.0/16 |
Create 2 rules to block traffic to VNET01 and VNET02:

Save the rule collection to make it effective.
Creating DNAT rule collection
For access from the outside network to for example RDP of servers, HTTPS or SQL we must create a DNAT rule collection for DNAT rules. By default all inbound traffic is blocked, so we must specify only the ports and source IP addresses we need to allow.
Go to the Firewall policy and then to “Rule collections”. Create a new rule collection and specify DNAT as type:
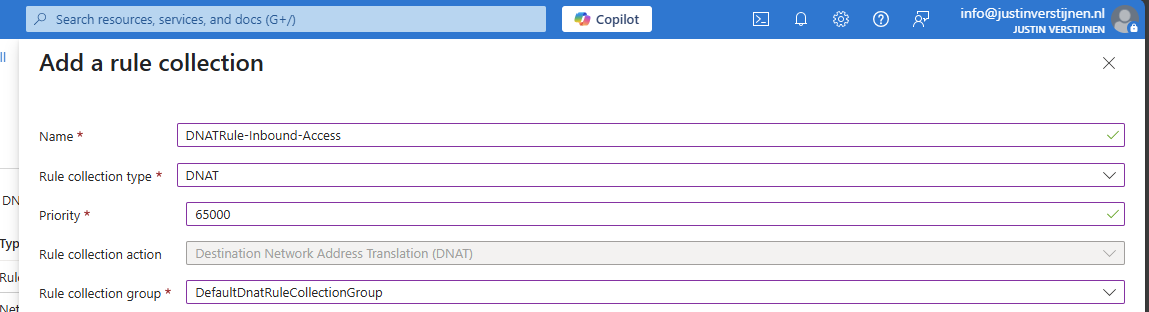
I chose a priority of 65000 because of broad rules. DNAT rules have the higest priority over network and application rules.
Create the rule collection.
Creating DNAT rules
Now we can create DNAT rules to allow traffic from the internet into our environment. Go to the just created DNAT rule collection and add some rules for RDP and HTTPS:
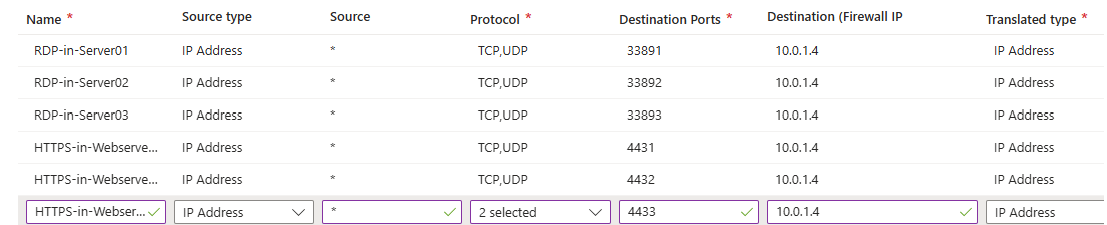
Part 2:
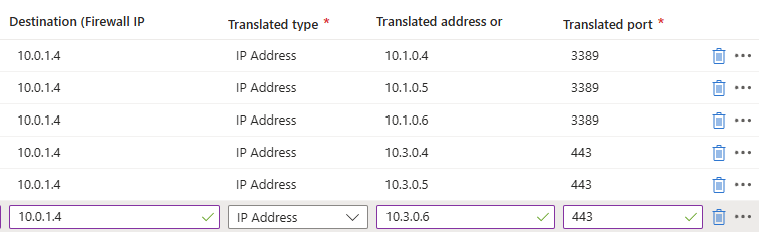
Here we have to specify which traffic from which source can access our internal servers. We can also do some translation here, with a different port number for internal and external networks. I used a 3389-1, 3389-2 and 3389-3 numbering here for the example but for real world scenario’s I advice a more scalable numbering.
So if clients want to RDP to Server01 with internal IP address 10.1.0.4, they connect to:
- 52.233.190.130:33891
- And is translated to 10.1.0.4 with port 3389
For DNAT rules, you need Standard or Premium SKU of Azure Firewall.
Creating Application rule collection
WIth application rules, you can allow or block traffic based on FQDNs and web categories. If using application rules to allow or block traffic, you must ensure there is no network rule in place, because that takes presedence over application rules.
To block a certain website for example create a new Rule collection for Application and specify the action “Deny”.
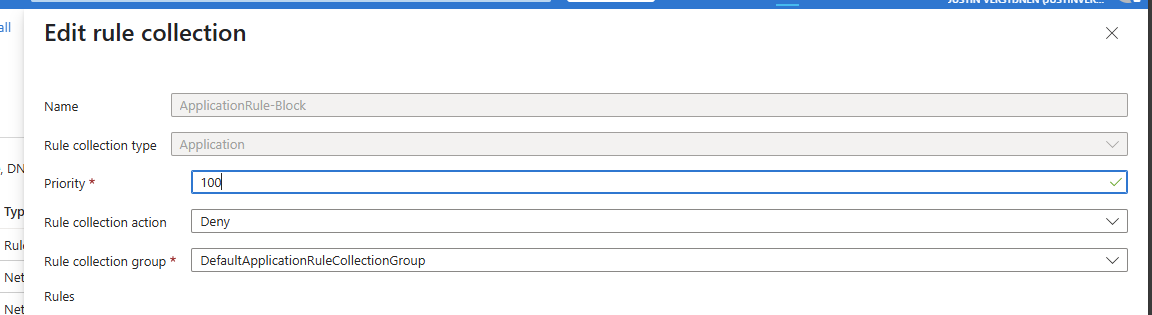
Save the collection and advance to the rules.
Creating Application rules
Now we can create some application rules to block certain websites:

For example I created 2 rules which block access from the workstations to apple.com and vmware.com. Make sure when using application rules, there has to be another rule in place to allow traffic with a higher priority number (closer to 65000)
Summary
Azure Firewall is a great solution for securing and segmenting our cloud network. It can defend your internal and external facing servers against attacks and has some advanced features with the premium SKU.
In my opinion, it is better than managing a 3rd party firewall in a seperate pane of glass, but the configuration is very slow. Every addition of a rule or collection takes around 3 or 4 minutes to apply. The good thing about this is that they are instantly applied after being saved.
I hope this guide was helpful and thank you for reading.
Sources
These sources helped me by writing and research for this post;
End of the page 🎉
You have reached the end of the page. You can navigate through other blog posts as well, share this post on X, LinkedIn and Reddit or return to the blog posts collection page. Thank you for visiting this post.
If you think something is wrong with this post or you want to know more, you can send me a message to one of my social profiles at: https://justinverstijnen.nl/about/
If you find this page and blog very useful and you want to leave a donation, you can use the button below to buy me a beer. Hosting and maintaining a website takes a lot of time and money. Thank you in advance and cheers :)
The terms and conditions apply to this post.
What is Azure Firewall?
Azure Firewall is a cloud-native Firewall which can be implemented in your Azure network. It acts as a Layer 3, 4 and 7 Firewall and so has more administrative options than for example NSGs.
Requirements
- Around 15 minutes of your time
- Basic knowledge of Azure
- Basic knowledge of networking and networking protocols
What is Azure Firewall?
Azure Firewall is an cloud based firewall to secure and your cloud networking environment. It acts as point of access, a sort of castledoor, and can allow or block certain traffic from the internet to your environment and from environment to the internet. The firewall can mostly work on layers 3, 4 and 7 of the OSI model.
Some basic tasks Azure Firewall can do for us:
- Port Forward multiple servers through the same IP address (DNAT)
- Superseding the native NAT Gateway to have all your environment communicating through the same static outbound IP address
- Allowing or blocking traffic from and to your virtual networks and subnets
- Block outbound traffic for sensitive servers
- Configuring a DMZ part of your network
- Blocking certain categories of websites for users on Azure Virtual Desktop
Azure Firewall overview
An overview of how this looks:
In this diagram, we have one Azure Firewall instance with an policy assigned, and we have 3 Azure virtual networks. These have each their own purpose. With Azure Firewall, all traffic of your machines and networks is going through the Firewall so we can define some policies there to restrict traffic.
To route your virtual network outbound traffic through Azure Firewall, a Route table must be created and assigned to your subnets.
Azure Firewall Pricing
To not be 100% like Microsoft who are very often like: “Buy our stuff” and then be suprised about the pricing, I want to be clear about the pricing of this service. For the West Europe region, you pay at the moment of writing:
- Basic instance: 290 dollars per month
- Standard instance: 910 dollars per month
- Premium instance: 1280 dollars per month
This is purely the firewall, and no calculated data. This isn’t that expensive, for the premium instance you pay around 20 dollars per Terabyte (1000GB).
Types of rules
Let’s deep further into the service itself. Azure Firewalls knows 3 types of rules you can create:
| Type | Goal | Example |
| DNAT Rule | Allowing traffic from the internet | Port forwarding Make your internal server available for the internet |
| Network Rule | Allowing/Disallowing traffic between whole networks/subnets | Block outbound traffic for one subnet DMZ configuration |
| Application Rule | Allowing/Disallowing traffic to certain FQDNs or web categories | Blocking a website Only allow certain websites/FQDN |
Rule processing order
Like standard firewalls, Azure Firewall has a processing order of processing those rules which you have to keep in mind when designing and configuring the different rules:
- DNAT
- Network
- Application
The golden rule of Azure Firewall is: the first rule that matches, is being used.
This means that if you create a network rule that allows your complete Azure network outbound traffic to the internet but you want to block something with application rules, that this is not possible. This because there is a broad rule that already allowed the traffic and so the other rules aren’t processed.
Rule Collections
Azure Firewall works with “Rule Collections”. This is a set of rules which can be applied to the firewall instances. Rule Collections are then categorized into Rule Collection Groups which are the default groups:
- DefaultDNATRuleCollectionGroup
- DefaultNetworkRuleCollectionGroup
- DefaultApplicationRuleCollectionGroup
How this translates into the different aspects is shown by the diagram below:
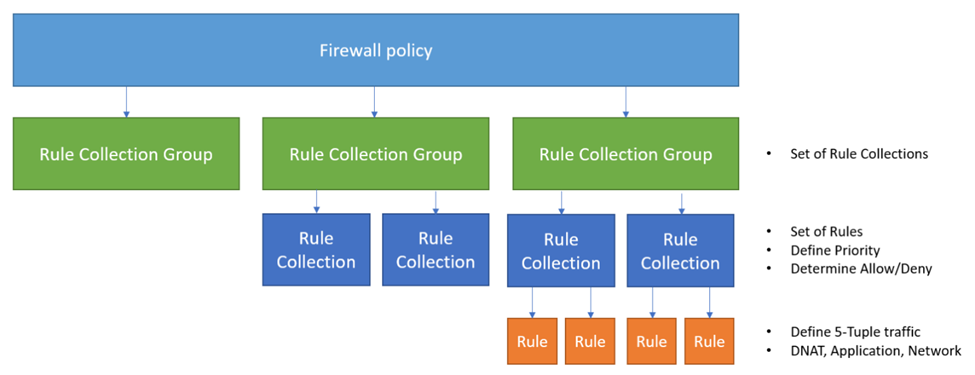
Firewall and Policies
Azure Firewall works with Firewall Policies. A policy is the set with rules that your firewall must use to filter traffic and can be re-used over multiple Azure Firewall instances. You can only assign one policy per Firewall instance. This is by design of course.
Extra security options (Premium only)
When using the more expensive Premium SKU of Azure Firewall, we have the 3 extra options below available to use.
TLS inspection
TLS inspection allows the firewall to decrypt, inspect, and then re-encrypt HTTPS (TLS) traffic passing through it. The key point of this inspection task is to inspect the traffic and block threats, even when the traffic is normally encrypted.
How it works in simplified steps:
- Client sends HTTPS request and Azure Firewall intercepts it
- Firewall presents its own certificate to the client (it acts as a man-in-the-middle proxy)
- Traffic is decrypted and inspected for threats using threat intelligence, signature-based detection, etc
- The Firewall re-encrypts the traffic and forwards it to the destination
This requires you to setup an Public Key Infrastructure and is not used very often.
IDPS
IDPS stands for Intrusion Detection and Preventing System and is mostly used to defend against security threats. It uses a signature-based database of well-known threats and can so very fast determine if specific packets must be blocked.
It very much does:
- Packet Inspection of inbound and outbound traffic
- Signature matching
- Alert generation of discovered matches
- Blocking the traffic
Threat Intelligence
Threat Intelligence is an option in the Azure Firewall Premium SKU and block and alerts traffic from or to malicious IP addresses and domains. This list of known malicious IP addresses, FQDNs and domains are sourced by Microsoft themselves.
It is basically an option you can enable or disable. You can use it for testing with the “Alert only” option.
Private IP Ranges (SNAT)
You can configure Source Network Address Translation (SNAT) in Azure Firewall. This means that your internal IP address is translated to your outbound IP address. A remote server in another country can do nothing with your internal IP addresses, so it has to be translated.
To clarify this process:
Your workstation in Azure has private IP 10.1.0.5, and when communicating to another server on the internet this address has to be translated. This is because 10.1.0.5 is in the private IP addresses range of RFC1918. Azure Firewall automatically translates this into his public IP addresses so the remote host only sees the assigned public IP address, in this case the fictional 172.172.172.172 address.
Your home router from your provider does the same thing. Translating internal IP addresses to External IP addresses.
Summary
Azure Firewall is a great cloud-native firewalling solution if your network needs one. It works without an extra, completely different interface like a 3rd party firewall.
In my honest opinion, I like the Firewall solution but for what it is capable of but is very expensive. You must have a moderate to big network in Azure to make it profitable and not be more expensive than your VMs and VPN gateway alone.
Thank you for reading this guide. Next week we will do a deep dive into the Azure Firewall deployment, configuration and setup in Azure.
End of the page 🎉
You have reached the end of the page. You can navigate through other blog posts as well, share this post on X, LinkedIn and Reddit or return to the blog posts collection page. Thank you for visiting this post.
If you think something is wrong with this post or you want to know more, you can send me a message to one of my social profiles at: https://justinverstijnen.nl/about/
If you find this page and blog very useful and you want to leave a donation, you can use the button below to buy me a beer. Hosting and maintaining a website takes a lot of time and money. Thank you in advance and cheers :)
The terms and conditions apply to this post.
Azure Default VM Outbound access deprecated
Starting on 30 September 2025, default outbound connectivity for Azure VMs will be retired. This means that after this date you have to configure a way for virtual machines to actually have connection to the internet. Otherwise, you will get an VM that runs but is only available through your internal network. In this post I will do a deep dive into this new developement and explain what is needed and what this means for your existing environment and how to transition to the new situation after this 30 September 2025 date.
What does this new requirement mean?
This requirement means that every virtual machine in Azure created after 30 September 2025 needs to have an outbound connectivity method configured. You can see this as a “bring your own connection”.
If you do not configure one of these methods, you will end up with a virtual machine that is not reachable from the internet. It can be reached from other servers (Jump servers) on the internal network or by using Azure Bastion.
The options in Azure we can use to facilitate outbound access are:
| Type | Pricing | When to use? |
| Public IP address | 4$ per VM per month | Single VMs |
| Load Balancer | 25$ - 75$ per network per month | Multiple different VMs (customizable SNAT) |
| NAT Gateway | 25$ - 40$ per subnet per month | Multiple similar VMs (default SNAT) |
| Azure Firewall | 800$ - 1300$ per network per month | To create complete cloud network with multiple servers |
| Other 3rd party Firewall/NVA | Depends on solution | To create complete cloud network with multiple servers |
Load balancer, NAT Gateway, Azure Firewall and 3rd party firewall (NVA) also need a Public IP address.
To further explain what is going on with these types:
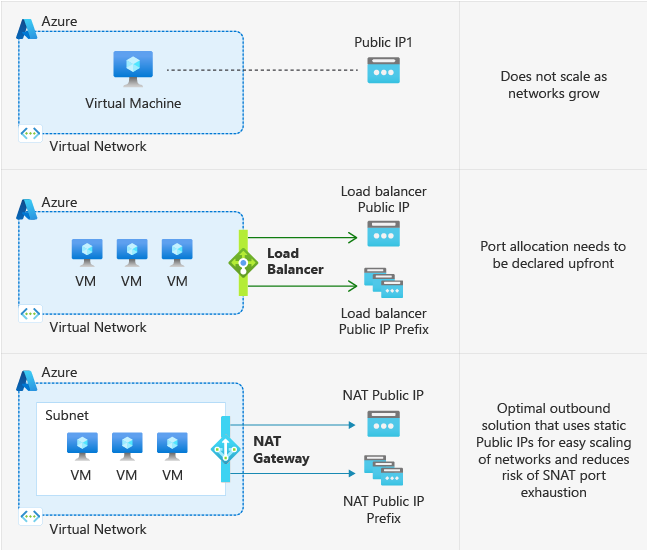
These are the Azure native solutions to achieve defualt outbound access with the details on the right.
This change means that Microsoft actually mark all subnets as “Private Subnet”, which you can already configure today:

Why would Microsoft choose for this?
There are some different reasons why Microsoft would choose to change this. It’s primary reason is to embrace the Zero Trust model, and so “secure-by-default”. Let’s find out all reasons:
- Security by default: Not connecting VMs to the internet that doesn’t need them increases security
- Predictable IP ranges: In the old situation, the outbound IP address could change anytime which increases confusion
- Explicit method: With this change you can choose what VMs need internet access and what VMs don’t. This because you actually have to configure them. In the old situation all VMs have internet access
- Cost management: The costs of the machines will be more expected as there will be less automated traffic and you can decide which VMs need internet access and what machines does not
What to do with existing VMs?
Existing VMs will not be impacted by this change.
Only when deploying a new VM after the migration date: 30 September 2025, the VM will not have outbound internet access and one of the methods must be configured.
Summary
I thnk this is a great change of Microsoft to change this behaviour. Yes, your environment will cost more, but the added security and easier manageability will really make up for it.
I hope I informed you about this change and thank you for reading.
Sources:
- https://learn.microsoft.com/en-us/azure/virtual-network/ip-services/default-outbound-access
- https://azure.microsoft.com/nl-nl/updates?id=default-outbound-access-for-vms-in-azure-will-be-retired-transition-to-a-new-method-of-internet-access
End of the page 🎉
You have reached the end of the page. You can navigate through other blog posts as well, share this post on X, LinkedIn and Reddit or return to the blog posts collection page. Thank you for visiting this post.
If you think something is wrong with this post or you want to know more, you can send me a message to one of my social profiles at: https://justinverstijnen.nl/about/
If you find this page and blog very useful and you want to leave a donation, you can use the button below to buy me a beer. Hosting and maintaining a website takes a lot of time and money. Thank you in advance and cheers :)
The terms and conditions apply to this post.
Microsoft Azure certifications for Developers
This page shows what Microsoft Azure certifications are available for Developer-minded people. I intend to focus as much on the developers as possible, although this is not my primary subject. I did some research and I didn’t find it very clear what to do, where to start etcetera.
The certification poster
Microsoft has an monthly updating certification poster available to have an overview for each solution category and the certifications of that category. You can find the poster here:
Certification types
Certifications in the Microsoft world consist of 4 categories/levels:
- Fundamentals: Foundational certifications to learn the overview of the category
- Intermediate: Intermediate certification to learn how a solution works and to manage it
- Expert: Expert certifications to learn to how to architect a solution
- Specialties: These are add-ons designed for specific solutions like Azure Virtual Desktop, SAP workloads, Cosmos DB and such. (not included below)
Microsoft wants you to always have lower certifications before going up the stairs. It wants you if you take an expert certification, you also have the knowledge of the fundamentals and intermediate certification levels. Some expert certifications even have hard pre-requisites.
The certification list for developers
There are multiple certifications for Azure available that can be interesting for developers (at the time of writing):
- Azure Fundamentals (AZ-900)
- Azure AI Fundamentals (AI-900)
- Azure Data Fundamentals (DP-900)
- Azure Administrator (AZ-104)
- Azure AI Engineer (AI-102)
- Azure Developer (AZ-204)
- Azure Solutions Architect (AZ-305)
- Azure DevOps Expert (AZ-400)
- Azure Database Administrator (DP-300)
For specific solutions like Power Platform and Dynamics, there are different certifications available as well but not included in this page.
Microsoft has given codes to the exams, they are called AZ-900 or AI-900 and such. By passing the exam you will be rewarded with the certification.
Developer certification path on Azure
No further clarify the paths you can take as developer, I have created a topology to describe the multiple paths you can take:
I have separated the list of Developer-interesting certifications into the layers, and created the 4 different paths to take at the top. Some certifications are interesting for multiple paths and having more knowledge is always better.
Some certifications also have overlap. Some knowledge of the AZ-104 and AZ-204 are the same. In AZ-305 and AZ-400, the information also can be similar but are focussed on getting you to the level of the job title, without having to follow multiple paths.
Summary
I hope I helped you to clarify and decide what certification to take as developer with interest in Azure. Thank you for reading this guide.
End of the page 🎉
You have reached the end of the page. You can navigate through other blog posts as well, share this post on X, LinkedIn and Reddit or return to the blog posts collection page. Thank you for visiting this post.
If you think something is wrong with this post or you want to know more, you can send me a message to one of my social profiles at: https://justinverstijnen.nl/about/
If you find this page and blog very useful and you want to leave a donation, you can use the button below to buy me a beer. Hosting and maintaining a website takes a lot of time and money. Thank you in advance and cheers :)
The terms and conditions apply to this post.
Creating Static Web Apps on Azure the easy way
Microsoft Azure has a service called the ‘Static Web Apps" (SWA) which are simple but yet effective webpages. They can host HTML pages with included CSS and can link with Azure Functions for doing more advanced tasks for you. In this guide we will explore the possibilities of Static Web Apps in Azure.
Requirements
- Around 45 minutes of your time
- An account for Github (recommended)
- An Azure subscription to host your Static Web App
- Some basic knowledge of Azure
- A custom domain to link the web app to your domain
Introduction to Static Web Apps and Github
Before we dive into Static Web Apps and Github, I want to give a clear explaination of both the components that will help us achieving our goal, hosting a simple web app on Azure.
In Azure we create a Static Web App, which can be seen as your webserver. However, Azure does not provide an easy way to paste your HTML code in the server. That is where we use Github for. This process looks like this:
Everytime we commit/change our code in Github, the repository will automatically start a Workflow task which is created automatically. This takes around a minute depending of the size of your repository. It will then upload the code into the Static Web App and uses a deployment token/secret for it. After this is done, the updated page will be available in your Static Web App.
In this guide, we will create a simple and funny page, called https://beer.justinverstijnen.nl which points to our Static Web App and then shows a GIF of beer. Very simple demonstration of the possibilities of the Azure service. This guide is purely for the demonstration of the service and the process, and after it runs perfectly, you are free to use your own code.
Create a Github account and repository
If you haven’t created your Github account, do this now. Go to https://github.com and sign up. This is really straight forward.
After creating and validating your account, create a new repository:
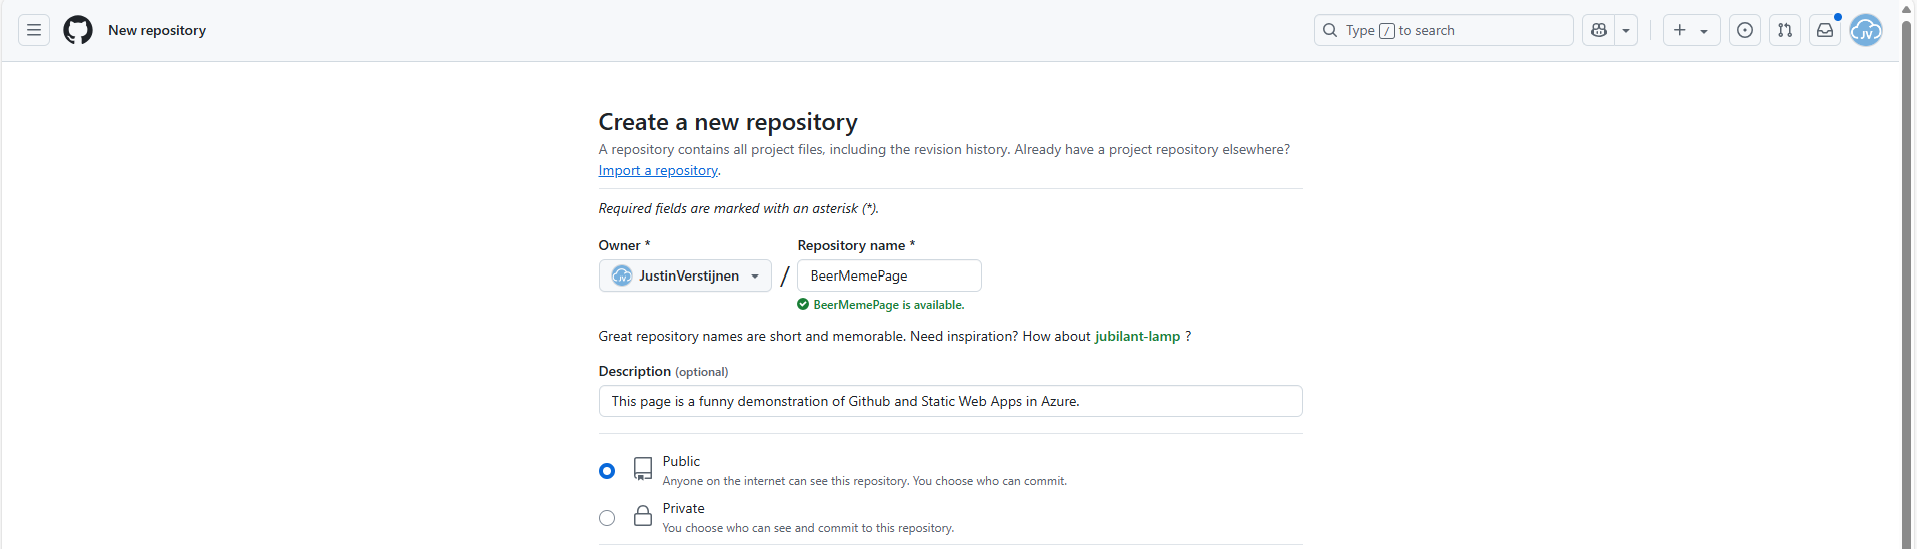
Give it a name, description and detemine if you want it to be public or private.
After that you have the option of choosing a license. I assigned the MIT license, which basically tells users that they are free to use my code. It isn’t that spectacular :)
Click on “Create repository” to create the repository and we are done with this step.
Upload the project files into Github
Now we have our repository ready, we can upload the already finished files from the project page: https://github.com/JustinVerstijnen/BeerMemePage
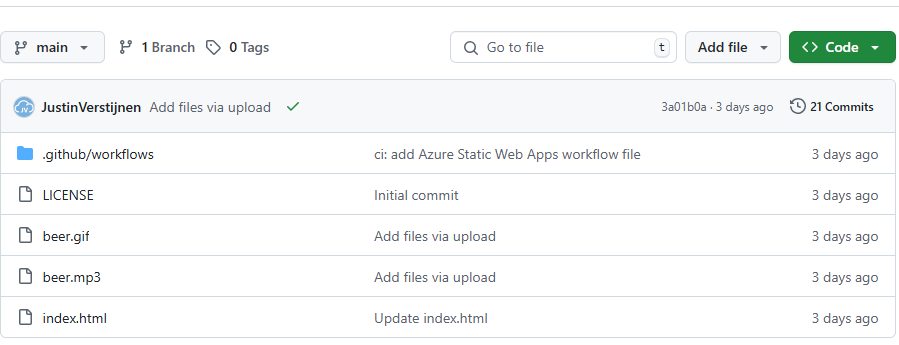
Click on “Code”.
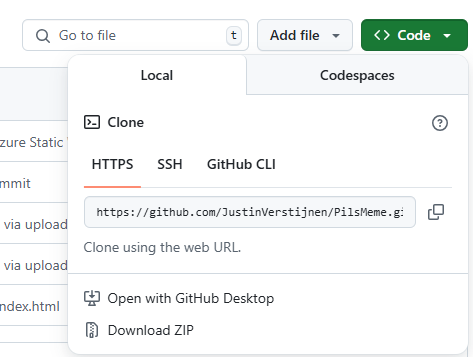
Click on “Download ZIP”.
This downloads my complete project which contains all needed files to build the page in your own repository.
Unzip the file and then go to your own repository to upload the files.
Click on “Add file” and then on “Upload files”.
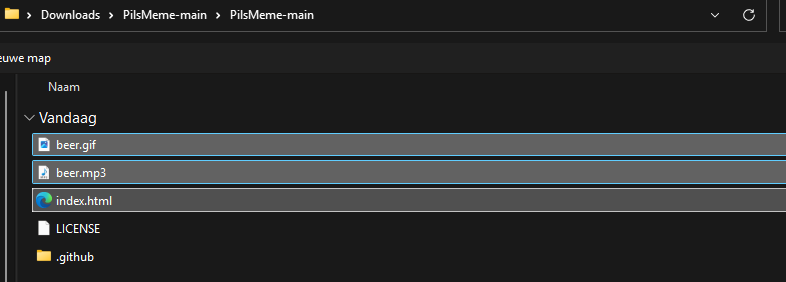
Select these files only;
- Beer.gif
- Beer.wav
- Index.html
The other 2 files will be generated by Github and Azure for your project.
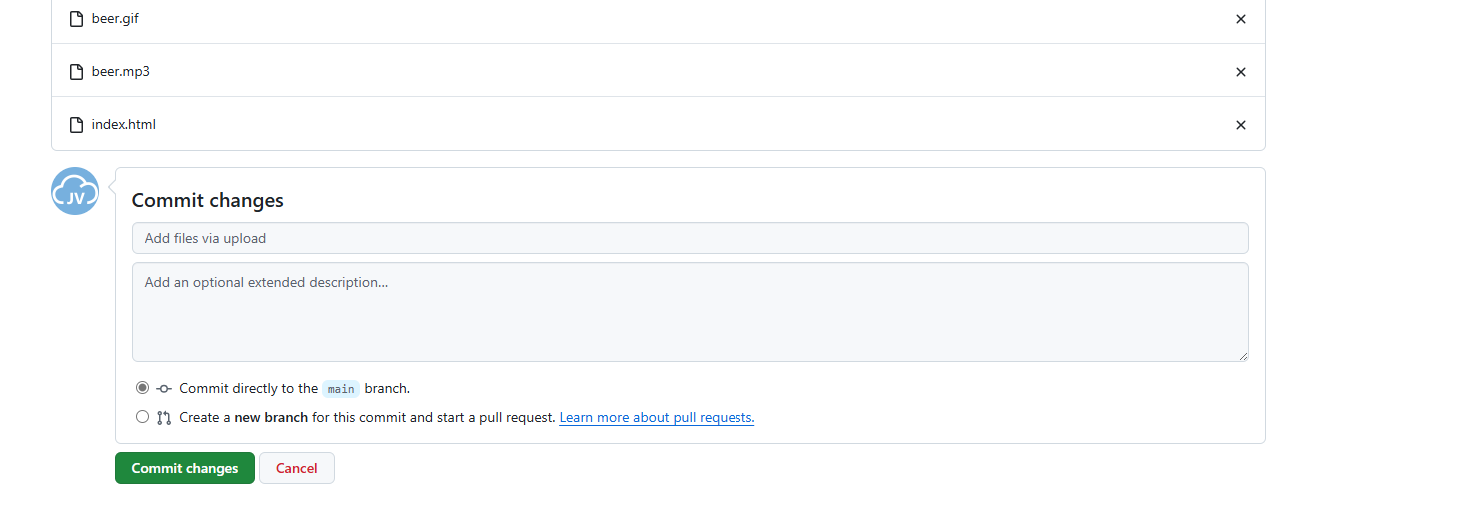
Commit (save) the changes to the repository.
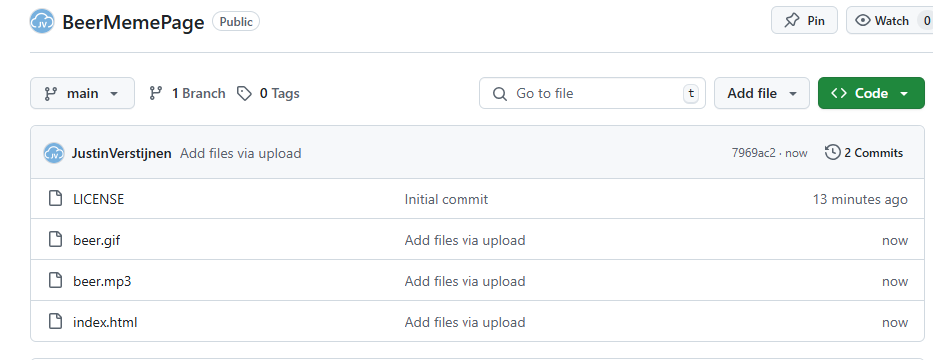
Now our repository is ready to deploy.
Create a Static Web App in Azure
Now we can head to Azure, and create a new resource group for our Beer meme page project:
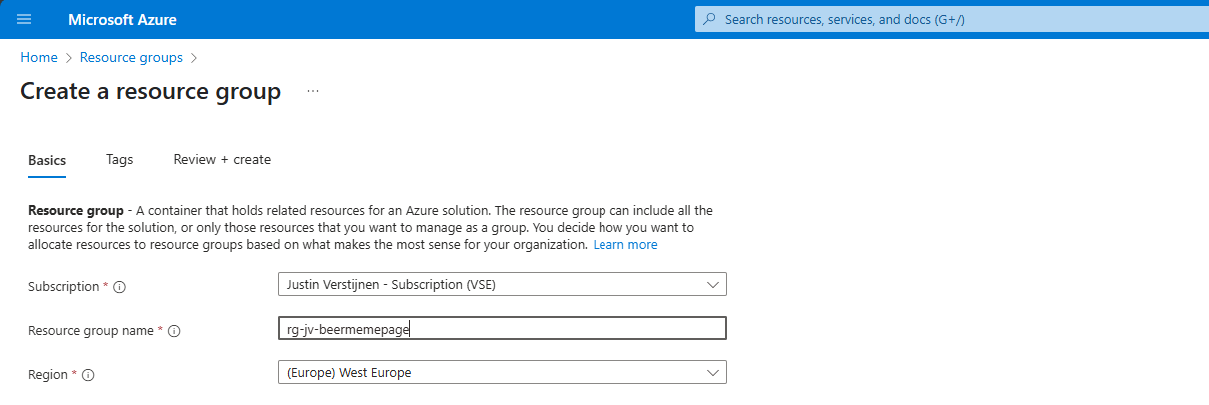
Finish the wizard and then head to “Static Web Apps”.
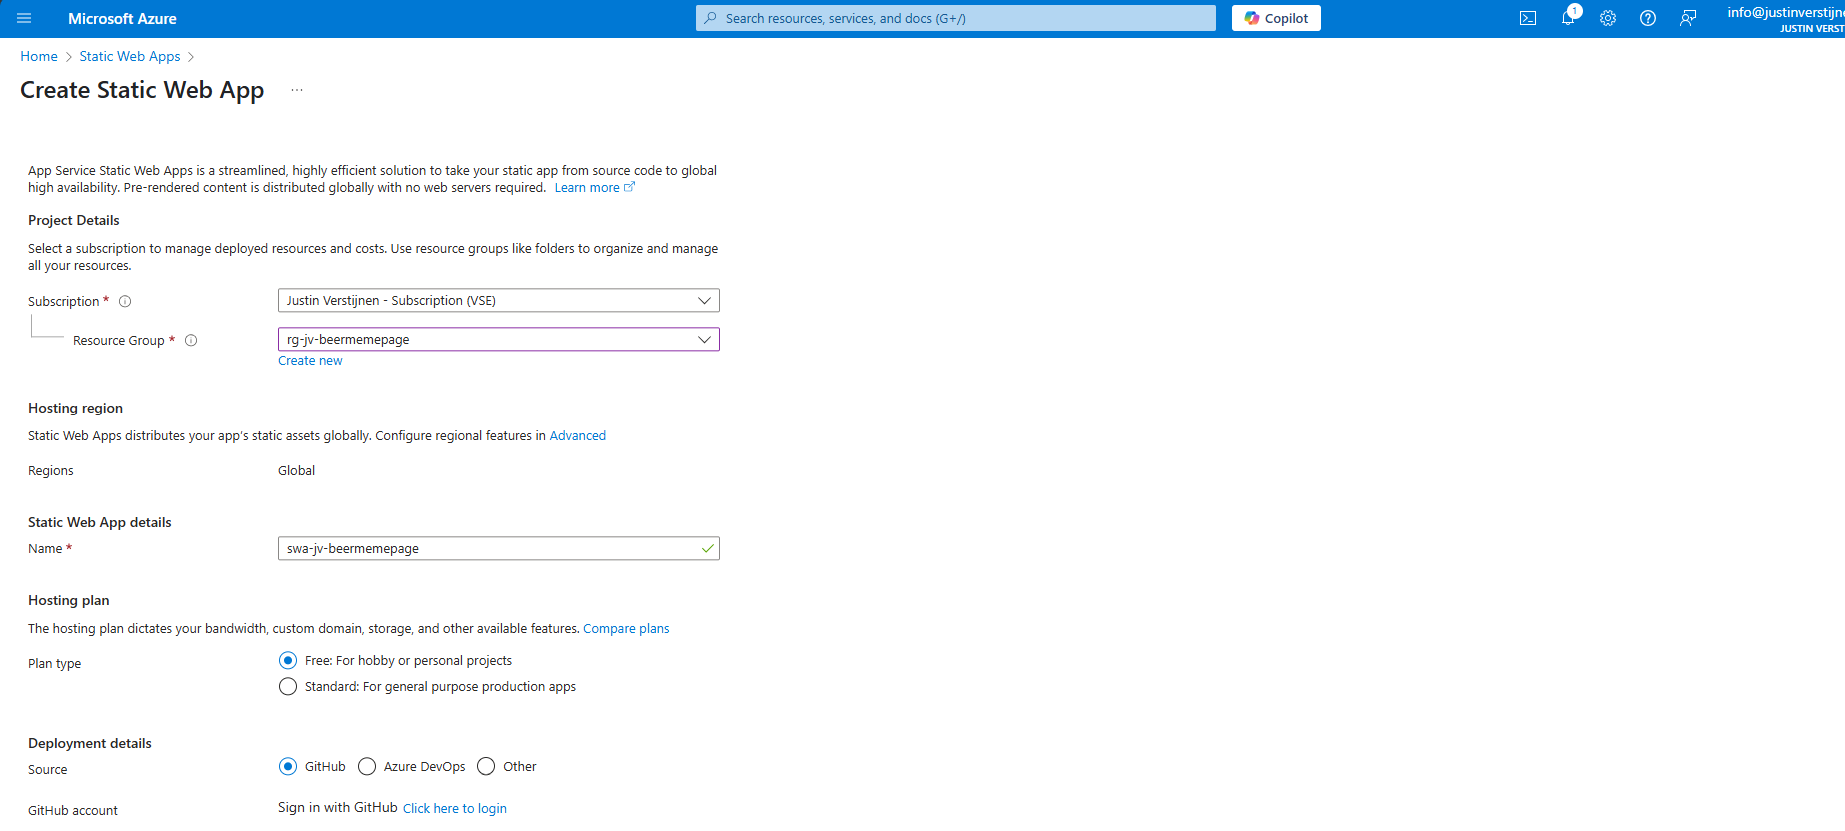
Place the web app into your freshly created resource group and give it a name.
Then I selected the “Free” plan, because for this guide I dont need the additional options.
For Deployment details, select GitHub, which is the default option. Click on “Click here to login” to link your Github account to your Azure account.
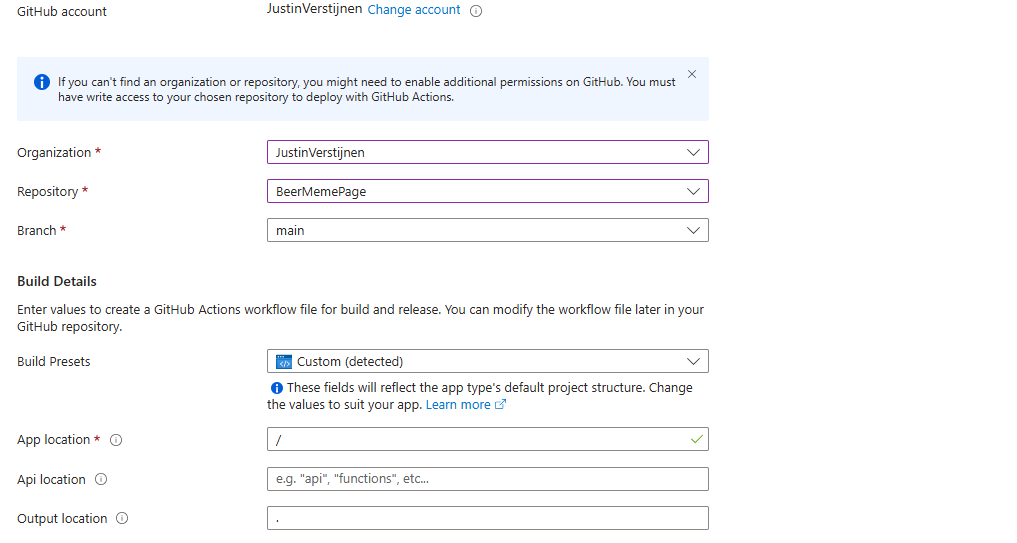
Select the right Organization and Repository. The other fields will be filled in automatically and can be left as they are.
You can advance to create the web app. There is nothing more that we need to configure for this page. Finish the creation of the Static Web App and wait for a few minutes for Azure and Github completing the actions and uploading your website assets to Azure. This takes around 3 minutes.
Check the deployment of your page
After the SWA deployment in Azure is done and having patience for a few minutes, we can test our website. Go to the created resource and click on “Visit your site”:
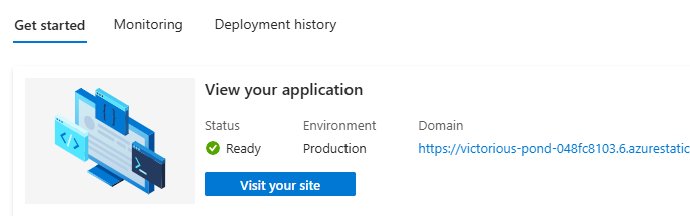
This brings up our page:

Click anywhere on the gif to let the audio play. Autoplay on visit only is not possible due to browser SPAM restrictions.
After deployment we can see in Github that a .github folder is created:
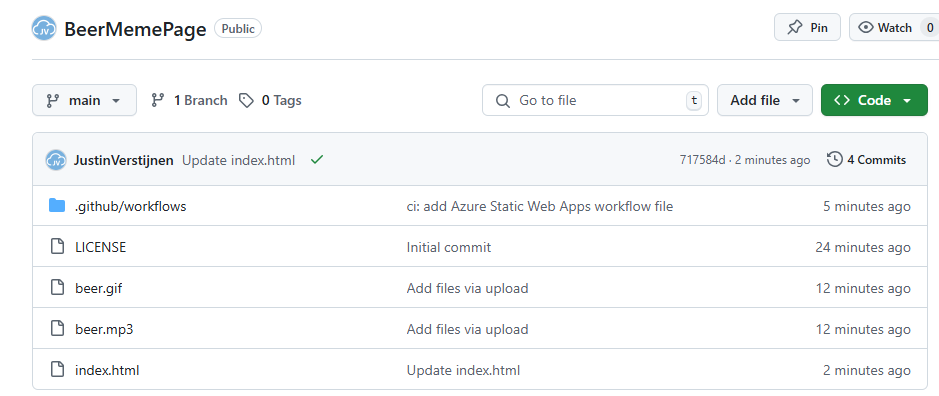
This contains a file that deploys the files into the Azure Static Web App (SWA) automatically after commiting anything. You can view the statis in the grey bar above the files. A green check means that everything is succesfully deployed to Azure.
Create a custom domain name
Now that we are done with the deployment, we still have to create our cool beer.justinverstijnen.nl domain name that redirects to the static web app. We don’t want to fill in the complete Azure page when showing it to our friends, right?
In Azure, go to the Static web app and open the options menu “custom domains”
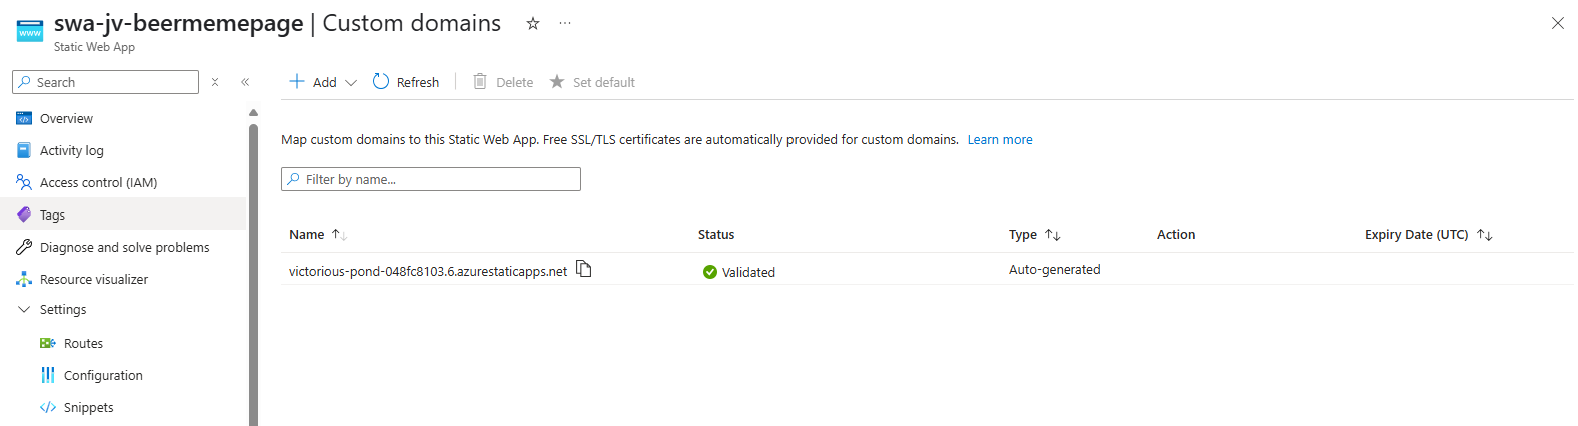
Click on “Add” to add your domain name.
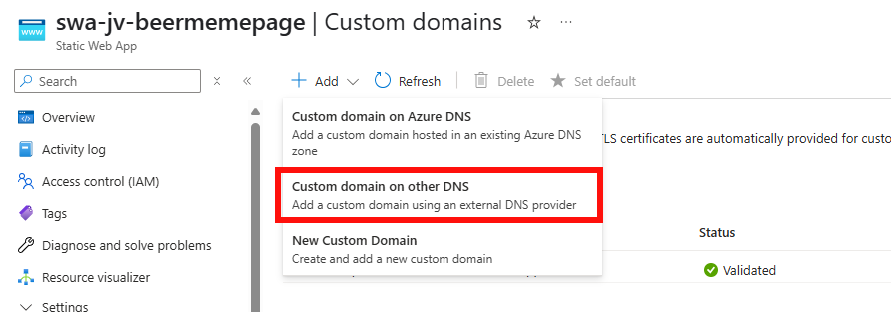
Then select “Custom domain on other DNS” if you use a external DNS provider.
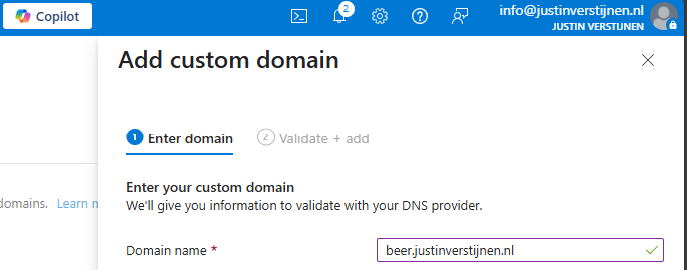
Fill in your desired domain name, and we have to validate now that we actually own this domain.
My advice is to use the CNAME option, as this is the way we forward to the static web app afterwards. This enables us to validate and redirect with one record only (instead of a verification TXT and a CNAME)
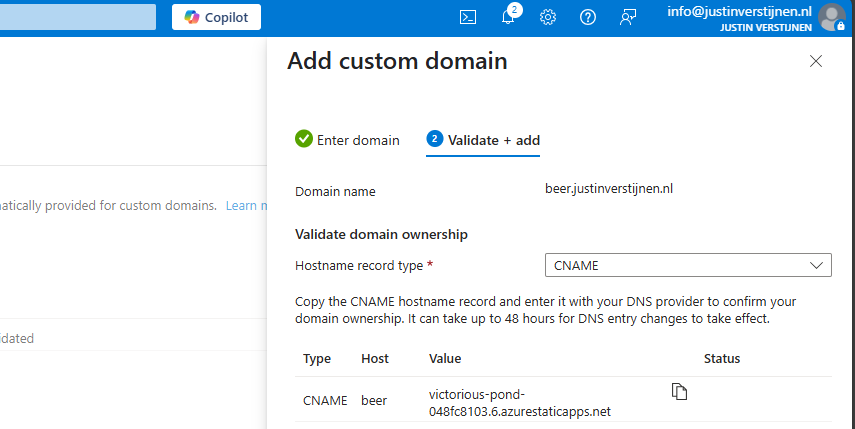
Create a CNAME record on your DNS hosting called “beer” with the value.

End the value of the CNAME record with a “.” dot because it is an external domain.
If you use a higher level domain, like justinverstijnen.nl, your DNS host may require you to create a ALIAS record instead of a CNAME record.
Save the record, wait for 2 minutes and click “Validate” in Azure to validate your CNAME record. This process is mostly done within 5 minutes, but it can take up to 48 hours.
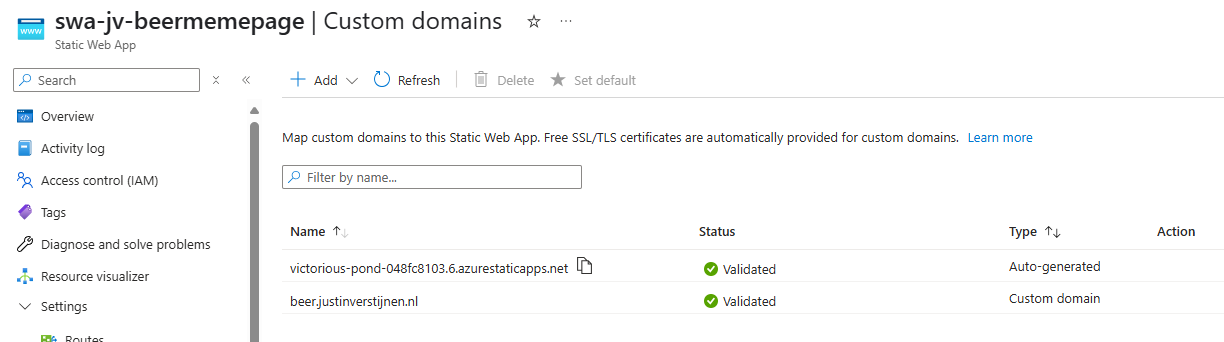
The custom domain is added. Let’s test this:
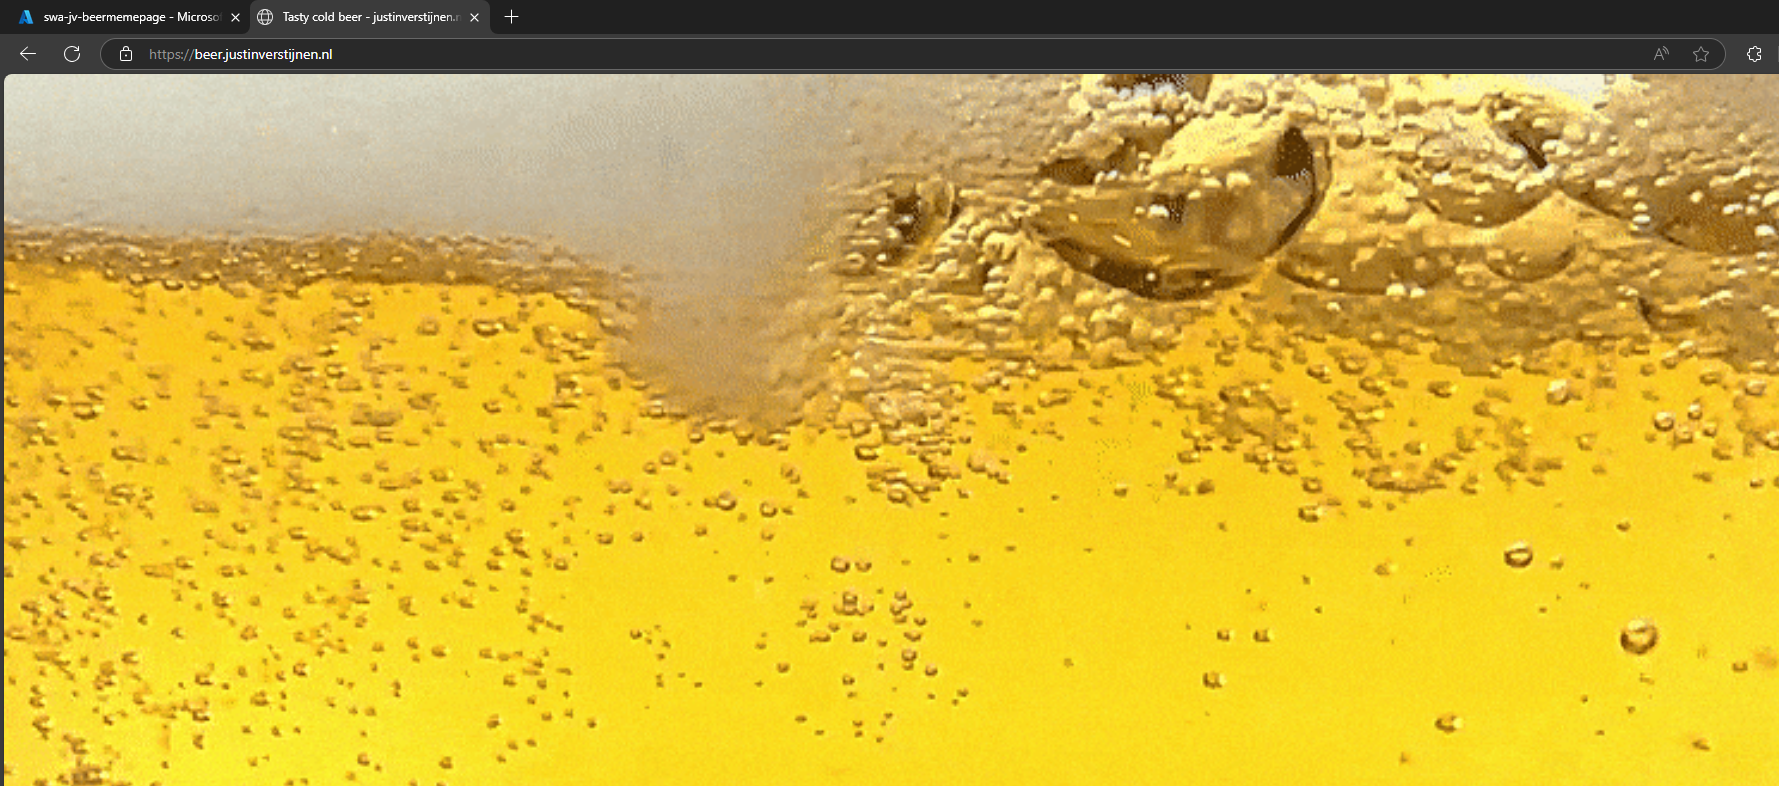
Great, it works perfectly. Cheers :)
The most great thing is that everything is handled by Azure; from deployment -> to SSL certificate so the customer deploys such sites without any major problems.
Knowledge check
Knowledge check
This quiz needs JavaScript to show the questions and feedback.
Summary
Azure Static Web Apps are a great way of hosting your simple webpages. They can be used for a variety of things. Management of the SWA instance is done in Azure, management of the code through Github.
Thank you for reading this guide and I hope it was helpful.
End of the page 🎉
You have reached the end of the page. You can navigate through other blog posts as well, share this post on X, LinkedIn and Reddit or return to the blog posts collection page. Thank you for visiting this post.
If you think something is wrong with this post or you want to know more, you can send me a message to one of my social profiles at: https://justinverstijnen.nl/about/
If you find this page and blog very useful and you want to leave a donation, you can use the button below to buy me a beer. Hosting and maintaining a website takes a lot of time and money. Thank you in advance and cheers :)
The terms and conditions apply to this post.
Create custom Azure Workbooks for detailed monitoring
Azure Workbooks are an excellent way to monitor your application and dependencies in a nice and customizable dashboard. Workbooks can…
Introduction
Azure Workbooks are a powerful way to build customizable dashboards for monitoring applications and infrastructure. They can combine multiple data sources such as:
- Metrics
- Log Analytics Workspaces
- Visualizations
They are flexible enough for quick performance overviews or deep investigations.
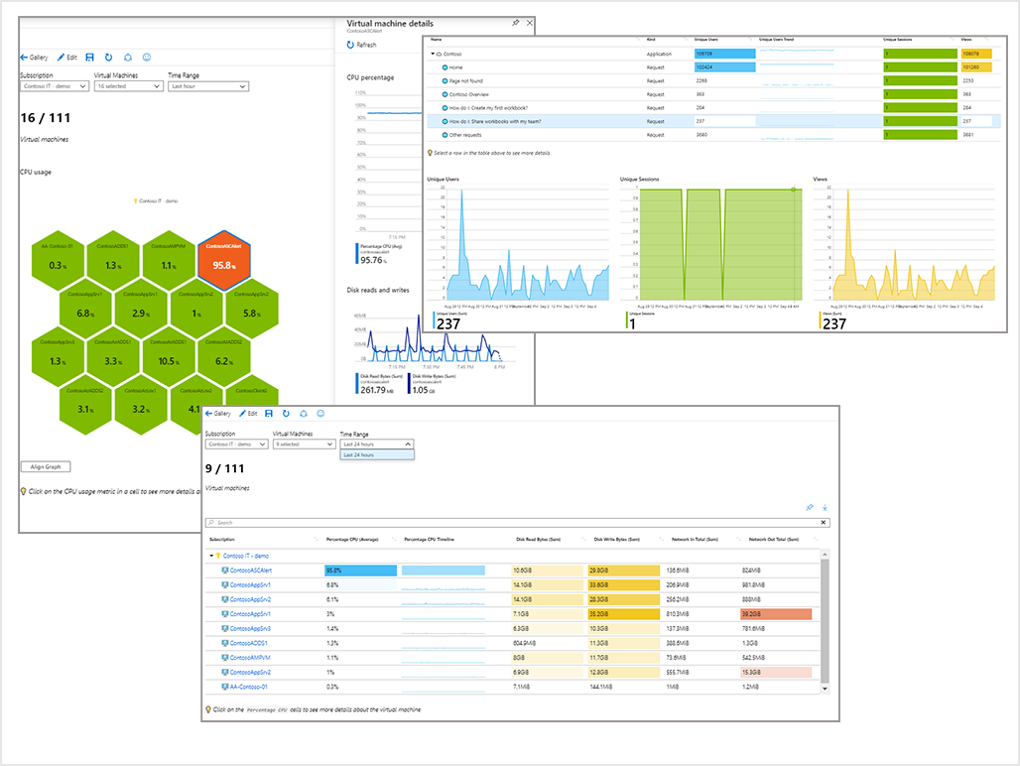
Using Default Azure Workbooks
Many Azure resources include built-in workbook templates with basic health and performance insights.
- Open your Virtual Machine.
- Select Workbooks.
- Choose Overview or another template.
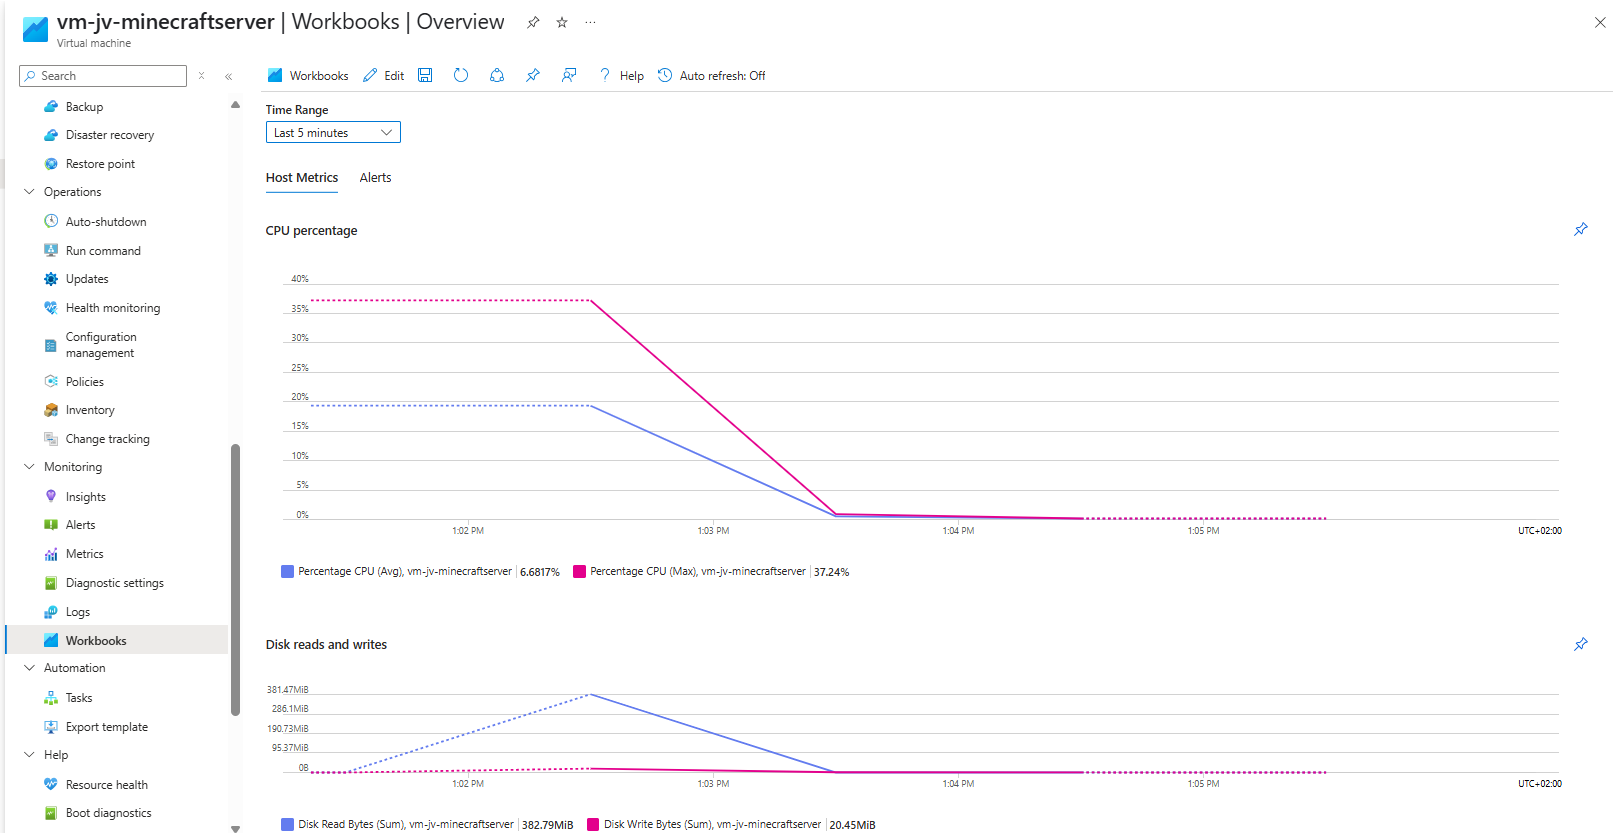
Workbook Templates and Examples
Microsoft maintains a public repository with workbook templates:
This library contains hundreds of ready-to-use workbooks that can also be reused in your own custom dashboards.
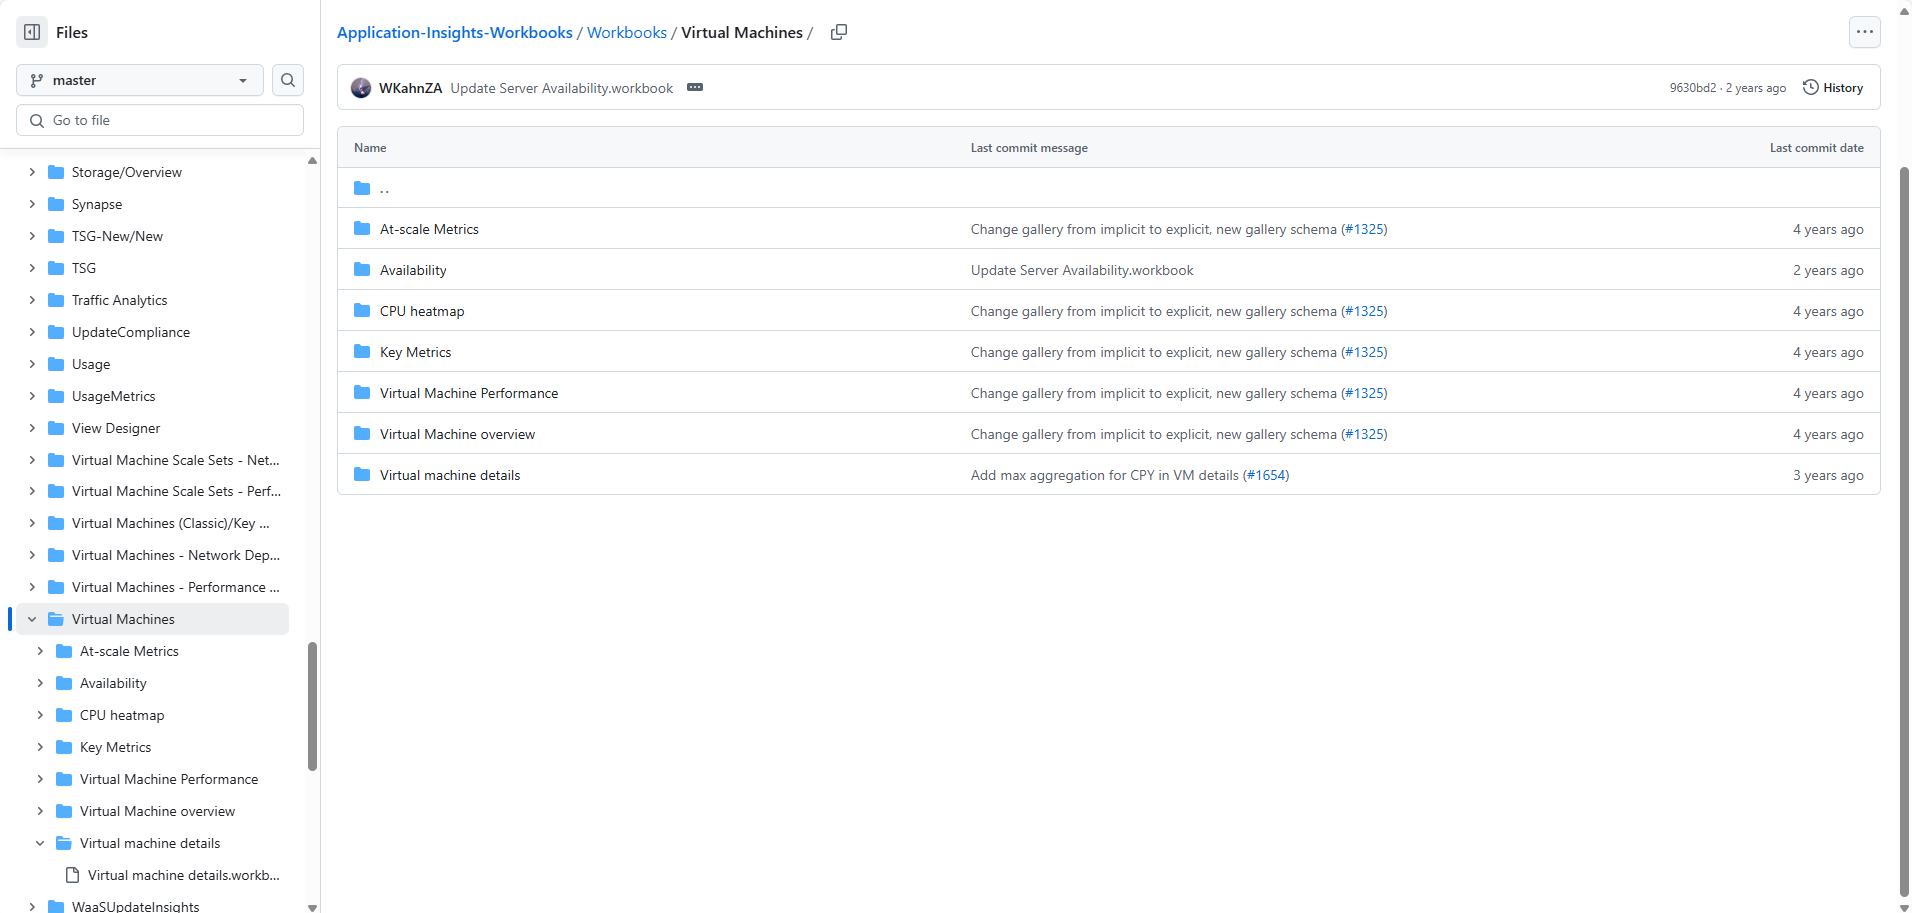
Import a Predefined Workbook
Create a new workbook in Azure and open the Advanced Editor to paste workbook JSON from GitHub.
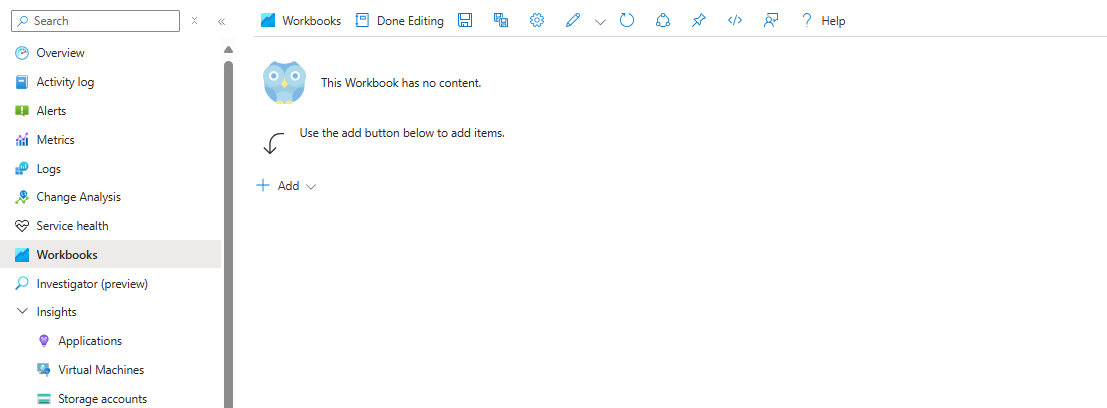

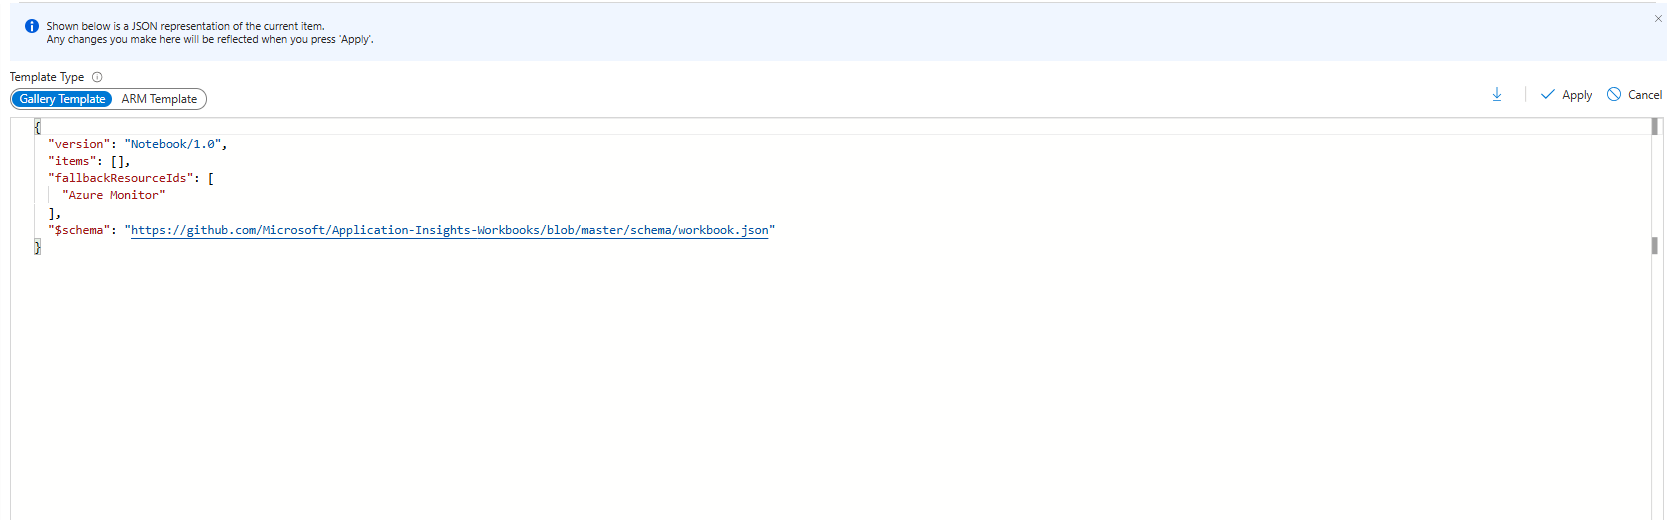
After applying the JSON, the workbook becomes available in your tenant.
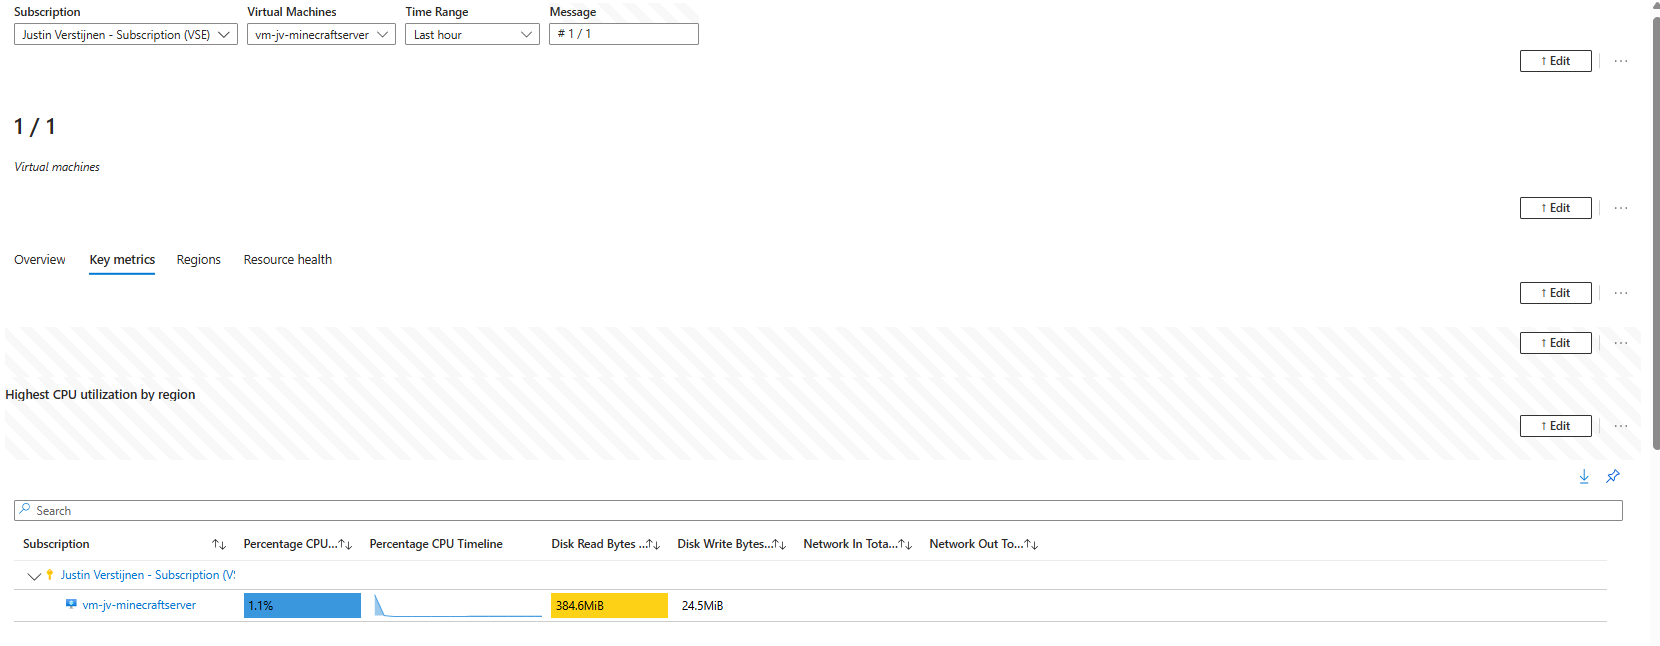
Build Your Own Custom Workbook
Useful building blocks:
- Parameters – filters, selectors, dynamic views
- Queries – KQL queries against Log Analytics
- Metrics – CPU, memory, disk, network
- Groups – combine components into sections

Add CPU Metrics
Create a new metric tile:
- Resource type: Virtual Machines
- Scope: select one or more VMs
- Metric: Percentage CPU
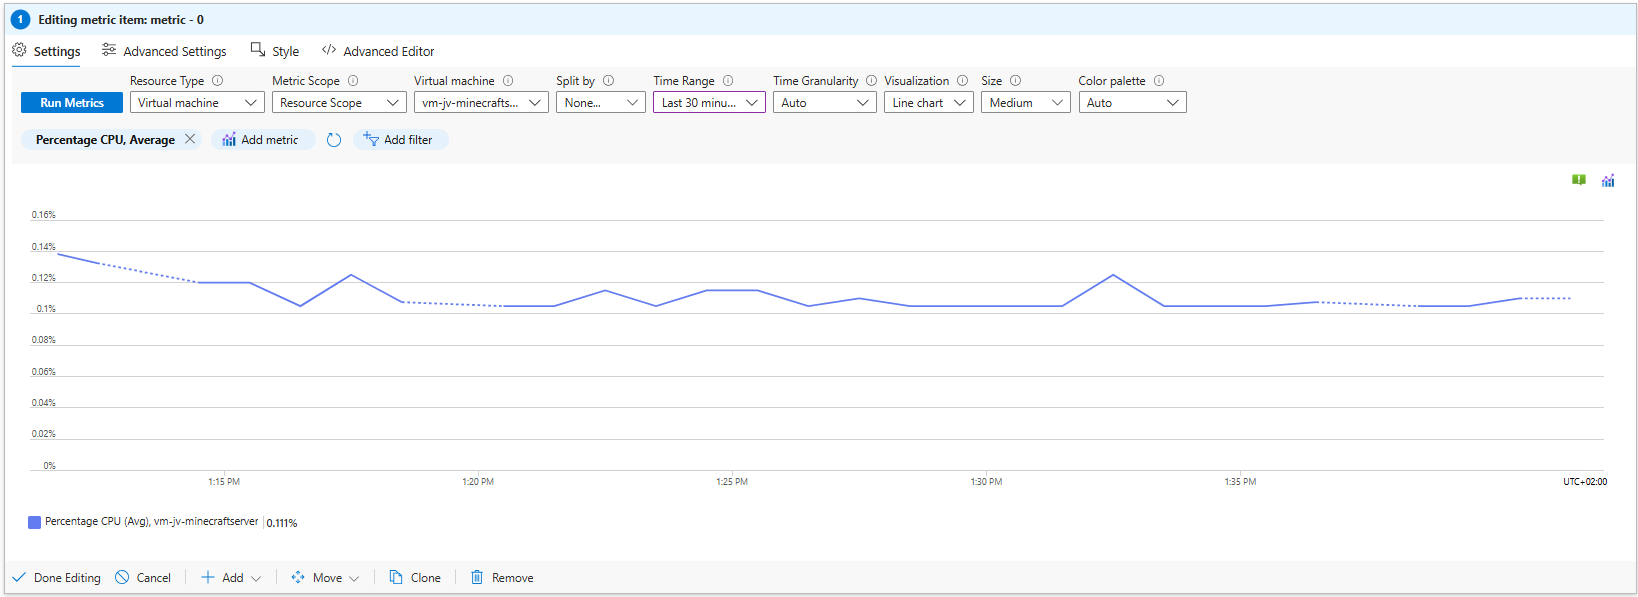
Add Memory Metrics
Use:
- Available Memory Percentage
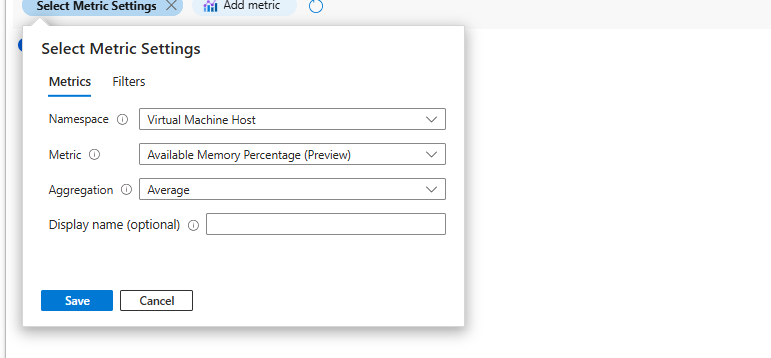
Add Disk Metrics
Recommended metrics:
- Disk Read Bytes
- Disk Read Operations/sec
- Disk Write Bytes
- Disk Write Operations/sec
Use Average aggregation.
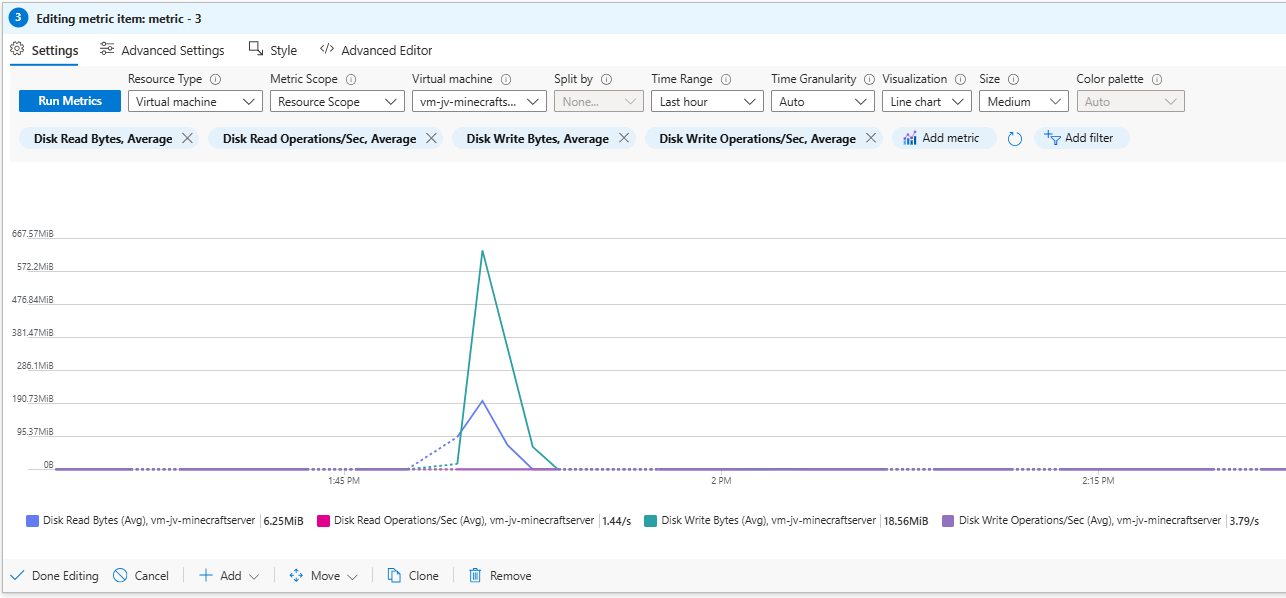
Save the Workbook
Store workbooks in a dedicated monitoring resource group or alongside the application.
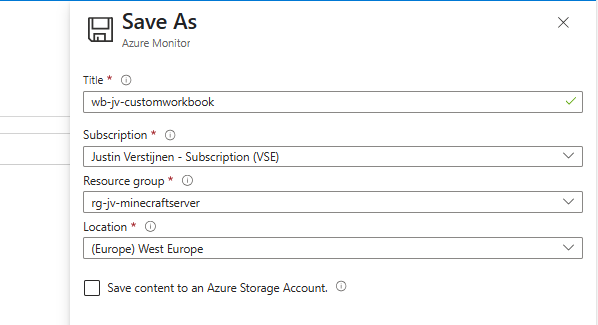
Improve Visualizations
Add Titles
Use Advanced Settings to define chart titles.
Tile Order and Size
Reorder tiles and set width percentages (for example 50%) to create two-column layouts.
Use Bar Charts
Bar charts are often clearer than line charts for quick health checks.
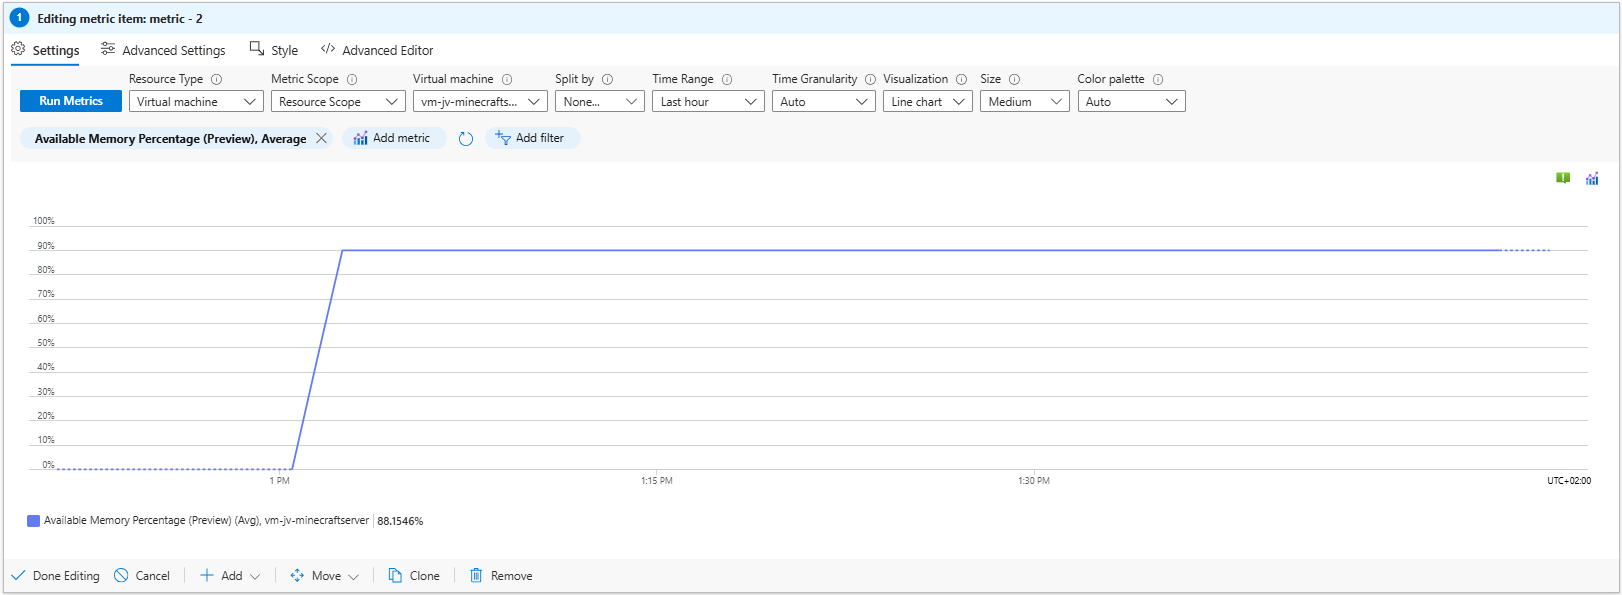
Grid View for Operations
Grid views are ideal for incident response and multi-VM overviews.
Add conditional formatting such as:
- CPU: Green → Red
- Memory Available: Red → Green
Round percentages to zero decimals for readability.
Download Example Workbook
You can download the original sample workbook here:
Summary
Azure Workbooks provide a flexible and scalable way to visualize operational data in Azure. Start with templates, then evolve toward dashboards tailored to your own workloads.
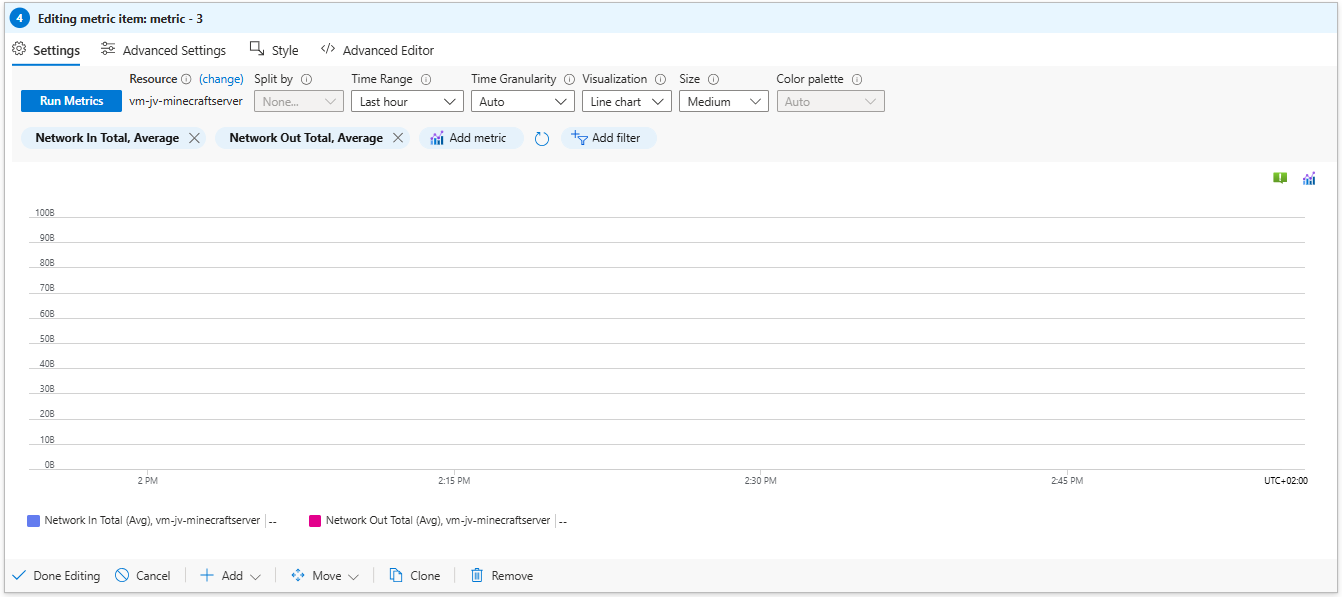
Setup a Minecraft server on Azure
Sometimes, we also want a step down from our work and want to fully enjoy a videogame. Especially when you really like games with open worlds, Minecraft is a great game. And what if I tell you we can setup a server for Minecraft on Azure so you can play it with your friends and have a 24/7 uptime this way.
Requirements
- An Azure environment
- Basic knowledge of Azure
- Basic knowledge of Linux and SSH
- Basic knowledge of networking and TCP/UDP
- Experience with Minecraft to test the server
- Around 45 minutes of your time
System requirements of a Minecraft server
For a typical Minecraft server, without Mods, the guidelines and system requirements are as stated below:
| Processor cores | Ram | Player Slots | World Size |
| 2 | 8GB | Up to 10 | Up to 8GB |
| 4 | 16GB | Up to 20 | Up to 15GB |
| 8 | 32GB | Up to 50 | Up to 20GB |
| 16 | 64GB | Up to 100 | Up to 60GB |
Setup the Azure environment for a Minecraft server
Creating the Resource Group
First, we need to setup our Azure environment for a Minecraft server. I started with creating a Resource group named “rg-jv-minecraftserver”.

This resource group can we use to put all of the related resources in. We not only need to create a VM but also an virtual network, Public IP address, Network Security Group and disk for storage.
Creating the Server VM
After creating the Resource group, we can create the server and put it in the created Resource group.
For a single server-setup, we can use most of the default settings of the wizard. For an environment of multiple servers I advice you a more scalable approach.
Image and Size
Go to “Virtual Machines” and create a new virtual machine:
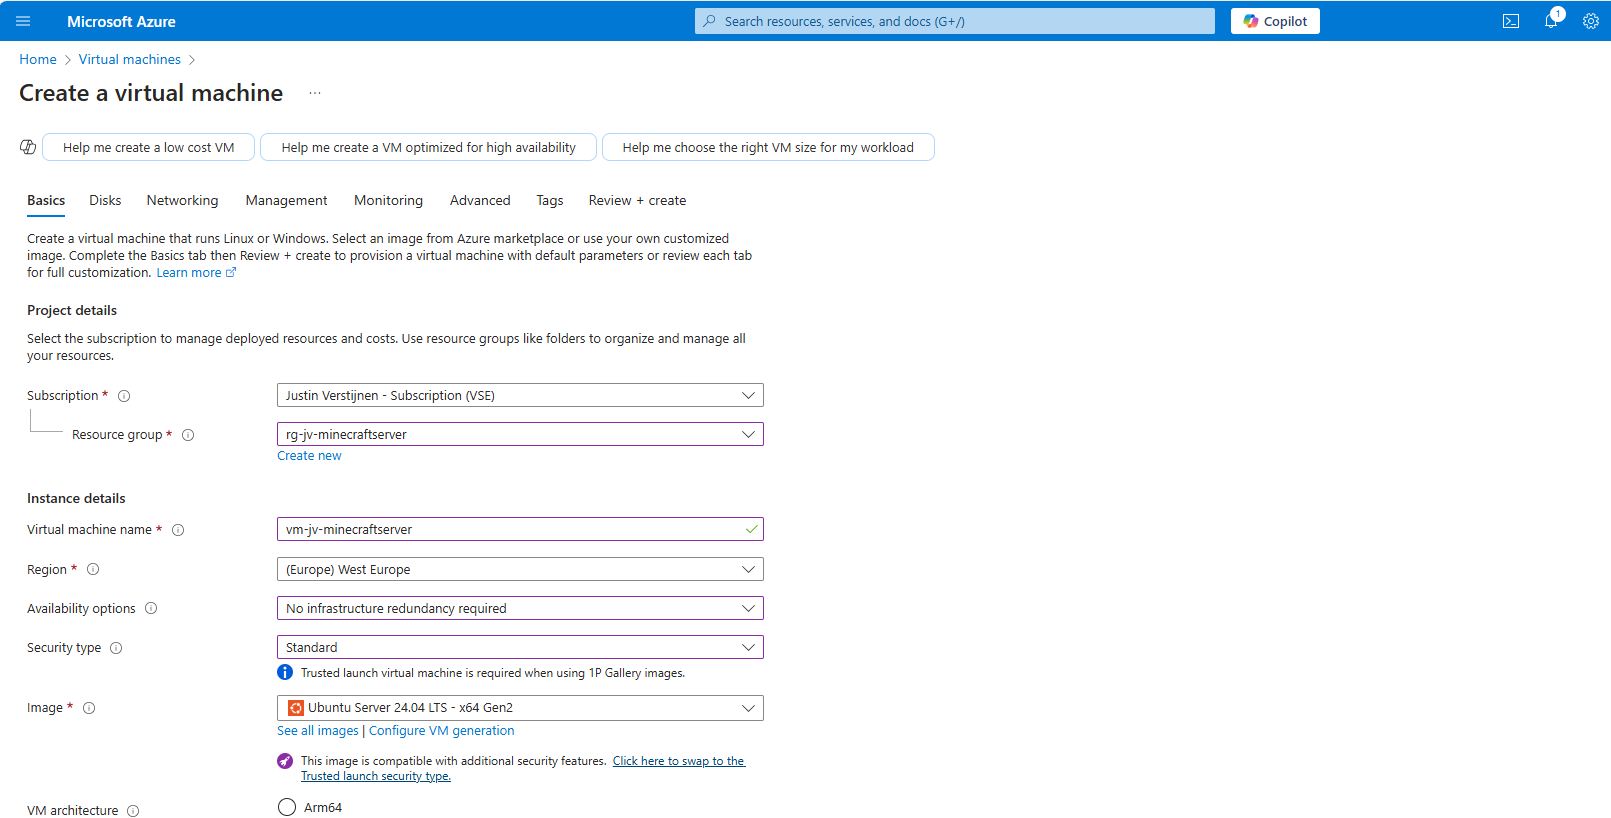
Put the server in the created resource group. I use the image Ubuntu Server 24.04 LTS - x64 Gen2 for this deployment. This is a “Long-Term Support” image, which are enterprise grade images with at least 5 years support.
For the specs, I used the size E4s_V6 which has 4vCPU’s and 32GB of RAM. Enough for 20 to 50 players and a big world so the game will not get boring.
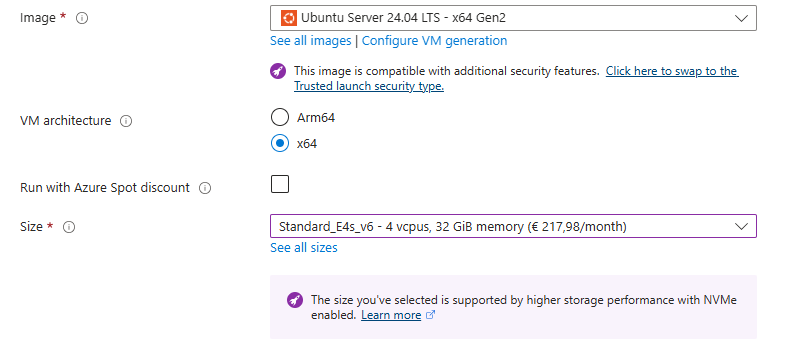
Authentication
For the Authentication type, use an SSH key if you are familiar with that or use a password. I used the password option:
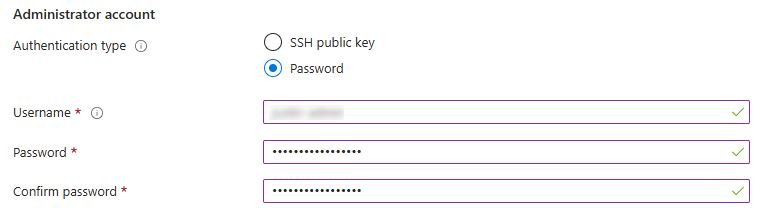
Inbound ports
For the inbound ports, use the default option to let port 22 open. We will change this in a bit for more security.
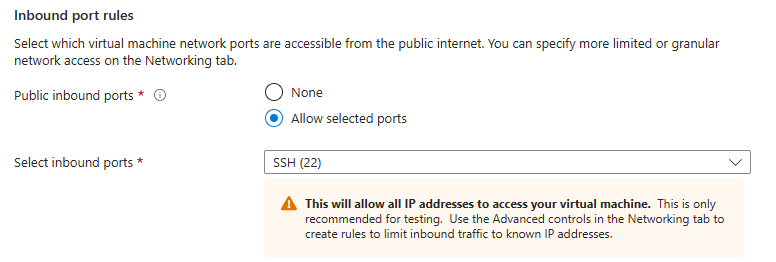
Disks and storage
For the disk settings, let this as default:

I chose a deployment with an extra disk where the server itself is stored on. This way we have a server with 2 disks:
- Disk 1: OS
- Disk 2: Minecraft world
This has some advantages like seperate upgrading, more resilience and more performance as the Minecraft world disk is not in use by the OS.
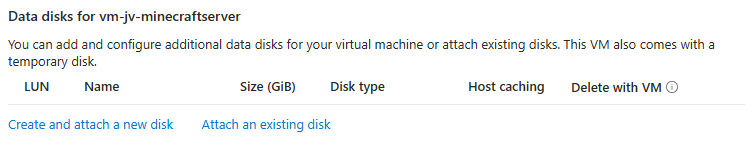
Select the option “Create and attach a new disk”. Then give the disk a name and select a proper size of your needs.
I chose 128GB as size and have the performance tier as default.
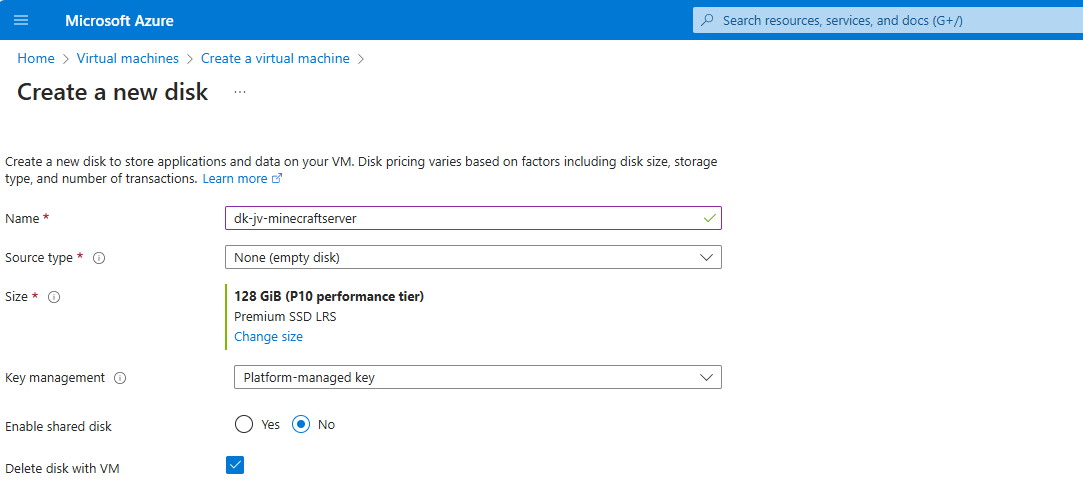
Click “OK” and review the settings:
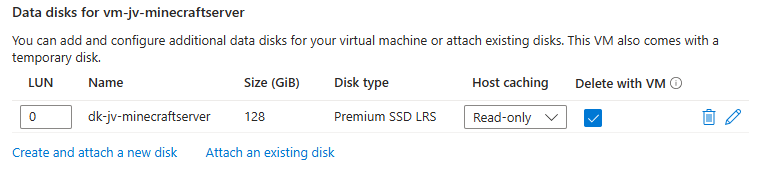
Networking
Advance to the “Networking” tab.
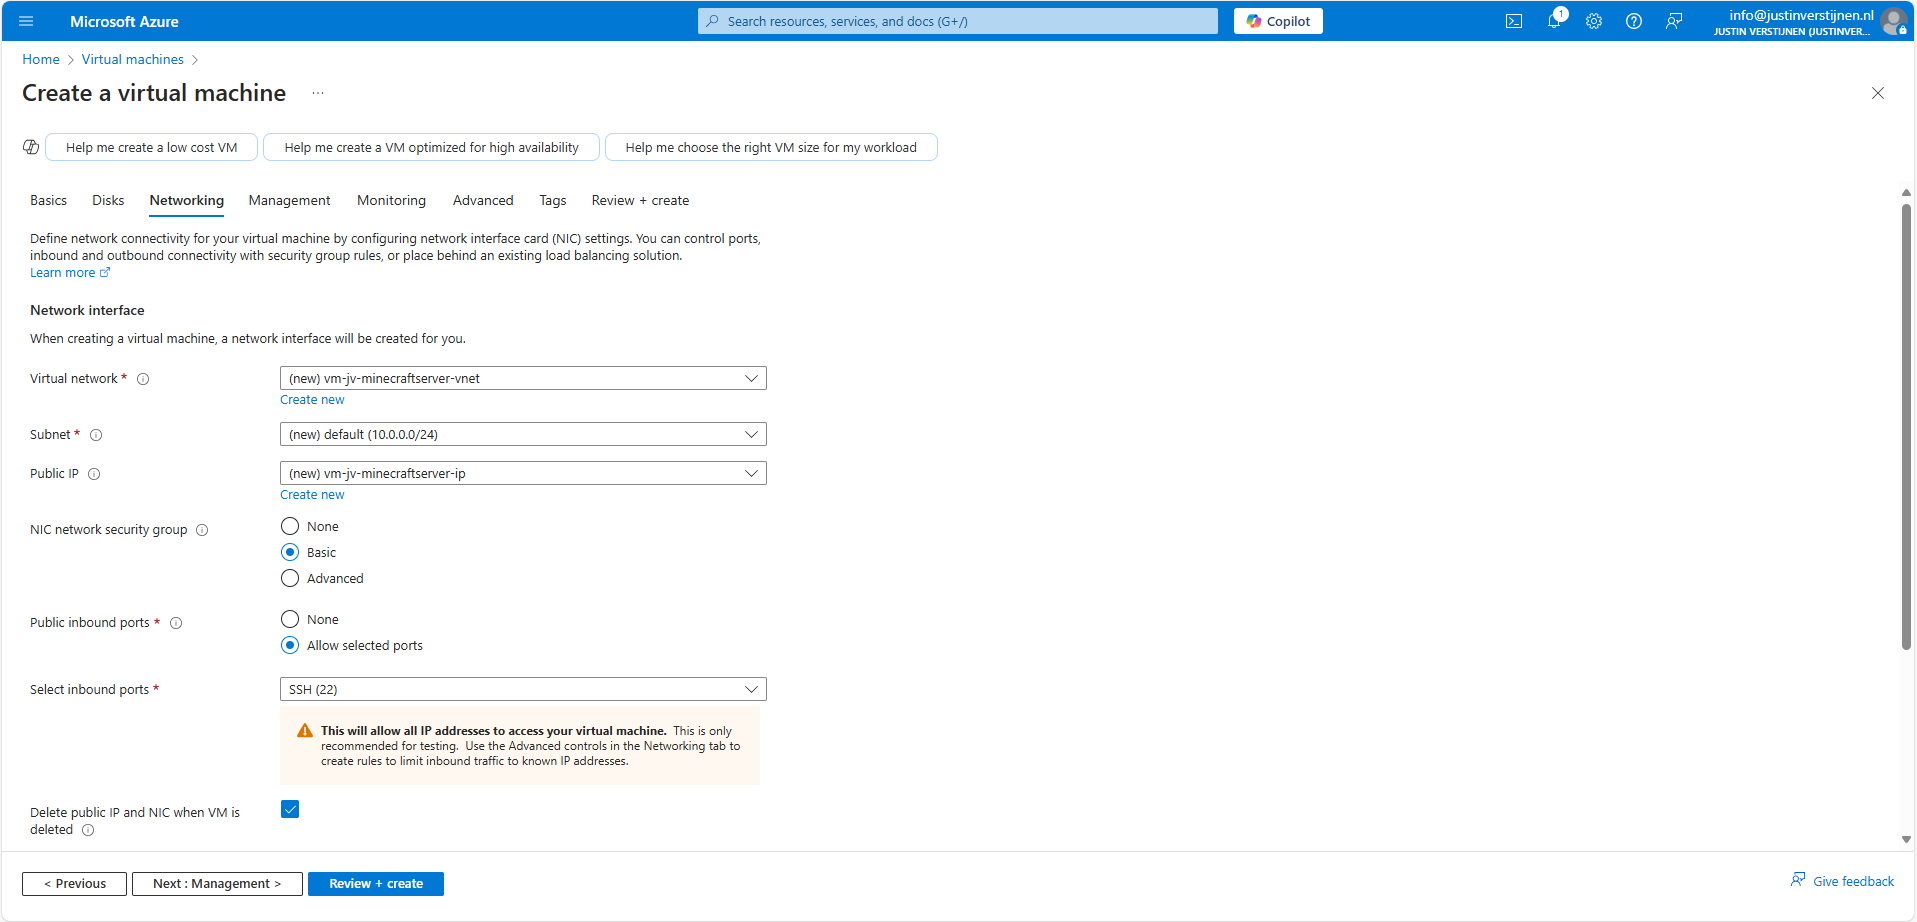
Azure automatically creates a virtual network and a subnet for you. These are needed for the server to have an outbound connection to the internet. This way we can download updates on the server.
Also, by default a Public IP and a Network Security Group are created. Those are for inbound connection from players and admins and to secure those connections.
I let all these settings as default and only checked “Delete Public IP and NIC when VM is deleted”.
Go to the next tab.
Automatic shutdown (if needed)
Here you have a setting for automatic shutdown if you want to. Can come in handy when you want to automatically shutdown your server to reduce costs. You have to manually enable the server after shutdown if you want to play again.
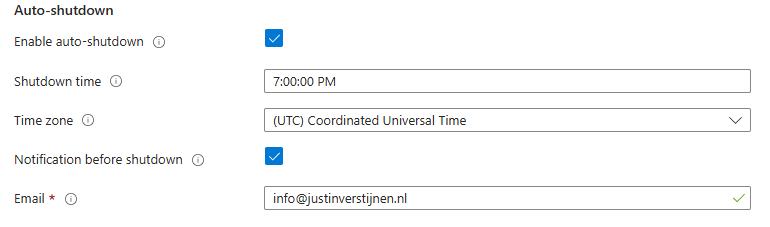
Review settings
After this go to the last tab and review your settings:
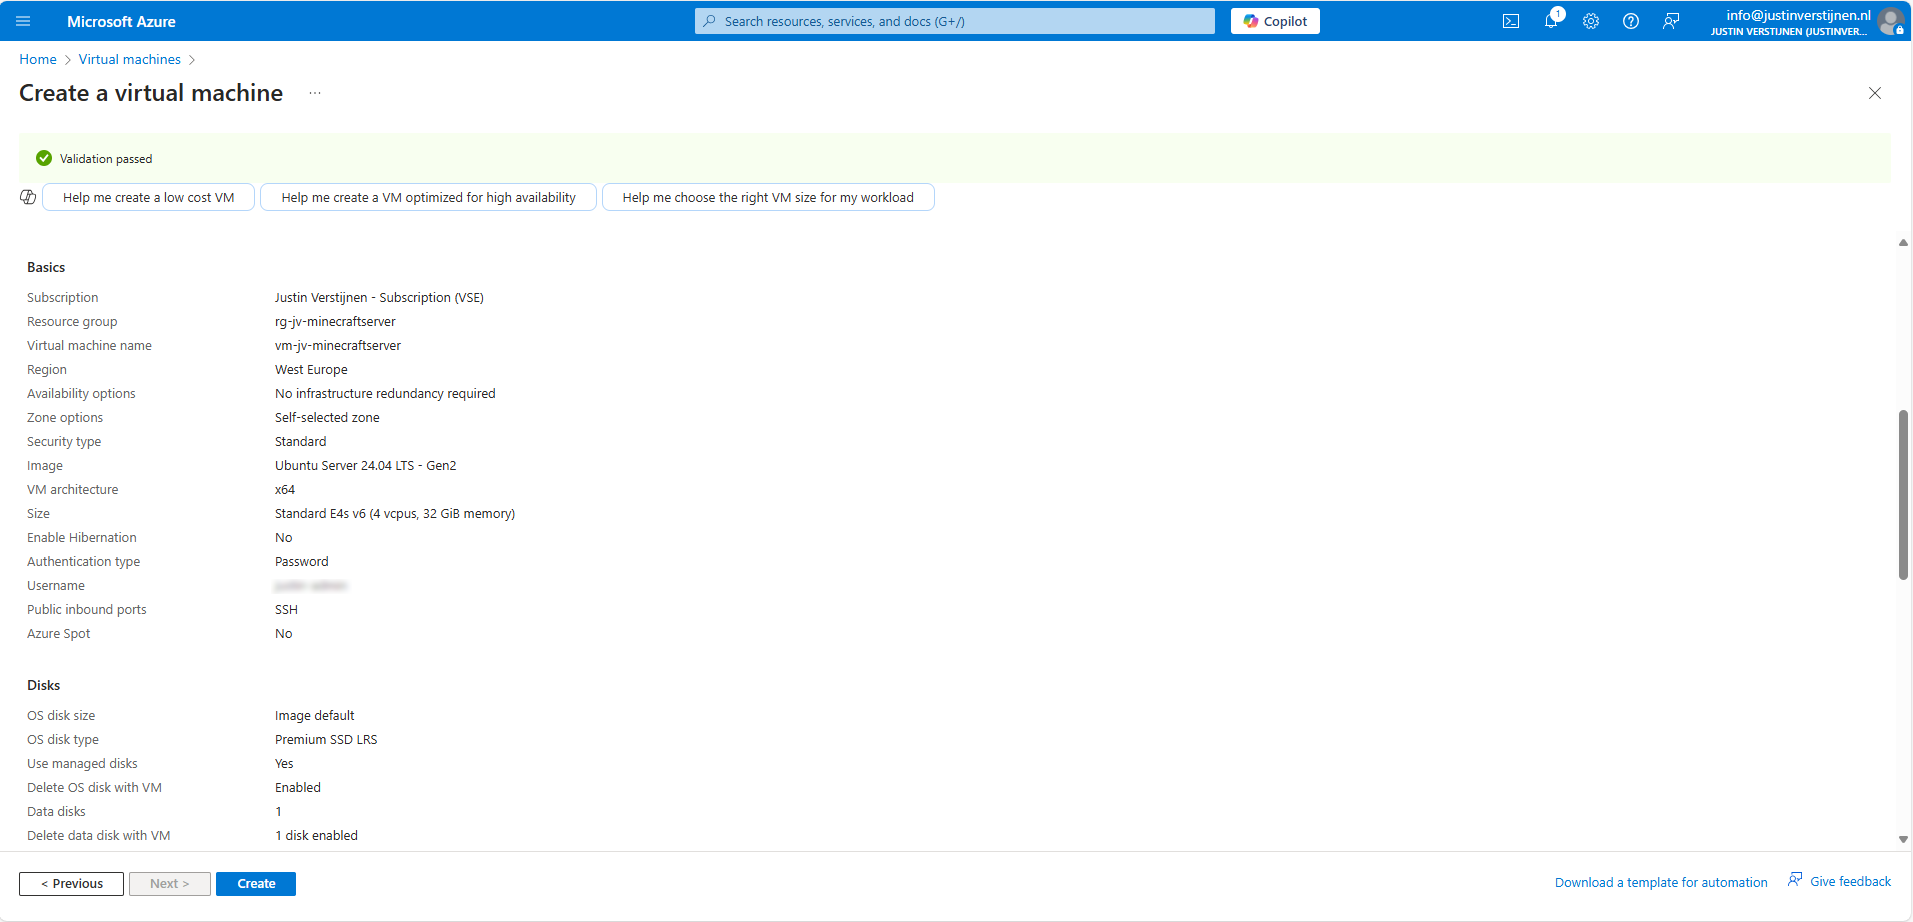
Then create the virtual machine and we are good to go! Create the virtual machine and advance to the next part of the guide.
Securing inbound connections
We want to secure inbound connections made to the server. Let’s go to “Network Security Groups” (NSG for short) in Azure:
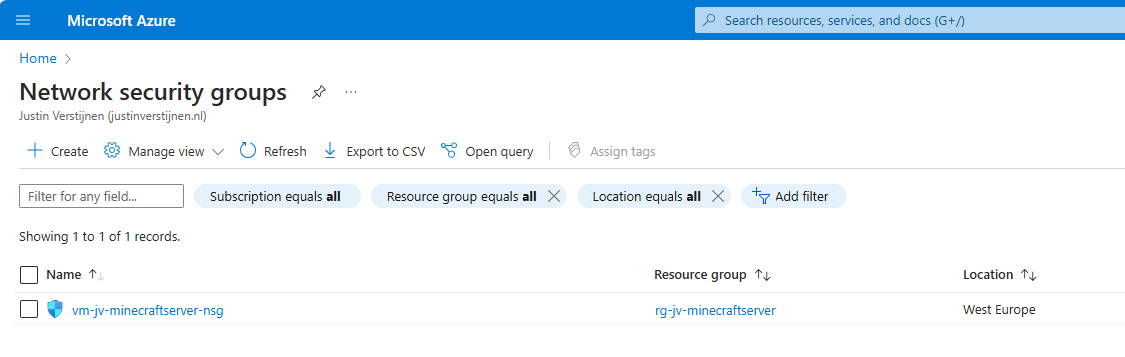
Open the related NSG and go to “Inbound Security rules”.
By default we have a rule applied for SSH access that allows the whole internet to the server. For security, the first thing we want to do is limit this access to only our own IP address. You can find your IP address by going to this page: https://whatismyipaddress.com/
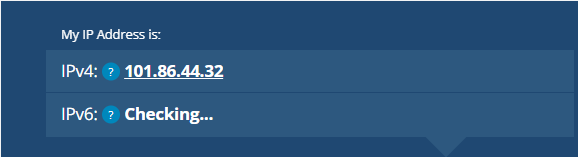
Note this IP address down and return to Azure.
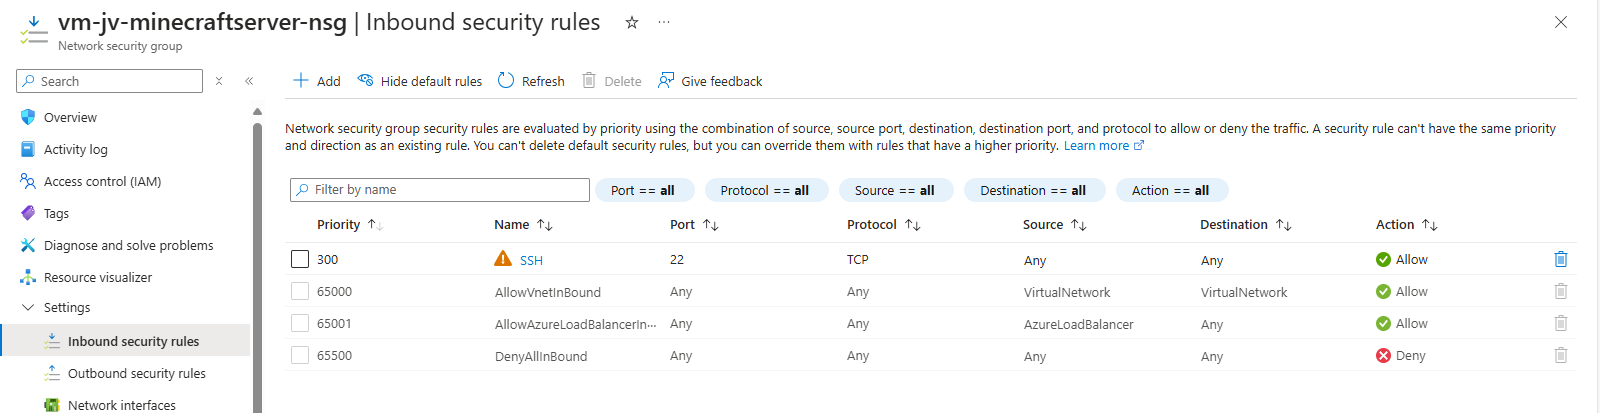
Click on the rule “SSH”.
Change the “Source” to “IP addresses” and paste in the IP address from the IP lookup website. This only allows SSH (admin) traffic from your own IP-address for security. This is a whitelist.
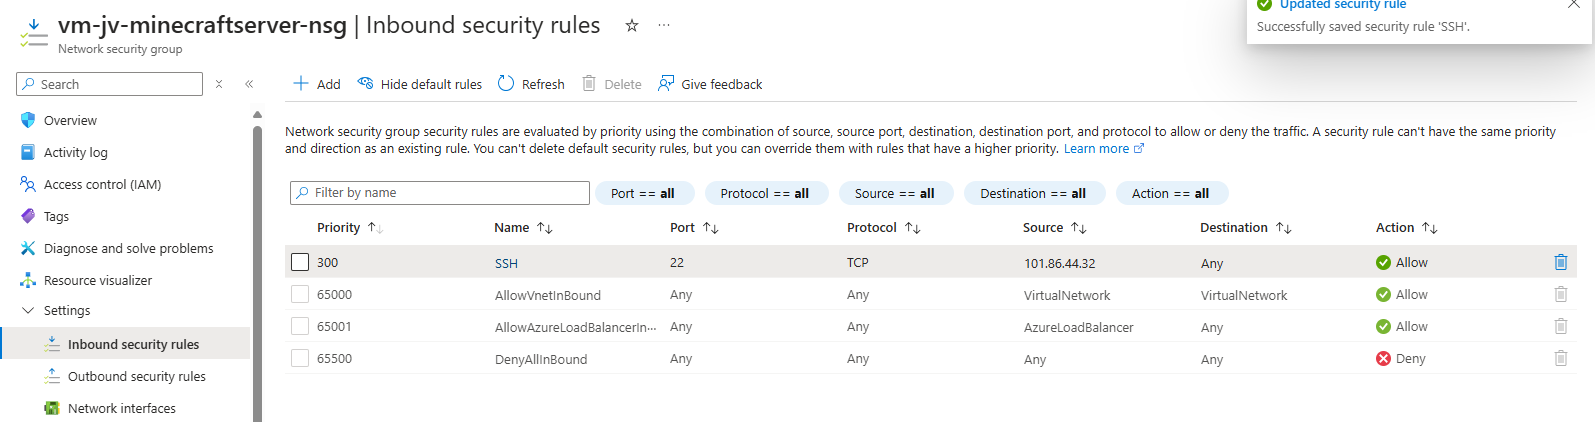
You see that the warning is now gone as we have blocked more than 99% of all worldwide IP addresses SSH access to our server.
Allow inbound player connections
After limiting SSH connections to our server, we going to allow player connections to our server. We want to play with friends, dont we?
Again go to the Network Security Group of the Minecraft server.
Go to “Inbound Security rules”
Create a new rule with the following settings:
| Setting | Option |
| Source | Any* |
| Source port ranges | * (Any) |
| Destination | Any |
| Service | Custom |
| Destination port ranges | 25565 (the Minecraft port) |
| Protocol | Any |
| Action | Allow |
| Priority | 100 (top priority) |
| Name | You may choose an own name here |
*Here we do allow all inbound connections and use the Minecraft username whitelist.
My rule looks like this:
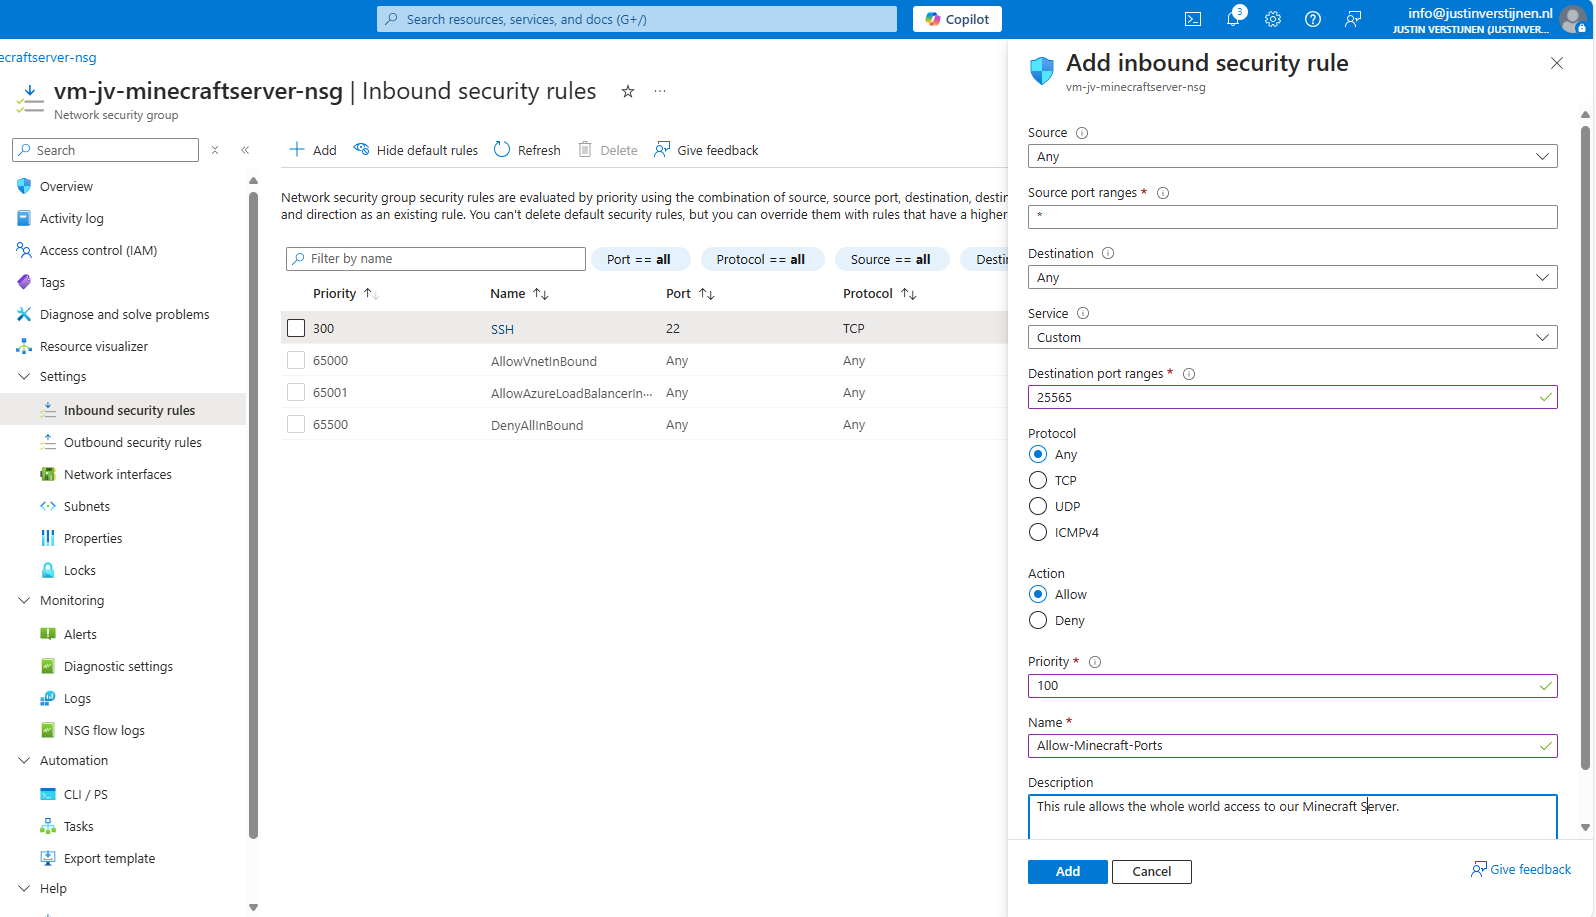
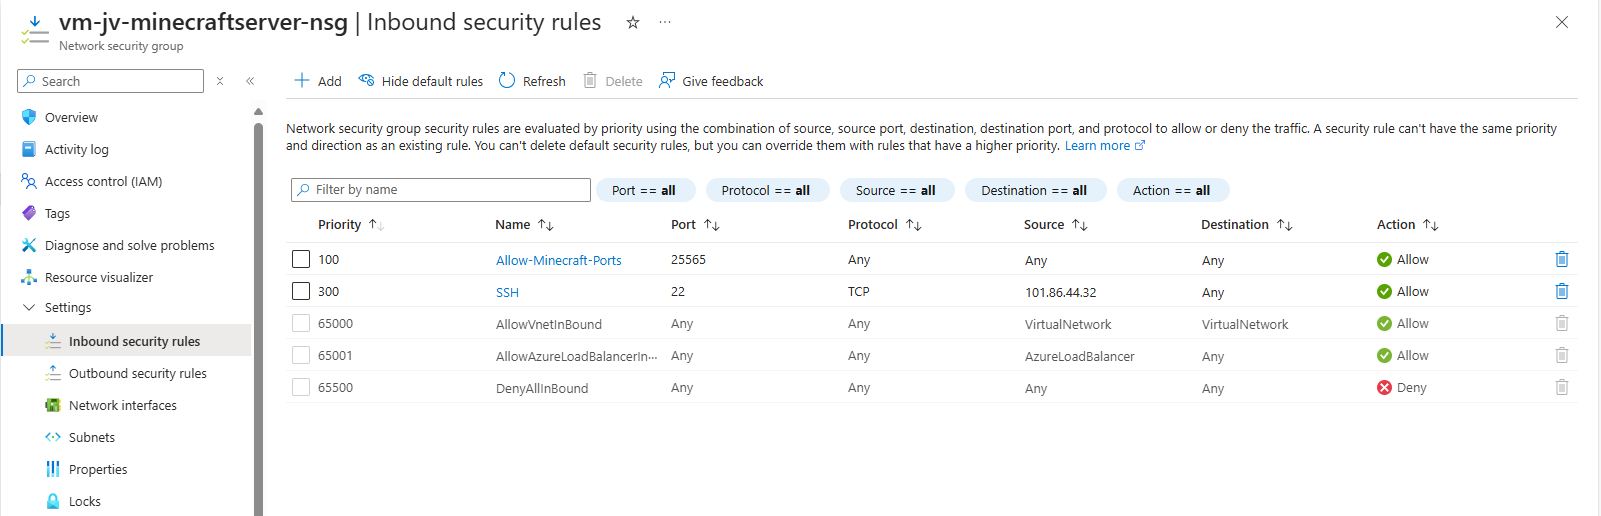
Now the network configuration in Azure is done. We will advance to the server configuration now.
Logging into the server with SSH
Now we can login into our server to do the configuration of the OS and the installation of the Minecraft server.
We need to make a SSH connection to our server. This can be done though your preferred client. I use Windows Powershell, as this has an built-in client for SSH. You can follow the guide:
Open Windows Powershell.
Type the following command to login to your server:
POWERSHELL
ssh username@ip-addressHere you need your username from the virtual machine wizard and server IP address. You can find the server IP address under the server details in Azure:
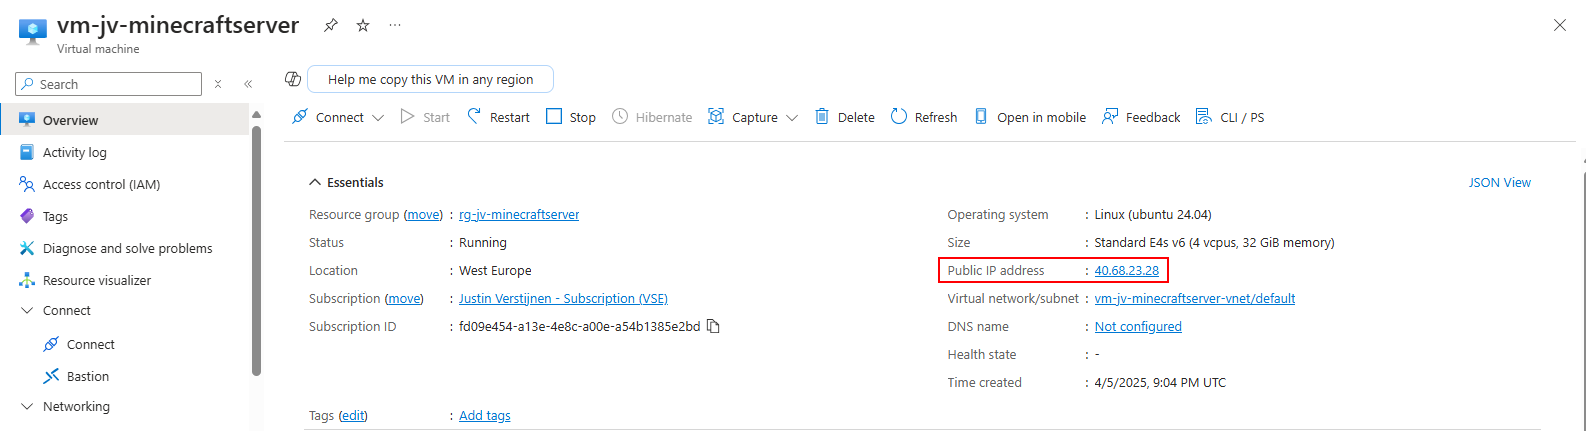
I used this in my command to connect to the server:
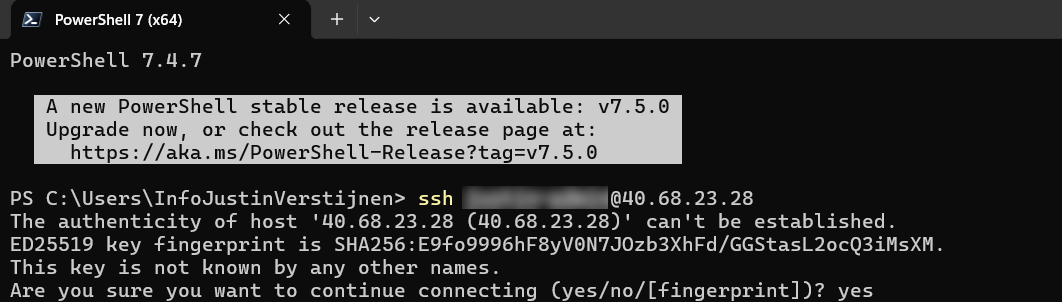
After the command, type “Yes” and fill in your password. Then hit enter to connect.
Now we are connected to the server with SSH:
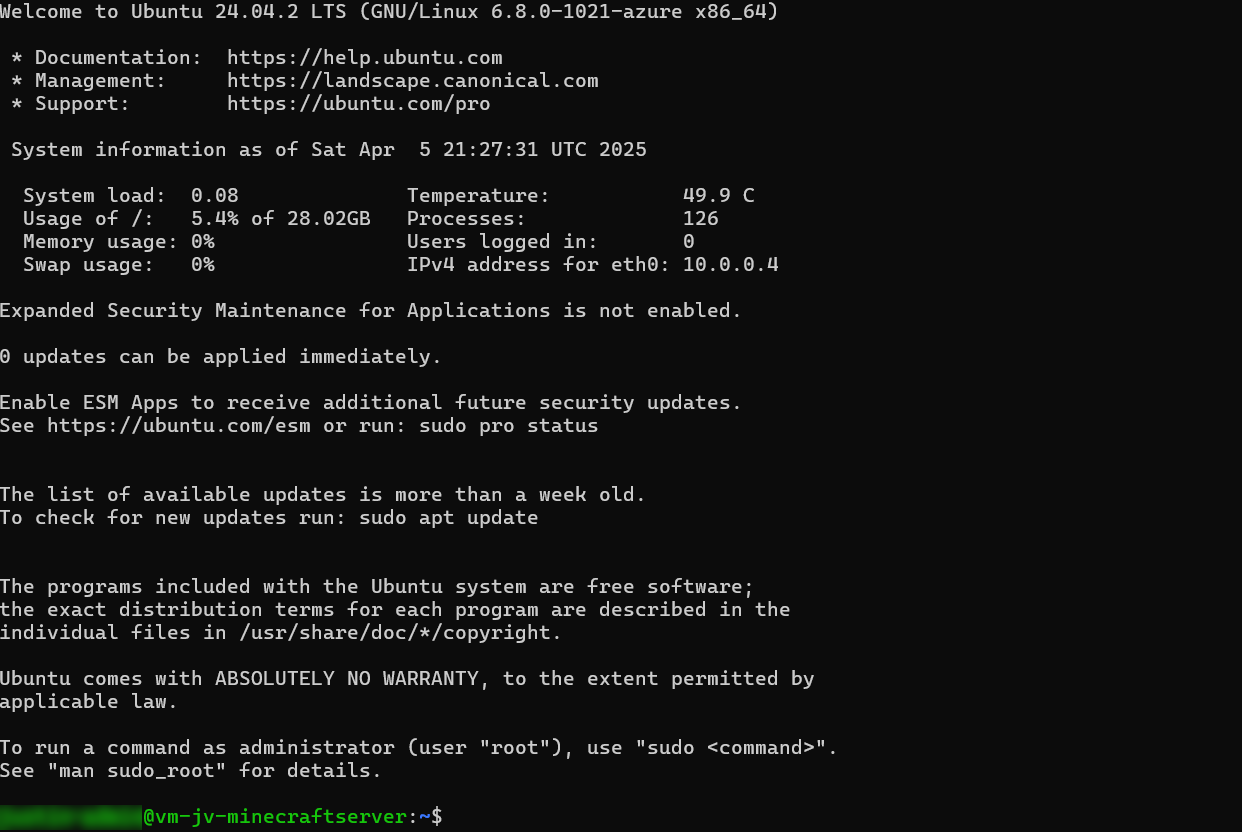
Configuring the server and install Minecraft
Now that we are logged into the server we can finally install Minecraft Server. Follow the steps below:
Run the following command to get administrator/sudo access:
BASH
sudo -s
Now you see the line went from green to white and starts with “root”. This is the highest level of privileges on a Linux system.
Now run the following command to install the latest updates on Ubuntu:
BASH
apt-get updateNow there will be a lot of activity, as the machine is updating all packages. This can take up to a minute.
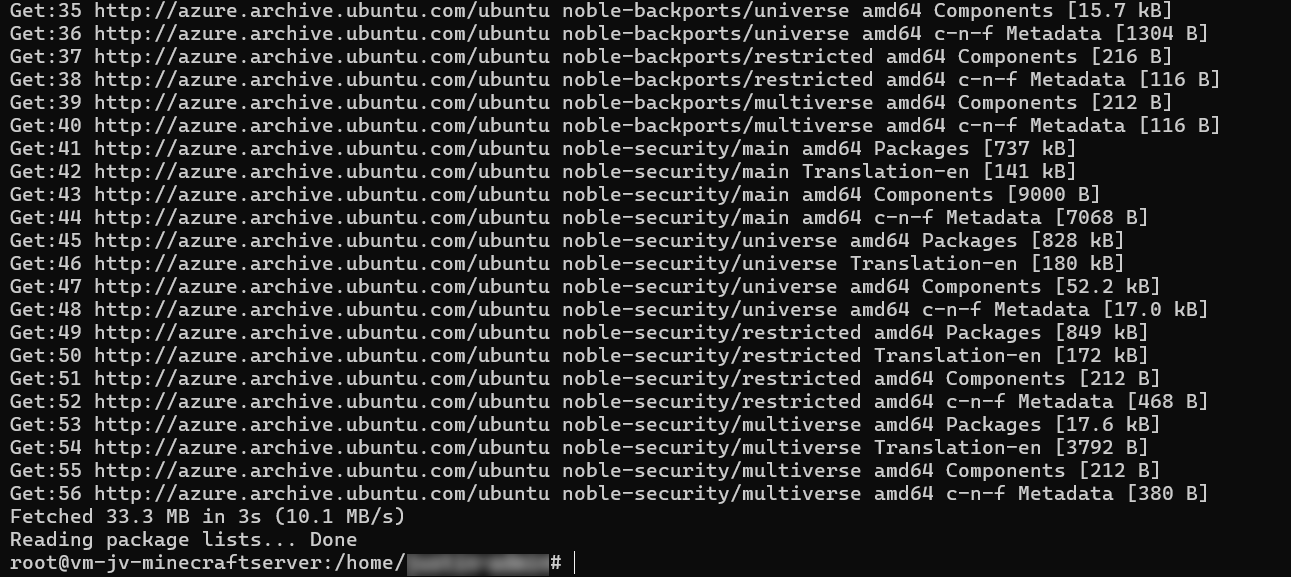
Installing Dependencies
Now we have to install some dependencies for Minecraft Server to run properly. These must be installed first.
Run the following command to install Java version 21:
BASH
apt install openjdk-21-jdk-headless -yThis will take up to around a minute.
After this is done we have to install “unzip”. This is a tool to extract ZIP files.
BASH
apt-get install wget screen unzip -yThis will take around 5 seconds.
Configure secondary disk
Since we have a secondary disk for Minecraft itself, we have to also configure this. It is now a standalone not mounted (not accessible) disk without a filesystem.
Run the following command to get all disks in a nice overview:
BASH
lsblk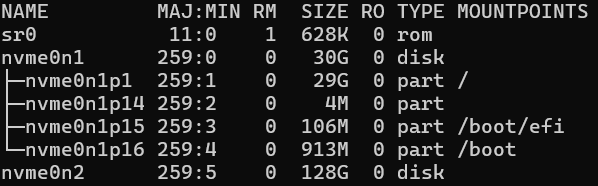
In my case, the nvme0n2 disk is the added disk. This can be different on your server, so take a good look at the size which is your disk.
Now we now our disk name, we can format the disk:
BASH
fdisk /dev/nvme0n2This will start an interactive wizard where it wants to know how to format the disk:
- Type n and press enter -> For a new partition
- Type p and press enter -> For a primary partition
- Hit enter twice to use the default setting for the sectors (full disk)
- Type w and press enter -> To quit the tool and save the settings
If we now again run the command to list our disk and partitions, we see the change we did:
BASH
lsblk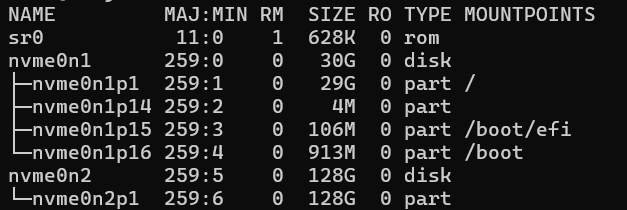
Under disk “nvme0n2” there is now an partition called “nvme0n2p1”.
We still need to assign a filesystem to the partition to make it readable. The filesystem is ext4 as this is the most used in Linux systems.
Run the following command and change the disk/partition to your own settings if needed.
BASH
sudo mkfs.ext4 /dev/nvme0n2p1After the command finishes, hit another “Enter” to finish the wizard.
Now we have to create a mount point, tell Linux what folder to access our disk. The folder is called “minecraft-data”.
BASH
mkdir /mnt/minecraft-dataAnd now we can finally mount the disk to this folder by running this command:
BASH
mount /dev/nvme0n2p1 /mnt/minecraft-dataLet’s try if this works :)
BASH
cd /mnt/minecraft-data
This works and our disks is now operational. Please note that this is non-persistent and gone after a reboot. We must add this to the systems disks of Linux to mount this at boot.
Automatically mount secondary disk at boot
To automatically mount the secondary disk at boot we have to perform a few steps.
Run the following command:
BASH
blkid /dev/nvme0n2p1You will get an output of this command what we need. Mine is:

We have to edit the fstab system file to tell the system part that it must make this mount at boot.
Run the following command to run a text editor to change that fstab file:
BASH
nano /etc/fstabNow we have to add a line of our secondary disk including its mount point and file system. I added the line as needed:
BASH
UUID=7401b251-e0a0-4121-a99f-f740c6c3ed47 /mnt/minecraft-data ext4 defaults,nofail,x-systemd.device-timeout=10 0 2This looks like this in my fstab file:

Now press the shortcut CTRL and X to exit the file and choose Yes to save the file.
I directly restarted the server to check if the secondary disk is mounted like expected. We don’t want this happening after all of our configuration work of course.

As you can see this works like a charm.
Configure the Minecraft Server itself
Now we have arrived at the fun part of configuring the server, configuring Minecraft server itself.
Go to the created minecraft data folder, if not already there.
BASH
cd /mnt/minecraft-dataWe have to download the required files and place them into this folder. The latest release can be found at the official website: https://www.minecraft.net/en-us/download/server
First, again acquire Sudo/administrator access:
BASH
sudo -sWe can now download the needed file on the server by running this command:
BASH
wget https://piston-data.mojang.com/v1/objects/e6ec2f64e6080b9b5d9b471b291c33cc7f509733/server.jarNow the file is at the right place and ready to start:
We now need to create a file to agree with the End User License Agreement (EULA), and can do this with the following command:
BASH
echo "eula=true" > eula.txtThis command creates the file and fills it with the right option.
We can now finally run the server with 28GBs of RAM with the following command:
BASH
java -Xmx28672M -Xms28672M -jar server.jar nogui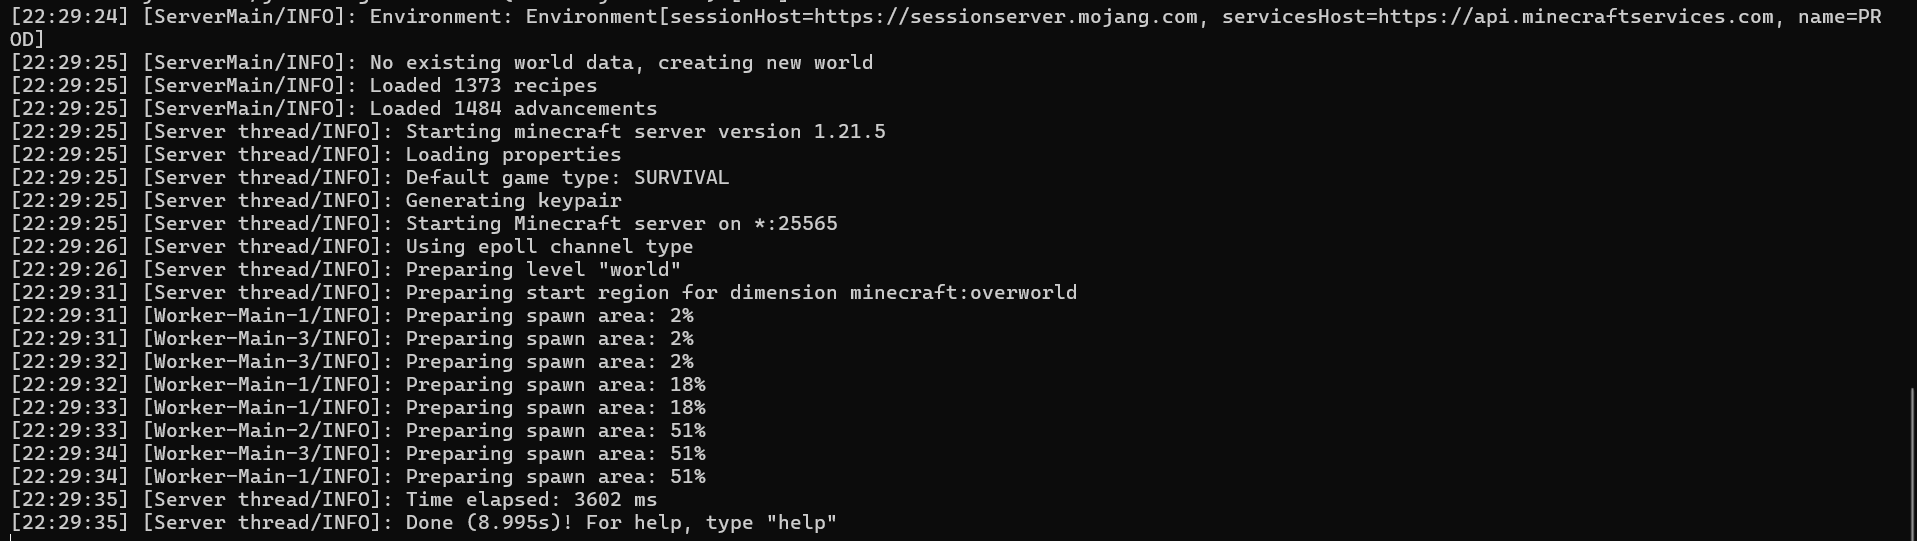
Now our server has been fully initialized and we are ready to play.
Connecting to the server
The moment we have been waiting for, finally playing on our own Minecraft server. Download the game and login to your account.
Open “Multiplayer”.
Click on “Add Server” and fill in the details of your server to connect:
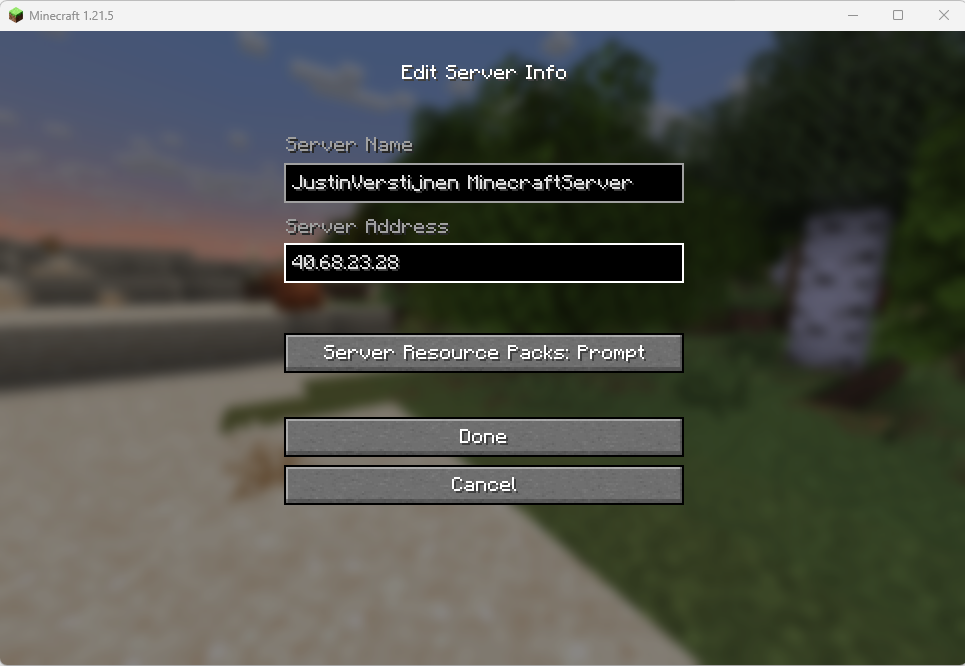
Click on “Done” and we are ready to connect:
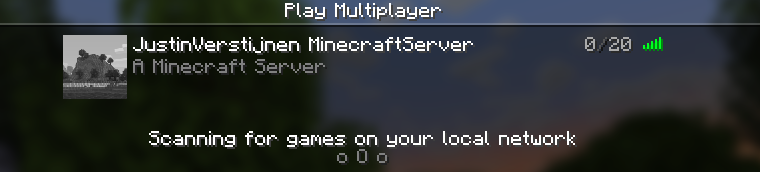
Connect and this will open the server:
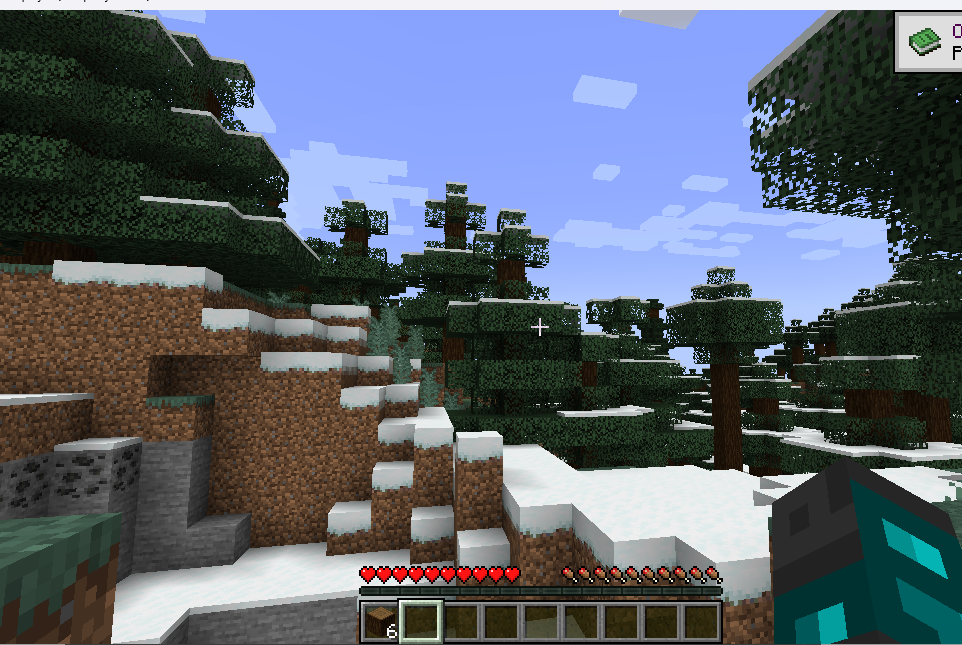
I already cut some wood for my first house. Haha.
Connecting also generated some logs:
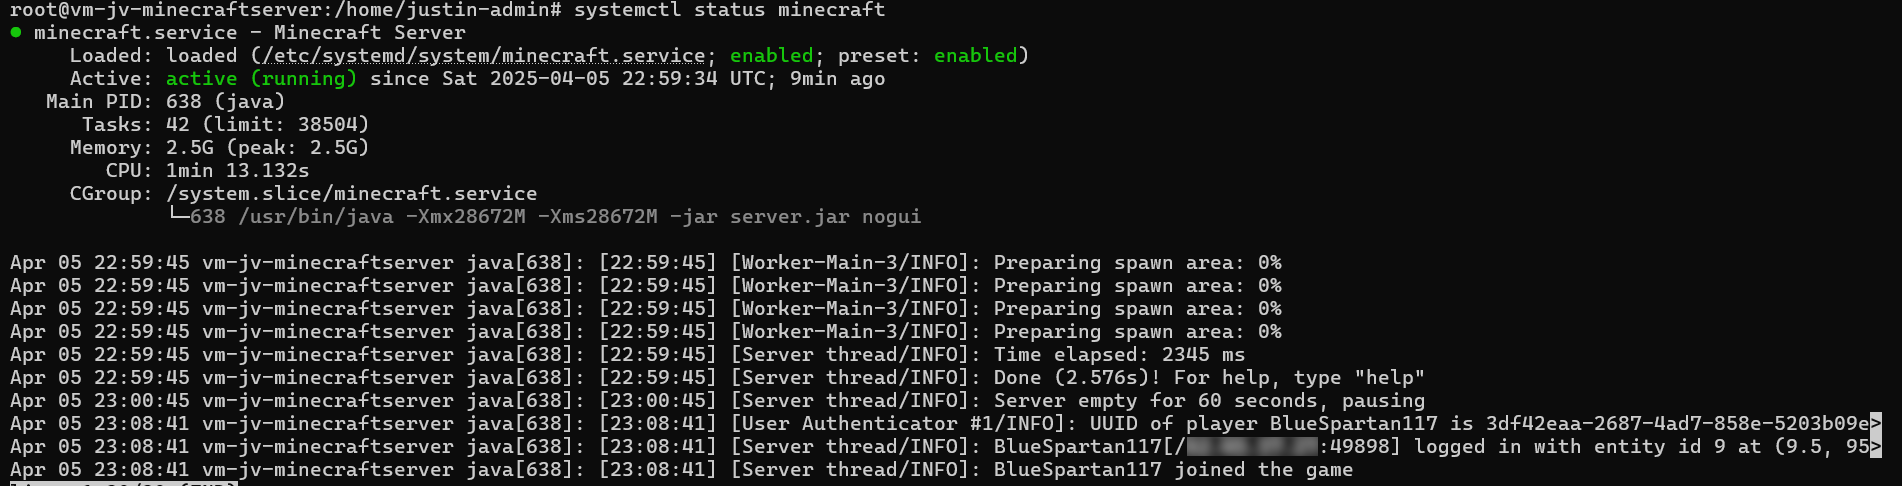
Running the Minecraft server on startup
Now we ran Minecraft server manually at startup, but what we want is that the service automatically starts with the server as this is an dedicated server for it. We want to automate such things.
We are going to create a Linux system service for this. Start with running this command:
BASH
nano /etc/systemd/system/minecraft.serviceThis again opens a text editor where we have to paste in some information.
BASH
[Unit]
Description=Minecraft Server
After=network.target

[Service]
WorkingDirectory=/mnt/minecraft-data
ExecStart=/usr/bin/java -Xmx28672M -Xms28672M -jar server.jar nogui
User=root
Restart=on-failure
RestartSec=10

[Install]
WantedBy=multi-user.target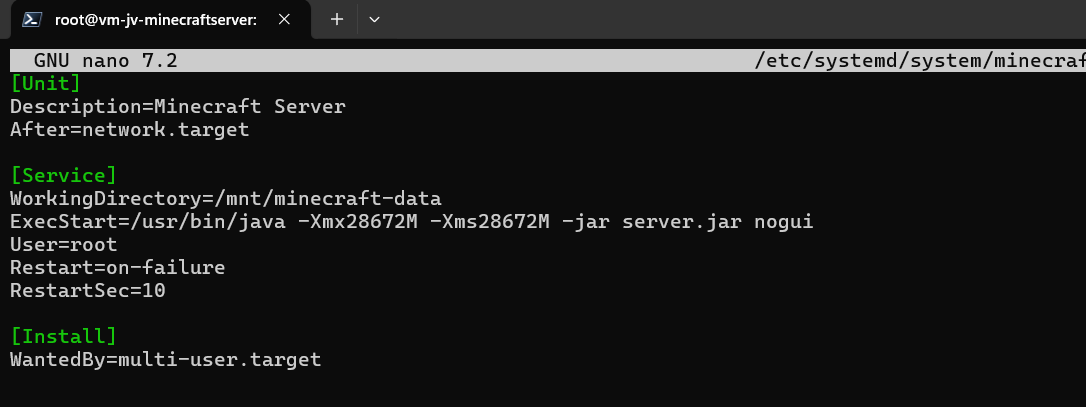
Then use the shortcut CTRL and X to exit and select Yes to save.
Now run this commands (can be run at once) to refresh the services list and to enable our newly created Minecraft-service:
BASH
sudo systemctl daemon-reexec
sudo systemctl daemon-reload
sudo systemctl enable minecraft.service
Now run this command to start Minecraft:
BASH
sudo systemctl start minecraftWe can view the status of the service by running this command:
BASH
sudo systemctl status minecraft
We made a separate service of Minecraft which allows it to automatically run at boot. We can easily restart and stop it when needed without using the complex commands of Minecraft.
With the systemctl status minecraft command you can see the last 10 lines for troubleshooting purposes.
Changing some Server/game settings
We can change some server settings and properties on the SSH, like:
- Gamemode
- Player limit
- Status/MOTD
- Whitelist on/off
- Whitelisted players
All of these settings are in files of the minecraft directory. You can navigate to the minecraft directory by using this command:
BASH
cd /mnt/minecraft-data
Open the file server.properties
BASH
nano server.propertiesIn this file all settings of the server are present. Lets change the status/MOTD message for example:
JSON
motd=[§6Justin Verstijnen§f] §aOnlineThis makes the text in colors and all fancy and stuff. You can find this in the internet.
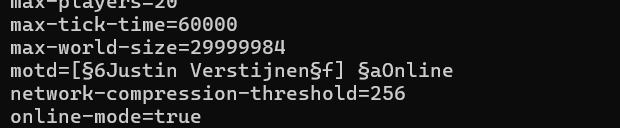
Now save the file by using CTRL + X and select Yes and hit enter. This saved the file.
After each change to those files, the service has to be restarted. You can do this with this command:
BASH
systemctl restart minecraftAfter restarting, the server shows up like this:
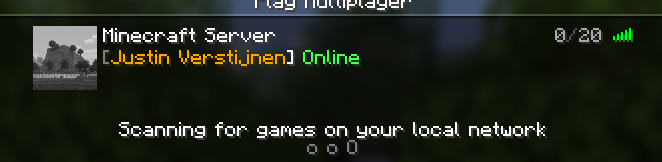
Summary
While hosting a Minecraft server setup on Azure is a possibility, it’s not that cost-efficiënt. It is alot more expensive than hosting your own server or other 3rd party cloud providers who do this. What is true is that the uptime in terms of SLA is maybe the highest possible on Azure, especially when using redundancy with Availability Zones.
However I had a lot of fun testing this solutionand bringing Minecraft, Azure and Linux knowledge together and build a Minecraft server and write a tutorial for it.
Thank you for reading this guide and I hope it was helpful.
End of the page 🎉
You have reached the end of the page. You can navigate through other blog posts as well, share this post on X, LinkedIn and Reddit or return to the blog posts collection page. Thank you for visiting this post.
If you think something is wrong with this post or you want to know more, you can send me a message to one of my social profiles at: https://justinverstijnen.nl/about/
If you find this page and blog very useful and you want to leave a donation, you can use the button below to buy me a beer. Hosting and maintaining a website takes a lot of time and money. Thank you in advance and cheers :)
The terms and conditions apply to this post.
Deploy Resource Group locks automatically with Azure Policy
Locks in Azure are a great way to prevent accidental deletion or modify resources or resource groups. This helps further securing your environment and make it somewhat more “fool proof”. Now with Azure Policy we can automatically deploy Locks to Resource Groups to secure them from deleting or read-only resources. In this guide I will explain how this can be done and how it works.
Note: Locks on Resource Groups can stop some automations. If you use read-only locks on a Azure Virtual Desktop resource group for example, autoscaling will not work anymore.
Take care and test these changes before creating them and assigning this policy to such (production) subscription.
The solution described
This solution consists of an Azure Policy Definition, that is assigned to the subscription where this must be executed. It also consists of a custom role that only gives the needed permissions, and nothing more.
The Azure Policy evaluates the resource groups regularly and puts the lock on the resource groups. No need for manual lock deployment anymore.
It can take up to 30 minutes before a (new) resource group gets the lock assigned automatically, but most of the time it happens a lot faster.
Step 1: Creating the custom role
Before we can use the policy and automatic remediation, we need to set the correct permissions. As this must be done on subscription-level, the normal permissions would be very high. In our case, we will create a custom role to achieve this with a much lower privileged identity.
Go to “Subscriptions”, and select the subscription where you want the policy to be active. Now you are here, copy the “Subscription ID”:
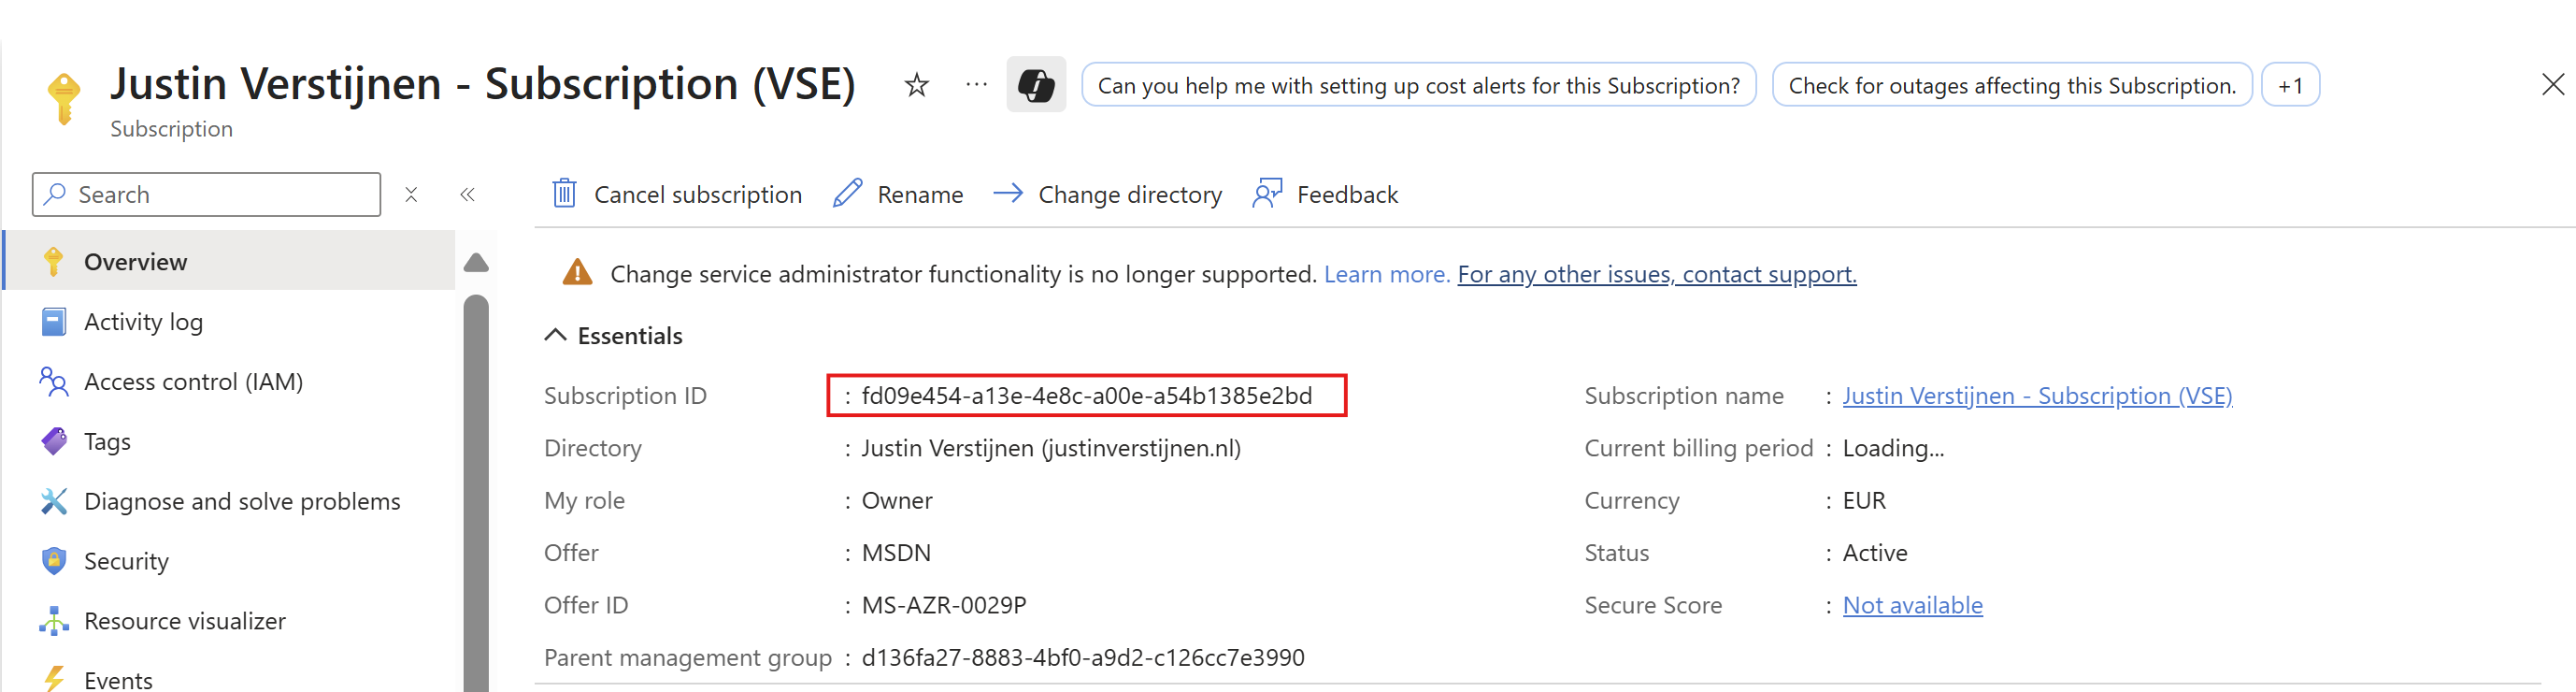
Go to “Access control (IAM)”. Then click on “+ Add” and then “Add custom role”.
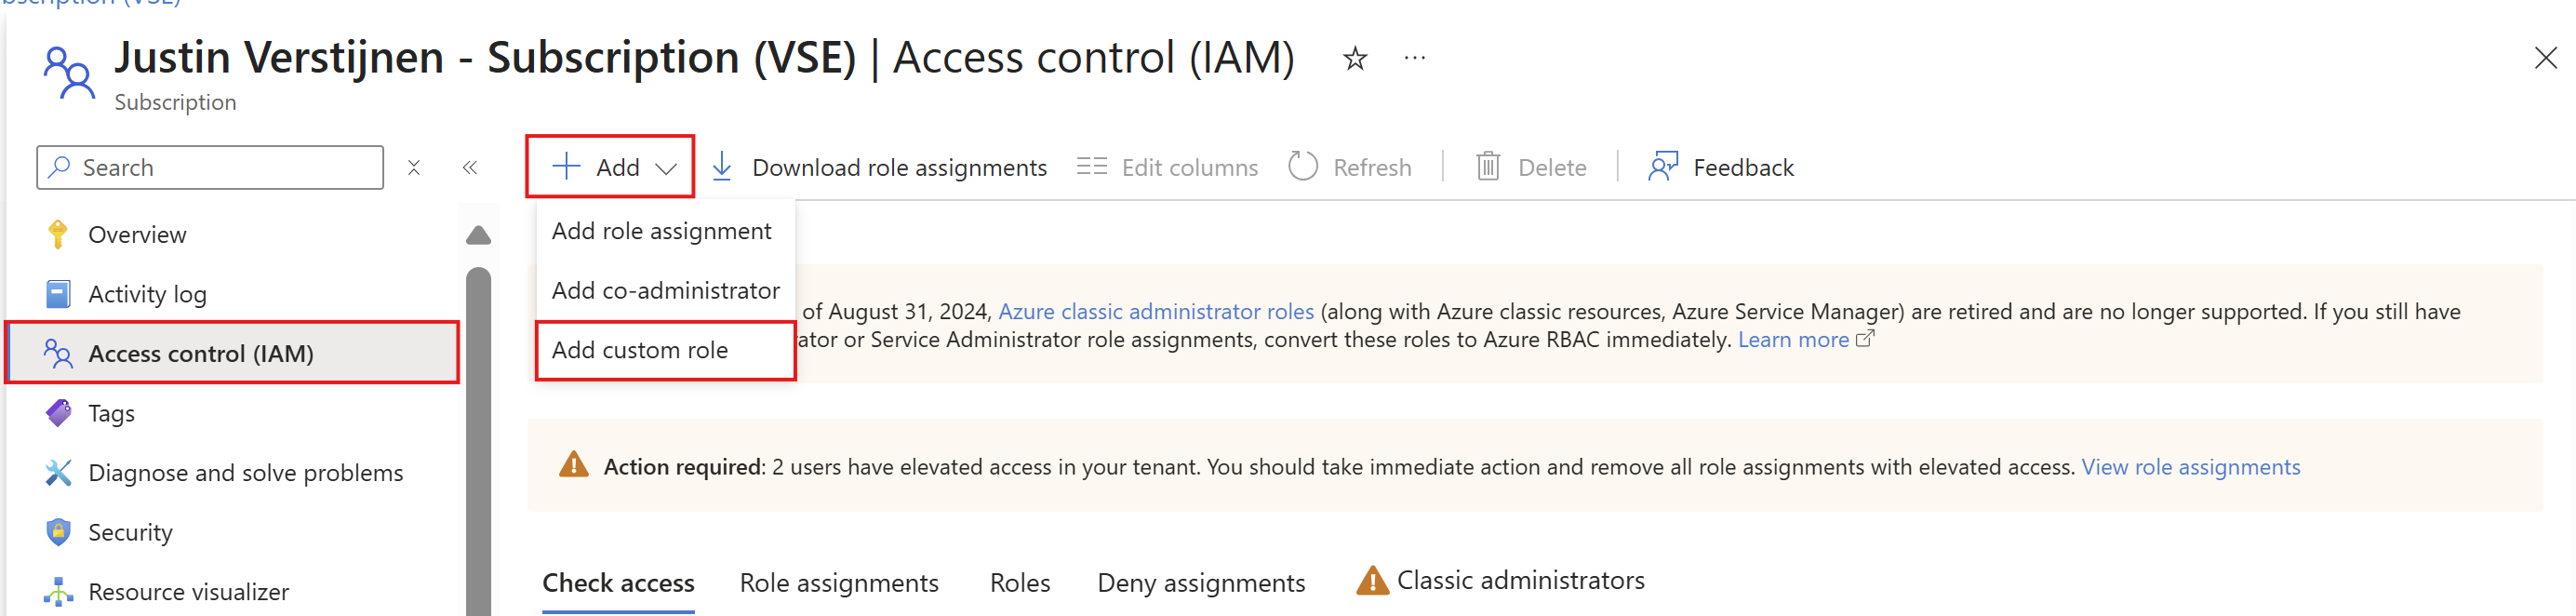
Here go directly to the “JSON” tab, click “Edit” and paste the code below, and then paste the subscription ID on the placeholder on line 6:
JSON
{
  "properties": {
    "roleName": "JV-CR-AutomaticLockRGs",
    "description": "Allows to place locks on every resource group in the scope subscription.",
    "assignableScopes": [
      "/subscriptions/*subscriptionid*"
    ],
    "permissions": [
      {
        "actions": [
          "Microsoft.Authorization/locks/*",
	        "Microsoft.Resources/deployments/*",
          "Microsoft.Resources/subscriptions/resourceGroups/read"
        ],
        "notActions": [],
        "dataActions": [],
        "notDataActions": []
      }
    ]
  }
}
Or view the custom role template on my GitHub page:
Then head back to the “Basics” tab and customize the name and description if needed. After that, create the custom role.
Step 2: Create the Policy Definition
Now we can create the Policy Deinition in Azure. This is the definition or let’s say, the set of settings to deploy with Azure Policy. The definition is then what is assigned to a determined scope which we will do in the next step.
Open the Azure Portal, and go to “Policy”.
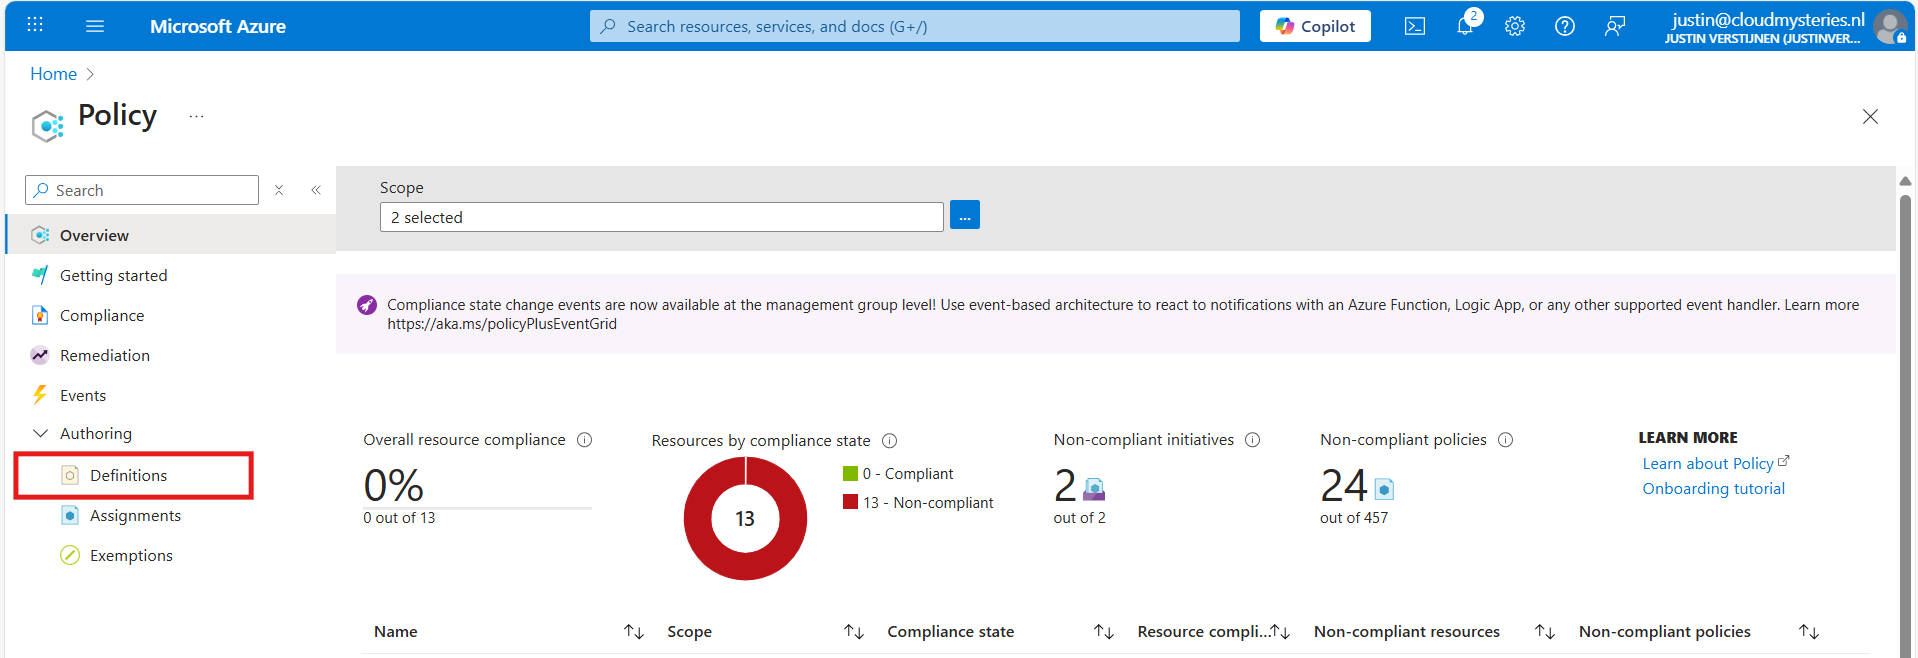
Then under “Authoring” click on “Definitions”. Then click “+ Policy Definition” to create a new policy definition.
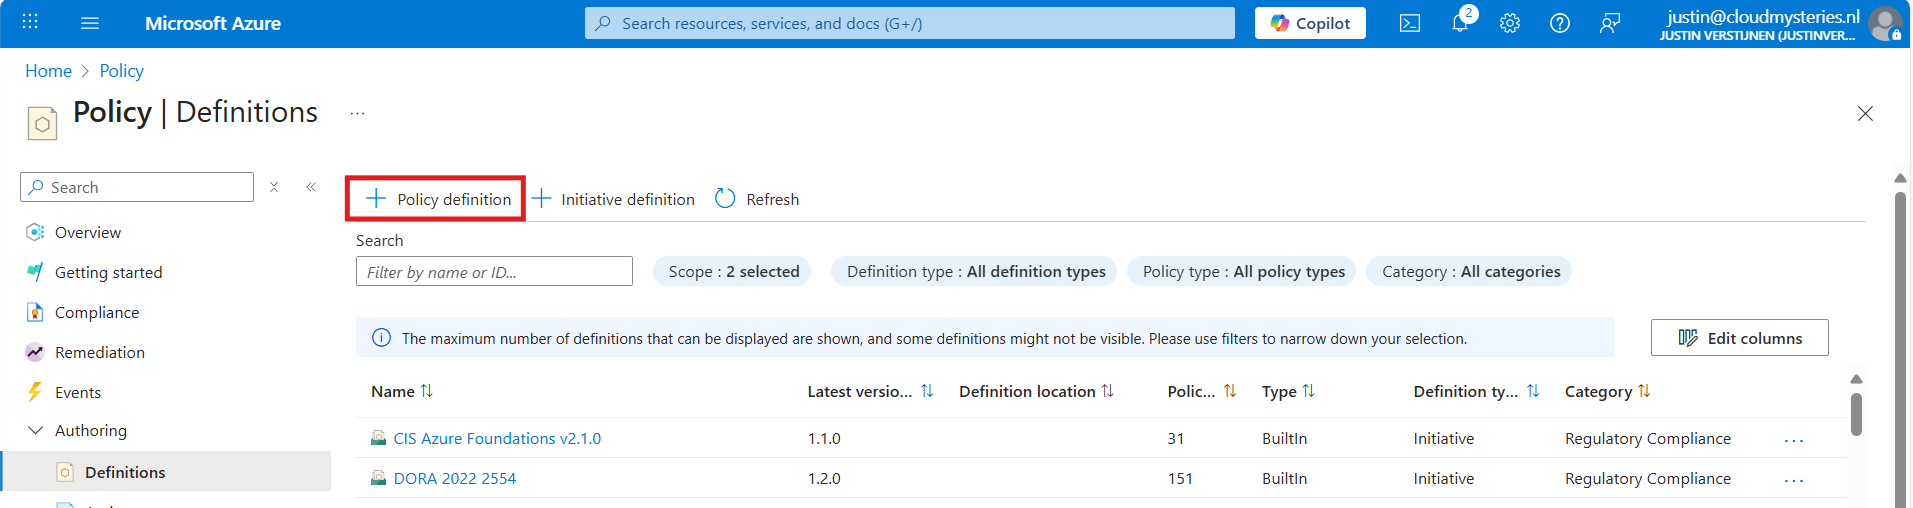
In the “Definition Location”, select the subscription where the policy must place locks. Then give the definition a name, description and select a category. Make sure to select a subscription and not a management group, otherwise it will not work.
After that, we must paste the code into the Policy Rule field. I have the fully prepared code template here:
Open the link and click this button to copy all code:

Then paste the code above into the Policy rule field in Azure:
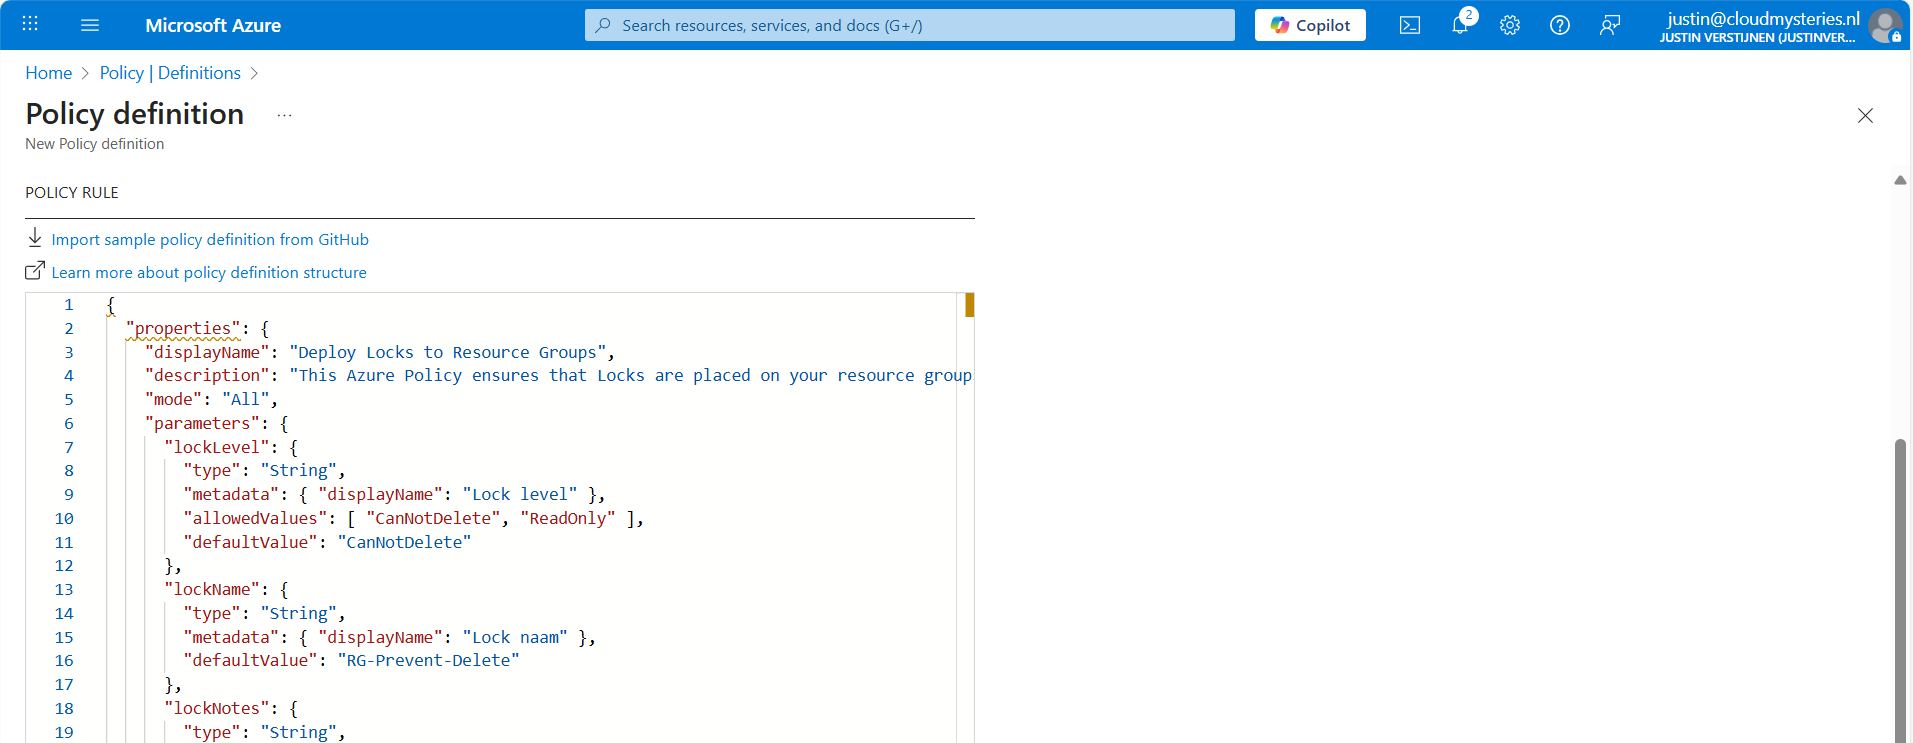
After that, save the policy definition and we are done with creating the policy definition.
Step 3: Assign the Policy to your subscription(s)
Now that we have made the definition, we can assign this to our subscription(s). You can do this by clicking on “Assign policy” directly after creating the definition, or by going back to “Policy” and selecting “Assignments”:
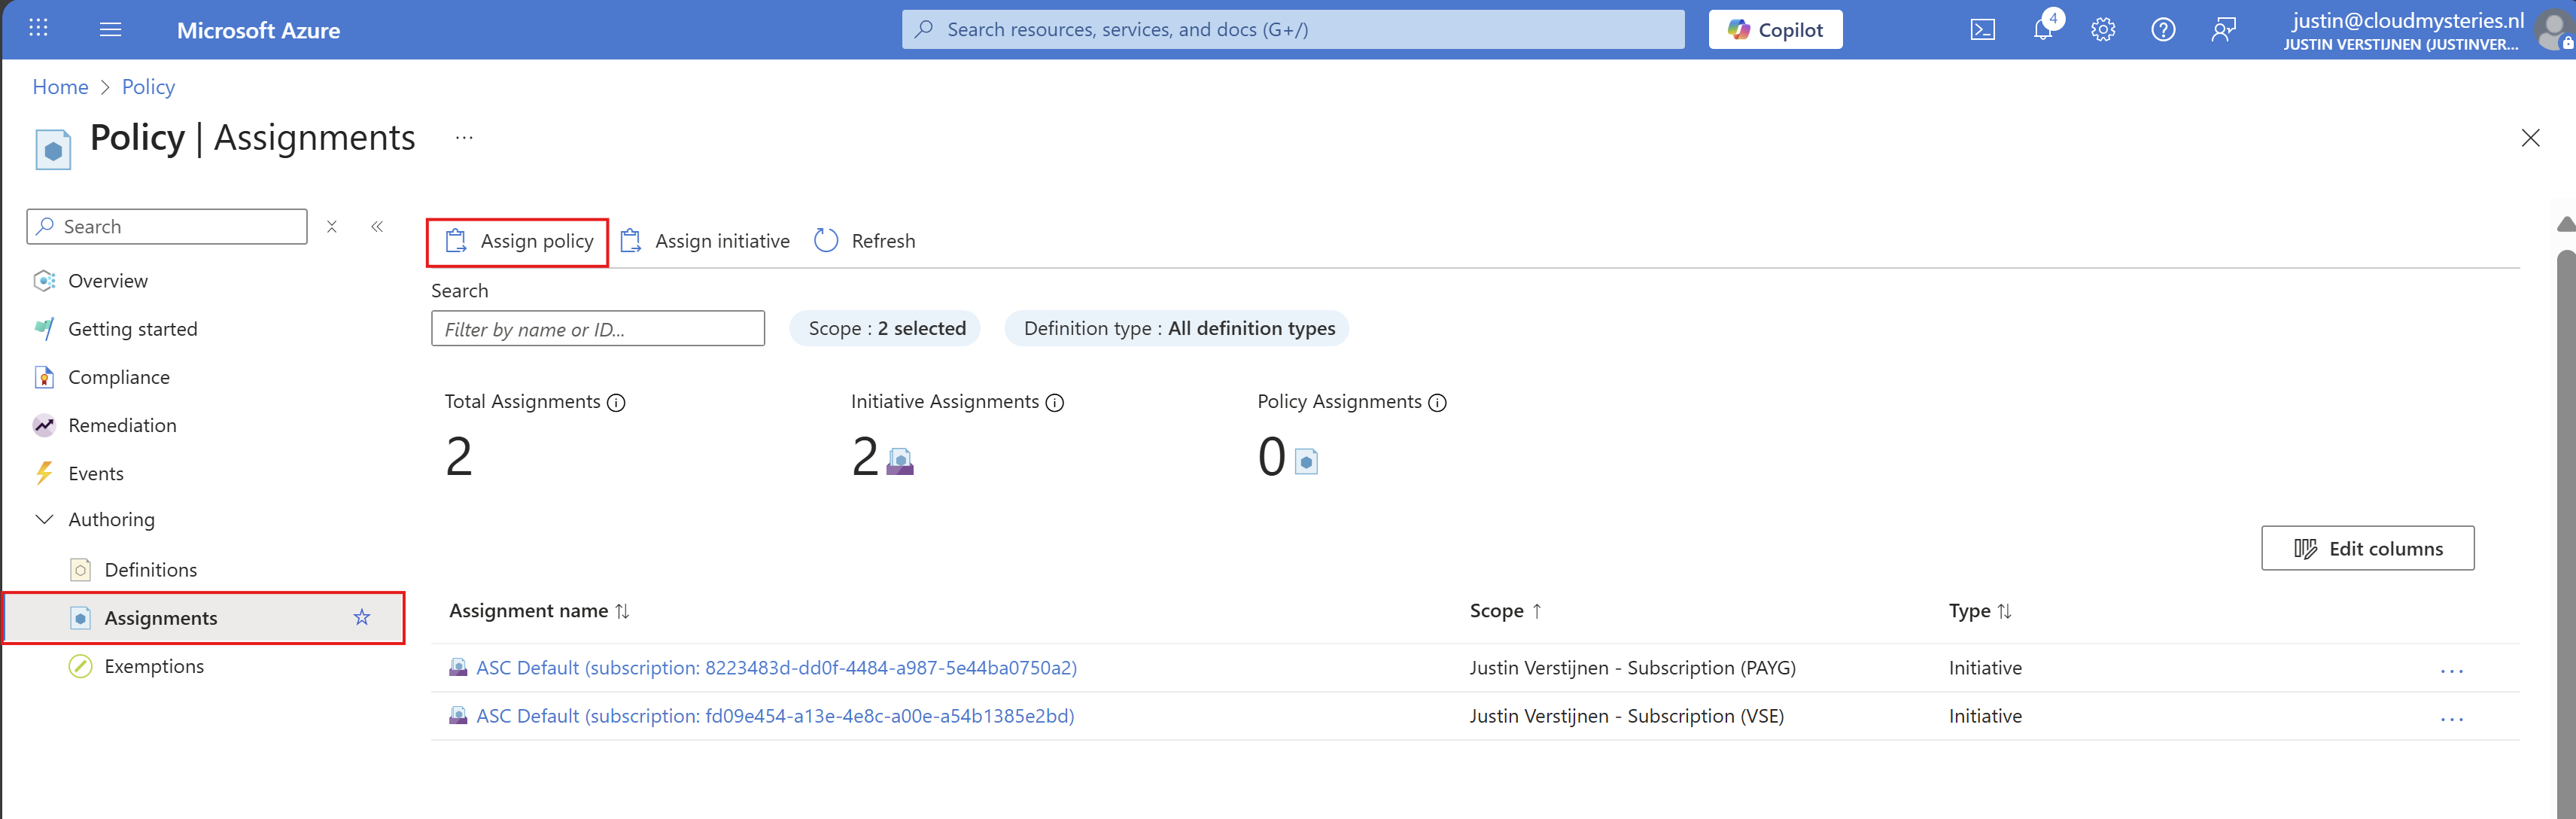
Click on “Assignments” and then on “Assign Policy”.
At the scope level, you can determine which subscription to use. Then you could set some exclusions to exclude some resouce groups in that subscription.
At the Policy definition field, select the just created definition to assign it, and give it a name and description.
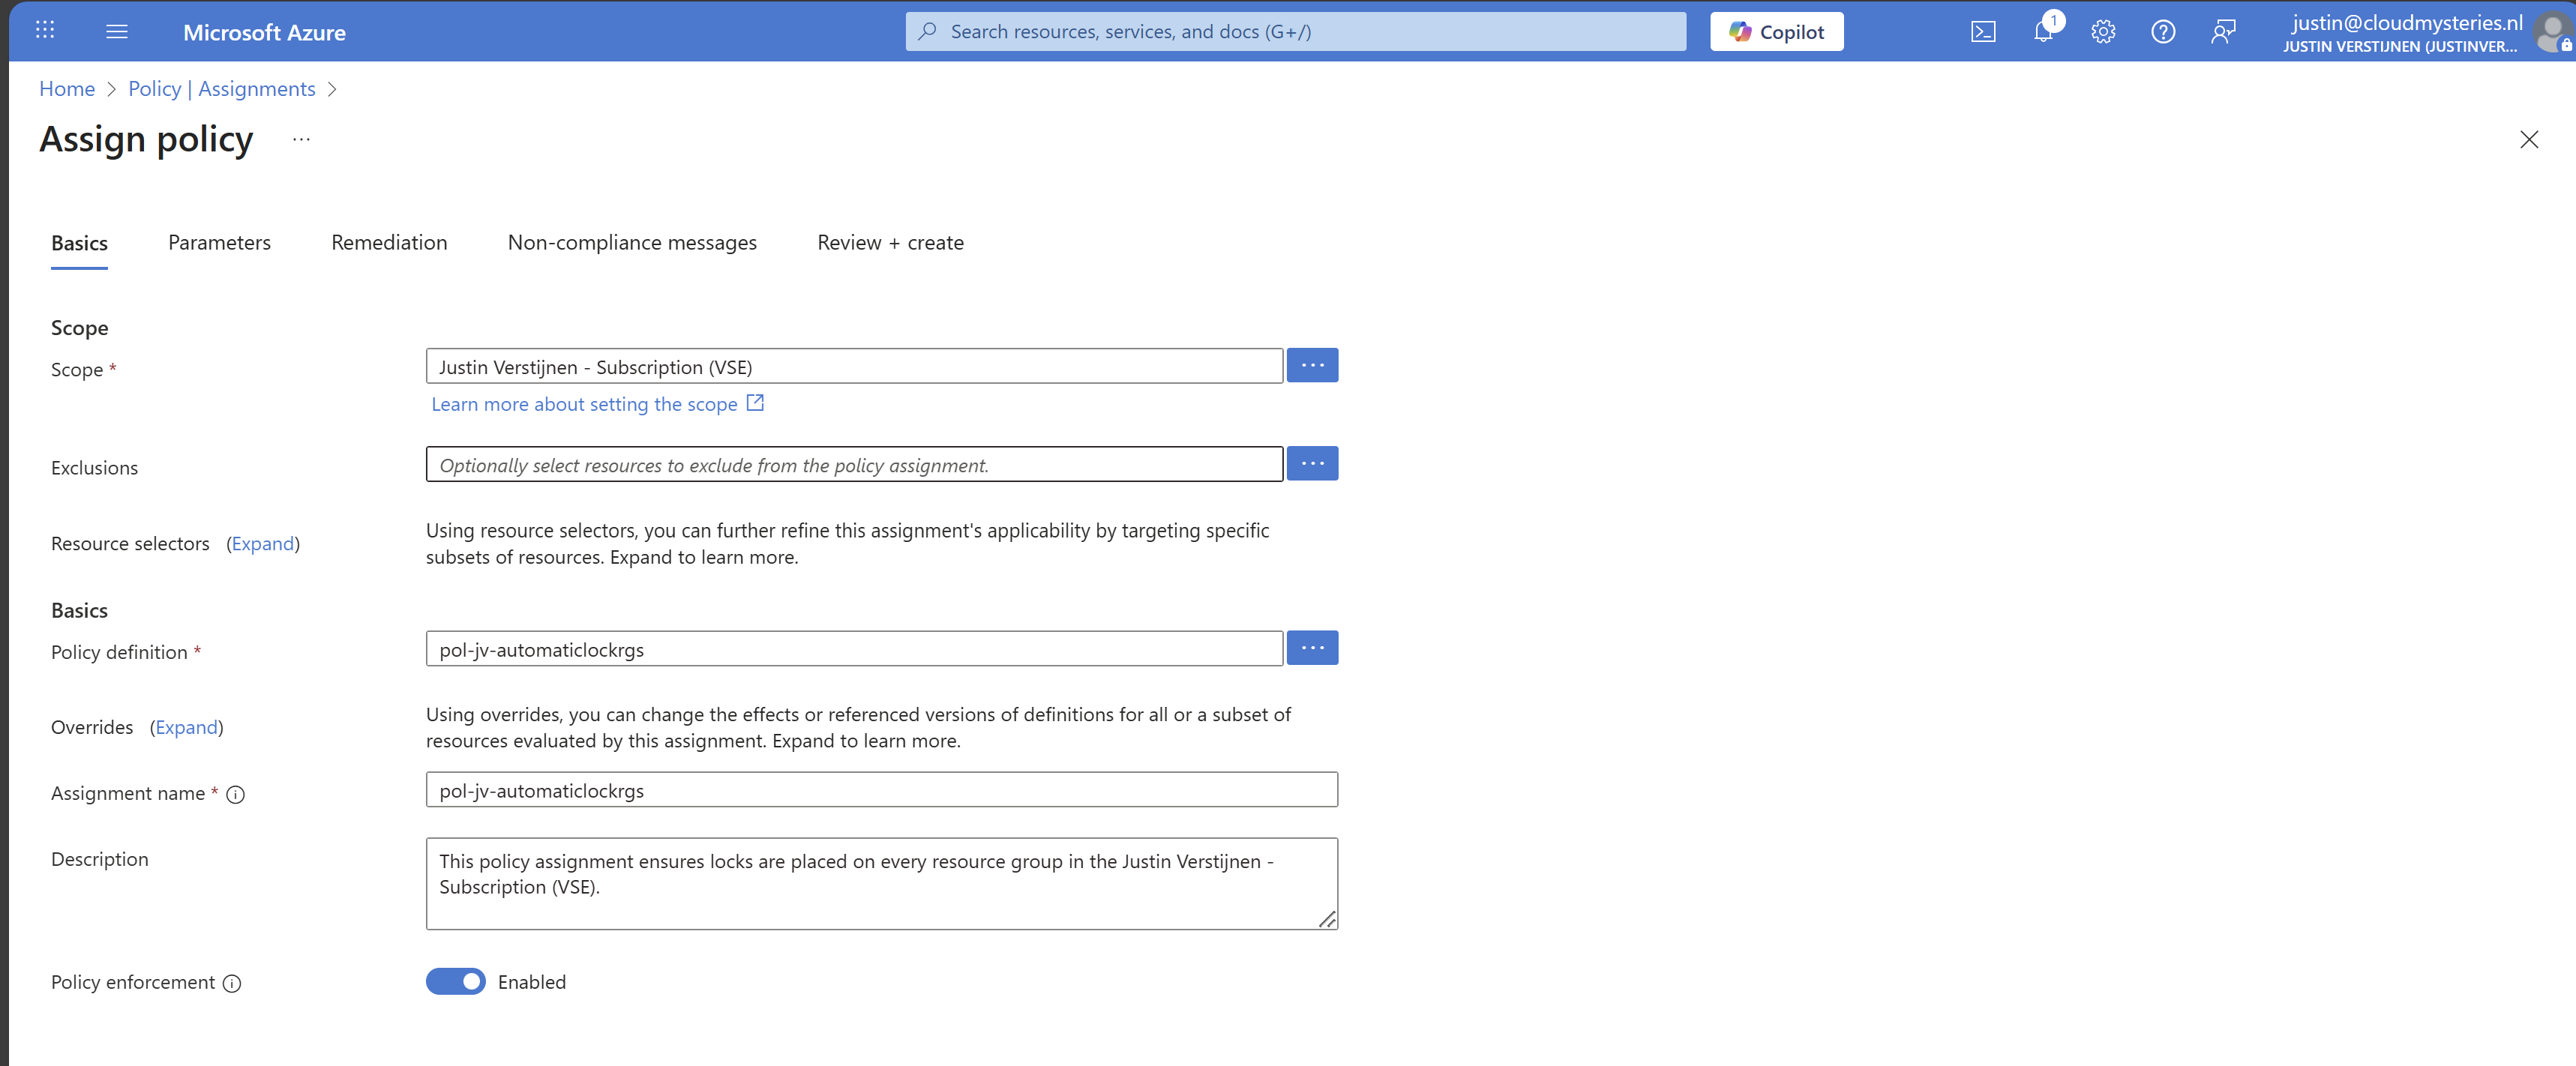
Then advance to the tab “Remediation”. The remediation task is where Azure automatically ensures that resources (or resource groups in this case) are compliant with your policy. This by automatically placing the lock.
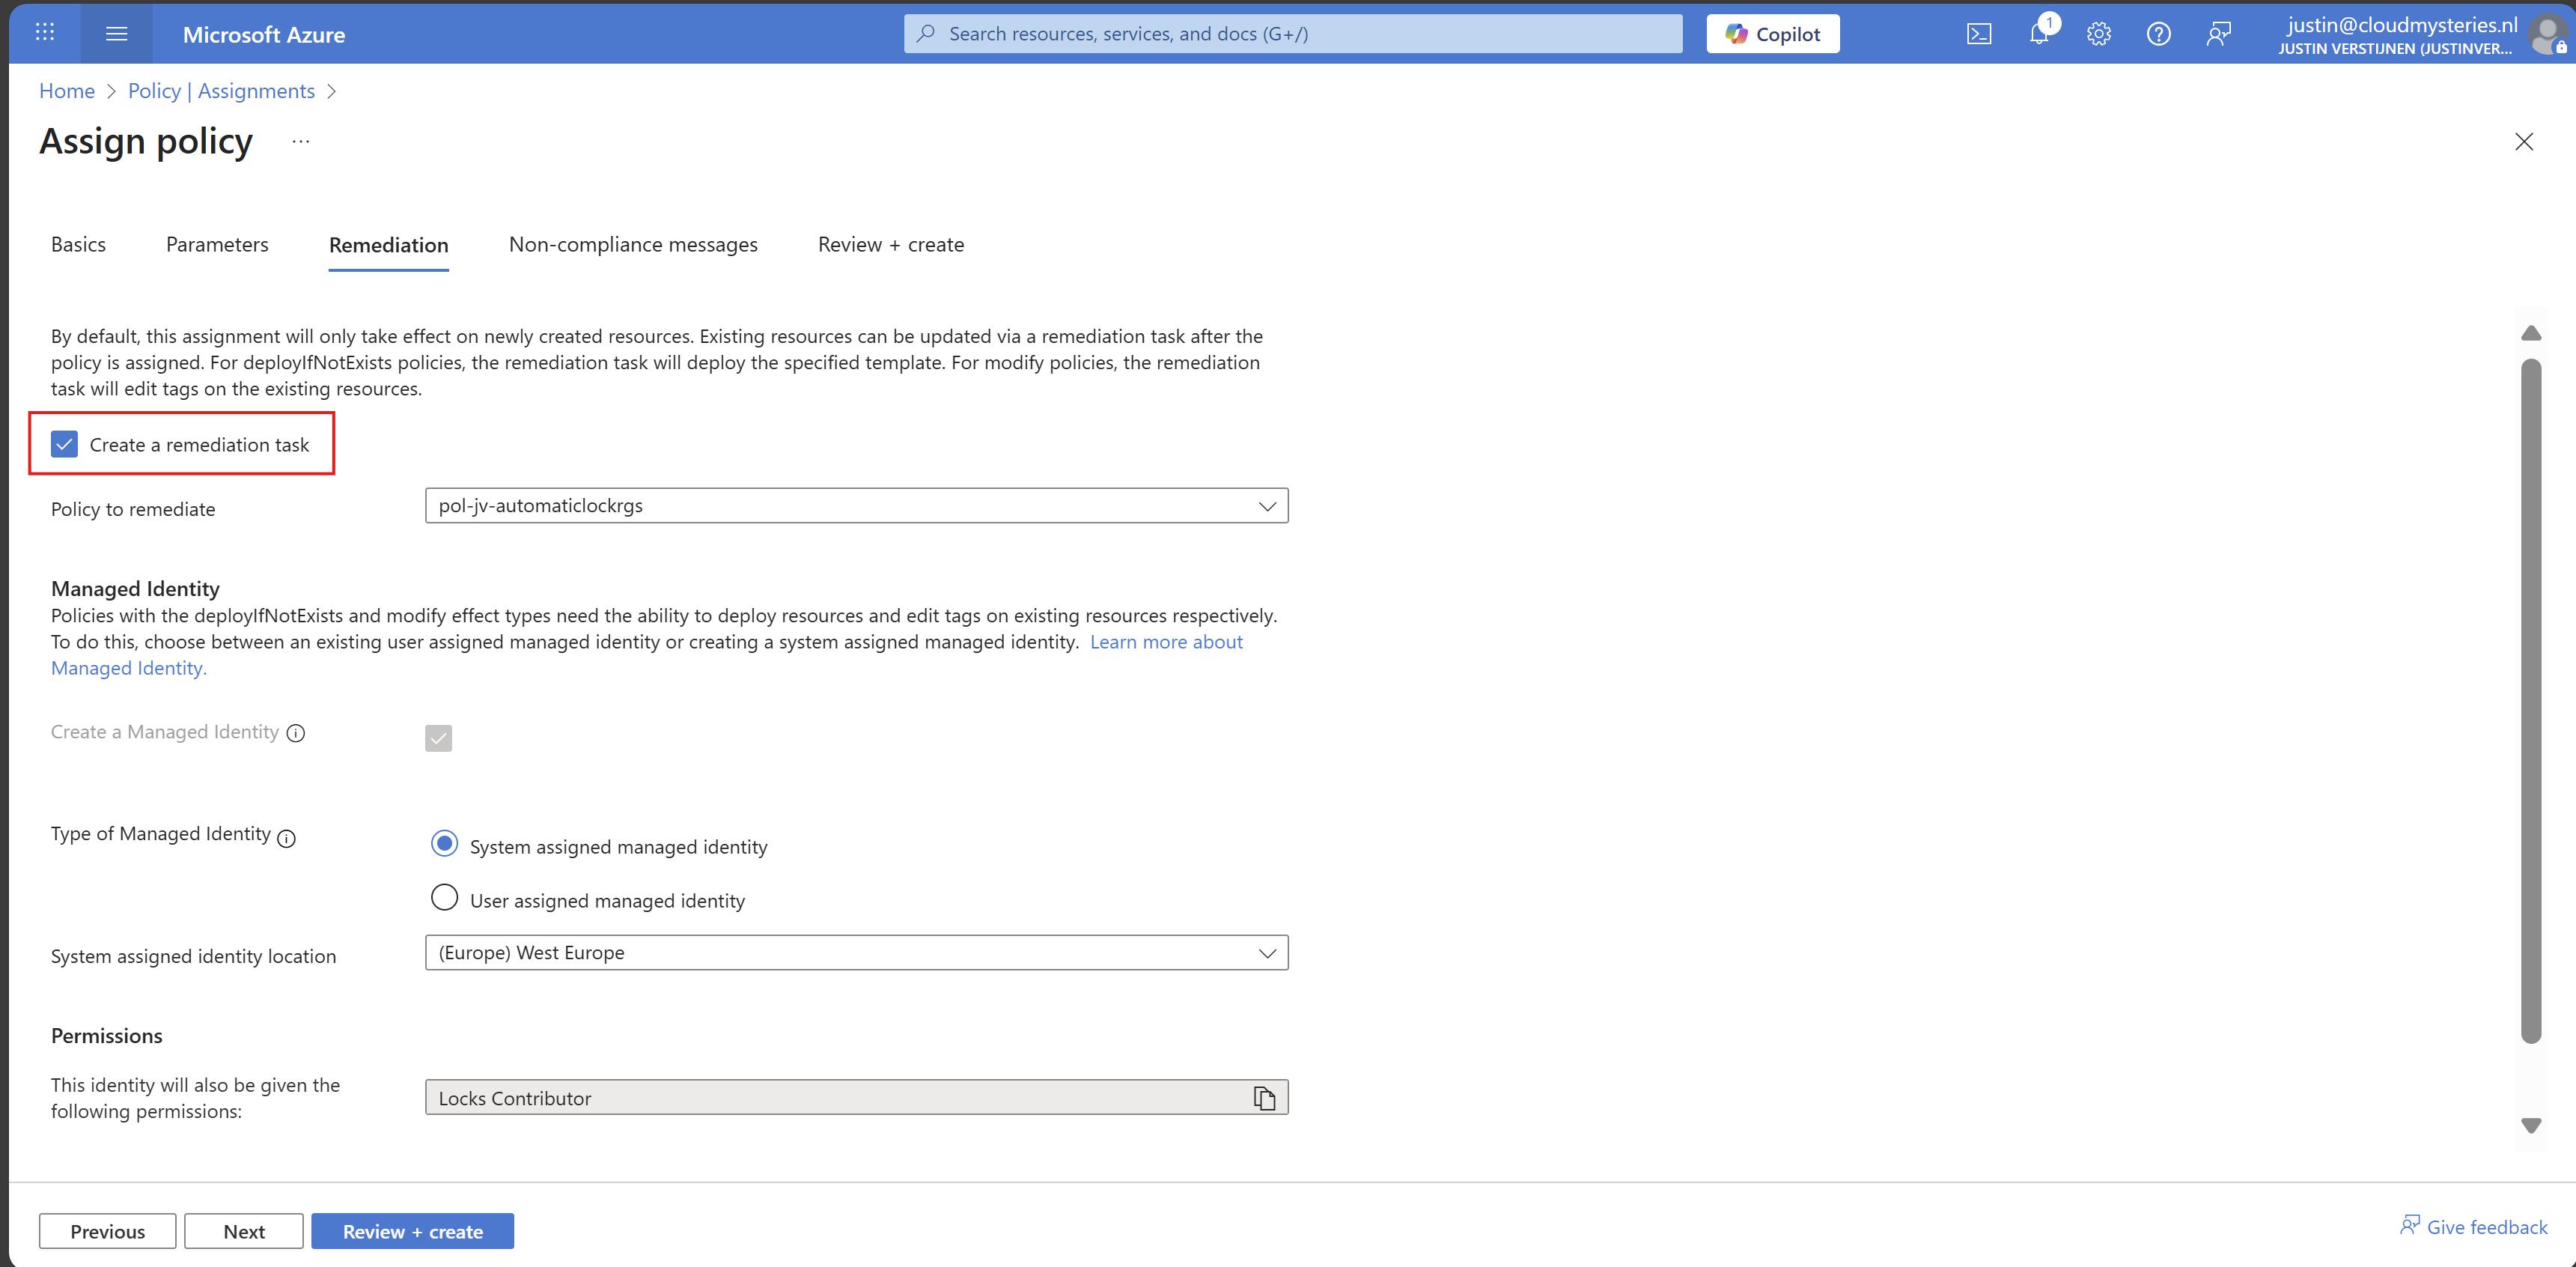
Enable “Create a remediation task” and the rest can be left default settings. You could use a user assigned managed identity if needed.
Finish the assignment and the policy will be active.
Step 4: Assign the custom role to your managed identity
Now that we have assigned the managed identity to our remediation task, we can assign new permissions to it. By default, Microsoft assigns the lock contributor role, but is unfortunately not enough.
Go to your subscription, and once again to “Access control (IAM)”. Then select the tab “Role assignments”:
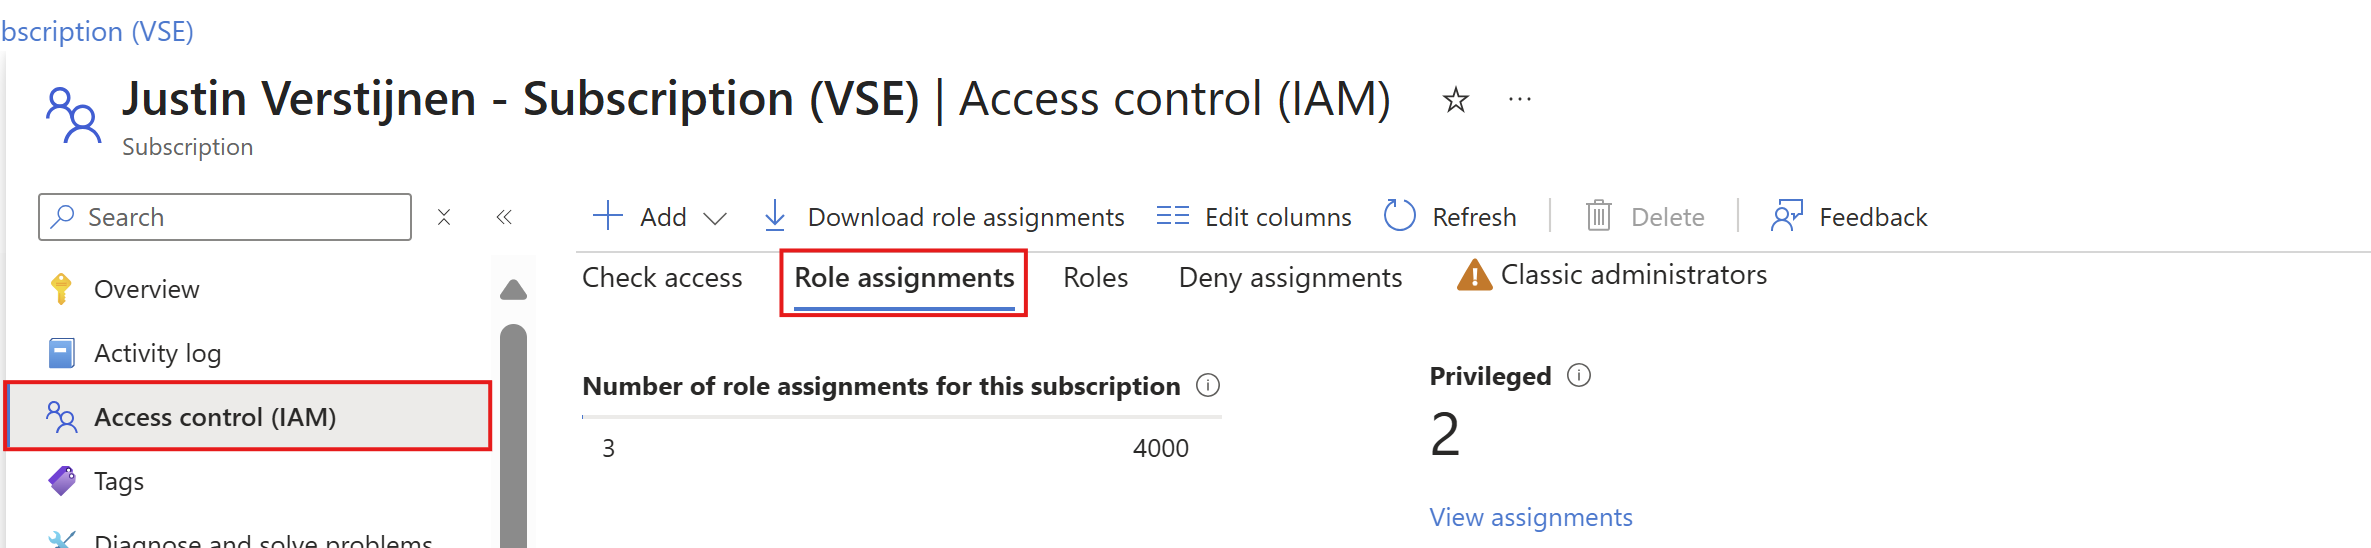
Search for the managed identity Azure just made. It will be under the “Lock Contributor” category:

Copy or write down the name and click “+ Add” and add a role to the subscription.
On the “Role” tab, select type: “Custom role” to only view custom roles and select your just created role:
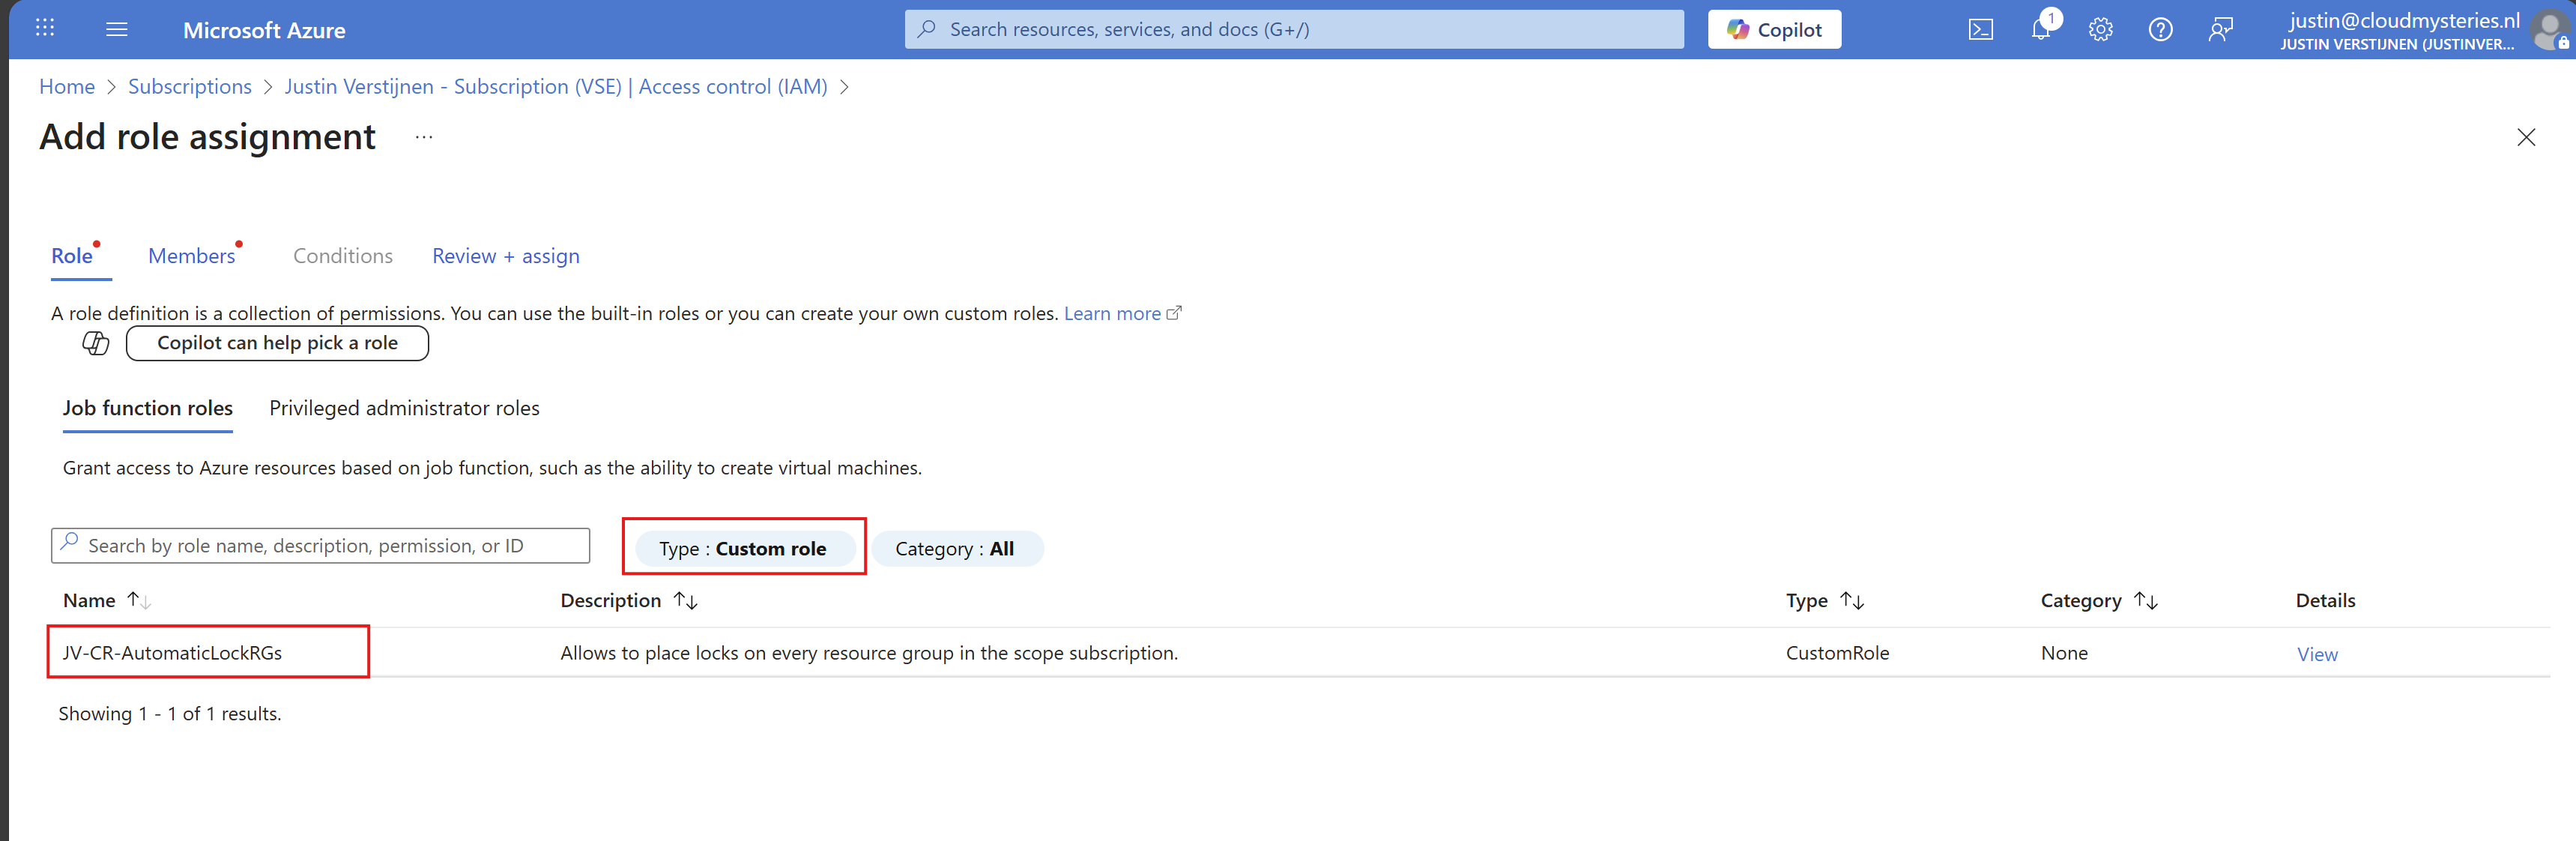
Click next.
Make sure “User, group or service principal” is selected, click “+ Select members” and paste in the name of the identity you have just copied.
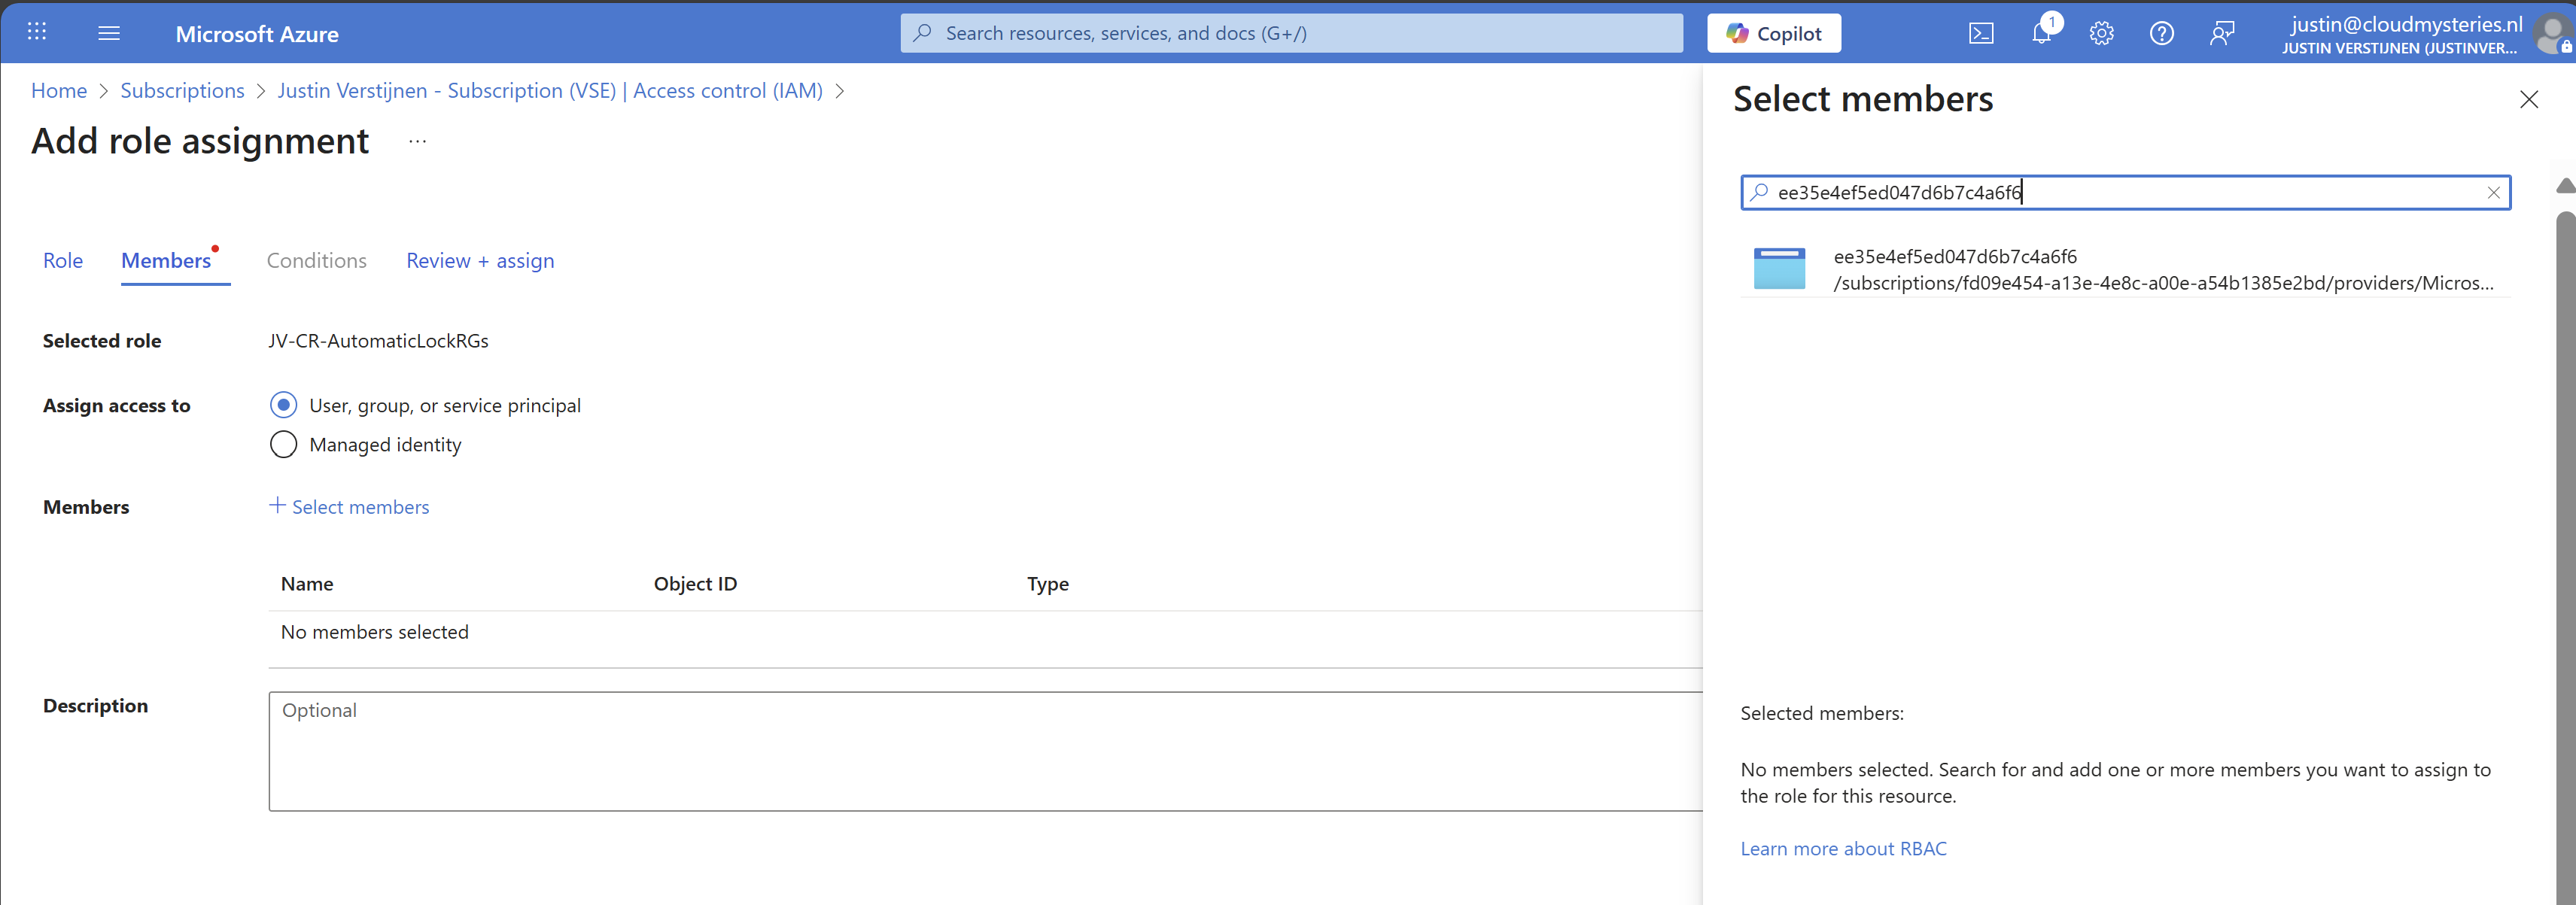
While Azure call this a managed identity, it is really a service principal which can sound very strange. WHy this is is really simple, it is not linked to a resource. Managed Identities are linked to resources so a resource has permissions. In this case, it’s only Azure Policy.
Select the Service principal and complete the role assignment.
Step 5: Let’s test the outcome
After configuring everything, we have to wait around 15 minutes for the policy to become active and the remediation task to put locks on every resource group.
After the 15 minute window we can check the status of the remediation task:
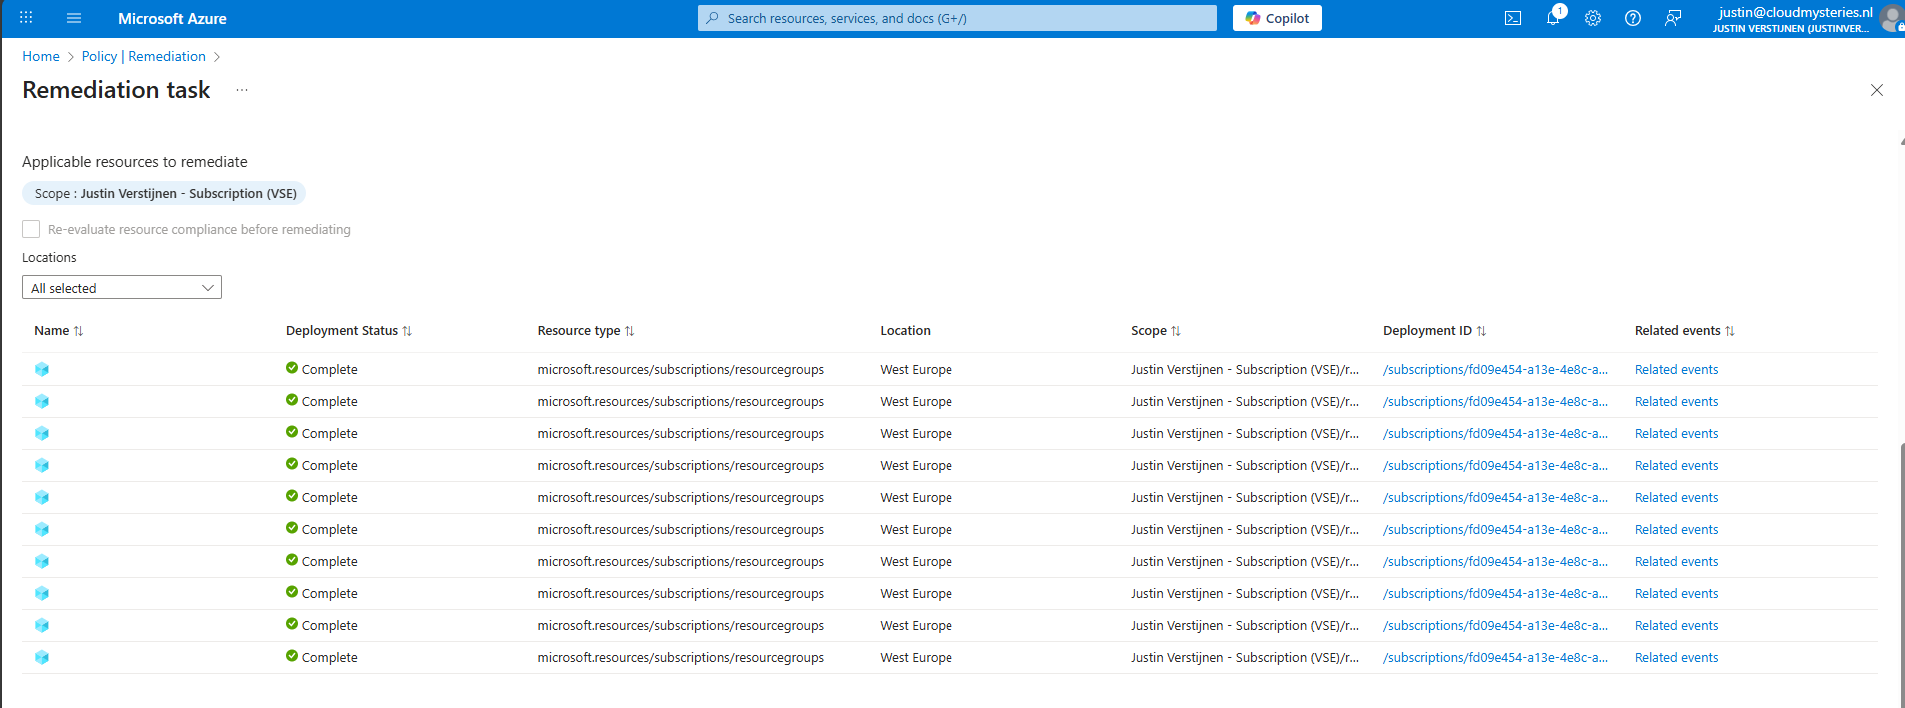
Looks promising! Let’s take a look into the resource groups itself:

Looks great and exactly what we wanted to achieve.
Step 6: Exclude resource groups from getting locks (optional)
Now with this Azure Policy solution, every resource group created automatically gets a Delete lock type. To exclude resource groups in your subscription to get a lock, go back to the policy assignment:
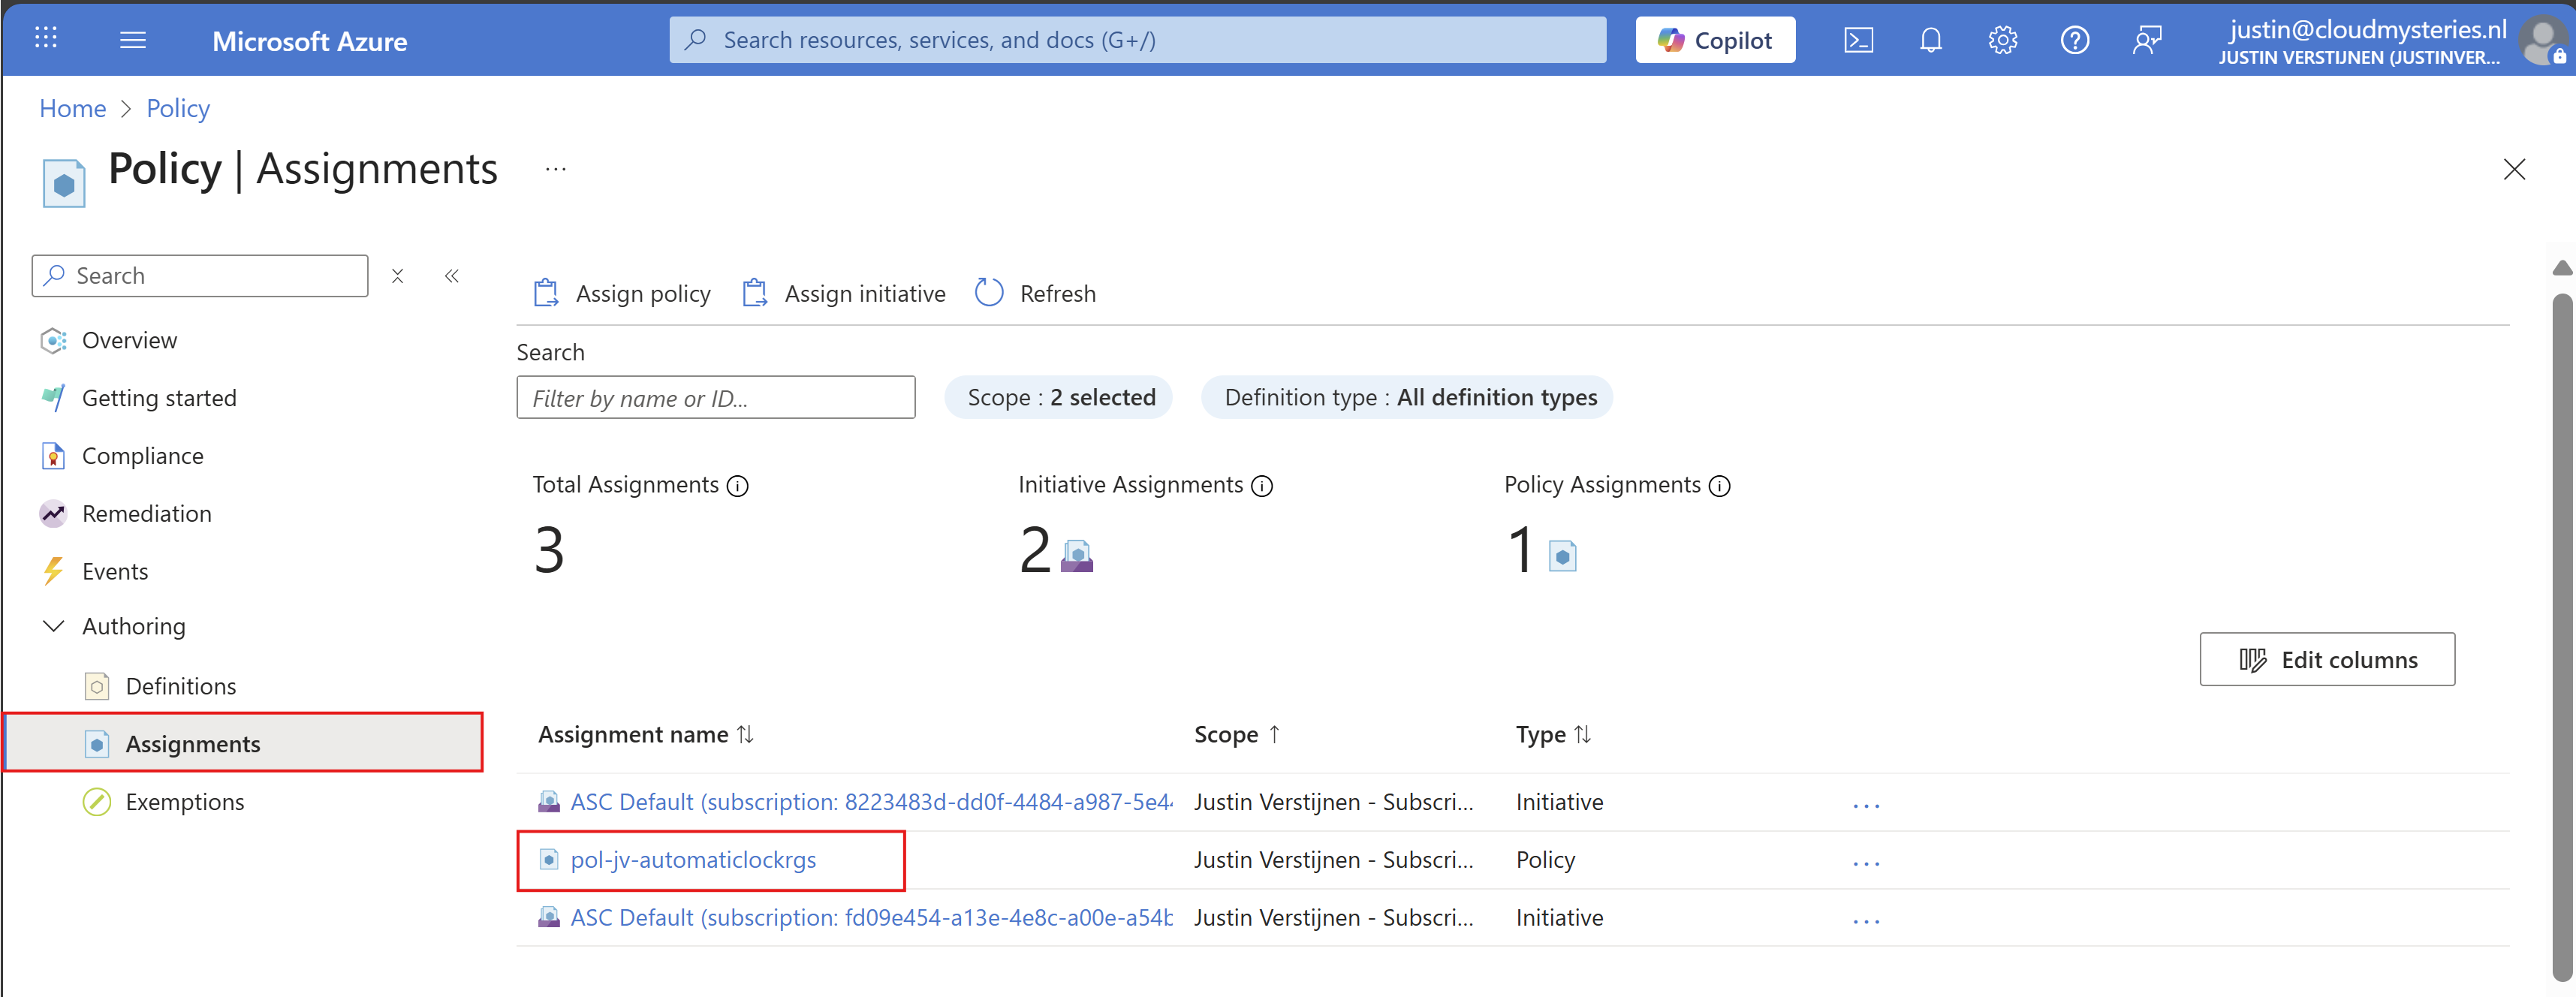
Then click on your policy assignment and then on “Edit assignment”:
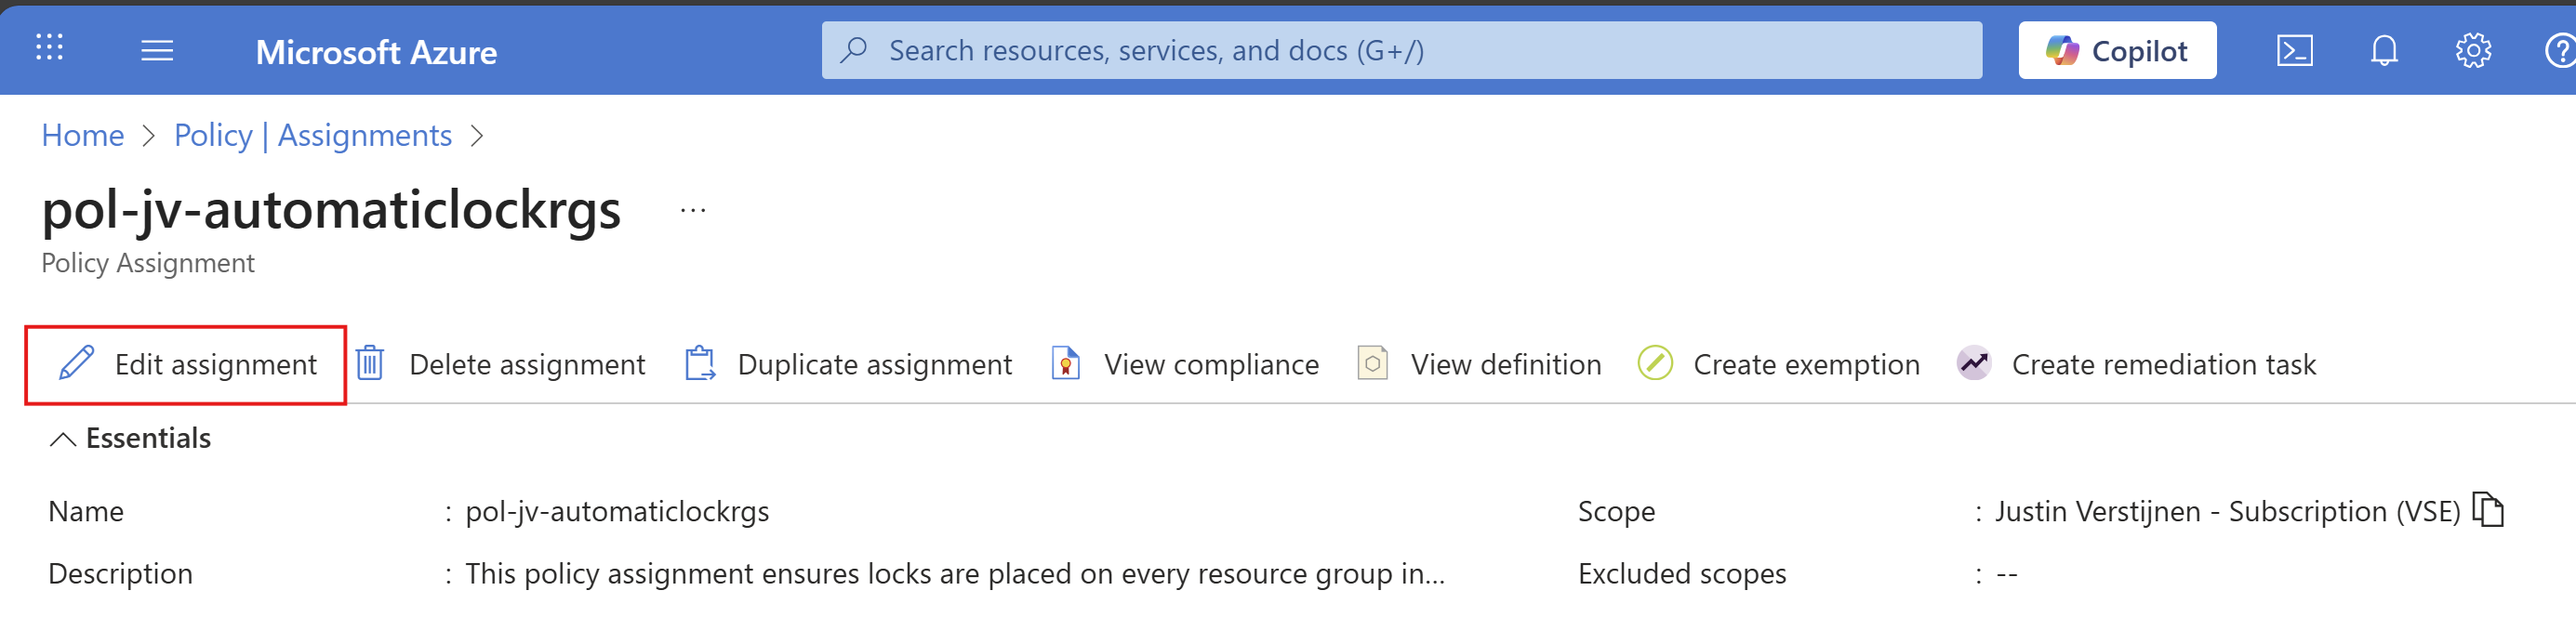
And then click on the “Exclusions” part of this page:

Here you can select the resource groups to be excluded from this automatic locking solution. Recommended is to select the resource groups here where you do some sort of automation on it. A prevent delete lock prevents automations from deleting resources in the resource group.
After selecting your resource groups to be excluded, save the configuration.
Summary
Locks in Azure are a great way to prevent some resource groups from accidental deletion and change of resource groups. It also helps by protecting the containing resources to be deleted or changed for a great inheritance-like experience. However they can be useful and great, take care on what resource group to place what lock because they can disrupt some automation tasks.
Azure Policy helps you on top of locks themselves to place Locks automatically on the resouce groups in case you forgot them.
Thank you for reading this guide and I hope it was helpful.
Sources
These sources helped me by writing and research for this post;
- https://learn.microsoft.com/en-us/azure/governance/policy/concepts/effect-deploy-if-not-exists
- https://learn.microsoft.com/en-us/azure/azure-resource-manager/management/lock-resources?tabs=json
- https://learn.microsoft.com/nl-nl/azure/governance/policy/how-to/remediate-resources?tabs=azure-portal#how-remediation-security-works
End of the page 🎉
You have reached the end of the page. You can navigate through other blog posts as well, share this post on X, LinkedIn and Reddit or return to the blog posts collection page. Thank you for visiting this post.
If you think something is wrong with this post or you want to know more, you can send me a message to one of my social profiles at: https://justinverstijnen.nl/about/
If you find this page and blog very useful and you want to leave a donation, you can use the button below to buy me a beer. Hosting and maintaining a website takes a lot of time and money. Thank you in advance and cheers :)
The terms and conditions apply to this post.
Monitor and reduce carbon emissions (CO2) in Azure
In Microsoft Azure, we have some options to monitor and reduce your organizations Carbon emissions (CO2) from services hosted in the cloud. When hosting servers on-premises, they need power, cooling and networking and those are also needed in the cloud. By migrating servers to the cloud doesn’t mean that those emissions do not count. Those emissions are generated on an other location. In this guide, I will show some features of Microsoft Azure regarding monitoring and reducing carbon emissions.
Carbon Optimization dashboard
Azure offers several Carbon Optimization options to help organizations to monitor and reduce their CO₂ emissions and operate more sustainable. You can find this in the Azure Portal by searching for “Carbon optimizations”:
At this dashboard we can find some interesting information, like the total emissions from when your organization started using Azure services, emissions in the last month and the potential reductions that your organization can make.
Emissions details
On the Emissions details pane we can find some more detailed information, like what type and resources contributed to the emissions:
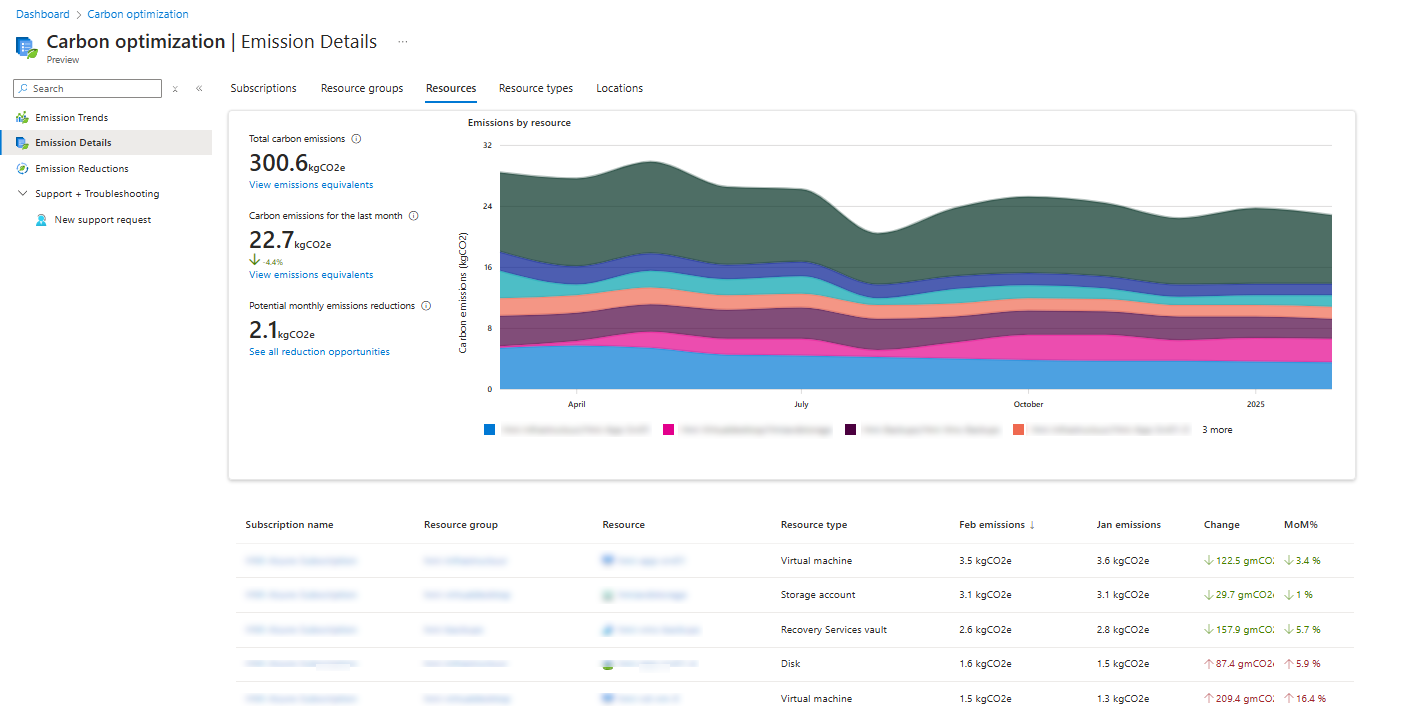
Here we have an overview of an Azure environment with 5 servers, a storage account including backup. You see that the virtual machine on top is the biggest factor of the emissions each month. This has the most impact on the datacenters of Microsoft in terms of computing power. The storage account takes the 2nd place, because of all the redundant options configured there (GRS).
We can also search per type of resources, which makes the overview a lot better and summarized:
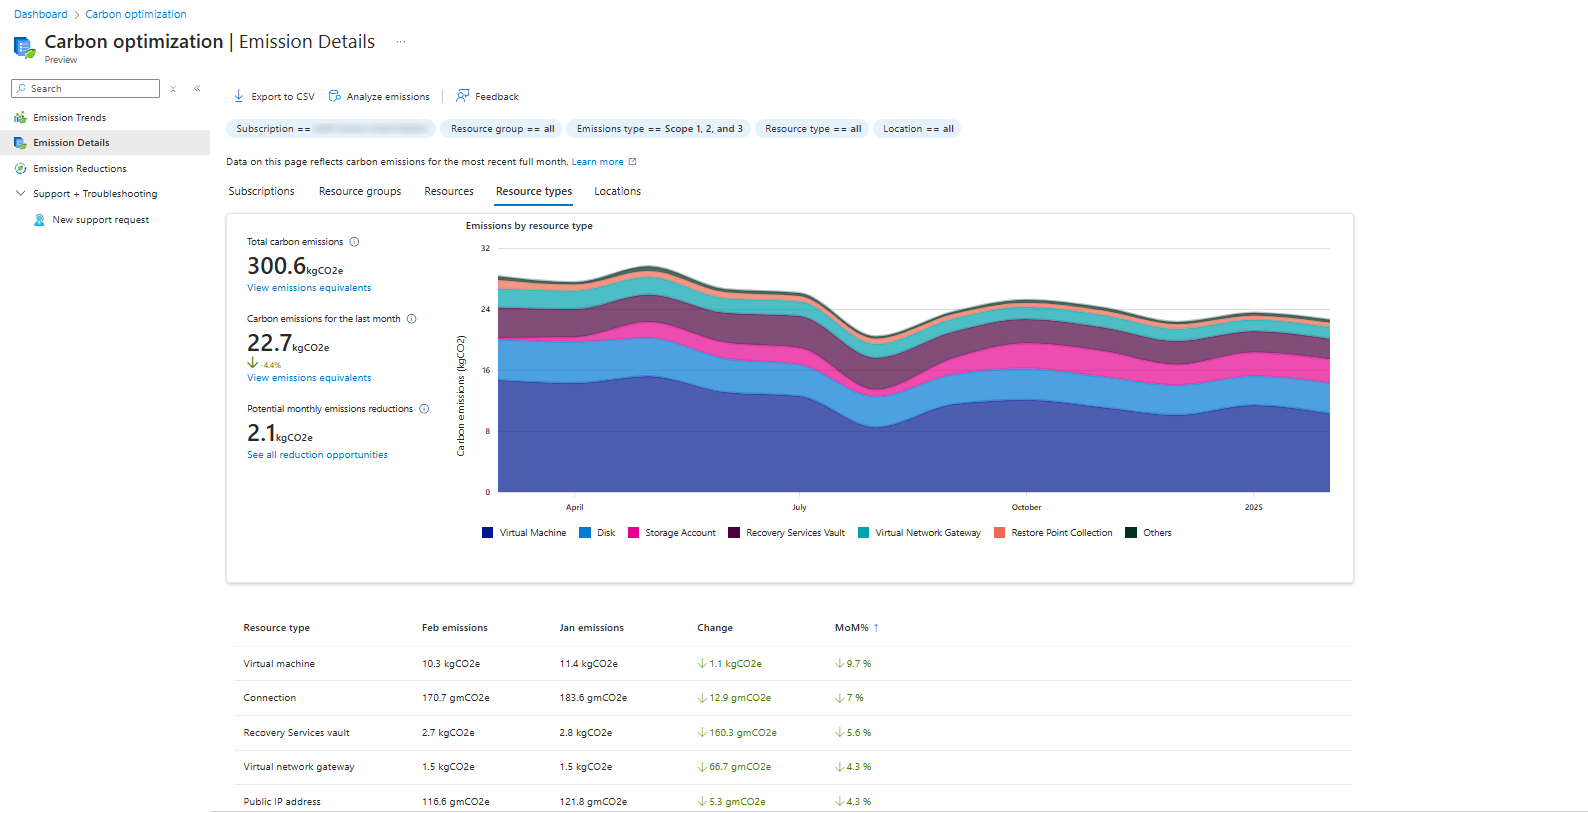
Emissions Reductions and advices
The “Emissions Reductions” detail pane contains advices about how to reduce emissions in your exact environment:
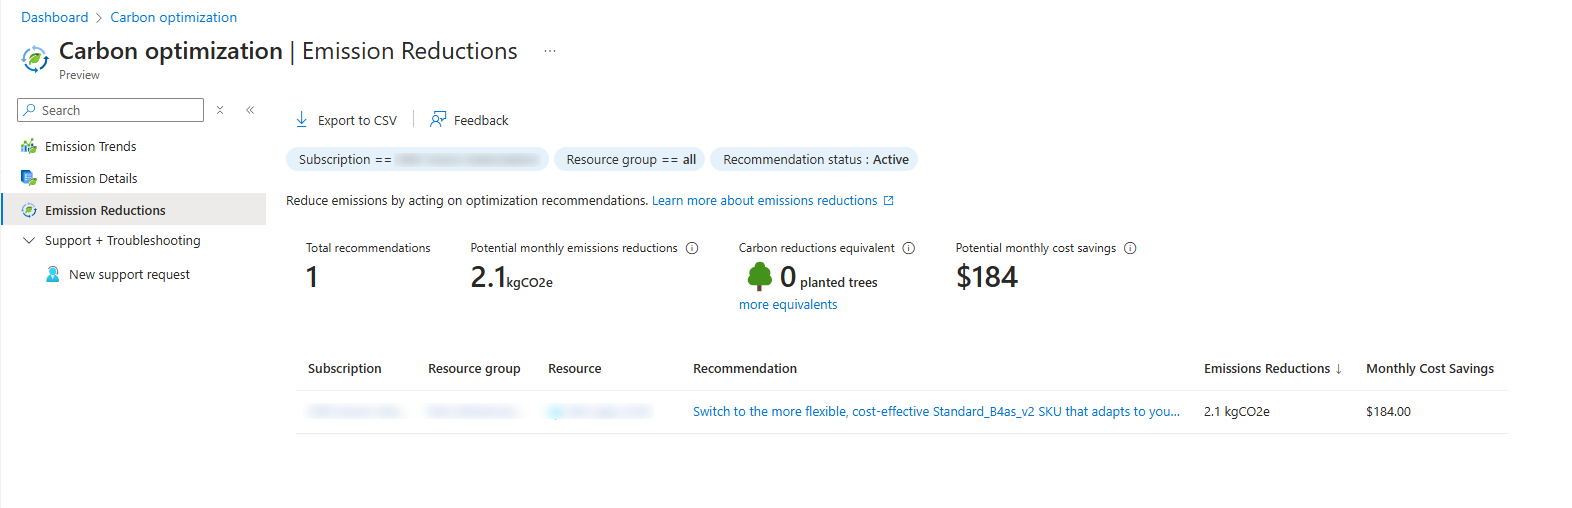
In my environment I have only 1 recommendation, and that is to downgrade one of the servers that has more resources than it needs. However, we have to stick to system requirements of an specific application that needs those resources at minimum.
Types/Scopes of emissions
To understand more about generic Carbon emission calculating, I will add a simple clarification.
Carbon emissions for organizations are mostly calculated in those 3 scopes:
| Scope | Type of Emissions | Sources | Example |
| Scope 1 | Direct emissions | Company-owned sources | Company vehicles, on-site fuel combustion, refrigerant leaks |
| Scope 2 | Indirect emissions from purchased energy | Electricity, heating, cooling | Powering offices, data centers, factories |
| Scope 3 | Indirect emissions from the value chain | Upstream (suppliers) and downstream (customers) | Supply chain, product use, business travel, employee commuting |
Like shown in the table, cloud computing will be mostly calculated as Scope 3 emissions, because of external emissions and not internal. On-premises computing will be mostly calculated as Scope 2. As you already saw, the scopes count for the audited company. This means that Scope 3 emissions of an Microsoft customer may be Scope 2 emissions for Microsoft itself.
Emissions Azure vs on-premises
While we can use the Azure cloud to host our environment, hosting on-premises is still an option too. However, hosting those servers yourself means a lot of recurring costs for;
- Hardware
- Energy costs
- Maintenance
- Cooling
- Employee training
- Reserve hardware
- Licenses
An added factor is that energy to power those on-premises servers are mostly done with “grey” energy. Microsoft Azure guarantees a minimum of 50% of his energy is from renewable sources like solar, wind, and hydro. By the end of 2025, Microsoft strives to reach the 100% goal. This can make hosting your infrastructure on Azure 100% emissions free.
Summary
While this page may not be that technical and interesting for you and your company, for some companies this can be interesting information.
However, Microsoft does not recommend using these numbers in any form of marketing campaigns and to only use as internal references.
Thank you for reading this guide and I hope it was interesting.
End of the page 🎉
You have reached the end of the page. You can navigate through other blog posts as well, share this post on X, LinkedIn and Reddit or return to the blog posts collection page. Thank you for visiting this post.
If you think something is wrong with this post or you want to know more, you can send me a message to one of my social profiles at: https://justinverstijnen.nl/about/
If you find this page and blog very useful and you want to leave a donation, you can use the button below to buy me a beer. Hosting and maintaining a website takes a lot of time and money. Thank you in advance and cheers :)
The terms and conditions apply to this post.
Migrate servers with Azure Migrate in 7 steps
This page is about Azure Migrate and how you can migrate an on-premises server or multiple servers to Microsoft Azure. This process is not very easy, but it’s also not extremely difficult. Microsoft hasn’t made it as simple as just installing an agent on a VM, logging in, and clicking the migrate button. Instead, it is built in a scalable way.
Requirements
- A server to migrate to Microsoft Azure
- Ability to install 1 or 2 additional servers
- Must be in the same network
- Around 60 minutes of your time
- Administrator access to all source servers
- RDP access to all source servers is useful
- Secure Boot must be disabled on the source servers
- A target Azure Subscription with Owner access
- 1 server dedicated to Migration based on Windows Server 2016*
- 2 servers for Discovery and Migration based on Windows Server 2016*
*Windows Server 2016 is the only supported OS, please do not install other versions as this will not work.
Evaluation versions may be used.
Officially, it is not supported to combine the Discovery Server and the Migration Server. These must be separate servers according to the official documentation. However, I was able to successfully combine them in a testing environment.
The process described
The migration of servers to Microsoft Azure consists of 3 phases: Discovery, Replicate and then Migrate.
- Azure Migrate begins with a Discovery once a Discovery Server has been set up. This server inventories all machines, including dependencies, and reports them to Azure. You can find this information in the Azure Migrate project within the Azure Portal
- It is not mandatory to set-up the Discovery server, in this case you have to document all risks and information yourself
- When you’re ready, you can choose to replicate the machines to Azure. This process is handled by the Configuration/Process server. Azure Migrate starts a job to completely copy the server to Azure in small portions till both sides are synchronized. This can take days or weeks to complete
- Once the migration is fully prepared and both sides are synchronized, you can initiate the final migration. Azure Migrate will transfer all changes made since the initial replication and ensure that the machines in Azure become the primary instances
Step 1: Preparations
Every migration starts with some sort of preparations. This can consist of:
- Describing the scope of the migration; which machines do I want to migrate?
- Method of migrating; 1 to 1 migration or a complete rebuild?
- Assess possible risks and sensitive data/applications
Make sure that this information is described in a migration plan.
Step 2: Creating a new Azure Migrate-project
Go to the Azure Portal, navigate to Azure Migrate:

Open the “Servers, databases, and web apps” blade on the left:
On this page, create a new Azure Migrate project.
When this is set-up, we go to our migration project:
Under “Migration Tools”, click “Discover”.
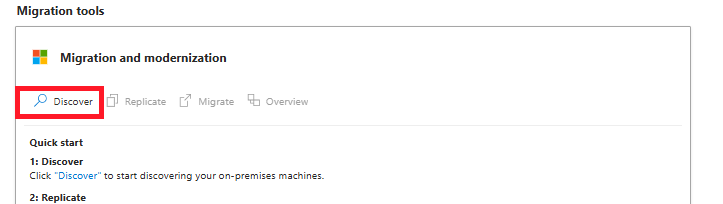
On the next page, we have to select the source and target for our migration. In my case, the target is “Azure VM”.
The source can be a little confusing, but hopefully this makes it clear:
- VMWare vSphere Hypervisor: Only for Enterprise VMware solutions which uses vSphere to manage virtual machines (no ESXi)
- Hyper-V: When using Hyper-V as virtualization platform
- Physical: Every other source, like VMware ESXi, actually Physical or other public/private clouds
In my case, I used VMware ESXi to host a migration testing machine, so I selected “Physical”.
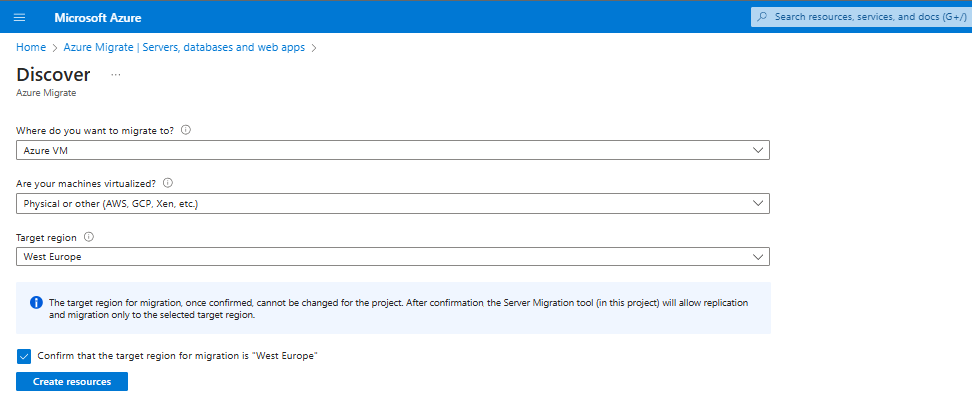
Hit “Create resources” to let Azure Migrate prepare the rest of the process.
Now we can download the required registration key to register our migration/processing machine.
Save the VaultCredentials file to a location, we will need this in a further step to register the agents to the Migration project.
Step 3: Installing the Configuration/Processing server
In step 3 we have to configure our processing server which replicates the other servers to Microsoft Azure. This is a complete standalone machine on the same VMware host in my case and is a Windows Server 2016 Datacenter Evaluation installation.
Now, we have to install the configuration server:
- Minimum system requirements:
- 2 vCPUs or 2 CPU cores
- 8GB RAM
- At least 600GB storage (caching of the other servers)
- Network and internet access
- Windows Server 2016
After the initial installation of this server, we have to do some tasks:
- Disable Internet Explorer Enhanced Security settings in the Server Manager
- Open Server Manager, then Local Server (1) and then the IE Enhanced Security Configuration (2)
- Disable this for “Administrators” and click OK.
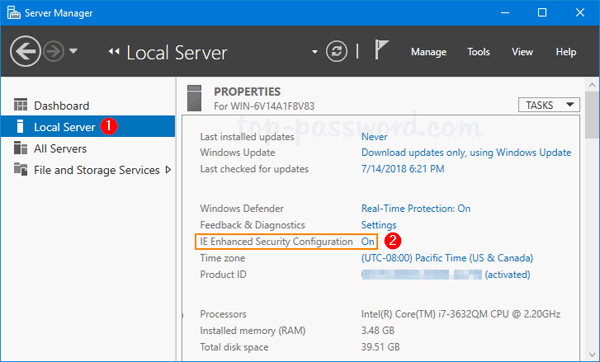
Now we have to install the Replication appliance software from the last part of Step 2. You can find this in the Azure Portal under the project or by clicking this link: https://aka.ms/unifiedinstaller_we
Install this software and import the .VaultCredentials file.
Document all settings and complete the installation process, because we will need it in step 5.
After these steps, the wizard asks us to generate a passphrase. This will be used as encryption key. We don’t want to transfer our servers unencrypted over the internet right?
Generate a passphrase of a minimum of 12 characters and store it in a safe place like a Password vault.
Step 4: Configuring the Configuration/Processing server
In step 4 we have to configure our Configuration/Processing server and prepare it to perform the initial replication and migration itself.
After installing the software in step 3, there will be some icons on the desktop:
We have to create a shared credential which can be used on all servers to remote access them. We can do this with the “Cspsconfigtool”. Open this and create a new credential.
You can use all sorts of credentials (local/domain), as long as they have local administrator permissions on the target machines.
In my case, the migration machine had the default “Administrator” logon so I added this credential to the tool.
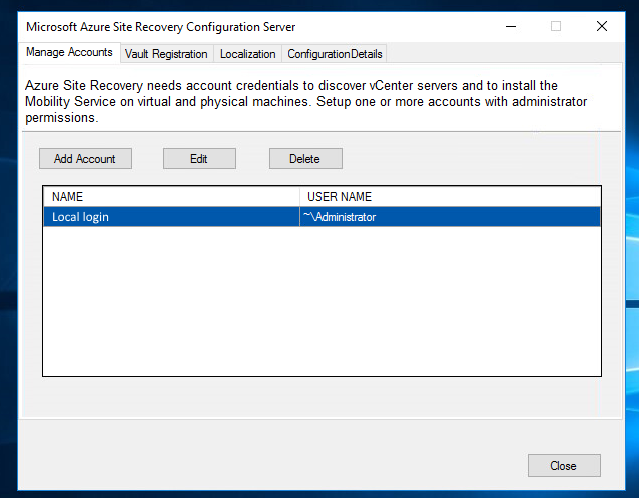
You have to create a credential for every server. This can be a “one-fits-all” domain logon, or when all logins for servers are unique add them all.
Step 5: Preparing the servers for Migration
To successfully migrate machines to Microsoft Azure, each machine must have the Mobility Agent installed. This agent establishes a connection with the Configuration/Process Server, enabling data replication.
The agent can found at two different places:
- On the Configuration/Process Server (if using the official appliance)
- %ProgramData%\ASR\home\svsystems\pushinstallsvc\repository
- By downloading it here: https://learn.microsoft.com/en-us/azure/site-recovery/vmware-physical-mobility-service-overview
On each machine you must install this agent from the Configuration/Process Server. You can easily access the folder via the network:
- \IP address\c$\ProgramData\ASR\home\svsystems\pushinstallsvc\repository
Open the installation (.exe file) on one of the servers and choose to install the Mobility service. Then click “Next” to start the installation.
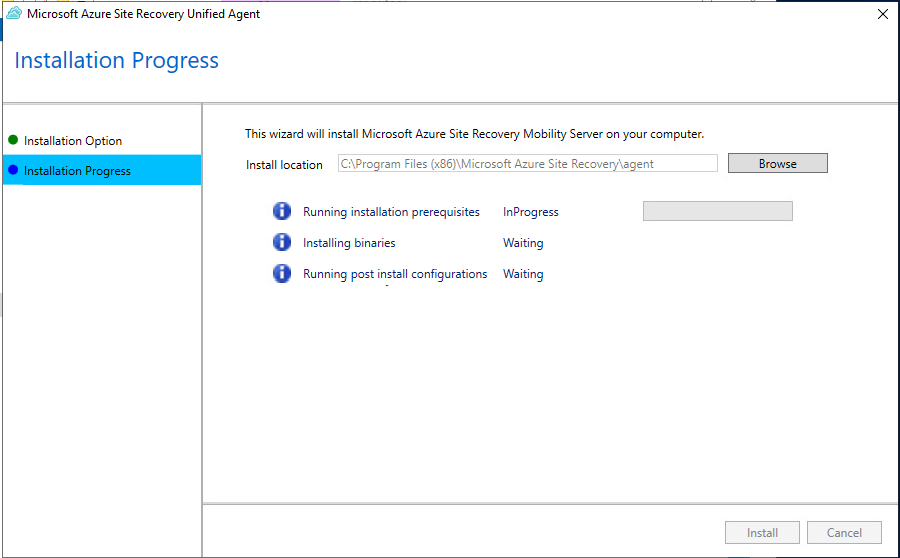
After the installation is complete (approximately 5 to 10 minutes), the setup will prompt for an IP address, passphrase, and port of the configuration server. Enter these details from step 3 and the port 443.
Once the agent is installed, the server appears in the Azure Portal. This may take 15 minutes and may require a manual refresh.
When the server is visible like in the picture above, you can proceed to step 6.
Step 6: Perform the initial replication
Now we can perform the initial replication (Phase 2) of the servers to Azure. To perform the replication of the virtual servers, open the Azure Portal and then navigate to Azure Migrate.
Under “Migration tools”, click on “Replicate”.
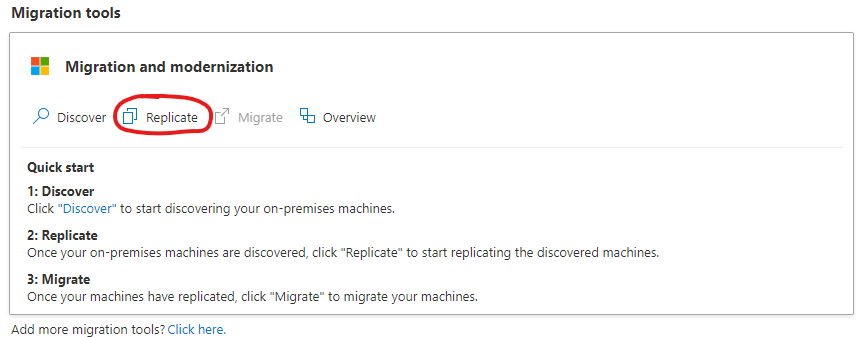
Select your option again and click Next. In my case, it is “Physical” because of using a free version of VMware ESXi.
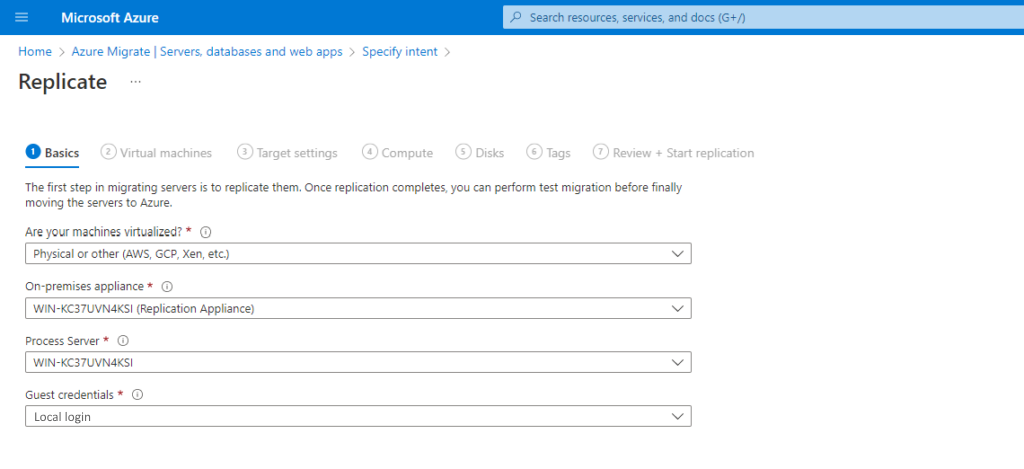
Select the machine to replicate, the processing server and the credentials you created in step 4.
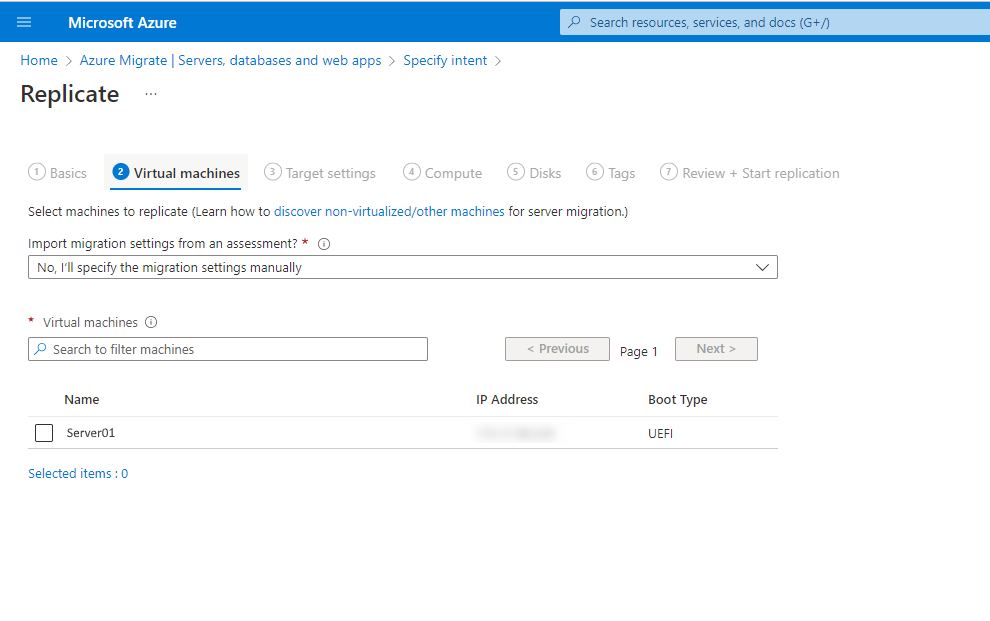
Now we have to select the machines to replicate. If all servers use the same processing server and credentials, we can select all servers here.
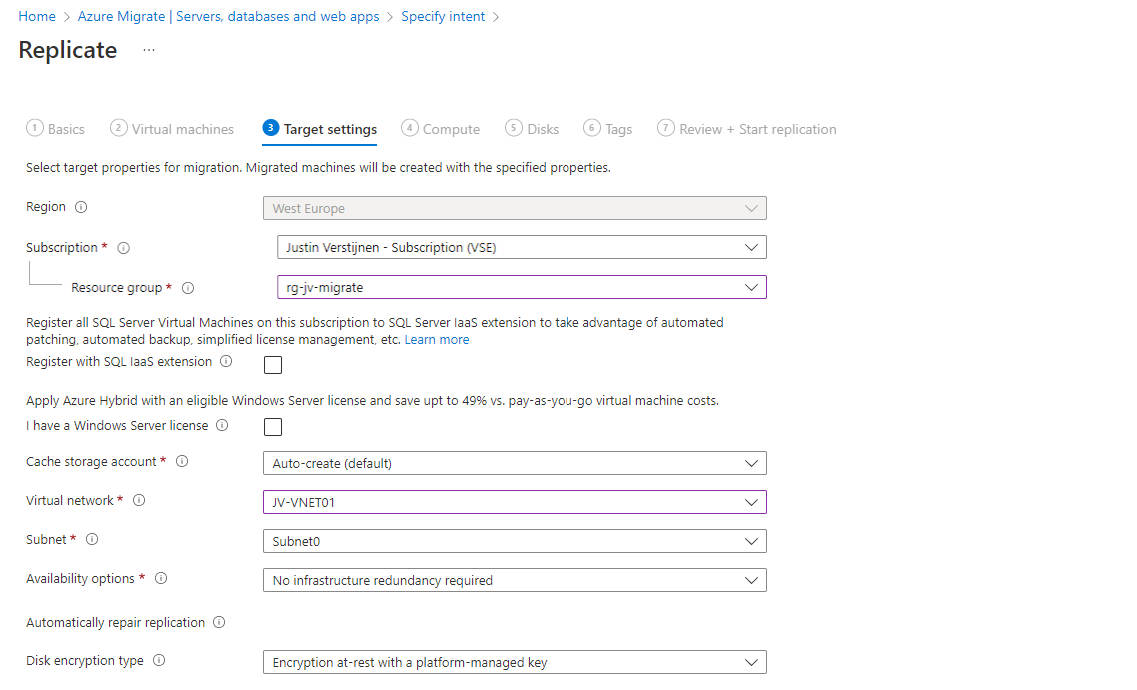
At the next page, we have to configure our target VM in Azure. Configure it to fit your needs and click “Next”.
After this wizard, the server is being synchronized at a low speed with a temporary Azure Storage account, which can take anywhere from a few hours to a few days. Once this replication is complete, the migration will be ready, and the actual final migration can be performed.
Wait for this replication to be complete and be 100% synchronized with Microsoft Azure before advancing to Step 7/Phase 3.
Step 7: The final migration
We arrived at the final step of the migration. Le Moment Suprême as they say in France.
Ensure that this migration is planned in a sort of maintenance window or when no end-users are working to minimize disruptions or data loss.
Now the source server must be shut down to prevent data loss. This also allows the new instance in Azure to take over its tasks. Shut it down properly via Windows and wait until it is fully powered off.
Then, go to the Azure Portal, navigate to Azure Migrate, and under “Migration tools”, click on “Migrate”.
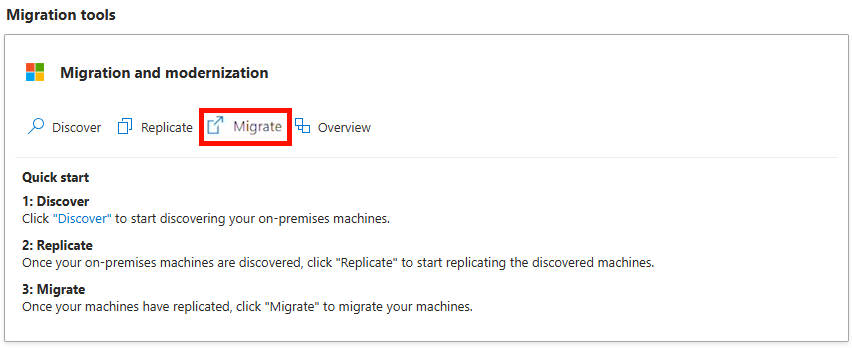
Go through the wizard and monitor the status. In my case, this process took approximately 5 minutes, after which the server was online in Microsoft Azure.
And now it’s finished.
Summary
Migrating a server or multiple servers with the Azure Migrate tool is not overly difficult. Most of the time is planning and configuring. Additionally, I encountered some issues here and there which I have described on this page along with how to prevent them.
I have also done some migration in production from on-premises to Azure with Azure Migrate and when it’s completely set-up, its a really reliable tool to perform so called “Lift-and-shift” migrations.
Thank you for reading this guide!
End of the page 🎉
You have reached the end of the page. You can navigate through other blog posts as well, share this post on X, LinkedIn and Reddit or return to the blog posts collection page. Thank you for visiting this post.
If you think something is wrong with this post or you want to know more, you can send me a message to one of my social profiles at: https://justinverstijnen.nl/about/
If you find this page and blog very useful and you want to leave a donation, you can use the button below to buy me a beer. Hosting and maintaining a website takes a lot of time and money. Thank you in advance and cheers :)
The terms and conditions apply to this post.
Save Azure costs on Virtual Machines with Start/Stop
With the Azure Start/Stop solution we can save costs in Microsoft Azure and save some environmental impact. In this guide I will explain how the solution works, how it can help your Azure solutions and how it must be deployed and configured.
Requirements
- Around 45 minutes of your time
- An Azure subscription
- One or more Azure VMs to automatically start and stop
- Basic knowledge of Azure
- No fear of JSON configurations
- Some drink of your choice
Introduction to the Start/Stop solution
The Start/Stop solution is a complete solution and collection of predefined resources built by Microsoft itself. It is purely focussed on starting VMs and stopping VMs based on some rules you can configure. The solution consists of some different resources and dependencies:
| Type of resource | Purpose |
| Application Insights | Enables live logs in the Function App for troubleshooting |
| Function App | Performs the underlying tasks |
| Managed Identity (on Function App) | Gets the permissions on the needed scope and is the “service account” for starting and stopping |
| Log Analytics Workspace | Stores the logs of operations |
| Logic Apps | Facilitate the schedule, tasks and scope and sends this to the Function App to perform |
| Action Group/Alerts | Enables notifications |
The good thing about the solution is that you can name all resources to your own likings and configure it without the need to built everything from scratch. It saves a lot of time and we all know, time is money.
To learn more about the Start/Stop solution, check out this page: https://learn.microsoft.com/en-us/azure/azure-functions/start-stop-vms/overview
After deploying the template to your resource group, you can find some Logic Apps that are deployed to the resource group:
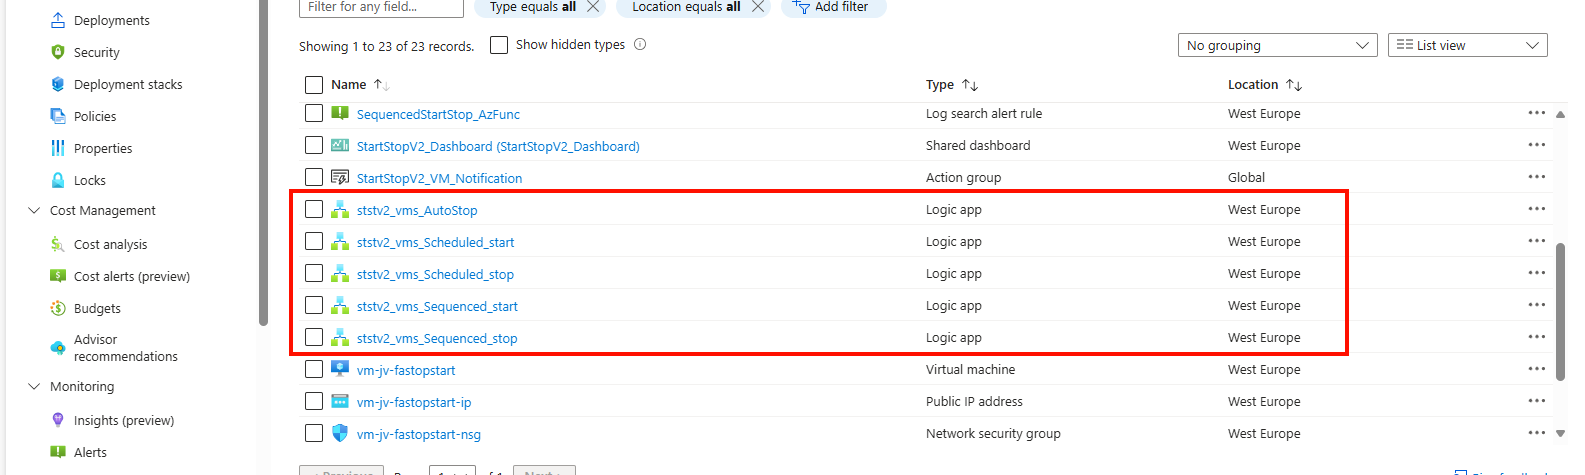
These all have their own task:
- AutoStop: Stop VMs automatically at a certain time
- Scheduled Start: Start VMs at a scheduled time
- Scheduled Stop: Stop VMs at a scheduled time
- Sequenced Start: Start VMs in a predefined order at a scheduled time
- Sequenced Stop: Stop VMs in a predefined order at a scheduled time
In this guide, I will stick to the Scheduled Start and Scheduled Stop tasks because this is what we want.
Possible savings
With this solution you can start and stop virtual machines on scheduled times. This can save Azure Consumption costs because you pay significantly less when VMs are stopped (deallocated) instead of turned on and not being used. You can see this as lights in your house. You don’t leave them all on at night do you?
Let’s say, we have 5 servers (E4s_V5 + 256GB storage) without 1 or 3 year reservations and a full week, which is 168 hours. We are using the Azure calculator for these estimations:
| Running hours | Information | Hours | Costs (a week) | % costs saved |
| 168 hours | Full week | 24/7 | $ 619 | 0% |
| 126 hours | Full week ex. nights | 6AM to 12PM | $ 517 | 16% |
| 120 hours | Only workdays | 24/5 | $ 502 | 19% |
| 75 hours | Business hours + spare | 6AM to 9PM | $ 392 | 37% |
Check out how these calculations are made: https://azure.com/e/763a431f77dc4c73868c4f250e6cf522
As you can see, the impact on the costs is great, according to the times you enable the servers. You can save up to 35% but at the expense of availability. Also, we always have to pay for our disks IP addresses so the actual savings are not linear to the running hours.
There can be some downsides to this, like users wanting to work in the evening hours or on weekends. The servers are unavailable, so is their work.
Deploying the Start/Stop solution
To make our life easier, we can deploy the start/stop function directly from a template which is released by Microsoft. You can click on the button below to deploy it directly to your Azure environment:
Source: https://learn.microsoft.com/en-us/azure/azure-functions/start-stop-vms/deploy
After clicking the button, you are redirected to the Azure Portal. Log in with your credentials and you will land on this page:
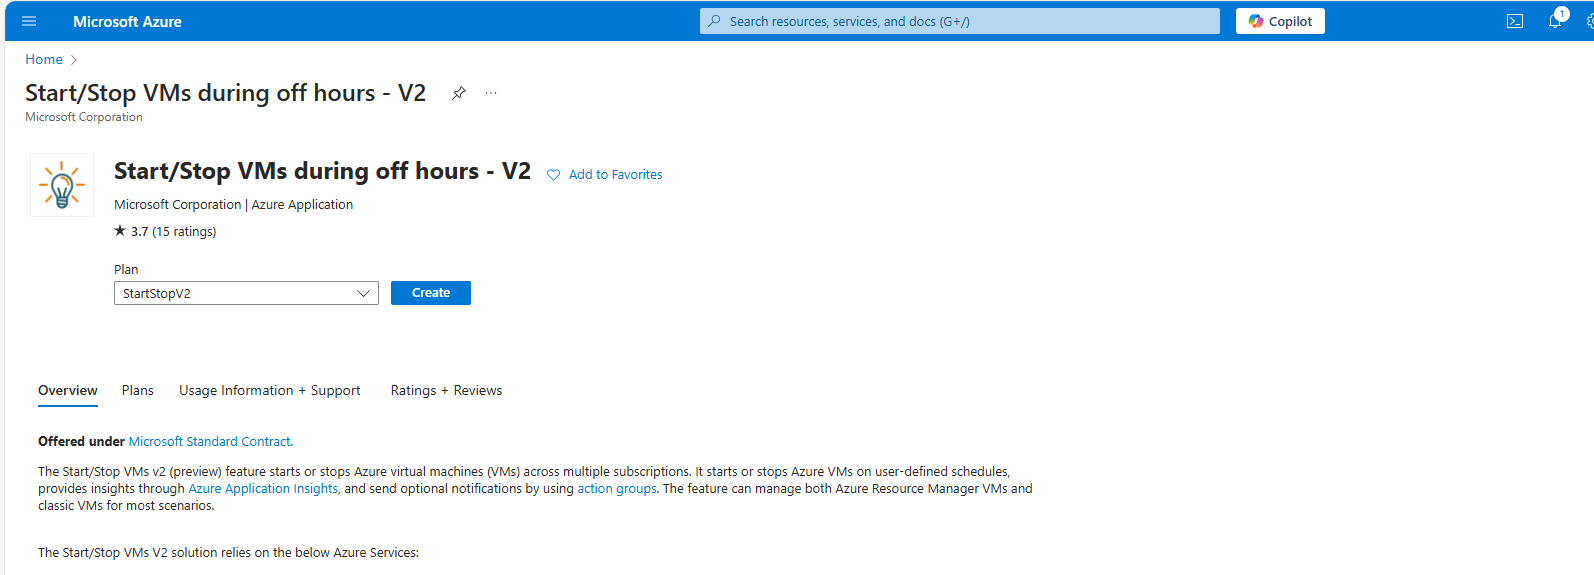
Selectthe appropriate option based on your needs and click on “Create”
- StartStopV2
- StartStopV2-AZ -> Zone Redundant
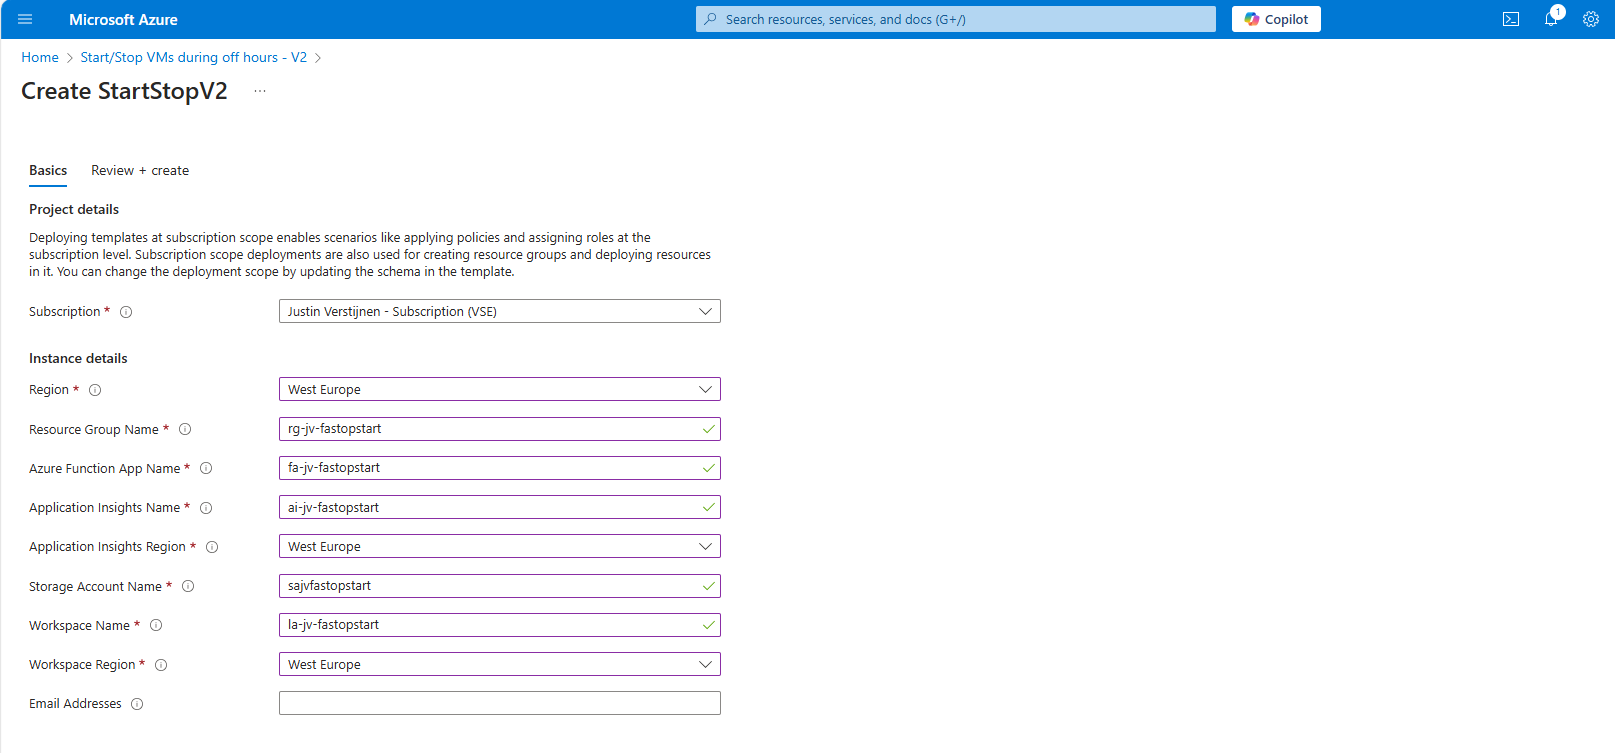
You have to define names of all the dependencies of this Start/Stop solution.
After this step, create the resource and all the required components will be built by Azure. Also all the permissions will be set correctly so this minimizes administrative effort.
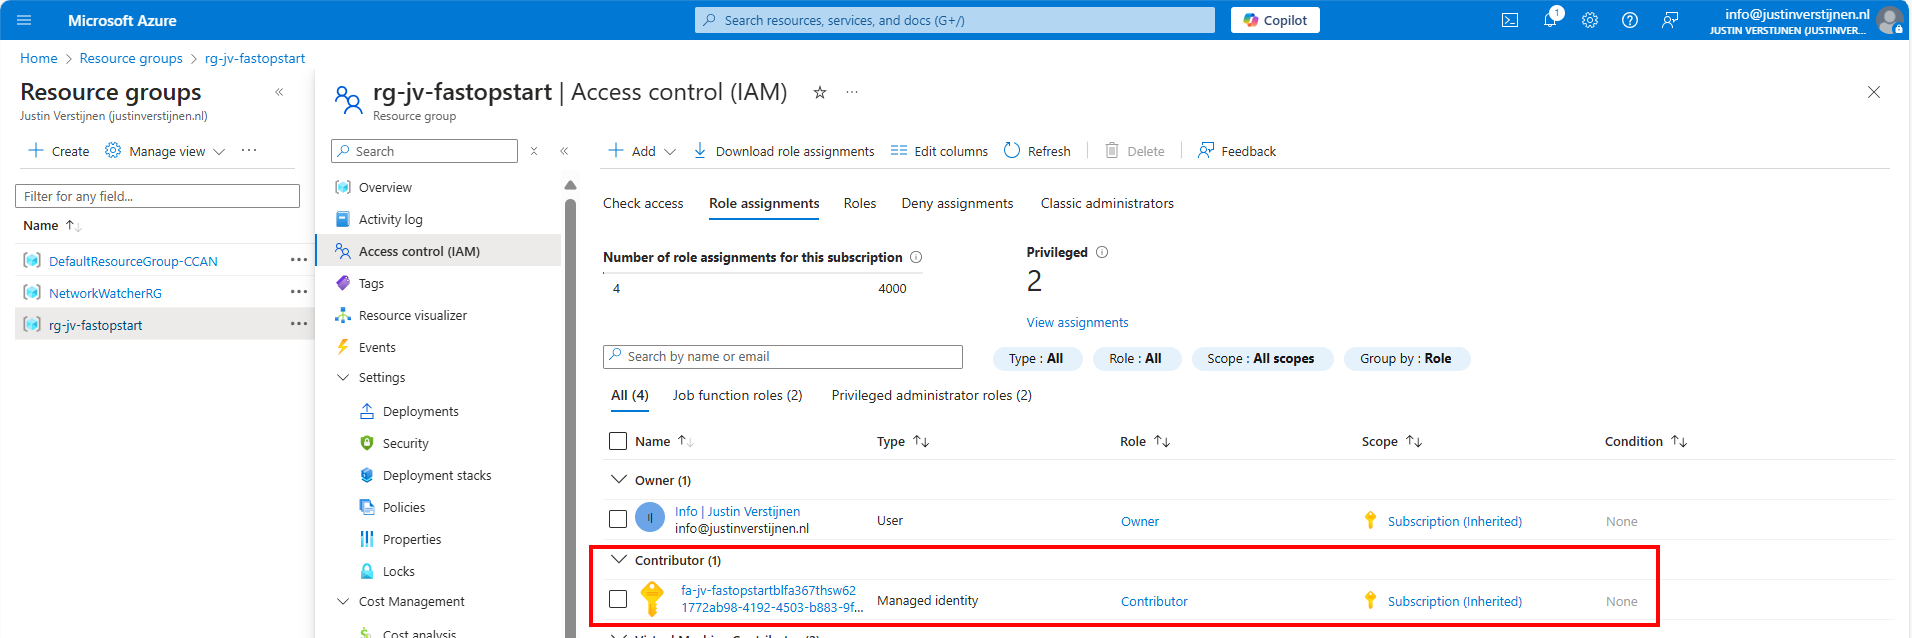
There is created a managed identity and will be assigned “Contributor” permissions on the whole resource group. This way it has enough permissions to perform the tasks needed to start and shutdown VMs.
Logic Apps described
In Azure, search for Logic Apps and go to the ststv2_vms_Scheduled_start resource.
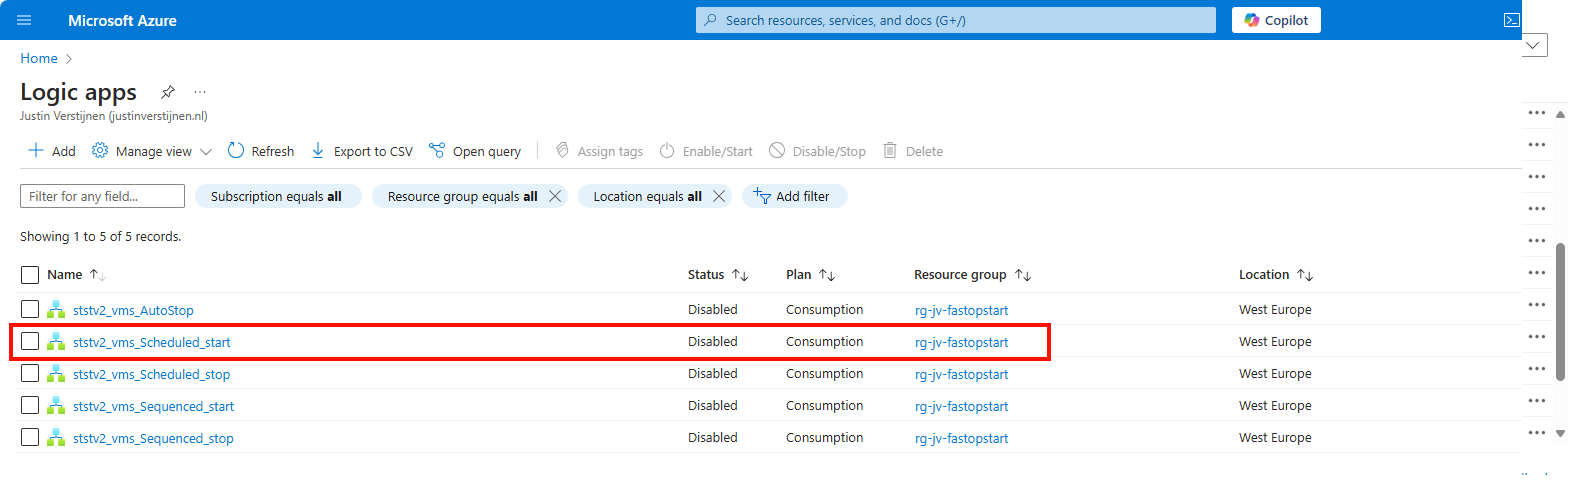
Open the Resource and on the left, click on the “Logic App Desginer”.
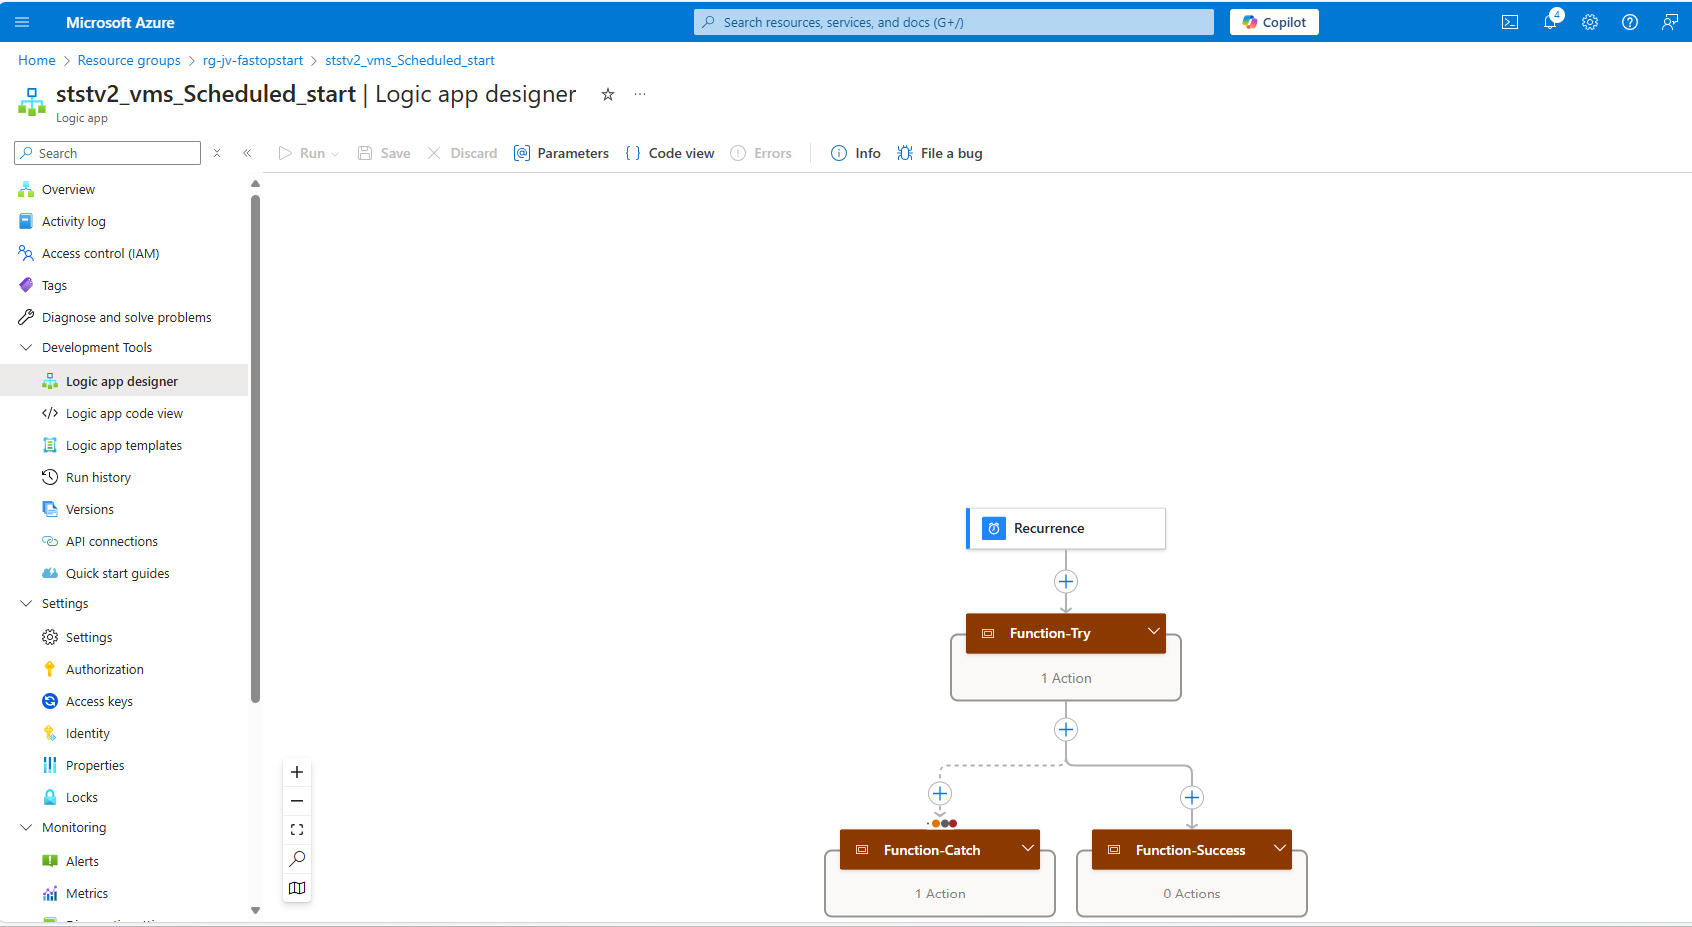
Here you see some tasks and blocks, similar to a Power Automate flow if you are familiar with those.
We can configure the complete flow here in the blocks:
- Recurrence: Here is where you define your scheduled start time of the VM(s)
- Function-Try: Here is the scope of the VMs you wil automatically start. You can define:
- Whole subscription: to start all VMs in a certain subscription
- Resource Group: to start all VMs in a certain resource group
- Single VM: To start one VM
Configure Auto start schedule
Click on the “Recurrence” block and change the parameters to your needs. In my case, I configured to start the VM on 13:45 Amsterdam time.
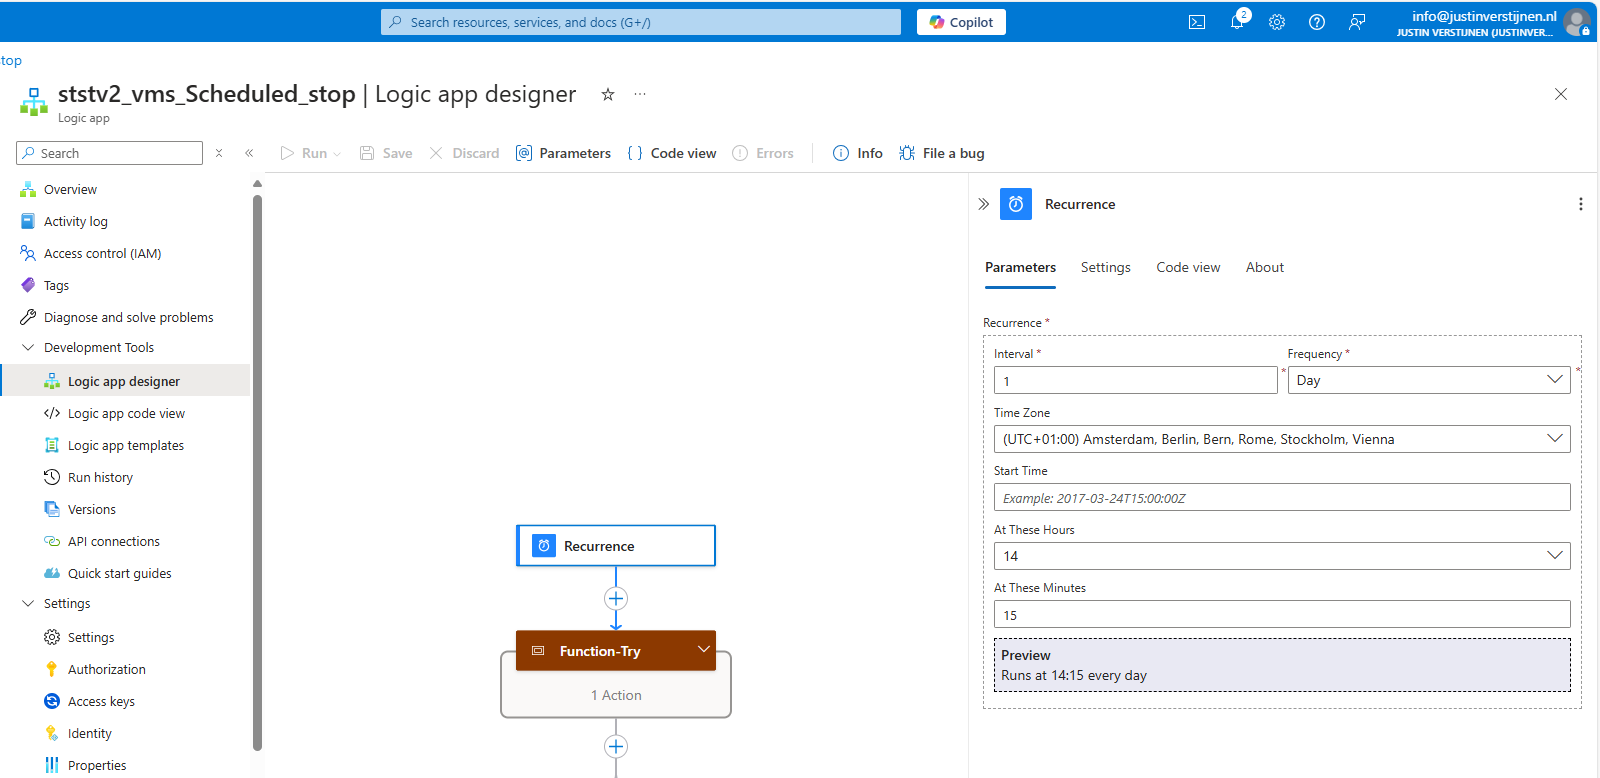
After configuring the scheduled start time, you can close the panel on the right and save the configuration.
Configuring the scope
After configuring the recurrence we can configure the scope of the start logic app. You can do that by clicking on “Function-Try”.
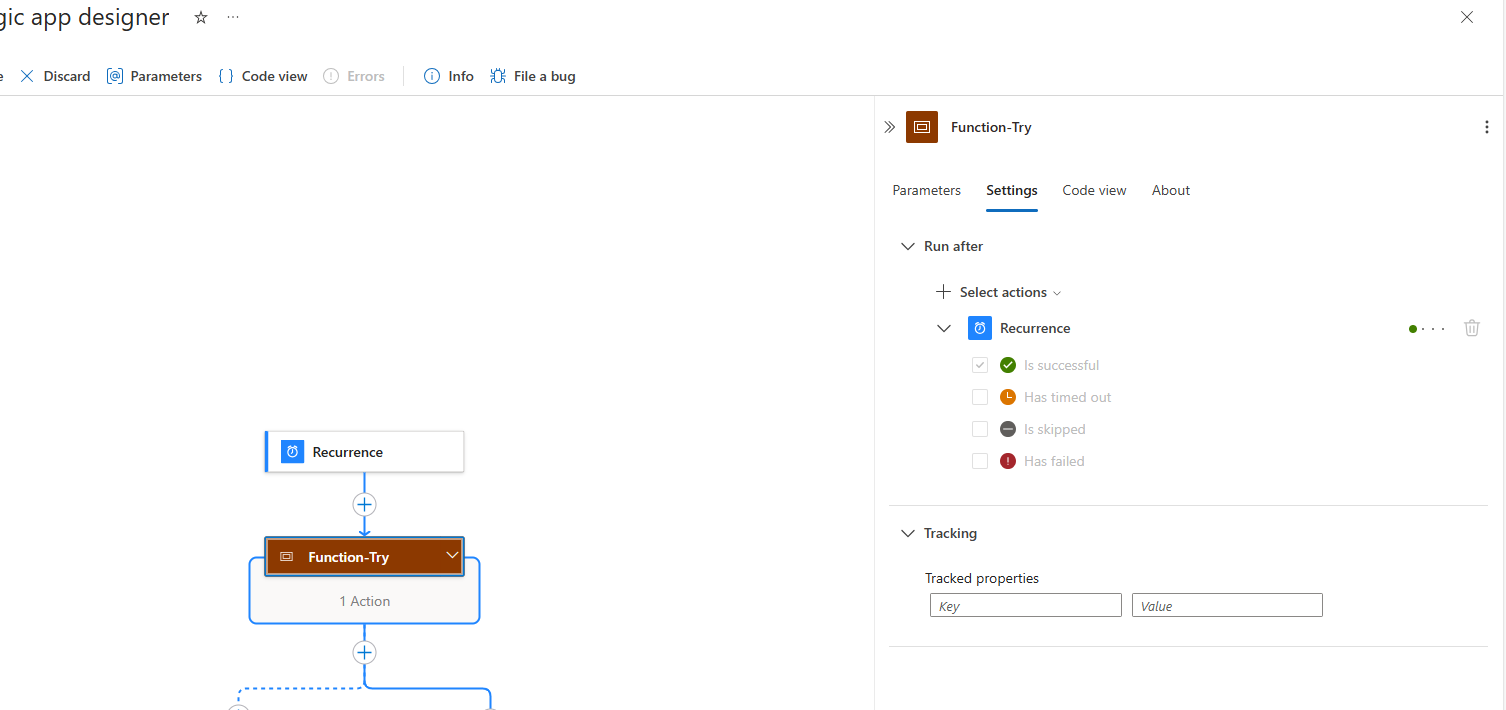
On the “Settings” tab you can see that the recurrence we configured is used in this task to check if the time is matched. If this is a “success” the rest of the Logic App will be started.
Now we have to open the “Logic app code view” option on the left and we have to make a change to the code to limit the scope of the task.
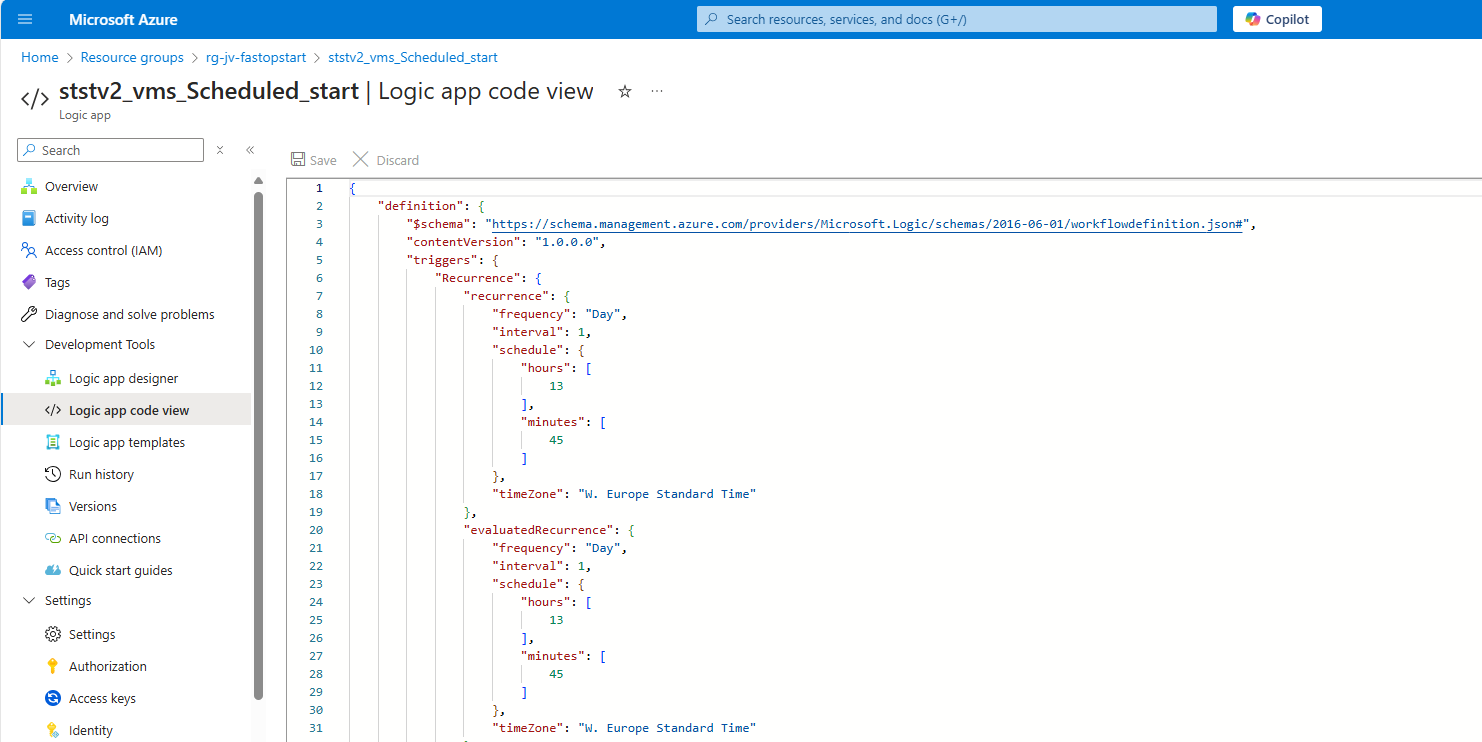
Now we have to look out for a specific part of this code which is the “Function-Try” section. In my case, this section starts on line 68:
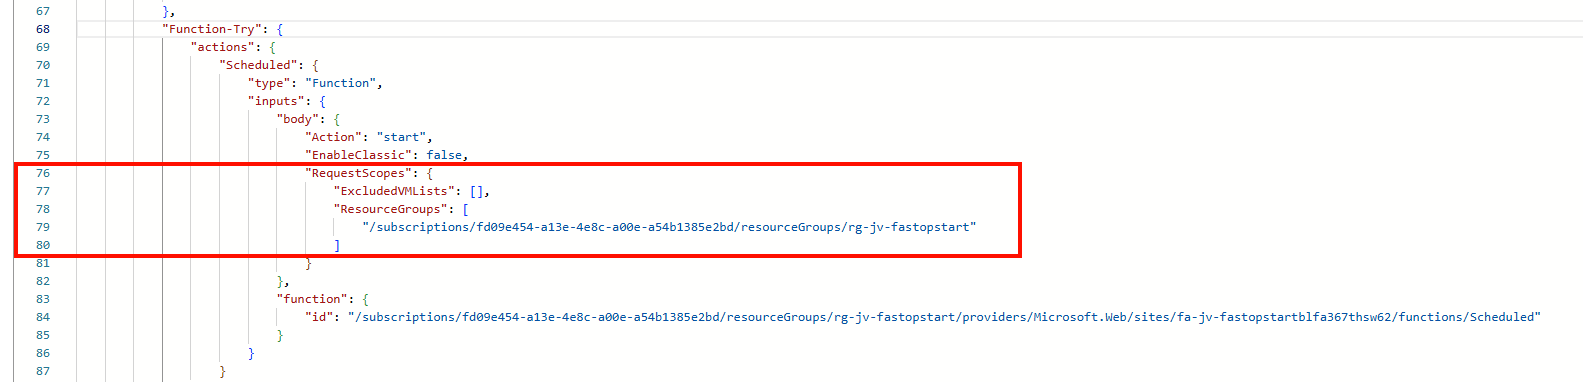
Now we have to paste the Resource ID of the resource group in here. You can find the Resource ID of the resource very fast and in a copy-paste manner by navigating to the resource group on a new browser tab, go to properties and in the field “Resource ID”:
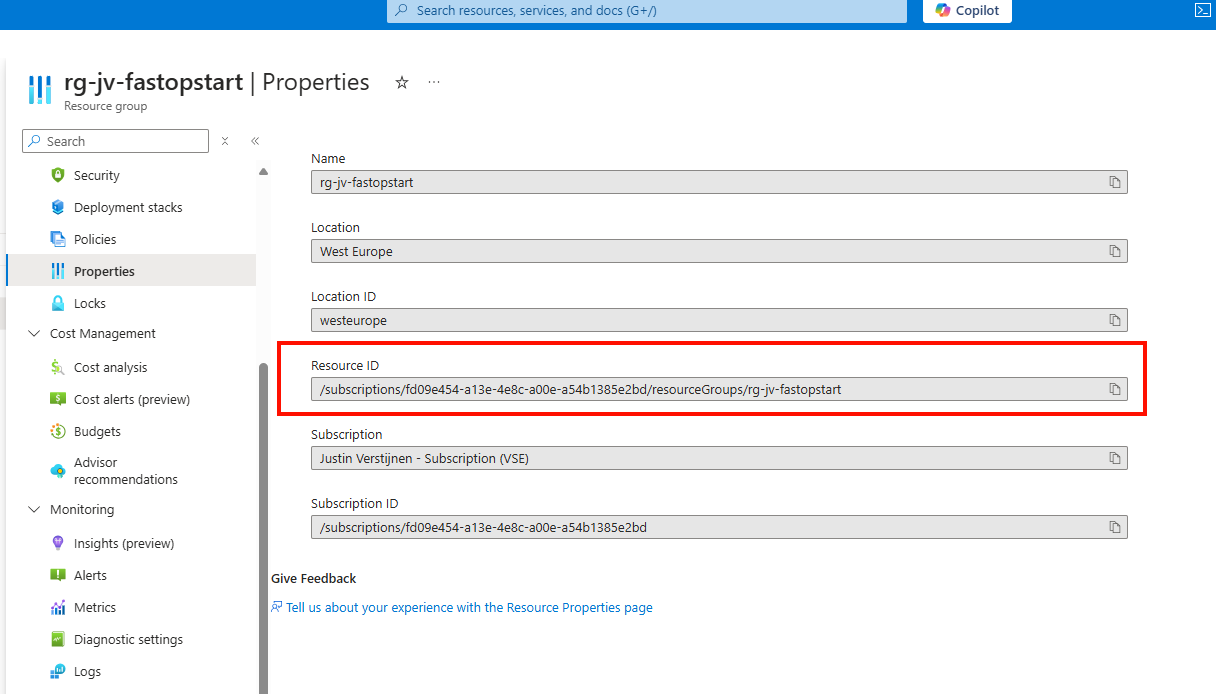
Paste the Resource ID of the resource group and head back to the logic app code view browser tab.
Paste the copied Resource ID there and add a part of code just under the “RequestScopes” parameter if you want to exclude specific VMs:
JSON
"ExcludedVMLists": [],In the “ExcludedVMLists” part you can paste the resource ID of virtual machines in the same resource group which you want to exclude from the Auto Start/Stop solution.
Now my “Function-Try” code block looks like this (line 68 to line 91):
JSON
"Function-Try": {
                "actions": {
                    "Scheduled": {
                        "type": "Function",
                        "inputs": {
                            "body": {
                                "Action": "start",
                                "EnableClassic": false,
                                "RequestScopes": {
                                    "ExcludedVMLists": [],
                                    "ResourceGroups": [
                                        "/subscriptions/fd09e454-a13e-4e8c-a00e-a54b1385e2bd/resourceGroups/rg-jv-fastopstart"
                                    ]
                                }
                            },
                            "function": {
                                "id": "/subscriptions/fd09e454-a13e-4e8c-a00e-a54b1385e2bd/resourceGroups/rg-jv-fastopstart/providers/Microsoft.Web/sites/fa-jv-fastopstartblfa367thsw62/functions/Scheduled"
                            }
                        }
                    }
                },
                "runAfter": {},
                "type": "Scope"
            }
If you want to copy and paste this code in your own configuration, you have to change the resource group to your own on line 12 above and the Resource ID of the Azure Function on line 17.
After this change, save the configuration and go back to the Home page of the logic app.
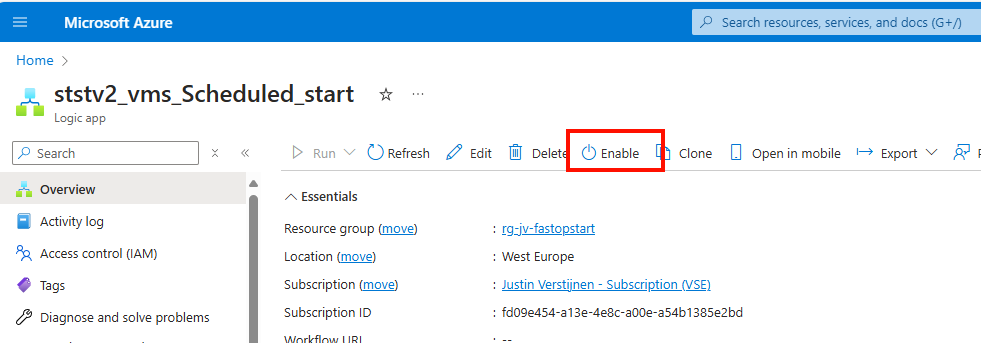
Enable the logic app by clicking “Enable”. This starts the logic app and begins checking the time and starting of the VMs.
Configure Auto stop schedule
To configure the Auto stop schedule, we have to go to the Logic app “ststv2_vms_Scheduled_stop”
Go to the Logic App Designer, just when we did with the Auto Start schedule:
Click on the “Recurrence” block and configure the desired shutdown time.
After changing it to your needs save the logic app and go to the “Logic app code view.
Again, go to Line 68 and change the resource group to the “Resource ID” of your own Resource Group. In my case, the code looks like this (line 68 to line 91):
JSON
"Function-Try": {
                "actions": {
                    "Scheduled": {
                        "type": "Function",
                        "inputs": {
                            "body": {
                                "Action": "stop",
                                "EnableClassic": false,
                                "RequestScopes": {
                                    "ExcludedVMLists": [],
                                    "ResourceGroups": [
                                        "/subscriptions/fd09e454-a13e-4e8c-a00e-a54b1385e2bd/resourceGroups/rg-jv-fastopstart"
                                    ]
                                }
                            },
                            "function": {
                                "id": "/subscriptions/fd09e454-a13e-4e8c-a00e-a54b1385e2bd/resourceGroups/rg-jv-fastopstart/providers/Microsoft.Web/sites/fa-jv-fastopstartblfa367thsw62/functions/Scheduled"
                            }
                        }
                    }
                },
                "runAfter": {},
                "type": "Scope"
            }
In the “ExcludedVMLists” part you can paste the resource ID of virtual machines in the same resource group which you want to exclude from the Auto Start/Stop solution.
After configuring the Function-Try block you can save the Logic app and head to its Home page and enable the Logic App to make it active.
Let’s check the Auto Start outcome
Now I configured the machine to start on 13:45. You will not see the change directly in the Azure Portal but it will definitely start the VM.
At 13:45:
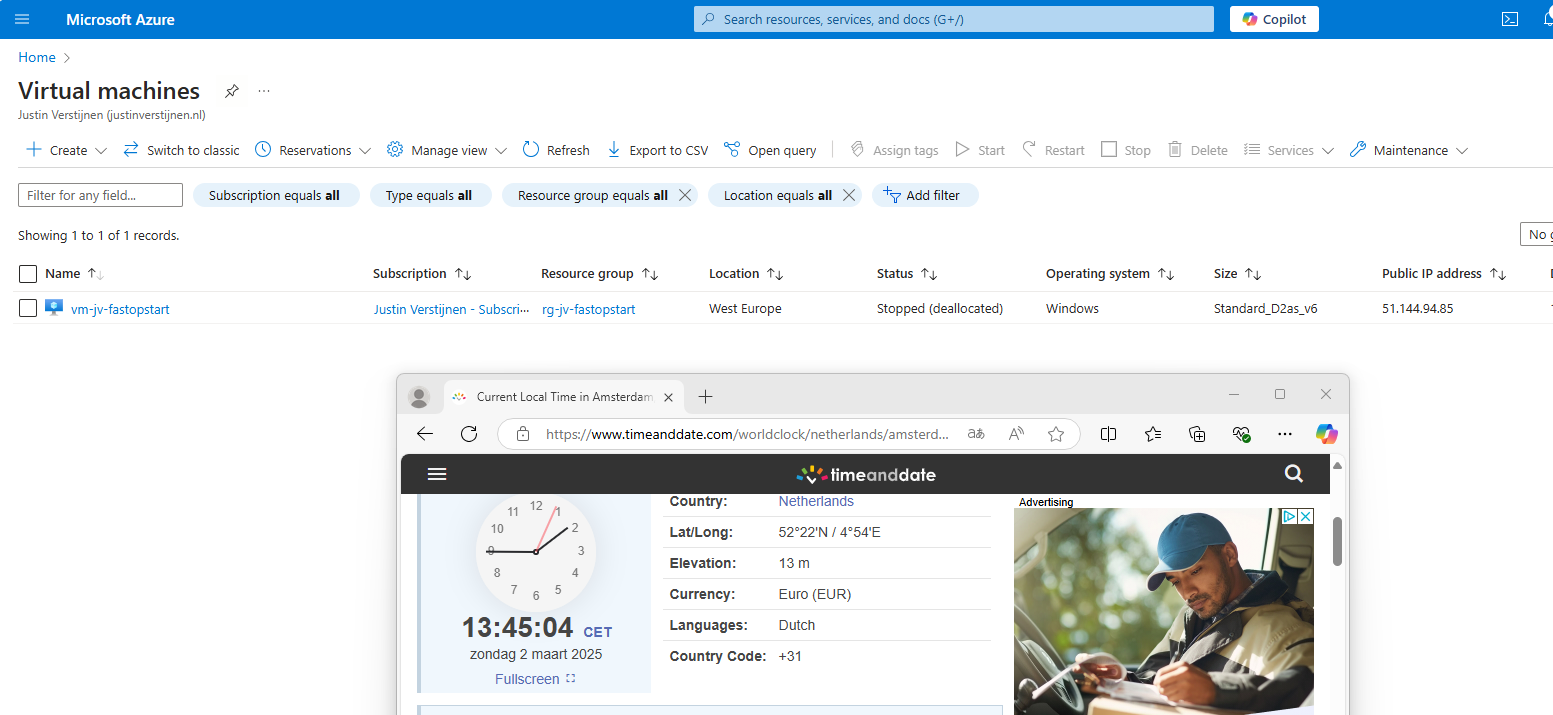
And some minutes later:
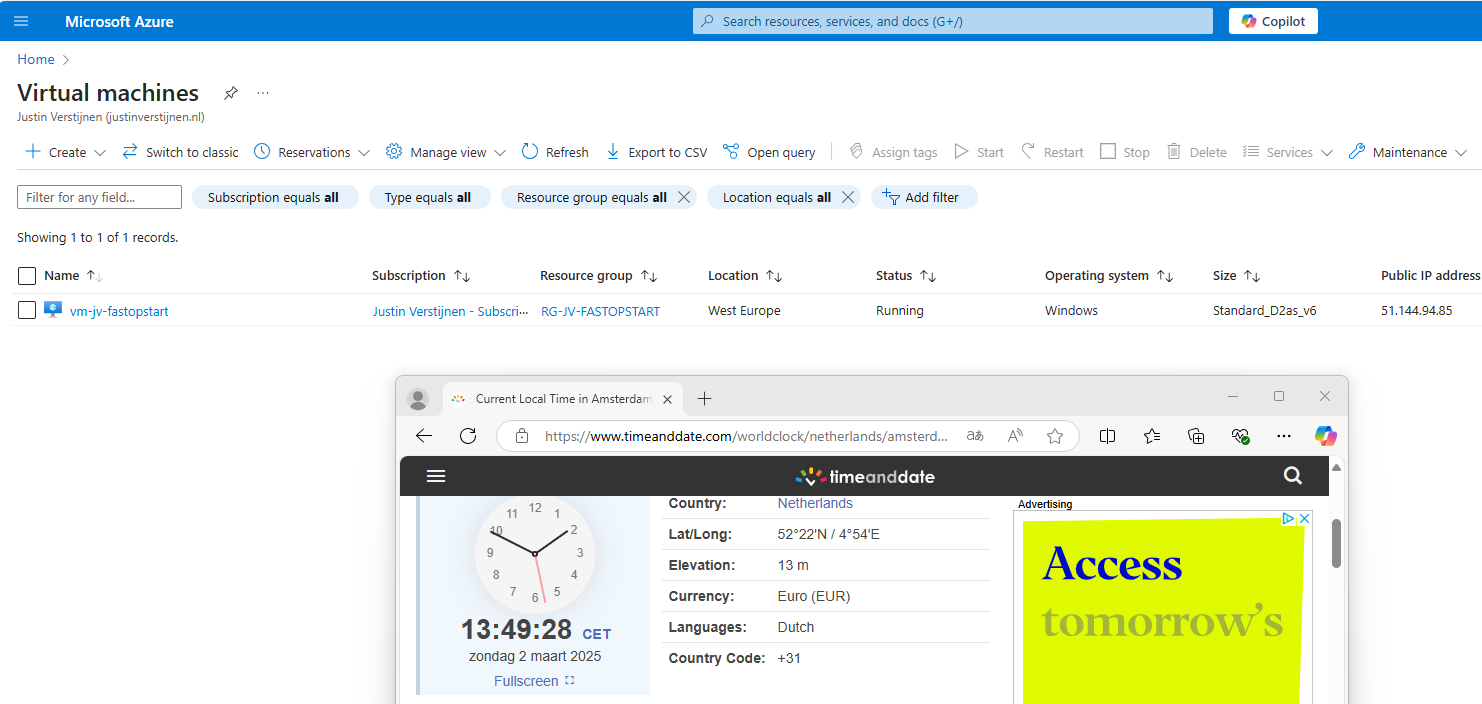
Now the starting procedure will work for all your VMs in that same resource group, excluding VMs you excluded.
Let’s check the Auto Stop outcome
Now I configured the machine to stop on 14:15. My VM is running at this time to test if it will shutdown.
At 14:15:
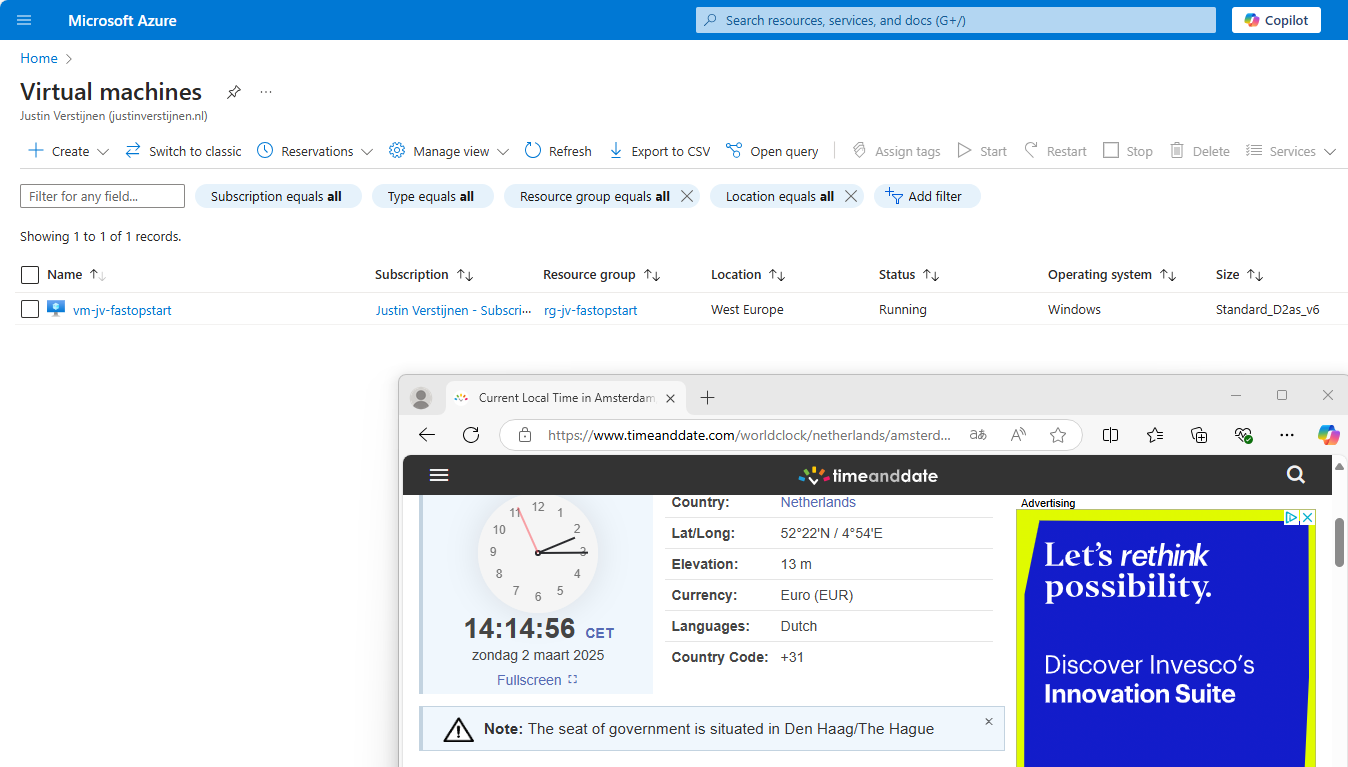
And some time later:
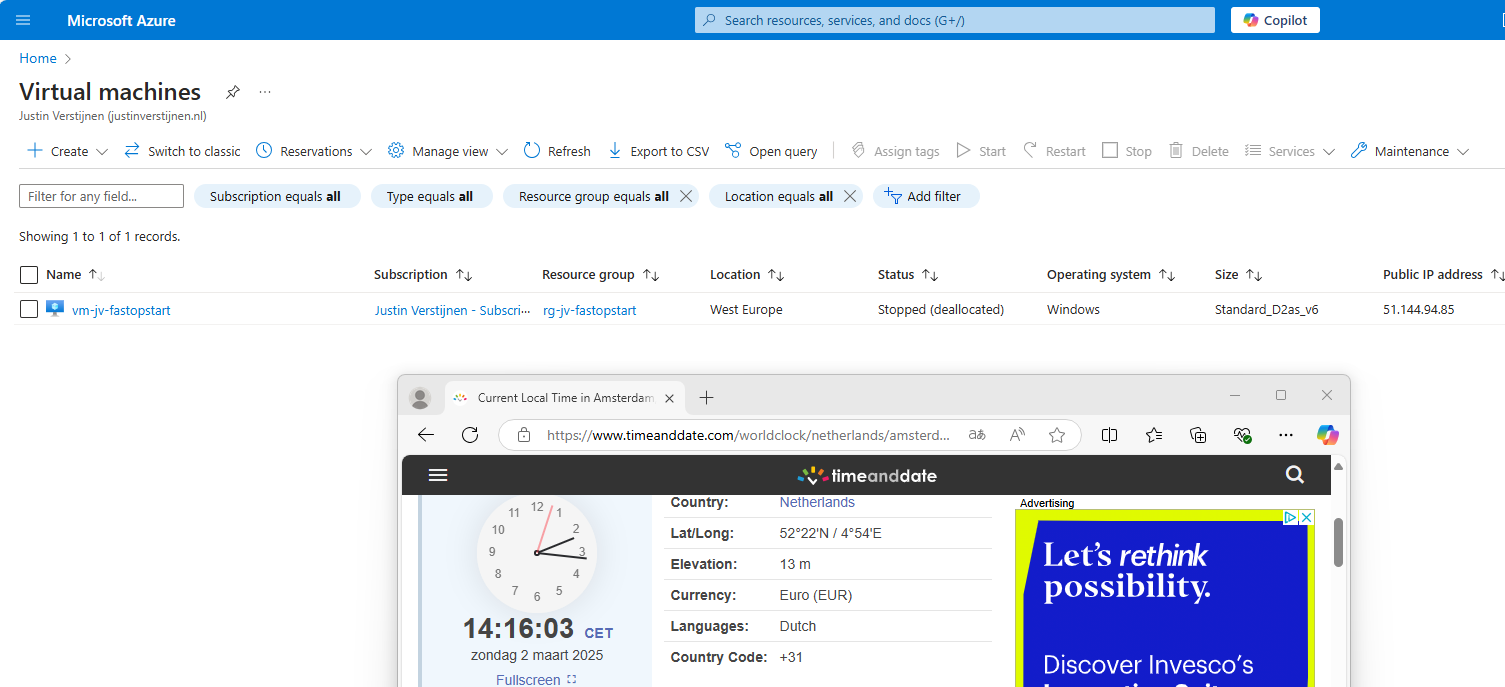
This confirms that the solution is working as intended.
Troubleshooting the Start/Stop solution
There may be some cases that the solution does not work or gives other errors. We can troubleshoot some basic things in order to solve the problem.
- Check the status of the Logic App -> Must be “Enabled”
- Check the trigger of the Logic App
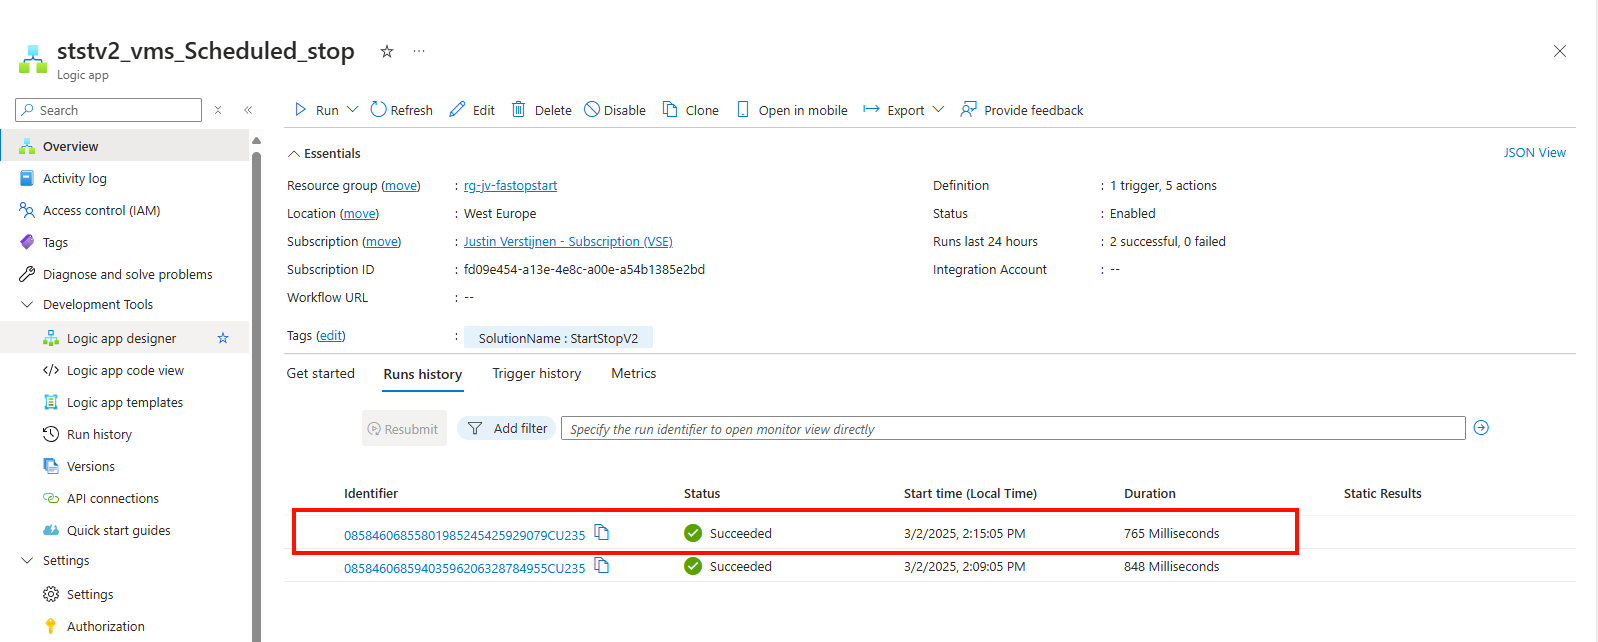
Maybe your time or timezone is incorrect. By going to the logic app and then the “Runs history” tab, you can view if the logic app has triggered at the right time.
- Check permissions
The underlying Azure Function app must have the right permissions in your Resource Group to be able to perform the tasks. You can check the permissions by navigating to your Resource Group, and them check the Access Control (IAM) menu.
Double check if the right Functions App/Managed Identity has “Contributor” permissions to the resource group(s).
Configuring notifications
In some cases, you want to be alerted when an automatic tasks happens in Azure so if any problem ill occur, you are aware of the task being executed.
You can configure notifications of this solution by searching for “Notifications” in the Azure Portal and heading to the deployed Action Group.
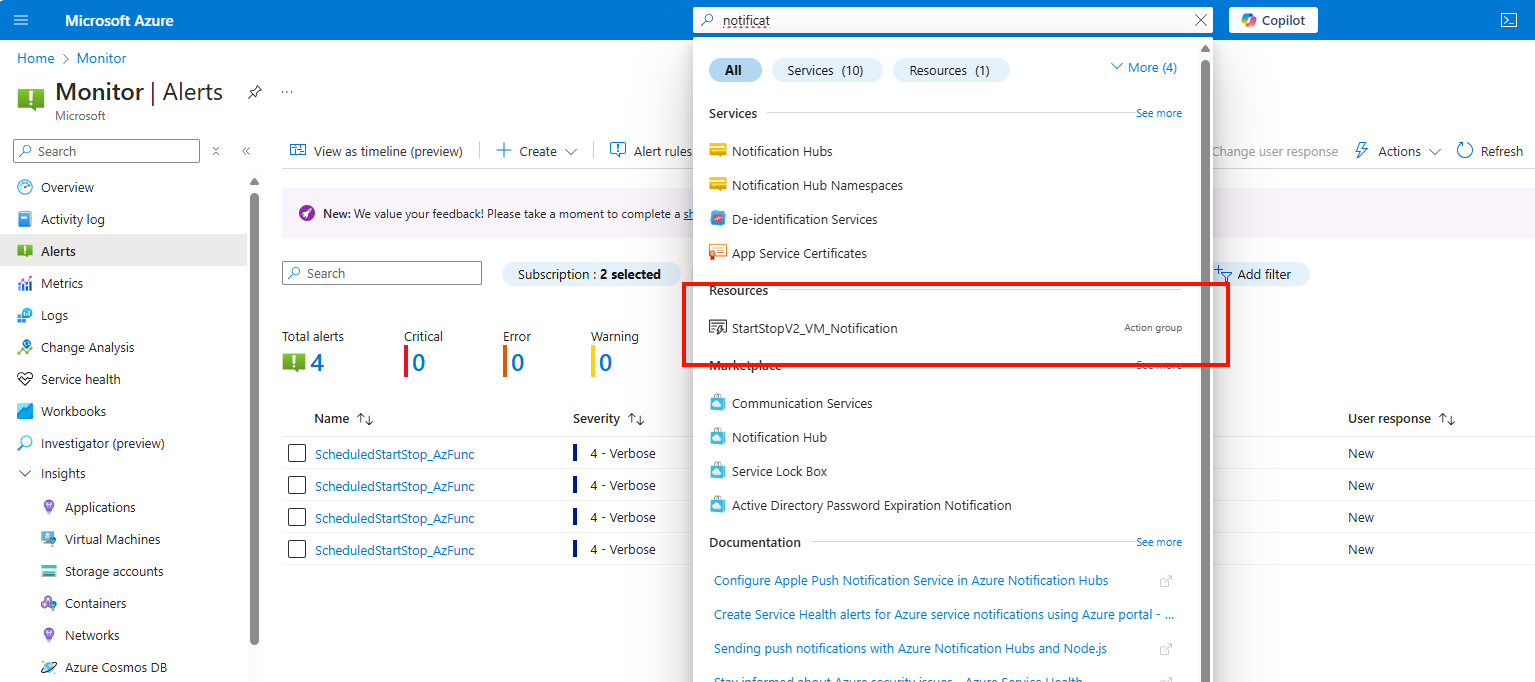
Here you can configure what type of alert you want to receive when some of the tasks are executed.
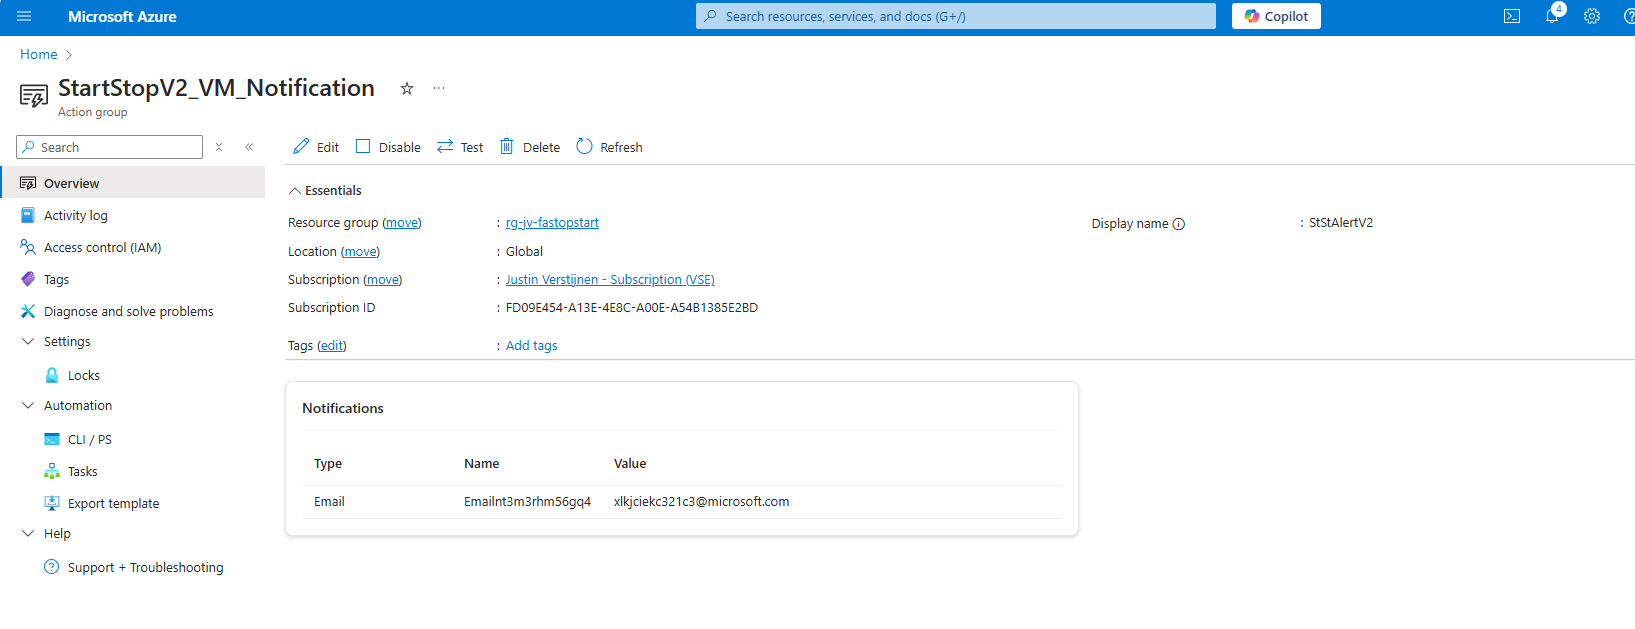
Click on the “Edit” button to edit the Action Group.
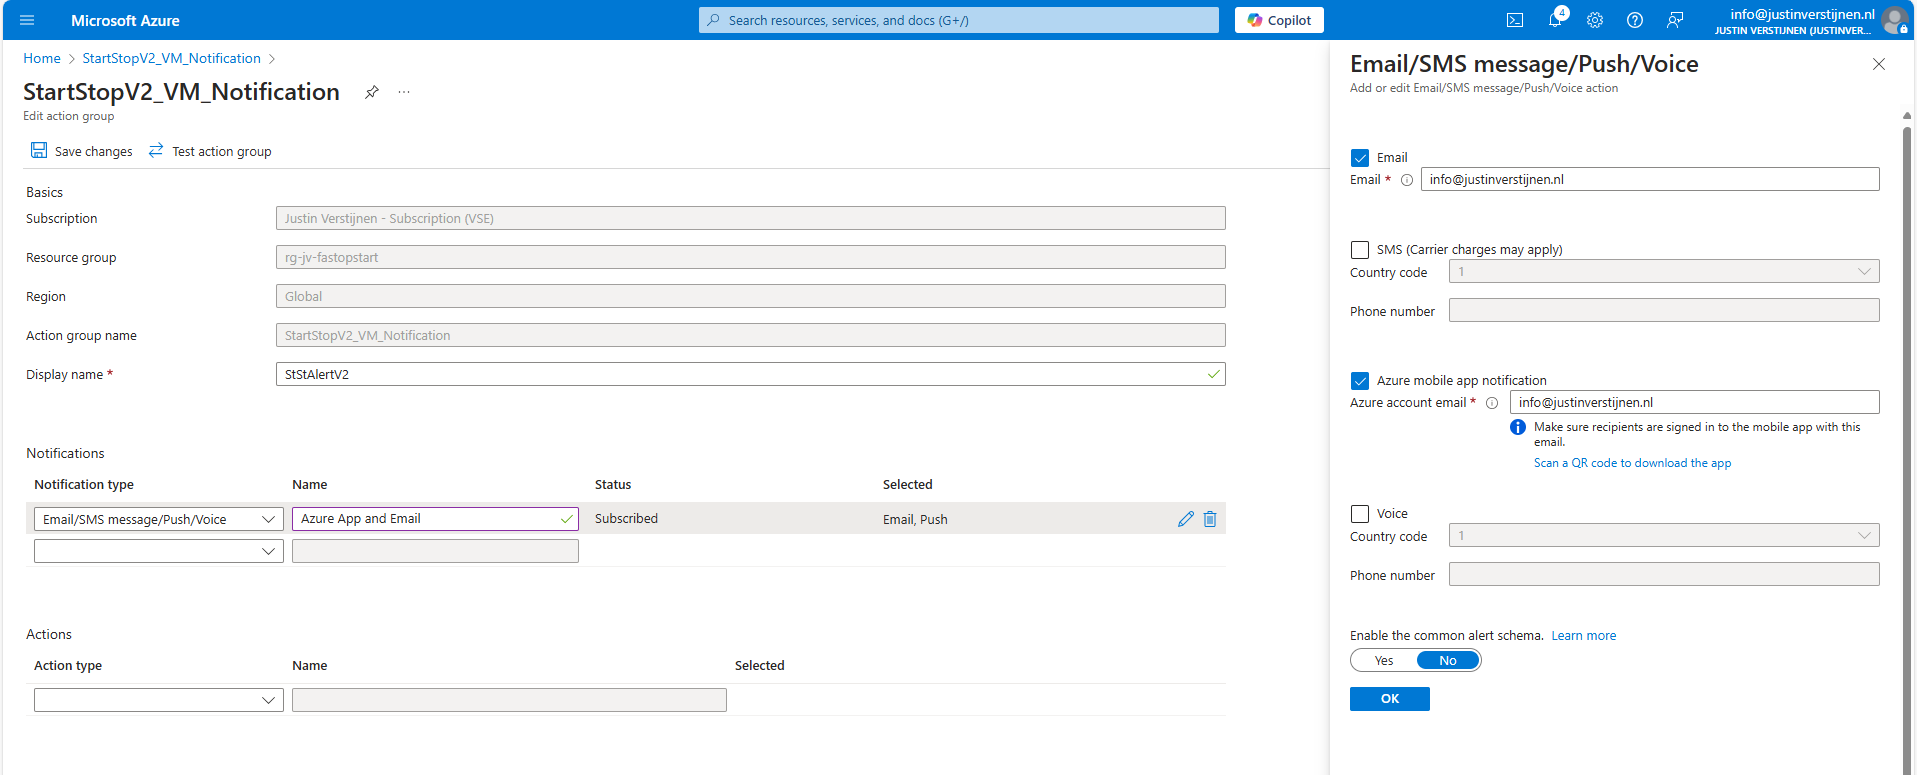
Here you can configure how you want to receive the notifications. Be aware that if this task is executed every day, this can generate a huge amount of notifications.
This is an example of the email message you will receive:
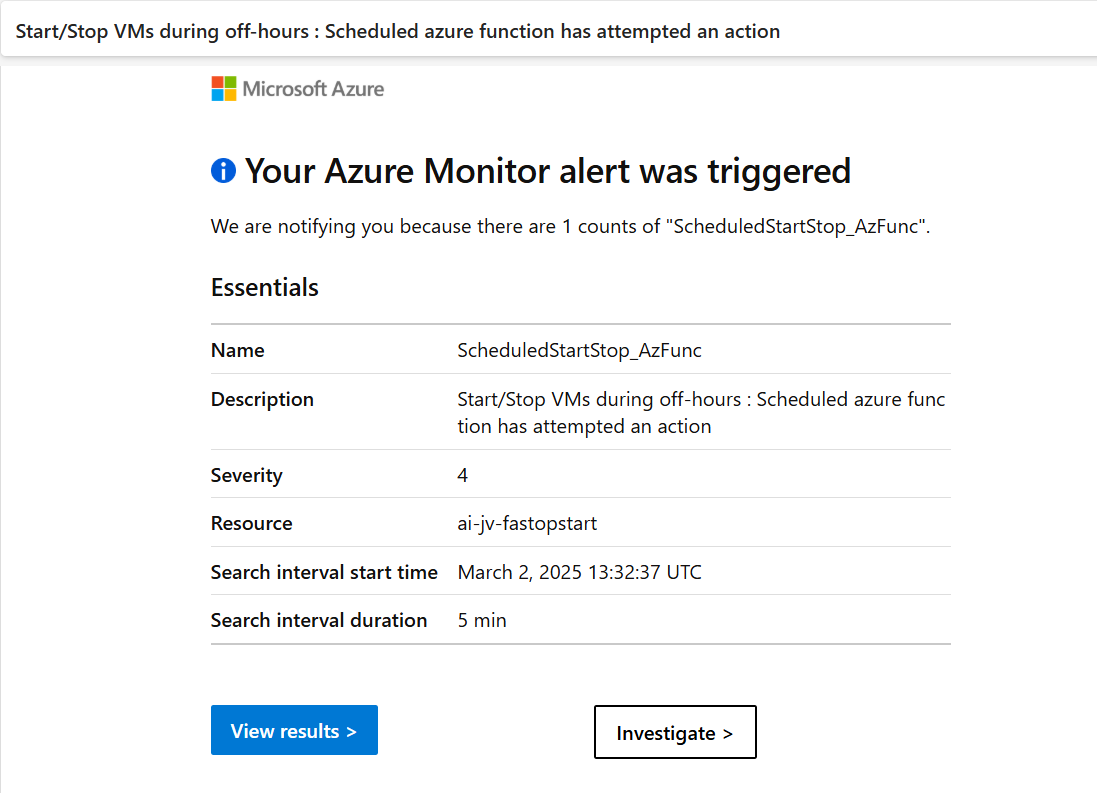
You can further change the texting of the notification by going into the alerts in Azure.
Summary
This solution is a excellent way to save on Azure VM consumption costs and shutting down VMs when you don’t need them. A great example of how computing in Azure can save on costs and minimize usage of the servers. Something which is a lot more challenging in On-premises solutions.
This solution is similar to the Scaling Plans you have for Azure Virtual Desktop, but then for non-AVD VMs.
Thank you for reading this page and I hope I helped you by saving costs on VM consumption in Microsoft Azure.
End of the page 🎉
You have reached the end of the page. You can navigate through other blog posts as well, share this post on X, LinkedIn and Reddit or return to the blog posts collection page. Thank you for visiting this post.
If you think something is wrong with this post or you want to know more, you can send me a message to one of my social profiles at: https://justinverstijnen.nl/about/
If you find this page and blog very useful and you want to leave a donation, you can use the button below to buy me a beer. Hosting and maintaining a website takes a lot of time and money. Thank you in advance and cheers :)
The terms and conditions apply to this post.
Deep dive into IPv6 with Microsoft Azure
In Microsoft Azure, we can build servers and networks that use IPv6 for their connectivity. This is especially great for your webservers, where you want the highest level of availability for your users. This is achieved the best using both IPv4 and IPv6 protocols. In this guide we do a deep dive into IPv6 in Microsoft Azure and I will show some practical examples of use of IPv6 in Azure.
Requirements
- Basic knowledge of Azure and IPv4 and IPv6
- Reading this guide prior is recommended: https://justinverstijnen.nl/basic-ipv6-explaination/
- Around 45 minutes of your time
- An Azure subscription to test and succeed on
- A cup of coffee or drink of your choice :)
Creating a Virtual Network (VNET) with IPv6
By default, Azure pushes you to use an IPv4 address space when creating a virtual network in Azure. Now this is the best understandable and easy version of addressing.
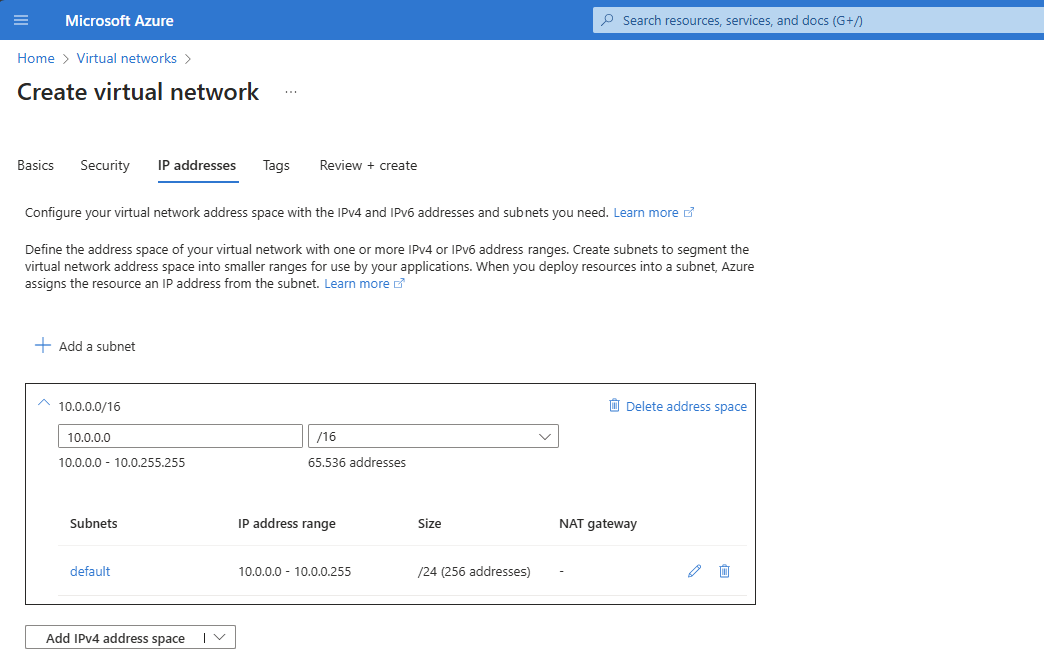
In some cases we want to give our IPv6 addresses only, IPv4 addresses only or use dual-stack where we assign both IPv4 and IPv6 to our resources.
In the wizard, we can remove the default generated address space and design our own, IPv6 based address space like I have done below:

This space is a block (fd00::/8) which can be used for private networks and for example in our case. These are not internet-routable.
In the same window, we can configure our subnets in the IPv6 variant:
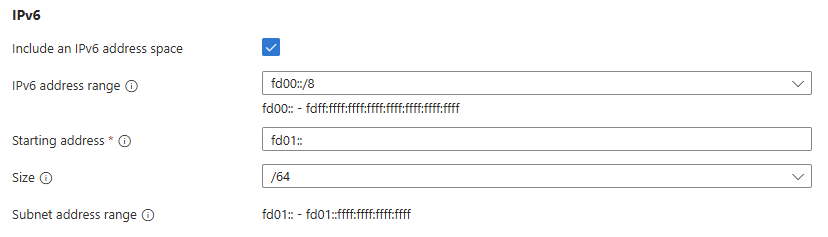
Here I created a subnet called Subnet-1 which has address block fd01::/64 which means there are 264 (18 quintillion) addresses possible in one subnet. Azure only supports /64 subnets in IPv6, this because this has the best support over all devices and operating systems worldwide.
For demonstration purposes I created 3 subnets where we can connect our resources:
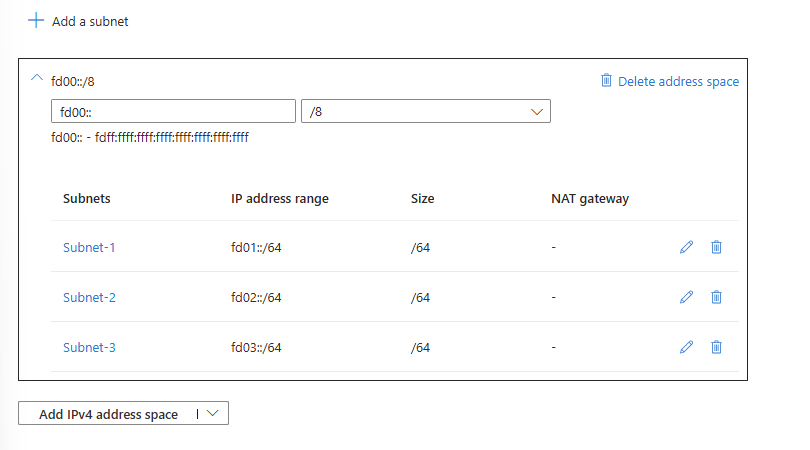
And we are done :)
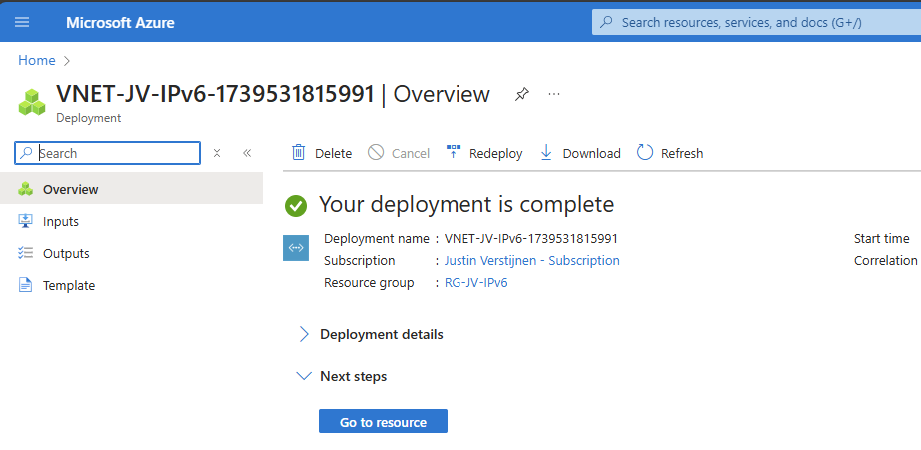
Connecting a virtual machine (VM) to our IPv6 network
Now comes the more difficult part of IPv6 and Azure. By default, Azure pushes to use IPv4 for everything. Some options for IPv6 are not possible through the Azure Portal. Also every virtual machine requires a IPv4, selecting a subnet with only IPv6 gives an error:

So we have to add IPv4 address spaces to our IPv6 network to connect machines. This can be done through the Azure Portal:
Go to your virtual network and open “Address space”
Here I added a 10.0.0.0/8 IPv4 address space:

Now we have to add IPv4 spaces to our subnets, what I have already done:
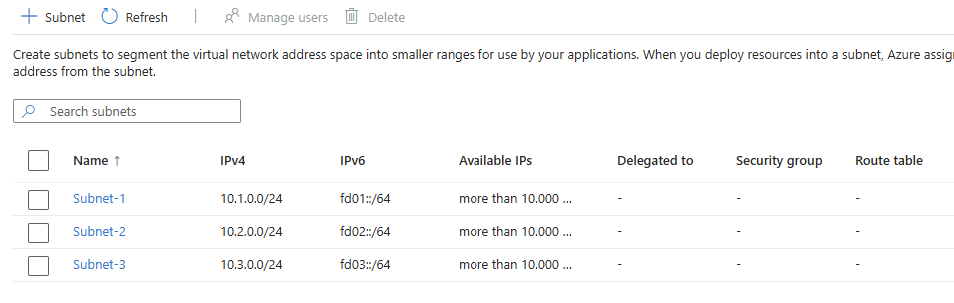
Add the virtual machine to our network:
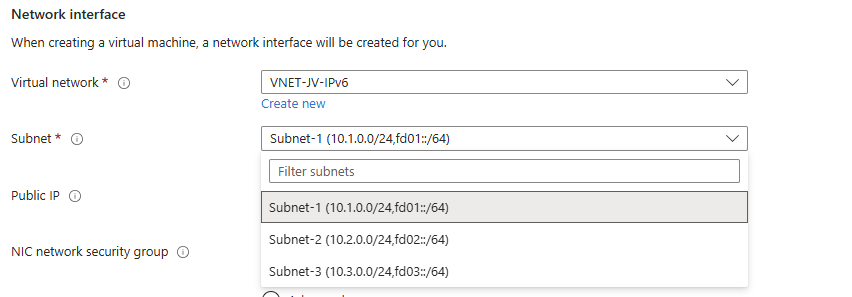
We have now created a Azure machine that is connected to our IPv4 and IPv6 stacked network.
After that’s done, we can go to the network interface of the server to configure the network settings. Add a new configuration to the network interface:
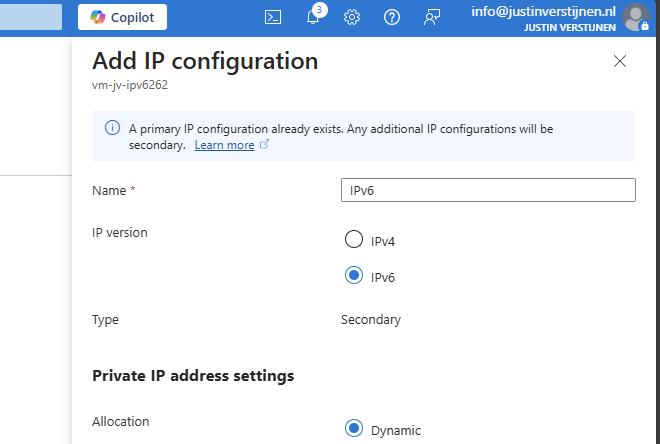
Here we can use IPv6 for our new IP configuration. The primary has to be leaved intact because the machine needs IPv4 on its primary interface. This is a Azure requirement.
Now we have assigned a new IP configuration on the same network interface so we have both IPv4 and IPv6 (Dual-stack). Lets check this in Windows:
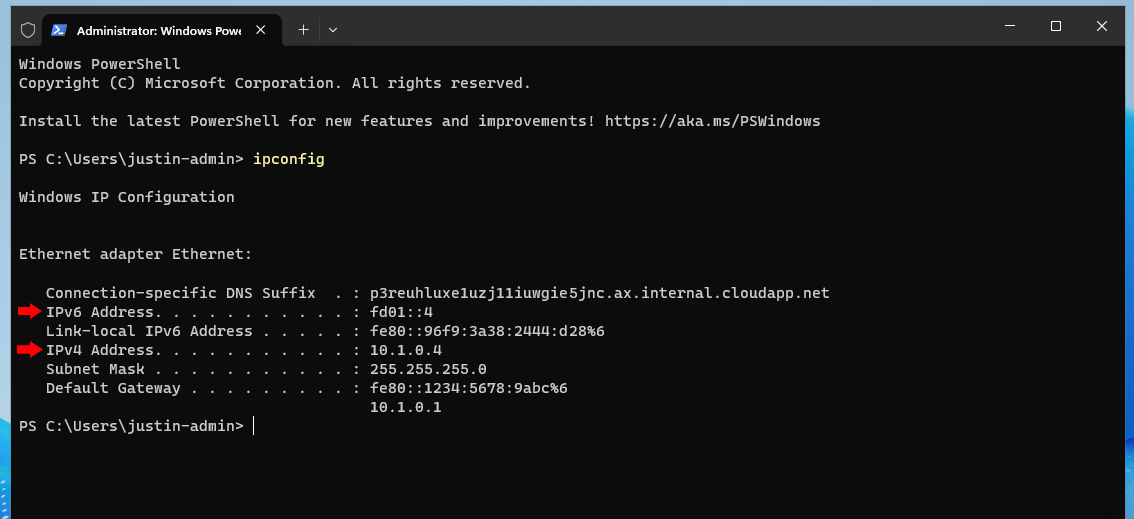
Here you can see that we have both IPv4 and IPv6 addresses in our own configured address spaces.
Create a IPv6 Public IP address
Now the cherry on the pie (like we say in dutch) is to make our machine available to the internet using IPv6.
I already have a public IPv4 address to connect to the server, and now I want to add a IPv6 address to connect to the server.
Go in the Azure Portal to “Public IP Addresses” and create a new IP address.
At the first page you can specify that it needs to be an IPv6 address:
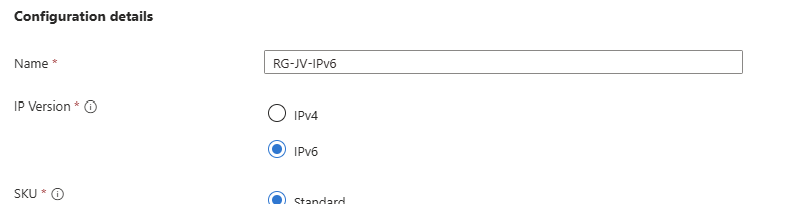
Now we can go to the machine and assign the newly created public IP address to the server:
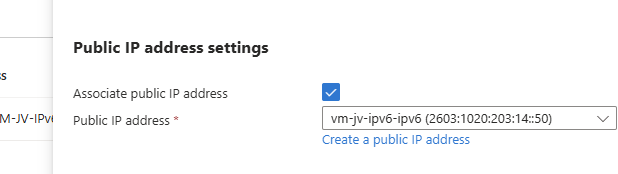
My complete configuration of the network looks like this:
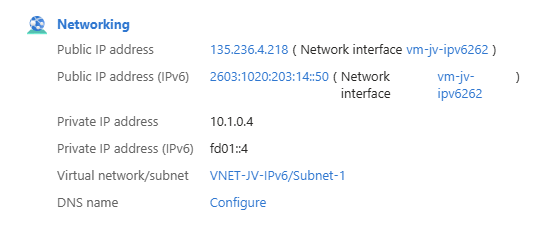
Now our server is available through IPv6. Good to mention that you may not be possible to connect to the server with this address because of 6-to-4 tunneling and ISP’s not supporting IPv6. In this case we have to use the IPv4 method.
Inter-subnet connectivity with IPv6
To actually test the IPv6 connectivity, we can setup a webserver in one of the subnets and try if we can make a connection with IPv6 to that device. I used the marketplace image “Litespeed Web Server” to serve this purpose.
I used a simple webserver image to create a new VM and placed it in Subnet-2. After that I created a secondary connection just like the other Windows based VM and added a private and a public IPv6 address:
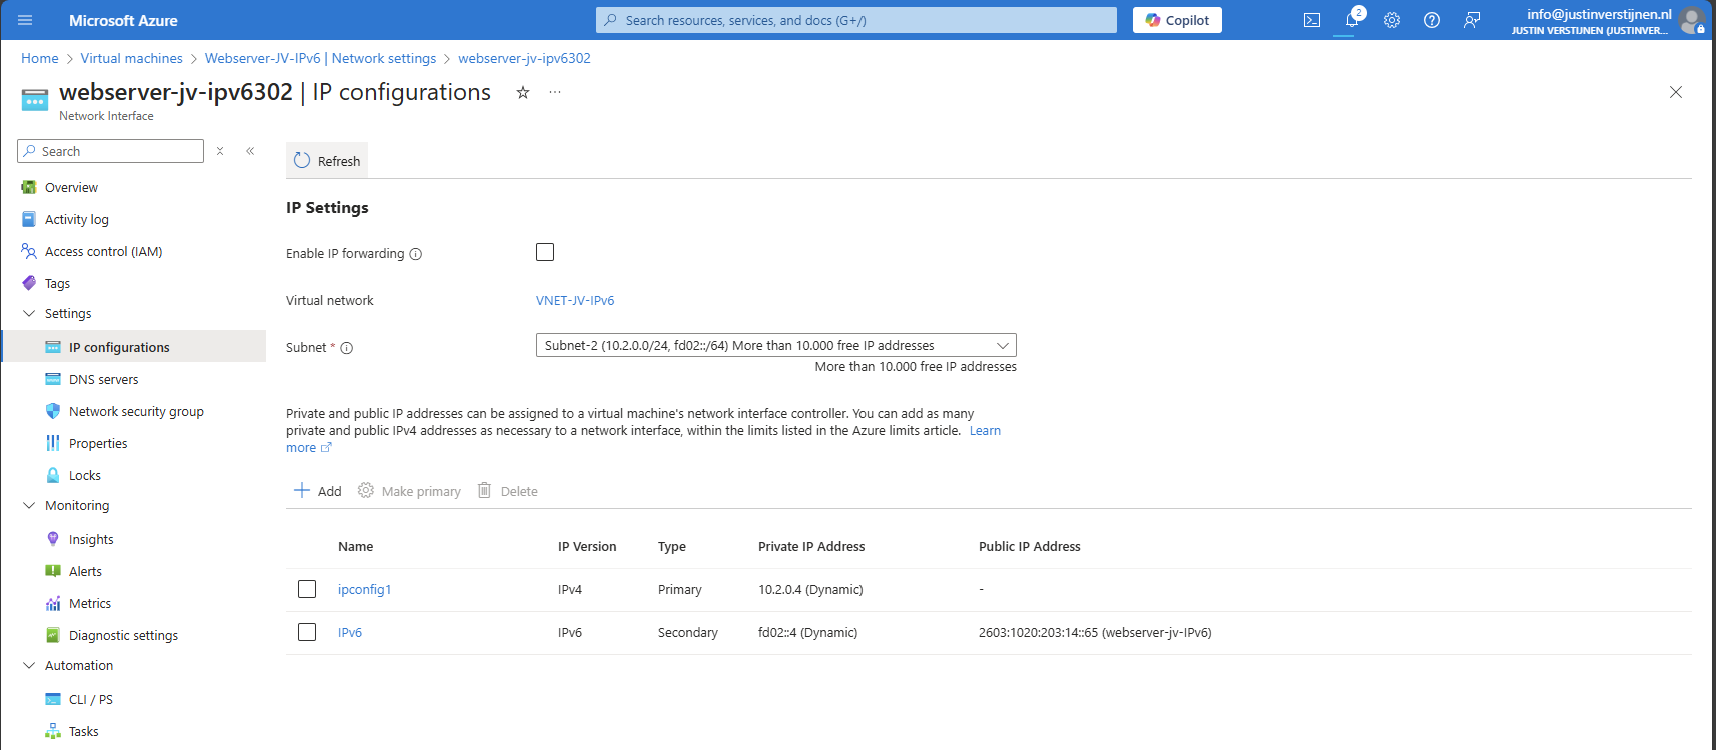
Now we are on the first VM which runs on Windows and we try to connect to the webserver:
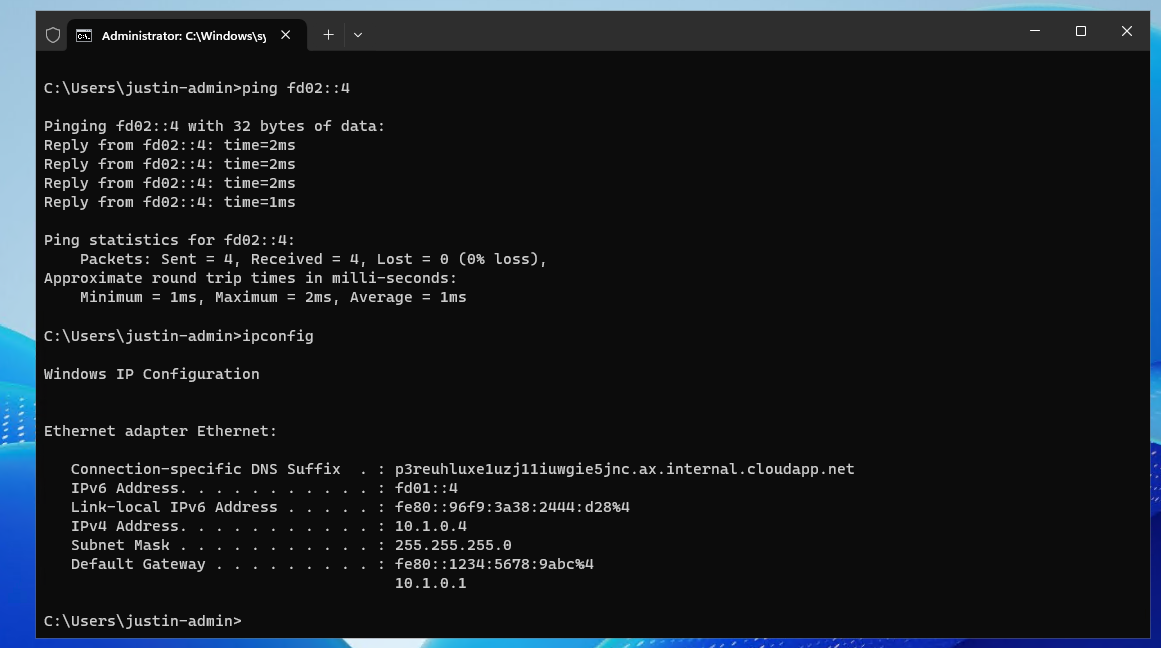
A ping request works fine and we get a response from the webserver.
Lets try if we can open the webpage. Please note, if you want to open a website on a IPv6 address, the address has to be placed [within brackets]. THis way the browser knows how to reach the page. This only applies when using the absolute IPv6 address. When using DNS, it is not needed.
I went to Edge and opened the website by using the IPv6 address: https://[fd02::4]
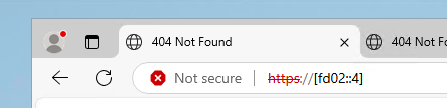
The webserver works, but I get a 404 not found page. This is by my design because I did not publish a website. The connection works like a charm!
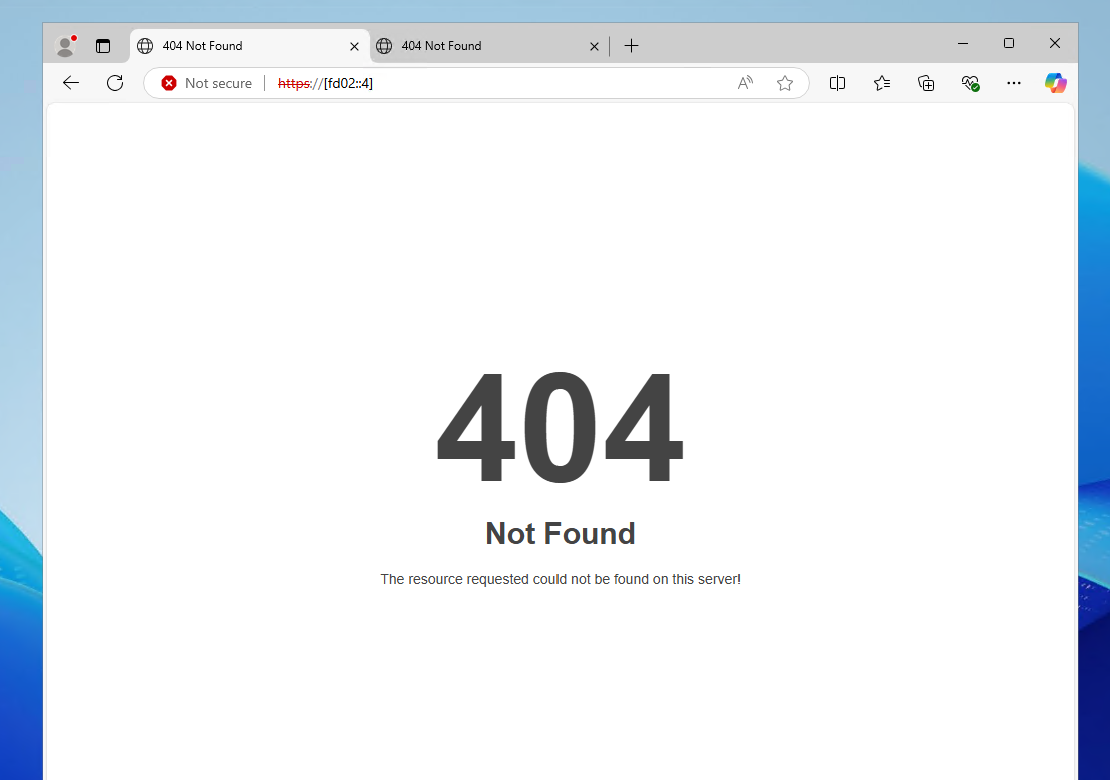
The webserver also works with the added Public IPv6 address:
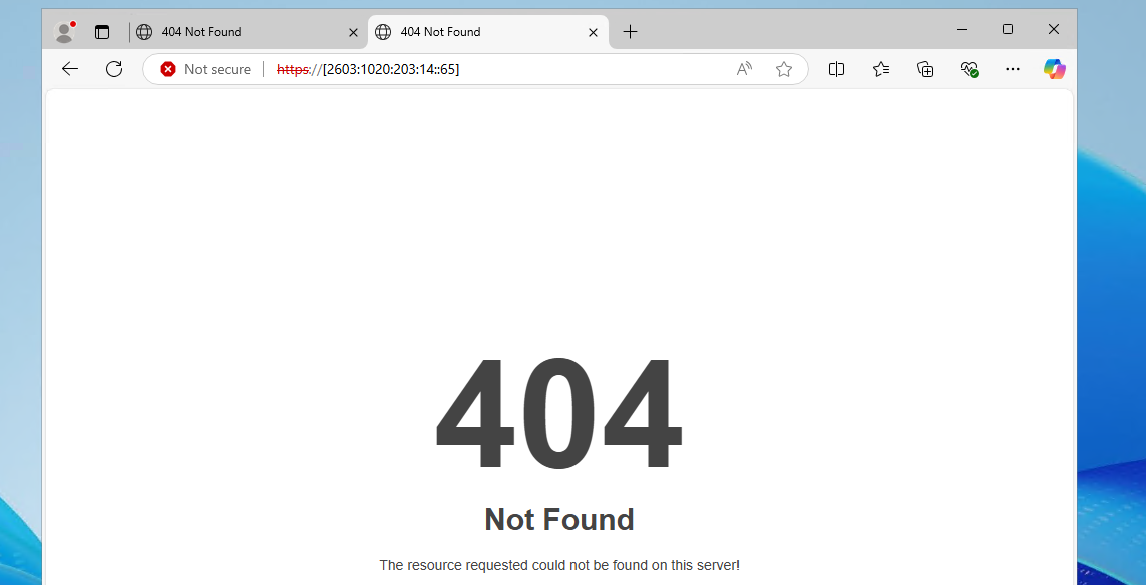
Small note: some webservers/firewalls may be configured manually to listen to IPv6. With my used image, this was the case.
Summary
When playing with IPv6, you see that some things are great but its use is primarily for filling up the worldwide shortage of IPv4 addresses. Also I admit that there is no full support for IPv6 on Azure, most of the services I tested like VMs, Private Endpoints, Load balancers etcetera all requires IPv4 to communicatie which eliminates the possibility to go full IPv6.
My personal opninion is that the addressing can be easier than IPv4, when done correctly. In the addressing I used in this guide I used the fd00::/8 space which makes very short addressess and no limitation of 250 devices without having to upper the number. These days a network of 250 devices is no exception.
End of the page 🎉
You have reached the end of the page. You can navigate through other blog posts as well, share this post on X, LinkedIn and Reddit or return to the blog posts collection page. Thank you for visiting this post.
If you think something is wrong with this post or you want to know more, you can send me a message to one of my social profiles at: https://justinverstijnen.nl/about/
If you find this page and blog very useful and you want to leave a donation, you can use the button below to buy me a beer. Hosting and maintaining a website takes a lot of time and money. Thank you in advance and cheers :)
The terms and conditions apply to this post.
Using Azure Update Manager to manage updates at scale
Azure Update Manager is a tool from Microsoft and is developed to automate, installing and documenting Windows updates or updates to Linux server on Azure. This all in a single pane of glass and without installing any additional software.
Azure Update Manager is a tool from Microsoft and is developed to automate, installing and documenting Windows updates or updates to Linux server on Azure. This all in a single pane of glass and without installing any additional software.
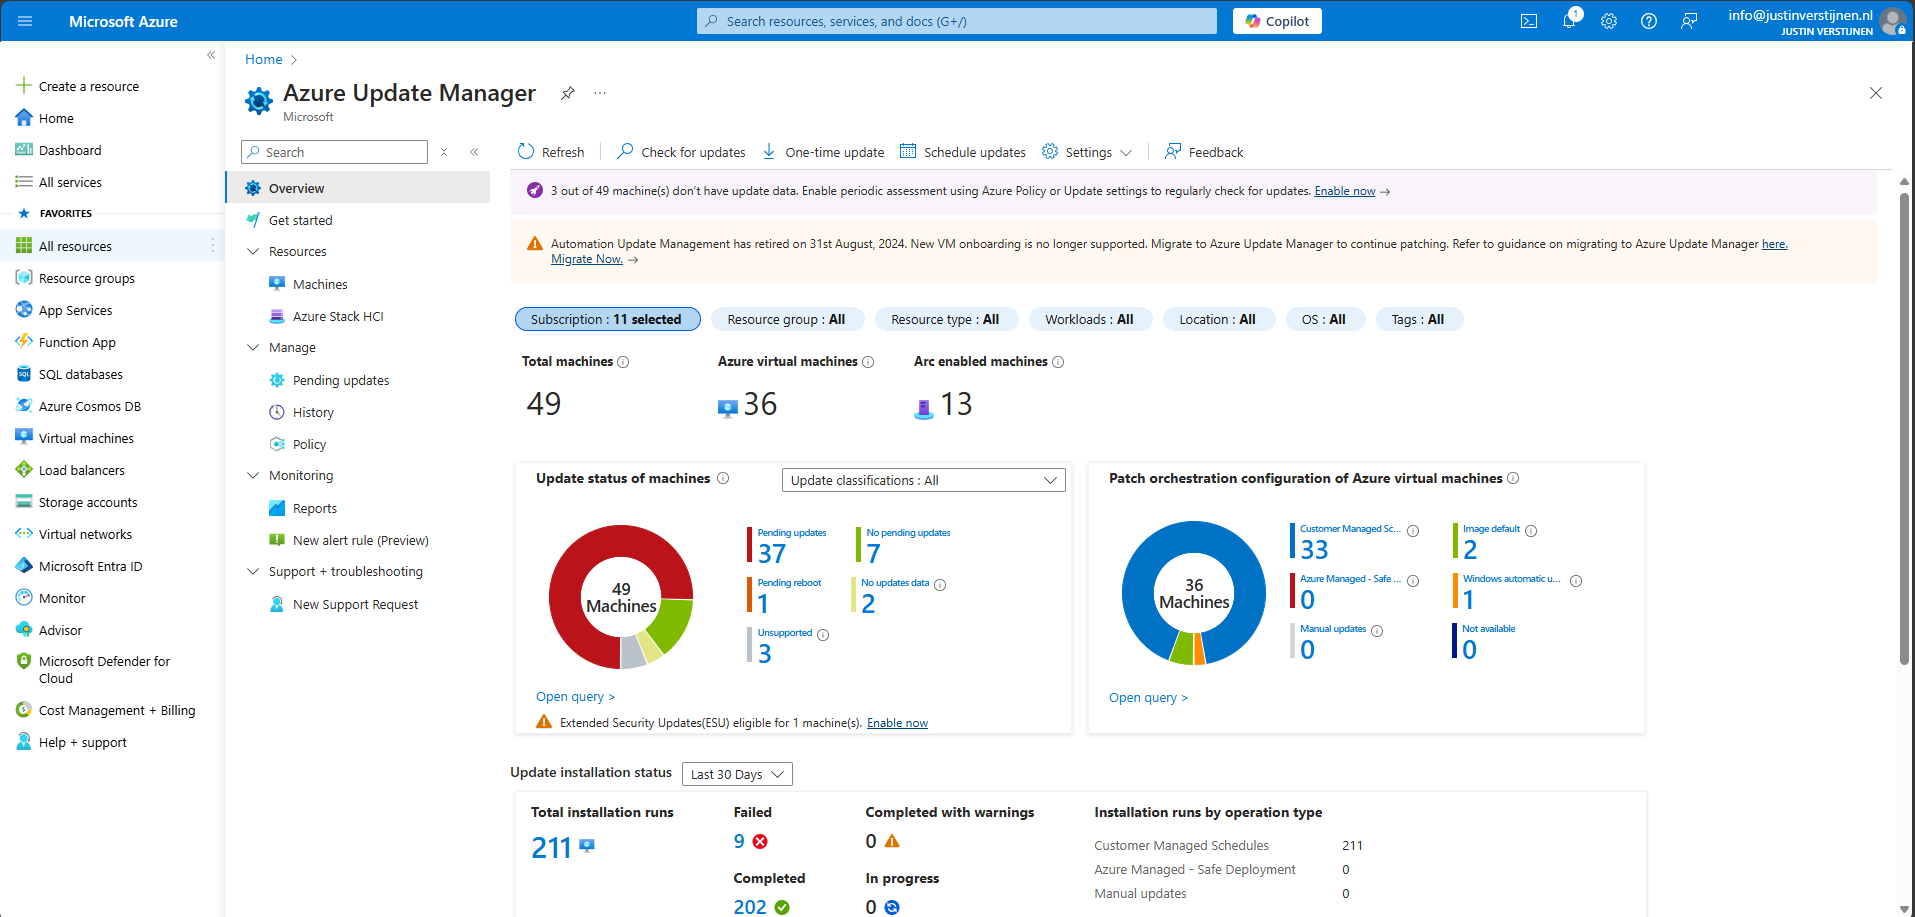
Requirements
- Around 15 minutes of your time
- An Azure subsciption
- An Azure server or Azure Arc server
Supported systems
Azure Update Manager supports the following systems for assessments and installing updates, therefore managing them:
- Azure Windows VMs (SQL/Non-SQL)
- Azure Arc Windows VMs (SQL/Non-SQL)
- Azure Linux VMs (Some distributions: See support here)
- Azure Arc Linux VMs (Some distributions: See support here)
Windows client (10/11) OSs are not supported.
Features
Azure Update Manager has the following features:
- Automatic assessments: for new updates, this will check for new updates every 24 hours
- One time install: When there are critical updates you can perform a one-time install to install updates at scale on all managed servers
- Automatic installation: this is the action that installs all updates to your servers by following the rules in your maintenance configuration
- Maintenance configurations: this is a set of rules how your updates will be deployed and on what schedule
Enroll a new server into Azure Update Manager
To enroll a new server into Azure Update Manager, open your VM and under “Operations”, open “Updates”
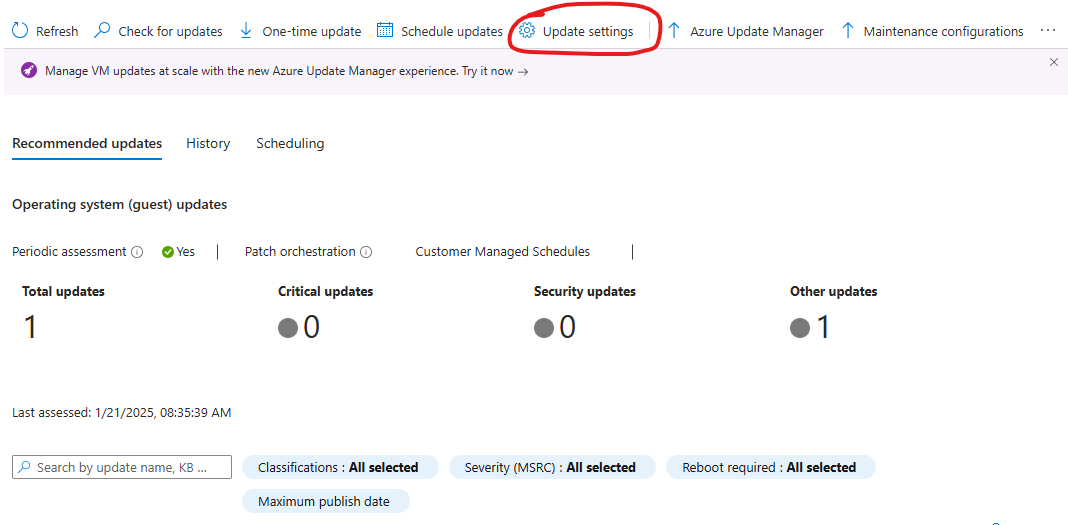
Click on the “Update settings”
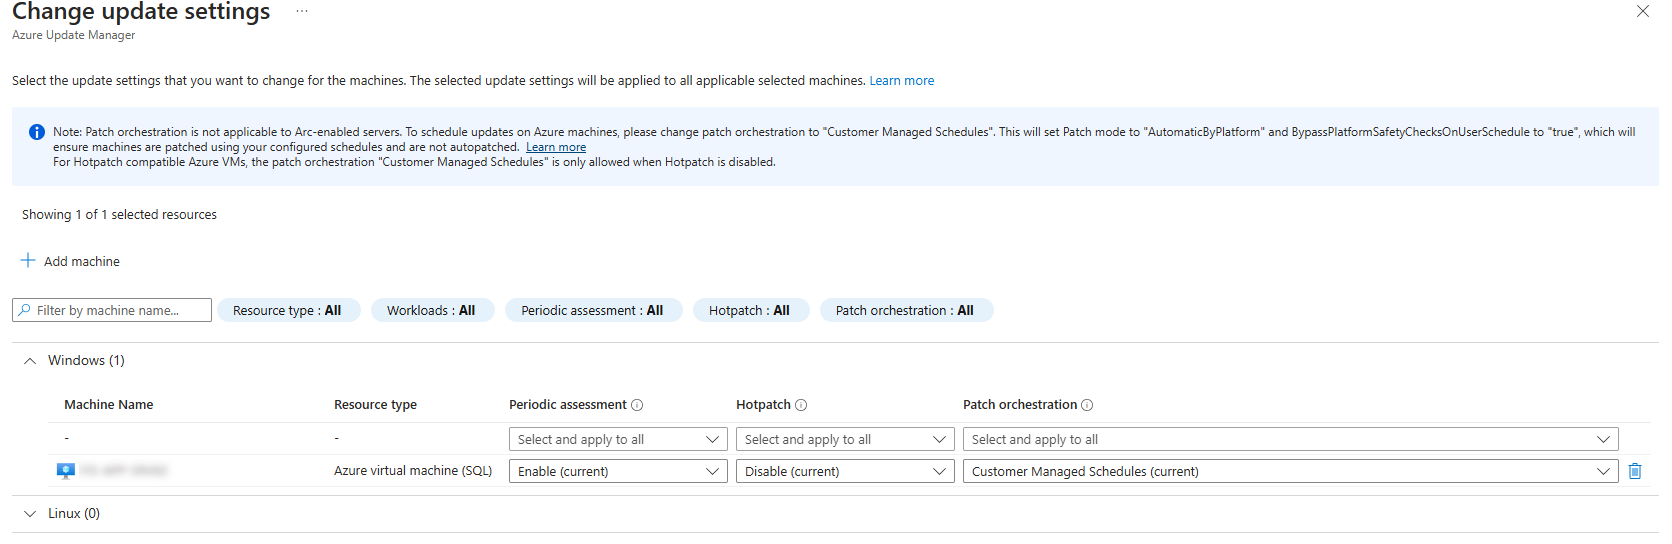
Select under periodic assessment the option “Enable” to enable the service to automatically scan for new updates and under “Patch Orchestration” select “Customer Managed Schedules”.
Does your VM support Hotpatching, this must be disabled to take benefit from Azure Update Manager.
Enroll a bunch of servers into Azure Update Manager
In our work, most of the time we want to do things at scale. To enroll servers into Azure Update Manager, go to the Azure Update Manager-Machines blade.
Select all machines and click on “Update settings”.
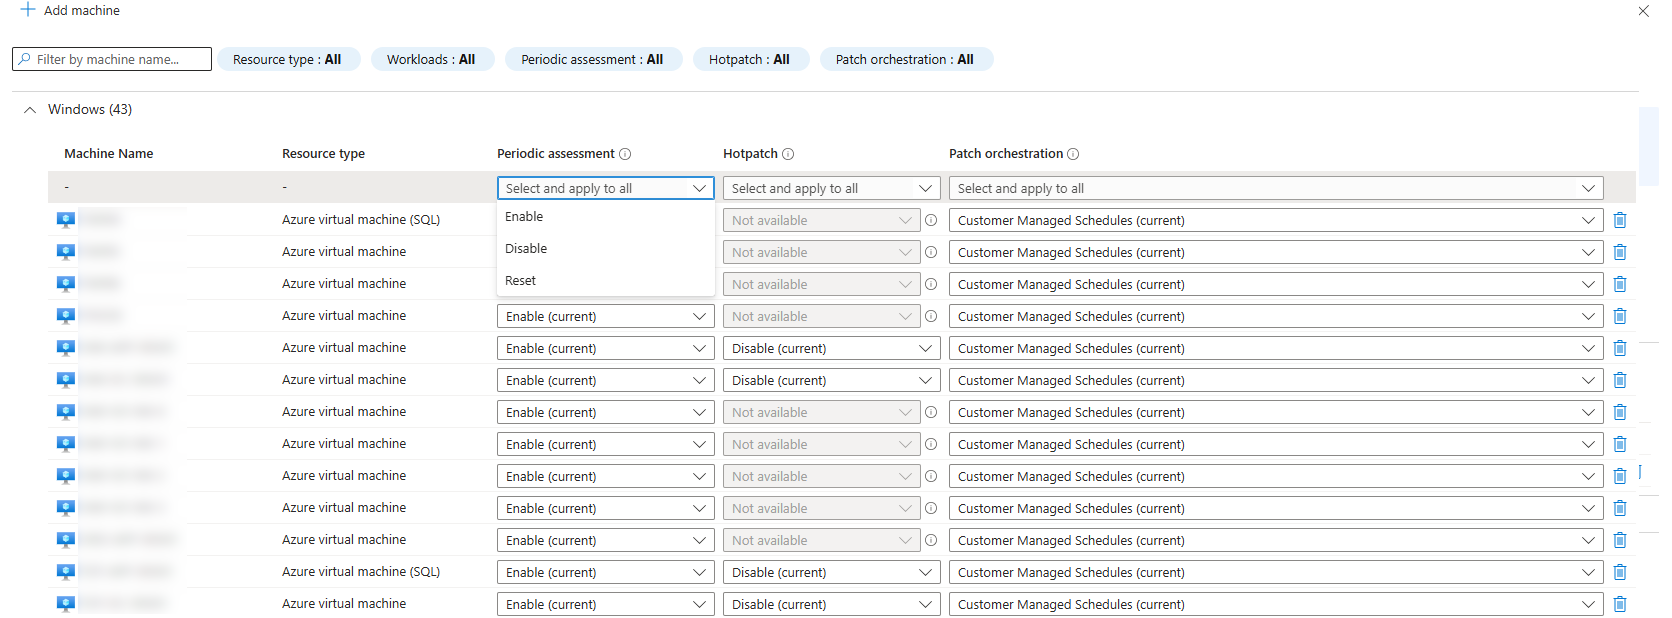
Here you can do the same for all servers on your subscriptions (and Lighthouse managed subscriptions too)
By using the top drop down menu’s you can bulk change the options of the VMs to the desired settings. In my case I want to install updates on all servers with the same schedule.
Creating Maintenance configurations
With the maintenance configurations option, you can define how Azure will install the updates and if the server may reboot yes or no.
The options in a configuration are:
- A scope/selection of the machines
- What schedule to install the updates (when, frequency and reboot action)
- What category of updates to install
- Events; you can define an event to happen before Azure installs the update. For example a Email message or notification.
You can configure as many configurations as you want:
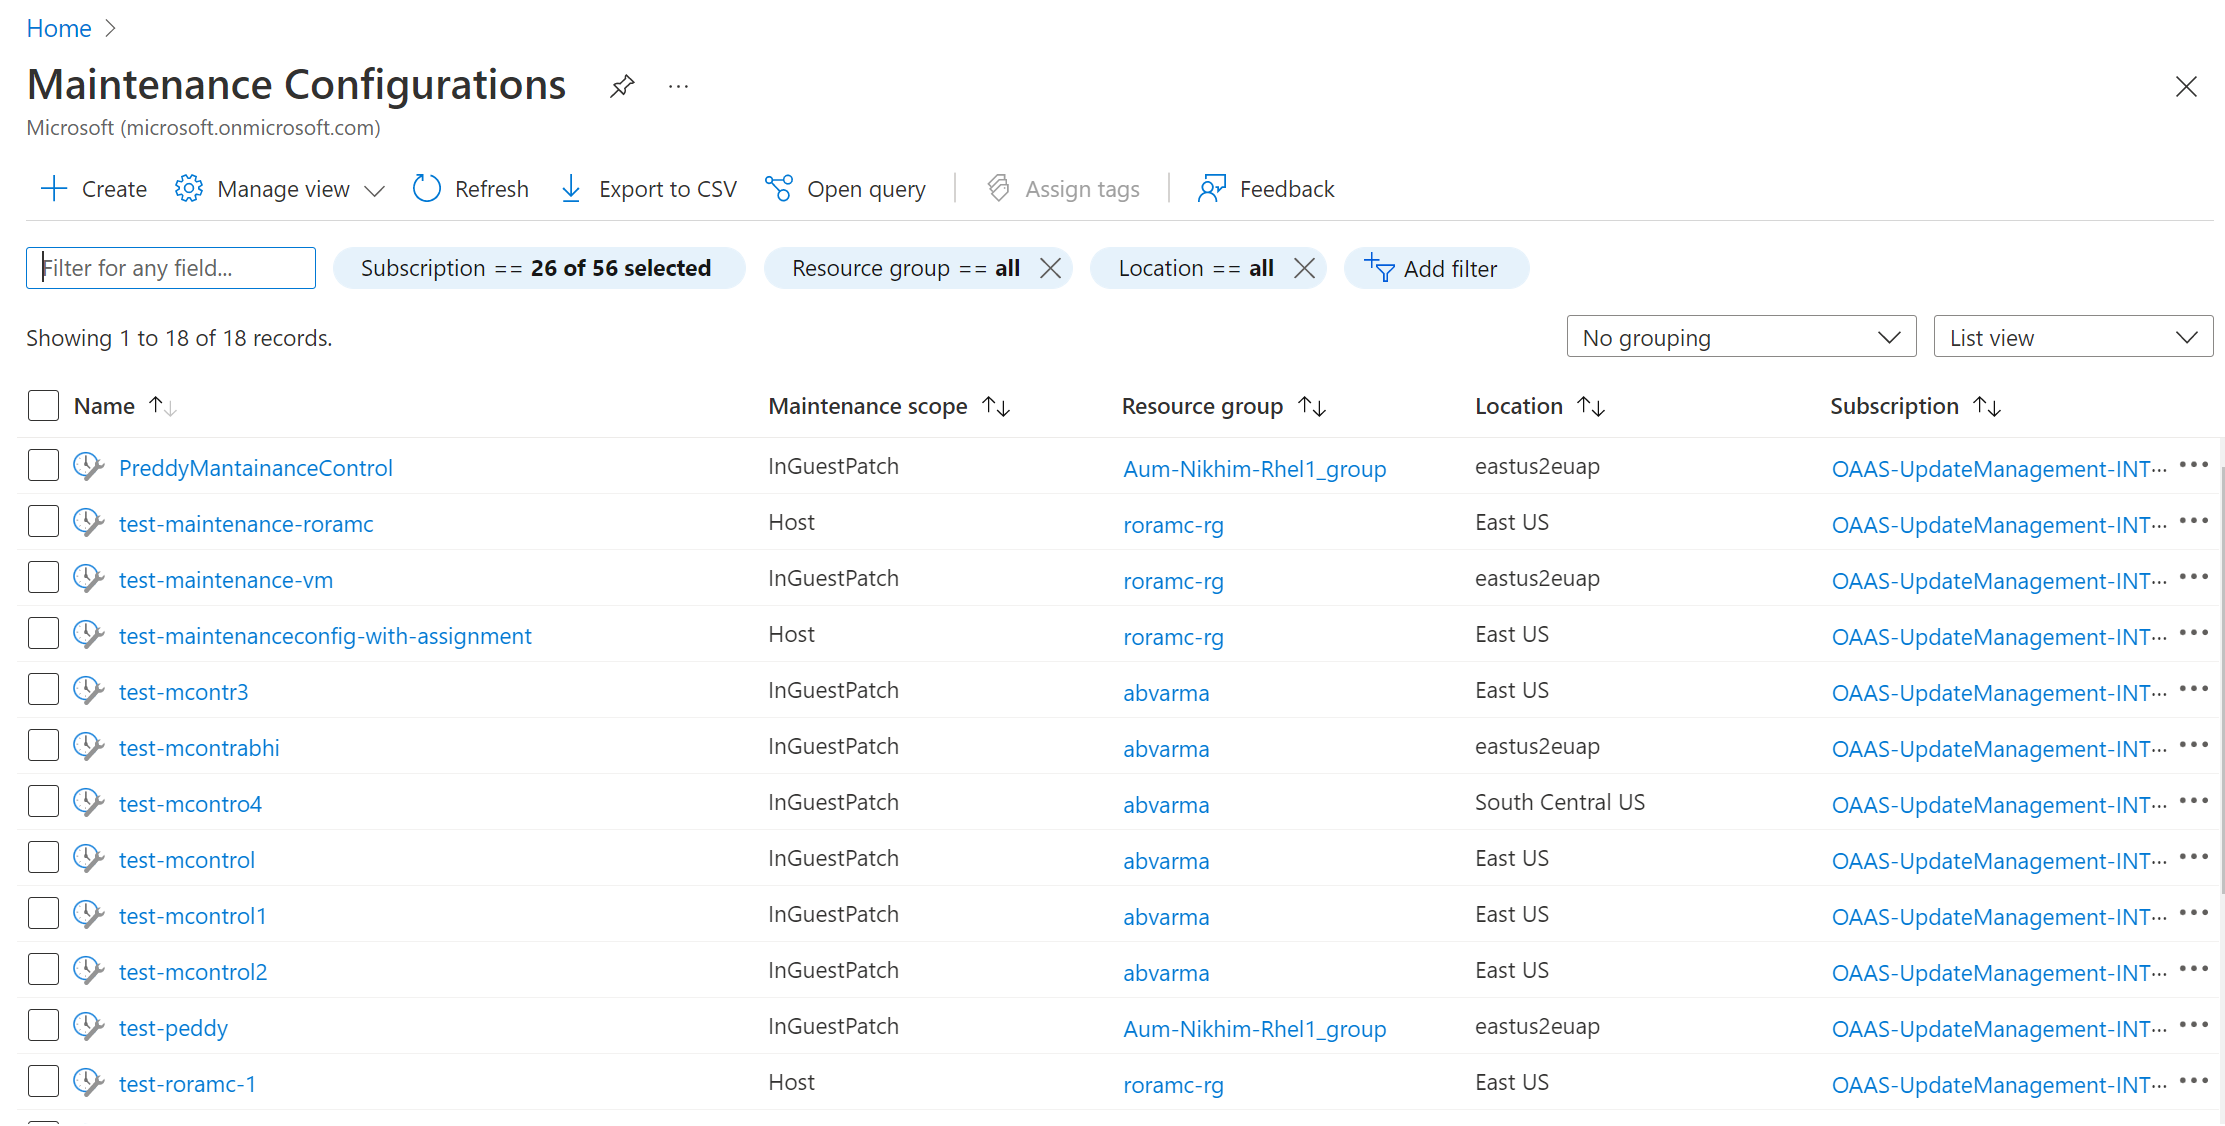
The result
On the server we see after a succesful run + reboot the updates are installed succesfully:

And if we check the recently installed updates:
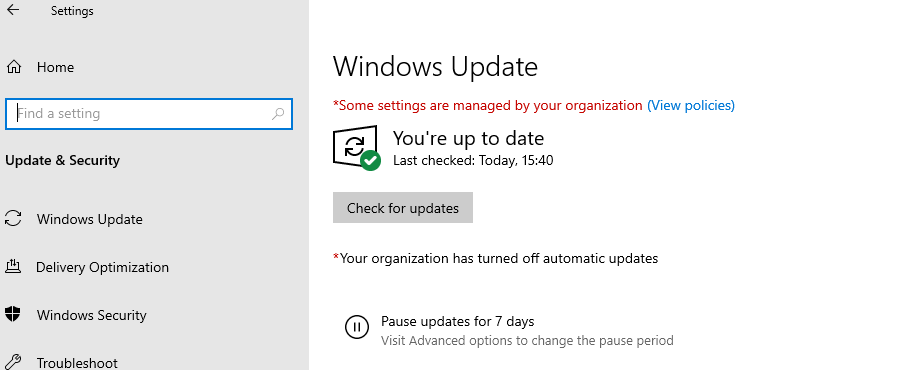
You can also check the latest installed updates through PowerShell:
PowerShell
(New-Object -ComObject Microsoft.Update.Session).CreateUpdateSearcher().QueryHistory(0,500) | Where-Object { $_.Operation -eq 1 -and $_.Title -match 'KB\d{6,7}' -and $_.Title -notmatch 'driver' } | Select-Object Date,@{Name='KB';Expression={[regex]::Match($_.Title,'KB\d{6,7}').Value}} | Group-Object KB | ForEach-Object { $_.Group | Sort-Object Date -Descending | Select-Object -First 1 } | Sort-Object Date -Descending | Format-Table -AutoSizeSummary & Tips
- Install updates in “rings”, and do not bulk deploy updates onto all servers
- Installing updates always have a 0,1% chance to fail. Have backups and personnel ready
- Reboot servers after installing updates in their maintenance window
End of the page 🎉
You have reached the end of the page. You can navigate through other blog posts as well, share this post on X, LinkedIn and Reddit or return to the blog posts collection page. Thank you for visiting this post.
If you think something is wrong with this post or you want to know more, you can send me a message to one of my social profiles at: https://justinverstijnen.nl/about/
If you find this page and blog very useful and you want to leave a donation, you can use the button below to buy me a beer. Hosting and maintaining a website takes a lot of time and money. Thank you in advance and cheers :)
The terms and conditions apply to this post.
10 ways to use tags in Microsoft Azure
When being introduced to Azure, I learned about tags very quickly. However, this is something you can use in practice but is no requirement to make stuff actually work. Now some years ahead in my Azure journey, I can recommend (at least) 10 ways to use them properly and to make them actually useful in your environment. I will explain these ways in this article.
What are Tags in Azure?
Tags are a pair of editable values in Microsoft Azure. These are in this pair-convention:
- Name : Value
We can define ourselves what the Name and Value actually are, if we stay within these limits:
- Name: maximum of 512 characters
- Value: maximum of 256 characters
- Half these values for storage accounts
- These characters are not supported:
<,>,%,&,\,?,/
An example of a resource in my environment using tags:
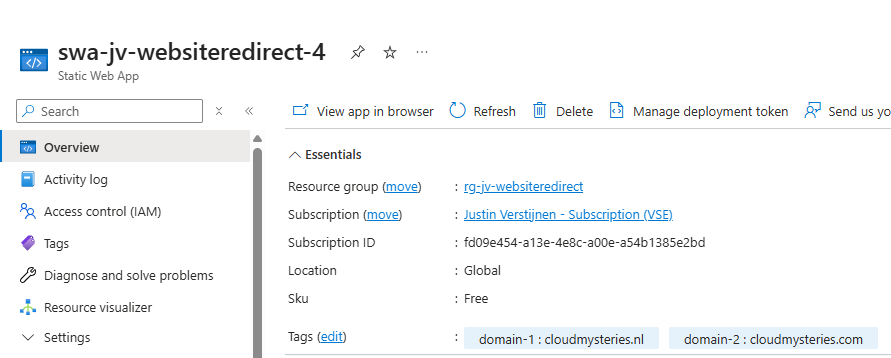
I marked two domains I use for a redirection to an other website. Therefore I have a nice overview over multiple resources.
You can only use 1 unique Name per resources. Multiple tags with the same name are not possible.
(Therefore I used domain-1 and domain-2).
Some advices before start using Tags
Before we go logging into our environment and tag everything we see, I will first give some advice which will be useful before starting
- Tags are stored plain text, so do not store sensitive data into tags
- Some roles can actually see tags, even without access to their assigned resource
- Reader
- Cost Management Reader
- You will need at least Contributor permissions to assign or remove tags to resources
- Tags will not flow from Subscription to Resource Groups or to resources. These tag lists are independently
- Think about what tags to actually use, make some documentation and keep those tags up-to-date
How to create tags in Azure?
You can add tags to a resource by opening it, and then click on “Tags”. Here we can define what tags to link to the resource. As you might use the same name/value for multiple resources, this will auto-suggest you for easy linking:
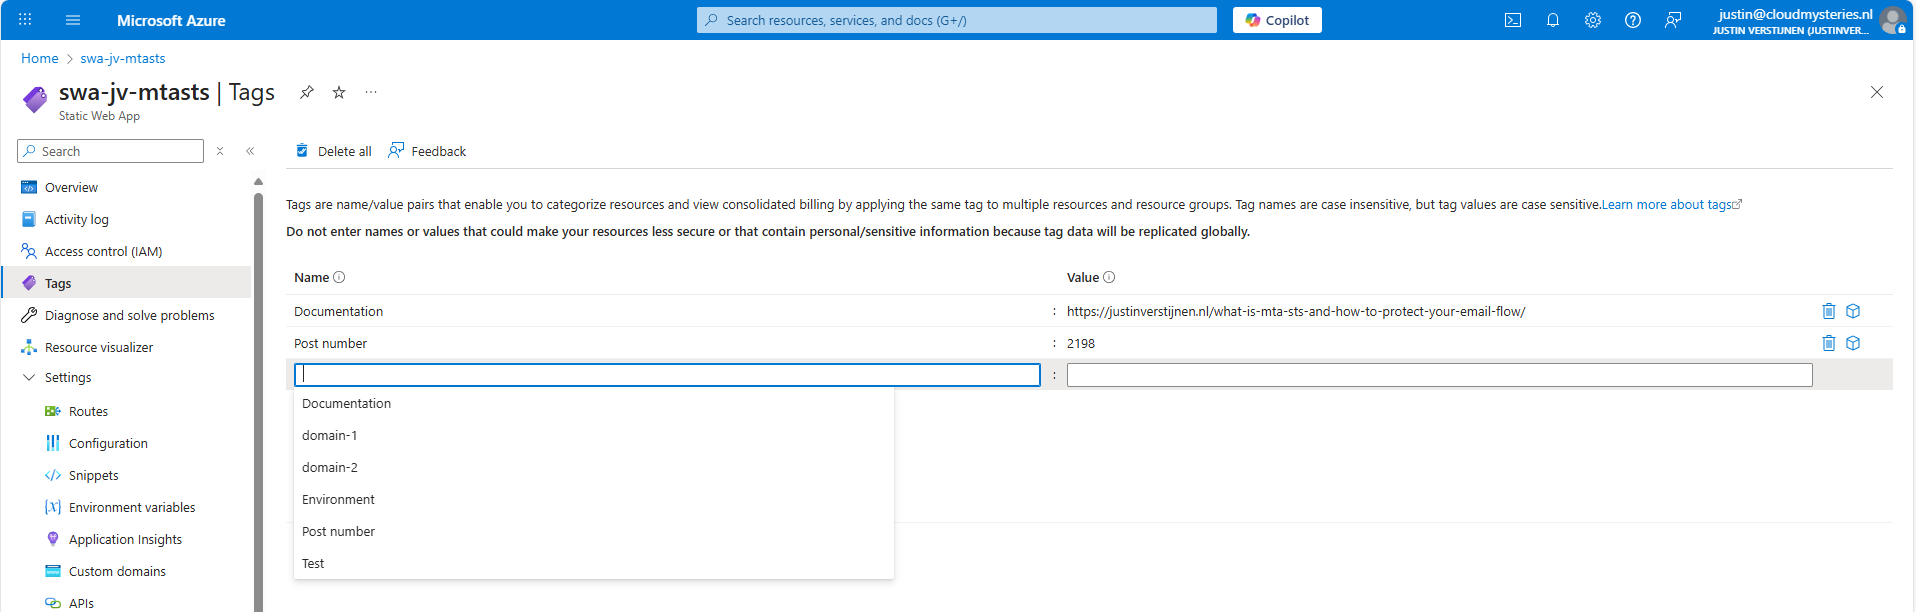
Check out this video where I demonstrate creating the tags from the example below, 1: Documentation
https://www.youtube.com/watch?v=sR4GdScNG7M
1: Documentation
Documentation of your environment is very important. Especially when configuring things, then to not touch it for sometimes months or years. Also when managing resources with multiple people in one company, using a tag to point to your documentation is very useful.
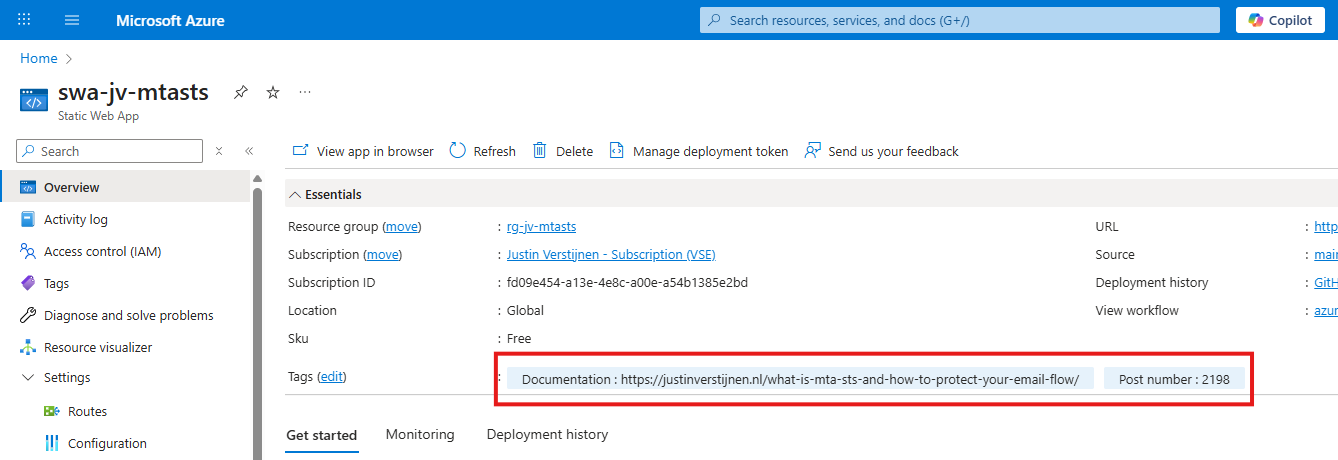
If you have a nice and numbered documentation-system, you can use the number and page number. Otherwise you can also use a whole link. This points out where the documentation of the resource can be found.
If using a Password management solution, you can also use direct links to your password entry. This way you make it yourself and other people easy to access a resource while still maintaining the security layer in your password management solution. As described, Reader access should not grant actual access to a resource.
2: Environment separation
You can use tags to mark different environments. This way every administrator would know instantly what the purpose of the resource is:
- Testing
- Acceptance (end-user testing)
- Production
- Production-Replica
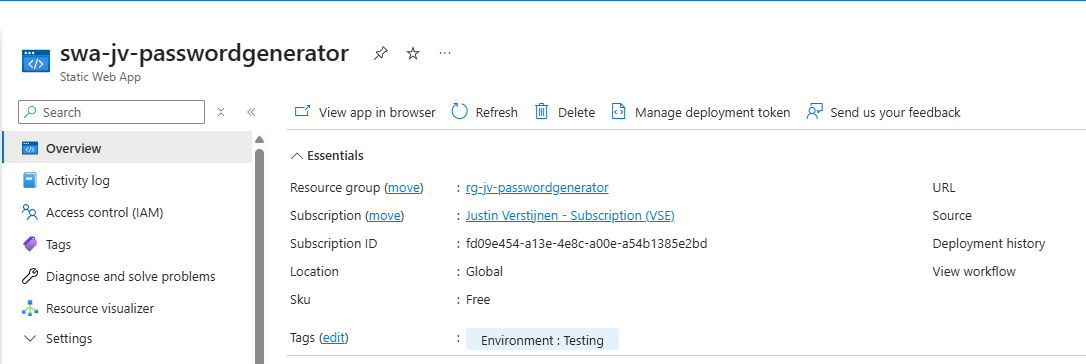
Here I marked a resource as a Testing resource as an example.
3: Responsable person or departments
In a shared responsibility model on an Azure environment, we would mostly use RBAC to lock down access to your resources. However, sometimes this is not possible. We could define the responsibility of a resource with tags, defining the person or department.
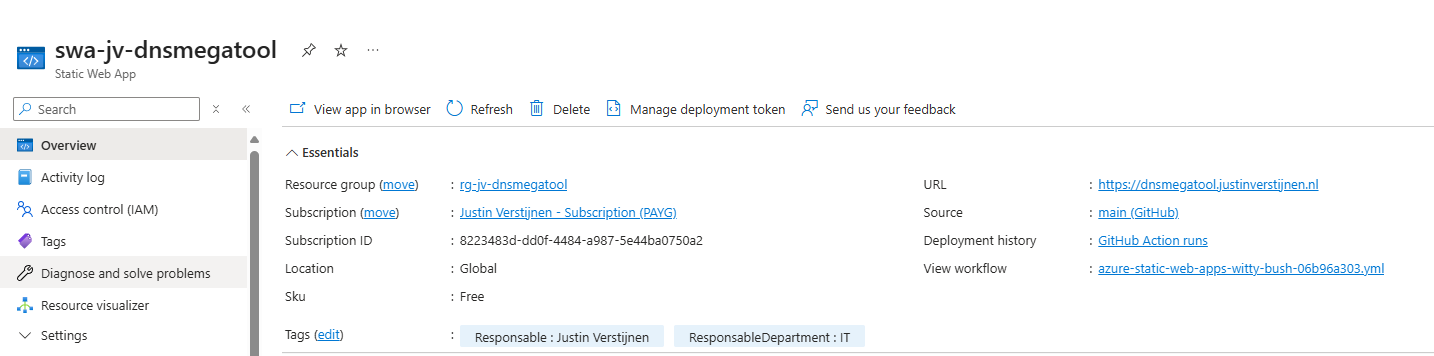
4: Lifecycle and retention
We could add tags to define the lifecycle and retention of the data of an resource. Here I have 3 examples of how this could be done:
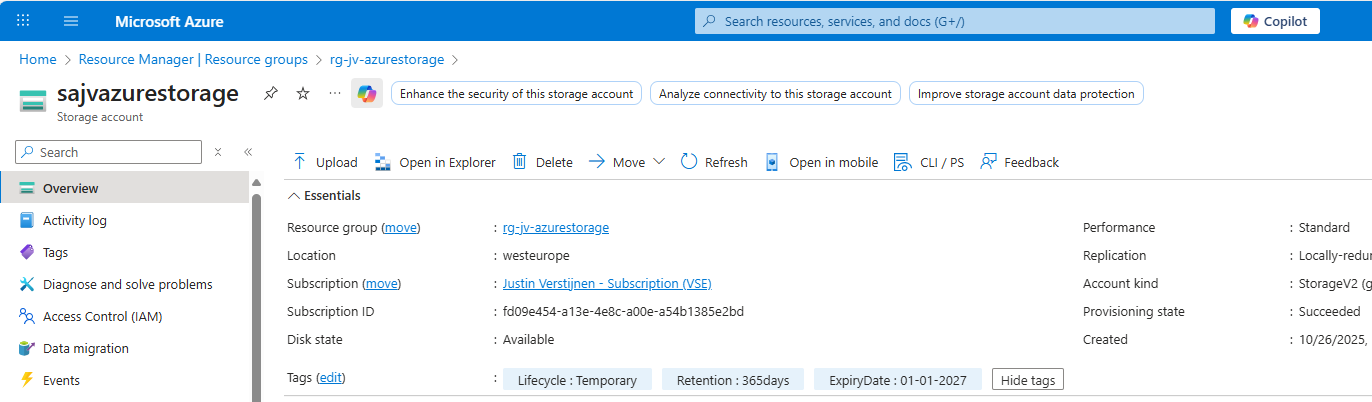
I created a tag Lifecycle, one for Retention in days and a Expiry date, after when the resource can be deleted permanently. Useful if storing some data temporarily after a migration.
5: Compliance
We could use the tags on an Azure resource to mark if they are compliant with industry accepted security frameworks. This could lookm like this:
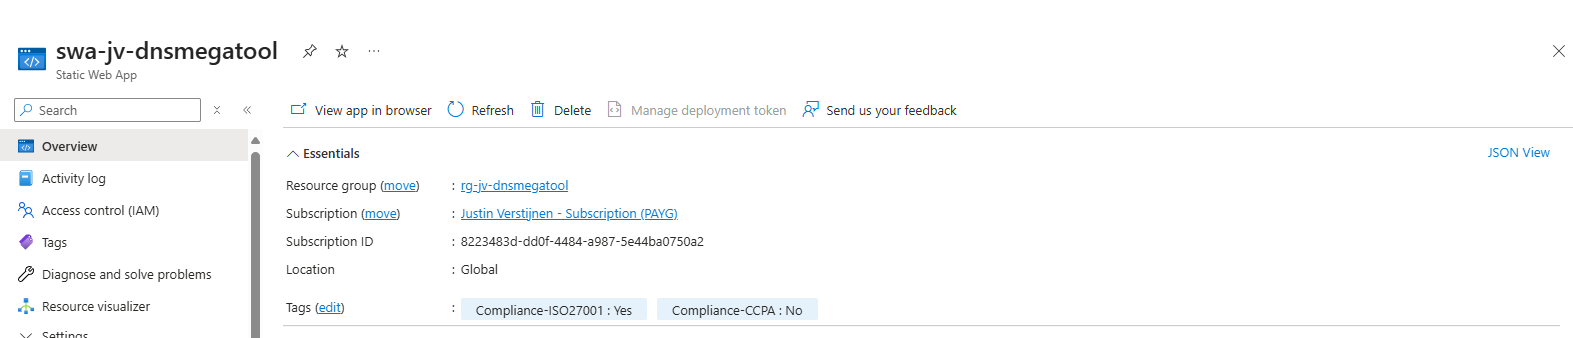
Compliance could be some customization, as every organization is different.
6: Purpose and Dependencies
You can add tags to define the role/purpose of the resource. For example, Role: Webserver or Role: AVD-ProfileStorage, like I have done below:
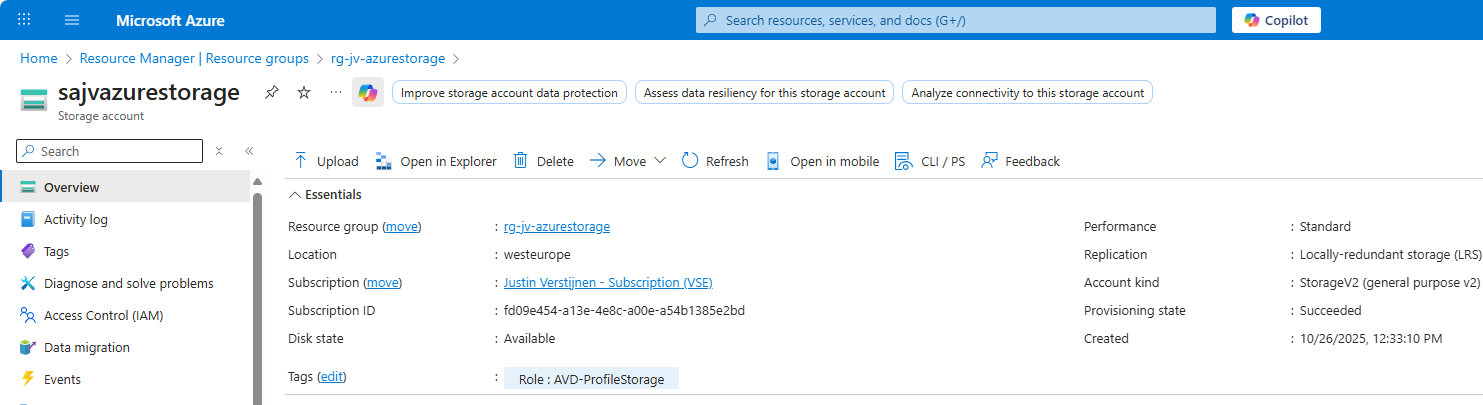
This way you can define dependencies of a solution in Azure. When having multiple dependencies, some good documentation is key.
7: Costs separation
You can make cost overviews within one or multiple subscriptions based on a tag. This make more separation possible, like multiple departments using one billing method or overviews for total costs of resources you have tagged with a purpose.
You can make these overviews by going to your subscription, then to “Cost Analysis” and then “Group By” -> Tags -> Your tag.
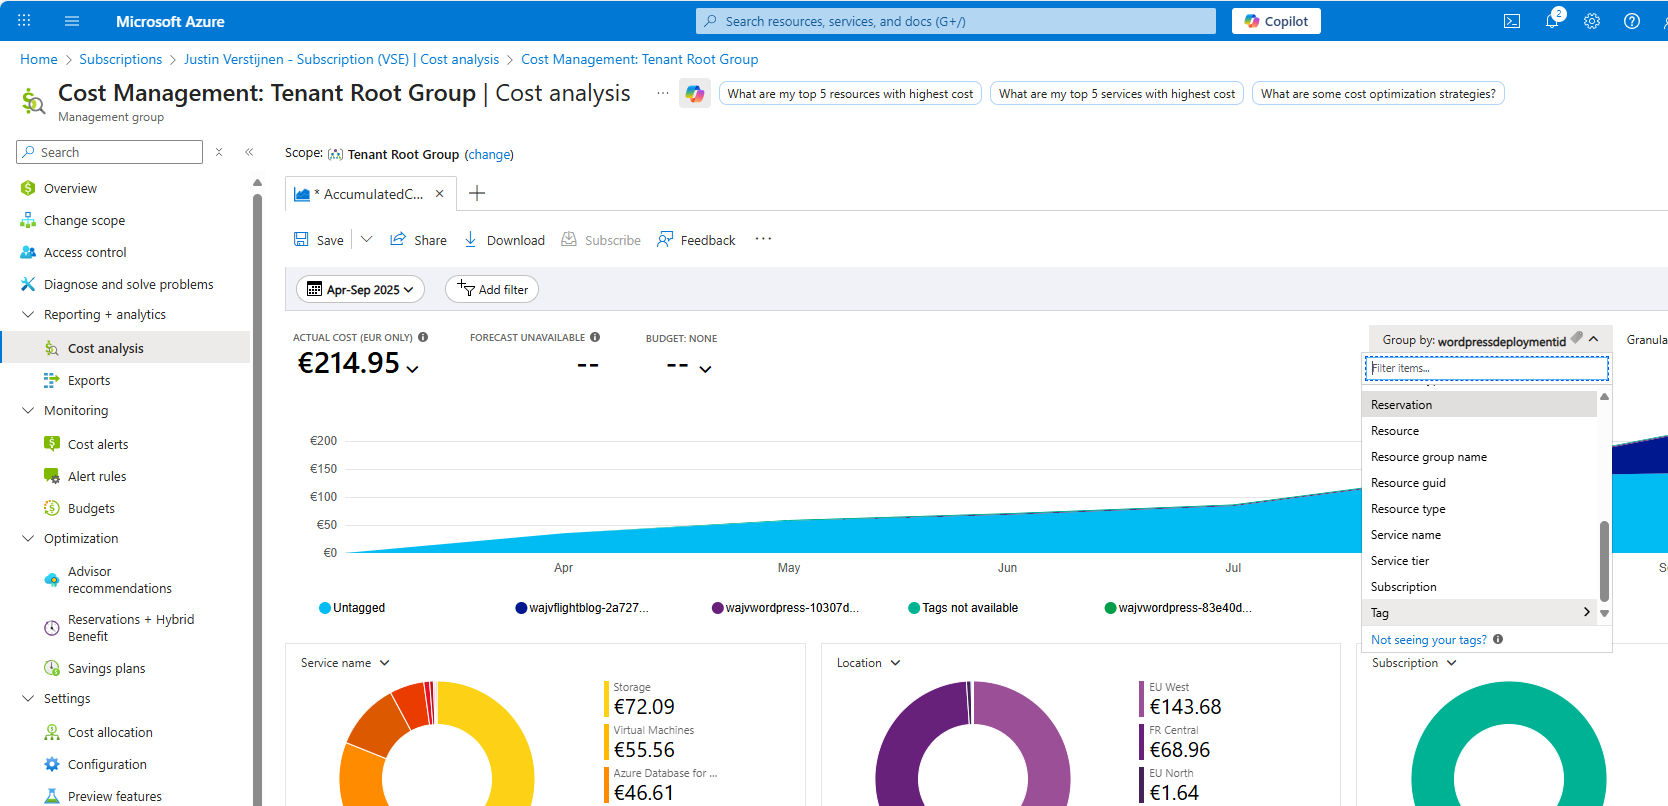
This way, I know exactly what resources with a particular tag was billed in the last period.
8: Maintenance hours and SLAs
Tags could be used excellently to define the maintenance hours and Restore Time Objective (RTO) of a resource. This way anyone in the environment will know exactly when changes can be done and how many data-loss is acceptable if errors occur.
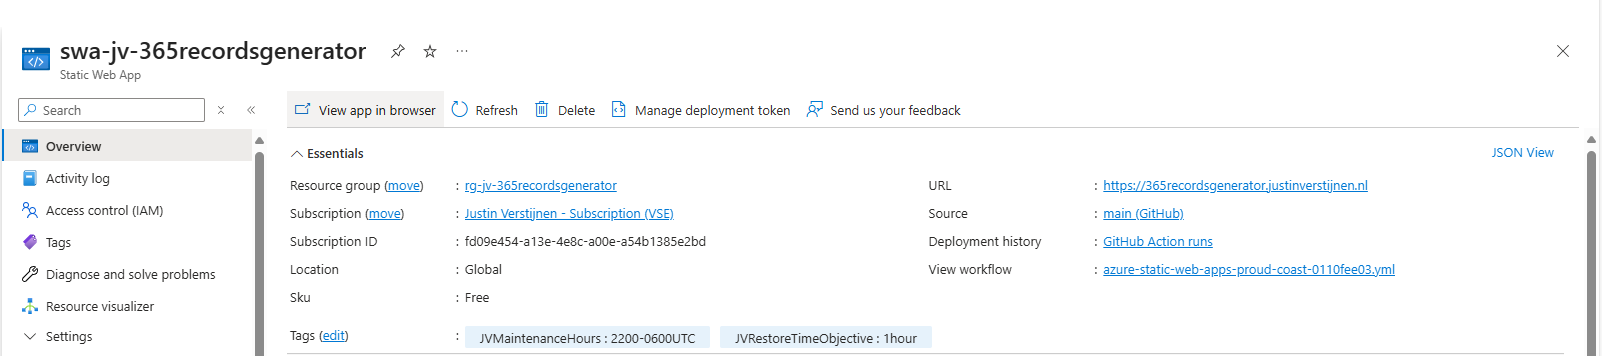
Here I have created 2 tags, defining the maintenance hours including the timezone and the Restore Time Objective.
9: Solution version
This will be very useful if you are deploying your infrastructure with IaC solutions like Terraform and Bicep. You can tag every resource of your solution with a version which you specify with a version number. If deploying a new version, all tags will be changed and will align to your documentation.
An example of this code can look like this:
JSON
# Variables
variable "version" {
  type        = string
  description = "Version number"
  default     = "1.0.1"
}

# Provider
provider "azurerm" {
  features {}
}

# Resource Group
resource "azurerm_resource_group" "rg" {
  name     = "rg-jv-dnsmegatool"
  location = "westeurope"

  tags = {
    Version = var.version
  }
}

# Static Web App
resource "azurerm_static_web_app" "swa" {
  name                = "swa-jv-dnsmegatool"
  resource_group_name = azurerm_resource_group.rg.name
  location            = azurerm_resource_group.rg.location
  sku_tier            = "Free"
  sku_size            = "Free"

  tags = {
    Version = var.version
  }
}
And the result in the Azure Portal:
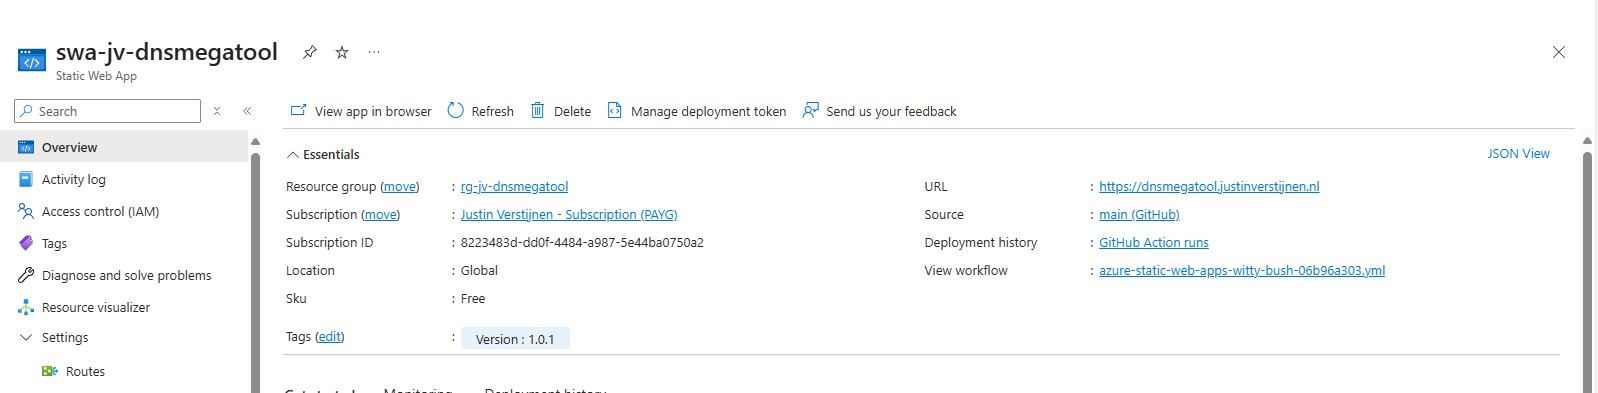
10: Disaster Recovery-tier
We could categorize our resources into different tiers for our Disaster Recovery-plan. We could specify for example 3 levels:
- Level 1: Mission Critical
- Level 2: Important
- Level 3: Not important
This way we write our plan to in case of emergencies, we first restore Level 1 systems/resources. After they all are online, we could advance to Level 2 and then to Level 3.
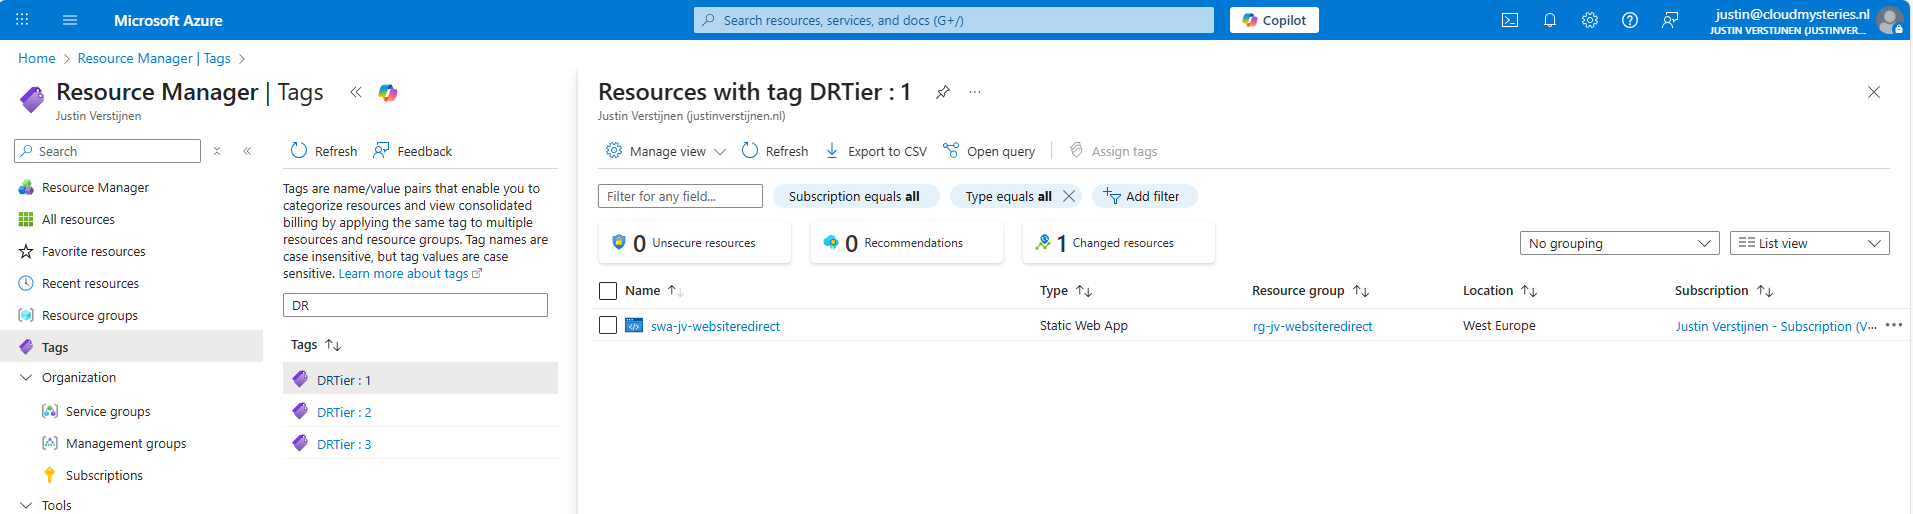
By searching for the tags, we can instantly view which resources we have to restore first according to our plan, and so on.
Bonus 1: Use renameable tags
In an earlier guide, I described how to use a renameable tag for resources in Azure:
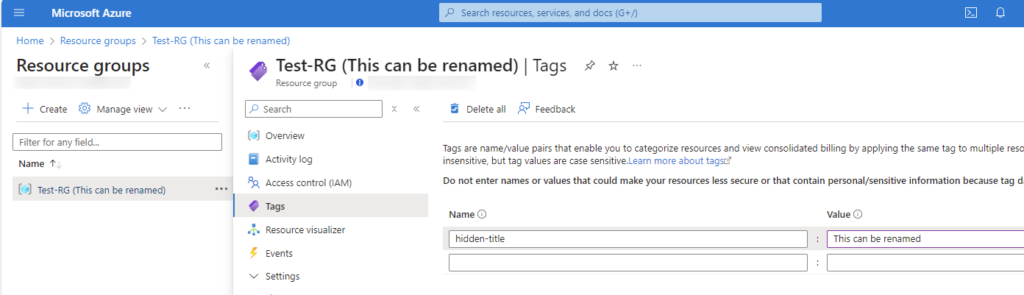
This could be useful if you want to make things a little more clear for other users, like a warning or a new name where the actual name cannot be changed unfortunately.
Check out this guide here: https://justinverstijnen.nl/renameable-name-tags-to-resource-groups-and-resources/
Summary
Tags in Microsoft Azure are a great addition to your environment and to make it perfect. It helps a way more when managing an environment with multiple persons or parties when tags are available or we could use some custom views based on tags. In bigger environments with multiple people managing a set of resources, Tags would be unmissable.
Sources
These sources helped me by writing and research for this post;
End of the page 🎉
You have reached the end of the page. You can navigate through other blog posts as well, share this post on X, LinkedIn and Reddit or return to the blog posts collection page. Thank you for visiting this post.
If you think something is wrong with this post or you want to know more, you can send me a message to one of my social profiles at: https://justinverstijnen.nl/about/
If you find this page and blog very useful and you want to leave a donation, you can use the button below to buy me a beer. Hosting and maintaining a website takes a lot of time and money. Thank you in advance and cheers :)
The terms and conditions apply to this post.
My Azure Naming Framework
Naming your resources in Microsoft Azure ensures a proper way of recognizing a certain cause and result of what your resources do. Good naming is part of the documentntation process, where an environment with good naming strategy will always do it better in case of outages or technical problems.
My Azure Naming Framework
The picture below shows how I name my Azure Resources in my own environment. Creating a good naming strategy from the very beginning is a great way to maintain overview over your resources and instantly know what they do.
Why naming Azure resources is important
When working in Azure every day, naming is not “just for looks”. It helps me and collegues or partners to work faster and with fewer mistakes. Here’s what can be gained from good names:
- I find things faster (in the portal, in scripts, and in logs)
- I know what a resource is for without opening it
- I can spot duplicates or wrong environments (like dev vs prod)
- I can manage cost and ownership better because names follow the same meaning
- Automation becomes easier because my naming rules stay consistent
However, some resources cannot be named beforehand. Like a Virtual Machine that automatically gets a disk and NIC. If we get the chance to rename the resource, we will do this of course. The automatic names also make very clear what the resource is related to.
The format itself
I like a naming format that is easy to use but tells every Azure Engineer what the purpose is of a particular resource.
- specification-resource-type-resource-purpose
If you want, you can add a “prod” or “dev” step at any place you want to separate production from testing and development environments.
I keep the format consistent, even if not every part is available for every resource type. Some resource don’t support hyphens in the names, mostly public resources like Storage Accounts and Image Galleries, there I use the same setup but then without hyphens. Also I like to use generic abbreviations which are also used by Microsoft and 3rd parties to keep everything recognizable.
Some examples
As you might have already seen in some of my posts, I use this format a lot and almost exclusively for naming the Azure resources.
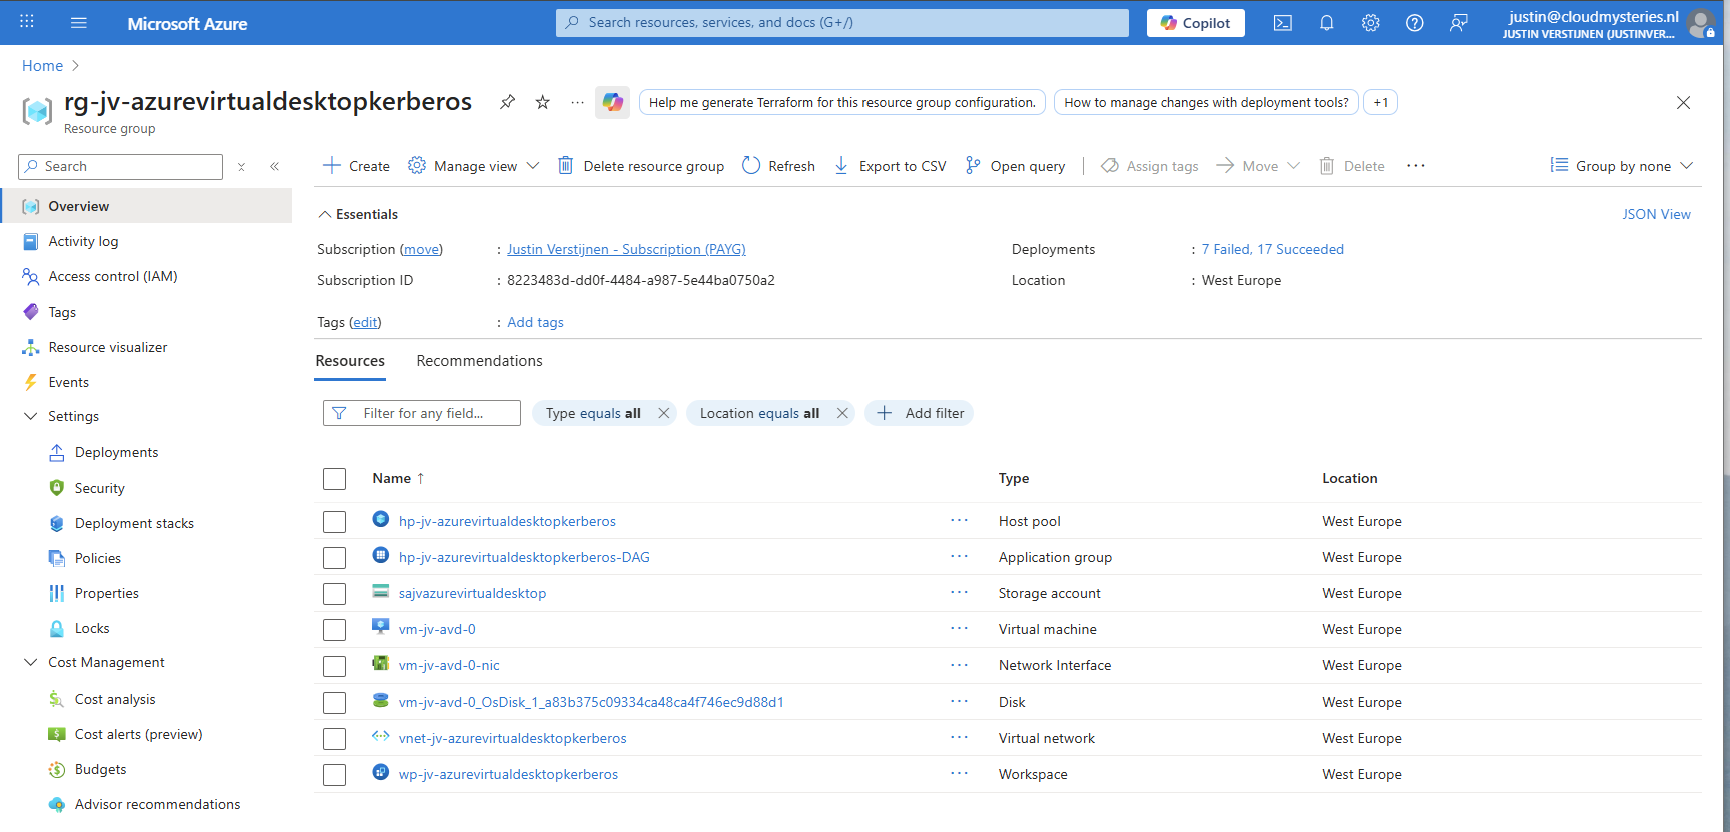
Summary
In this post I explained why naming Azure resources matters, and how I handle my personal Azure environment where the resources are named. My approach is simple: I follow the naming policy when I can set names, and I accept Azure auto-naming when Azure creates resources for me. Then, if needed, I use Azure Policy to enforce the naming rule so the tenant stays consistent over time and after doing several demonstrations.
Here is the framework again, but then in image.
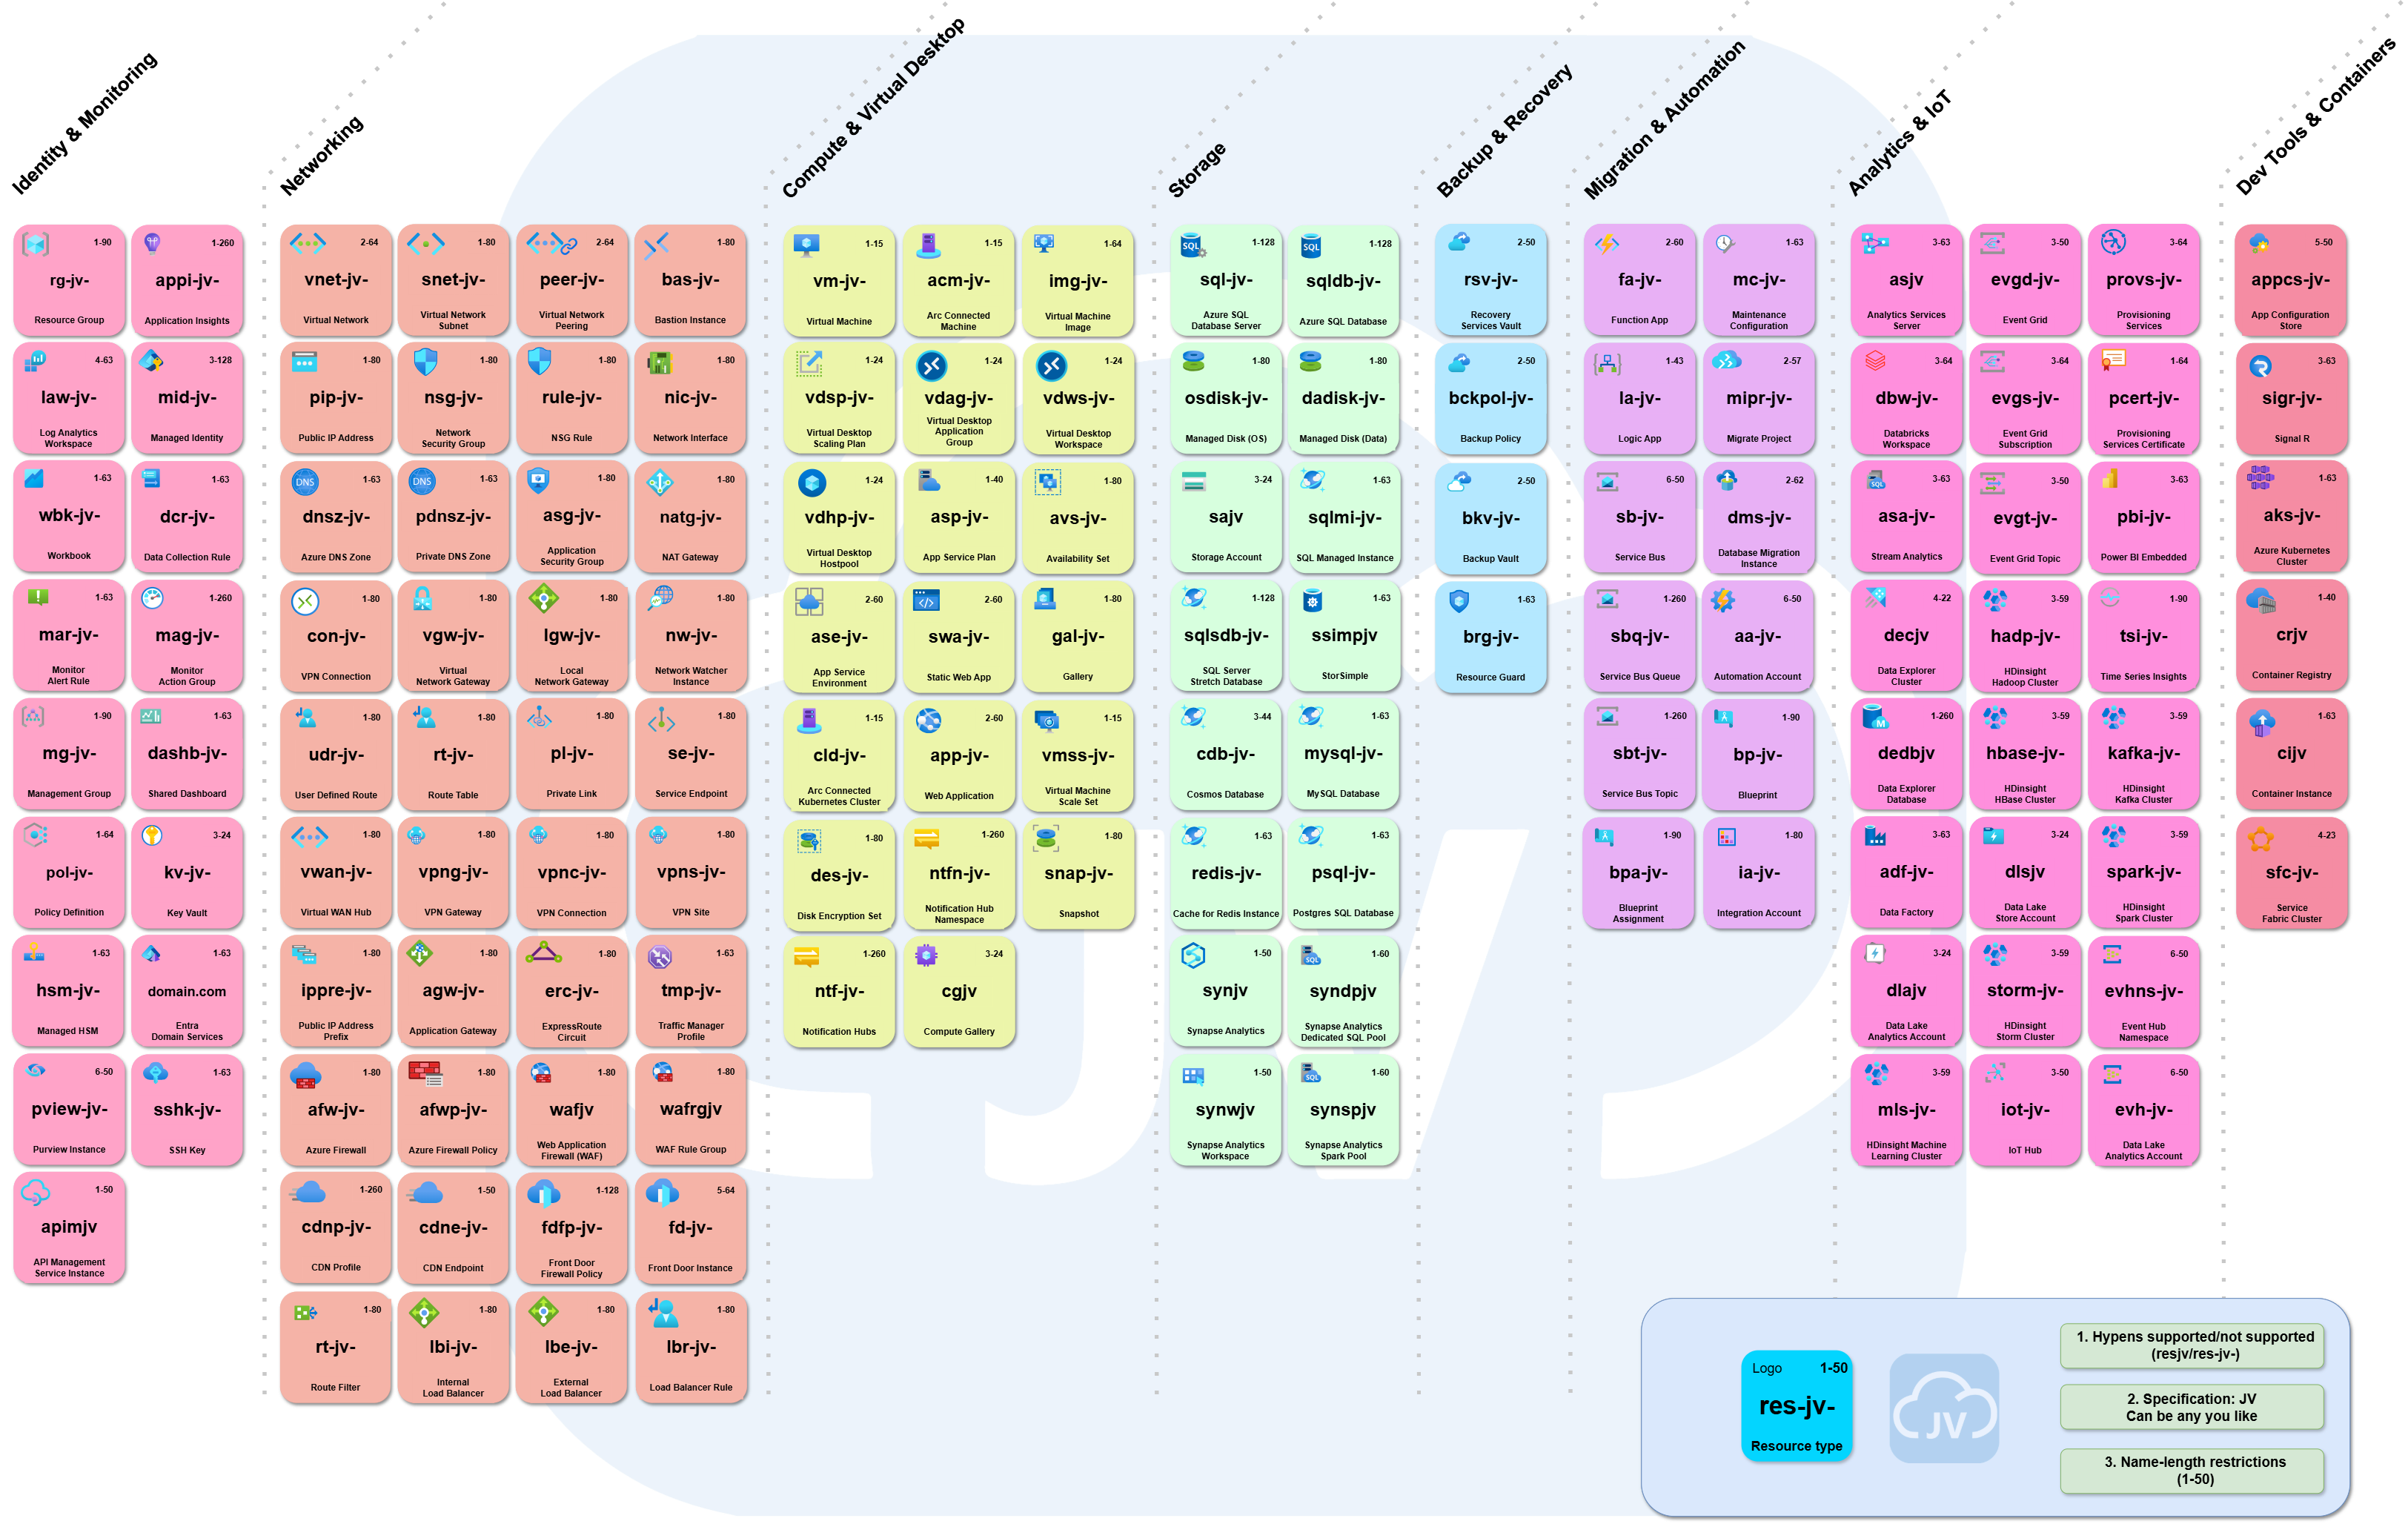
Thank you for reading this post and I hope it was helpful!
Sources
These sources helped me by writing and research for this post;
- https://learn.microsoft.com/azure/cloud-adoption-framework/ready/azure-best-practices/resource-naming
- https://learn.microsoft.com/azure/governance/policy/overview
- https://learn.microsoft.com/azure/governance/policy/concepts/effects
End of the page 🎉
You have reached the end of the page. You can navigate through other blog posts as well, share this post on X, LinkedIn and Reddit or return to the blog posts collection page. Thank you for visiting this post.
If you think something is wrong with this post or you want to know more, you can send me a message to one of my social profiles at: https://justinverstijnen.nl/about/
If you find this page and blog very useful and you want to leave a donation, you can use the button below to buy me a beer. Hosting and maintaining a website takes a lot of time and money. Thank you in advance and cheers :)
The terms and conditions apply to this post.
Azure VPN Gateway Maintenance - How to configure
Most companies who use Microsoft Azure in a hybrid setup have a Site-to-Site VPN gateway between the network in Azure and on-premises. This connection becomes mission critical for this company as a disruption mostly means a disruption in work or processes. But sometimes, Microsoft has to perform updates to these gateways to keep them up-to-date and secure. We can now define when this will be exactly, so we can configure the gateways to update only outside of business hours. In this guide I will explain how to configure this.
Why configure a maintenance configuration?
We would want to configure a maintenance configuration for our VPN gateway to Azure to prevent unwanted updates during business hours. Microsoft doesn’t publish when they perform updates to their infrastructure, so this could be any moment.
Microsoft has to patch or replace their hardware regularly, and by configuring this maintenance configuration, we tell them: “Hey, please only do this for us in this window“. You could understand that configuring this is essential for availability reasons, but also don’t postpone updates too long for security and continuity reasons. My advice is to schedule these updates daily or weekly.
If the gateway is already up-to-date during the maintenance window, nothing will happen.
How to configure a maintenance configuration
Let’s dive into how to configure this VPN gateway maintenance configuration. Open up the Azure Portal.
Then go to “VPN gateways“.
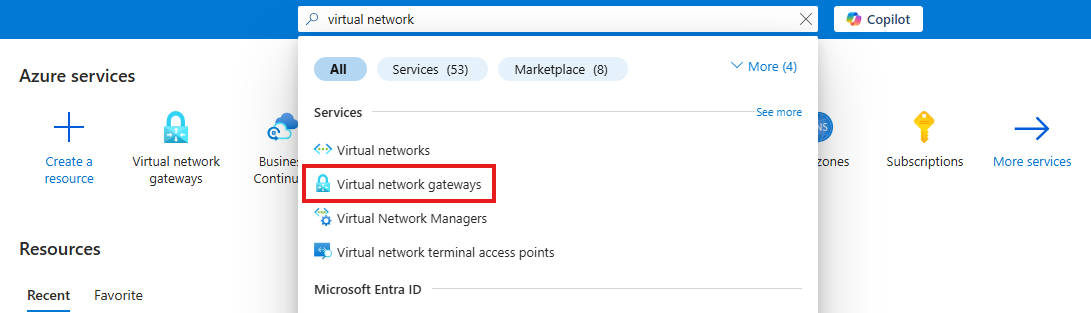
If this list is empty, you will have to select “VPN gateways“ in the menu on the left:
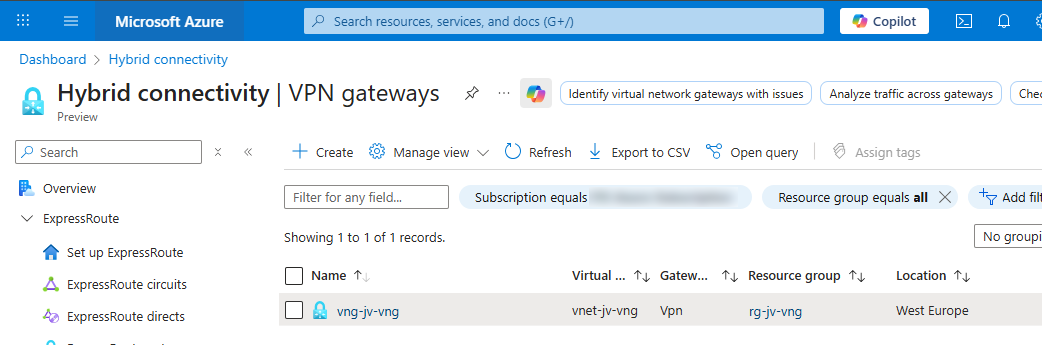
Open your VPN gateway and select “Maintenance“.
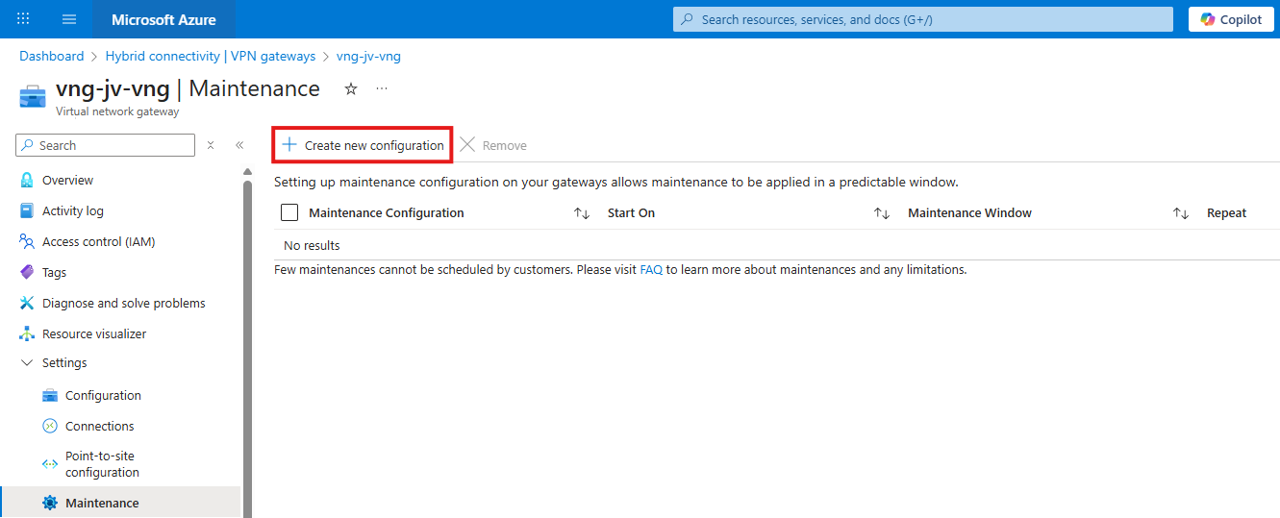
Then click on “Create new configuration“.
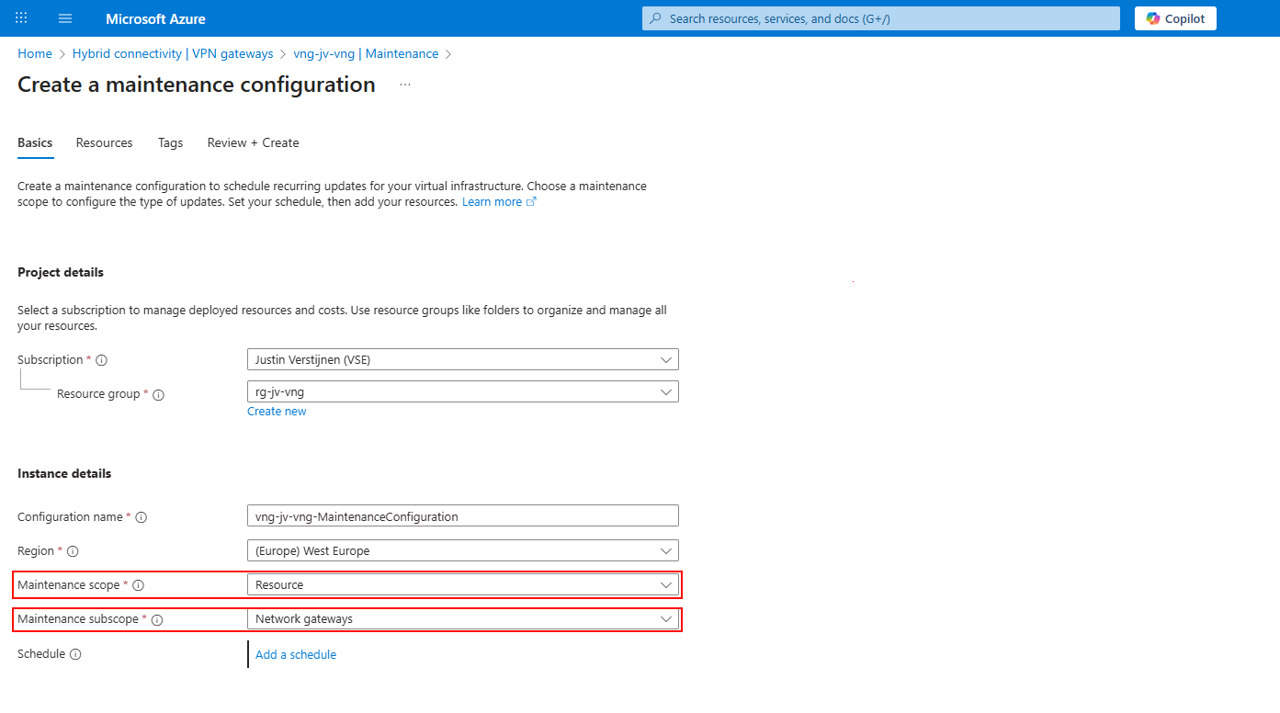
Fill in your details, select Resource at Maintenance Scope and Network Gateways for Maintenance subscope and then click “Add a schedule“.
Here I created a schedule that starts on Sunday at 00:00 hours and takes up to 6 hours:
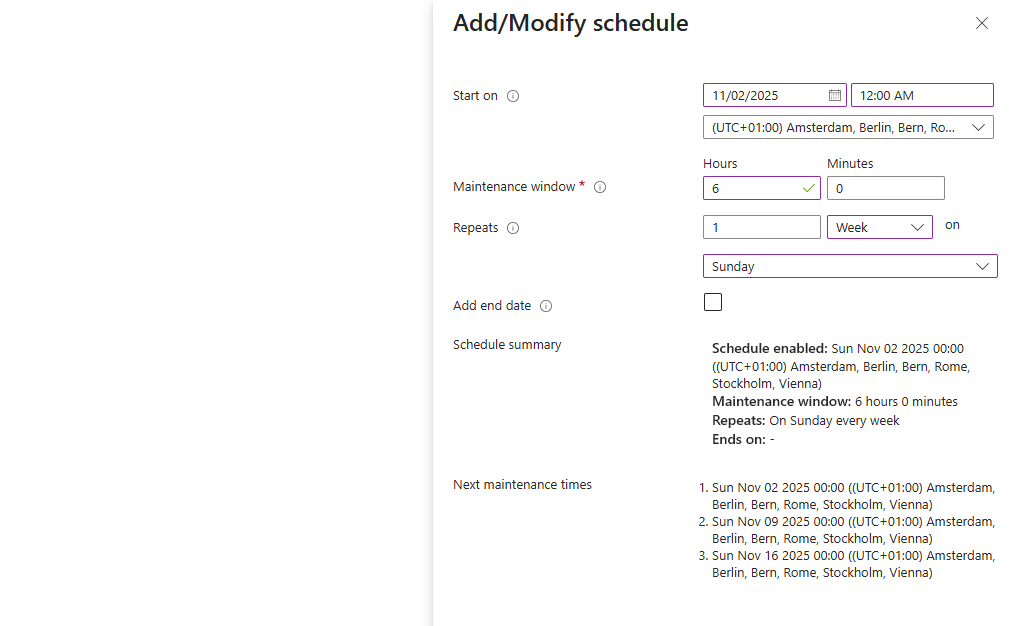
This must obviously be scheduled at a time then the VPN gateway may be offline, so outside of business hours. This could also be every day, depending on your wishes and needs.
After configuring the schedule, save the schedule and advance to the “Resources“ tab:
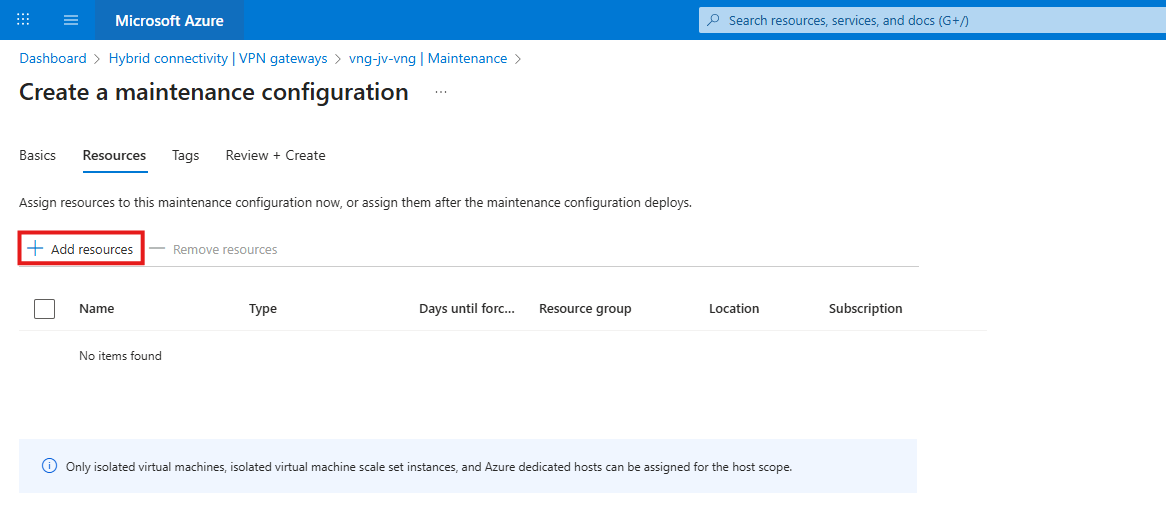
Click the “+ Add resources“ button to add the virtual network gateway.
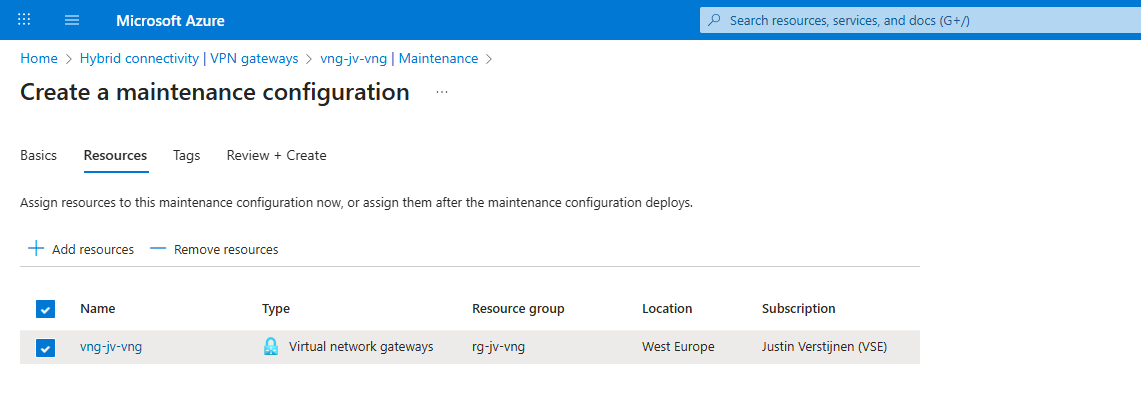
Then you can finish the wizard and the maintenance configuration will be applied to the VPN gateway.
Summary
Configuring maintenance configuration is relatively easy to do and it helps your environment to be more predictable. However this may never be the case, we know for sure that Microsoft doesn’t apply updates to our VPN gateway during business hours.
Sources
These sources helped me by writing and research for this post;
End of the page 🎉
You have reached the end of the page. You can navigate through other blog posts as well, share this post on X, LinkedIn and Reddit or return to the blog posts collection page. Thank you for visiting this post.
If you think something is wrong with this post or you want to know more, you can send me a message to one of my social profiles at: https://justinverstijnen.nl/about/
If you find this page and blog very useful and you want to leave a donation, you can use the button below to buy me a beer. Hosting and maintaining a website takes a lot of time and money. Thank you in advance and cheers :)
The terms and conditions apply to this post.
Azure Stack HCI - Host your Virtual Desktops locally
Azure Stack HCI is a solution for Microsoft Azure to host Azure resources on your own hardware and location. This sounds traditional but can help to boost your Azure resources for your customer and/or use case. For example, with Azure Stack HCI it is possible to host some Azure Virtual Desktop hosts in your own network to boost performance by decreasing latency. Also it is possible to use GPU enabled software on this without having the very high monthly computing costs.
Introduction to Azure Stack HCI
Azure Stack HCI is a solution for Microsoft Azure to host Azure resources on your own hardware and location. This sounds traditional but can help to boost your Azure resources for your customer and/or use case.
For example, with Azure Stack HCI it is possible to host some Azure Virtual Desktop hosts in your own network to boost performance by decreasing latency. Also it is possible to use GPU enabled software on this.
Azure Stack HCI became part of Azure Local after writing this post, see more information here:
Supported Azure Services
The supported Azure services at the moment of writing are:
- Windows and Linux VMs
- Azure Virtual Desktop session hosts
- Containers
- AKS (Azure Kubernetes Services)
- SQL
- Azure Functions
- Logic Apps
- Event Grid
- And more: https://azure.microsoft.com/en-us/products/azure-stack/hci/
Requirements to follow this guide
You need the following to follow this guide and make sure to minimize errors:
- 2 Physical/Virtual servers for Azure Stack HCI nodes (1 for the single node cluster setup further in this guide)
- 1 Domain Controller server
- Powershell module
AsHciADArtifactsPreCreationToolinstalled - Azure CLI installed
- Powershell module
- An ISO for Azure Stack HCI (Download from Azure Portal)
- An Azure subscription where you have the following permissions
- Key Vault Contributor
- Windows Admin Center Admin Login
- Contributor
- A resource group in Azure where you have the following permissions
- Key Vault Data Access Administrator
- Key Vault Secrets Officer
- Key Vault Contributor
- Storage Account Contributor
- A Azure storage account which is the cluster witness (needed for quorum)
In my guide, I will focus on creating a cluster with 2 nodes. I have included and tested the steps to create a single-server cluster too:
My environment
My environment consists of one physical server with 3 VMs on it. In a production environment it is better to physically segment the HCI cluster nodes to multiple fault domains. This setup is purely for educational purposes. In production environments, one hardware error will result in 100% outage
I create a Multi-node server cluster to experiment with Stack HCI. The environment looks like this.
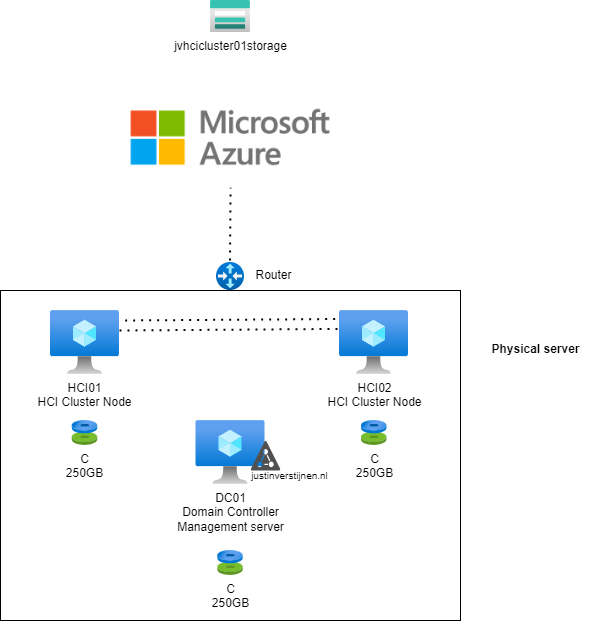
- 2 nodes (HCI01 and HCI02)
- 1 domain controller (DC01)
- In Azure: 1 storage account
In Azure I have a single resource group where I want to deploy my cluster into:
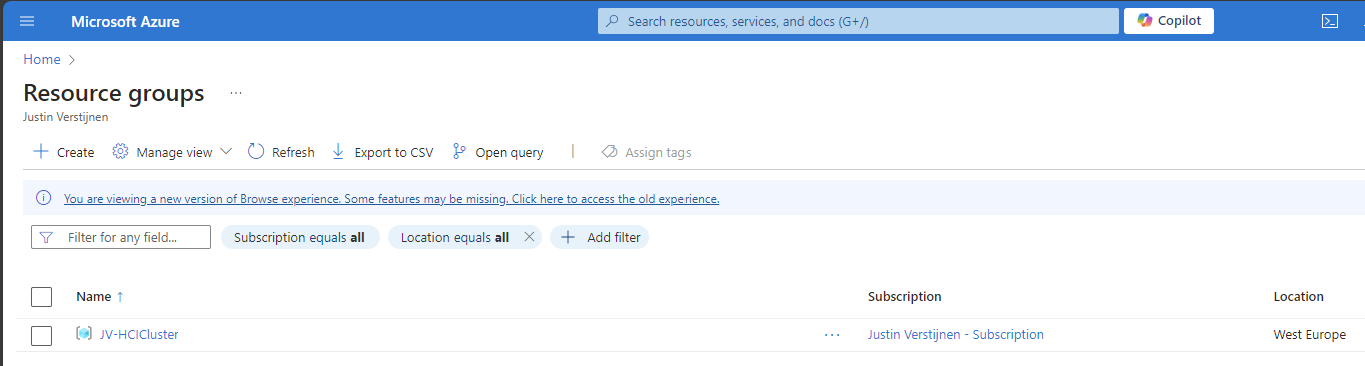
1. Multi-node setup guide
1.1 Installing nodes for the cluster
The installation of Azure Stack HCI is very straight-forward, and the same as installing Windows 11 or Windows Server. At the time you follow this guide I think you understand how to do this.
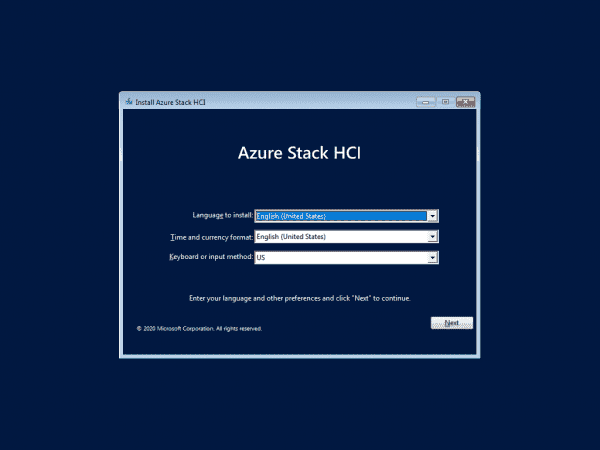
Install Azure Stack HCI on both of the nodes. Sit back or get a cup of coffee because this will take around 15 minutes :). To not waste time, my advice is to prepare the Active Directory during the installation.
1.2 Prepare Active Directory
We have to prepare our Active Directory for the coming change, the introduction of a new Cluster. This cluster will be settled in its own OU for future machines. Unfortunately, this OU cant be created through the GUI and has to be created with PowerShell.
Create a new Active Directoy forest when you don’t have one.
On the domain controller/management server, you have to first install the following Powershell module:
POWERSHELL
Install-Module AsHciADArtifactsPreCreationTool -Repository PSGallery -ForceAfter that, create a new OU for your HCI nodes by using the HCI module (only possible with this module). Change the name of your desired OU to your needs. I created it with the command below:
POWERSHELL
New-HciAdObjectsPreCreation -AzureStackLCMUserCredential (Get-Credential) -AsHciOUName "OU=StackHCI,DC=justinverstijnen,DC=nl"At the credential section, you have to specify a new user who can manage the HCI cluster and is used as service account. The user must comply with the following requirements:
- No special characters in username
- Password must me 12 characters at minimum
- Username may NOT be in DOMAIN\User or USER@DOMAIN format
I created my user like shown below:
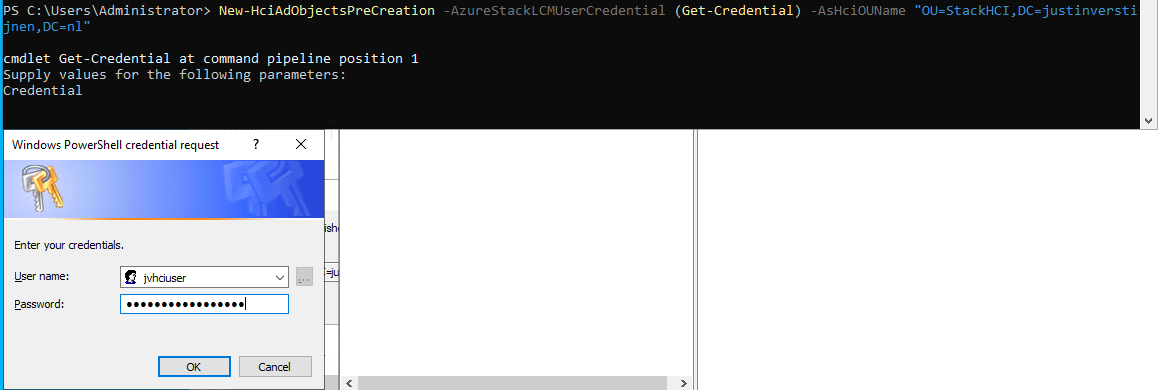
The module accepted my account:
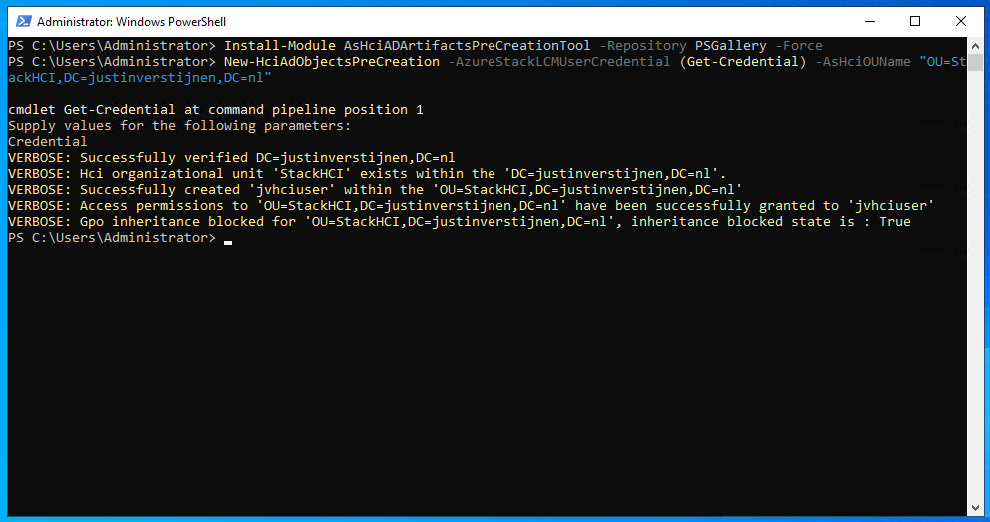
When going to the Active Directory Users and Computers center, you see the changes are processed succesfully:
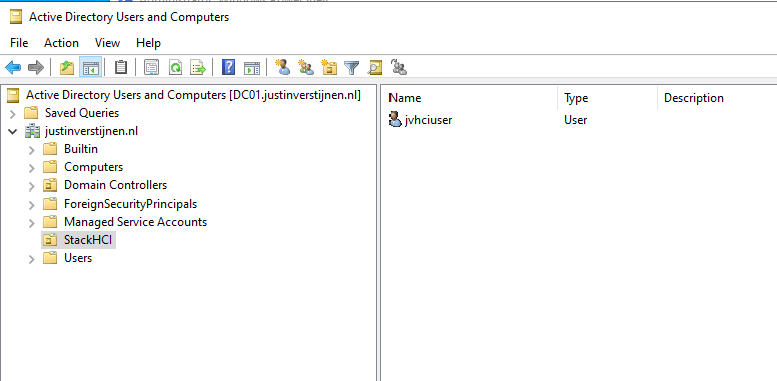
Now we have configured the Active Directory and we can go on to configure the cluster nodes.
1.3 Preparing the cluster nodes
After the installation and preparation of the nodes we can perform a default configuration of the nodes through sconfig:
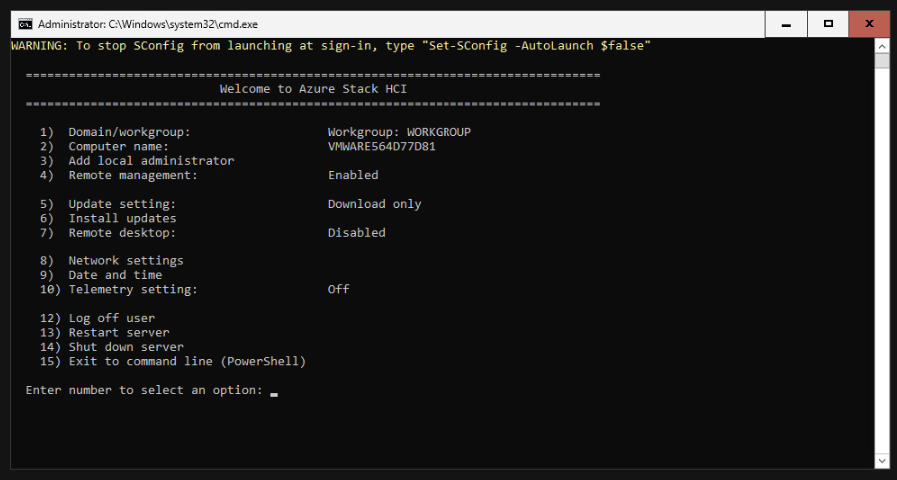
This menu is the same as on server-core installations of Windows Server. Navigate through the menu by using the numbers and the extra options you get afterwards.
I have done the following steps on both of the nodes:
- Changed computer-name
- Downloaded the latest updates
- Enabled remote-management and enabled response to Ping (4 -> 3)
- Changed DNS server to:
- Preferred server: my domain controller
- Alternate server: DNS of my ISP provider
Note: do NOT join your nodes to Active Directory, otherwise the wizard to create a cluster will fail.
The result after these steps.
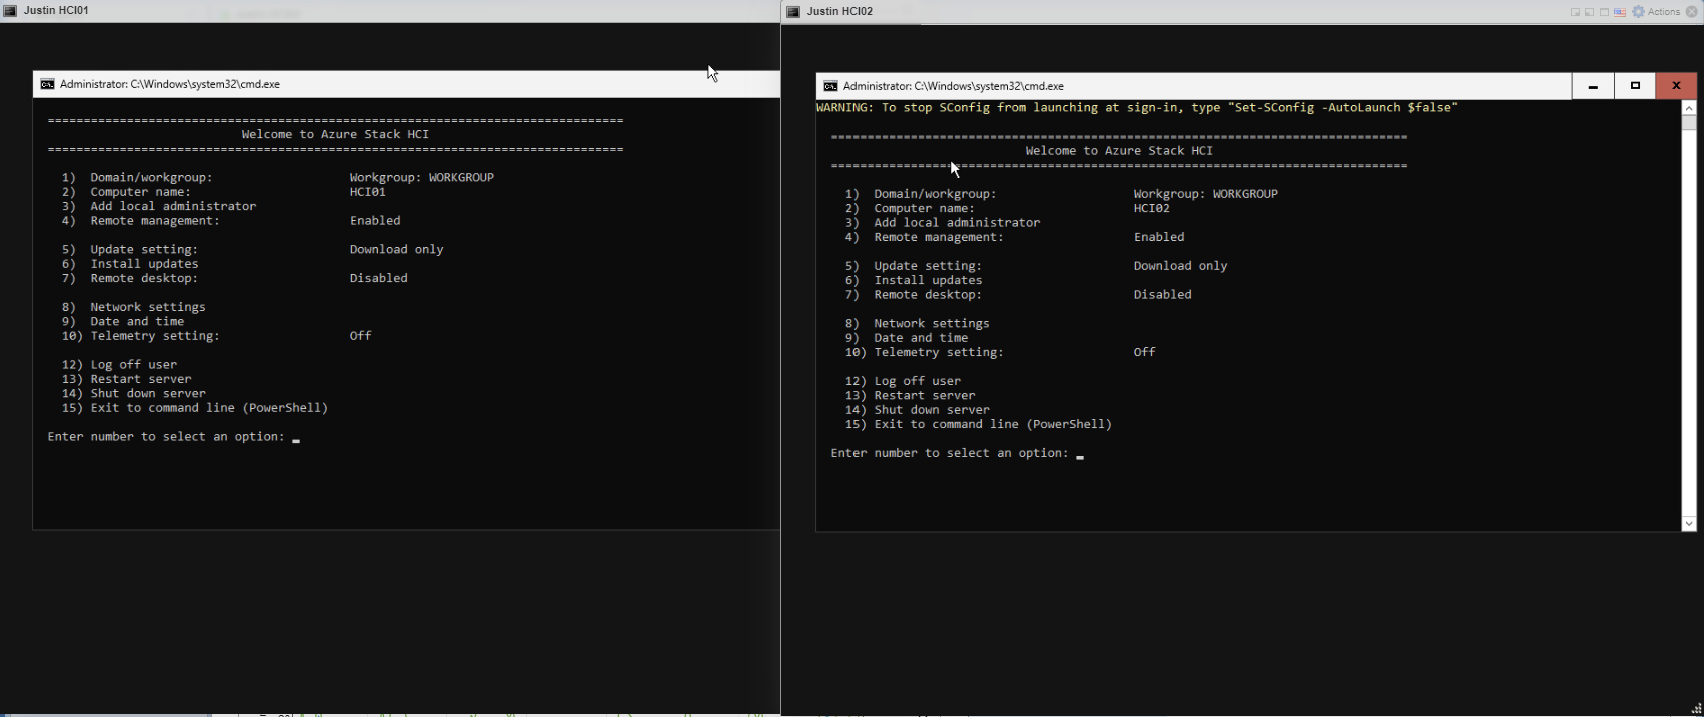
After the basic configuration of the nodes is complete, we have to do the following pre-configuration steps on every node:
Install Hyper-V (needed for virtualization purposes)
POWERSHELL
Enable-WindowsOptionalFeature -Online -FeatureName Microsoft-Hyper-V -AllAfter installation of this feature, restart the node. You can do this with the following command:
POWERSHELL
Restart-ComputerWhen the node is restarted, install the needed Powershell modules. Install these on all of the nodes.
POWERSHELL
Install-Module AzsHCI.ARCinstaller -Force
Install-Module Az.Accounts -Force
Install-Module Az.ConnectedMachine -Force
Install-Module Az.Resources -Force
After installing all the needed modules, we can register every node to Azure Arc. We can perform this by running the commands below and change the parameters:
POWERSHELL
$AzureSubscription = "SUBSCRIPTION ID"
$AzureTenantID = "TENANT ID"

Connect-AzAccount -SubscriptionId $AzureSubscription -TenantId $AzureTenantID -DeviceCode
Now you have to login via the Device code on a browser on your local computer or management server. This is because the Azure Stack HCI operating system doesn’t have a browser and doesn’t support interactive login.
Now we have to run another command with parameters:
POWERSHELL
$AzureResourceGroup = "Resource Group Name"
$AzureARMtoken = (Get-AzAccessToken).Token
$AzureAccountID = (Get-AzContext).Account.Id

Invoke-AzStackHciArcInitialization -SubscriptionId $AzureSubscription -ResourceGroup $AzureResourceGroup -TenantId $AzureTenantID -Region westeurope -ArmAccessToken $AzureARMtoken -AccountID $AzureAccountID -Cloud "AzureCloud"
Now the node will be registered to Azure Arc. This will take around 10 minutes.

After some minutes, the nodes appear in the Azure portal:
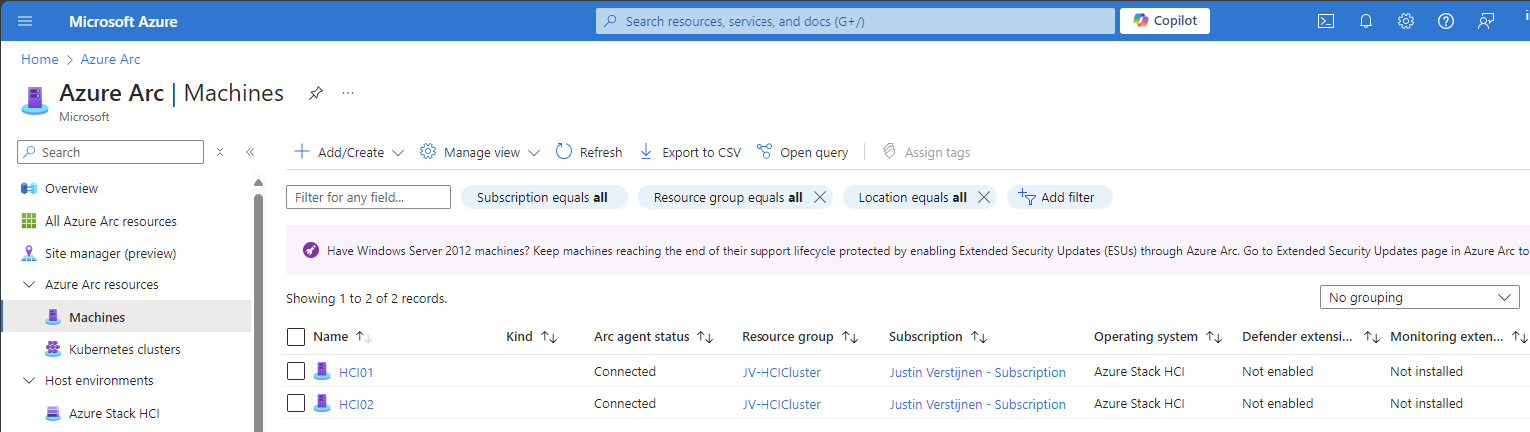
Now we have achieved this, we don’t need the nodes anymore and we can close the connections to it. The rest of the cluster/node configuration will be done in the Azure Portal. This was just the setup of the nodes itself.
After the machines appear in the Azure Portal, the service will install the needed extensions on all of the cluster nodes. You can’t go further before all the extensions are installed. You can follow the status by clicking on one of the cluster nodes and the open the blade “Extensions”.
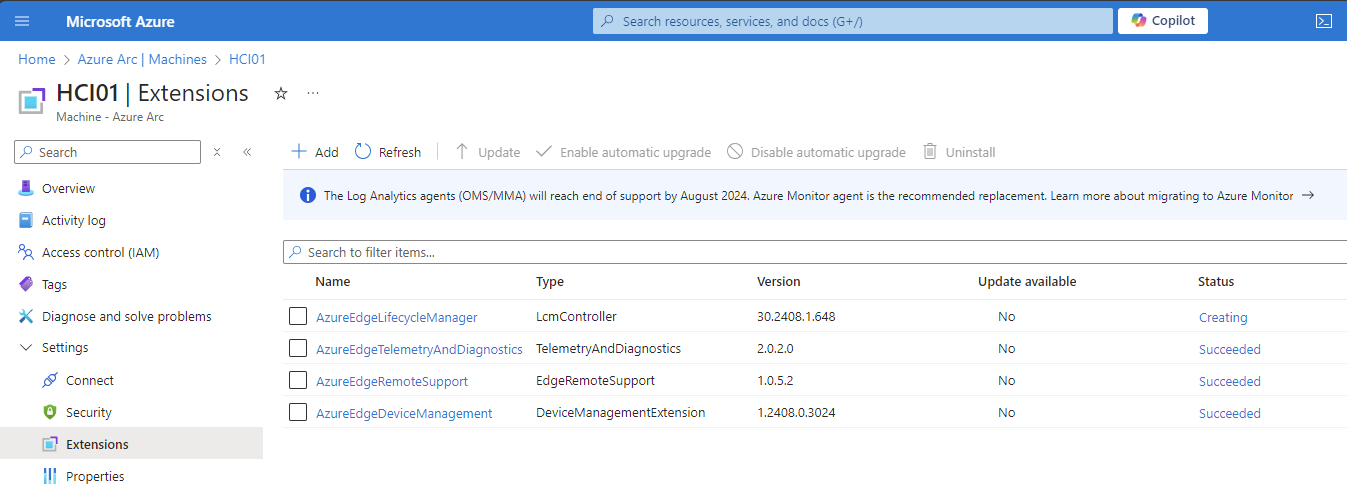
All of the nodes must have at least 3 extensions and the status must be “Succeded”.
1.4 Creating the cluster in the Azure Portal
Now we have prepared everything, and we can create the cluster in the Azure portal now.
Go to Azure Arc and open the blade “Azure Stack HCI”:
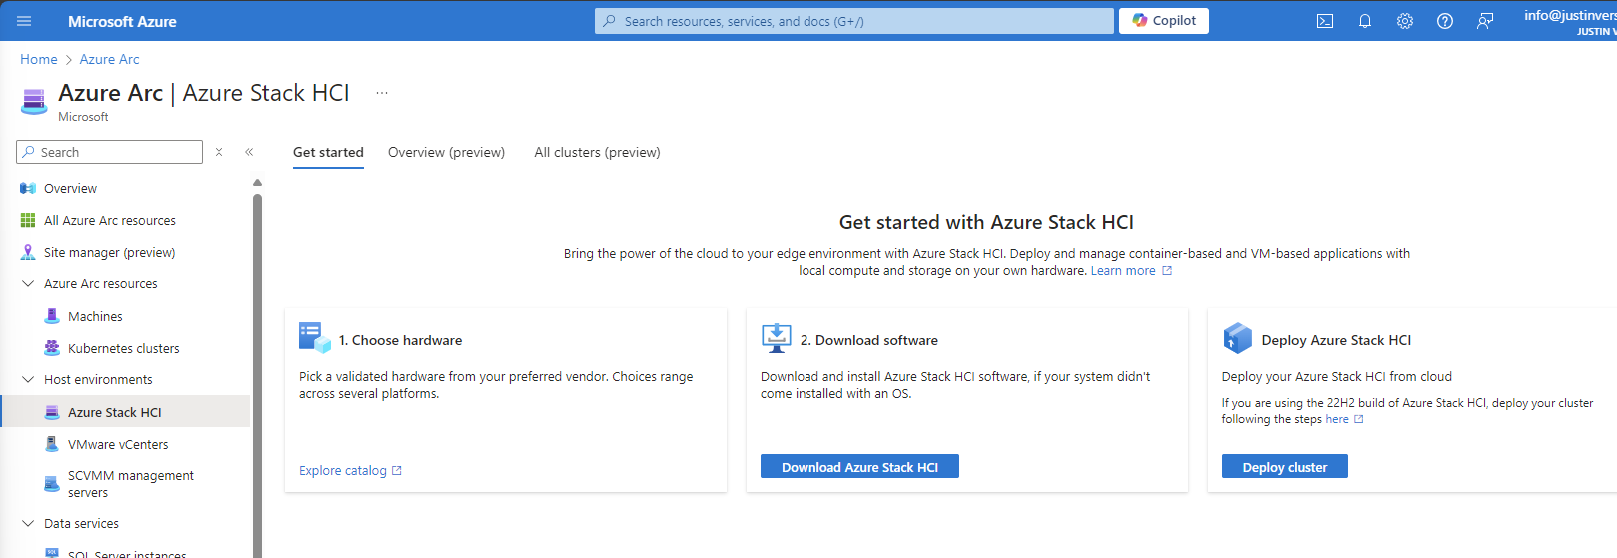
Select the option “Deploy cluster”
We now have to fill in some details. Next to a HCI cluster, Azure needs a Key Vault to store some secrets for encryption purposes. We have to create that in this wizard:
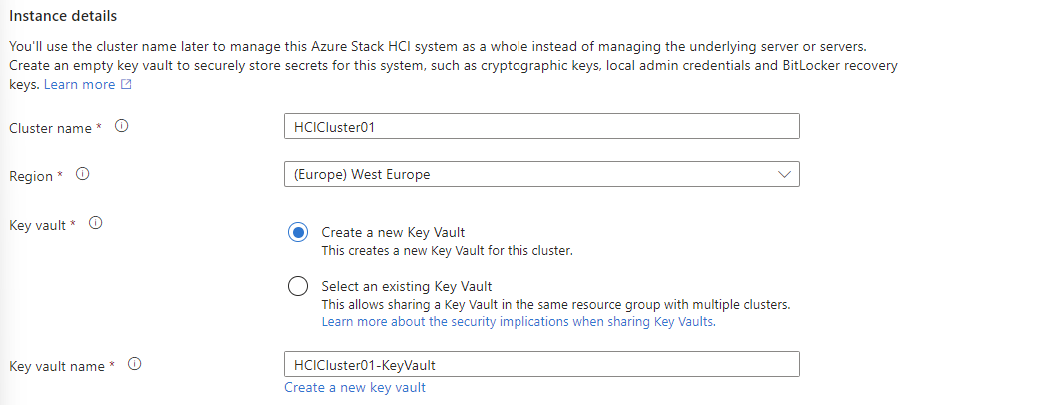
After that, we have to validate our cluster nodes by Azure to check if all pre-requisites are done:
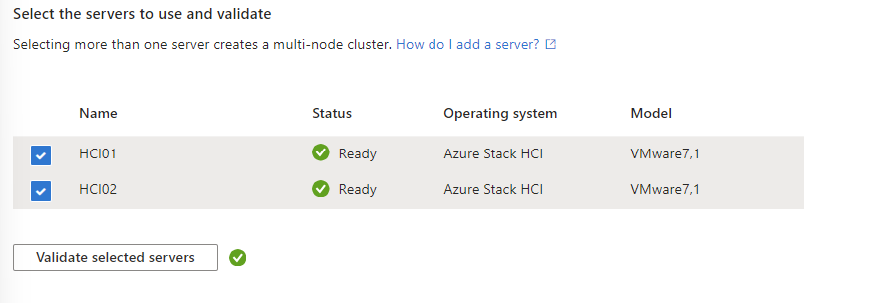
After succesfully validating the nodes, we can go further in the wizard.
On the tab “Configuration”, I chose for a new configuration:
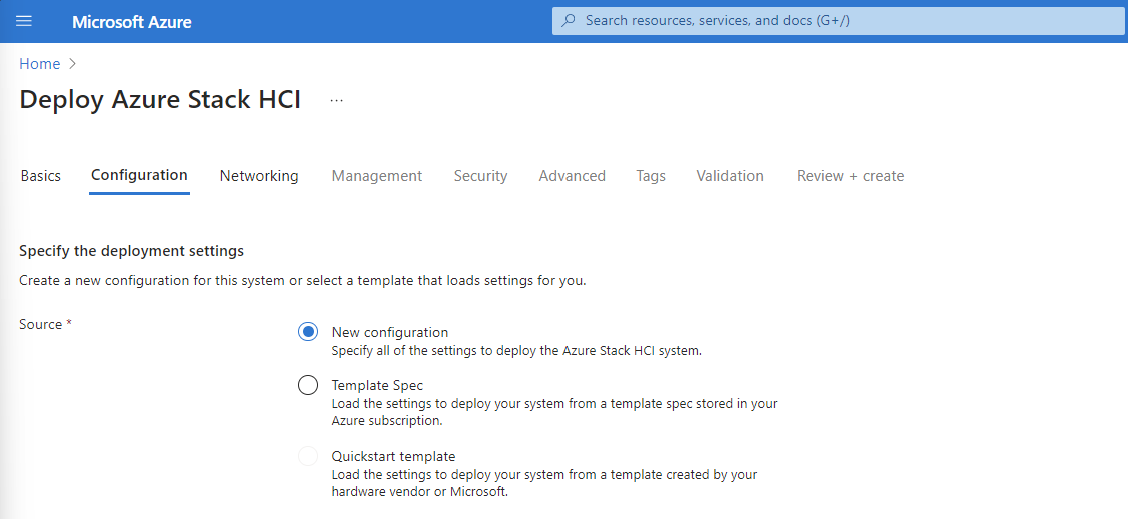
On the tab “Networking”, I chose for “Network switch for storage”. This means if there is a network switch between the servers. In my environment, I am using VMware as Hypervisor for my cluster nodes. This has a internal switching system and has no direct link to the PCIe connected network interface.
Further, you have the option to segment your cluster network by using different network links for:
- Management
- Traffic between nodes
- Storage network
In my environment I chose to group all traffic. In real world and business critical environments, it is often better to segment the traffic to increase performance and security.
After that step, we have to configure network connectivity. Select the network interface and at the IP configuration section, keep in mind at the DNS servers you need connection to your domain controller.
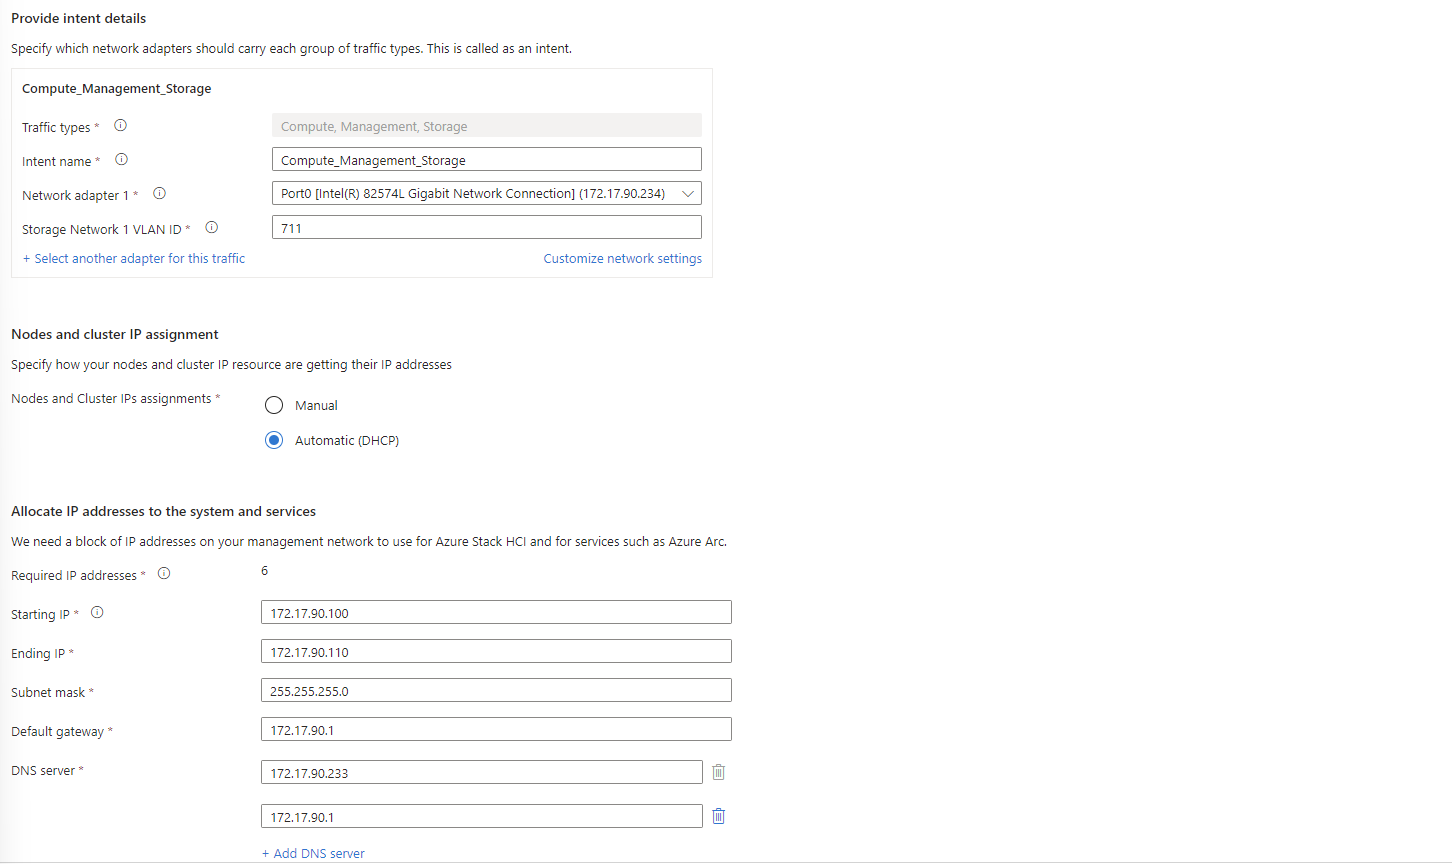
When everything is filled in correctly, we can advance to the “Management” tab.
At the Management Tab, you can define a location name tag. After that you need to define your storage account which will be used to keep the cluster online when a node is offline. In clustering, you always need to have your cluster online for 50% of your nodes + 1 witness.
Then we have to configure our Active Directory domain and OU. The OU has to be the distinguished name which you can find by using the “Attribute Editor” tab on a OU in Active Directory.
Also we have a deployment account and a local administrator account:
- Deployment account: is the account we created in step 1.2
- Local administrator: is the account on the cluster nodes we created after installation of Stack HCI OS
Fill in those details and click Next: Security
We want the highest level of security, so we choose the recommended settings:
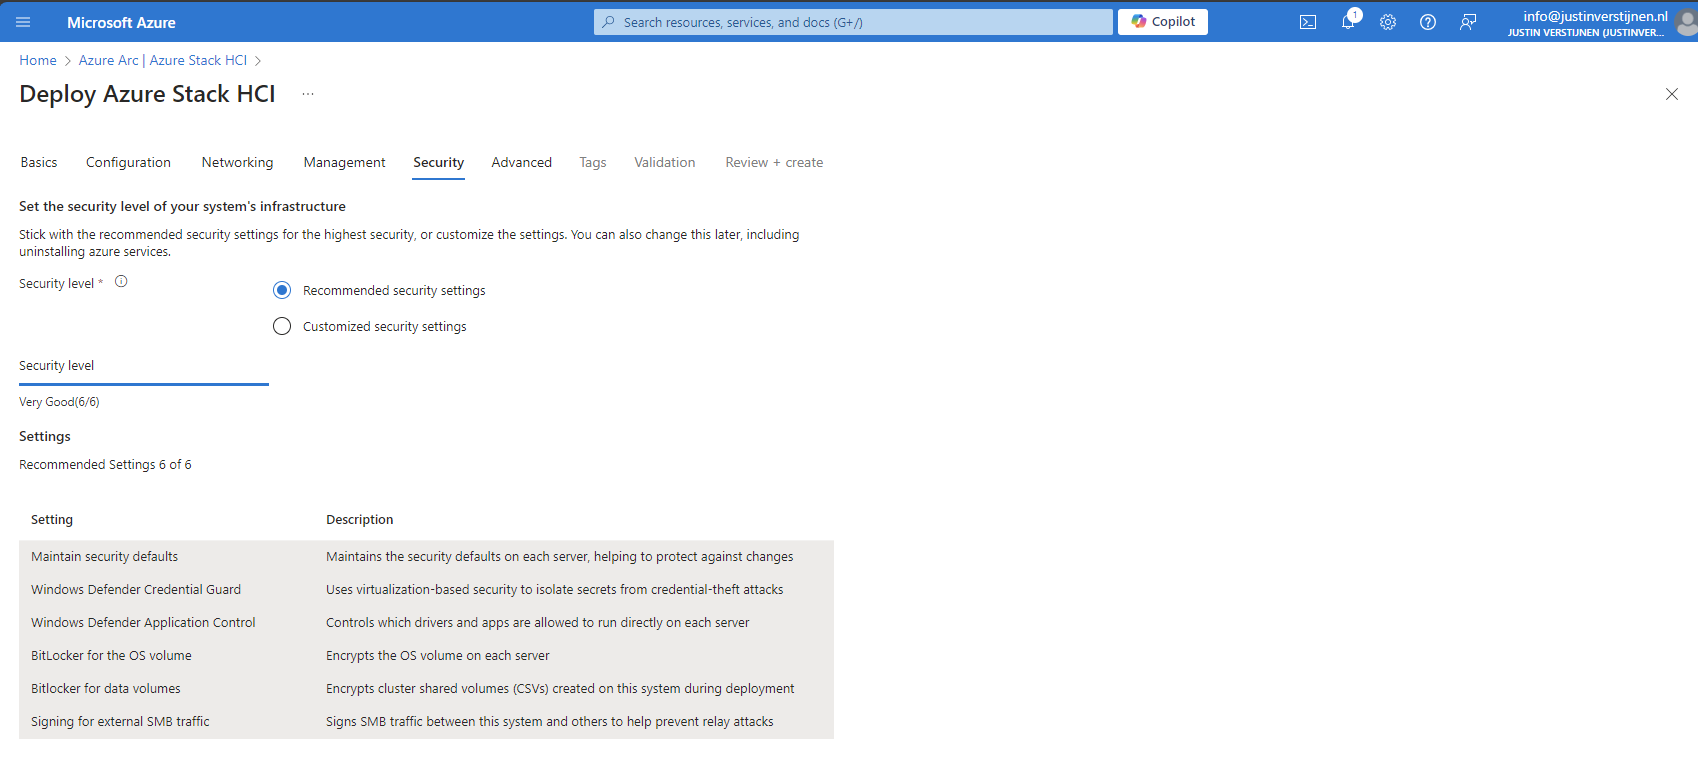
After that we can go to the tab “Validation”. Here we have to validate the complete configuration of the cluster:
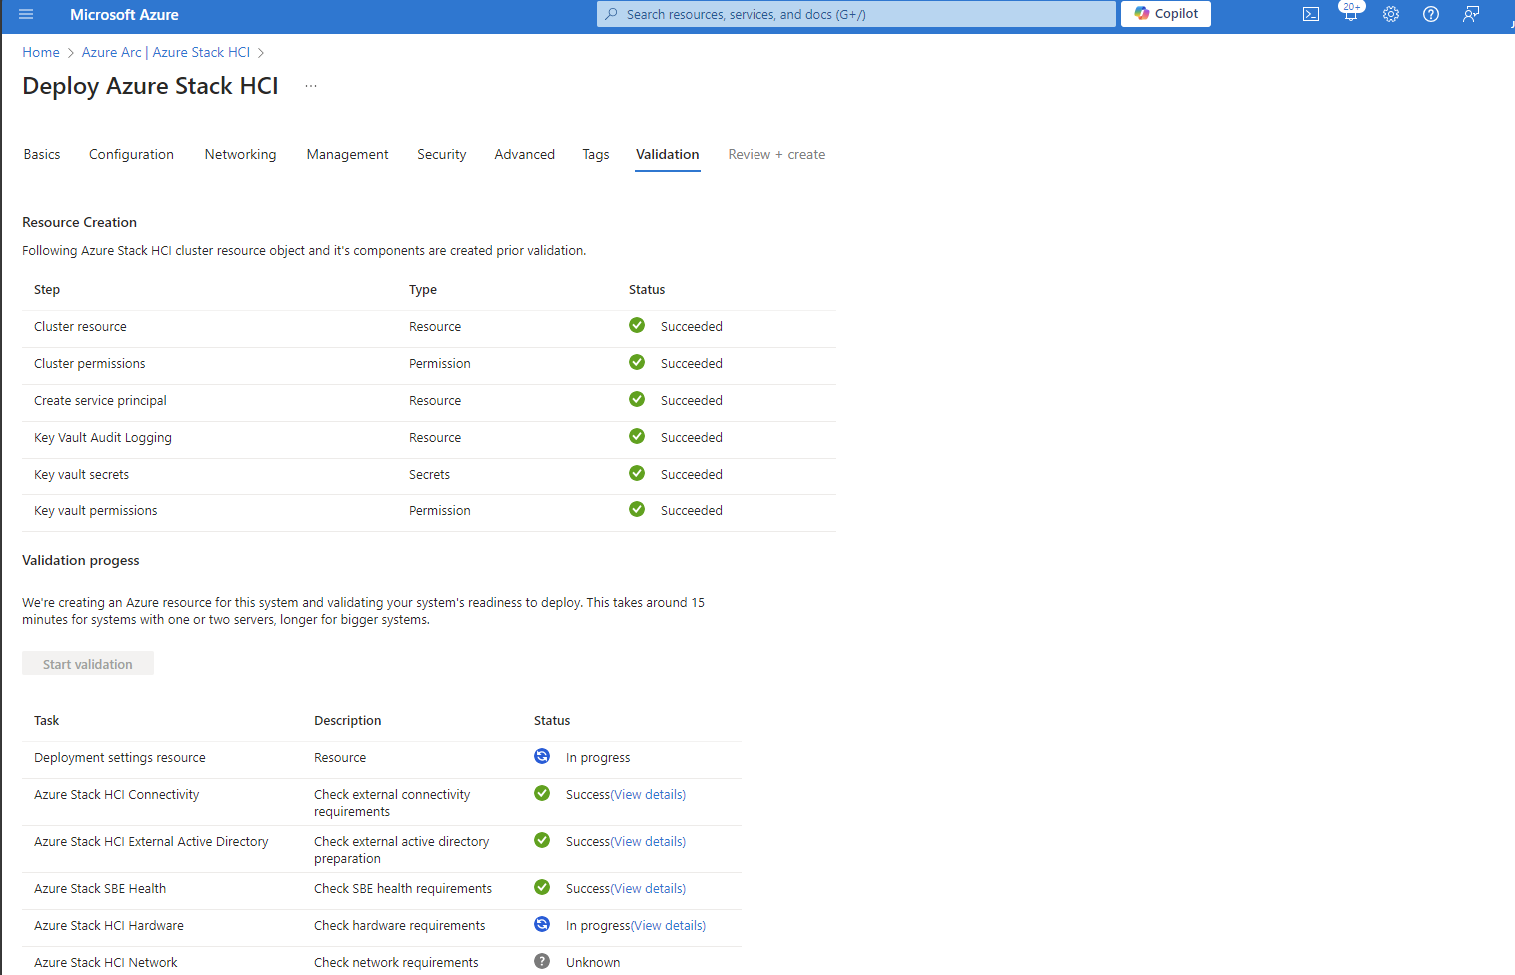
2. Steps for creating a single-node cluster
Microsoft doesn’t officially support a single node cluster, but you can create this. When you want to configure this, most of the steps must be done in PowerShell.
For testing, this is a great way to explore the service. My advice in a production environment is to use 2 or more nodes at minimum.
2.1 Testing cluster configuration prior to creating
To test your current configuration of all nodes, run a pre-creation check. A cluster has to succeed all the validation tests, otherwise the configuration is not supported by Microsoft and therefore not production-ready.
On the Management-server, run the following command:
POWERSHELL
Test-Cluster -Node HCI01 -Include "Storage Spaces Direct", "Inventory", "Network", "System Configuration"Te result I got is the following:
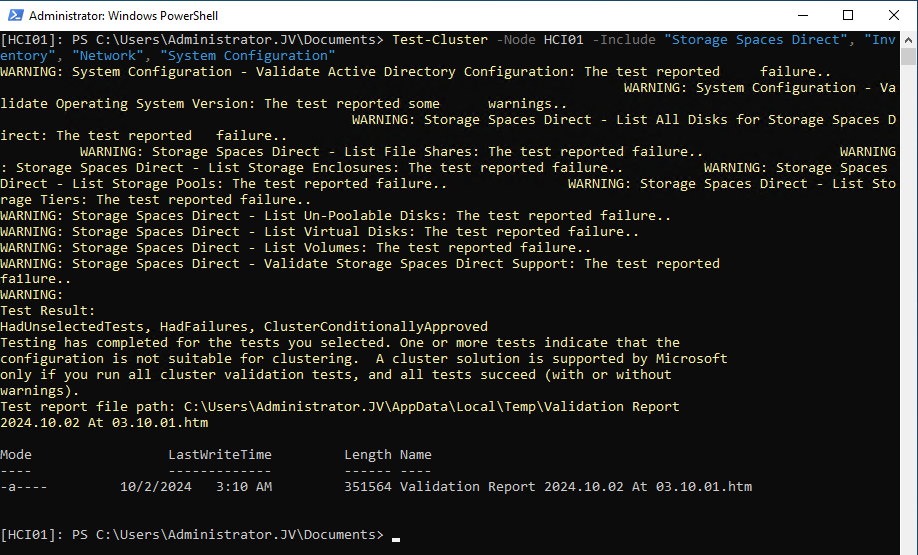
It gives us the steps we have to fix first before creating the cluster. We get the warnings because at this point we didn’t have everything configured. The following components needs configuration
- Active Directory
- Operating System version
- Storage Spaces Direct
2.2 Prepare Active Directory
Create a new Active Directoy forest when you don’t have one.
Then, install the needed HCI Powershell module when you don’t have it already:
POWERSHELL
Install-Module AsHciADArtifactsPreCreationTool -Repository PSGallery -ForceAfter that, create a new OU for your HCI nodes by using the HCI module (only possible with this module). Change the name of your desired OU to your needs. I created it with the command below:
POWERSHELL
New-HciAdObjectsPreCreation -AzureStackLCMUserCredential (Get-Credential) -AsHciOUName "OU=StackHCI,DC=justinverstijnen,DC=nl"At the credential section, you have to specify a new user who can manage the HCI cluster and is used as service account. The user must comply with the following requirements:
- No special characters in username
- Password must me 12 characters at minimum
- Username may NOT be in DOMAIN\User or USER@DOMAIN format
I created my user like shown below:
The module accepted my account:

2.3 Prepare the drives
Before creating the cluster we have to prepare the drives for using Storage Spaces Direct. THis means, clearing them, setting them to read/write mode and setting them as “Primordial”
This can be done with the following commands:
On the management-server, define all your cluster nodes by using their computer name of Active Directory:
POWERSHELL
$ServerList = "HCI01"Then prepare the drives with these commands (run all at once) with the following commands:
POWERSHELL
Invoke-Command ($ServerList) {
    Update-StorageProviderCache
    Get-StoragePool | ? IsPrimordial -eq $false | Set-StoragePool -IsReadOnly:$false -ErrorAction SilentlyContinue
    Get-StoragePool | ? IsPrimordial -eq $false | Get-VirtualDisk | Remove-VirtualDisk -Confirm:$false -ErrorAction SilentlyContinue
    Get-StoragePool | ? IsPrimordial -eq $false | Remove-StoragePool -Confirm:$false -ErrorAction SilentlyContinue
    Get-PhysicalDisk | Reset-PhysicalDisk -ErrorAction SilentlyContinue
    Get-Disk | ? Number -ne $null | ? IsBoot -ne $true | ? IsSystem -ne $true | ? PartitionStyle -ne RAW | % {
        $_ | Set-Disk -isoffline:$false
        $_ | Set-Disk -isreadonly:$false
        $_ | Clear-Disk -RemoveData -RemoveOEM -Confirm:$false
        $_ | Set-Disk -isreadonly:$true
        $_ | Set-Disk -isoffline:$true
    }
    Get-Disk | Where Number -Ne $Null | Where IsBoot -Ne $True | Where IsSystem -Ne $True | Where PartitionStyle -Eq RAW | Group -NoElement -Property FriendlyName
} | Sort -Property PsComputerName, Count
This will give no output when succeeded:
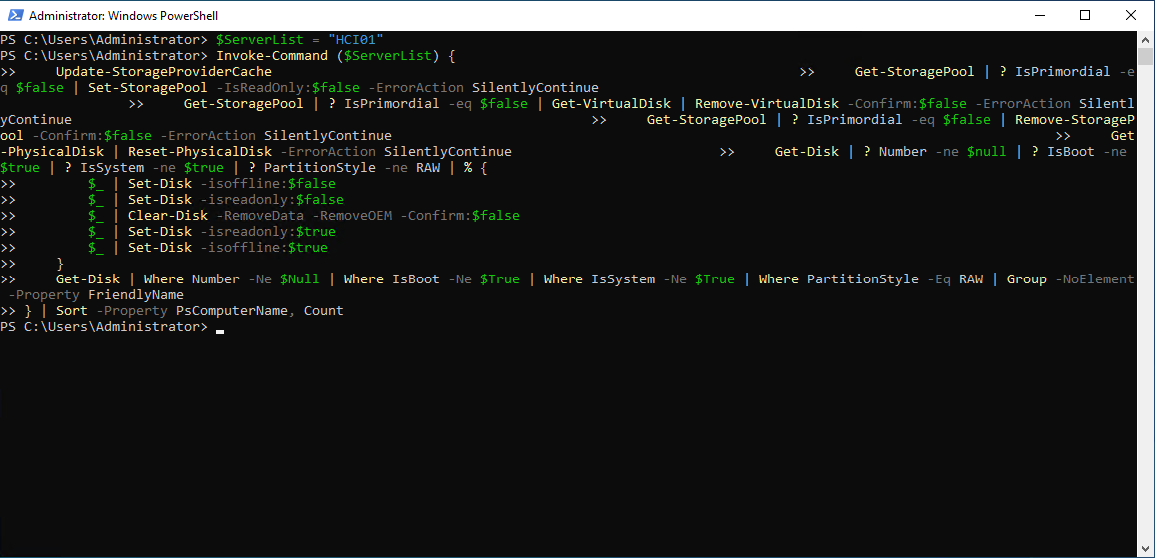
2.4 Creating the cluster
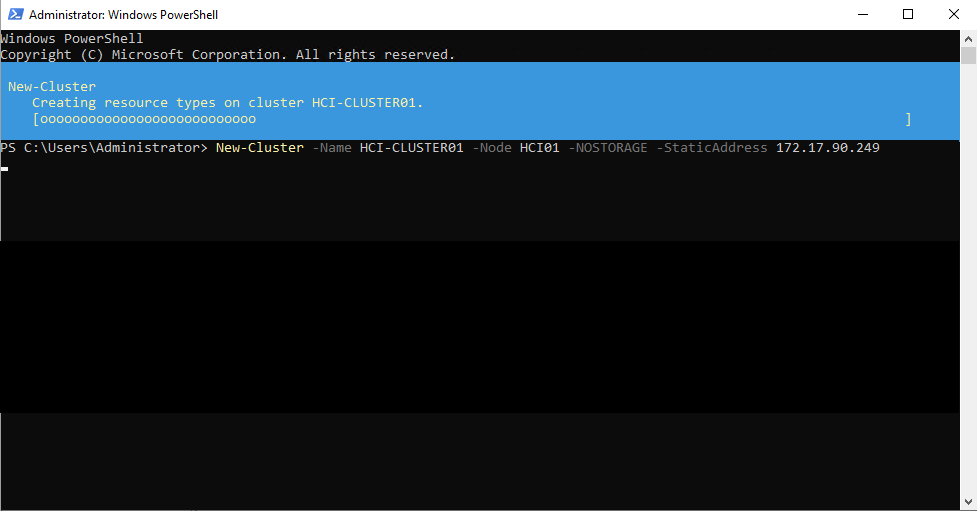
POWERSHELL
New-Cluster -Name HCI-CLUSTER01 -Node HCI01 -NOSTORAGE -StaticAddress 172.17.90.249After creating the cluster, we have to enable Storage Spaces Direct, but without Cache. We do this with the following command:
POWERSHELL
Enable-ClusterStorageSpacesDirect -CacheState Disabled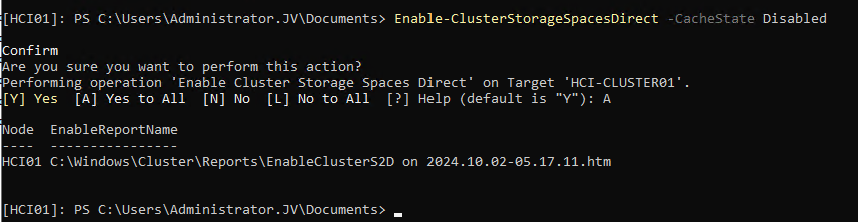
The output shows the command has been processed succesfully.
2.5 Update Cluster Functional Level
To fully let your cluster work, you have to update the functional level of the cluster. This is a version of the language the nodes use to speak with each other.
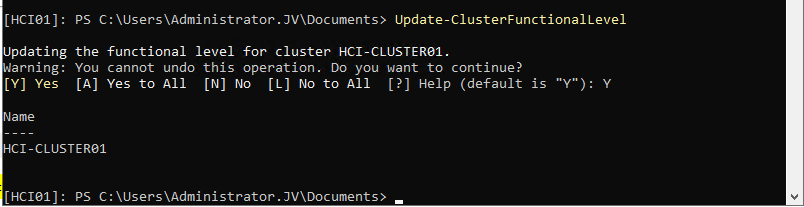
2.6 Creating Cluster Shared Volume
After everything for the cluster has been created, we have to create a Cluster Shared Volume (CSV). We can also do this from Powershell but can also be done with the Server Manager.
For Powershell, run the following command:
POWERSHELL
New-VirtualDisk -StoragePoolFriendlyName S2D* -FriendlyName CSVDisk -Size 240GB -ResiliencySettingName SimpleMy output was:
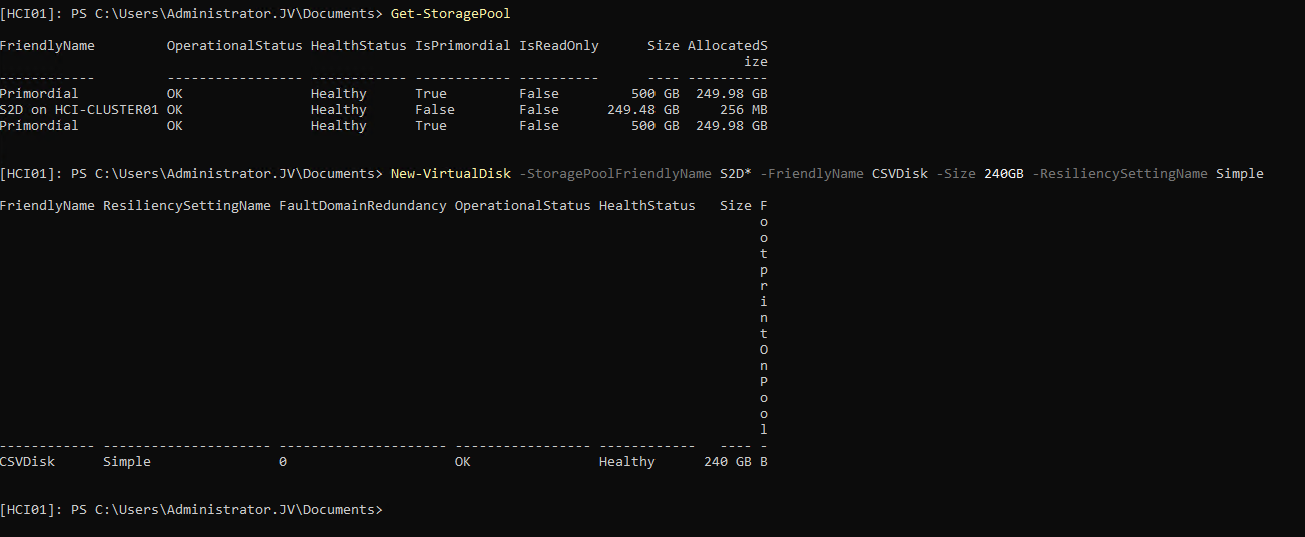
2.7 Register the cluster to Azure Stack HCI
After you configured everything of the local server we have to register the cluster to Azure Arc/Stack HCI. We can do this by following these steps:
First, register the needed resource providers in the Azure Portal. You can find this under your active subscription where you want to register the Cluster.
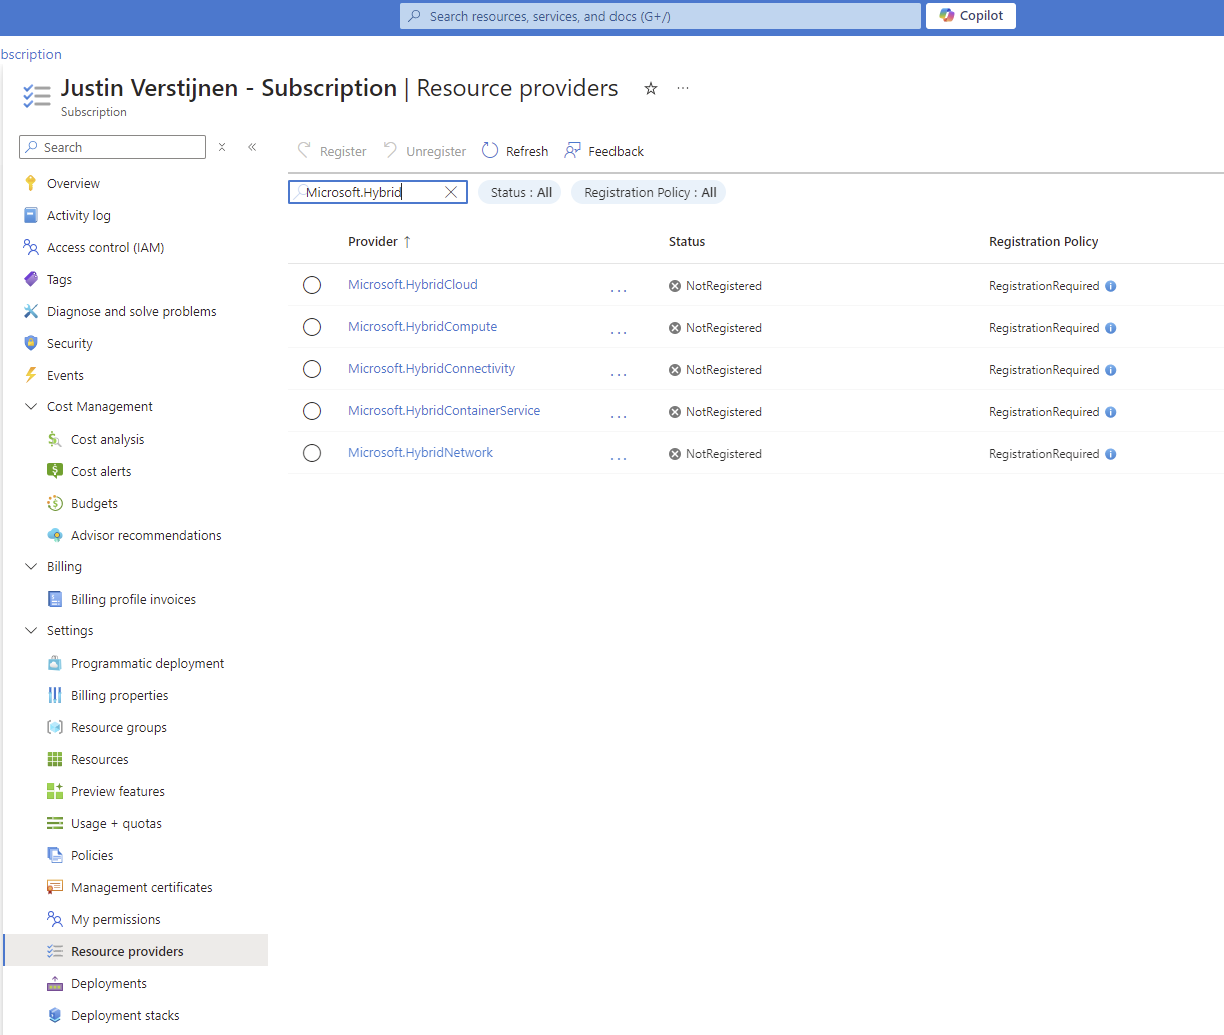
Register the following resource providers here:
- Microsoft.AzureStackHCI
- Microsoft.HybridCompute
- Microsoft.HybridConnectivity
- Microsoft.GuestConfiguration
By registering the resource providers, you enable every setting needed to use the service in your subscription. Microsoft does not enable everything by default to save its infrastucture from unneeded load.
After the Resource Providers are registered, we can finally register our cluster to Azure Arc. Go back to your HCI nodes and install the Azure StackHCI Powershell module:
POWERSHELL
Install-Module -Name Az.StackHCIAfter installing the module on every HCI cluster node, we can register the cluster node to Azure. You have to do this on every node, and this cannot be done through Powershell Remote.
POWERSHELL
Register-AzStackHCI -SubscriptionId "SUBSCRIPTION ID" -ResourceGroupName jv-test-stackhci -TenantId "TENANT ID" -Region westeurope -ResourceName HCI01Here you need to login via https://microsoft.com/devicelogin
After that step, you have to wait around 10 minutes for the registration to be done.
2.8 Azure Stack HCI in the Azure Portal
You can access Azure Stack HCI in the Azure Portal:
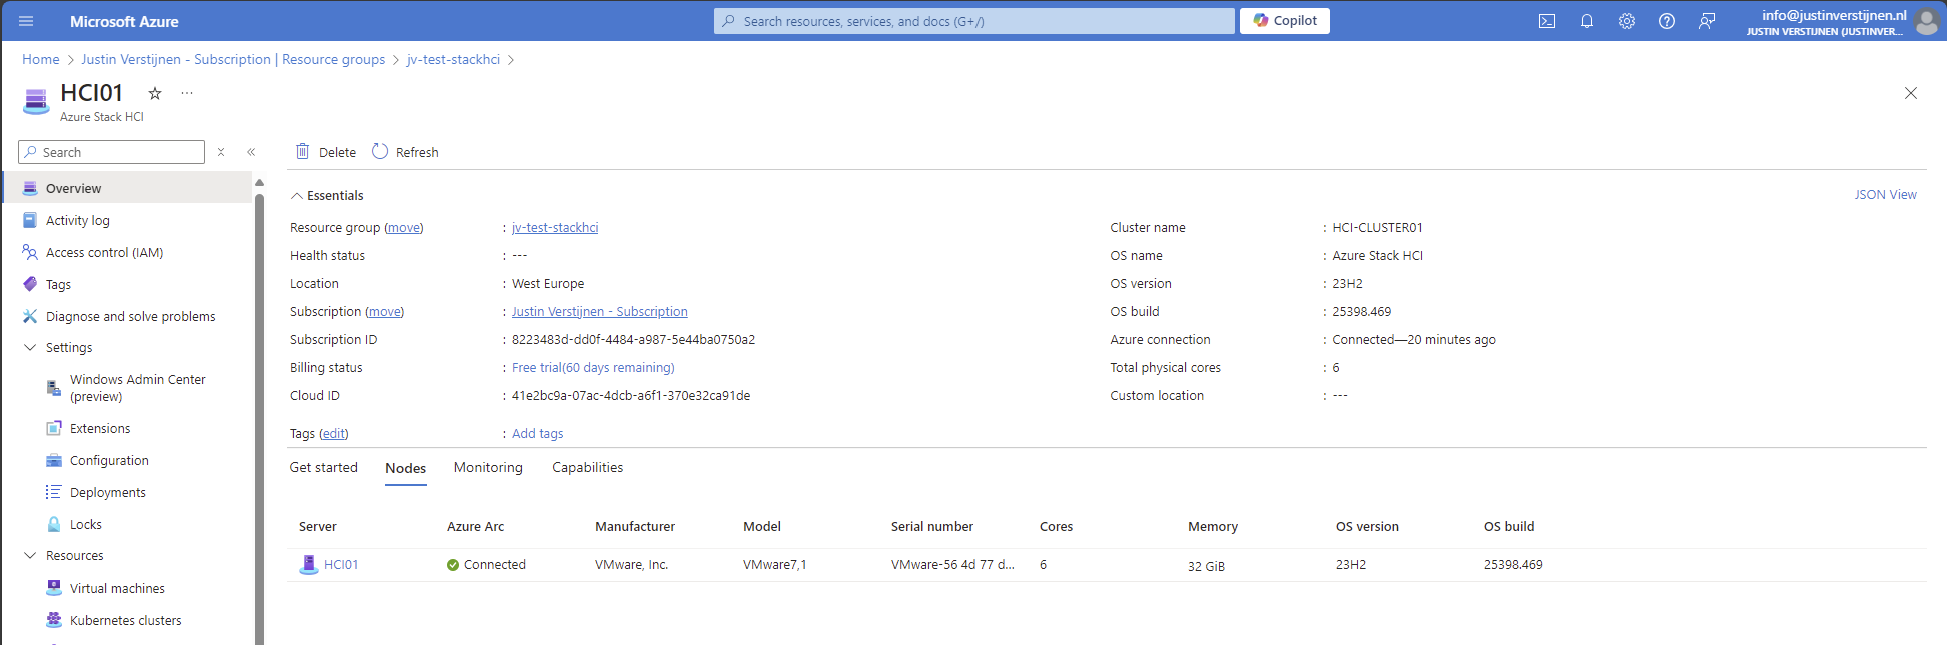
Here you can manage the nodes and clusters.
To actually create resources on the hardware on-premises through Azure Stack HCI, you have to configure a Arc Resource Bridge. This is a connection between the host OS of the cluster nodes and Azure. We can configure this through Windows Admin Center, which can be enabled on the cluster nodes.
Summary
Azure Stack HCI is the newest evolution in hybrid setups, where you want to leverage as much as possible from the Azure services, but want the flexibility of using your own hardware and increasing security and performance. Another pro of this setup is that you can save costs by not using the expensive servers on Azure with certain needs, like GPU-enabled machines.
End of the page 🎉
You have reached the end of the page. You can navigate through other blog posts as well, share this post on X, LinkedIn and Reddit or return to the blog posts collection page. Thank you for visiting this post.
If you think something is wrong with this post or you want to know more, you can send me a message to one of my social profiles at: https://justinverstijnen.nl/about/
If you find this page and blog very useful and you want to leave a donation, you can use the button below to buy me a beer. Hosting and maintaining a website takes a lot of time and money. Thank you in advance and cheers :)
The terms and conditions apply to this post.
How to learn Azure - My learning resources
When starting to learn Microsoft Azure, the resources and information can be overwhelming. At this page I have summarized some resources which found out during my Azure journey and my advice on when to use what resource.
To give a quick overview of all the training resources I used throughout the years and give you different types and sorted the resources from beginning to end:
- Text based
- Video’s
- Labs and Applied Skills
1. Starting out (Video and text-based)
When starting out, my advice is to first watch the following video of John Savill explaining Microsoft Azure and giving a real introduction.
https://www.youtube.com/watch?v=_x1V2ny8FWM
After this, there is a Microsoft Learn collection available which describes the beginning of Azure:
Starting out (Video) Starting out (Text)
2. Creating a free trial on Azure
Because we are learning to understand, administer and later on architecting a solution, it is very crucial to have some hands-on experience with the platform. I really recommend you to create a free account to explore the portal, its features and its services.
When you have a creditcard you can sign up for a free 150 to 200 dollar budget which is free. When the budget is depleted there are no costs involved till you as user agree with costs.
My advice is to explore the portal and train yourself to do simple tasks like:
- Create a virtual machine and connect to it using RDP or SSH
- Create a virtual network and network peering
- Create network security groups
- Create a virtual machine and backup it
3. Get your Azure Fundamentals (AZ-900) certification
When having some experience with the solutions, it is great to learn for your AZ-900 Azure Fundamentals certification. Its a great way to express yourself to the world that you have the knowledge of what Azure is. There are also some Interactive Guides which let you around simulated environments where not errors can be made.
Learning for the AZ-900 certification is possible through the following source:
Microsoft Learn: https://learn.microsoft.com/en-us/training/courses/az-900t00#course-syllabus
After you have done the complete cource, I recommend you watch the Study Cram of John Savil for AZ-900. He is a great explainer of concepts, and he explains every detail you need to know for the exam including some populair exam questions.
John Savil: https://www.youtube.com/watch?v=tQp1YkB2Tgs
John has a extra playlist for each concept where he will go deeper into the subject than in the cram. You can find that here: https://www.youtube.com/playlist?list=PLlVtbbG169nED0_vMEniWBQjSoxTsBYS3
AZ-900 Text course AZ-900 Video course AZ-900 Study Cram AZ-900 Interactive guides
4. AZ-104 Interactive guides
When you have AZ-900 in the pocket, you can go further by getting AZ-104, the level 2 Azure certification. This certification goes deeper into the concepts and technical information than AZ-900. After you get AZ-104, Microsoft wants you to be prepared to administer Azure and environments.
You can follow the AZ-104 Microsoft Learn collection which can be found here: https://learn.microsoft.com/nl-nl/training/paths/az-104-administrator-prerequisites/
Also, in the modules there are some interactive guides. These are visual but you cant do anything wrong. Great way to do things for the first time. I have the whole collection for you here:
https://mslabs.cloudguides.com/guides/AZ-104%20Exam%20Guide%20-%20Microsoft%20Azure%20Administrator
When wanting to have some great hands-on experience and inspiration for your Azure trial/test environment, there are some practice labs available based on the interactive guides to build the resources in your own environment. You can find them under heading 8.
AZ-104 Interactive labs AZ-104 Text course
5. Complete the AZ-104 cram of John Savill
When finished with all the labs and modules and maybe your own research you are ready to follow the study cram of John Savill for AZ-104. He is a great explainer and summarizes all the concepts and stuff you need to know for the exam. When you don’t know the term he explains, you have to work on that.
The video can be found here:
https://www.youtube.com/watch?v=0Knf9nub4-k
6. Do a AZ-104 practice exam
When knowing everything John axplained, you are ready to do a practice exam. You can find it here:
I have one note when using the practice exams for training. The actual exam is harder than the practice exam. In the practice exam, you only have to select one or multiple answers about “simple questions”. In the actual exam you get questions like:
- Single/Multiple choice
- Drag and drop in order or terms to explaination
- Hot Area: You get one or more pictures about a configuration and you have to spot an error, configuration, mistake etc.
7. Do some Micrsoft Azure Applied Skills
Microsoft has some great Applied Skills where you have to perform certain hands-on specialized tasks in different solutions, such as Azure. It works as simple as: you get a lab simulation, you perform 2 to 8 tasks and you submit the assessment.
You can retry them in a few days after failing, and of course, it is meant to better understand how to perform the actions so you are able to do this in practice. I really advice you to not only brute force the assessments but really understand what you are doing. Only this prepares you in a good way for working with Azure.
There are some great assessments available for Azure and Windows Server which I all completed and liked a lot:
- Homepage: https://learn.microsoft.com/en-us/credentials/browse/?credential_types=applied%20skills
- Securing Azure Storage: https://learn.microsoft.com/en-us/credentials/applied-skills/secure-storage-azure-files-azure-blob-storage/
- Azure Monitor: https://learn.microsoft.com/en-us/credentials/applied-skills/deploy-and-configure-azure-monitor/
- Migrating SQL server to Azure SQL: https://learn.microsoft.com/en-us/credentials/applied-skills/migrate-sql-workloads-azure-sql-database/
- Securing network access with Azure Firewall: https://learn.microsoft.com/en-us/credentials/applied-skills/configure-secure-workloads-use-azure-virtual-networking/
- Azure Arc: https://learn.microsoft.com/en-us/credentials/applied-skills/deploy-and-manage-microsoft-azure-arc-enabled-servers/
8. Do the AZ-104 Github Labs (subscription required)
Microsoft has published a lot of labs to do in your own environment to be familiar with the Azure platform. These are real objectives you have to do, and in my Azure learning journey I found these the most fun part to do of all study recourses.
However, it requires you to have an Azure subscription to click around and deploy some resources, but some tips to have this actually really cheap:
- Delete resources after finishing the lab
- Shutdown VMs when not using
- Pick cheap options, not “Premium” options
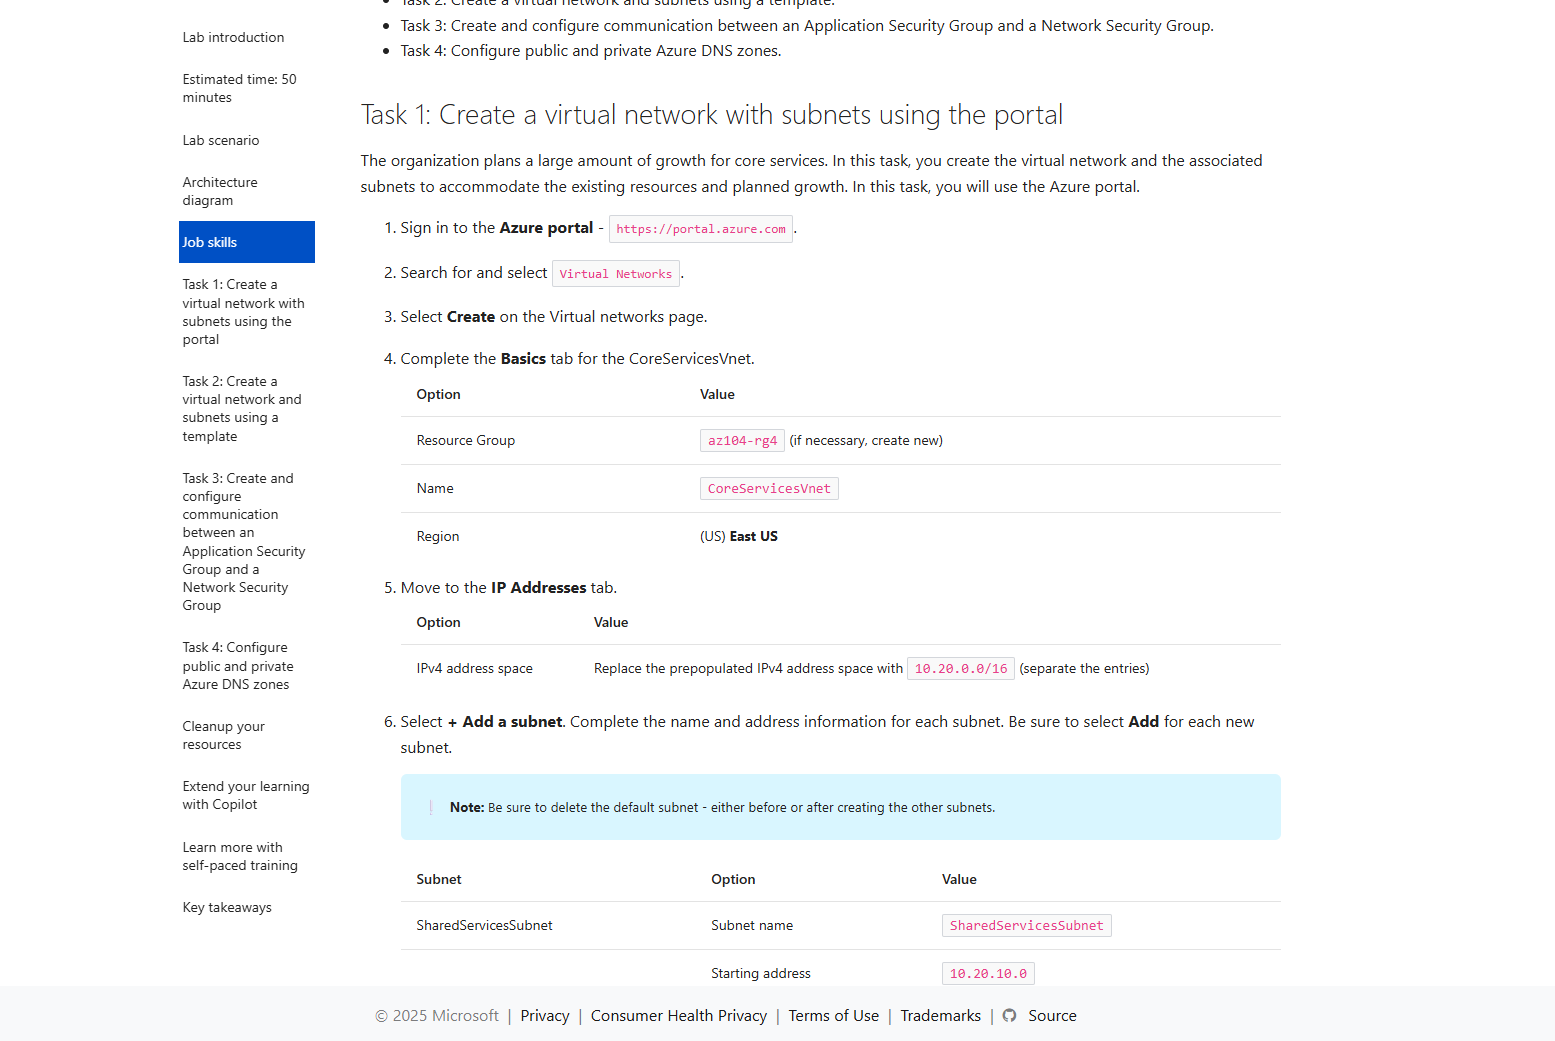
9. Get your AZ-104 certification
After doing everything on this page and knowing everything John explained in the study cram, you are ready to take the exam for AZ-104. The most important parts are that you must have some hands-on experience in Azure which I did really cover but the more experience you have, the more chance of success.
Good luck!
10. Possible follow-ups on AZ-104
After you have the AZ-104 certification, you can pursue multiple paths to further broaden your Azure knowledge and journey:
- Azure Virtual Desktop (AZ-140)
- Azure Architect (AZ-305)
- Azure Networking Engineer (AZ-700)
- Azure Security Engineer (AZ-500) or Security Architect (SC-100)
Also I really recommend doing these labs if you are pursuing a career in Azure Networking or networking in general:
Azure Network Security Workshop
These are specialized labs like heading 4 of this page but then for networking and securing incoming connections.
End of the page 🎉
You have reached the end of the page. You can navigate through other blog posts as well, share this post on X, LinkedIn and Reddit or return to the blog posts collection page. Thank you for visiting this post.
If you think something is wrong with this post or you want to know more, you can send me a message to one of my social profiles at: https://justinverstijnen.nl/about/
If you find this page and blog very useful and you want to leave a donation, you can use the button below to buy me a beer. Hosting and maintaining a website takes a lot of time and money. Thank you in advance and cheers :)
The terms and conditions apply to this post.
Introduction to Azure roles and permissions (RBAC/IAM)
In this page, I will explain you the basics of Microsoft Azure roles and permissions management (RBAC) and help you secure your environment.
When managing a Microsoft Azure environment, permissions and roles with RBAC is one of the basic ways to improve your security. At one hand, you want to have the permissions to do basic tasks but at the other hand you want to restrict an user to be able to do only what he needs to. This is called, the principle of “least-privilege”.
In this guide, I want to you to understand the most of the basic knowledge of managing access controls in Azure without very complex stuff.
Basic definitions in roles and permissions Azure
When talking about roles and permissions in Azure, we have the basic terms below, and later in this article all pieces of the puzzle will be set in place.
Terms to understand when planning and managing permissions:
- Roles
- Data Roles
- Custom Roles
- Scope
- Role assignments
- Principals
- Managed Identity
What is a role?
A role is basically a collection of permissions which can be assigned to a principal in Azure. While there are over 100 roles available, they all follow the structure below:
| Reader (1) | Contributor (2) | Owner (3) |
| Can only read a resource but cannot edit anything. “Read only” | You can change anything in the resource, except permissions. “Read/write” | You can change anything in the resource including permissions. “Read/Write/Permissions” |
Those built in roles are available in Azure, but for more granular permissions there are some more defined roles:
- Virtual Machine Contributor
- Can change a lot of settings of the virtual machine, but not the permissions.
- Backup Reader
- Can only read the settings and back-up states, but cannot make changes.
- Backup Contributor
- Can change settings of the backups, except changing permissions.
- SQL Server Contributor
- Can change SQL Server settings but cannot change permissions or access the SQL database.
As you can see, almost every built-in role in Azure follows the 1-2-3 role structure and allows for simple and granular security over your resources.
What are Data Roles?
Aside from resource-related roles for managing security on a resource, there are also roles for the data a resource contains. These are called Data Roles and are also considered as a collection of permissions.
Data Roles are used to control what a principal can do with the data/content a resource hosts. You may think of the following resources:
- SQL Databases
- Key Vaults
- Storage Accounts
To make your permissions management a lot granular, you might want to have a person managing the resource and another person te manage the content of the resouce. In this case you need those data roles.
What are Custom Roles?
Azure has a lot of built in roles available that might fulfill your requirements, but sometimes you want to have a role with some more security. A custom role is a role that is completely built by yourself as the security administrator.
You can start customizing a role by picking a builtin role and add permissions to that role. You can also build the role completely using the Azure Portal.
To begin creating a custom role, go to any access control blade, click “Add” and click “Add custom role”.
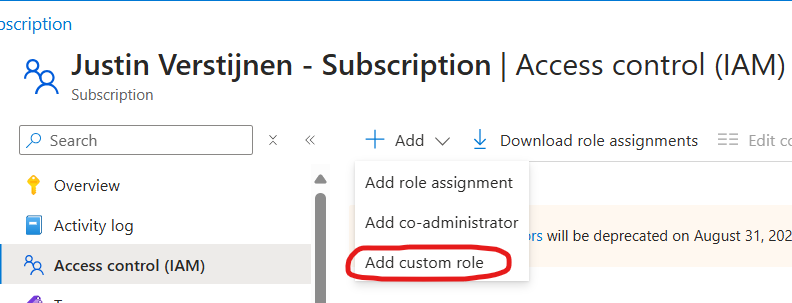
From there you have the option to completely start from scratch, or to clone a role and add or delete permissions from it to match your goal.
Creating your own role is the best way, but can take up a lot of time to build and manage. My advice is to stick to built in roles wherever it’s possible.
What is the scope of a role?
The scope of a role is where exactly your role is applied. In Azure we can assign roles at the following scopes:
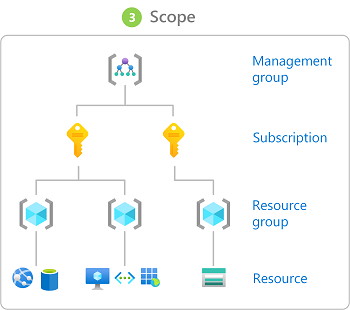
Management Group (MG) Contains subscriptions
Subscription (Sub) Contains resource groups
Resource Group (RG) Contains resources
Resource (R) Contains data
- Role assignments will inherit top to bottom, assigning roles to the subscription level allows this role to “flow” down to all resource groups and resources of that subscription.
- Caution when using role assignments on the management group or subscription level.
Some practical examples of assigning roles to a certain scope:
- You have a financial person who wants to view the costs of all subscriptions in your environment.
- You assign him the role (Reader) on the Management group level.
- You have a administrator that is allowed to make changes in 2 of the 3 resource groups, but not in the third.
- You assign him the role (Contributor) on the 2 resource groups
- You want to have a administrator to do everything one 1 subscription but not on your other subscriptions.
- You assign him the role (Owner) at the “everything” subscription.
What are role assignments and how do they work?
A role assignment is when we assign a role to a principal. As stated above, this can be done on 4 levels. Azure RBAC is considered an additive model.
It is possible to assign multiple roles to one or multiple principals. The effective outcome is that all those permissions will stack so all the permissions assigned will apply.
For example:
- User1 has the Reader role on Subscription1
- User1 has the Contributor role on RG1 which is in Subscription1
- The outcome is that User1 can manage everything in RG1, and read data in other RG’s.
You can also check effective permissions at every level in the Azure Portal by going to “Access control (IAM)” and go to the tab “Check access”.
- With the “View my access” button, you list your stack of permissions at your current scope
- With the “Check access” button, you can check permissions of another principal at your current scope
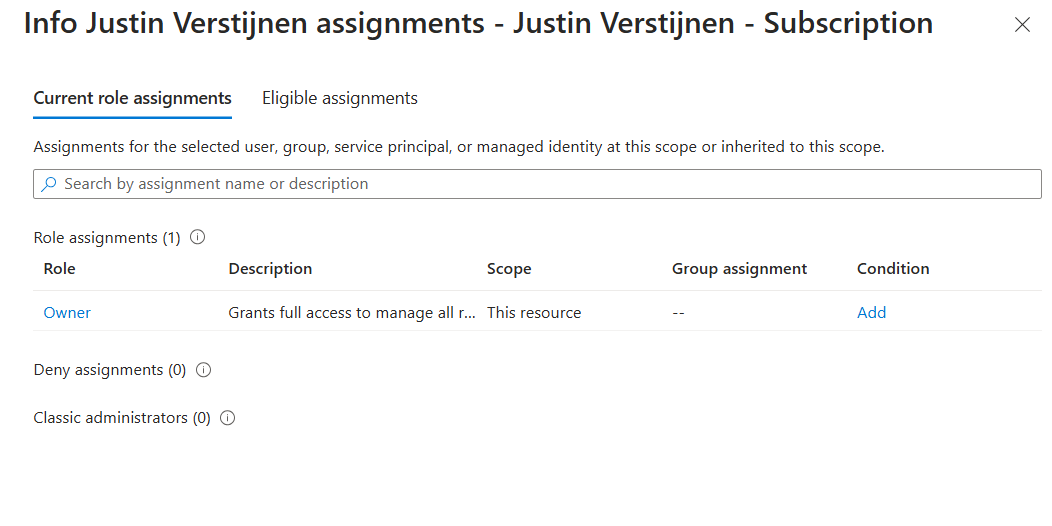
This is my list of permissions. Only “Owner” is applied to the subscription level.
Conditions in role assignments
A relatively new feature is a condition in a role assignment. This way you can even further control:
- What roles your users can assign, even when they have the “Owner” role.
- What principals he can assign roles to
- For example, only to users, but not to groups or managed identities
- Or only to exactly what principals you choose
- Block/filter some roles like priveleged roles
- For example, a user may assign some reader/contributor roles but not the “Owner” role.
What are principals?
In Azure and Entra ID, principals are considered identities where you can assign roles to. These are:
- Users
- Groups
- Service Principals
- Managed Identities
Users and groups remain very basic terms, and since you made it to this far into my guide, I consider you as technically proven to fully understand those terms. Good job ;).
Service Principals
A service principal is a identity created for a application or hosted service. This can be used to assign a non-Azure application permissions in Azure.
An example of a service principal can be a third party built CRM application that needs access a Exchange Online mailbox. At the time of writing, July 2024, Basic authentication is deprecated and you need to create a service principal to reach this goal.
Managed Identities
A managed identity is a identity which represents a resource in Azure like a virtual machine, storage account or web app. This can be used to assign a resource a role to another resource.
For example; a group of virtual machines need access to your SQL database. You can assign the roles on the SQL database and define the virtual machines as principal. This will look like this the image below.
All principals are stored in Microsoft Entra ID which is considered a Identity Provider, a database which contains all principals.
Summary
So to summarize this page; the terms mean:
- Roles: A role is a collection of permissions to a resource.
- Data Roles: A Data Role is a collection of permissions to the data of a resource like a SQL database, Azure Storage Account, Key Vault or Backup vault.
- Custom Roles: A custom role is a role created by a administrator to have the highest level or granurality based on permissions you are allowed or not allowed (Actions/NotActions)
- Scope: The level where the role is assigned. For example a Management group, Resource group or Subscription.
- Role assignments: A role assignment is a role assigned to a principal.
- Principals: A principal is a identity where a role can be assigned to like a User, Group or Managed Identity.
- Managed Identity: A managed identity is a account linked to a resource, so a resource can have permissions assigned.
This guide is very basically how permissions works. Basic access management and knowing who have what access is a basic tool to improve your security posture and prevent insider risks. This is nothing different in a system like Azure and fortunately has various options for roles permissions.
This page is a great preparation of this subject for the following Microsoft exams:
- AZ-104
- AZ-500
- SC-300
- SC-900
End of the page 🎉
You have reached the end of the page. You can navigate through other blog posts as well, share this post on X, LinkedIn and Reddit or return to the blog posts collection page. Thank you for visiting this post.
If you think something is wrong with this post or you want to know more, you can send me a message to one of my social profiles at: https://justinverstijnen.nl/about/
If you find this page and blog very useful and you want to leave a donation, you can use the button below to buy me a beer. Hosting and maintaining a website takes a lot of time and money. Thank you in advance and cheers :)
The terms and conditions apply to this post.
Network security in Azure with NSG and ASG
When designing, managing and securing a network in Microsoft Azure we have lots of options to do this. We can leverage third-party appliances like Fortinet, Palo Alto, PFSense or Sophos XG Firewall but we can also use the somewhat limited built-in options; Network Security Groups (NSG for short) and Application Security Groups (ASG). In this guide I will explain how Network Security Groups (NSG) and Application Security Groups (ASG) can be used to secure your environment.
What does an Network Security Group (NSG) do?
A network Security Group is a layer 4 network security layer in Azure to filter incoming and outgoing traffic which you can apply to:
- A single VM, you assign it to the NIC (Network Interface Card)
- A subnet, which contains similar virtual machines or need the same policy
In a Network Security Group, you can define which traffic may enter or leave the assigned resource, this all based on layer 4 of the OSI model. In the Azure Portal, this looks like this:
To clarify some of the terms used in a rule;
- Source: This is the source of where the traffic originates from. To allow everything, select “Any” but to specify IP-adresses select “IP-adresses”.
- Source port ranges: This is the source port which the source uses. The best way is to leave this a “*” so a client can determine its own port.
- Destination: This is the destination of the traffic. This will mostly be your Azure resource or subnet.
- Service: These are predefined services which use common TCP/UDP ports for easy creation.
- Destination port ranges: This is the port of the destination which traffic has.
- Protocol: Select TCP, UDP or ICMPv4 based on your requirements.
- Action: Select if you want to block or allow the traffic
- Priority: This is the priority of the rule. A number closer to zero means the rule will be processed first and priorities with a higher number will be processed in the order after that.
To learn more about NSG’s in Azure, check out this webpage: https://learn.microsoft.com/en-us/azure/virtual-network/network-security-groups-overview
Rule processing of NSGs
When having rules in a Network Security Group, we can have theoretically thousands of rules. The processing will be applied like the rules below;
- When applying a NSG to both the virtual machine and the subnet of the machine, the rules will stack. This means you have to specify all rules in both NSG’s.
- My advice is to use NSG’s on specific servers on machine level, and to use NSG’s on subnets when you have a subnet of identical or similar machines. Always apply a NSG but on one of the 2 levels.
- A rule with a higher priority will be processed first. 0 is considered the highest priority and 65500 is considered the lowest priority.
- The first rule that is matched will be applied and all other rules will be ignored.
Inbound vs. Outbound traffic in Azure networks
There are 2 types of rules in a Network Security Group, inbound rules and outbound rules which have the following goal;
- Inbound rules: These are rules for traffic incoming from another Azure network or internet to your Azure resources. For example;
- A host on the internet accessing your Azure webserver on port 443
- A host on the internet accessing your Azure SQL server on port 1433
- A host on the internet accessing your Azure server on port 3389
- Outbound rules: These are rules for traffic from your Azure network to another Azure network or the internet. For example;
- A Azure server on your network accessing the internet via port 443
- A Azure server on your network accessing a application on port 52134
- Restricting outbound traffic by only allowing some ports
NSGs of Azure in practice
To further clarify some practice examples I will create some different examples:
Example 1:
When you want to have your server in Azure accessible through the internet, we need to create a inbound rule and will look like below:

We have to create the rule as shown below:
A advice for opening RDP ports to the internet is to specify at least one IP-adress. Servers exposed with RDP to the internet are easy targets to cybersecurity attacks.
Example 2:
When you want to only allow certain traffic from your Azure server to the internet, we need to create 2 outbound rules and will look like below:
Here I have created 2 rules:
- A rule to allow outbound internet access with ports 80, 443 and 53 with a priority of 100
- A rule to block outbound internet access with all ports and all destinations with a priority of 4000.
Effectively only ports 80, 443 and 53 will work to the internet and all other services will be blocked.
Application Security Groups
Aside from Network Security Groups we also have Application Security Groups. These are fine-grained, application-assigned groups which we can use in Network Security Groups.
We can assign virtual machines to Application Security Groups which host a certain service like SQL or webservices which run on some certain ports.
This will look like this:
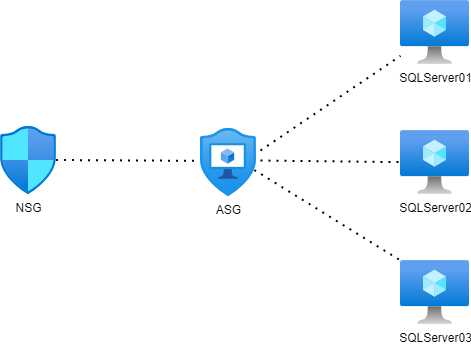
This will come in handy when managing a lot of servers. Instead of changing every NSG to allow traffic to a new subnet or network, we can only add the new server to the application security group (ASG) to make the wanted rules effective.
To create a Application Security Group, go in the Azure Portal to “Application Security Groups” and create a new ASG.
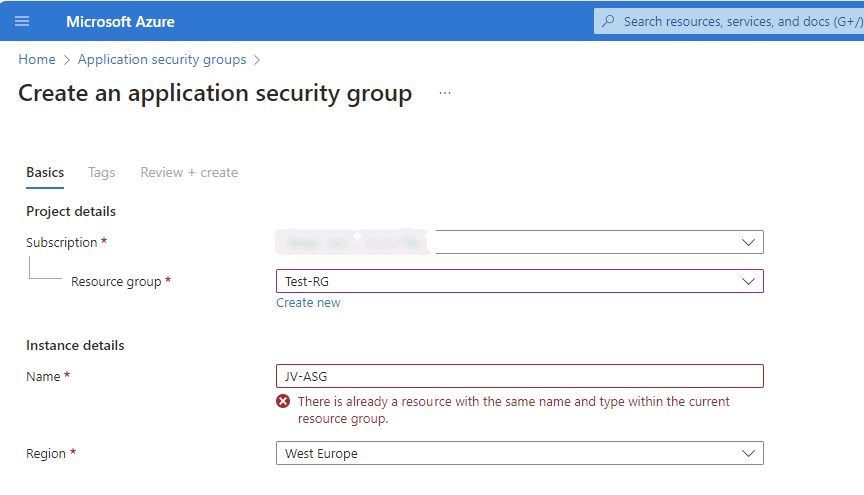
Name the ASG and finish the wizard.
After creating the ASG we can assign a virtual machine to it by going to the virtual machine, and assign the ASG to it:
Now we have a Application Security Group with virtual machines assigned we can go and create a Network Security Group and define the new ASG in it:
After this we have replicated the situation like in the diagram above which will be future proof and scalable. This situation can be replicated for every situation where you have a set of identical machines that need to be assigned to a NSG.
Summary
Network Security Groups (NSG)s are an great way to protect your Azure network on Layer 4 of the OSI model. This means you can configure any IP based communication with ports and such. However, this is no complete replacement of an Firewall hosted in Azure. A firewall can do much more, like actively block connections, block certain applications and categories and websites.
I hope this guide was interesting and thank you for reading.
Sources
These sources helped me by writing and research for this post;
End of the page 🎉
You have reached the end of the page. You can navigate through other blog posts as well, share this post on X, LinkedIn and Reddit or return to the blog posts collection page. Thank you for visiting this post.
If you think something is wrong with this post or you want to know more, you can send me a message to one of my social profiles at: https://justinverstijnen.nl/about/
If you find this page and blog very useful and you want to leave a donation, you can use the button below to buy me a beer. Hosting and maintaining a website takes a lot of time and money. Thank you in advance and cheers :)
The terms and conditions apply to this post.
Rename name-tags to resource groups and resources
When it comes to naming your Azure Resource Groups and resources, most of them are not renameable. This due to limitations on the platform and maybe some underlying technical limitations. However, it is possible to assign a renameable tag to a resource in Azure which can be changed or used to clarify its role.
When it comes to naming your Azure Resource Groups and resources, most of them are not renameable. This due to limitations on the platform and maybe some underlying technical limitations. However, it is possible to assign a renameable tag to a resource in Azure which can be changed or used to clarify its role. This looks like this:
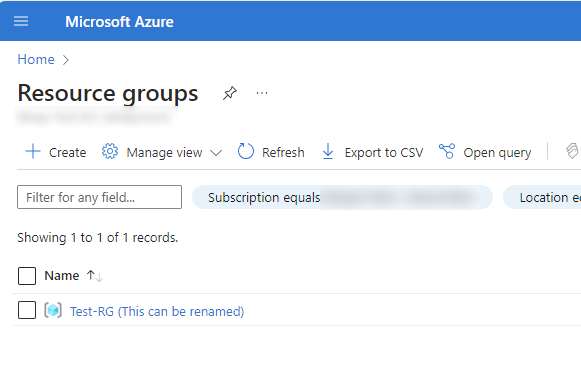
How to add those renameable tags in the Azure Portal?
You can add this name tag by using a tag in Microsoft Azure. In the portal, go to your resource and go to tags. Here you can add a new tag:
| Name | Value |
|---|---|
| hidden-title | “This can be renamed“ |
An example of how this looks in the Azure Portal:
Summary
I thought of how this renameable titels can be used in production. I can think of the following:
- New naming structure without deploying new resources
- Use complex naming tags and a human readable version as name tag
- More overview
- Documentation-purposes
- Add critical warning to resource
Sources
These sources helped me by writing and research for this post;
End of the page 🎉
You have reached the end of the page. You can navigate through other blog posts as well, share this post on X, LinkedIn and Reddit or return to the blog posts collection page. Thank you for visiting this post.
If you think something is wrong with this post or you want to know more, you can send me a message to one of my social profiles at: https://justinverstijnen.nl/about/
If you find this page and blog very useful and you want to leave a donation, you can use the button below to buy me a beer. Hosting and maintaining a website takes a lot of time and money. Thank you in advance and cheers :)
The terms and conditions apply to this post.