All pages referring or tutorials for generic Networking.
This is the multi-page printable view of this section. Click here to print.
Networking
- Introduction to Networks
- The Basics and Benefits of IPv6
- Deep dive into networks
- Networking Implementation Runbook
Introduction to Networks
This page is an introduction to Networks. We don’t need to know everything about it, but often face it in our work. In this guide I will give you a basic understanding of networks, IP addresses, VLANs, Segmenting etcetera. Basically everything you need to understand the process, and hopefully even more than that.
Requirements
- Some basic networking knowledge
- Some basic subnetting knowledge
- Around 20 minutes of your time
Introduction to Networking
Networking is the process of connecting devices to share data and resources. It allows communication between users over local or global distances. Networks can range from small home setups to large corporate infrastructures. Key components include routers, switches, and protocols that manage data traffic. Effective networking ensures reliable, secure, and efficient information exchange. As technology advances, networking plays a critical role in enabling digital communication worldwide.
Logically this means that every device will have an IP address and this can be used to communicate with other devices. This can look like the diagram below:
This shows a simple network with 8 devices, all connected to each other. In practice, the circle will represent the infrastructure; the Routers and Switches.
Routers
In every network, we have a device that plays the “Router” role. This is basically connecting different networks to each other. In most bigger networks, this can be the firewall.
On Azure, the routing and switching part is done with creating a virtual network. This means that this is all managed and you only select the network you want to connect with.
Switches
Switches are the distribution part of a network. These are literally like power strips but then for networks. One cable goes in (called the “Uplink)”, and all other cables are going out of the switch (called “Downlinks)”. Connecting a device to a downlink of a switch gives access to the network.
Routers and Switches can seem the same as terms but they are different in a particular way. Routers connects our devices to different networks, and Switches redistribute those networks.
IP addressing
IP addresses are needed on a network for every device to know where to deliver a package. You can compare this like in a real world city, where every street has a name and every house has a house number. IP addressing works kind of the same way, but translated in a way so computers can also work with it.
We have two types/versions of IP addresses:
- IPv4, where we will focus on in this guide
- IPv6, for more information about IPv6 I recommend first understand IPv4 and then read this guide: https://justinverstijnen.nl/basic-ipv6-explaination/
IP address are built in this way:
The first part represents the “Network ID”, which is a static part and will remain till configured different. The last part represents the “Host ID” which is a number that is different for every host. The Network ID can be compared to a real life Street and the Host ID is the house number.
Class A, Class B and Class C networks
Now this is a basic explaination of a Class C address, where we only use the last number. We have 3 classes that we use in networking:
- Class A (255.0.0.0 to 255.254.0.0)
- Class B (255.255.0.0 to 255.255.254.0)
- Class C (255.255.255.0 to 255.255.255.255)
Now this tells us how many devices we can use in our network:
- In Class A, we can connect millions of devices because there are many available addresses
- In Class B, we can connect up to 65.000 devices
- In Class C, we can connect up to 254 devices
The most important here is the Subnet mask which tells devices on what part of the IP addressing scheme they are.
Introduction to Subnet masks
You must have seen them in your daily life of being an IT guy, Subnet masks. This is a number like:
- 255.255.255.0 or /24
- 255.255.0.0 or /16
This number decides how many hosts we can use in our network. The more zeros in the subnet mask, the more host addresses are available. For example, /24 (255.255.255.0) allows 254 usable hosts, while /16 (255.255.0.0) allows 65.534 usable hosts. Subnet masks help divide networks into smaller parts, making management and security easier. A best practice is always to have your subnets as small as possible for networks or VLANs, but the bottom line is mostly /24.
A smaller subnet is basically a higher performance. Because some requests, like broadcasts are sent to every address. This process is faster to 254 addresses than to 65.000 addresses.
Tip: use my Subnet calculator to calculate your networks: https://subnet.justinverstijnen.nl/
Deep dive into IP addresses
IPv4 addresses, like 172.16.254.1, are decimal representations of four 8-bit binary blocks, known as octets. Each octet ranges from 0 to 255, making every IPv4 address 32 bits in total.
The IP address 172.16.254.1 can be represented in binary format like shown in the picture below:

So an IP address is basically a human readable way of how the devices work under the hood. All based on 0’s and 1’s.
Subnets, Segmentation and VLANs
Subnetting is a technique used in networking to divide a larger IP network into smaller, more manageable subnetworks (subnets). It helps optimize IP address allocation, improve network performance, and enhance security by segmenting traffic.
Each subnet operates as an independent network while still being part of the larger network. By using subnetting, organizations can efficiently manage IP address space, reduce network congestion, and implement better access control.
Subnetting is achieved by modifying the subnet mask, which determines how many bits are used for the network and how many for the host portion of an IP address. Understanding subnetting is essential for network engineers and administrators to design scalable and efficient network infrastructures.
In Azure, we do this by creating a virtual network which has an address space (for example: 10.0.0.0/16) and we can build our subnets in that space (10.0.0.0/24, 10.0.1.0/24, 10.0.2.0/24 etc.). I have done this for demonstration in the picture below:
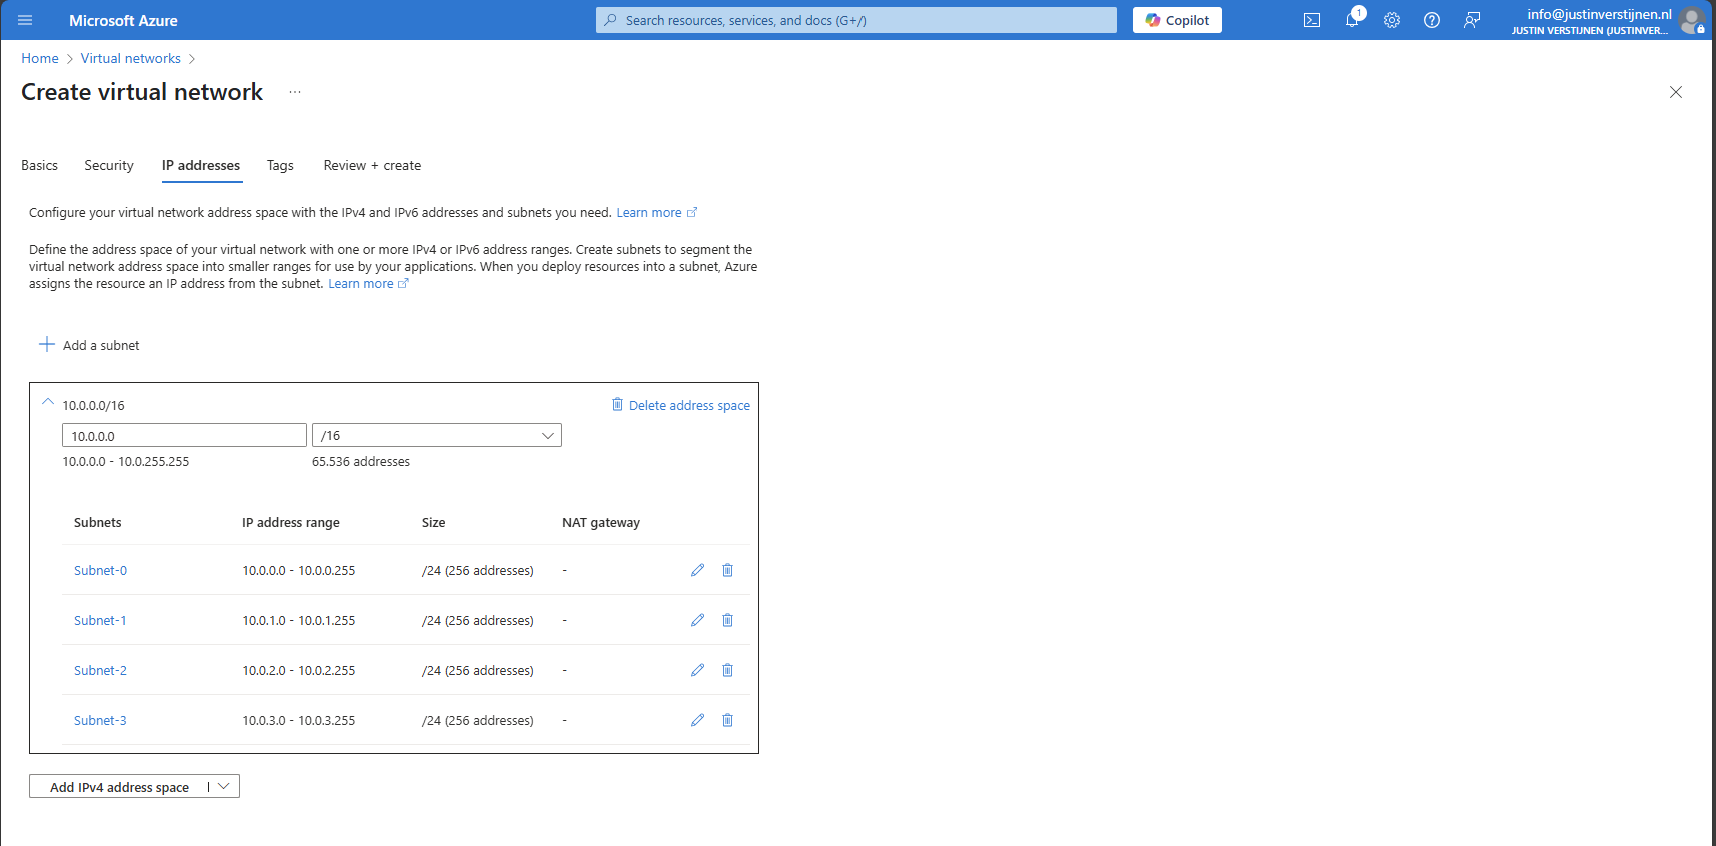
When using routers and switches, we can segment our network in different, Virtual networks which are called VLANs. This can help us by dividing devices into different isolated networks without the need of having seperate physical networks.
For designing VLANs you have to calculate the subnet sizes and ip address schemes. I have a tool available for doing this:
Tips for understandable network addressing
So when designing networks, you will never know how long you are gonna use it. My advice is to always have a good networking plan and document your plan for future use and expansion.
I have some tips for designing networks that work well:
- Always use as small as possible networks, with /24 as bottom line
- Segment devices with good logic (Servers to servers, Guest to guest etc.)
- Link your VLAN IDs to your Network IDs
- For example;
- VLAN ID 10 to 10.0.10.0/24
- VLAN ID 20 to 10.0.20.0/24
- VLAN ID 99 to 10.0.99.0/24
- For example;
Complete overview of Subnet masks and usable addresses
To have a cheat sheet of subnet masks, I have created a complete table of all usable Subnet masks including how much addresses you can assign in those networks:
| Prefix | Subnet mask | Usable addresses |
|---|---|---|
| Supernets (ISPs) | ||
| /0 | 0.0.0.0 | Used as wildcard |
| /1 | 128.0.0.0 | 2,147,483,646 |
| /2 | 192.0.0.0 | 1,073,741,822 |
| /3 | 224.0.0.0 | 536,870,910 |
| /4 | 240.0.0.0 | 268,435,454 |
| /5 | 248.0.0.0 | 134,217,726 |
| /6 | 252.0.0.0 | 67,108,862 |
| /7 | 254.0.0.0 | 33,554,430 |
| Class A networks | ||
| /8 | 255.0.0.0 | 16,777,214 |
| /9 | 255.128.0.0 | 8,388,606 |
| /10 | 255.192.0.0 | 4,194,302 |
| /11 | 255.224.0.0 | 2,097,150 |
| /12 | 255.240.0.0 | 1,048,574 |
| /13 | 255.248.0.0 | 524,286 |
| /14 | 255.252.0.0 | 262,142 |
| /15 | 255.254.0.0 | 131,070 |
| Class B networks | ||
| /16 | 255.255.0.0 | 65,534 |
| /17 | 255.255.128.0 | 32,766 |
| /18 | 255.255.192.0 | 16,382 |
| /19 | 255.255.224.0 | 8,190 |
| /20 | 255.255.240.0 | 4,094 |
| /21 | 255.255.248.0 | 2,046 |
| /22 | 255.255.252.0 | 1,022 |
| /23 | 255.255.254.0 | 510 |
| Class C networks | ||
| /24 | 255.255.255.0 | 254 |
| /25 | 255.255.255.128 | 126 |
| /26 | 255.255.255.192 | 62 |
| /27 | 255.255.255.224 | 30 |
| /28 | 255.255.255.240 | 14 |
| /29 | 255.255.255.248 | 6 |
| /30 | 255.255.255.252 | 2 |
| /31 | 255.255.255.254 | 0 |
| /32 | 255.255.255.255 | 0 |
Comma’s used in Usable addresses to not be confused with IP addresses ;)
Knowledge check
Knowledge check
This quiz needs JavaScript to show the questions and feedback.
This quiz needs JavaScript to show the questions and feedback.
Summary
I hope I gave you a great basic understanding of how networks work and the fundamentals to use networking in Azure. Its part of our jobs and not very easy to start out with.
Thank you for reading my guide and I hope it was helpful.
End of the page 🎉
You have reached the end of the page. You can navigate through other blog posts as well, share this post on X, LinkedIn and Reddit or return to the blog posts collection page. Thank you for visiting this post.
If you find this page and blog very useful and you want to leave a donation, you can use the button below to buy me a beer. Hosting and maintaining a website takes a lot of time and money. Thank you in advance and cheers :)

The terms and conditions apply to this post.
The Basics and Benefits of IPv6
IPv6. We hear it a lot these days and it’s a very common network addressing protocol and the successor of the older IPv4, but will not necessarily take over IPv4 100% (yet). On this page I will describe the basics, some tips and the benefits.
Requirements
- Around 15 minutes of your time
- Basic networking knowledge is great
IP addressing with IPv4 and IPv6
When we speak of a network, we speak of a set connected devices (we call them clients/nodes) where each device has its own use. Also there are some fundamental components every network has:
- Router (this device connects your network to other networks like the internet)
- Client
Like I said, your network contains several devices and each devices has to know how to connect to an other device. This will be done using an IP address. Using IP addresses enables you to have a very efficient network in terms of cabling. In the past there some coaxial based networks where every device was physically connected to each other.
You can pretty much compare IP addresses to sending a post card in real life. Your postal company has to know where your postcard must be delivered, but then in terms of finding the right device in your network.
IP addresses examples
An IP address looks like the addresses below:
- 192.168.1.25 or 172.16.4.75 for IPv4
- fd00::1or fd85:28a1:f4fa::1 for IPv6
IPv4 addressing
In the early ages of computers, a digital manner of adressing network devices was needed. After some research IPv4 was born. A very efficient addressing manner which is easily understandable by computers but also for humans. We humans like easy dont we?
The whole IPv4 addresses space contains 32 bits which means there are 4,3 billion (232) different addresses possible. In the early 80’s when IPv4 was founded this was more than enough.
With the rapid increase in devices worldwide, the shortage of IPv4 addresses became increasingly apparent. This is not surprising, considering that the global number of people is nearly twice the number of available IPv4 addresses.
IPv6 addressing
To fulfill the shortage of IP addresses, IPv6 was born in 1998 which has as primary goal to fulfill the requirement of having enough addresses available for everyone. Fortunately, they did not go way over the top and instead used a 128 bits (2128) address space. In this space, the total usable addresses in IPv6 are 340.282.366.920.938.463.463.374.607.431.768.211.456 (340 undecillion).
Addressing scheme
Both IPv4 and IPv6 use a similar addressing scheme which is similar to your physical home address and number:
| Type | Network ID | Host ID | Full address |
| IPv4 | 192.168.10.0/24 | .25 | 192.168.10.25 |
| IPv6 | fd12:3456:789a::/64 | ::100 | fd12:3456:789a::100 |
A great way to better understand this:
Network ID represents the street, which is the same for all buildings in that street.
Host ID represents the unique number of your building/house, which is different for each building in the same street.
Differences between IPv4 and IPv6 and benefits
Most of the time in our job, a higher number means faster. Unfortunately this is not the case with IPv6. IPv6’s main job is to create more possible addresses. It does have some great advantages because at the time of founding there was more knowledge, like real world scenario’s where IPv4 weak points were.
| Advantage IPv6 | More information |
| Larger address space | IPv6 has more than a million IP addresses available per person on earth and IPv4 has 0,5 IP addresses per person. |
| Better security with IPSec | IPv6 supports built in IPsec where every package is encrypted at sending and decrypted at receiving to prevent an attacker to steal packages and monitor your behaviour online. |
| Easy network setup with SLAAC | IPv4 requires DHCP or static adressing where IPv6 the device can assign a address itself using duplicate detection, router advertisements and auto assignment. |
| No NAT needed | Because we dont need to share IP addresses anymore, the need of NAT is eliminated. You can directly connect on a device (when the firewall is configured to do so of course). |
| Multicast instead of broadcast | In a network, some devices like Chromecast, Sonos and Airplay use broadcast to advertise themselves. This means it sends a package to all devices. Multicast in IPv6 sends only to specified devices to reduce network load. |
Common IPv4 addresses in IPv6
When it comes to compare generic terms in networking, you can use the table below:
| Explaination | IPv4 | IPv6 |
| Localhost address | 127.0.0.1 | ::1 |
| No DHCP server (APIPA) | 169.254.0.0/16 | fe80::/10 |
| Subnet mask | 255.255.255.0 | /64 |
| Types of network routing | Class A, B and C | 1 class |
| Type of notation | Decimal (0-9) with dots . | Hexadecimal (0-9 and A-F) with colons : |
Knowledge check
Knowledge check
This quiz needs JavaScript to show the questions and feedback.
This quiz needs JavaScript to show the questions and feedback.
Summary
This page greatly explains how IPv4 and IPv6 addresses and their basics and benefits work, and there is a lot to also tell about. Obviously too much to include on a single page. Also I want the content to be readable and to stay within the best attention span of humans :).
End of the page 🎉
You have reached the end of the page. You can navigate through other blog posts as well, share this post on X, LinkedIn and Reddit or return to the blog posts collection page. Thank you for visiting this post.
If you find this page and blog very useful and you want to leave a donation, you can use the button below to buy me a beer. Hosting and maintaining a website takes a lot of time and money. Thank you in advance and cheers :)
The terms and conditions apply to this post.
Deep dive into networks
A theoretical guide to designing a network that is clear, scalable, resilient, secure and easy to operate.
Planning
A good network design usually starts long before the first switch is mounted in a rack. The easiest mistake to make is to begin with hardware: pick a switch, count the ports, add some access points and work out the rest later. That can work for a small environment, but as soon as the network grows, the missing decisions start to show.
A better starting point is to define what the network actually needs to do. How many users and devices will connect to it? Which services matter most? How much downtime is acceptable? Are there several floors, buildings or locations? Which systems should be separated from each other, and who will be responsible for managing the environment once the project is finished?
You do not need a perfect answer to every question before drawing the first diagram, but the important requirements should be clear enough to guide the design. A network for a small office with a few dozen devices will naturally look different from a multi-site environment where access, wireless coverage and redundancy are critical.
It also helps to decide what a successful result looks like. A project is not complete simply because all devices have power and users can reach the internet. Testing, documentation and fixing issues discovered during rollout are part of the work as well. A realistic planning phase leaves room for those steps.
At the same time, try not to design only for today. A network should have enough room for extra switches, more wireless clients, additional VLANs and perhaps another location later on. That does not mean building an unnecessarily complex enterprise design for a small office. It means choosing a structure that can grow without forcing you to rethink everything from the beginning.
The most useful network designs are often the most predictable ones. When someone understands how one part of the environment is built, the next part should feel familiar. That consistency becomes valuable later, especially when troubleshooting under pressure.
Cabling
That predictability starts at the physical layer. Cabling is easy to treat as the boring part of a network project, but a badly organized rack can make even a technically good network frustrating to support.
Imagine opening a rack during an outage and finding dozens of cables with no labels, different lengths looped around each other and no clear indication of which connection is an uplink. The network may have worked perfectly the day before, but the physical installation now makes a simple problem harder to solve.
Good cable management is therefore not about making a rack look nice for a photo. It is about making the environment understandable. A well organized rack helps you trace connections, replace hardware and make changes without accidentally disconnecting something unrelated.
A few simple standards usually make a large difference. Cable colors can be used to separate functions such as management, voice, access points, servers or uplinks, as long as everyone understands the convention. The exact colors do not matter nearly as much as using them consistently.
Cable length matters too. A cable should have enough slack for safe routing and maintenance, but large loops of unused cable quickly create clutter. Reusable hook and loop straps are useful because bundles can be reopened when the network changes, while permanent cable ties often make later work more difficult.
Where practical, keep power and network cabling separated. Apart from making the rack easier to follow, this can reduce unwanted electromagnetic interference in situations where higher power equipment and longer cable runs are involved.
Labeling is probably the most useful habit of all. Patch panels, important uplinks and both ends of critical cables should be identifiable without manually tracing a cable through the rack. Those labels should also match the documentation.
The end goal is simple: when you open a rack, the broad structure of the network should already make sense before you touch anything.
Topology
Once the physical layer is clear, the next question is how the switches are connected.
A small network may start with one switch and later grow by adding another switch behind it, and then another one behind that. This kind of daisy chain can work, but each downstream switch becomes dependent on every switch and uplink in front of it. A single failure near the beginning of the chain can therefore disconnect a much larger part of the network than expected.
As the environment grows, a central structure becomes easier to understand and easier to support. Access switches can connect directly towards a central switching layer instead of depending on a long chain of intermediate devices.
In larger environments, it is useful to think in terms of access, distribution and core.
The access layer is where users and devices connect. Computers, phones, printers, cameras and wireless access points normally live here. The distribution layer connects access switches and often becomes the logical place for routing and policy. The core then connects the larger parts of the environment and focuses on moving traffic quickly and predictably.
These roles do not always require three separate groups of physical devices. In many small and medium sized environments, the distribution and core functions are combined into what is commonly called a collapsed core.
The important part is not how many boxes you have. It is whether each part of the network has a clear role.
A good topology should make one question easy to answer: where will this traffic go?
When that answer is obvious from the design, troubleshooting becomes much easier. When the path depends on a long history of improvised links, every incident becomes a discovery exercise.
Core
The central switching layer becomes the foundation for the rest of the design, so this is where capacity and resilience start to matter more.
A small environment may be perfectly fine with one capable managed switch at the center. In a larger or more critical environment, however, one central device can become an unnecessary single point of failure.
A collapsed core is often a practical middle ground. One or two central Layer 3 switches provide the main switching and routing functions, while access switches connect directly to them. This keeps the design compact without losing the benefits of a clear hierarchy.
When selecting equipment for this layer, port count is only one part of the story. Uplink capacity, forwarding performance, power requirements, management features, monitoring support and redundancy options can be just as important. A switch with enough ports may still be a poor fit if every uplink becomes a bottleneck or if the device cannot support the design you want to build around it.
Where downtime has a meaningful impact, two central switches can provide alternative paths for access switches and important services. The goal is not to add duplicate hardware simply because redundancy sounds good. The goal is to remove specific single points of failure that actually matter.
That distinction is important because redundancy also adds complexity. Extra links and extra devices introduce more possible traffic paths, which means the design must be deliberate. A second path that has not been thought through can create loops, unexpected forwarding behavior or a false sense of safety.
A resilient core should therefore be designed together with the mechanisms that control those extra paths.
Segmentation
With the physical and logical structure in place, the next step is deciding how devices should be separated.
A flat network is easy to build because everything sits in the same broadcast domain. The problem is that it becomes harder to control as the environment grows. User devices, printers, cameras, servers, guest devices and infrastructure may all have very different requirements, yet in a flat design they are placed together.
Segmentation gives those groups their own logical boundaries.
In many enterprise networks, one VLAN maps to one IP subnet and one Layer 2 broadcast domain. Traffic inside the same VLAN can usually be switched locally, while communication between VLANs must be routed by a Layer 3 device. That routing point creates a place where policy can be applied.
This allows you to separate user devices from servers, place cameras and other IoT devices in their own network, keep guest wireless clients away from internal systems and restrict access to network management interfaces.
The exact number of VLANs is not important. More VLANs do not automatically mean better security or a better design. Every VLAN should have a clear reason to exist. If two groups of devices have the same requirements and the same access policy, splitting them may only create extra work.
A dedicated management network is a good example of useful separation. Switches, access points, firewalls and controllers can be placed in a network that is reachable only from trusted administration systems. That keeps management interfaces away from normal user traffic.
Addressing should follow the same principle of predictability. A multi-site environment becomes much easier to operate when site numbers, network functions and management ranges follow a consistent pattern. The scheme does not need to be clever. In fact, if nobody can understand it without opening a spreadsheet, it is probably too complicated.
Segmentation should make the network easier to reason about, not harder.
Resilience
The moment you add redundant paths, you also introduce the possibility of loops.
At Layer 2, a loop can become a serious problem because Ethernet frames do not have the same kind of hop limit that IP packets have. Broadcast and unknown unicast traffic can continue circulating and may be copied repeatedly. The result can be a broadcast storm, unstable MAC address tables and a network that becomes unusable.
Spanning Tree Protocol exists to prevent that.
Switches exchange Bridge Protocol Data Units, usually called BPDUs, and use them to build a loop-free Layer 2 topology. One switch becomes the root bridge, and the other switches calculate their preferred path towards it. Redundant paths that are not needed at that moment can be placed into a non-forwarding state while still remaining available as alternatives.
The root bridge should be selected intentionally. Leaving the decision entirely to default values may still produce a working network, but it may not produce the traffic paths you expected.
Modern environments commonly use faster variants such as Rapid Spanning Tree Protocol, but the principle remains the same: keep redundant Layer 2 paths available without allowing them all to forward traffic in a way that creates a loop.
Failover time should also be treated carefully. It is easy to read a protocol specification and assume that a certain failure will always recover within a fixed number of seconds. In reality, convergence depends on the protocol, timers, topology and the type of failure. The only reliable way to understand how your own environment behaves is to test it.
Default gateway redundancy solves a different problem.
When two Layer 3 devices can provide the gateway for a VLAN, a first hop redundancy protocol can present one virtual gateway address to the clients. One device forwards traffic at a given moment, while another can take over when needed. VRRP is one standards-based example of this approach.
This reduces the dependency on one physical gateway, but it should not be described as guaranteed zero downtime. A short interruption may still occur, and behavior depends on the design and failure scenario.
That leads to the most important rule of redundancy: a second uplink, second switch or second gateway is only useful when you know what happens during failure. Untested redundancy is still an assumption.
Switching
Once the topology and segmentation are clear, individual switching features can support the design.
Access ports normally connect endpoints and place those endpoints in the correct VLAN. Trunk links carry multiple VLANs between network devices or towards systems that need access to more than one VLAN.
A trunk does not need to carry every VLAN in the environment. Only transporting VLANs where they are actually needed keeps the design easier to understand and reduces unnecessary exposure.
At the access edge, port security can provide another layer of control. Depending on the platform, a switch may be able to allow only specific MAC addresses, learn approved addresses, limit how many addresses are seen on a port or restrict the port when that policy is violated.
These controls can be useful, but MAC addresses should not be treated as strong identities because they can be spoofed. Where stronger access control is needed, technologies such as 802.1X can authenticate users or devices before normal network access is allowed.
DHCP relay is another feature that becomes useful in a segmented network.
A DHCP client initially relies on broadcast traffic, and broadcasts do not normally cross routed VLAN boundaries. Without a relay function, a DHCP server would need to sit in every subnet or use another local mechanism to answer those clients.
A Layer 3 gateway can instead receive the request and forward it to a central DHCP server. The server can then use the relay information to determine which network the request came from and select the correct address pool.
This allows one DHCP service to support multiple VLANs without flattening the network or duplicating servers everywhere.
The larger lesson is that features such as trunks, port security and DHCP relay should support the architecture. They should not become a collection of settings that exist without a clear reason.
Start with the design. Then enable the features that help that design work safely and predictably.
Management
A switch is not ready for production simply because it forwards traffic.
It also needs to be manageable.
Secure remote access, predictable naming and useful logging may not be as visible as switching capacity, but they determine how quickly you can understand a problem later.
SSH is commonly used for encrypted command-line access and should be preferred over older unencrypted management methods. Management access should also come from trusted administration networks rather than being open from every user VLAN.
A practical management standard usually includes a predictable hostname, a documented management address, time synchronization, logging, monitoring and useful interface descriptions. Central authentication can also help where the platform supports it.
Interface descriptions are especially valuable. During an incident, a port named uplink to floor 2 switch tells you much more than an empty interface description.
Good management standards save small amounts of time every day and large amounts of time during incidents.
The exact commands and configuration syntax differ between vendors, but the operational goal is always the same: a network device should be easy to find, easy to identify and easy to troubleshoot.
Monitoring
Management tells you how to reach a device. Monitoring tells you how that device behaves over time.
A network should not become visible only when users start complaining. Monitoring creates a baseline and gives you something to compare against when behavior changes.
Useful network monitoring can include device availability, interface state, throughput, errors, discards, resource usage and environmental data where the hardware supports it.
SNMP is still widely used for this purpose.
An Object Identifier, or OID, identifies a specific managed value. A Management Information Base, or MIB, describes groups of those values and helps monitoring software understand what they represent. An SNMP walk can query part of the OID tree and is useful when discovering which information a device exposes.
The monitoring platform then decides what to do with that information. An OID itself does not define whether a value is healthy or unhealthy. Thresholds, alerts and trends are part of the monitoring logic.
The SNMP version matters as well.
SNMPv1 is old and provides very limited security. SNMPv2c is still common and uses community strings, but it does not provide modern message encryption. SNMPv3 can provide user-based authentication and message privacy when it is configured with the appropriate security level.
For new deployments, SNMPv3 is generally the better option when both the network device and monitoring platform support it. Read-only access should be used where possible, and management protocols should be restricted to trusted source networks.
In a multi-site environment, monitoring does not always require a complete monitoring server at every location. A local probe, collector or agent can often gather data on site and forward the results to a central platform. That can reduce management traffic across the WAN and still provide visibility when a site connection becomes unstable.
The real power of monitoring is history.
A throughput value at one moment tells you very little. A graph covering days or months can show whether an uplink is normally busy, whether errors started after a change or whether traffic is slowly approaching a capacity limit.
That historical context turns troubleshooting from guessing into comparing.
Wireless
Wireless design is different from wired design because the medium itself is shared and constantly changing.
An access point can look excellent on paper and still perform badly when it is installed in the wrong location. Wireless design is therefore not only about coverage. It is about radio behavior, client capability, interference, channel reuse and airtime.
Wi-Fi commonly operates across several frequency bands, including 2.4 GHz, 5 GHz and, on supported equipment and in regions where it is available, 6 GHz.
As a general rule, lower frequencies tend to travel farther and pass through obstacles more easily, while higher frequency bands can provide more available channel capacity. That does not make one band universally better than another. The right choice depends on the building, the clients and the required capacity.
Channel planning matters because nearby access points share radio airtime. Two access points placed close together should not automatically use the same channel and power settings. The goal is to create useful coverage cells while limiting unnecessary interference.
In the 2.4 GHz band, deployments using 20 MHz channels often use a non-overlapping plan such as channels 1, 6 and 11, although local regulations and the surrounding environment still matter.
Transmit power is another common source of misunderstanding. More power is not automatically better. An access point may be heard from a much greater distance than a client device can transmit back. Large cells also create more contention with neighboring access points.
Wireless design therefore needs to balance coverage and capacity.
The building itself plays a large role. Metal can strongly reflect or block radio signals. Concrete, dense walls, glass and many other materials can reduce signal quality. That is why access points should not be placed only by looking for empty spots on a ceiling plan.
You need to think about where people actually work, how many clients are expected, which applications they use and what sits physically between the client and the access point.
Antenna design changes the shape of the coverage area as well. Omnidirectional antennas spread energy across a broad area, while directional antennas focus coverage towards a specific direction. That can be useful in corridors, warehouses, large halls, outdoor links or other locations where broad coverage is not the goal.
The mounting orientation matters because the antenna pattern is designed around a specific position. An access point installed in the wrong orientation may not cover the area the way you expect.
Even with careful planning, a floor plan remains a prediction. The real environment may contain interference, unexpected materials and client behavior that were not visible beforehand.
That is why wireless design must be validated after installation. Signal quality, roaming behavior, channel utilization, interference and real client performance should all be checked in the live environment.
The building always gets the final vote.
Noise
Every wireless network operates with some level of background noise. The important question is not whether noise exists, but whether it is high enough to reduce the difference between the wanted signal and everything else the receiver hears.
Thermal noise is always present. A wider channel listens to a larger part of the spectrum, so it also collects more noise. This is one reason why narrower channels such as 20 MHz can be more reliable in busy or noisy environments. Wider channels such as 40, 80 or 160 MHz can offer more capacity, but they also consume more spectrum and leave fewer opportunities for clean channel reuse.
Other wireless networks are another common source of interference.
When several nearby networks use the same channel, they create co-channel contention. They are not necessarily destroying each other’s frames, but they must share airtime. When overlapping channels interfere with each other, the result is adjacent-channel interference, which can be even more disruptive.
A good channel plan reduces unnecessary overlap, while transmit power helps control the size of each coverage cell. The goal is not to make every access point reach as far as possible. The goal is to create cells that are large enough for reliable service but small enough for predictable reuse.
There is also receiver noise, which is produced by the radio hardware itself, and electromagnetic interference from sources outside the Wi-Fi network. Bluetooth devices, microwave ovens, industrial equipment, electrical systems, video transmitters and radar can all contribute depending on the environment.
When interference is suspected, RF scanning or spectrum analysis can help identify what is happening. Sometimes the best fix is not a new setting. Moving an access point away from an interference source can be more effective than trying to compensate with more transmit power.
Rates
Wi-Fi clients and access points support multiple data rates, and those rates have a direct effect on airtime.
Lower data rates can usually be received over a greater distance because they require less signal quality. The downside is that they take much longer to transmit the same amount of data.
This creates a trade-off.
Keeping very low legacy rates enabled can increase the effective size of a wireless cell, but it also allows slow transmissions to consume a disproportionate amount of airtime. In a dense environment, raising the minimum supported data rate can improve efficiency.
An access point may, for example, stop supporting the lowest legacy rates and require clients to communicate at a higher minimum rate. This can reduce the airtime used by management traffic, discourage distant clients from staying attached to the wrong access point and help create smaller cells that can be reused more effectively.
The downside is equally important: increasing the minimum rate reduces the effective coverage area. Clients with a weak signal may no longer be able to connect, and older devices may not support the required rates.
Minimum data rates should therefore be part of the overall wireless design and tested with the actual client devices used in the environment. They should not be increased simply because a higher number looks better.
Airtime
Wireless performance is not only about how many megabits are being transferred. Airtime is often the more limited resource.
Within the same contention domain, devices share access to the channel. Every transmission therefore consumes part of the available airtime, regardless of whether the frame carries a large amount of useful data.
Broadcast and multicast traffic can be especially expensive because it is often transmitted at a relatively low basic data rate so that connected clients have a reasonable chance of receiving it. A small amount of broadcast traffic can therefore consume a surprisingly large share of the available airtime.
In a wireless network where several access points participate in the same Layer 2 network, broadcast traffic may also need to be transmitted by multiple access points. One noisy client can therefore affect more than its own connection.
Reducing unnecessary broadcast traffic, segmenting very large Layer 2 networks and investigating devices that generate unusual amounts of broadcast traffic can all help. Depending on the platform and use case, multicast optimization or client isolation may also reduce unnecessary airtime use.
The important principle is that low bandwidth does not always mean low wireless impact. A small amount of slow traffic can still consume a large amount of airtime.
Troubleshooting
Wireless problems usually appear first as symptoms.
A user may report a slow connection, a client may disconnect repeatedly or an access point may show a high retry rate. None of those symptoms immediately tells you what the root cause is.
The first step is therefore to separate the symptom from the cause.
An access point that appears overloaded may have too many active clients, insufficient capacity, a poor channel plan, incorrect radio settings, excessive broadcast traffic or one problematic client consuming a large amount of airtime. Hardware or software resource problems can also play a role.
Adding another access point is not automatically the right answer. An additional access point using the wrong channel or transmit power can make the RF environment worse. Measure first, then change the design.
Packet retries are another useful symptom. A small number of retries is normal because wireless is a shared medium. A high retry rate, however, can indicate co-channel contention, adjacent-channel interference, external RF interference, poor signal quality, an oversaturated environment or a mismatch between client and access point transmit power.
That last point is easy to miss. An access point that transmits much more strongly than the client can create an asymmetric connection. The client hears the access point clearly, but the access point struggles to hear the client.
In some environments, reducing access point transmit power can therefore improve the design. Directional antennas can also help where coverage needs to be focused into a particular area.
Clients that disconnect or suffer inconsistent latency may be dealing with coverage gaps, weak signal quality, high channel utilization, interference, poor roaming behavior or incorrect access point placement.
A site survey should use devices that represent the real clients in the environment. Different laptops, phones and scanners have different radios, antennas and transmit capabilities. Designing only around what the access point can hear gives an incomplete picture.
The client experience is what matters.
A fixed value such as -60 dBm can be a useful reference point, but it should not be treated as a universal requirement. The correct target depends on the application, client type and roaming expectations.
When troubleshooting wireless issues, several values should be considered together: signal strength, signal-to-noise ratio, channel utilization, retry rate, data rate, roaming behavior and client capability.
One number rarely tells the complete story.
Standards
Wi-Fi has evolved through several generations of the IEEE 802.11 standards. Each generation improved something different: speed, efficiency, frequency use or the way many clients share the wireless medium.
| Standard | Common name | Bands | Channel widths | Maximum theoretical capability |
|---|---|---|---|---|
| 802.11 | Legacy Wi-Fi | 2.4 GHz | Approximately 20 MHz | Up to 2 Mbps |
| 802.11a | Wi-Fi 2 generation | 5 GHz | 20 MHz | Up to 54 Mbps |
| 802.11b | Wi-Fi 1 generation | 2.4 GHz | Approximately 20 MHz | Up to 11 Mbps |
| 802.11g | Wi-Fi 3 generation | 2.4 GHz | 20 MHz | Up to 54 Mbps |
| 802.11n | Wi-Fi 4 | 2.4 and 5 GHz | 20 and 40 MHz | Up to 600 Mbps |
| 802.11ac | Wi-Fi 5 | 5 GHz | 20, 40, 80 and 160 MHz | Several gigabits per second |
| 802.11ax | Wi-Fi 6 | 2.4 and 5 GHz | 20, 40, 80 and 160 MHz | Up to approximately 9.6 Gbps |
| 802.11ax | Wi-Fi 6E | 6 GHz in addition to Wi-Fi 6 bands | 20, 40, 80 and 160 MHz | Up to approximately 9.6 Gbps |
These values are theoretical maximums, not numbers every client will reach.
A normal client usually supports fewer spatial streams than the maximum defined by the standard. Real throughput is also affected by signal quality, channel width, interference, airtime utilization, protocol overhead and the number of active clients.
A wireless standard therefore tells you what is technically possible, not what every device will achieve in normal use.
Newer generations also focus increasingly on efficiency rather than only maximum speed. Wi-Fi 6, for example, introduced technologies such as OFDMA to use available airtime more efficiently when many clients are active.
This is why a newer Wi-Fi generation can improve the experience in a busy environment even when a single client does not need a higher peak throughput.
Documentation
Once the design is built, it still needs to be understandable to someone who was not involved in every decision.
A network diagram should reduce confusion, not create more of it.
Trying to place the entire environment on one page often produces a diagram that looks impressive from a distance but becomes almost useless during troubleshooting. A better approach is to split the environment into logical views.
One overview can show how the main parts connect, while separate pages can focus on the core, switching, servers, internet edge, wireless infrastructure, individual sites or security zones.
Related devices should be grouped visually so that the structure is easy to scan. A rack, site, switch group, DMZ or network zone can be placed inside a clearly named container.
Use consistent shapes and line styles. A switch should look like a switch everywhere in the documentation, and physical links should be distinguishable from logical relationships when both are shown.
Do not rely on color alone. The diagram should still make sense when printed, viewed in grayscale or opened by someone who does not distinguish every color easily.
Only show information that helps people understand the design. Device names, important uplinks, relevant link speeds, redundant paths, VLAN references and interface names can all be useful. Detailed configuration usually belongs somewhere else.
The most important part of documentation is keeping it current.
An outdated diagram can be worse than no diagram because people may trust information that is no longer true. Updating documentation should therefore be part of the change itself, not something left for later.
Validation
The final step is checking whether the network actually does what the design intended.
Do not stop at “the network is online.” That only proves that some traffic is working.
Test the parts that mattered.
Can users reach the services they need? Are networks that should be separated actually separated? Does a failed uplink behave the way you expected? Does the backup gateway take over? Does spanning tree choose the intended topology? Does monitoring detect an important interface failure?
Then look at the operational side as well. Can another engineer understand the diagrams and interface descriptions? Are the physical labels correct? Can the environment grow without forcing a redesign?
A network design is not finished when the last cable is connected.
It is finished when the result has been tested, documented and handed over in a way that someone else can support.
The strongest designs are not necessarily the most complicated ones. They are the ones that remain understandable when something fails.
Knowledge check
Knowledge check
This quiz needs JavaScript to show the questions and feedback.
This quiz needs JavaScript to show the questions and feedback.
End of the page 🎉
You have reached the end of the page. You can navigate through other blog posts as well, share this post on X, LinkedIn and Reddit or return to the blog posts collection page. Thank you for visiting this post.
If you find this page and blog very useful and you want to leave a donation, you can use the button below to buy me a beer. Hosting and maintaining a website takes a lot of time and money. Thank you in advance and cheers :)
The terms and conditions apply to this post.
Networking Implementation Runbook
This page contains a standardized runbook of how I performed network implementations. This can be used as an checklist and guide, reference or as to-do list to describe at a high level how I perform such migrations. The information in this implementation guide is based on experiences and mistakes made in the past, with the goal of ensuring future implementations run as smoothly as possible and to minimize outage.
When do you use this implementation guide?
With network implementations, I mean the implementation, migration, or replacement of one or more of the following components:
- DHCP server, IP address ranges, and/or VLANs
- Firewall
- Modem / internet-facing router
- Switch or switches (managed and unmanaged)
Implementation guide overview
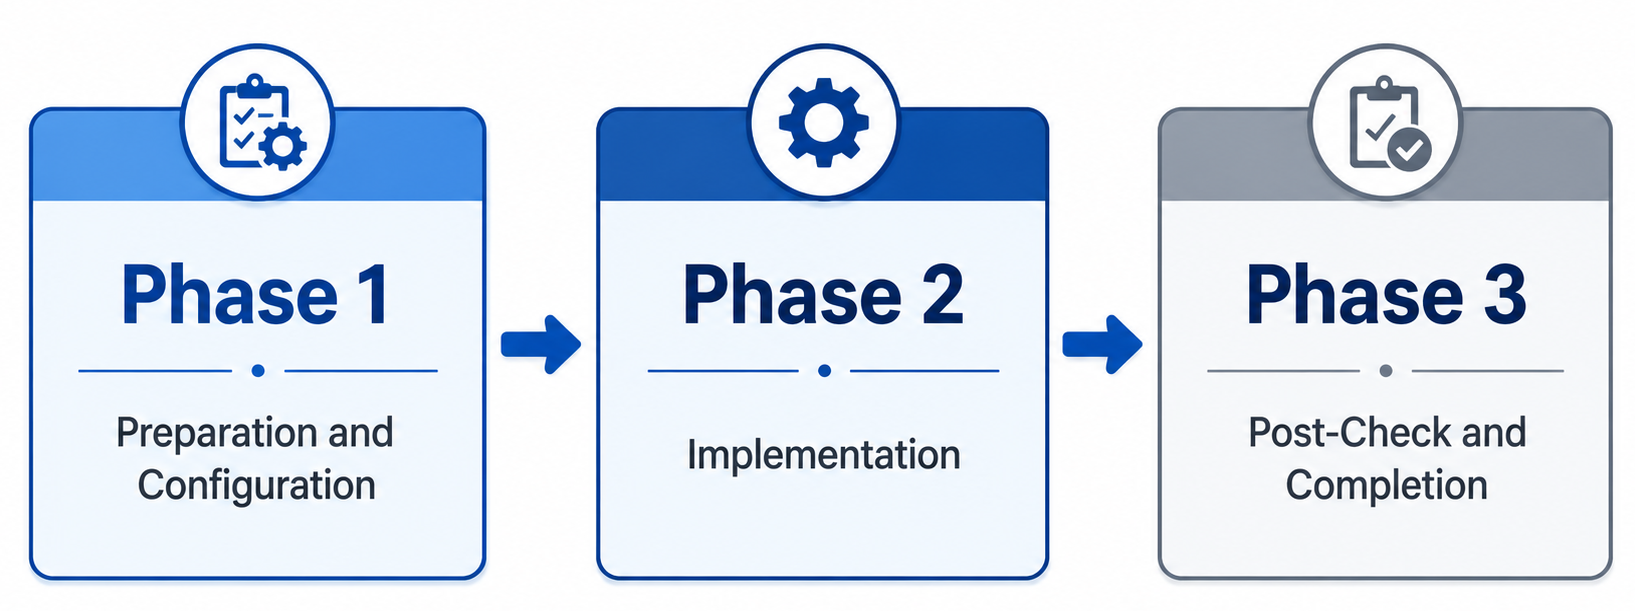
To keep the process as simple as possible, this implementation guide consists of three phases:
The phases of a network migration are:
- Preparation and configuration
- Implementation
- Post-check and completion
Phase 1: Preparation and configuration
In the preparation and configuration phase, all equipment is configured and prepared for implementation. This means I mostly connect all new devices, configure the firmware, updating all firmware to the latest available versions and register the devices into your asset management solution (CMDB).
Before configuring any equipment, the current situation must first be inventoried because you need to know what hardware to order.
1.1 Inventory of the current network
Perform the steps below to gather all required information:
Networks and address spaces
- Perform an IP scan on all networks
- Identify static IP addresses and DHCP reservations
Other systems
- Inventory any camera surveillance system
- Inventory any alarm system
1.2 Configuration of new equipment
The configuration may consist of:
- Replicating the current situation (from step 1.1), or
- A completely new implementation
For a fully new implementation, the list below can be used as a guideline.
Configuration tasks
The following components must be configured on the new network equipment:
- Update firmware and software to the latest available versions
- Configure networks and VLANs
- Configure the DHCP server and address pools
- Configure DHCP reservations
- Configure DNS servers
- Configure required firewall rules
- Open required TCP/UDP ports (DNAT)
- Preconfigure required Site-to-Site VPN connections
Phase 2: Implementation
The implementation phase is the shortest phase. It consists solely of switching the network to use the new equipment and/or a new IP range, DHCP server, or VLAN.
Follow:
- 2.1 when deploying new network equipment
- 2.2 when implementing a new IP range, DHCP server, and/or VLAN
2.1 Deployment of new network equipment
At the start of Phase 2, we assume that the new equipment:
- Is already installed in the customer’s network cabinet
- Is ready for cutover
Preferably, perform these activities outside of the customer’s business hours to minimize outage.
Implementation steps
- Ensure it is clearly known which cables must be switched
- To avoid DHCP and ARP issues, power off all switches completely and save their configurations prior
- Switch the cable(s) identified in step 1
- Verify that the connection is working
- Power on all switches that were turned off
- Verify network connectivity
- Enable any VPN connections (Point-to-Site and Site-to-Site)
Before proceeding to Phase 3, verify whether the following scenario applies.
2.1.1 Firewall – ISP modem → Bridge mode or DMZ
ISPs often provide their own modem. This modem should not be removed, as doing so may result in no support from the provider during outages.
To prevent double NAT, one of the following 2 options must be configured:
Bridge mode (preferred)
- The modem forwards all traffic 1:1
- Effectively functions like an unmanaged switch
- WAN configuration is applied to the deployed firewall:
- IP address
- Subnet mask
- Gateway
- DNS servers
Note: Bridge mode may sometimes only be enabled by the ISP themselves. Take this into account when performing implementations outside of office hours.
DMZ (Demilitarized Zone)
- The modem forwards all traffic to the deployed firewall
- The WAN IP address of the firewall must be known to the modem
- DMZ / Exposed Host must be configured on the modem
With either option correctly configured:
- Internet access should function
- External access to TCP/UDP ports should work
Phase 3: Post-check and completion
The final phase focuses on verifying whether the network implementation was successful.
All implemented components must be tested before leaving the customer — including evenings, weekends, or other special periods.
Work through the checklist from top to the bottom.
If an issue arises it must be resolved before continuing, due to component dependencies.
This ensures the implementation does not cause issues in the (near) future.
3.1 Extended testing list
| Check | Additional information |
|---|---|
| Firewall functionality | Verify the firewall operates correctly and is externally reachable for management |
| Switch functionality | Verify inter-switch traffic and PoE functionality (if applicable) |
| DHCP service | Verify that a connected device receives the correct DHCP lease |
| DNS servers | Verify DNS settings via ipconfig /all |
| Network connectivity | Verify connectivity to the firewall using ping and/or HTTPS |
| Internet access | Verify that endpoints have internet access |
| DHCP reservations | Verify that all reserved devices received the correct leases |
| Site-to-Site VPNs | Verify all Site-to-Site VPN connections |
| Printers | Verify all printers function correctly |
| Scanners | Verify network features such as scan-to-folder, SharePoint, or email |
| Camera surveillance system | Verify cameras and external access (4G/5G), if applicable |
| Alarm system | Verify operation and test with the security provider |
| Open ports / DNAT | Verify all inventoried open ports function correctly |
| Point-to-Site VPNs | Verify all client VPN connections |
3.2 Short test list
- Firewall
- Switches
- DHCP
- DNS
- Network connectivity
- Internet
- DHCP reservations
- VPN – Site-to-Site
- Printers
- Scanners
- Camera surveillance system
- Alarm system
- Open ports / DNAT
- VPN – Point-to-Site
Summary
This page describes how I have done network implementations in the past and use it as a checklist to perform future implementations. Sometimes in the heat of the moment you forget some things here and there. To address this problem, I created this checklist for myself.
End of the page 🎉
You have reached the end of the page. You can navigate through other blog posts as well, share this post on X, LinkedIn and Reddit or return to the blog posts collection page. Thank you for visiting this post.
If you find this page and blog very useful and you want to leave a donation, you can use the button below to buy me a beer. Hosting and maintaining a website takes a lot of time and money. Thank you in advance and cheers :)
The terms and conditions apply to this post.