All pages referring or tutorials for PowerShell.
This is the multi-page printable view of this section. Click here to print.
PowerShell
- Windows Server Inventory Report Script
- Remove Roaming Profile folders with PowerShell (force)
- Clean files on a schedule with Powershell script
- How to completely hide language bar/selector Windows 11
- Initial Installation script for Windows Azure VMs
- Disk cleaning script on Windows Azure VMs
- Get Device serial number on Windows 11 24H2 and up
- How to upload PowerShell script to Gallery with Github Actions
- Create AD users with on demand script
- How to Export Active Directory (AD) users fast and easy
- Set correct language and timezone on Azure VM
- Get Windows Product Key with PowerShell
- Getting started with PowerShell
- Using PowerShell remote sessions
- How to enable Remote Group Policy update
- Bulk create Active Directory users with Powershell
Windows Server Inventory Report Script
To help us IT identifying certain configurations on a server and possible misconfigurations I have made a PowerShell script which creates a…
To help us IT identifying certain configurations on a server and possible misconfigurations I have made a PowerShell script which creates a complete overview of the current server configuration and exports it as a single HTML file.
In this post I will explain how to use it and how the script works.
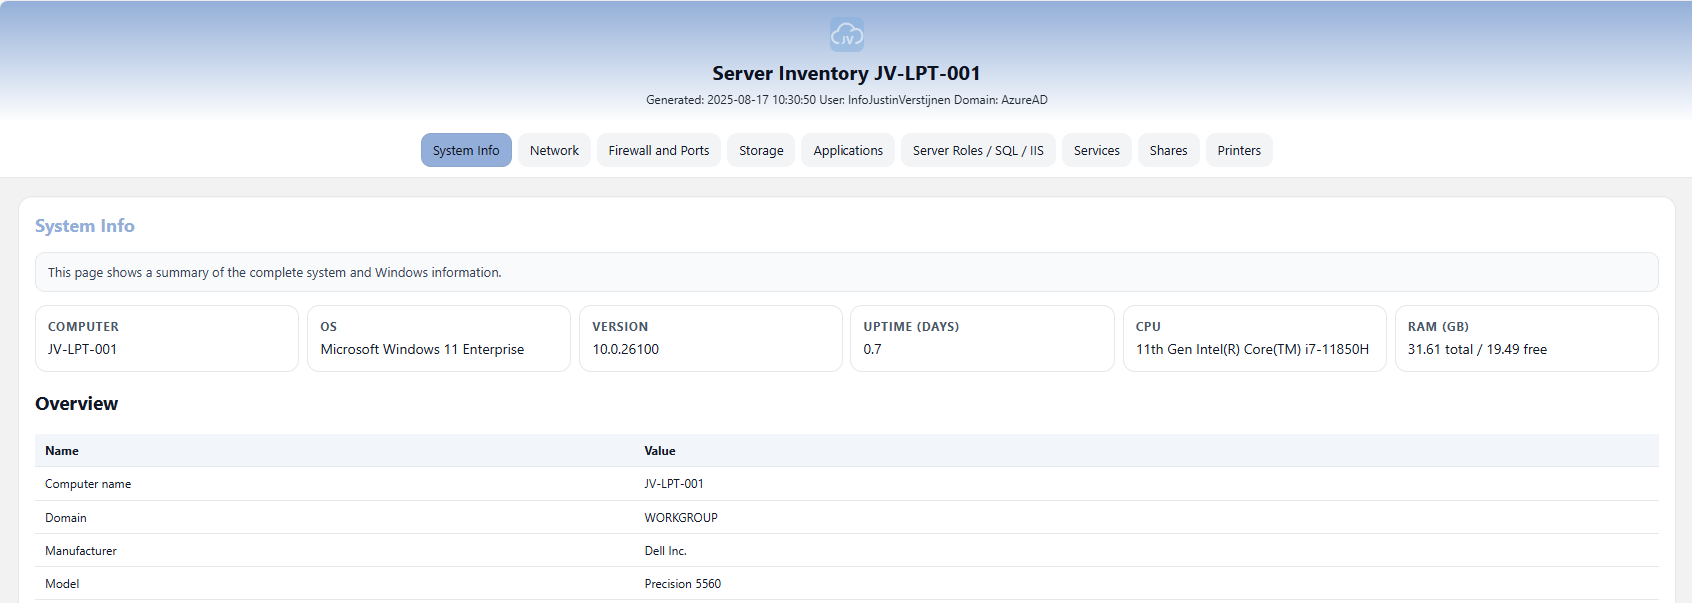
An example of the output of the script.
Where to download this script?
For the fast pass, my script can be downloaded here:
What does the Server Inventory script do?
The script I have made creates a full system configuration report which shows us a lot of information:
- Generic System information
- Network information
- Firewall configuration and Ports
- Storage information
- Applications
- Server roles, SQL and IIS configuration
- Services
- Configured shares
- Installed printers
How to use the script with Powershell Gallery
I have uploaded this script to the PowerShell Gallery for quick and easy installation/use. You can download and install the script by typing this into your PowerShell window:
POWERSHELL
Install-Script JV-ServerInventoryReportAt the question for the untrusted repository, answer “Yes to all” (A).

Now the script is installed, and we can execute it by running:
POWERSHELL
JV-ServerInventoryReportThis immediately runs the script and saves the output to your desktop folder.
How to use the script manually
To use the script, we need to do some steps. You can do it in your own way, but I show the most easiest way to run the script without compromising system security.
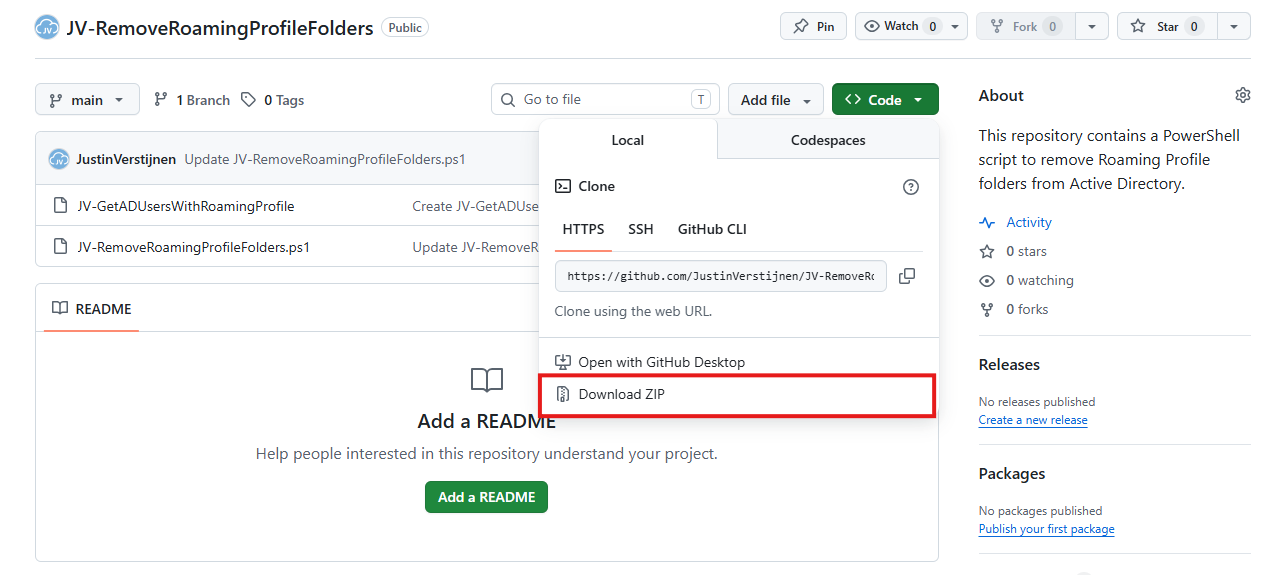
First download the script from GitHub:
Click on the blue button above. You now are on the GitHub page of the script.
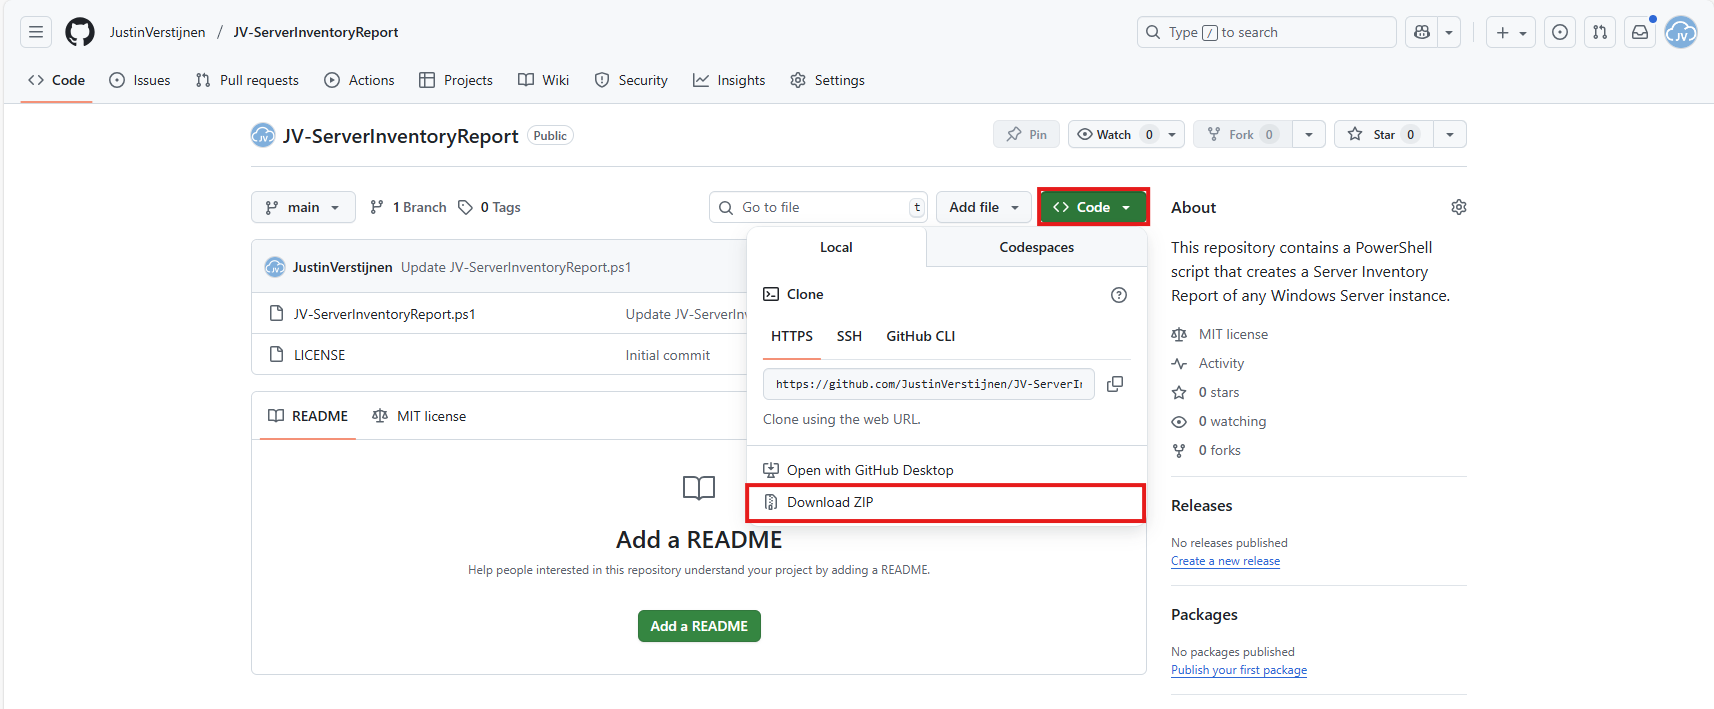
Click on “Code” and then “Download ZIP”.
Now place the files on the server where you want to execute the script.
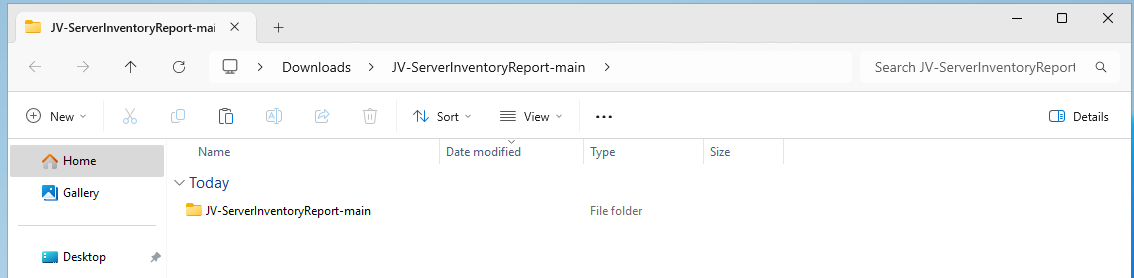
Unzip the ZIP file.
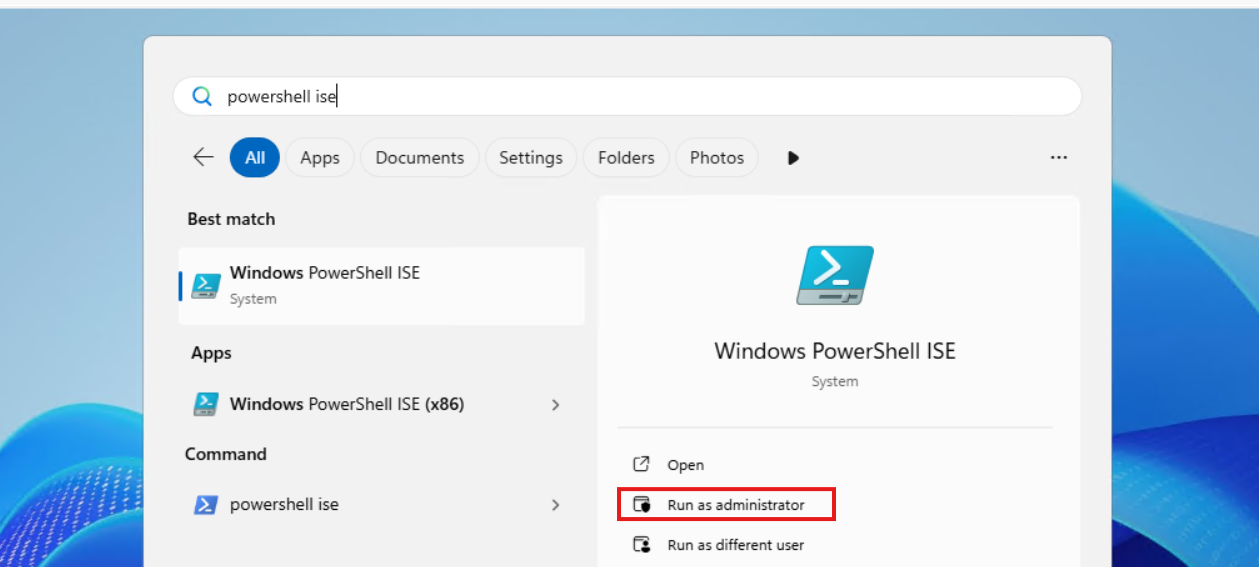
Open Powershell ISE as administrator.
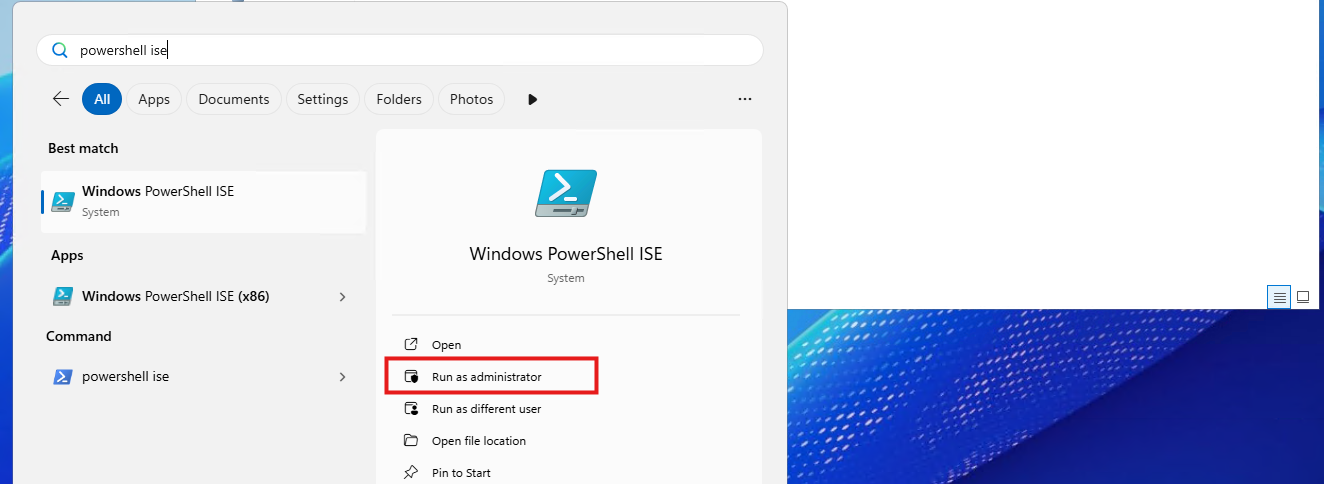
After opening PowerShell ISE and after authenticating, open the script.
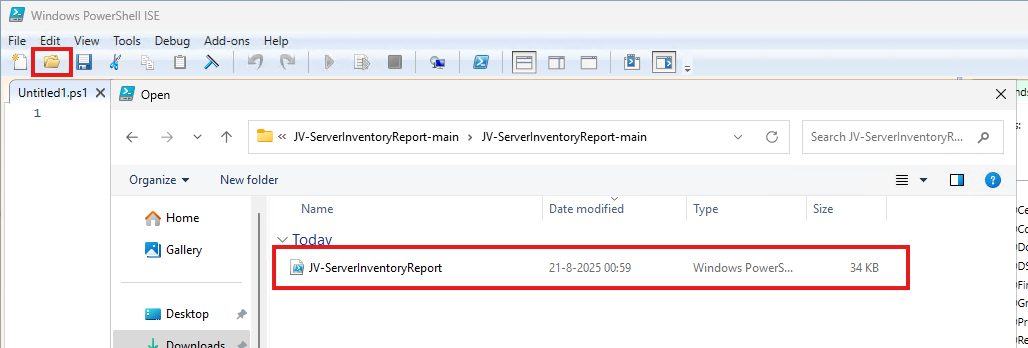
Review the script to understand what it does. This is always a good recommendation before executing unknown scripts.
After reviewing, run the following command to temporarily disable the PowerShell execution policy:
POWERSHELL
Set-ExecutionPolicy Unrestricted -Scope ProcessThis disables the default PowerShell execution policy for only the duration of your PowerShell window. After closing PowerShell, every other window will have this enabled again.
Then run the script by clicking the “Play” button:

The script will run. This takes about 30 seconds. After it has been succesfully completed, the HTML-file will be placed on the desktop (or other location if you specify this while running).
POWERSHELL
PS C:\Users\justin-admin> Set-ExecutionPolicy Unrestricted -Scope Process

PS C:\Users\justin-admin> C:\Users\justin-admin\Downloads\JV-ServerInventoryReport-main\JV-ServerInventoryReport.ps1
Script made by...
     _           _   _        __     __            _   _  _
    | |_   _ ___| |_(_)_ __   \ \   / /__ _ __ ___| |_(_)(_)_ __   ___ _ __
 _  | | | | / __| __| | '_ \   \ \ / / _ \ '__/ __| __| || | '_ \ / _ \ '_ \
| |_| | |_| \__ \ |_| | | | |   \ V /  __/ |  \__ \ |_| || | | | |  __/ | | |
 \___/ \__,_|___/\__|_|_| |_|    \_/ \___|_|  |___/\__|_|/ |_| |_|\___|_| |_|
                                                       |__/
Report written to: C:\Users\justin-admin\Desktop\Server-Inventory_20250821_101816.html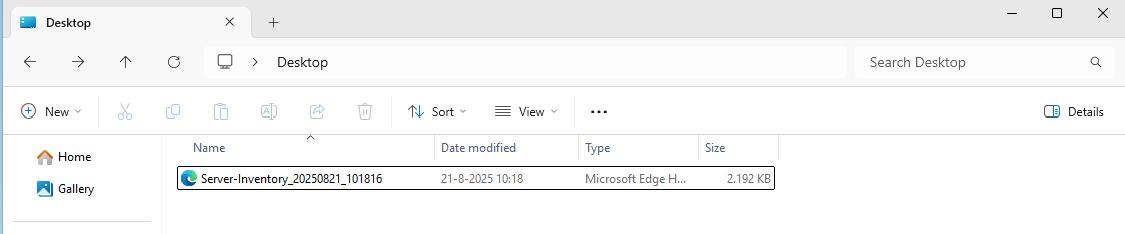
Then you can open this file with your favorite webbrowser and review the information.
Summary
This script provides a great and simple overview of the full server configuration. It places everything in nice and clear tables, while still granting access to the raw outputs it used to markup the tables.
Everything is placed in nice and clear tabs so information is categorized, and the information can be easily exported.
I hope my script is helpful for you and thank you for viewing.
Sources
These sources helped me by writing and research for this post;
- https://learn.microsoft.com/en-us/powershell/scripting/learn/ps101/09-functions?view=powershell-7.5
- https://learn.microsoft.com/en-us/powershell/module/microsoft.powershell.utility/convertto-html?view=powershell-7.5
End of the page 🎉
You have reached the end of the page. You can navigate through other blog posts as well, share this post on X, LinkedIn and Reddit or return to the blog posts collection page. Thank you for visiting this post.
If you think something is wrong with this post or you want to know more, you can send me a message to one of my social profiles at: https://justinverstijnen.nl/about/
If you find this page and blog very useful and you want to leave a donation, you can use the button below to buy me a beer. Hosting and maintaining a website takes a lot of time and money. Thank you in advance and cheers :)

The terms and conditions apply to this post.
Remove Roaming Profile folders with PowerShell (force)
This guide uses and describes a PowerShell script that removes a roaming profile folder by taking ownership, fixing permissions and attributes, and using a robocopy fallback if delete fails due to several possible reasons.
What this script does
This script tries to clean and delete a folder which I have used in the past to remove Roaming Profile folders from Active Directory. These folders are heavily secured as personal data might reside in it. It can also contain files with more than 260 characters and as we already know by now, Windows doesn’t like that. This script therefore manages to do the following steps:
- Changes ownership (takeown`)
- Changes permissions (icacls) for the logged in administrator to actually get access to the folder if not having already
- Removes protected file attributes (attrib)
- If normal delete fails, it uses a robocopy fallback to make the folder empty
Failure
Make sure you delete the correct folders as this script performs destructive actions with irreversible results. Be sure to make backups prior to perform this action.
Requirements
- Run PowerShell or PowerShell ISE as Administrator
- Local machine access (SMB share not supported)
- Update these two variables before actuallyrunning:
- $fullPath = the folder you want to clean/remove
- $emptydir = where the script creates a temporary empty folder
- Be sure you are pointing to the correct folder as this script deletes contents without creating backups
Step 1: Download the script
Let’s start with downloading the script from my GitHub page:
Click on “Code” and then “Download ZIP”.
Now you have to put the script on the computer/server where the roaming profile folder is.
Step 2: Open and edit the script prior to execution
Before we run the script, we need to change the parameters. Let’s open PowerShell ISE as Administrator on the destination server for a nice split window of editing and execution of the script.
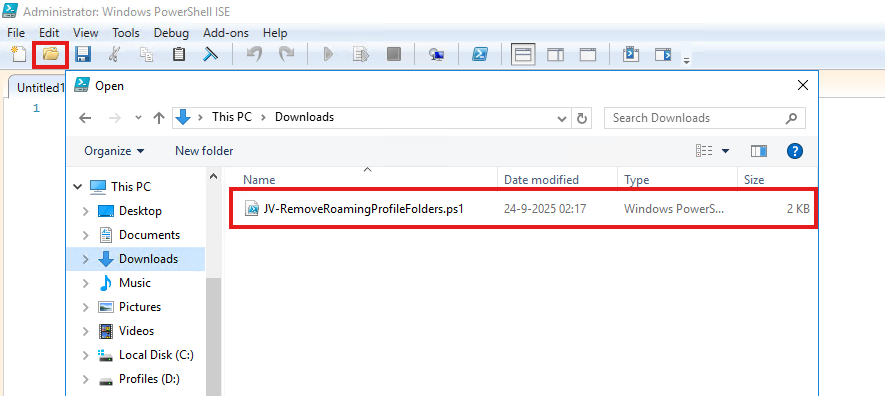
Then open the just downloaded file:
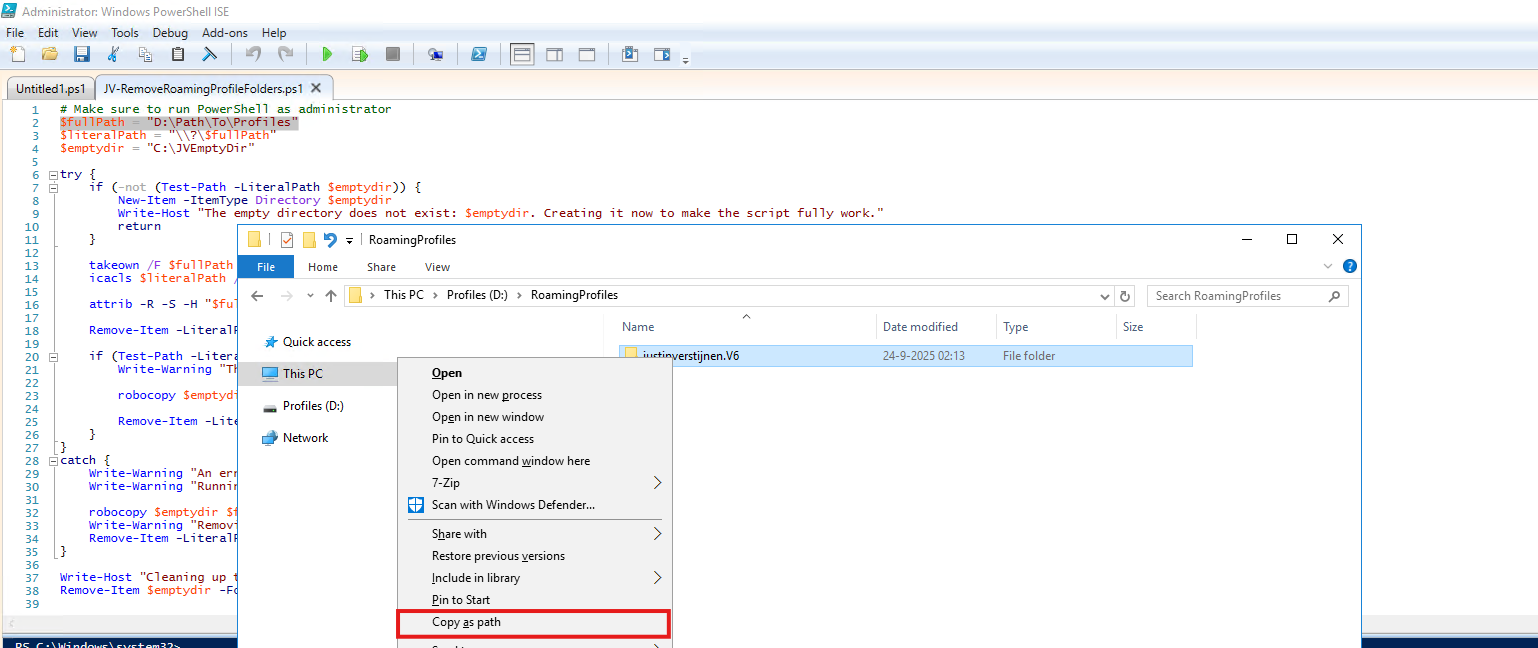
Then we need to change the folder on Line 2:
- $fullPath = “D:\Path\To\Profiles”
This must become the actual path on your machine you can’t remove through the GUI. Let’s say my own Roaming Profile on D:\RoamingProfiles\justinverstijnen.V6. Navigate to the folder, and then do a right click on that folder while holding down the Shift button. This brings up an option to copy the full path.
Paste that value in the variable on Line 2:
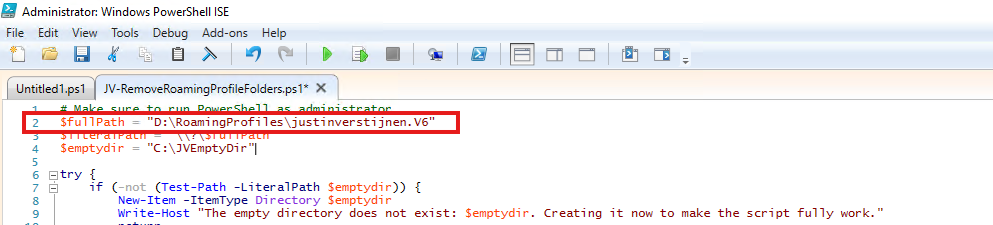
You can also change the value on Line 4 to change the temporary directory needed for the fallback method. This folder is cleaned before the script is finished.
Step 3: Running the script
Before we can actually run the script, great chance that the machine has an PowerShell execution policy active which it has by default. Run this command to bypass this for the duration of this window:
PowerShell
Set-ExecutionPolicy Unrestricted -Scope Process -ForcePaste the command into the blue execution part and hit Enter.

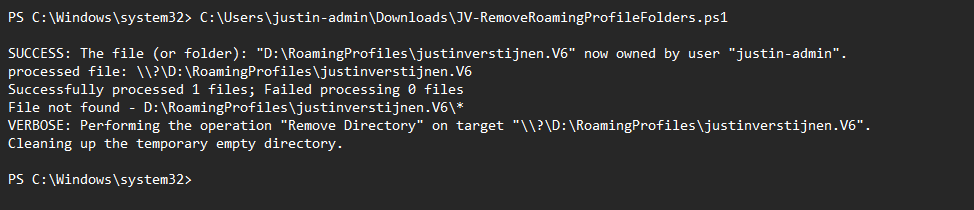
Now we are ready to execute the script to delete the bothering folder. Click on the “Play” button in the menu bar:
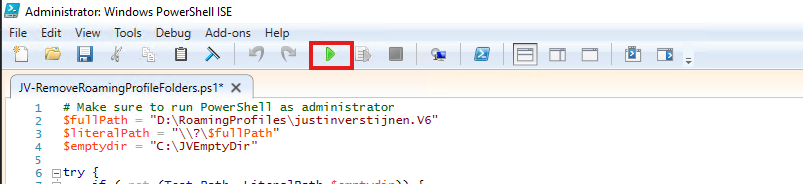
The script will exactly tell you what its doing at every moment, giving you insights on what files are permanently deleted.
Step 4: Check the results
After the script has finished, let’s check with the GUI File Explorer what has happened with the folder:
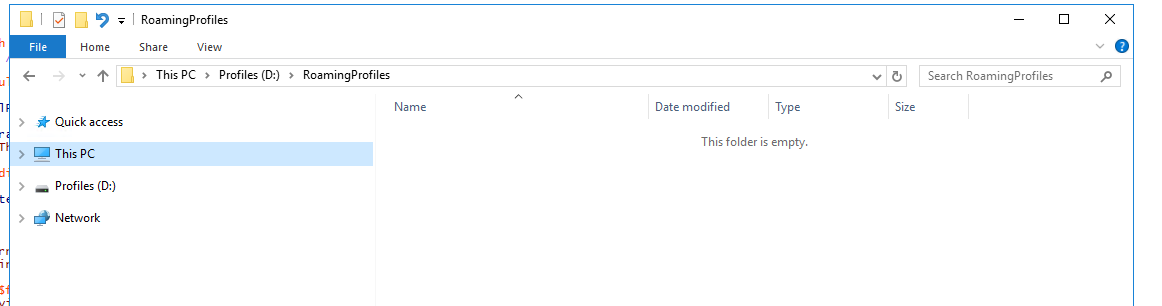
The folder is now completely gone and not bothering us anymore, which is great. You can use it for deleting more profiles by changing the variable on Line 2 to a new profile in case you need this.
Summary
- The script is designed to remove a folder and its contents , even when permissions, too long file lengths (260 chars) or attributes make deletion hard.
- It first tries a normal delete (Remove-Item), then:
- if the folder still exists, it uses a robocopy fallback to mirror an empty folder over the target (so the target becomes empty)
- if an error happens, it also uses the robocopy fallback and then tries again to remove what is left
- The script makes changes to permissions and ownership of the target folder (because of takeown and icacls).
- Because this is destructive, only run it when you are sure $fullPath is correct.
Thank you for reading this post and I hope it was helpful!
Sources
These sources helped me by writing and research for this post;
- https://learn.microsoft.com/powershell/module/microsoft.powershell.management/remove-item
- https://learn.microsoft.com/windows-server/administration/windows-commands/takeown
End of the page 🎉
You have reached the end of the page. You can navigate through other blog posts as well, share this post on X, LinkedIn and Reddit or return to the blog posts collection page. Thank you for visiting this post.
If you think something is wrong with this post or you want to know more, you can send me a message to one of my social profiles at: https://justinverstijnen.nl/about/
If you find this page and blog very useful and you want to leave a donation, you can use the button below to buy me a beer. Hosting and maintaining a website takes a lot of time and money. Thank you in advance and cheers :)
The terms and conditions apply to this post.
Clean files on a schedule with Powershell script
Sometimes in IT, we have software or solutions that need to to save temporary files in your filesystem. Let’s say, a feed with logs or…
Sometimes in IT, we have software or solutions that need to to save temporary files in your filesystem. Let’s say, a feed with logs or CSV files that are saved, logs or back-ups like the Bartender software. The software itself doesn’t have a solution to clean up those files and after 2 years, the size can be massive.
To let this files clean on schedule I have created a Powershell script which cleans those files in specific folders after they are not modified in *specfied* days . You can define the folders and number of days at the parameters section of the script.
Note: Think out very carefully how long the retention must be. Deleting files is a irreverible action!
The clean script
The Powershell script for cleaning up files is on my GitHub page:
It starts with a parameter to define the amount of days you want to retain the files. It checks this at the last write time to the file.
After that, it defines the folders where it must check for files with no exclusion of file extensions. It removes all files and folders in the defined folders.
What does the script do?
The script is meant for cleaning specific files after X days. A great example of it in practice is if you have Bartender installed on a server. Bartender will every day save deleted database records to a file without it even bothering cleaning it up. After 2 years, such folder can be over 25GB’s. With this script, it only keeps 30 versions of the file. Assuming we have more retention on our backups, we don’t need any more than that.
The script works in this way:
- Ensuring it runs as Administrator
- Enable logging
- Saves a log file in the same directory with 5MB limit by default (can be adjusted to your needs)
- Searching for the files to be cleaned, which are older than the specified days
- Deleting the files and logging them for reference
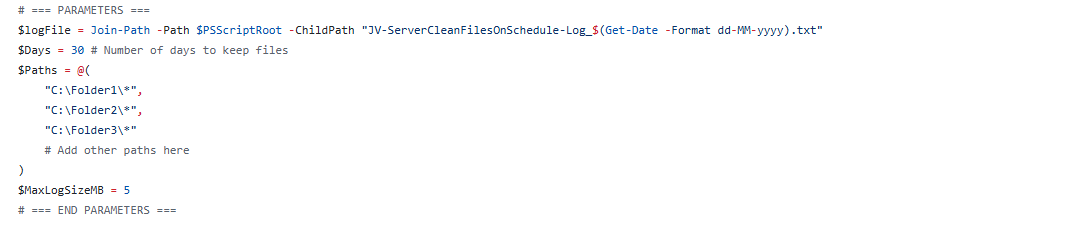
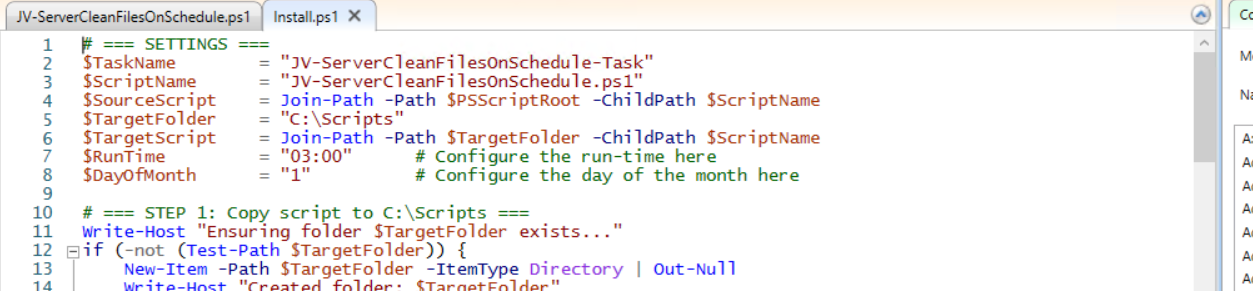
Script parameters for customization
At the beginning of the script, we can set some parameters for customization of the script. The rest of the script can be as-is to ensure it still runs.
I will refer to the line numbers of the script on GitHub:
- Line 14: Specify the number of days to keep files (typing 30 will keep files for 30 days)
- Line 15: Specify the paths. As this is an array, it must be comma-seperated except the last one. Keep this in mind. You can add as many folders as you want but be aware to not put in critical folders
- Line 21: Specify the maximum size of the log file. It will remove lines at the start of the file so the latest information is always available
Installing the clean script automatically
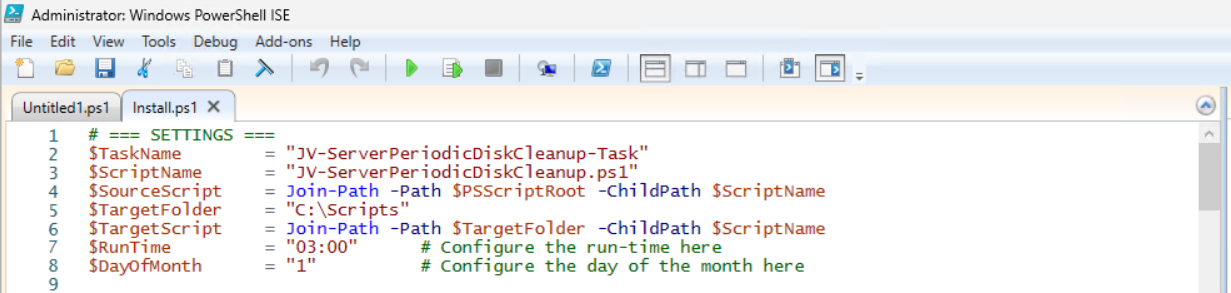
For installation with Task Scheduler I included an installation script that, by default, configures a task in the Windows Task Scheduler that runs it;
- Every first day of the month
- At hour 03:00
If these settings are great for you, you can leave them as-is.
The Installation script creates a folder in C:\ named “Scripts” if not already there and places the cleaning script there.
Installation
Click on the blue button above. You now are on the Github page of the script.
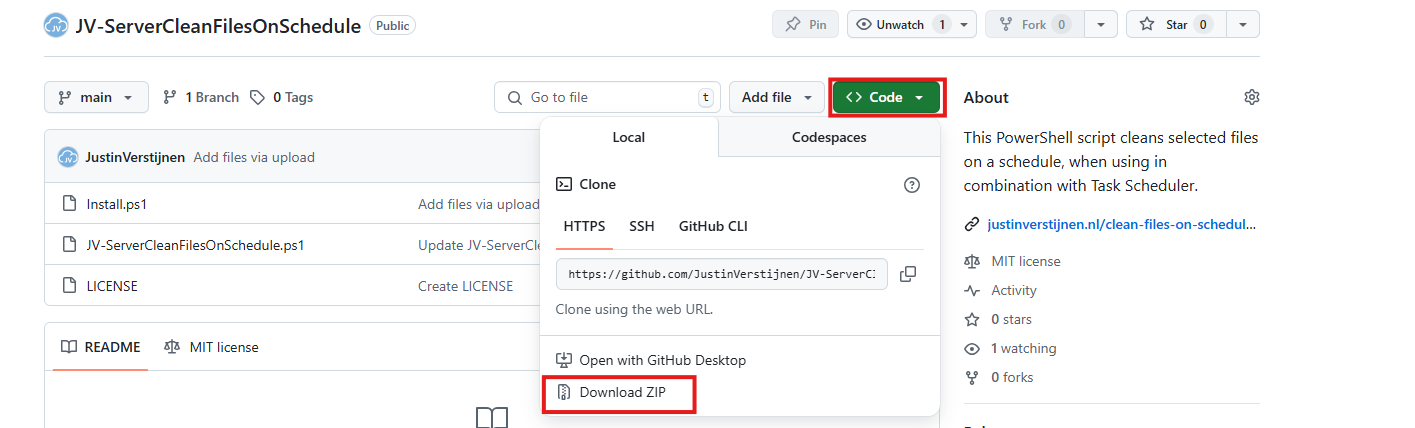
Click on “Code” and then “Download ZIP”.
Then place the files on the server where you want to install the script.
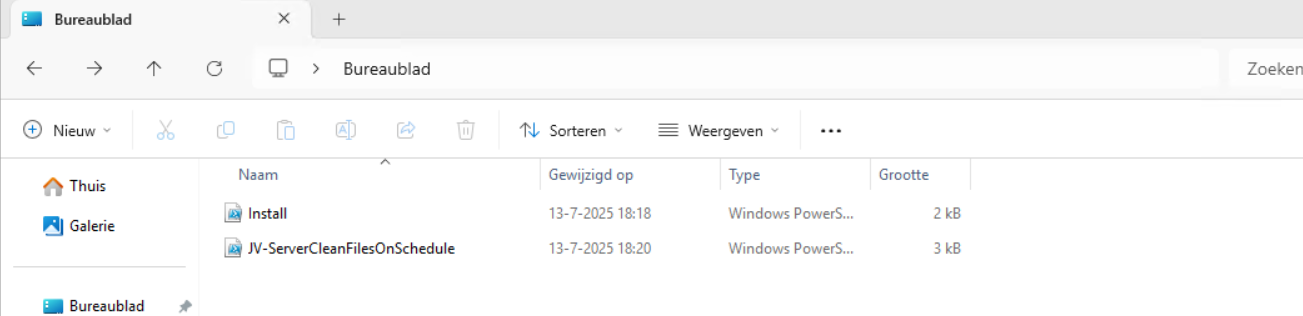
Open Powershell ISE as administrator.
Now open the “Install” script.
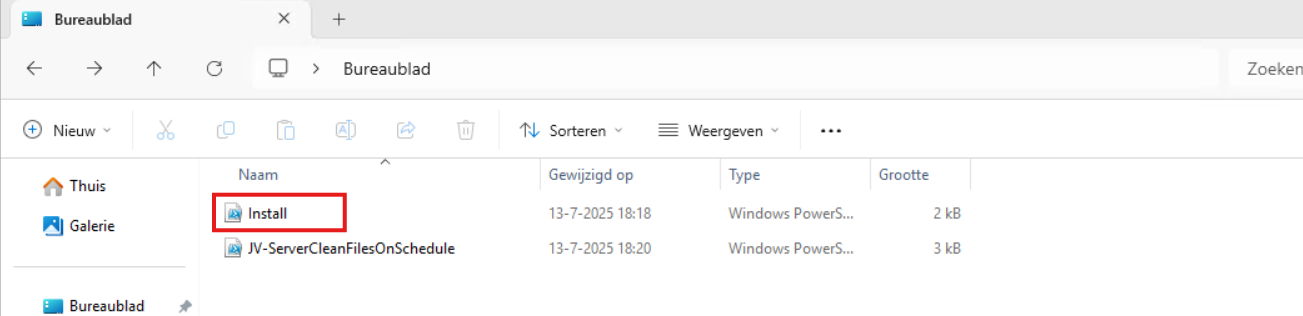
Review it’s default settings and if you feel at home in PowerShell, review the rest of the script to understand what it does.
You can change the schedule very easily by changing the runtime: 0:00 till 23:59 and the day of month to specify the day number of the month (1-31).
After your schedule is ready, let’s ensure we temporarily bypass the Execution Policy by typing the command in the blue window below:
POWERSHELL
Set-ExecutionPolicy Unrestricted -Scope ProcessThis way the execution policy stays enabled but for this session only it’s been lowered. When you close the window, you have to type this again before be able to run scripts.
Execute the command, and when prompted to lower the policy, click Yes.
Now execute the Install script by clicking the green “Run” button:

After executing the script, we get the message that the task has been created succesfully:

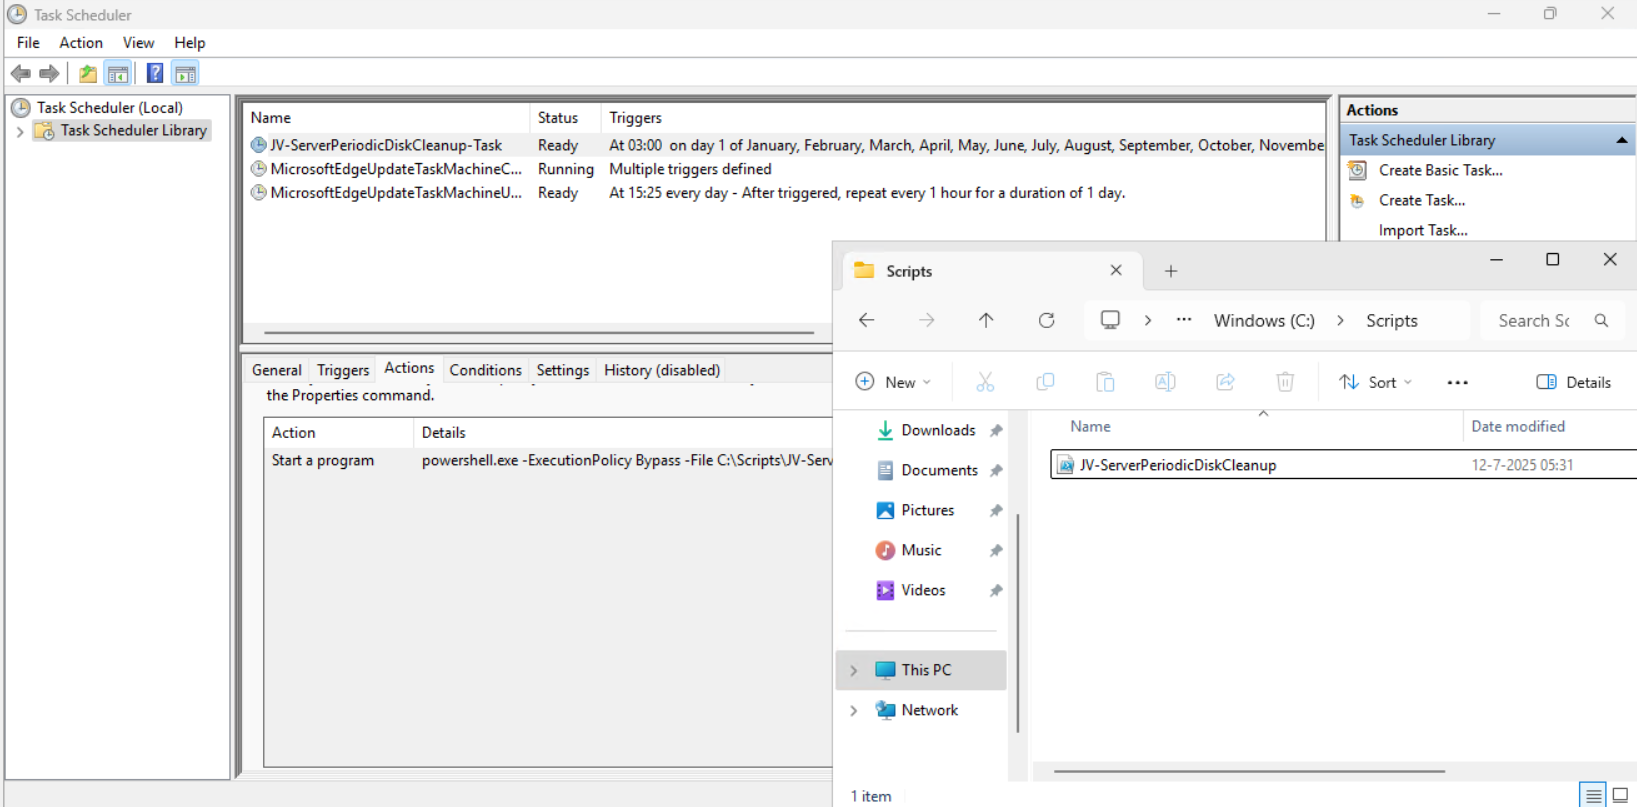
Let’s check this in the Windows Task Scheduler:

As you can see, the script is succesfully installed to Task Scheduler. This ensures it runs every first of the month at 03:00 (or at your own defined schedule). Also, the script has been placed in C:\Scripts for a good overview of the scripts of the system.
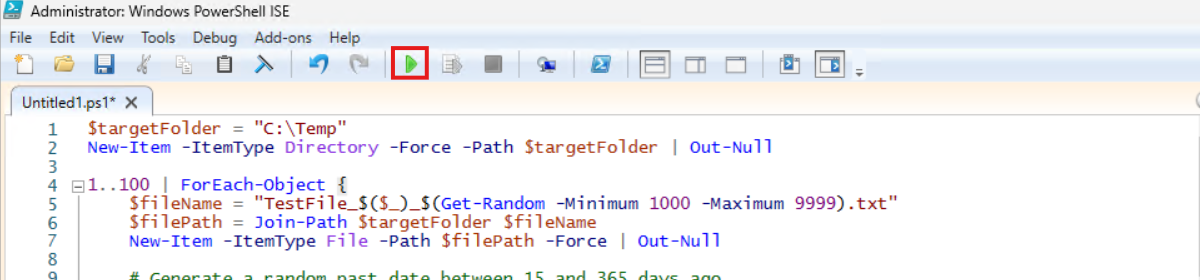
Using the script manually/demonstration
For demonstration of the clean script, I created a second, simple script that creates 100 dummy files in the C:\Temp directory. This with last write times between 15 and 365 days ago.
POWERSHELL
$targetFolder = "C:\Temp"
New-Item -ItemType Directory -Force -Path $targetFolder | Out-Null

1..100 | ForEach-Object {
    $fileName = "TestFile_$($_)_$(Get-Random -Minimum 1000 -Maximum 9999).txt"
    $filePath = Join-Path $targetFolder $fileName
    New-Item -ItemType File -Path $filePath -Force | Out-Null

    # Generate a random past date between 15 and 365 days ago
    $daysAgo = Get-Random -Minimum 15 -Maximum 365
    $randomDate = (Get-Date).AddDays(-$daysAgo)
    (Get-Item $filePath).LastWriteTime = $randomDate
    (Get-Item $filePath).CreationTime = $randomDate
}
After executing the script from my GitHub page, the files older than 30 days only must be removed while files between the 15 and 30 days must be retained.
Setting the PowerShell Execution Policy
Before we can run any of the scripts, we have to do a one-time bypass for the Powershell Execution Policy by typing the command in the blue window below:
POWERSHELL
Set-ExecutionPolicy Unrestricted -Scope ProcessThis way the execution policy stays enabled but for this session only it’s been lowered. When you close the window, you have to type this again before be able to run scripts.
Execute the command, and when prompted to lower the policy, click Yes.
Running the dummy files script
Now we can run the script itself by clicking the green “Play” button.
Now we have a folder with 100 files with random last write times:
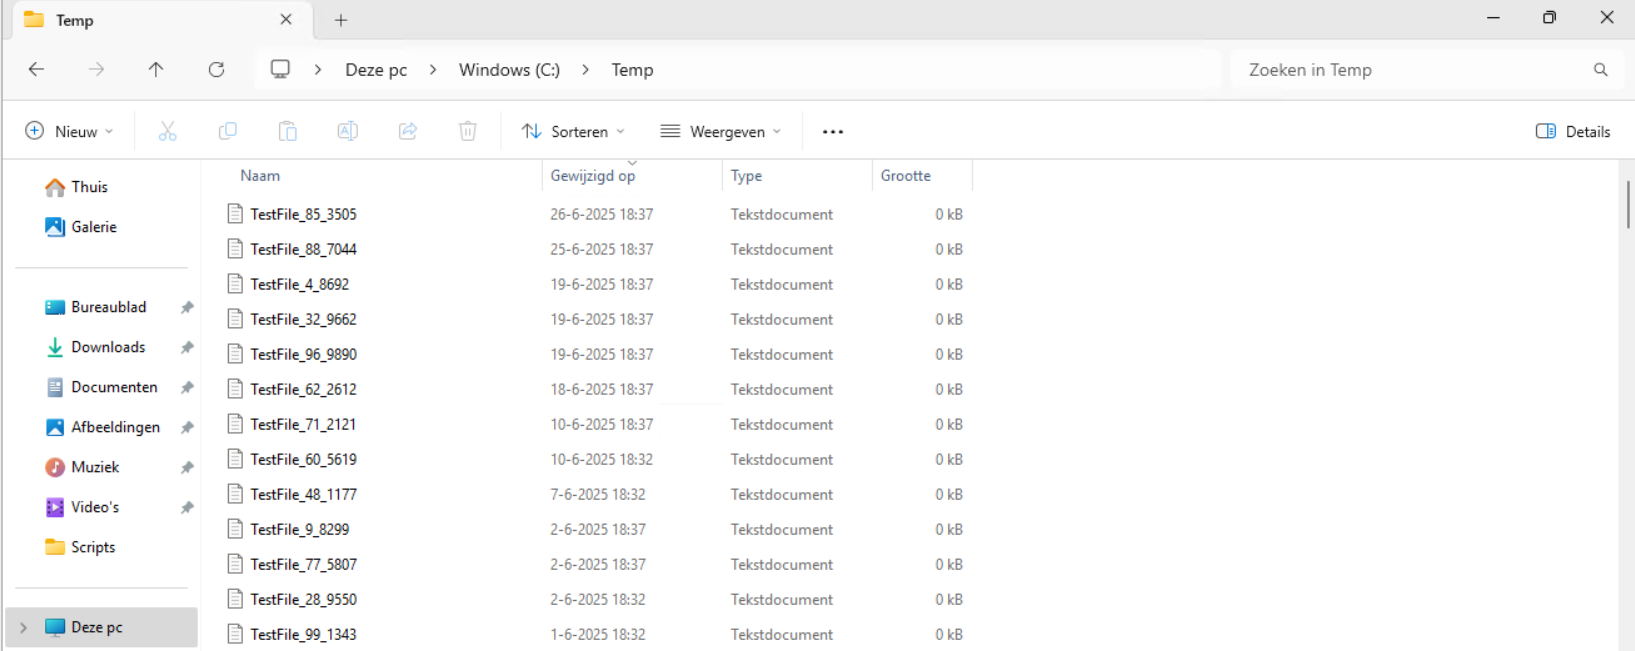
If we would execute the cleanup script, only the files from 18-6-2025 and newer will be retained.
Review the parameters on line 12 to 20, change them to your needs and then execute the script. I have changed the Paths to C:\Temp only.

The script will now delete every file older than the specified days:

Let’s take a look at the folder:
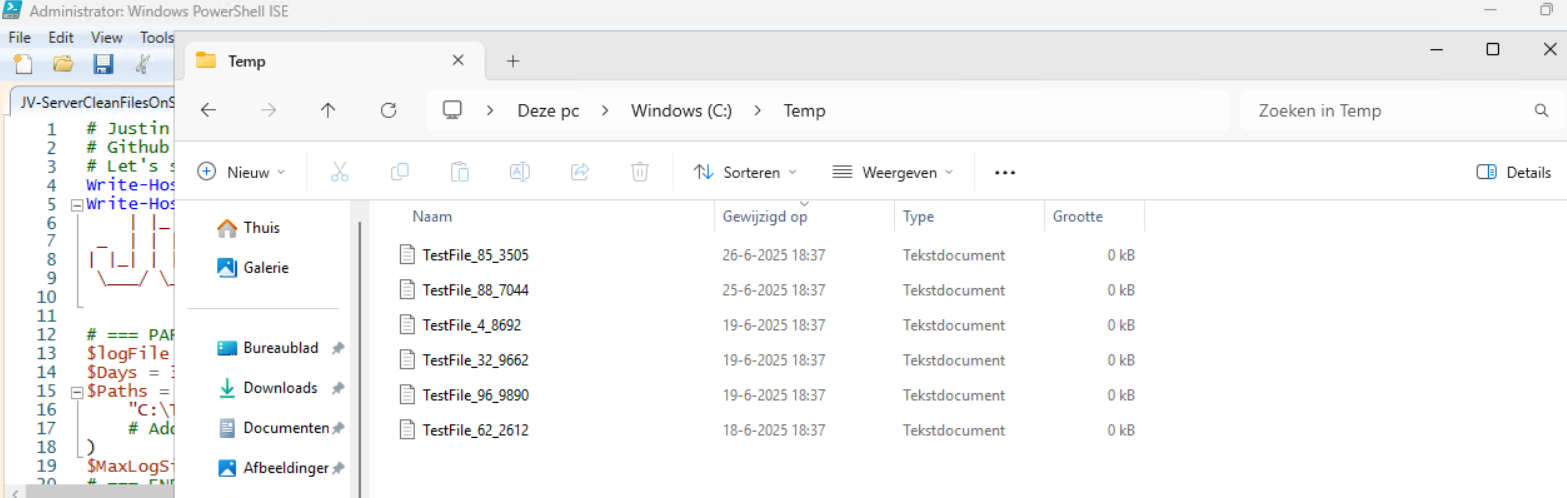
All cleared now and only versions younger than 30 days are retained.
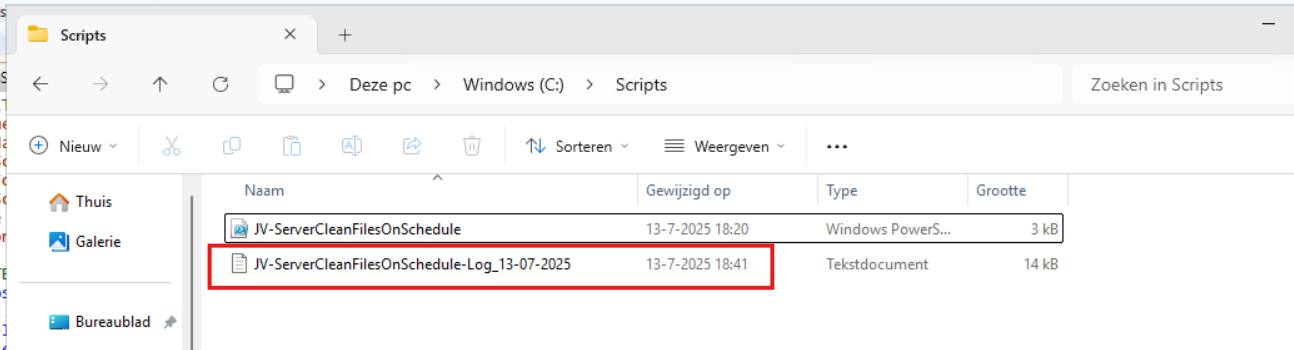
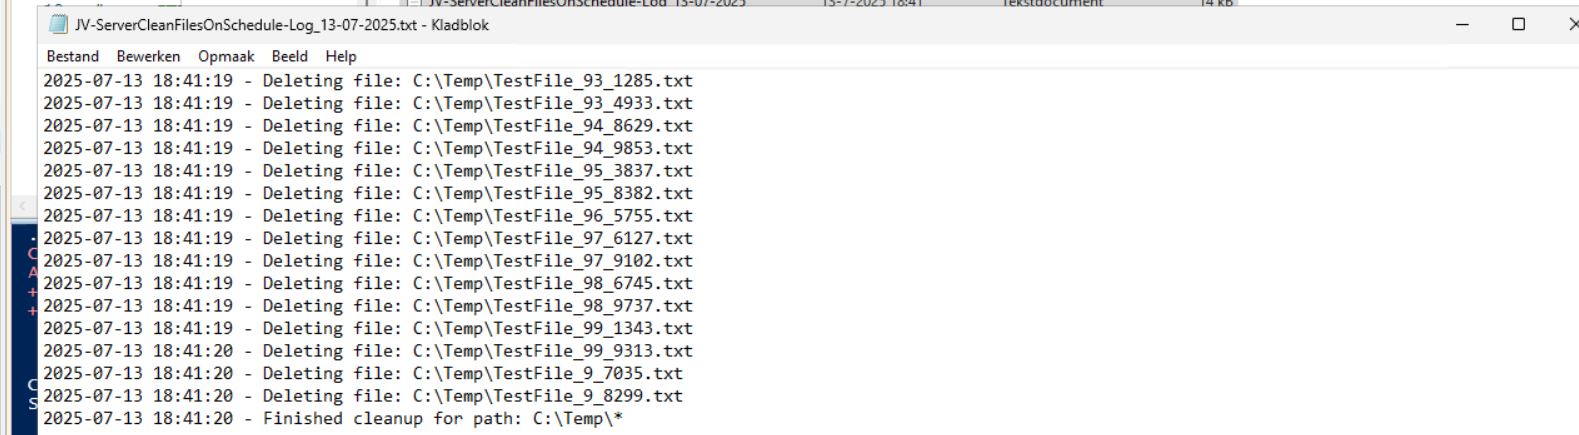
In the Script directory, a file is created, containing all the filenames it has removed:
Summary
This Powershell script can help cleaning up files in specific folders. mostly I use this for maintenance on servers where software is installed without proper retention settings of their temporary files. This script helps keeping your disks clean and indirectly improves the availability of your infrastructure.
Thank you for reading this guide and I hope this was helpful.
Sources
These sources helped me by writing and research for this post;
- https://learn.microsoft.com/en-us/powershell/module/microsoft.powershell.management/get-childitem?view=powershell-7.5
- https://learn.microsoft.com/en-us/powershell/scripting/learn/ps101/09-functions?view=powershell-7.5
End of the page 🎉
You have reached the end of the page. You can navigate through other blog posts as well, share this post on X, LinkedIn and Reddit or return to the blog posts collection page. Thank you for visiting this post.
If you think something is wrong with this post or you want to know more, you can send me a message to one of my social profiles at: https://justinverstijnen.nl/about/
If you find this page and blog very useful and you want to leave a donation, you can use the button below to buy me a beer. Hosting and maintaining a website takes a lot of time and money. Thank you in advance and cheers :)
The terms and conditions apply to this post.
How to completely hide language bar/selector Windows 11
One of the small things I experienced in one of the updates for Windows 11 (24H2) is that the language bar/selector get’s automatically…
One of the small things I experienced in one of the updates for Windows 11 (24H2) is that the language bar/selector get’s automatically visible on the Windows taskbar. In previous versions of Windows, this was only available when using multiple keyboard languages.
Because this can get very annoying, I researched on how to disable this button to clean up our taskbar and only use it for the applications and space we need.
Cause of appearance
In most cases, this button will appear automatically when more than 1 language is installed in Windows. However, after one of the updates for 24H2, it appeared for me on multiple PC’s. Especially the PC’s which were installed with the Dutch language.
When using the Dutch language, we also have to configure “United States International” as keyboard layout, or we get issues with some of the symbols.
How I removed the button
Initially, I started with browsing on the internet how to disable this button ans they all pointed to this registry key:
- Computer\HKEY_CURRENT_USER\Software\Microsoft\CTF\LangBar
And set the value for “ShowStatus” to 3. However, this didn’t work for me, but you can try this by running this command in PowerShell:
POWERSHELL
Set-ItemProperty -Path "HKCU:\Software\Microsoft\CTF\LangBar" -Name "ShowStatus" -Value 3The way I finally manage to disable the button is to run these commands.
First run this command. This disables the Input manager which loads the language switcher:
POWERSHELL
New-ItemProperty -Path "HKCU:\Software\Microsoft\CTF" -Name DisableThreadInputManager -PropertyType DWord -Value 1 -ForceThen run this command to disable the startup item for the Text Services Framework:
POWERSHELL
reg delete "HKCU\Software\Microsoft\Windows\CurrentVersion\Run" /v "ctfmon.exe" /fSummary
Because I want to share how I solved the problem doesn’t mean you should actually do this. Running these commands can interrupt some of your systems’ functions or other components. So only run them if you are familiar with your computer and be able to be up and running within an hour in case this happens.
If you managed to run the commands, I hope I helped you to get rid of this annoying bar :).
End of the page 🎉
You have reached the end of the page. You can navigate through other blog posts as well, share this post on X, LinkedIn and Reddit or return to the blog posts collection page. Thank you for visiting this post.
If you think something is wrong with this post or you want to know more, you can send me a message to one of my social profiles at: https://justinverstijnen.nl/about/
If you find this page and blog very useful and you want to leave a donation, you can use the button below to buy me a beer. Hosting and maintaining a website takes a lot of time and money. Thank you in advance and cheers :)
The terms and conditions apply to this post.
Initial Installation script for Windows Azure VMs
When deploying Windows VMs in Azure, we get the default settings. This means we get a 12-hour clock, standard UTC/Zulu timezone and such…
When deploying Windows VMs in Azure, we get the default settings. This means we get a 12-hour clock, standard UTC/Zulu timezone and such. For users like us in the Netherlands we want to change this but not by hand.
For this purpose I built this script. It sets the timezone for Western Europe and sets the clock to 24-hour system. It also does some bonusses like responding to ping and disabling the IE Enhanced Security as it’s mostly server focussed. We don’t change the Windows language and this stays English.
Where to download this script?
For the fast pass, my script can be downloaded here:
What does the Initial server installation script do?
The script itself has 6 steps:
- Ensuring it runs as Administrator
- Enable logging
- Saves a log file in the same directory and with 100KB limit
- Setting the timezone to Western Euopean time (Amsterdam time)
- Setting regional settings for 24 hours clock
- Disables IE Enhanced Security
- Enables response to ping for local networks
- Reboots the server
Using the initial server installation script
To use the script, we must first download it from the Github page:
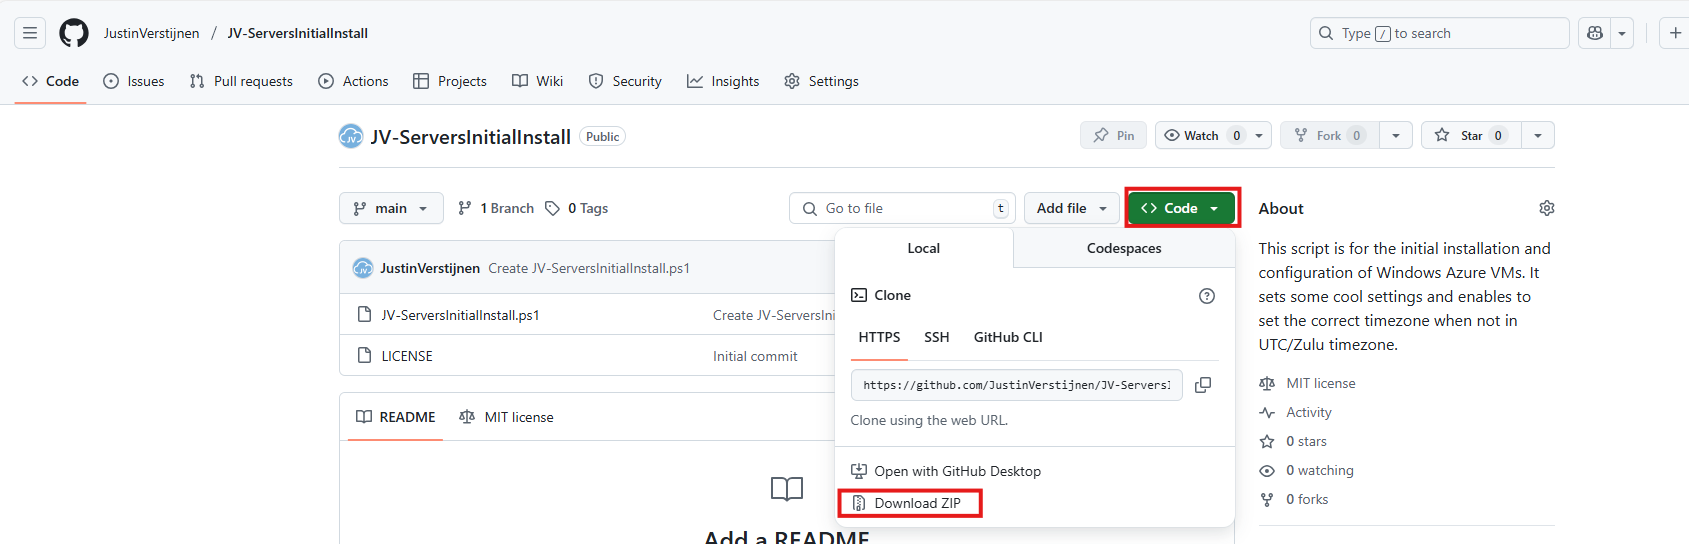
Click on “Code” and then “Download ZIP”.
Now place the script on the machine where it must run, If not already done so.
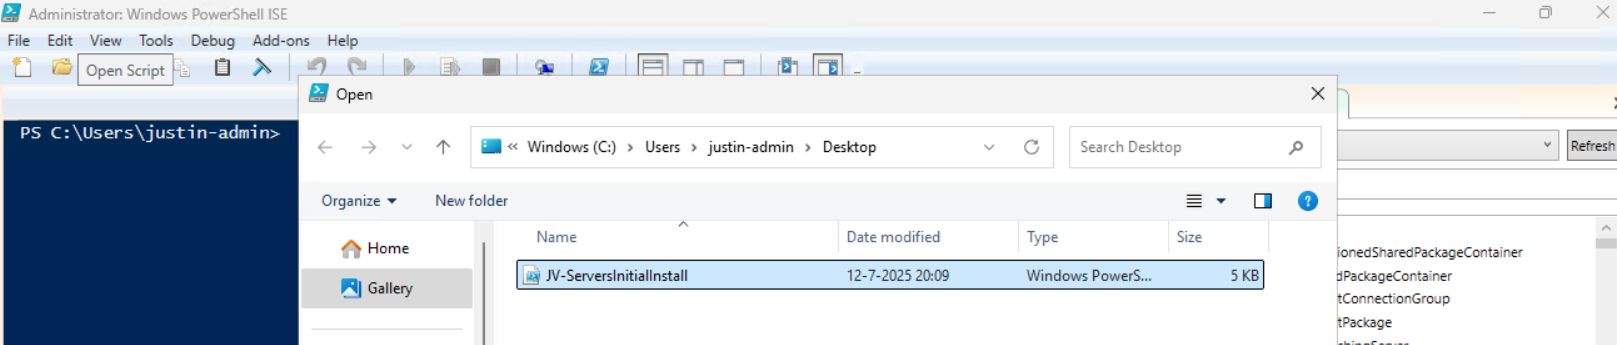
To run this in the most user-friendly way possible, open the PowerShell ISE as administrator:
Type in your credentials and advance.
Now open the script by using the “Open” function:
Before we can run, we must change the Powershell Execution policy temporarily. We can do this by typing the command in the blue window below:
POWERSHELL
Set-ExecutionPolicy Unrestricted -Scope ProcessThis way the execution policy stays enabled but for this session only it’s been lowered. When you close the window, you have to type this again before be able to run scripts.
Execute the command, and when prompted to lower the policy, click Yes.
Now we are ready to execute the script. Double check the parameters section (Line 13 to 18) of the script to ensure this complies with your desired settings.

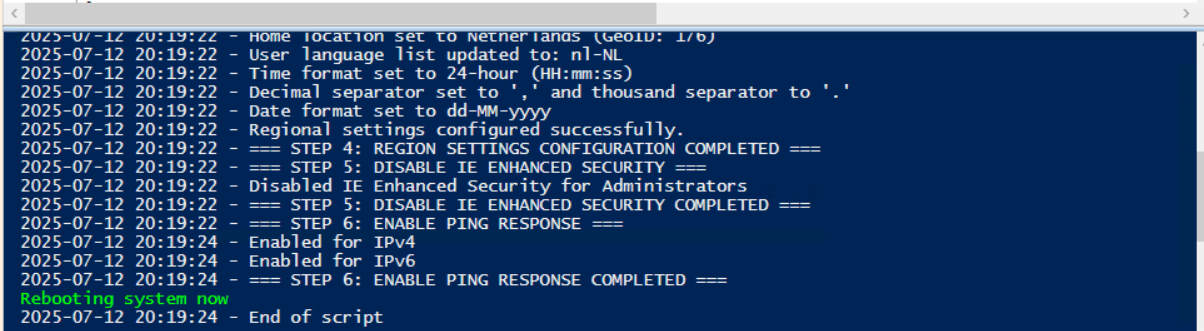
Then run the script:

This shows that the script runs and sets every setting correctly. After running correctly, the server will instantly reboot to apply all settings:
Summary
This is a great script to use for installing Windows Servers on initial. These are some settings we must do by hand normally but we can now to with a simple script. Also setting the correct timezone can sometimes be stupid as the timezone may roll back to the Azure default. This script ensures this doesn’t happen.
Thank you for reading the post and I hope the script is useful.
Sources
These sources helped me by writing and research for this post;
- https://learn.microsoft.com/en-us/windows/win32/intl/table-of-geographical-locations
- https://learn.microsoft.com/en-us/powershell/module/international/set-culture?view=windowsserver2025-ps
- https://learn.microsoft.com/en-us/powershell/module/international/set-culture?view=windowsserver2025-ps
End of the page 🎉
You have reached the end of the page. You can navigate through other blog posts as well, share this post on X, LinkedIn and Reddit or return to the blog posts collection page. Thank you for visiting this post.
If you think something is wrong with this post or you want to know more, you can send me a message to one of my social profiles at: https://justinverstijnen.nl/about/
If you find this page and blog very useful and you want to leave a donation, you can use the button below to buy me a beer. Hosting and maintaining a website takes a lot of time and money. Thank you in advance and cheers :)
The terms and conditions apply to this post.
Disk cleaning script on Windows Azure VMs
On Windows Servers, a critical point is maintaining the disk space. If a disk fills up to the end, several errors can occur and impacting…
On Windows Servers, a critical point is maintaining the disk space. If a disk fills up to the end, several errors can occur and impacting the end-users experience of your applications. Something we definitely not want.
To help reducing this chance, I have created a PowerShell script that cleans up your server using built in tools of Windows. In this post, I will explain what the script does, how to install it and how to use it.
Where do download this script?
For the fast pass, my script can be downloaded here:
What does the disk cleanup script do?
The script I have made focusses primarily on cleaning up some folders we don’t need for the server to work. This consists of:
- Windows Update download cache of already installed updates
- TEMP folders
- Unused drivers
- Unused Event logs
- Google Chrome browsing cache
- Microsoft Edge browsing cache
- Recycle bins
The script itself has 6 steps:
- Ensuring it runs as Administrator
- Enable logging
- Saves a log file in the same directory and with 100KB limit
- Running Windows Cleanmgr-tool
- Simulating the Cleanmgr tool for all other local drives
- Deleting unused device drivers
- Removing cache for Chrome and Edge
- Rebooting the server.
How to install the Disk cleaning script Automatically
For installation with Task Scheduler I included an installation script that, by default, configures a task in the Windows Task Scheduler that runs it;
- Every first day of the month
- At hour 03:00
If these settings are great for you, you can leave them as-is.
The Installation script creates a folder in C:\ named “Scripts” if not already there and places the cleaning script there.
Installation
Click on the blue button above. You now are on the Github page of the script.
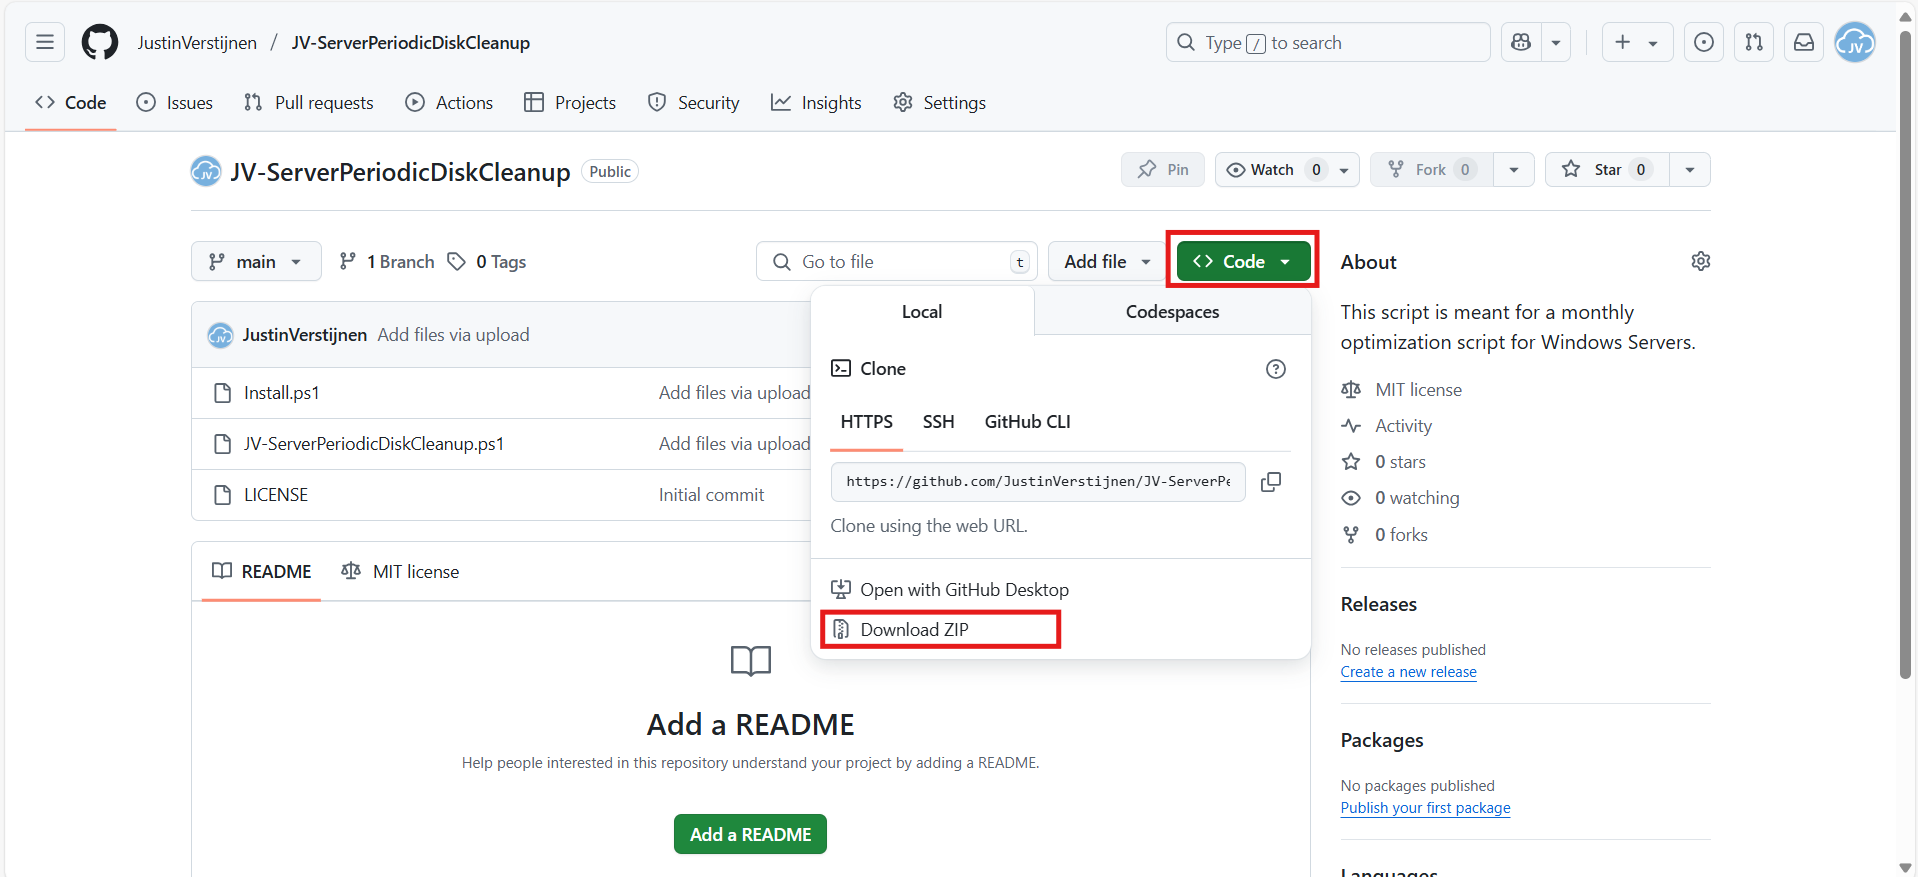
Click on “Code” and then “Download ZIP”.
Now place the files on the server where you want to install the script.
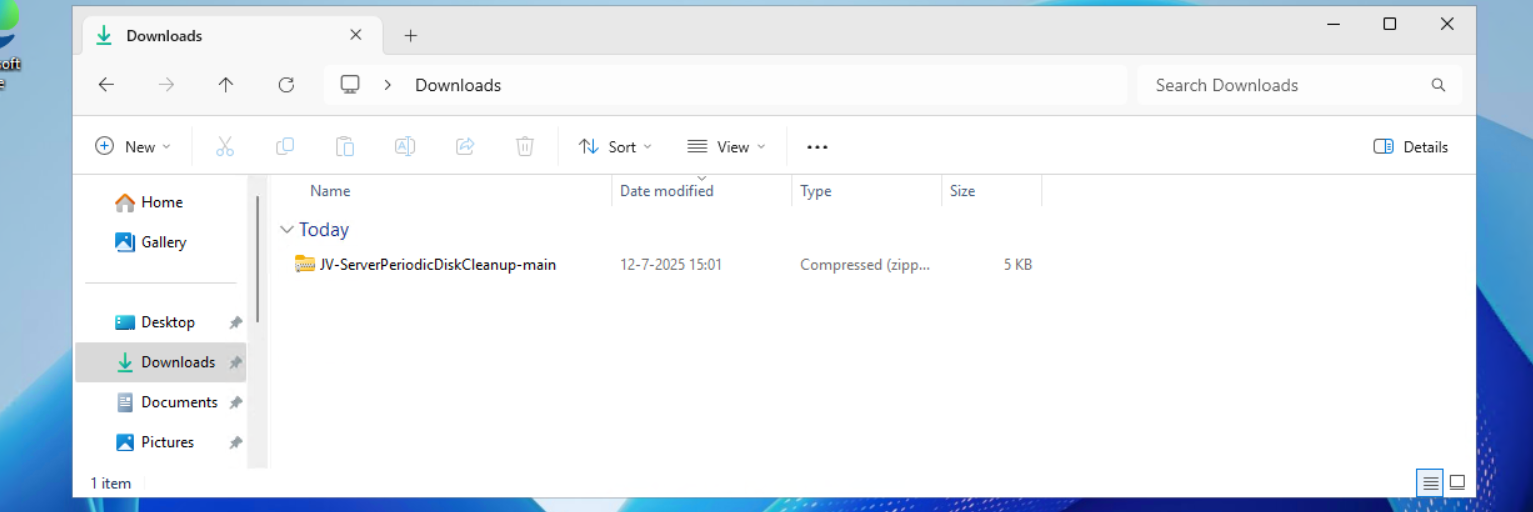
Unzip the file and then we can run the “Install” script. This must be run as administrator and temporarily without Execution Policy.
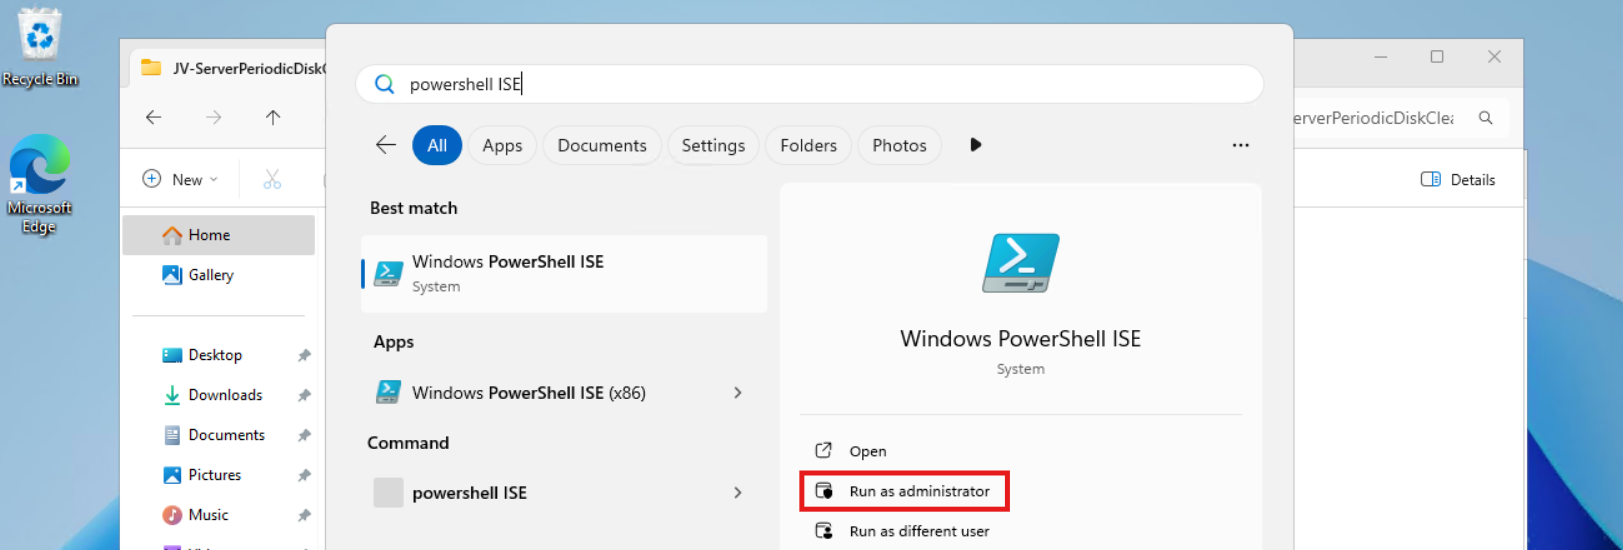
Open Powershell ISE as administrator.
Now open the “Install” script.
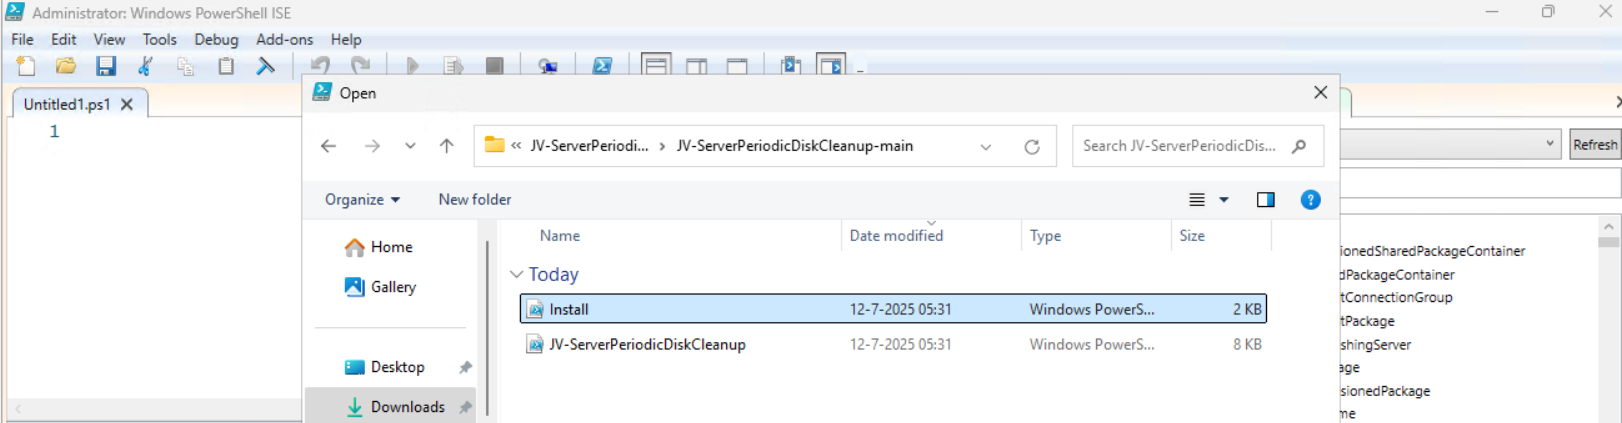
Review it’s default settings and if you feel at home in PowerShell, review the rest of the script to understand what it does.
You can change the schedule very easily by changing the runtime: 0:00 till 23:59 and the day of month to specify the day number of the month (1-31).
After your schedule is ready, let’s ensure we temporarily bypass the Execution Policy by typing the command in the blue window below:
POWERSHELL
Set-ExecutionPolicy Unrestricted -Scope ProcessThis way the execution policy stays enabled but for this session only it’s been lowered. When you close the window, you have to type this again before be able to run scripts.
Execute the command, and when prompted to lower the policy, click Yes.

Now execute the Install script by clicking the green “Run” button:

After executing the script, we get the message that the task has been created succesfully:

Let’s check this in the Windows Task Scheduler:
As you can see, the script is succesfully installed to Task Scheduler. This ensures it runs every first of the month at 03:00 (or at your own defined schedule). Also, the script has been places in C:\Scripts for a good overview of the scripts of the system.
How to install the Disk cleaning script manually
If you want to define your own schedule and script location, it can be better to install the script yourself or only using it when you need it.
Click on the blue Download button at the beginning of the page.
Click on “Code” and then “Download ZIP”.
Then place the ZIP file on the server where you want to install the disk cleanup script.
Move the script to the right location
Select the script and place it in your preferred location. My advice is to not install this in a user profile, but in a location accessible for all users. Like C:\Scripts.
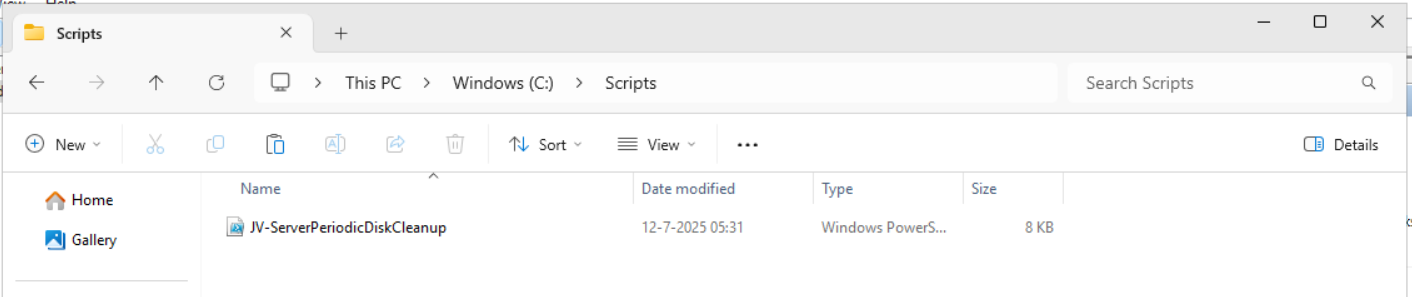
I have placed the scipt into the correct folder. If you also want the script to run on a schedule, open up the “Task Scheduler” (taskschd.msc).
Creating the scheduled task
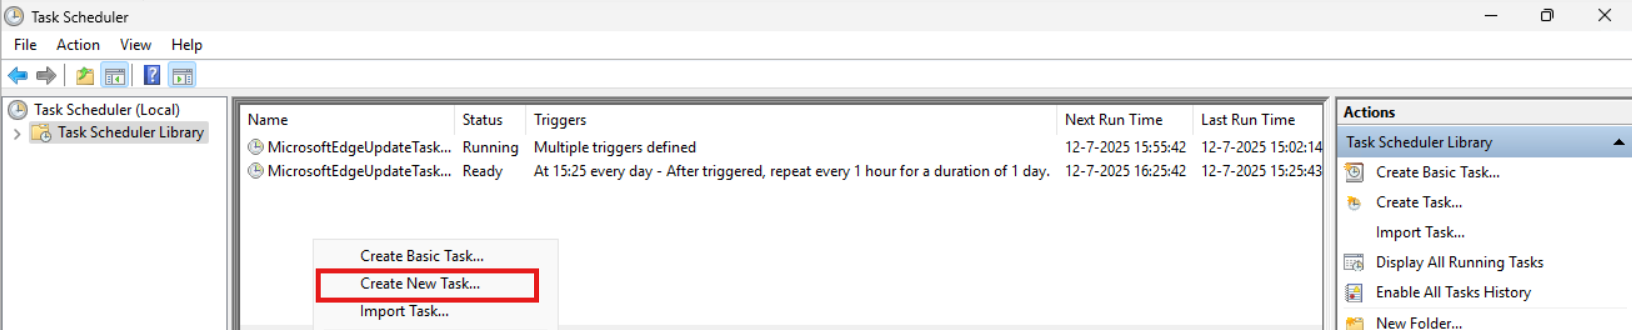
Do a “Right-mouse click” on the empty space and click on “Create New Task…”.
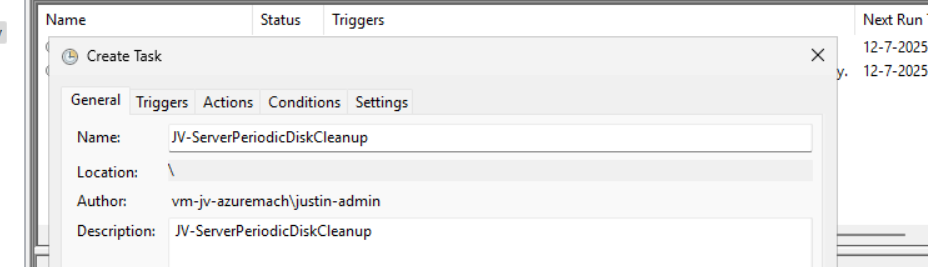
Give the task a name and description that alings with your documentation.
Then change the user to “SYSTEM” to run this in SYSTEM context for the highest privileges:
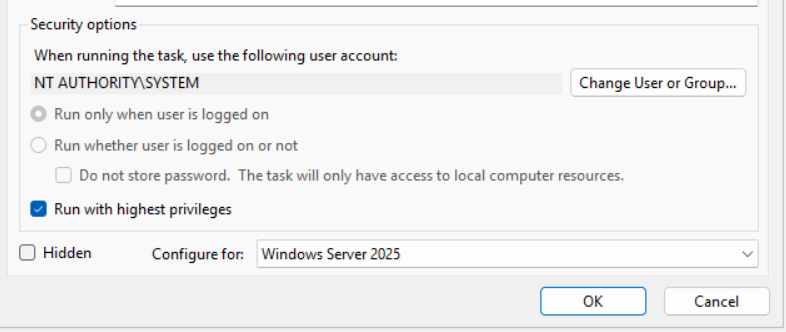
Then check the “Run with highest privileges” and select the highest OS possible in the “Configure for” dropdown menu.
Configure script trigger
Go to the “Triggers” tab and add a new trigger.
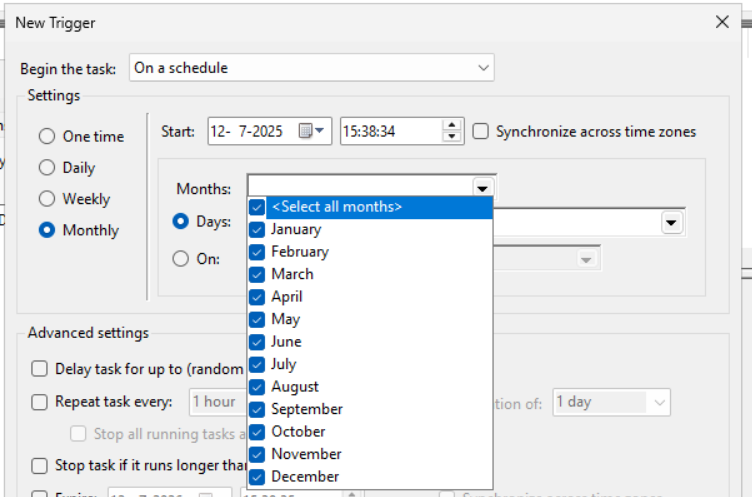
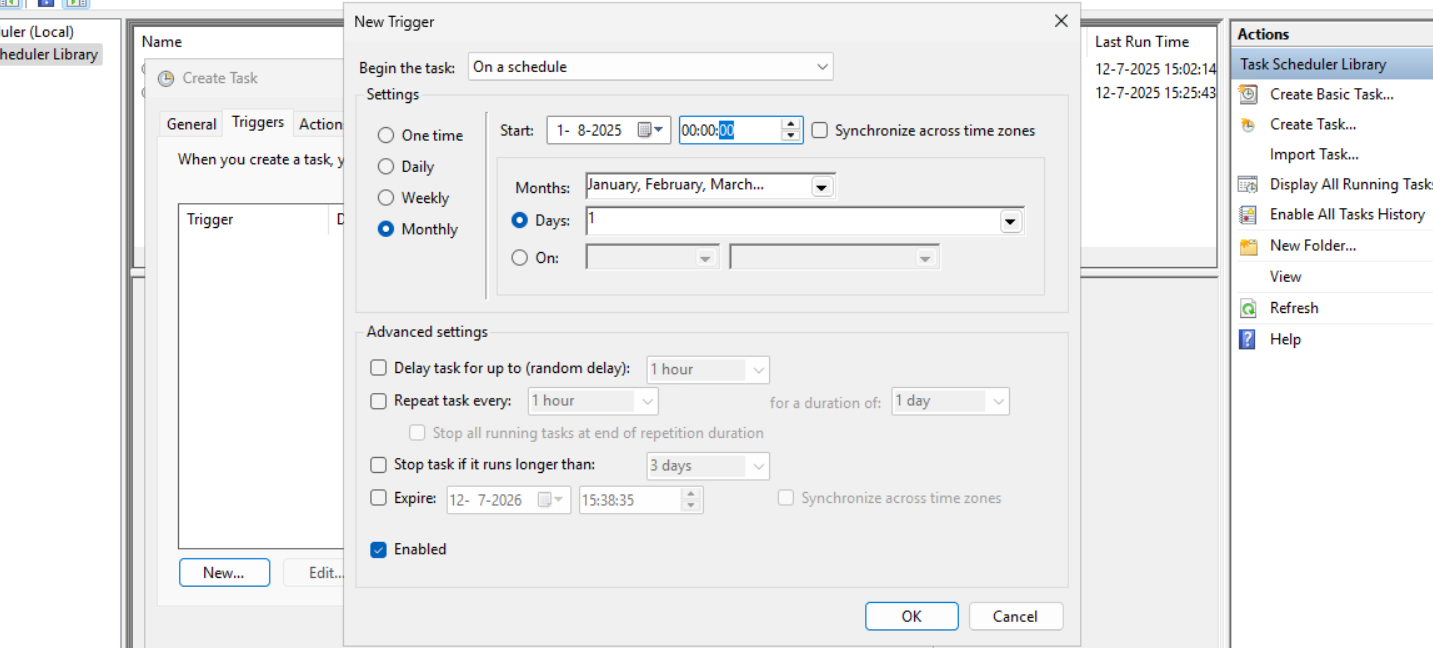
Select “Monthly” and select all months. Then change the “Days” field to 1 to run it on the first day.
You can defer from this schedule if your environment needs that. This is just an example.
Now the page looks like this:
Configure script action
Click “OK” and go to the “Actions” tab. Create a new action.
In the “Program/Script” field, type in the following:
POWERSHELL
powershell.exeIn the “Add arguments (optional):” field, type in the following:
POWERSHELL
-ExecutionPolicy Bypass -File C:\Scripts\JV-ServerPeriodicDiskCleanup.ps1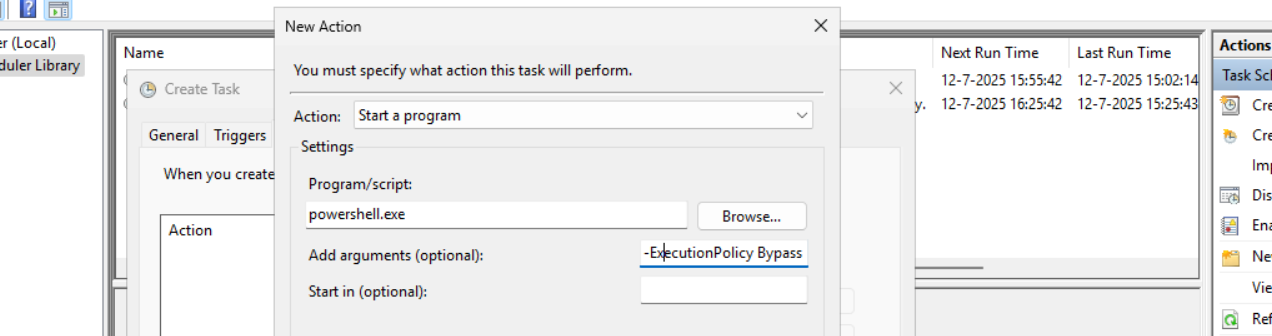
Now click on “OK” twice to create the task.
Testing the task
Now we can manually run the task to ensure it runs on a schedule too. Right click the task and click on “Run” to start the task.

As we can see, the script runs succesfully as it still runs after 30 seconds. This means the task and permissions are correct.

The script can take up to several hours when cleaning everything, depending on the server size.
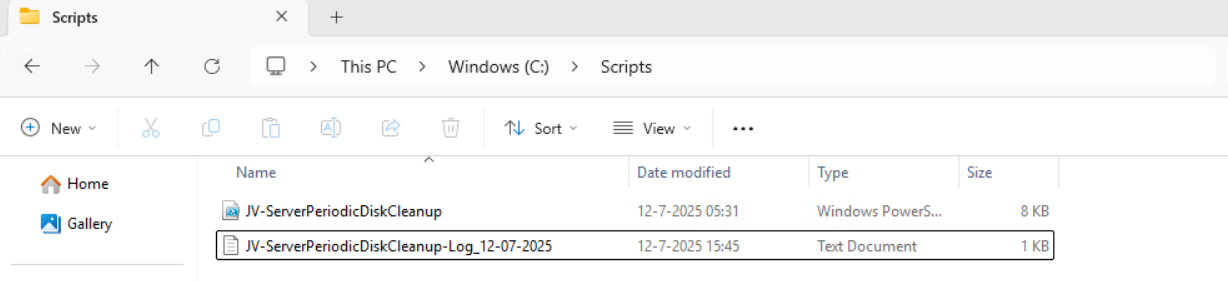
In the folder of the script, a log file is created:
Summary
I think it’s a great way to use scripts like these once per month on your server. We can better be pro-actively cleaning up our servers than waiting till some issue occurs. However, my advice is to not run this script too often. Once or twice per month is good enough.
We IT guys’ work is to minimize disruptions and ensure end users don’t need to call us. If we IT guys are completely invisible and users think: “What are those guys even doing?”, then we do your jobs correctly.
Thank you for reading this post and I hope it was helpful.
Sources
These sources helped me by writing and research for this post;
End of the page 🎉
You have reached the end of the page. You can navigate through other blog posts as well, share this post on X, LinkedIn and Reddit or return to the blog posts collection page. Thank you for visiting this post.
If you think something is wrong with this post or you want to know more, you can send me a message to one of my social profiles at: https://justinverstijnen.nl/about/
If you find this page and blog very useful and you want to leave a donation, you can use the button below to buy me a beer. Hosting and maintaining a website takes a lot of time and money. Thank you in advance and cheers :)
The terms and conditions apply to this post.
Get Device serial number on Windows 11 24H2 and up
With Windows 24H2 and the deprecation of WMIC, a easy command to find your devices’ serial number is gone. However, we can still look this up with Powershell.
To get your device’s serial number, use the following command in Windows PowerShell:
POWERSHELL
Get-WmiObject win32_bios | select SerialNumberIts as simple as that!
End of the page 🎉
You have reached the end of the page. You can navigate through other blog posts as well, share this post on X, LinkedIn and Reddit or return to the blog posts collection page. Thank you for visiting this post.
If you think something is wrong with this post or you want to know more, you can send me a message to one of my social profiles at: https://justinverstijnen.nl/about/
If you find this page and blog very useful and you want to leave a donation, you can use the button below to buy me a beer. Hosting and maintaining a website takes a lot of time and money. Thank you in advance and cheers :)
The terms and conditions apply to this post.
How to upload PowerShell script to Gallery with Github Actions
When using the PowerShell Gallery to upload and publish your scripts and PowerShell modules to the world it’s recommended to use Github Actions for CI/CD to automatically update your live packages on the PowerShell Gallery. At first, this looked somewhat complex to me but it’s relatively easy.
On this page I will show how I’ve uploaded scripts from Github to the PowerShell Gallery with using a Github Action.
Requirements
- Around 30 minutes of your time
- Github account
- Powershell Gallery account
- A PowerShell script for testing to actually upload to the PowerShell Gallery
Introduction to PowerShell Gallery
In short, the PowerShell Gallery is a public repository which contains PowerShell scripts and modules which all PowerShell users can download and install. All of this using some simple commands:
POWERSHELL
Install-Module ExchangeOnlineManagementThe official “ExchangeOnlineManagement” module is an example of a module dat is uploaded to the gallery which can be download. Before installing, the user needs administrative permissions, the Powershell execution policy applies and we have to accept downloading from the repository.
It has a report-system where malicious scripts and modules can get reported and the deleted, so we can state that it’s pretty secure to use the PowerShell Gallery.
Introduction to Github and Github Actions
Github is a industry-accepted repository hosting service. This allows you to create a repository for a custom solution which you have created, which can be complete applications, source code but in our case a Powershell script. The goal of Github is to publish your source code so others can use and learn from it. You can also create private repositories to share with only specific users.
Github Actions
Inside our Github repository, we have Github Actions which can automate processes for us. As we want to develop using Github, we want our new version automatically pushed to the PowerShell Gallery. Github Actions can do this for us.
The action automatically kicks in every time a file in your repository is changed:
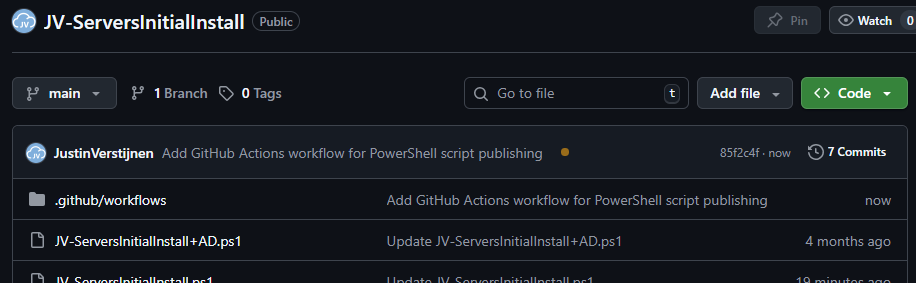
Step 1: Create a repository
Assuming you have a PowerShell script which is ready to upload to the PowerShell Gallery, we must first create a Github repository. Head to Github to do this.
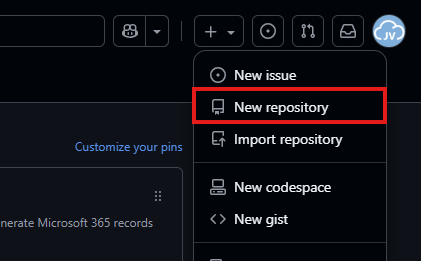
In the top-right corner, click on the “+” button and then on “New repository”.
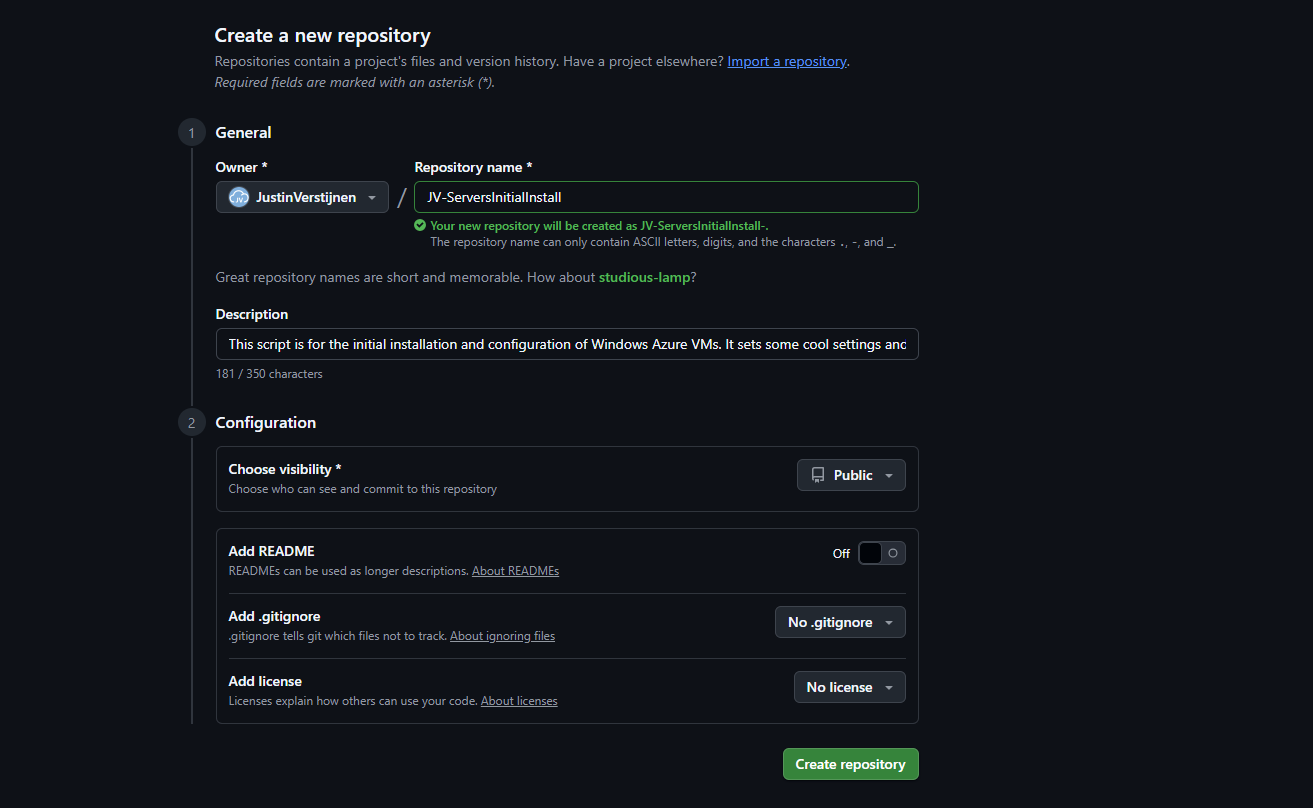
Give the repository a name and description, and determine the visibility. Then press “Create repository”.
For this solution to work, the repository can be either Public or Private. As we upload our script to a public reposity, we can also set this to “Public”. This gives users access to the “source code”.
Now the repository is created, and we can upload our PowerShell script to it.
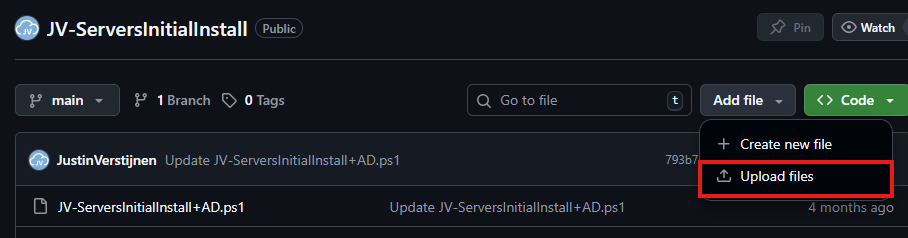
Select the script on your local machine, change the name and upload it to Github.
Step 2: Alter script for use with PowerShell Gallery
Because we upload our script to a public repository, we must define some metadata in our script. This includes an Author, tags, description and version number and such.
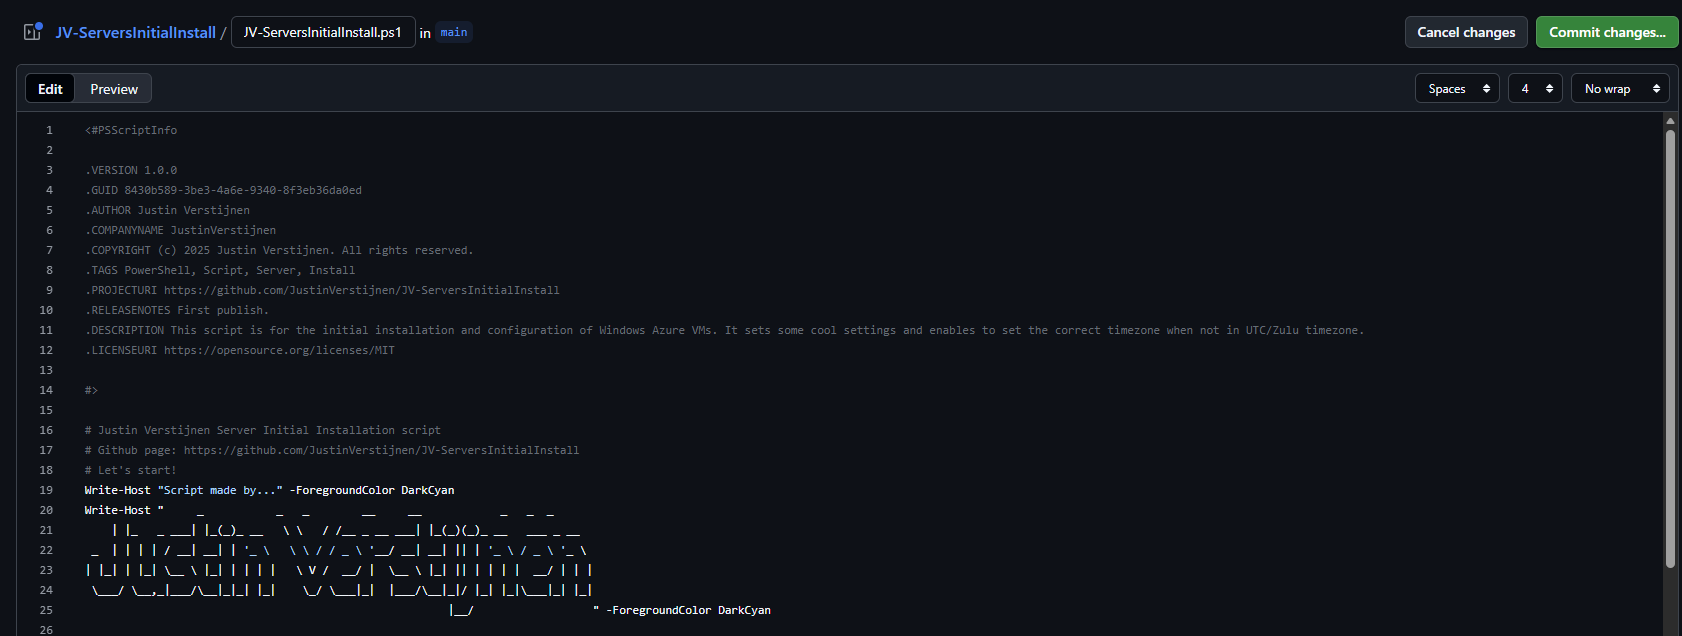
In Github, change your script and add this part to the top of the .ps1 file
POWERSHELL
<#PSScriptInfo
.VERSION 1.0.0
.GUID fb0384df-0dd8-4a57-b5e5-d3077c30a404
.AUTHOR Justin Verstijnen
.COMPANYNAME JustinVerstijnen
.COPYRIGHT (c) 2025 Justin Verstijnen. All rights reserved.
.TAGS PowerShell, Script, Example
.PROJECTURI https://github.com/JustinVerstijnen/JV-ServerInventoryReport
.RELEASENOTES First publish.
.DESCRIPTION A good description of your script
.LICENSEURI https://opensource.org/licenses/MIT
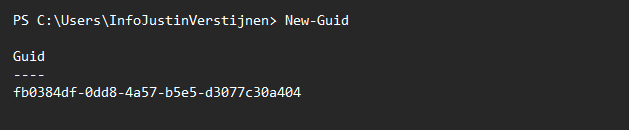
#>Change the information, and generate a new GUID with your own Powershell window:
POWERSHELL
New-GuidPowershell then generates a new GUID for you to use in your script:
My script looks like this now:
When you are done pasting and changing the script information, we can save the changes by pressing “Commit changes” twice.
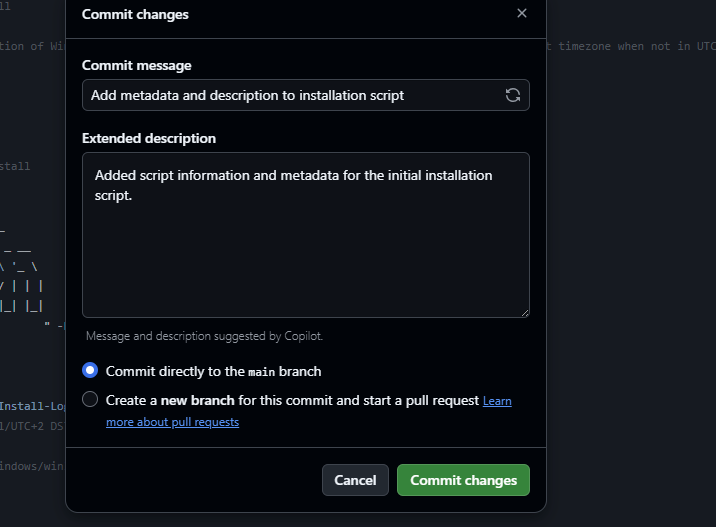
Press again to change the file, and we have prepared our script to be uploaded.
Step 3: Create an Powershell Gallery API key
For Github to have access to our PowerShell Gallery account, we must create an API key. Head to the PowerShell Gallery.
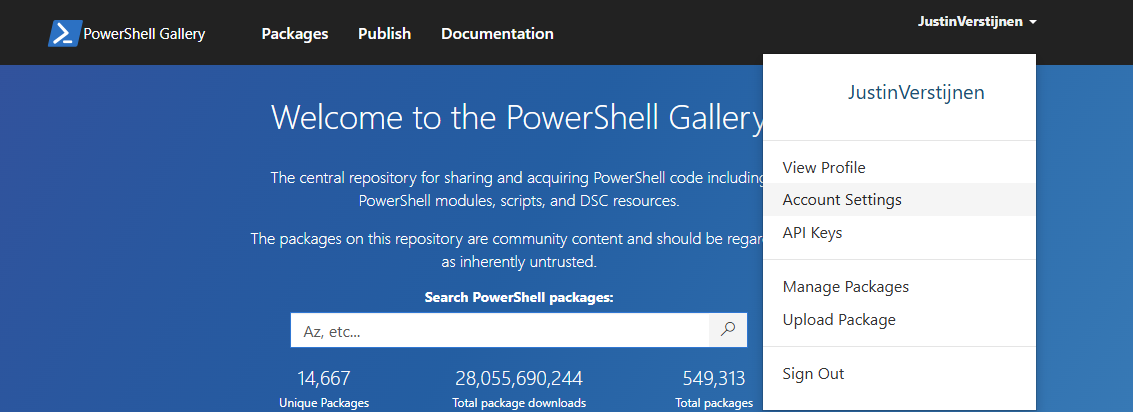
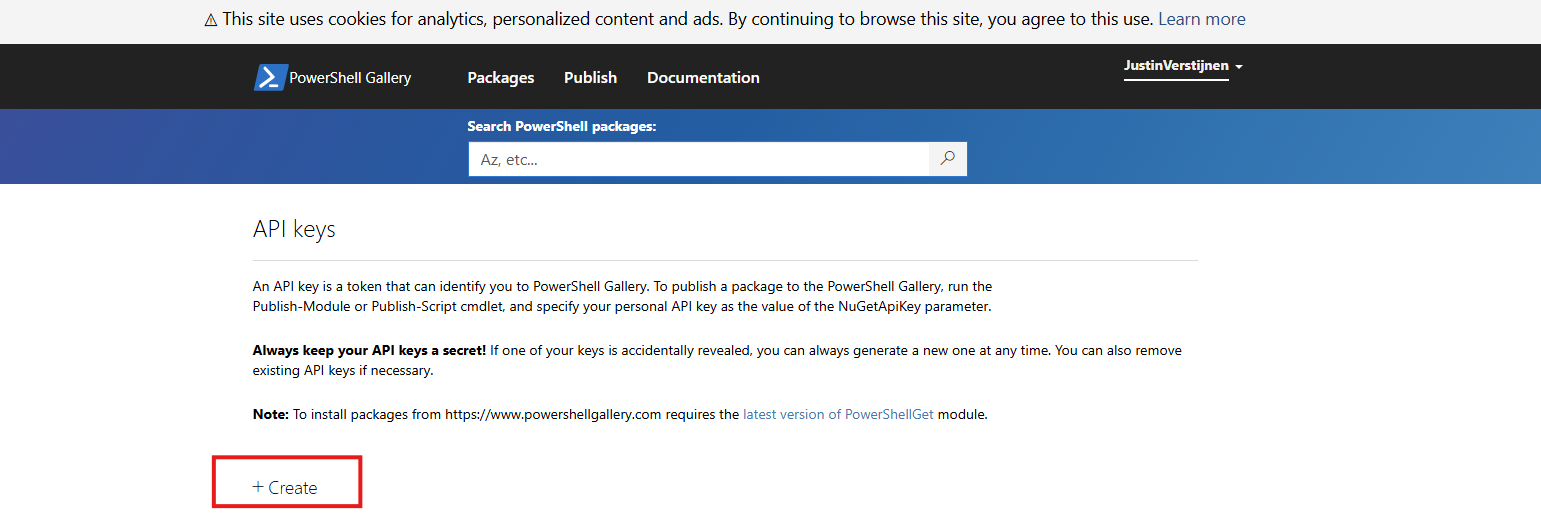
Go to “API Keys”. Then click on “Create”.
Now we have to fill in some information. In general, it is best-practice to create an API key for every project/repository.
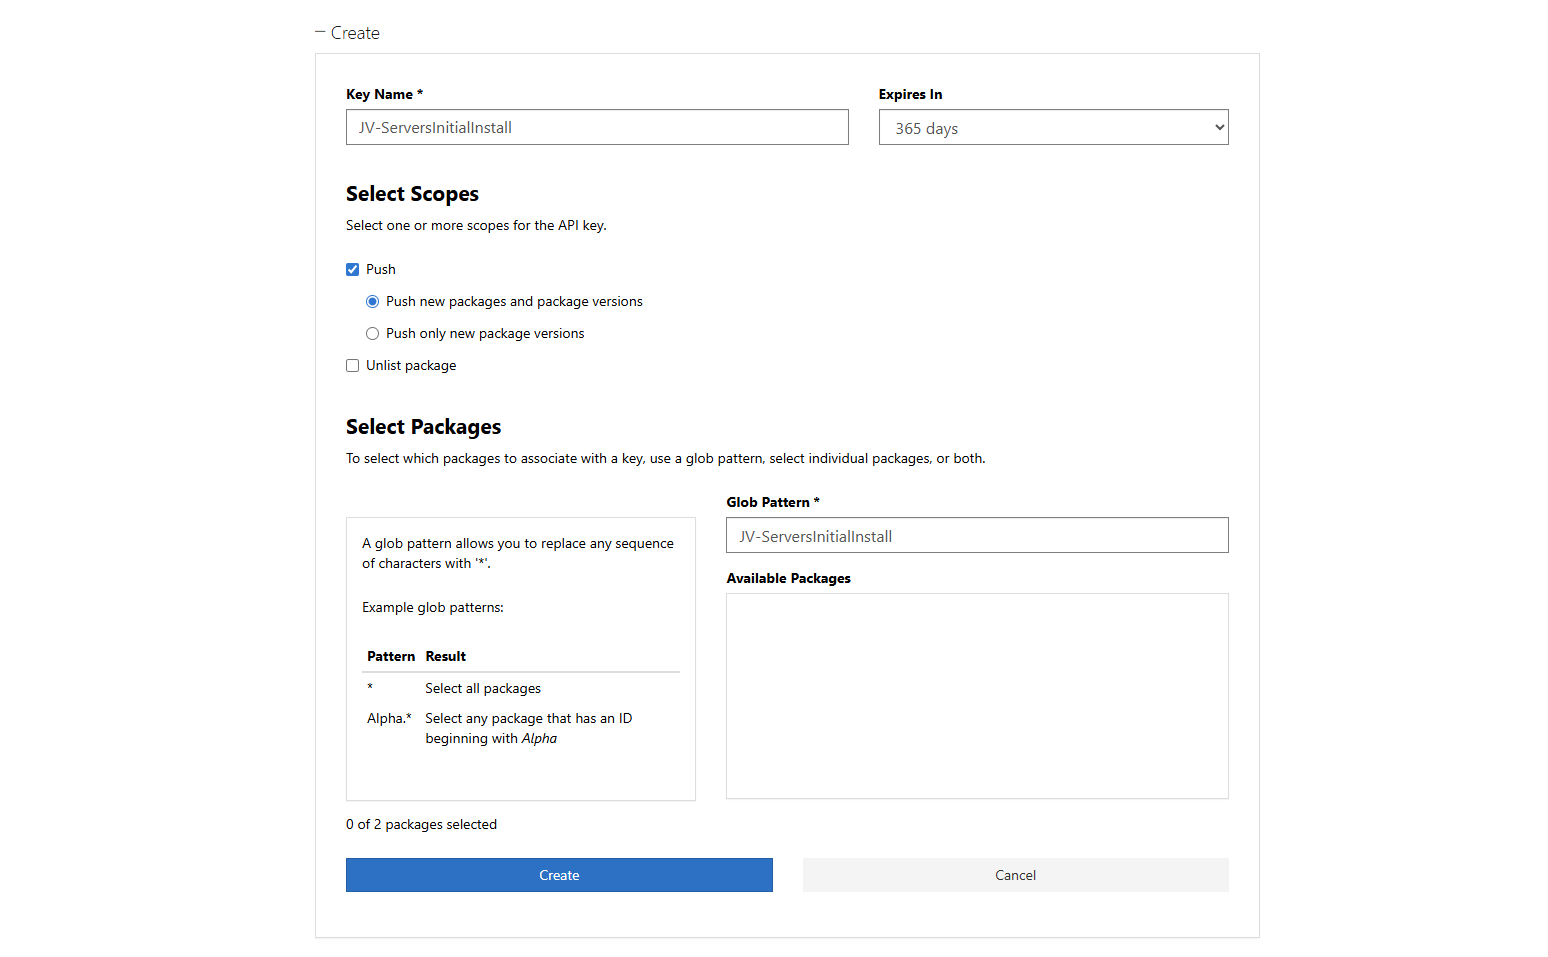
Click “Create” and that gives you the API key. You can only get the key now, so save it in a safe place like your Password manager.
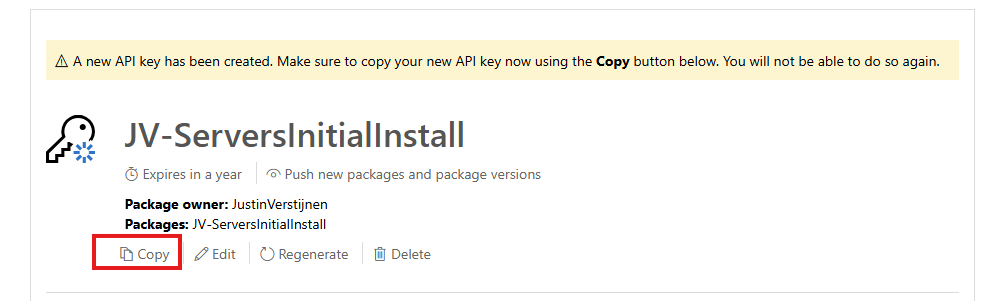
We need this API key in the next step.
Step 4: Insert the API key
Now let’s head back to Github to insert our API key.
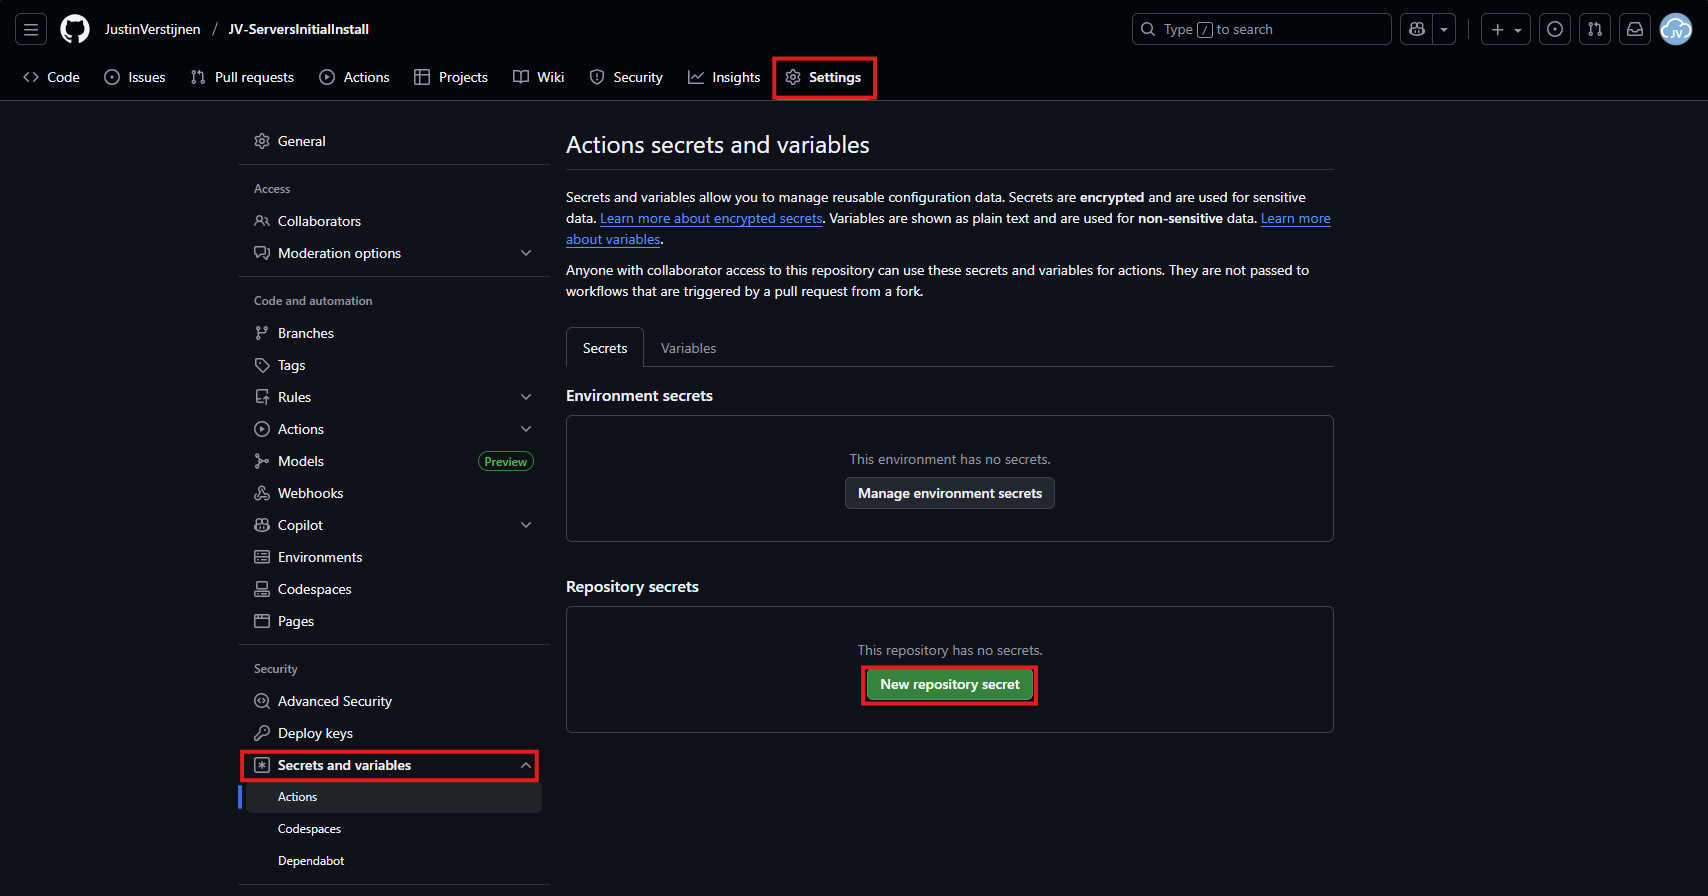
In your Github repository, go to “Settings”, then “Secrets and variables” and then create a new repository secret.
In the “Name” field, paste this:
JSON
PSGALLERY_API_KEYIn the “Secret” field, paste your just saved API key:
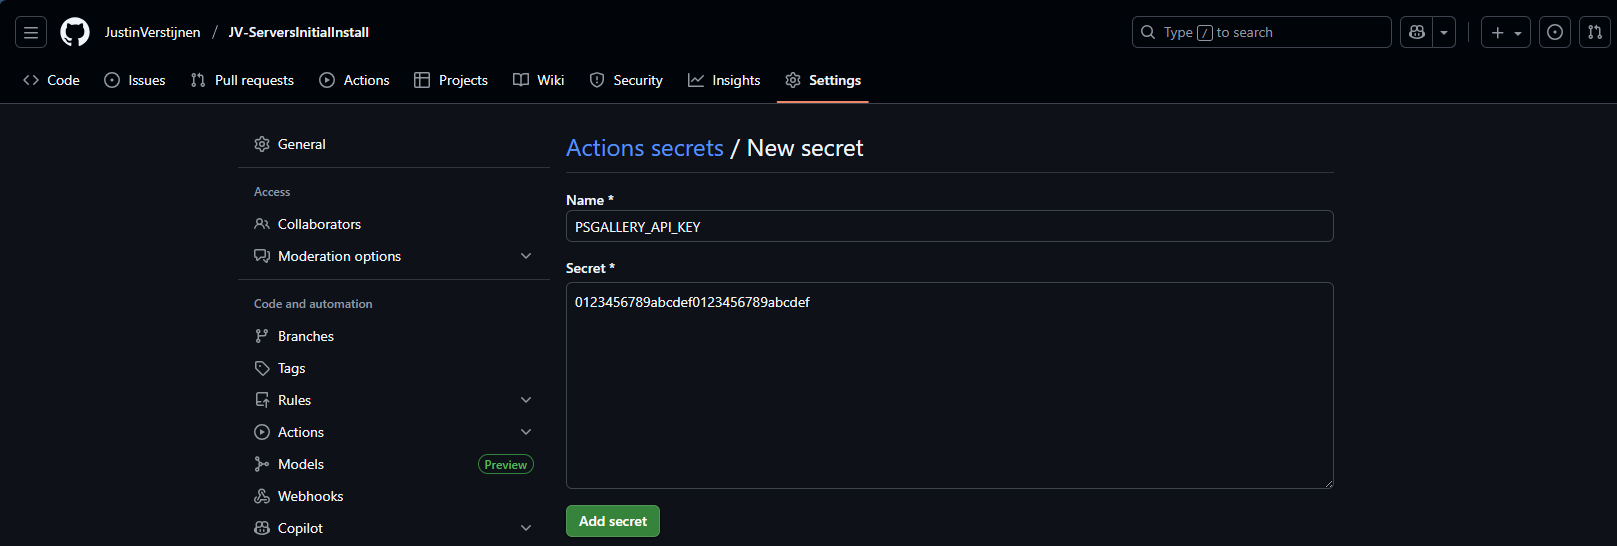
Click on “Add secret” to add the secret to your repository.
The API key is saved secretly, and in the code we refer to this secret. This is a best-practice to save API keys instead of plain text in your public code.
Step 5: Create your Github Action
Now we have the API key inserted, head back to the repository on Github and let’s create the Github Action that pushes our script automatically to the PowerShell Gallery.
An action is completely based on a single .yml (YAML) file which executes everytime the repository is changed. We will create this file now.
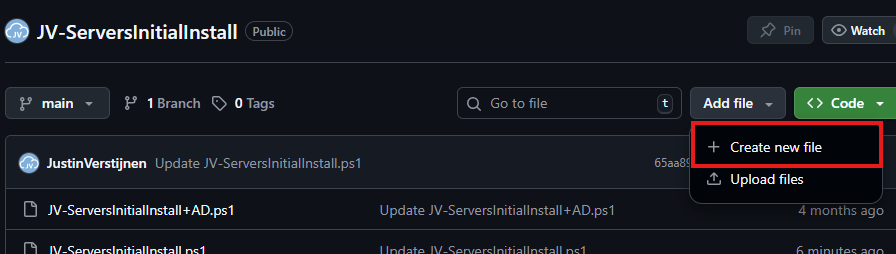
Click on “Add file” and then the option “Create new file”:
In the top-left corner, type or paste in:
JSON
.github/workflows/publish.ymlThen paste in this code below, which is a completely prepared action for exactly this use-case:
YAML
name: Publish PowerShell Script to PowerShell Gallery

on:
  push:
    branches:
      - main
    paths:
      - '**/*.ps1'
      - '.github/workflows/publish.yml'

jobs:
  publish:
    runs-on: windows-latest

    env:
      # Variables (change this to your script)
      SCRIPT_NAME: JV-ServersInitialInstall
      SCRIPT_PATH: ./JV-ServersInitialInstall.ps1
      DISPLAY_NAME: JV-ServersInitialInstall
      PSGALLERY_SECRET: ${{ secrets.PSGALLERY_API_KEY }}

    steps:
      - name: Checkout repository
        uses: actions/checkout@v4

      - name: Ensure NuGet and PowerShellGet are available
        shell: pwsh
        run: |
          Set-PSRepository -Name "PSGallery" -InstallationPolicy Trusted
          [Net.ServicePointManager]::SecurityProtocol = [Net.SecurityProtocolType]::Tls12

          if (-not (Get-PackageProvider -Name NuGet -ErrorAction SilentlyContinue)) {
              Install-PackageProvider -Name NuGet -MinimumVersion 2.8.5.201 -Force
          }

          Install-Module PackageManagement -Force -AllowClobber -Scope CurrentUser
          Install-Module PowerShellGet -Force -AllowClobber -Scope CurrentUser

      - name: Validate script metadata
        shell: pwsh
        run: |
          Test-ScriptFileInfo -Path "$env:SCRIPT_PATH"

      - name: Publish script to PowerShell Gallery
        shell: pwsh
        run: |
          $ErrorActionPreference = 'Stop'
          Publish-Script -Path "$env:SCRIPT_PATH" -NuGetApiKey "$env:PSGALLERY_SECRET" -Verbose

      - name: Confirm publication
        shell: pwsh
        run: |
          Write-Host "Successfully published $env:DISPLAY_NAME to PowerShell Gallery."
Change the information on lines 17, 18 and 19 to your own information and then save the file by clicking “Commit changes” in the top right corner. Make sure the script name and path exactly match your file name on the repository and do not change anything else.

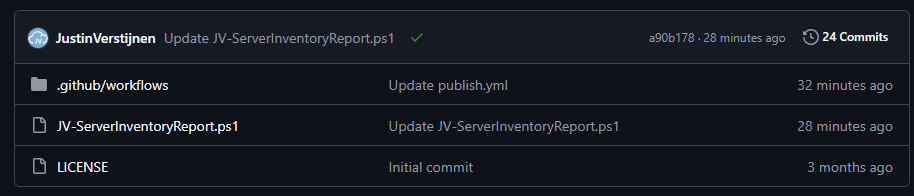
For about a minute, this will show on the homepage of your repository:
This means the Action is now actually processing the changes and publishing our new script. It will directly upload the script to the PowerShell Gallery for us.
Step 6: Checking the results
Now the the action has ran, and did not give any error. It must now be available on the PowerShell Gallery.

Lets head back to the PowerShell Gallery to check the status. Click on your profile, and then on “Manage Packages”.
Here we see that the packages has been uploaded:

If you click on it you get actual instructions to install the script on your computer and we will see the information we have added to the script:

Pretty cool in my opinion.
Step 7: Installing and testing the script
Now we have our script on the PowerShell Gallery, we can actually download and execute the script using some simple commands.
Do not execute my example script, unless you know what you are doing.
Open PowerShell on your testing environment and execute this command with your script name to install your newly uploaded script.
POWERSHELL
Install-Script -Name JV-ServersInitialInstallAfter executing this command you need to need to answer some questions:
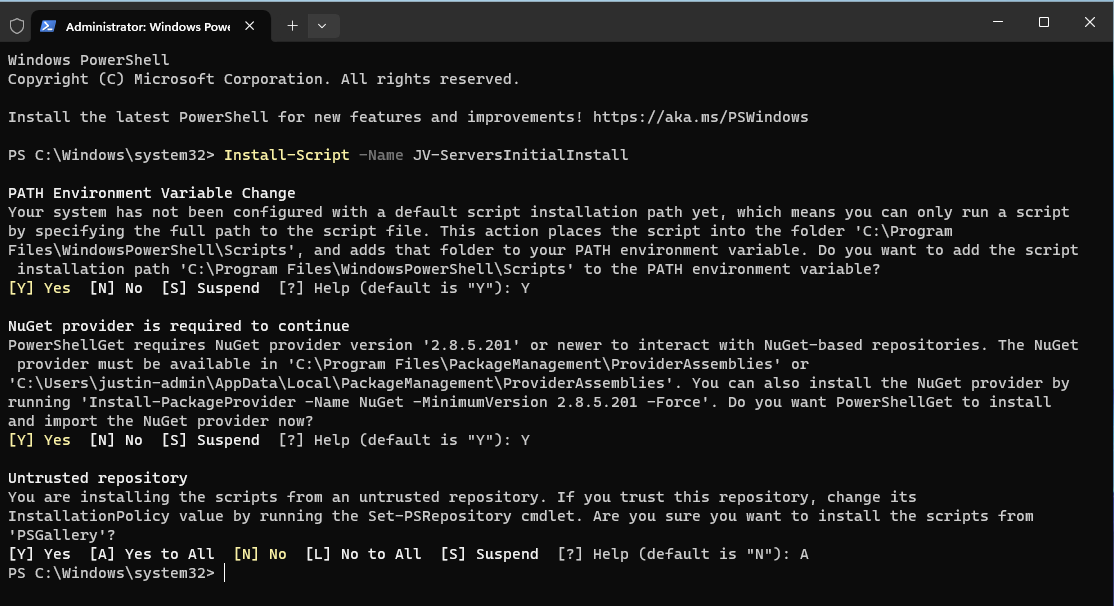
In order to actually run the script, you need to answer all with Yes/All.
After the script is installed, we can run it with your script name:
POWERSHELL
JV-ServersInitialInstall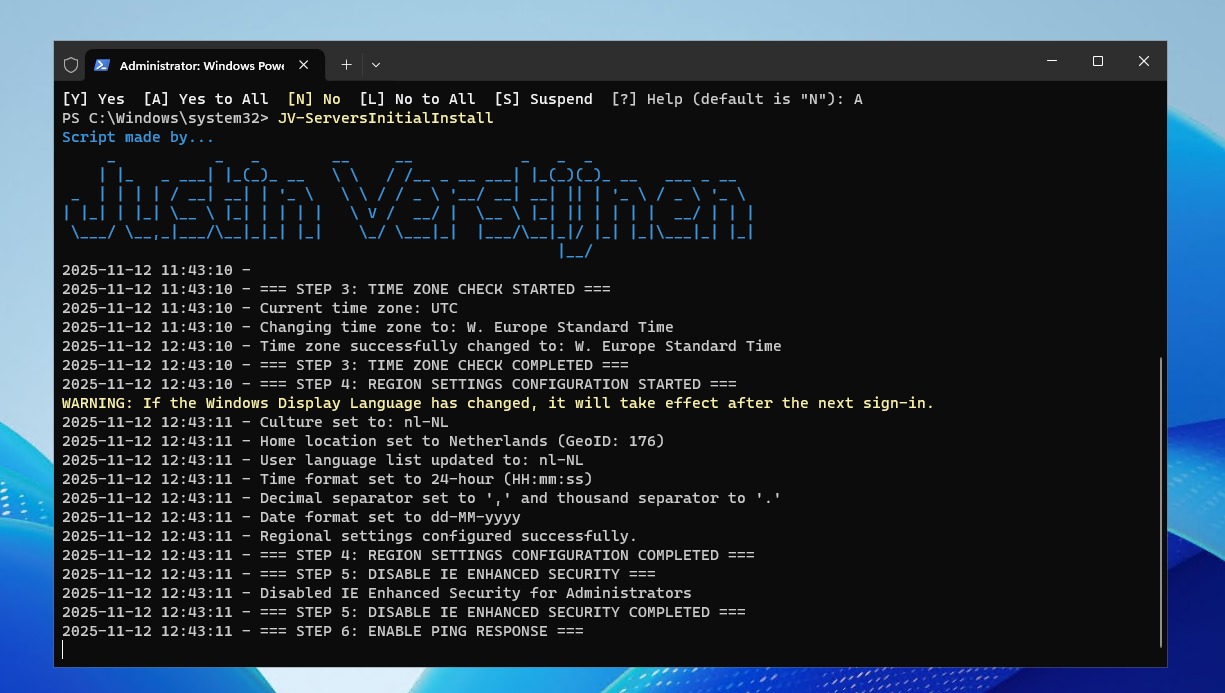
The script will run directly which is very nice and useful for mass use.
Conclusion
This setup for uploading scripts to the PowerShell Gallery is really great. We can change our script on one place and it will automatically upload to the live gallery for users to download.
Sources
These sources helped me by writing and research for this post;
- https://learn.microsoft.com/en-us/powershell/gallery/getting-started?view=powershellget-3.x
- https://docs.github.com/en/actions/get-started/understand-github-actions
Thank you for reading this guide and I hope it was helpful.
End of the page 🎉
You have reached the end of the page. You can navigate through other blog posts as well, share this post on X, LinkedIn and Reddit or return to the blog posts collection page. Thank you for visiting this post.
If you think something is wrong with this post or you want to know more, you can send me a message to one of my social profiles at: https://justinverstijnen.nl/about/
If you find this page and blog very useful and you want to leave a donation, you can use the button below to buy me a beer. Hosting and maintaining a website takes a lot of time and money. Thank you in advance and cheers :)
The terms and conditions apply to this post.
Create AD users with on demand script
Today I have a PowerShell script that creates users by asking the user what to fill in. This works by having a fully prepared “New-ADUser” command with all the properties filled in to have all users using the same attributes.
Today I have a PowerShell script that creates users by asking the user what to fill in. This works by having a fully prepared “New-ADUser” command with all the properties filled in to have all users using the same attributes.
I will explain how this script works on this page.
The create AD users on demand script
For the fast pass, the script can be downloaded from my GitHub page:
The script described
The script is relatively easy and consists of 4 steps:
- Importing the modules needed
- Asking the user about on what details the user must be created
- Making everything ready, creates the user and adds him to the defined security groups
- Prints everything in the command window for a summary
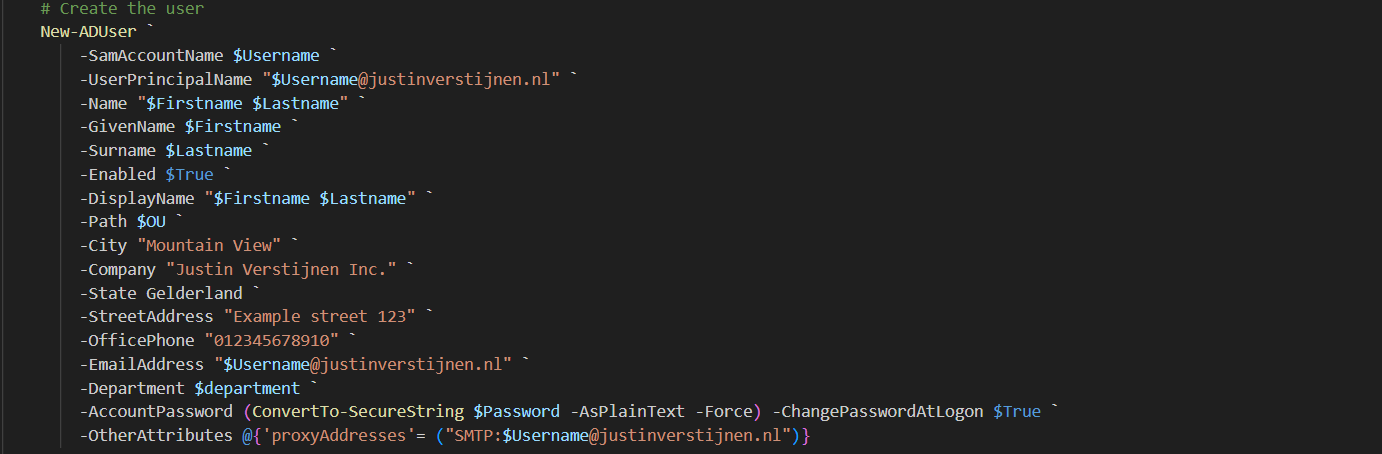
Parameters and Attributes
The script contains a set of pre-defined attributes which you can change to your own settings:
You can change all of these settings, but I advice you to not change any $variables because that will break the script.
On line 12 to 14, you have a parameter that specifies the OU to create the user in:

Change this to your own OU when using. You can find this by enabling the “Advanced Features” in the “View” menu and then going to the OU properties and the “Attributes”.
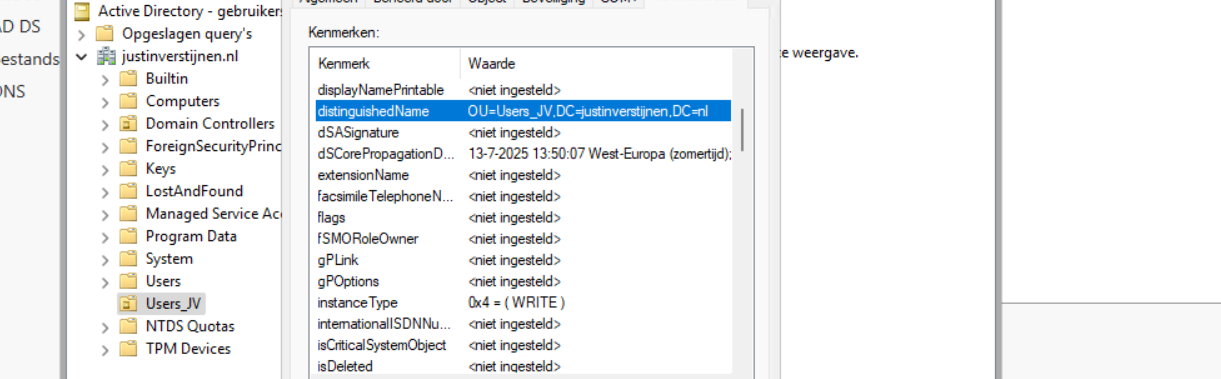
Search for the “DistinguishedName” attribute and copy that value.
Using the create AD users on demand script
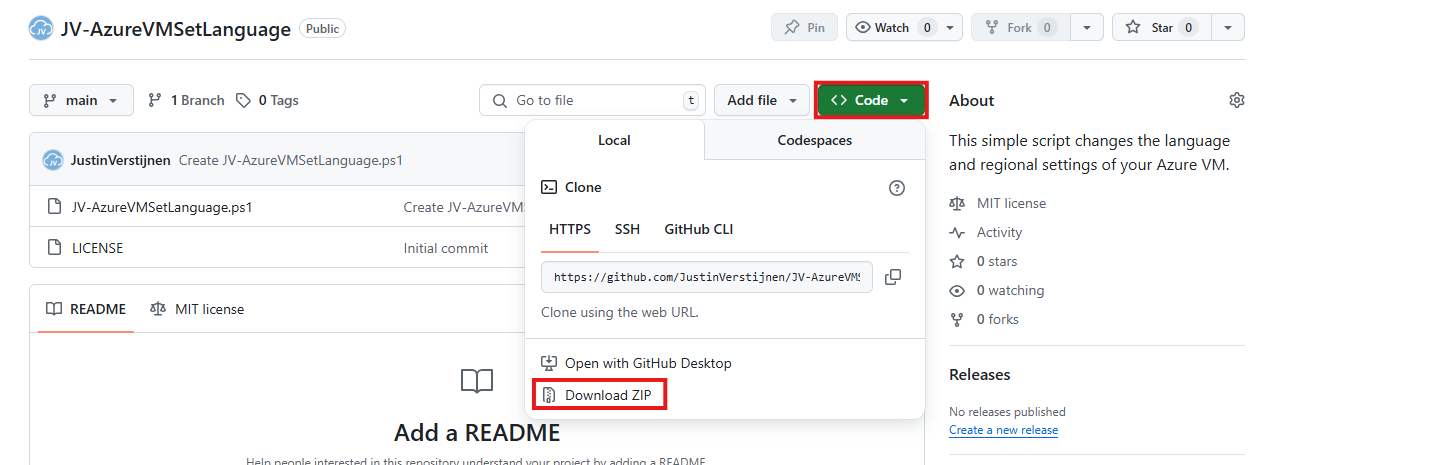
To use my create ad users script, go to my GitHub page and download the script there:
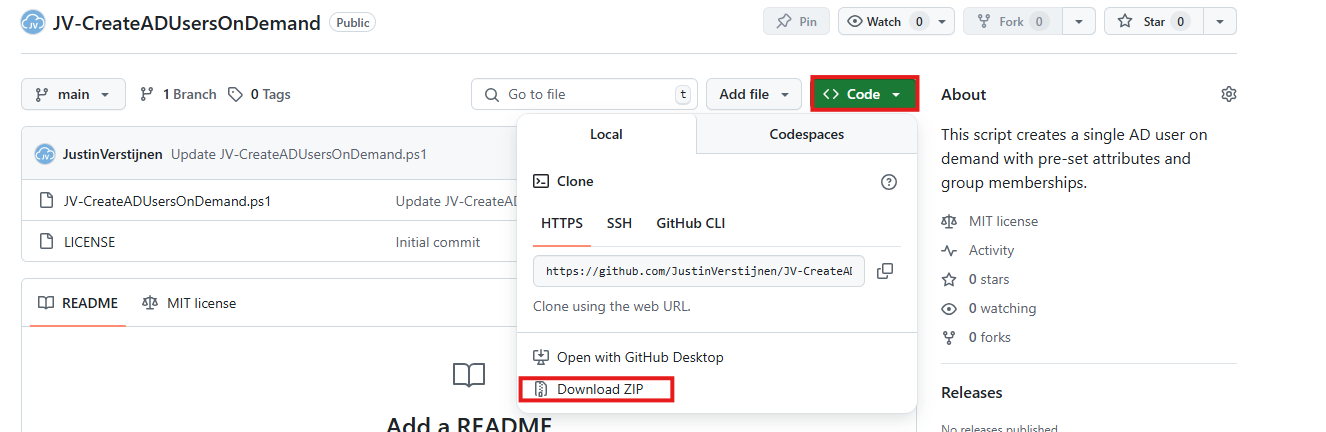
Click on “Code” and then on “Download ZIP”.
Then place the ZIP file on your Active Directory management server.
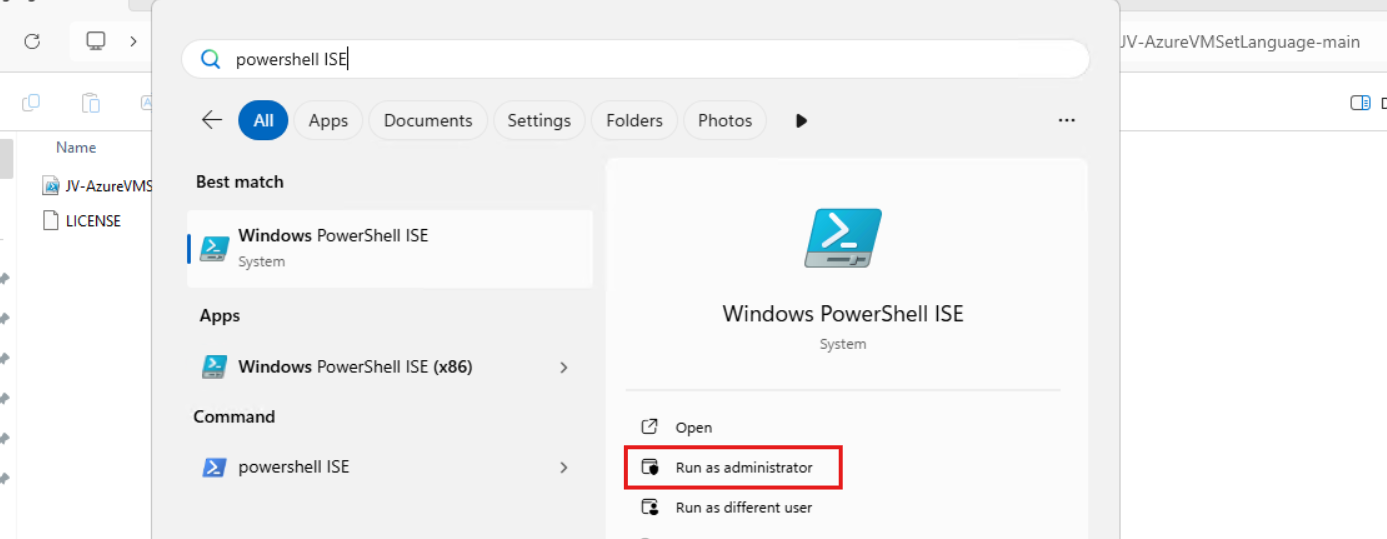
Open PowerShell ISE as Administrator:
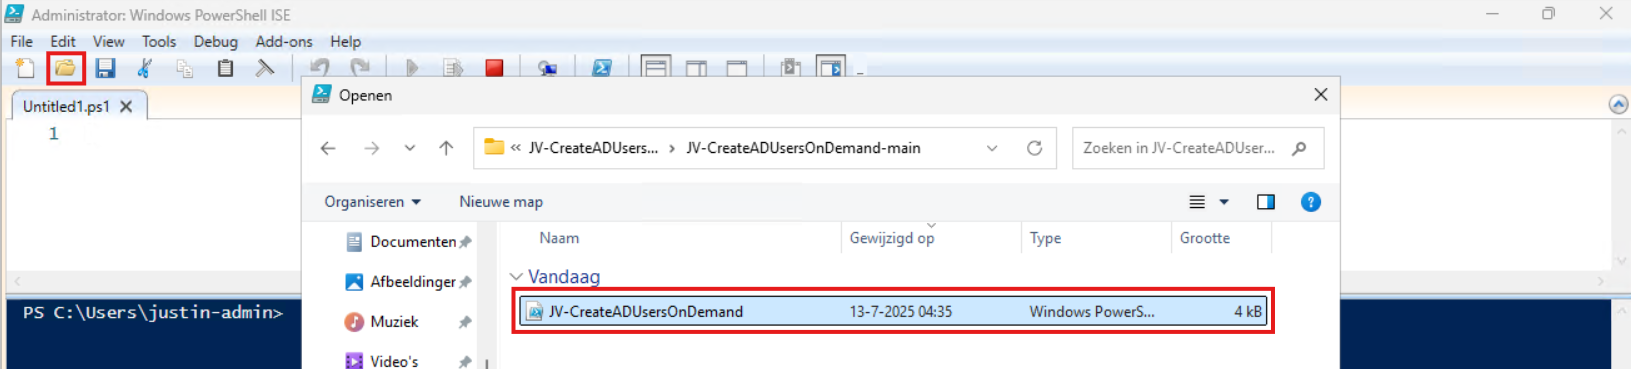
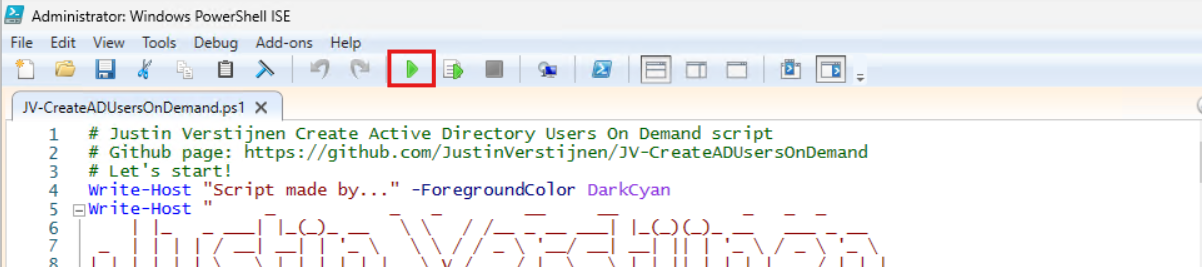
Verify your credentials if needed and then use the “Open” function of PowerShell ISE and open the script file:
Review:
- The parameters and set the correct OU (line 12 to 14)
- The attributes for the user (line 41 to 57)
Correct those if needed.
Before we can run the script, we have to do a one-time bypass for the Powershell Execution Policy by typing the command in the blue window below:
POWERSHELL
Set-ExecutionPolicy Unrestricted -Scope ProcessThis way the execution policy stays enabled but for this session only it’s been lowered. When you close the window, you have to type this again before be able to run scripts.
Execute the command, and when prompted to lower the policy, click Yes.
Now we can run the script itself by clicking the green “Play” button.
Now the script will ask the details for the user:
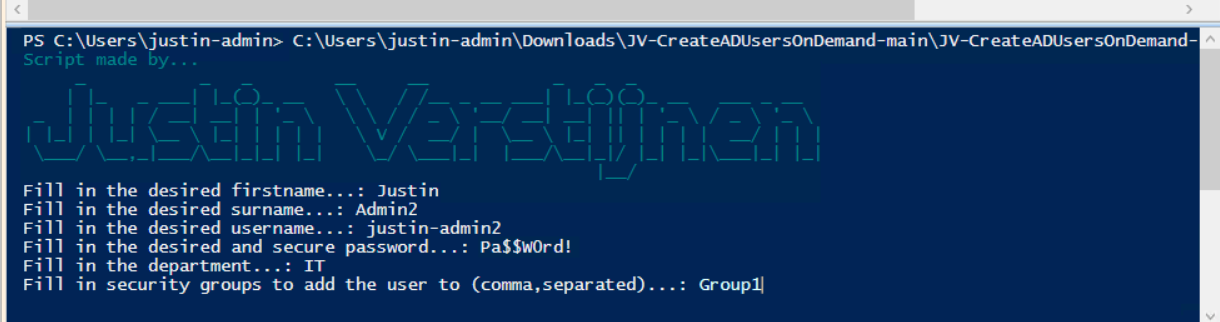
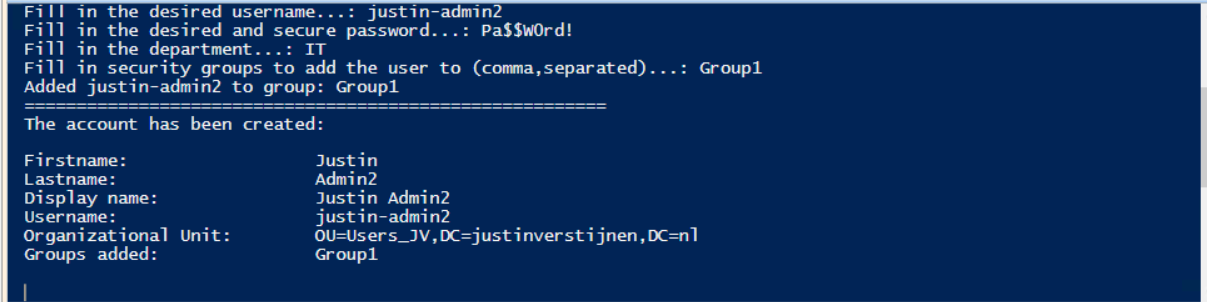
After filling this in and hit Enter, the user will be created almost instantly:
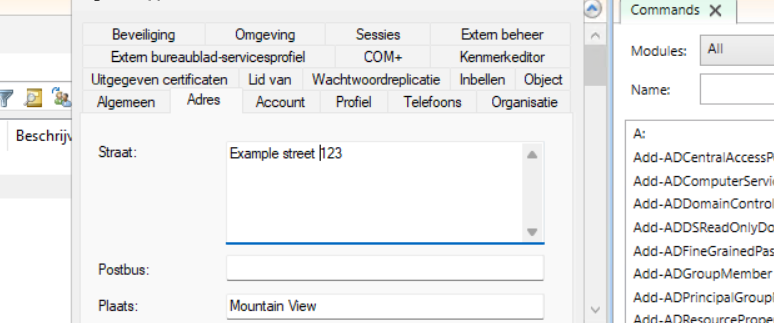
Now let’s take a look in the Active Directory Users and Computers snap-in (dsa.msc):
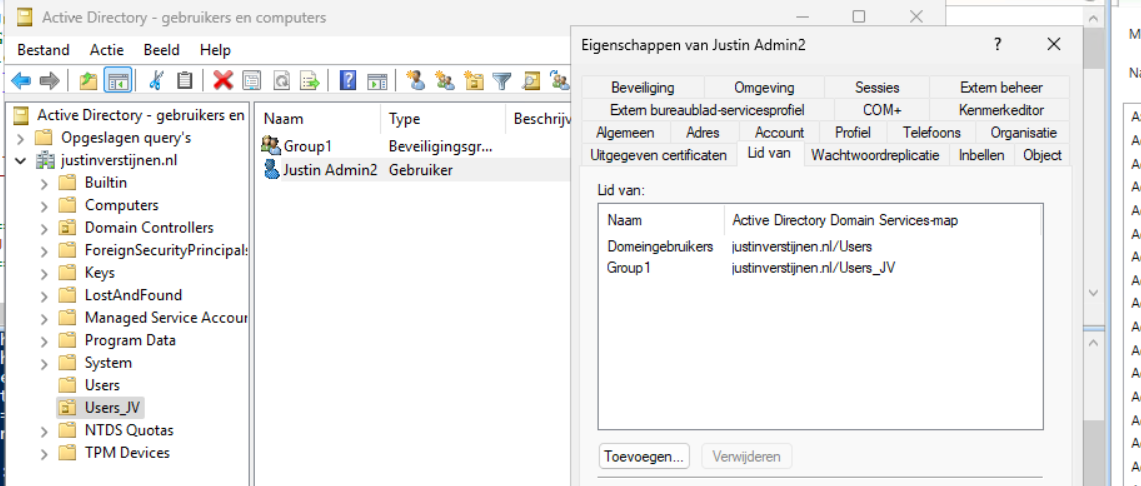
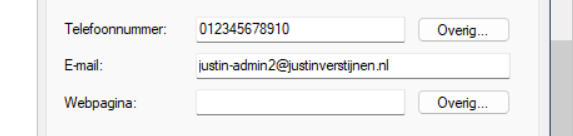
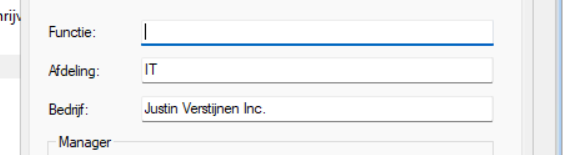
The user is succesfully created in the desired OU and Group1 has been added to the member of list. Also the extra attributes has been added to the user:
Summary
This script can ultimately be used when all users must be created in the same way. Let’s say, the emailaddress field must always be filled in, or the address or department. Those are steps that often will be skipped in real life. Using a pre-determined script will ensure this is always filled in.
Thank you for reading this post and I hope it is helpful.
Sources
These sources helped me by writing and research for this post;
End of the page 🎉
You have reached the end of the page. You can navigate through other blog posts as well, share this post on X, LinkedIn and Reddit or return to the blog posts collection page. Thank you for visiting this post.
If you think something is wrong with this post or you want to know more, you can send me a message to one of my social profiles at: https://justinverstijnen.nl/about/
If you find this page and blog very useful and you want to leave a donation, you can use the button below to buy me a beer. Hosting and maintaining a website takes a lot of time and money. Thank you in advance and cheers :)
The terms and conditions apply to this post.
How to Export Active Directory (AD) users fast and easy
Sometimes we need to export all of our AD users. The one time for applying changes, sometimes for monitoring the inventory but often for licensing purposes.
At this page I will show you how to export all your AD users fast and easy.
The Export AD users script:
For the fast pass, I uploaded the script to my Github page:
How to export the AD users by hand
To export the users without using a script, navigate to your Active Directory management server and open up Powershell. We will do all the action the script above does, but then by hand and type in every command separately.
Type in the first command to ensure the correct module is loaded:
POWERSHELL
Import-Module ActiveDirectoryThen we can execute the command to query all AD users:
POWERSHELL
$adusers = Get-ADUser -filter * -Properties UserPrincipalName,Mobile,Givenname,sn,name | select UserPrincipalName,Mobile,Givenname,sn,nameThis saves all the users in the $adusers variable. Now let’s print this list:
POWERSHELL
$adusersThis shows all users in the PowerShell window itself, but we are able to export this to a CSV file:
POWERSHELL
$adusers | Export-Csv "C:\Users\$env:USERNAME\Desktop\AD_Export.csv" -NTI -Delimiter ";"This gives us a nice and “Excel-ready” export of all the AD users. It is also very clean, but you can add or remove extra attributes from Active Directory from the second command.
For a complete list of all the attributes that can be used, visit this Microsoft Learn article.
Summary
This page shows an easy way to export all your AD users in a great and readable way. It also has some possibilities for customization but it shows how to do it in the most simple way possible. I also included a automatic way and a manual/by hand way to learnexactly what happens.
Thank you for reading and I hope it was helpful.
Sources
These sources helped me by writing and research for this post;
- https://learn.microsoft.com/en-us/powershell/module/activedirectory/get-aduser?view=windowsserver2025-ps#filter
- https://learn.microsoft.com/en-us/powershell/scripting/learn/ps101/03-discovering-objects?view=powershell-7.5#active-directory
End of the page 🎉
You have reached the end of the page. You can navigate through other blog posts as well, share this post on X, LinkedIn and Reddit or return to the blog posts collection page. Thank you for visiting this post.
If you think something is wrong with this post or you want to know more, you can send me a message to one of my social profiles at: https://justinverstijnen.nl/about/
If you find this page and blog very useful and you want to leave a donation, you can use the button below to buy me a beer. Hosting and maintaining a website takes a lot of time and money. Thank you in advance and cheers :)
The terms and conditions apply to this post.
Set correct language and timezone on Azure VM
By default, all Azure VMs are set to English language and UTC/Zulu timezone. This will work for a great portion of the Azure VM users but…
By default, all Azure VMs are set to English language and UTC/Zulu timezone. This will work for a great portion of the Azure VM users but there are users in other parts of the world too. Like in the Netherlands, where I live we are 1 or 2 hours ahead of that timezone depending on the season.
Also, in the case of Azure Virtual Desktop, we want to present our users their native language as system language. For this case, I have made a script to correct those settings.
The script to set the language and timezone on Azure VM
For the fast pass, I have the script here:
The script steps described
The script consists of 7 steps:
- Ensuring the script runs as Administrator
- Querying current language (as it must remove it later on)
- Installing the new language pack
- Change the system language and regional settings
- Sets new timezone
- Sets new language for all current and new users
- Removing old language and reboots VM
Using the script
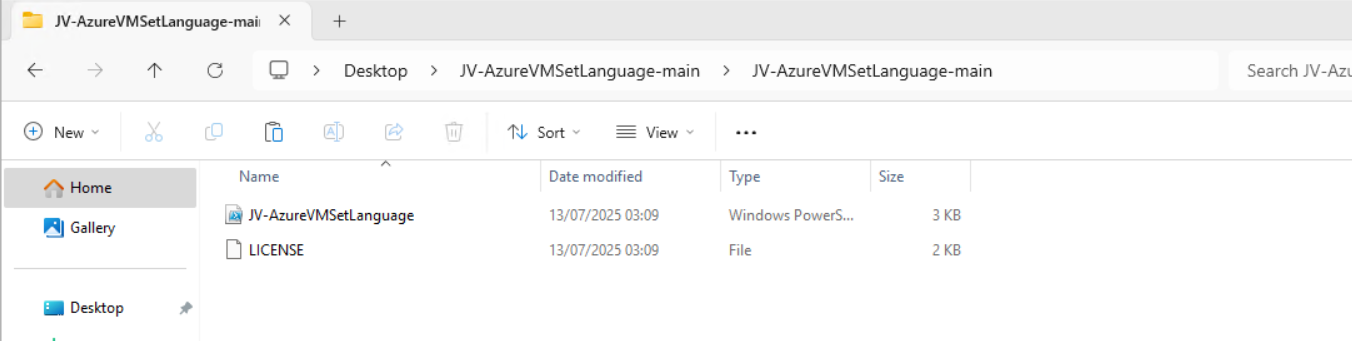
To use my script, download it from Github and place it on your newly created or existing Azure VM.
Click on “Code” and then on “Download ZIP”.
Place the ZIP file on your server. Then unzip it so we can navigate to the script itself.
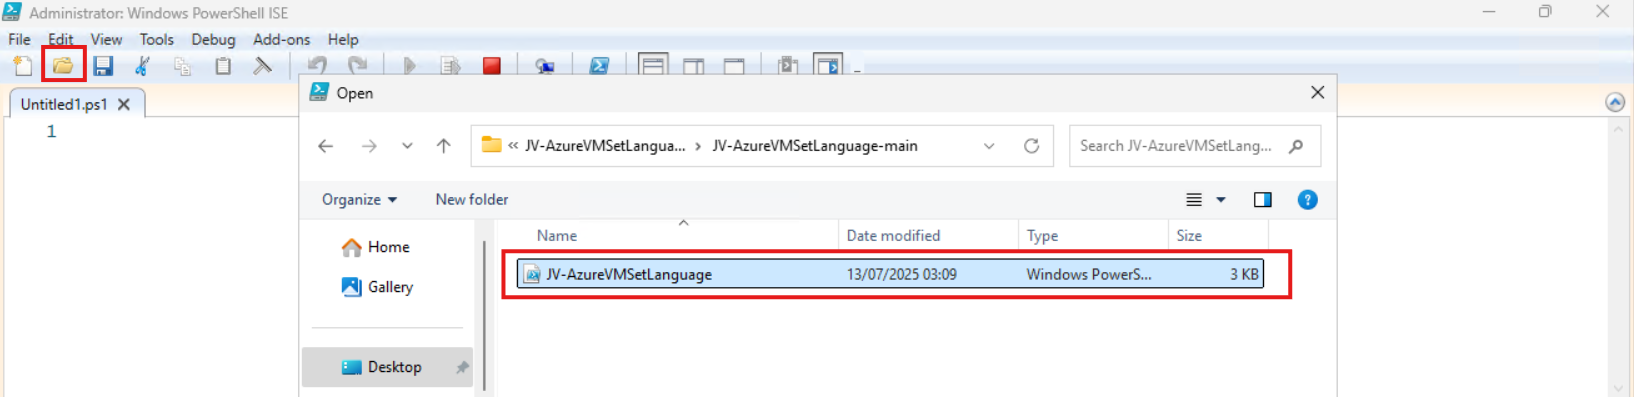
Now we can execute this script. The easiest way is to open the PowerShell ISE version as this eliminates navigating to the script by hand.
Open PowerShell ISE as Administrator:

Verify your credentials if needed and then use the “Open” function of PowerShell ISE and open the script file:
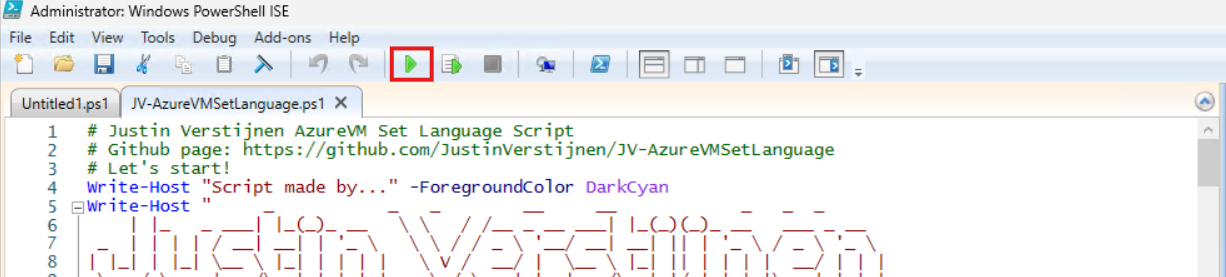
The script will now be opened and review the parameters on line 12 till 16:

By default, everything is set to “Dutch” but you can change them. I added links to the corresponding artices of Microsoft to quickly lookup what your settings must be. The links are also added to the sources at the bottom of this post.
Before we can run the script, we have to do a one-time bypass for the Powershell Execution Policy by typing the command in the blue window below:
POWERSHELL
Set-ExecutionPolicy Unrestricted -Scope ProcessThis way the execution policy stays enabled but for this session only it’s been lowered. When you close the window, you have to type this again before be able to run scripts.
Execute the command, and when prompted to lower the policy, click Yes.

Now we can run the script itself by clicking the green “Play” button.
The script can take up to 20 minutes, so have a little patience.
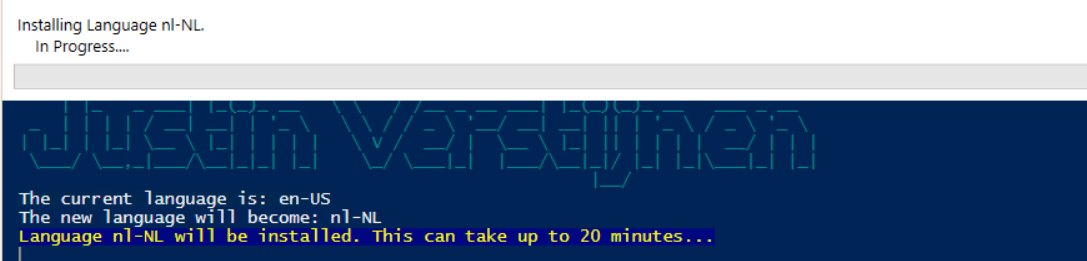
After every task is completed the server will reboot and you will be presented with the new settings.
Before and after the script
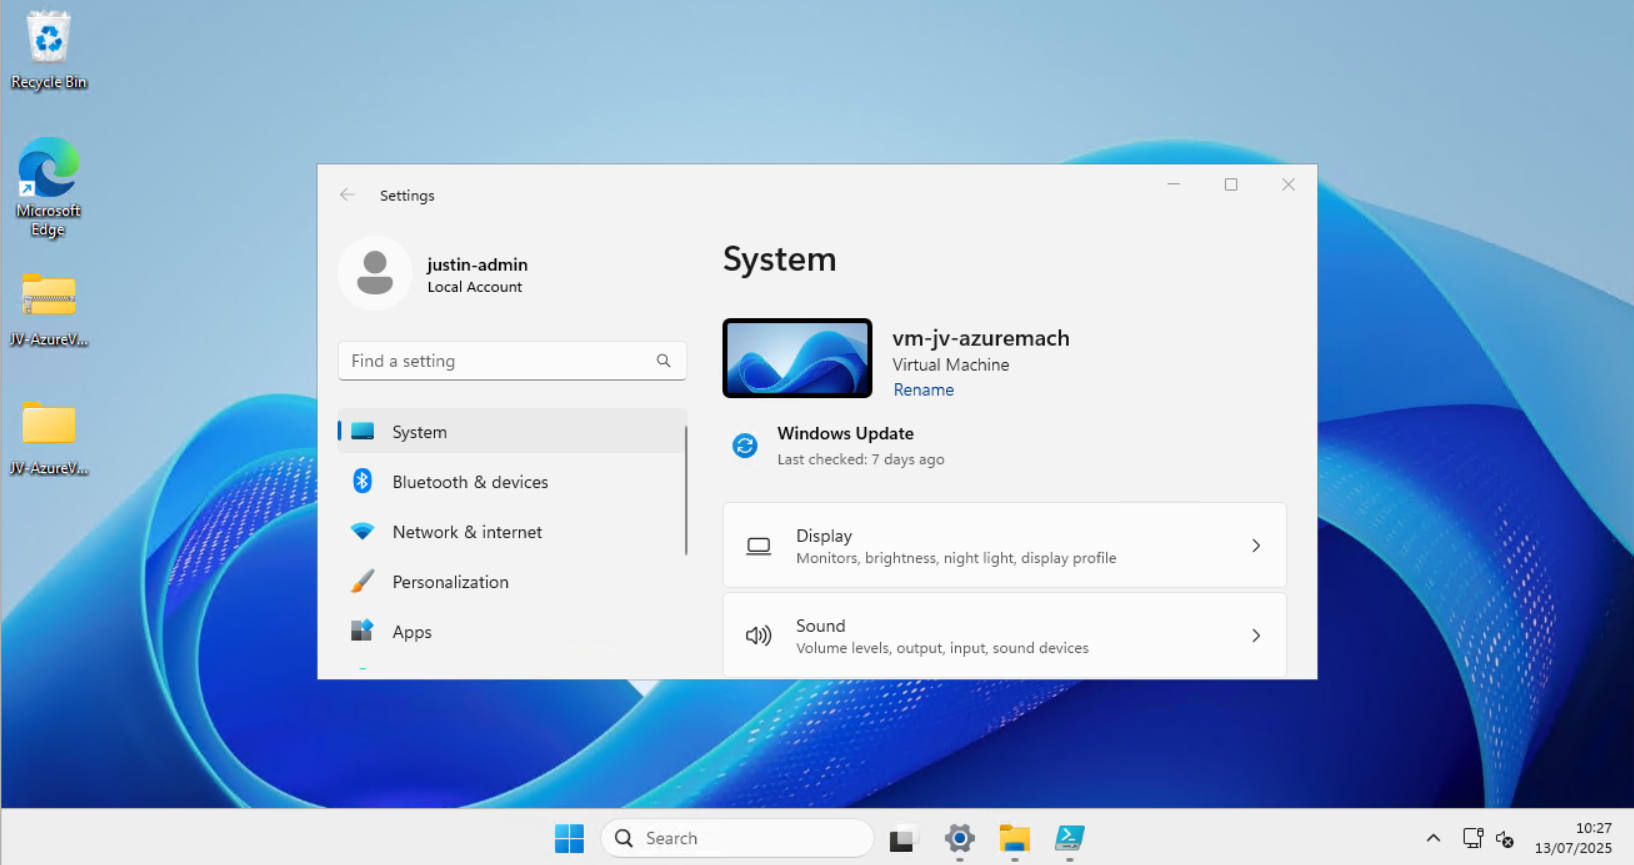
Before the script ran, my machine looked like this:
After the script ran, my machine looked like this:
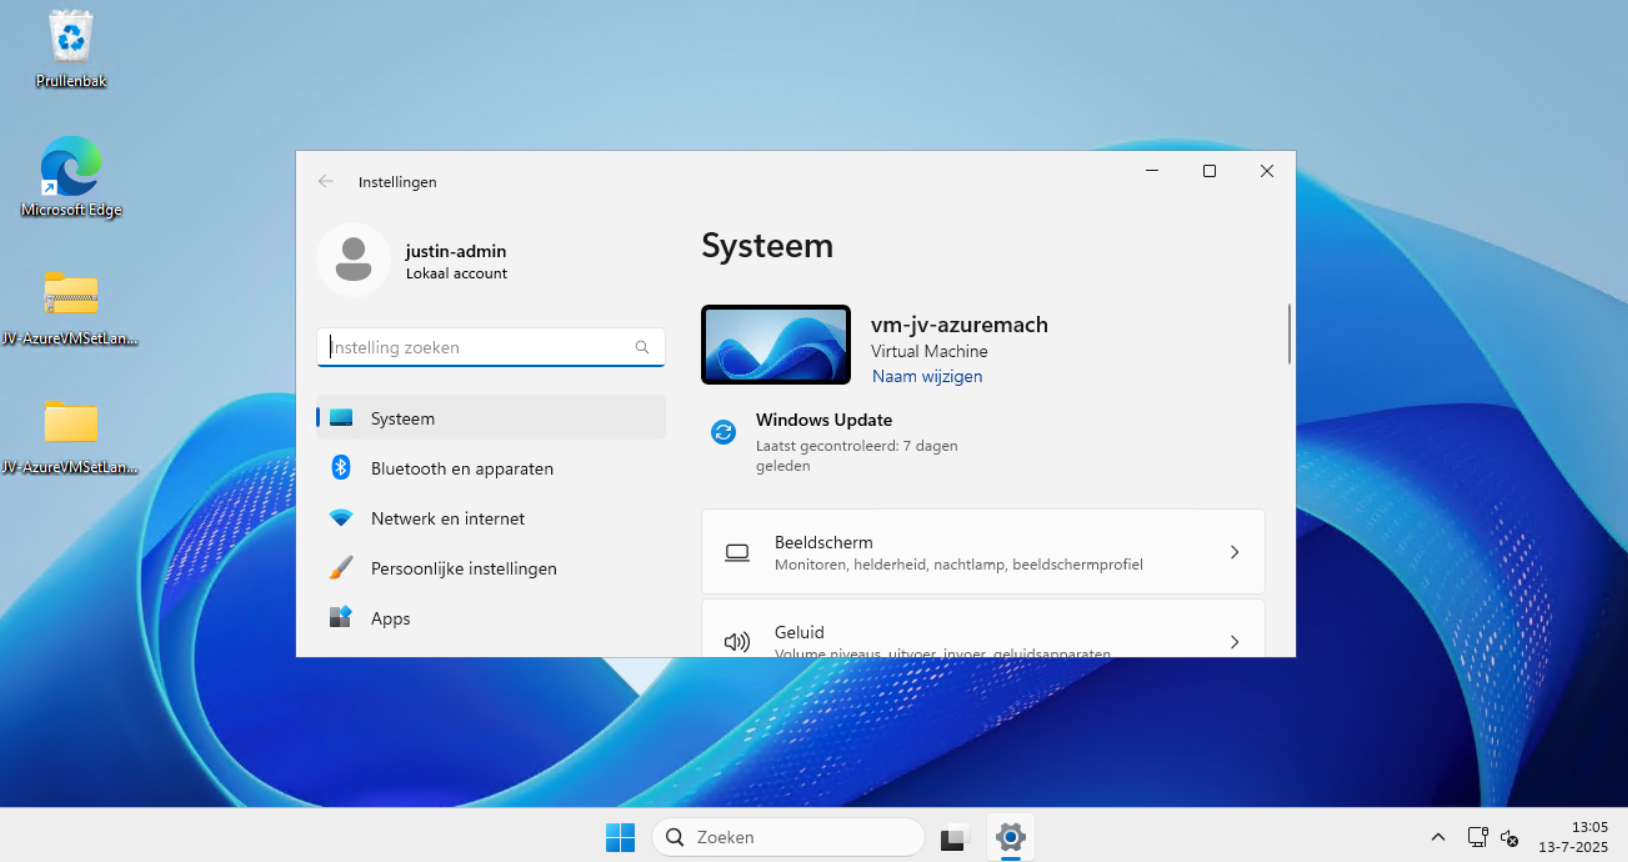
Perfectly in Dutch settings and ready to go.
Setting 24 hour-clock
Because of usability of my script, I did not include the use of the 24 hour clock because Windows does this because of the culture settings. If wanting to set this manually, you can execute these commands in PowerShell manually:
POWERSHELL
$24hclock = Get-UICulture

($24hclock.DateTimeFormat).ShortTimePattern = 'HH:mm'

Set-Culture $24hclock
This sets the time indication to 24-hour clock system.
Summary
In the beginning of creating Azure VMs this was something I found to be annoying. This was exactly the reason I wrote the script. This is especially useful when deploying Azure Virtual Desktop machines, as you want to present the users with their native language. We IT guys often like the systems in English so for us, it’s no problem.
I hope the script is useful and thank you for reading.
Sources
These sources helped me by writing and research for this post;
- https://learn.microsoft.com/en-us/linkedin/shared/references/reference-tables/language-codes
- https://learn.microsoft.com/en-us/windows-hardware/manufacture/desktop/default-time-zones?view=windows-11#time-zones
- https://learn.microsoft.com/en-us/windows/win32/intl/table-of-geographical-locations
- https://learn.microsoft.com/en-us/powershell/module/languagepackmanagement/set-systempreferreduilanguage?view=windowsserver2025-ps
End of the page 🎉
You have reached the end of the page. You can navigate through other blog posts as well, share this post on X, LinkedIn and Reddit or return to the blog posts collection page. Thank you for visiting this post.
If you think something is wrong with this post or you want to know more, you can send me a message to one of my social profiles at: https://justinverstijnen.nl/about/
If you find this page and blog very useful and you want to leave a donation, you can use the button below to buy me a beer. Hosting and maintaining a website takes a lot of time and money. Thank you in advance and cheers :)
The terms and conditions apply to this post.
Get Windows Product Key with PowerShell
Sometimes we need to have the original installed Windows Product Key just for documentation purposes. This post explains how to retrieve your activation key from the registry.
We simply can do this with one command in PowerShell:
POWERSHELL
(Get-ItemProperty -Path "HKLM:\SOFTWARE\Microsoft\Windows NT\CurrentVersion\SoftwareProtectionPlatform").BackupProductKeyDefault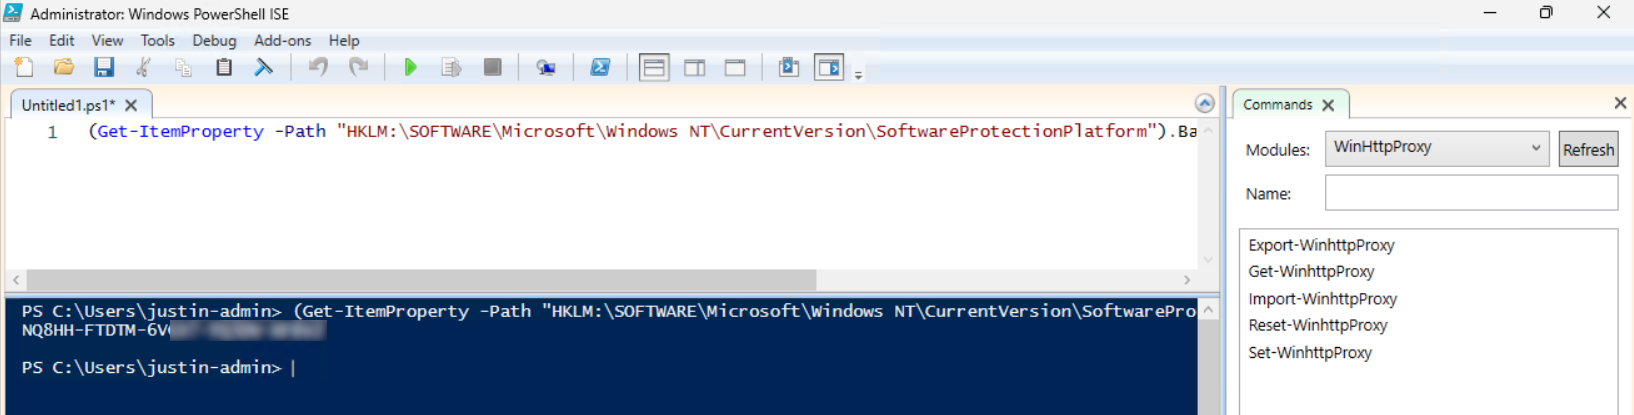
Please note that I am not encouraging software abuse or pirating, just sharing a tip to make our IT life a bit easier. It happens that a server or computer gets installed and we forget to document the product key or just to match it with our known information.
End of the page 🎉
You have reached the end of the page. You can navigate through other blog posts as well, share this post on X, LinkedIn and Reddit or return to the blog posts collection page. Thank you for visiting this post.
If you think something is wrong with this post or you want to know more, you can send me a message to one of my social profiles at: https://justinverstijnen.nl/about/
If you find this page and blog very useful and you want to leave a donation, you can use the button below to buy me a beer. Hosting and maintaining a website takes a lot of time and money. Thank you in advance and cheers :)
The terms and conditions apply to this post.
Getting started with PowerShell
PowerShell is a powerful command-line shell and scripting language that can help you inspect systems, automate repetitive tasks, and manage computers more efficiently. At first, a command-line interface can look intimidating. Fortunately, PowerShell is designed around a fairly consistent command structure, making it easier to learn than it may first appear. This article introduces the basic concepts of PowerShell and includes a few simple commands that you can try yourself.
1: What is PowerShell?
PowerShell is both a command-line shell and a scripting language. You can use it interactively by entering one command at a time, or you can combine multiple commands into scripts to automate larger tasks.
Common use cases include:
- Checking system information
- Managing files and folders
- Troubleshooting network connections
- Automating repetitive tasks
- Managing Windows environments
- Processing and exporting data
One of the most useful things about PowerShell is that its commands usually return objects instead of plain text. This means that the output can easily be filtered, sorted, selected, and passed to another command. I will dive into this later.
2: How PowerShell commands work
PowerShell commands are commonly called cmdlets. Almost all of those cmdlets follow a simple naming convention:
Verb-Noun
The verb describes the action, while the noun describes what the command works with separated by a - and mostly typed in CamelCase where every syllable starts with a capital letter.
Some examples of PowerShell commands include:
Get-ItemGet-ProcessGet-ServiceTest-NetConnectionWrite-Output
The Get verb is especially common because it is used to retrieve information. For example, the following command shows a list of running processes:
PowerShell
Get-ProcessYou do not need to remember every PowerShell command. PowerShell can help you discover commands as you go.
To list available commands, use:
PowerShell
Get-CommandTo get help for a specific command you don’t remember the options or variables for, use:
PowerShell
Get-Help Get-ProcessYou see, PowerShell is a really simple approach for very deep and forcefull computer and server administration tasks.
3: Windows PowerShell and PowerShell
You may come across two different names:
- Windows PowerShell
- PowerShell
Windows PowerShell is the older Windows-only edition that is included with many Windows systems. Modern PowerShell (version 7 at the time of writing) is cross-platform and can run on Windows, Linux, and macOS. For basic commands, the experience is often very similar. Some Windows-specific commands, however, are only available on Windows.
You can check which version you are currently using with by printing this variable:
PowerShell
$PSVersionTable4: Demo time - Simple PowerShell commands to try
The best way to learn PowerShell is to try a few commands yourself. Open (Windows) PowerShell on your computer and type in these simple commands:
4.1: Show the computer name
The following command displays the name of the computer:
PowerShell
$env:COMPUTERNAME4.2 Show the current date and time
Use Get-Date to display the current date and time:
PowerShell
Get-DateYou can also pre-format the output:
PowerShell
Get-Date -Format "yyyy-MM-dd HH:mm:ss"4.3 Show the current user
The following command displays the currently signed-in user:
PowerShell
$env:USERNAME4.4 Check free disk space
This command shows the available file system drives:
PowerShell
Get-PSDrive -PSProvider FileSystemThe output includes the amount of used and free space.For a more readable overview in gigabytes, you can use:
PowerShell
Get-PSDrive -PSProvider FileSystem |
    Select-Object Name,
        @{Name="UsedGB"; Expression={[math]::Round($_.Used / 1GB, 2)}},
        @{Name="FreeGB"; Expression={[math]::Round($_.Free / 1GB, 2)}}
4.5 Show running processes
To view running processes:
PowerShell
Get-ProcessYou can for example sort the processes by memory usage:
PowerShell
Get-Process |
    Sort-Object WorkingSet -Descending |
    Select-Object -First 10 Name, Id, WorkingSet
4.6 Test a network connection
You can use PowerShell to test whether a remote system is reachable:
PowerShell
Test-NetConnection justinverstijnen.nlTo test a specific TCP port:
PowerShell
Test-NetConnection justinverstijnen.nl -Port 443This can be useful when troubleshooting network or application connectivity. The Test-NetConnection command also has a more simpeler alias which does the same but saves you some typing:
Bash
tnc justinverstijnen.nl -Port 4435. The pipeline
One of the most important PowerShell concepts is the pipeline. The pipeline uses the | character to send the output of one command to another command.
For example:
PowerShell
Get-Process | Sort-Object CPU -DescendingThis command:
- Retrieves the running processes.
- Sends those processes to
Sort-Object. - Sorts them by CPU usage.
You can continue adding commands to the pipeline. For example, this displays the five processes with the highest CPU value:
PowerShell
Get-Process |
    Sort-Object CPU -Descending |
    Select-Object -First 5
6. Variables
A variable stores a value so that you can use it again later. PowerShell variables start with a $ symbol.
For example:
PowerShell
$ComputerName = $env:COMPUTERNAME

Write-Output "This computer is called $ComputerName"
Variables can contain many different types of data, including:
| Type | Description | Example |
|---|---|---|
| String | Text | "Hello" |
| Integer | A whole number | 42 |
| Boolean | True or false | $true |
| Array | A collection of values | 1, 2, 3 |
| Object | Structured data returned by PowerShell commands | Get-Process |
7. Commands and scripts
You can use PowerShell interactively by entering commands one at a time. This is useful for quick checks and troubleshooting. When you need to repeat the same steps, you can save the commands in a PowerShell script with the .ps1 file extension.
For example, the following script creates a small system summary:
PowerShell
$ComputerName = $env:COMPUTERNAME
$UserName = $env:USERNAME
$CurrentTime = Get-Date

Write-Output "Computer name: $ComputerName"
Write-Output "Current user: $UserName"
Write-Output "Current time: $CurrentTime"
A script can start very small. Over time, you can add variables, conditions, loops, functions, logging, and error handling.
8. A simple example with a condition
PowerShell can make decisions by using an if statement. The following example checks the free space on the C: drive:
PowerShell
$Drive = Get-PSDrive -Name C
$FreeSpaceGB = [math]::Round($Drive.Free / 1GB, 2)

if ($FreeSpaceGB -lt 20) {
    Write-Output "Warning: Only $FreeSpaceGB GB of free space remains."
}
else {
    Write-Output "There is $FreeSpaceGB GB of free space available."
}
This is a simple example of how PowerShell can retrieve information, evaluate it, and return a different result depending on the situation.
9. Useful tools for writing PowerShell
You can write PowerShell commands and scripts in many different editors. Common options include:
- Windows Notepad
- Notepad++
- Visual Studio Code
- Windows PowerShell ISE
For beginners, Visual Studio Code is a popular option because it provides syntax highlighting, suggestions, and extensions for working with PowerShell. For very small commands, however, the PowerShell terminal itself is often enough.
10. A few tips for beginners
Start with small commands and inspect the output before building larger scripts. Scripts doesn’t have to be that complex at first. Use Get-Help when you want to learn how a command works:
PowerShell
Get-Help Get-Process -ExamplesUse Get-Member to discover which properties and methods an object contains:
PowerShell
Get-Process | Get-MemberAnd remember: you do not need to memorize everything. Knowing how to discover commands and inspect their output is one of the most important PowerShell skills.
Info
Be careful when running commands that change or remove data. Before using an unfamiliar command, read its help documentation and test it in a safe environment whenever possible.
Knowledge check
Knowledge check
This quiz needs JavaScript to show the questions and feedback.
This quiz needs JavaScript to show the questions and feedback.
Summary
PowerShell can be used for anything from a quick system check to large-scale automation.
The most important concepts to remember are:
- Commands usually follow the
Verb-Nounnaming convention. - PowerShell works with objects.
- The pipeline connects commands.
- Variables store values for later use.
- Scripts allow you to repeat and automate tasks.
You do not need to start with complex automation. A few simple commands are enough to begin learning how PowerShell works. Try checking your computer name, the current time, your free disk space, or the running processes. From there, you can gradually combine commands and build your own scripts.
Thank you for reading this post and I hope it was helpful!
End of the page 🎉
You have reached the end of the page. You can navigate through other blog posts as well, share this post on X, LinkedIn and Reddit or return to the blog posts collection page. Thank you for visiting this post.
If you think something is wrong with this post or you want to know more, you can send me a message to one of my social profiles at: https://justinverstijnen.nl/about/
If you find this page and blog very useful and you want to leave a donation, you can use the button below to buy me a beer. Hosting and maintaining a website takes a lot of time and money. Thank you in advance and cheers :)
The terms and conditions apply to this post.
Using PowerShell remote sessions
In this guide I will explain how to use PowerShell remote sessions, what they are and how to configure your systems to use this. PowerShell Remote Sessions can be a great way to administer your virtual machines, cluster-nodes or physical Windows-based devices. With a Powershell remote session you can execute powershell commands on a remote device. It works the best with servers in a specific management subnet. I do not recommend to administer client devices with Powershell because this can be a huge security risk.
Requirements
- Management computer/Priveleged Access Workstation
- 15-20 minutes of your time
- Management server and endpoints are Active Directory joined
Starting out
Before we can use Powershell to administer remote computers, we need to enable two things:
- 1. WinRM service (Endpoint): This is a service in Windows that enables remote management. Powershell Remote relies greatly on this service so we have to enable this on the endpoint. By default it is disabled due to its security reasons.
- 2. Trusted Hosts (Management server): This has to be configured on your management server. This is a whitelist to protect against security threats who can abuse this option. Here you configure to what machines (name/IP-address) you can connect to.
1. Configure Windows Remote Management (WinRM)
On the endpoint you have to enable WinRM. This can be done manually with one simple command, or at scale with Group Policy.
Simple and one command:
POWERSHELL
winrm quickconfigAt scale with Group Policy:
Create a new or use an existing Group Policy object and go to:
Computer Configuration > Policies > Administrative Templates > Windows Components > Windows Remote Management (WinRM) > WinRM Service.
Pick the option: “Allow remote server management through WinRM”
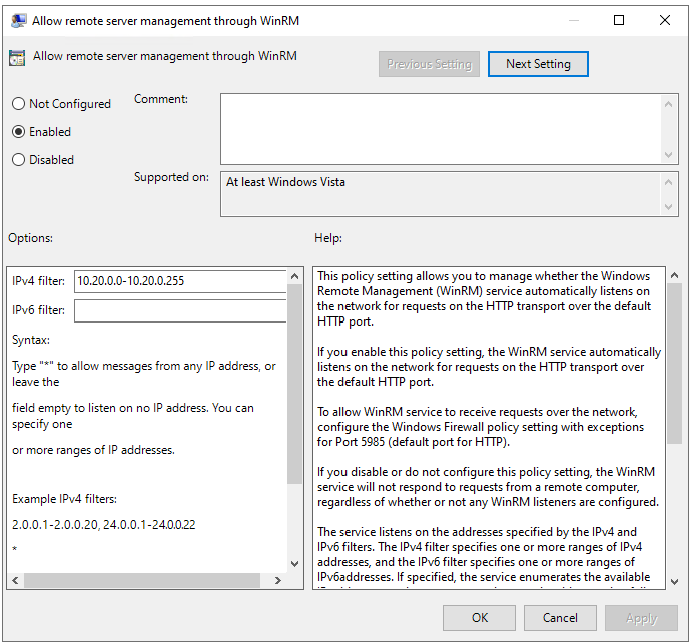
Here we can define from what IP-addresses we can use WinRM for a more secure use of WinRM.
After this option we have to allow WinRM access in the Windows Firewall to work. This also has to be done on the endpoint.
In the GPO, go to:
Computer Configuration -> Policies -> Windows Settings -> Windows Defender Firewall with Advanced Security
Create a new Inbound rule based on a Predefined rule:
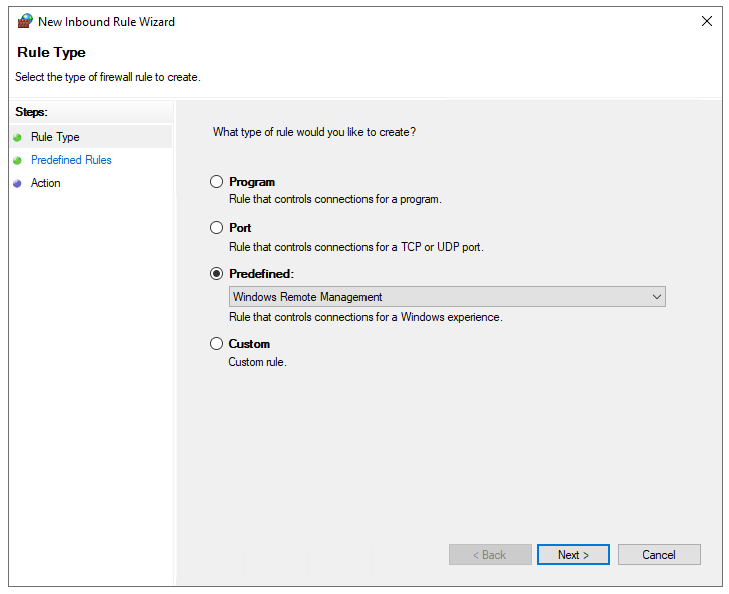
Click next till the wizard is done.
Now we have a GPO to enable WinRM on all endpoints. Apply this to the OU with the endpoints and wait for the GPO to apply. In the meantime we can configure TrustedHosts on our management workstation.
2. Configure TrustedHosts
To configure your trustedhosts you can use a simple command on your management server:
POWERSHELL
Set-Item WSMan:\localhost\Client\TrustedHosts #IP-address#You can use IP-addresses, DNS-names, FQDNs and wildcards. To add a whole subnet (like 10.20.0.0/24) to your trustedhosts list, use the following command:
POWERSHELL
Set-Item WSMan:\localhost\Client\TrustedHosts -Value "10.20.0.*"Another really unsafe option is to add everything to your TrustedHosts list (not recommended):
POWERSHELL
Set-Item WSMan:\localhost\Client\TrustedHosts -Value "*"One small note: we use the command Set-Item. This will set the complete TrustedHosts setting to the setting in your command and will overwrite all existing entries. We can also use the following command to add an entry with keeping the current configuration:
POWERSHELL
Add-Item WSMan:\localhost\Client\TrustedHosts -Value "10.20.0.*"If you have set this up like one of the methods above, we are all set and done.
3. Setting up an PowerShell Remote session
To start using a PowerShell remote session after you have done all the prerequisites, use the command below:
POWERSHELL
Enter-PSSession -ComputerName 10.20.0.1You get a prompt to logon with your credentials. The account has to be member of the local Administrators group.
Now we are logged in and we can execute commands like being locally on the server.
POWERSHELL
[JV-TEST-SERVER]: PS C:\Users\justinverstijnen\Documents>4. Managing multiple endpoints remotely
To automate some tasks, we can execute commands on our management server on multiple remote endpoints. Think about a group policy update, starting a service or a script that has to be executed directly without restarting the servers to make it work.
We can do this with the Invoke-Command command. In the brackets we can paste our script or command to execute on the endpoints.
POWERSHELL
Invoke-Command -Computername Server1,Server2,Server3,Server4,Server5 -Scriptblock {gpupdate /force}5. Multiple sessions and session persistence
With Powershell remoting we can also save sessions in a parameter. We mostly use this to execute a script on multiple servers. This can also be done to use it with the Invoke-Command above This works like:
POWERSHELL
$sessions = New-PSSession -ComputerName Server01, Server02, Server03

Invoke-Command -Session $sessions -ScriptBlock { gpupdate /force }
The way this works is that you save the connections in a variable and you use this as a whole to execute your commands. Makes it simple for executing commands at scale.
Summary
PowerShell remote is a very handy tool to remote connect to a endpoint/server. In practice we want to use simple and GUI-based tools but we have to dig into console commands at some point. For example, if you accidentally stop the Remote Desktop service or during a system outage.
End of the page 🎉
You have reached the end of the page. You can navigate through other blog posts as well, share this post on X, LinkedIn and Reddit or return to the blog posts collection page. Thank you for visiting this post.
If you think something is wrong with this post or you want to know more, you can send me a message to one of my social profiles at: https://justinverstijnen.nl/about/
If you find this page and blog very useful and you want to leave a donation, you can use the button below to buy me a beer. Hosting and maintaining a website takes a lot of time and money. Thank you in advance and cheers :)
The terms and conditions apply to this post.
How to enable Remote Group Policy update
This guide explains how to perform Remote Group Policy updates and how to do the initial configuration needed.
Group Policy update to multiple computers
Sometimes you want to force a group policy update on multiple computers. Often when I am configuring Azure Virtual Desktop Session Hosts I need this option instead of logging into all hosts and executing the command manually.
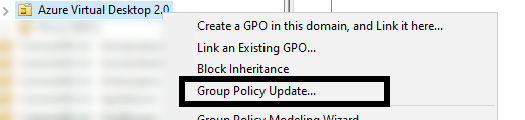
There is a option in Group Policy management to force a group policy update to all computers in a OU:

Actually, this only works after you configured this on the remote computers. The good part is, there is a way to do this with Group Policy!
Errors explained
When you do not configure remote group policy update, you get errors like:
- 0x8007071a
- The remote procedure call was cancelled
These state that access to the remote computer cannot be established, which is actually because of security reasons.
Enable remote Group Policy update
To enable remote Group Policy update with a GPO, create a new GPO or use an existing one:
Go to the settings for the Windows Firewall:
Computer Configuration -> Policies -> Windows Settings -> Security Settings -> Windows Defender Firewall with Advanced Security
Create 2 new inbound rules based on a predefined sets:
- Remote Scheduled Tasks Management
- Windows Management Instrumentation
Select all rules of both of the predefined rulesets.
After this link the GPO to the right OU and do a last manual GPupdate or wait for the scheduled GPupdate to finish.
Performing remote Group Policy updates
You can use the Group Policy update option in Group Policy Management (gpmc.msc) to perform a group policy update on all computers in a OU.
After that you will get succeeded notifications:
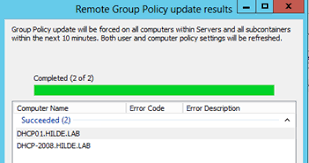
Summary
Remote Group Policy update is an excellent way to manage traditional Active Directory computers and updating them remotely instead of physically walk to the computers to perform the update yourself. Even on Microsoft Azure servers, it is a very handy tool because updating policies can be done through your central management server.
Thank you for reading this guide!
End of the page 🎉
You have reached the end of the page. You can navigate through other blog posts as well, share this post on X, LinkedIn and Reddit or return to the blog posts collection page. Thank you for visiting this post.
If you think something is wrong with this post or you want to know more, you can send me a message to one of my social profiles at: https://justinverstijnen.nl/about/
If you find this page and blog very useful and you want to leave a donation, you can use the button below to buy me a beer. Hosting and maintaining a website takes a lot of time and money. Thank you in advance and cheers :)
The terms and conditions apply to this post.
Bulk create Active Directory users with Powershell
This page will share a PowerShell script to create bulk AD users with Powershell including instructions to use it.
When it comes to creating users for Active Directory, especially in new implementations, you want to minimize the time needed to create the accounts. This is possible by creating the AD users with Powershell.
Requirements
- Minimal knowledge of Powershell
- An Active Directory environment
Full script for creating AD users
Here is the full script including CSV that creates the ad users:
Step 1: Prepare CSV
Fill in the CSV file with all required information.
The script I am using and sharing at this page has the following headings:
CSV
firstname,lastname,username,passwordThis is a very simple and effective manner where the script will base additional information like the emailaddress and proxyaddress attributes on the username.
Step 2: Change parameters
The script has the domain justinverstijnen.nl everywhere in it. This has to be changed at the following lines to your own preference:
- UserPrincipalName
- Path (Distinguished Name of OU)
- EmailAddress
- OtherAttributes
Step 3: Run PowerShell script to create AD users
Download the script file and copy the script and csv file to the same folder on the destination server. After that run the script and it will create the users.
Note: If you want to bypass the Powershell Execution Policy in the most effective and secure way possible, use the following command:
POWERSHELL
Set-ExecutionPolicy RemoteSigned -Scope ProcessThis will allow all scripts to be runned in the Powershell window till it is closed. After closing the window, running scripts will be blocked again till running this command again.
After running this command you can navigate to the folder where the CSV file and PS1 file are located and run the script by using:
POWERSHELL
.\bulk_user.ps1
End of the page 🎉
You have reached the end of the page. You can navigate through other blog posts as well, share this post on X, LinkedIn and Reddit or return to the blog posts collection page. Thank you for visiting this post.
If you think something is wrong with this post or you want to know more, you can send me a message to one of my social profiles at: https://justinverstijnen.nl/about/
If you find this page and blog very useful and you want to leave a donation, you can use the button below to buy me a beer. Hosting and maintaining a website takes a lot of time and money. Thank you in advance and cheers :)
The terms and conditions apply to this post.