Adding Ubuntu endpoints to Microsoft Intune
Categories:
9 minute read
Why add your Ubuntu endpoints to Microsoft Intune?
This question has a very simple answer: compliance, management, and security.
As IT professionals, we want to manage every endpoint from a single pane of glass while keeping compliance and security at a consistently high level. Linux endpoints are often overlooked in IT departments, especially compared to Windows and macOS devices. This makes them an interesting attack vector, because they are not always properly managed, monitored, or secured.
Some important reasons to manage Linux endpoints with Intune are:
- Centralized device visibility: IT teams can see which Linux devices are used within the organization and who is using them
- Compliance monitoring: Devices can be checked against compliance requirements, such as operating system version, encryption status, and security settings
- Conditional Access integration: Access to company resources can be based on device compliance. This means that only trusted and compliant devices can access sensitive data
- Support for audits and reporting: Having Linux devices enrolled in Intune makes it easier to prove that endpoints are known, monitored, and managed
- Reduced shadow IT risk: Linux devices are sometimes used by developers, administrators, or technical users without the same level of IT oversight. Intune helps bring these devices back into the managed environment
In this post, I will add an Ubuntu Desktop device to Microsoft Intune and apply some basic settings to make it a lot more secure.
Supported Linux versions
The Linux versions that are supported by Microsoft Intune are these:
| Linux distribution | Supported versions |
|---|---|
| Ubuntu Desktop / Ubuntu LTS | 24.04 LTS and 26.04 LTS |
| Red Hat Enterprise Linux | RHEL 9 and RHEL 10 |
The official support is listed here and could be updated in the future: https://learn.microsoft.com/en-us/intune/fundamentals/ref-supported-platforms#linux
What happens if we try to join unsupported Linux OS versions? I tried this just for fun with Zorin OS (which is based on Ubuntu) but an error is presented unfortunately:
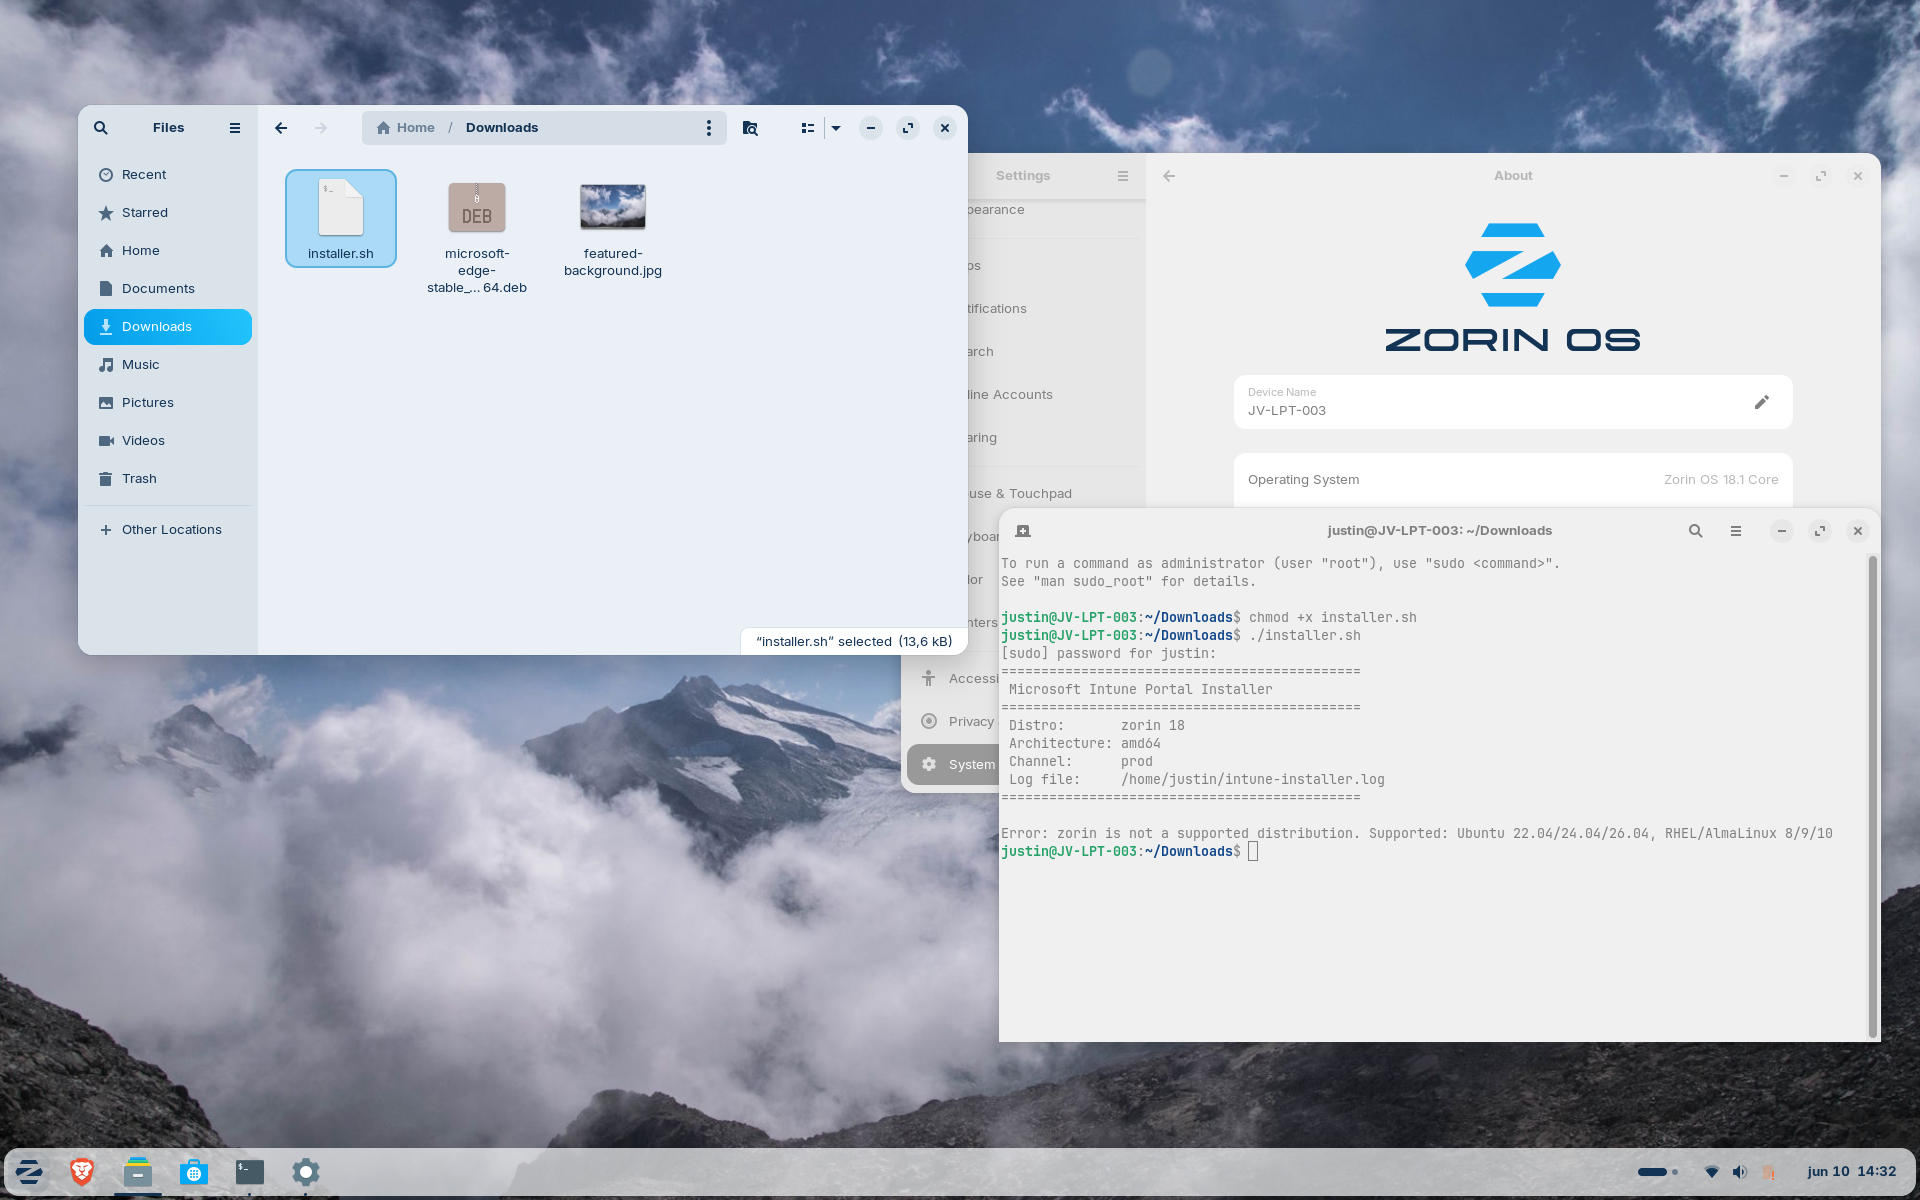
Error: zorin is not a supported distribution. Supported: Ubuntu 22.04/24.04/26.04, RHEL/AlmaLinux 8/9/10
So only supported OS versions and distributions can actually work with Microsoft Intune.
Supported options in Microsoft Intune
While support is available for Linux/Ubuntu devices, the functionality is very limited. The only options we have are:
- Compliance Policies
- Custom scripts
With the custom scripts option, it’s possible to basically do everything at root level which is nice but the end user has the permissions to block this potentially. I hope to see more features in the future like device encryption, wipe and locking down some users’ permissions on Linux.
Step 1: Installing Ubuntu Desktop (optional)
Assuming you might already have Ubuntu or a supported version installed already, this step will be optional. If not, you can also follow Step 1. Otherwise, skip this step.
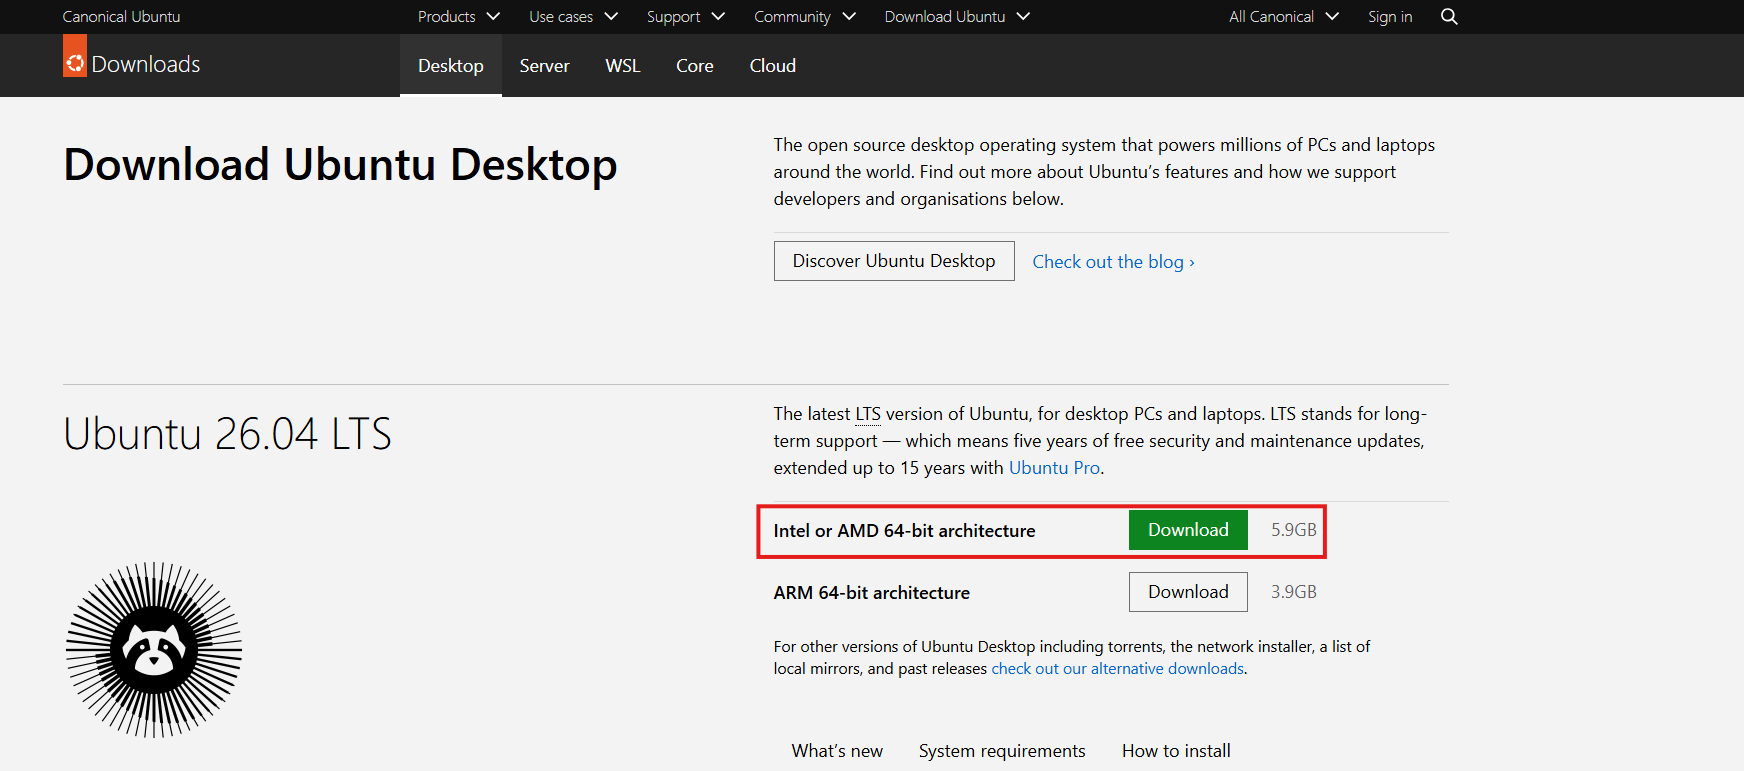
In the first step, I will be installing my demo laptop with Ubuntu Desktop 26.04. This can be installed from here: https://ubuntu.com/download/desktop
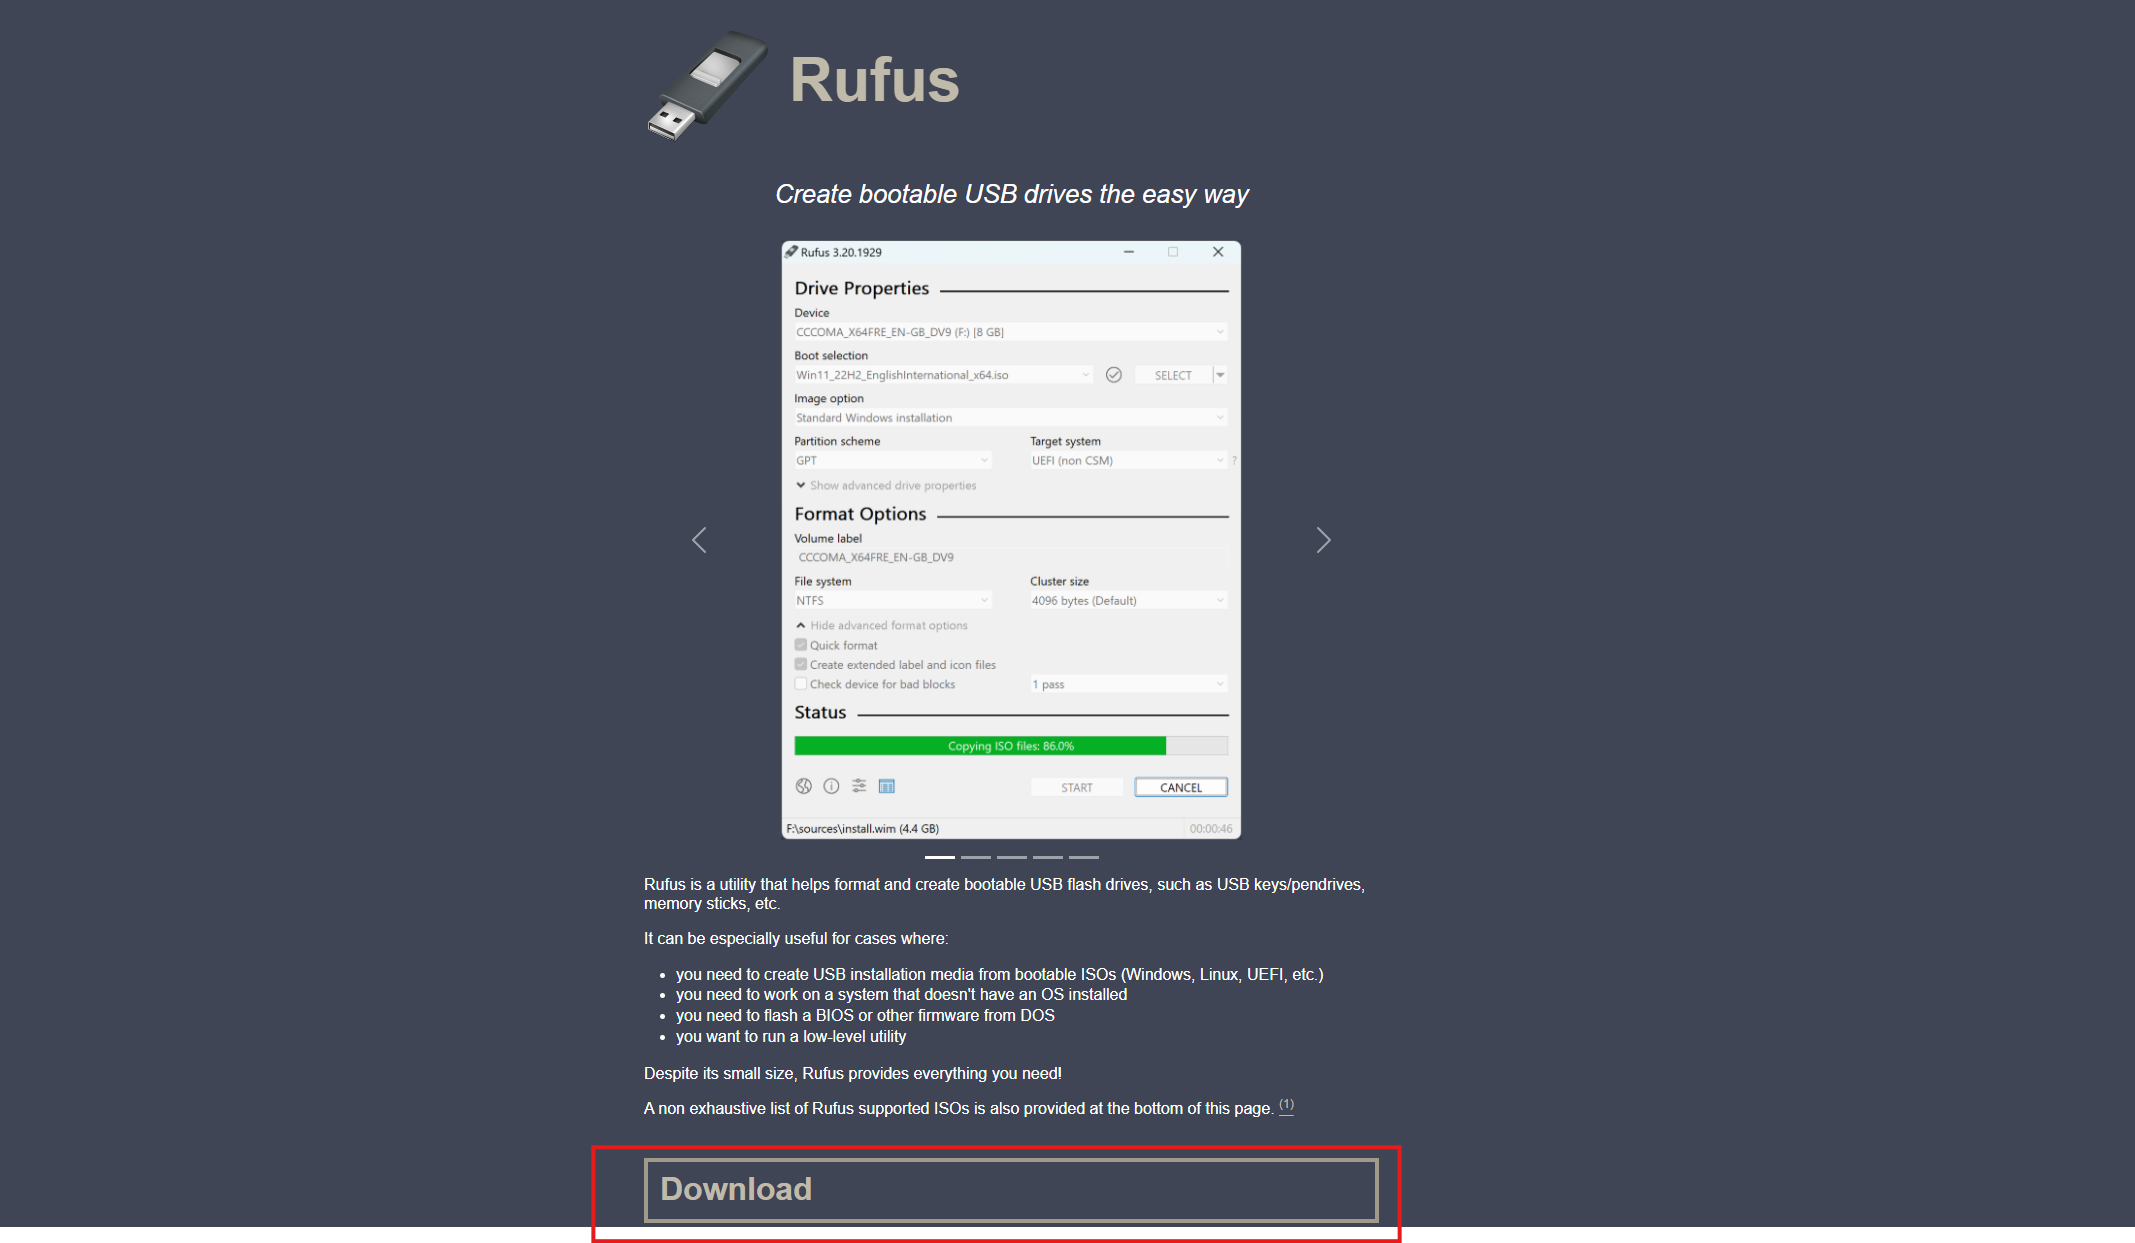
Then we must “burn” this ISO image in a USB drive. I have used Rufus for years for this purpose and will also do it now. You can download this simple, no nonsense tool here: https://rufus.ie/en/
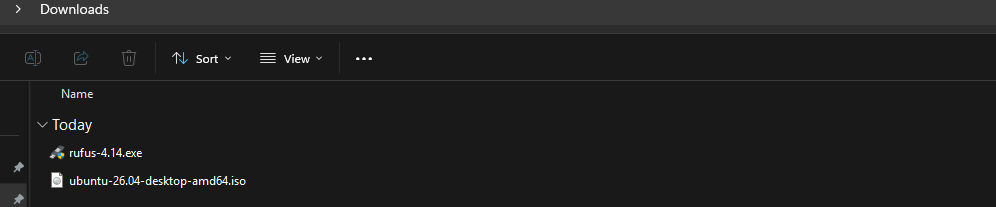
We should have those 2 files now:
Open Rufus and select the ISO image. Then hit Start and I selected the default ISO mode.
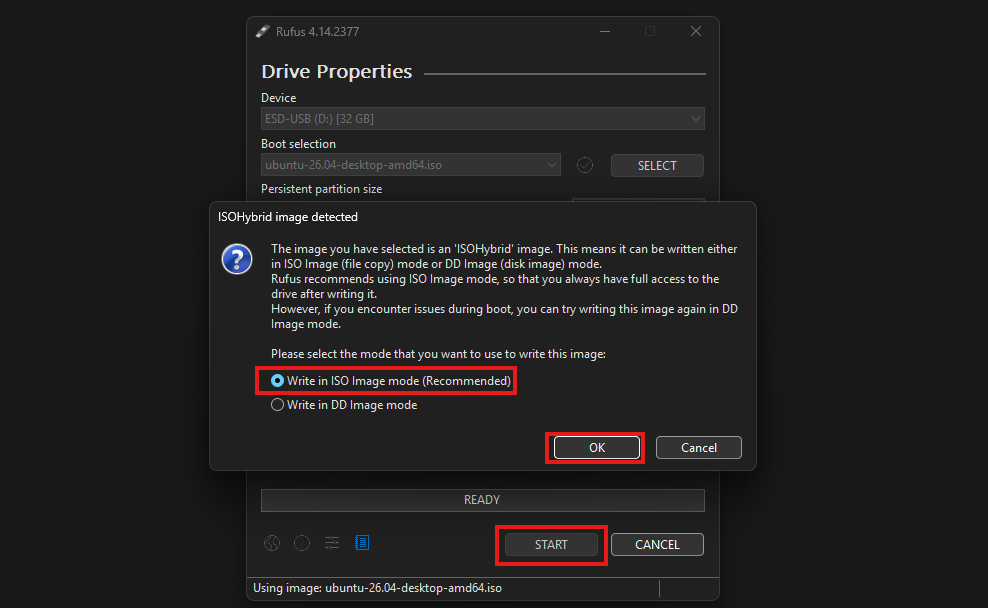
The ISO will now be “burned” to the USB drive, resulting in a full data loss of everything on the USB drive.
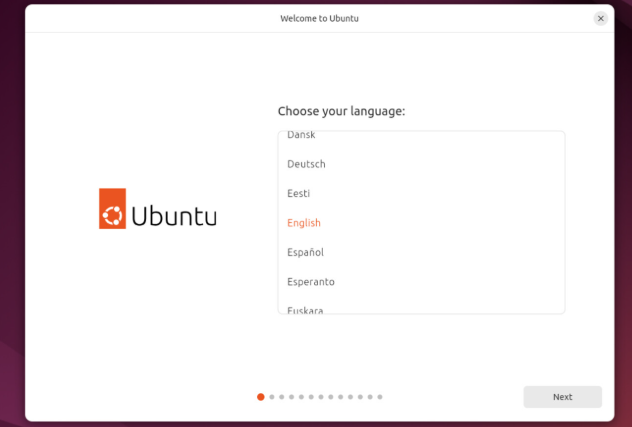
After the ISO has been written to the USB drive, I have connected it to the testing device and booted it from USB. Then I have followed the default installation of Ubuntu, which is pretty straightforward.
During the installation, you can proceed with Step 2, as we have to wait for a few minutes. This makes the process a bit more efficient.
During the installation, it’s recommended to enable Device Encryption as this cannot be done through Microsoft Intune Policies.
Step 2: Create dynamic device security group
We can prepare our Intune environment by creating a dynamic security group for Linux devices. I like dynamic security groups in Intune as assignments are done automatically and eliminating the need for us to manually add devices to groups. Policies and Compliance will also automatically apply.
Open Microsoft Intune admin center on https://intune.microsoft.com and open up “Groups” from the left and then click “New group”.
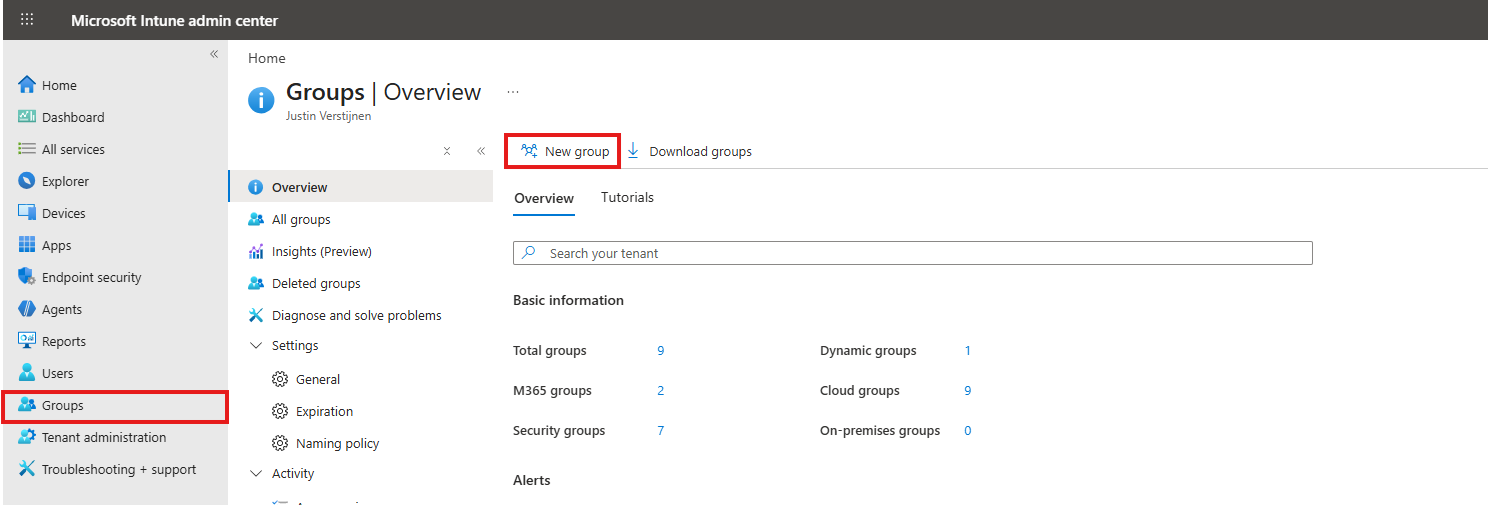
Fill in the details of the group and select the Membership type “Dynamic Device”.
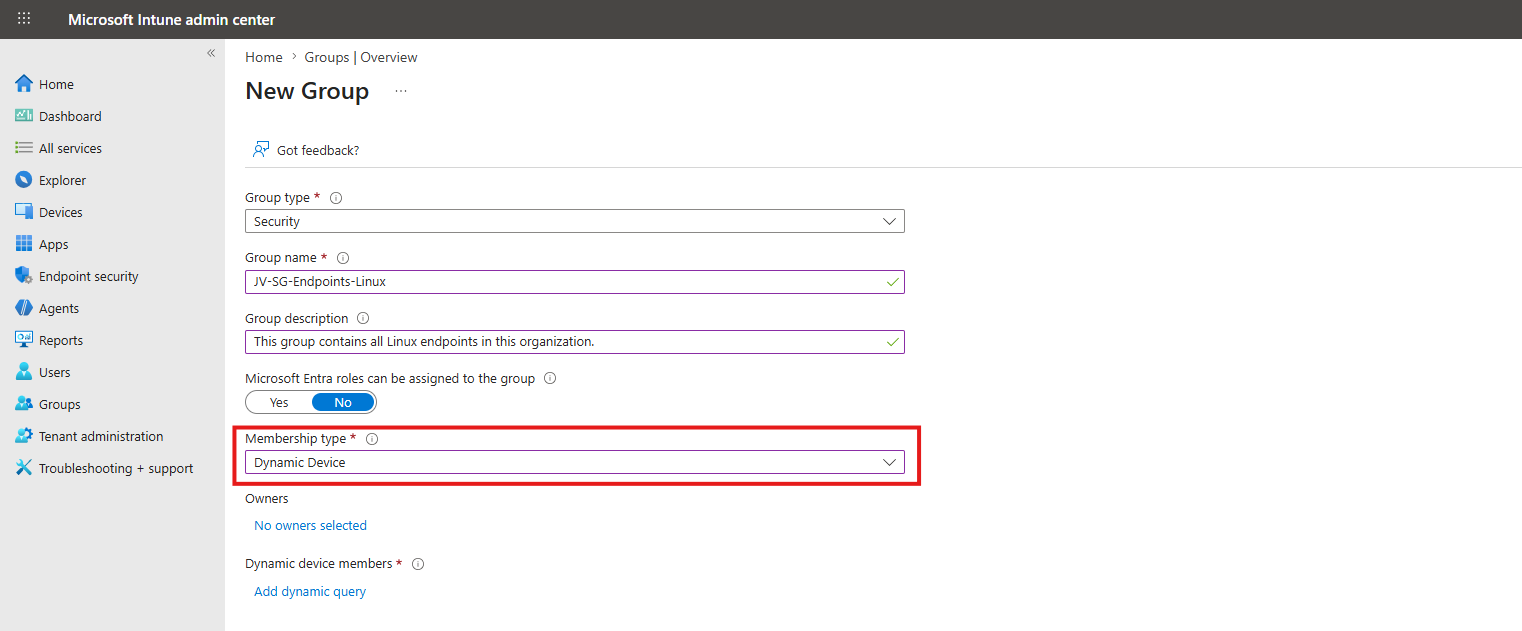
Then click “Add dynamic query” to add filtering on what devices must be added to the group. First, select the deviceOSType to equal to Linux and then add another expression, called deviceManagementAppId to equal 0000000a-0000-0000-c000-000000000000. This means only Intune joined devices, which filters out Entra registered Linux devices. Check the screenshot below for reference.
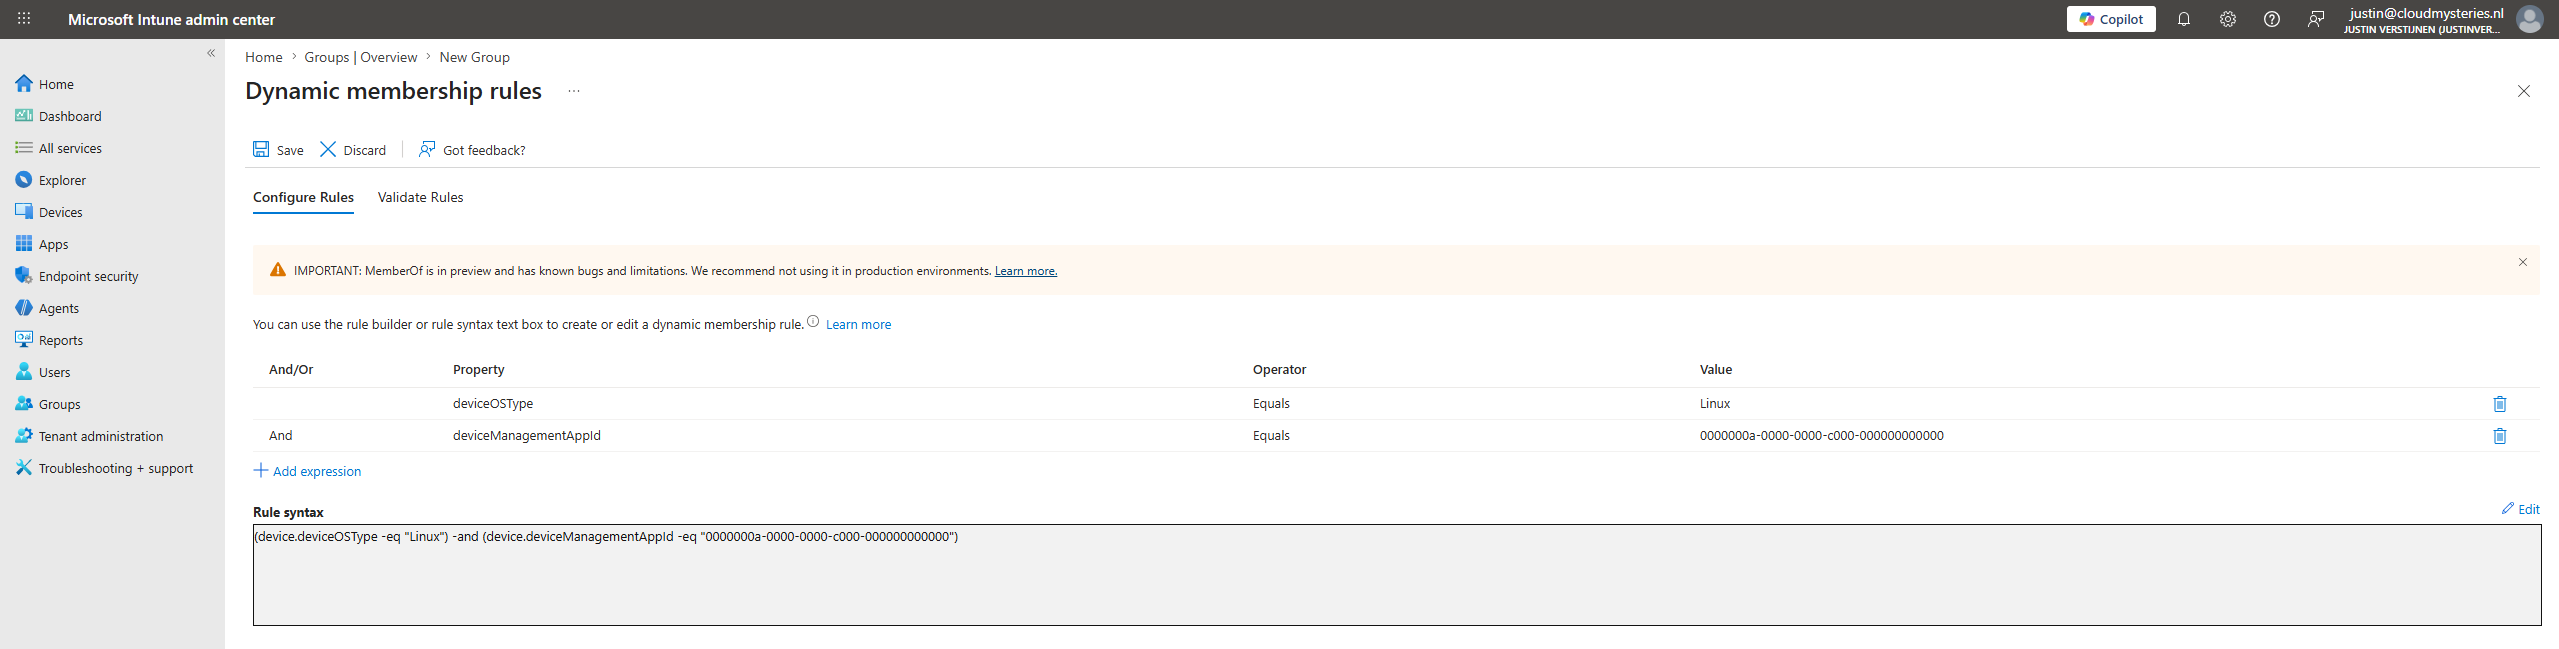
You can also walk the fast path and copy the complete Rule syntax below into your Dynamic rule syntax:
(device.deviceOSType -eq "Linux") and (device.deviceManagementAppId -eq "0000000a-0000-0000-c000-000000000000")Save the group and go to the next step.
Step 3: Join Ubuntu device to Microsoft Intune
After the installation is done of the Ubuntu device, we can now join the device to Microsoft Intune.
This can be done by performing these 3 actions:
- Install Microsoft Edge
- Install Microsoft Intune App with installer script
- Enroll device
Let’s go through these tasks in this step.
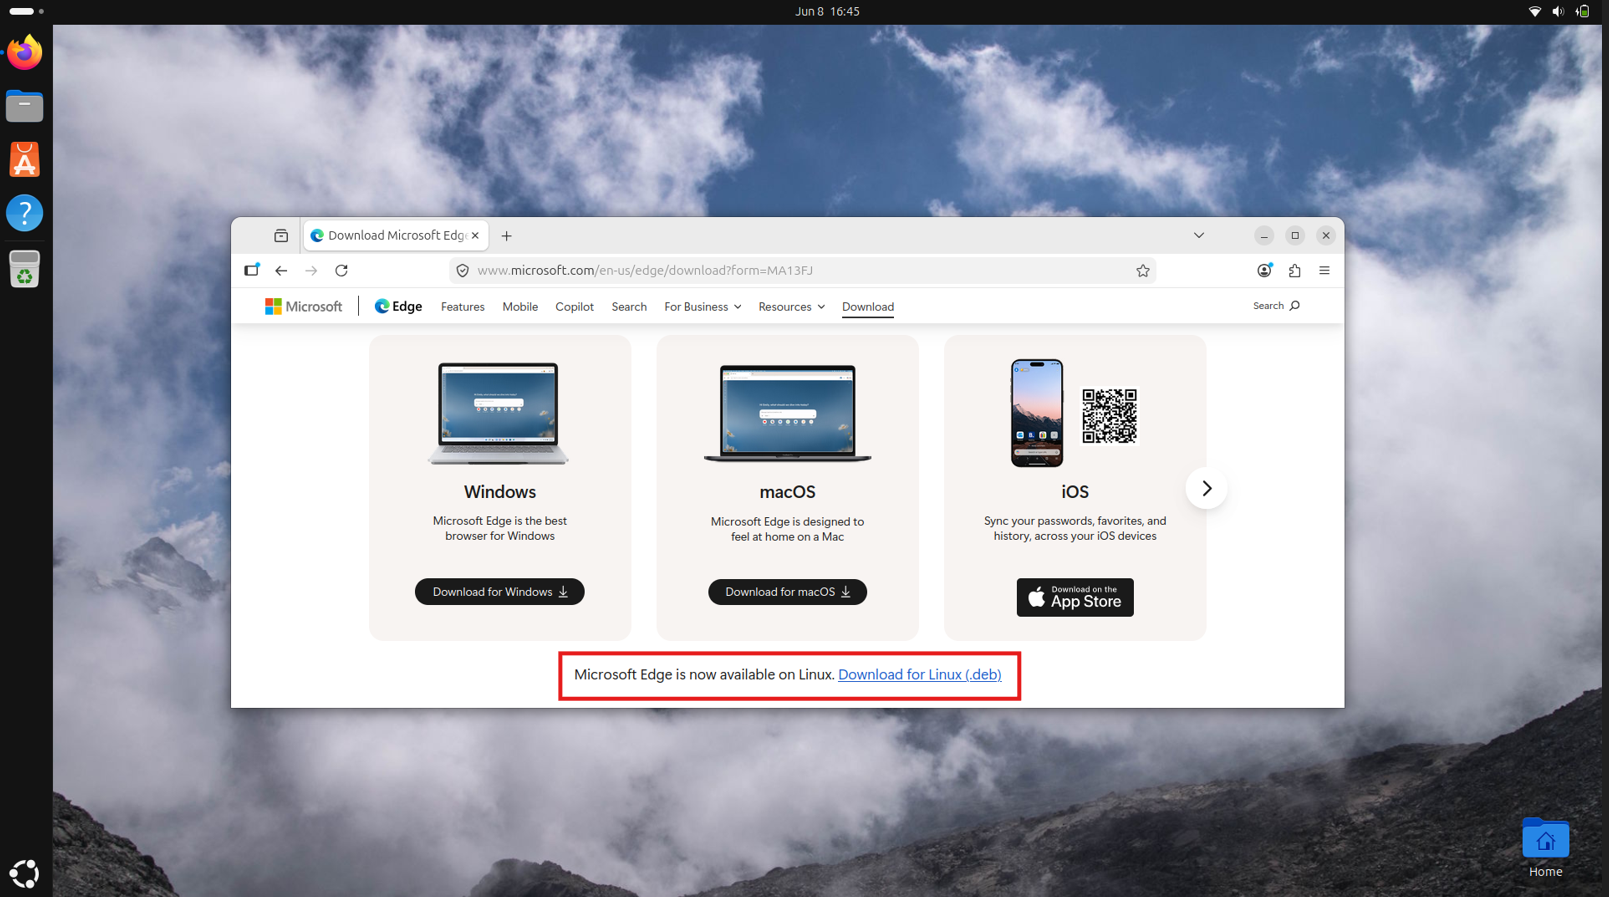
On the Ubuntu device, open up the web browser and download Microsoft Edge from this site: https://www.microsoft.com/en-us/edge/download. Here scroll down and click the link “Download for Linux (.deb)”.
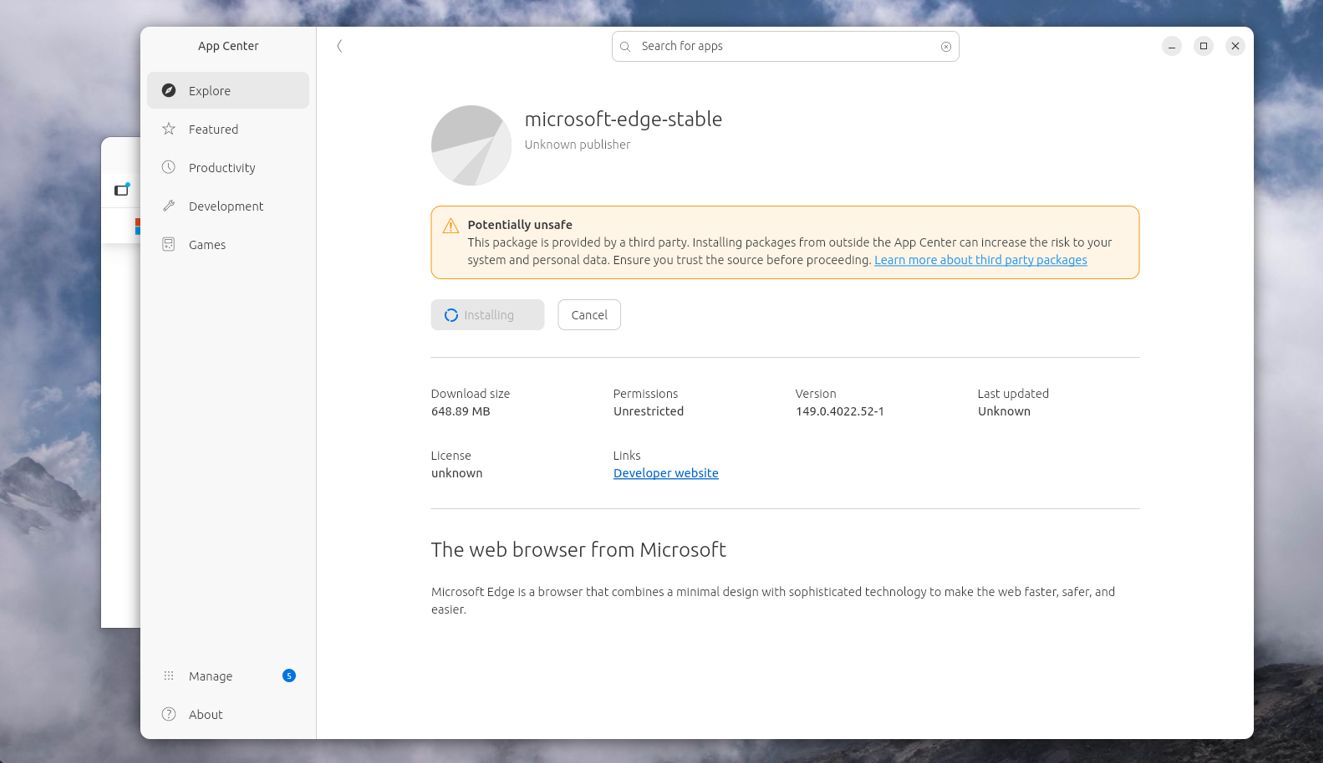
Then head to the “Downloads” folder on your device and right-click the just downloaded .deb file and open it with the App Center. This is a nice and easy way to install the package without the need to open the Terminal (just yet).
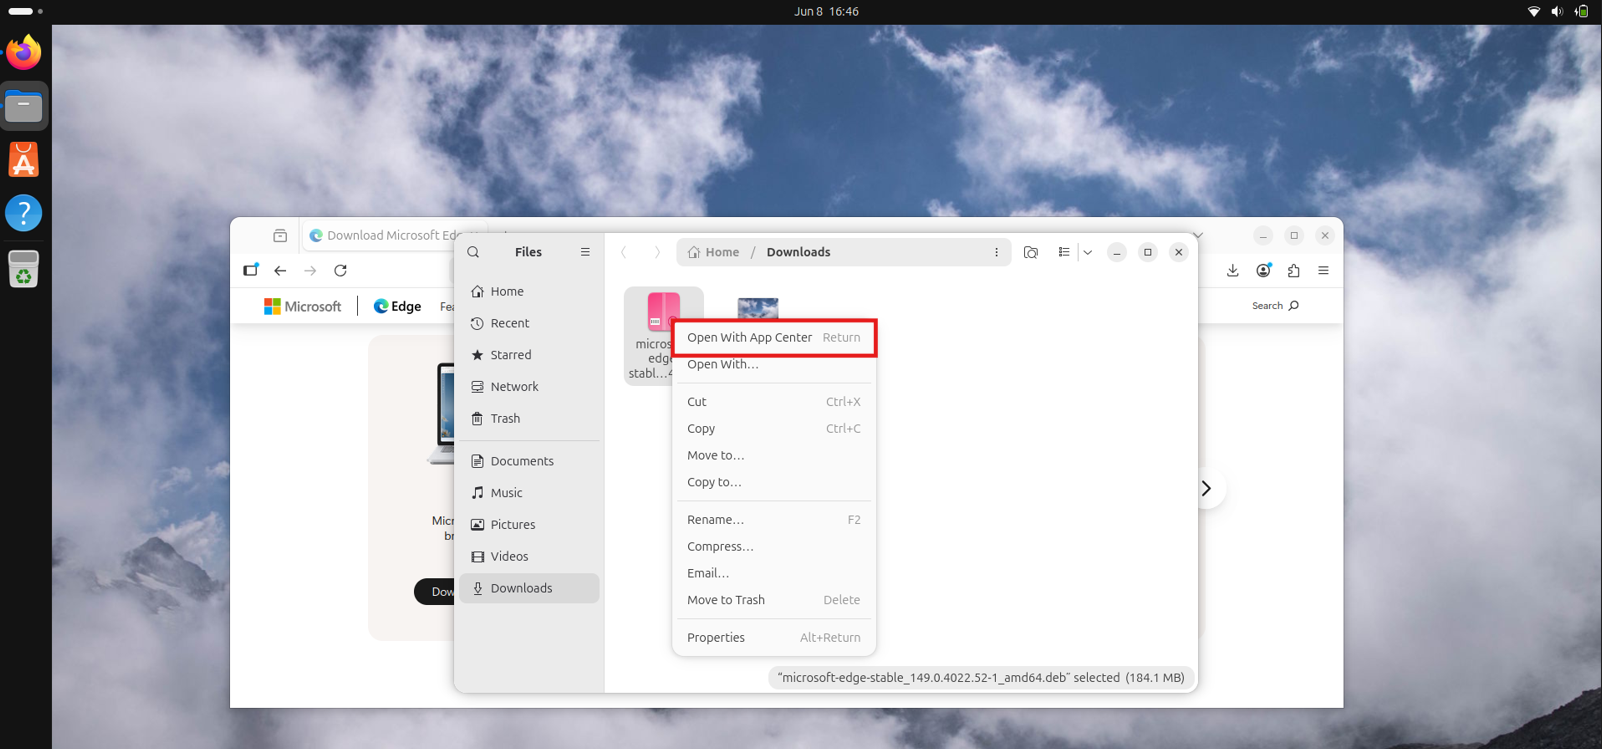
Click through the windows stating that it might be a potentially unsafe application and proceed.
After Microsoft Edge has been installed, open this GitHub repository and download the installer.sh script. This script installs the Microsoft Intune application used to register and enroll your device.
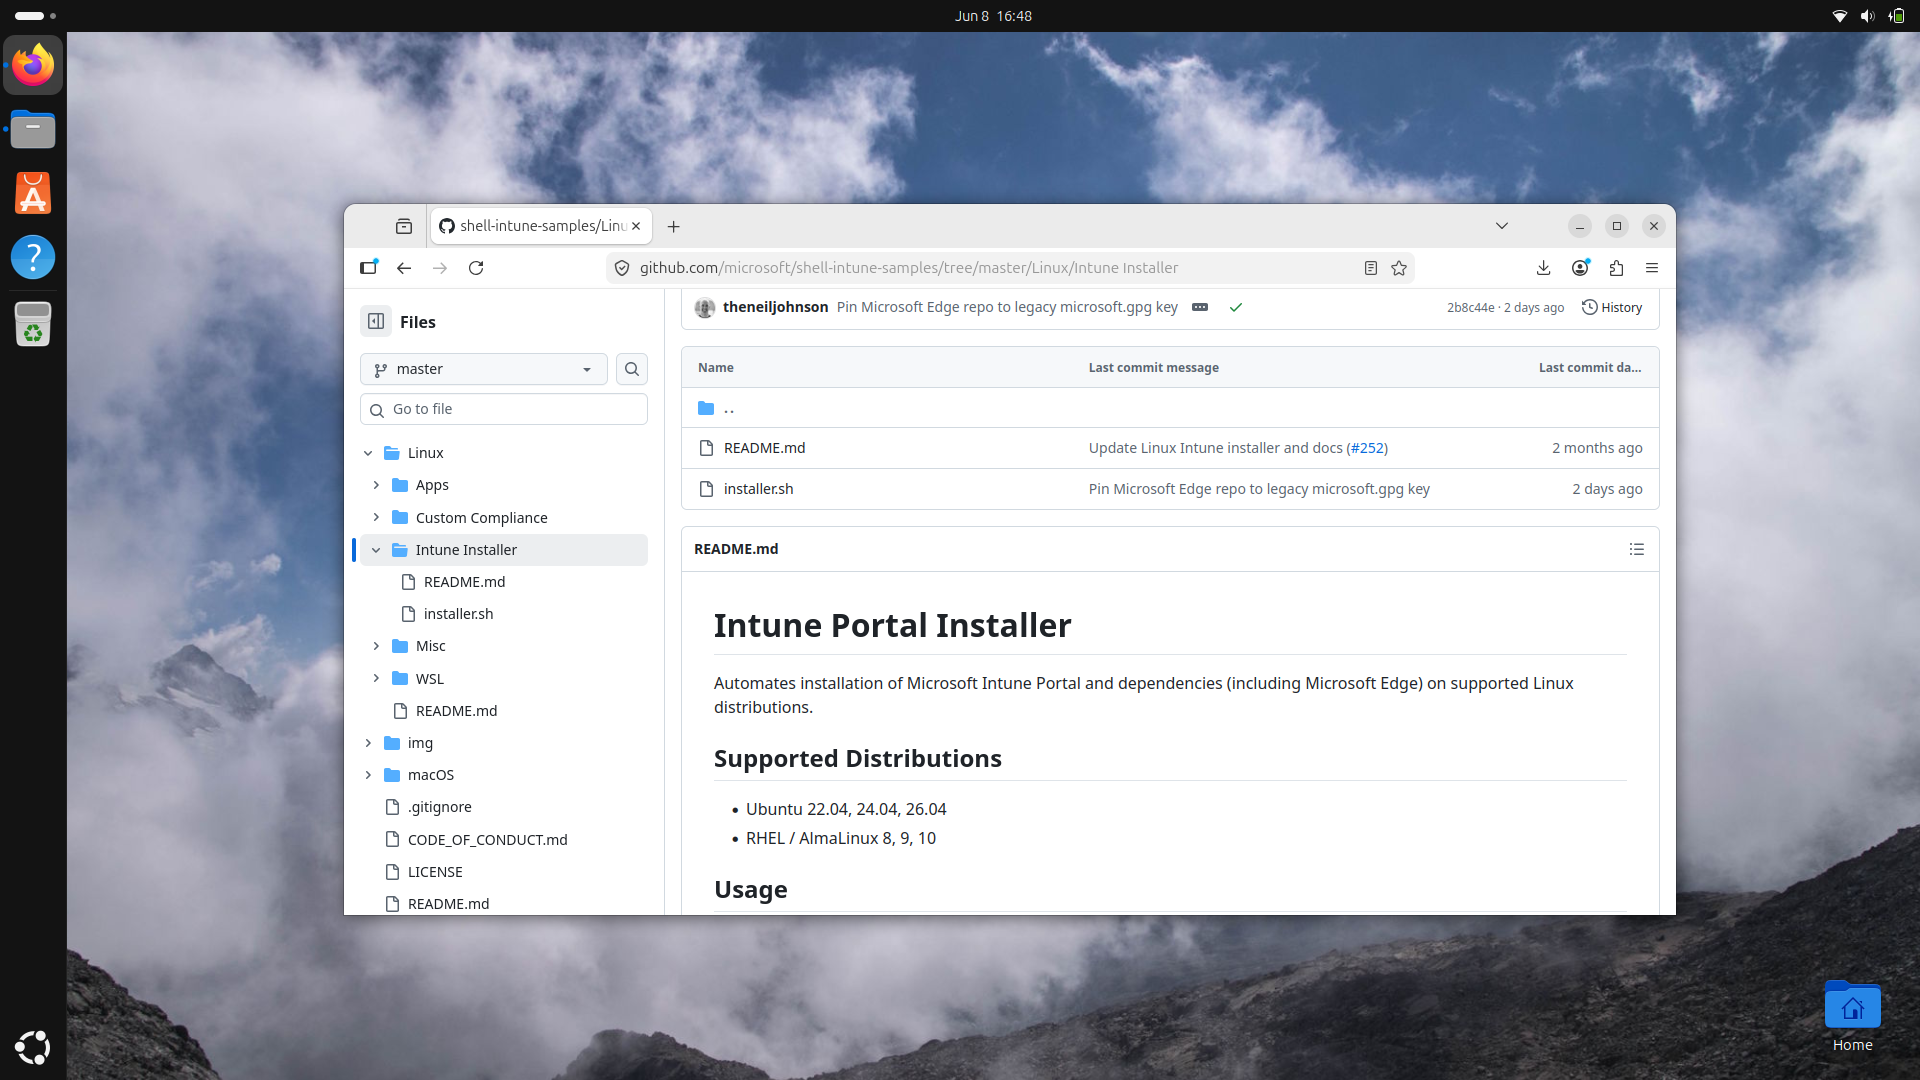
Click on the installer.sh script and then download the file. It will be logically saved into the Downloads folder, so again open up the File Explorer and open “Downloads”.
From there, right-click unused space and select “Open with Terminal” to open the Terminal app straight to this folder.

Now run this command in the Terminal to make the just downloaded script ready to be executed:
chmod +x installer.shThen run this command to actually run the script:
./installer.sh --verboseThen authenticate with your credentials and wait for the script to finish. This is mostly done within 45 seconds.
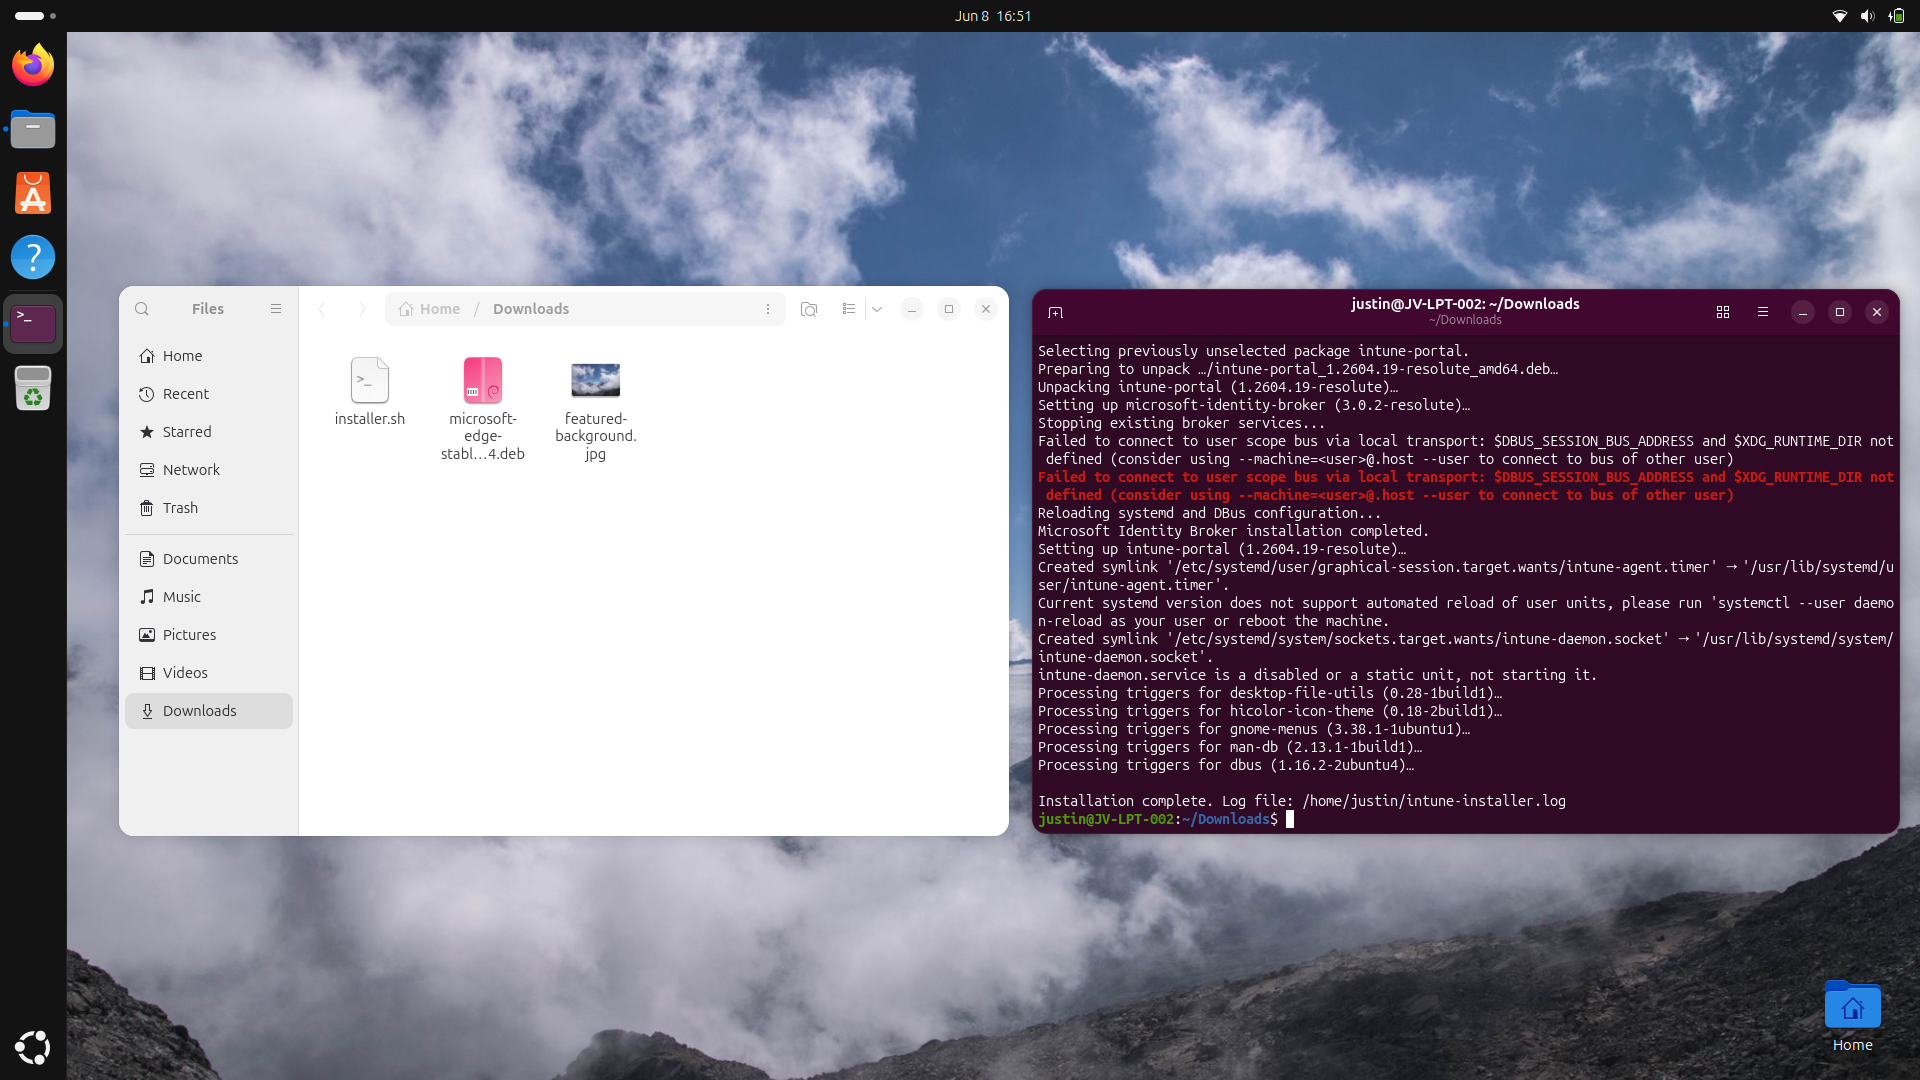
The script gave an error but proceeded and still finished, and everything was working as intended after that, so I chose to ignore it. The Intune Application was now ready to be used:
Open up the Microsoft Intune app, log in to your account and the rest will be pretty straightforward as shown in this animation:
All screenshots were taken within 30 seconds of each other, showing the simplicity of this process.
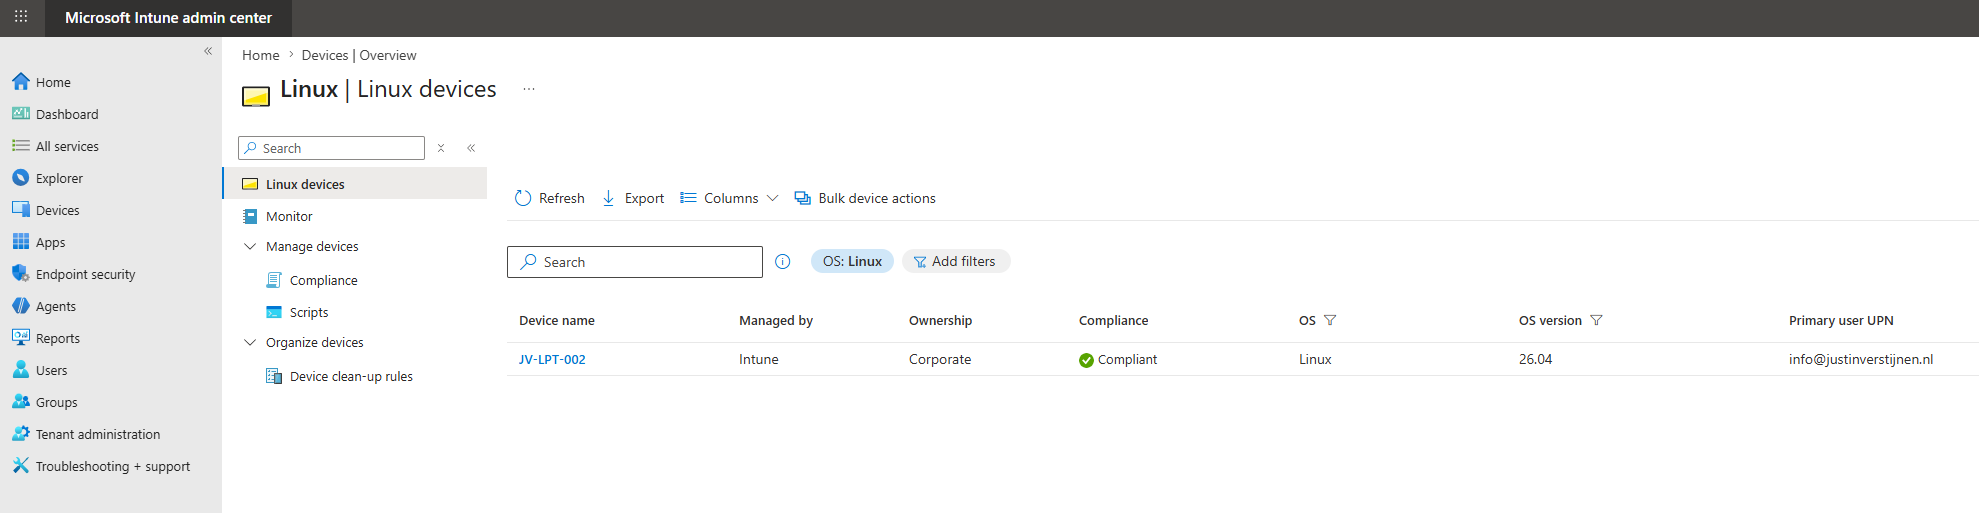
Step 4: Checking status in Microsoft Intune
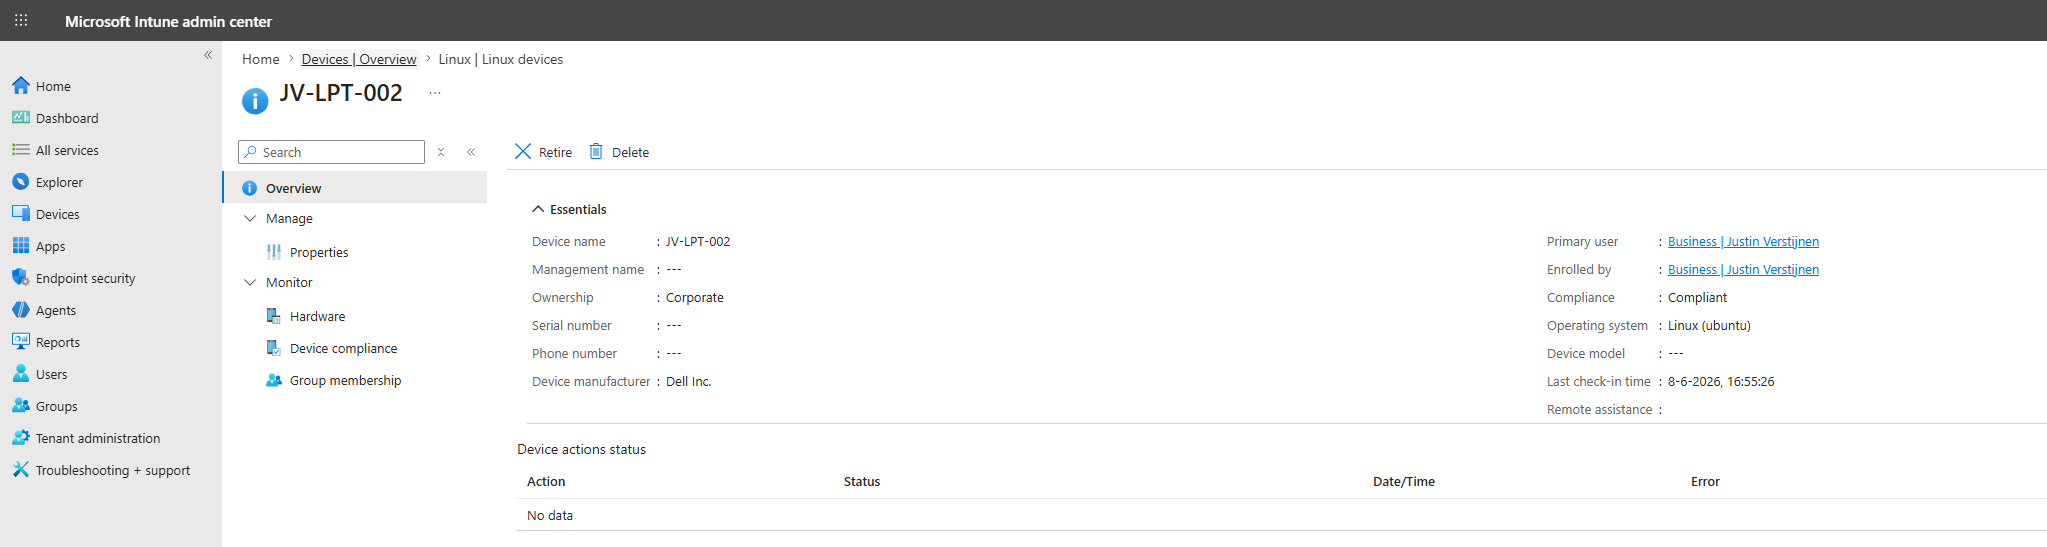
After the device has been enrolled, I waited for a few minutes (at max 10 minutes), and then checked the Microsoft Intune admin center:
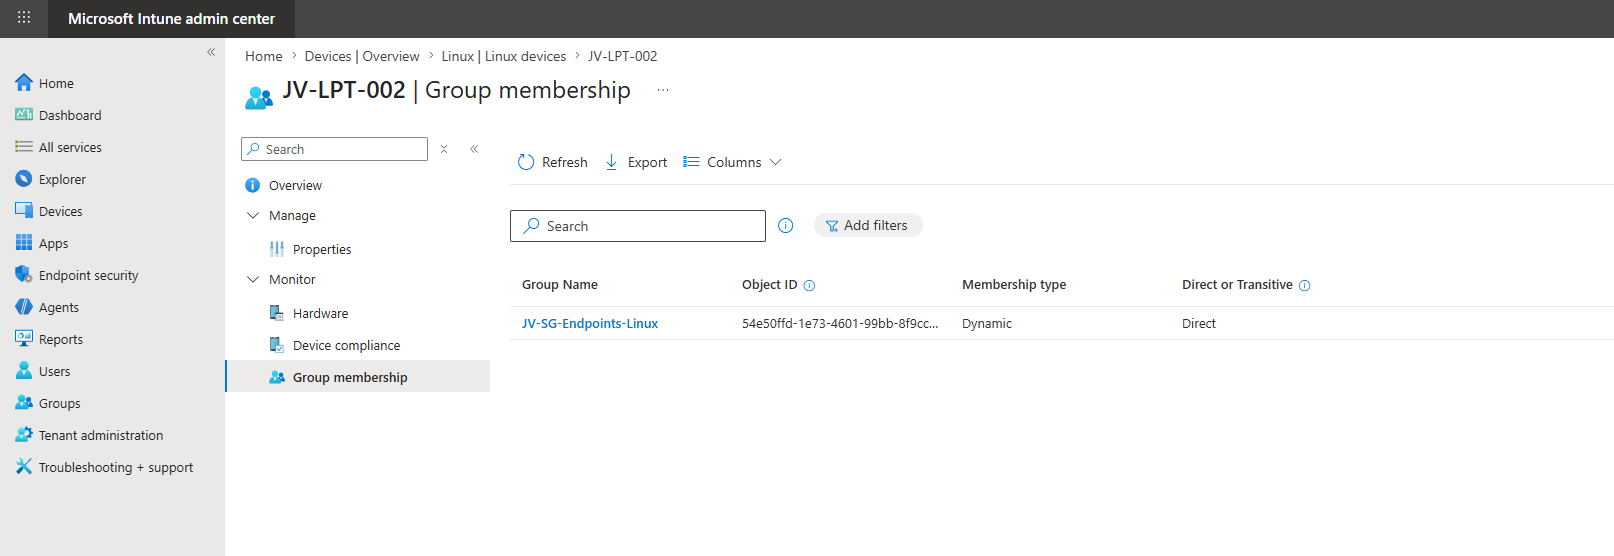
The device has just been added to the list. Opening the device and checking the “Group memberships” also shows that the device is successfully added to our earlier created dynamic security group.
The device options and information are somewhat limited, as we cannot wipe the device from Intune and most basic information is also not filled which is somewhat disappointing.
Step 5: Creating a Compliance Policy for Linux
So let’s zoom in on the features that are available for Linux. Under “Linux devices”, open up “Compliance” and let’s create a Compliance policy:
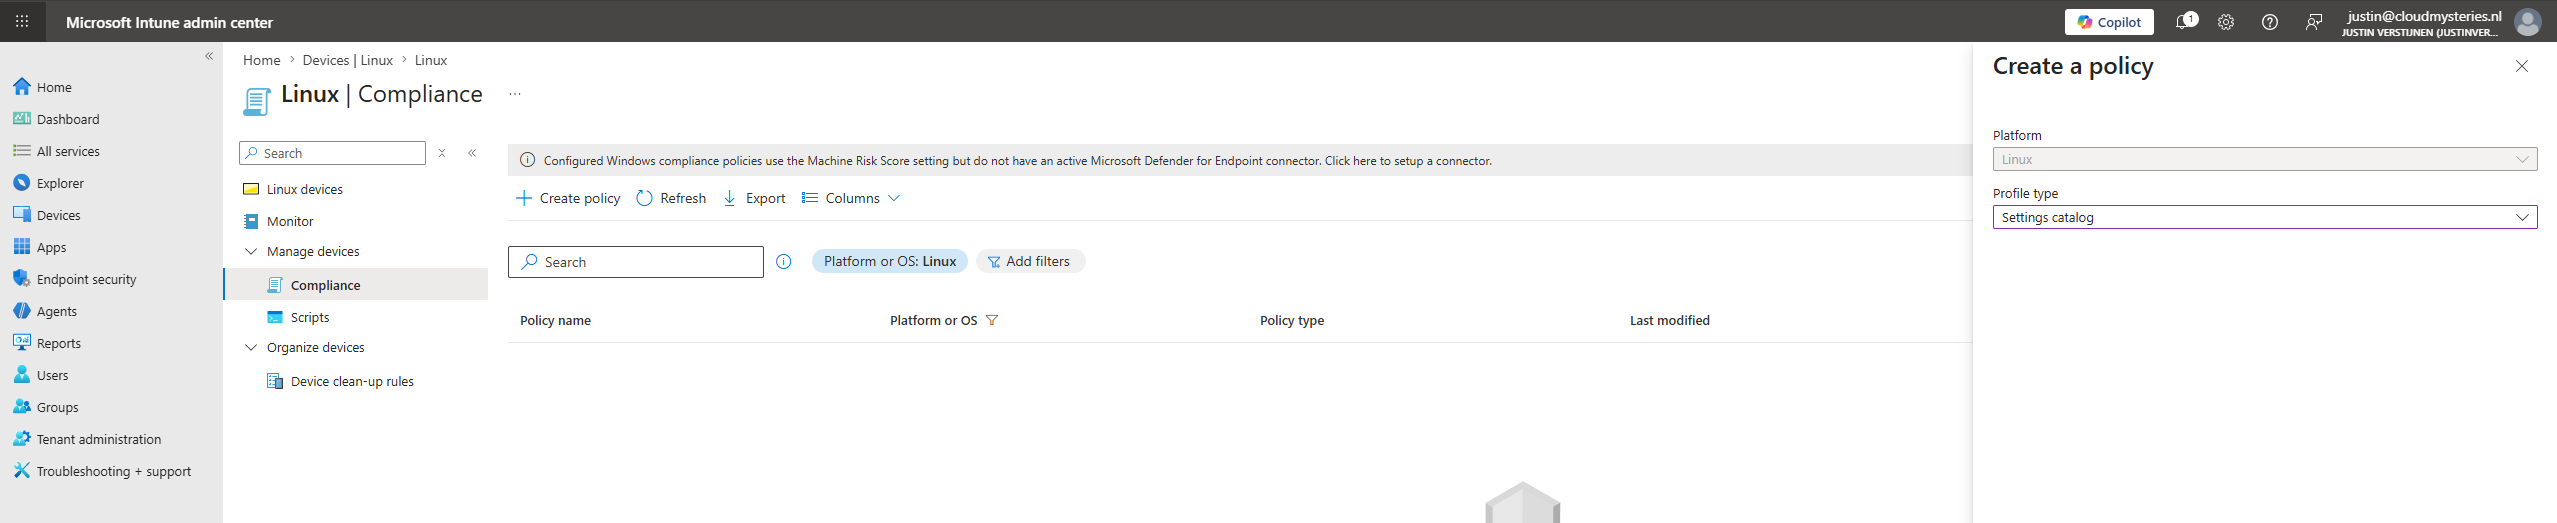
Don’t bother to select the profile type “Templates” as they are not available (yet). Select “Settings catalog”.
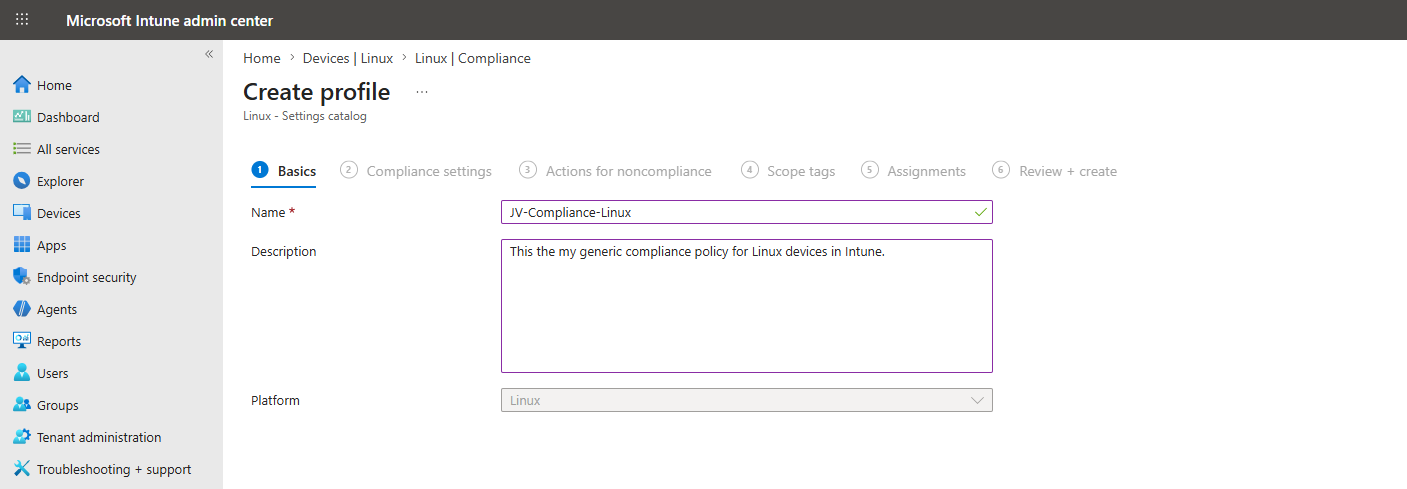
Give the policy a name and description and advance to the next tab.
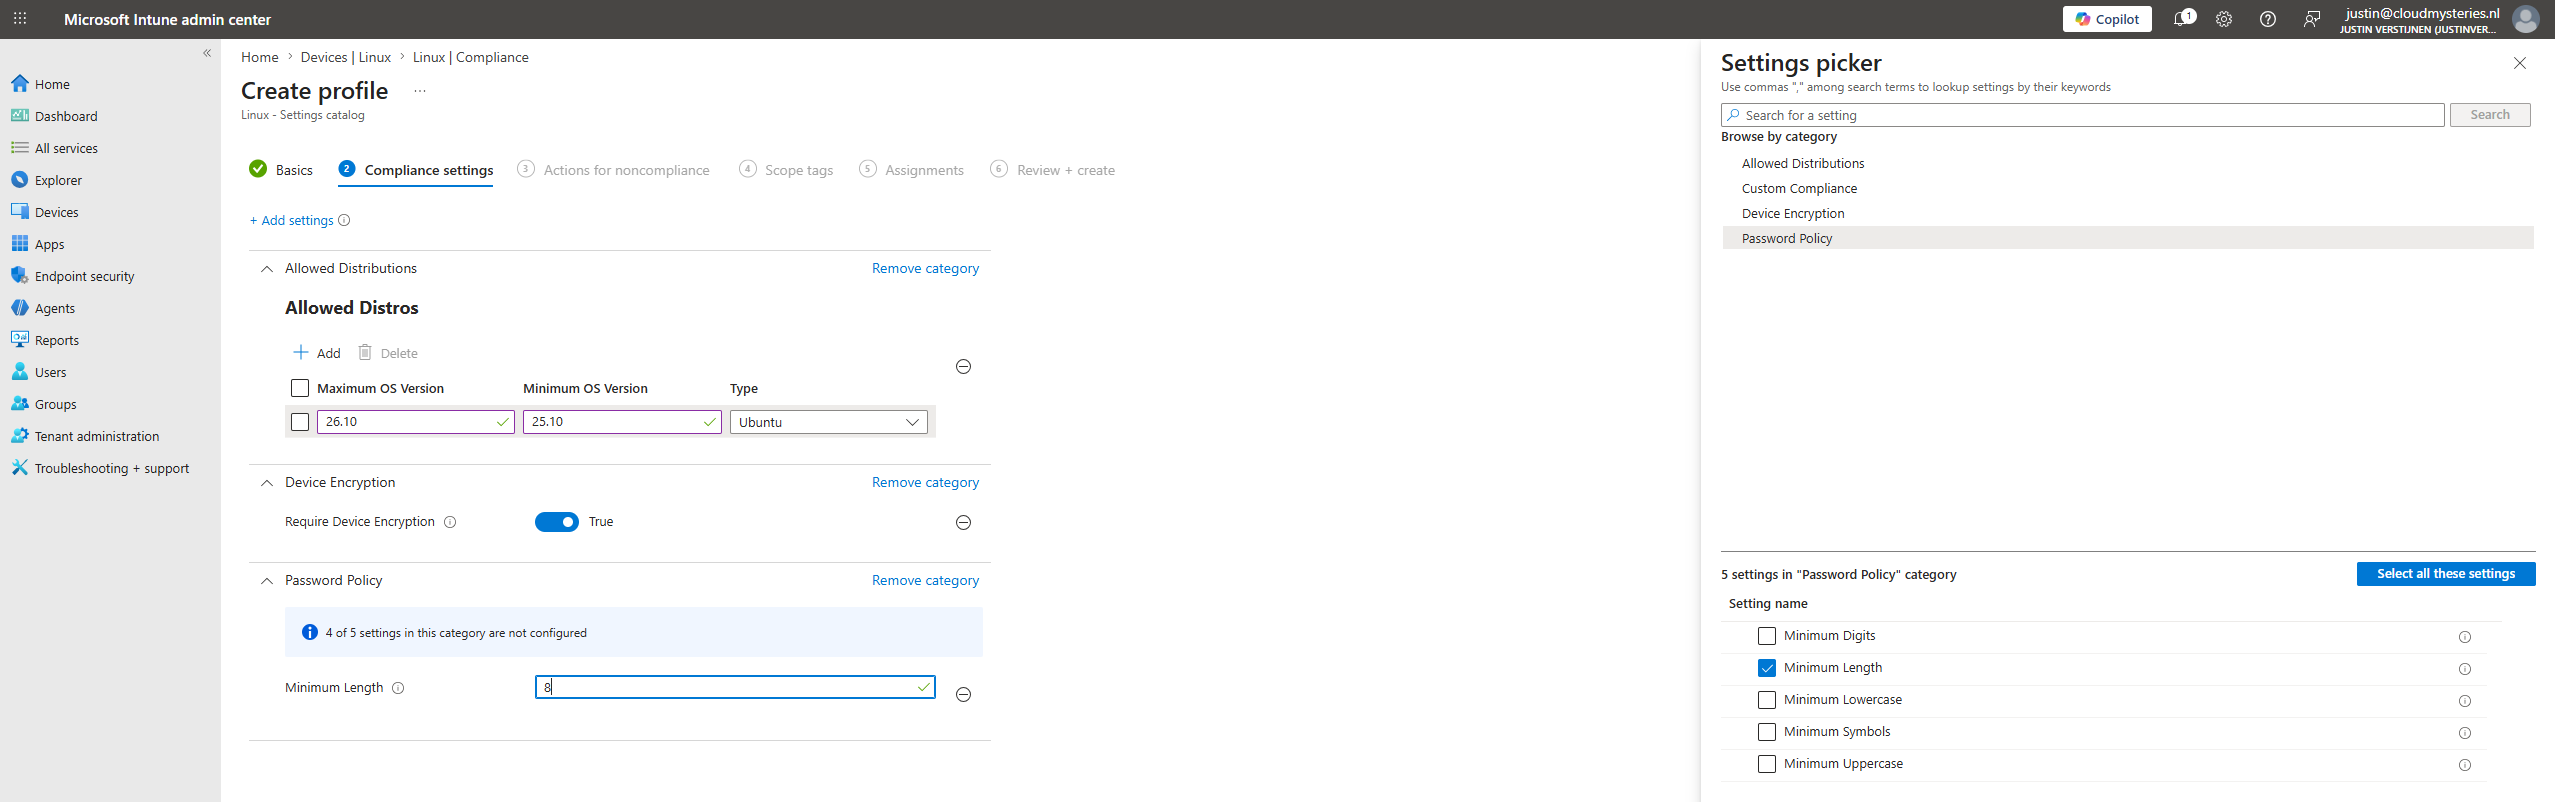
These are the options we have, and I configured a basic set of them for the purpose of this guide:
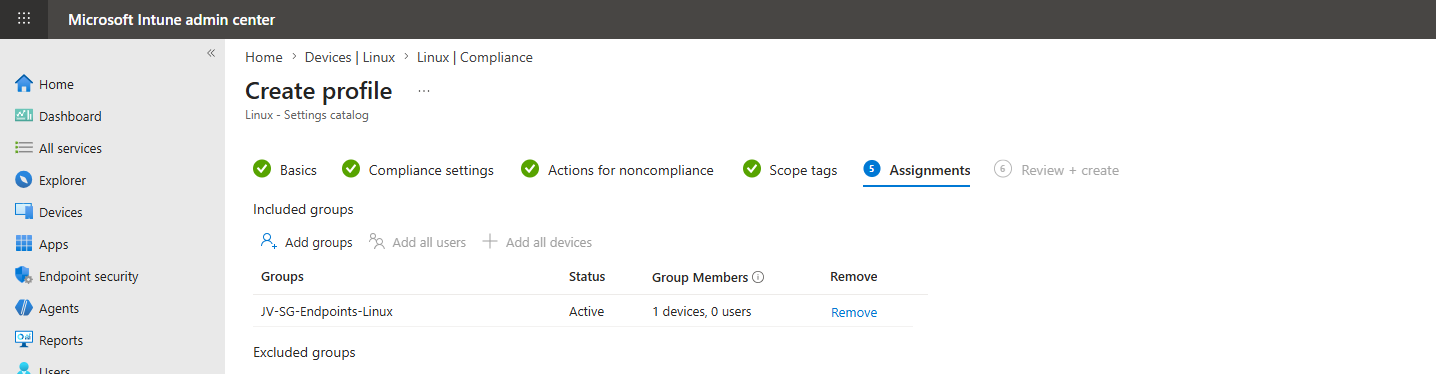
Then assign the policy to the created group and finish the wizard.
Intune will now scan the Linux devices if they are compliant with the rules we have configured here, but will not remediate them. This looks like this after around 15 minutes:
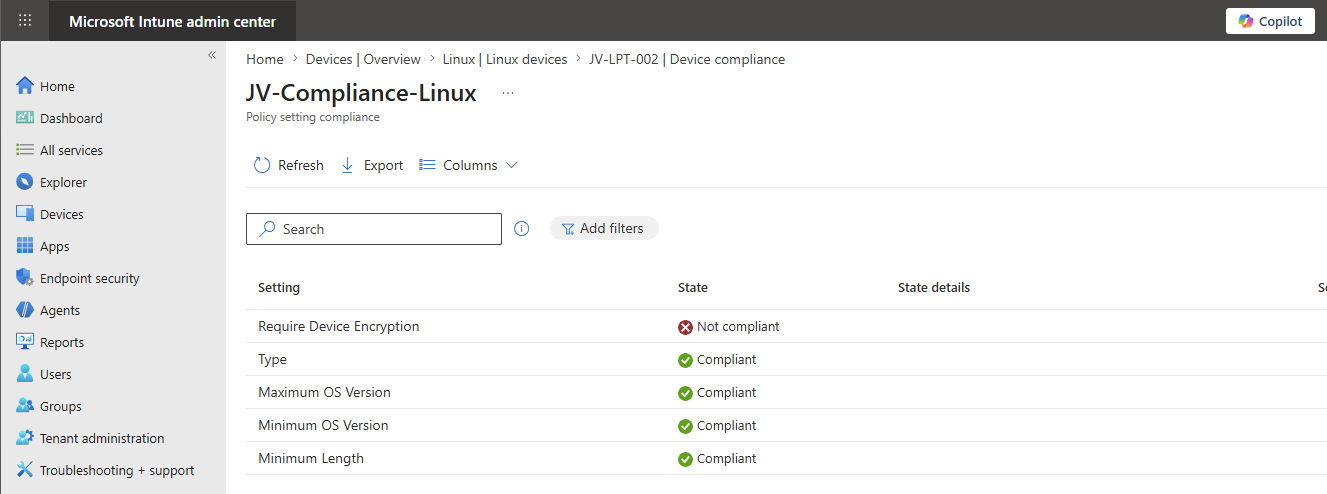
This is as intended as I did not enable encryption at the installation, just for checking if this will be found by Microsoft Intune.
Step 6: Deploy custom scripts
Another option we have for Linux devices is to deploy custom scripts, just like we can do with PowerShell scripts on Windows. We can do very advanced stuff with this which is nice, but requires some knowledge about Bash and Ubuntu itself.
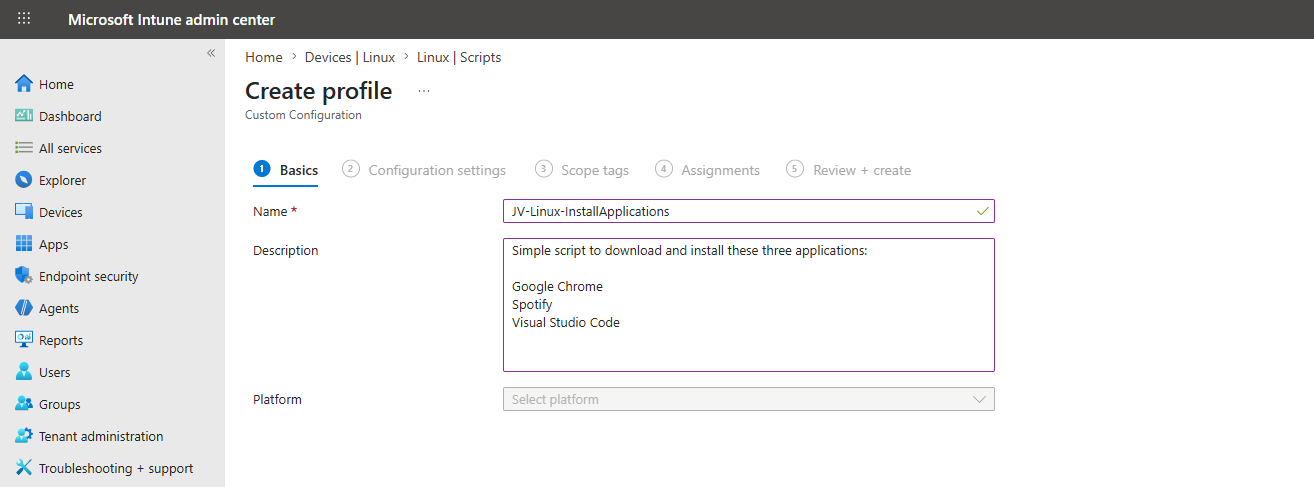
For the purpose of this guide, I created a simple script to download and install these three applications:
- Google Chrome
- Spotify
- Visual Studio Code
Download the script below and let’s create the script in Microsoft Intune.
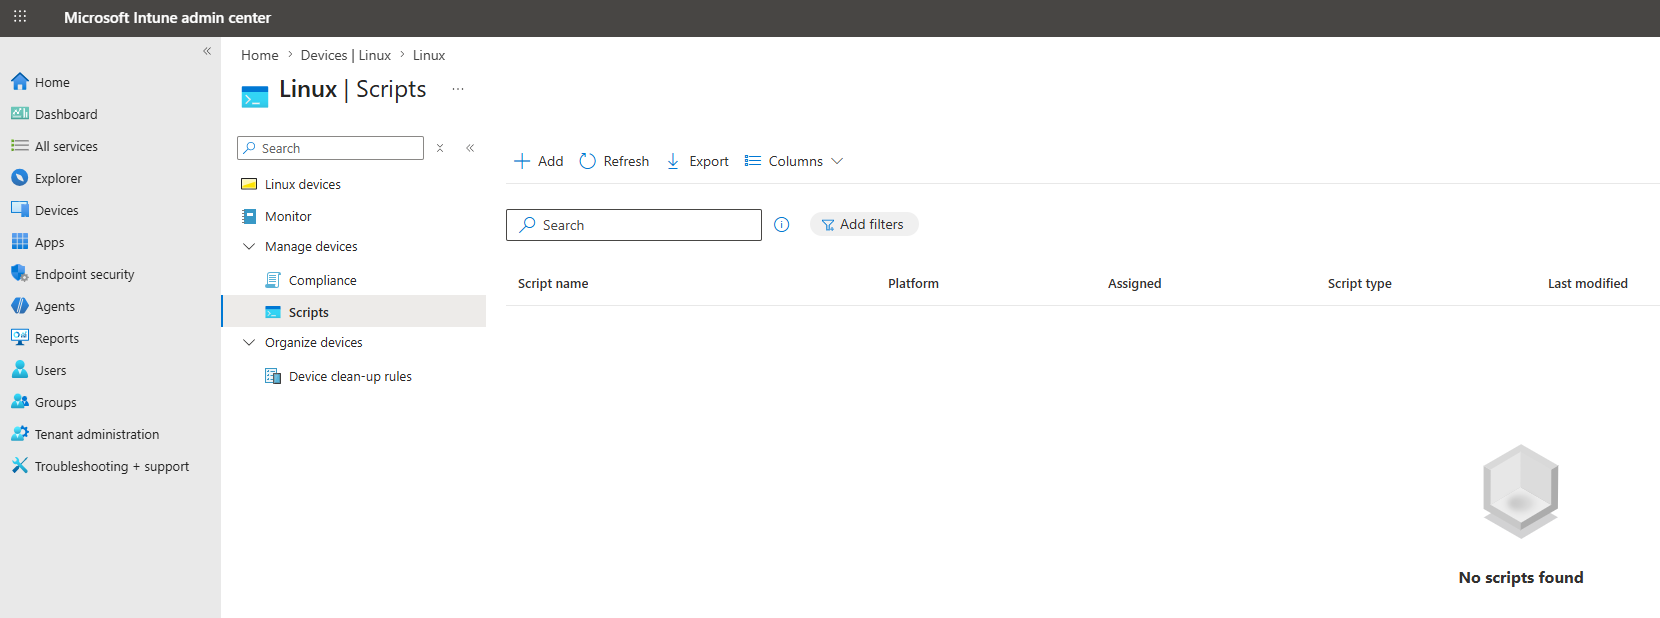
In Microsoft Intune, go to “Linux” and from there go to “Scripts” and click “+ Add”.
Give the script a name and clear description and advance to the next tab.
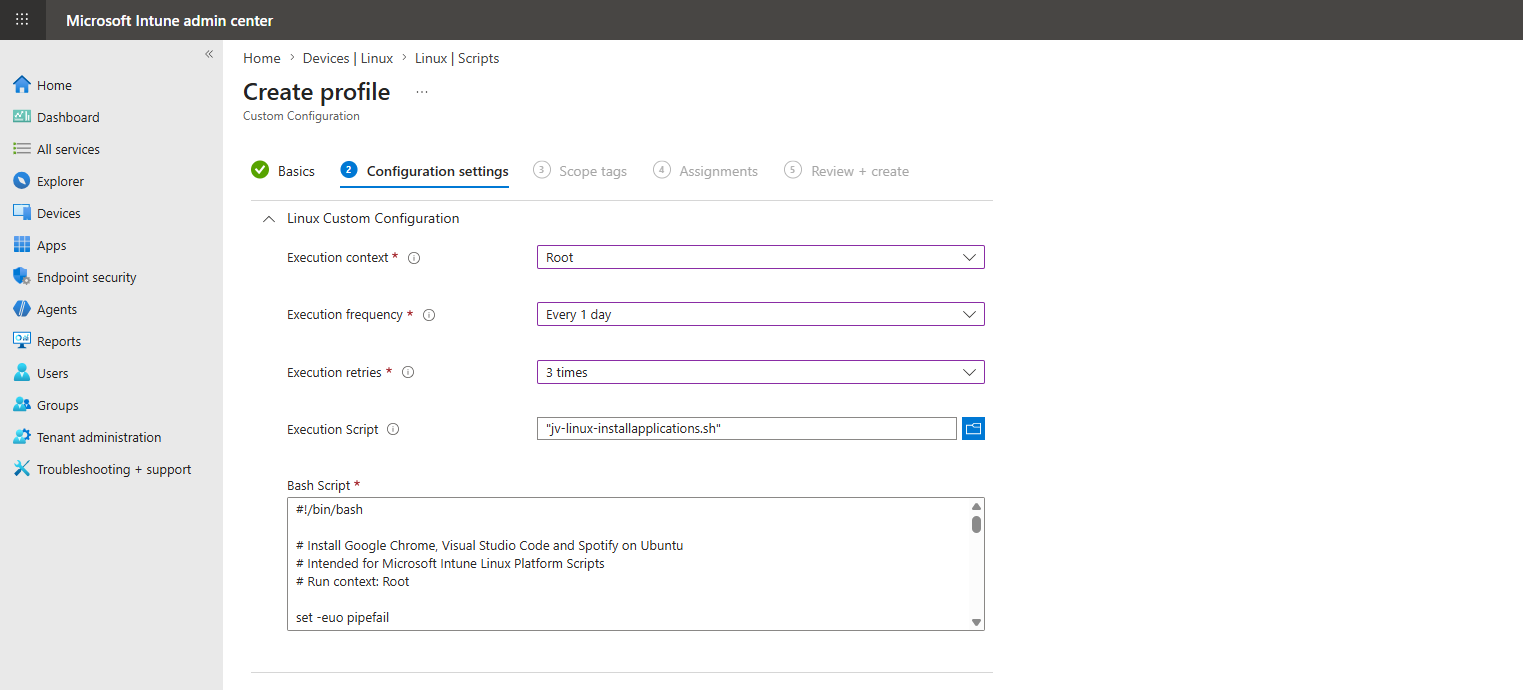
On the “Configuration settings” tab, unfold the Linux Custom Configuration blade and configure this:
| Option | Set this |
|---|---|
| Execution context | Root |
| Execution frequency | Every 1 day |
| Execution retries | 3 times |
| Execution Script | Select the downloaded script here |
This must look similar to this, where you can change your settings depending on your situation of course:
Once again, assign the custom script to your dynamic devices group:
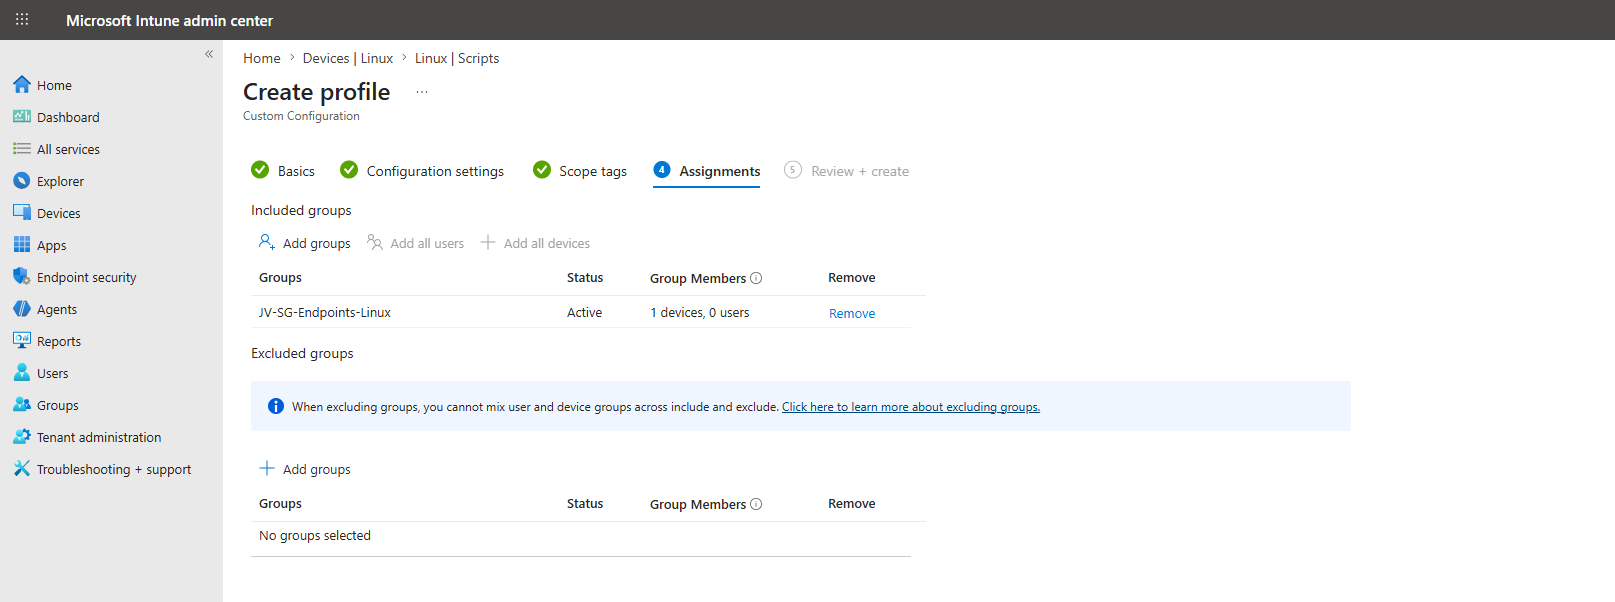
Now we have to wait for a few minutes before the script will be pushed to Microsoft Intune. In my case, it took after one reboot and saving the policy for the script to actually apply on Ubuntu where I was surprised at the speed. Faster than on Windows in some cases.
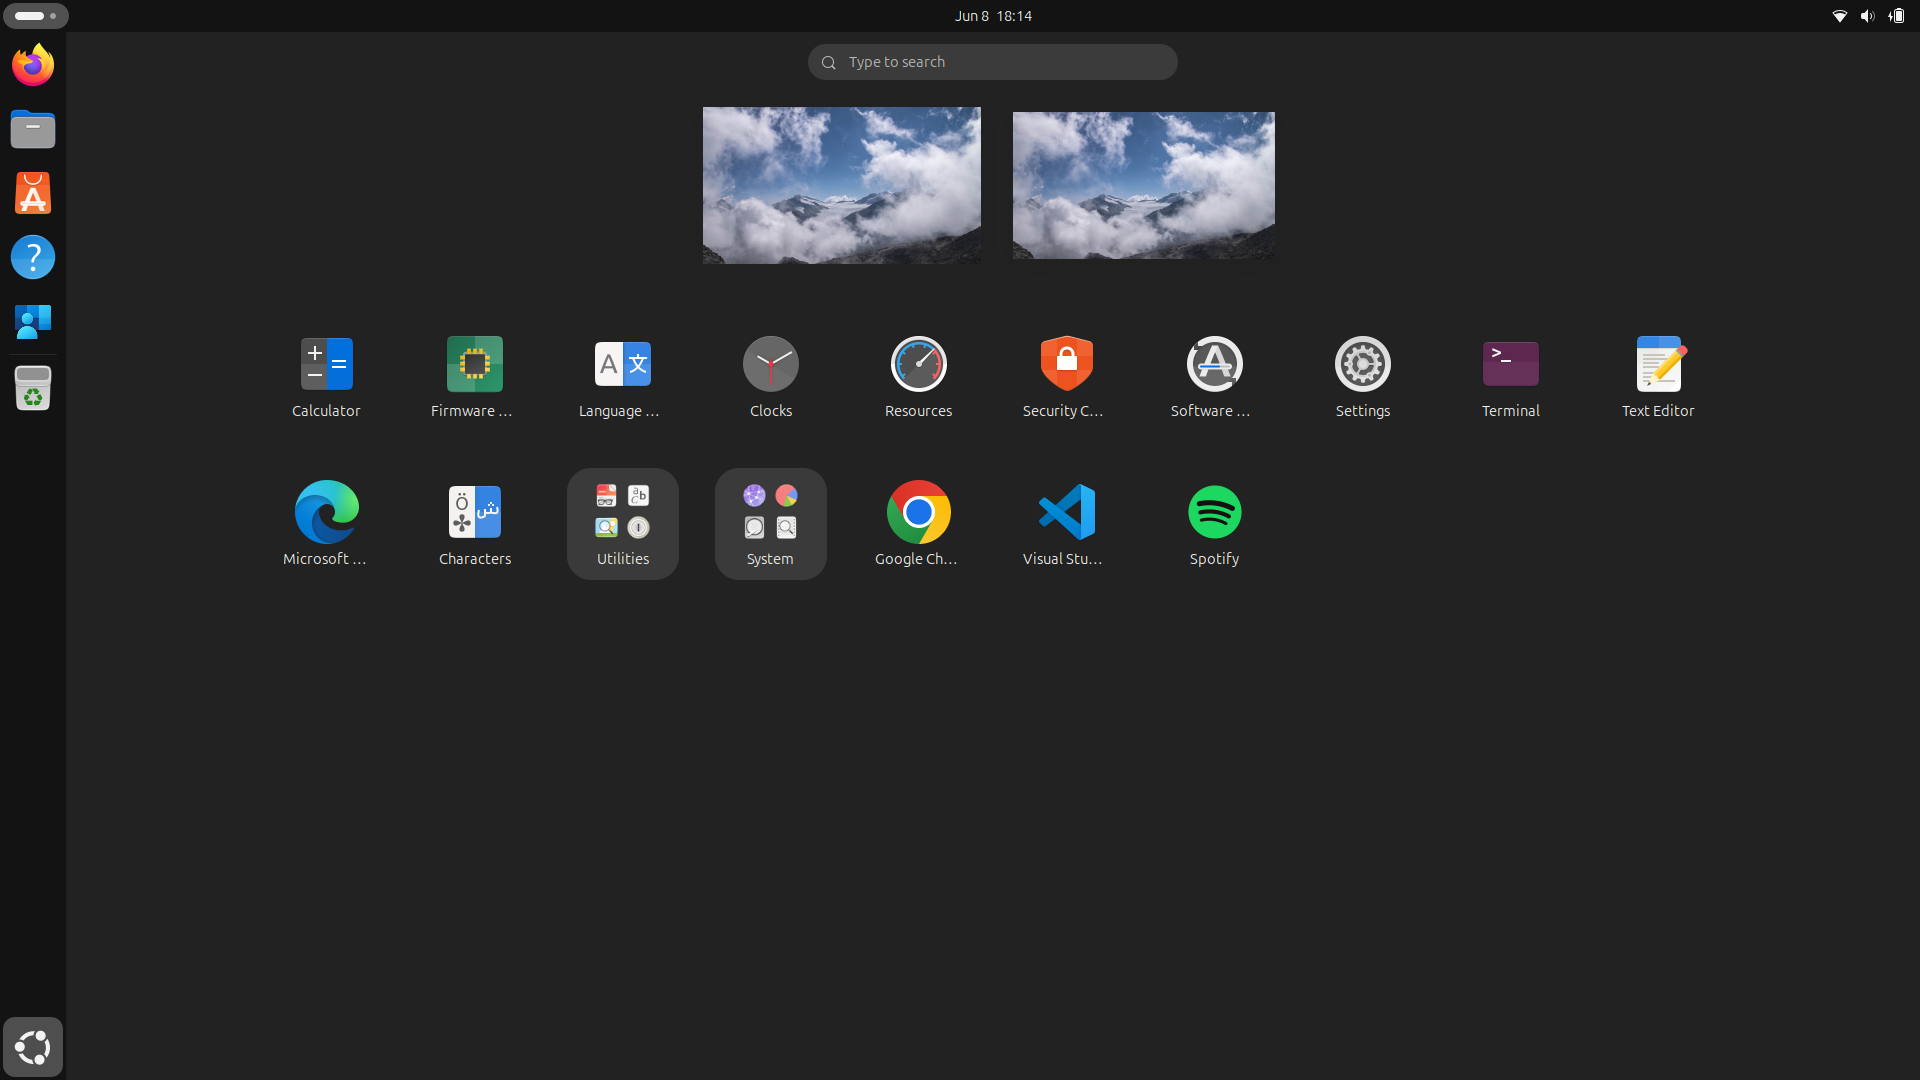
The applications are successfully installed after the first reboot.
Knowledge check
This quiz needs JavaScript to show the questions and feedback.
Summary
Adding Ubuntu endpoints to Microsoft Intune is a simple but valuable step toward bringing Linux devices into the same endpoint management strategy as Windows, macOS, iOS, and Android devices. If we want to keep a high level of compliance and security, this is a must for your organization.
Hopefully, Microsoft will continue to expand Linux support in Intune with more configuration, encryption, and remote management options. But even with the current feature set, enrolling Ubuntu devices is a good first step toward a more complete and secure endpoint management approach. With the custom scripts option, we can have basically any option available with some deep knowledge.
Next week I have a new post going further in some management with Ubuntu devices using custom scripts.
I hope this post was helpful and thank you for reading!
Sources
- https://learn.microsoft.com/en-us/intune/fundamentals/ref-supported-platforms#linux
- https://rufus.ie/en/
- https://learn.microsoft.com/en-us/intune/device-enrollment/guide-linux
End of the page 🎉
You have reached the end of the page. You can navigate through other blog posts as well, share this post on X, LinkedIn and Reddit or return to the blog posts collection page. Thank you for visiting this post.
If you find this page and blog very useful and you want to leave a donation, you can use the button below to buy me a beer. Hosting and maintaining a website takes a lot of time and money. Thank you in advance and cheers :)

The terms and conditions apply to this post.