Automatic Azure Boot diagnostics monitoring with Azure Policy
Categories:
8 minute read
In short, Azure Policy is a compliance/governance tool in Azure with capabilities for automatically pushing your resources to be compliant with your stated policy. This means if we configure Azure Policy to automatically configure boot diagnostics and save the information to a storage account, this will be automatically done for all existing and new virtual machines.
Step 1: The configuration explained
The boot diagnostics in Azure enables you to monitor the state of the virtual machine in the portal. By default, this will be enabled with a Microsoft managed storage account but we don’t have control over the storage account.
With using our custom storage account for saving the boot diagnostics, these options are available. We can control where our data is saved, which lifecycle management policies are active for retention of the data and we can use GRS storage for robust, datacenter-redundancy.
For saving the information in our custom storage account, we must tell the machines where to store it and we can automate this process with Azure Policy.
The solution we’re gonna configure in this guide consists of the following components in order:
- Storage Account: The place where serial logs and screenshots are actually stored
- Policy Definition: Where we define what Azure Policy must evaluate and check
- Policy Assignment: Here we assign a policy to a certain scope which can be subscriptions, resource groups and specific resources
- Remediation task: This is the task that kicks in if the policy definition returns with “non-compliant” status
Step 2: How to create your custom storage account for boot diagnostics
Assuming you want to use your own storage account for saving Boot diagnostics, we start with creating our own storage account for this purpose. If you want to use an existing managed storage account, you can skip this step.
Open the Azure Portal and search for “Storage Accounts”, click on it and create a new storage account. Then choose a globally unique name with lowercase characters only between 3 and 24 characters.
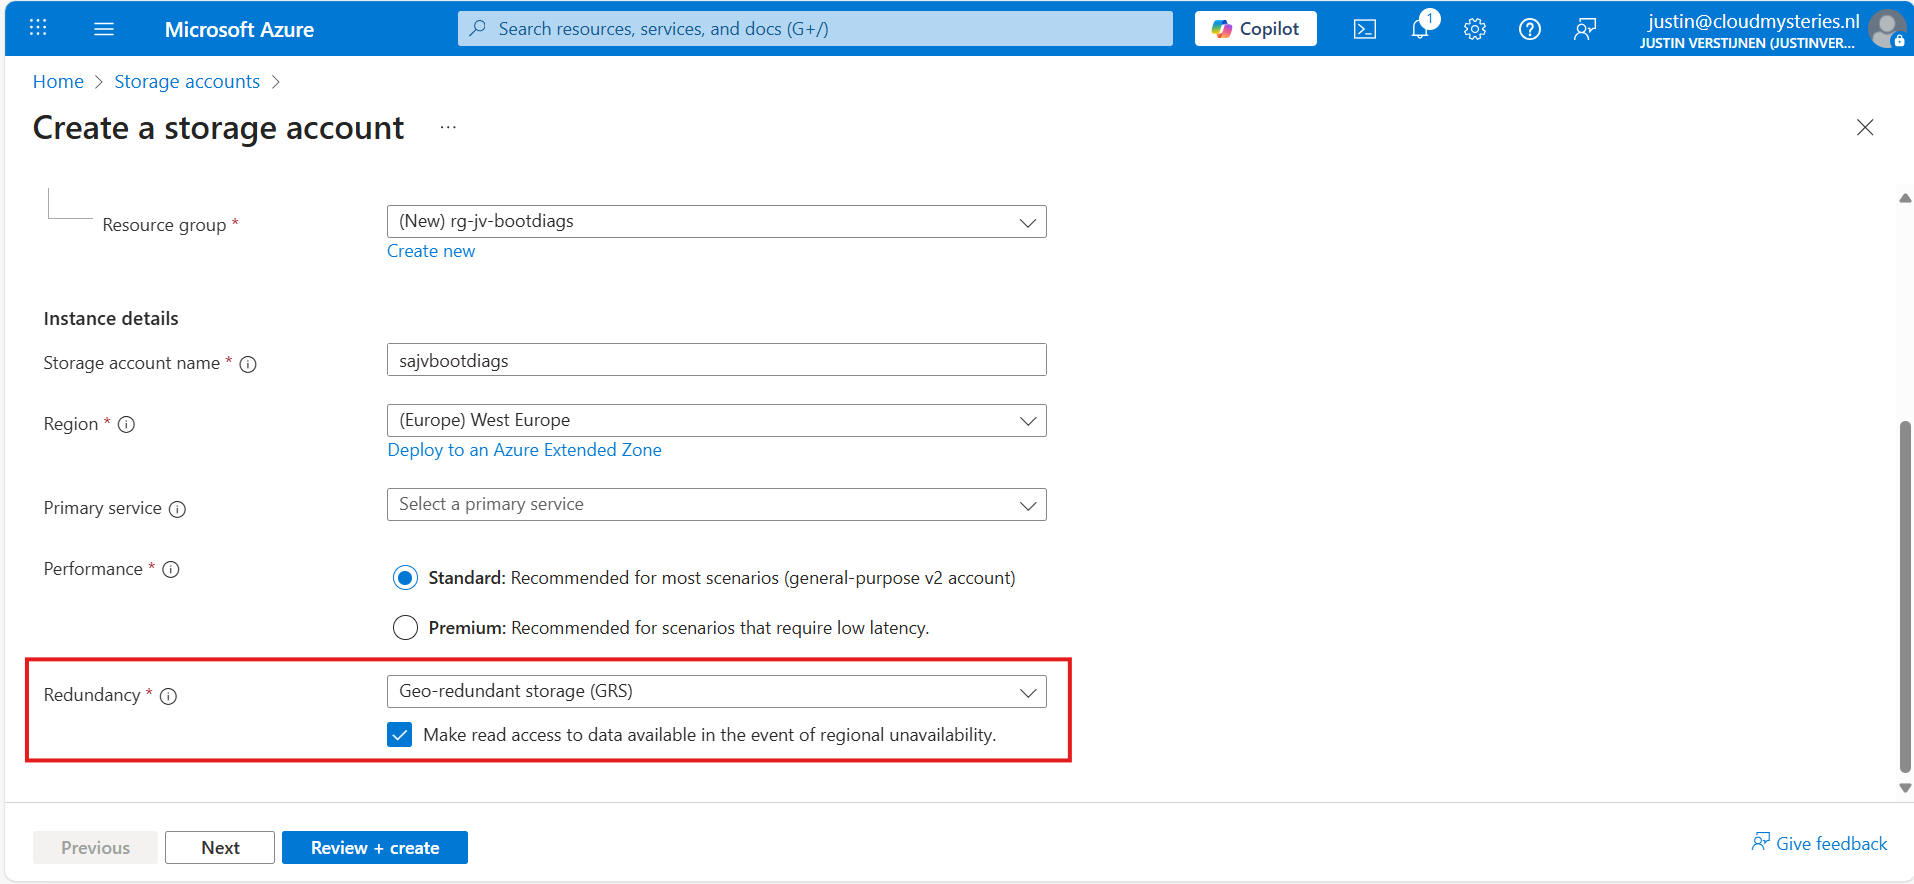
Make sure you select the correct level of redundancy at the bottom as we want to defend ourselves against datacenter failures. Also, don’t select a primary service as we need this storage account for multiple purposes.
At the “Advanced” tab, select “Hot” as storage tier, as we might ingest new information continueosly. We also leave the “storage account key access” enabled as this is required for the Azure Portal to access the data.
Advance to the “Networking” tab. Here we have the option to only enable public access for our own networks. This is highly recommended:
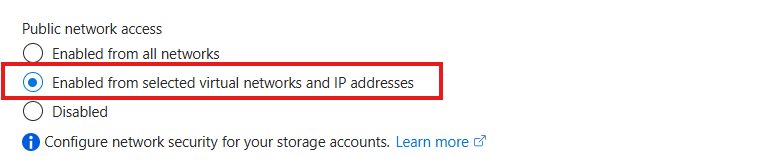
This way we expose the storage account access but only for our services that needs it. This defends our storage account from attackers outside of our environment.
For you actually able to see the data in the Azure Portal, you need to add the WAN IP address of your location/management server:
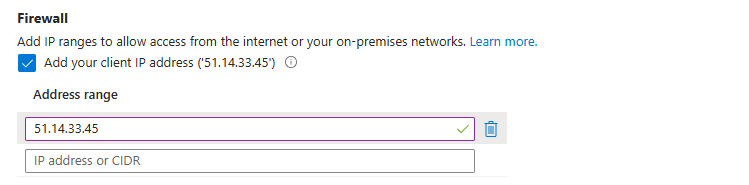
You can do that simply by checking the “Client IP address”. If you skip this step, you will get an error that the boot diagnostics cannot be found later on.
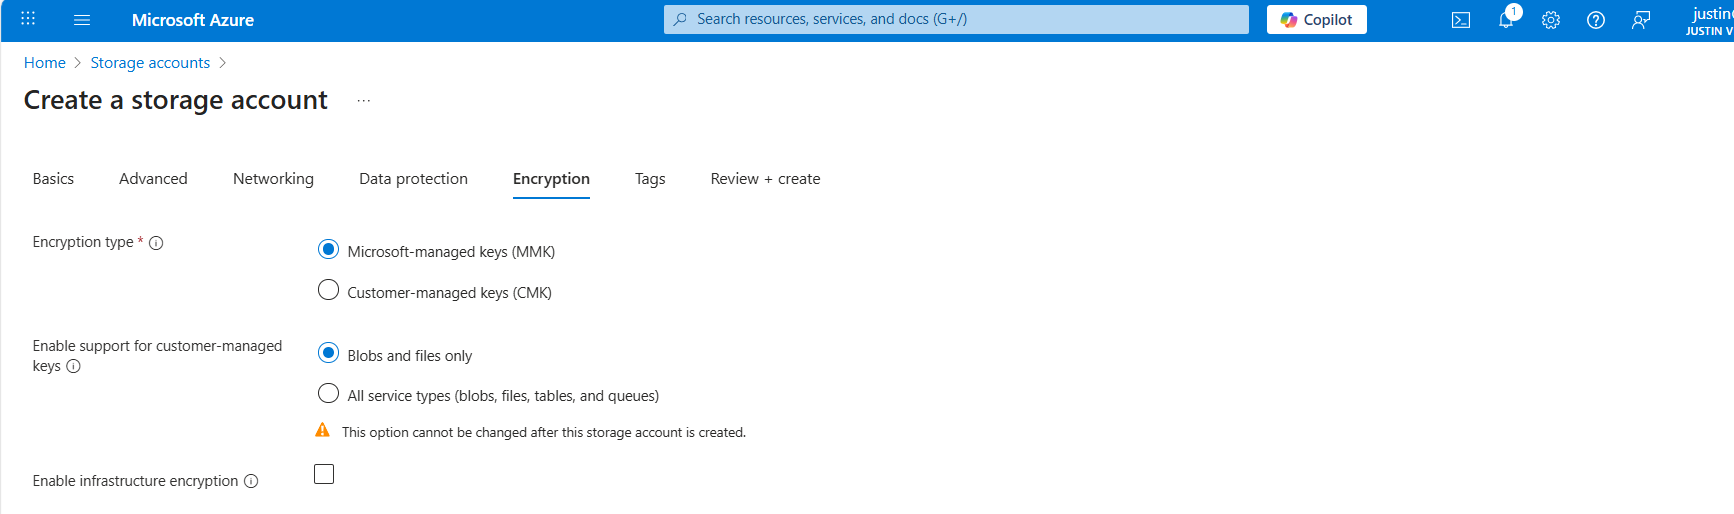
At the “Encryption” tab we can configure the encryption, if your company policies states this. For the simplicity of this guide, I leave everything on “default”.
Create the storage account.
Step 3: How to create the Azure Policy definition
We can now create our Azure Policy that alters the virtual machine settings to save the diagnostics into the custom storage account. The policy overrides every other setting, like disabled or enabled with managed storage account. It 100% ensures all VMs in the scope will save their data in our custom storage account.
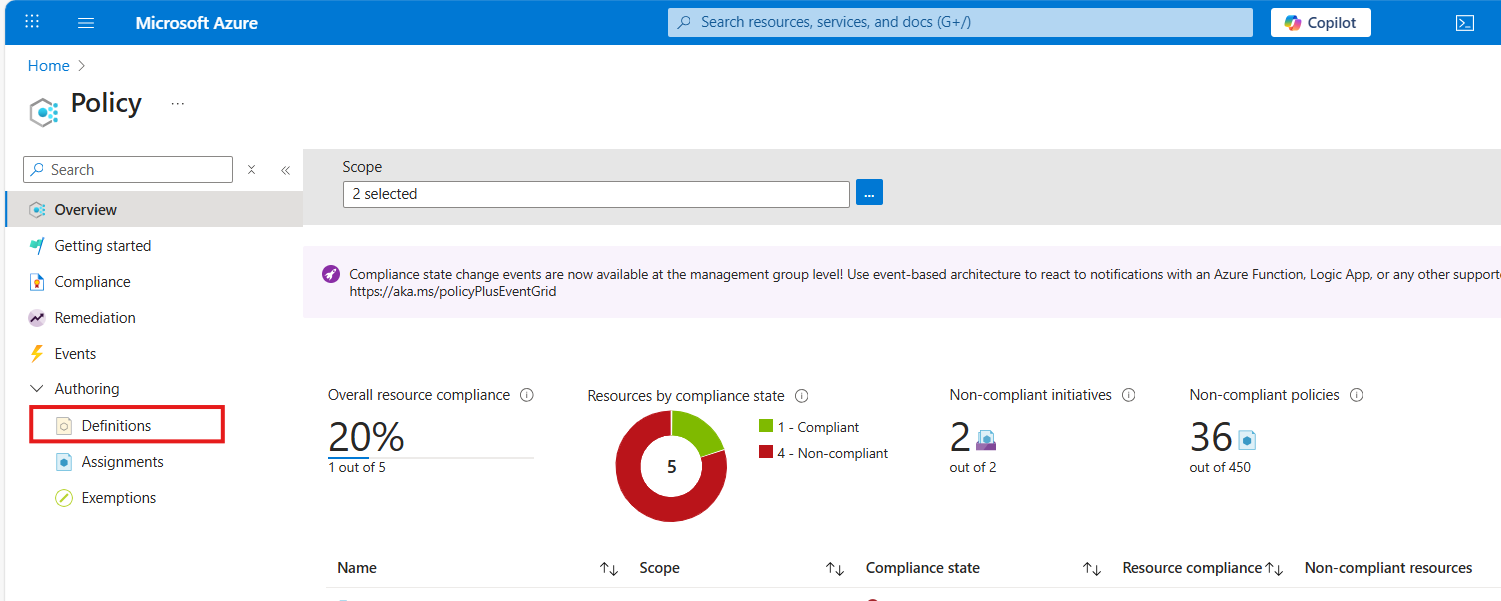
Open the Azure Portal and go to “Policy”. We will land on the Policy compliancy dashboard:
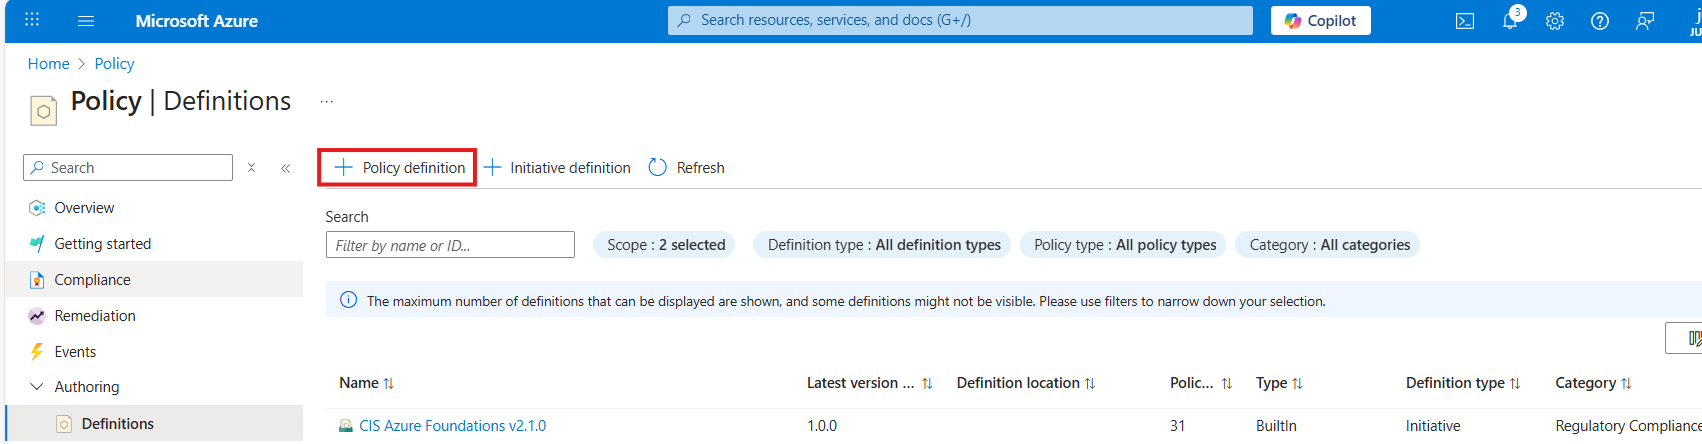
Click on “Definitions” as we are going to define a new policy. Then click on “+ Policy Definition” to create a new:
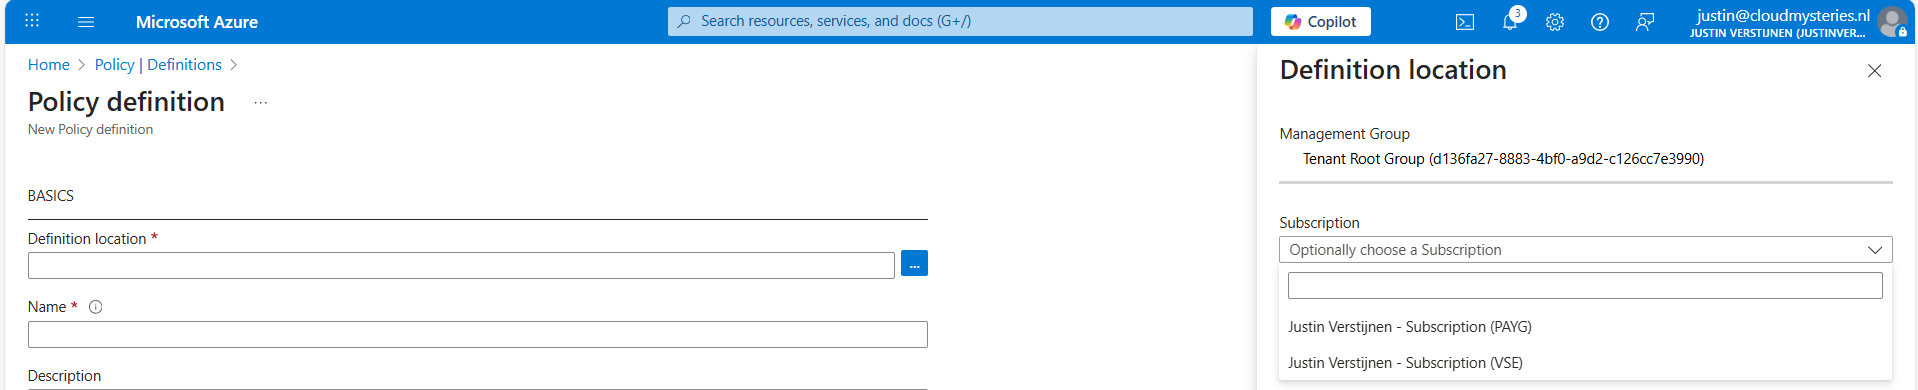
At the “definition location”, select your subscription where you want this configuration to be active. You can also select the tenant root management group, so this is enabled on all subscriptions. Caution with this of course.
Warning: Policies assigned to the Tenant Management Group cannot be assigned remediation tasks. Select one or more subscriptions instead.
Then give the policy a good name and description.
At the “Category” section we can assign the policy to a category. This changes nothing to the effect of the policy but is only for your own categorization and overview. You can also create custom categories if using multiple policies:

At the policy rule, we have to paste a custom rule in JSON format which I have here:
{
"mode": "All",
"parameters": {
"customStorageUrl": {
"type": "String",
"metadata": {
"displayName": "Custom Storage",
"description": "The custom Storage account used to write boot diagnostics to."
},
"defaultValue": "https://*your storage account name*.blob.core.windows.net"
}
},
"policyRule": {
"if": {
"allOf": [
{
"field": "type",
"equals": "Microsoft.Compute/virtualMachines"
},
{
"field": "Microsoft.Compute/virtualMachines/diagnosticsProfile.bootDiagnostics.storageUri",
"notContains": "[parameters('customStorageUrl')]"
},
{
"not": {
"field": "Microsoft.Compute/virtualMachines/diagnosticsProfile.bootDiagnostics.storageUri",
"equals": ""
}
}
]
},
"then": {
"effect": "modify",
"details": {
"roleDefinitionIds": [
"/providers/Microsoft.Authorization/roleDefinitions/9980e02c-c2be-4d73-94e8-173b1dc7cf3c"
],
"conflictEffect": "audit",
"operations": [
{
"operation": "addOrReplace",
"field": "Microsoft.Compute/virtualMachines/diagnosticsProfile.bootDiagnostics.storageUri",
"value": "[parameters('customStorageUrl')]"
},
{
"operation": "addOrReplace",
"field": "Microsoft.Compute/virtualMachines/diagnosticsProfile.bootDiagnostics.enabled",
"value": true
}
]
}
}
}
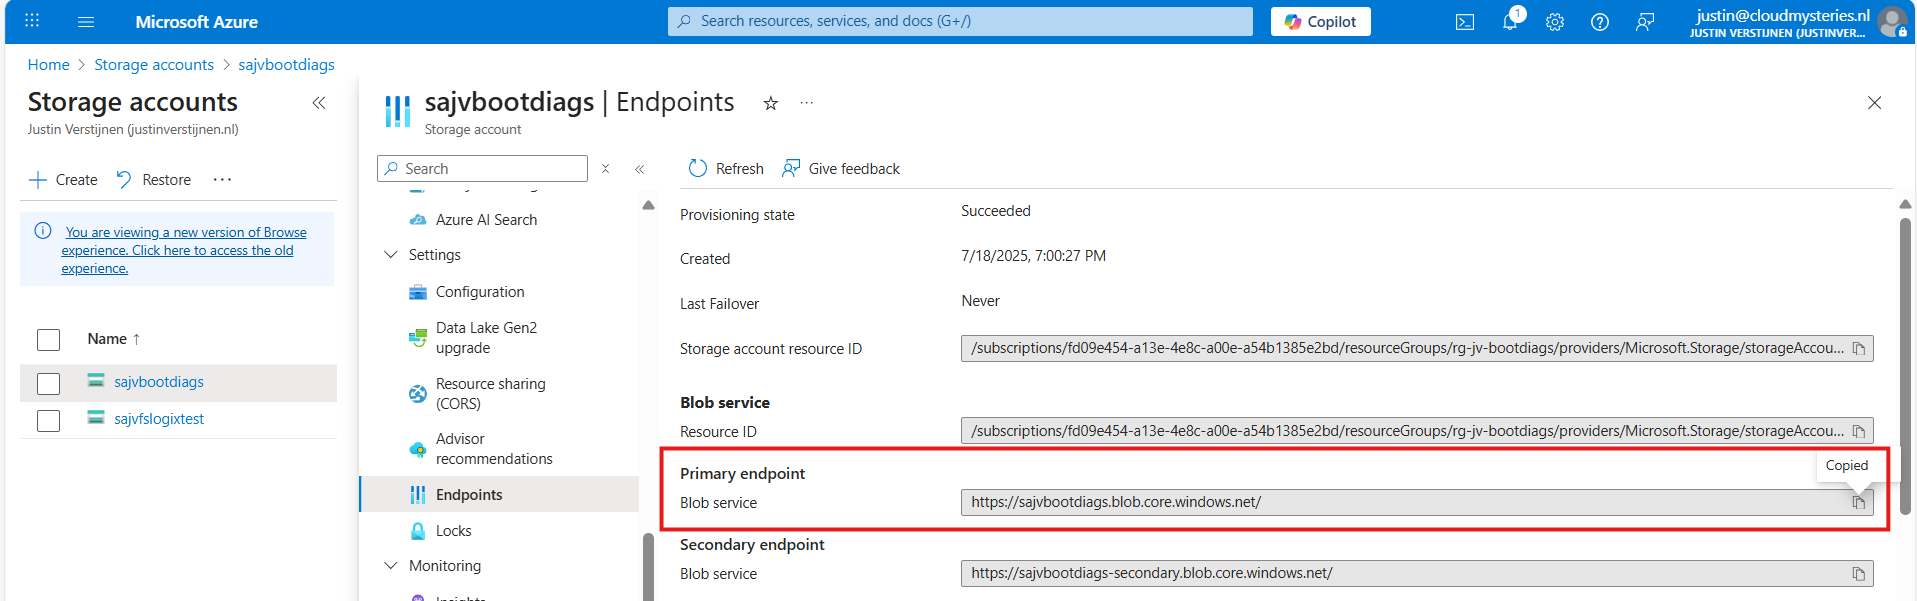
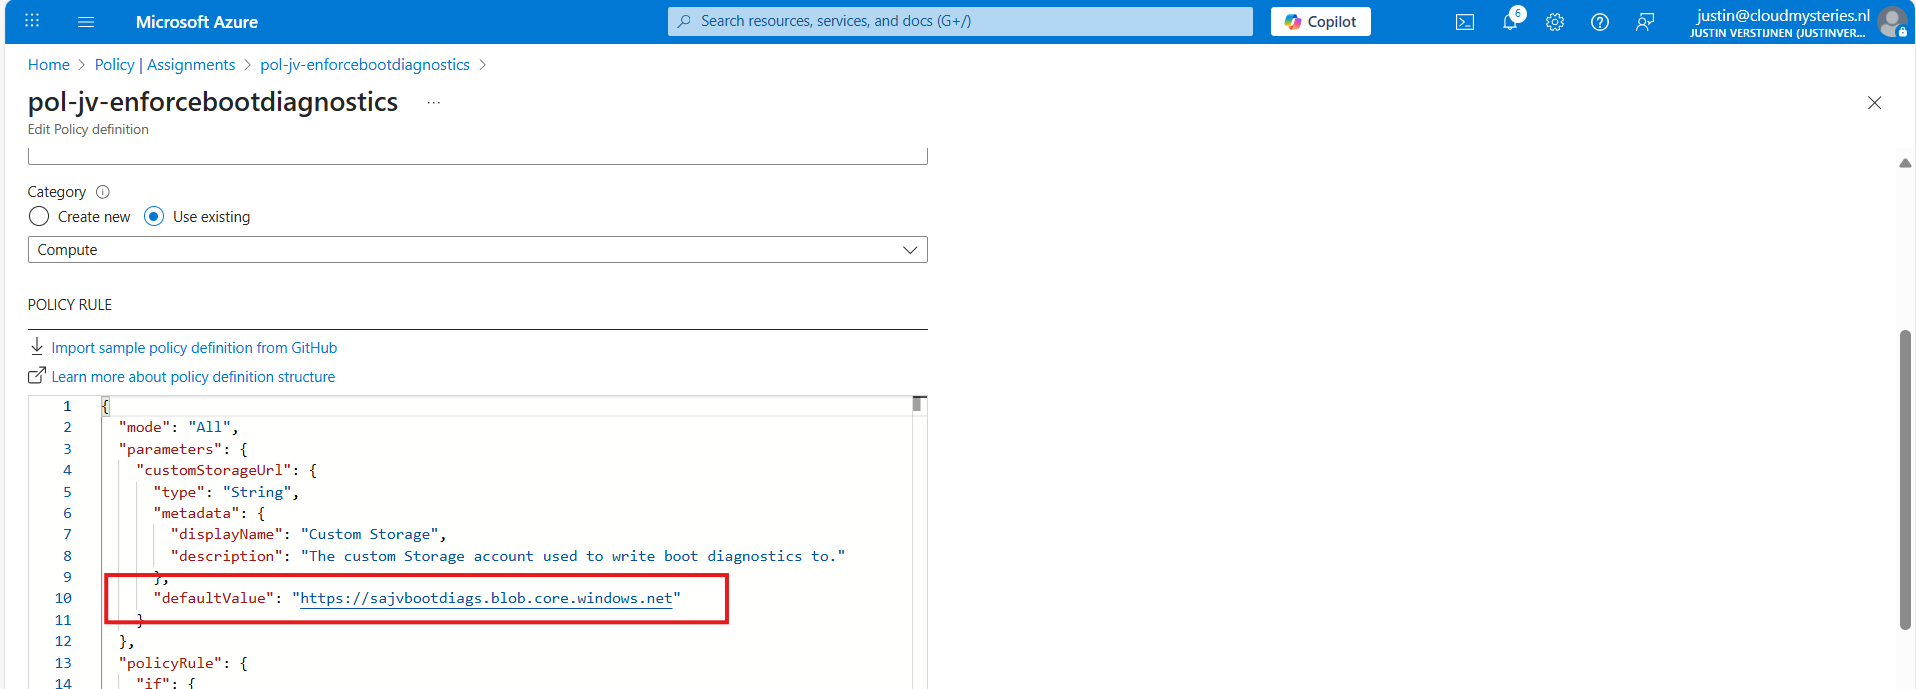
}Copy and paste the code into the “Policy Rule” field. Then make sure to change the storage account URI to your custom or managed storage account. You can find this in the Endpoints section of your storage account:
Paste that URL into the JSON definition at line 10, and if desired, change the displayname and description on line 7 and 8.
Leave the “Role definitions” field to the default setting and click on “Save”.
Step 4: Assigning the boot diagnostics policy definition
Now we have defined our policy, we can assign it to the scope where it must be active. After saving the policy you will get to the correct menu:
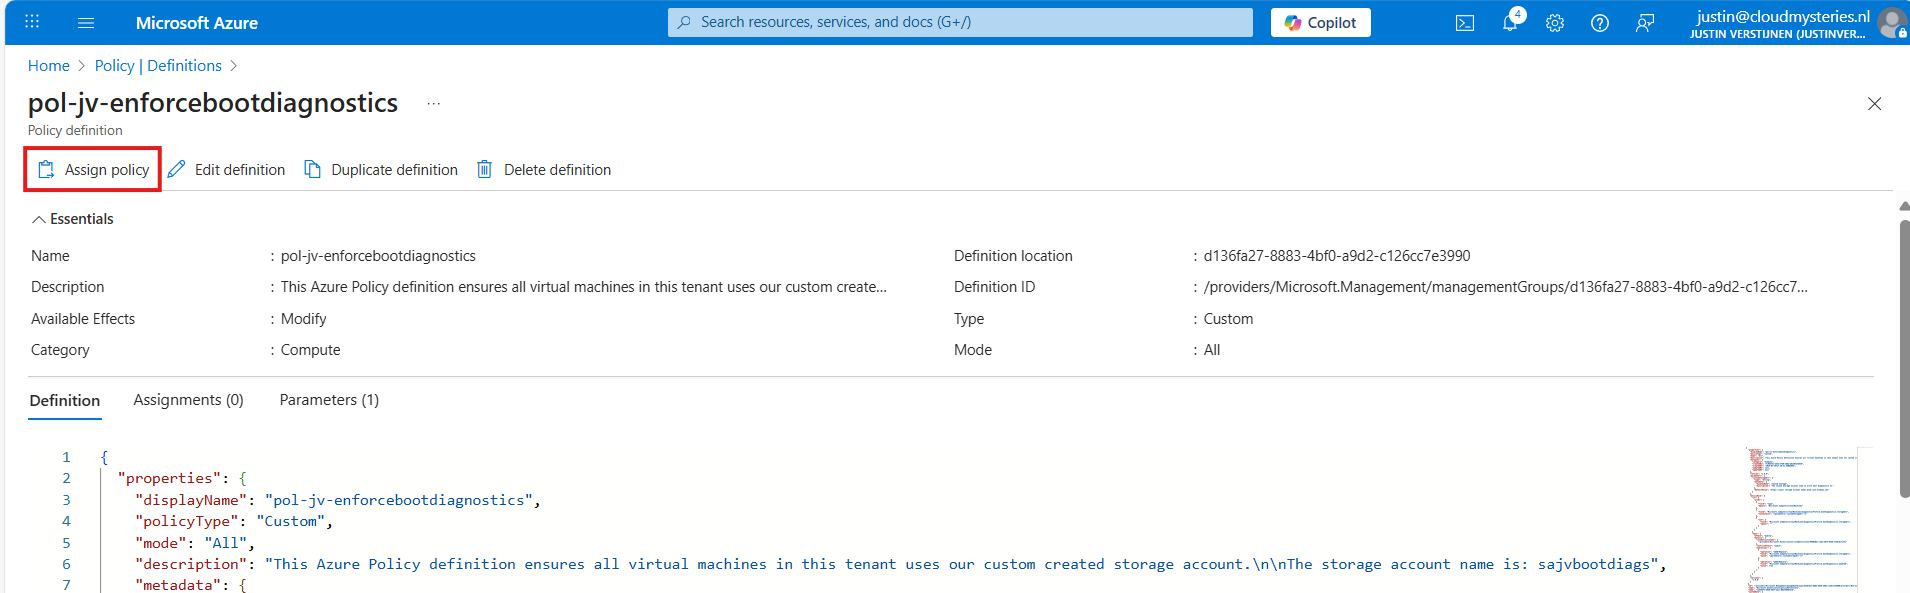
Otherwise, you can go to “Policy”, then to “Definitions” just like in step 3 and lookup your just created definition.
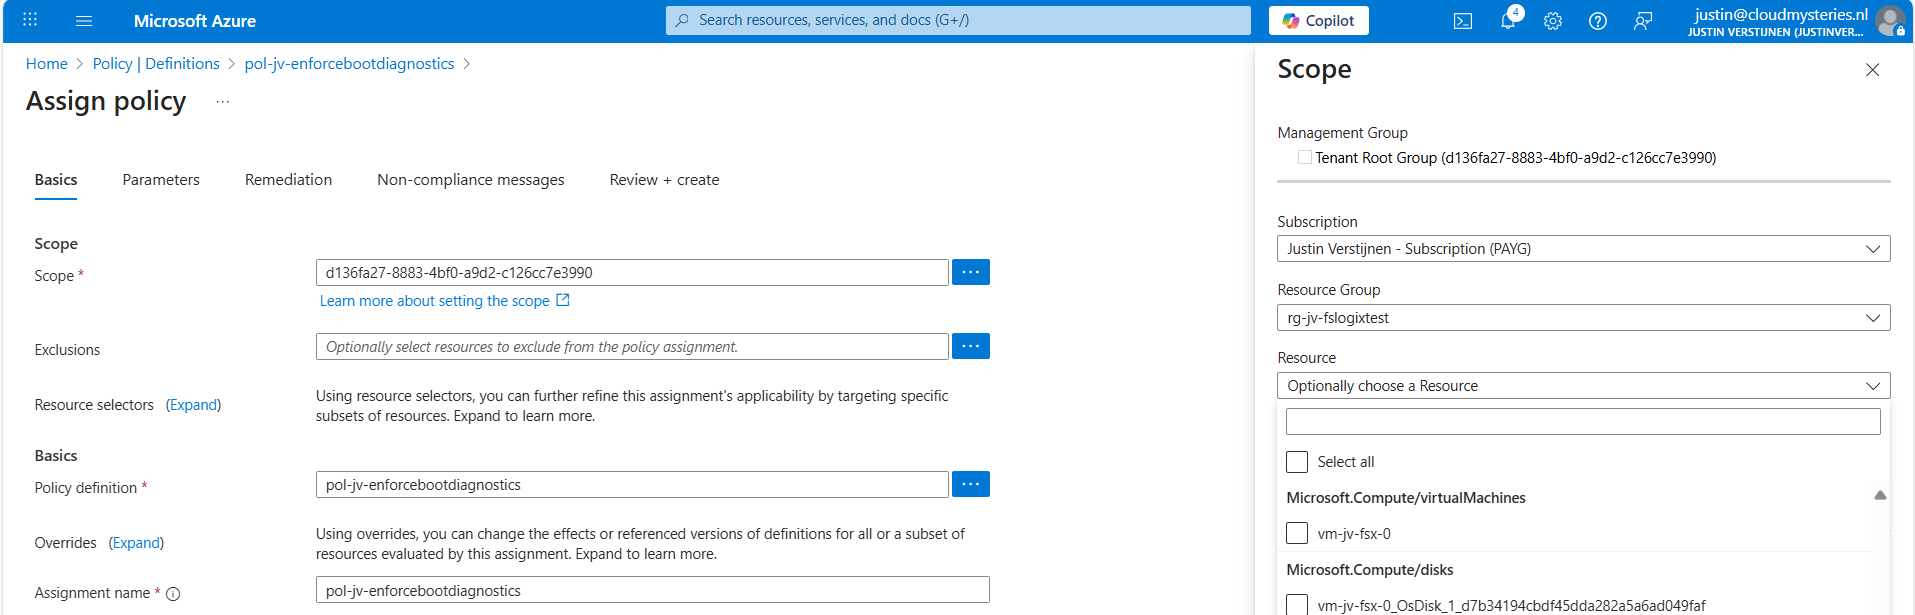
On the Assign policy page, we can once again define our scope. We can now set “Exclusions” to apply to all, but some according to your configurations. You can also select one or multiple specific resources to exclude from your Policy.
Leave the rest of the page as default and advance to the “Remediation” tab:
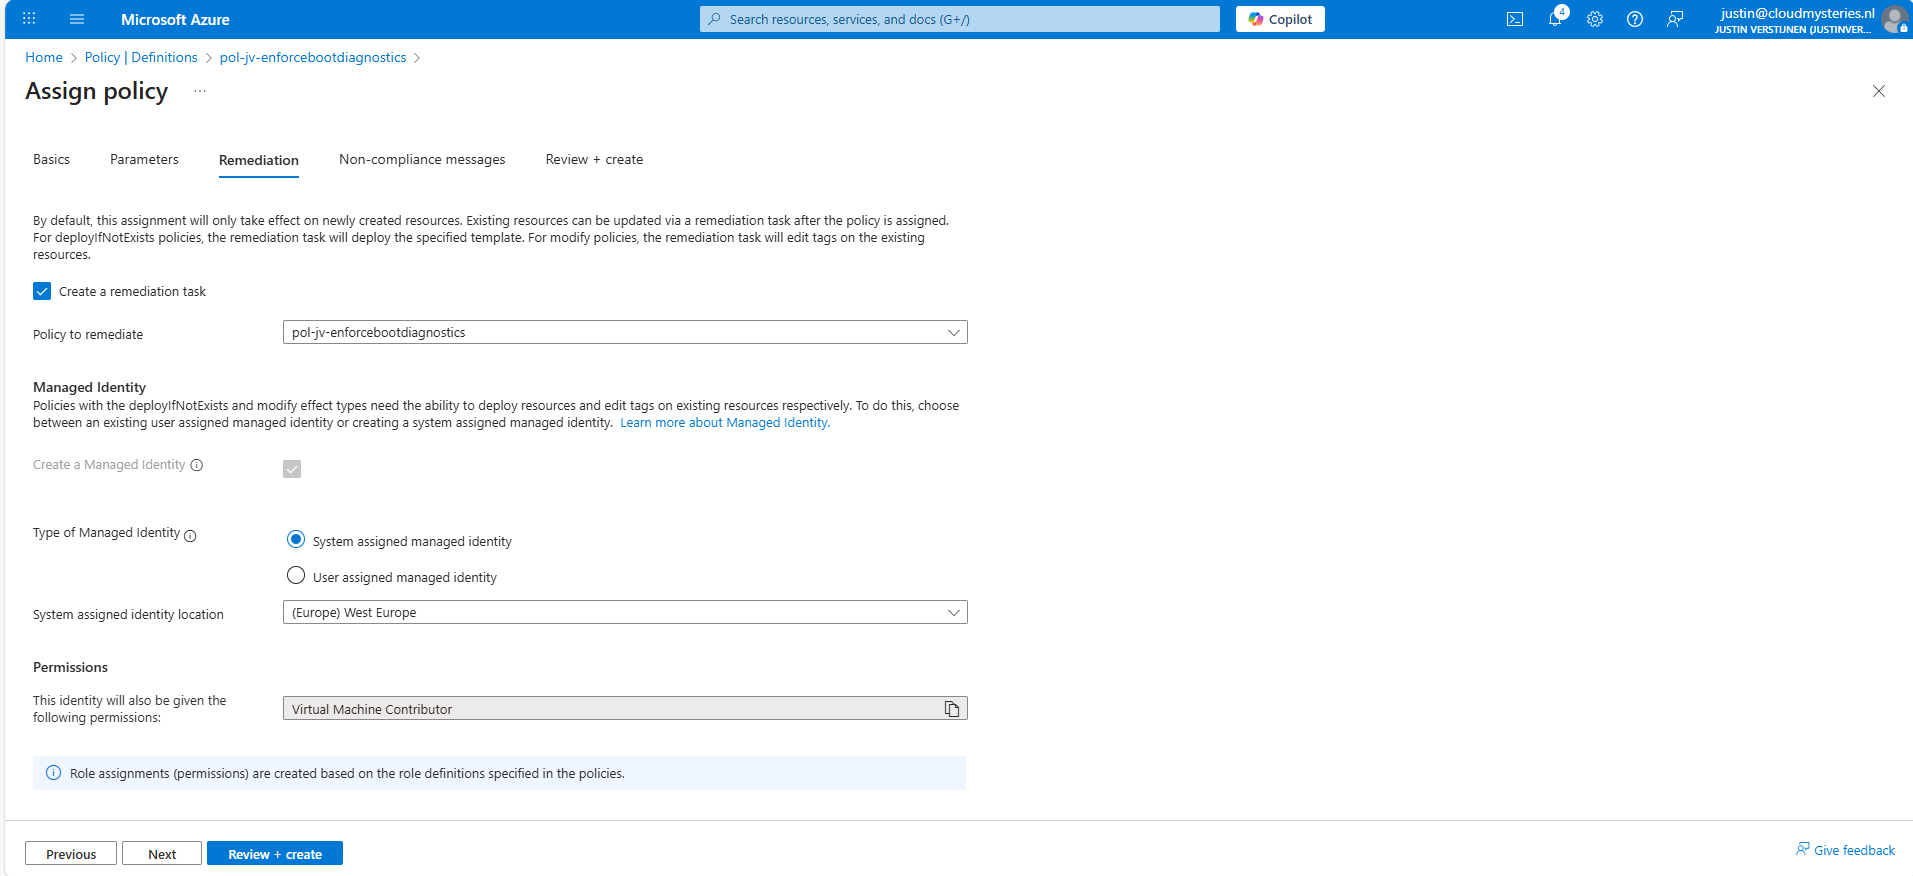
Enable “Create a remediation task” and select your policy if not already there.
Then we must create a system or user assigned managed identity because changing the boot diagnostics needs permissions. We can use the default system assiged here and that automatically selects the role with the least privileges.
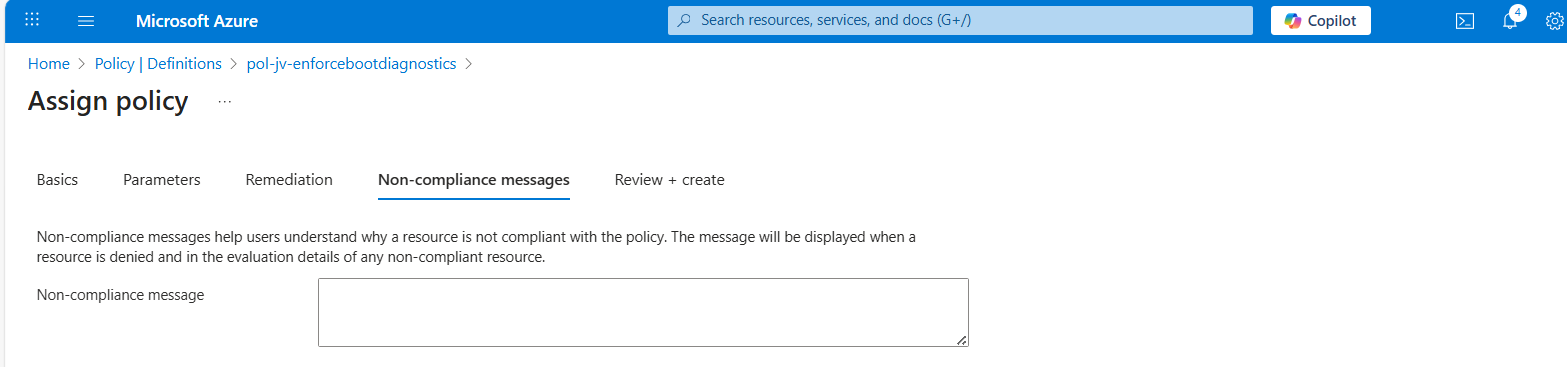
You could forbid the creation of non-compliant virtual machines and leave a custom message, like our documentation is here -> here. This then would show up when creating a virtual machine that is not configured to send boot diagnostics to our custom storage account.
Advance to the “Review + create” tab and finish the assignment of the policy.
Step 5: Test the configuration
Now that we finished the configuration of our Azure Policy, we can now test the configuration. We have to wait for around 30 minutes when assigning the policy to become active. When the policy is active, the processing of Azure policies are much faster.
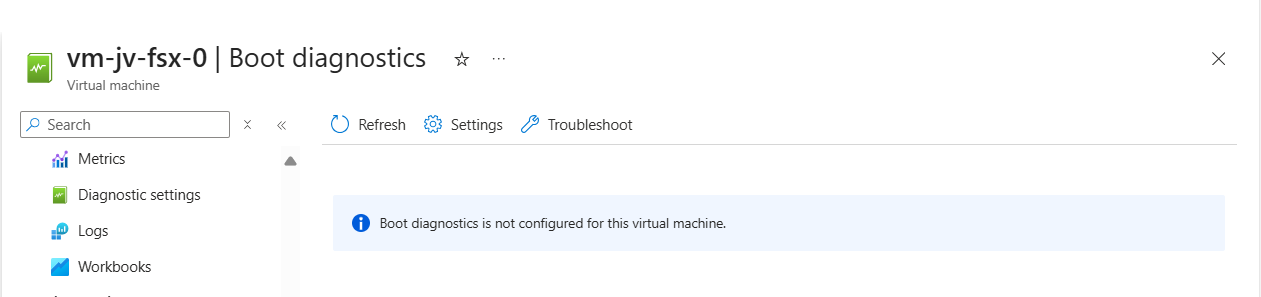
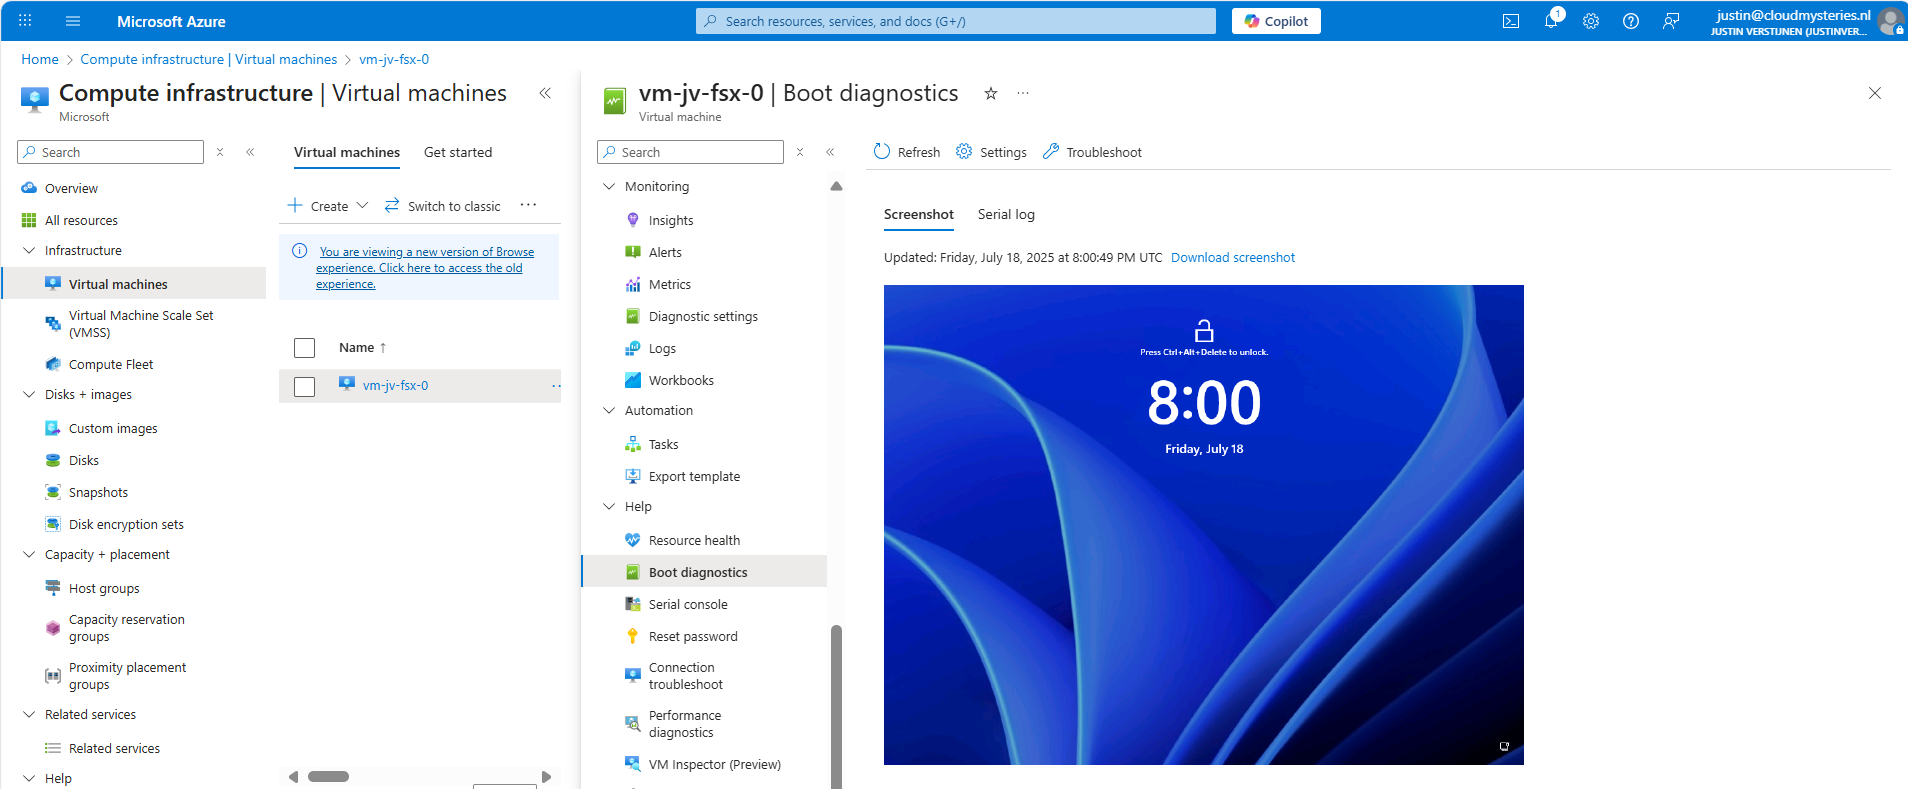
In my environment I have a test machine called vm-jv-fsx-0 with boot diagnostics disabled:
This is just after assigning the policy, so a little patience is needed. We can check the status of the policy evaluation at the policy assignment and then “Remediation”:
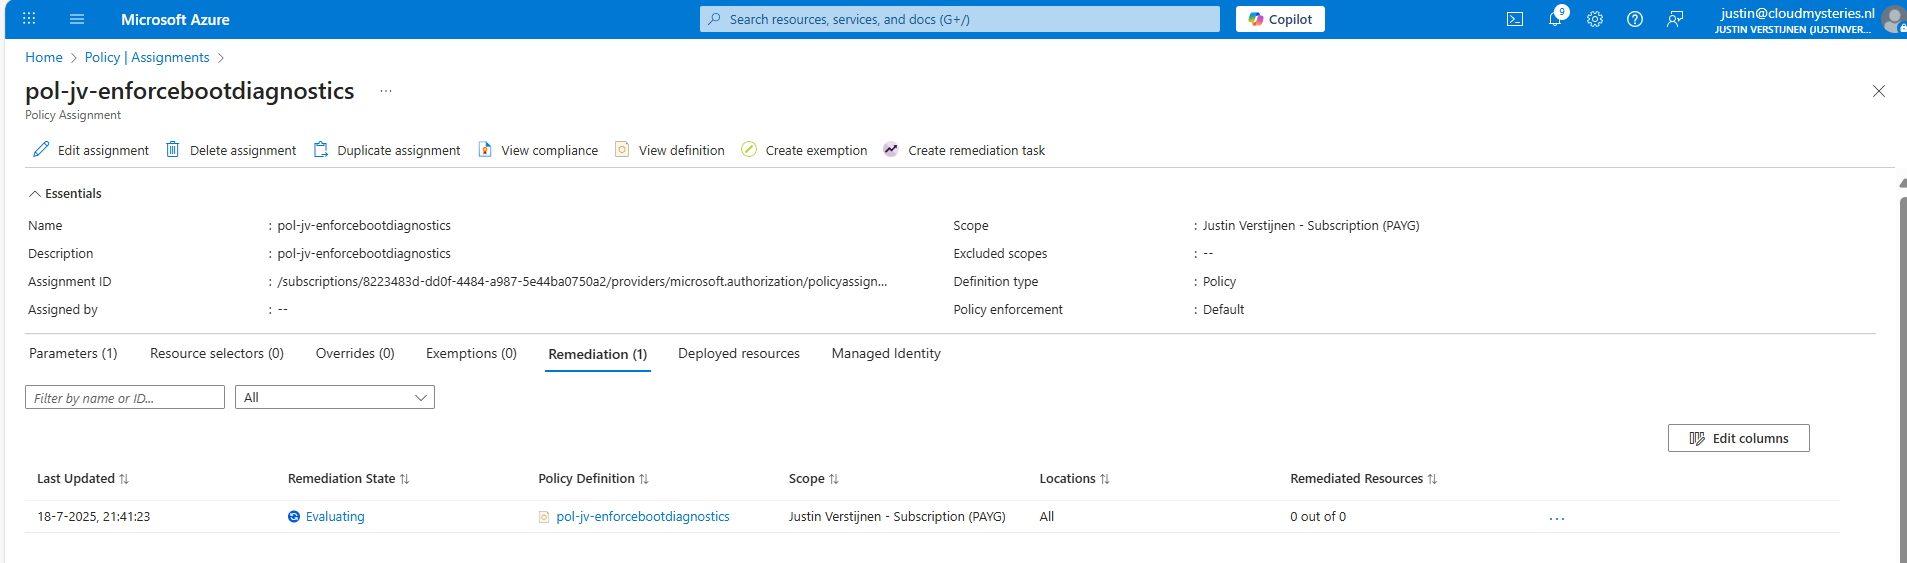
After 30 minutes or something, this will automatically be configured:
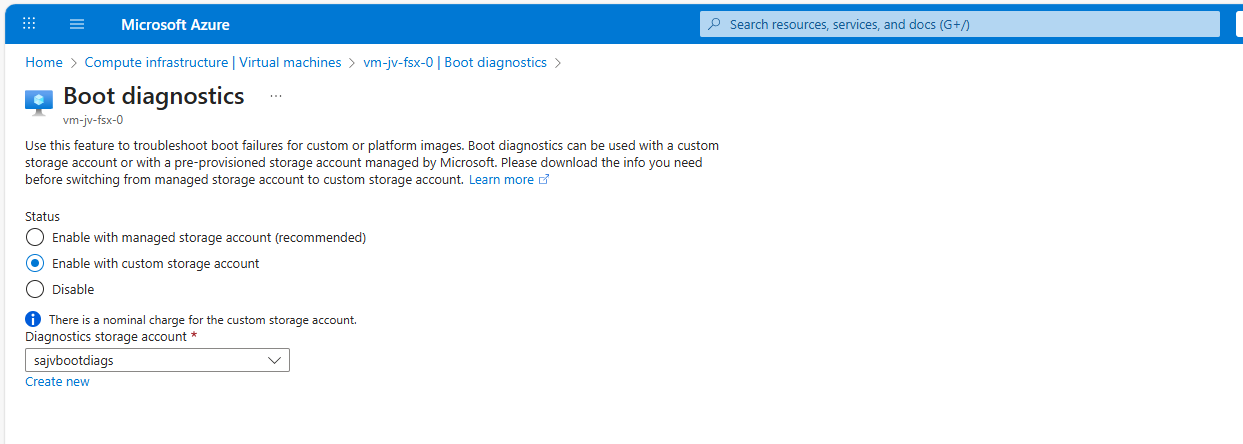
This took about 20 minutes in my case. Now we have access to the boot configuration:
Step 6: Monitor your policy compliance (optional)
You can monitor the compliance of the policy by going to “Policy” and search for your assignment:
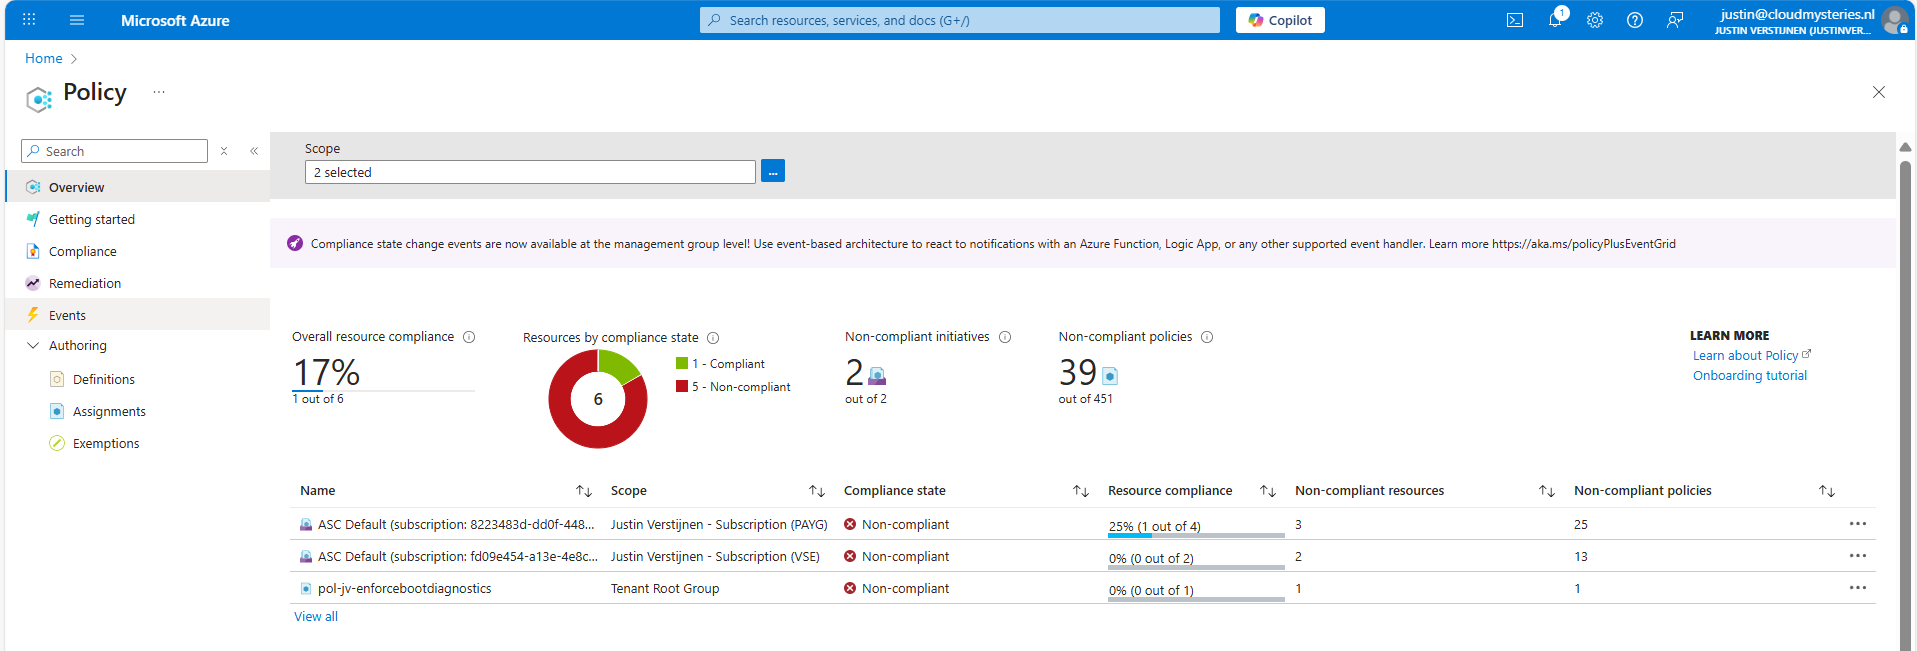
You will see the configuration of the definition, and you can click on “Deployed resources” to monitor the status and deployment.
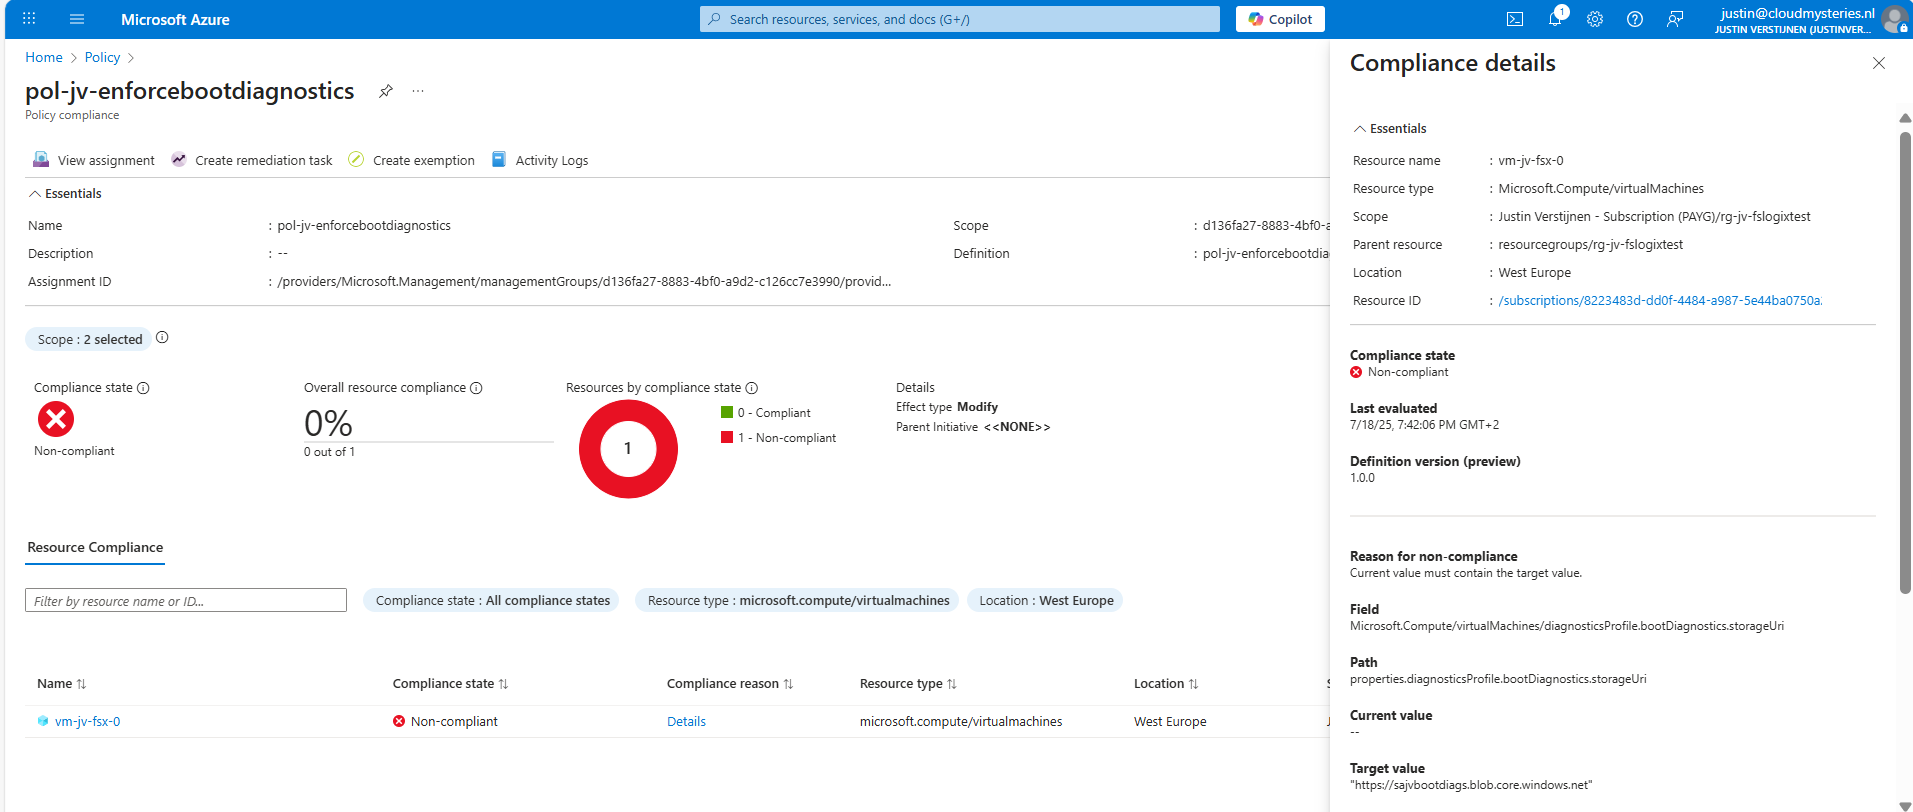
It will exactly show why the virtual machine is not compliant and what to do to make it compliant. If you have multiple resources, they will all show up.
Summary
Azure Policy is a great way to automate, monitor and ensure your Azure Resources remain compliant with your policies by remediating them automatically. This is only one possibility of using Policy but for many more options.
I hope I helped you with this guide and thank you for visiting my website.
Sources
These sources helped me by writing and research for this post;
- https://learn.microsoft.com/en-us/azure/governance/policy/overview
- https://learn.microsoft.com/en-us/azure/virtual-machines/boot-diagnostics
End of the page 🎉
You have reached the end of the page. You can navigate through other blog posts as well, share this post on X, LinkedIn and Reddit or return to the blog posts collection page. Thank you for visiting this post.
If you think something is wrong with this post or you want to know more, you can send me a message to one of my social profiles at: https://justinverstijnen.nl/about/
If you find this page and blog very useful and you want to leave a donation, you can use the button below to buy me a beer. Hosting and maintaining a website takes a lot of time and money. Thank you in advance and cheers :)

The terms and conditions apply to this post.