Automatically accept SSO prompt on Windows
The single sign on prompt
If you are managing Windows 11 devices, you may have noticed the Continue to sign in? prompt when a user opens an application such as Microsoft Company Portal or another Microsoft application.
The prompt asks the user if Windows can use their signed-in Microsoft Entra ID account to automatically sign in to other Microsoft apps and services.
This behavior is especially noticeable in the European Economic Area (EEA), where Microsoft changed the Windows sign-in experience to give users more control over automatically using their Windows account in other applications.
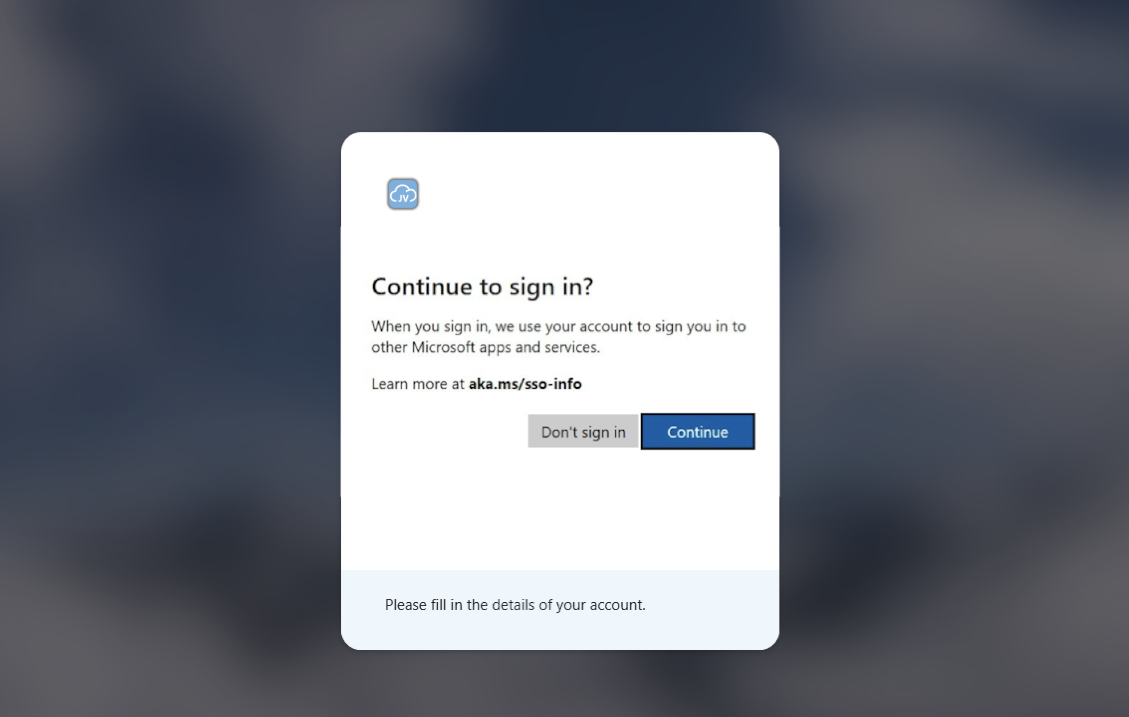
On a personal device this isn’t really a problem. The user can simply click Continue and normally won’t be asked again.
On managed devices however, especially freshly installed Microsoft Intune and Windows Autopilot devices, this can interrupt the seamless onboarding experience. For example, Company Portal can automatically start but still waits for the user to accept the SSO permission before it can continue signing in.
Luckily Microsoft has now introduced a supported setting/registry option called:
AutoAcceptSsoPermission
With this policy configured, Windows can automatically accept the SSO permission for Microsoft Entra ID accounts on supported managed devices.
In this post, I will show you three different ways to configure it:
- Microsoft Intune
- Group Policy
- Windows Registry
Requirements
Before configuring this setting, make sure your devices meet the following requirements:
- Windows 11 version 24H2 or 25H2
- July 2026 monthly security update (KB5101650) or newer installed
- Microsoft Entra ID account
- Administrative permissions for the configuration method you are using
Option 1: Configure with Microsoft Intune
Let’s start with Microsoft Intune. At the moment, Microsoft provides AutoAcceptSsoPermission as a registry-based policy. Because there is no native Settings Catalog setting available for it yet, we can deploy the registry configuration using a PowerShell script which I will demonstrate.
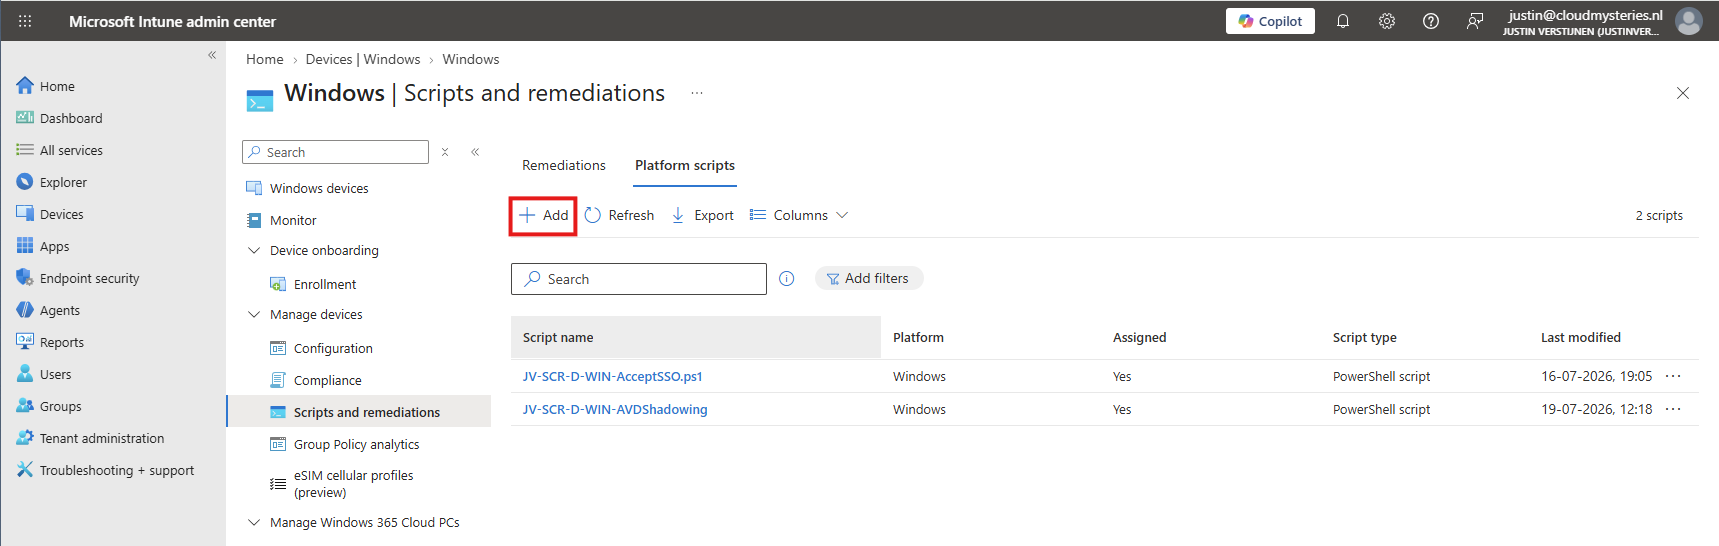
Open the Microsoft Intune admin center and navigate to:
Devices > Scripts and remediations > Platform scripts
Click + Add and select Windows 10 and later to add a new script.
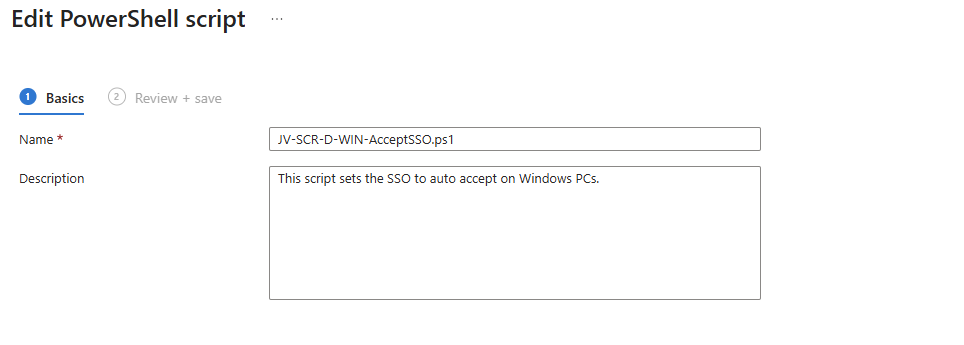
Give the script a good name and description:
Then continue to the Script settings page. Create a .ps1 file on your desktop with the following content and save/upload this file:
New-Item -Path "HKLM:\SOFTWARE\Policies\Microsoft\Windows\AAD" -Force | Out-Null; New-ItemProperty -Path "HKLM:\SOFTWARE\Policies\Microsoft\Windows\AAD" -Name "AutoAcceptSsoPermission" -Value 1 -PropertyType DWord -Force | Out-NullYou can download a full and ready file from here:
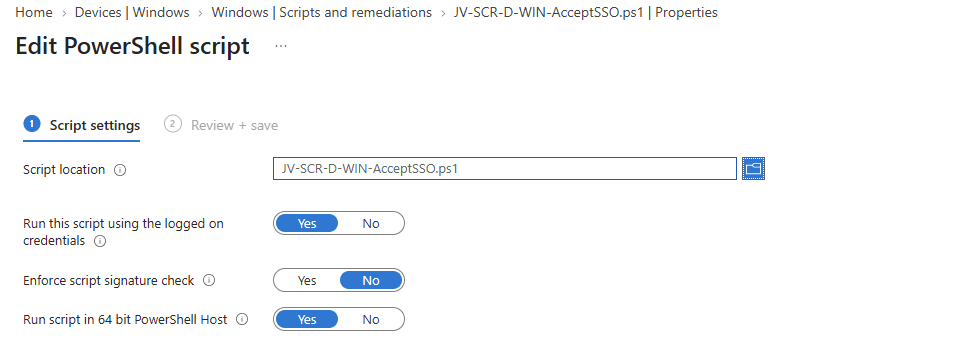
Then back in Intune, configure the following script settings:
- Run this script using the logged on credentials: Yes
- Enforce script signature check: No
- Run script in 64-bit PowerShell host: Yes
Continue to the Assignments tab and assign the script to the device group containing the Windows 11 devices where you want to automatically accept the SSO permission. Then finish the wizard and create the script.
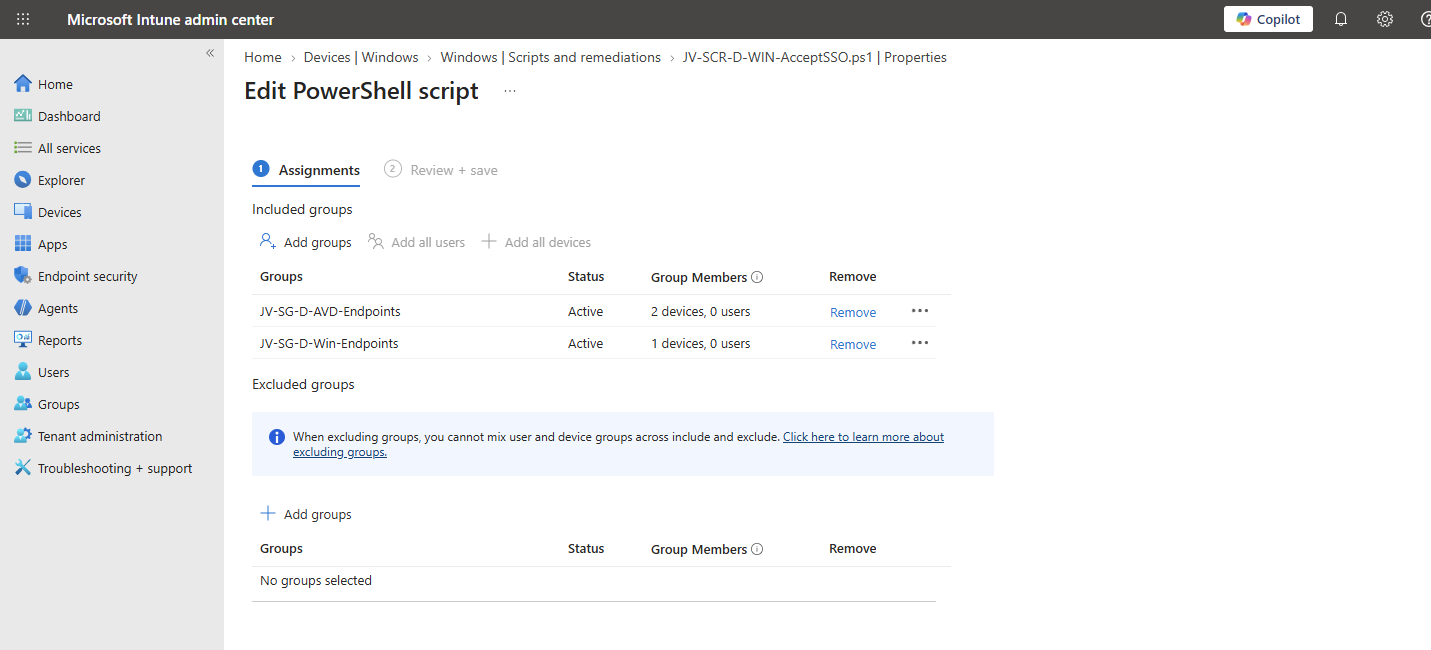
Microsoft Intune will now deploy the script through the Intune Management Extension. After the script has been executed, the following registry configuration should exist and successfully configured on the device:
HKLM\SOFTWARE\Policies\Microsoft\Windows\AAD\AutoAcceptSsoPermission
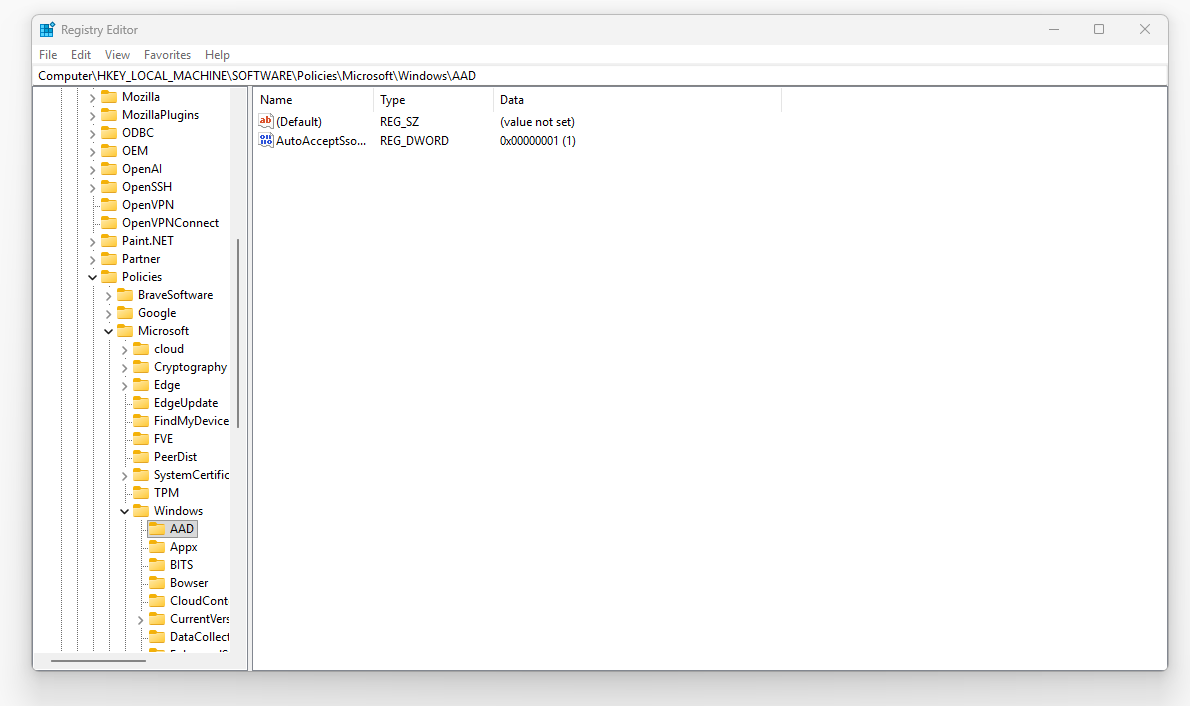
Option 2: Configure with Group Policy
If your Windows devices are managed using Active Directory and traditional Group Policy, we can configure exactly the same registry setting through a GPO. Because AutoAcceptSsoPermission is a registry-based policy, we can use Group Policy Preferences to configure the required registry value, which is more easy than a PowerShell script.
Open the Group Policy Management Console (gpmc.msc):
Create a new Group Policy Object or use an existing GPO containing your Windows device configuration. Then edit the GPO and navigate to:
Computer Configuration > Preferences > Windows Settings > Registry
Here, right click the empty space and create a new Registry Item.
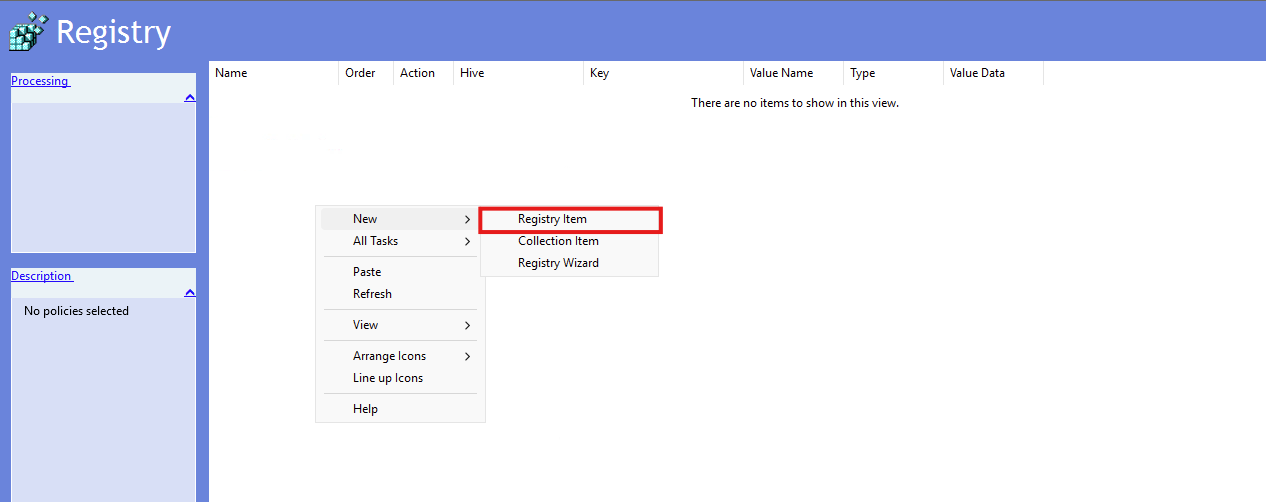
Configure the following settings:
| Setting | Value |
|---|---|
| Action | Update |
| Hive | HKEY_LOCAL_MACHINE |
| Key Path | SOFTWARE\Policies\Microsoft\Windows\AAD |
| Value name | AutoAcceptSsoPermission |
| Value type | REG_DWORD |
| Value data | 1 |
As shown as in the image below:
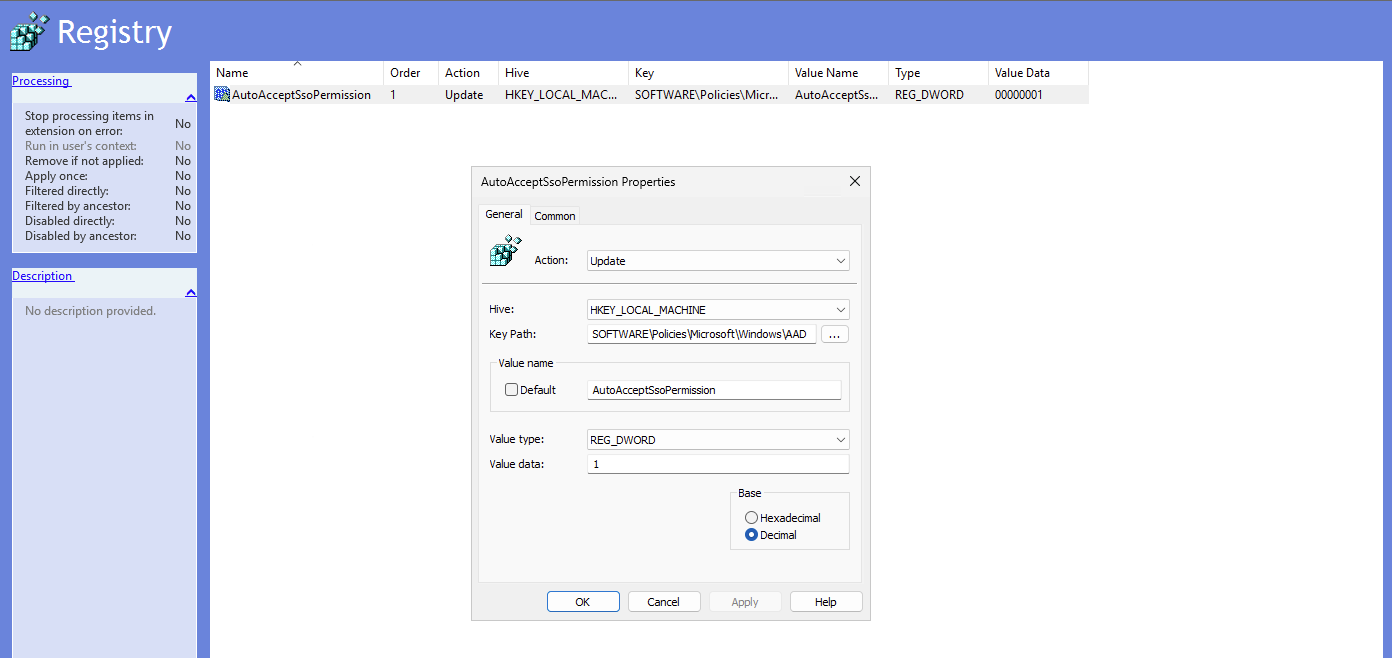
Click Apply and OK. Then link the Group Policy Object to the Organizational Unit containing the computers where you want to configure this setting if not already done so.
You can wait for the normal Group Policy refresh or manually force an update on a test device:
gpupdate /forceAfter the Group Policy has been applied, check the following registry location:
HKEY_LOCAL_MACHINE\SOFTWARE\Policies\Microsoft\Windows\AAD
You should now see the key and DWORD value configured.
Option 3: Configure directly through Registry
Of course, we can also configure the setting directly in the Windows Registry.
I would mainly use this option for testing or troubleshooting. When deploying this configuration to multiple managed devices, I recommend using Microsoft Intune or Group Policy instead.
Open PowerShell or Command Prompt with administrative permissions and run:
reg.exe add "HKLM\SOFTWARE\Policies\Microsoft\Windows\AAD" /v "AutoAcceptSsoPermission" /t REG_DWORD /d 1 /fOr if you prefer to configure PowerShell:
New-Item -Path "HKLM:\SOFTWARE\Policies\Microsoft\Windows\AAD" -Force | Out-Null; New-ItemProperty -Path "HKLM:\SOFTWARE\Policies\Microsoft\Windows\AAD" -Name "AutoAcceptSsoPermission" -Value 1 -PropertyType DWord -Force | Out-NullYou can also manually check this by opening Registry Editor (regedit.exe) and navigating to:
Computer\HKEY_LOCAL_MACHINE\SOFTWARE\Policies\Microsoft\Windows\AAD
The AutoAcceptSsoPermission DWORD should have a value of 1.
Summary
This guide demonstrated the new AutoAcceptSsoPermission configuration. We can deploy this setting using Microsoft Intune, Group Policy or directly through the Windows Registry.
For Microsoft Intune environments I prefer deploying the setting using a device-context PowerShell script. For traditional Active Directory environments, Group Policy Preferences is an easy way to configure exactly the same registry value, as we can change this relatively easy.
After applying the policy, supported managed Windows devices can automatically accept the SSO permission for Microsoft Entra ID accounts, making the sign-in and onboarding experience a little bit more seamless.
Thank you for reading this post and I hope it was helpful!
These sources helped me by writing and research for this post;
End of the page 🎉
You have reached the end of the page. You can navigate through other blog posts as well, share this post on X, LinkedIn and Reddit or return to the blog posts collection page. Thank you for visiting this post.
Support the blog
