Azure Compute Gallery and (AVD) VM images
Categories:
8 minute read
Azure Compute Gallery is a great service in Azure to store, capture and maintain your VM images. This can be helpful when deploying multiple similar VMs. Use cases of this can be VM Scale Sets, webservers , containers or Azure Virtual Desktop session hosts.
In this blog post, I will tell more about Azure Compute Gallery, how to use it when imaging VMs and how it can help you storing and maintaining images for your VMs.
Requirements
- Around 40 minutes of your time
- Basic knowledge of (Windows) VMs
- Basic knowledge of Azure
- An Azure subscription to test the functionality
What is Azure Compute Gallery?
Azure Compute Gallery (ACG) is a service in Azure that helps you storing, categorizing and maintaining images of your virtual machines. This can be really helpful when needing to deploy similar virtual machines, which we do for Virtual Machine Scale Sets but also for Azure Virtual Desktop. Those are 2 services where similar images needs to be deployed. You can also build “specialized” images for different use cases where similarity is not a requirement, like Active Directory Domain Controllers or SQL/Application servers.
The features of Azure Compute Gallery:
- Image versioning: We can build our own versioning and numbering for images, storing newer images under a new version number for documentation and testing purposes. This makes it easy to rollback to a previous version if something is wrong.
- Global Replication: Images can be distributed across multiple regions for more availability and faster deployment
- Sharing of images: You can share Azure Compute Gallery images with tenants outside of your own organization, especially useful when you have Azure Landing Zones
- Security and Access control: Access to different images and versions can be restricted through Azure RBAC.
How does Azure Compute Gallery work?
Azure Compute Gallery itself is a sort specialized storage account for storing images only. In the gallery, you have a VM definition, which is a group of images for a specific use case and under the definitions, we put the images itself. All of this looks like this:
This is an example of a use-case of Azure Compute Gallery, where we store images for Azure Virtual Desktop VMs and for our Webservers, which we re-image every month in this case.
Azure Compute Gallery vs Managed Images
Azure Compute Gallery has some advantages over the “older” and more basic Managed Images which you may use. Let’s dive into the key differences:
| Feature | Azure Compute Gallery | Managed Images |
| Creating and storing generalized and specialized images | ✅ | ✅ |
| Region availability | ✅ | ❌ |
| Versioning | ✅ | ❌ |
| Trusted Launch VMs (TPM/Secure Boot) | ✅ | ❌ |
Pricing of Azure Compute Gallery
The costs of Azure Compute Gallery is based on:
- How much images you store
- How many regions you store a copy for availability
- The storage tier you run the images on
In my exploratory example, I had a compute gallery active for around 24 hours on Premium SSD storage with one replica, and the costs of this were 2 cents:

This was a VM image with almost nothing installed, but let it increase to 15 cents per 24 hours (5 euro per month) and it still is 100% worth the money.
Create a Azure Compute Gallery
Let’s dive into the Azure Portal, and navigate to “Azure Compute Gallery” to create a new gallery:
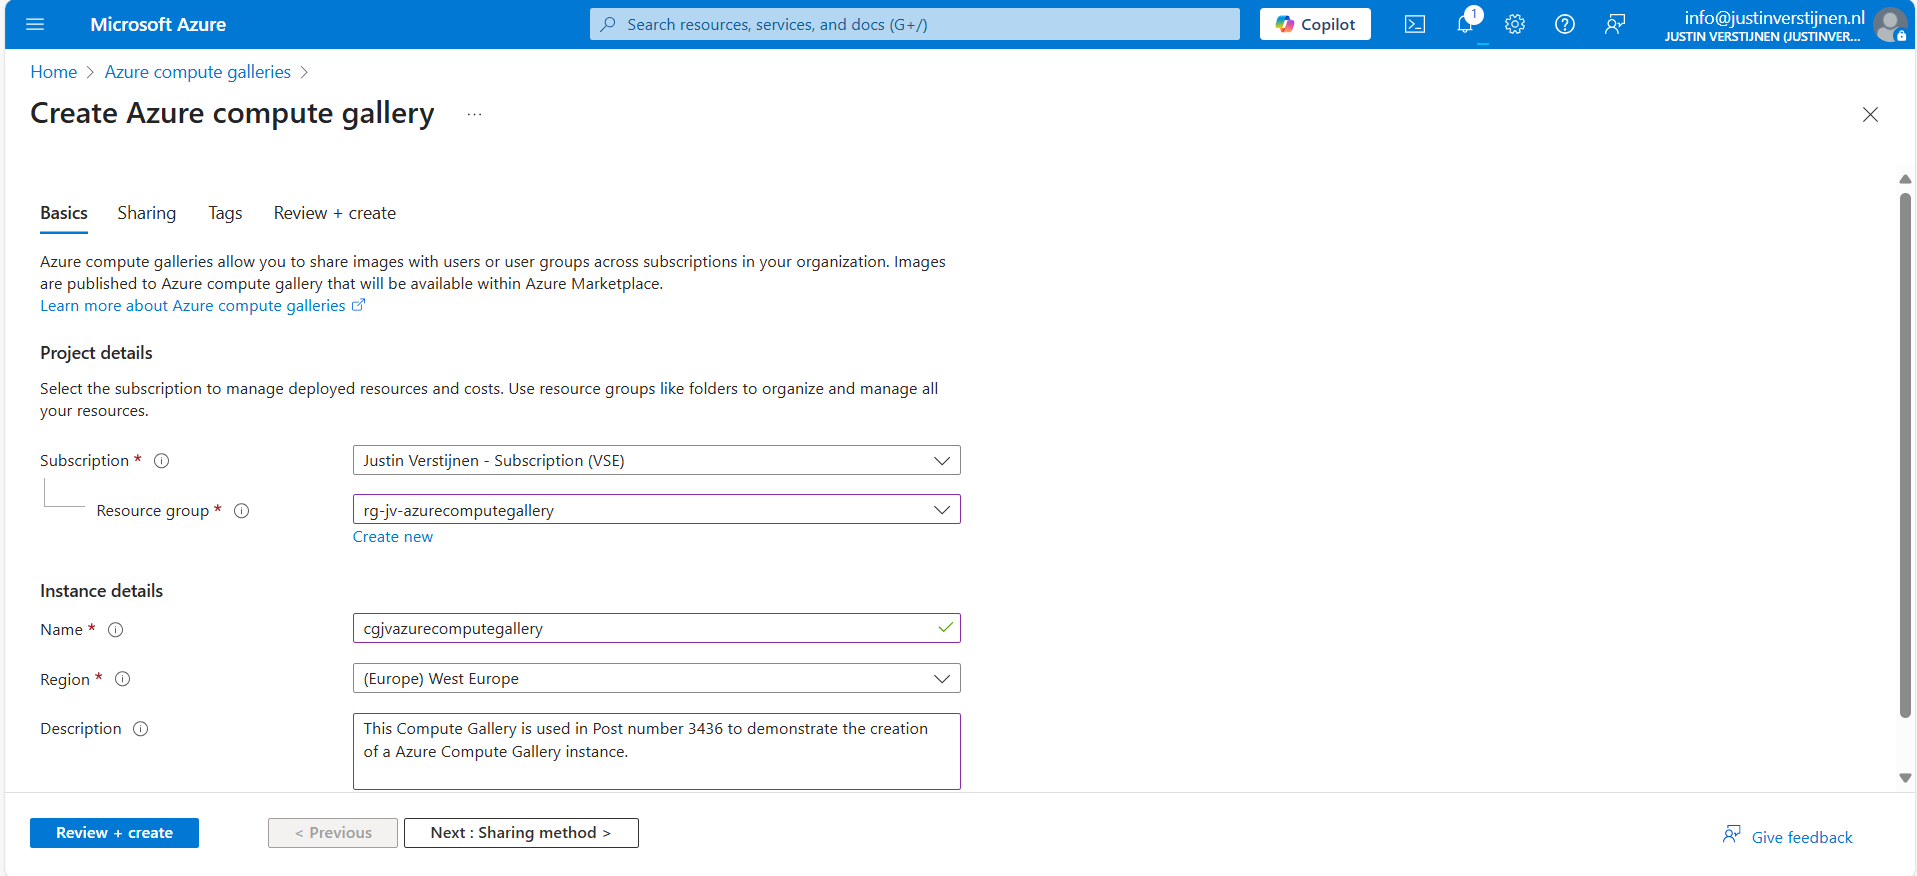
Give the gallery a name, place it in a resource group and give it a clear description. Then go to “Sharing method”.
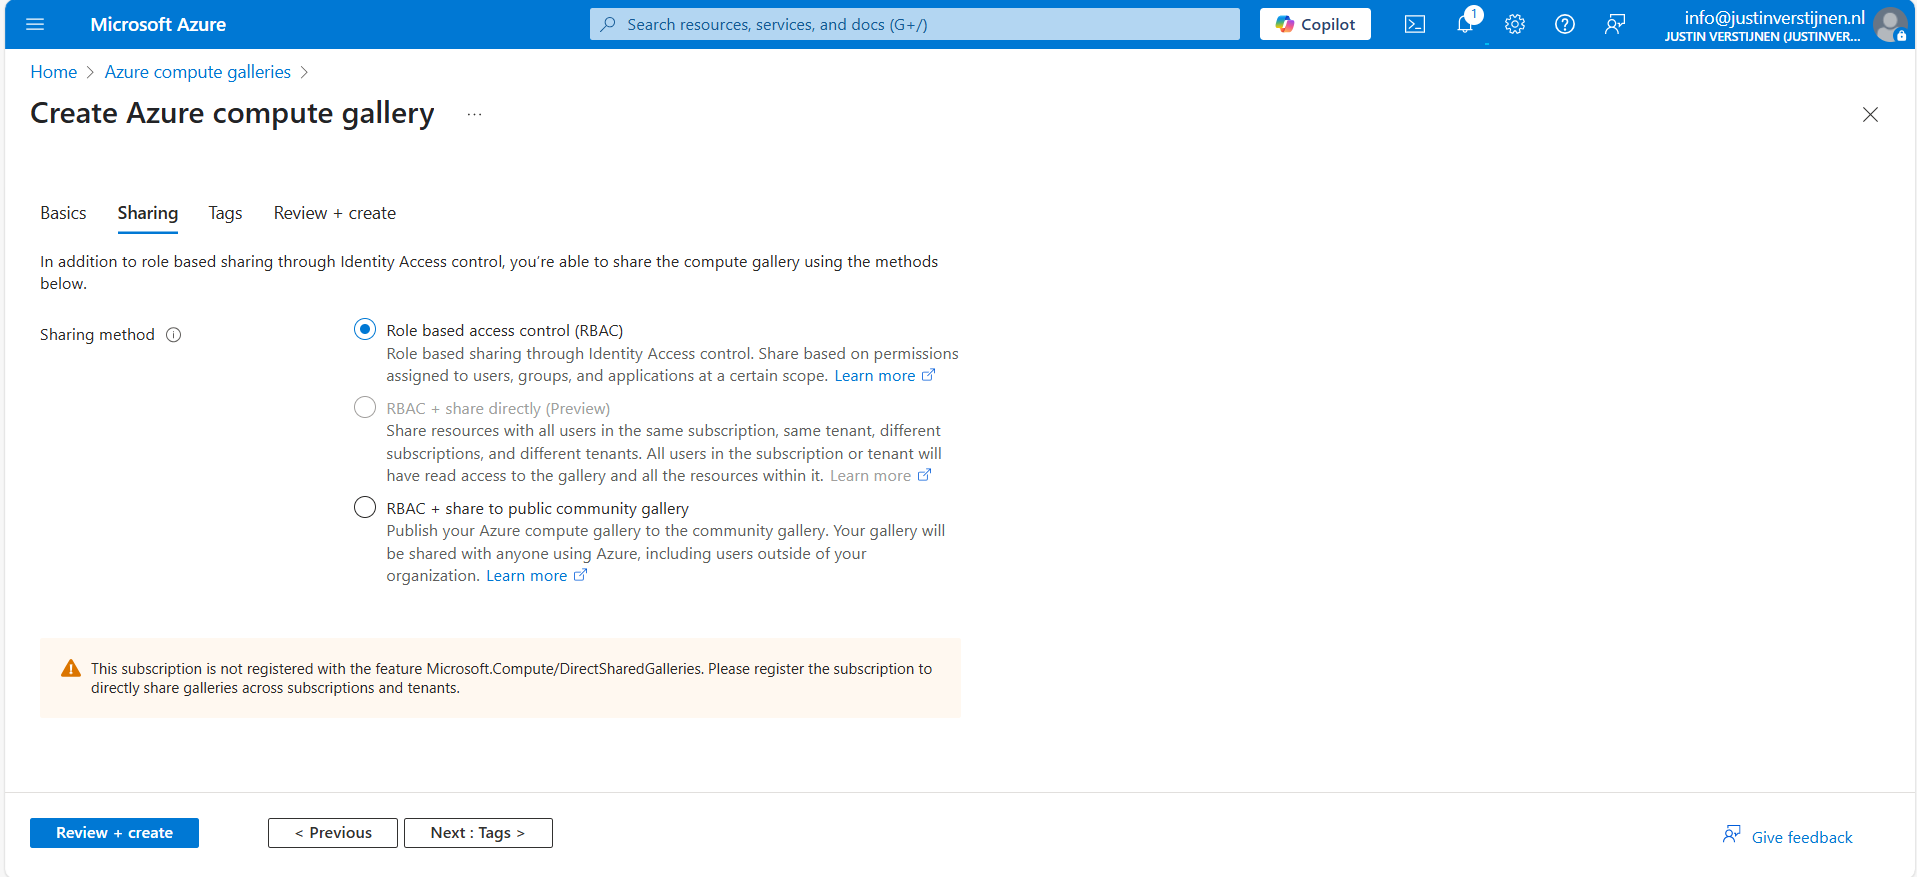
Here we have 3 options, where we will cover only 2:
- Role based access contol (RBAC): The gallery and images are only available to the people you give access to in the same tenant
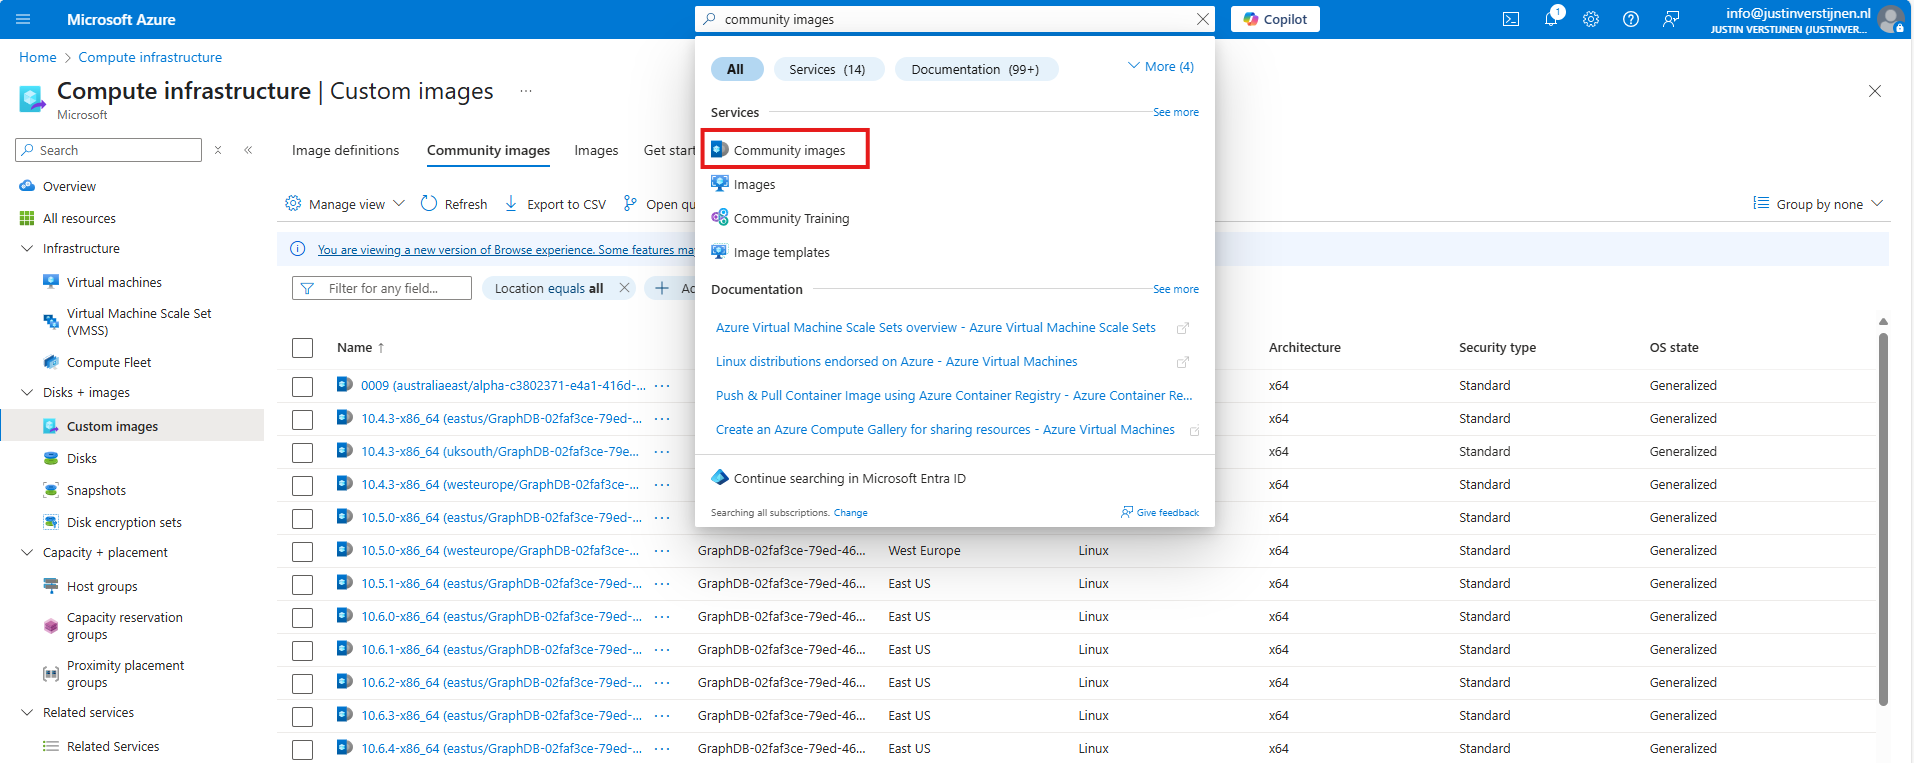
- RBAC + share to public community gallery: The gallery and images can be published to the community gallery to be used by everyone using Azure, found here:
After you made your choice, proceed to the last page of the wizard and create the gallery.
Create a VM image definition
VM image definitions can be created manually like this step, but also through a image you capture. Most of the information will be filled in automatically when choosing the second option.
I will showcase both of the options.
After creating the gallery itself, the place to store the images, we can now manually create a VM image definition. The category of images that we can store.
Click on “+ Add” and then “VM image definition”:
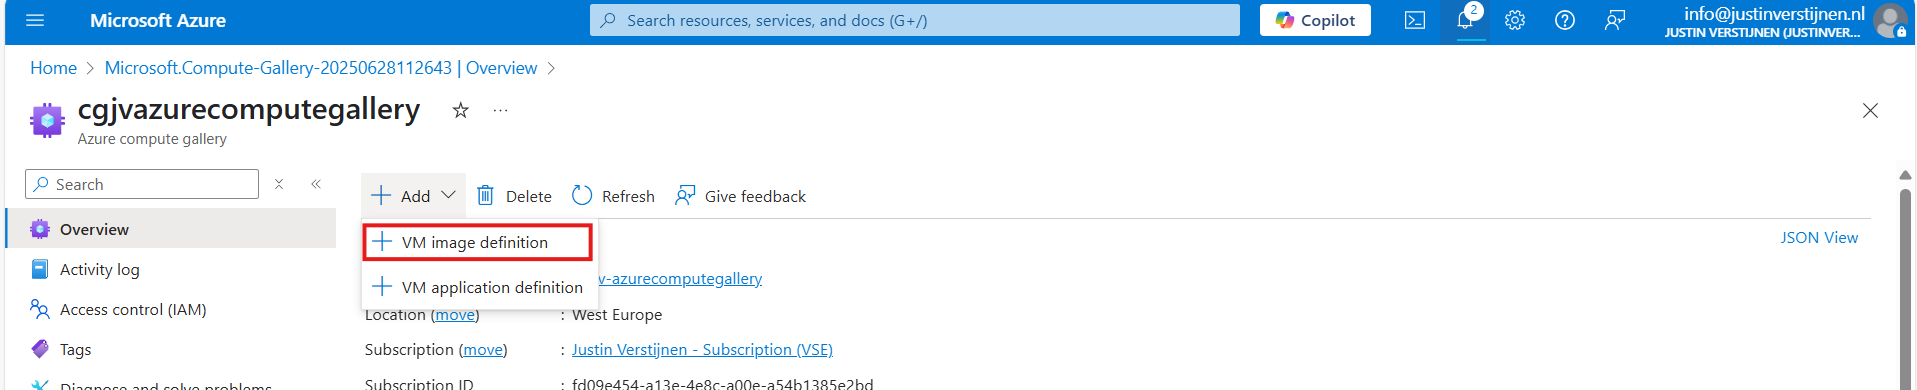
Here we need to define which type of VMs we will be storing into our gallery:
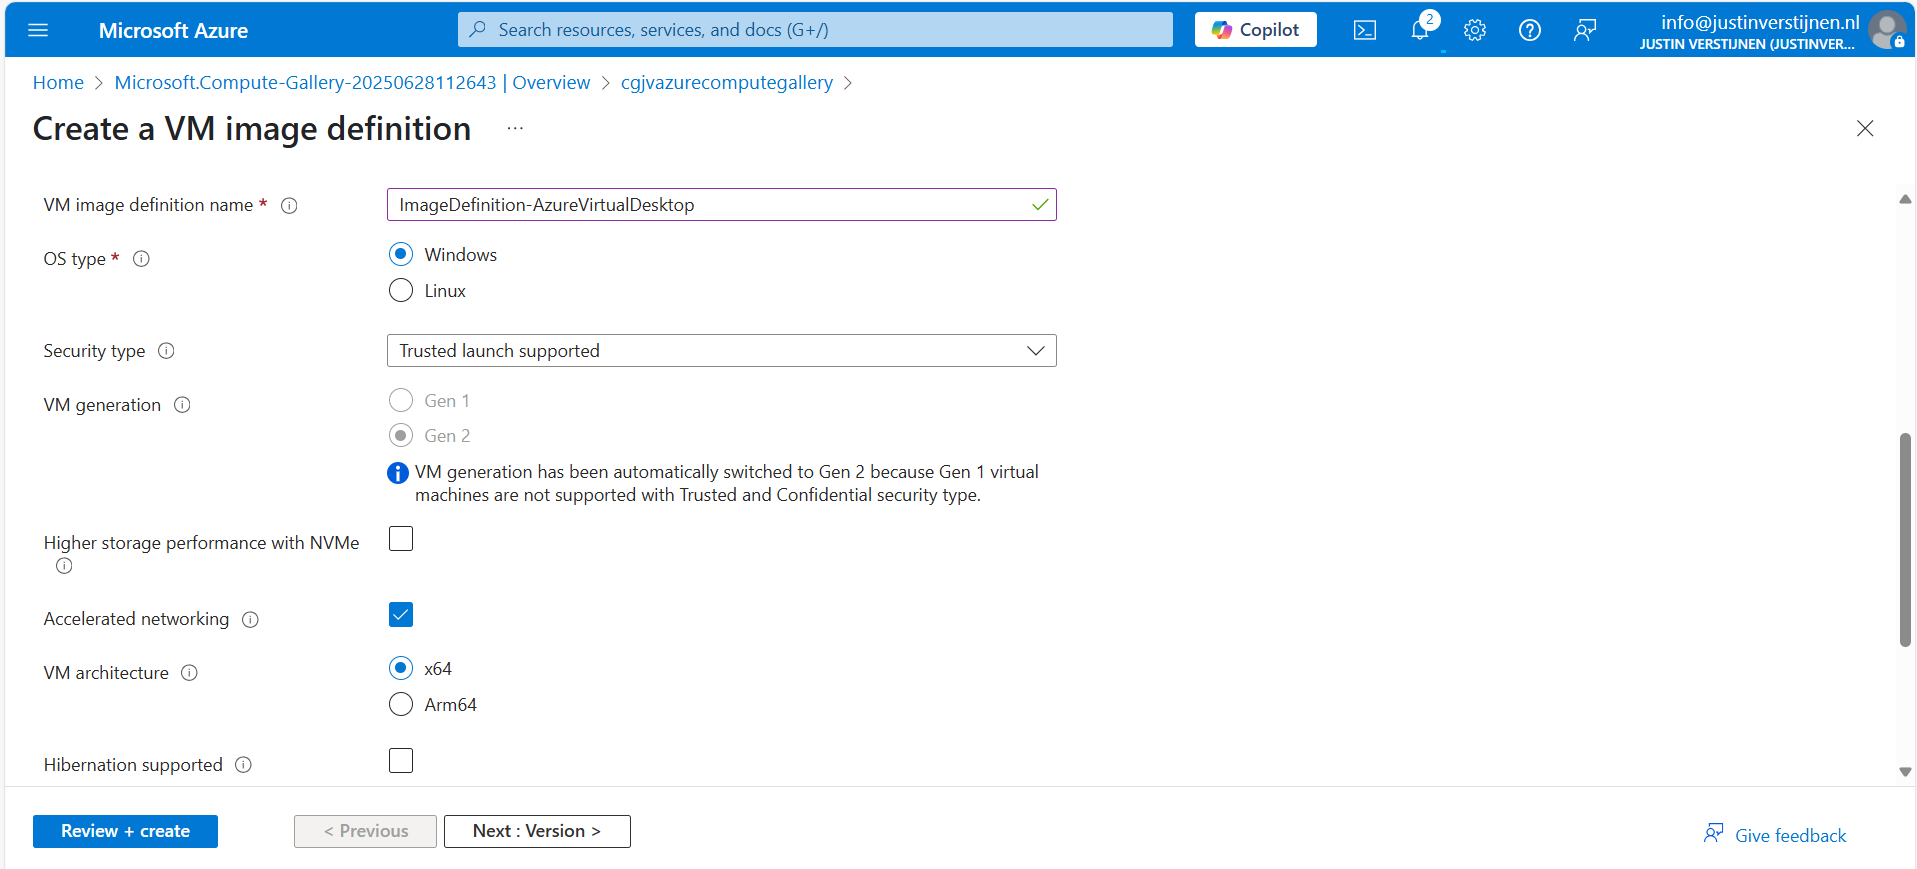
Here I named it “ImageDefinition-AzureVirtualDesktop”, the left side of the topology I showed earlier.
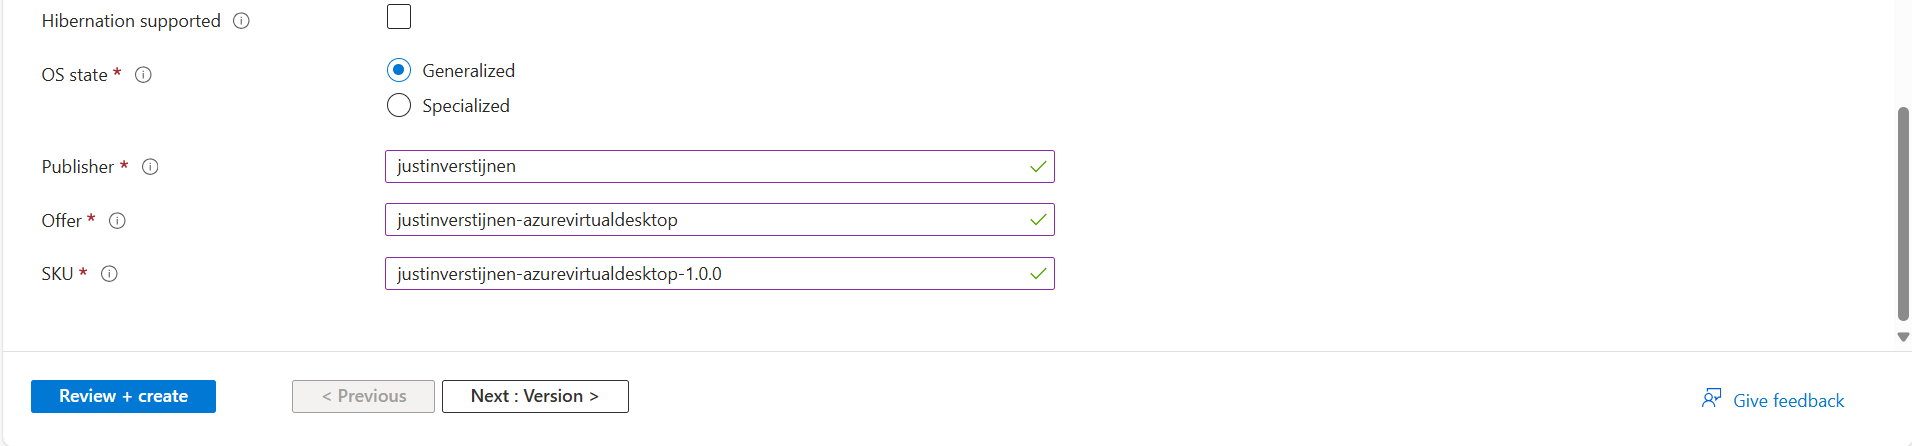
The last part can be named as you wish. This is meant for having more information for the image available for documentation purposes. Then go to the next page.
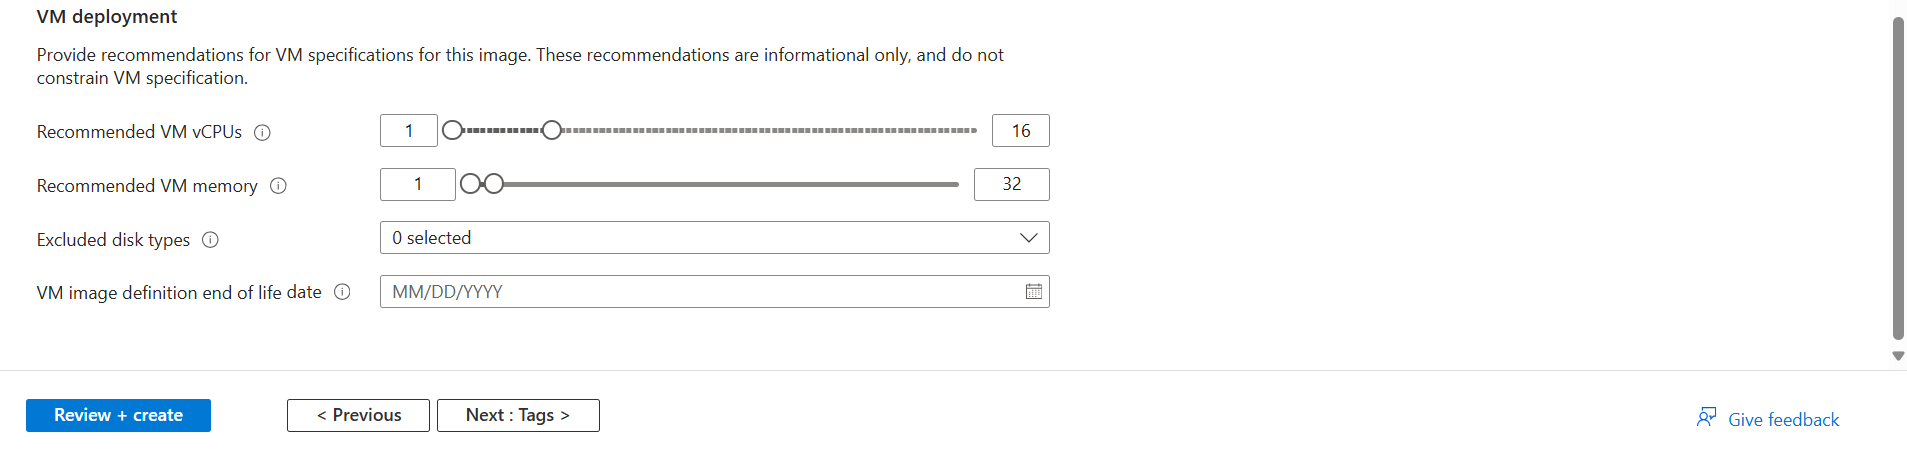
Here you can define the versioning, region and end date of using the image version. A EOL (End-of-Life) for your image.
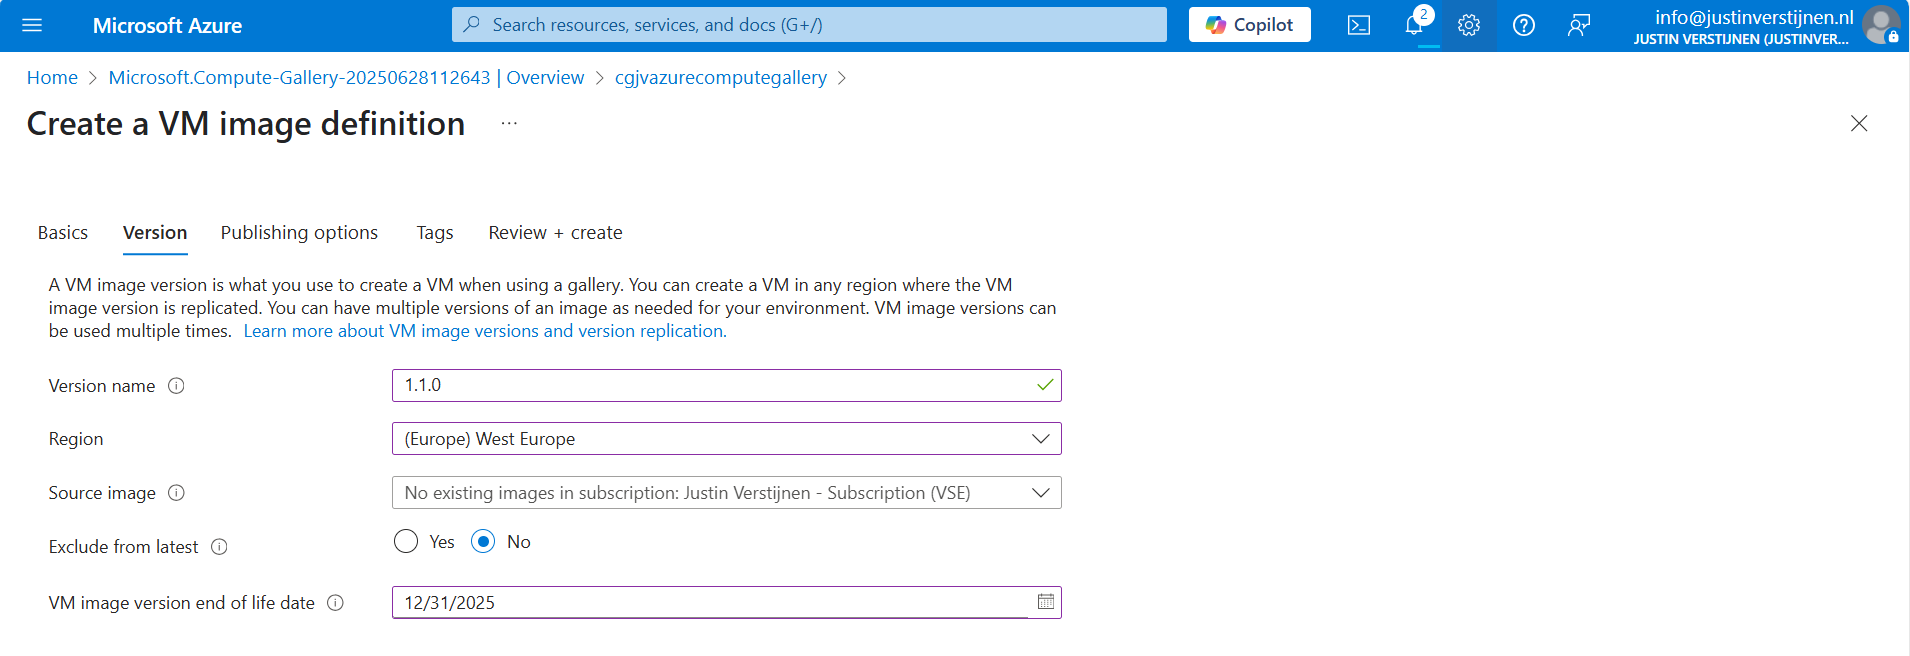
We can also select a managed image here, which makes migrating from Managed Images to Azure Compute Gallery really easy. After filling in the details go to the next page.
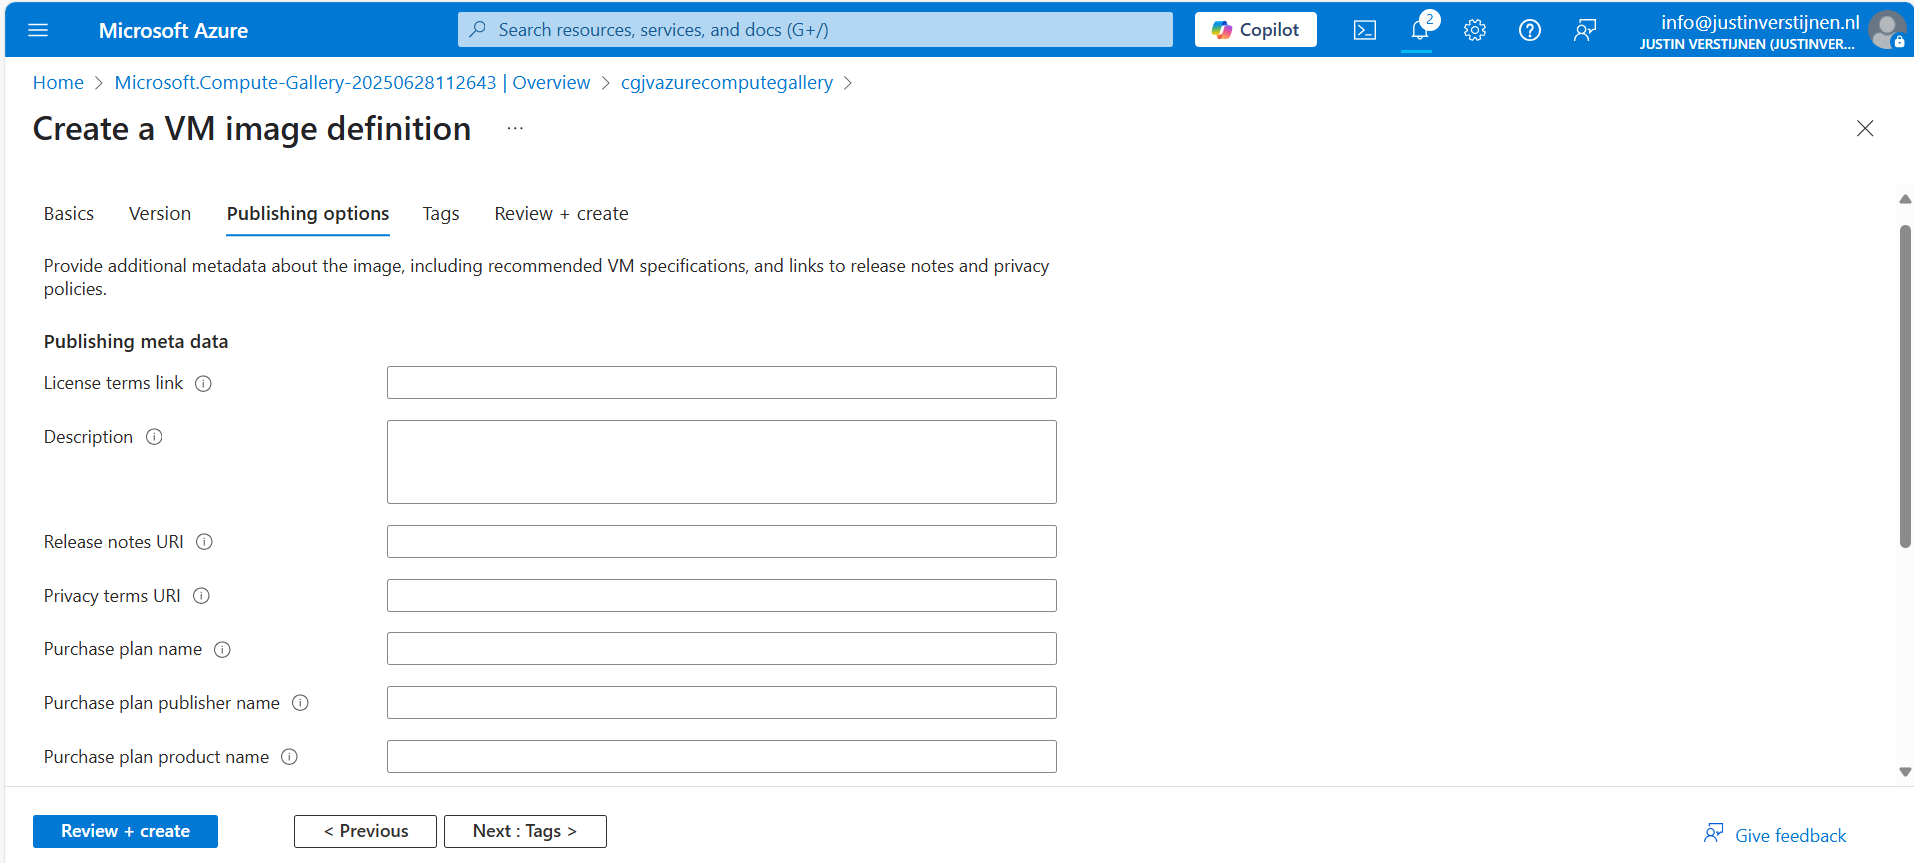
On the “Publishing options” page we can define more information for publishing and documentation including guidelines for VM sizes:
After defining everything, we can advance to the last page of the wizard and create the definition.
Capture a VM and store it in the gallery
For demonstrating how to capture a virtual machine into the gallery/definition, I already created a ready virtual machine with Windows Server 2025. Let’s perform some pre-capturing tasks in the VM:
- Disabling IE Enhanced Security Configuration
- Installing latest Windows updates
- Installing Google Chrome
Sysprep
Sysprep is a application which is shipped with Windows which cleanes a Windows installation from specific ID’s, drivers and such and makes the installation ready for mass deployment. You must only use this for temporary machines you want to images, as this is a semi-destructive action for Windows. A generalized VM in Azure cannot be booted, so caution is needed.
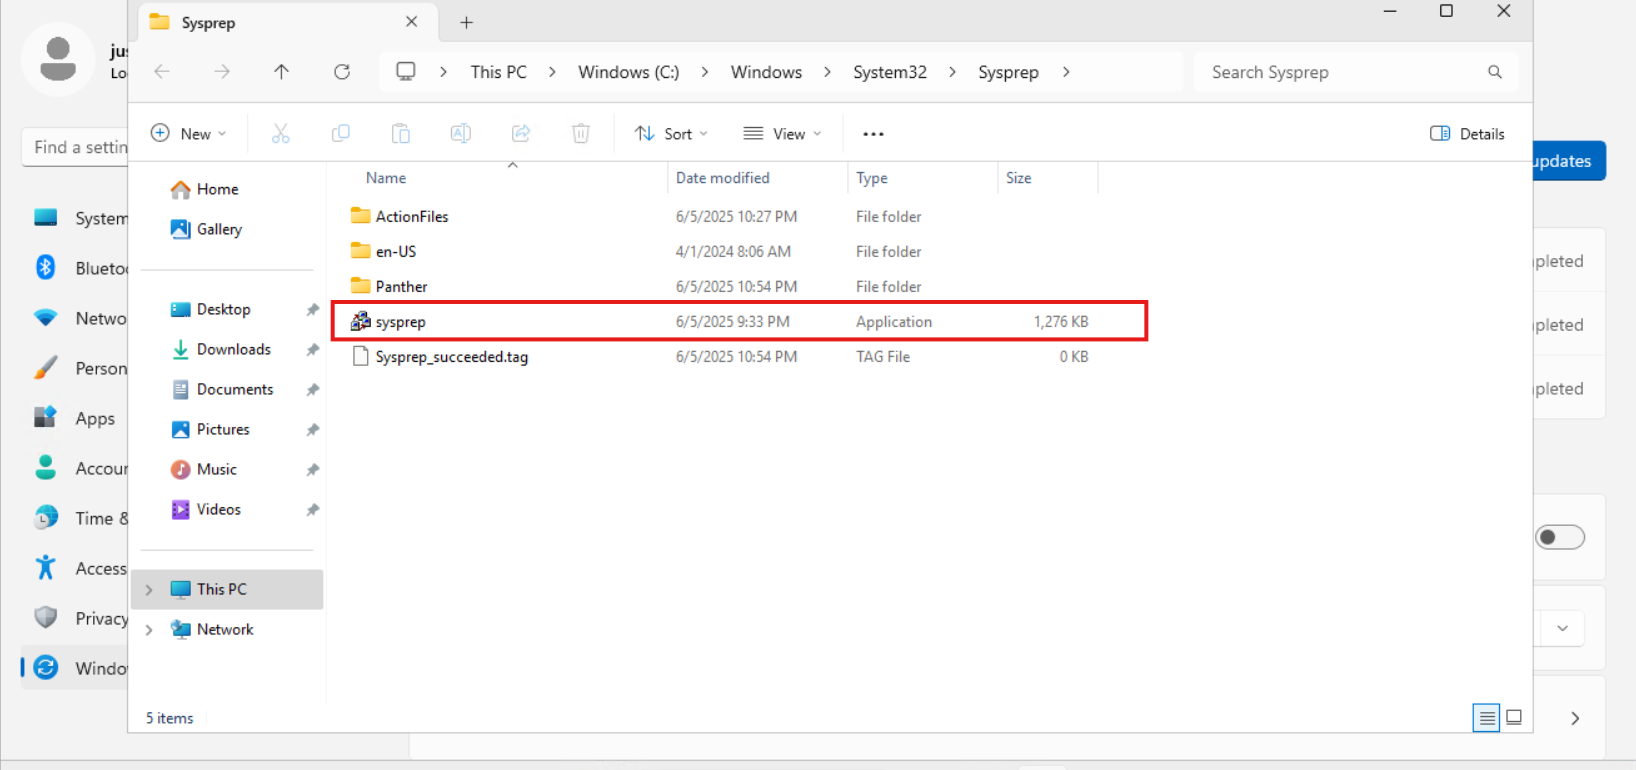
After finishing those pre-capturing tasks, clean up the VM by cleaning the installation files etc. Then run the application Sysprep which can be found here: C:\Windows\System32\Sysprep
Open the application and select “Generalize” and the as Shutdown option: “Shutdown”.
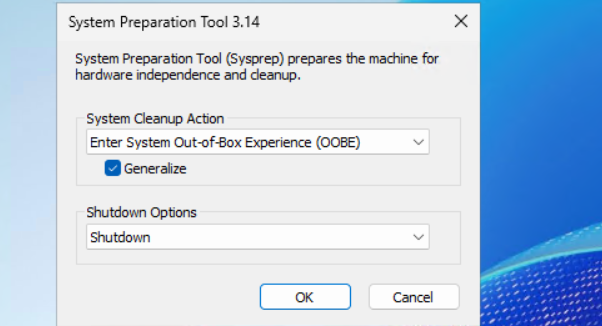
Click “OK” and wait till the virtual machine performs the shutdown action.

If you get an error during this stage that states Bitlocker is activated, you need to disable it temporarily. At deployment of the image, this will be re-activated.
Disable-BitLocker -MountPoint "C:"
Capturing the image in Azure
After the virtual machine is sysprepped/generalized succesfully, we can go to the virtual machine in the Azure Portal to capture it and store it in our newly created Compute gallery.
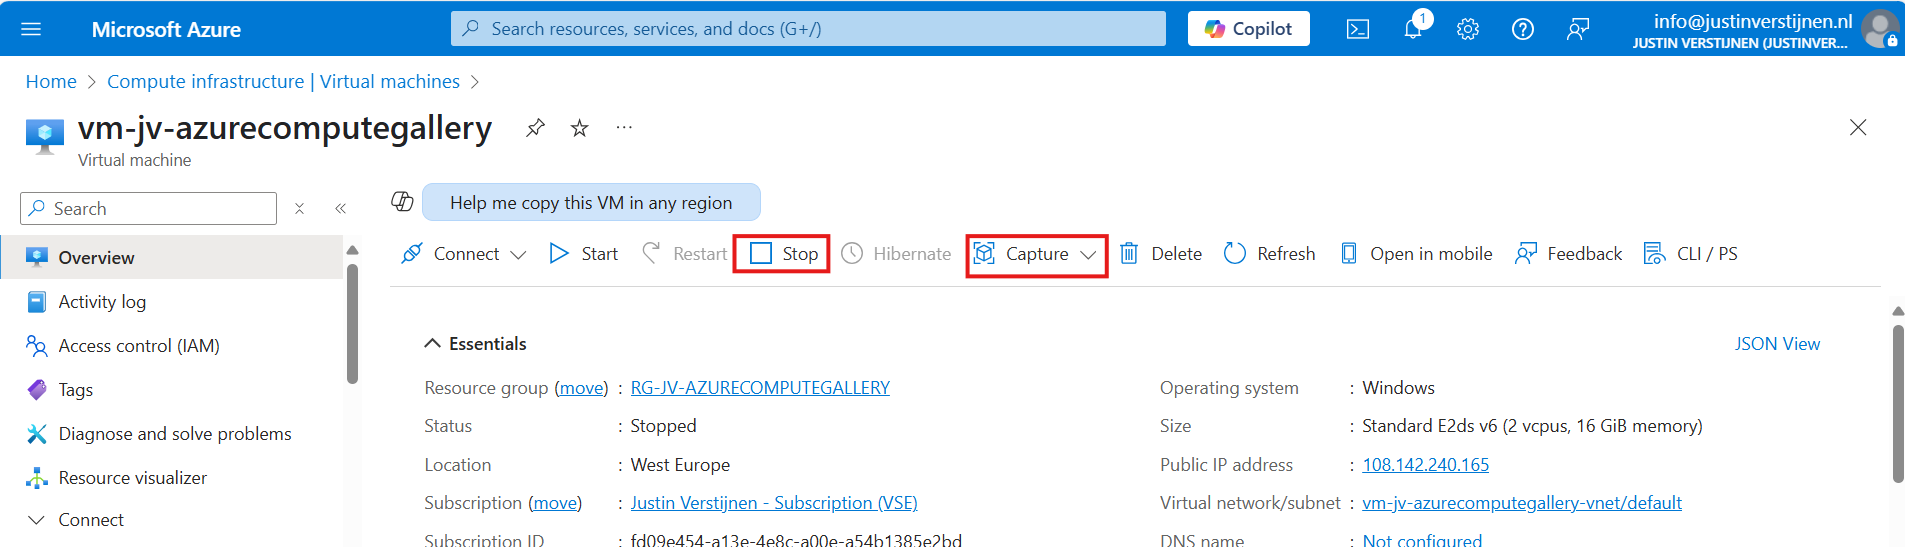
First clikc on “Stop” to actually deallocate the virtual machine. Then click on “Capture” and select “Image”.
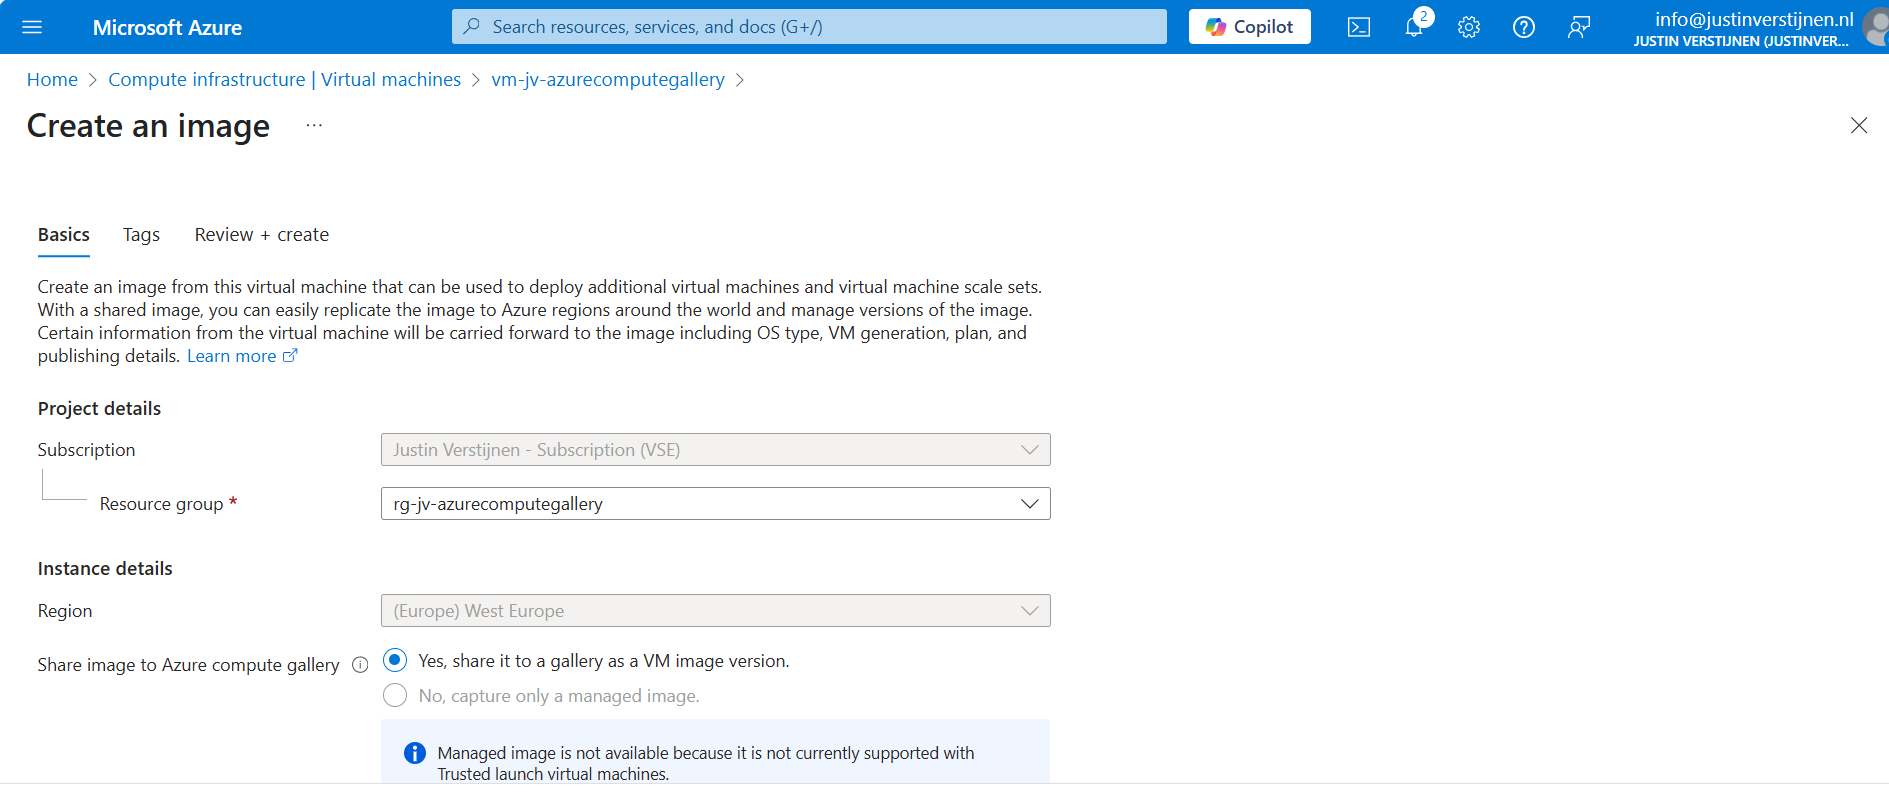
Select the option “Yes, share it to a gallery as a VM image version” if not already selected. Then scroll down and select your compute gallery as storage.
Creating the VM image definition automatically
Scroll down on the first page to “Target VM image definition”. We can create a VM image definition here based on the image we give Azure:
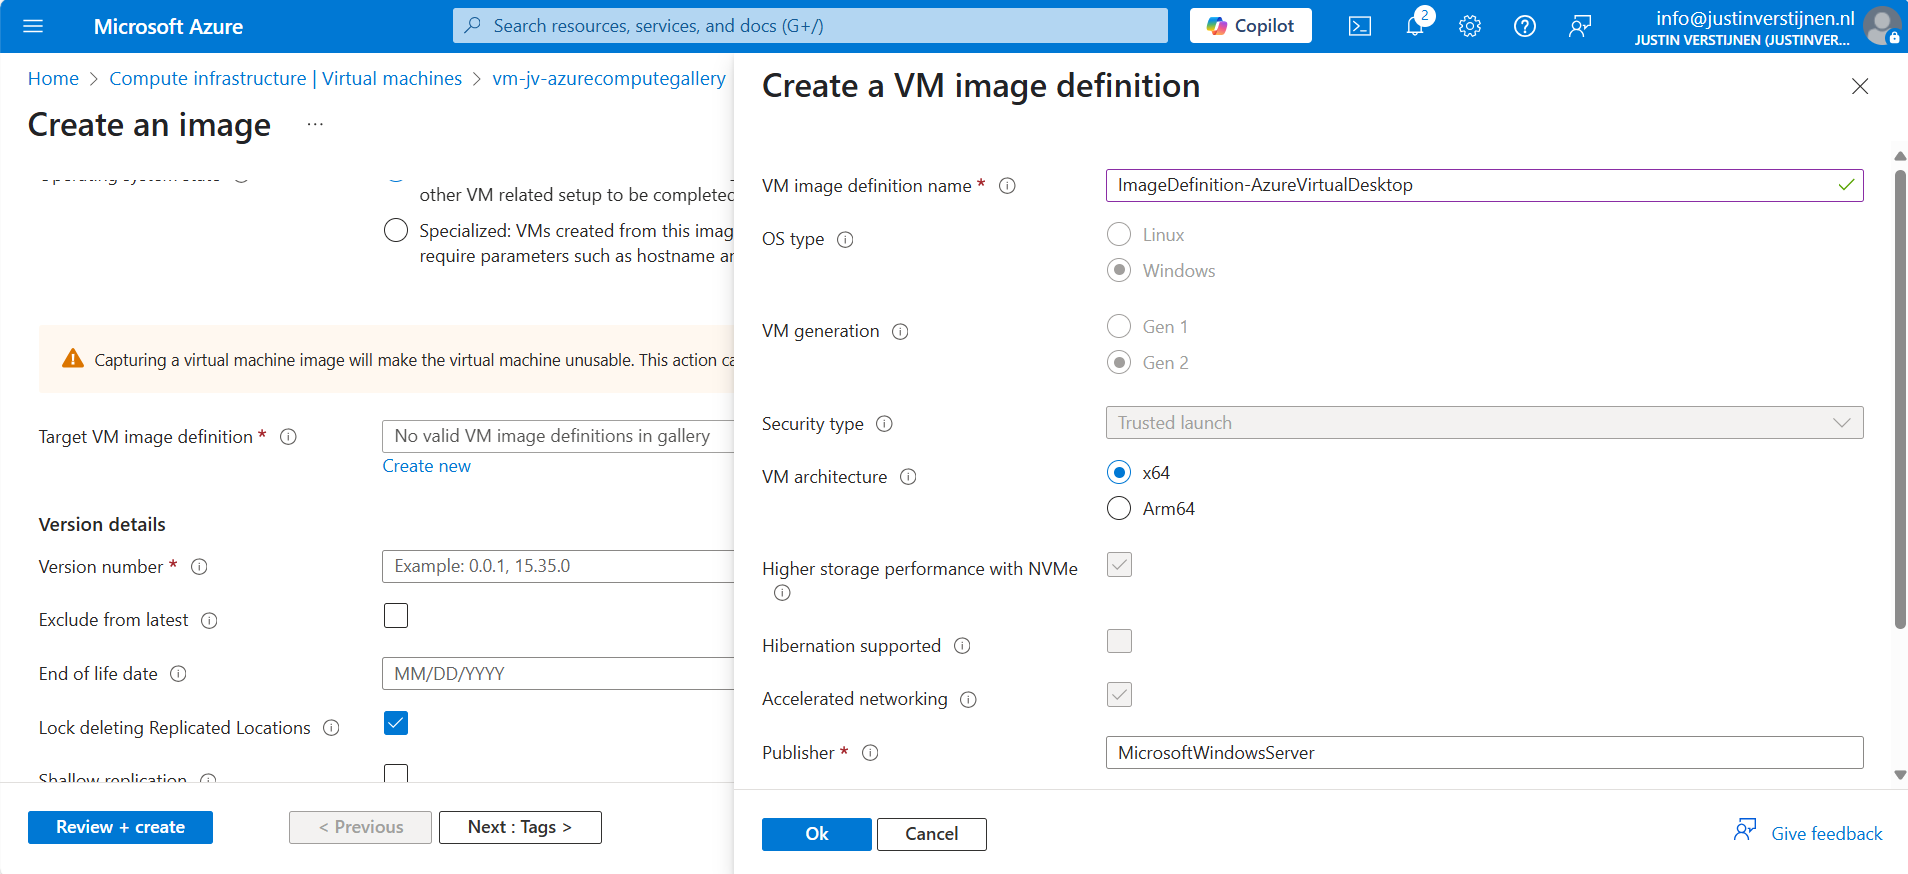
We don’t have to fill in that much. A name for the image is enough.
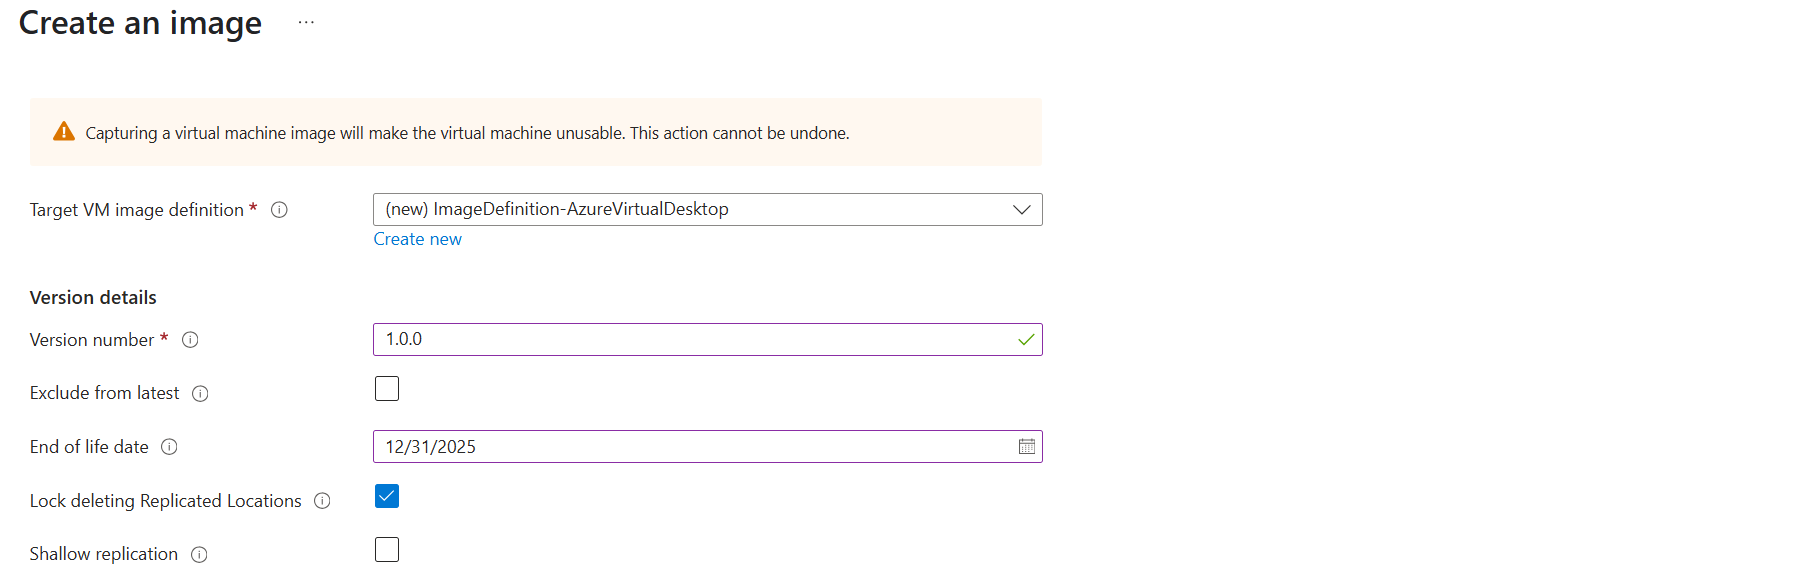
After that, click on “Add” and fill in the version numer and End of life date:
Then scroll down to the redundancy options. You can define here what type of replication you want and what type of storage:
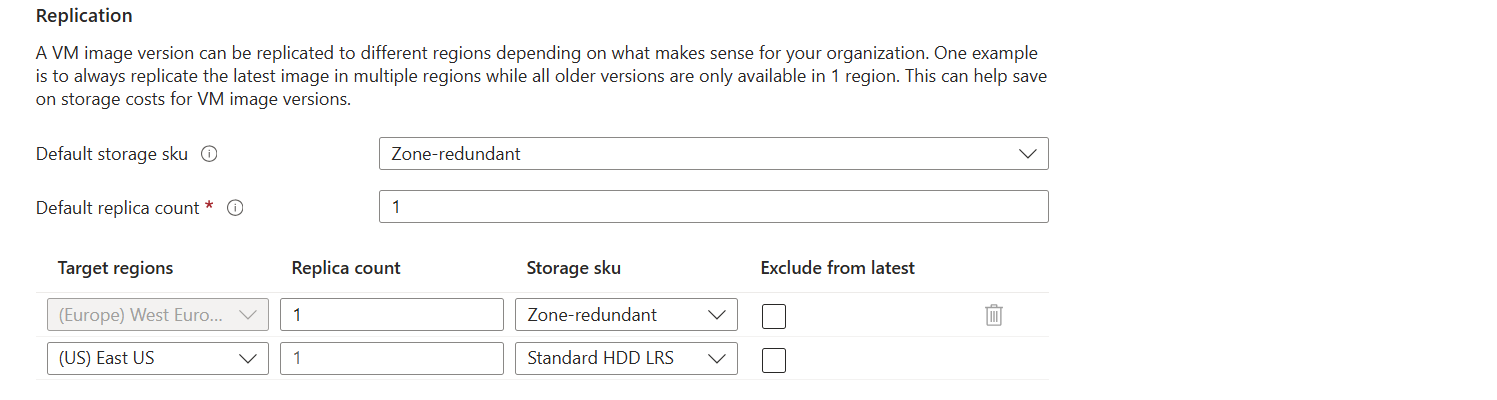
I changed the options to make it more available:
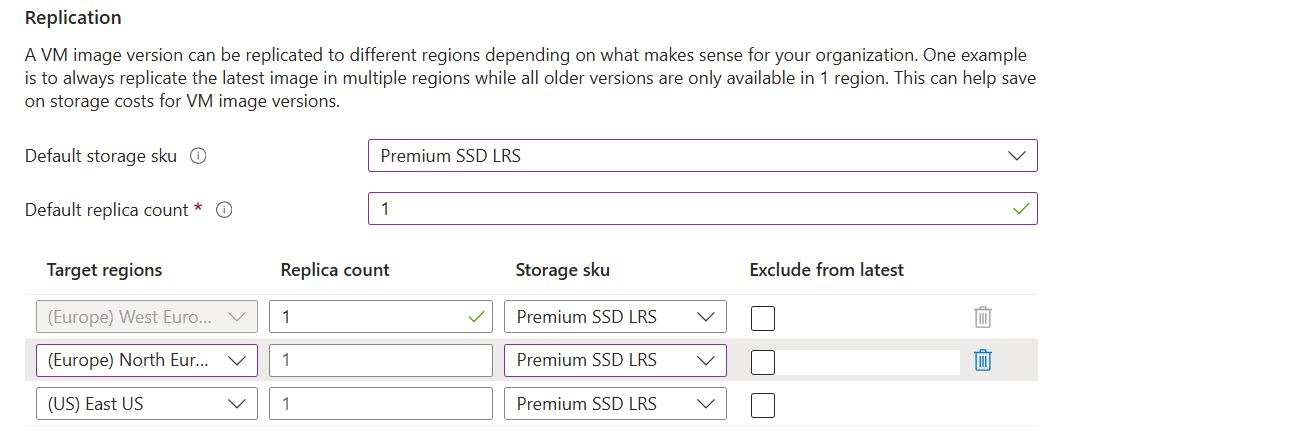
Only the latest versions will be available in the regions you choose here. Older versions are only available in the primary region (The region you can’t change).
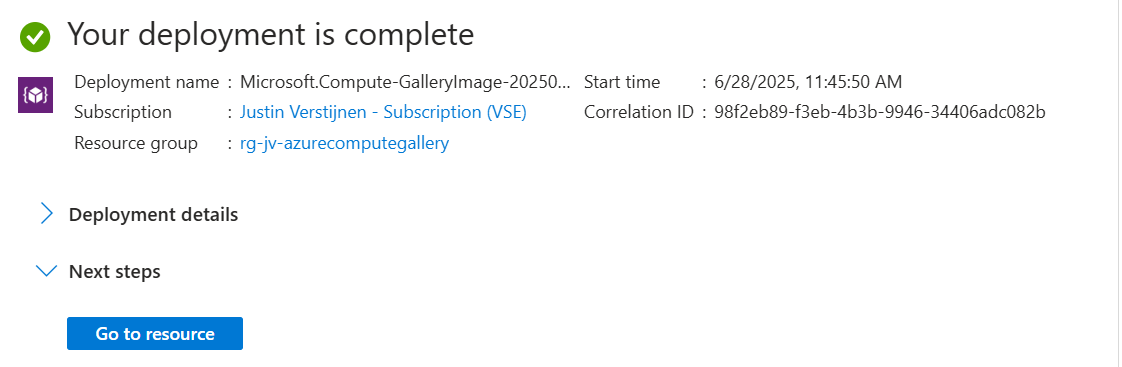
After that finish the wizard, and the virtual machine will now be imaged and stored in Azure Compute Gallery.
Summary
Azure Compute Gallery is a great way to stora and maintain images in a fairly easy way. At first it can be overwhelming but after this post, I am sure you know the basics of it, how to use it and how it works.
If you already know the process with Managed Images, the only thing changed is the location of where you store the images. I think Azure Compute Gallery is the better option because of centralizing storage of images instead of random in your resource group and having support for trusted launch.
Sources
These sources helped me by writing and research for this post;
Thank you for reading and I hope it was helpful.
End of the page 🎉
You have reached the end of the page. You can navigate through other blog posts as well, share this post on X, LinkedIn and Reddit or return to the blog posts collection page. Thank you for visiting this post.
If you think something is wrong with this post or you want to know more, you can send me a message to one of my social profiles at: https://justinverstijnen.nl/about/
If you find this page and blog very useful and you want to leave a donation, you can use the button below to buy me a beer. Hosting and maintaining a website takes a lot of time and money. Thank you in advance and cheers :)

The terms and conditions apply to this post.