Clean up old FSLogix profiles with Logic Apps
Categories:
8 minute read
I will give you a step-by-step guide to build this Logic App yourself.
Make sure you have backups ofenabled on your storage account so when a file is deleted but you need it for some reason after some time, you can restore it from a monthly or yearly backup.
Also: Recover Services storage is much cheaper than live Storage Account storage, keep this in mind when implementing this sort of Logic Apps.
Requirements
- Around 30 minutes of your time
- An Azure Subscription
- An Azure Files share ready for the Logic App to check and delete files from
- Basic Knowledge of Azure, Logic Apps and Storage Accounts
Download the Logic App Template
For the fast pass, you can download the Logic App JSON code here:
Then you can use the code to configure it completely and only change the connections.
The Logic App described
The logic app looks like this:
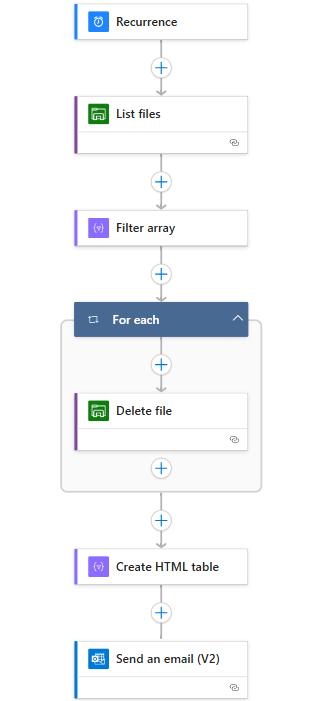
Recurrence: This is the trigger for the Logic App, and determines when it should run.
List Files: This connects to the storage account (using Storage Access Key) and folder and gets all file data.
Filter Array: Here the filtering on the last modified time/date takes place.
For Each -> Delete file: For each file that is longer than your stated last change date in the “Filter Array” step, deletes the file.
Create HTML template: Formats each file into a HTML template prior for sending via email.
Send an email: Sends an email of all the profiles which were deleted by the script for monitoring purposes.
This is a relatively simple 6-step logic app where the last 2 are optional. If you don’t want to receive email, it would be 4 steps and done after the for each -> Delete file step.
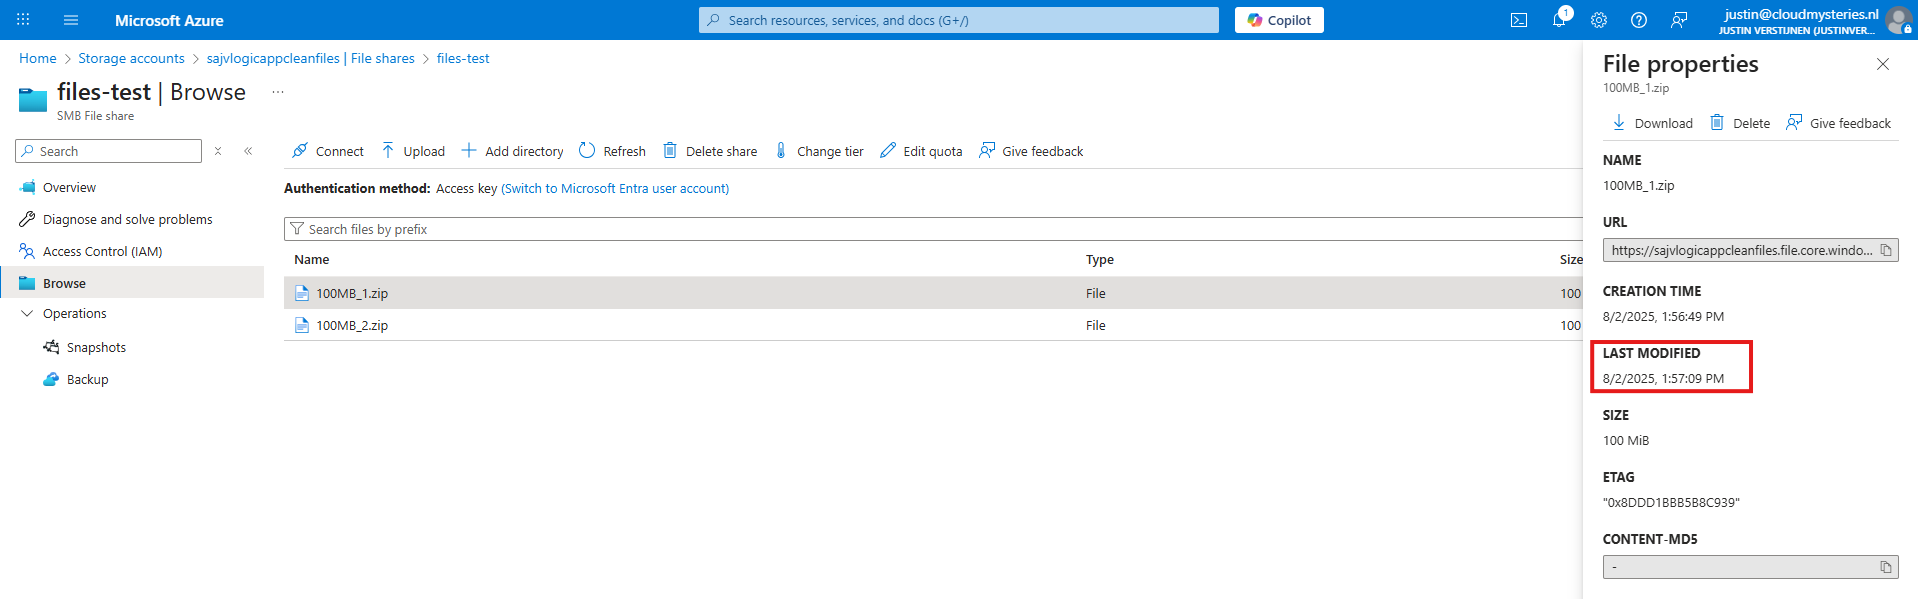
The Logic App monitors this date in the Azure Portal:
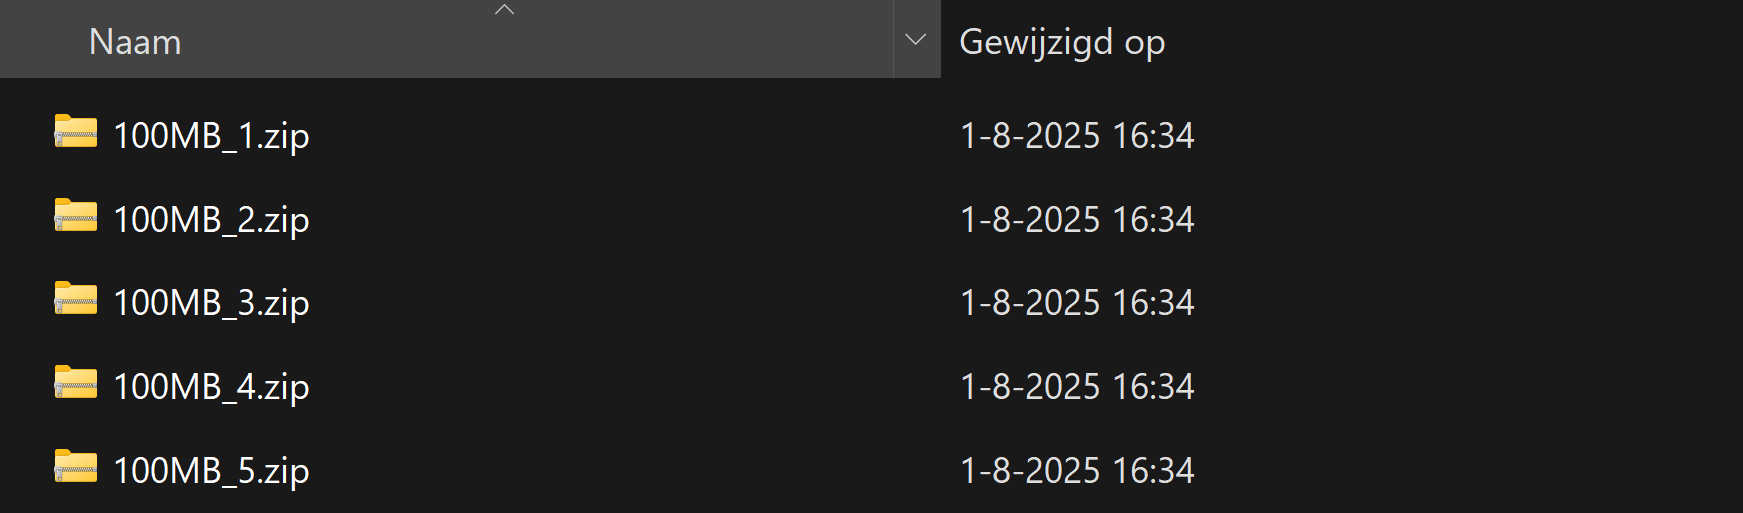
Not the NTFS last modified date which you will find in Windows:
Step 1: Deploying the Logic App
Now we will configure this Logic App step-by step to configure it like I have done.
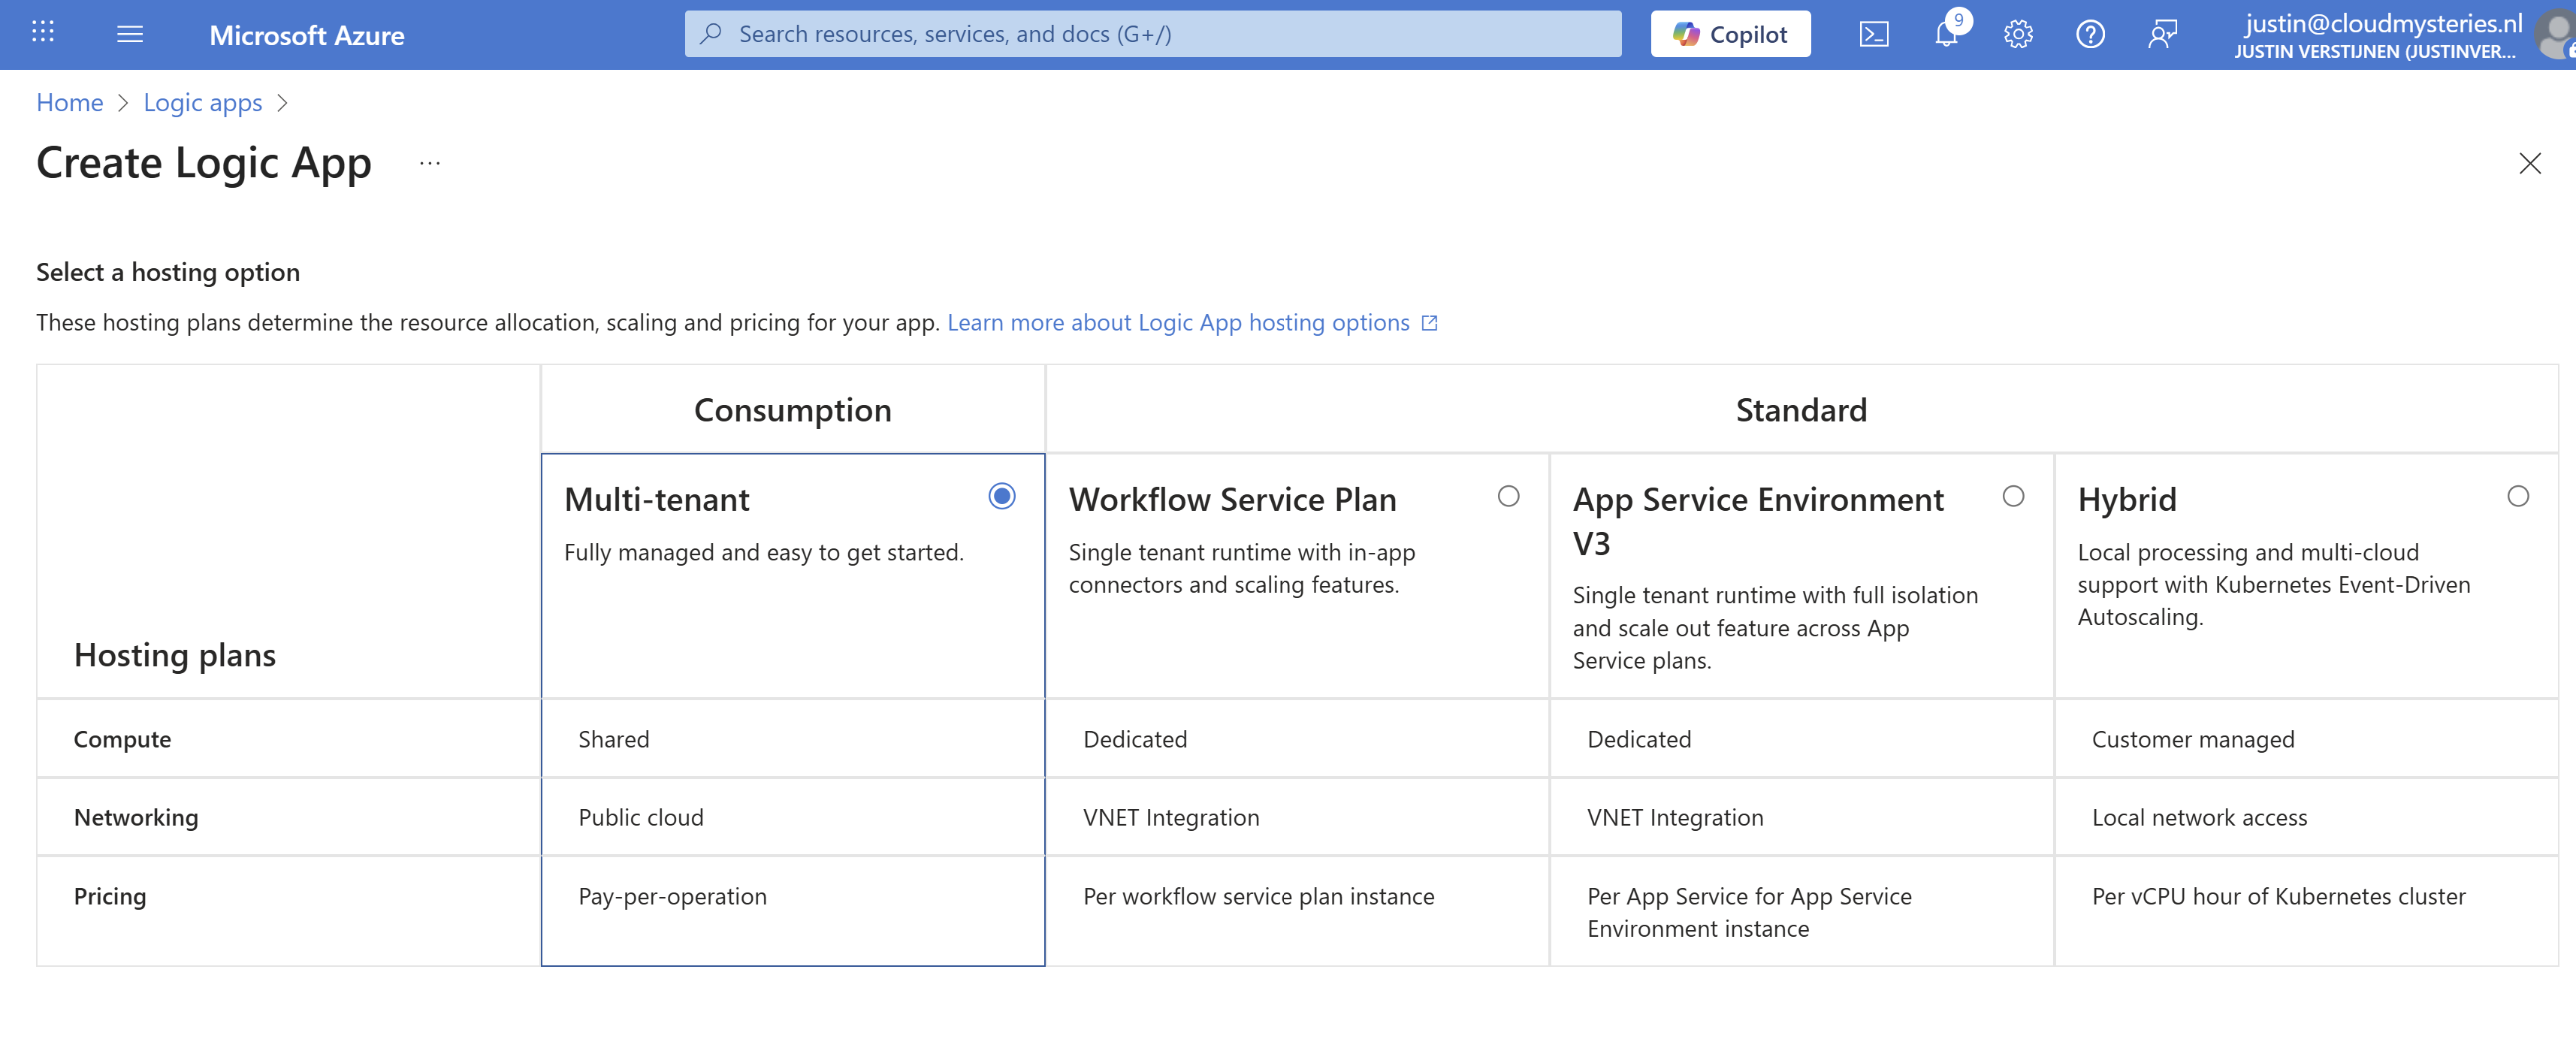
Start by creating a new Logic App in the Azure Portal. Choose the “Multi-tenant” option for the most cost-effective plan:
Advance.
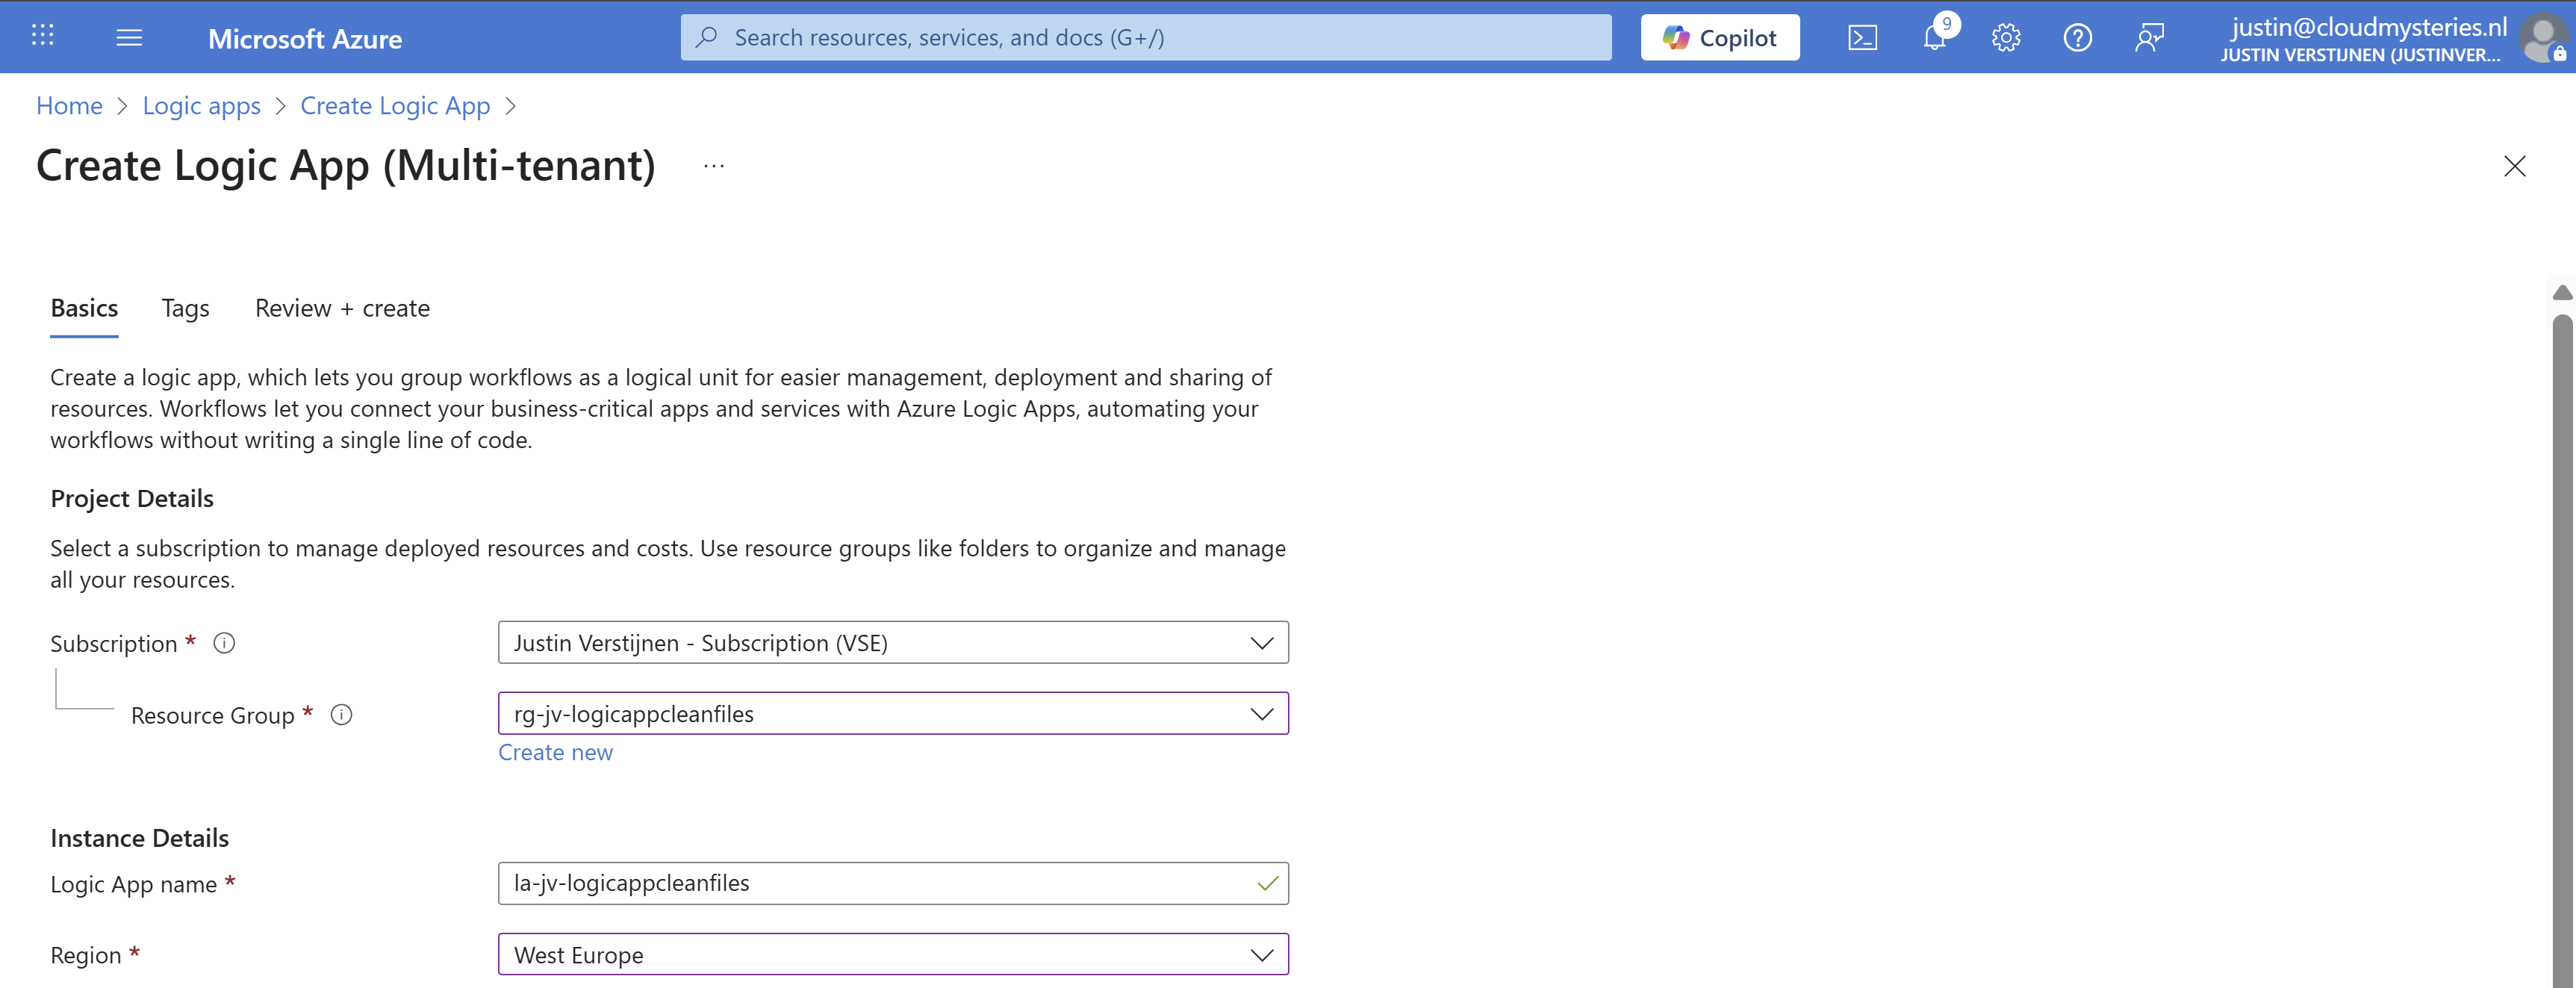
Select the right resource group, give it a name and select the right region. Then advance to the last page and create the Logic App.
Step 2: Create the trigger
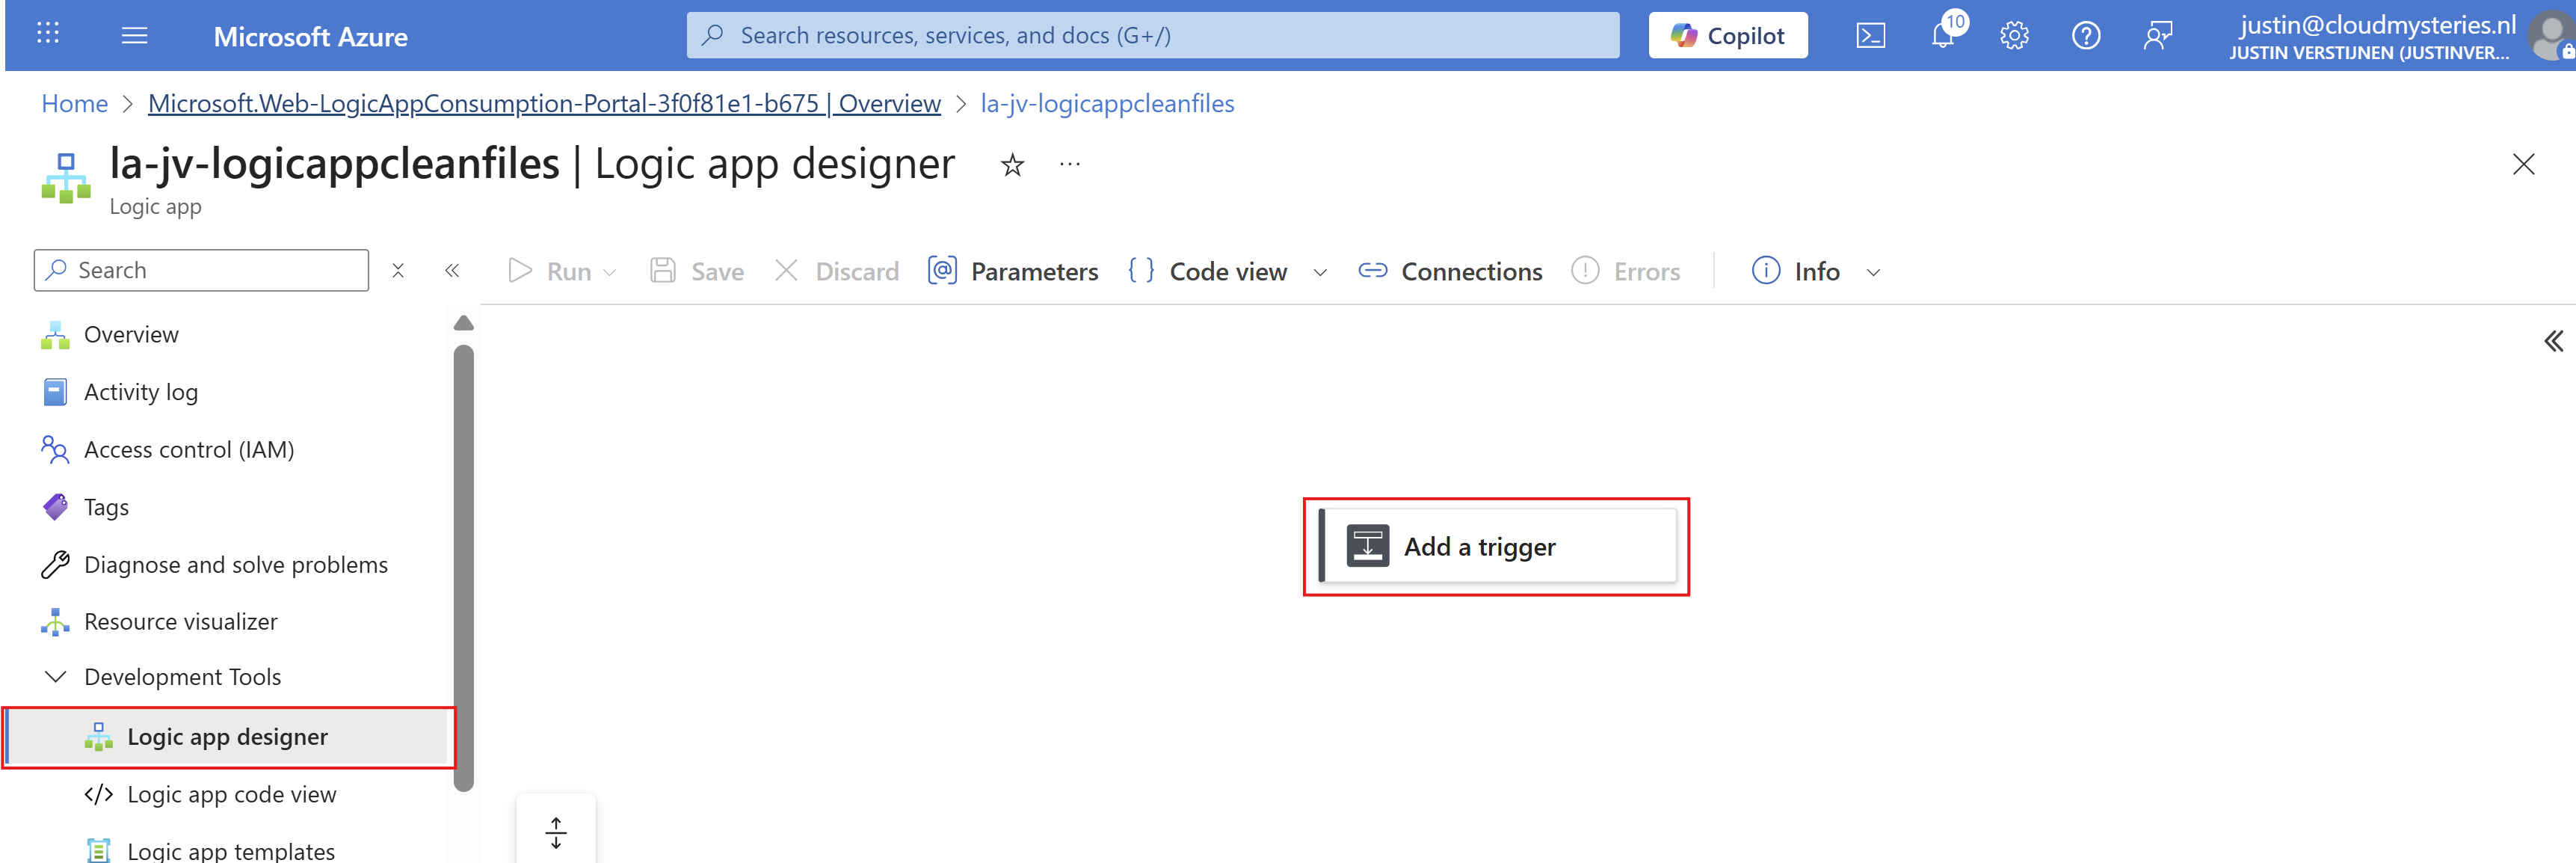
Now that we have the Logic App, we must now configure the trigger. This states when the Logic App will run.
Open the Logic App designer, and click the “Add a trigger” button.
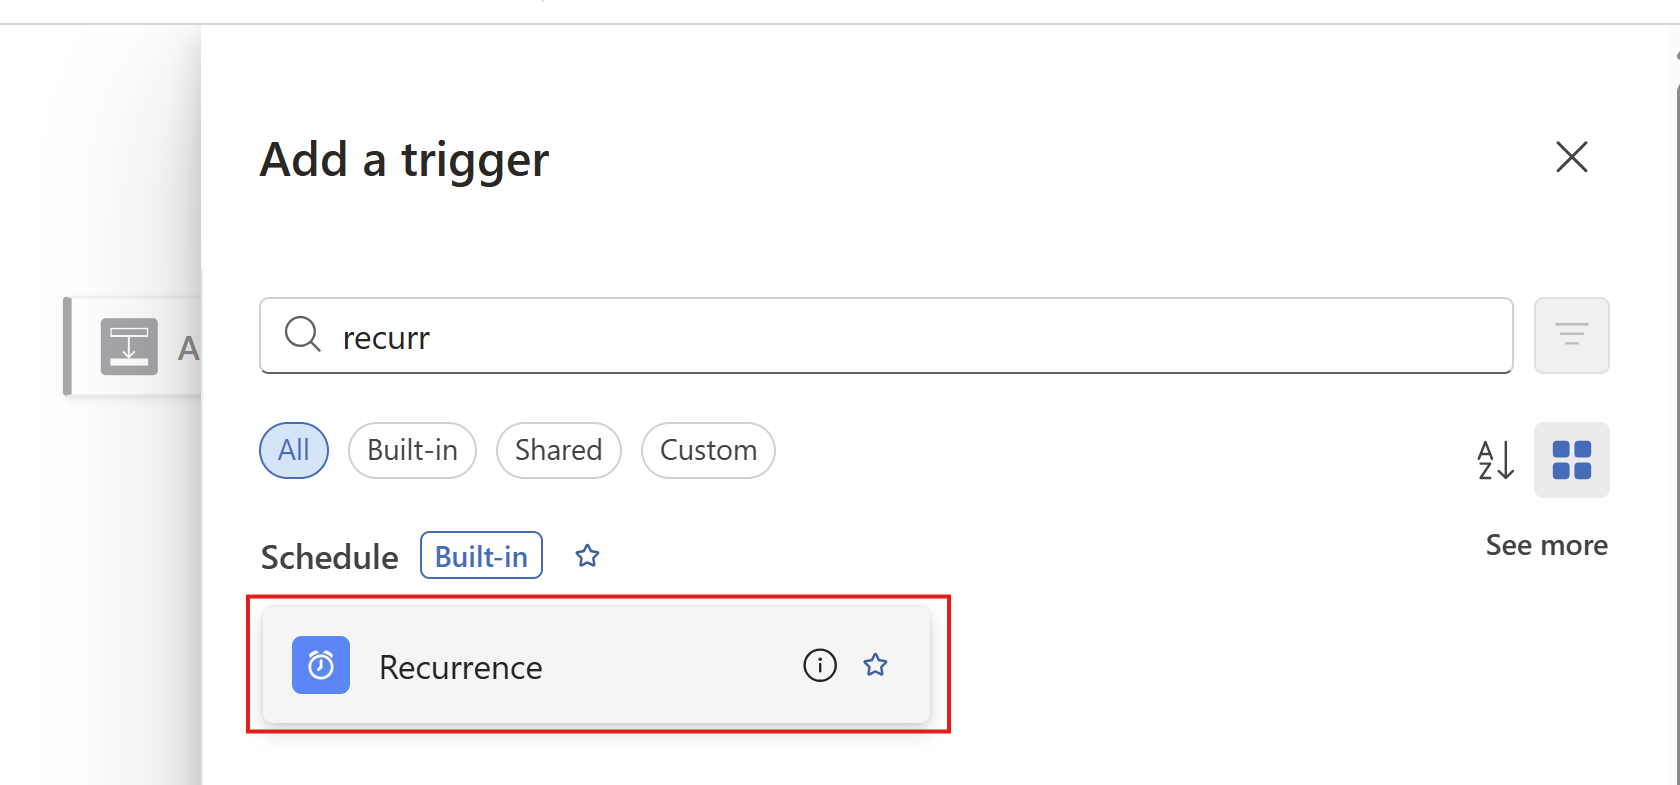
Search for “Recurrence” and select it.
Then configure when the Logic App must run. In my example, I configured it to run every day on 00:00.
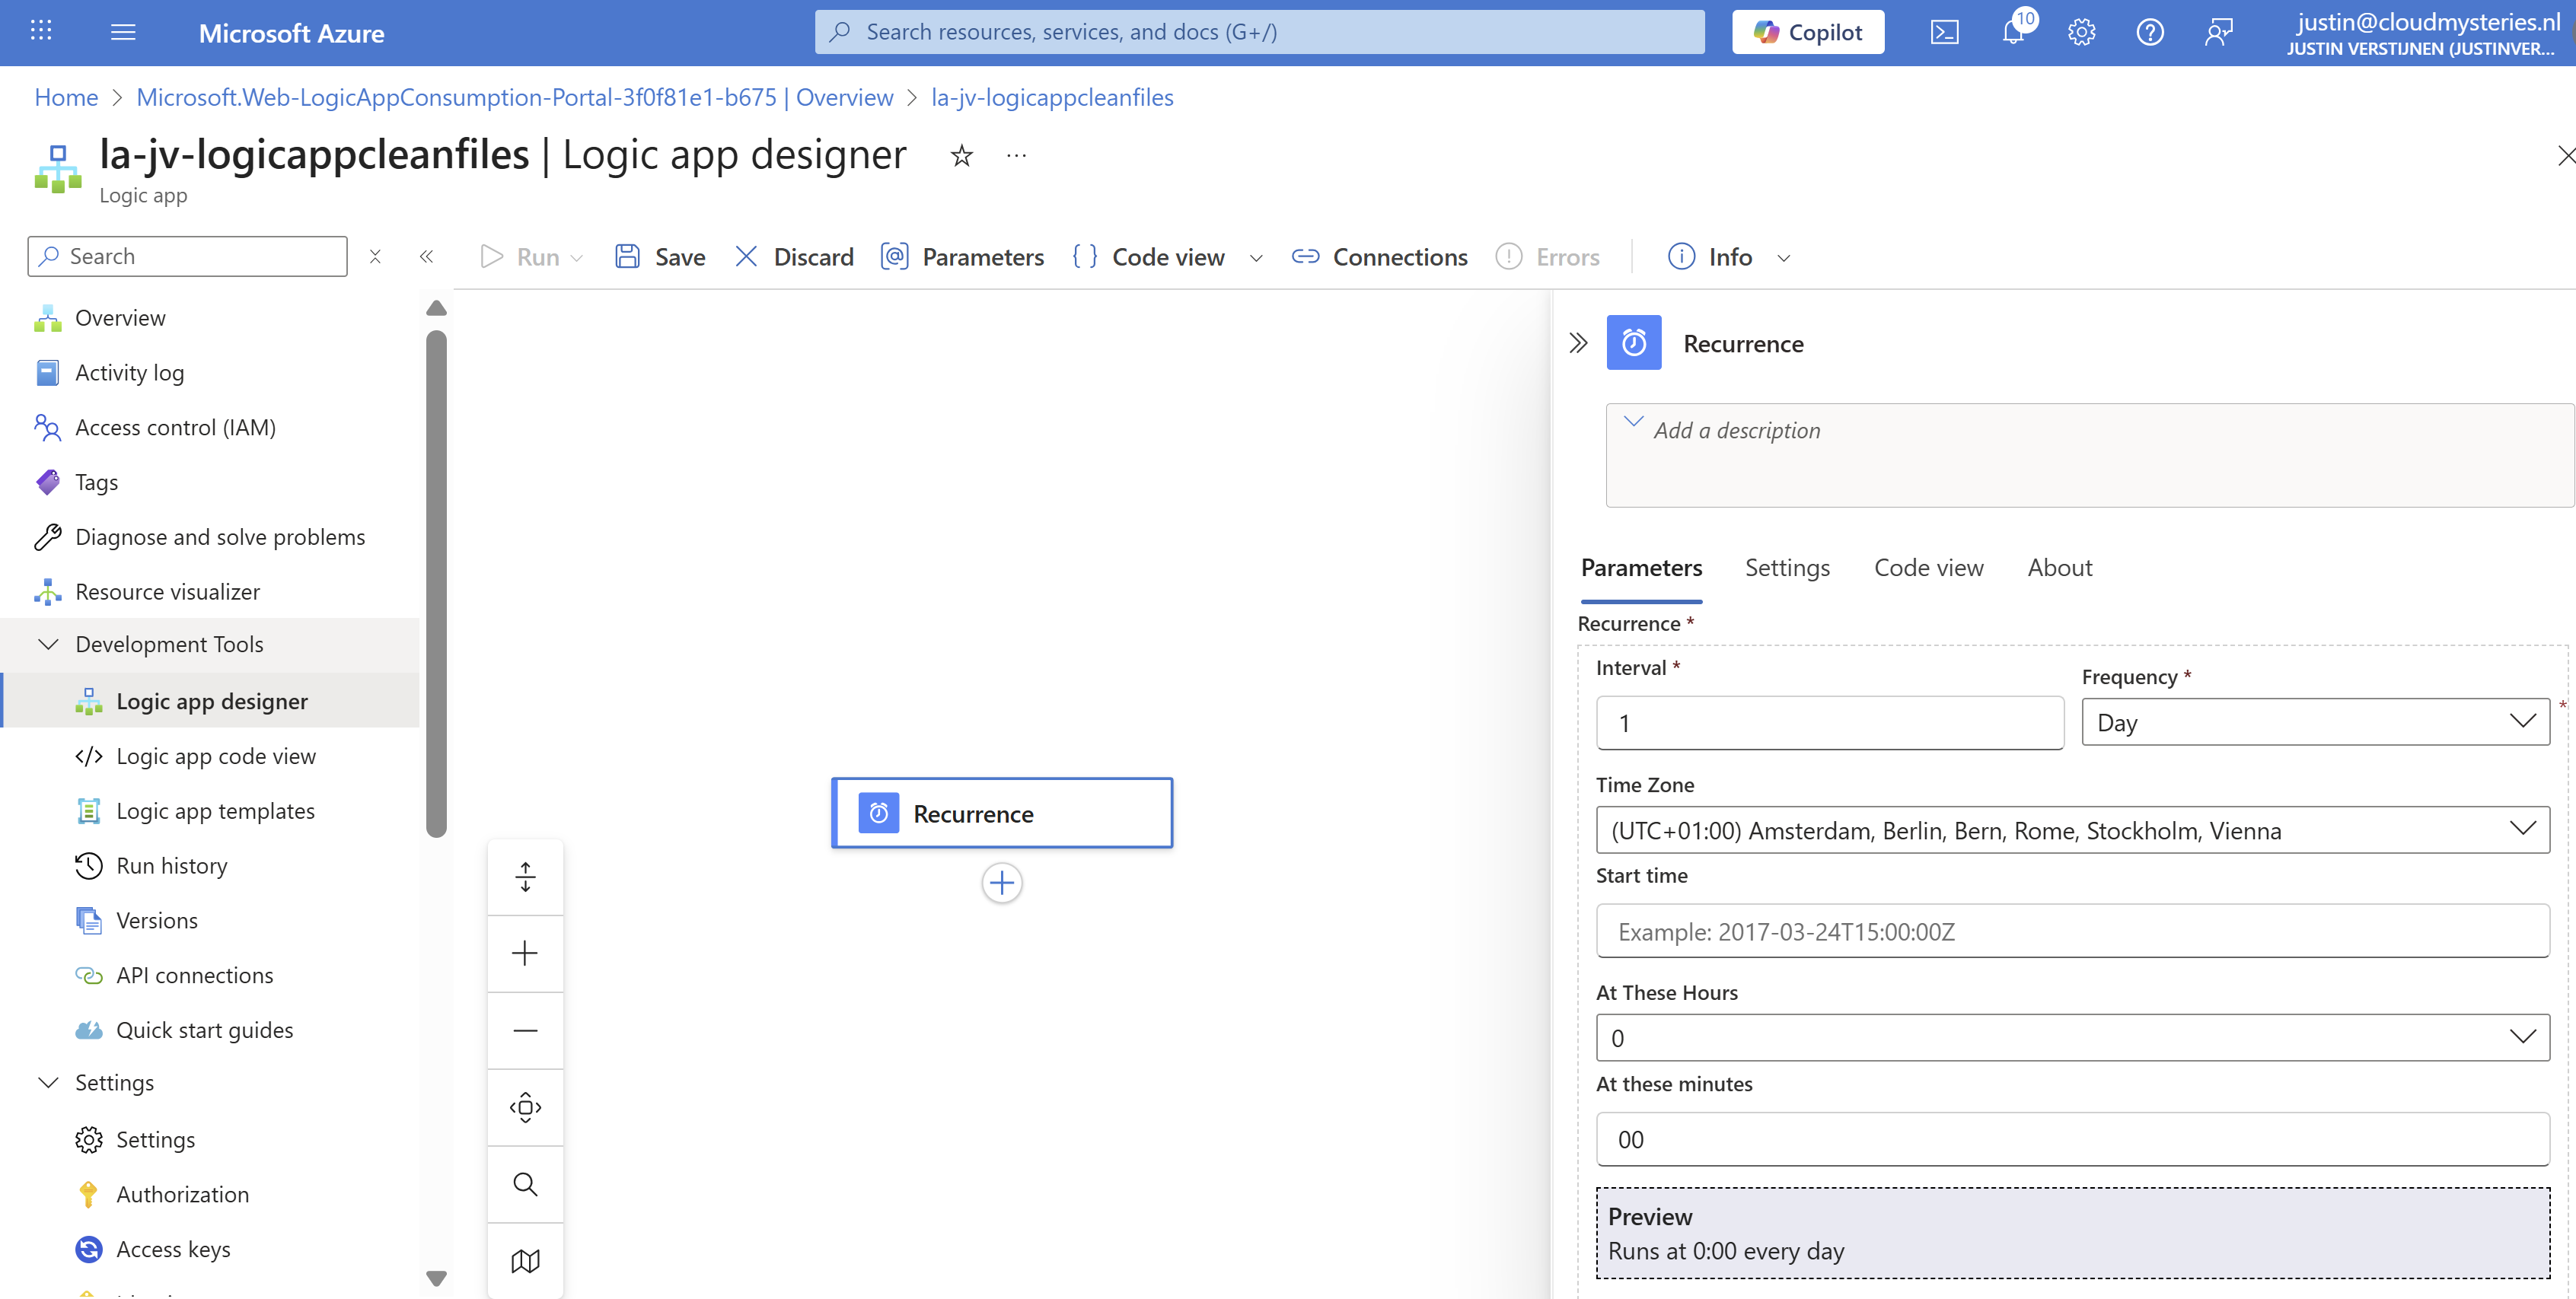
Then save the Logic App.
Step 3: Create the Azure Files connection and list step
Now we have to configure the step to connect the Logic App to the Azure Files share and configure the list action.
Add a step under “Recurrence” by clicking the “+” button:
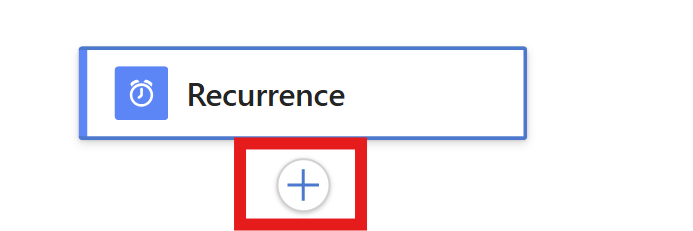
And then click “Add an action”. Then search for “List Files” of the Azure File Storage connector. Make sure to choose the right one:

Click the “List Files” button to add the connector and configure it. We now must configure 3 fields:
- Connection name: This is a free-of-coice name for the connection
- Azure Storage Account: Here we must paste the URL for the Azure Storage Account - File instance
- You can find this in the Storage account under “Endpoints” then copy the “File service” URL.
- Azure Storage Account Access Key: Here we must paste one of the 2 access keys
- You can find this in the Storage account under “Access Keys” and copy one of the 2 keys.
This must look like this:
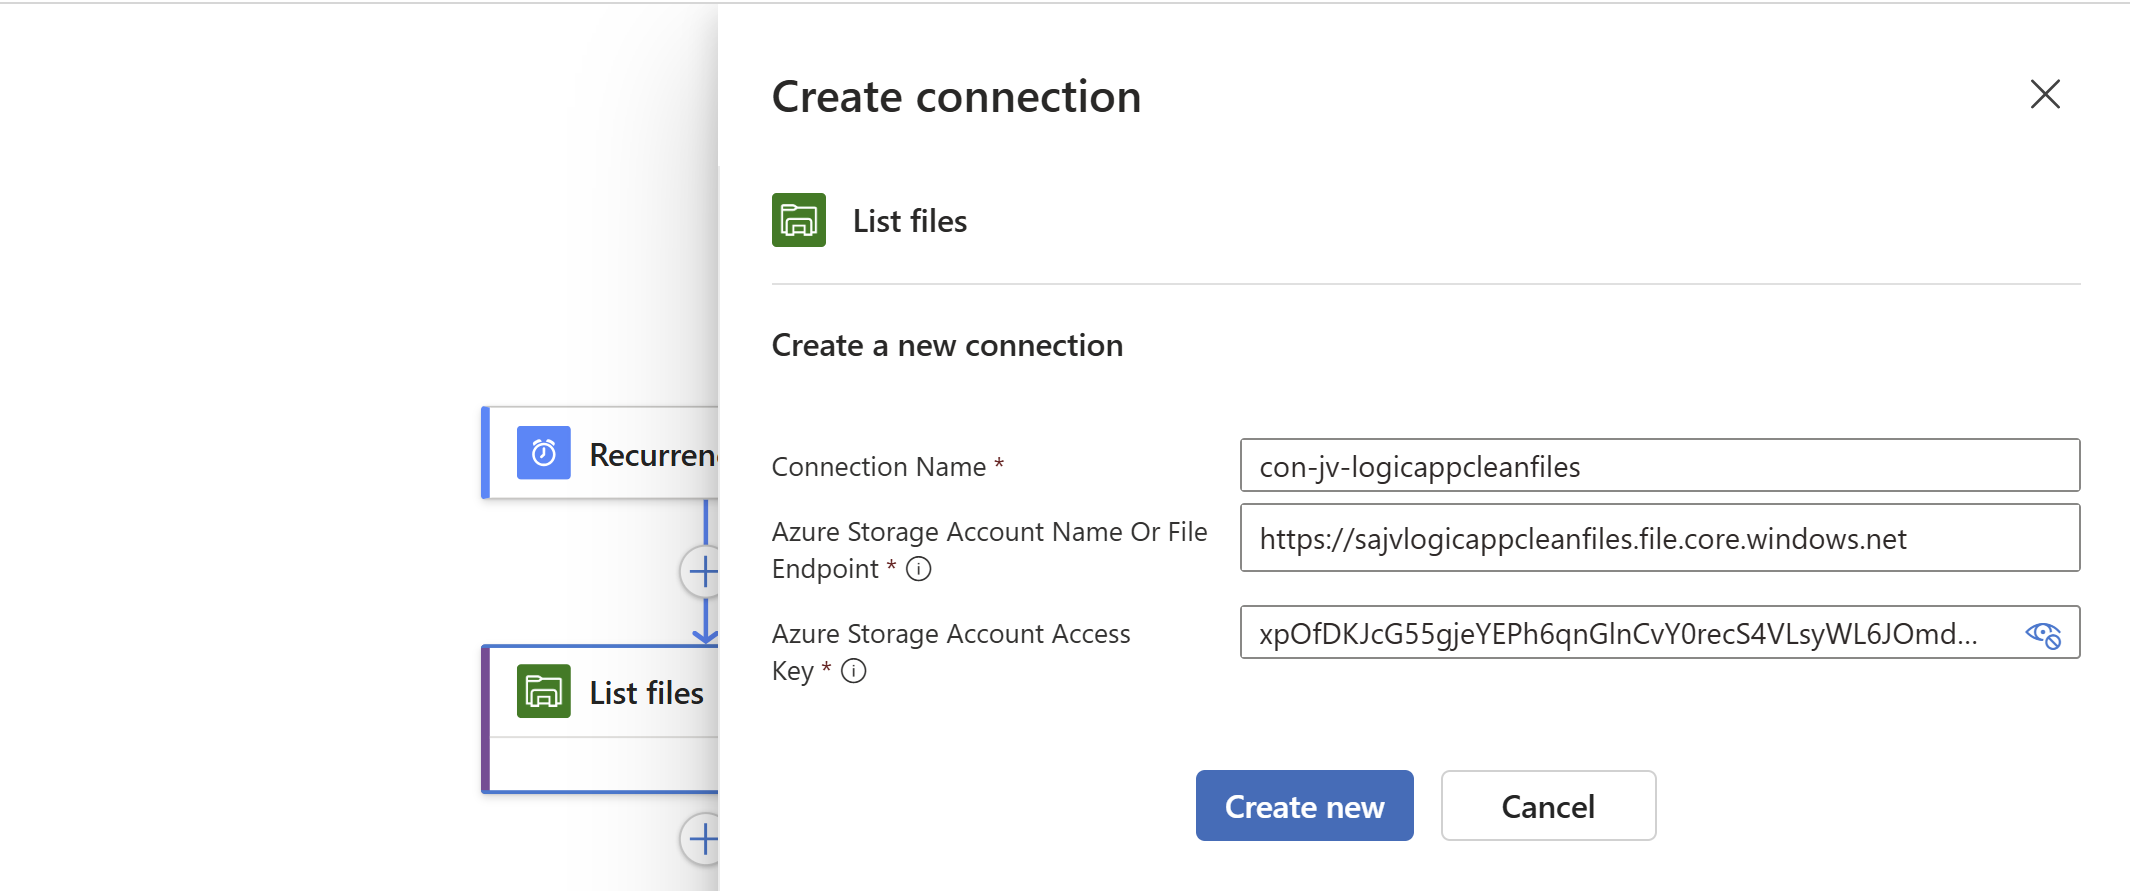
Click on “Create new” to create the connection. Because we now have access to the storage account we can select the right folder on the share:
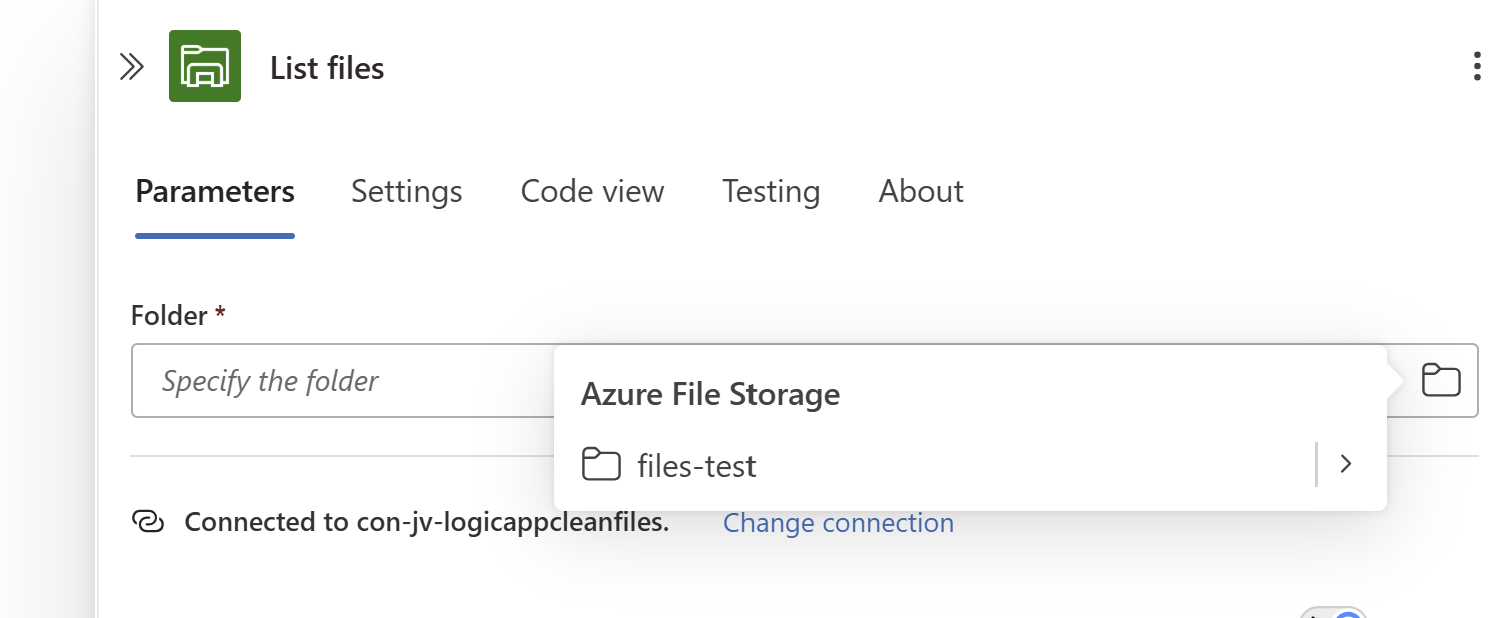
Save the Logic App.
Step 4: Create the Filter Array step and configure the retention
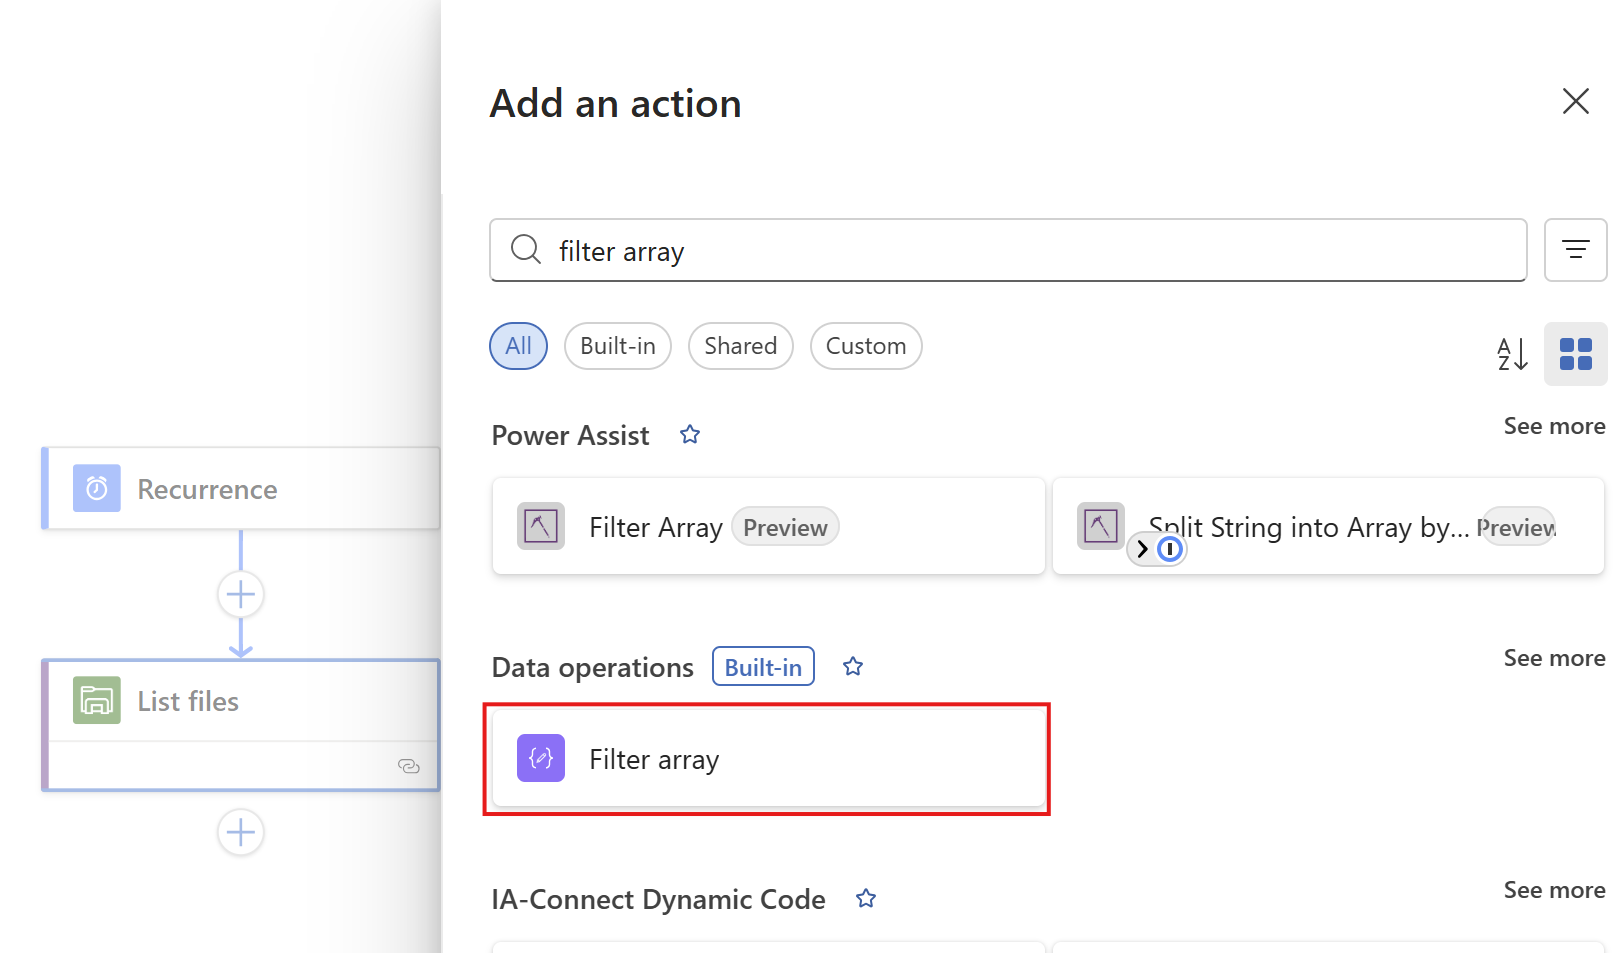
We have to add another step under the “List Files” step, called a “Filter Array”. This checks all files from the previous step and filters only the files that are older than your rule.
Add a “Filter Array” step from the “Data operations” connector:
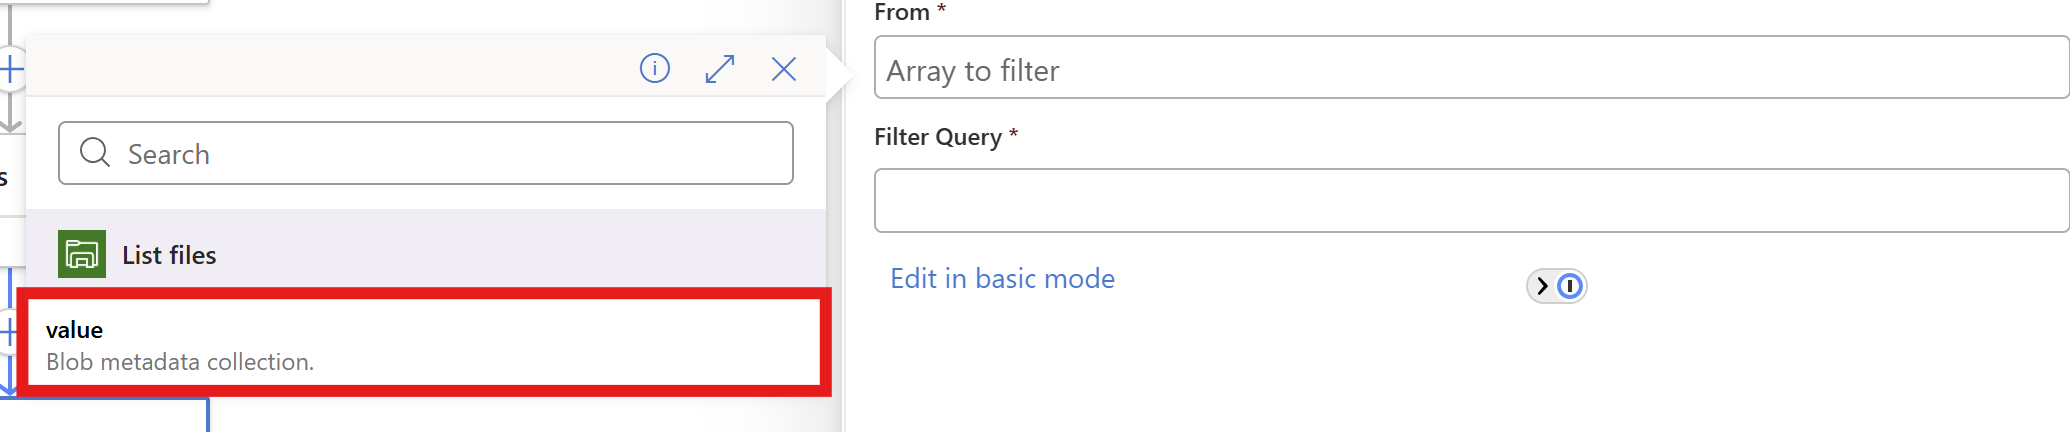
At the “From” field, click on the thunder button to add a dynamic content

And pick the “value” content of the “List Files” step.
In the “Filter query” field, make sure you are in the advanced mode through the button below and paste this line:
@lessOrEquals(item()?['LastModified'], addDays(utcNow(), -180))You can change the retention by changing the 180 number. This is the amount of days.
You could also use minutes for testing purposes which I do in my demonstration:
@lessOrEquals(item()?['LastModified'], addMinutes(utcNow(), -30))This will only keep files mofidied within 30 minutes from execution. It’s up to you what you use. You can always change this and ensure you have good backups.
After pasting, it will automatically format the field:

Save the Logic App.
Step 5: Create the “Delete files” step
Now we have to add the step that deletes the files. Add the “Delete file” action from the Azure File Storage connector.
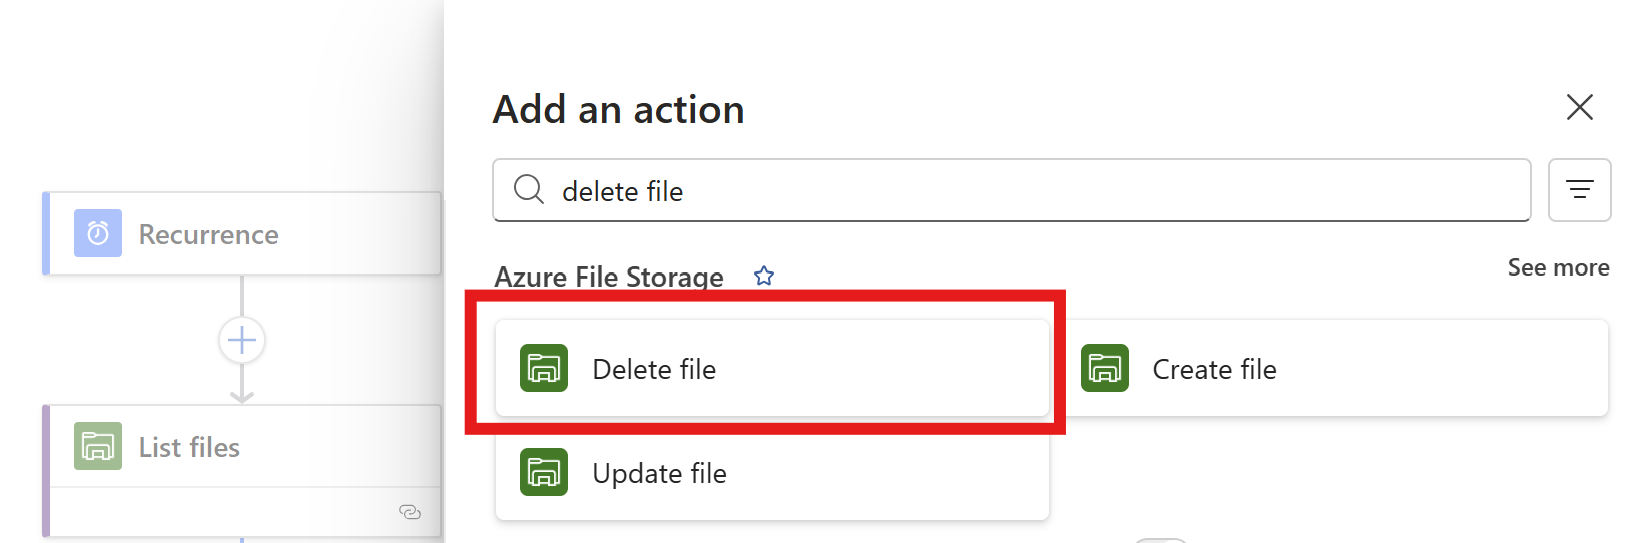
Click the “Delete files” option.
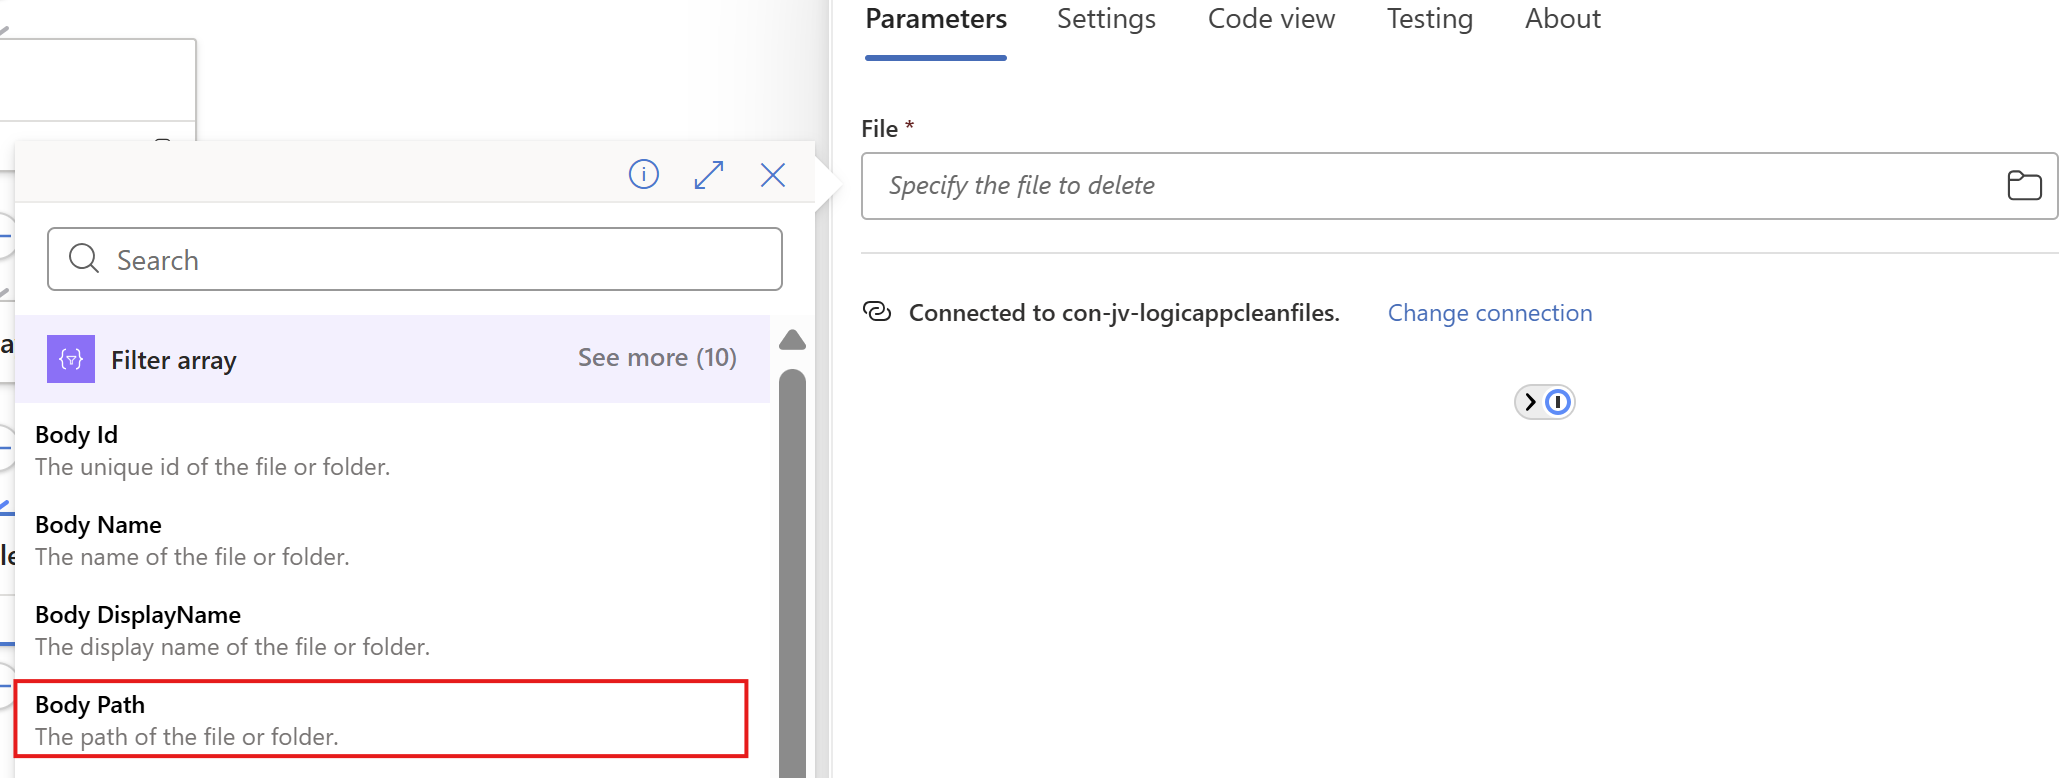
Now on the “File” field, again click on the thunder icon to add dynamic content and add the “Body Path” option of the “Filter Array” step.
Make sure you select the Filter Array step, as other steps might delete ALL files.
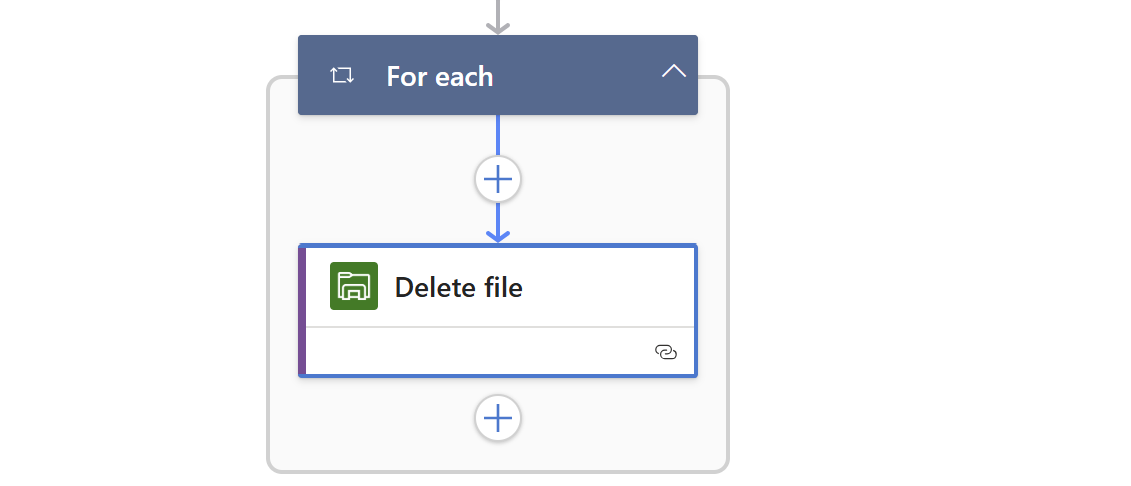
This automatically transforms the “Delete files” step into a loop where it performs the action for all filtered files in the “Filter Array” step.
Save the Logic App.
Step 6: Create the “HTML table” step (optional)
We can now, if you want to receive reports of the files being deleted, add another step to transform the list of files deleted into a table. This is a preparation step for sending it through email.
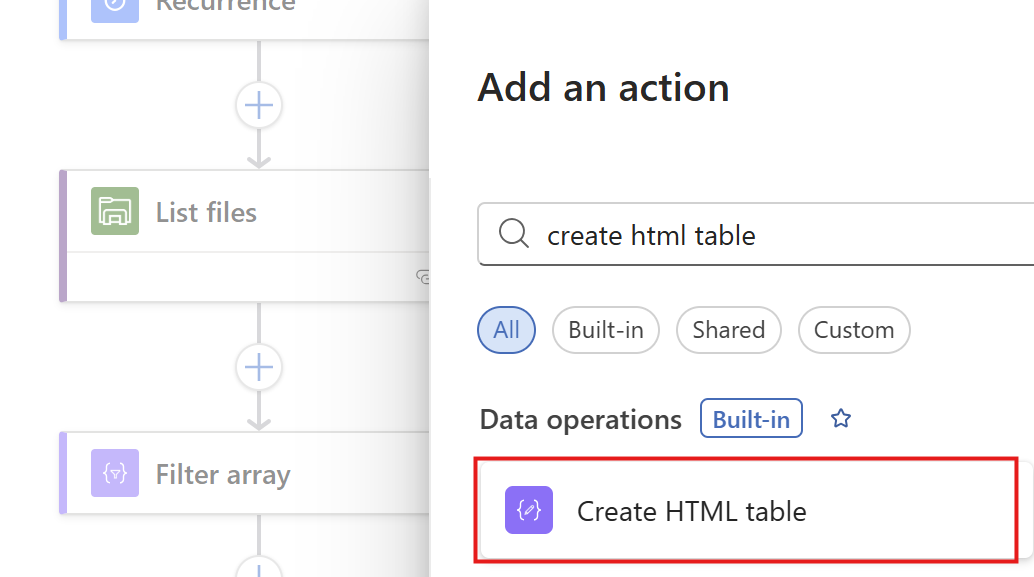
Add a step called “Create HTML table” from the Data operations connector.
Then we have to format our table:
On the “From” field, again click the thunder icon to select dynamic content:
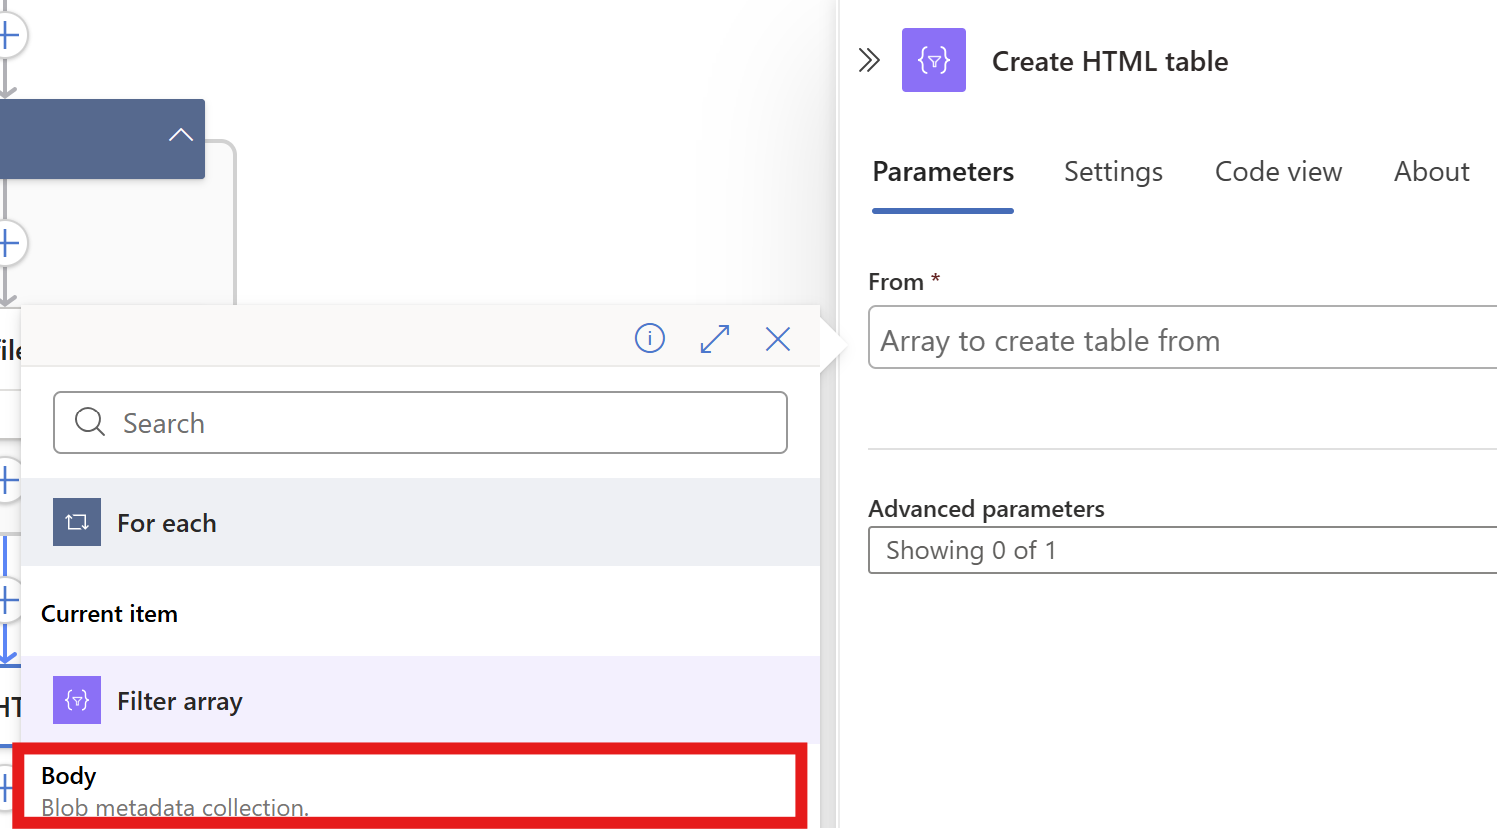
From the “Filter Array” step, select the Body content. Then on the “Advanced Parameters” drop down menu, select “Columns”. And after that on the “Columns” drop down menu, select “Custom”:
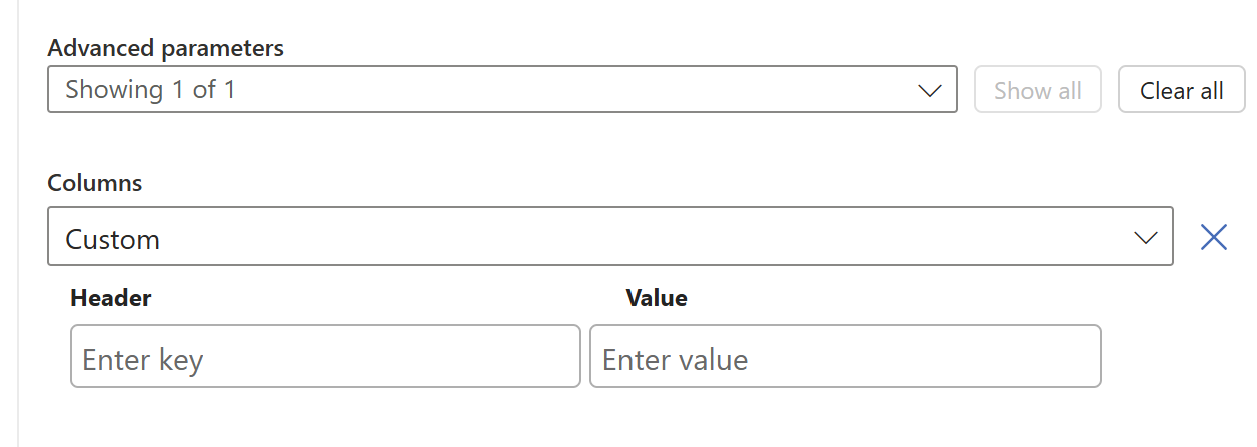
We now have to add 2 columns and configure in the information the Logic App needs to fill in.
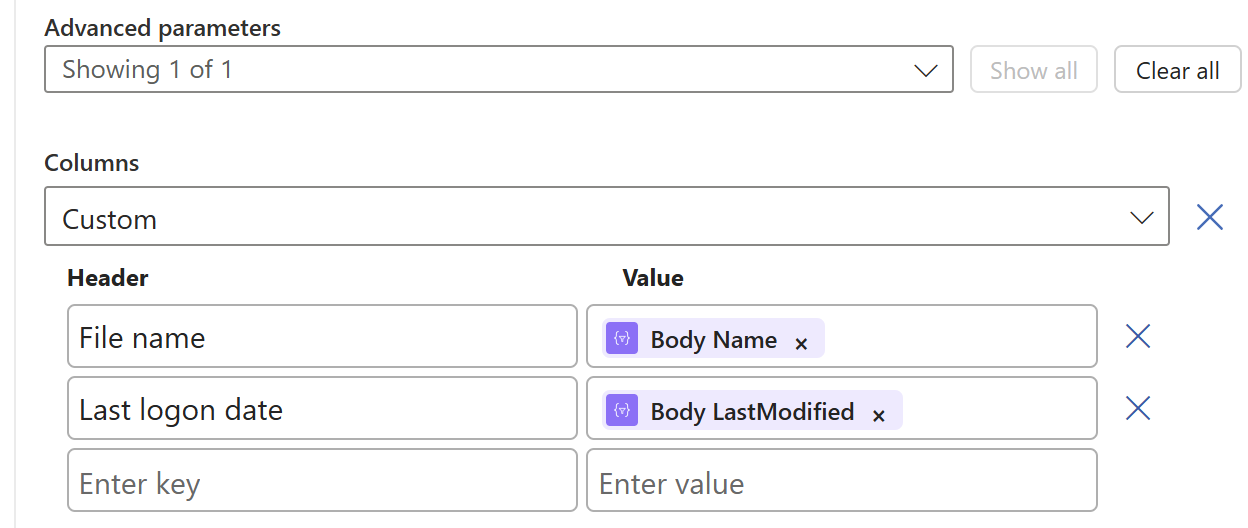
Paste these 2 lines in the “Header” fiels:
- File name
- Last logon date
And in the “Value” field, click the thunder icon for dynamic content and select the “Body Name” and “Body Last Modified” information from the “Filter Array” step.
This must look like this in the end:
Now save the Logic app and we need to do one final step.
Step 7: Create the Send an Email action (optional)
Now we have to send all the information from previous steps by email. We have to add an action called ‘Send an Email":
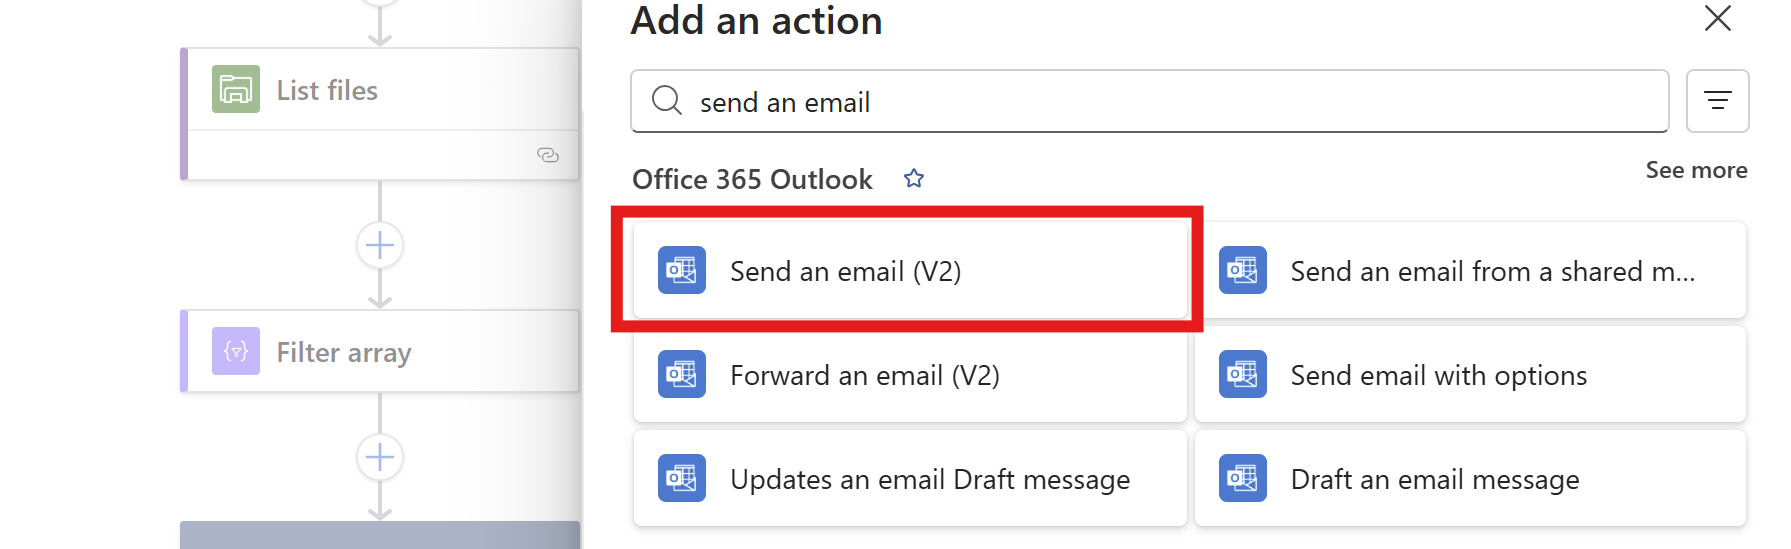
Make sure to use the “Office 365 Outlook” connector and not the Outlook.com connector. Also pick the newest version available in case of multiple versions.
Now create a connection to a mailbox, this means logging into it.
Then configure the address to send emails to, the subject and the text. I have did this:
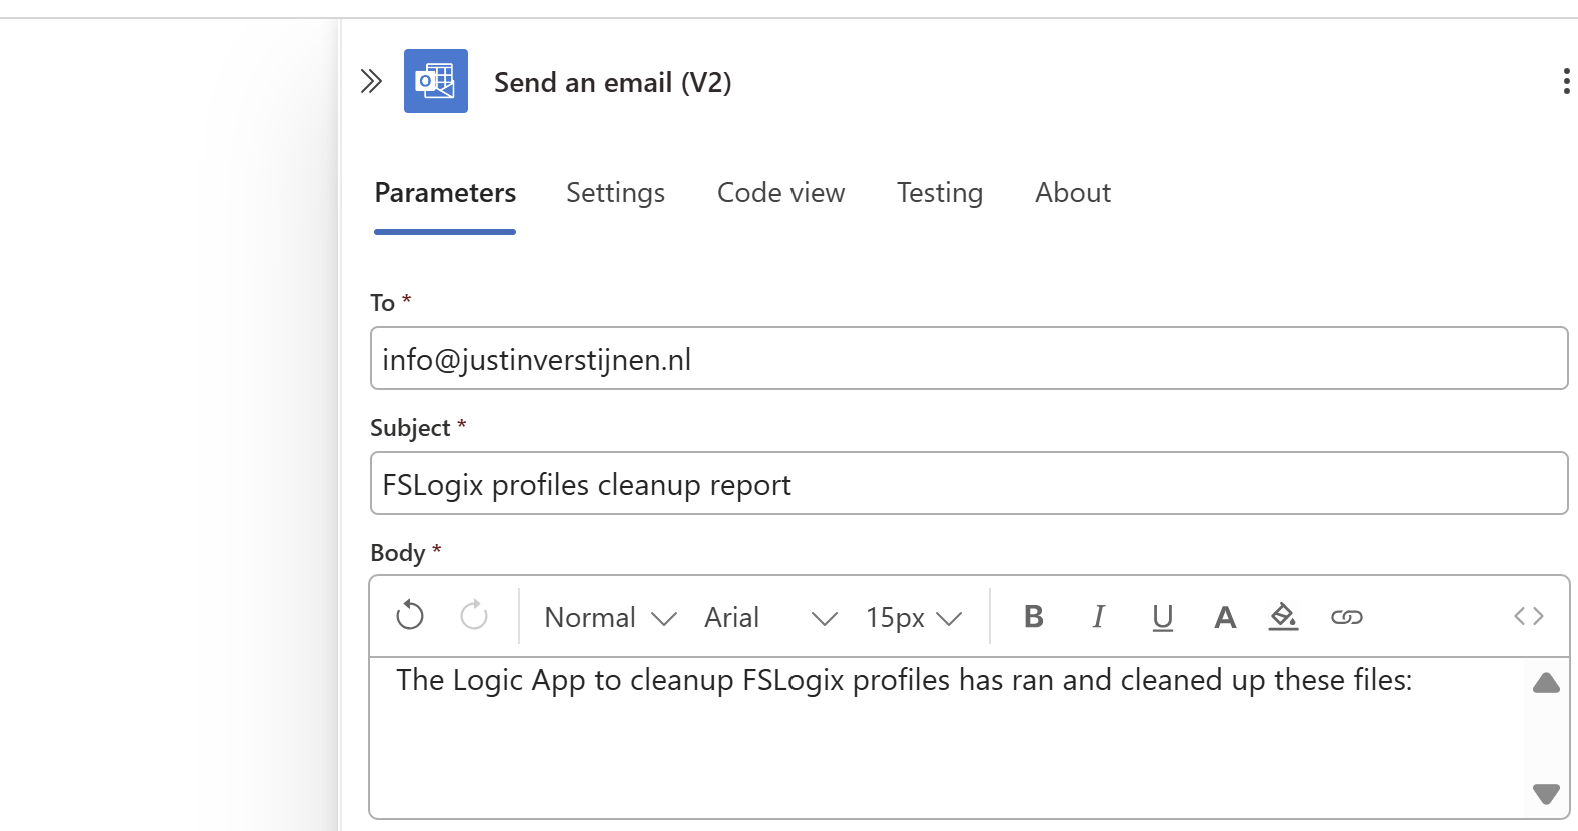
Then under the line in the “Body” field, paste a new dynamic content by clicking the thunder icon:

And select the “Output” option from the “Create HTML table” step which is basically the formatted table.

Now the Output dynamic content should be under your email text, and that will be where the table is pasted.
The Logic App live in in action
Now we have configured our Logic App and we want to test this. For the testing purpose, I have changed the rule in the “Filter Array” step to this:
@lessOrEquals(item()?['LastModified'], addMinutes(utcNow(), -30))This states that only files modified in the last 30 minutes will be kept, and longer than 30 minutes will be deleted. This is based on the Azure Files “Last Modified” time/date.

On the file share I have connected, there are 5 files present that acts as dummy files:
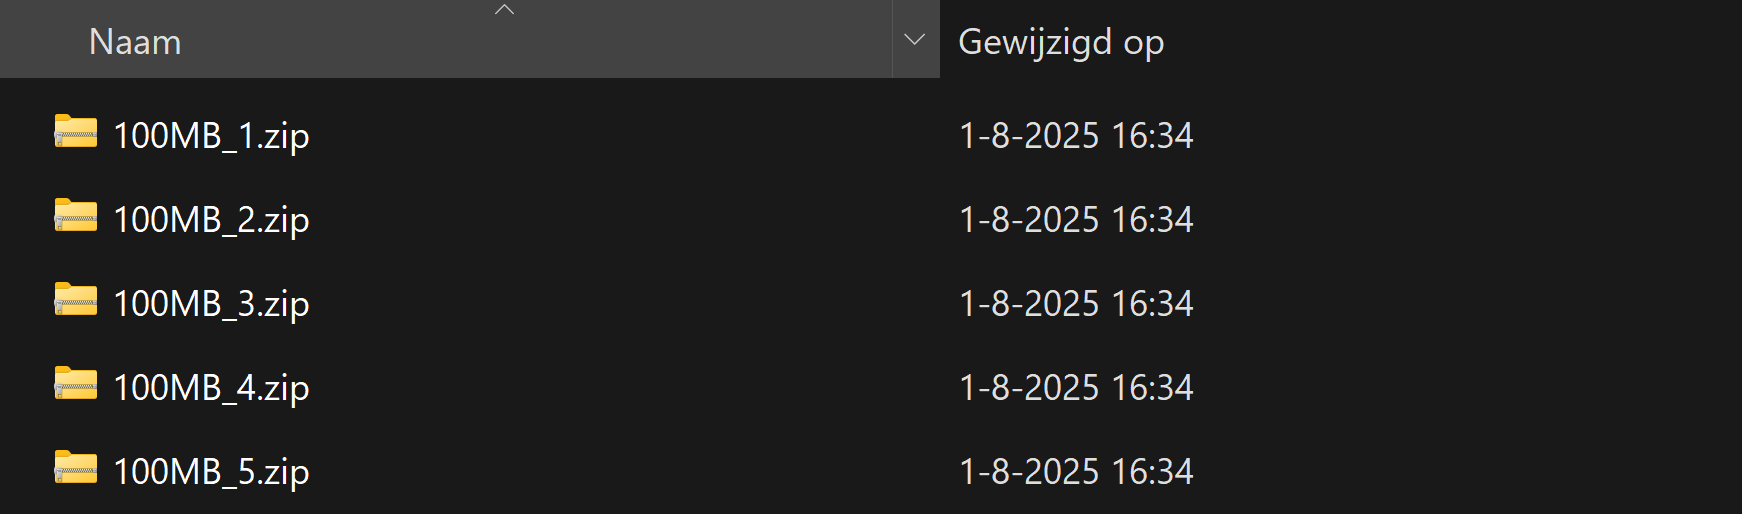
In the portal they have a different last modified date:
- 1: 8/2/2025, 1:57:09 PM
- 2: 8/2/2025, 1:57:19 PM
- 3: 8/2/2025, 2:11:39 PM
- 4: 8/2/2025, 2:11:49 PM
- 5: 8/2/2025, 2:17:45 PM
It’s now 2:39 PM on the same day, that will mean executing it now would:
- Delete files 1 and 2
- Retain files 3, 4 and 5
I ran the logic app using the manual “Run” button:

It ran successfully:

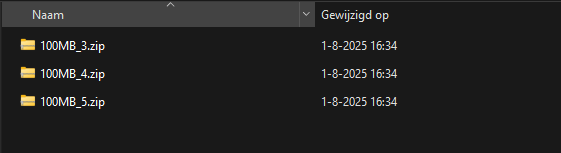
The files 1 and 2 are gone as they were not modified within 30 minutes of execution.
And I have a nice little report in my email inbox what files are exactly deleted:
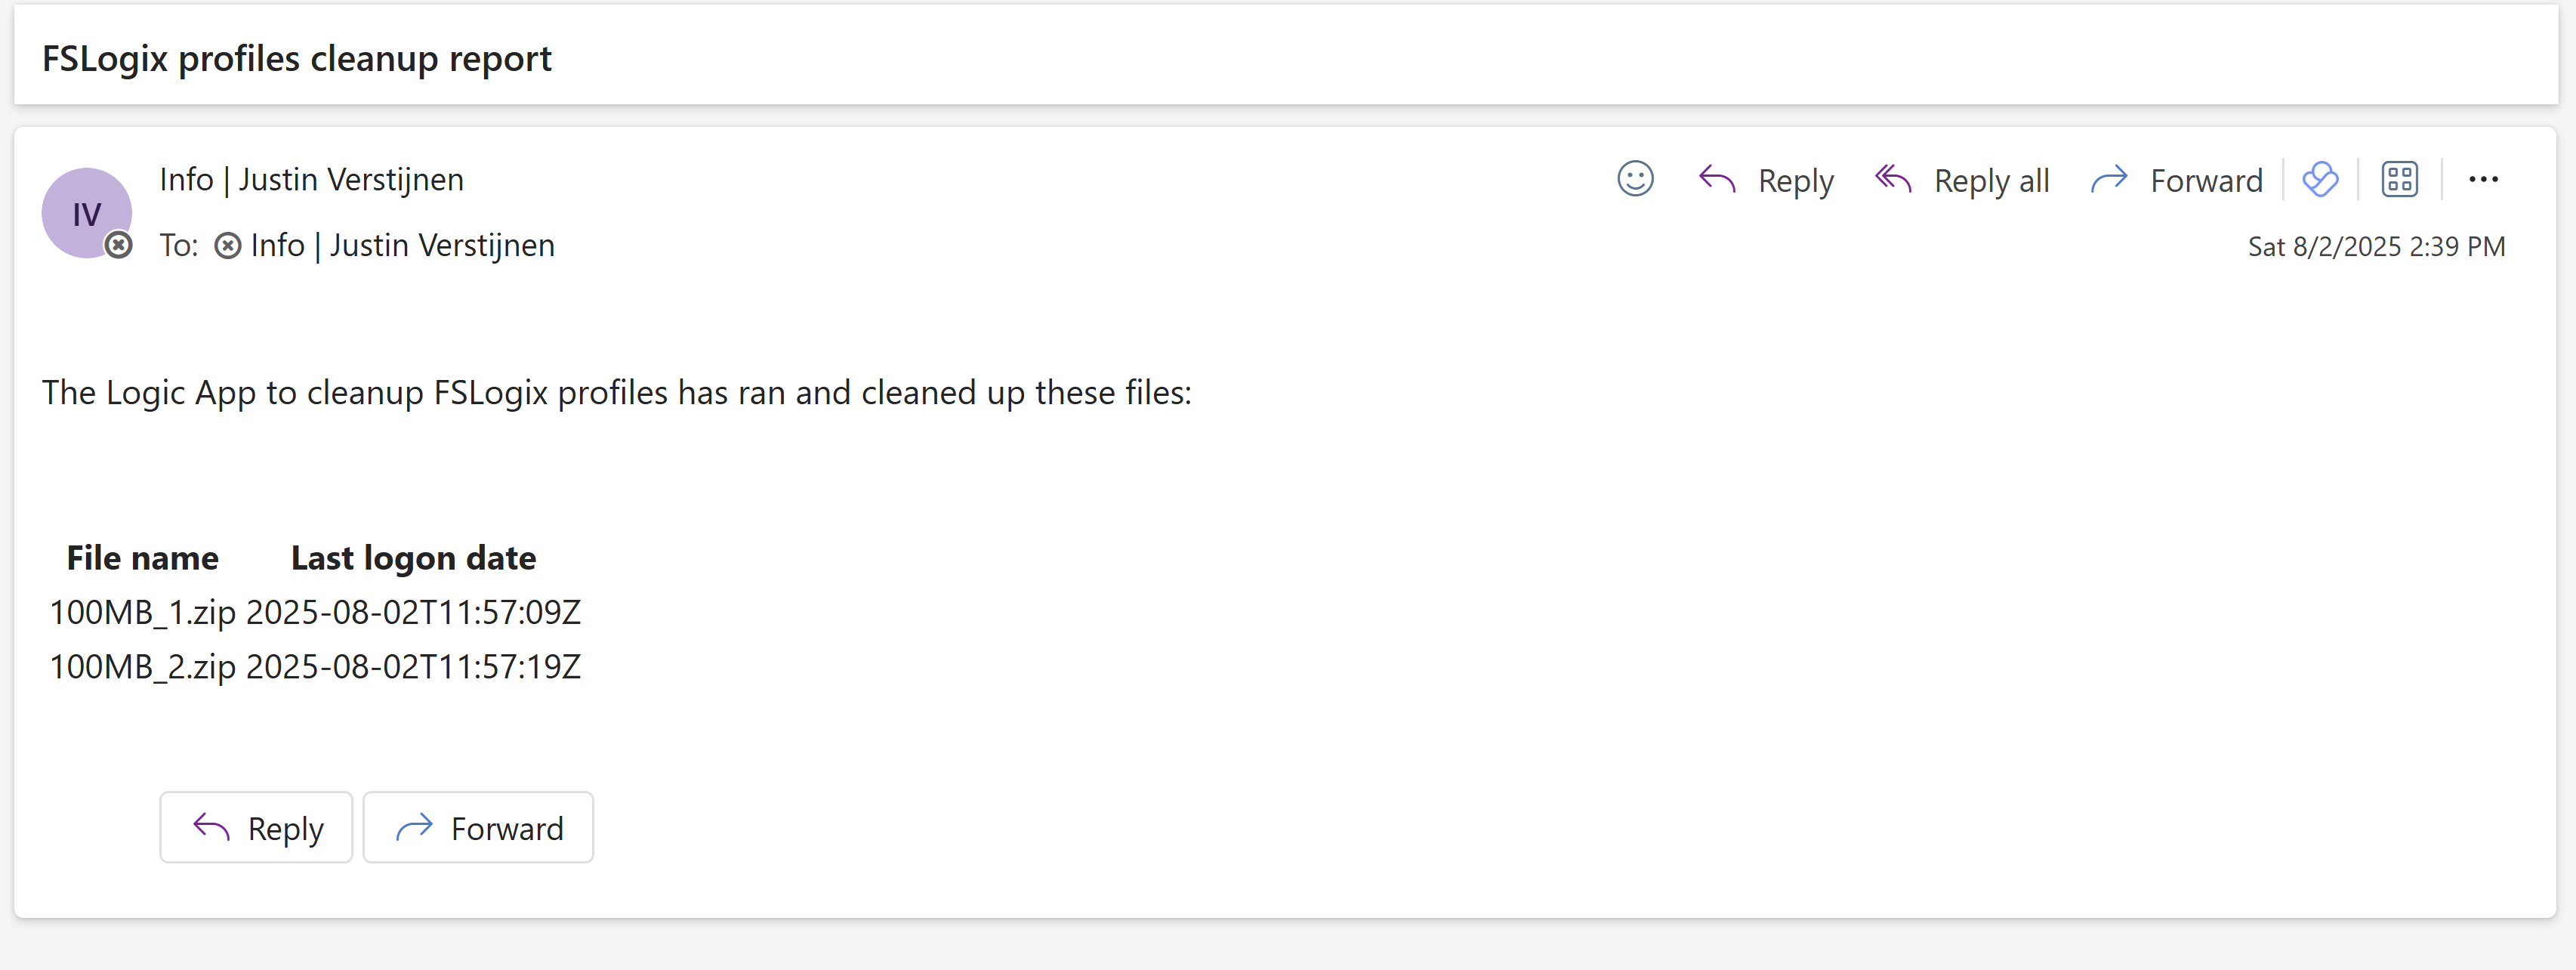
The last logon date is presented in UTC/Zulu timezone, but for my guide we have to add 2 hours.
Summary
This solution is really great for a Azure-native solution for cleaning Azure Virtual Desktop profiles. This is especially great when not having access to servers who can run this via SMB protocol.
The only downside in my opinion is that we cannot connect to the storage account using a Managed Identity or Storage Access Signature (SAS token), but that we must use the Storage Access key. We now connect with a method that has all rights and can’t be monitored. In most cased we would want to disable the Storage Access Key to have access.
Thank you for reading this guide and I hope it was helpful.
Sources
These sources helped me by writing and research for this post;
End of the page 🎉
You have reached the end of the page. You can navigate through other blog posts as well, share this post on X, LinkedIn and Reddit or return to the blog posts collection page. Thank you for visiting this post.
If you find this page and blog very useful and you want to leave a donation, you can use the button below to buy me a beer. Hosting and maintaining a website takes a lot of time and money. Thank you in advance and cheers :)

The terms and conditions apply to this post.