Configure Scaling Plans in Azure Virtual Desktop
Categories:
5 minute read
Step 1: Create scaling plan
Open the Azure Portal at https://portal.azure.com and go to “Azure Virtual Desktop”, then to “Scaling plans”.
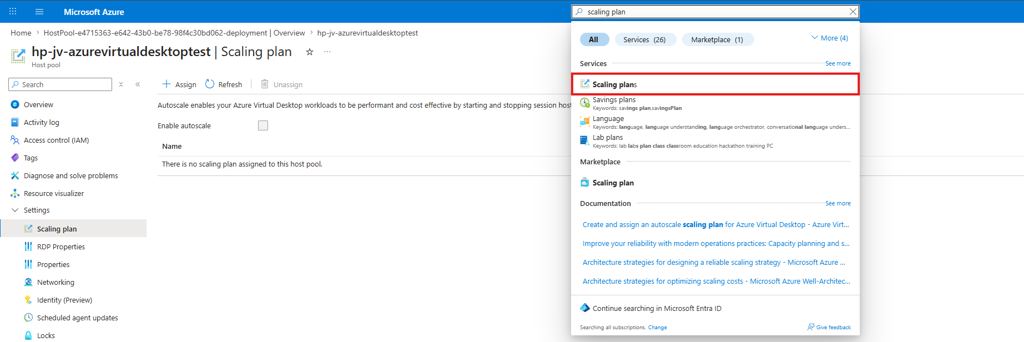
At this screen, click “+ Create”. This will open the Scaling Plan wizard.
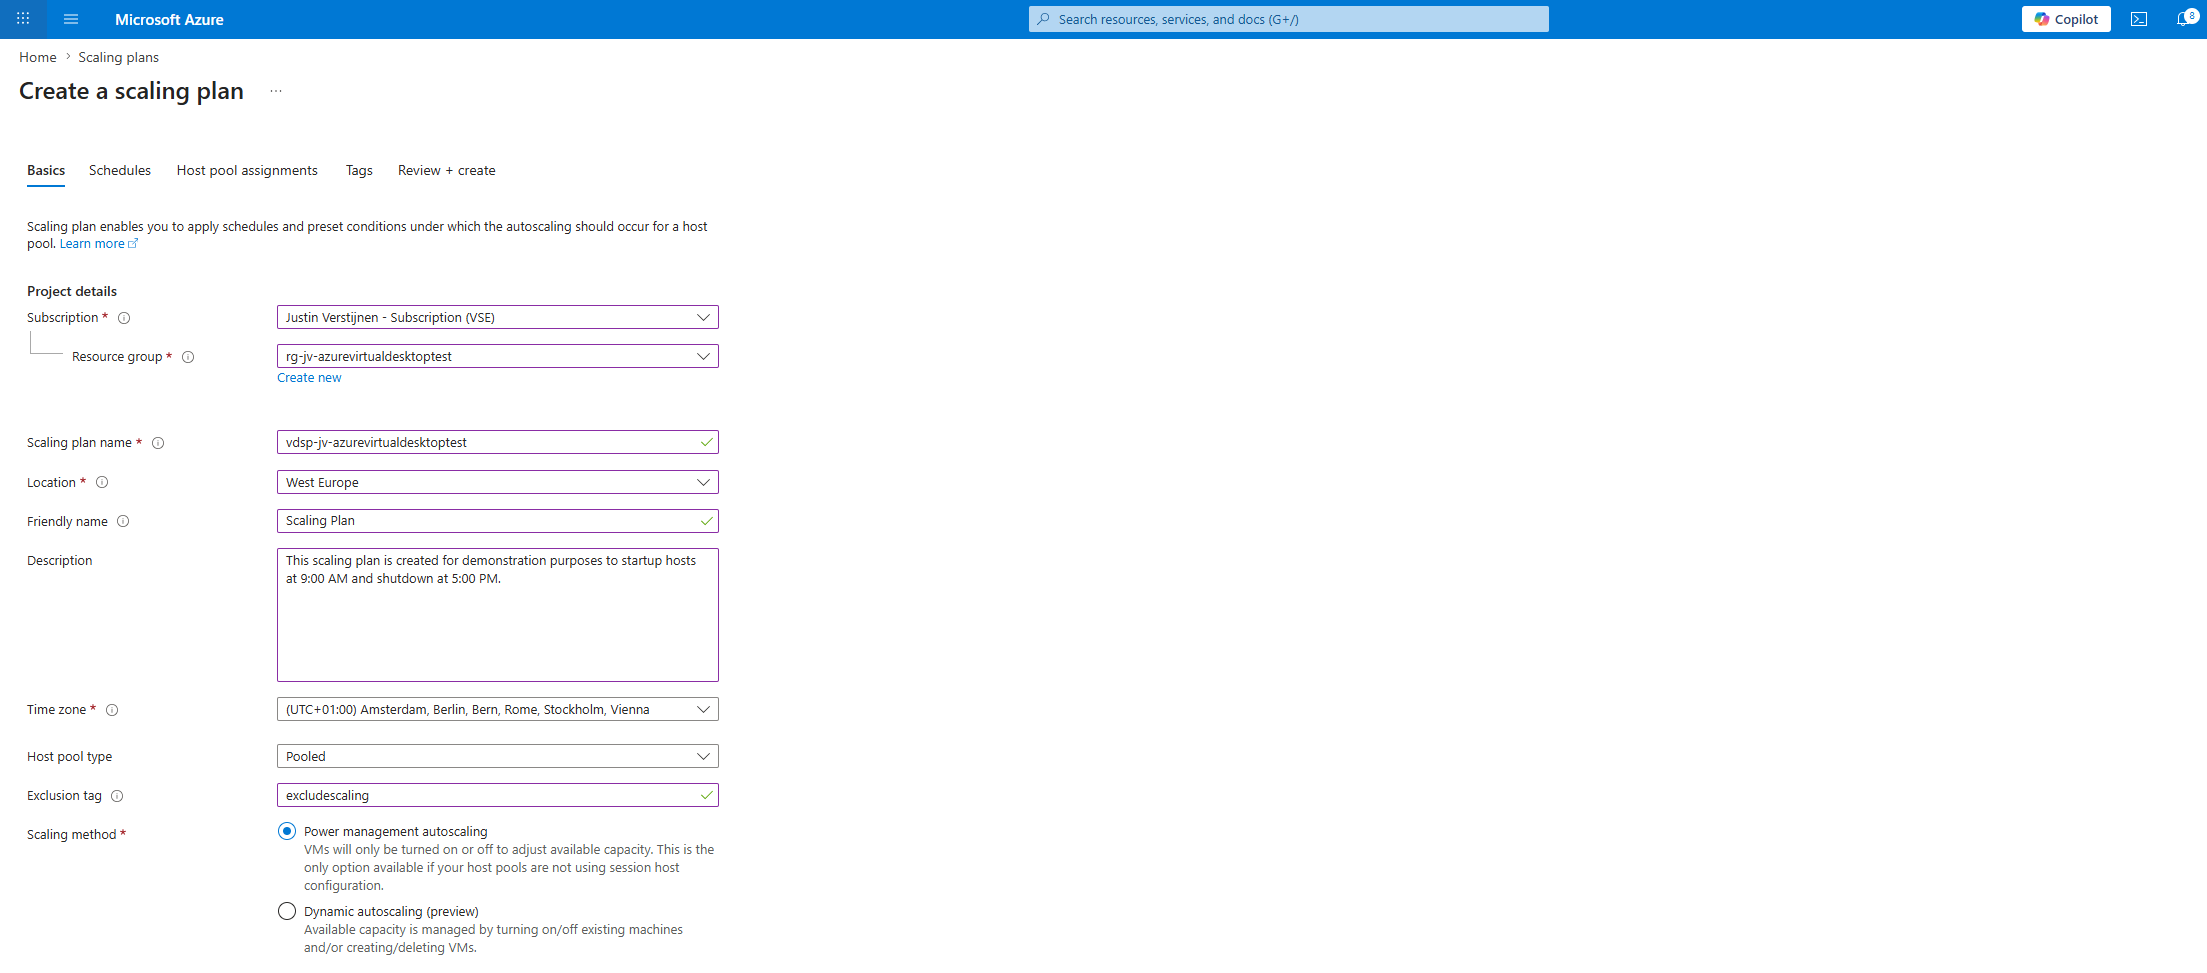
Here fill in the details like resource group, name and description. You can also add an exclusion tag, which is a nice way of excluding specific VMs from being turned on or off. You must then assign this tag to the VM object in Azure:
- excludescaling:true
Select the “Power management autoscaling” option which is basically what it describes. Click “Next”. We must now define the schedule.
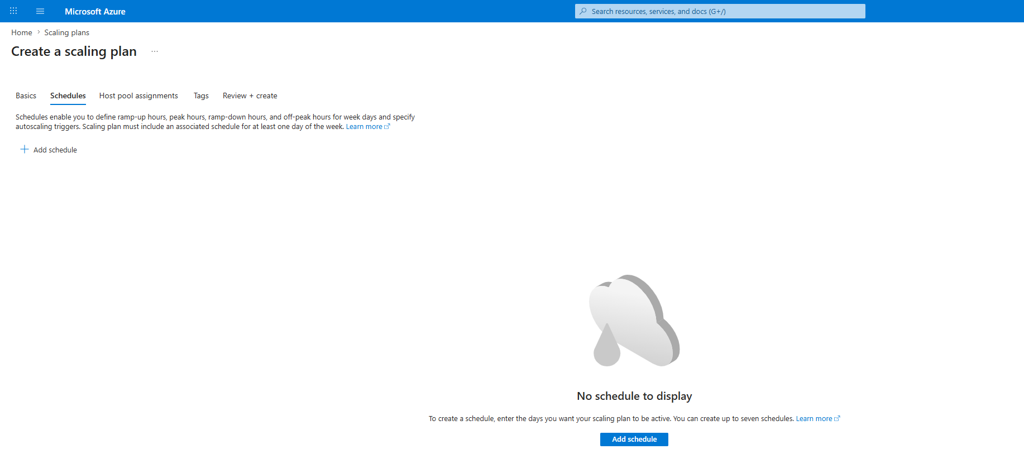
Step 2: Create schedules
Now we can create the actual schedule. Click “+ Add schedule” and create the schedule for the working days of the organization.
This example company business hours are from 09:00 AM to 05:00 PM. Users may start before this time and stop after this time, just like in real organizations.
This is an example of a typical organization, but you have to interpret this into your organization/configuration.
Personally, I usually only configure the real business days and business hours here. For evenings, nights, and weekends, I prefer to let Start VM on Connect handle the first sign-in if somebody still needs access. That works well for environments where users sometimes log in outside normal hours, without keeping all hosts online all the time. If the environment is planned to have frequent outside of office hours workers, then take this into account for the scaling plan times or capacity.
The schedule is split into four phases:
| Phase | What it means |
|---|---|
| Ramp-up | The start of the office hours, |
| Peak hours | The normal working hours when the most users are expected |
| Ramp-down | The moment you start moving back to a cheaper setup |
| Off-peak hours | The outside of office hours |
Let’s configure the schedule.
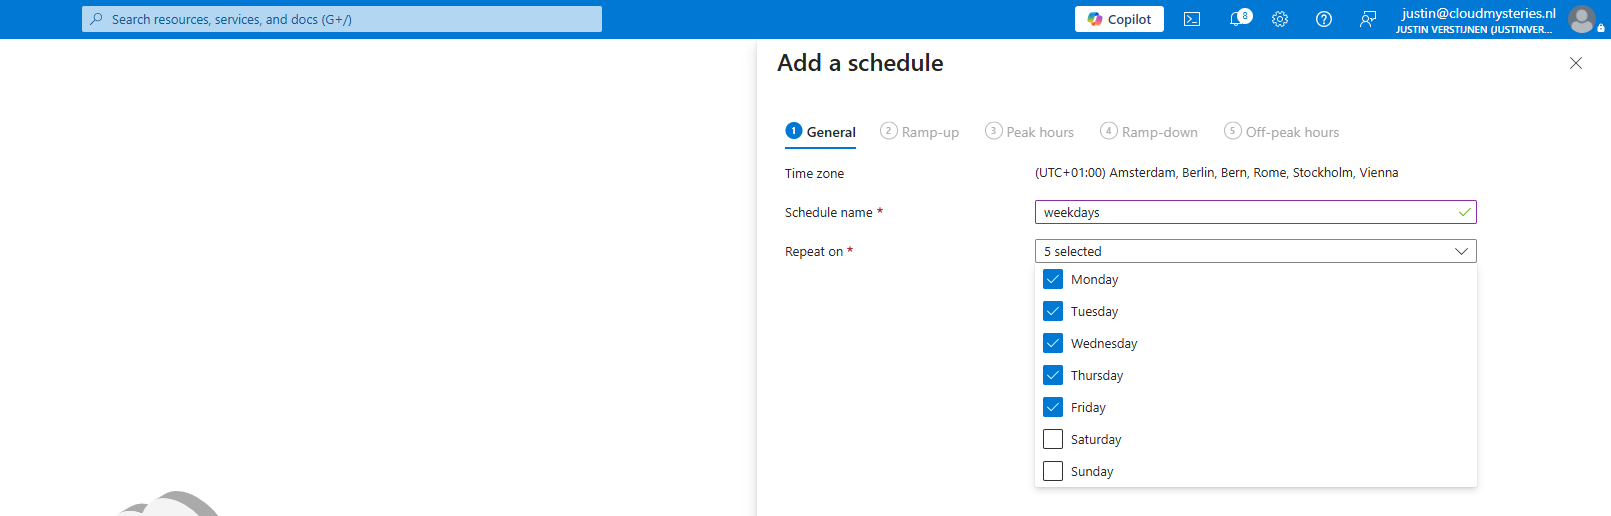
Here I selected the business days only.
2.1 Ramp-up
In the “Ramp-up” tab, I normally set the start time to about 30 minutes before employees begin. That gives the first users a better experience because one or more hosts are already online when they begin. You can also make this an hour before the actual working time or shorter.
I also like using Breadth-first here. That spreads the sessions across the running hosts instead of filling one host first. This gives the users a better user experience.
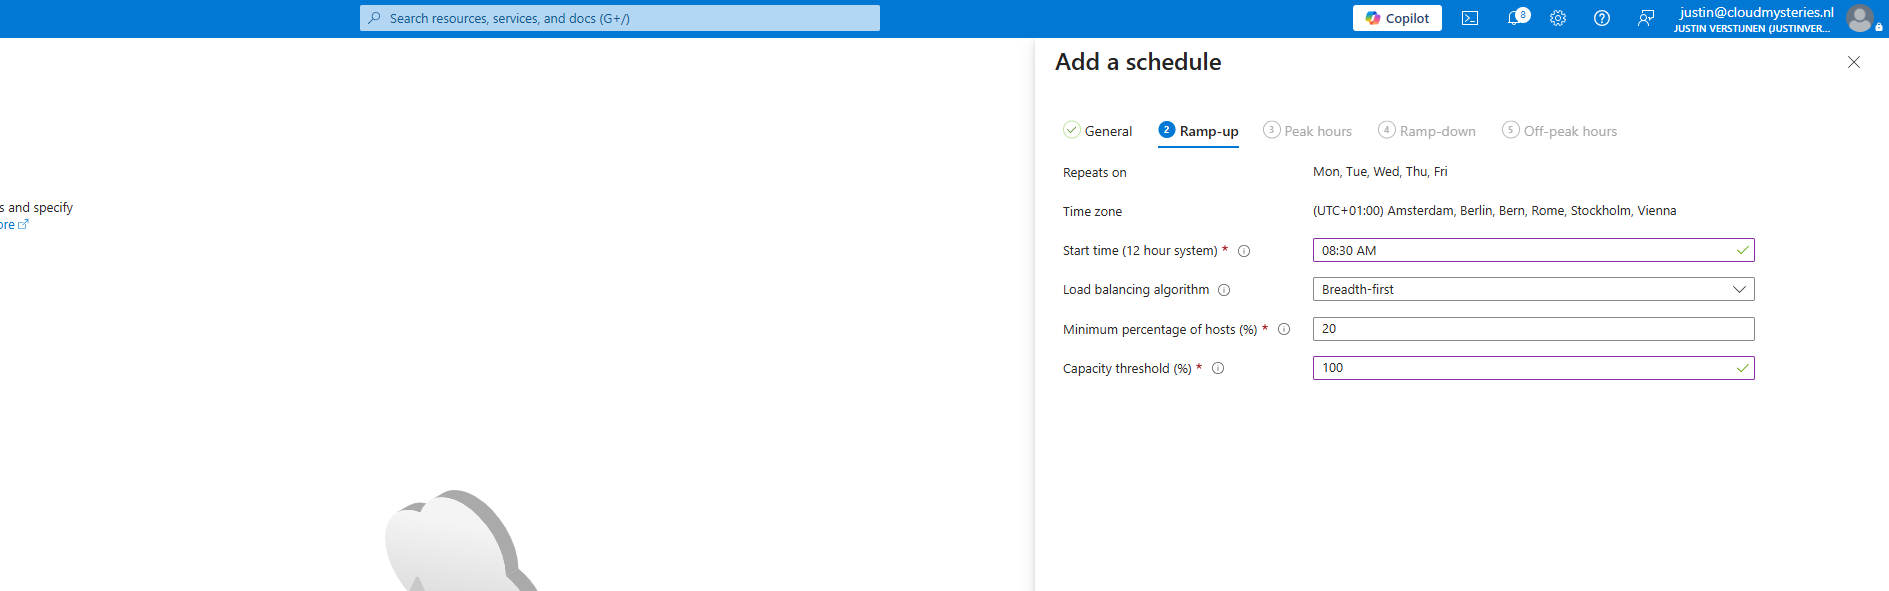
I configured the hostpool to have at least 20 percent of the hosts online during this window. This is 1 machine if having 5 total machines, but 10 if having a total of 50. The capacity threshold is the threshold value of the amount of connected users, based on the sessions. At 100%, a new machine will only be enabled after having 100% of session slots full.
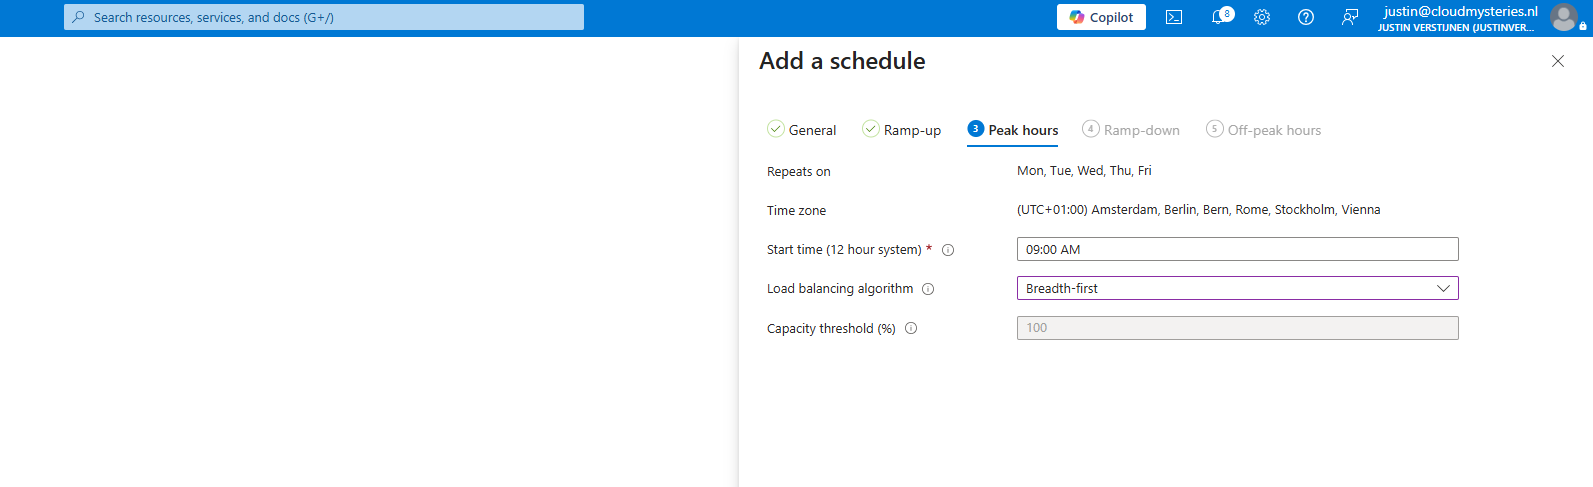
2.2 Peak hours
In the “Peak hours” tab, set the time that matches the real busy start of the organization. This is the only value we have to configure at this tab.
2.3 Ramp-down
This is where the cost-saving part really starts. I usually begin ramp-down about 30 minutes before the end of the working day.
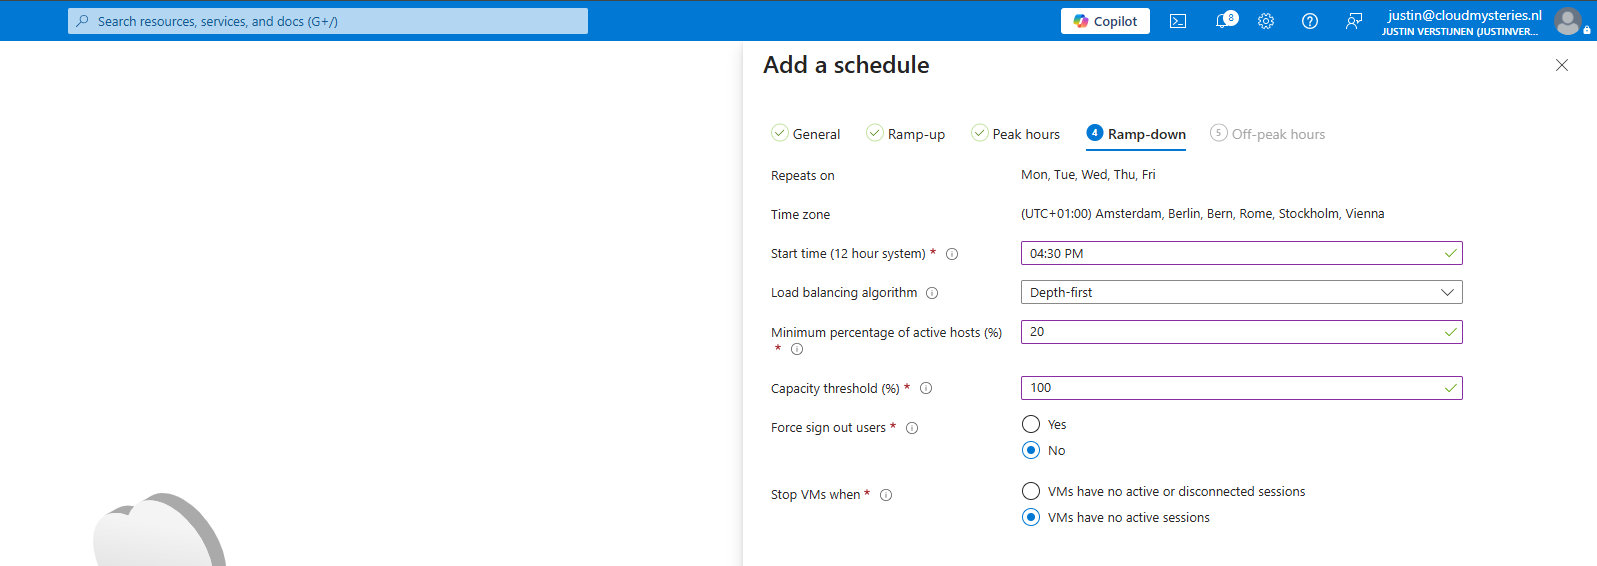
These are the settings I prefer here:
- Force sign out users: No
- Stop VMs when: VMs have no active sessions
This combination is a safe choice in many environments. It means users who are still actively working will not get kicked out unexpectedly with all sorts of data loss as result.
If you want disconnected sessions to be cleaned up properly, also configure a session timeout on your session hosts. For example, use Group Policy or Microsoft Intune and configure the policy “Set time limit for disconnected sessions”. A safe value for this policy is 1 hour. This means the machine will be ultimately shut down 1 hour after the last user disconnected their session. Instructing your users to only sign-off is the best option, but most of them will basically not do that.
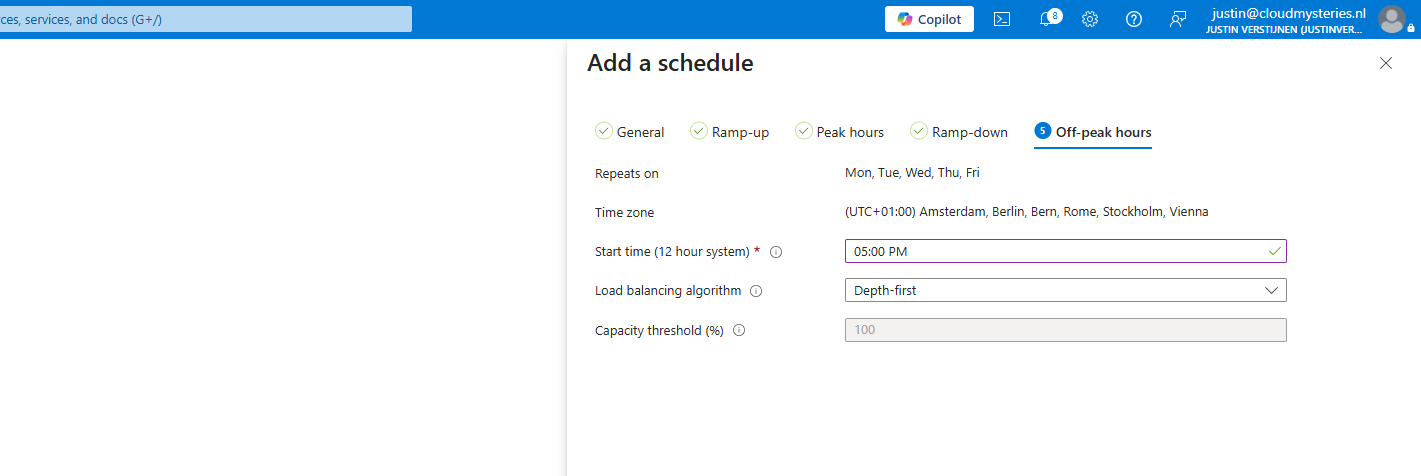
2.4 Off-peak hours
On the last tab, set the beginning of the off-peak hours or the end of business hours of the organization. From ramp-down and onward, I usually switch to Depth-first. That helps Azure Virtual Desktop place sessions on fewer machines, so the unused hosts can be powered off. This saves some computing costs.
After the schedule is created successfully, let’s head to Step 3.
Step 3: Assign scaling plan
In the same wizard, you can assign the scaling plan directly to one or more host pools of the same type.
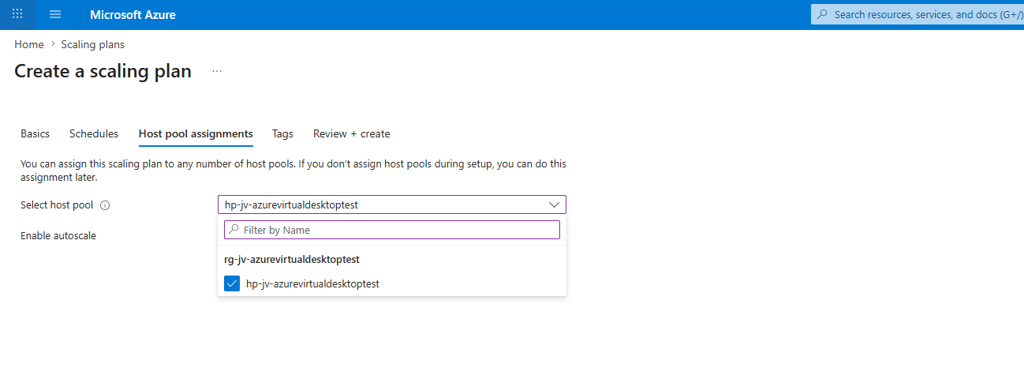
Make sure the checkbox or toggle for Enable autoscale is enabled, otherwise the scaling plan is assigned but it will not actually do anything.
This toggle is also useful during troubleshooting. If you need to test something and do not want Azure Virtual Desktop to automatically start or stop hosts for a moment, you can temporarily disable autoscale on the host pool assignment.
After assigning the scaling plan to the hostpool, the scaling plan will be active and working.
Summary
A scaling plan is a simple and very useful feature in Azure Virtual Desktop. It helps you run session hosts when they are needed, save costs outside business hours.
My usual setup is straightforward: use Power management autoscaling, configure only the real working days and working hours, keep a small percentage of hosts ready in ramp-up, use Breadth-first during active hours, and switch to Depth-first during ramp-down and off-peak hours. If users still need access outside those times, Start VM on Connect is a very nice addition.
Thank you for reading this post and I hope it was helpful!
Sources
These sources helped me by writing and research for this post;
- https://learn.microsoft.com/en-us/azure/virtual-desktop/autoscale-glossary
- https://learn.microsoft.com/en-us/azure/virtual-desktop/autoscale-create-assign-scaling-plan
- https://learn.microsoft.com/en-us/azure/virtual-desktop/autoscale-scenarios#scenario-1-when-does-autoscale-turn-virtual-machines-on
- https://learn.microsoft.com/en-us/azure/virtual-desktop/start-virtual-machine-connect
- https://learn.microsoft.com/en-us/azure/virtual-desktop/configure-host-pool-load-balancing
End of the page 🎉
You have reached the end of the page. You can navigate through other blog posts as well, share this post on X, LinkedIn and Reddit or return to the blog posts collection page. Thank you for visiting this post.
If you find this page and blog very useful and you want to leave a donation, you can use the button below to buy me a beer. Hosting and maintaining a website takes a lot of time and money. Thank you in advance and cheers :)

The terms and conditions apply to this post.