Configure Watermarking in Azure Virtual Desktop
What is Watermarking?
Watermarking is a security feature in Azure Virtual Desktop to add watermarks to the user’s sessions. This will be a QR code where you can add information like the Connection information or Device information. This will look like this:
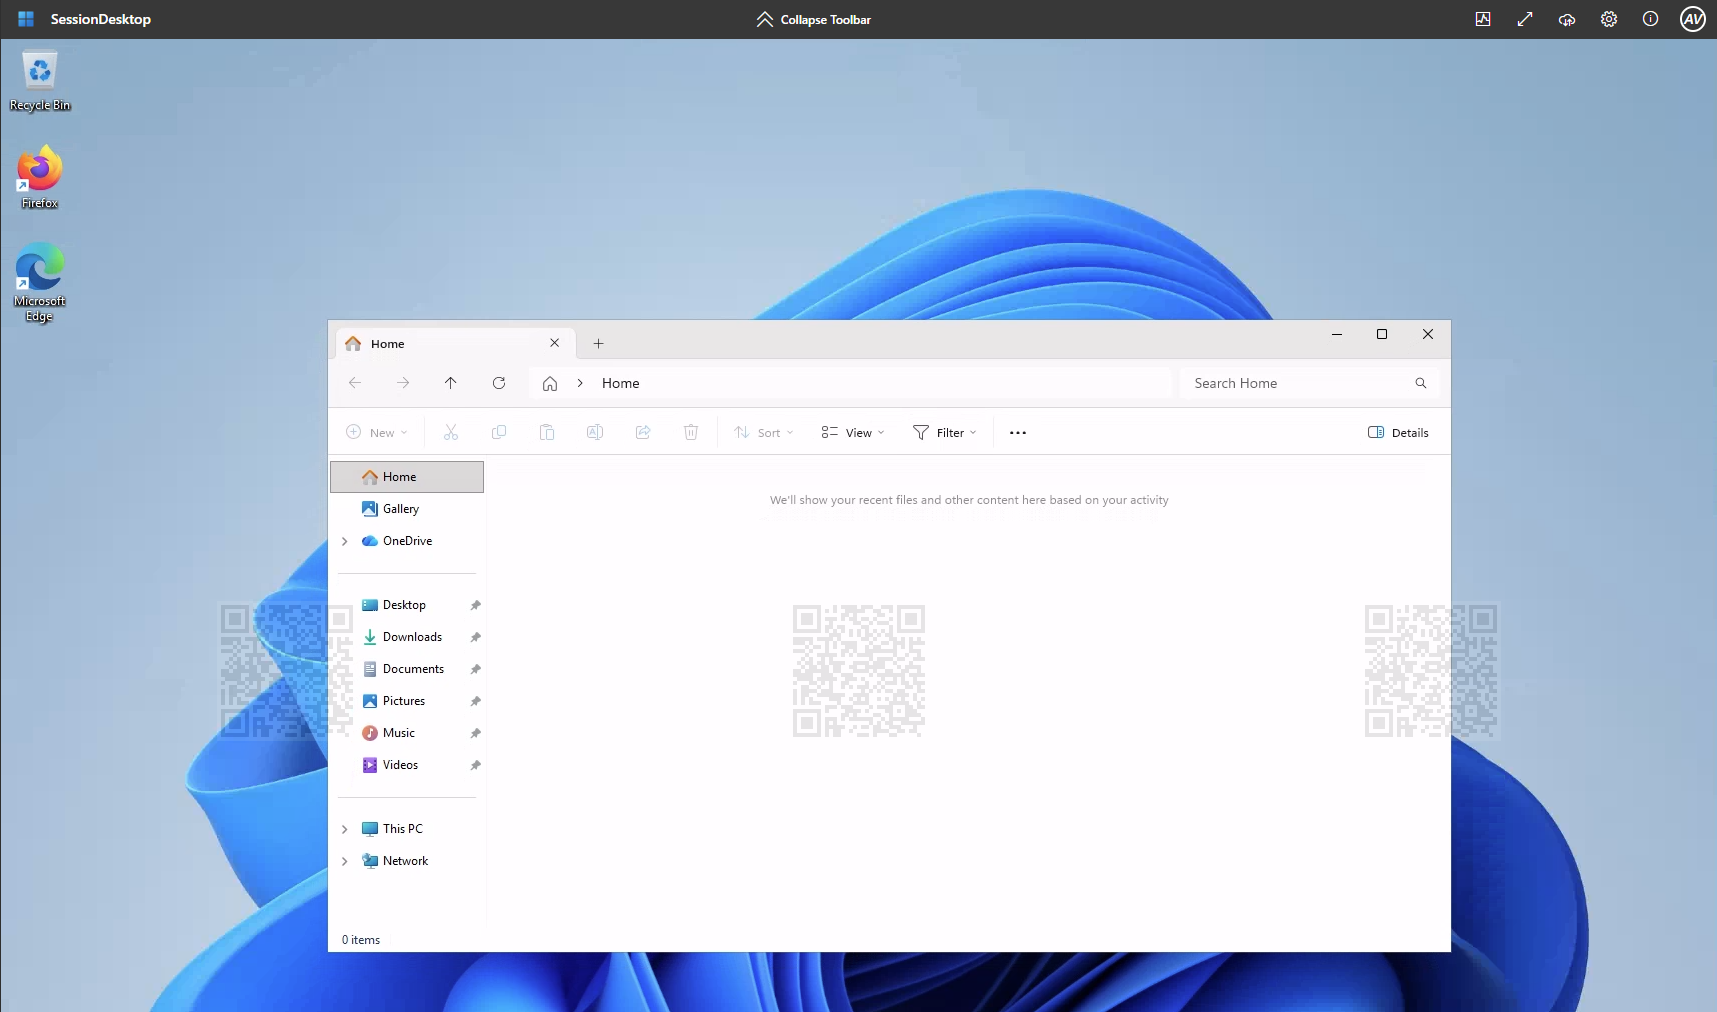
In this case, the QR code contains this data:
- Entra Device ID: 67557cd8-ddb8-45f5-9173-3bd92956b2a5
- Time/date stamp: 03/21/2026:13:17:18
In this post, I will explain why to possibly use this feature and how to configure with Microsoft Intune and Group Policy.
Why configure Watermarking?
We could have multiple reasons to configure Watermarking in Azure Virtual Desktop but the most important ones I can think of are:
- Better security awareness for end users, as screenshots or photos containing sensitive data will normally also contain a QR code, which can help trace the image back to the date, time and AVD session and indirectly the user itself
- Faster troubleshooting, because IT can use the information from the watermark to identify the correct session and session host
- Better incident investigation when sensitive information is leaked through a screenshot, screen recording or photo taken with an external device
Its more like an in between setting for not completely blocking screenshot ability, but also not fully permit them.
Option 1: Configure with Microsoft Intune
Let’s start by opening the Microsoft Intune admin center on https://intune.microsoft.com and head to “Devices” and then “Windows”. From there click “Configuration” and choose to create a new policy here or to add the settings to an existing policy.
For demonstration purposes, I will create a new policy here, based on Windows 10 and Later and use the Settings catalog.
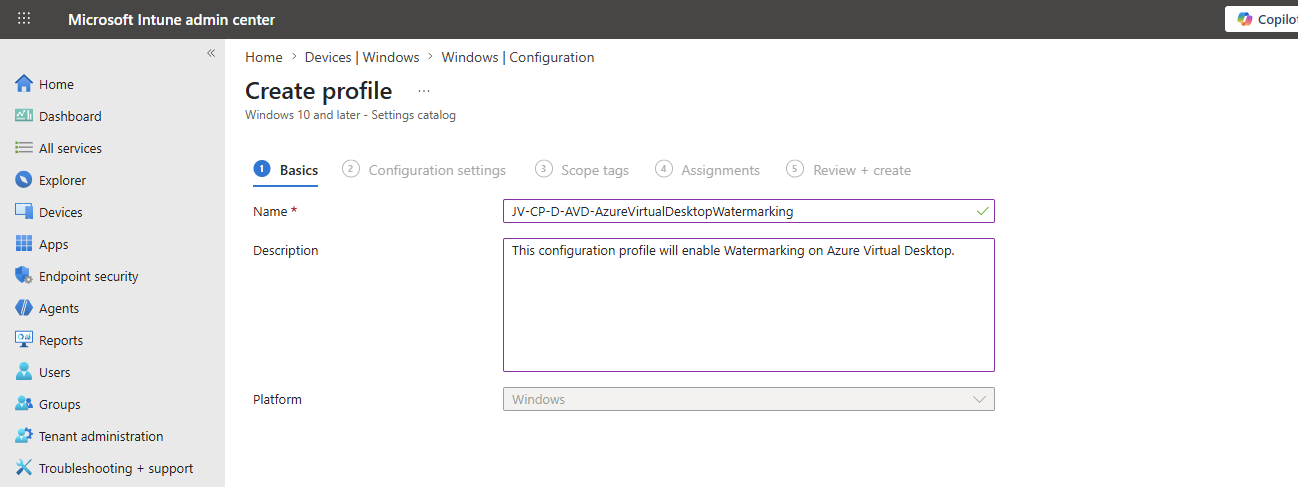
Give the policy a descriptive name and description. Then head to the next tab.
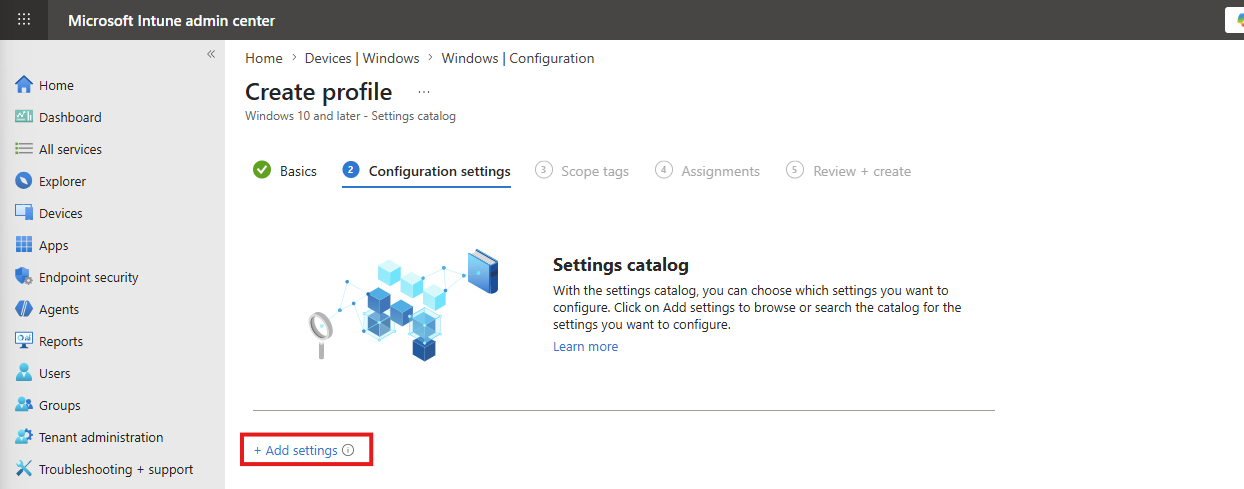
Here click “+ Add settings” and search for this option: Enable watermarking
Administrative Templates -> Windows Components -> Remote Desktop Services -> Remote Desktop Session Host -> Azure Virtual Desktop
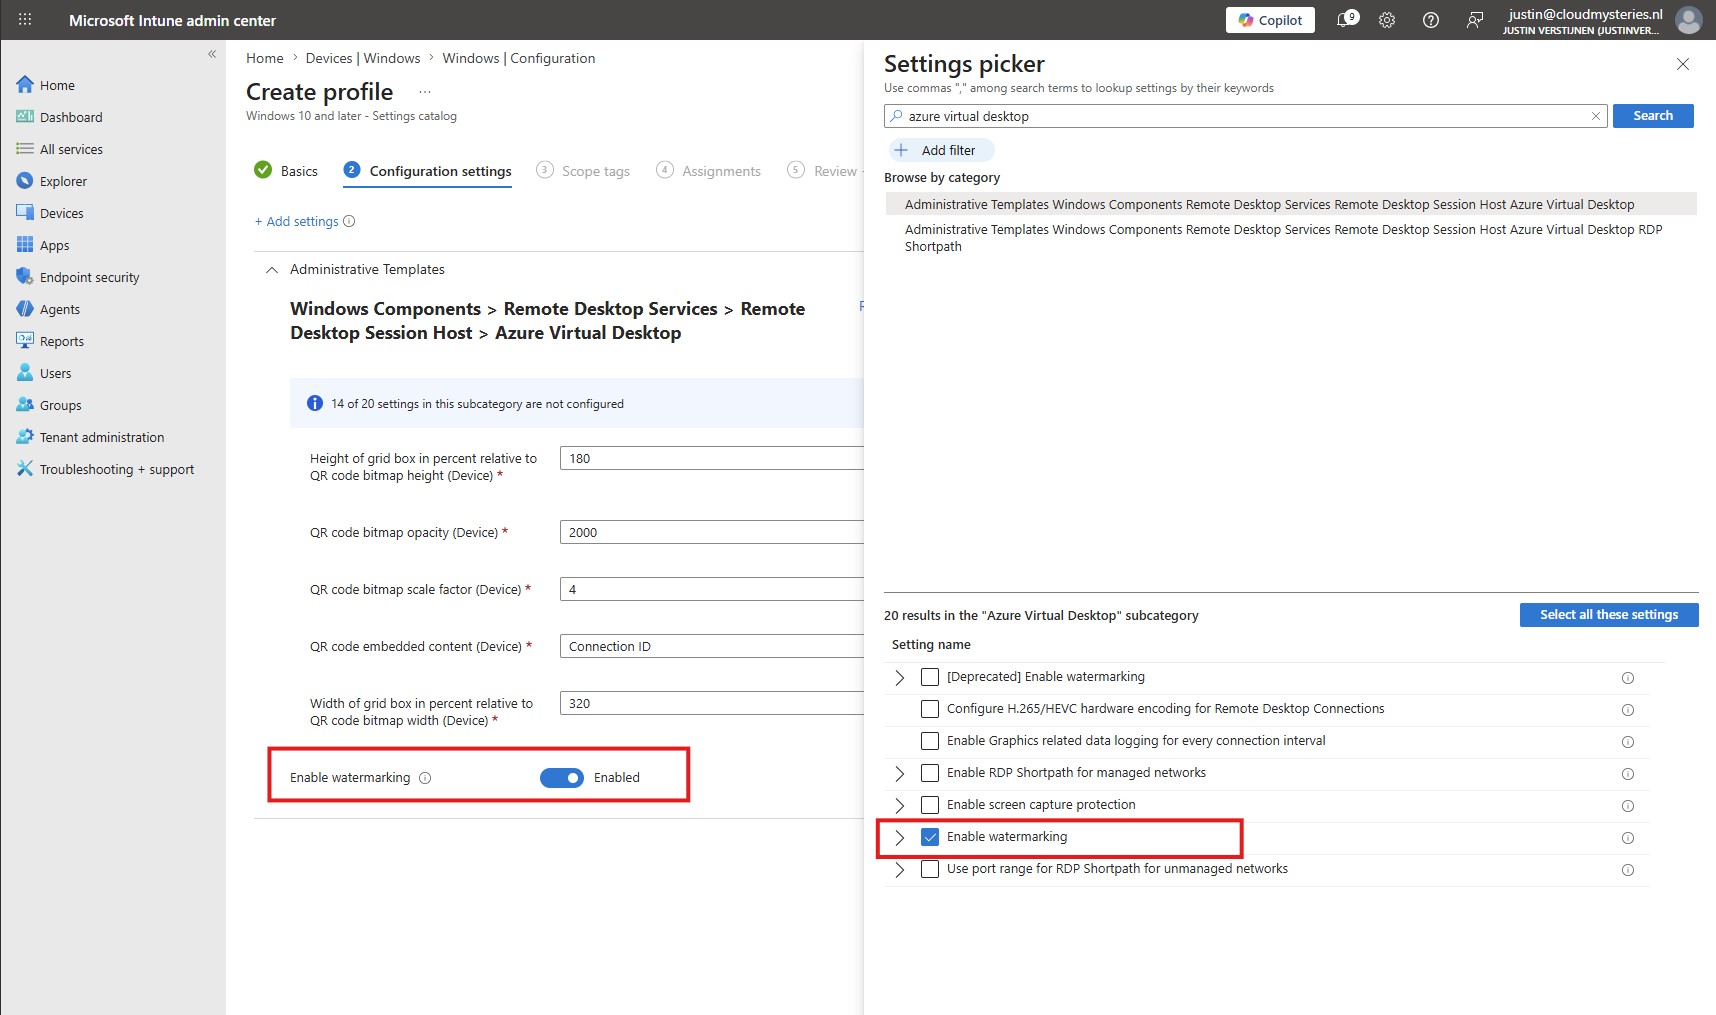
Select the configuration and enable it. Now comes a part of trial and error to align wih your preferences, as we have multiple settings to set.
For the official Microsoft description, check out: https://learn.microsoft.com/en-us/azure/virtual-desktop/watermarking?tabs=intune#:~:text=You%20can%20configure%20the%20following%20options%3A
After some testing on my end, I had the best results with these settings, where the QR codes were barely visible but not very prominent for the users.
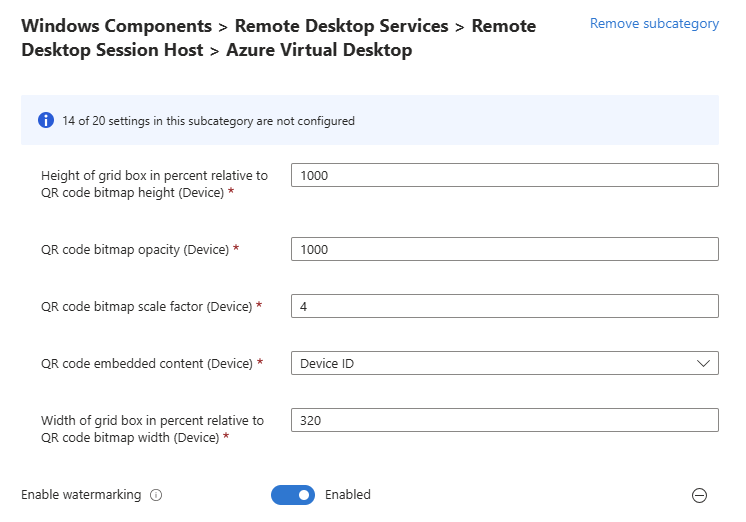
- Height of grid box in percent relative to QR code bitmap height (Device): 1000
- QR code bitmap opacity (Device): 1000
- QR code bitmap scale factor (Device): 4
- QR code embedded content (Device): Device ID
- Width of grid box in percent relative to QR code bitmap width (Device): 320
This makes the QR codes visible like shown here:
They are barely visible but scanning works on light backgrounds but with the Bitmap opacity option you can set the opacity higher to make it more visible.
Then in Microsoft Intune, advance to the tab “Assignments” and assign the policy to your group containing Azure Virtual Desktop session hosts. After doing that, the session hosts may require a restart to actually apply this settings.
If the policy is applied and changed, it will be applied during sign-in of a user, so you can relatively easy check and modify your settings like the opacity.
Option 2: Configure with Group Policy
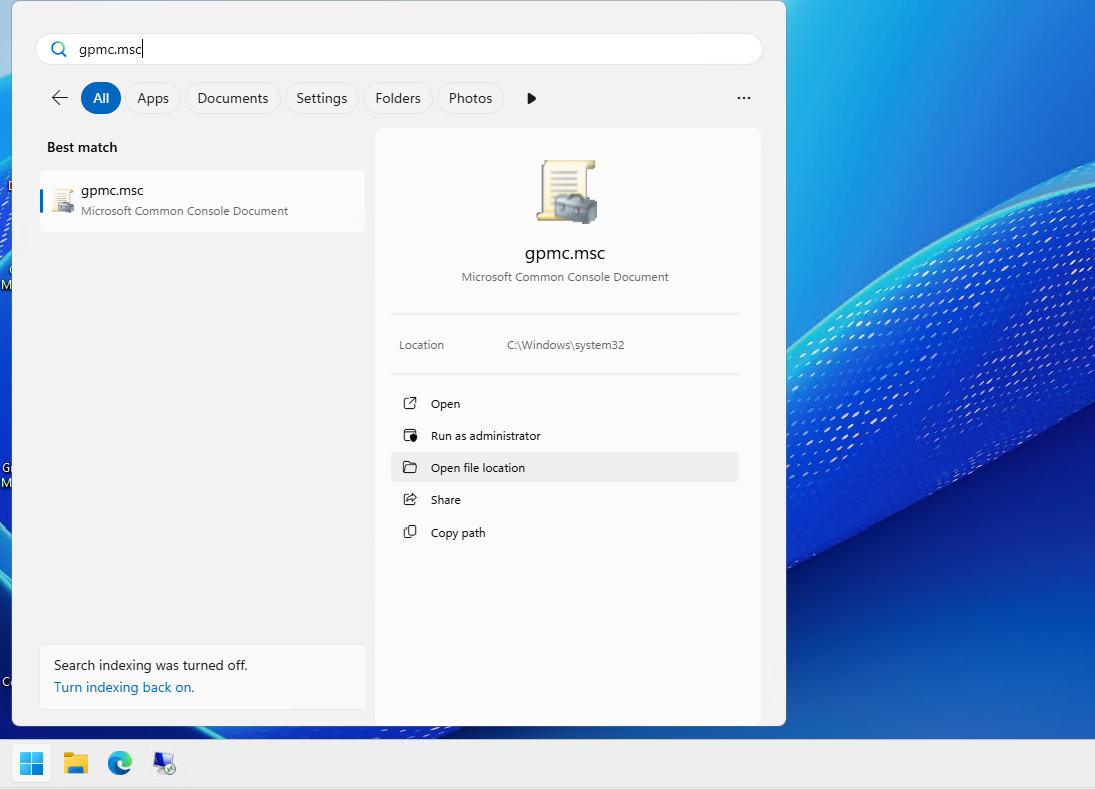
Open the Group Policy Management Console (gpmc.msc) on your management server.
Use an existing policy or to create a new policy to configure this setting. Then navigate to this folder:
Administrative Templates -> Windows Components -> Remote Desktop Services -> Remote Desktop Session Host -> Azure Virtual Desktop
Here you have the configuration: Enable watermarking, which has exactly the same settings as the Intune configuration, only in a slightly different order.
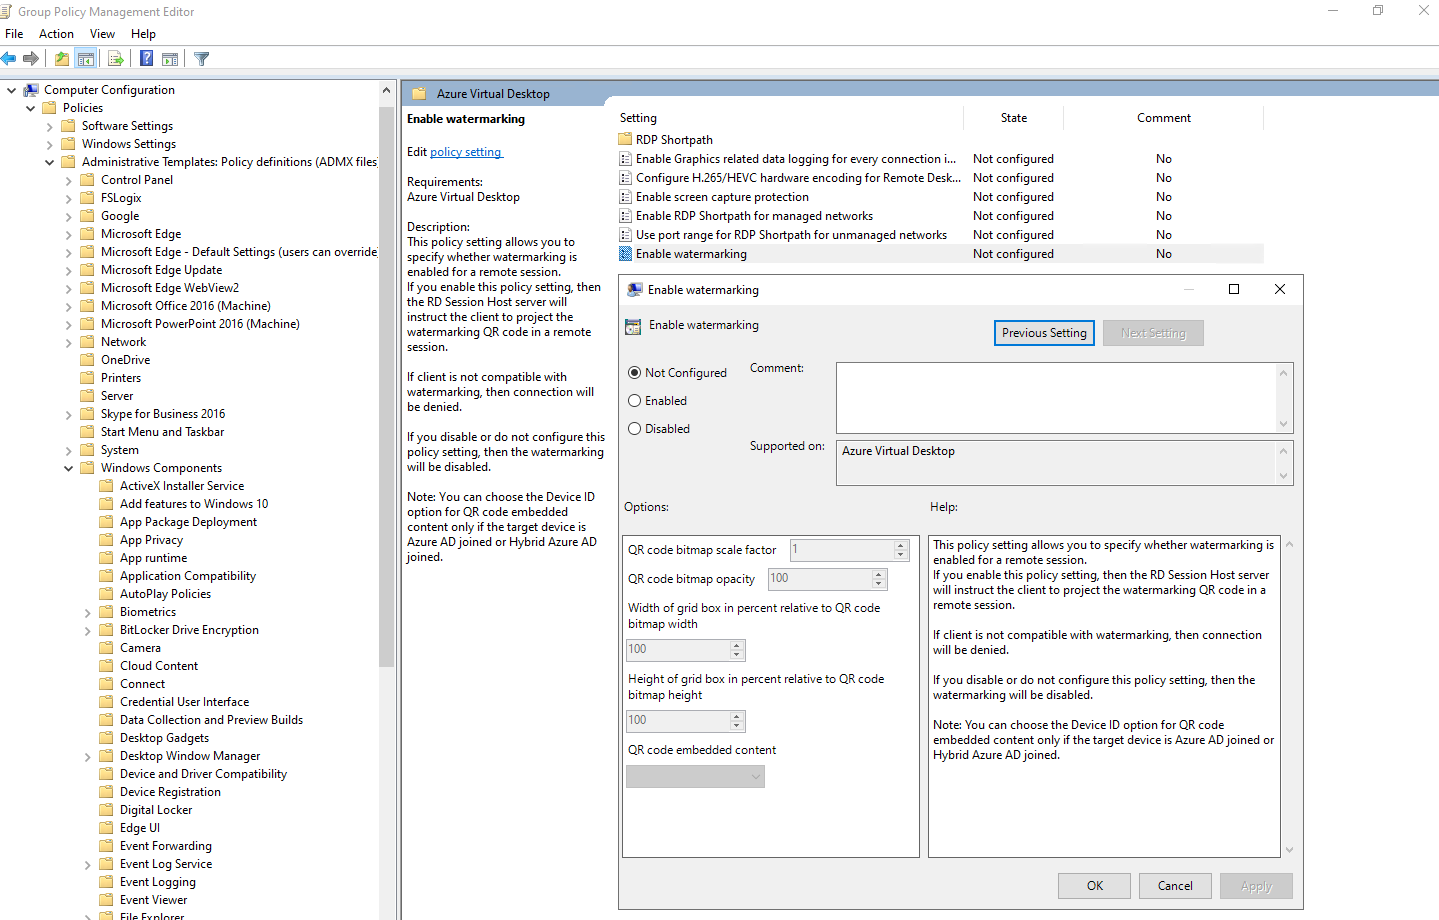
The settings that worked the best for me:
- QR code bitmap scale factor (Device): 4
- QR code bitmap opacity (Device): 1000
- Width of grid box in percent relative to QR code bitmap width (Device): 320
- Height of grid box in percent relative to QR code bitmap height (Device): 1000
- QR code embedded content (Device): Device ID
Then save the policy and apply it to the OU containing your Azure Virtual Desktop session hosts and reboot the session hosts.
Summary
Watermarking is a great feature which can increase your data security and awareness to users, printing a permanent sign of everything they do is traceable. You can also use the Connection ID option, but I found the Device ID option to be more useful but this can vary for everyone.
Thank you for reading this post and I hope it was helpful!
These sources helped me by writing and research for this post;
End of the page 🎉
You have reached the end of the page. You can navigate through other blog posts as well, share this post on X, LinkedIn and Reddit or return to the blog posts collection page. Thank you for visiting this post.
Support the blog
