Deploy Resource Group locks automatically with Azure Policy
Categories:
7 minute read
Note: Locks on Resource Groups can stop some automations. If you use read-only locks on a Azure Virtual Desktop resource group for example, autoscaling will not work anymore.
Take care and test these changes before creating them and assigning this policy to such (production) subscription.
The solution described
This solution consists of an Azure Policy Definition, that is assigned to the subscription where this must be executed. It also consists of a custom role that only gives the needed permissions, and nothing more.
The Azure Policy evaluates the resource groups regularly and puts the lock on the resource groups. No need for manual lock deployment anymore.
It can take up to 30 minutes before a (new) resource group gets the lock assigned automatically, but most of the time it happens a lot faster.
Step 1: Creating the custom role
Before we can use the policy and automatic remediation, we need to set the correct permissions. As this must be done on subscription-level, the normal permissions would be very high. In our case, we will create a custom role to achieve this with a much lower privileged identity.
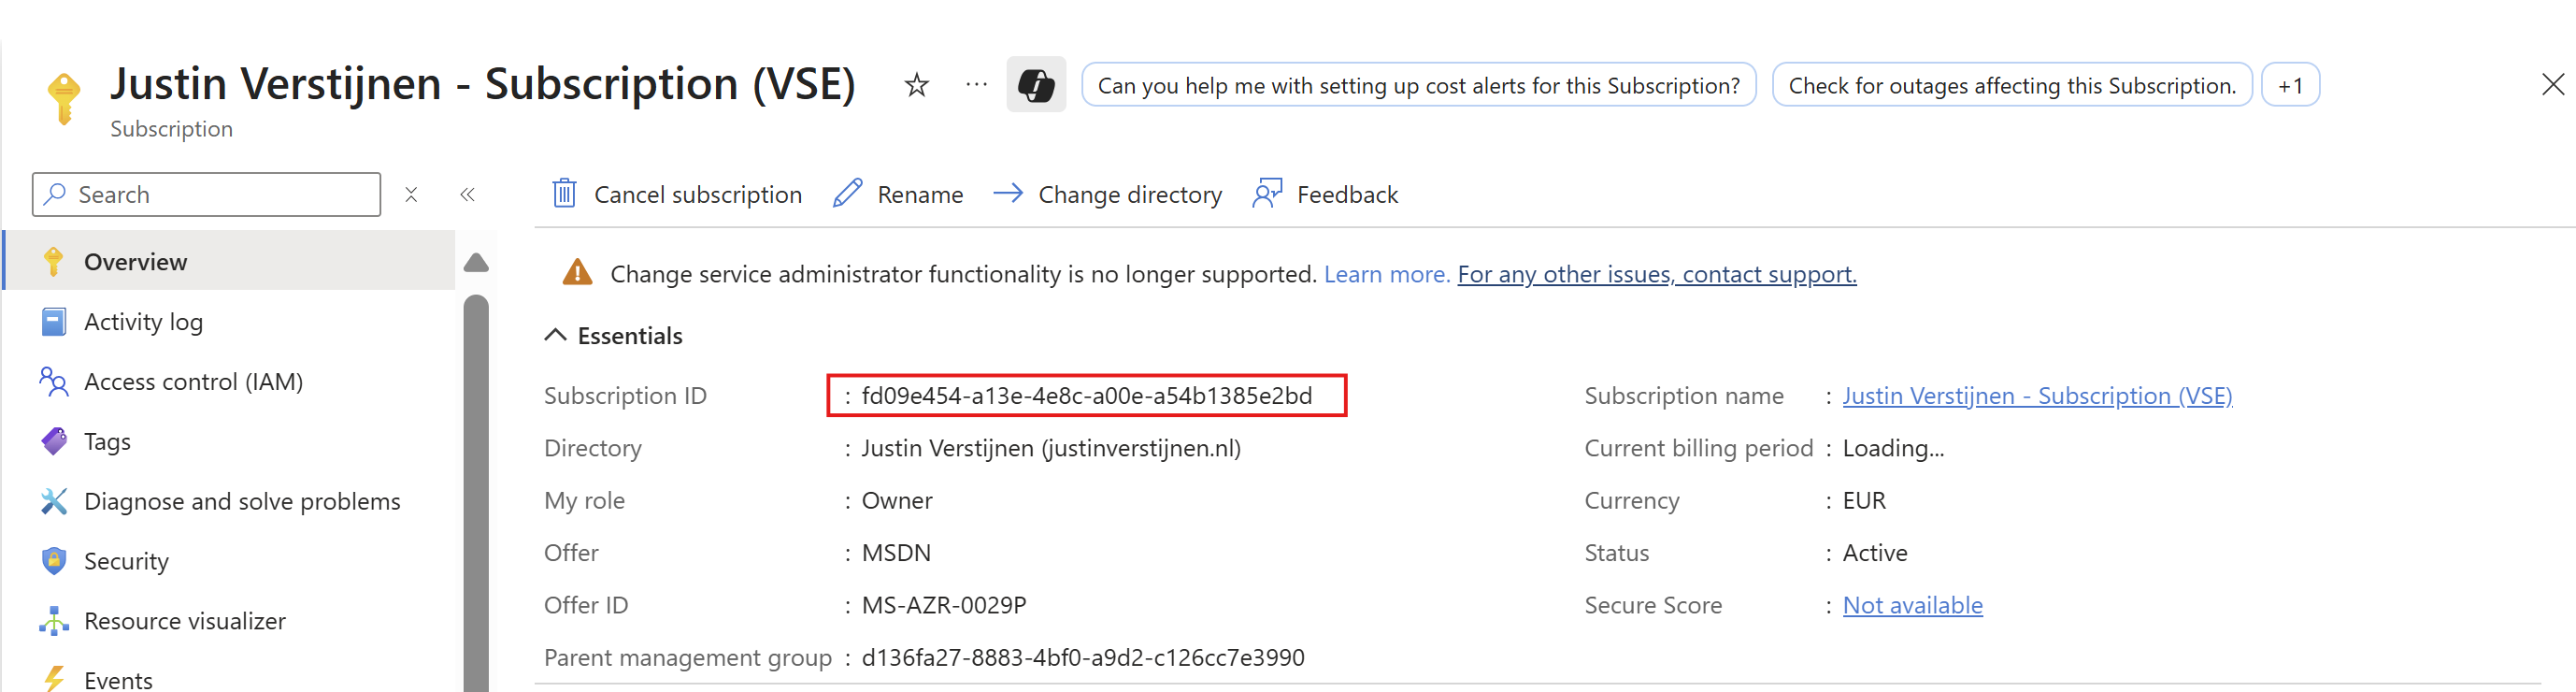
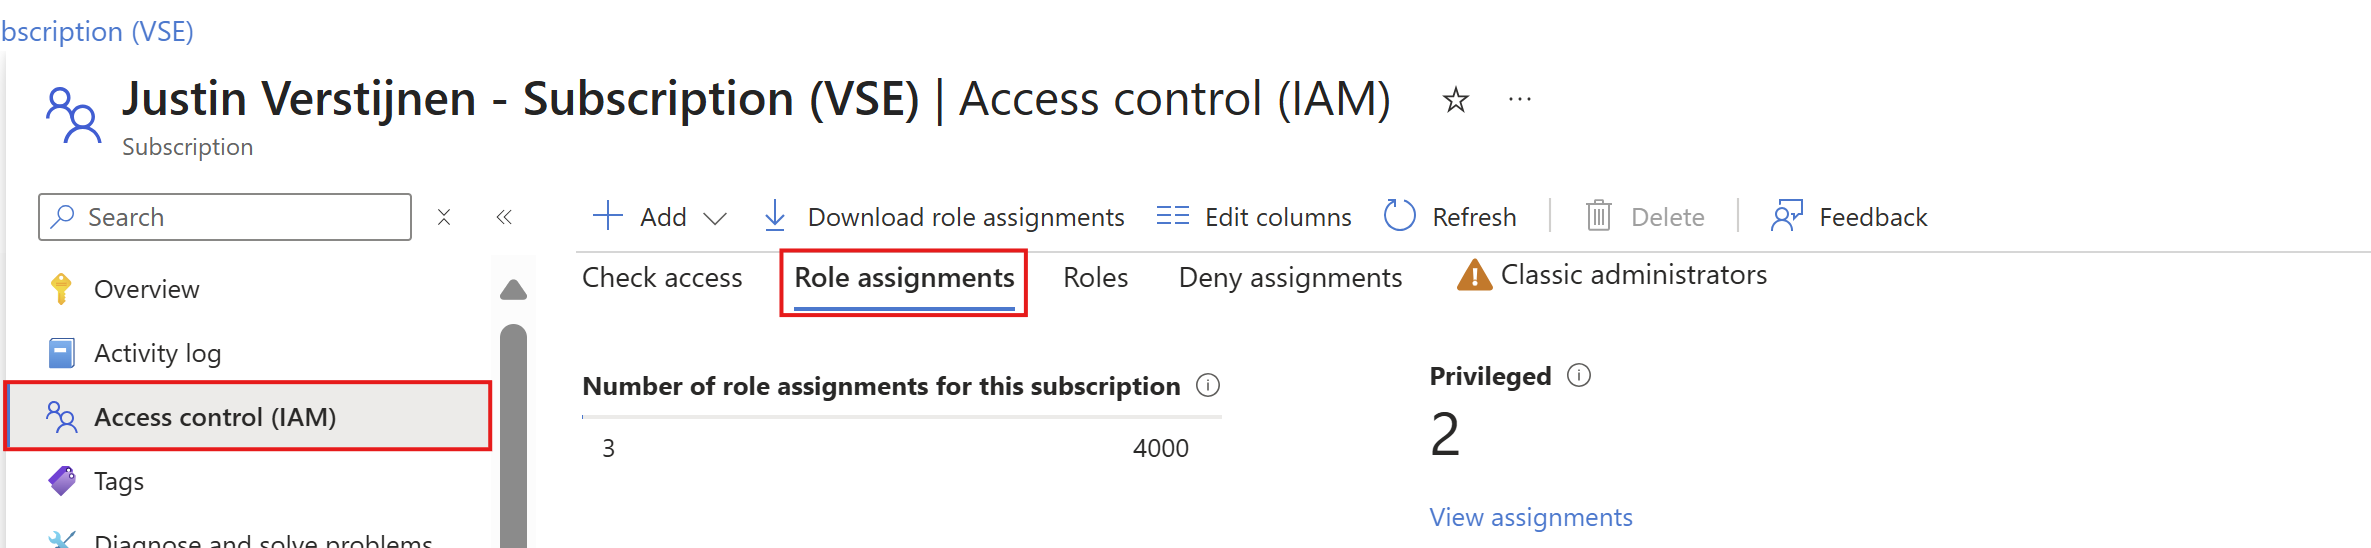
Go to “Subscriptions”, and select the subscription where you want the policy to be active. Now you are here, copy the “Subscription ID”:
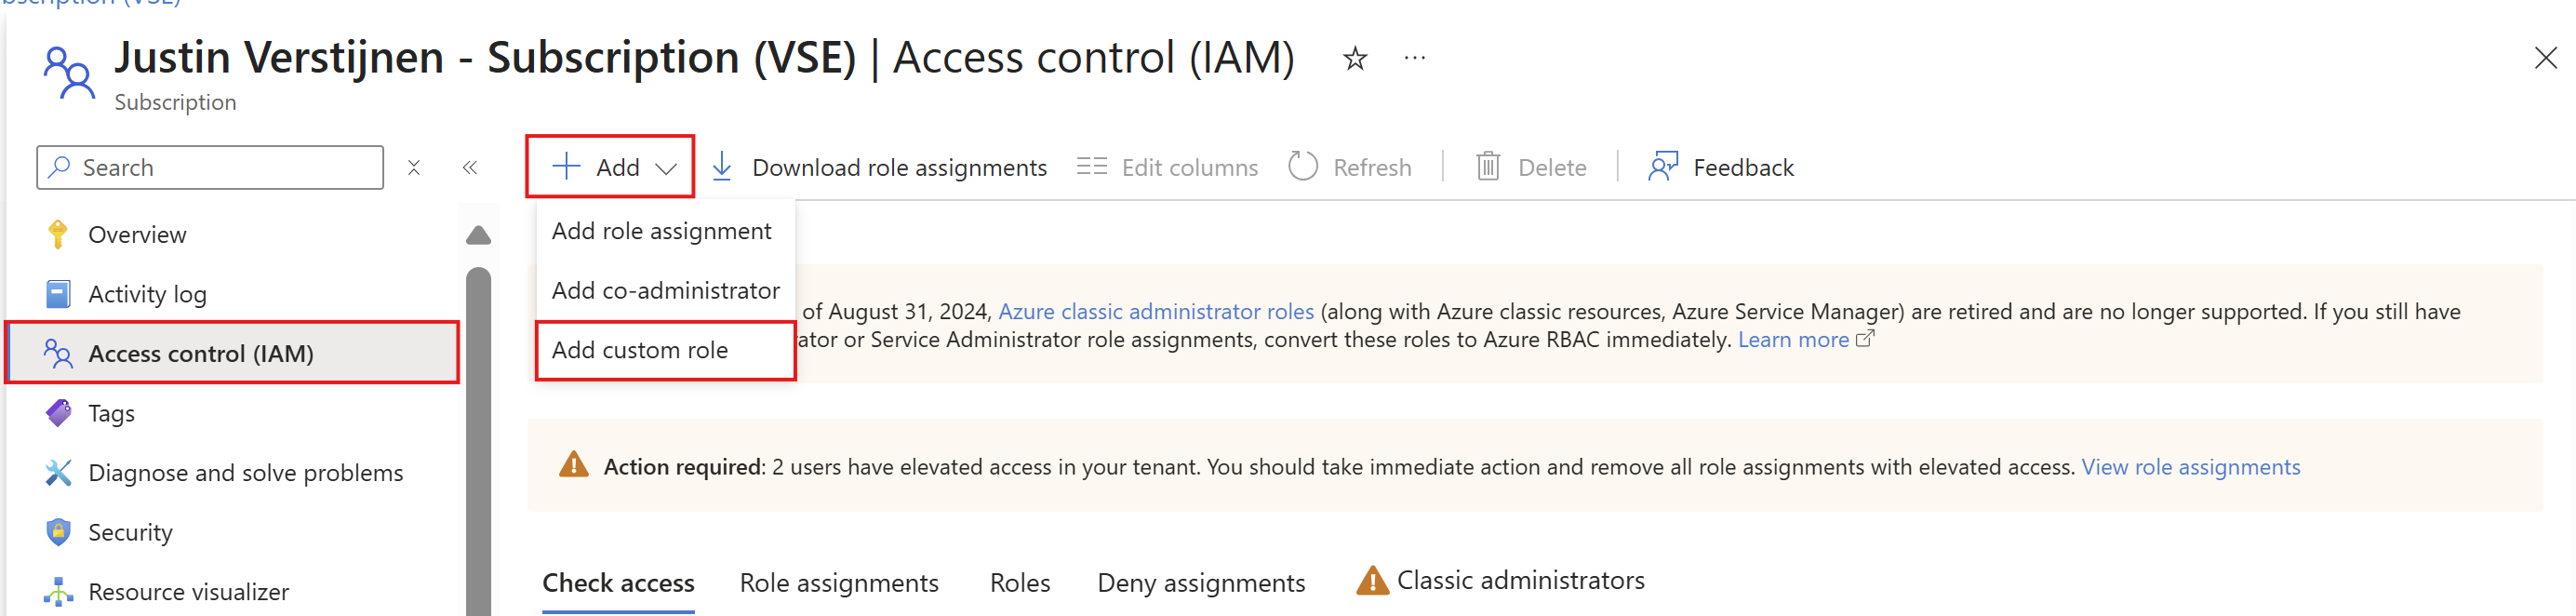
Go to “Access control (IAM)”. Then click on “+ Add” and then “Add custom role”.
Here go directly to the “JSON” tab, click “Edit” and paste the code below, and then paste the subscription ID on the placeholder on line 6:
{
  "properties": {
    "roleName": "JV-CR-AutomaticLockRGs",
    "description": "Allows to place locks on every resource group in the scope subscription.",
    "assignableScopes": [
      "/subscriptions/*subscriptionid*"
    ],
    "permissions": [
      {
        "actions": [
          "Microsoft.Authorization/locks/*",
	        "Microsoft.Resources/deployments/*",
          "Microsoft.Resources/subscriptions/resourceGroups/read"
        ],
        "notActions": [],
        "dataActions": [],
        "notDataActions": []
      }
    ]
  }
}
Or view the custom role template on my GitHub page:
Then head back to the “Basics” tab and customize the name and description if needed. After that, create the custom role.
Step 2: Create the Policy Definition
Now we can create the Policy Deinition in Azure. This is the definition or let’s say, the set of settings to deploy with Azure Policy. The definition is then what is assigned to a determined scope which we will do in the next step.
Open the Azure Portal, and go to “Policy”.
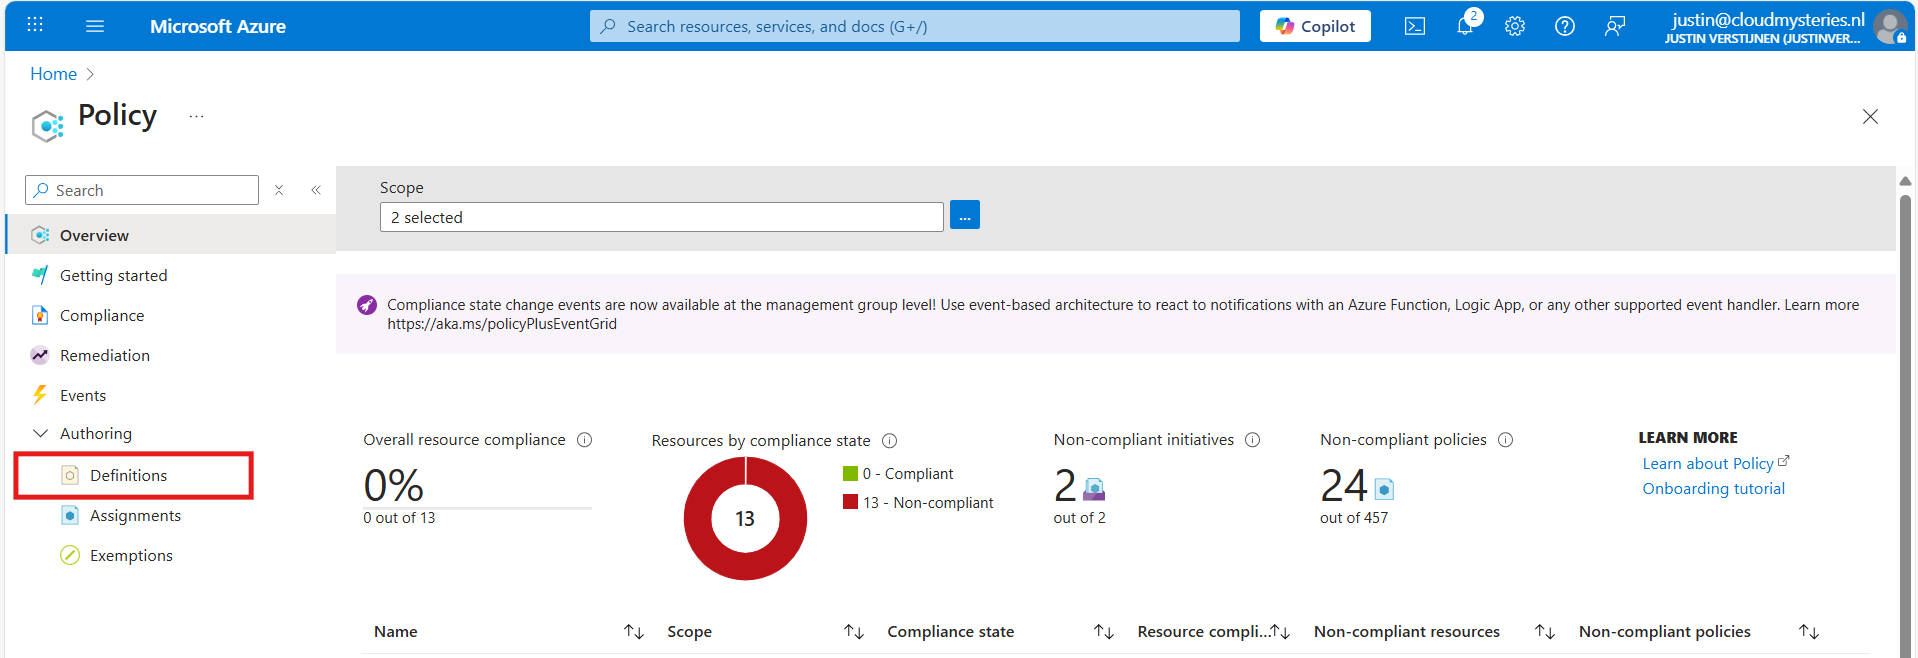
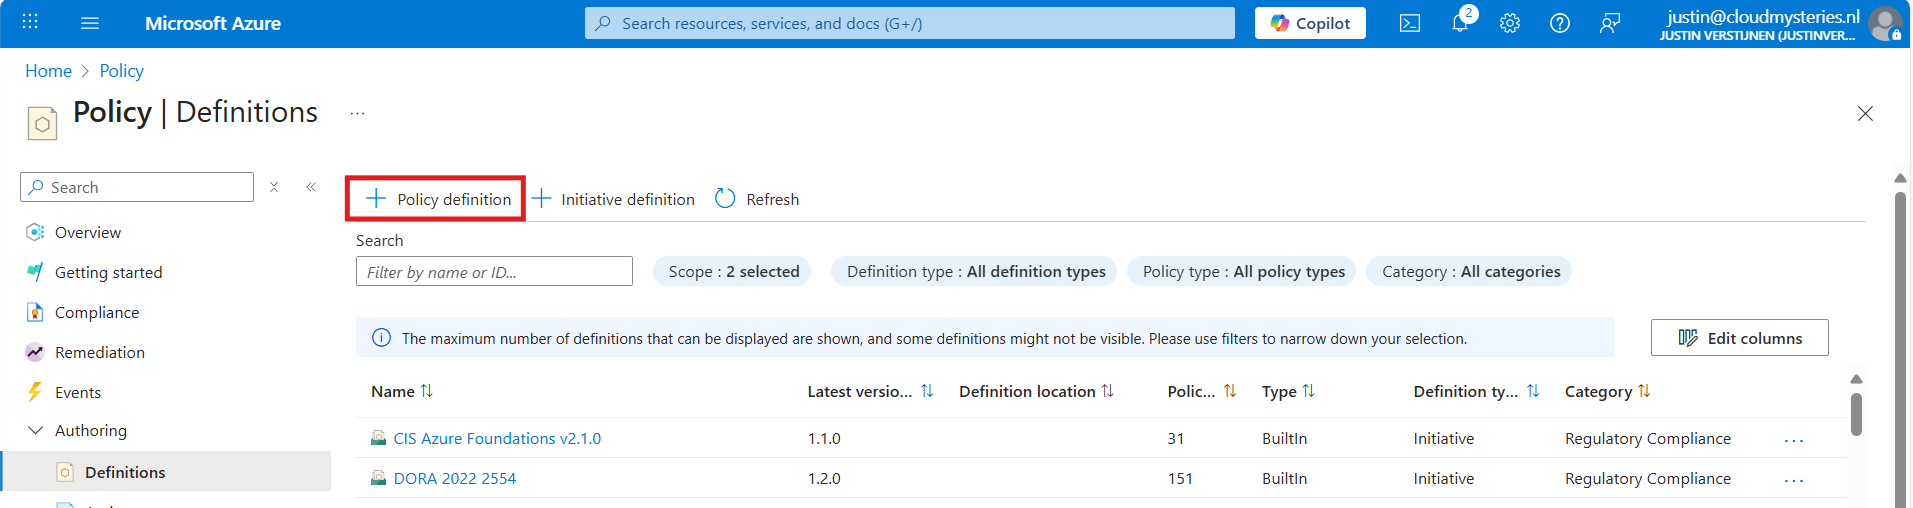
Then under “Authoring” click on “Definitions”. Then click “+ Policy Definition” to create a new policy definition.
In the “Definition Location”, select the subscription where the policy must place locks. Then give the definition a name, description and select a category. Make sure to select a subscription and not a management group, otherwise it will not work.
After that, we must paste the code into the Policy Rule field. I have the fully prepared code template here:
Open the link and click this button to copy all code:

Then paste the code above into the Policy rule field in Azure:
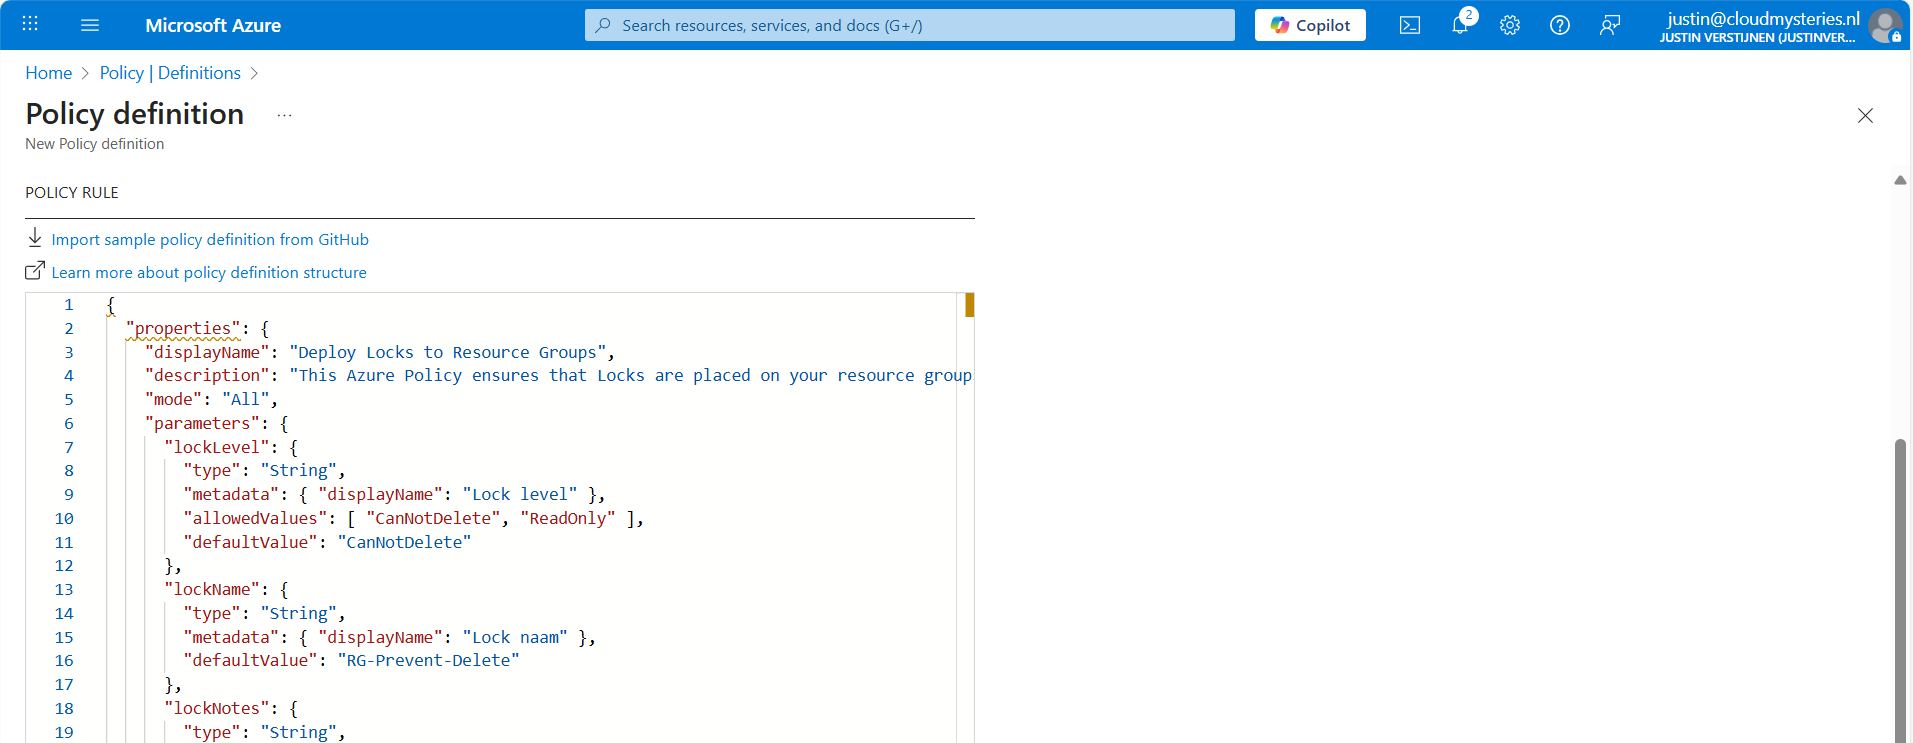
After that, save the policy definition and we are done with creating the policy definition.
Step 3: Assign the Policy to your subscription(s)
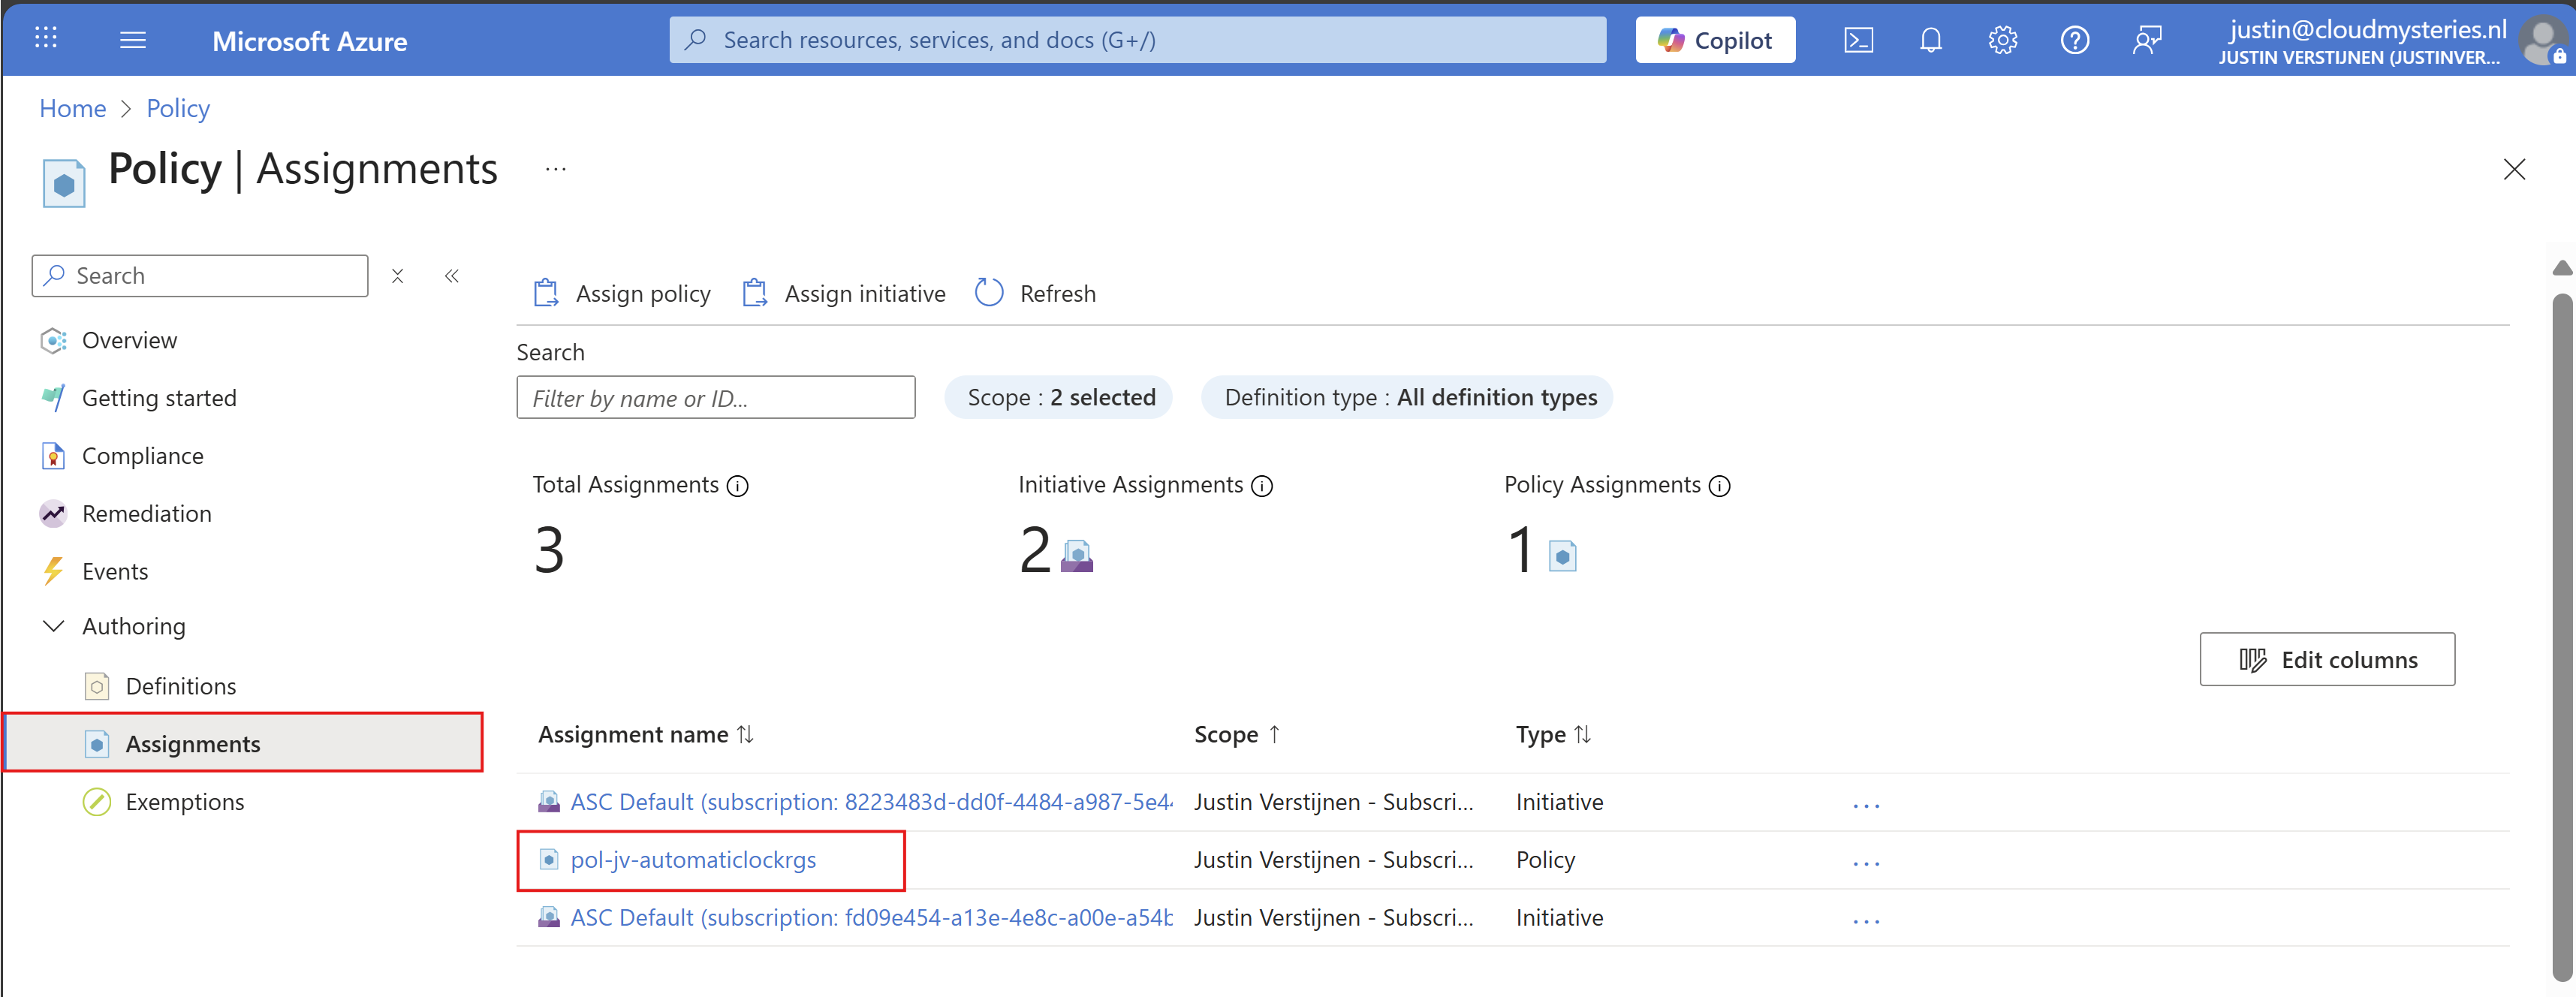
Now that we have made the definition, we can assign this to our subscription(s). You can do this by clicking on “Assign policy” directly after creating the definition, or by going back to “Policy” and selecting “Assignments”:
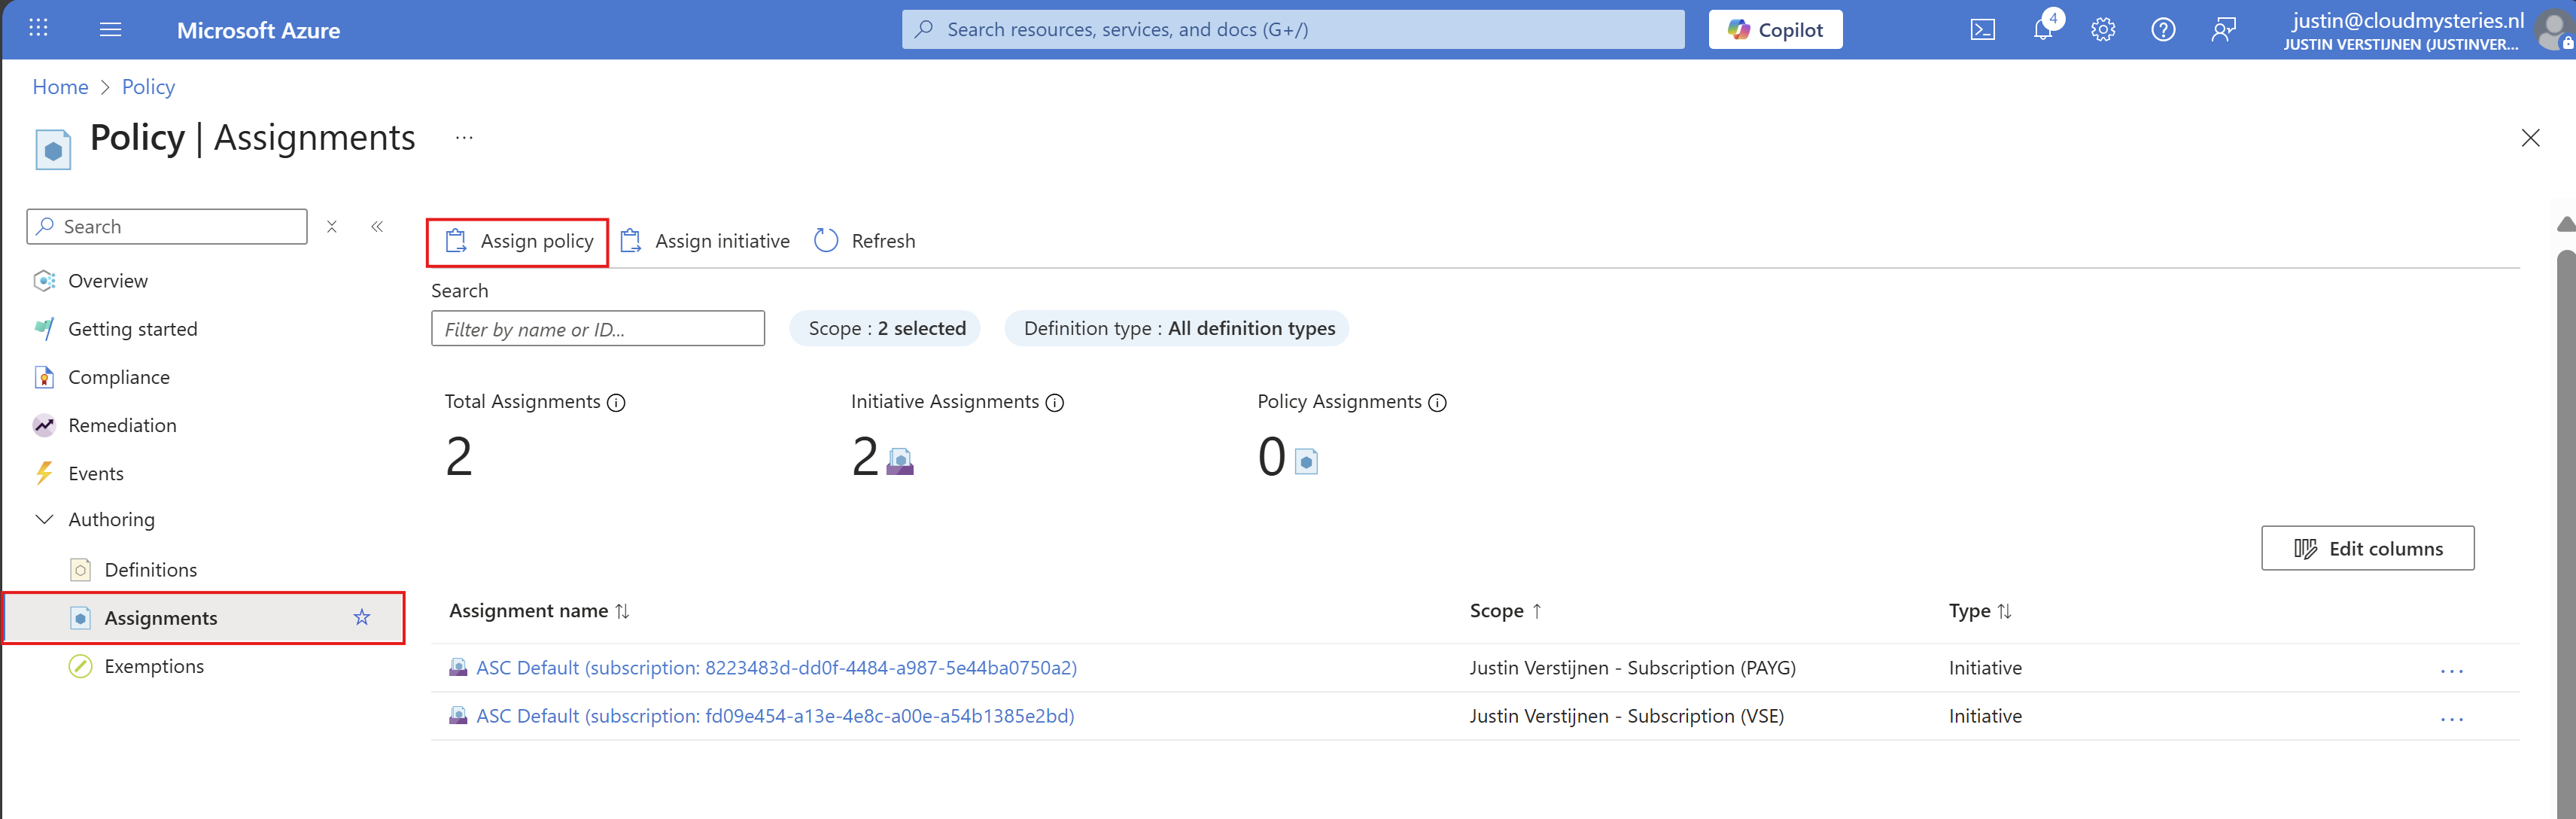
Click on “Assignments” and then on “Assign Policy”.
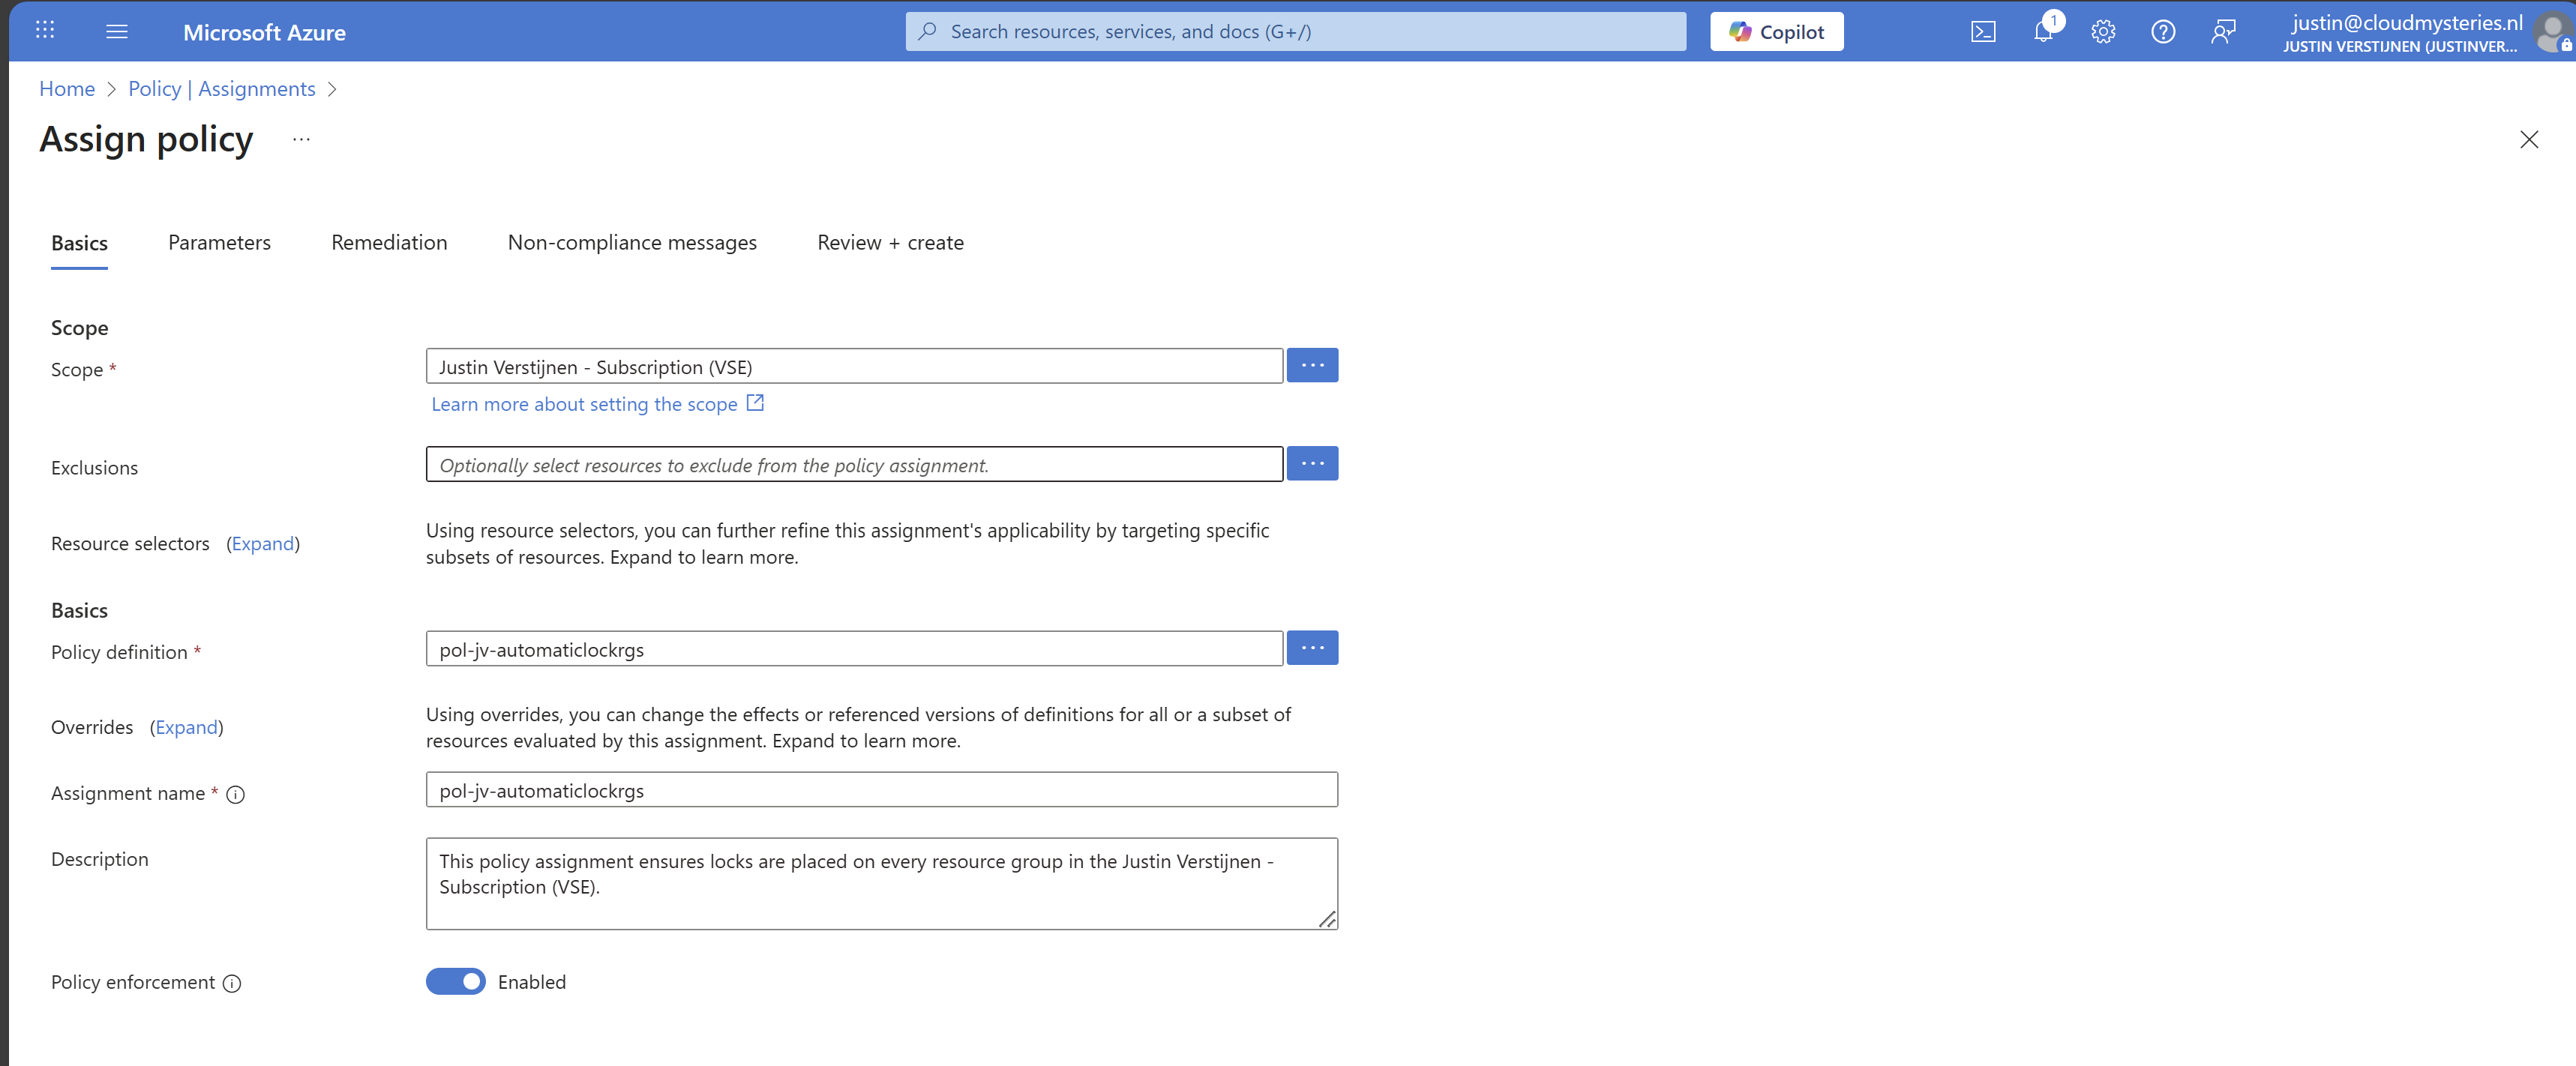
At the scope level, you can determine which subscription to use. Then you could set some exclusions to exclude some resouce groups in that subscription.
At the Policy definition field, select the just created definition to assign it, and give it a name and description.
Then advance to the tab “Remediation”. The remediation task is where Azure automatically ensures that resources (or resource groups in this case) are compliant with your policy. This by automatically placing the lock.
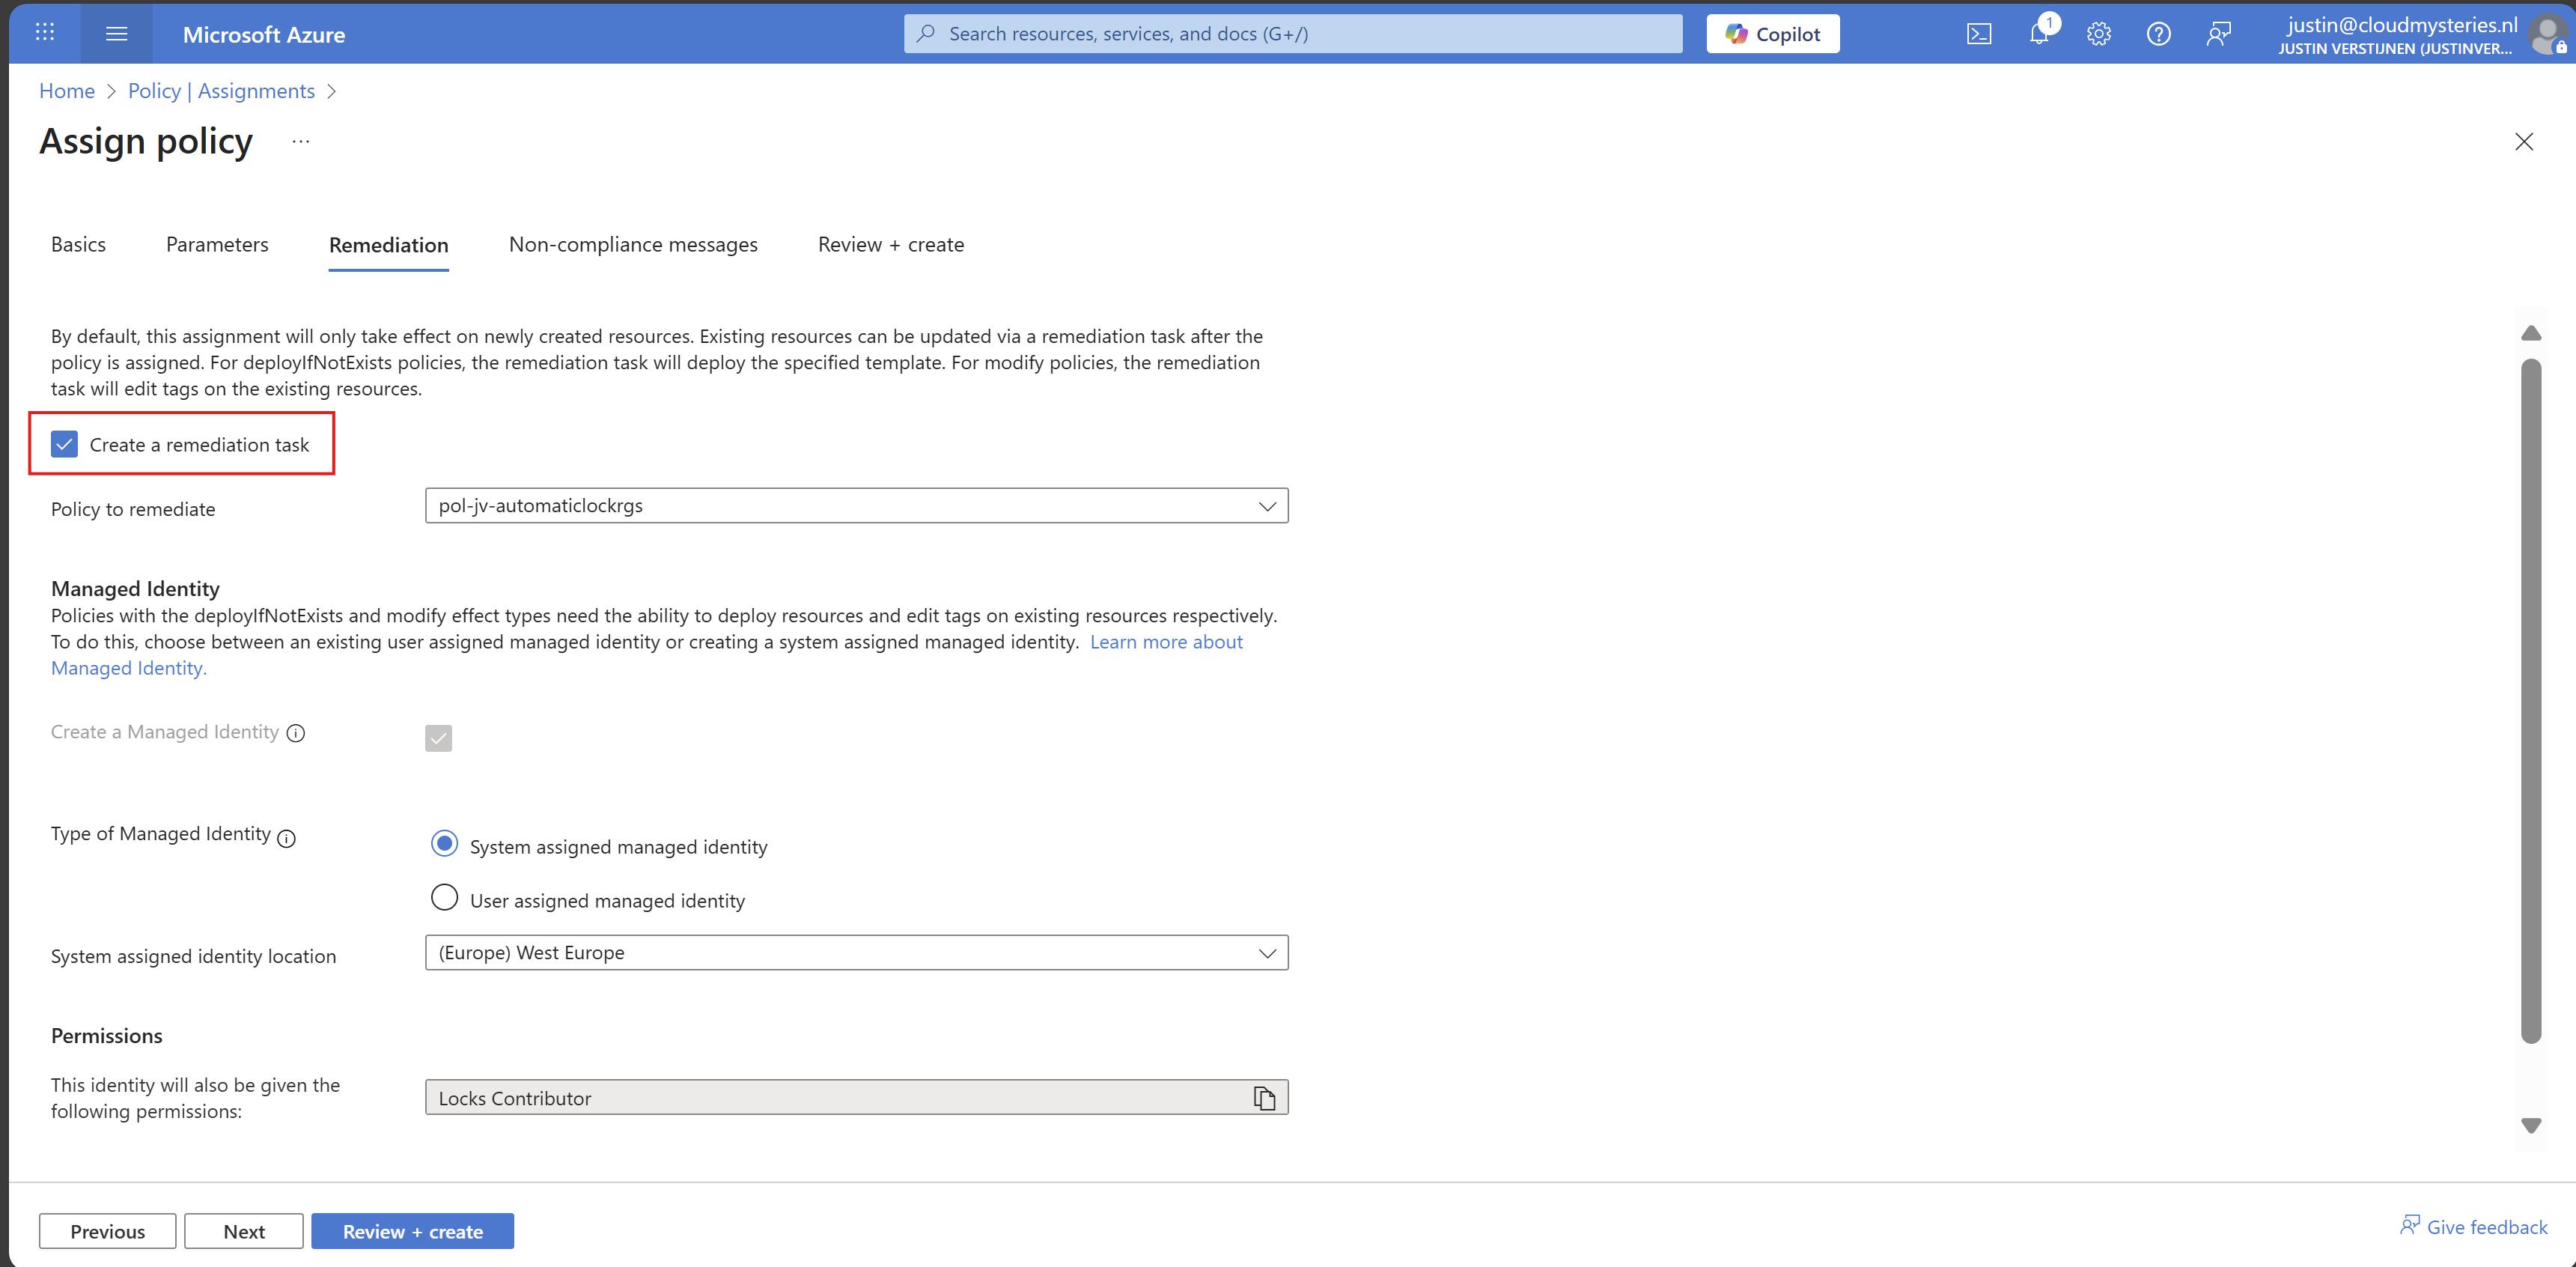
Enable “Create a remediation task” and the rest can be left default settings. You could use a user assigned managed identity if needed.
Finish the assignment and the policy will be active.
Step 4: Assign the custom role to your managed identity
Now that we have assigned the managed identity to our remediation task, we can assign new permissions to it. By default, Microsoft assigns the lock contributor role, but is unfortunately not enough.
Go to your subscription, and once again to “Access control (IAM)”. Then select the tab “Role assignments”:
Search for the managed identity Azure just made. It will be under the “Lock Contributor” category:

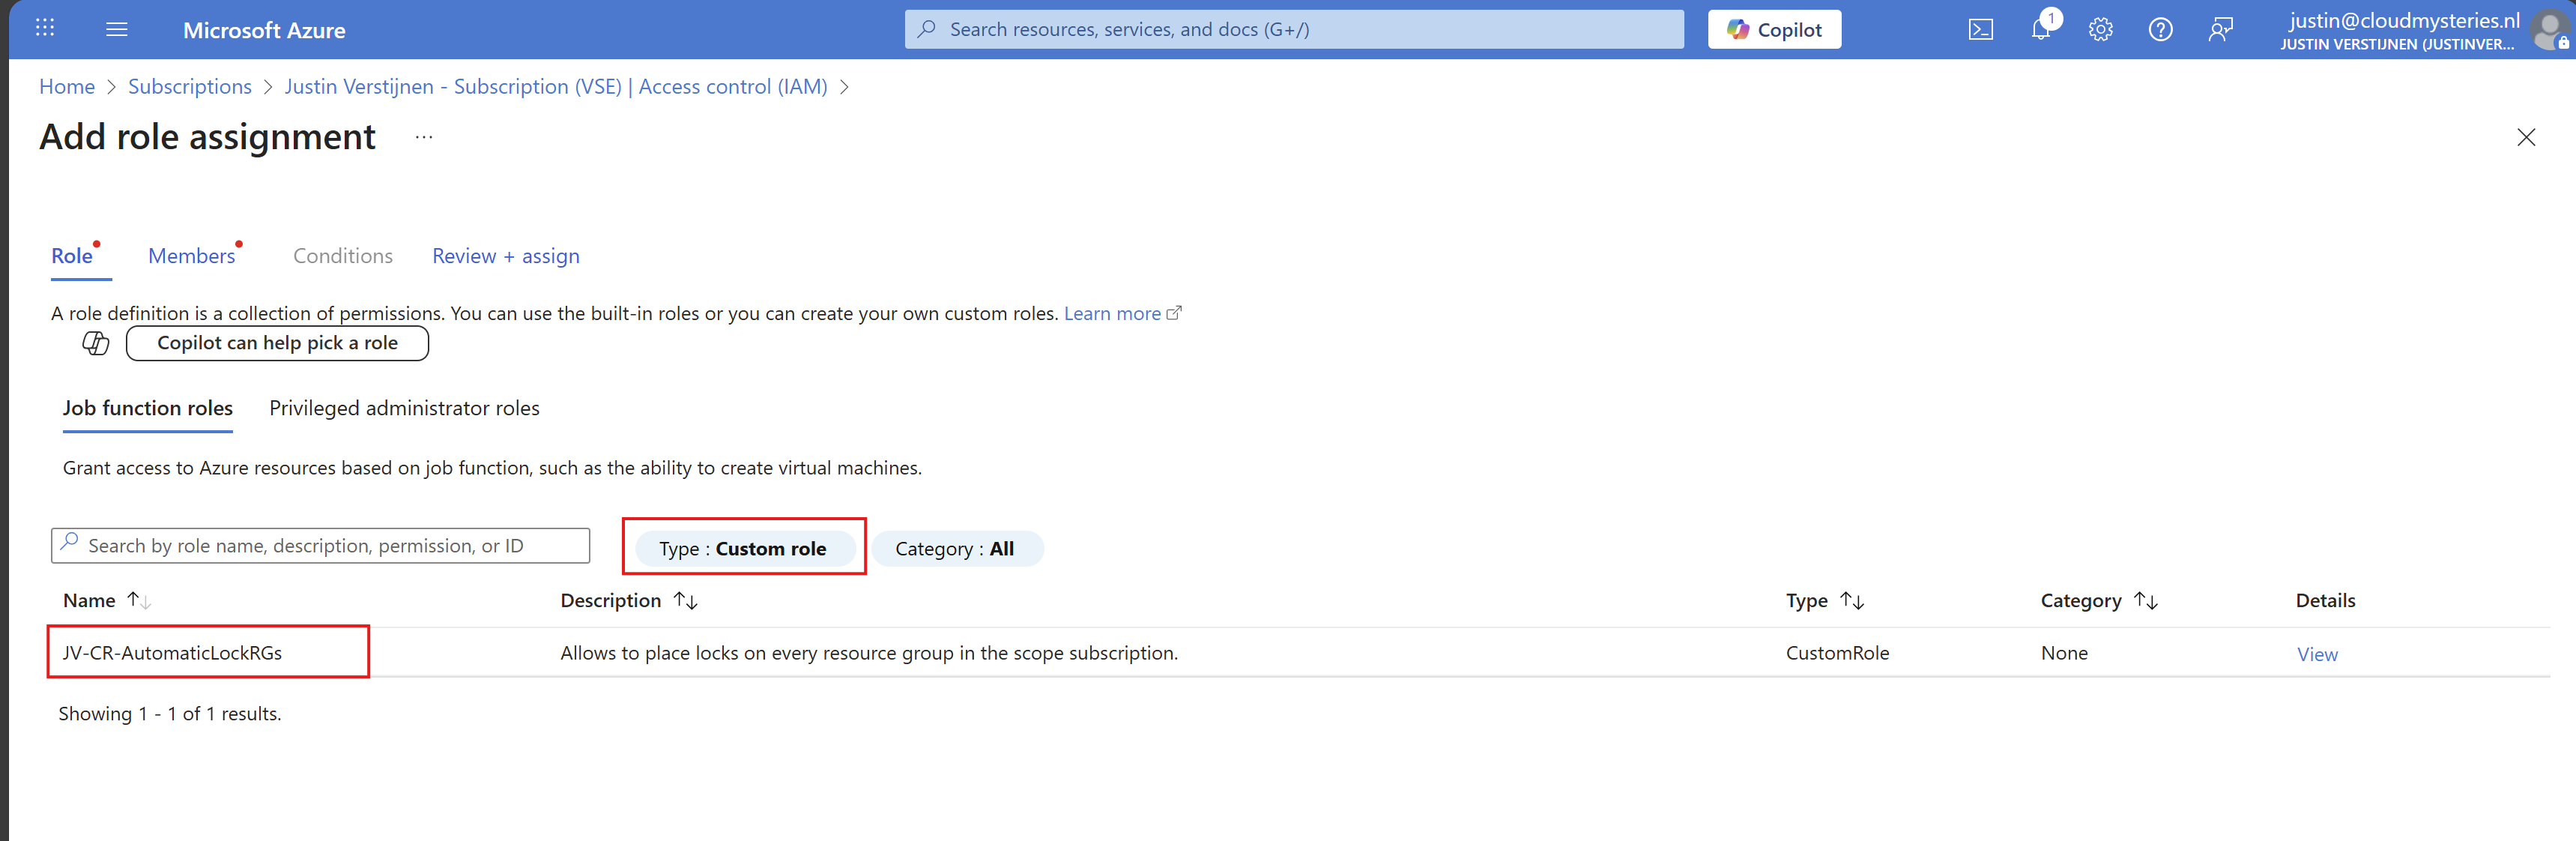
Copy or write down the name and click “+ Add” and add a role to the subscription.
On the “Role” tab, select type: “Custom role” to only view custom roles and select your just created role:
Click next.
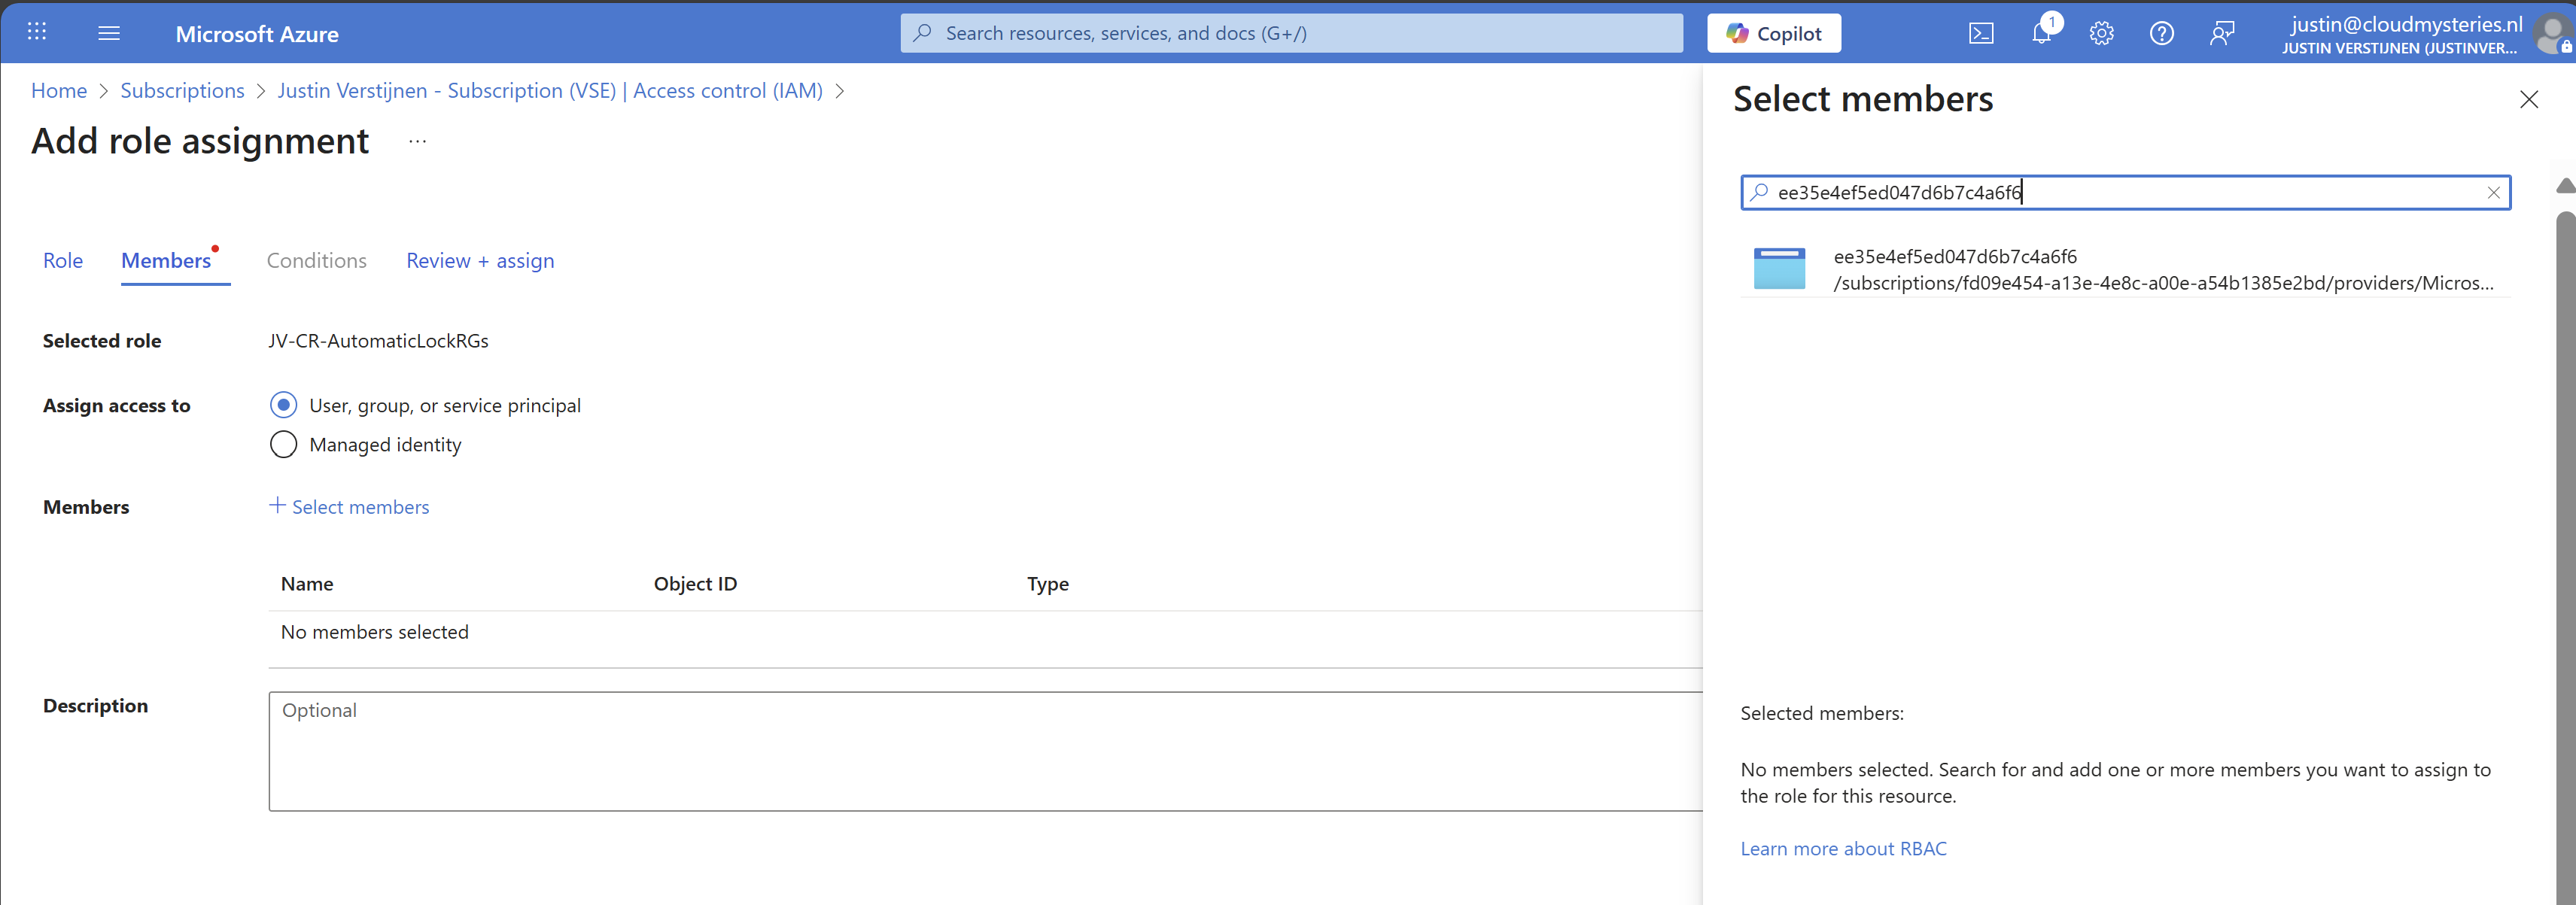
Make sure “User, group or service principal” is selected, click “+ Select members” and paste in the name of the identity you have just copied.
While Azure call this a managed identity, it is really a service principal which can sound very strange. WHy this is is really simple, it is not linked to a resource. Managed Identities are linked to resources so a resource has permissions. In this case, it’s only Azure Policy.
Select the Service principal and complete the role assignment.
Step 5: Let’s test the outcome
After configuring everything, we have to wait around 15 minutes for the policy to become active and the remediation task to put locks on every resource group.
After the 15 minute window we can check the status of the remediation task:
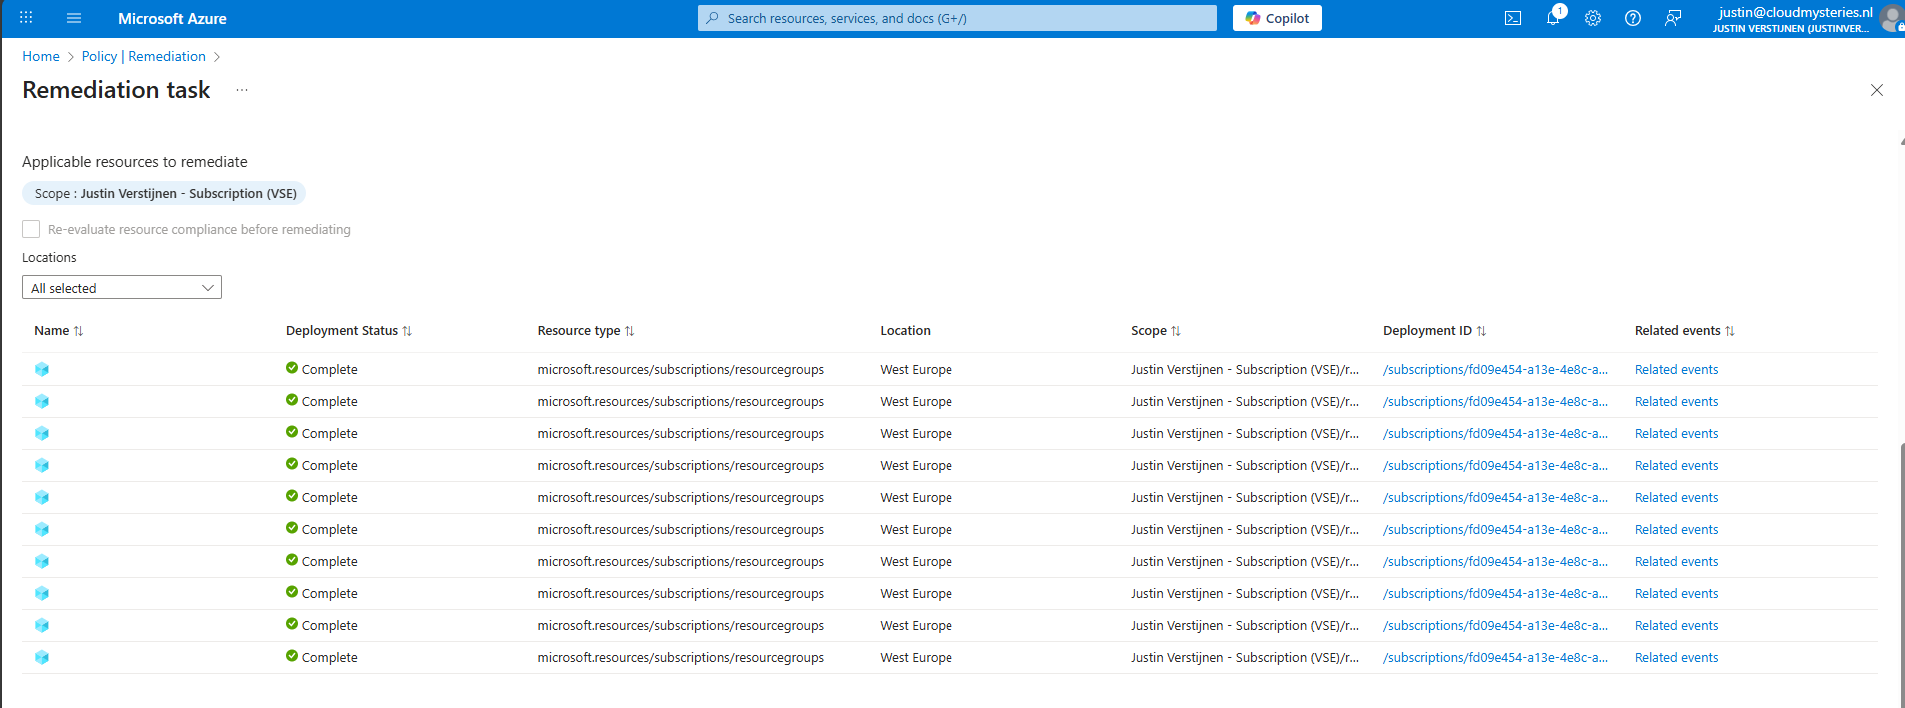
Looks promising! Let’s take a look into the resource groups itself:

Looks great and exactly what we wanted to achieve.
Step 6: Exclude resource groups from getting locks (optional)
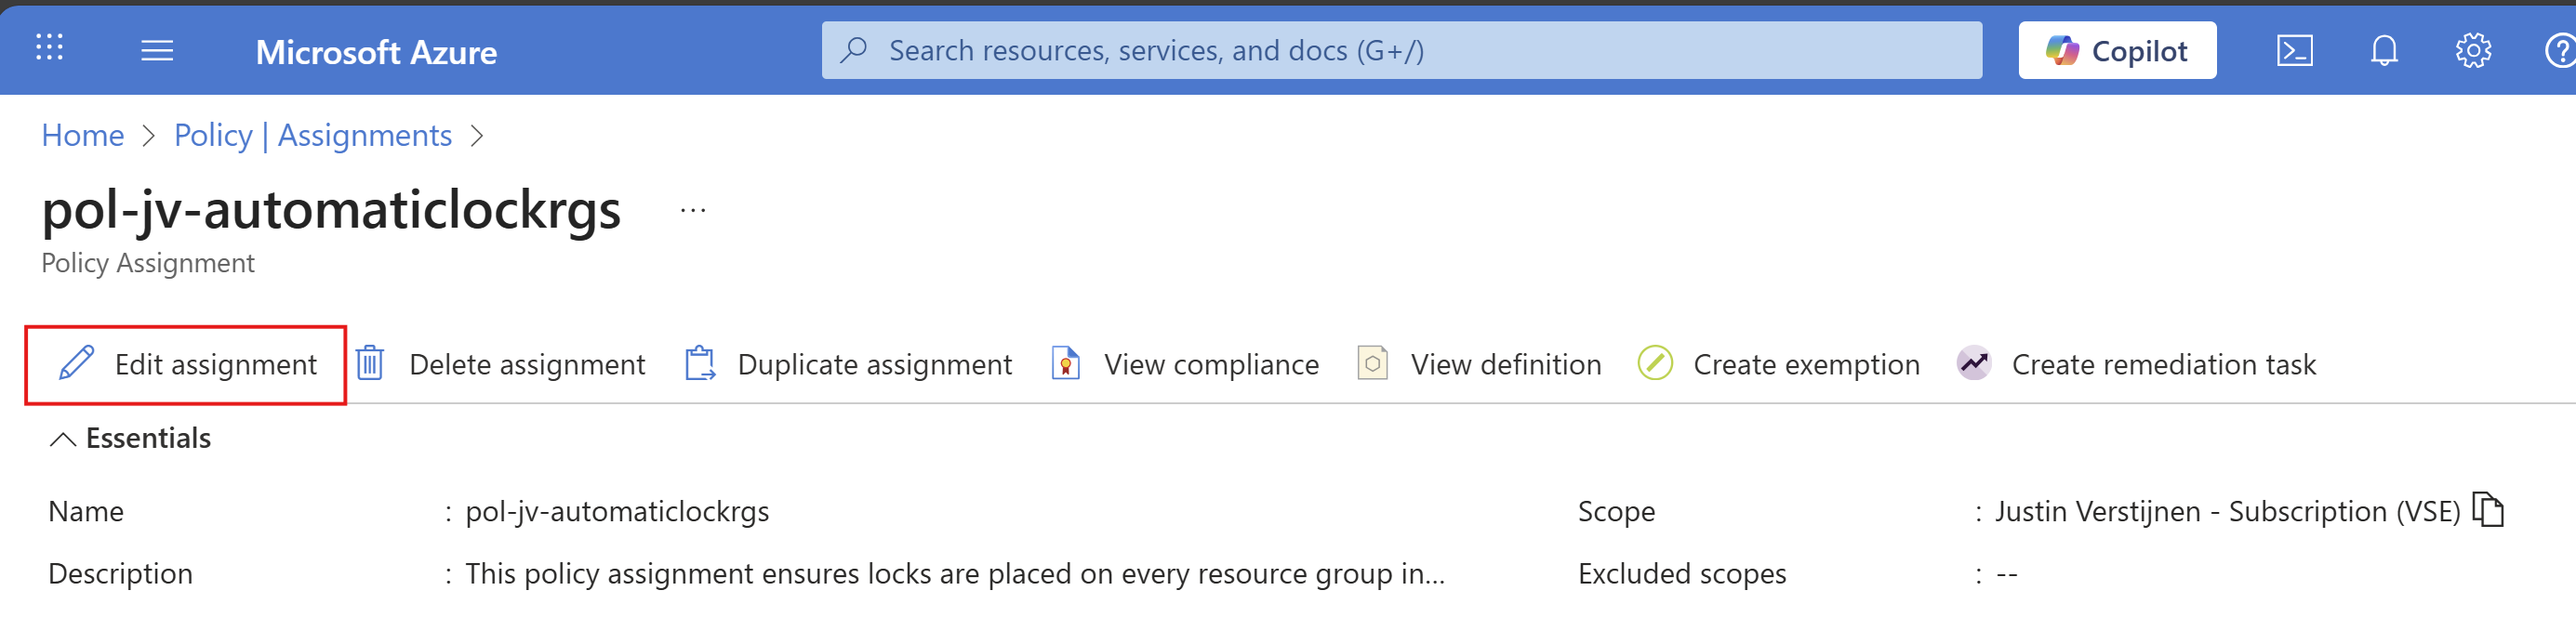
Now with this Azure Policy solution, every resource group created automatically gets a Delete lock type. To exclude resource groups in your subscription to get a lock, go back to the policy assignment:
Then click on your policy assignment and then on “Edit assignment”:
And then click on the “Exclusions” part of this page:

Here you can select the resource groups to be excluded from this automatic locking solution. Recommended is to select the resource groups here where you do some sort of automation on it. A prevent delete lock prevents automations from deleting resources in the resource group.
After selecting your resource groups to be excluded, save the configuration.
Summary
Locks in Azure are a great way to prevent some resource groups from accidental deletion and change of resource groups. It also helps by protecting the containing resources to be deleted or changed for a great inheritance-like experience. However they can be useful and great, take care on what resource group to place what lock because they can disrupt some automation tasks.
Azure Policy helps you on top of locks themselves to place Locks automatically on the resouce groups in case you forgot them.
Thank you for reading this guide and I hope it was helpful.
Sources
These sources helped me by writing and research for this post;
- https://learn.microsoft.com/en-us/azure/governance/policy/concepts/effect-deploy-if-not-exists
- https://learn.microsoft.com/en-us/azure/azure-resource-manager/management/lock-resources?tabs=json
- https://learn.microsoft.com/nl-nl/azure/governance/policy/how-to/remediate-resources?tabs=azure-portal#how-remediation-security-works
End of the page 🎉
You have reached the end of the page. You can navigate through other blog posts as well, share this post on X, LinkedIn and Reddit or return to the blog posts collection page. Thank you for visiting this post.
If you think something is wrong with this post or you want to know more, you can send me a message to one of my social profiles at: https://justinverstijnen.nl/about/
If you find this page and blog very useful and you want to leave a donation, you can use the button below to buy me a beer. Hosting and maintaining a website takes a lot of time and money. Thank you in advance and cheers :)

The terms and conditions apply to this post.