Encrypt your Microsoft 365 emails with S/MIME
Categories:
12 minute read
S/MIME explained
S/MIME means Secure / Multipurpose Internet Mail Extensions. It’s an email security standard defined by the Internet Engineering Task Force which allows you to encrypt your email messages and attachments sent. In simple terms:
It encrypts emails and attachments so only the intended recipient should read them
It digitally signs emails so the recipient knows:
- who sent the message
- that the content was not altered by an attacker in the middle (MitM attack)
S/MIME works using personal certificates (public/private keys), just like SSL certificates for web servers which will be handled automatically by most email clients.
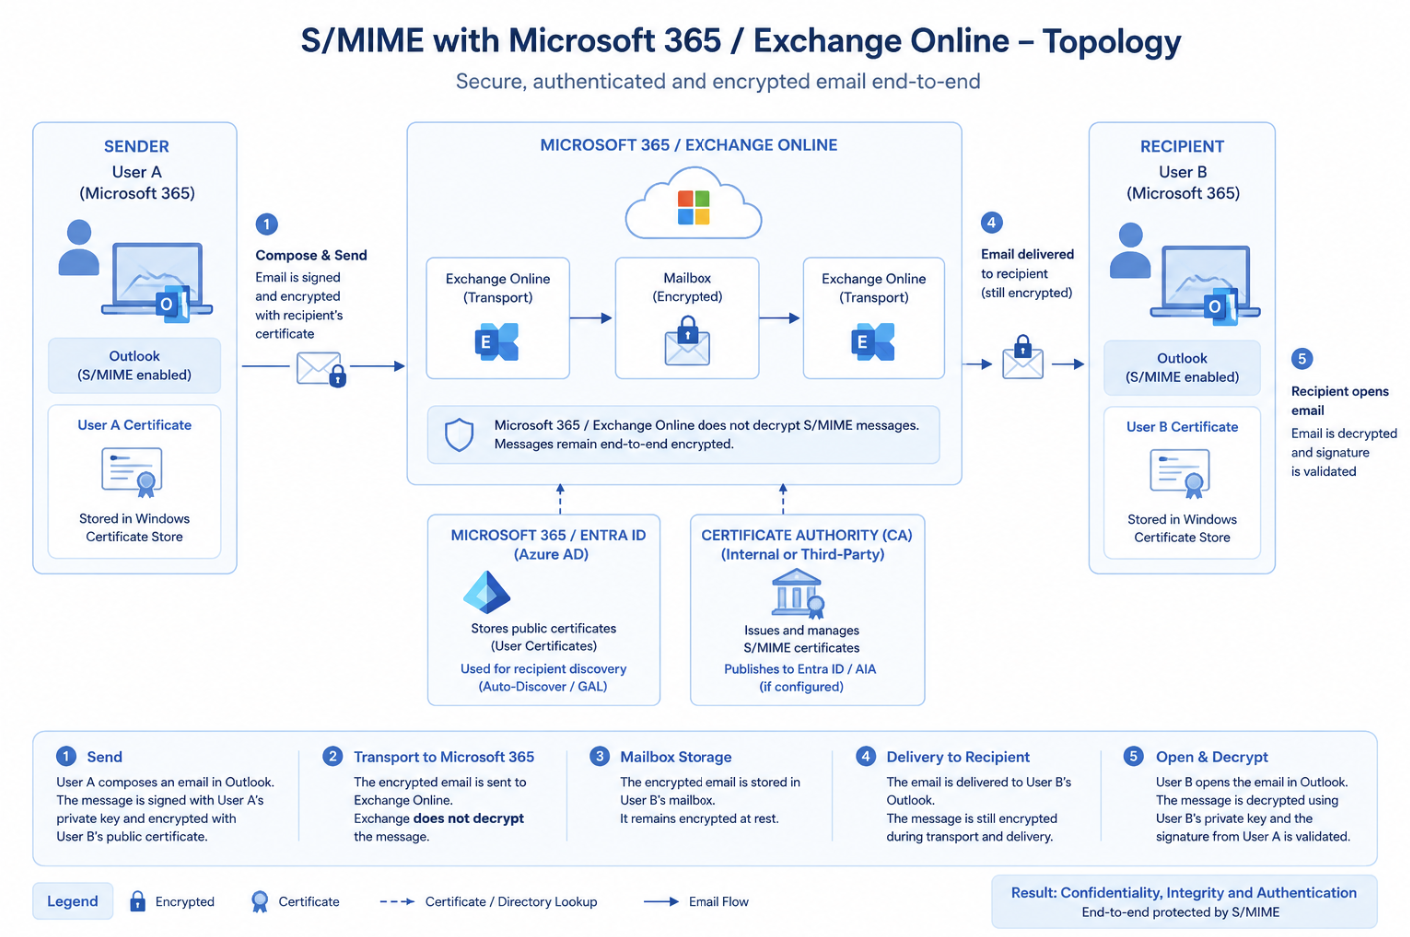
When the S/MIME certificates have been exchanged, S/MIME works like this:
- The sender has an S/MIME certificate installed in their email client. When sending an email, the message can be digitally signed with the sender’s private key. If the sender also has the recipient’s public key, the message can be encrypted for that recipient. (1)
- The signed and/or encrypted email flows through Exchange Online using the normal mail flow. Exchange Online transports and stores the message, but it does not decrypt the S/MIME-protected message content. The message is then delivered to the recipient’s mail environment through regular MX routing. (4)
- The recipient opens the email in their S/MIME-enabled email client. If the message is encrypted, it is decrypted using the recipient’s own private key. The sender’s public key is used to validate the digital signature and confirm that the message came from the sender and was not changed after it was sent. (5)
The different keys described:
| Component | What is it? | What is it used for? |
|---|---|---|
| Public key | The public part of someone’s S/MIME certificate | Used to encrypt email to that person or to verify that person’s digital signature |
| Private key | The secret part of the certificate, kept by the user | Used to decrypt email and to create a digital signature |
| Digital signature | A random cryptographic signature added to a specific email message | Used to prove that the email really came from the sender and that the content was not changed |
Requirements
- Around 30 minutes of your time
- Exchange Online Powershell module installed
- S/MIME certificate for your mailbox
- Microsoft 365 tenant/mailbox to configure S/MIME
S/MIME versus DKIM
When starting my research for S/MIME, I found S/MIME be really similar to what DKIM does, so I did a little research about the differences, and it has some clear takeaways:
- DKIM proves an email came from a specific domain/mailserver
- Keyword: Verification
- S/MIME proves an email came from a specific person and keeps the content private for Man in the middle attacks
- Keyword: Encryption
And I made a little overview about the features of both security protocols:
| Feature | S/MIME | DKIM |
|---|---|---|
| Encrypts email content | Yes | No |
| Digitally signs messages | Yes | Yes |
| Verifies individual sender | Yes | No |
| Verifies sending domain | No | Yes |
| End-to-end protection | Yes | No |
| Prevents mail server access to content | Yes | No |
| Detects content tampering | Yes | Yes |
| Protects message after delivery | Yes | No |
Step 1: Purchasing your S/MIME certificate(s)
The first thing we need to do is purchase an S/MIME certificate. This certificate is personal and linked to an email address. So if you want to use S/MIME for multiple users, you must request a certificate for every user/mailbox.
Then we must purchase a S/MIME certificate for every mailbox. In my case I used an S/MIME certificate from Actalis as this is a relatively cheap supplier, but you can also use another provider as long as they deliver a valid S/MIME certificate.
When purchasing the certificate, keep the following things in mind:
- Use the exact email address of the mailbox
- For example: user@domain.com
- Save the certificate password somewhere secure
- Download the certificate as a .pfx or .p12 file if possible
- Make sure the certificate includes the private key
The private key is important. Without the private key, Outlook can verify signed emails, but it cannot sign or decrypt emails for that mailbox.
After ordering the certificate, your certificate provider will usually send a validation email to the mailbox. Open the email and follow the steps from your provider to approve the certificate request.
As the steps for aquiring the certificate can be different for various issuers, I describe the logical steps you need to take to get such certificate.
Step 2: Downloading your certificate
After the validation is completed, you can download the S/MIME certificate from your certificate provider.
Most providers will give you a couple of download options. For Windows and Outlook, choose the option that gives you a .pfx or .p12 file. This file contains the certificate and the private key. Save the certificate somewhere temporary, for example:
C:\Temp\smime-certificate.pfxAlso save the certificate password. We need this password in the next step when importing the certificate into Windows.
If your provider also gives you the Root CA and Intermediate CA certificates, download those as well. We need the certificate chain later to configure Exchange Online.
Step 3: Installing the certificate
Now we have purchased and downloaded the S/MIME certificate, we need to install this on our Windows machine. You can also do this through Microsoft Intune, but I will do the manual option for the purpose of this guide.
Open your local Certificates manager (certmgr.msc)
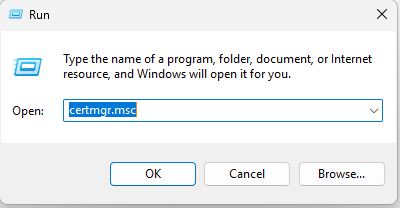
Open the application by hitting Enter or clicking OK.
Navigate to your Personal storage and click “Action -> All tasks -> Import…”
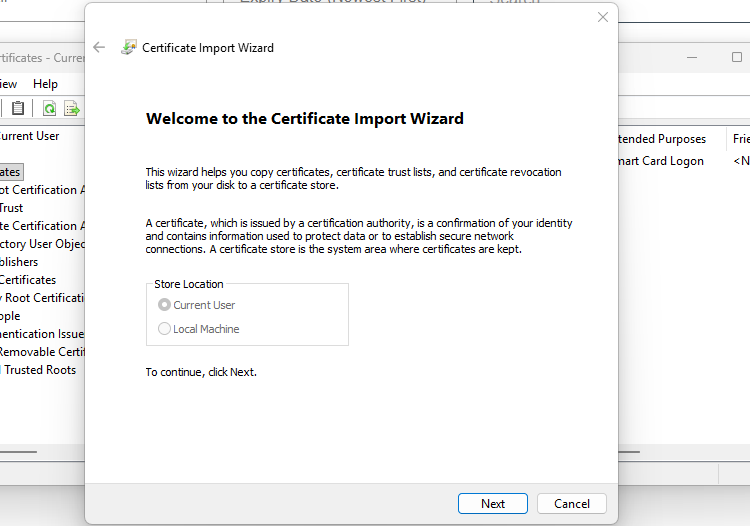
Click “Next”. Now select the certificate you downloaded and purchased.
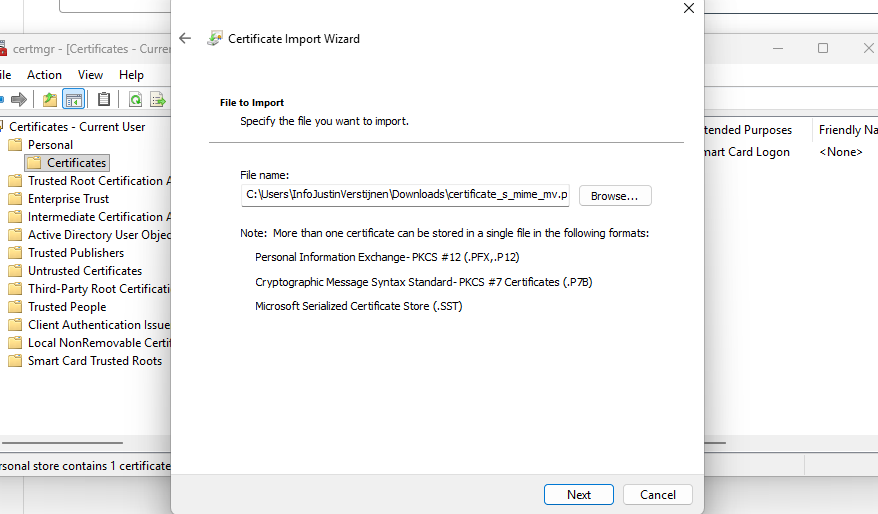
Click “Next”. Now insert the password if you have received this. If you did not get a password from your certificate issuer, leave this blank.
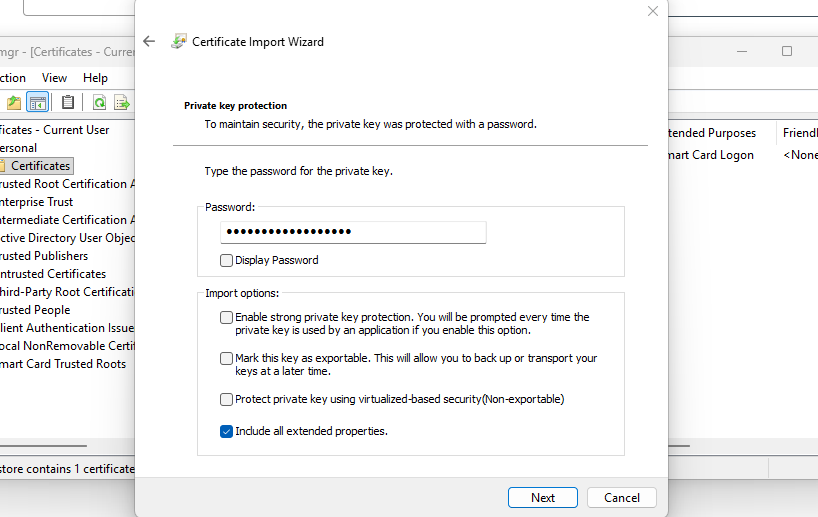
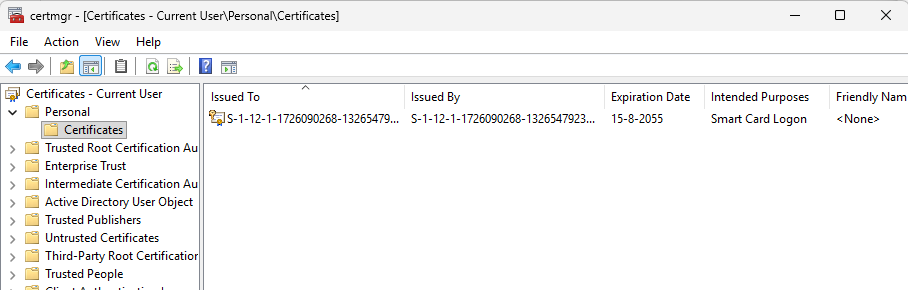
Click “Next” twice and then finish. The certificate should now be in your Personal certificate storage:

Step 4: Export certificate information to file
You have to follow step 4 and 5 for every S/MIME certificate issuer you use. If you use 3 different issuers for example for 50 mailboxes in total, you need to perform step 4 and 5 logically 3 times.
We must now export our certificate provider information to a single file. We can use that file to give it to Exchange Online to trust our certificates and be able to setup the secure, encrypted connection.
On the computer where you just installed the S/MIME certificate, open PowerShell (ISE) as Administrator.
Then paste the simple script below and change the parameters on line 1 and 2:
- Line 1: The name of the certificate provider
- Line 2: The location where you want to save the single certificate file
$CertProviderName = "Actalis"
$SstPath = "C:\JV-Exported-Certs.sst"
$rootCertificates = Get-ChildItem Cert:\LocalMachine\Root |
    Where-Object { $_.Subject -like "*$CertProviderName*" }
$intermediateCertificates = Get-ChildItem Cert:\LocalMachine\CA |
    Where-Object { $_.Subject -like "*$CertProviderName*" }

if (-not $rootCertificates -and -not $intermediateCertificates) {
    Write-Host "No Root or Intermediate certificates found for provider: $CertProviderName"
    return
}

$collection = New-Object System.Security.Cryptography.X509Certificates.X509Certificate2Collection

foreach ($certificate in $rootCertificates) {
    $collection.Add($certificate) | Out-Null
}

foreach ($certificate in $intermediateCertificates) {
    $collection.Add($certificate) | Out-Null
}

$bytes = $collection.Export([System.Security.Cryptography.X509Certificates.X509ContentType]::SerializedStore)
[System.IO.File]::WriteAllBytes($SstPath, $bytes)
$verify = New-Object System.Security.Cryptography.X509Certificates.X509Certificate2Collection
$verify.Import($SstPath)
Write-Host "SST contains:"
$verify | Select-Object Subject, Issuer | Format-Table -AutoSize
Write-Host "Certificate count:" $verify.Count
Write-Host "Exported to:" $SstPath
This script exports all root and intermediate certificate information from your certificate provider to a single file. We must upload this file to Exchange Online so Microsoft trusts our certificates.
You can now find the file in the C:\ root directory:
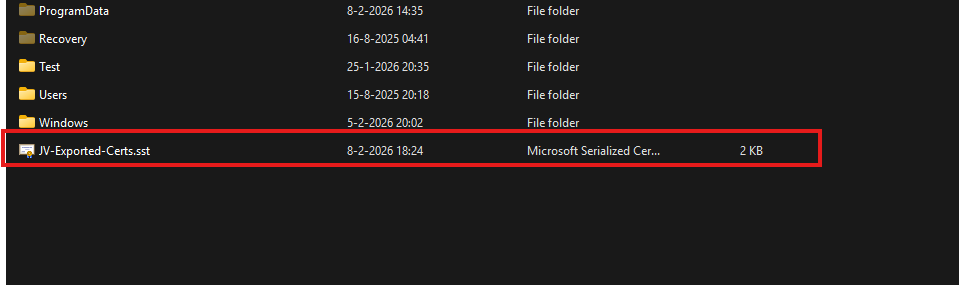
Now we are ready to go to the next step.
Step 5: Upload certificate provider information to Exchange Online
Now we have the file with all the information ready to be uploaded, let’s make a connection to Exchange Online with PowerShell. If you need to install the module, follow this guide: https://www.powershellgallery.com/packages/ExchangeOnlineManagement
Connect-ExchangeOnlineThen login to your tenant/account with at least Exchange administrator permissions. After a succesful login execute this command to tell Exchange Online which certificate provider you use.
Set-SmimeConfig -SMIMECertificateIssuingCA ([System.IO.File]::ReadAllBytes('C:\JV-Exported-Certs.sst'))This command should run without any output, which means it completed successfully.

After running that command, you can check if the certificate is added succesfully with these commands:
$cfg = Get-SmimeConfig
$col = New-Object System.Security.Cryptography.X509Certificates.X509Certificate2Collection
$col.Import($cfg.SMIMECertificateIssuingCA)
$col | Select Subject,Issuer | Format-Table -AutoSize
You will get the complete names of the certificates uploaded:

Wait for around 10 to 15 minutes before changing anything in your Email clients for this new configuration to propagate.
Step 6: Enable digital signatures in Outlook
Now we can go out of PowerShell and actually test if this email encryption works. Open your Outlook, go to Settings, and then Mail -> S/MIME.
First enable the “Digital signatures” option without enabling the Encrypt contents option yet. Enabling encryption by default will break your email sending capabilities if you do not have the public key of every receiver.
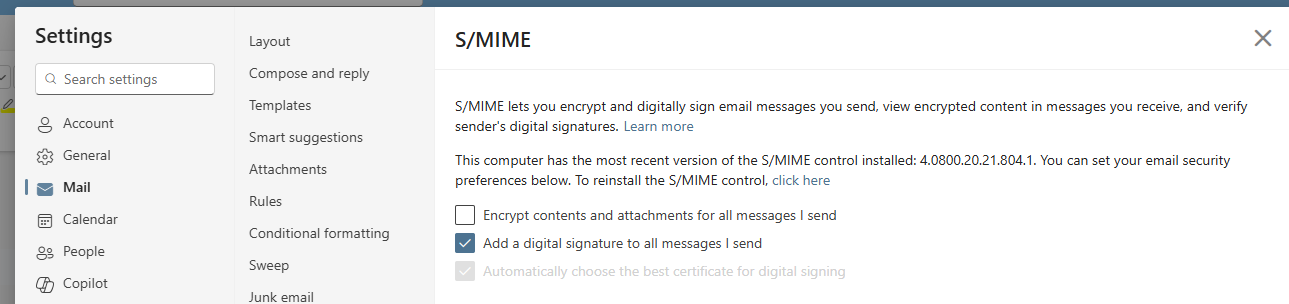
So for the first test email, only enable:
- Digitally sign messages I send
- Automatically choose the best certificate for digital signing
Do not enable this setting yet:
- Encrypt contents and attachments for messages I send
Save the settings and let’s test this in Step 5.
When this is configured, create a new email and send it to another mailbox. This first email does not need to be encrypted. It only needs to be digitally signed.
This is important because the receiver can obtain your public certificate from the signed email. This certificate contains your public key. After this, the receiver can use your public key to send encrypted emails back to you, and a secure channel has been created.
Step 7: Send your first digitally signed email
Create a new email in Outlook and send it to a test recipient of choice.
When the receiver opens the email, they should see that the message is digitally signed. This means that the receiving side can verify the sender and check that the message was not changed after sending.
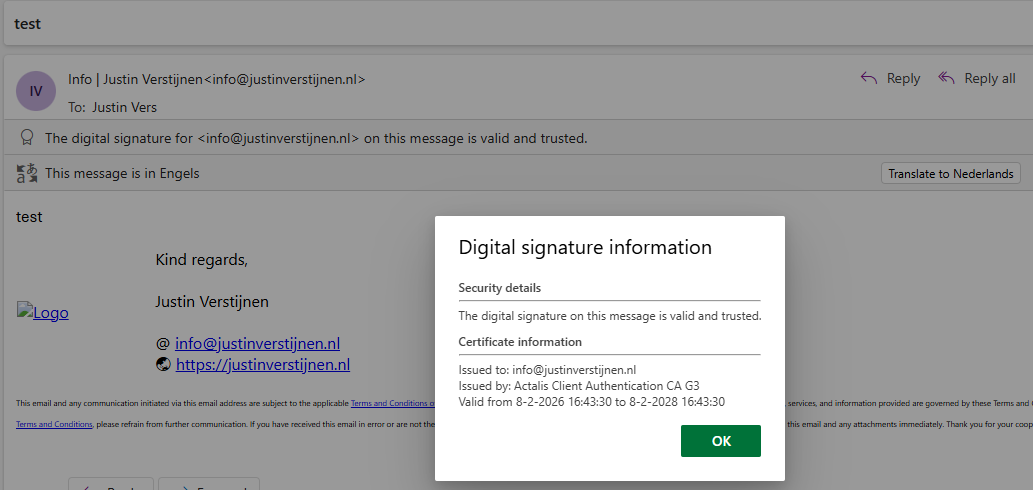
If this works, the signing part of S/MIME is configured correctly and this digital signature is now showed by Outlook on the recipient side:
Step 8: Send your first encrypted email
Now we can test the encryption part. Before you can send an encrypted email to anyone, your Outlook must know the public certificate of that receiver. The easiest way to do this is:
- Ask the receiver to send you a digitally signed email first
- Open that signed email in Outlook
- Save the contact if needed
- Reply to the message
- Enable encryption for this email
Now Outlook can use the public key of the receiver to encrypt the email.
If Outlook does not know the public key of the receiver, you will get an error saying that the message cannot be encrypted for one or more recipients.
When sending an encrypted email, the receiver needs their own private key to open the message. This is why S/MIME works great, but also needs some preparation when communicating with new recipients.
Step 9: Troubleshooting (optional)
The certificate is not trusted by your organization
If you get an error that the certificate is not trusted by your organization, check the certificate chain you uploaded to Exchange Online.
Run this command again:
$cfg = Get-SmimeConfig
$col = New-Object System.Security.Cryptography.X509Certificates.X509Certificate2Collection
$col.Import($cfg.SMIMECertificateIssuingCA)
$col | Select-Object Subject, Issuer | Format-Table -AutoSize
Check if both the Root CA and Intermediate CA from your certificate provider are visible.
If they are missing, export the .sst file again and upload it again:
Set-SmimeConfig -SMIMECertificateIssuingCA ([System.IO.File]::ReadAllBytes('C:\JV-Exported-Certs.sst'))After this, wait around 10 to 15 minutes before testing again.
Outlook cannot find a certificate
If Outlook cannot find your certificate, check if the certificate is installed in your Current User certificate store.
Open certmgr.msc and go to:
Personal -> Certificates
The certificate should be visible here and should contain your email address.
Also check if the certificate has a private key. You can see this when opening the certificate. It should say something like:
You have a private key that corresponds to this certificate.
If the private key is missing, you probably imported a .cer file instead of a .pfx or .p12 file.
You cannot send encrypted email to a recipient
This usually means Outlook does not have the public certificate of the receiver.
Ask the receiver to send you a digitally signed email first. Open that email and try to reply with encryption enabled.
If it still does not work, remove and recreate the Outlook contact, and then open the signed message again.
S/MIME is missing in Outlook on the web
If you use Outlook on the web, your browser may need the Microsoft S/MIME extension or control. This depends on the Outlook client and browser you are using.
For company managed devices, this can be configured with browser policies. In smaller environments it is often easier to use the Outlook desktop client for the first test.
Knowledge check
This quiz needs JavaScript to show the questions and feedback.
Summary
In this guide we configured S/MIME for Microsoft 365 and Exchange Online. We purchased and installed a personal S/MIME certificate, exported the Root and Intermediate CA information to an .sst file and uploaded this to Exchange Online.
After that, we enabled digital signing in Outlook and tested the first signed email. The most important thing to remember is that signing and encryption are not the same thing.
Signing proves that the message came from you and that the content was not changed. Encryption makes the content private, but only works if you have the public certificate of the receiver. The first email we will send is therefore not encrypted.
S/MIME is not the easiest mail security feature to configure, but after the first setup it works very nice for sending sensitive information between trusted contacts.
Sources
These sources helped me by writing and research for this post;
- https://learn.microsoft.com/en-us/exchange/security-and-compliance/smime-exo/configure-smime-exo
- https://learn.microsoft.com/en-us/exchange/security-and-compliance/smime-exo/smime-exo
- https://learn.microsoft.com/en-us/powershell/module/exchange/set-smimeconfig
End of the page 🎉
You have reached the end of the page. You can navigate through other blog posts as well, share this post on X, LinkedIn and Reddit or return to the blog posts collection page. Thank you for visiting this post.
If you think something is wrong with this post or you want to know more, you can send me a message to one of my social profiles at: https://justinverstijnen.nl/about/
If you find this page and blog very useful and you want to leave a donation, you can use the button below to buy me a beer. Hosting and maintaining a website takes a lot of time and money. Thank you in advance and cheers :)

The terms and conditions apply to this post.