Entra ID Custom CSS styling
Categories:
7 minute read
This feature of Entra ID has been deprecated which I find very unfortunate, but security first. Source: https://learn.microsoft.com/en-us/entra/fundamentals/reference-company-branding-css-template
Everybody who is managing Entra ID tenants ever saw this Custom CSS option during the wizard:
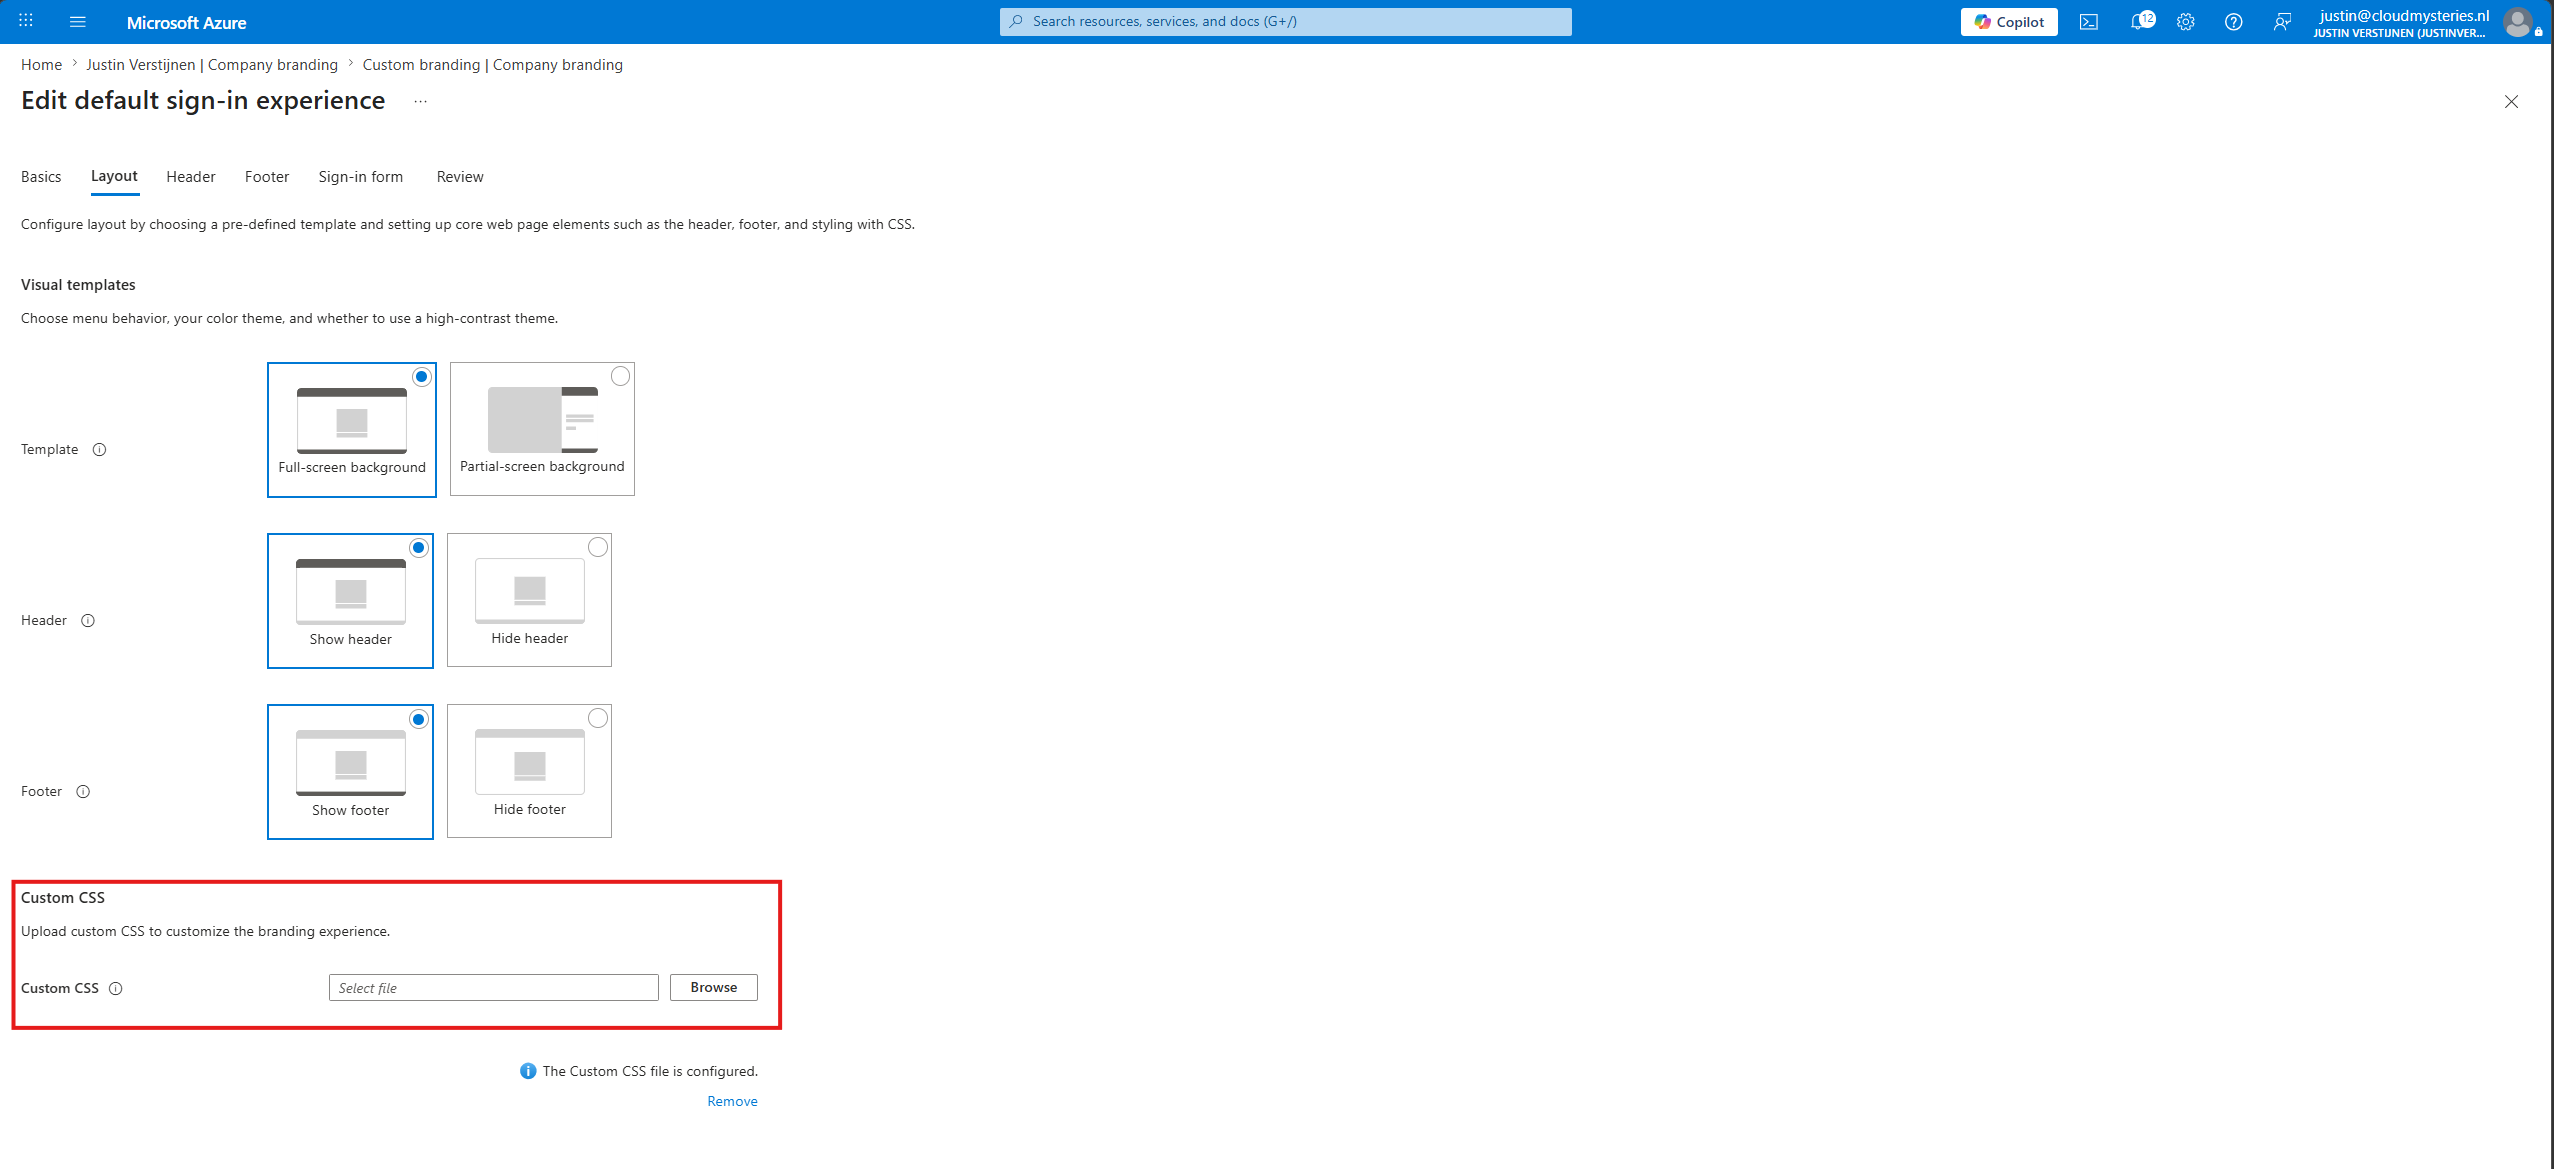
With this option, you can style some options in your sign-in pages to your own likings, enabling you to virtually use any CSS control available. In this guide I will show you how I have leveraged this option to change the sign-in pages to my own style. After some hours of trying different options, my sign-in page looks like this:
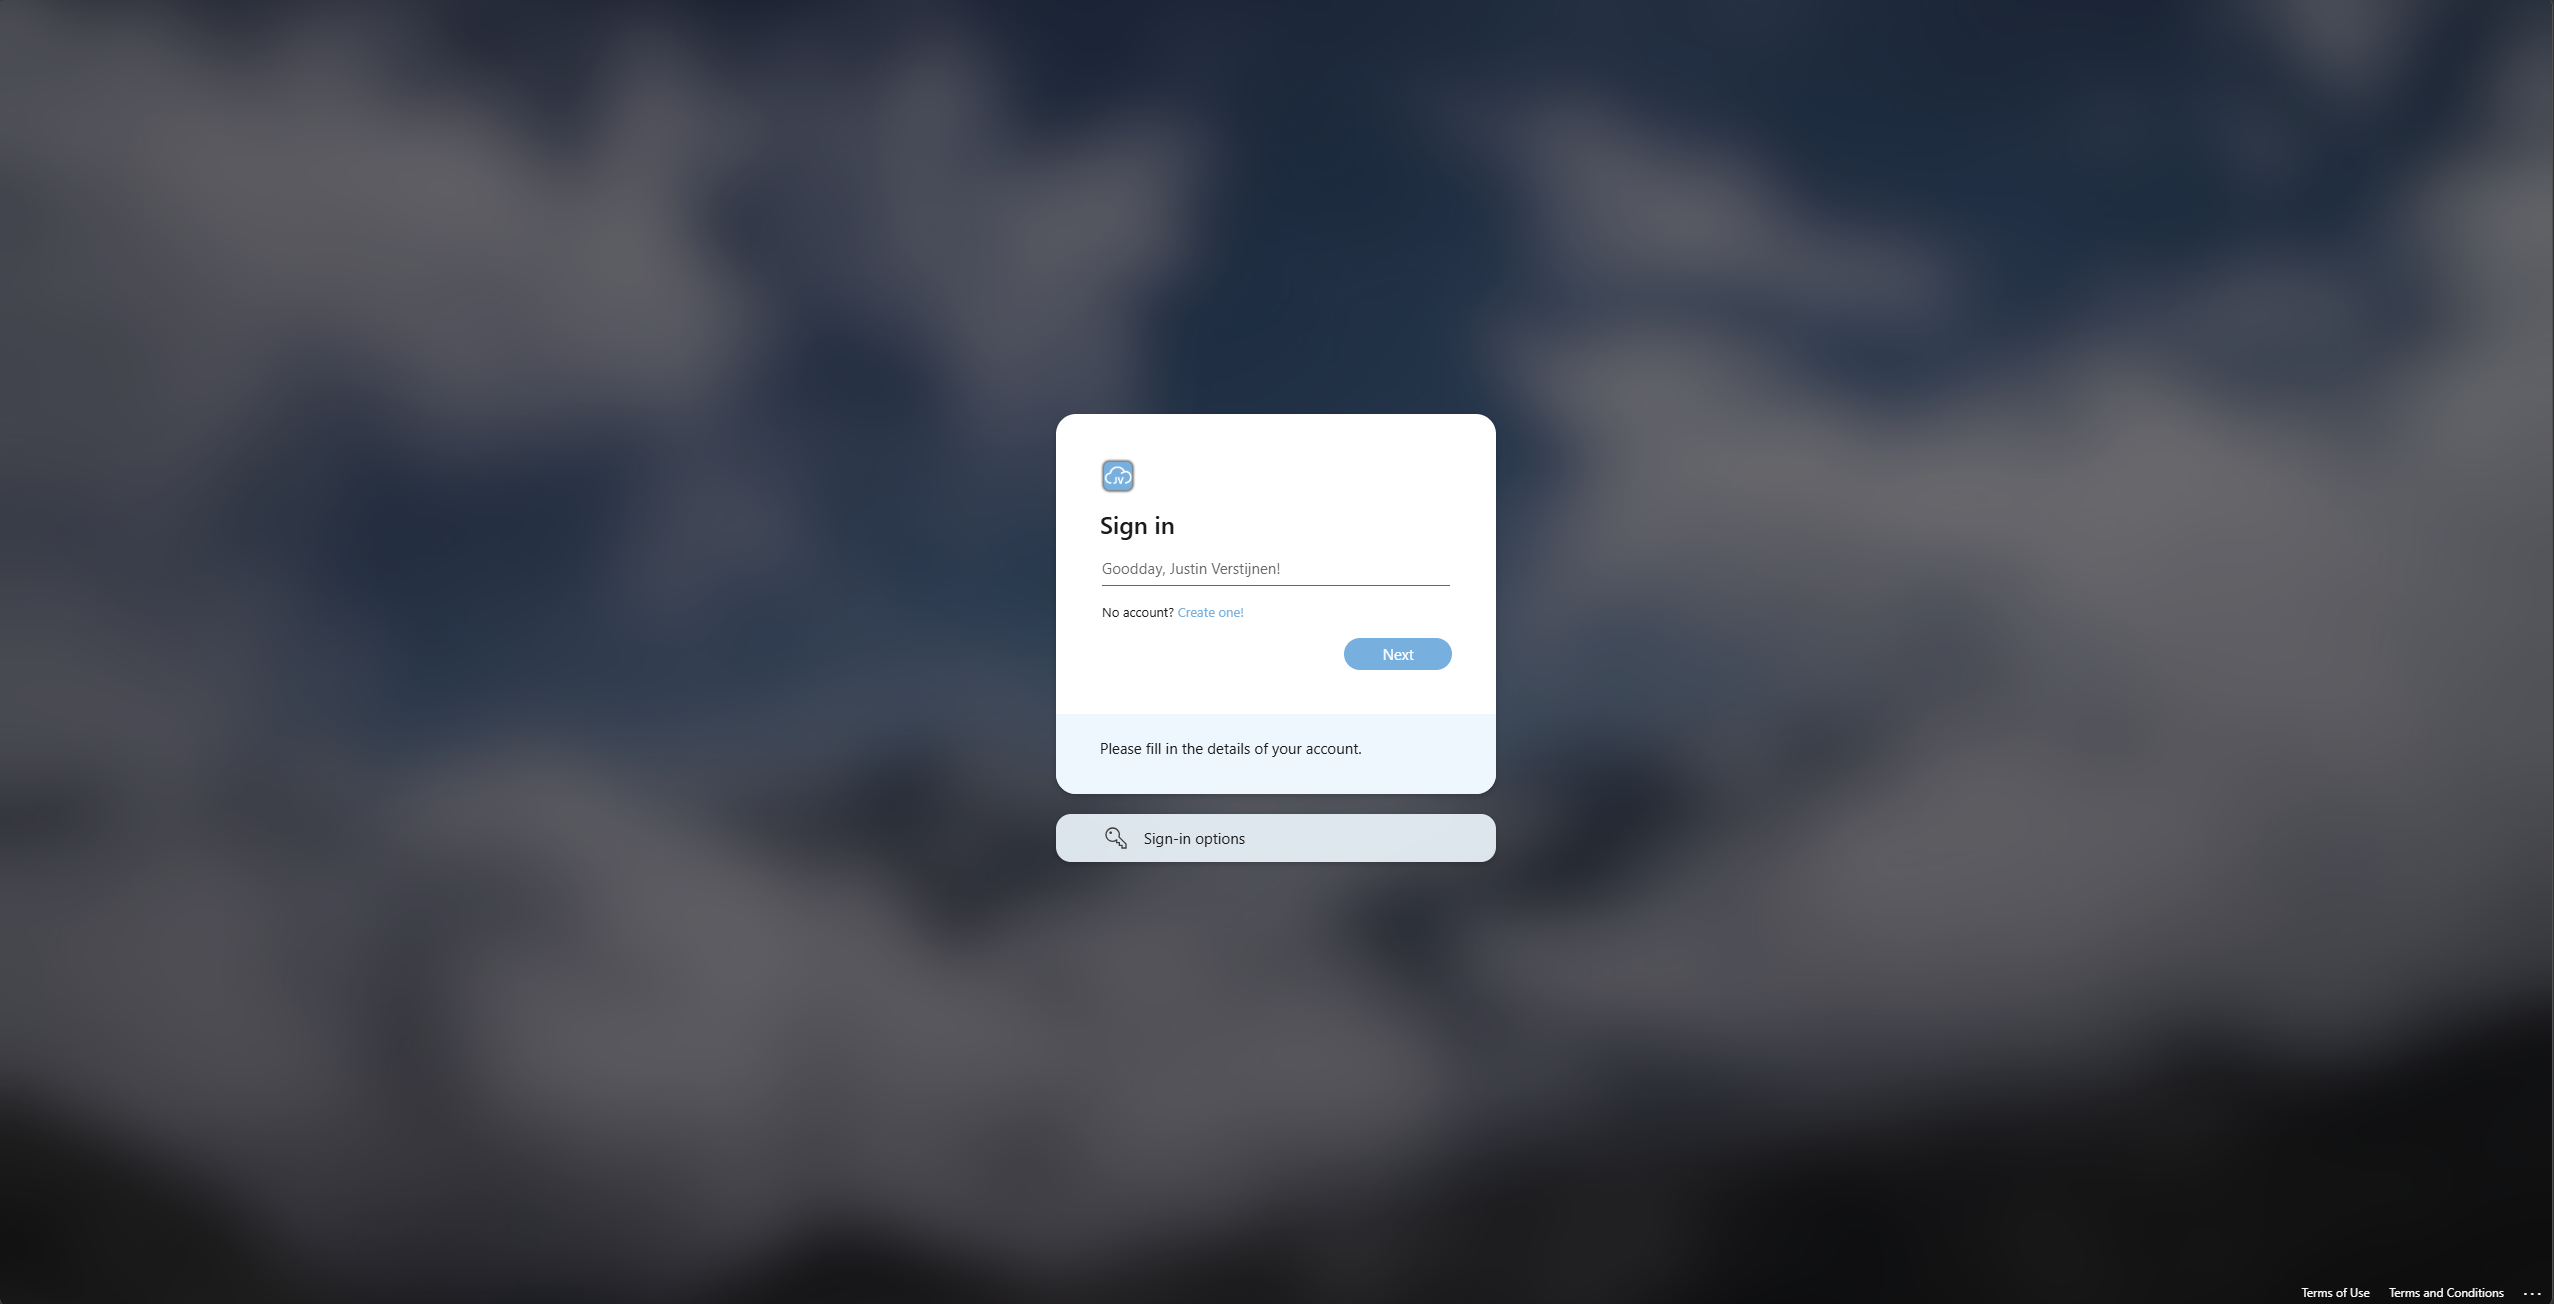
What has been changed in this sign-in prompt opposing the original:
- Custom color for links
- Custom color for buttons
- Custom color for the “Sign-in page text” block
- Custom color for the “Sign-in options” block
- Rounded Sign-in block
- Rounded buttons
Let’s take a look at how I achieved this step-by-step. However, I need you to understand that this guide dives into the custom CSS section only. The normal tenant branding options are pretty straight forward.
Requirements
The requirements of following this guide are:
- An Entra ID tenant created before January 5 2026 (tenants created after that date doesnt have this option available)
- Some knowledge about HTML and CSS
- Around 20 minutes of your time
Step 1: Defining the Custom CSS code
Let’s start by defining your CSS template. I have made an somewhat simpler template than the version of Microsoft, but the Microsoft version shows what elements can be customized. However, even that comprehensive list is very limited unfortunately so I picked out the most noticable options.
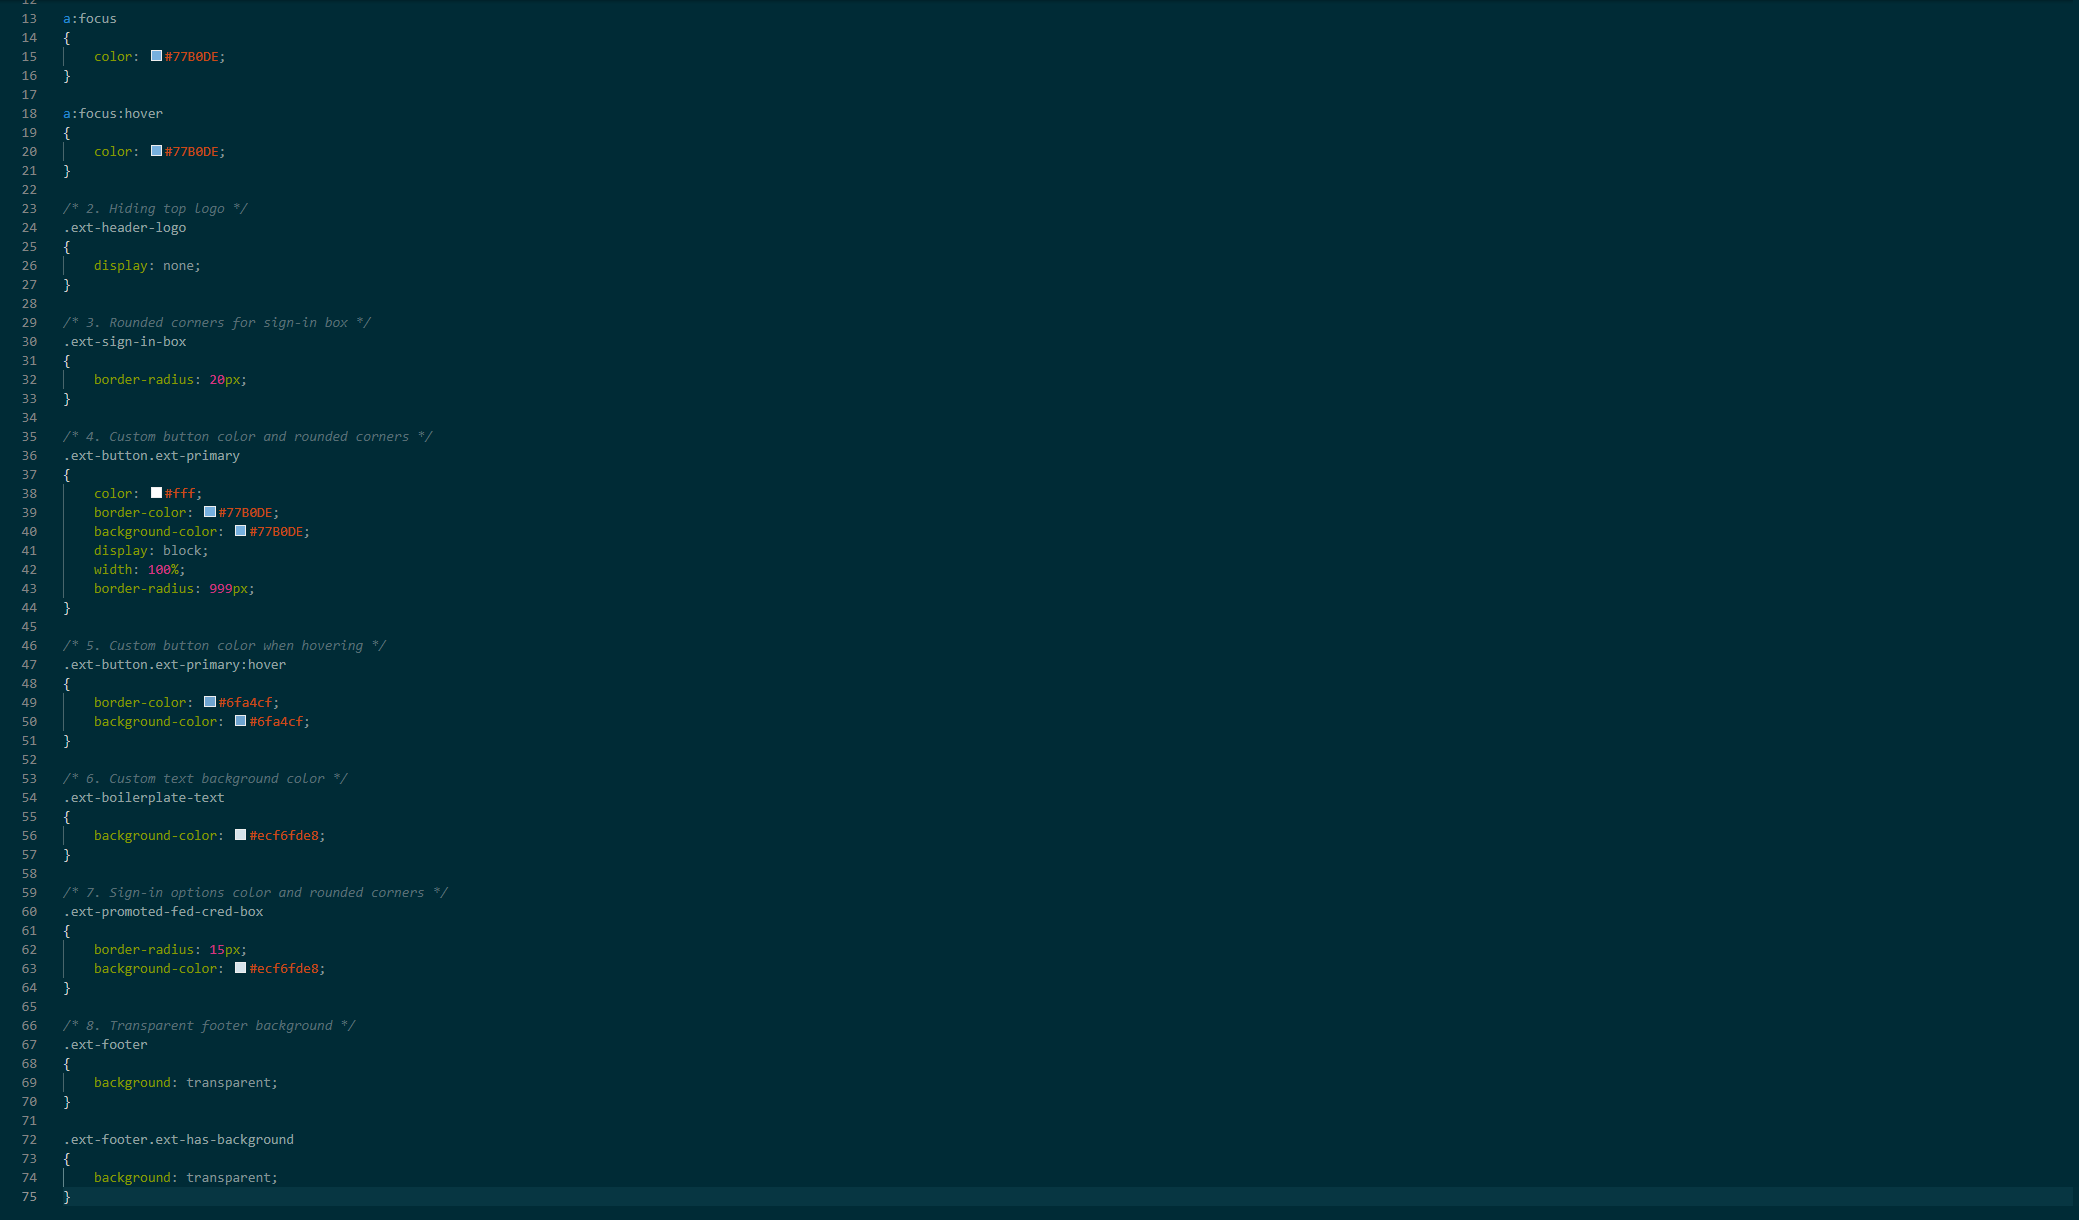
This is my full CSS file, where I have commented and so numbered the sections to show what options/classes define what on the page:
/* 1. Link colors */
a,
a:link
{
    color: #77B0DE;
}

a:hover
{
    color: #77B0DE;
}

a:focus
{
    color: #77B0DE;
}

a:focus:hover
{
    color: #77B0DE;
}

/* 2. Hiding top logo */
.ext-header-logo
{
    display: none;
}

/* 3. Rounded corners for sign-in box */
.ext-sign-in-box
{
    border-radius: 20px;
}

/* 4. Custom button color and rounded corners */
.ext-button.ext-primary
{
    color: #fff;
    border-color: #77B0DE;
    background-color: #77B0DE;
    display: block;
    width: 100%;
    border-radius: 999px;
}

.ext-button.ext-secondary
{
    color: #fff;
    border-color: #77B0DE;
    background-color: #77B0DE;
    display: block;
    width: 100%;
    border-radius: 999px;
}

/* 5. Custom button color when hovering */
.ext-button.ext-primary:hover
{
    border-color: #6fa4cf;
    background-color: #6fa4cf;
}

.ext-button.ext-secondary:hover
{
    border-color: #6fa4cf;
    background-color: #6fa4cf;
}

/* 6. Custom text background color */
.ext-boilerplate-text
{
    background-color: #ecf6fde8;
}

/* 7. Sign-in options color and rounded corners */
.ext-promoted-fed-cred-box
{
    border-radius: 15px;
    background-color: #ecf6fde8;
}

/* 8. Transparent footer background */
.ext-footer
{
    background: transparent;
}

.ext-footer.ext-has-background
{
    background: transparent;
}
Copy this full CSS contents and paste it into your favorite CSS editor. My pick is Visual Studio Code, as it has built-in error correction and color pickers. Now I will show you what setting changes what:
| CSS section | CSS classes definitions | Extra information |
|---|---|---|
| 1. Link colors | a a:link a:hover a:focus a:focus:hover | These settings define the color of the clickable links on the full website. |
| 2. Hiding top logo | .ext-header-logo | This setting hides the logo on the top-left corner. |
| 3. Rounded corners for sign-in box | .ext-sign-in-box | This setting makes the corners of the Sign-in box rounded. |
| 4. Custom button color and rounded corners | .ext-button.ext-primary | These settings changes the color of the buttons. |
| 5. Custom button color when hovering | .ext-button.ext-primary:hover | These settings changes the color of the buttons while hovering. |
| 6. Custom text background color | .ext-boilerplate-text | This setting changes the background of the custom sign-in text block. |
| 7. Sign-in options color and rounded corners | .ext-promoted-fed-cred-box | These settings changes the Sign-in options block, altering the corners and the background color. |
| 8. Transparent footer background | .ext-footer .ext-footer.ext-has-background | These settings remove the colored bar at the bottom of the page. |
To visualize this on the sign-in page:

Step 2: Changing the custom CSS
Now that we know what settings can be changed and what changes certain styles on the sign-in page, let’s customize the custom CSS to your likings. Copy/paste the CSS code from Step 1 if not already done and determine what colors you want to use.
Tip: use my HTML Color Picker tool if needing inspiration for colors.
Now I have opened the custom CSS file into Visual Studio Code. Now determine your main color, secondary and slightly darker color and a lighter color and replace these into the existing color fields. You can use the CTRL + H option, find and replace.
- Main color: #77b0de
- Secondary (darker) color: #6fa4cf
- Tertiary (lighter) color: #ecf6fde8
The border-radius values defines the rounded corners. You could also change that, but thats up to you.
Save the file to a CSS file and let’s head to Entra ID.
Step 3: Uploading the CSS file into Entra ID
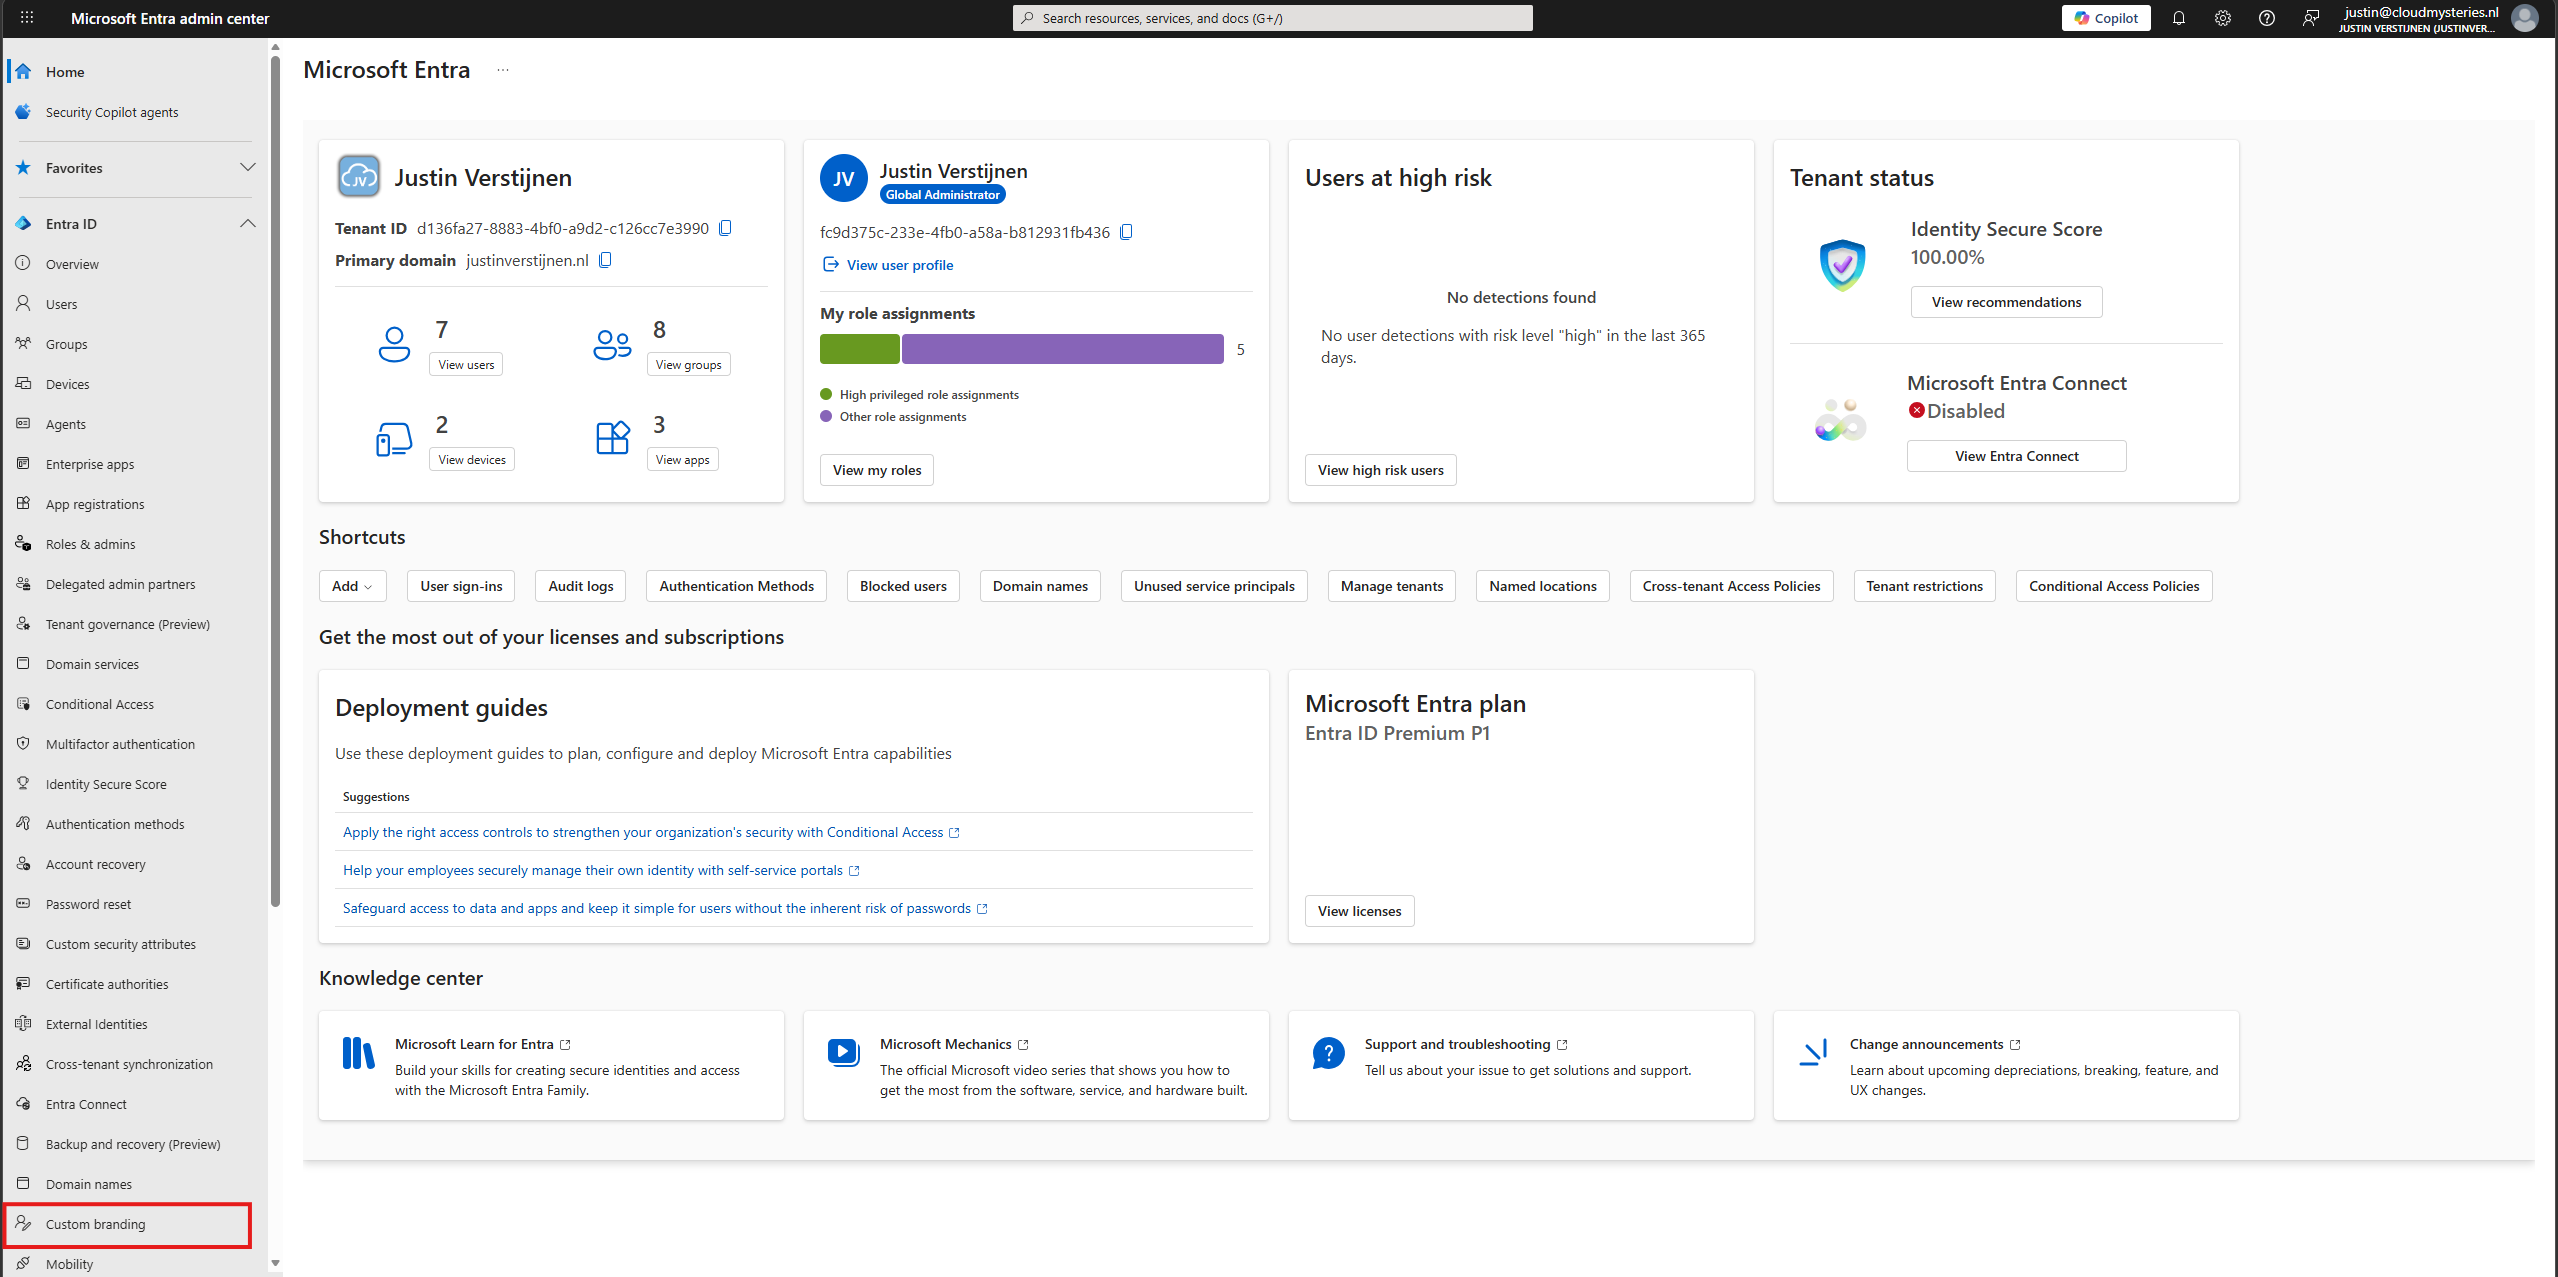
Now that we have defines our CSS file, let’s upload this new file. Open up Entra ID (https://entra.microsoft.com)
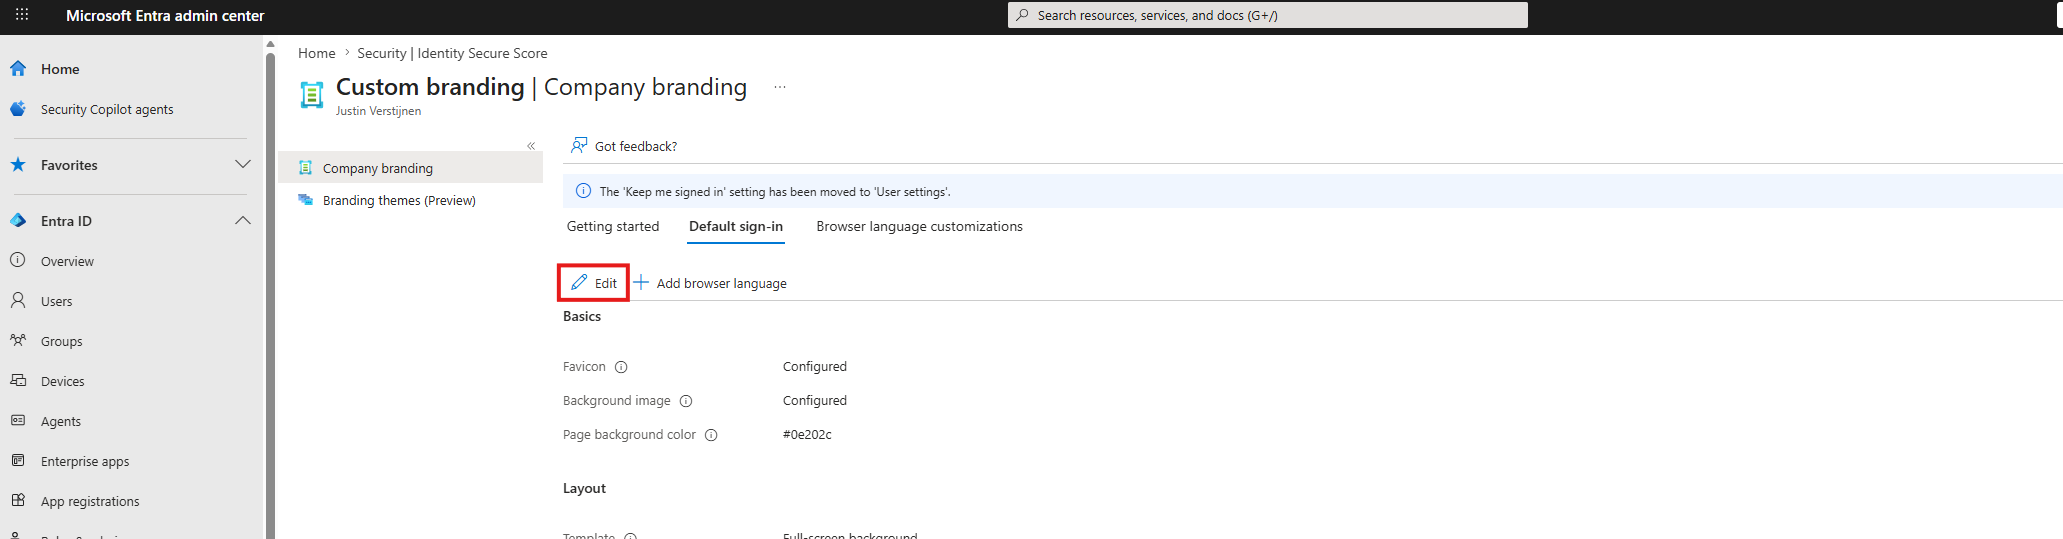
Then on the left, select “Custom branding”
On the tab “Default sign-in”, edit your branding configuration by clicking “Edit”.
Click on the “Layout” tab and scroll down to the Custom CSS option.
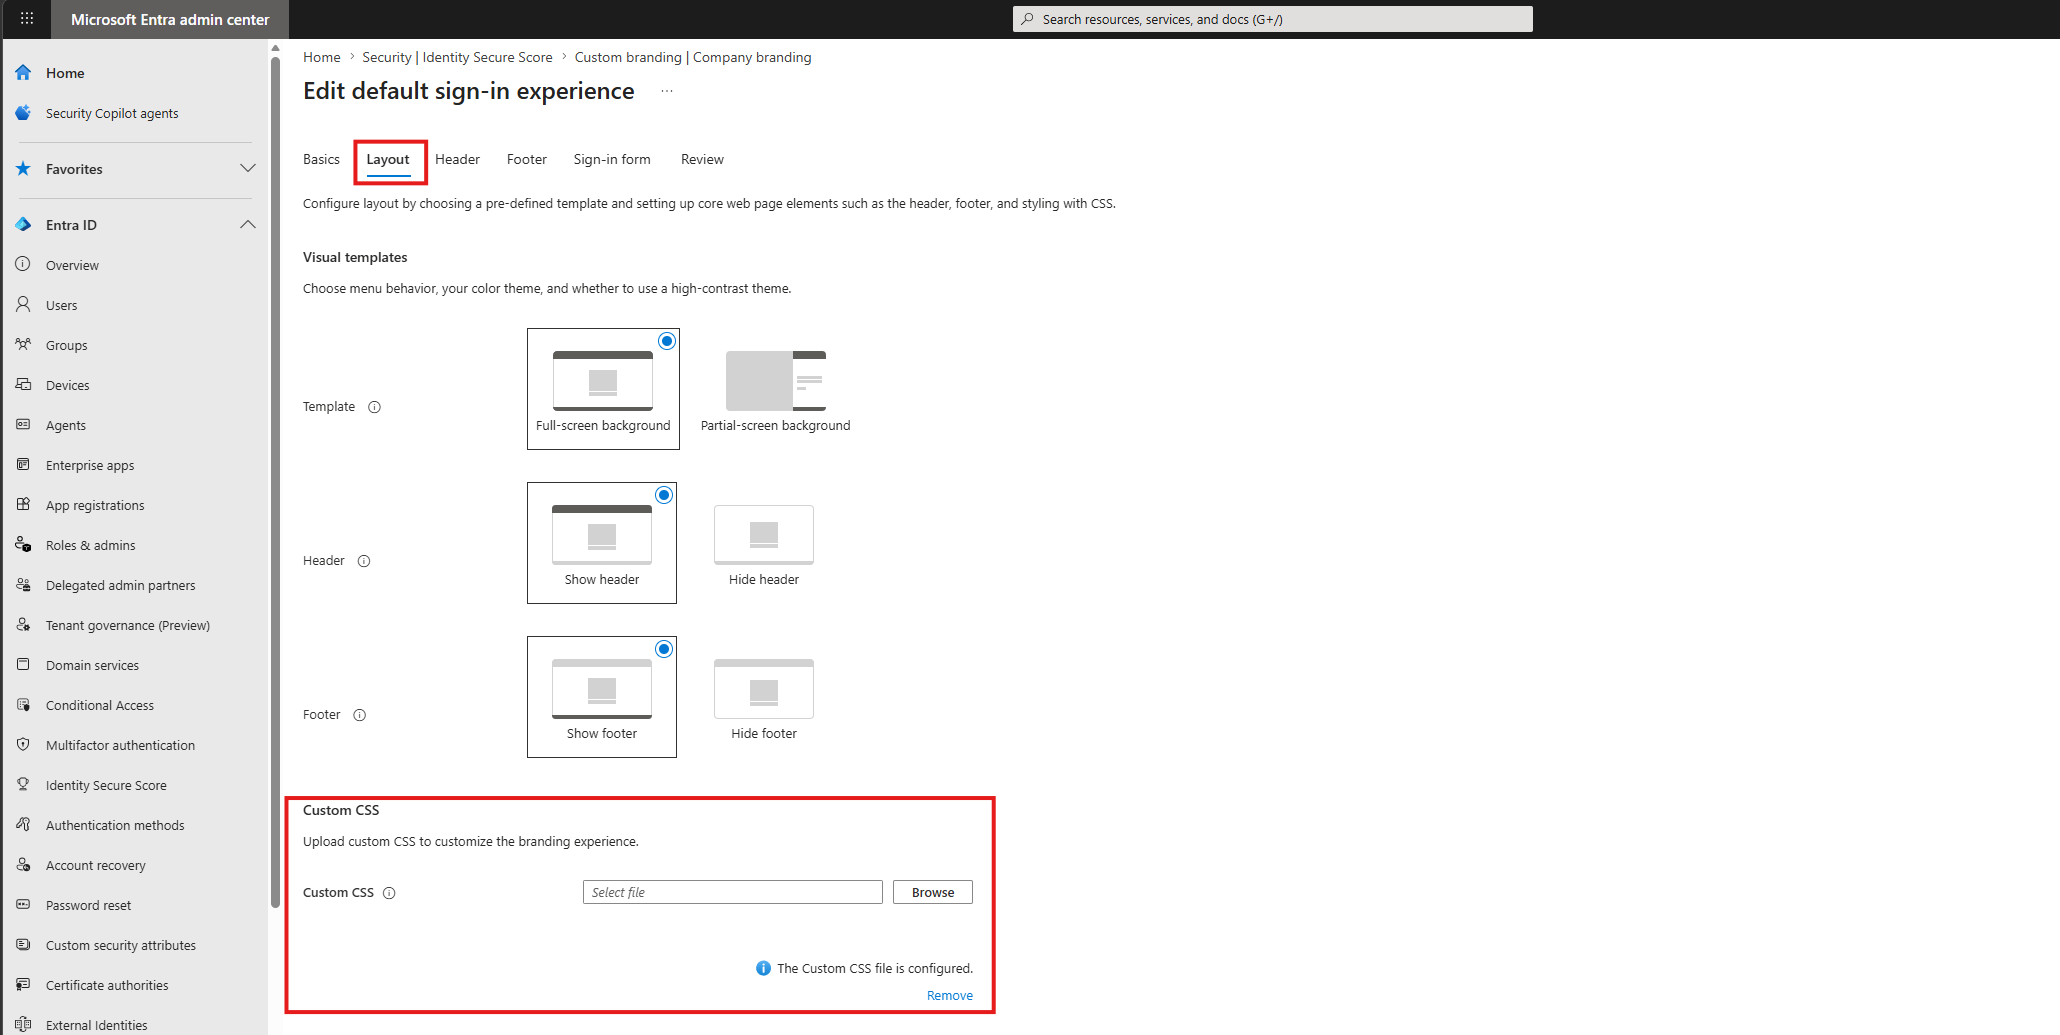
Click browse and select your just created CSS file. Then save the settings and let the system apply the changes.
Step 4: Let’s review the results
Now that we have applied our customized CSS, we can check the changes by opening a sign-in prompt of our tenant. The fastest way I know is to open up this link:
outlook.com/justinverstijnen.nlChange the domain-name after the “/” to your own primary domain name (like example.com). This automatically redirects to your tenants-login page immediately showing your company branding.
This should show the new branding within a few minutes.
Troubleshooting and customizing
Some things that could help you troubleshooting and possibly further customizing the sign-in experience:
- CSS are heavily cached, so you can expect different outcomes directly after changes, also across multiple devices
- Not every CSS control is correctly picked up as Microsoft does not support all options
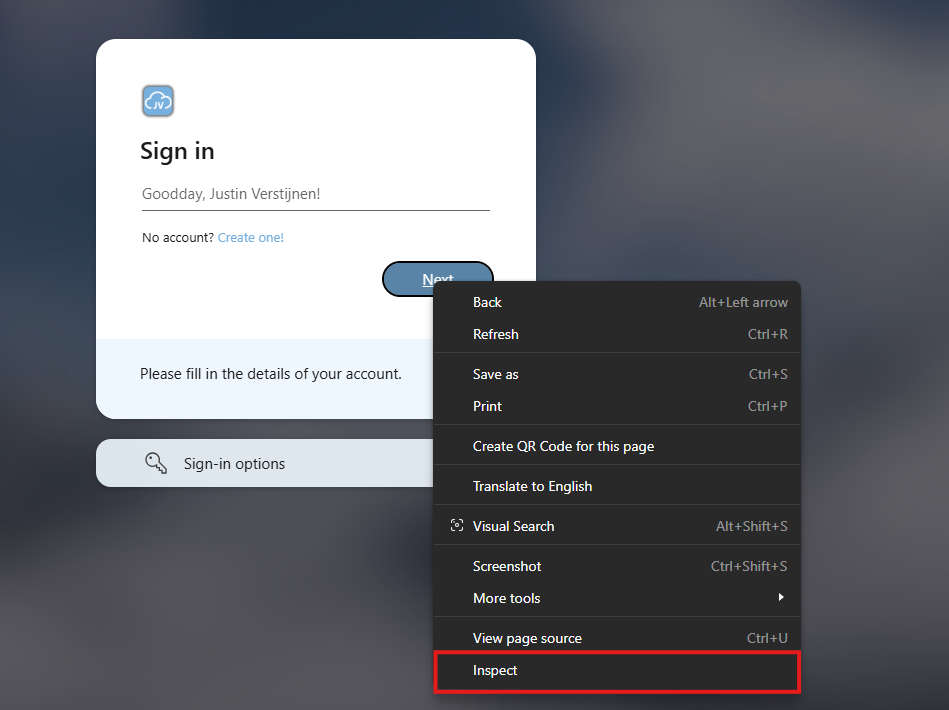
- If you want to live test some changes, you can use the “Devtools” of your browser. On Chrome and Edge browsers, this works like this:
Right-click the element (for example: the button) you want to customize and click on “Inspect”.
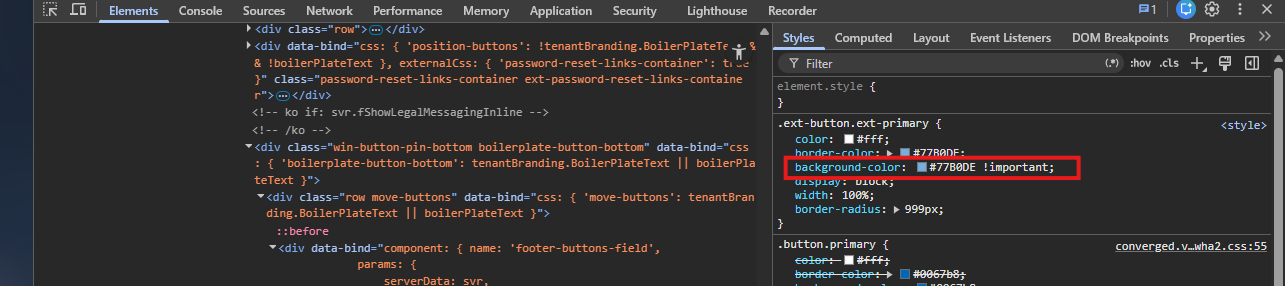
This opens up the Devtools where you can review the front-end code which makes up this page. The browser automatically shows the CSS on the right, exactly as we defined in our file:
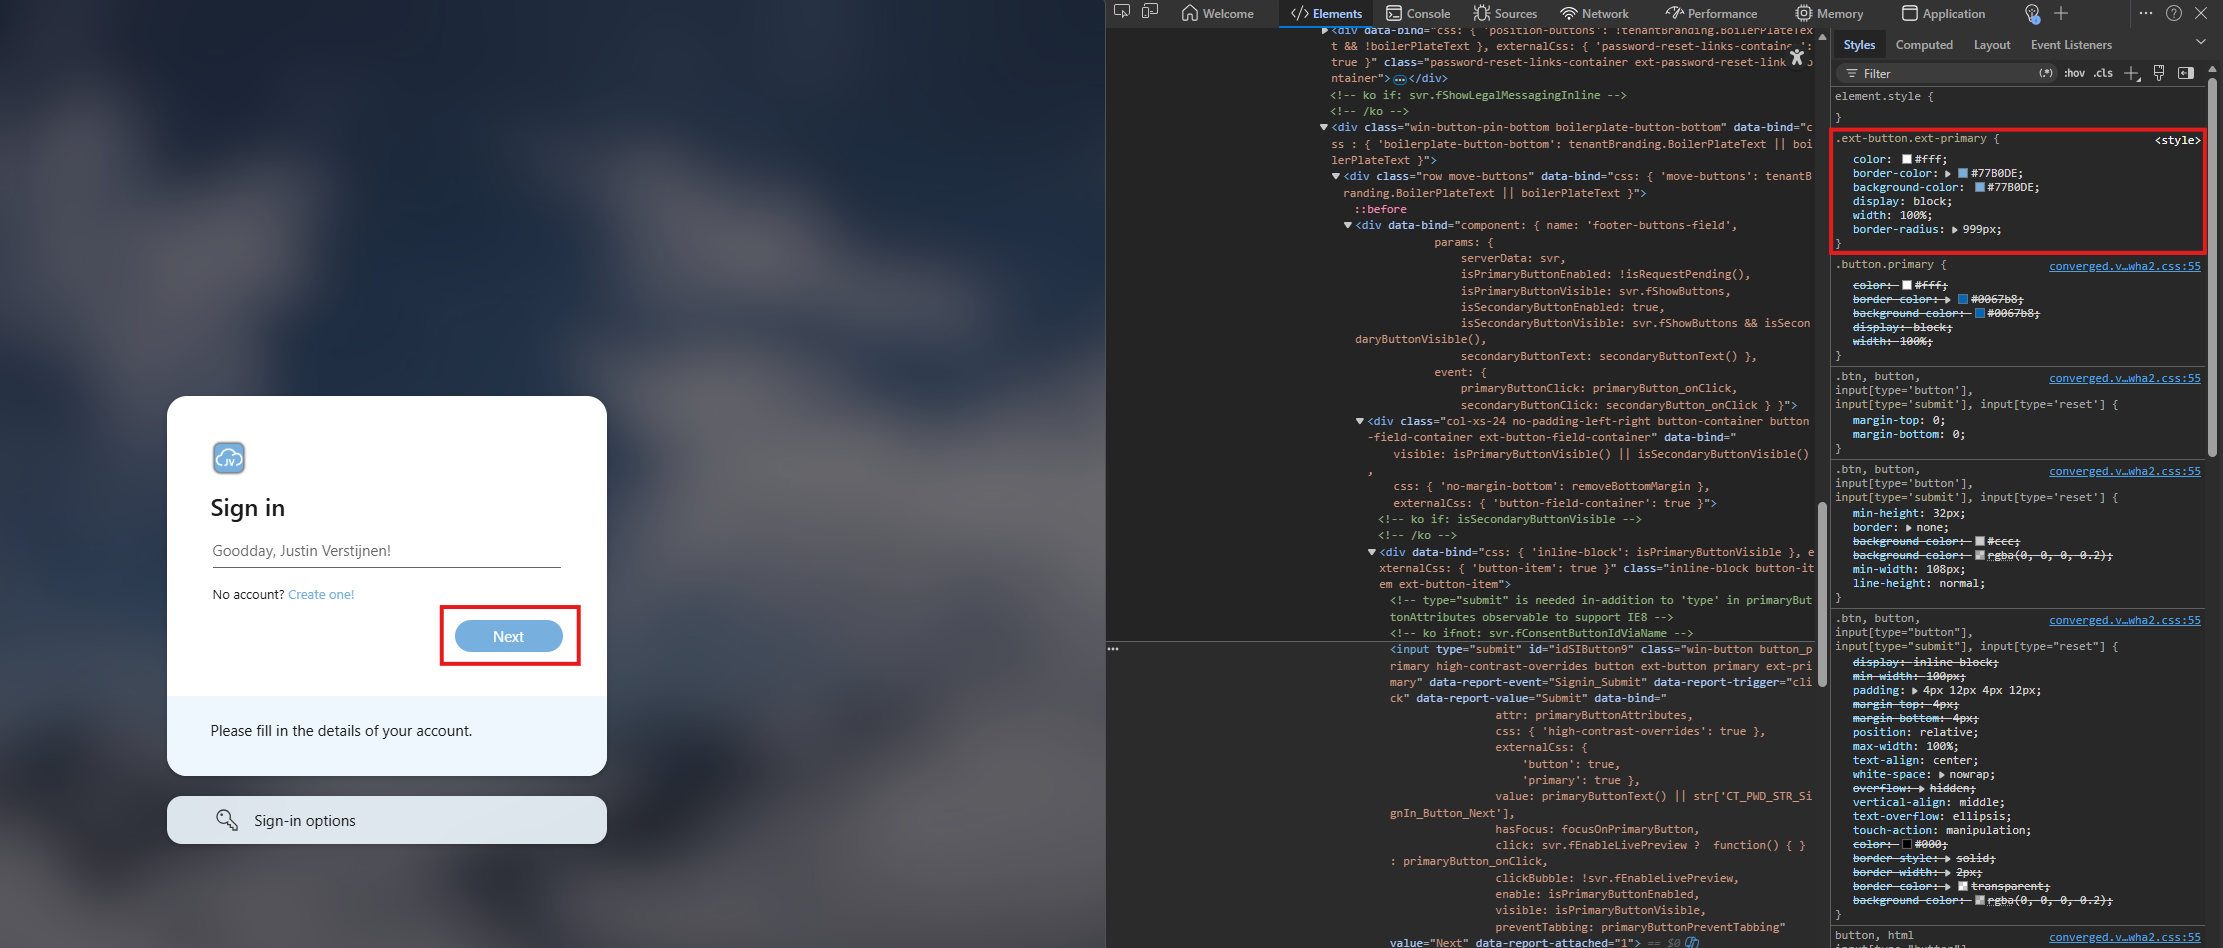
Now you can click the background-color option, but we cannot select a color yet. As we are using a color override, we need to add “!important” after the color code:
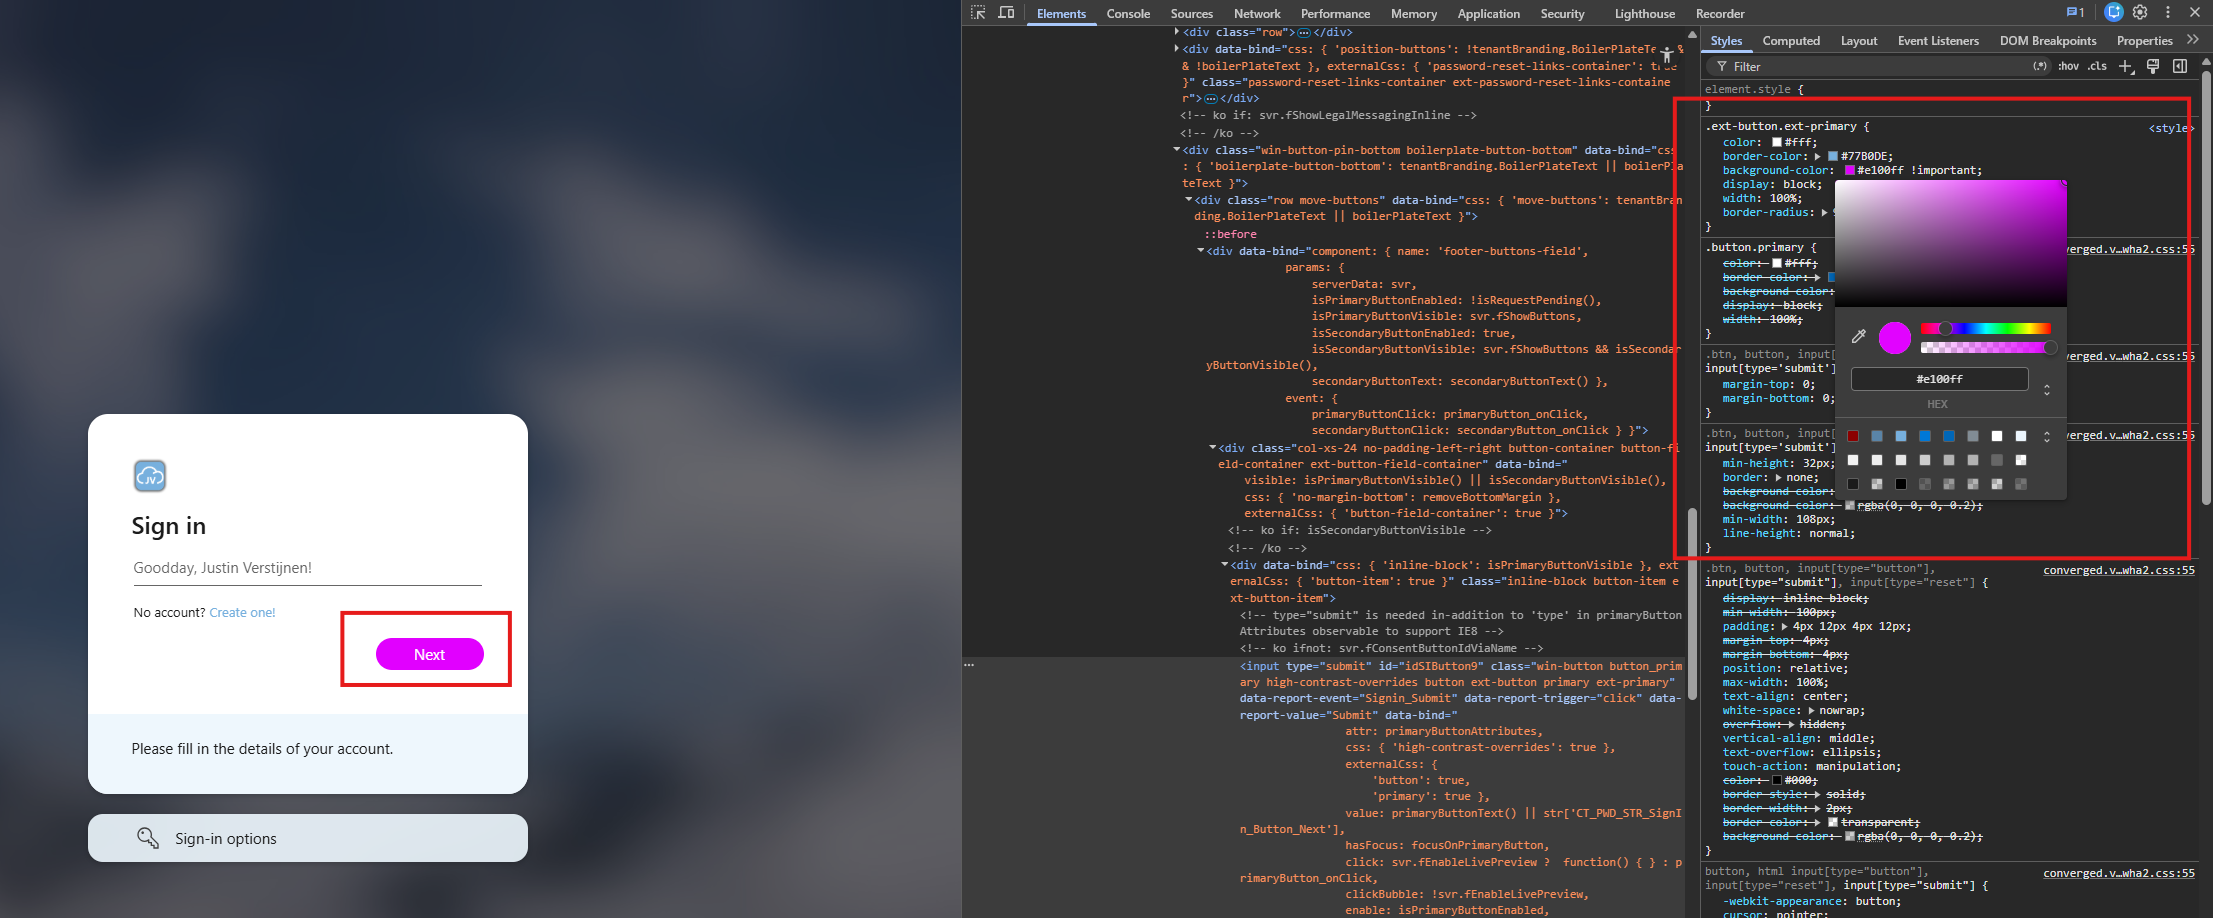
Now you can click the color-block before the HTML color code and live select the right color. If you have the right color, copy the value and paste that in the CSS file according to step 2.
Summary
This guide described how we can change some advanced appearance settings in Entra ID sign-in prompts. I really like to customize such things into the branding of an organization and end-users like that too.
Thank you for visiting this page and I hope it was helpful!
Sources
End of the page 🎉
You have reached the end of the page. You can navigate through other blog posts as well, share this post on X, LinkedIn and Reddit or return to the blog posts collection page. Thank you for visiting this post.
If you find this page and blog very useful and you want to leave a donation, you can use the button below to buy me a beer. Hosting and maintaining a website takes a lot of time and money. Thank you in advance and cheers :)

The terms and conditions apply to this post.