Getting started with Azure DNS
Azure DNS is a DNS hosting platform running inside Azure. It allows you to host your public DNS zones directly in Azure and manage records through the Azure Portal. It also has some great functionality/support like:
- Importing zones
- Exporting zones
- DNSSEC
- Automatic domain validation of some services
- Global redundancy with 4 DNS servers
In this guide, I will show how to create a public DNS zone, add DNS records, and link your domain name to Azure DNS to leverage this service. I will migrate one stale domain and configure DNSSEC for the full coverage.
Requirements
Before starting, make sure you have:
- An Azure subscription
- A registered public domain name, like justinverstijnen.nl or example.com
- Access to your current domain registrar or DNS provider
- Basic DNS knowledge
What is Azure DNS?
Azure DNS hosts your DNS zones on Microsoft infrastructure for both public and private scenario’s. Instead of managing DNS records at your registrar or another DNS provider, you can fully manage them inside Azure and use the Azure Portal or other management tools to manage your DNS zones like PowerShell, Azure CLI, ARM, Terraform, Bicep or APIs
A DNS zone contains various records which tells the internet where to find your domain’s services such as:
| Record type | Purpose |
|---|---|
| A | Links a hostname to an IPv4 address |
| AAAA | Links a hostname to an IPv6 address |
| CNAME | Redirects a hostname to another hostname |
| MX | Email routing |
| TXT | Verification and text records |
| NS | Name server delegation |
Step 1: Create a DNS zone
Open the Azure Portal at https://portal.azure.com, search for “DNS zones”, and select “Create”.
Fill in the following settings of the wizard to your likings.
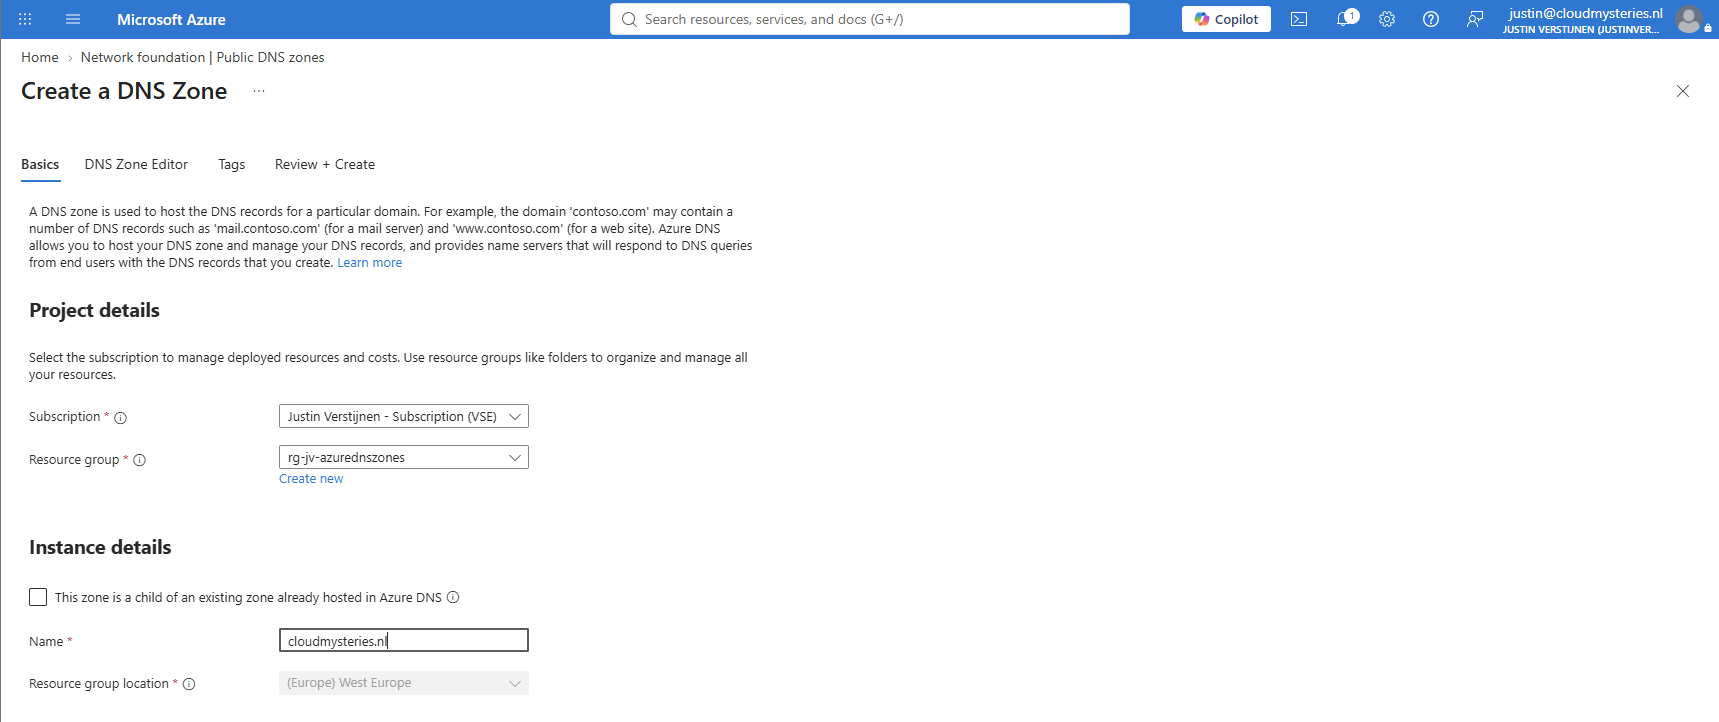
Click “Review + create” and then select “Create”. During this wizard, you could already import some records but we will do this soon.
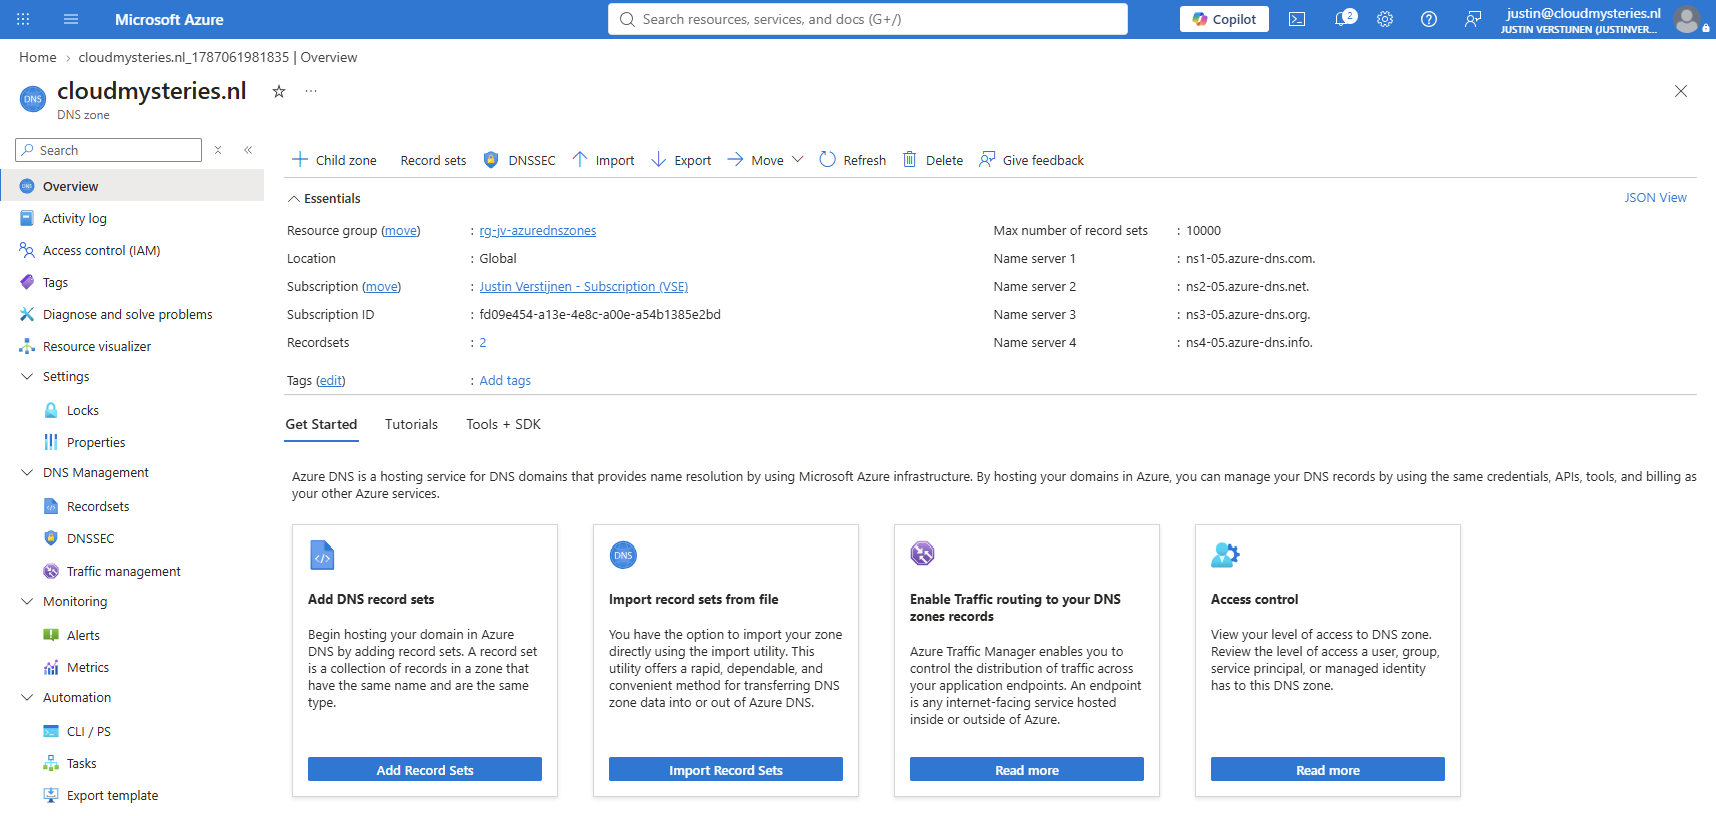
After deployment, open the DNS zone to verify some of the details:
You will now see the DNS records overview:
- ns1-05.azure-dns.com
- ns2-05.azure-dns.net
- ns3-05.azure-dns.org
- ns4-05.azure-dns.info
The NS records are important because these are the Azure DNS name servers your domain must use.
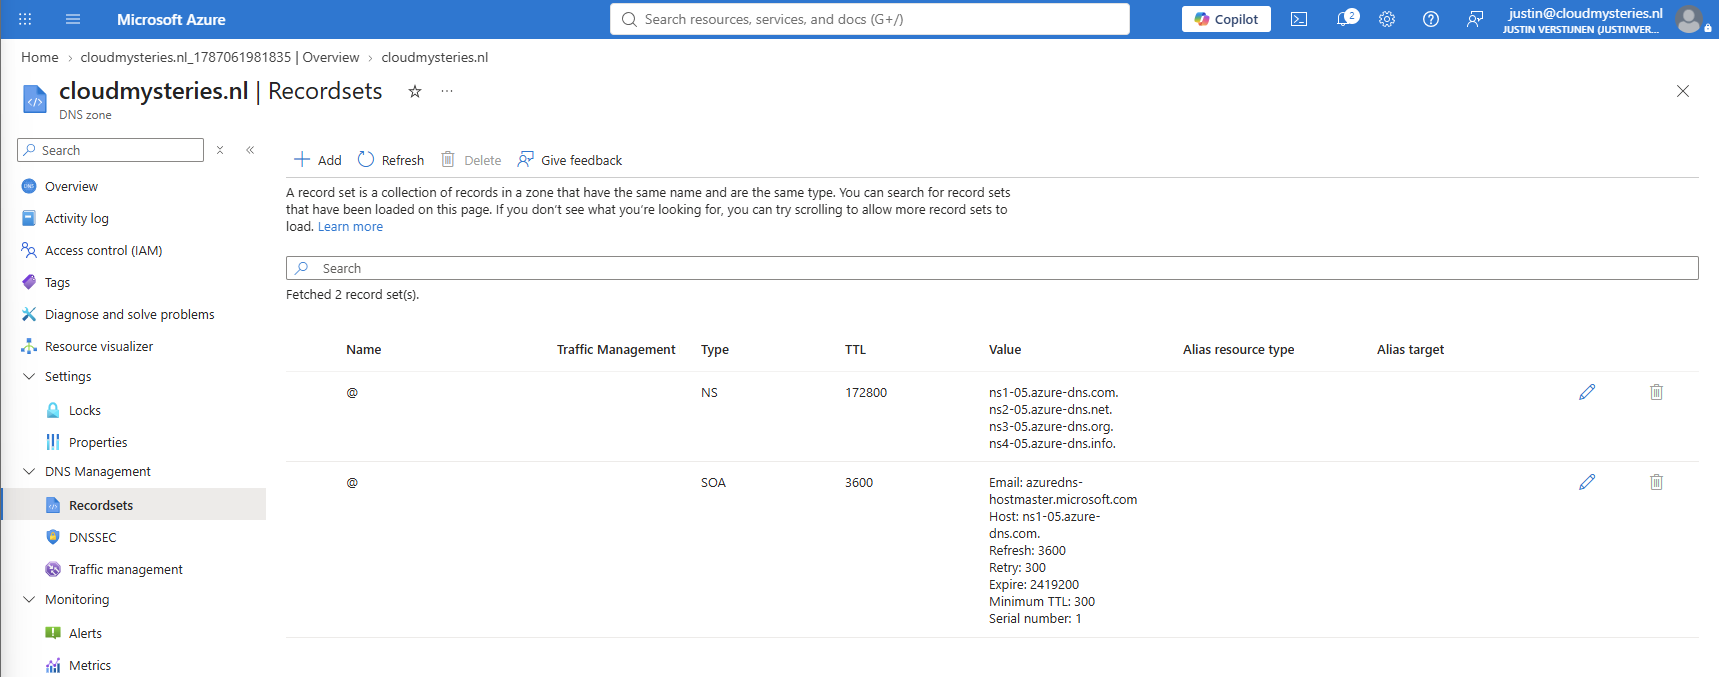
On the left, under “DNS Management” and then “Recordsets” you can find the panel to actually create DNS records manually.
Step 2: Create your first DNS record
Now we can create DNS records inside Azure. Open the Azure Portal at https://portal.azure.com, go to “DNS zones”, open your DNS zone, and select “+ Record set”.
For example, to create a website record:
| Setting | Value |
|---|---|
| Name | www |
| Type | A |
| TTL | 3600 |
| IP address | 150.171.109.34 |
Click “OK” to save the record. This creates the following DNS record which points the www record and cloudmysteries.nl domain to IP address:
www.cloudmysteries.nl -> 150.171.109.34However, nobody on the internet knows yet to look on Azure DNS for this record so any lookup to it will fail.
Step 3: Import your DNS zone into Azure DNS
As we now have setup Azure DNS and are familiar with the interface and management portal, we can import our DNS zone file. This is a file containing a full DNS zone with all records, values and names in it. It looks like this:
$ORIGIN cloudmysteries.nl.
$TTL 3600

@                       3600 IN MX    0 cloudmysteries-nl.s-v1.mx.microsoft.
@                       3600 IN TXT   "v=spf1 include:spf.protection.outlook.com -all"
autodiscover            3600 IN CNAME autodiscover.outlook.com.
mta-sts                 3600 IN CNAME justinverstijnen.github.io.
selector1._domainkey    3600 IN CNAME selector1-cloudmysteries-nl._domainkey.JustinVerstijnen.y-v1.dkim.mail.microsoft.
selector2._domainkey    3600 IN CNAME selector2-cloudmysteries-nl._domainkey.JustinVerstijnen.y-v1.dkim.mail.microsoft.
_dmarc                  3600 IN TXT   "v=DMARC1; p=reject; adkim=s; aspf=s; rua=mailto:reports@justinverstijnen.nl; ruf=mailto:reports@justinverstijnen.nl;"
_msradc                 3600 IN TXT   "https://rdweb.wvd.microsoft.com/api/arm/feeddiscovery"
_mta-sts                3600 IN TXT   "v=STSv1; id=20240719T000000Z"
_smtp._tls              3600 IN TXT   "v=TLSRPTv1; rua=mailto:reports@justinverstijnen.nl;"
At my current provider, I can make a direct export of the full zone. If this is possible for your provider then also do this. Otherwise you have to copy and paste everything or ask AI to do the magic for you.
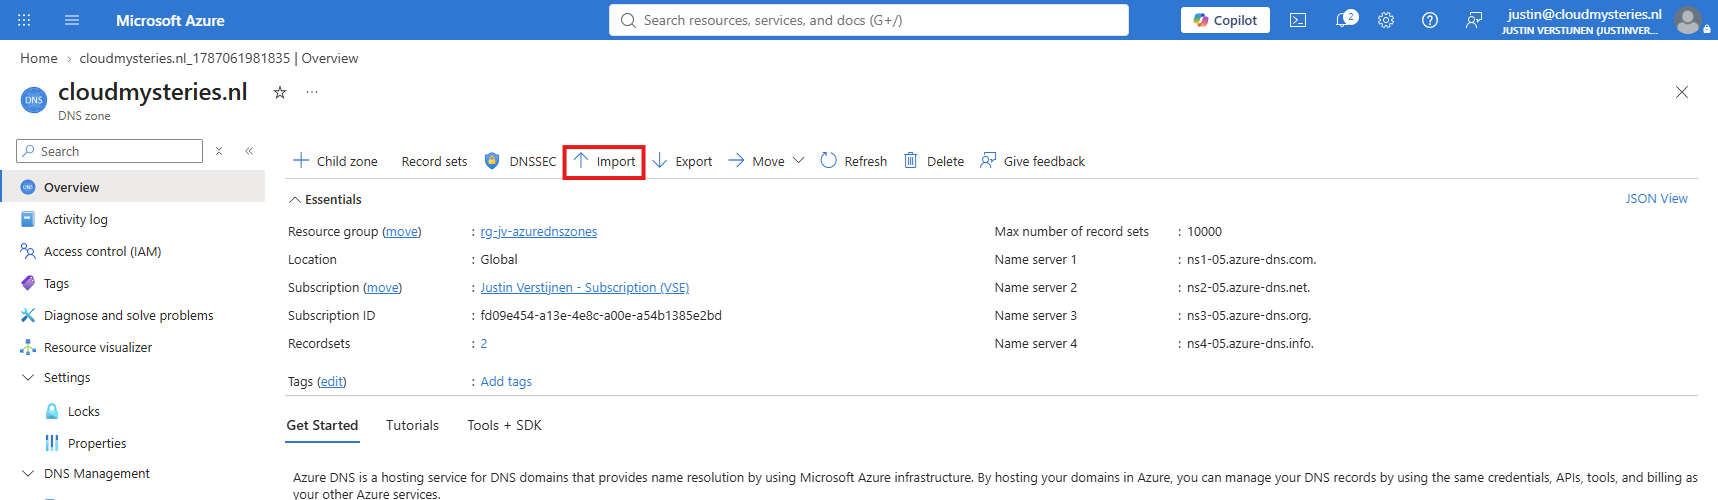
In Azure, open your DNS zone and import the zone-file by clicking the “Import” button.
Then select the just exported file:
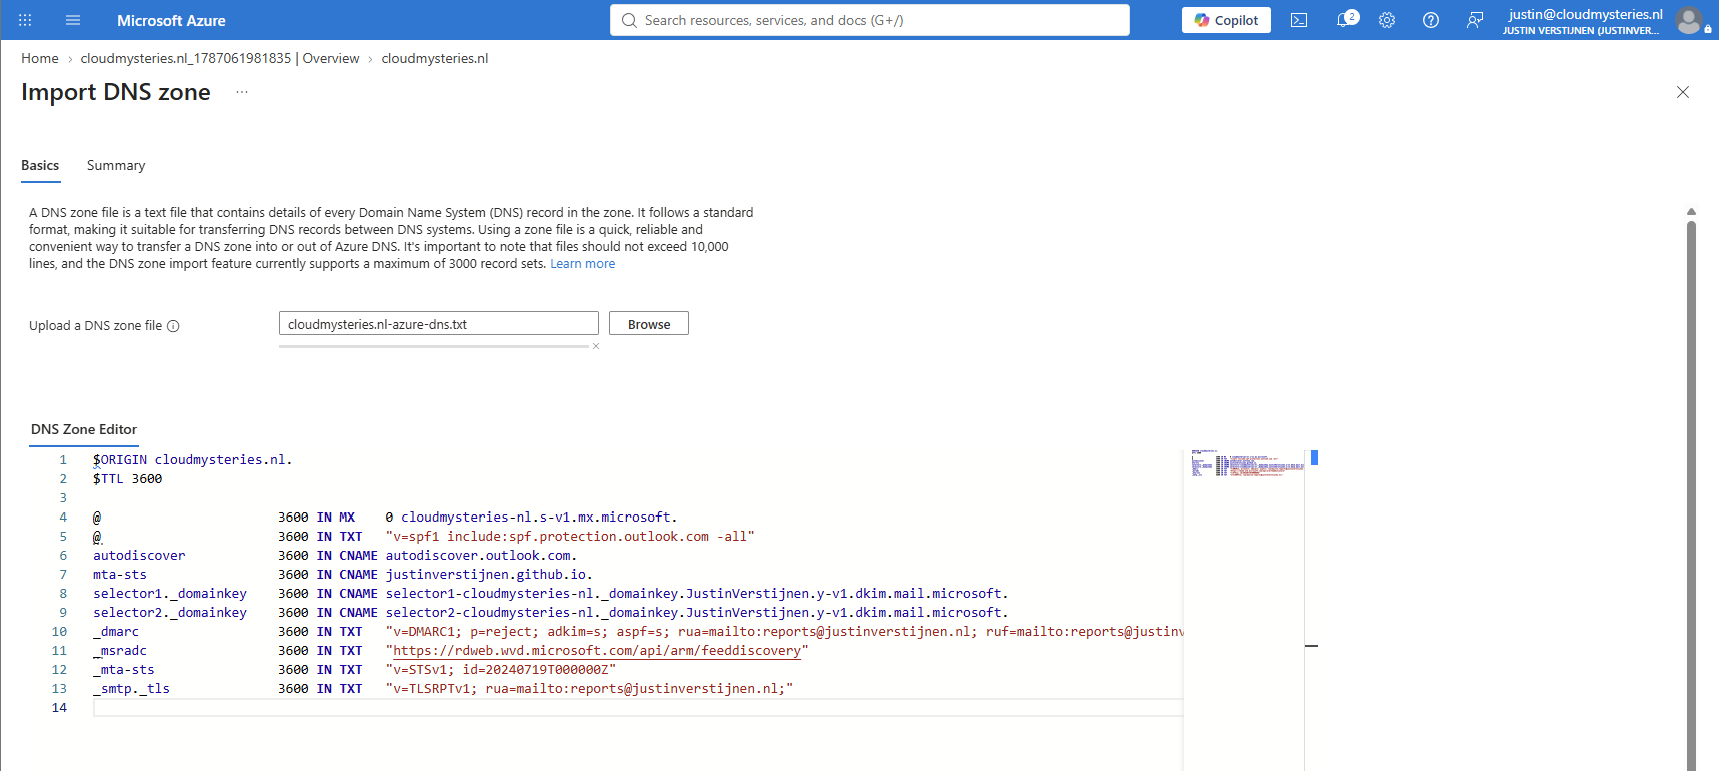
Now we can simply finish the wizard to get all records imported into Azure DNS. If any errors are found in the file, Azure will also help you correct them before importing.
Now our “phonebook” is ready and Azure DNS knows where your domain’s services can be found.
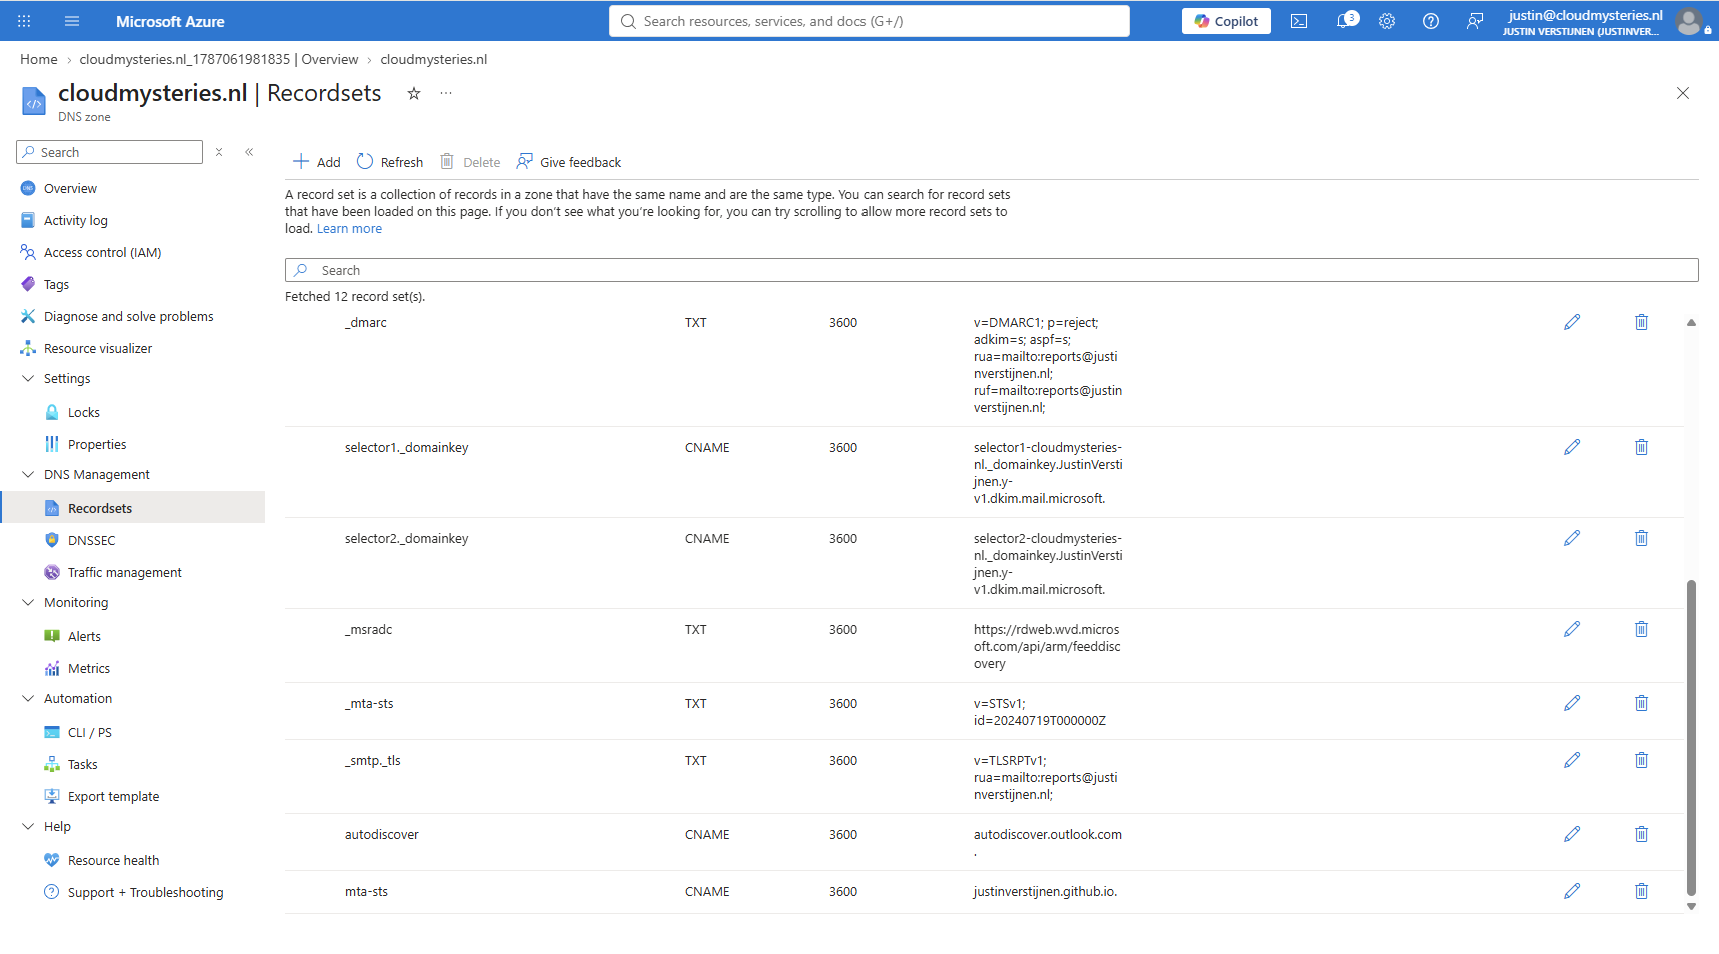
We are now fully ready to point your domain to Azure DNS. Performing this step before creating the records will result in a domain which the rest of the world doesn’t understand with service outage as result.
Step 4: Point your domain to Azure DNS
On the internet, at the portal/company you bought your domain name you have the option to set DNS servers. Here is where you tell the internet where the records of your domain can be found. Which in our case is Azure DNS where we just created all required records.
Inside the DNS zone overview in Azure, copy all four NS records which look similar to this:
ns1-05.azure-dns.com.
ns2-05.azure-dns.net.
ns3-05.azure-dns.org.
ns4-05.azure-dns.info.
We will use these in the next step, where sometimes a trailing dot is needed and in some cases not.
Now log-in to your domain registrar or current DNS hosting provider. Then find the domain name settings and replace the current name servers with the Azure DNS name servers.
Every registrar has a different interface, but usually this is located under:
- DNS
- Nameservers
- Domain management
- Custom nameservers
At my side, this looks like this:
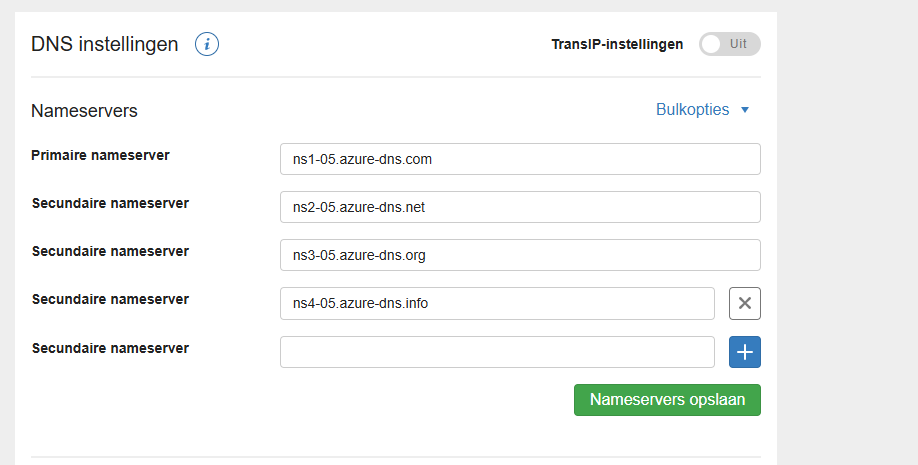
I have already pasted in the values from the Azure Portal, without the trailing dots. Then save the configuration.
DNS propagation can take some time, especially the NS records. In most cases this starts working within minutes, but globally it can take up to 24 to 48 hours.
Step 5: Monitoring the DNS propagation
For monitoring the proagation process, you can use this 3rd party tool: https://www.whatsmydns.net/ This tool checks with multiple endpoints around the globe which result is found when looking a certain record. Perfect for our scenario.
Here I created a temporary A record with an IP address (I obviously don’t own) on the Azure side and checked that record. If this can be found, then these endpoints understand and can find my new zone on Azure DNS:
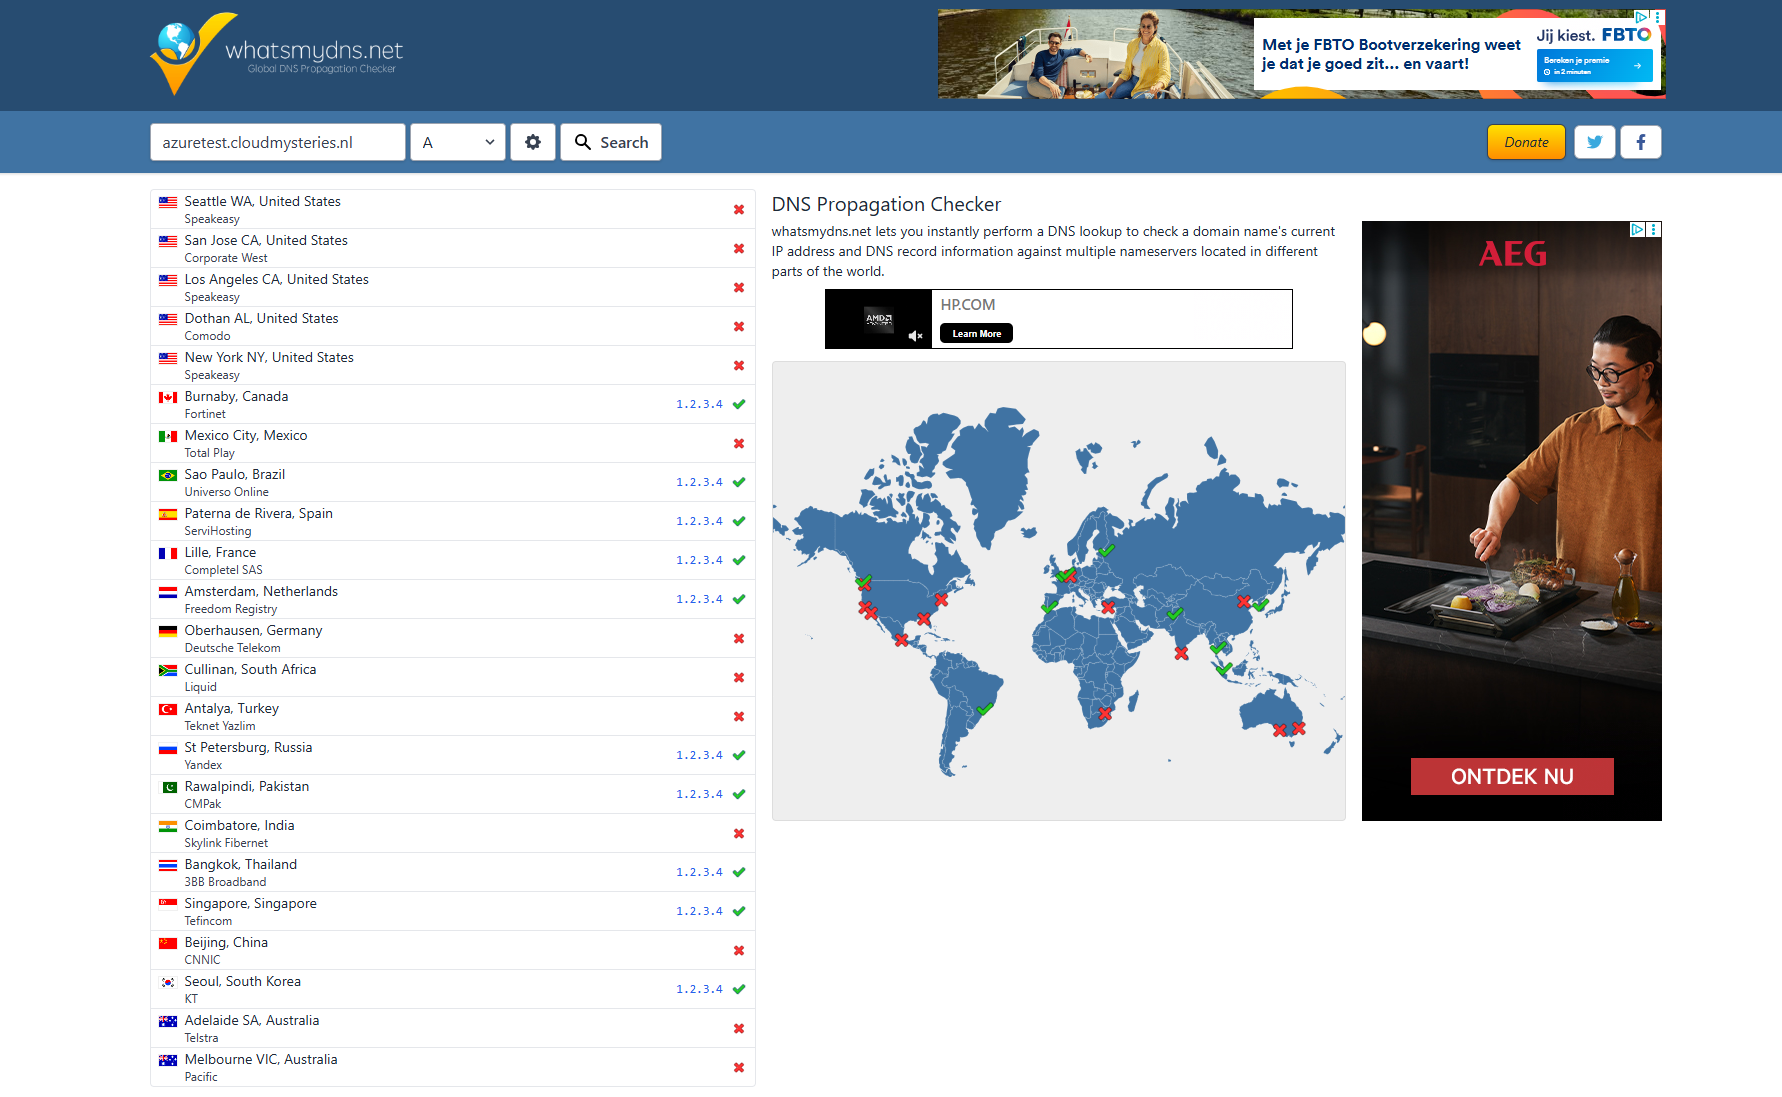
This was about 10 minutes after the changes.
You can also use PowerShell to check if the propagation is busy, but you only check this from your local PC. This causes some results to be in fast.
Resolve-DnsName azuretest.cloudmysteries.nlWhich outputs, if found:
Name                                           Type   TTL   Section    IPAddress
----                                           ----   ---   -------    ---------
azuretest.cloudmysteries.nl                    A      3600  Answer     1.2.3.4
This only checks from one endpoint, but doesn’t tell you anything about worldwide propagation, so the tool I mentioned is more reliable.
Step 6: Configure DNSSEC
We can now also configure DNSSEC on the domain. DNSSEC is basically an extra security layer where you create a trust from domain registrar to DNS provider so your DNS records cannot be spoofed, and will not be trusted by clients.
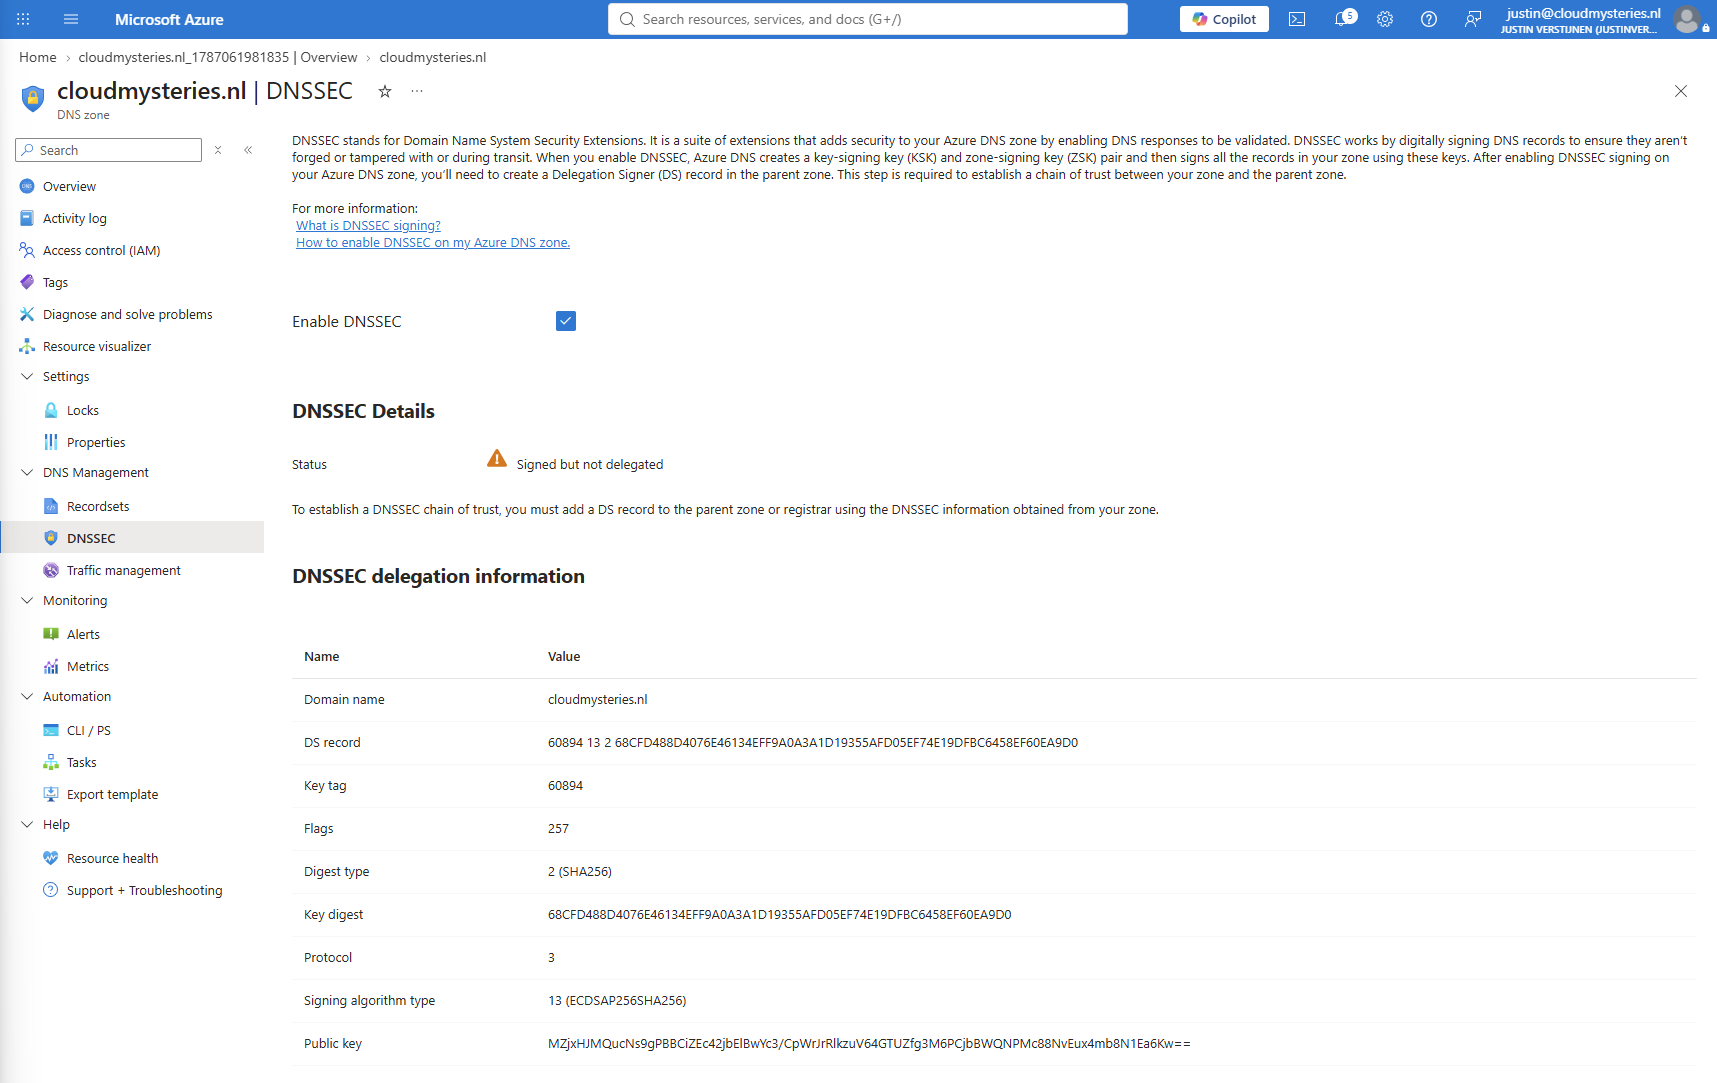
It works by generating a DS record/key on the DNS provider and setting this in the registrar.
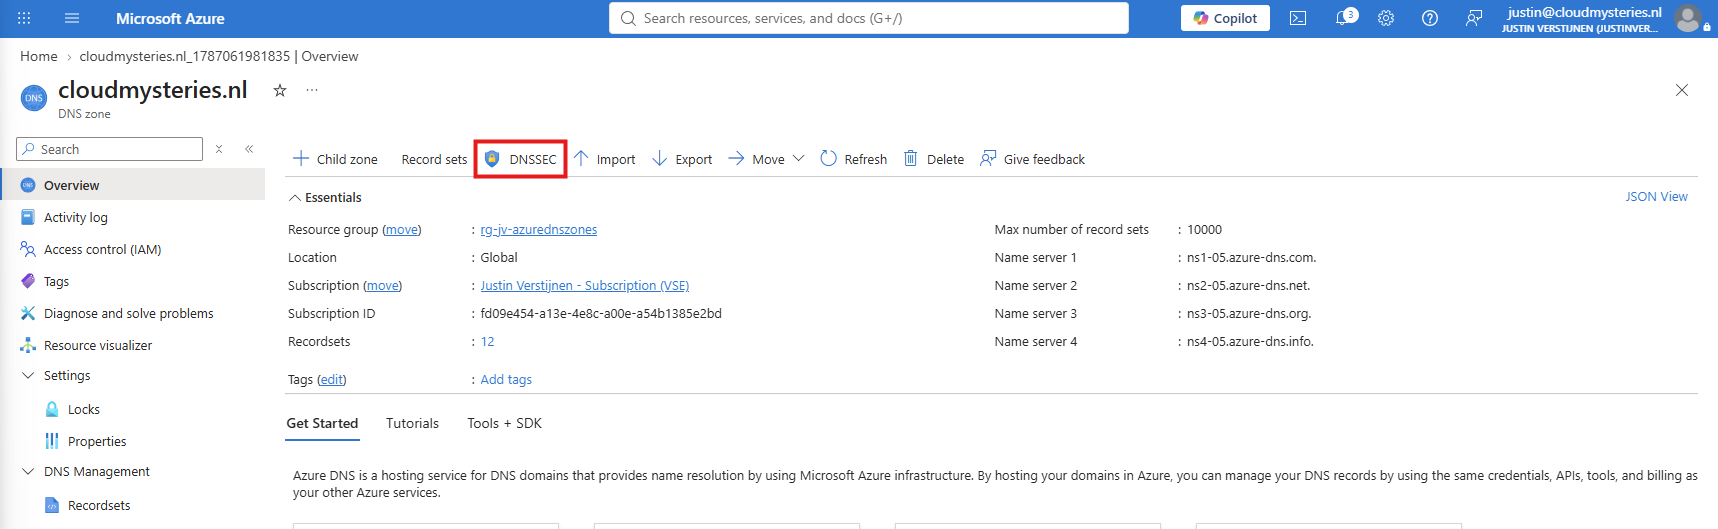
In Azure, click on “DNSSEC”:
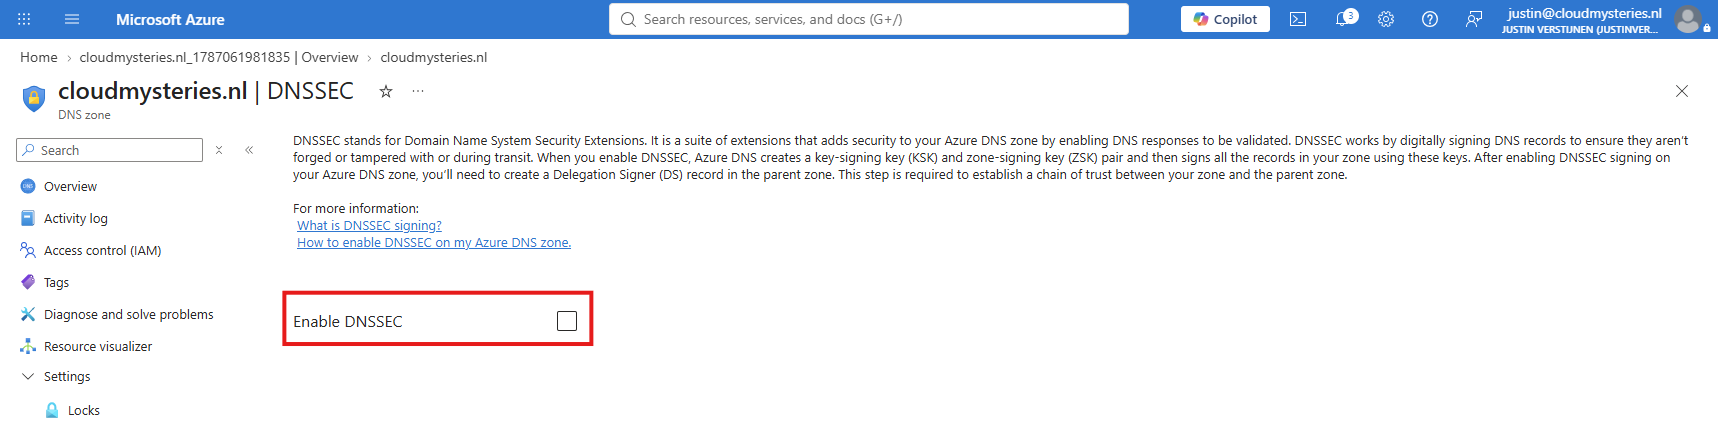
Here, DNSSEC must be enabled:
Enable DNSSEC and confirm the extra prompt. This gives you the information to submit to the registrar:
Now head to your registrar and search for the DNSSEC options. Make sure the registrar also supports DNSSEC for the domain.
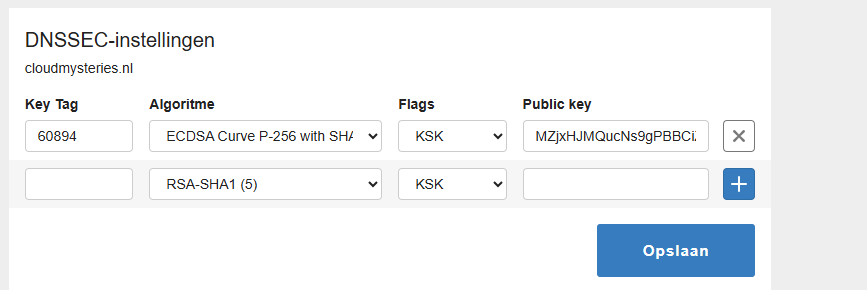
Here I have added the key tag, set the algorythm, flags and pasted the public key. This step may defer depending on the registrar you use.
After this has been configured, this can take a while to actually perform. You can check with my DNS MEGAtool at https://tools.justinverstijnen.nl/dnsmegatool if DNSSEC is active and an active record is found:
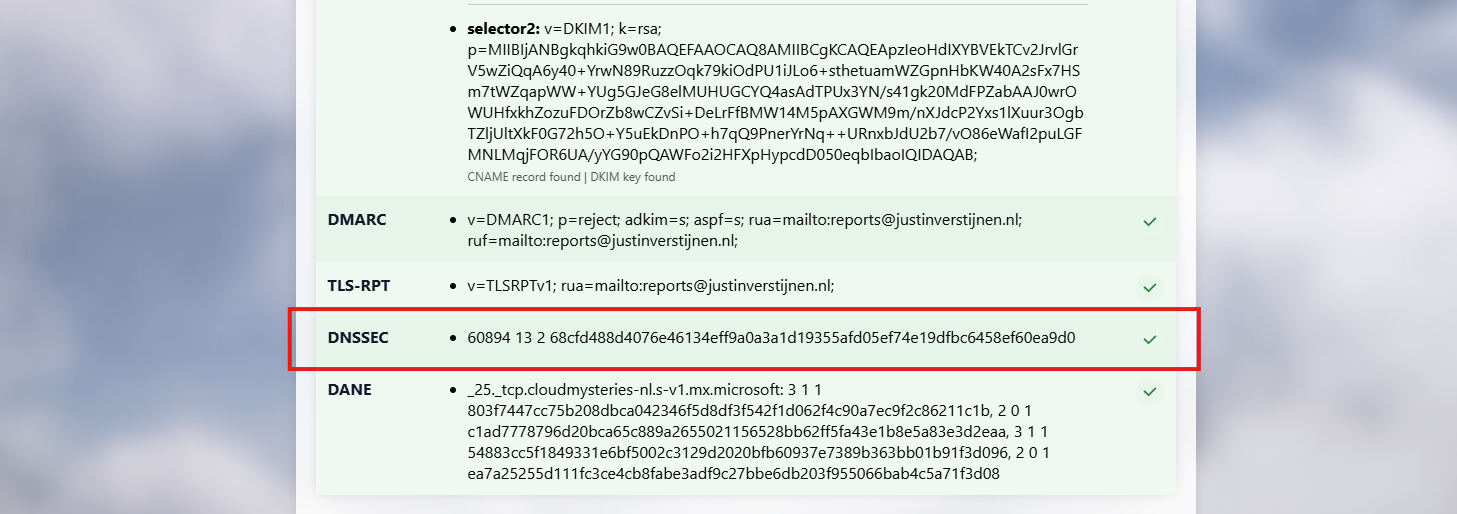
Green and a checkmark icon means an DNSSEC DS record is found and active.
Summary
Azure DNS allows you to centrally host and manage public DNS zones directly from Azure. In this guide we created a DNS zone, changed the domain name servers, created A and CNAME records, and tested the DNS resolution using the Whats My DNS tool and PowerShell. As bonus we configured DNSSEC to keep our domain secure and much more complex to spoof and man in the middle attacks.
Thank you for reading this post and I hope it was helpful!
These sources helped me by writing and research for this post;
End of the page 🎉
You have reached the end of the page. You can navigate through other blog posts as well, share this post on X, LinkedIn and Reddit or return to the blog posts collection page. Thank you for visiting this post.
Support the blog
