Group Policy Central Store and Active Directory
Group Policy Central Store described
When you manage Group Policies in an Active Directory environment, big chance you use the Administrative Templates quite often. These templates contain the policy settings which you can configure for Windows, Microsoft products, and many third-party applications like FSLogix and Google Chrome.
By default, Group Policy Management can use the Administrative Template files which are installed locally on the computer where you edit your Group Policies. This works, but can become confusing when multiple administrators or management servers are being used. One administrator could have newer or different sets of Administrative Templates installed than another admin. This is where the Group Policy Central Store comes in.
The Central Store is a shared location inside the SYSVOL folder of your Active Directory domain where we can centrally store our .admx and .adml files. All servers and clients can then fetch the configured policies from there ,because SYSVOL is shared and replicated between the Domain Controllers, the same Administrative Templates can then be used when editing Group Policies throughout the domain. The replication of these files work with Distributed File System (DFS).
In this guide, we will create one central location from where our Administrative Templates can be managed. This is crucial if having multiple domain controllers and/or management servers.
ADMX and ADML files described
Before creating the Central Store, it is useful to understand the two different file types we are going to work with.
- ADMX file: contains the actual policy definition, which describes things like the policy category, supported operating systems, registry locations, and which settings can be configured
- ADML file: contains the language-specific text belonging to the ADMX file. This includes the policy names, descriptions, help texts, and other information you see inside the Group Policy Management Editor
For example:
PolicyDefinitions
│
├── WindowsUpdate.admx
├── TerminalServer.admx
├── WindowsDefender.admx
│
└── en-US
    ├── WindowsUpdate.adml
    ├── TerminalServer.adml
    └── WindowsDefender.adml
It is important that the ADMX and ADML files belong together. Copying a new ADMX file without the matching language file can result in errors or missing descriptions inside Group Policy Management.
Requirements
- Around 20 minutes of your time
- An Active Directory domain
- Access to a Domain Controller
- Permissions to modify the SYSVOL Policies folder
- Group Policy Management Console
- A Windows 10 or Windows 11 computer with the Administrative Templates you want to use
- Basic knowledge of Active Directory and Group Policy
For this guide, I will use my Active Directory domain:
internal.justinverstijnen.nlYou will need to replace this with your own Active Directory domain name when following this guide in your own environment.
Step 1: Checking if a Central Store already exists
Before we start to create anything, we should first check if the domain already has a Central Store. Open File Explorer on your Domain Controller or management computer and browse to:
\\<yourdomain>\SYSVOL\<yourdomain>\PoliciesFor my domain this is:
\\internal.justinverstijnen.nl\SYSVOL\internal.justinverstijnen.nl\Policies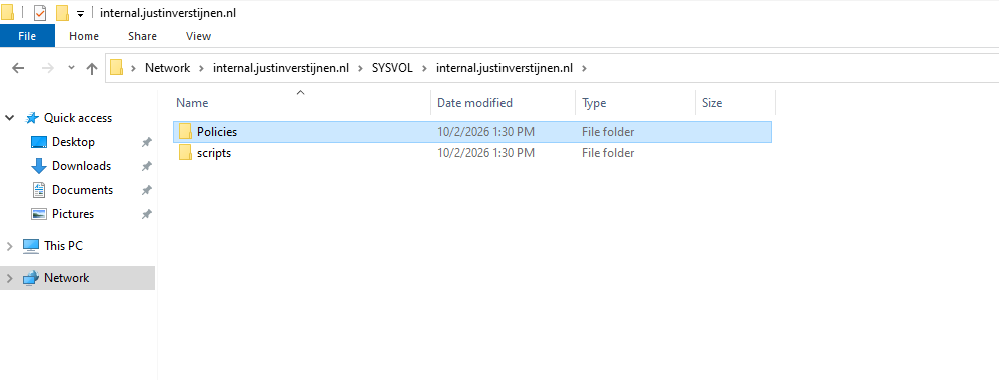
Inside the Policies folder, check if there is already a folder named PolicyDefinitions.
If the PolicyDefinitions folder already exists, your environment already has a Central Store. Do not create another PolicyDefinitions folder in that case. First check the existing files and make a backup before changing anything.
If there is no PolicyDefinitions folder yet, we can continue and create our new Central Store by following the steps below.
You could also check the location of the current Group Policy store in the Group Policy Management Console:
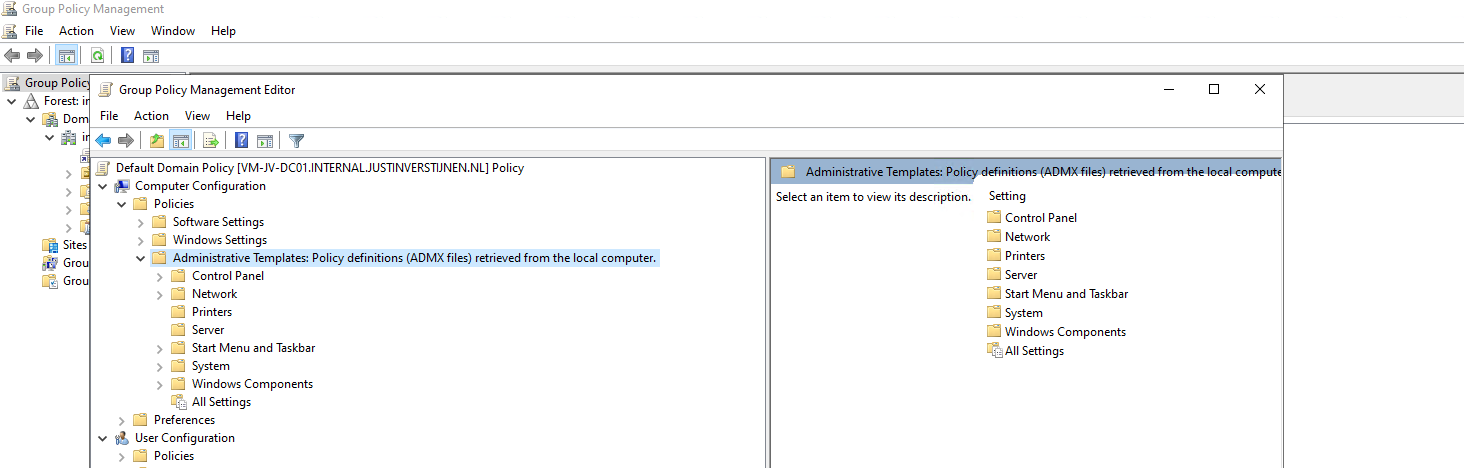
Step 2: Moving the current Policy store
Let’s move our store to the shared domain location. In your domain, you should have a server where you manage the group policies. This will be your management server or (single) domain controller.
Go to the folder C:\Windows on that server and on that location we have a folder called PolicyDefinitions.
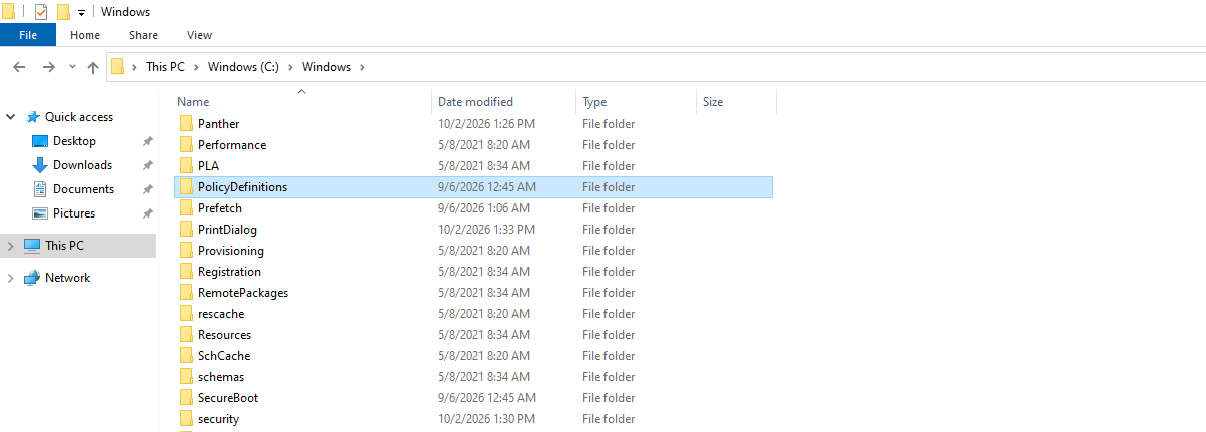
We will copy this folder PolicyDefinitions to the following location:
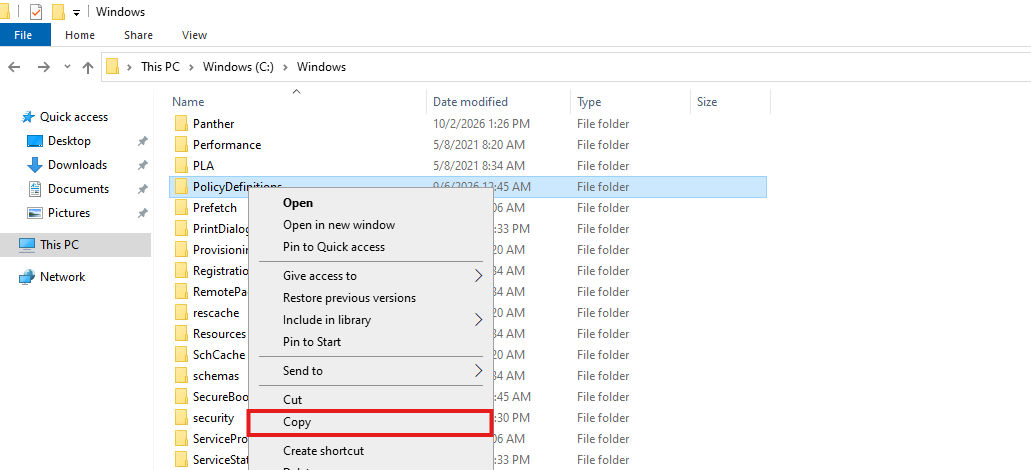
Click Copy. Then navigate back to your SYSVOL folder:
\\internal.justinverstijnen.nl\SYSVOL\internal.justinverstijnen.nl\PoliciesPaste the folder there:
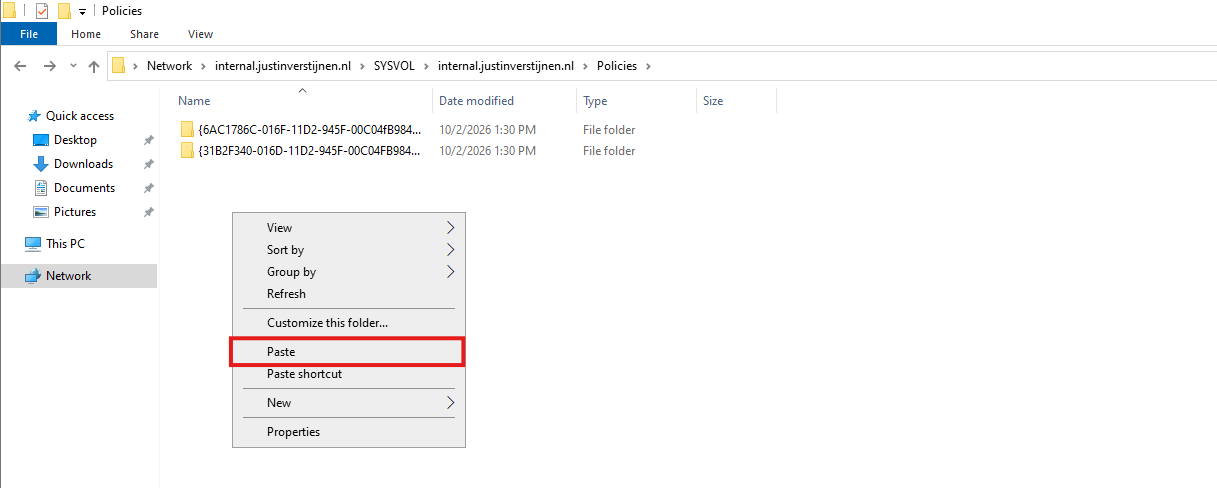
Now the folder is in the correct location and picked up by all servers in the domain.
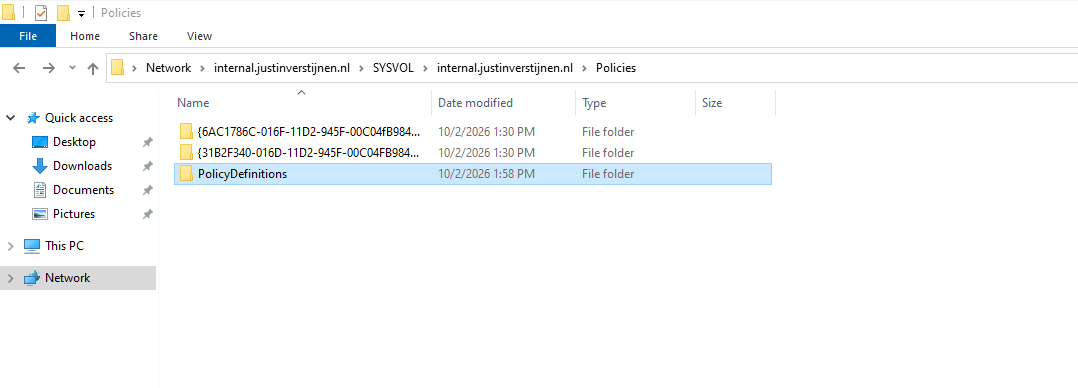
Step 3: Check the Central Store
Now we will check if the Central Store actually works. Let’s again open a random Group Policy Object in the Group Policy Management Console.
From there open the Administrative Templates. This will take some seconds if the Central Store works:
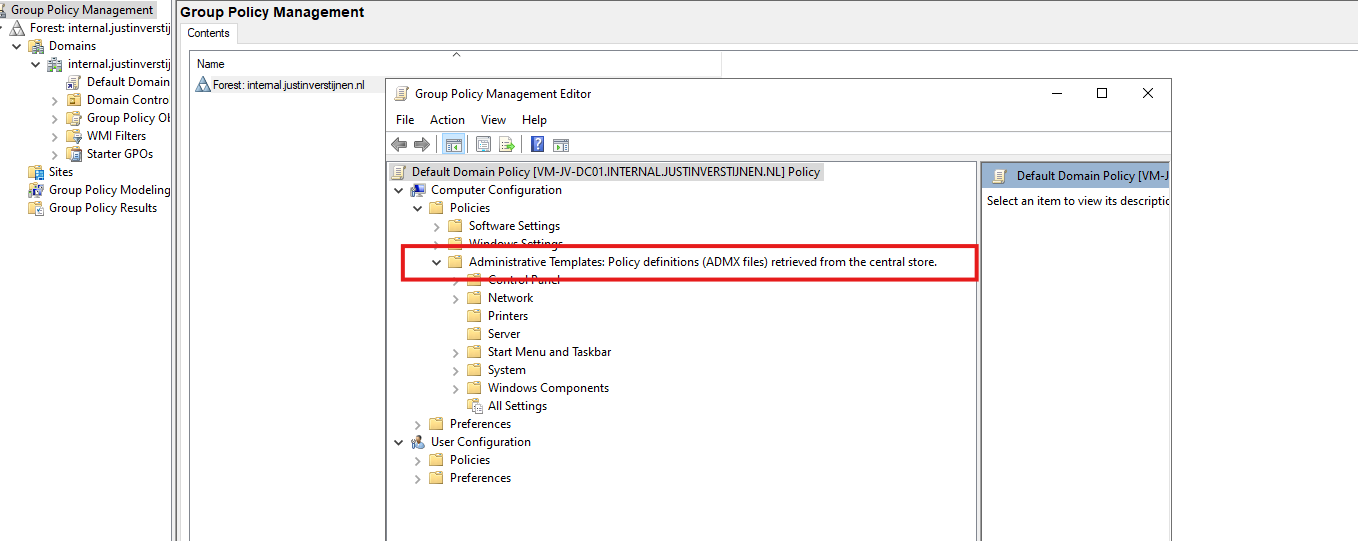
It will now show you that the Central Store is being used. Now we have one single store of ADMX/ADML files which is replicated with Distributed File System (DFS).
Step 4: Adding new ADMX and ADML policies
Our Central Store is working, but over time we will probably need additional Administrative Templates or update the existing files when:
- Microsoft releases new Windows or Office policies
- Microsoft Edge Administrative Templates are updated
- New FSLogix policies for AVD
- A third party application provides its own Group Policy templates, for example Google Chrome Enterprise
The downloaded Administrative Template package will normally contain one or more .admx files and matching .adml language files. For example, a package could look like this:
Administrative Templates
│
├── ExampleApplication.admx
│
└── en-US
    └── ExampleApplication.adml
The ADMX file must be placed in the PolicyDefinitions folder with the ADML file in the target subfolder of the preferred language. For my example, I will be installing the FSLogix Administrative Templates, which I downloaded from here: https://aka.ms/fslogix-latest
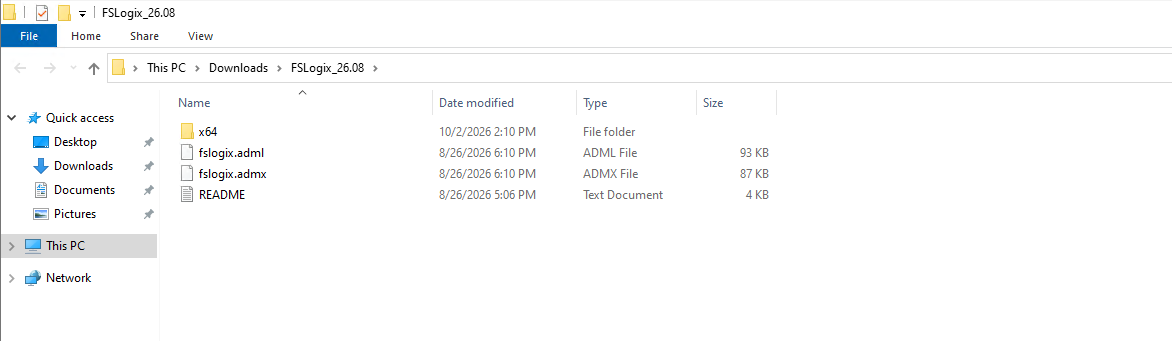
To install a United States policy, we can create a en-US folder at forehand.
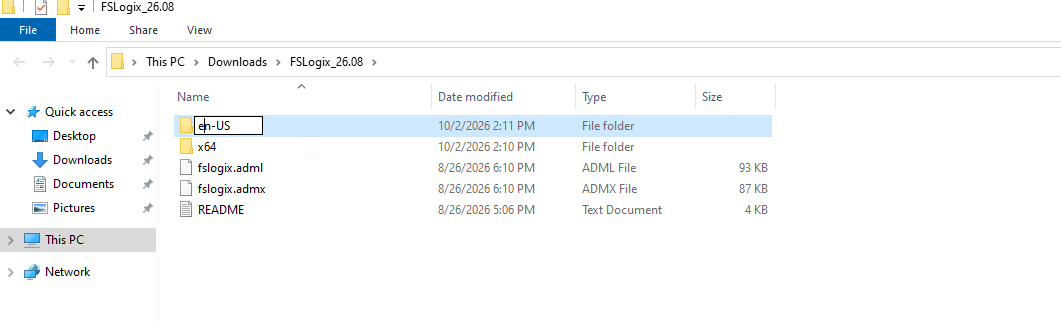
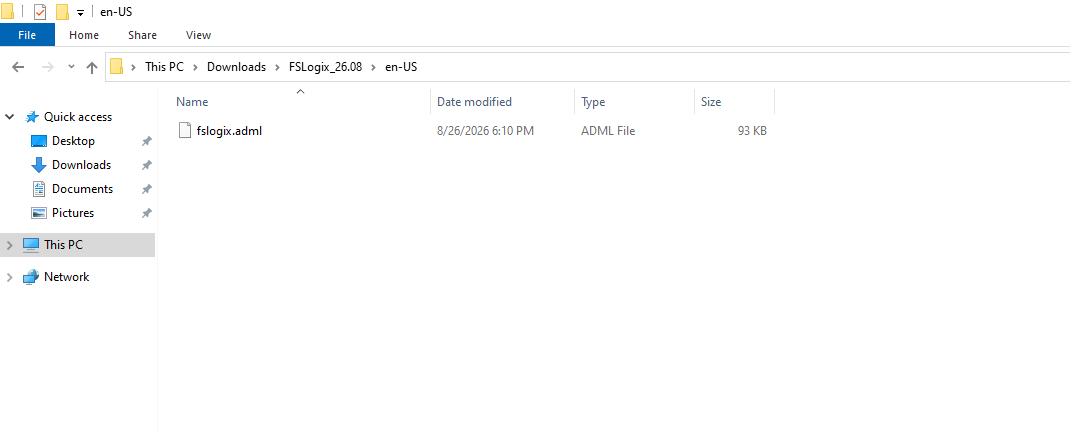
Then move the .ADML into the newly created en-US folder.
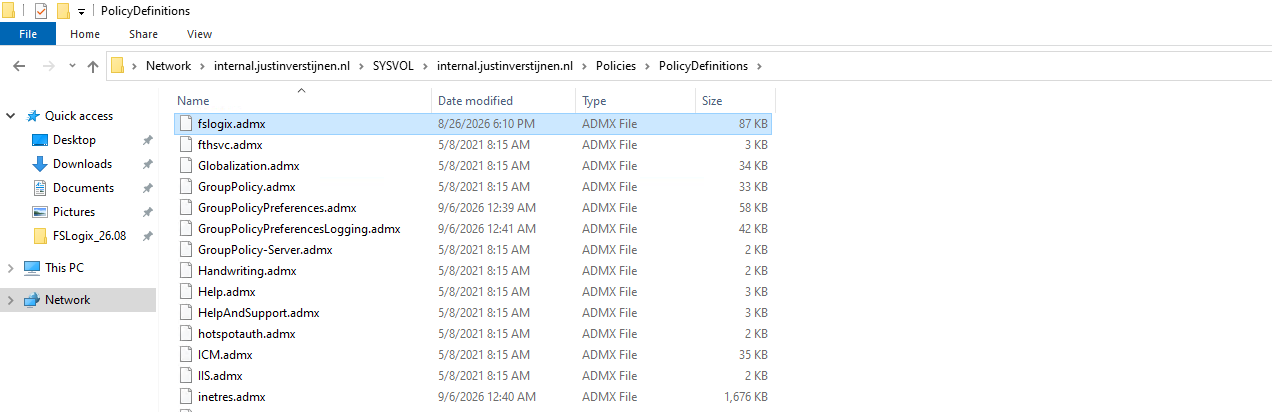
Now we can simply hold CTRL and select both files and copy them to this folder:
\\internal.justinverstijnen.nl\SYSVOL\internal.justinverstijnen.nl\Policies\PolicyDefinitionsPaste the files there and overwrite them when needed.
Then we can check the Group Policy Management Console again if FSLogix policies are being retrieved:
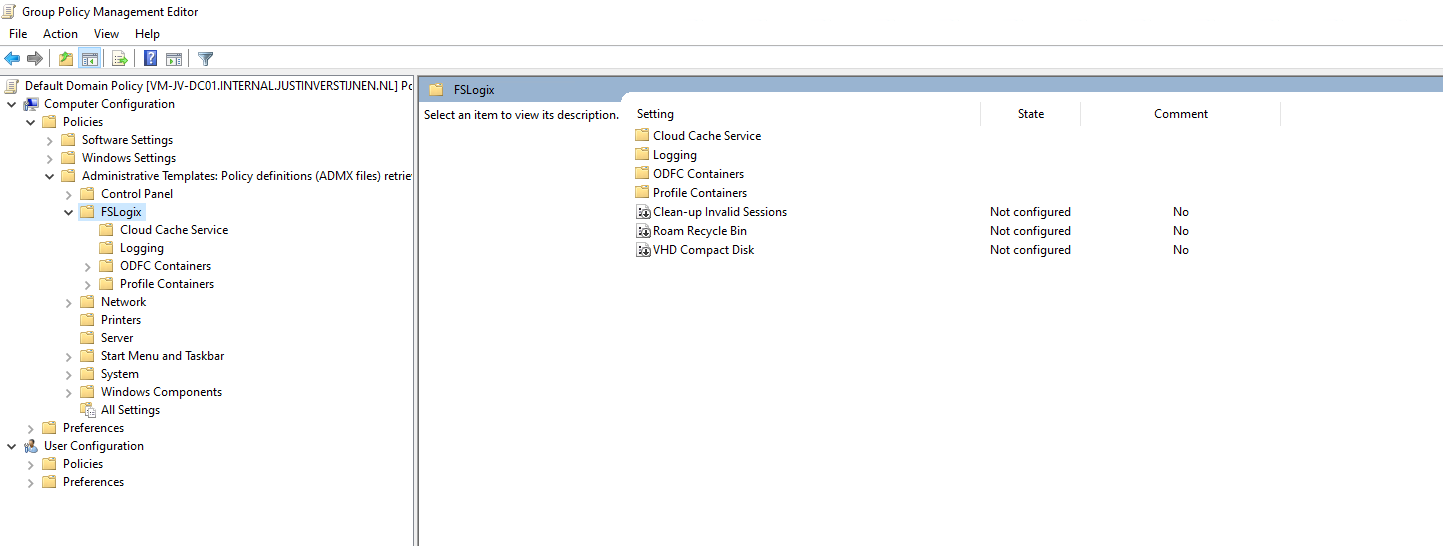
We now have the FSLogix policies, so the Central Store is working as expected.
Knowledge check
This quiz needs JavaScript to show the questions and feedback.
Summary
The Group Policy Central Store gives us one central location for the Administrative Templates used to manage Group Policies inside an Active Directory domain. Instead of depending on the local PolicyDefinitions folder of each management computer, we created a shared PolicyDefinitions folder inside SYSVOL and populated it with the required ADMX and ADML files. This folder is then replicated throughout the Active Directory domain.
When we need additional Administrative Templates later, we download the new templates, create a backup of the Central Store, copy the ADMX files to the root of PolicyDefinitions, and copy the matching ADML files into the correct language folder.
The biggest advantage for me is that all administrators now work with the same Administrative Templates instead of depending on which templates happen to be installed on their local management computer.
Thank you for reading this post and I hope it was helpful!
These sources helped me by writing and research for this post;
End of the page 🎉
You have reached the end of the page. You can navigate through other blog posts as well, share this post on X, LinkedIn and Reddit or return to the blog posts collection page. Thank you for visiting this post.
Support the blog
