How to implement Azure Firewall to secure your Azure environment
Categories:
11 minute read
Requirements
- Around 60 minutes of your time
- An Azure subscription
- Basic knowledge of Azure
- Basic knowledge of Networking
- Basic knowledge of Azure Firewall
Overview
Before creating all resources, it is great to plan before we build. I mean planning your network before building and having different overlaps or too much/less addresses available. In most cases, Azure recommends building a Hub-and-Spoke network, where we connect all spoke networks to a big hub.
In this guide, we are going to build this network:
IP ranges
The details of the networks are:
| VNET Name | Address Space | Goal |
| jv-vnet-00-hub | 10.0.0.0/16 | Hub for the network, hosting the firewall |
| jv-vnet-01-infrastructure | 10.1.0.0/16 | Network for servers |
| jv-vnet-02-workstations | 10.2.0.0/16 | Network for workstations |
| jv-vnet-03-perimeter | 10.3.0.0/16 | Network for internet-facing servers Isolated network |
We will build these networks. The only exception is VNET03, which we will isolate from the test of our network to defend against internet-facing attacks. This because attacks cannot perform lateral movement from these servers to our internal network.
Creating the hub network in Azure
In Azure, search for “Virtual Networks”, select it and create a virtual network.
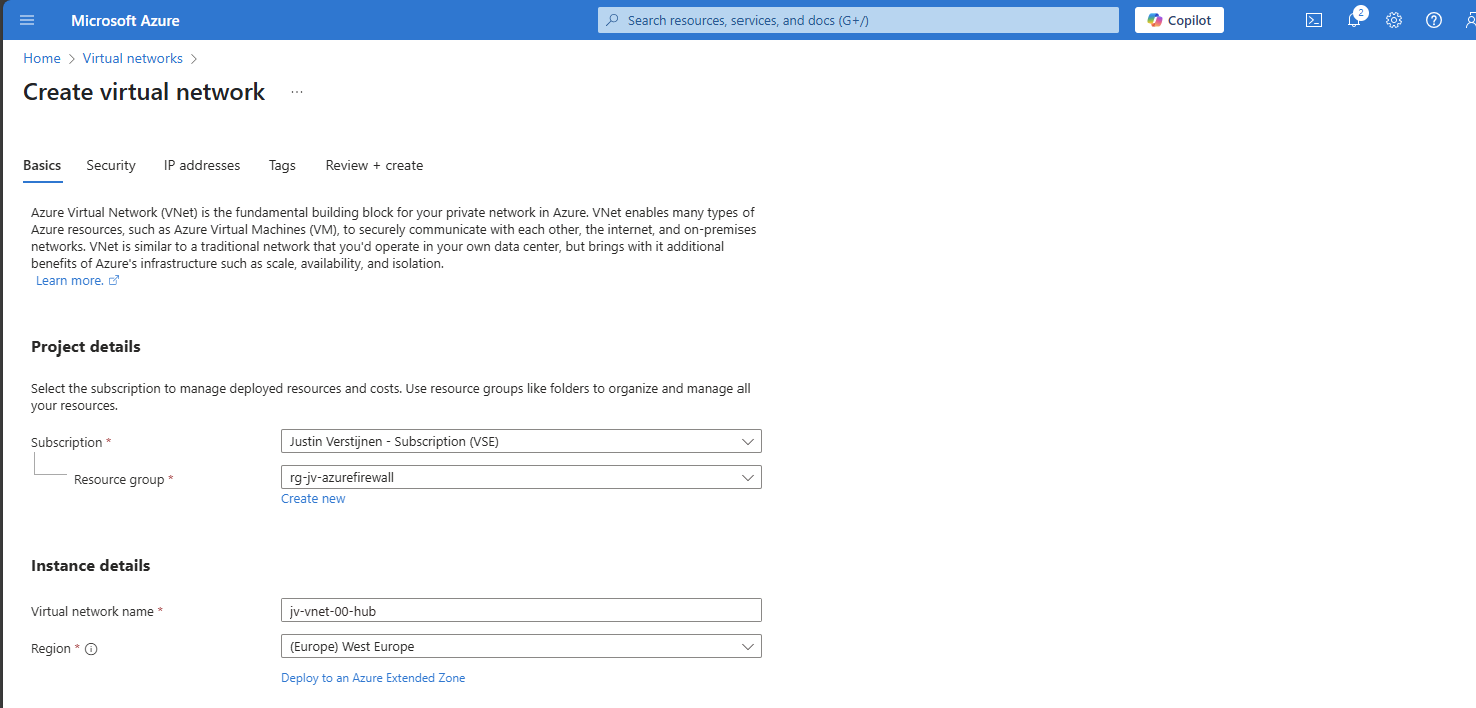
Create a new virtual network which we will configure as hub of our Azure network. This is a big network where the Azure Firewall instance will reside.
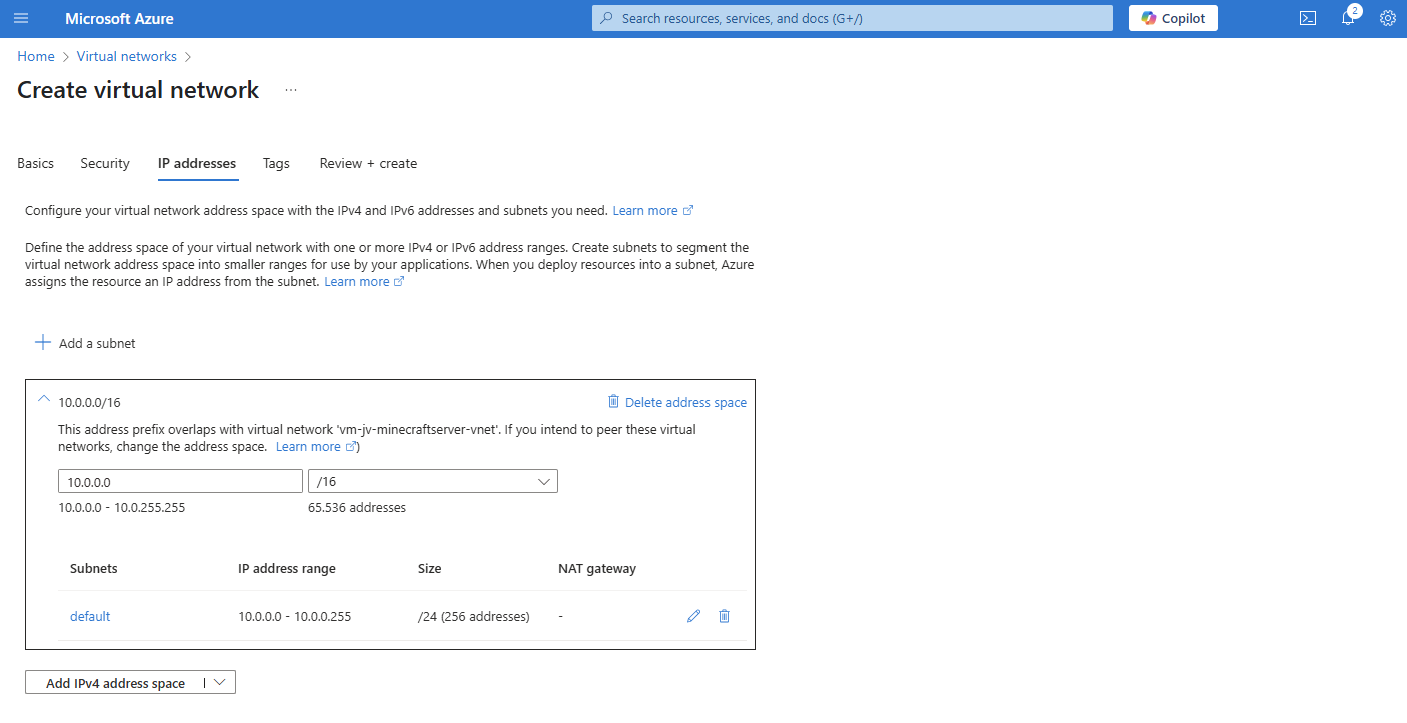
For the IP addresses, ensure you choose an address space that is big enough for your network. I chose for the default /16 which theoretically can host 65.000 addresses.
Finish the wizard and create the network.
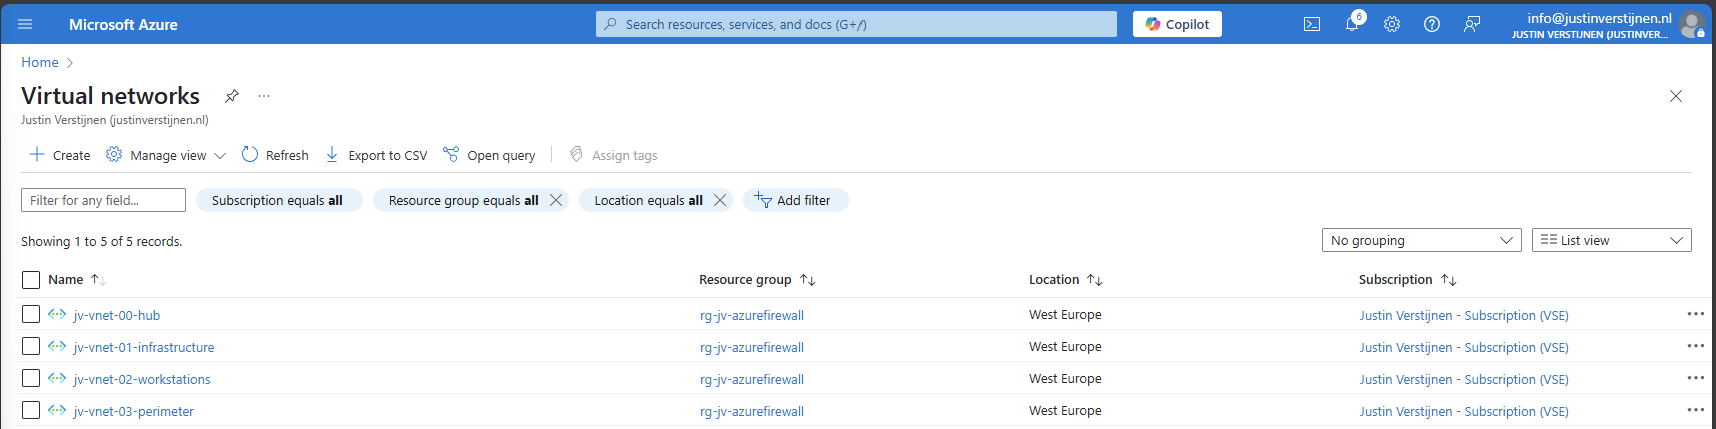
Creating the spoke networks in Azure
Now we can create the other spoke networks in Azure where the servers, workstations or other devices can live.
Create the networks and select your preferred IP address ranges.
Peering the networks
Now that we have all our IP ranges in place, we can now peer all spoke networks with our hub. We can do this the most efficient way by going to the Hub network and creating the peers from there:
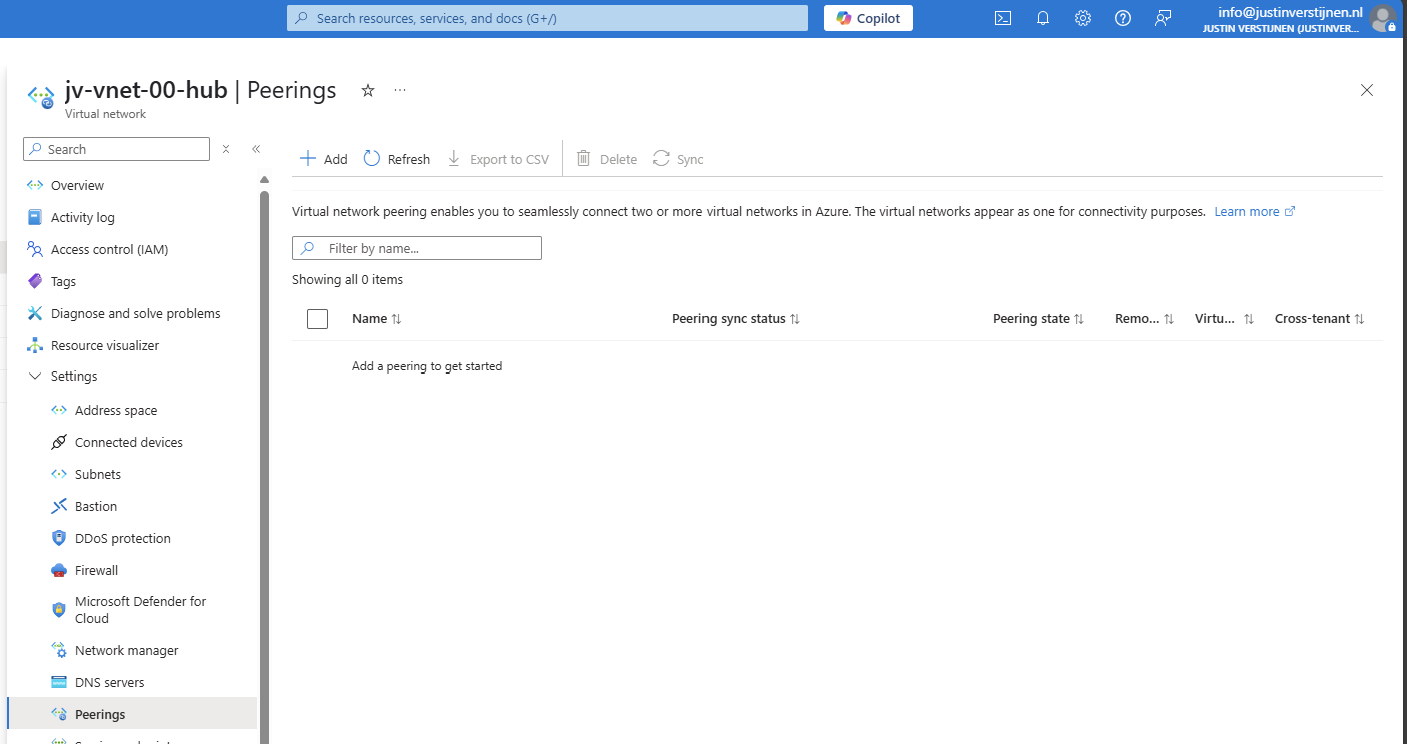
Create a new peering here.
Peering settings
The peerings are “cables” between the networks. By default, all networks in Azure are isolated and cannot communicate with each other. This by default would make it impossible to have a Firewall in another network as your servers and workstations.
We have to create peerings with the following settings:
| Setting name | Hub to Spoke | Spoke to Hub |
| Allow the peered virtual network to access *remote vnet* | Enabled | Enabled |
| Allow the peered virtual network to receive forwarded traffic from *remote vnet* | Enabled | Disabled |
| Allow gateway or route server in the peered virtual network to forward traffic to *remote vnet* | Disabled | Disabled |
| Enable the peered virtual network to use *remote vnet*’s remote gateway or route server | Disabled | Disabled |
Now we know how to configue the peerings, let’s bring this in practice.
Remote Network configuration (Spoke to Hub)
The wizard starts with the configuration of the peering for the remote network:
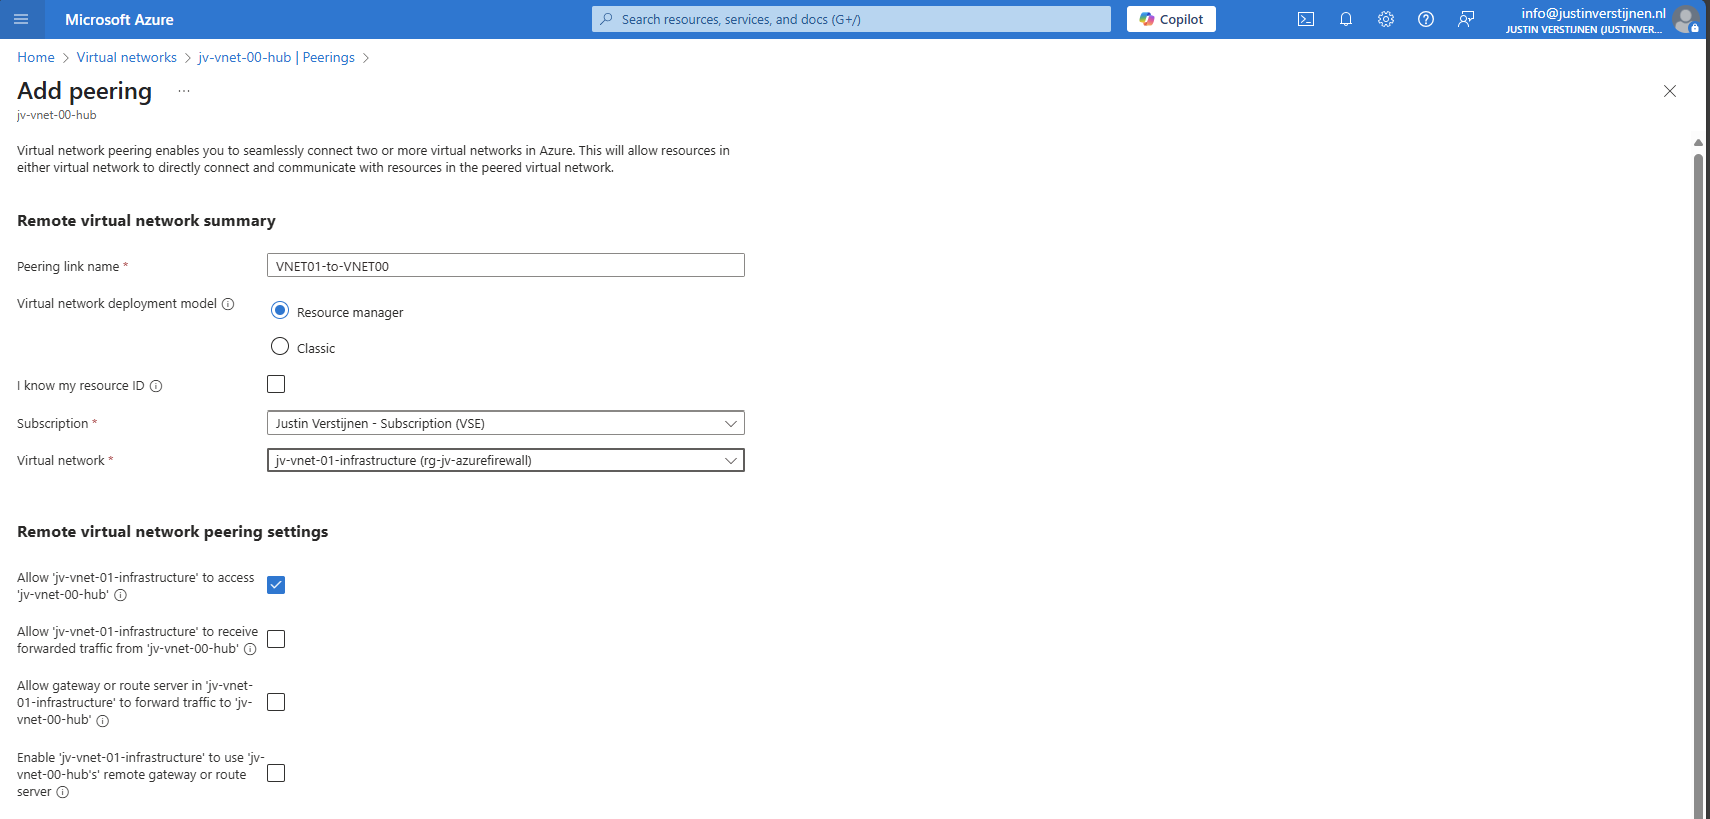
For the peering name, I advice you to simply use:
VNETxx-to-VNETxx
This makes it clear how the connections are. Azure will create the connection both ways by default when creating the peering from a virtual network.
Local Network configuration (Hub to Spoke)
Now we have to configure the peering for the local network. We do this according to the table:
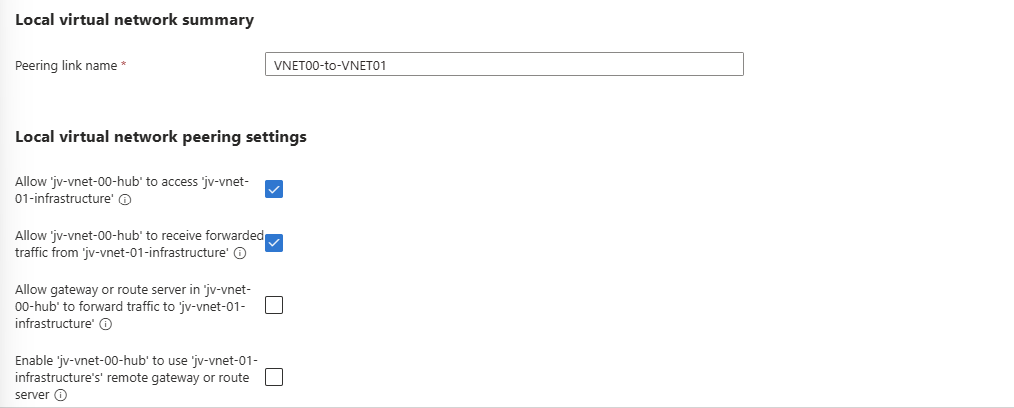
After these checks are marked correctly, we can create the peering by clicking on “Add”.
Do this configuration for each spoke network to connect it to the hub. The list of peered networks in your Hub network must look like this:
Now the foundation of our network is in place.
Creating the Azure Firewall subnet
Azure Firewall needs a subnet for management purposes which we have to create prior to creating the instance.
We can do this very easily by going to the Hub virtual network and then go to “Subnets”. Click on “+ Subnet” to create a subnet from template:
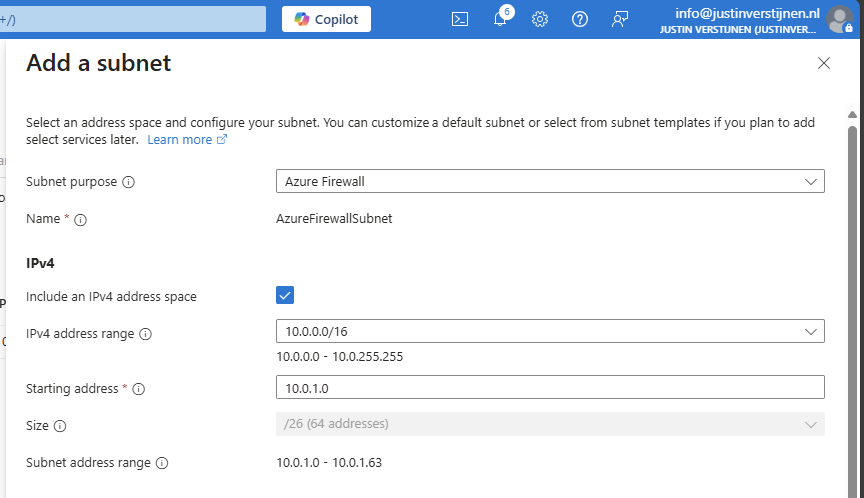
Select the “Azure Firewall” subnet purpose and everything will be completed automatically.
Creating a Azure Firewall Management Subnet
If you select the “Basic” SKU of Azure Firewall or use “Forced tunnling”, you also need to configure a Azure Firewall Management subnet. This works in the same way:
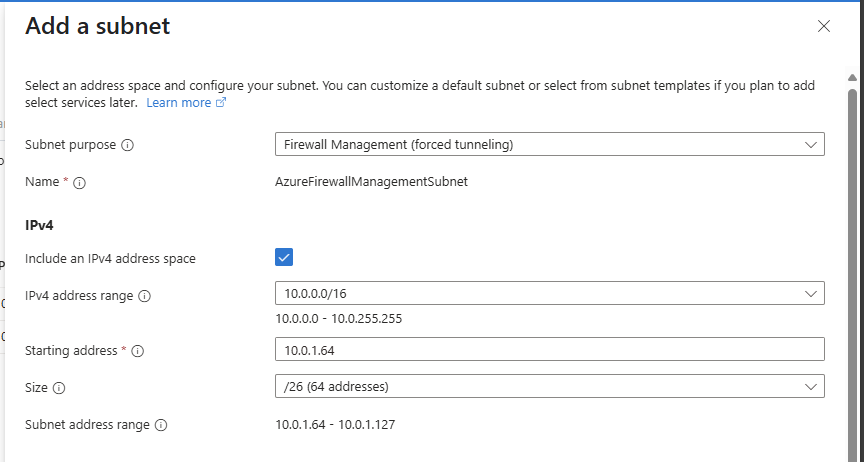
Select the “Firewall Management (forced tunneling)” option here and click on “Add” to create the subnet.
We are now done with the network configuration.
Creating the Azure Firewall instance
We can now start with Azure Firewall itself by creating the instance. Go to “Firewalls” and click on “+ Create” to create a new firewall. In this guide, I will create a Basic Firewall instance to show the bare minimum for its price.
Fill in the wizard, choose your preferred SKU and at the section of the virtual network choose to use an existing virtual network and select the created hub network.
After that create a new Firewall policy and give it a name:
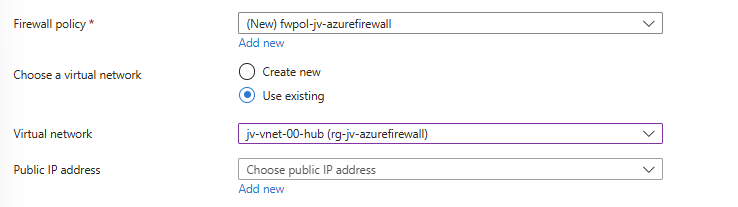
Now configure the public IP addresses for the firewall itself and the management IP address:
- Public IP address: This is used as the front door of your network, connecting to a server in your network means connecting to this IP
- Management Public IP address: This is the IP address used for management purposes
The complete configuration of my wizard looks like this:
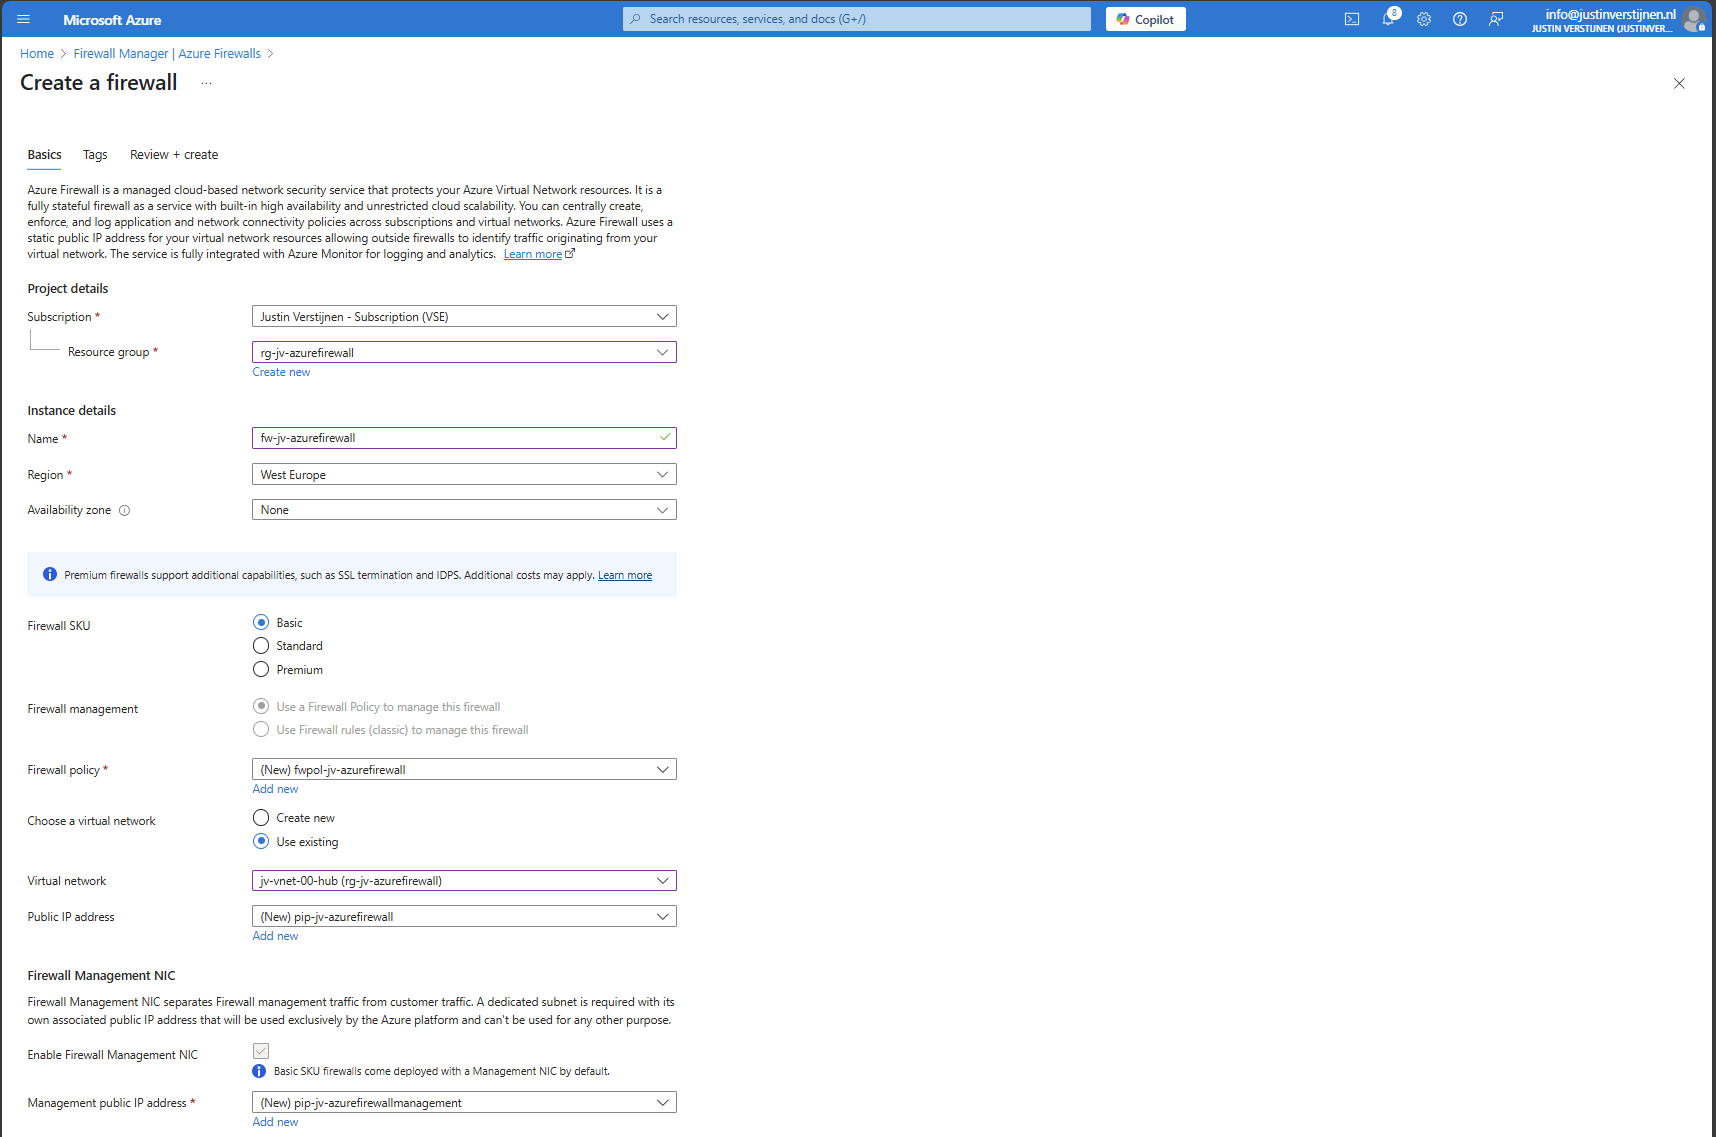
Now click on “Next” and then “Review and Create” to create the Firewall instance.
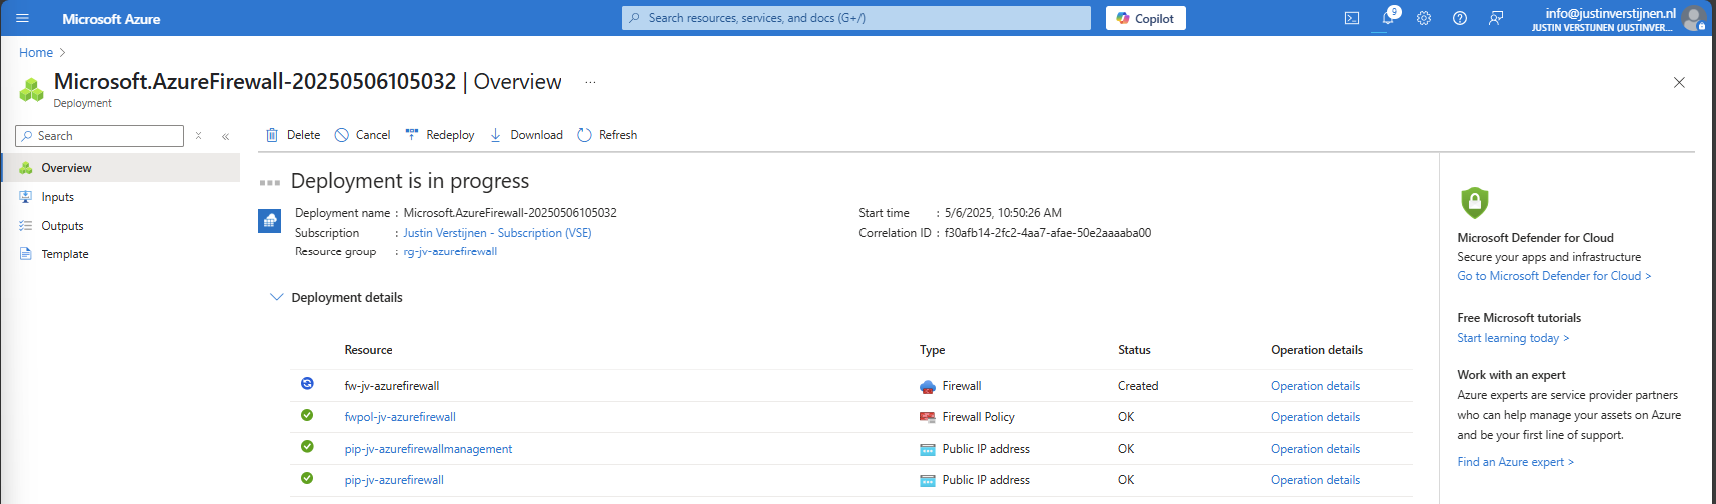
This will take around 5 to 10 minutes.
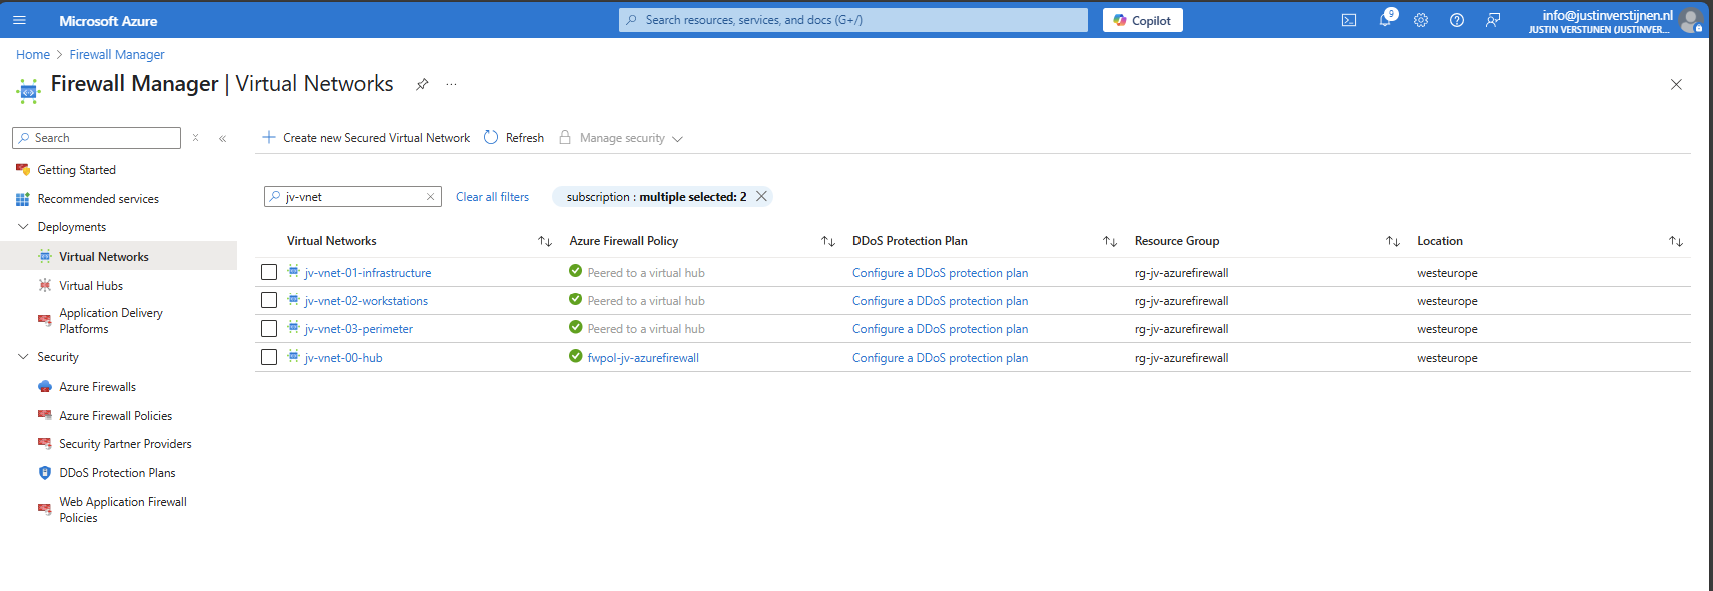
After the Firewall is created, we can check the status in the Firewall Manager:
And in the Firewall policy:
Creating routing table to route traffic to Firewall
Now that we have created our Firewall, we know it’s internal IP address:
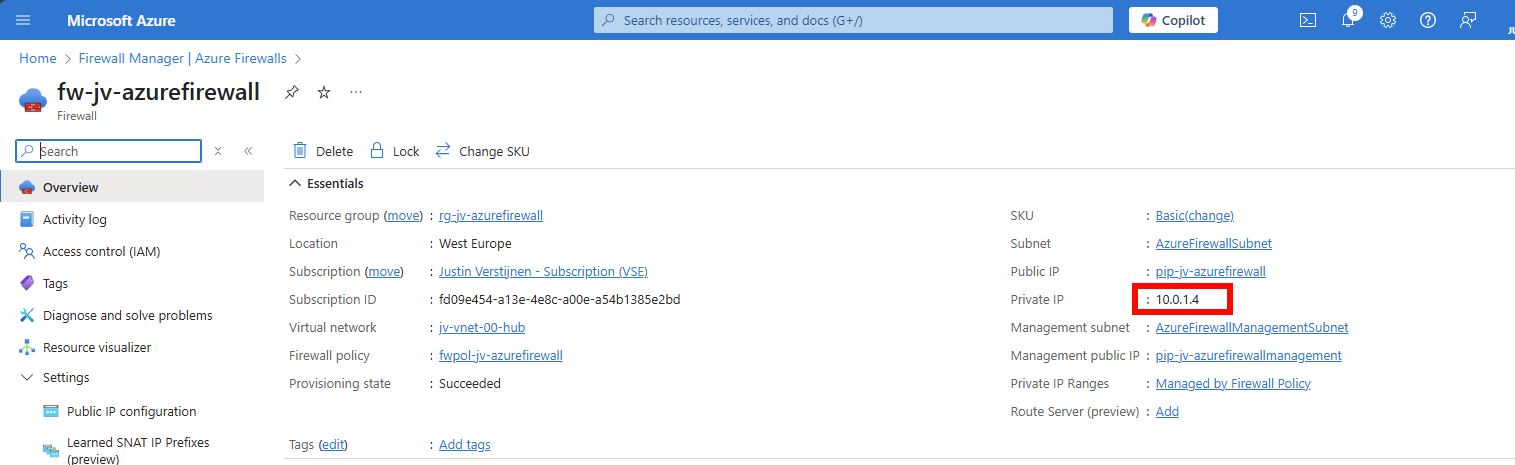
We have to tell all of our Spoke networks which gateway they can use to talk to the outside world. This is done by creating a route table, then a route and specifying the Azure Firewall instance.
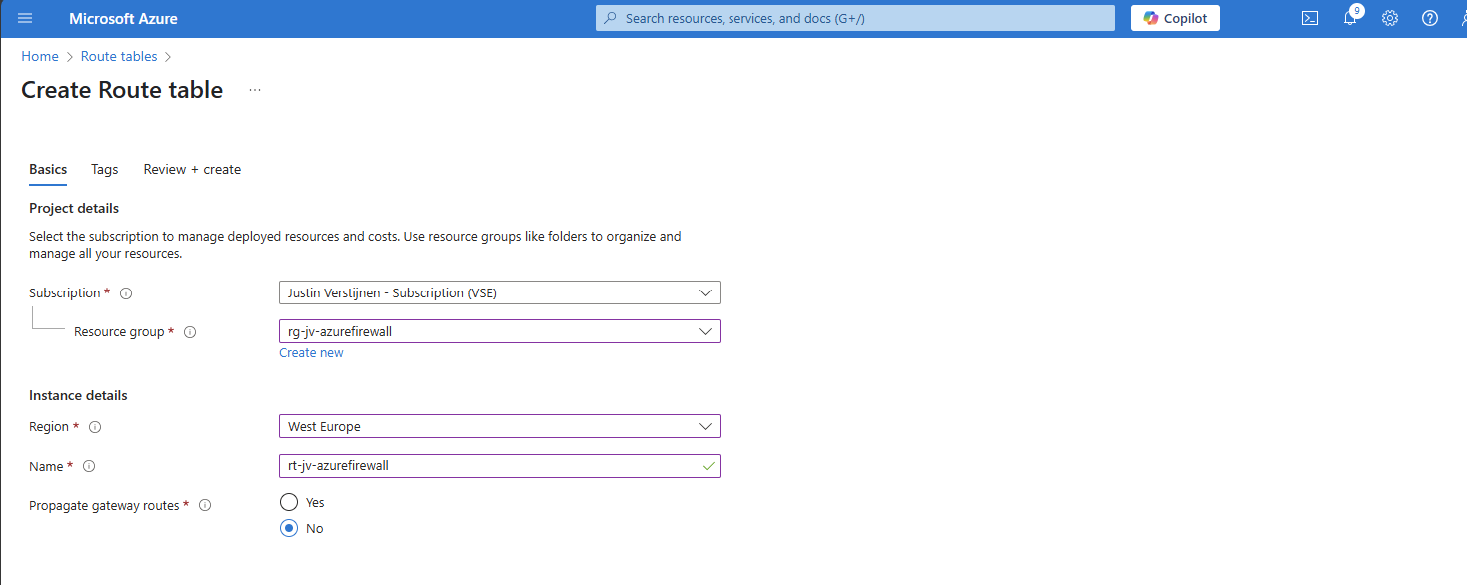
Go to “Route Tables” and create a new route table. Give it a name and place it in the same region as your networks:
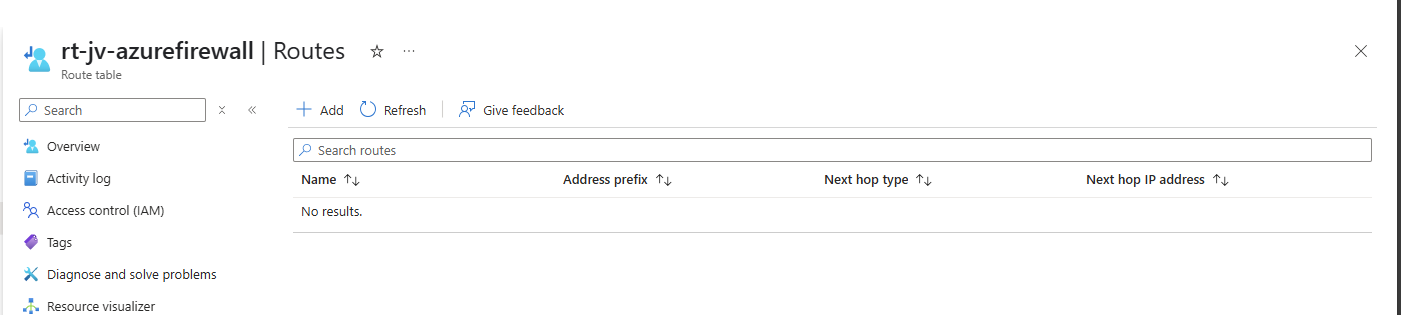
After this is done, we kan open the Route table and add a route in the Routes section:
Configure the route:
- Route name: Can be something of your own choice
- Destination type: IP addresses
- Destination IP addresses/CIDR ranges: 0.0.0.0/0 (internet)
- Next hop type: Virtual Appliance
- Next hop address: Your private IP addresss of Azure Firewall
Create the route. Now go to the “Subnets” section, because after creating the route, we must speficy which networks will use it.
In “Subnets”, click on “+ Associate” and select your spoke networks only. After selecting, this should look like this:
Now outbound traffic of any resource in those spoke networks is routed through the firewall and we can start applying our own rules to it.
Creating Network Rule collection
We can now start with creating the network rules to start and allow traffic. Azure Firewall embraces a Zero Trust mechanism, so every type of traffic is dropped/blocked by default.
This means we have to allow traffic between networks. Traffic in the same subnet/network however does not travel through the firewall and is allowed by default.
Go to your Firewall policy and go to “Rule Collections”. All rules you create in Azure Firewall are placed in Rule collections which are basically groups of rules. Create a new Rule collection:
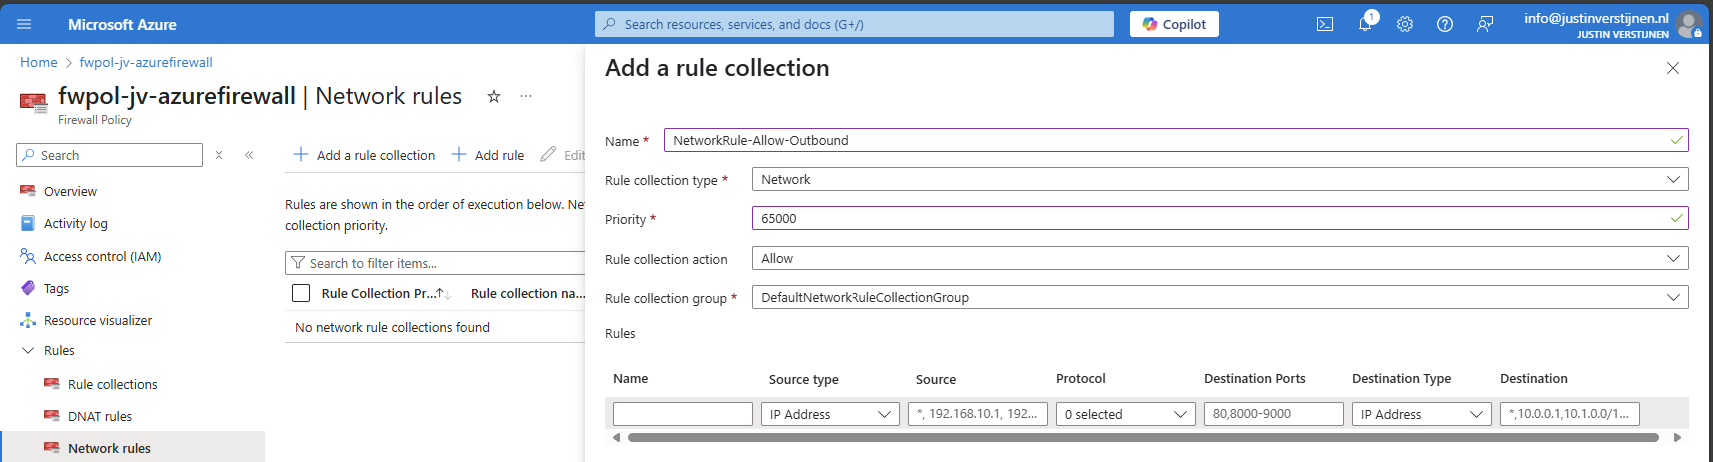
I create a network rule collection for all of my networks to allow outbound traffic. We can also put the rules of inter-network here, these are basically outbound in their own context.
The action of the rules is defined in the collection too, so you must create different collections for allowing and blocking traffic.
I also put the priority of this collection group on 65000, which means it is being processed as final. If we create rules with a number closer to 100, that is processed first.
Creating Network rules to allow outbound traffic
Now that we have our Network rule collection in place, we can create our rules to allow traffic between networks. The best way is to make rules per VNET, but you can specify the whole address space if you want. I stick with the recommend way.
Go to the Firewall Policy and then to “Network rules” and select your created network rule collection.
Create a rule to allow your created VNET01 outbound access to the internet.
| Name | Of your choice |
| Source type | 10.1.0.0/16 |
| Protocol | Any |
| Destination ports | * (all ports) |
| Destination type | IP Address |
| Destination | * (all IP addresses) |
Such rule looks like this:
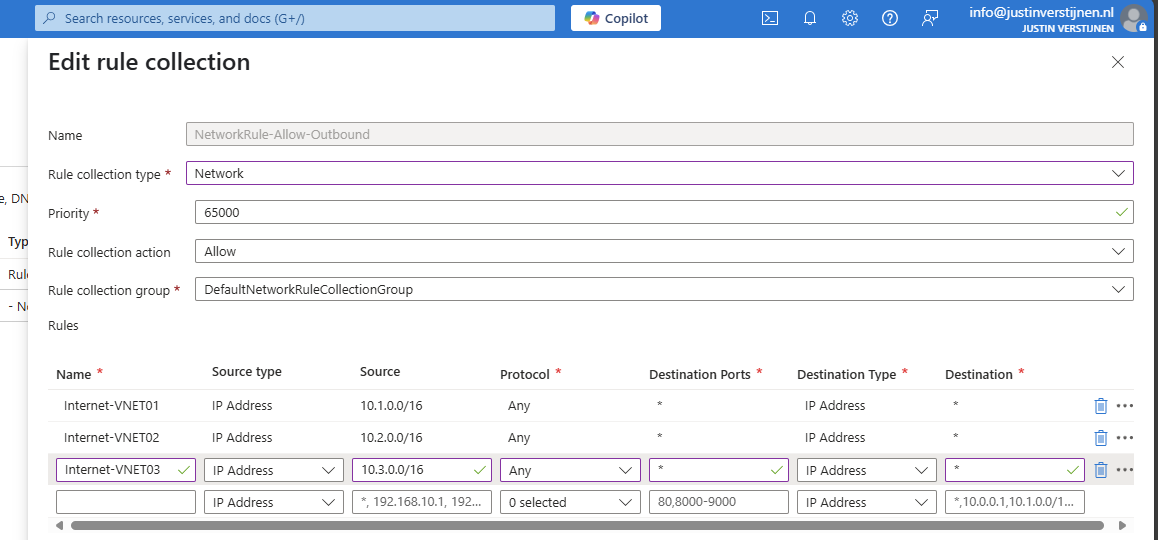
I created the rules for every spoke network (VNET01 to VNET03). Keep in mind you have to change the source to the address space of every network.
Save the rule to make it effective.
Creating Network rules to block Perimeter network
Now we can create a network rule to block the Perimeter network to access our internal network, which we specified in our architecture. We must create a rule collection for block-rules first:
Go to Rule collections and create a new rule collection:
- Name: Of your choice
- Rule collection type: Network
- Priority: 64000 (lower than our allow rules)
- Rule collection action: Deny
- Rule Collection Group: DefaultNetworkRuleCollectionGroup
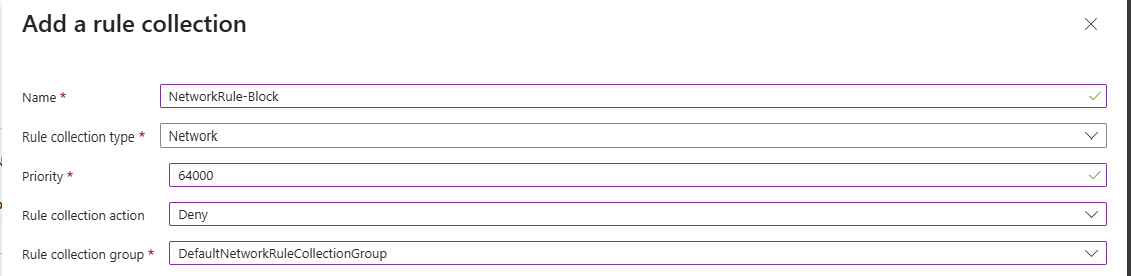
The most important are the priority and the action, where the priority must be closer to 100 to make it effective above the allow rules and the action to block the traffic.
Now create rules to block traffic from VNET03 to all of our spoke networks:
| Name | Of your choice |
| Source type | 10.3.0.0/16 |
| Protocol | Any |
| Destination ports | * (all ports) |
| Destination type | IP Address |
| Destination | 10.1.0.0/16 and 10.2.0.0/16 |
Create 2 rules to block traffic to VNET01 and VNET02:

Save the rule collection to make it effective.
Creating DNAT rule collection
For access from the outside network to for example RDP of servers, HTTPS or SQL we must create a DNAT rule collection for DNAT rules. By default all inbound traffic is blocked, so we must specify only the ports and source IP addresses we need to allow.
Go to the Firewall policy and then to “Rule collections”. Create a new rule collection and specify DNAT as type:
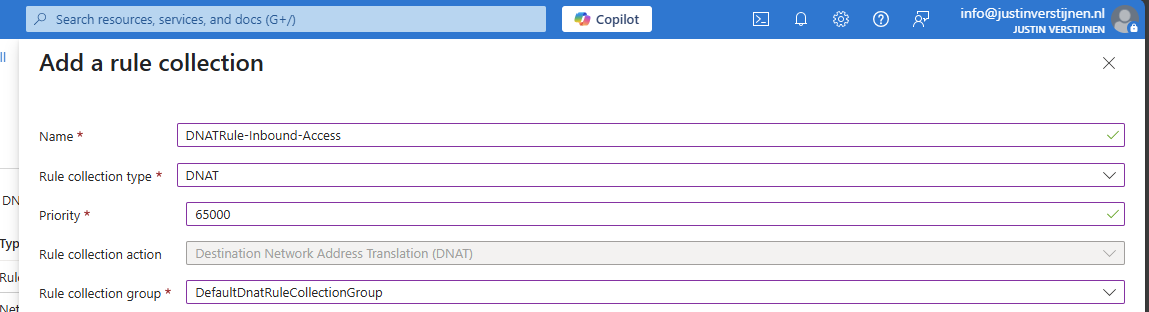
I chose a priority of 65000 because of broad rules. DNAT rules have the higest priority over network and application rules.
Create the rule collection.
Creating DNAT rules
Now we can create DNAT rules to allow traffic from the internet into our environment. Go to the just created DNAT rule collection and add some rules for RDP and HTTPS:
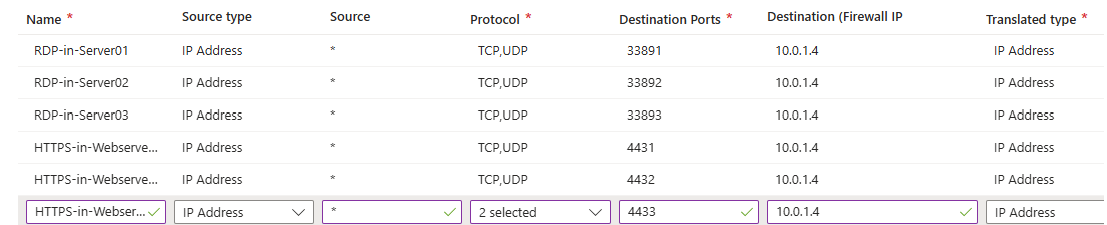
Part 2:
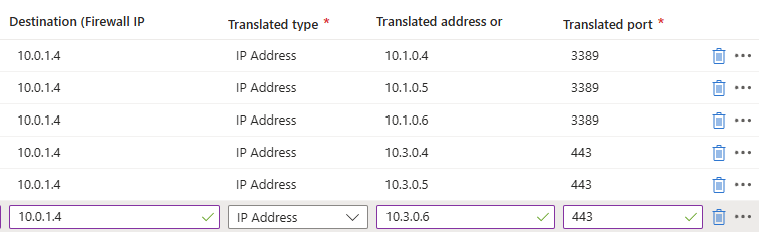
Here we have to specify which traffic from which source can access our internal servers. We can also do some translation here, with a different port number for internal and external networks. I used a 3389-1, 3389-2 and 3389-3 numbering here for the example but for real world scenario’s I advice a more scalable numbering.
So if clients want to RDP to Server01 with internal IP address 10.1.0.4, they connect to:
- 52.233.190.130:33891
- And is translated to 10.1.0.4 with port 3389
For DNAT rules, you need Standard or Premium SKU of Azure Firewall.
Creating Application rule collection
WIth application rules, you can allow or block traffic based on FQDNs and web categories. If using application rules to allow or block traffic, you must ensure there is no network rule in place, because that takes presedence over application rules.
To block a certain website for example create a new Rule collection for Application and specify the action “Deny”.
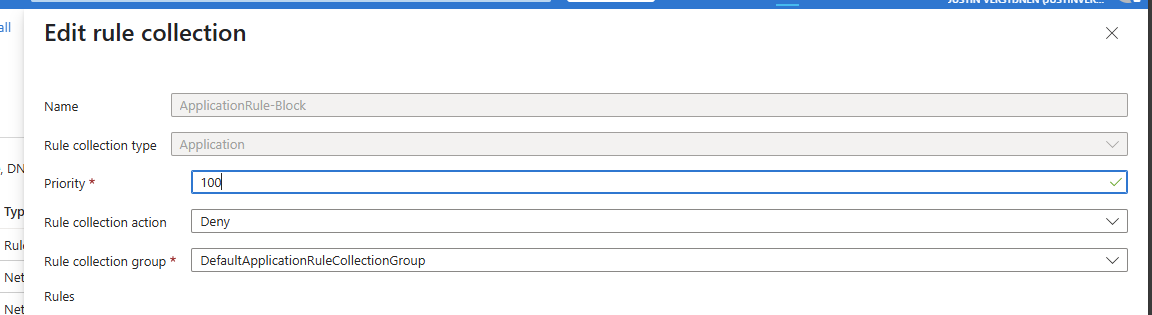
Save the collection and advance to the rules.
Creating Application rules
Now we can create some application rules to block certain websites:

For example I created 2 rules which block access from the workstations to apple.com and vmware.com. Make sure when using application rules, there has to be another rule in place to allow traffic with a higher priority number (closer to 65000)
Summary
Azure Firewall is a great solution for securing and segmenting our cloud network. It can defend your internal and external facing servers against attacks and has some advanced features with the premium SKU.
In my opinion, it is better than managing a 3rd party firewall in a seperate pane of glass, but the configuration is very slow. Every addition of a rule or collection takes around 3 or 4 minutes to apply. The good thing about this is that they are instantly applied after being saved.
I hope this guide was helpful and thank you for reading.
Sources
These sources helped me by writing and research for this post;
End of the page 🎉
You have reached the end of the page. You can navigate through other blog posts as well, share this post on X, LinkedIn and Reddit or return to the blog posts collection page. Thank you for visiting this post.
If you think something is wrong with this post or you want to know more, you can send me a message to one of my social profiles at: https://justinverstijnen.nl/about/
If you find this page and blog very useful and you want to leave a donation, you can use the button below to buy me a beer. Hosting and maintaining a website takes a lot of time and money. Thank you in advance and cheers :)

The terms and conditions apply to this post.