How to upload PowerShell script to Gallery with Github Actions
Categories:
8 minute read
When using the PowerShell Gallery to upload and publish your scripts and PowerShell modules to the world it’s recommended to use Github Actions for CI/CD to automatically update your live packages on the PowerShell Gallery. At first, this looked somewhat complex to me but it’s relatively easy.
On this page I will show how I’ve uploaded scripts from Github to the PowerShell Gallery with using a Github Action.
Requirements
- Around 30 minutes of your time
- Github account
- Powershell Gallery account
- A PowerShell script for testing to actually upload to the PowerShell Gallery
Introduction to PowerShell Gallery
In short, the PowerShell Gallery is a public repository which contains PowerShell scripts and modules which all PowerShell users can download and install. All of this using some simple commands:
Install-Module ExchangeOnlineManagementThe official “ExchangeOnlineManagement” module is an example of a module dat is uploaded to the gallery which can be download. Before installing, the user needs administrative permissions, the Powershell execution policy applies and we have to accept downloading from the repository.
It has a report-system where malicious scripts and modules can get reported and the deleted, so we can state that it’s pretty secure to use the PowerShell Gallery.
Introduction to Github and Github Actions
Github is a industry-accepted repository hosting service. This allows you to create a repository for a custom solution which you have created, which can be complete applications, source code but in our case a Powershell script. The goal of Github is to publish your source code so others can use and learn from it. You can also create private repositories to share with only specific users.
Github Actions
Inside our Github repository, we have Github Actions which can automate processes for us. As we want to develop using Github, we want our new version automatically pushed to the PowerShell Gallery. Github Actions can do this for us.
The action automatically kicks in every time a file in your repository is changed:
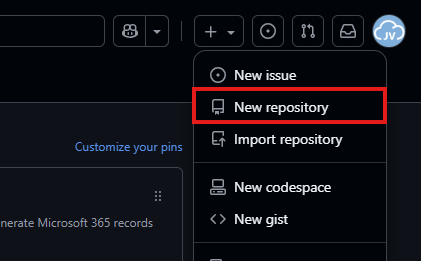
Step 1: Create a repository
Assuming you have a PowerShell script which is ready to upload to the PowerShell Gallery, we must first create a Github repository. Head to Github to do this.
In the top-right corner, click on the “+” button and then on “New repository”.
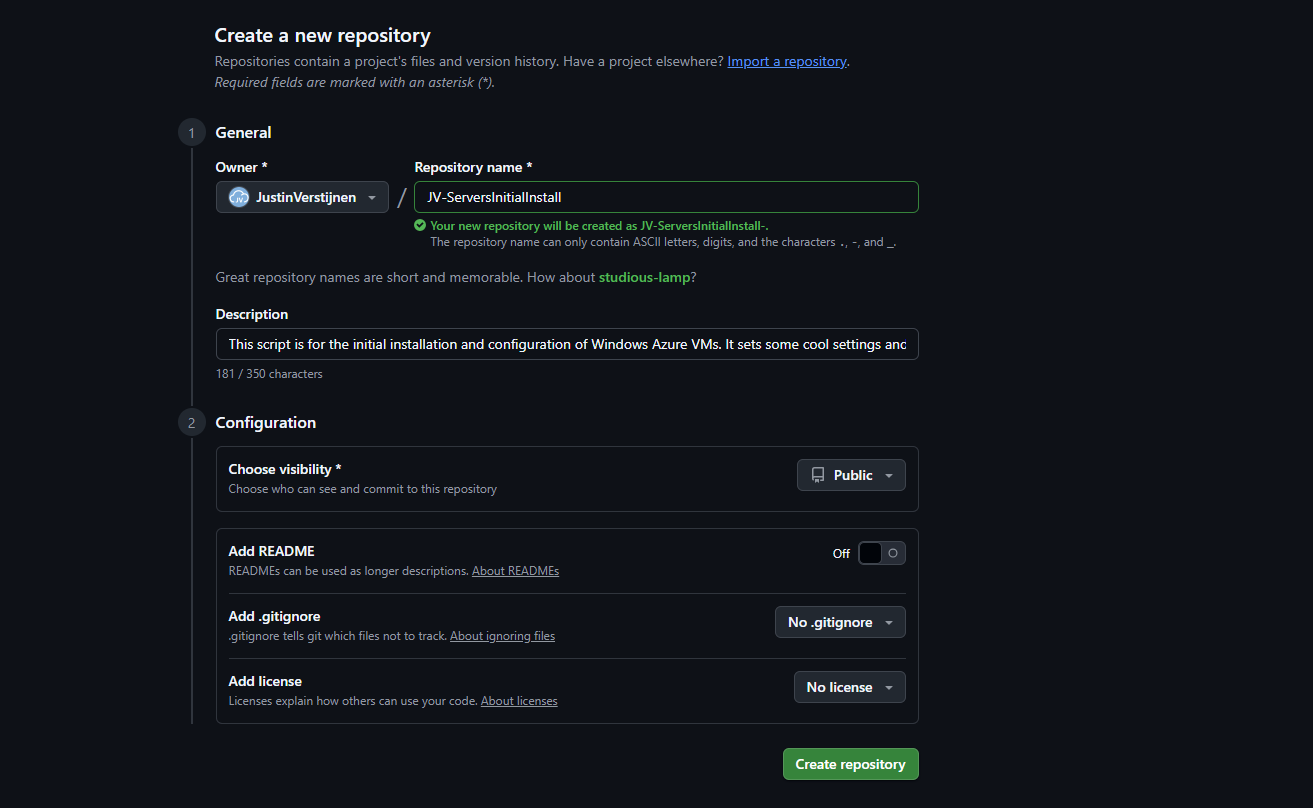
Give the repository a name and description, and determine the visibility. Then press “Create repository”.
For this solution to work, the repository can be either Public or Private. As we upload our script to a public reposity, we can also set this to “Public”. This gives users access to the “source code”.
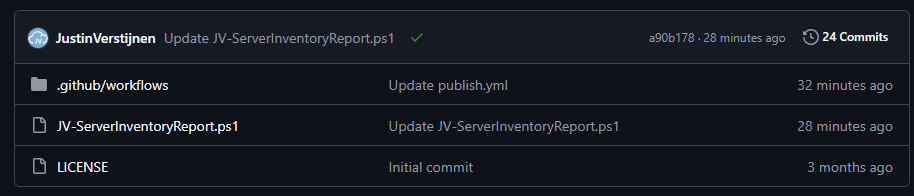
Now the repository is created, and we can upload our PowerShell script to it.
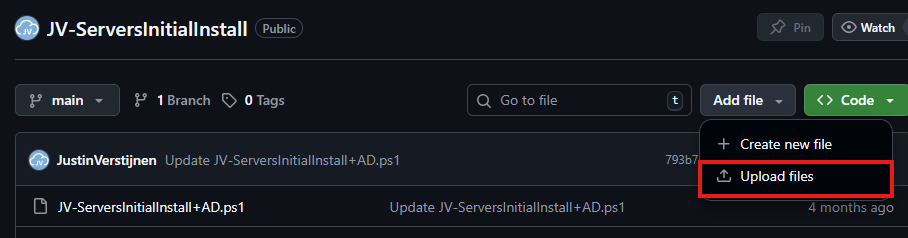
Select the script on your local machine, change the name and upload it to Github.
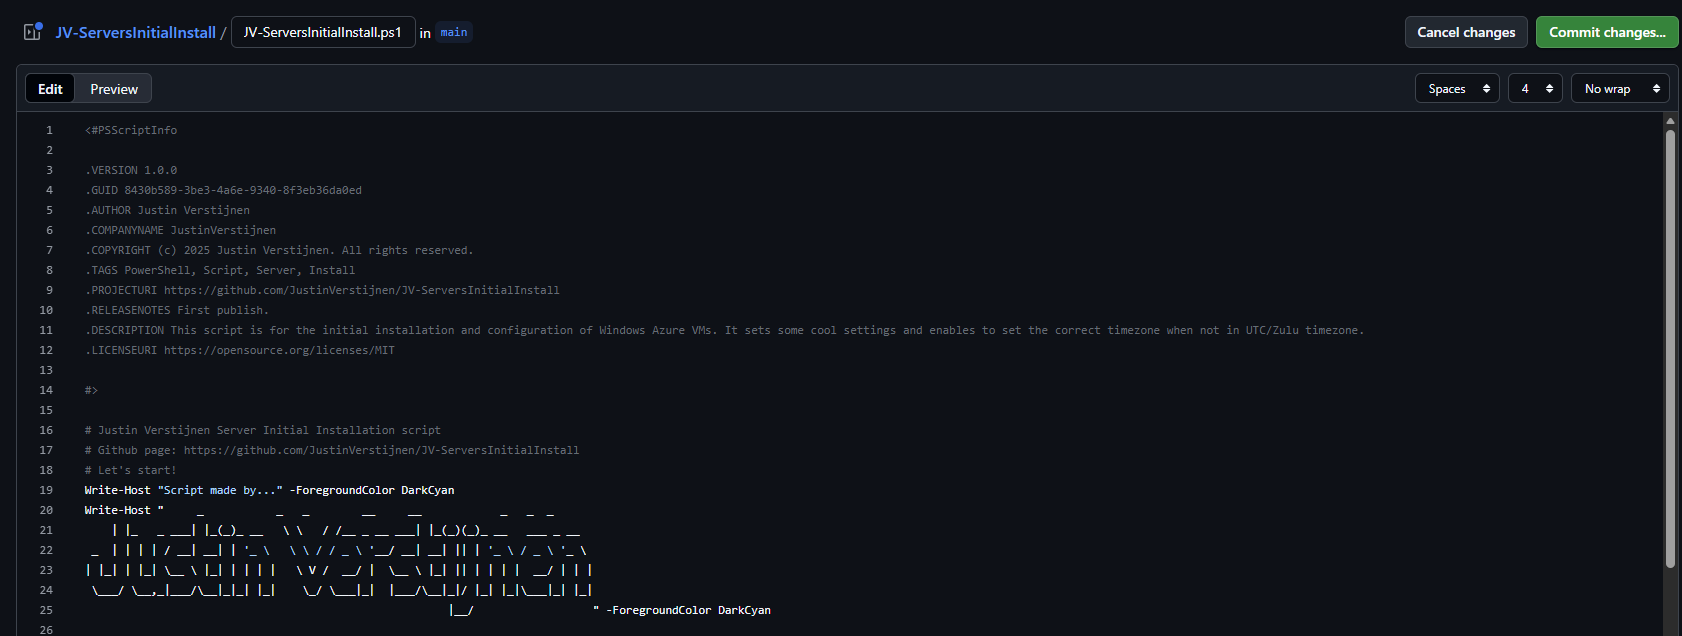
Step 2: Alter script for use with PowerShell Gallery
Because we upload our script to a public repository, we must define some metadata in our script. This includes an Author, tags, description and version number and such.
In Github, change your script and add this part to the top of the .ps1 file
<#PSScriptInfo
.VERSION 1.0.0
.GUID fb0384df-0dd8-4a57-b5e5-d3077c30a404
.AUTHOR Justin Verstijnen
.COMPANYNAME JustinVerstijnen
.COPYRIGHT (c) 2025 Justin Verstijnen. All rights reserved.
.TAGS PowerShell, Script, Example
.PROJECTURI https://github.com/JustinVerstijnen/JV-ServerInventoryReport
.RELEASENOTES First publish.
.DESCRIPTION A good description of your script
.LICENSEURI https://opensource.org/licenses/MIT
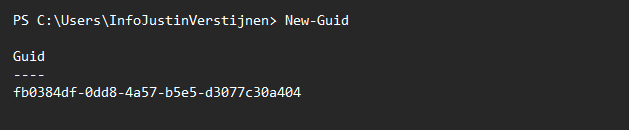
#>Change the information, and generate a new GUID with your own Powershell window:
New-GuidPowershell then generates a new GUID for you to use in your script:
My script looks like this now:
When you are done pasting and changing the script information, we can save the changes by pressing “Commit changes” twice.
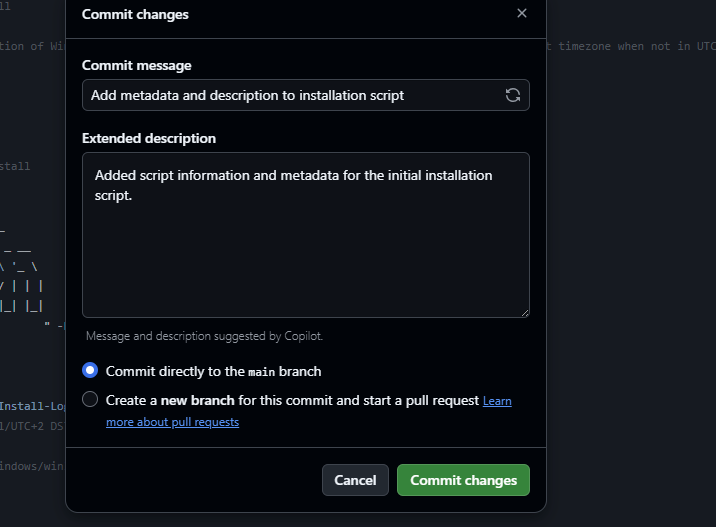
Press again to change the file, and we have prepared our script to be uploaded.
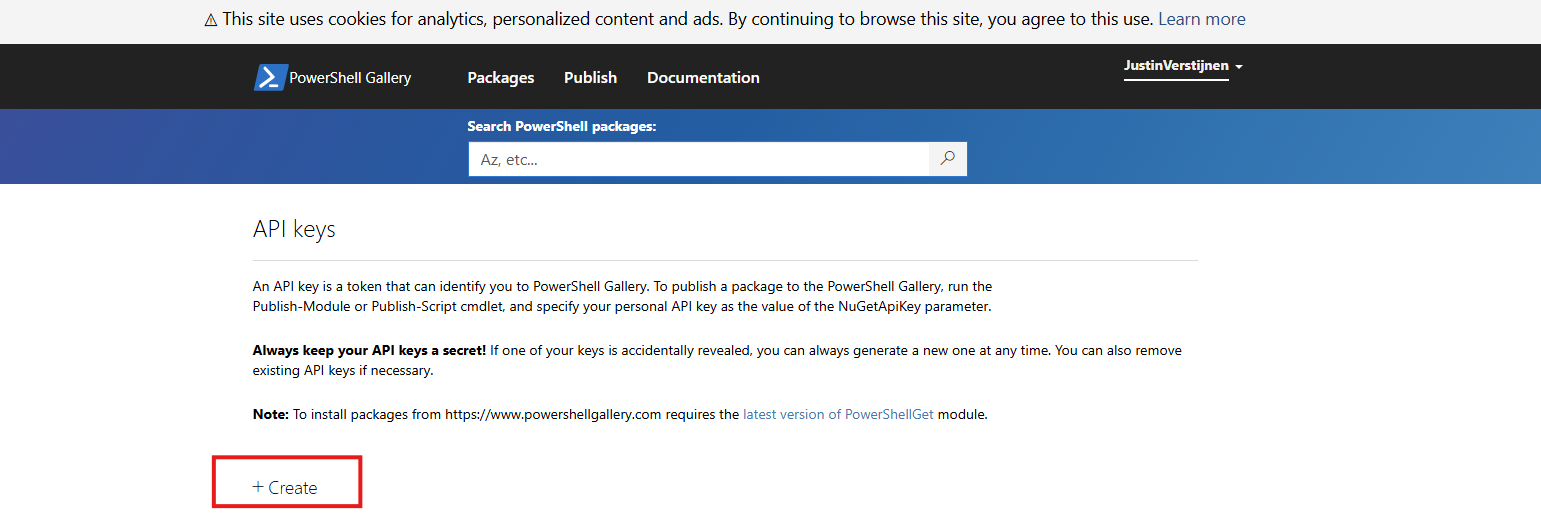
Step 3: Create an Powershell Gallery API key
For Github to have access to our PowerShell Gallery account, we must create an API key. Head to the PowerShell Gallery.
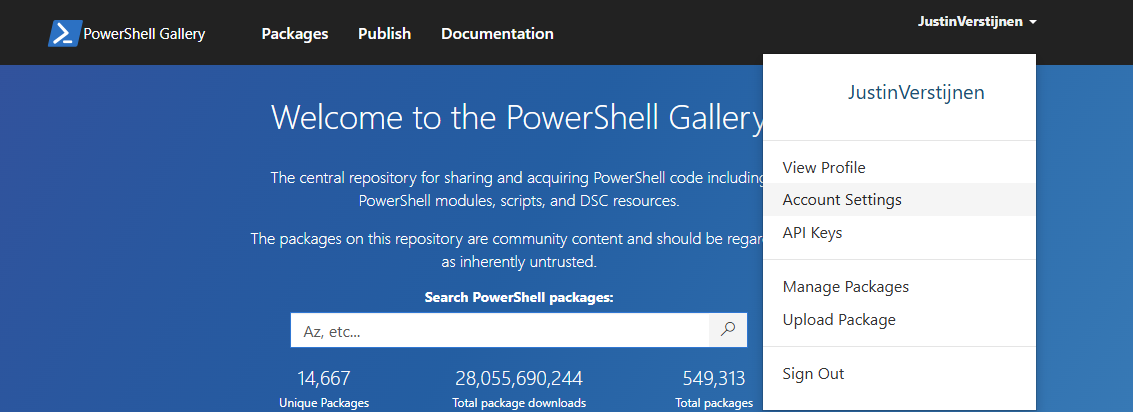
Go to “API Keys”. Then click on “Create”.
Now we have to fill in some information. In general, it is best-practice to create an API key for every project/repository.
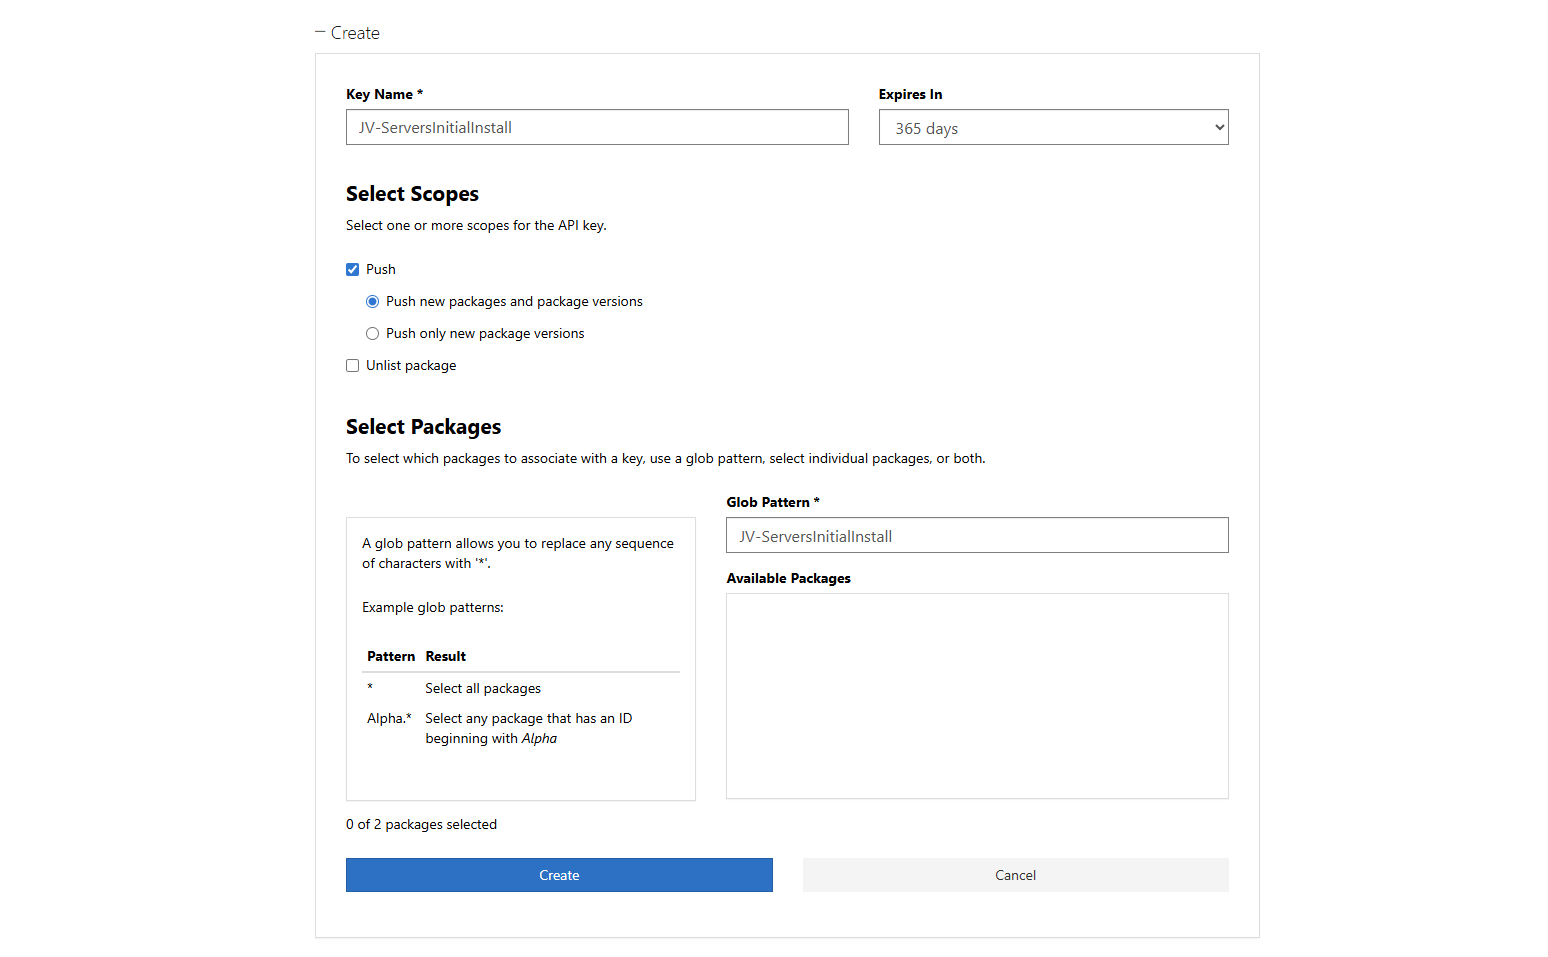
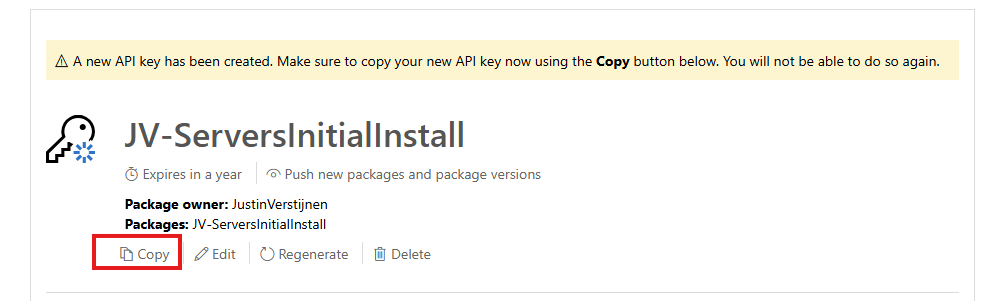
Click “Create” and that gives you the API key. You can only get the key now, so save it in a safe place like your Password manager.
We need this API key in the next step.
Step 4: Insert the API key
Now let’s head back to Github to insert our API key.
In your Github repository, go to “Settings”, then “Secrets and variables” and then create a new repository secret.
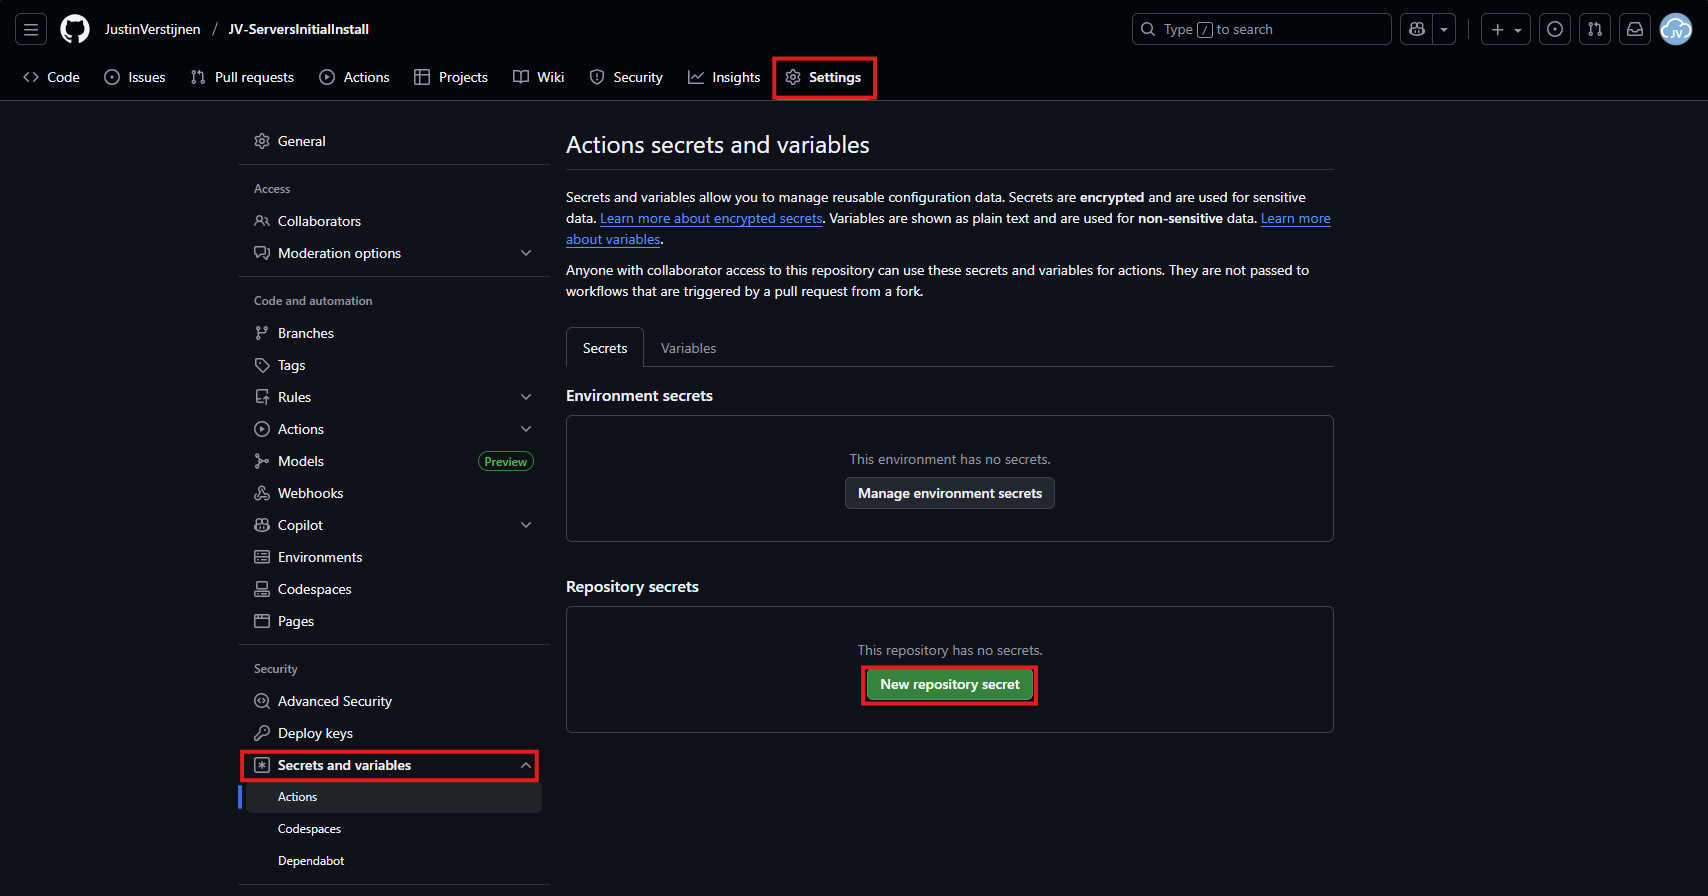
In the “Name” field, paste this:
PSGALLERY_API_KEYIn the “Secret” field, paste your just saved API key:
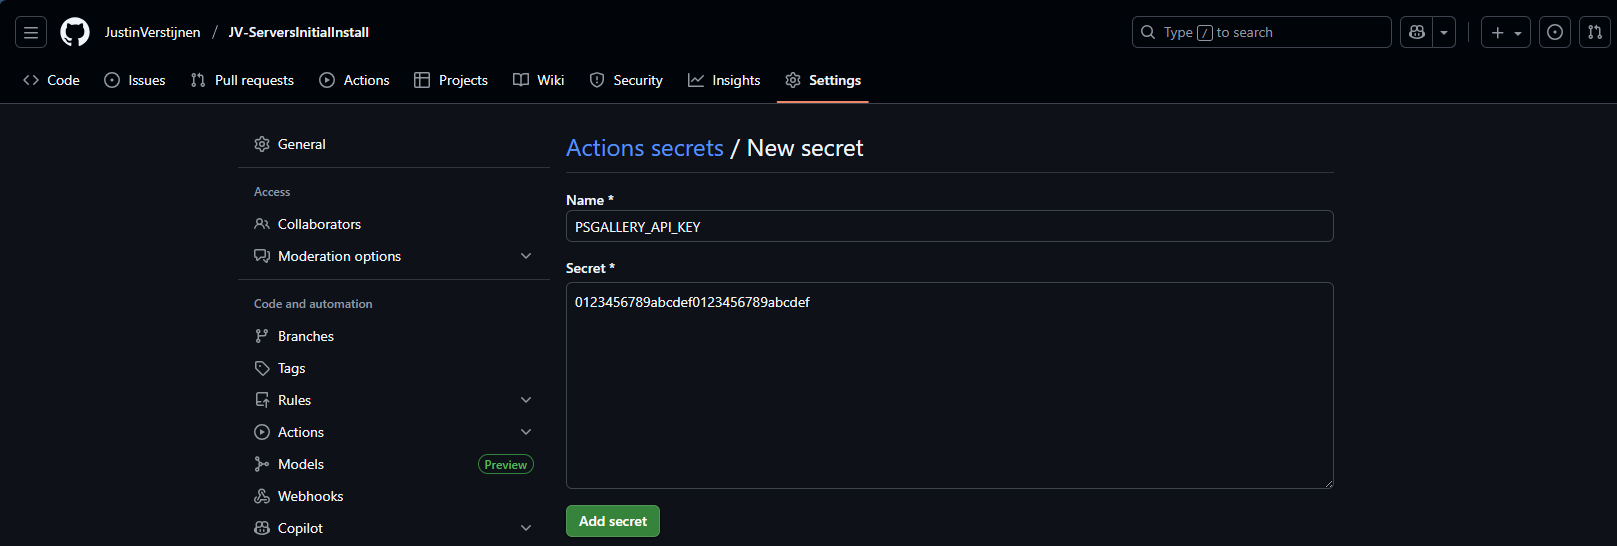
Click on “Add secret” to add the secret to your repository.
The API key is saved secretly, and in the code we refer to this secret. This is a best-practice to save API keys instead of plain text in your public code.
Step 5: Create your Github Action
Now we have the API key inserted, head back to the repository on Github and let’s create the Github Action that pushes our script automatically to the PowerShell Gallery.
An action is completely based on a single .yml (YAML) file which executes everytime the repository is changed. We will create this file now.
Click on “Add file” and then the option “Create new file”:
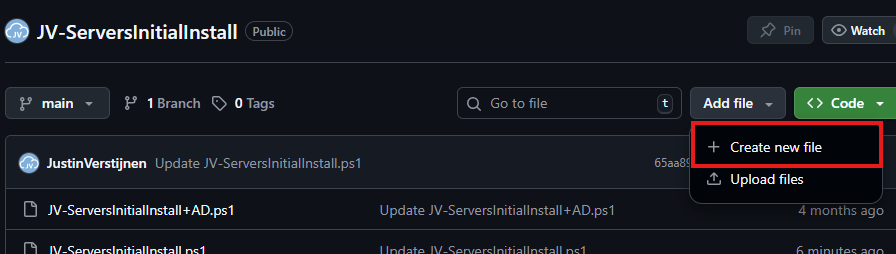
In the top-left corner, type or paste in:
.github/workflows/publish.ymlThen paste in this code below, which is a completely prepared action for exactly this use-case:
name: Publish PowerShell Script to PowerShell Gallery

on:
  push:
    branches:
      - main
    paths:
      - '**/*.ps1'
      - '.github/workflows/publish.yml'

jobs:
  publish:
    runs-on: windows-latest

    env:
      # Variables (change this to your script)
      SCRIPT_NAME: JV-ServersInitialInstall
      SCRIPT_PATH: ./JV-ServersInitialInstall.ps1
      DISPLAY_NAME: JV-ServersInitialInstall
      PSGALLERY_SECRET: ${{ secrets.PSGALLERY_API_KEY }}

    steps:
      - name: Checkout repository
        uses: actions/checkout@v4

      - name: Ensure NuGet and PowerShellGet are available
        shell: pwsh
        run: |
          Set-PSRepository -Name "PSGallery" -InstallationPolicy Trusted
          [Net.ServicePointManager]::SecurityProtocol = [Net.SecurityProtocolType]::Tls12

          if (-not (Get-PackageProvider -Name NuGet -ErrorAction SilentlyContinue)) {
              Install-PackageProvider -Name NuGet -MinimumVersion 2.8.5.201 -Force
          }

          Install-Module PackageManagement -Force -AllowClobber -Scope CurrentUser
          Install-Module PowerShellGet -Force -AllowClobber -Scope CurrentUser

      - name: Validate script metadata
        shell: pwsh
        run: |
          Test-ScriptFileInfo -Path "$env:SCRIPT_PATH"

      - name: Publish script to PowerShell Gallery
        shell: pwsh
        run: |
          $ErrorActionPreference = 'Stop'
          Publish-Script -Path "$env:SCRIPT_PATH" -NuGetApiKey "$env:PSGALLERY_SECRET" -Verbose

      - name: Confirm publication
        shell: pwsh
        run: |
          Write-Host "Successfully published $env:DISPLAY_NAME to PowerShell Gallery."
Change the information on lines 17, 18 and 19 to your own information and then save the file by clicking “Commit changes” in the top right corner. Make sure the script name and path exactly match your file name on the repository and do not change anything else.

For about a minute, this will show on the homepage of your repository:
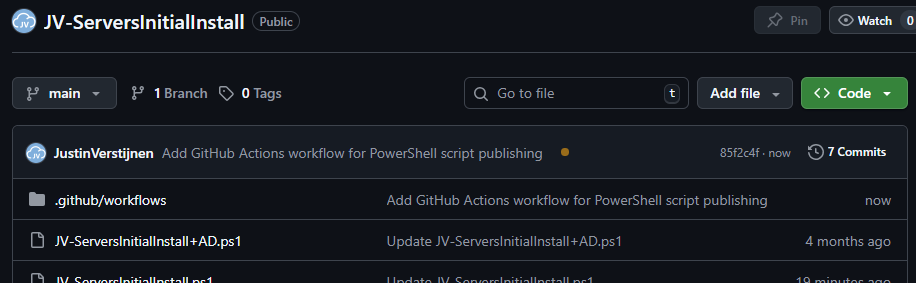
This means the Action is now actually processing the changes and publishing our new script. It will directly upload the script to the PowerShell Gallery for us.
Step 6: Checking the results
Now the the action has ran, and did not give any error. It must now be available on the PowerShell Gallery.

Lets head back to the PowerShell Gallery to check the status. Click on your profile, and then on “Manage Packages”.
Here we see that the packages has been uploaded:

If you click on it you get actual instructions to install the script on your computer and we will see the information we have added to the script:

Pretty cool in my opinion.
Step 7: Installing and testing the script
Now we have our script on the PowerShell Gallery, we can actually download and execute the script using some simple commands.
Do not execute my example script, unless you know what you are doing.
Open PowerShell on your testing environment and execute this command with your script name to install your newly uploaded script.
Install-Script -Name JV-ServersInitialInstallAfter executing this command you need to need to answer some questions:
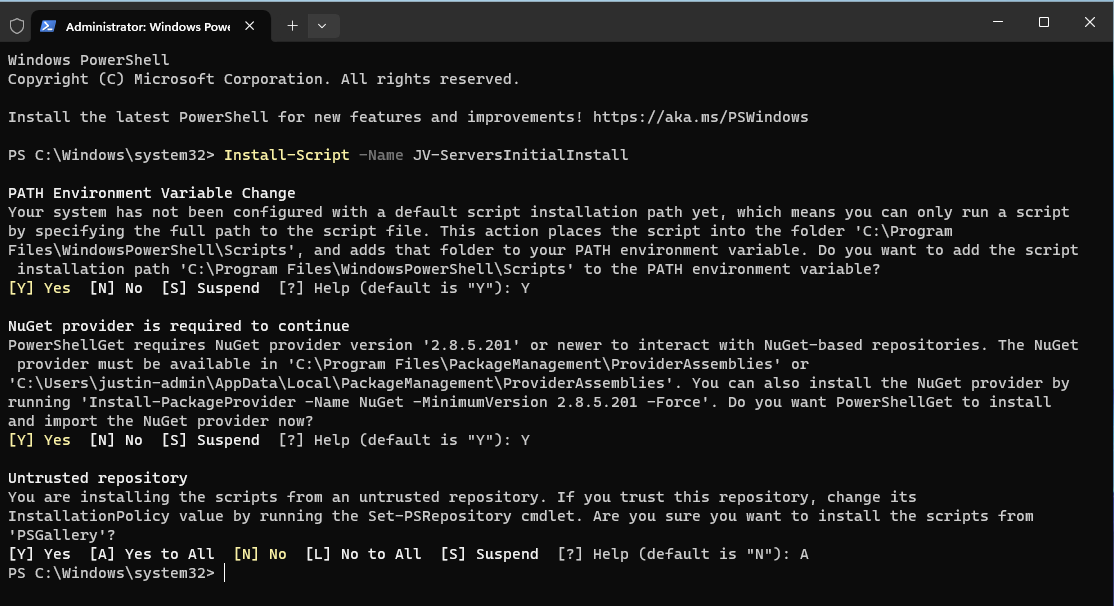
In order to actually run the script, you need to answer all with Yes/All.
After the script is installed, we can run it with your script name:
JV-ServersInitialInstall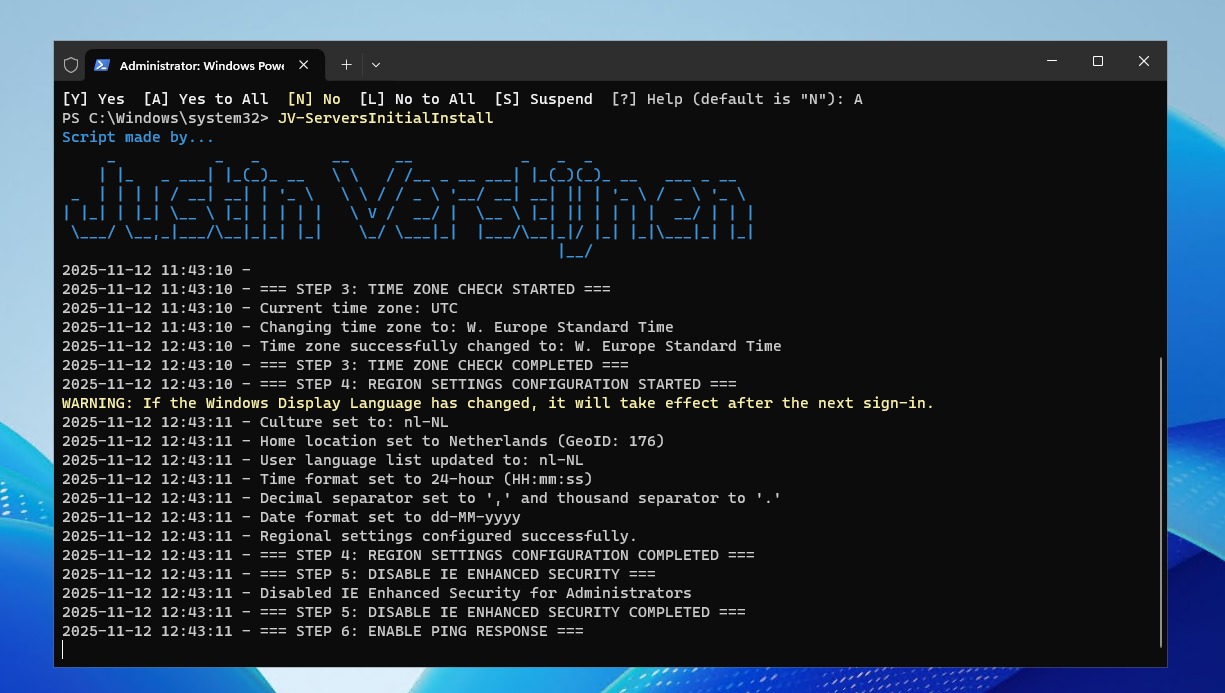
The script will run directly which is very nice and useful for mass use.
Conclusion
This setup for uploading scripts to the PowerShell Gallery is really great. We can change our script on one place and it will automatically upload to the live gallery for users to download.
Sources
These sources helped me by writing and research for this post;
- https://learn.microsoft.com/en-us/powershell/gallery/getting-started?view=powershellget-3.x
- https://docs.github.com/en/actions/get-started/understand-github-actions
Thank you for reading this guide and I hope it was helpful.
End of the page 🎉
You have reached the end of the page. You can navigate through other blog posts as well, share this post on X, LinkedIn and Reddit or return to the blog posts collection page. Thank you for visiting this post.
If you find this page and blog very useful and you want to leave a donation, you can use the button below to buy me a beer. Hosting and maintaining a website takes a lot of time and money. Thank you in advance and cheers :)

The terms and conditions apply to this post.