Implement Certificate-based authentication for Entra ID scripts
Categories:
5 minute read
Requirements
- Around 20 minutes of your time
- An Entra ID environment if you want to test this
- A prepared Entra ID app registration
- A server or workstation running Windows to do the connection to Entra ID
- Some basic knowledge about Entra ID and certificates
How does these certificates work?
Certificate based authentication means that we can authenticate ourselves to Entra ID using a certificate instead of user credentials or a password in plain text. When using some automated scripts it needs permissions to perform its actions but this means storing some sort of authentication. We don’t want to store our credentials on the server as this decreases our security and a potential risk of compromise.
Certificate based authentication works by generating a certificate (SSL/Self-signed) and using that for authentication. The certificate has to be enabled and on both sides, like described in the picture above.
This means that if an client doesn’t have a allowed certificate installed, we can never connect. This is great, so we can store our certificates in a digital safe and only install this on our script processing server. When generating a self signed certificate, a private key is also generated by the computer which means this also has to be in hands of an attacker to abuse your certificate.
After authenticating, we have the permissions (API or Entra Roles) assigned to the Enterprise Application/App Registration, which we will call a “Service Principal”.
Note: Self Signed certificaties will expire after 365 days (1 year).
Why this is more safe than secrets/credentials?
In the old Windows Server days, we could sometimes find really unsecure jokes like these:
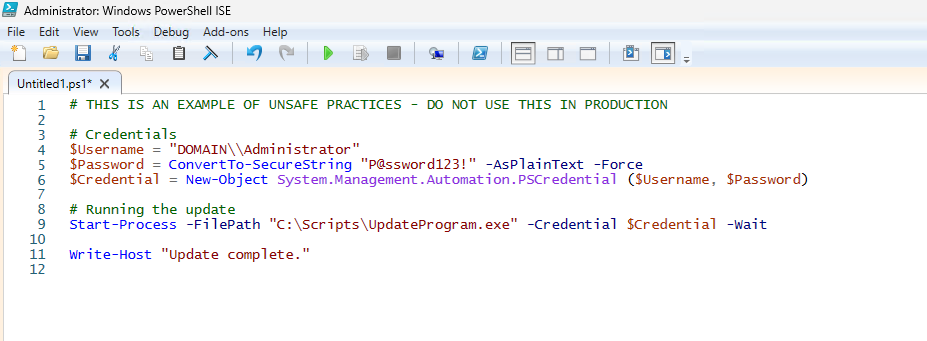
This is something that is really unsecure and I advice you to never do actions like these. With certificate-based authentication we eliminate the need for this by a lot.
Generating a self signed certificate
On our server or workstation where you want to setup the connection, we can generate a self signed certificate. The server then generates a certificate which is unique and can be used for the connection.
Let’s open PowerShell to generate a new Self Signed certificate. Make sure to change the *certificatename to your own value:
New-SelfSignedCertificate -Subject *certificatename* -CertStoreLocation Cert:\CurrentUser\MyThen we have to get the certificate to prepare it for exporting:
$Cert = Get-ChildItem -Path Cert:\CurrentUser\My | Where-Object {$_.Subject -eq "CN=*certificatename*"}Then give your certificate a name:
$CertCerPath = "Certificate.cer"And then export it to a file using the settings we did above:
Export-Certificate -Cert $Cert -FilePath $CertCerPath -Type CERTWe now have generated a self signed certificate using the settings of the server. We now must import this into Entra ID. This file doesn’t include a private key and this is stored on the server.
Adding a certificate to a Entra ID app registration
Now head to the Entra ID portal and go to your already created App registration, and then to “Certificates & Secrets”.
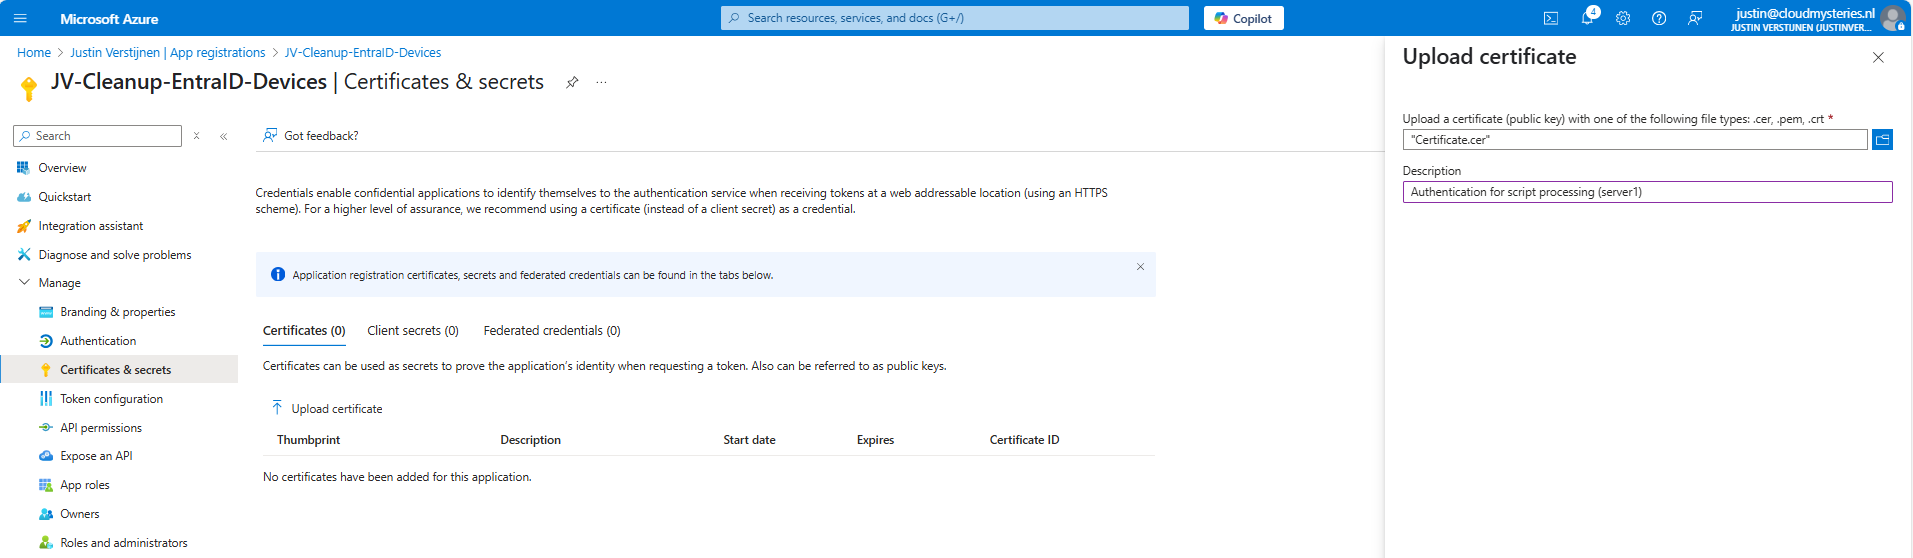
Upload the .cer file there to assign it to the app registration and get the assigned roles.
Now you will see the certificate uploaded:

Now we have the thumbprint of the certificate, which is a identifier of the certificate. You can also get this on the server where you just generated the certificate:
$cert.ThumbprintConnecting to Entra ID using a certificate
Installing the Microsoft Graph Powershell module can be done with:
PowerShell
Install-Module Microsoft.Graph -Scope CurrentUser -Repository PSGallery -Force
We can now logon to Microsoft Graph using this certificate, we must first fill in the parameters on your server:
$clientId = "your client-id"
$tenantId = "your tenant-id"
$thumbprint = "your thumbprint"

$cert = Get-ChildItem -Path Cert:\CurrentUser\My | Where-Object { $_.Thumbprint -eq $thumbprint }
Make sure you use your own client ID, Tenant ID and certificate thumbprint.
Now let’s connect to Graph with your certificate and settings:
Connect-MgGraph `
    -ClientId $clientId `
    -TenantId $tenantId `
    -Certificate $cert
Now you should be logged in succesfully:
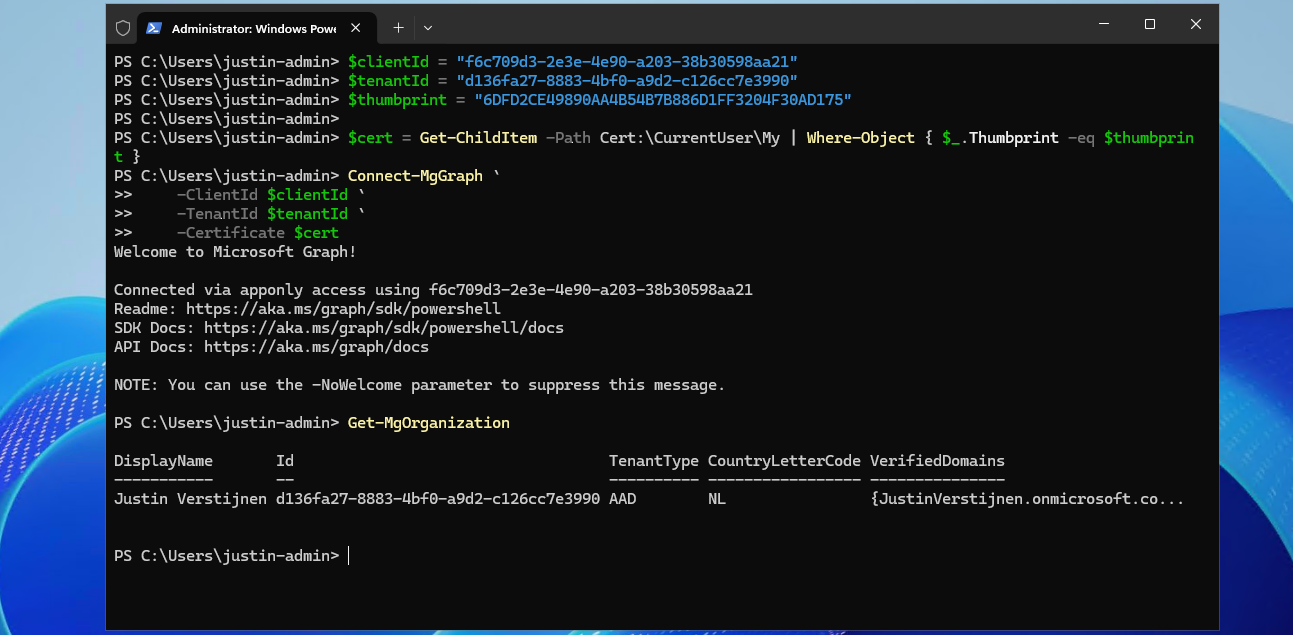
I double checked if we were able to get our organization and that was the case. This is a command that doesn’t work when not connected.
Connecting to Entra ID without a certificate (test)
As we should not be able to connect without the certificate installed, we will test this for sure on another device:

Powershell cannot find our certificate in the store. This is as expected as we didn’t install it. But let’s try another method:

With Exchange Online Powershell, this also doesn’t work because we don’t have the certificate installed. Working as intended!
Summary
Implementing Certificate based authentication is a must for unattended access to Entra ID and app registrations. Its a great authentication method when having a script processing server that needs access to Entra ID or any Microsoft 365/Azure service and not wanting to hard-code credentials which you shouldn’t do either.
This can also be used with 3rd party applications when supported. Most of the applications will only support Client ID and secrets, as this is much easier to implement.
Sources
These sources helped me by writing and research for this post;
- Create a self-signed public certificate to authenticate your application - Microsoft identity platform | Microsoft Learn
- Install the Microsoft Graph PowerShell SDK | Microsoft Learn
End of the page 🎉
You have reached the end of the page. You can navigate through other blog posts as well, share this post on X, LinkedIn and Reddit or return to the blog posts collection page. Thank you for visiting this post.
If you think something is wrong with this post or you want to know more, you can send me a message to one of my social profiles at: https://justinverstijnen.nl/about/
If you find this page and blog very useful and you want to leave a donation, you can use the button below to buy me a beer. Hosting and maintaining a website takes a lot of time and money. Thank you in advance and cheers :)

The terms and conditions apply to this post.