Joining storage account to Active Directory (AD DS)
Categories:
5 minute read
Requirements
- Around 30 minutes of your time
- An Azure subscription with the storage account
- An Active Directory (AD DS) to join the storage account with (on-premises/Azure)
- Basic knowledge of Active Directory and PowerShell
Step 1: Prepare the Active Directory server
We must first prepare our server. This must be a domain-joined server, but preferably not a domain controller. Use a management server instead when possible. We must execute
The server must have the following software installed:
- .NET Framework 4.7.2 or higher(Included from Windows 10 and up)
- Azure Powershell module and Azure Storage module
- The Active Directory PowerShell module (Can be installed through Server Manager)
Installing the Azure PowerShell module
You can install the Azure PowerShell module by executing this command:
Install-Module -Name Az -Repository PSGallery -Scope CurrentUser -ForceInstalling the Azure Storage module
You can install the Azure Storage PowerShell module by executing this command:
Install-Module -Name Az.Storage -Repository PSGallery -Scope CurrentUser -ForceNow the server is prepared for installing the AZFilesHybrid Powershell module.
Step 2: Using the AZFilesHybrid Powershell module
We must now install the AzFilesHybrid PowerShell module. We can download the files from the Github repository of Microsoft: https://github.com/Azure-Samples/azure-files-samples/releases

Download the ZIP file and extract this on a location on your Active Directory management server.
Now open the PowerShell ISE application on your server as administrator.
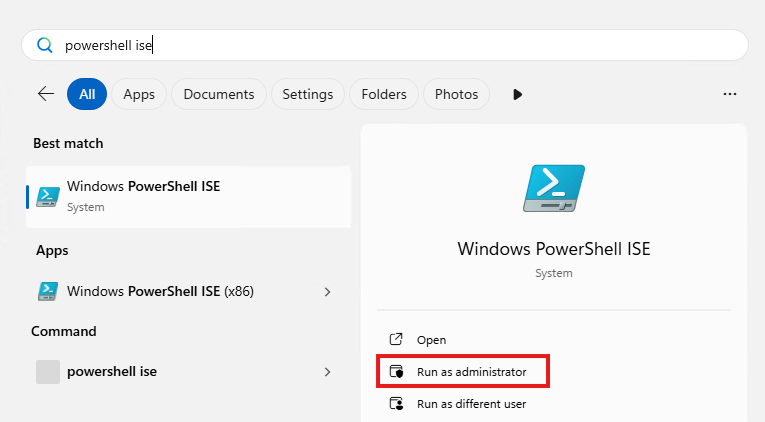
Then give consent to User Account Control to open the program.
Navigate to the folder where your files are stored, right-click the folder and click on “Copy as path”:
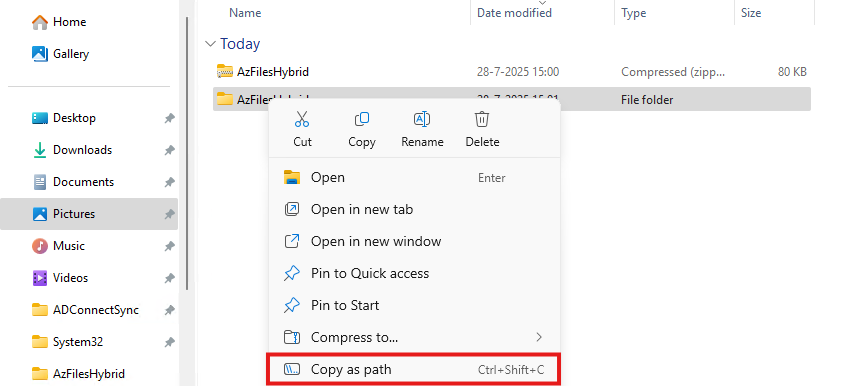
Now go back to PowerShell ISE and type “cd” followed by a space and paste your script path.
cd "C:\Users\justin-admin\Downloads\AzFilesHybrid"This will directly navigate PowerShell to the module folder itself so we can execute each command.
Step 3: Executing the script to join the Storage Account to Active Directory
Now copy the whole script block of the Microsoft Webpage or the altered and updated script block below and paste this into PowerShell ISE. We have to change the values before running this script. Change the values on line 9, 10, 11, 12 and 14.
Set-ExecutionPolicy -ExecutionPolicy Unrestricted -Scope Process

.\CopyToPSPath.ps1

Import-Module -Name AzFilesHybrid

Connect-AzAccount -DeviceCode

$SubscriptionId =     "<your-subscription-id-here>"
$ResourceGroupName =  "<resource-group-name-here>"
$StorageAccountName = "<storage-account-name-here>"
$SamAccountName =     "<sam-account-name-here>"
$DomainAccountType =  "ComputerAccount"
$OuDistinguishedName = "<ou-distinguishedname-here>"

Select-AzSubscription -SubscriptionId $SubscriptionId

Join-AzStorageAccount `
        -ResourceGroupName $ResourceGroupName `
        -StorageAccountName $StorageAccountName `
        -SamAccountName $SamAccountName `
        -DomainAccountType $DomainAccountType `
        -OrganizationalUnitDistinguishedName $OuDistinguishedName

Debug-AzStorageAccountAuth -StorageAccountName $StorageAccountName -ResourceGroupName $ResourceGroupName -Verbose- Subscription ID: This is the identifier of your Azure Subscription where your storage account is in. You can find this by going to “Subscriptions” in the Azure Portal.
- Resource Group Name: This is the name of the Resource Group, go to “Resource groups”
- Storage Account Name: This is the name of the joining storage account, go to “Storage Accounts”
- Sam Account Name: This will be the name in the Active Directory, must be less than 15 characters
- OU Distinguished Name: This is the OU name in LDAP format of Active Directory, you can find this by enabling Advanced Features in Active Directory and finding this name under the attributes.
After running this script with the right information, you will be prompted with a device login. Go to the link in a browser, login with a Entra ID Administrator account and fill in the code.

Now the storage account will be visible in your Active Directory.
Step 4: Checking status and Securing SMB access
After step 3, we will see the outcome of the script in the Azure Portal. The identity-based access is now configured.

Click on the Security button:

Set this to “Maximum security” and save the options.
Step 5: Testing access to the share
Ensure that the user(s) or groups you want to give access to the share have the role assignment “Storage File Data SMB Share Contributor”. This will give read/write NTFS access to the storage account. Now wait for around 10 minutes to let the permissions propagate.
Now test the access from File Explorer:
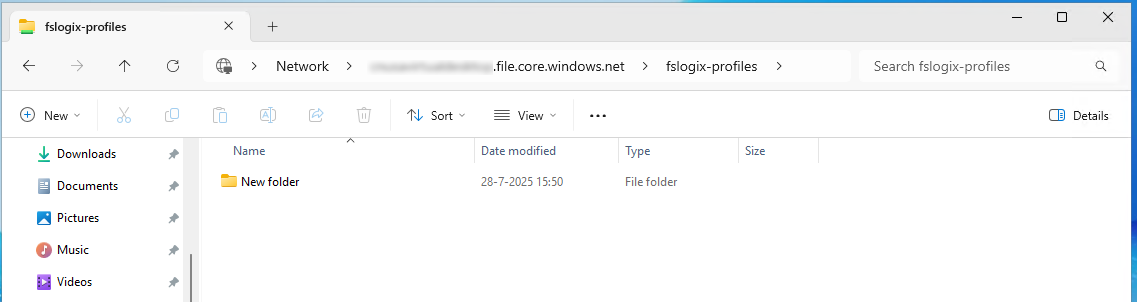
This works and we can create a folder, so have also write access.
Summary
This process we have to do sometimes when building an environment but most of the times, something doesn’t work, or we don’t have the modules ready, or the permissions were not right. Therefore I have decided to write this post to make this process as easy as possible while minimizing problems.
Thank you for reading this post and I hope it was helpful.
Sources
These sources helped me by writing and research for this post;
- https://learn.microsoft.com/en-us/azure/storage/files/storage-files-identity-ad-ds-enable#run-join-azstorageaccount
- https://github.com/Azure-Samples/azure-files-samples/releases
End of the page 🎉
You have reached the end of the page. You can navigate through other blog posts as well, share this post on X, LinkedIn and Reddit or return to the blog posts collection page. Thank you for visiting this post.
If you find this page and blog very useful and you want to leave a donation, you can use the button below to buy me a beer. Hosting and maintaining a website takes a lot of time and money. Thank you in advance and cheers :)

The terms and conditions apply to this post.