Manage your Windows VMs in Azure with Windows Admin Center
What is Windows Admin Center?
Windows Admin Center is a web-based management tool for managing Windows Servers and clusters. In the past it was a product which could be installed separately but it can now also be installed on your machines in Azure, enhancing the integration and giving you more options. The Azure Portal allows you to do management to the host-level, but Windows Admin Center goes one layer deeper, and is able to manage the guest OS itself.
It works by installing the service on your server and hosting the service on port 6516. You can also forward this port to access the management layer outside of Azure. For the highest level of security, you can also keep this in Azure itself. This ensures a user must first login to Azure and then have the specific roles to actually access the Windows Admin Center service.
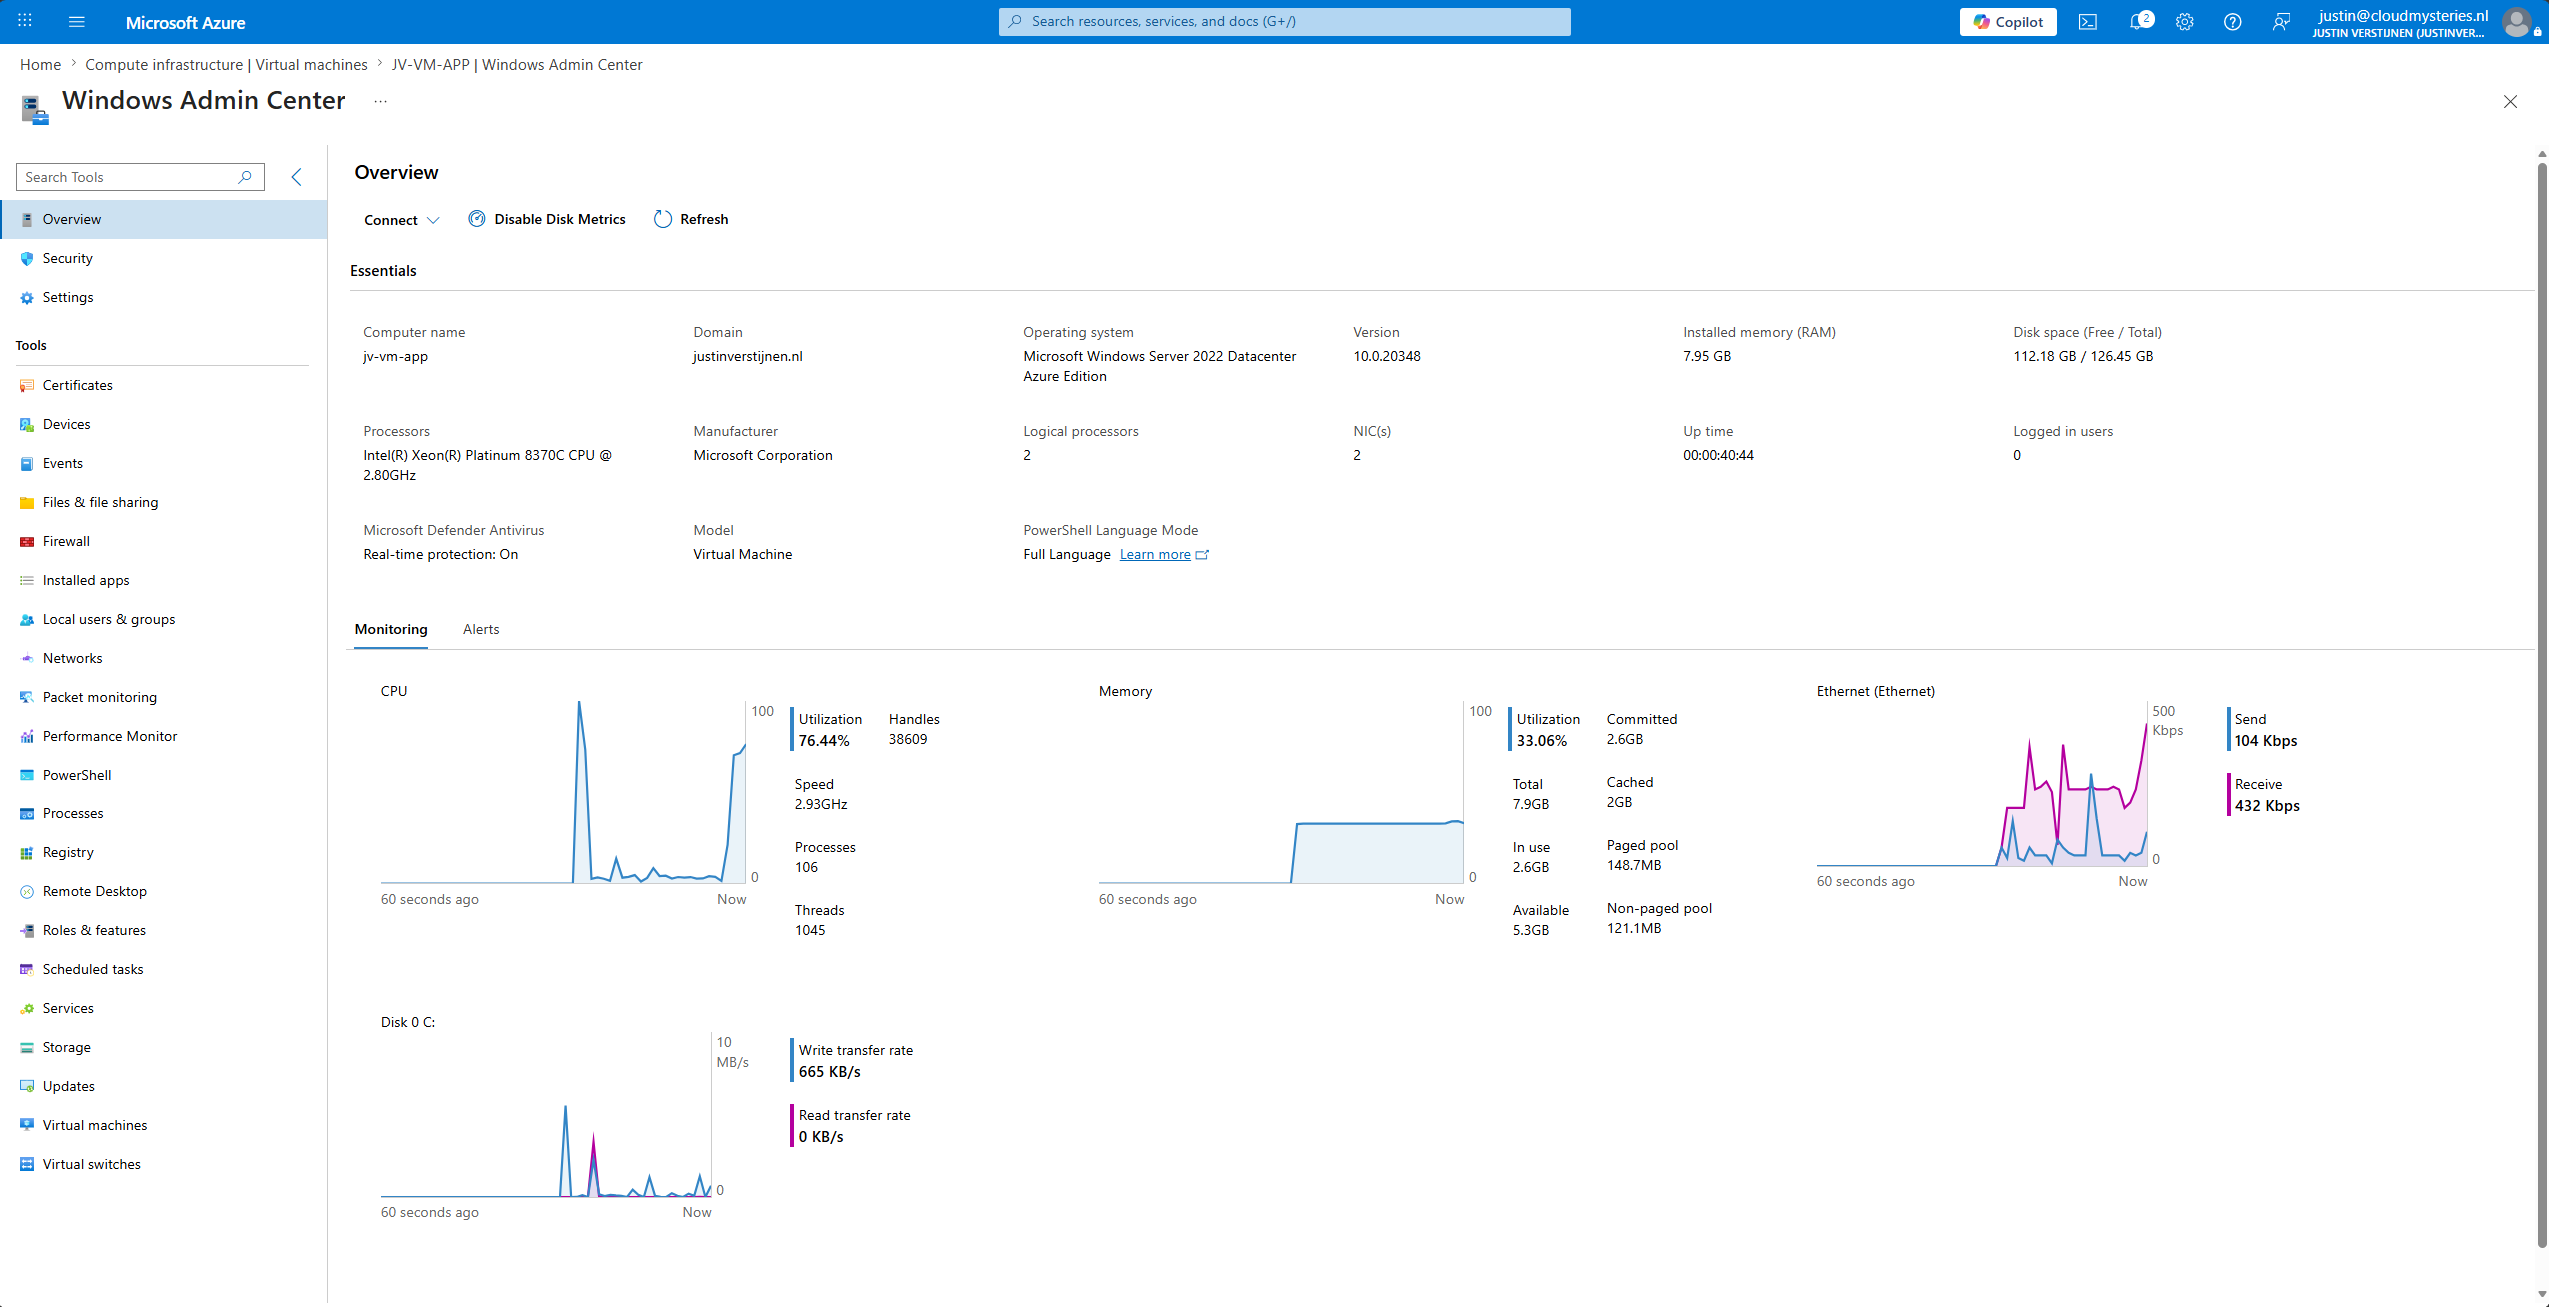
In the past, Windows Admin Center was a separate installation which can manage multiple servers but now its an extension which extends the Azure portal VM settings into your guest OS.
Step 1: Enable Windows Admin Center for your VMs
In the Azure Portal at https://portal.azure.com you can find the Windows Admin Center blade on the left at your Virtual Machines.
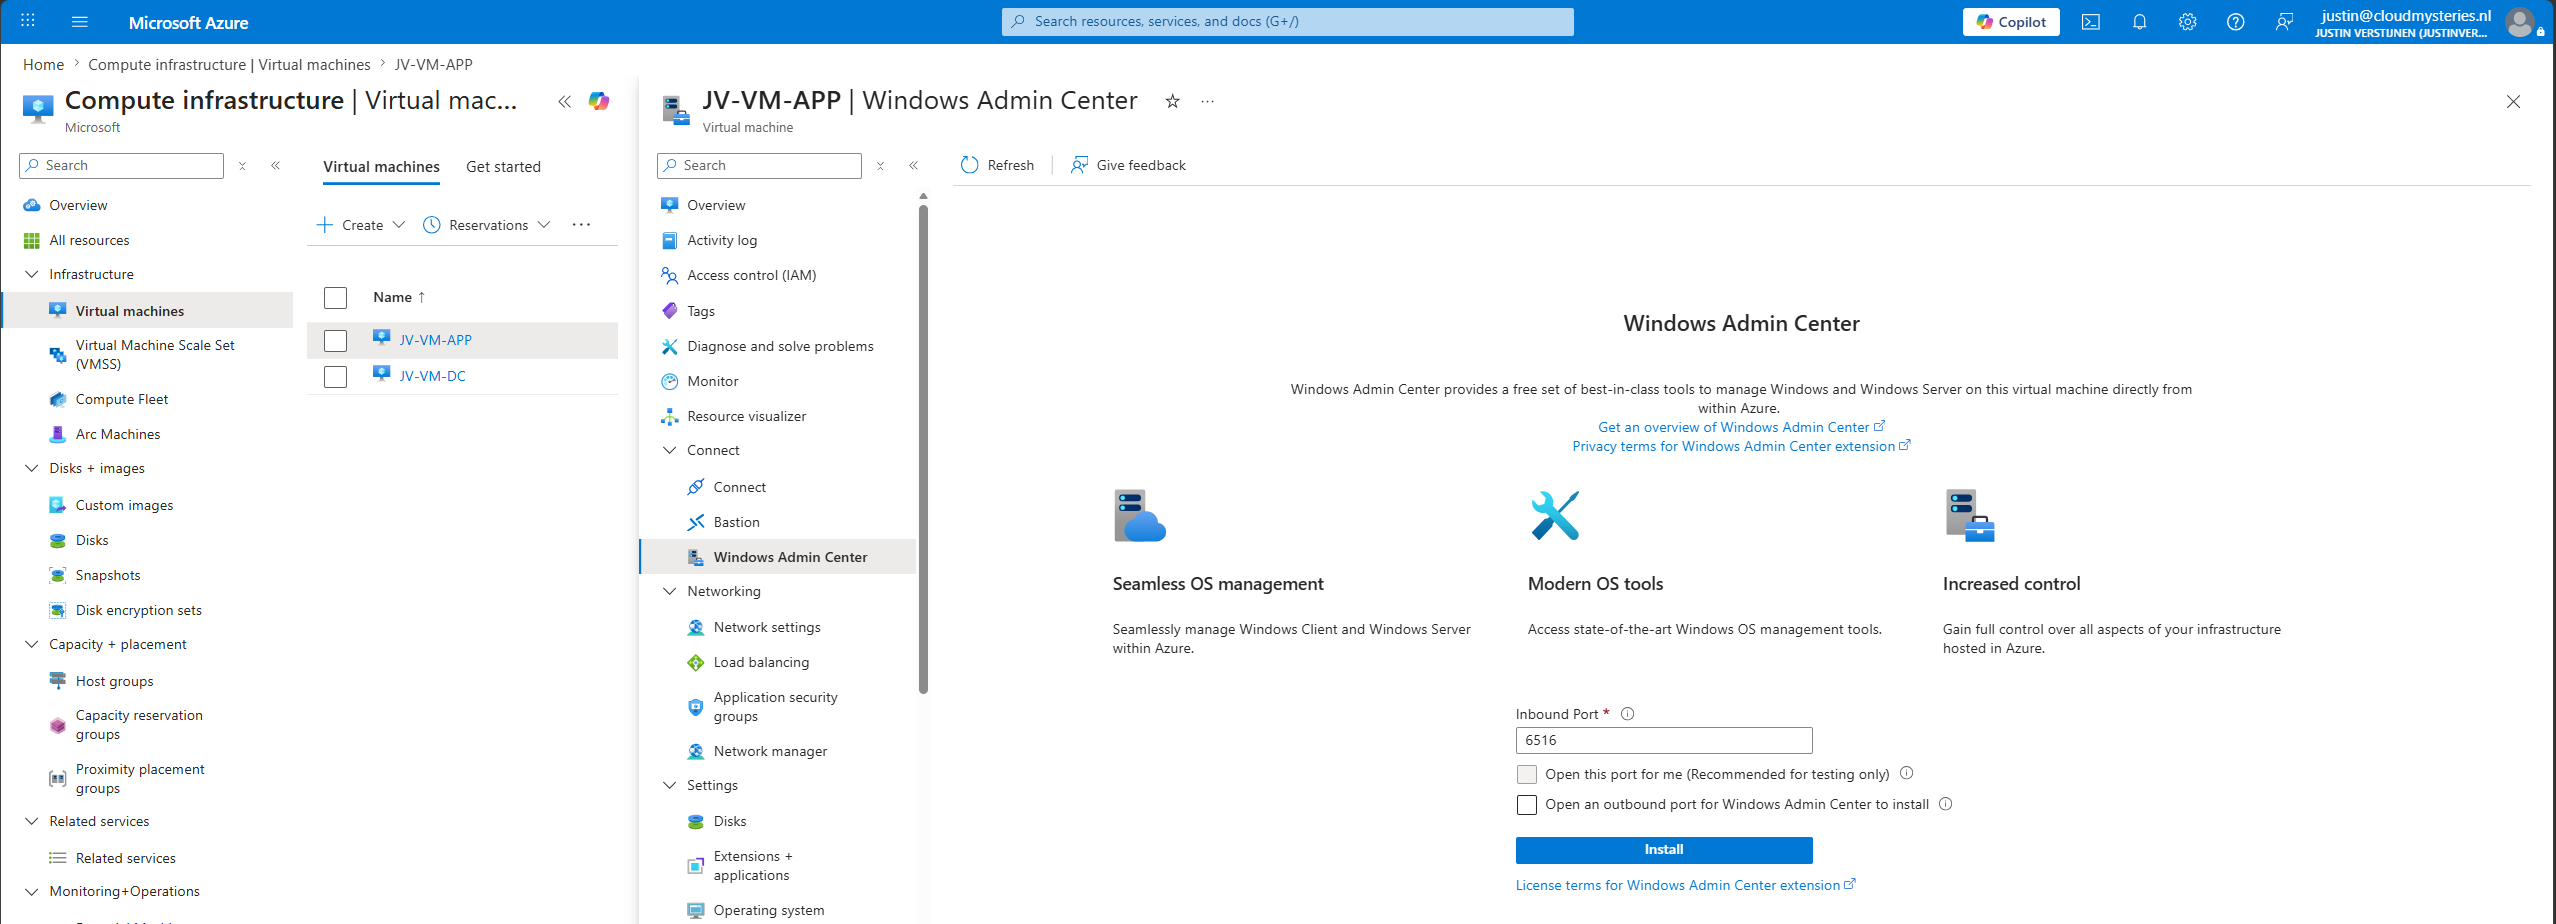
For this post, I have created 2 virtual machines, a DC and an application server where we will install Windows Admin Center onto the application server.
Let’s click on the “Install” button. It will immediately show what it does, namely installing a extension on the virtual machine:
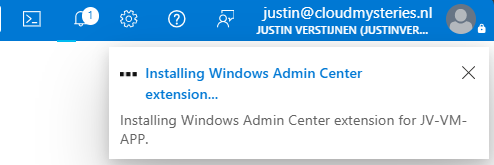
After enabling, Azure shows a notification that I need more permissions to actually be able to connect to Windows Admin Center:

Let’s assign this role.
Step 2: Assigning the correct permissions
We must assign the “Windows Admin Center Administrator Login” role to all users that must connect to the service. In my case, I will assign this role on the resource group level, as both servers are in the same resource group.
Go to the resource group, and open “Access Control (IAM)”.
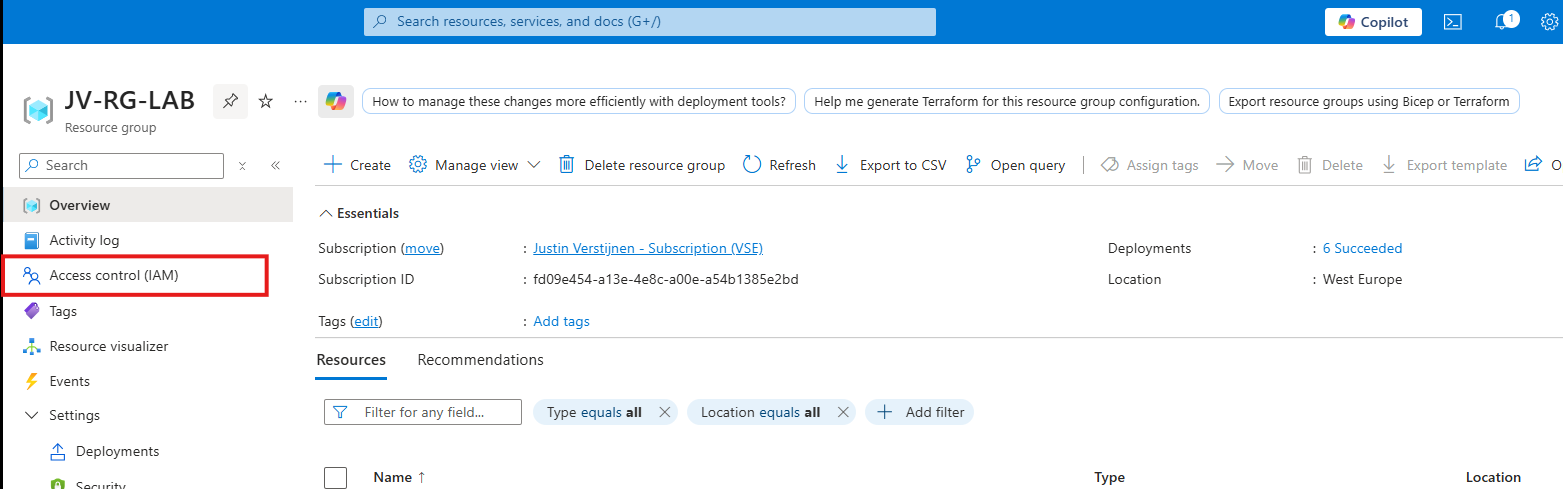
The click “+ Add” and then “Add role assignment”.
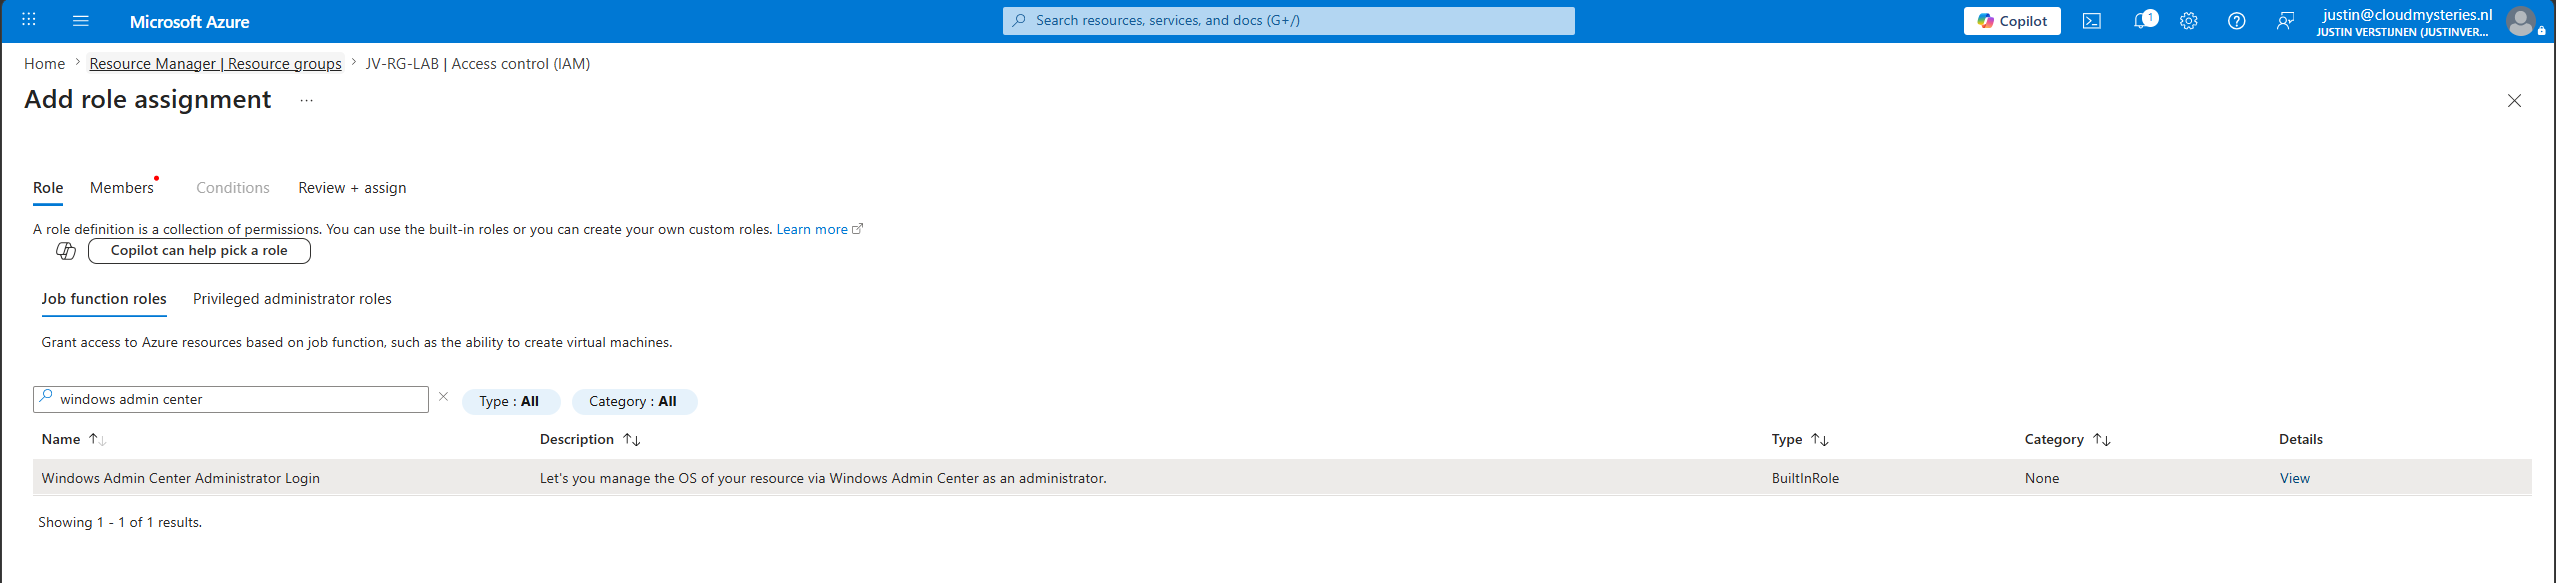
Type in “Windows Admin Center” or a part of it and the correct role will pop-up. Select it and advance to the next tab.
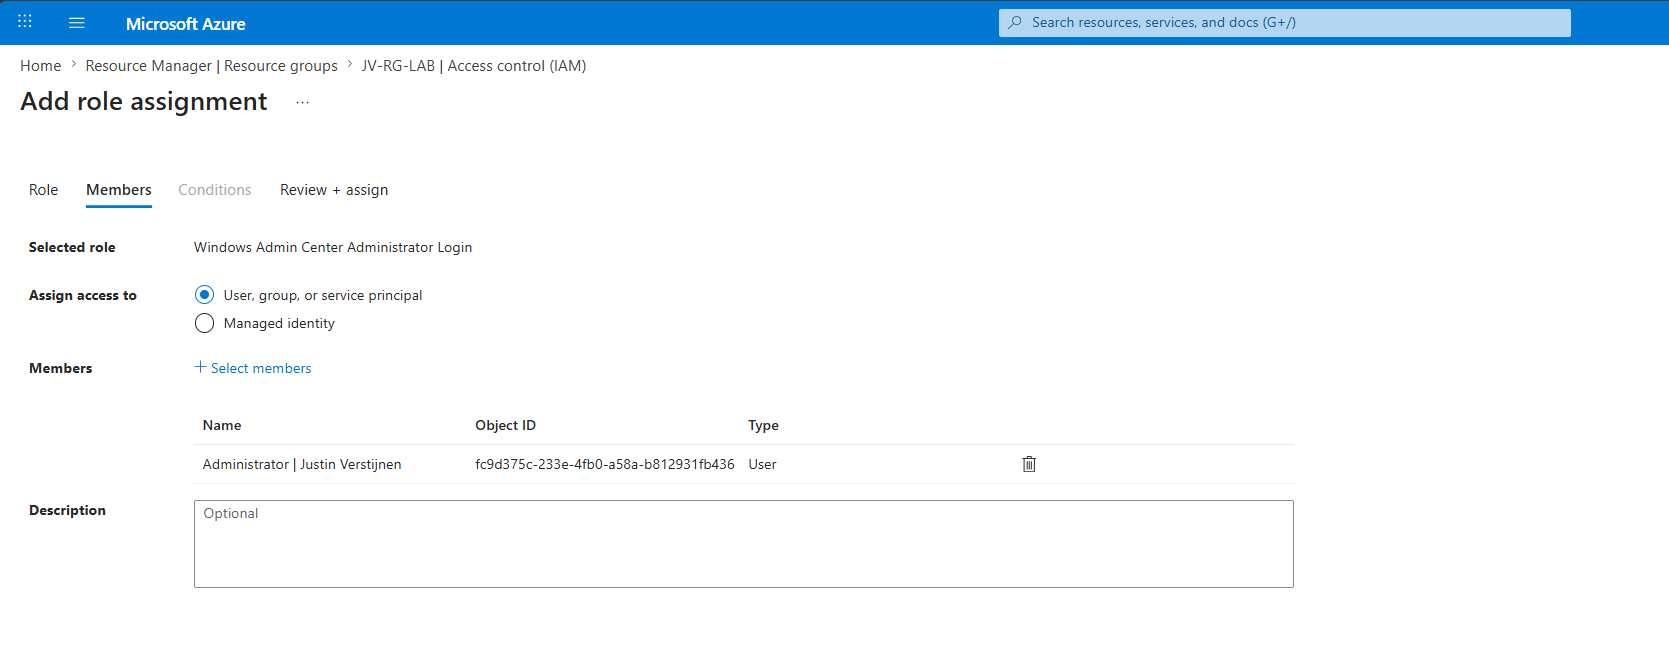
Select the user which needs access. This can also be a group but for the purpose of the guide, I only need access.
Finish the wizard to assign the role.
Step 3: Open up the ports (optional)
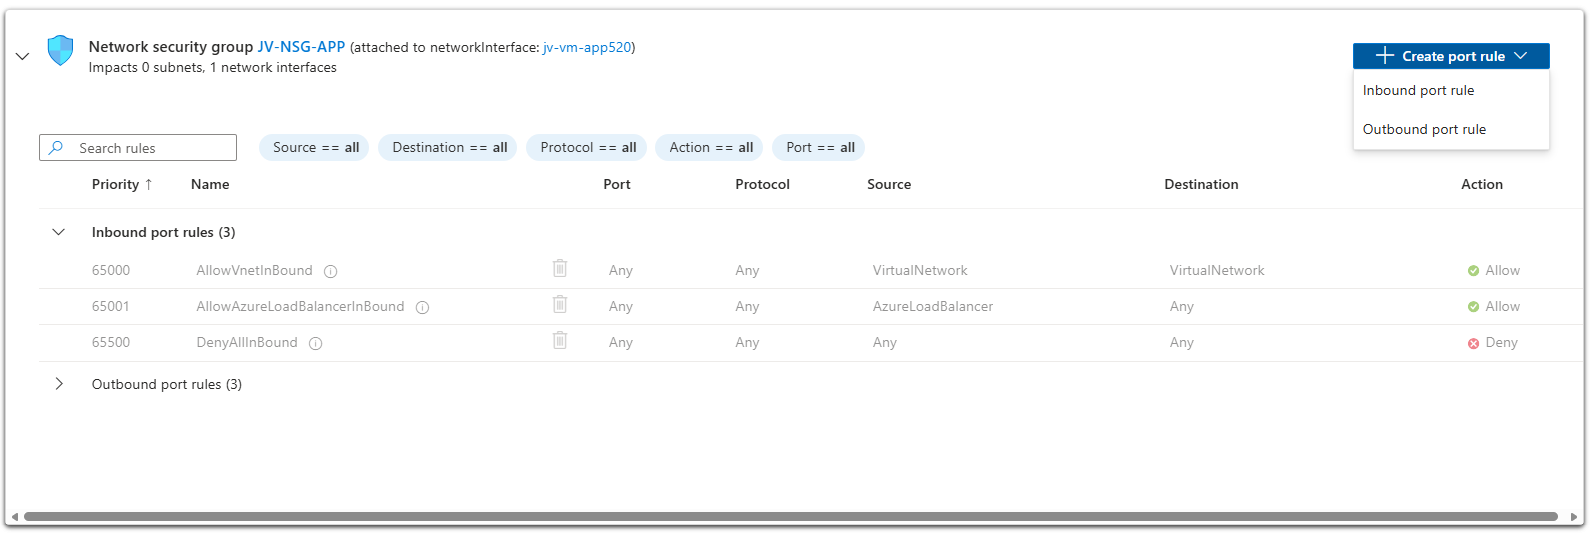
If your server is behind any Azure firewall, 3rd party firewall or Network Security Group you must open the port 6516 to your management network. In my case, I am using a Network Security Group on the application server, so I will create a new rule to access Windows Admin Center from my IP address.
Go to the Virtual Machine and then to “Network settings”. Create a new port rule here which should be an inbound port.
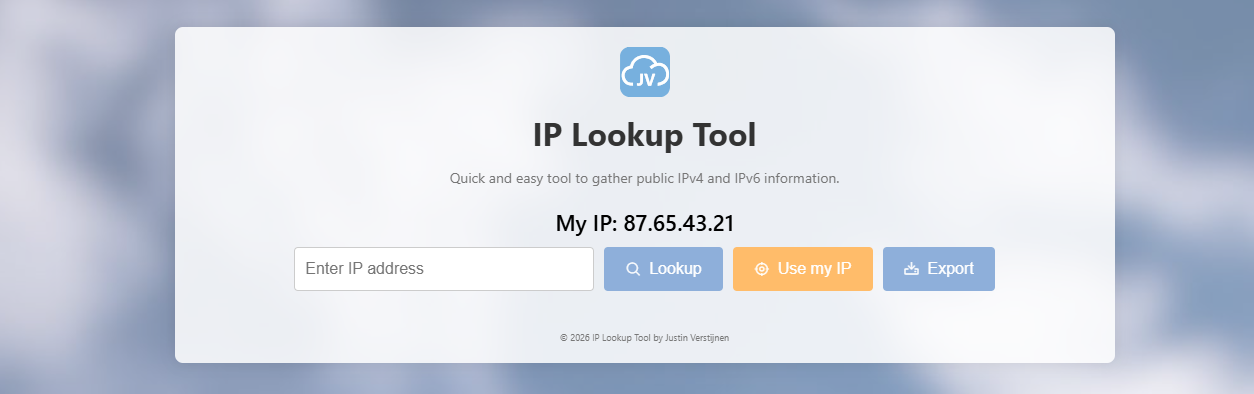
Lookup your source IP by finding your public IP address on a tool like https://tools.justinverstijnen.nl/iplookuptool/ and copy the value.
Fill this in to the wizard and it should look like this:
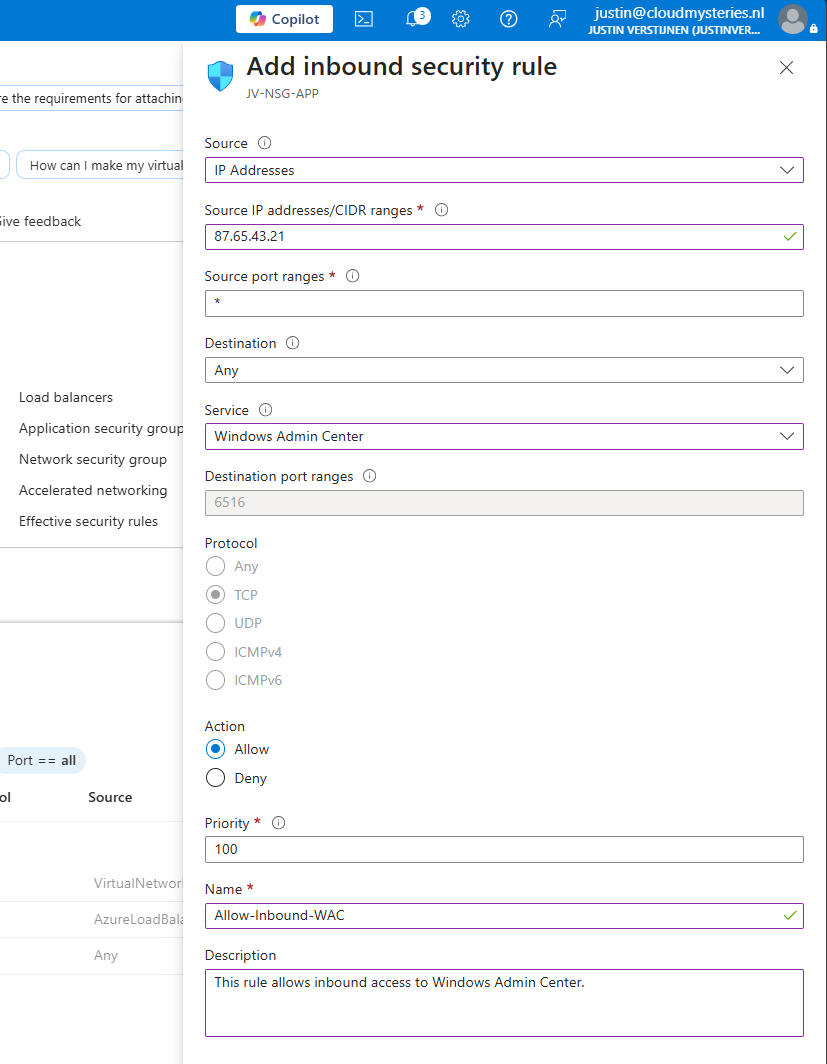
The IP address must be your own value of course, and you can directly use the Windows Admin Center (TCP 6516) template.
Add this rule and you should be good to go.
Step 4: Connecting to Windows Admin Center
After the service is installed and we have the correct permissions, we can now connect to Windows Admin Center. Go to the Virtual Machine where you installed the service and open “Windows Admin Center” from the left.
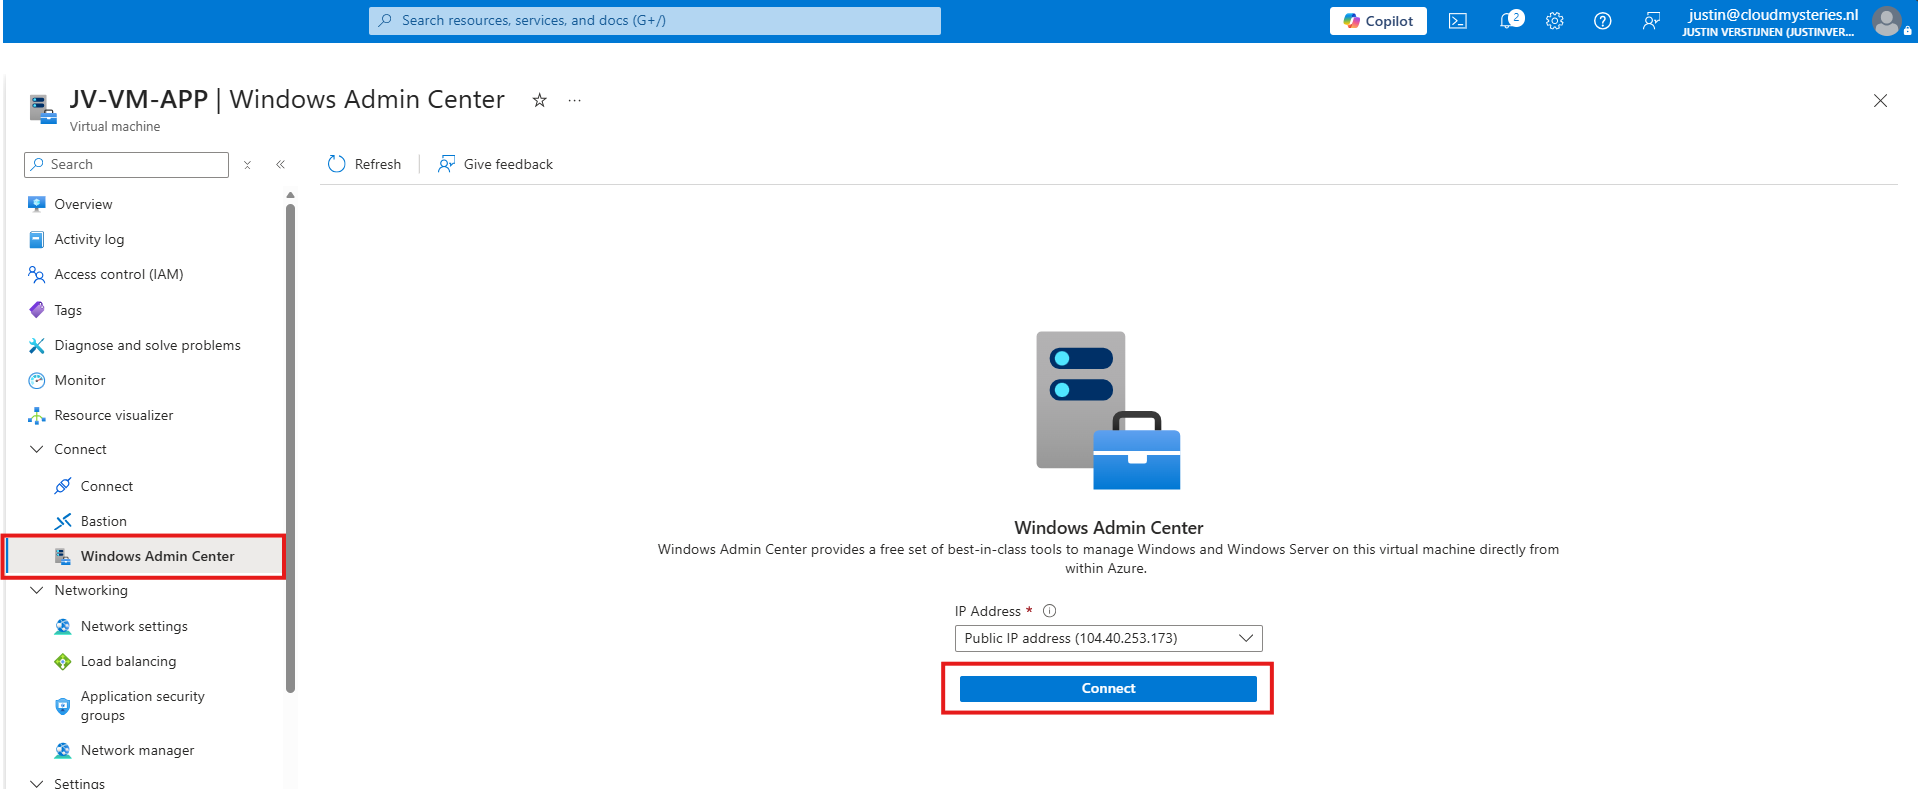
Click “Connect” to connect to the Windows Admin Center service. This should open the blade within 15 seconds:
Now we are in the Windows Admin Center blade of the server where we can perform some basic management tasks from this page, without needing to connect to RDP to the server which is really great. We have several options here, such as:
- Installing updates manually
- Adding or removing Server roles
- PowerShell window
- Windows Registry
- Scheduled tasks
- Storage and file sharing
To give a better overview of the tool, watch this video where I am clicking through the admin panel and showing the features and blades:
Knowledge check
This quiz needs JavaScript to show the questions and feedback.
Summary
In this post we have installed Windows Admin Center as an extension on a virtual machine in Azure which extends the management features of Azure into the Guest OS. This makes it possible to do more management tasks in the Azure Portal and reduces the need of actually needing RDP to login to the server.
I also showed some of the features in the video where I clicked around the Windows Admin Center blade and showed the features it has which is great.
Thank you for reading this post and I hope it was helpful.
These sources helped me by writing and research for this post;
End of the page 🎉
You have reached the end of the page. You can navigate through other blog posts as well, share this post on X, LinkedIn and Reddit or return to the blog posts collection page. Thank you for visiting this post.
Support the blog
