Managing Hyper-V server without Active Directory
Categories:
4 minute read
When you use Hyper-V server, you want to manage this with the management tools. However, by default Hyper-V only allows connections from domain-joined machines by design because of security and trust reasons.
We can bypass this requirement by building these trust ourselves and so managing the server from a machine that isnt even in a domain but Entra ID Joined or in a workgroup.
Installing Hyper-V management tools
When you use Windows 11 Pro/Education/Enterprise, you have the option to install Hyper-V on your machine. This can be done through the features on demand window:
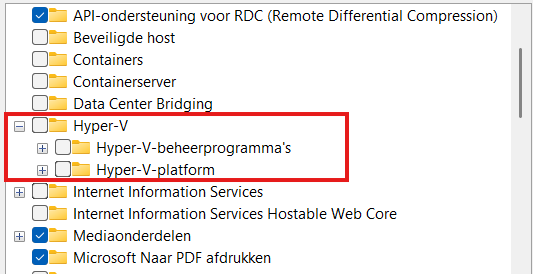
Here select the management tools and you are good to go.
Configurations we need to do
Before we can manage Hyper-V server from our non-domain joined machine, we need to configure some things on both sides. Both has to trust each other before we can make the connection.
Hyper-V server side configuration steps
- Configure Remote Management
- Configure PowerShell Remote
- Configure a hostname
Client side configuration steps
- Configure the NIC to use “Private” profile
- Adding the server to the “TrustedHosts” file
Let’s dive into these steps to make the connection work.
Hyper-V Server side configuration
When using Hyper-V server and logging in will present you this “sconfig” window:
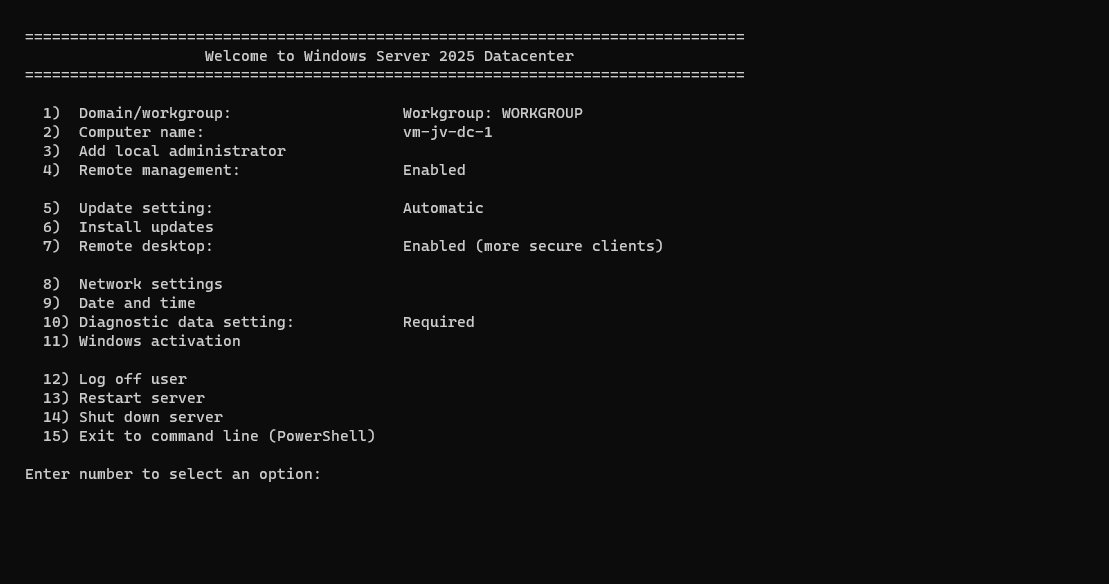
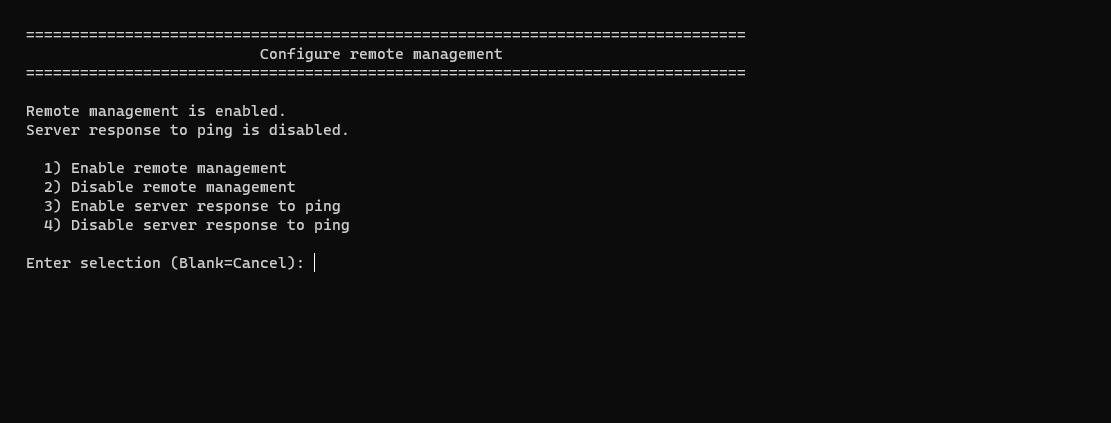
Press number “4” here to open the “Configure Remote Management” menu. Check if “Remote Management is enabled, otherwise enable it by pressing number “1”. Then press number “3” here to optionally enable ping response.
Then back on the home page, press number “2” to configure a hostname. This will be the hostname of your Hyper-V server. Do not reboot yet.
Then go back to the home of the sconfig menu, and press number “15” to go to Powershell.
In Powershell, type in the following command:
Enable-PSRemotingThis enables PowerShell to listen to remote sessions. Then type in a second command:
Enable-WSManCredSSP -Role serverThis enables CredSSP authentication and accepts local users on the server to authenticate from remote. Now reboot the server.
We can now head over to our client workstation for some configurations and the Hyper-V server can reboot in the meanwhile.
Client side configuration
On your workstation where you want to connect with Hyper-V, we need to execute some commands for checks and changes.
Open PowerShell as Administrator here and run this command:
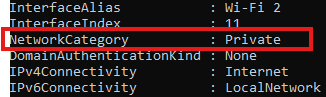
Get-NetAdapter | Get-NetConnectionProfileThis will return the configuration of your network interface card. This must be on “NetworkCategory: Private”
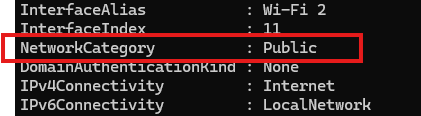
If this is Public, we need to run this command:
Set-NetConnectionProfile -InterfaceAlias "Wi-Fi 2" -NetworkCategory PrivateChange the Interface Alias to the output of your command and this will set the interface prfile to “Private” which is the least restrictive profile.
Now the profile is “Private”. Now we need to run another command to add the server to the Trustedhosts file of the workstation. We do this by executing this commands:
Start-Service -Name WinRMThis starts the WinRM service, now add the server:
Set-Item WSMan:\localhost\Client\TrustedHosts -Value *servername* -ForceChange the *servername* value to your configured servername. After that we can stop the WinRM service, as you might not want to have this running on your workstation.
Stop-Service -Name WinRMNow we would be able to connect to the server with Hyper-V.
Testing the connection
Open the Hyper-V Manager on your workstation:
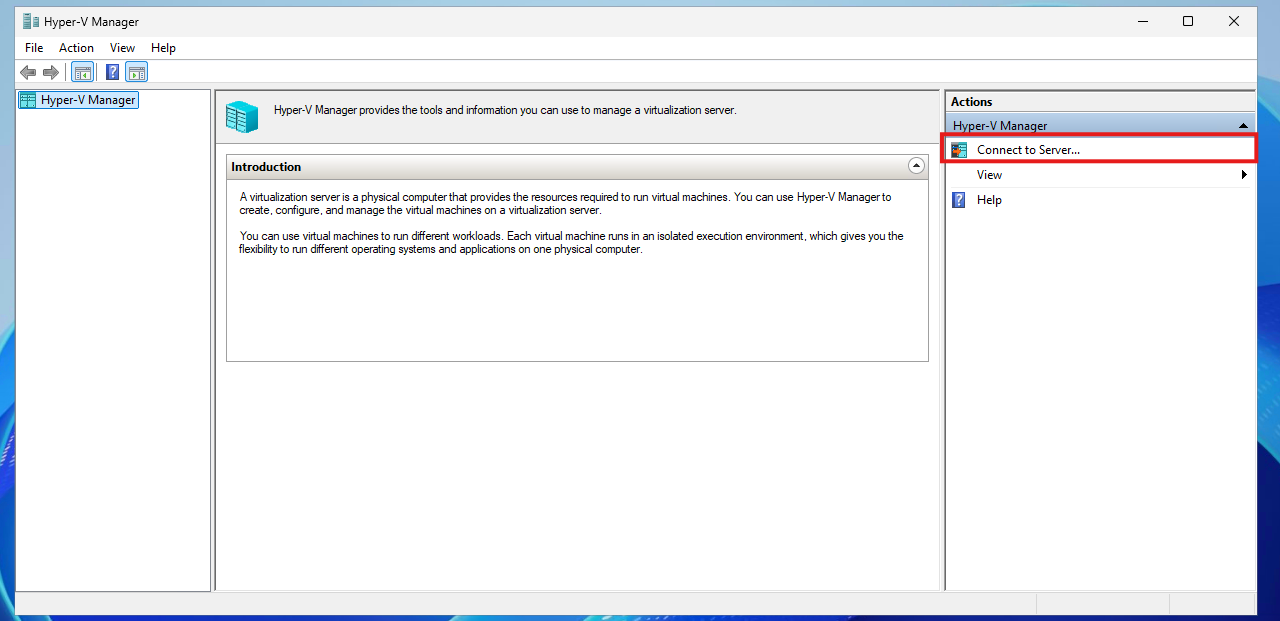
Click on “Connect to Server…” and the select another computer:
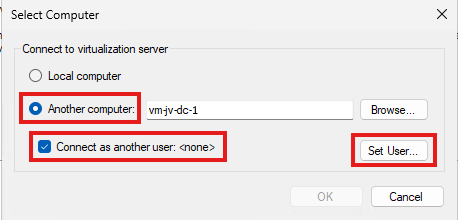
Type in the hostname of the external computer, select connect as another user and the set the user.
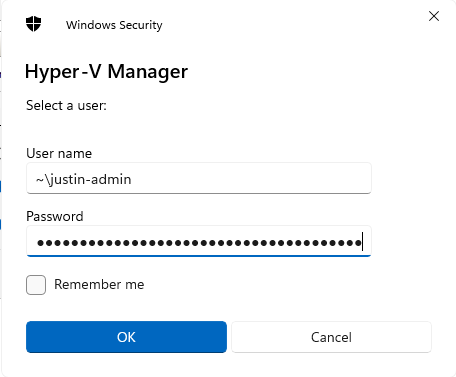
Use servername\username or ~\username which is basically the same and your password. Click OK now.
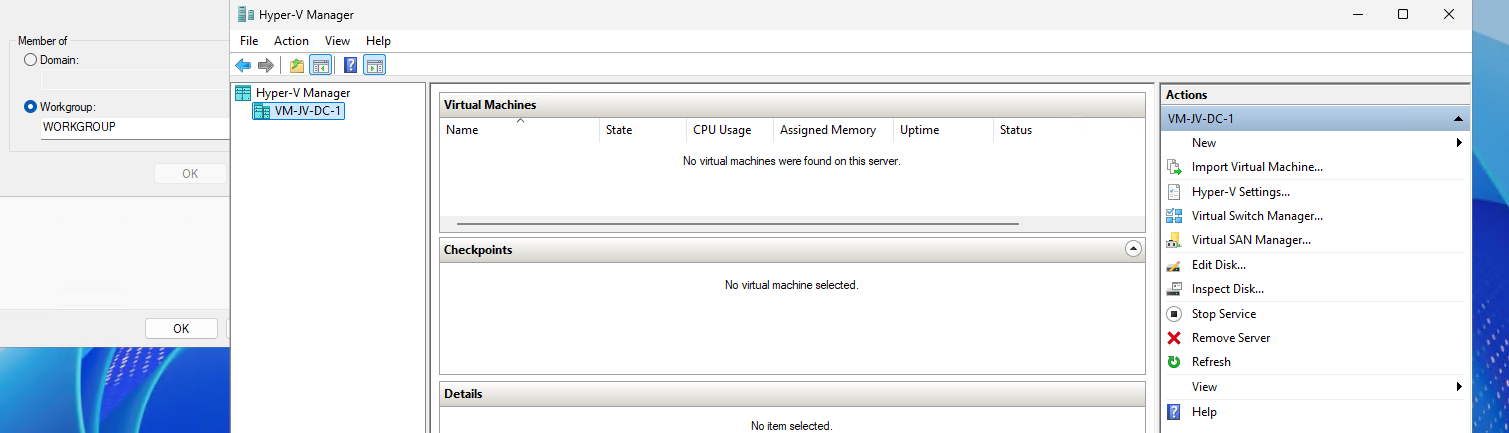
We will manage the Hyper-V server now while still being in a workgroup and non-domain joined environment.
If it still doesn’t work, you have to add the credentials to your credential manager on the workstation by running this command:
cmdkey /add:*servername* /user:justin-admin /pass:Pa$$W0rd!Summary
You see, setting this up is relatively easy. It’s somewhat more work but definitely worth it against other virtualization tools. When I had my own lab for the first time, this got me in some real errors. Fixing those is pretty easy.
Sources
These sources helped me by writing and research for this post;
- https://learn.microsoft.com/en-us/windows-server/virtualization/hyper-v/get-started/install-hyper-v?tabs=powershell&pivots=windows
- https://learn.microsoft.com/en-us/powershell/module/netconnection/get-netconnectionprofile?view=windowsserver2025-ps
End of the page 🎉
You have reached the end of the page. You can navigate through other blog posts as well, share this post on X, LinkedIn and Reddit or return to the blog posts collection page. Thank you for visiting this post.
If you think something is wrong with this post or you want to know more, you can send me a message to one of my social profiles at: https://justinverstijnen.nl/about/
If you find this page and blog very useful and you want to leave a donation, you can use the button below to buy me a beer. Hosting and maintaining a website takes a lot of time and money. Thank you in advance and cheers :)

The terms and conditions apply to this post.