Microsoft Defender External Attack Surface Management (EASM)
What is Defender External Attack Surface Management (EASM)?
Microsoft Defender External Attack Surface Management (EASM) is a separate Defender solution which can be used to defend and monitor some of your external attack surfaces, like:
- Websites
- IP addresses
- Domains
- SSL certificates
- Other digital assets
In addition to these components, EASM can also forward all relevant information and logs to SIEM solutions such as Microsoft Sentinel. It is also possible to manually input company-specific data, such as all domain names and IP addresses associated with its services.
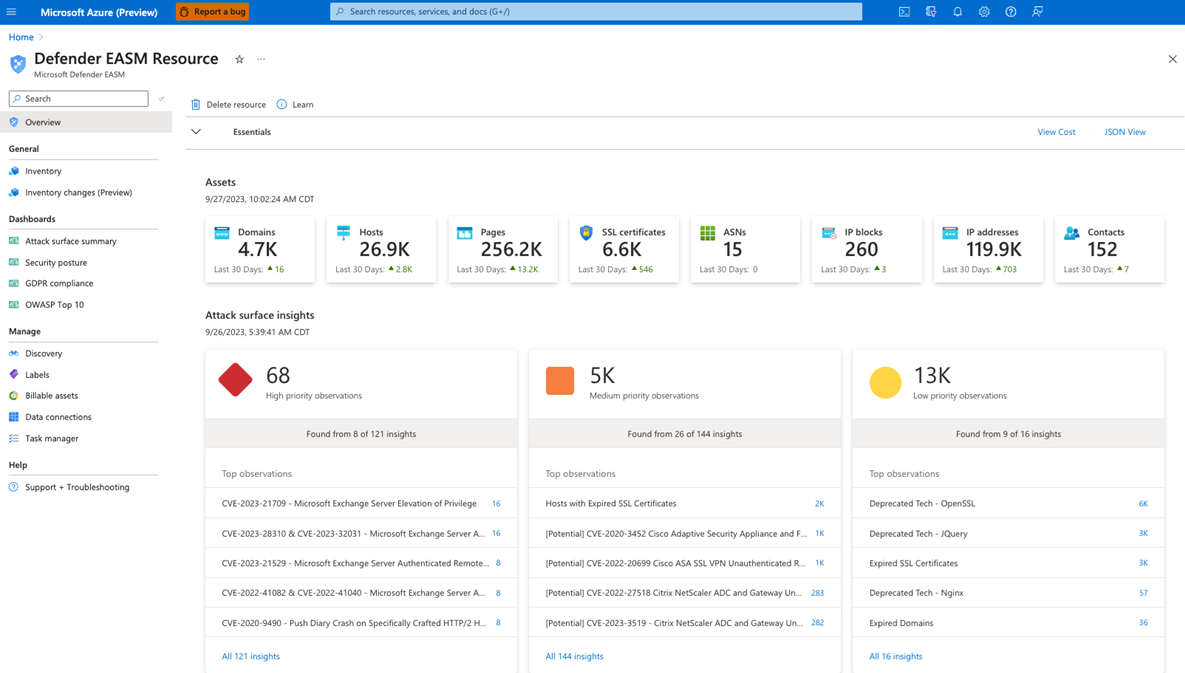
Source: Microsoft
Best features of Microsoft Defender EASM
The best features of Defender EASM are:
- Open port scanning on IP addresses
- SSL certificate monitoring + expiration date checks
- Domain name checks + expiration date verification
- Active scanning for known CVE score vulnerabilities
- Identifying common administrative misconfigurations
- Web server assessments based on OWASP guidelines
- Tracking changes in assets
- 30 days free trial of the solution (30 days no billing)
Estimated costs of Defender EASM
The costs for this solution are relatively minimal; you pay €0.01 per day per host, domain, or IP address which is added.
For example, I configured it with 10 instances of each, resulting in a total monthly cost of €9.17. The costs are billed on your Azure invoice of your subscription. This makes the solution relatively cheap.
Step 1: Deploy the EASM workspace
To get started using this solution, we navigate to the Azure Portal and search for “Defender EASM”.
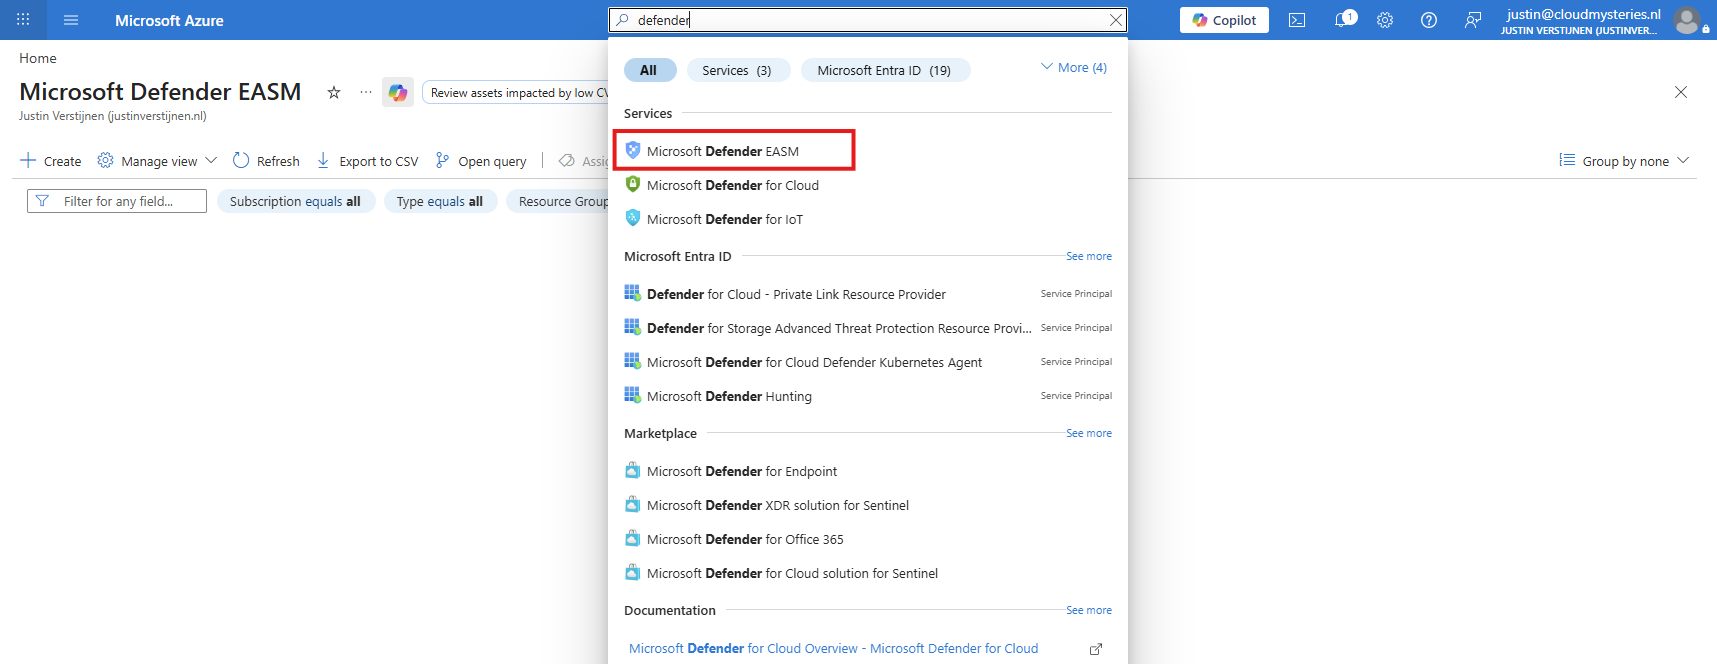
Then we create a new workspace in this Azure environment. Click “+ Create” to create a new workspace.
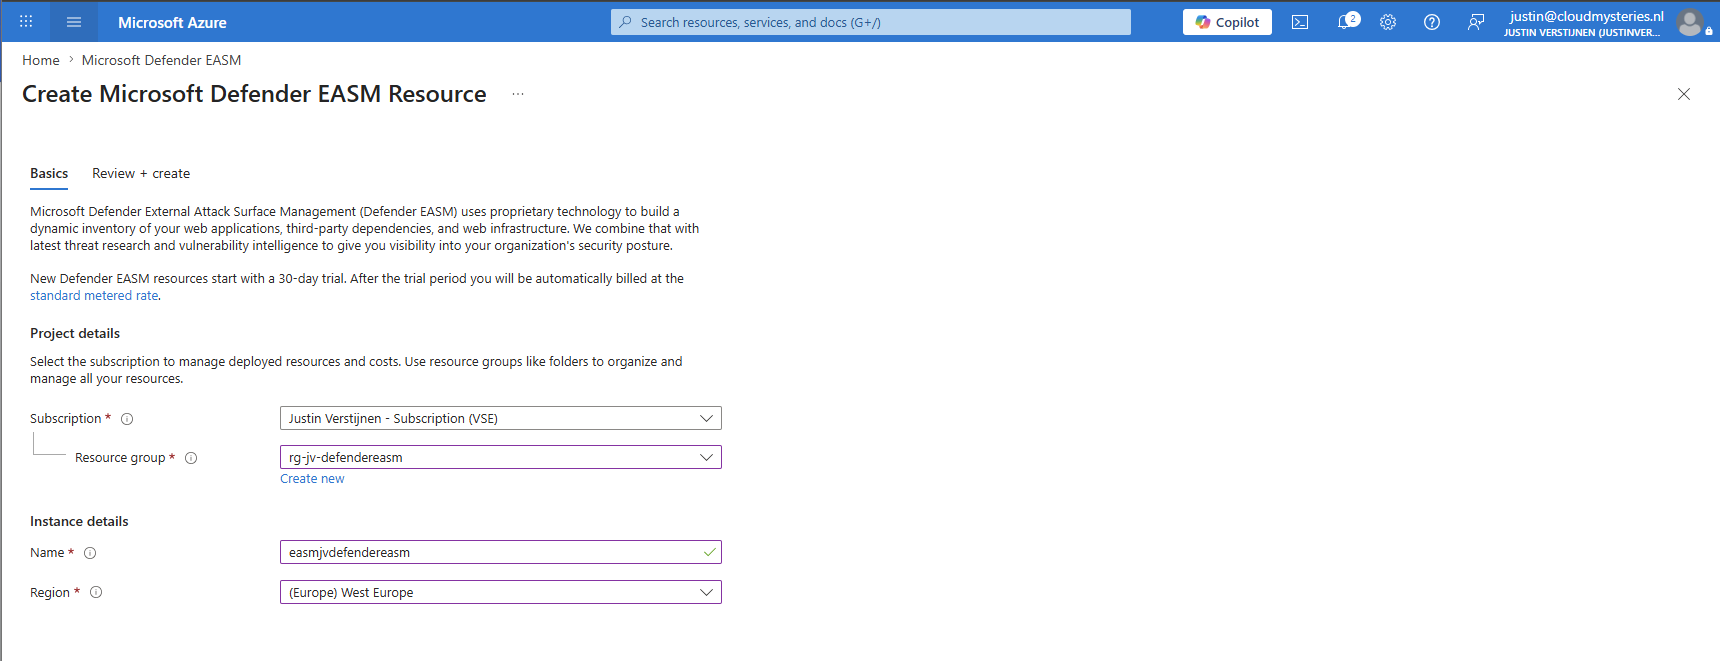
Give the workspace a name which only contains letters and numbers and finish the wizard. The workspace will now be deployed.
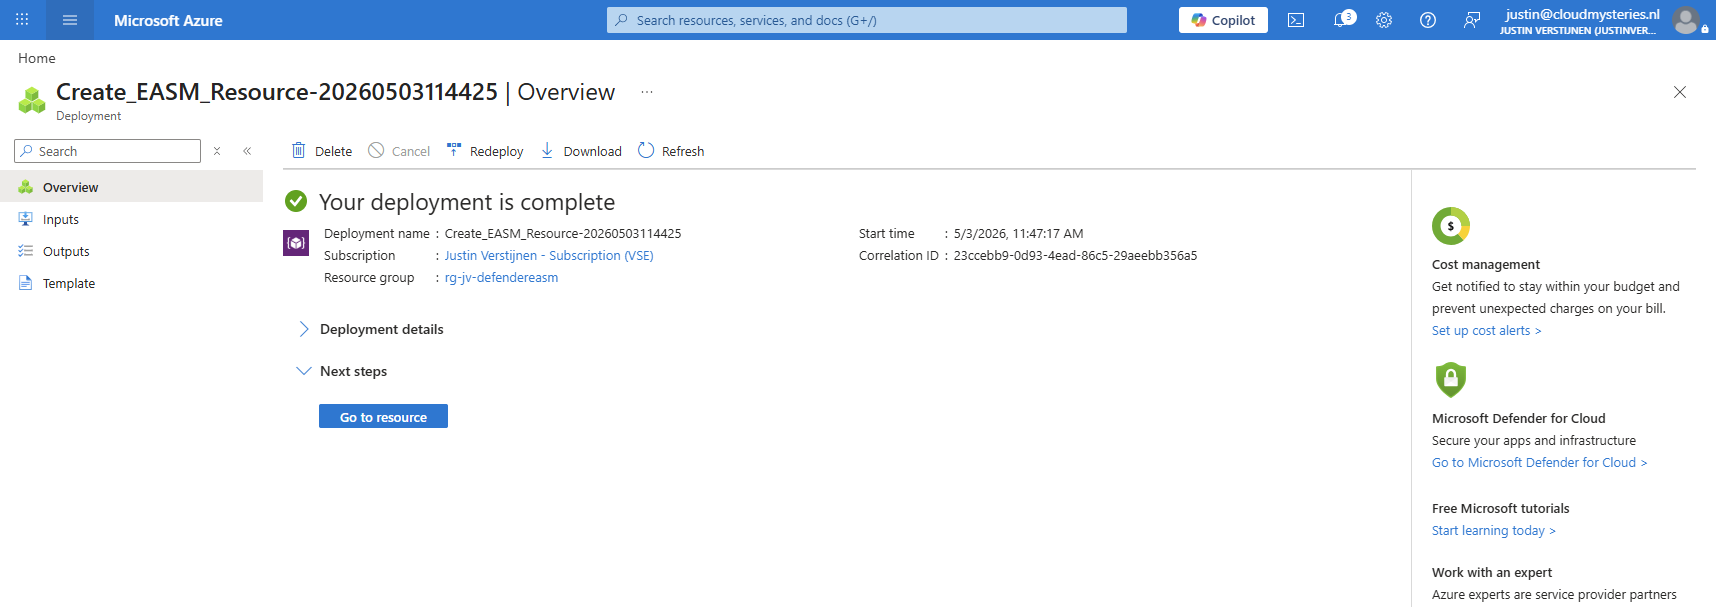
Step 2: Filling the EASM inventory
Now that we have the EASM workspace in place, we now need to fill it with our resources. This enables Defender EASM to scan and monitor them.
Navigate to the newly created EASM workspace and open the “Inventory” blade. Here you can choose to automatically discover your assets but I will add them manually for the purpose of this guide.
Click on the “Create a custom attack surface” button to add items to the inventory:
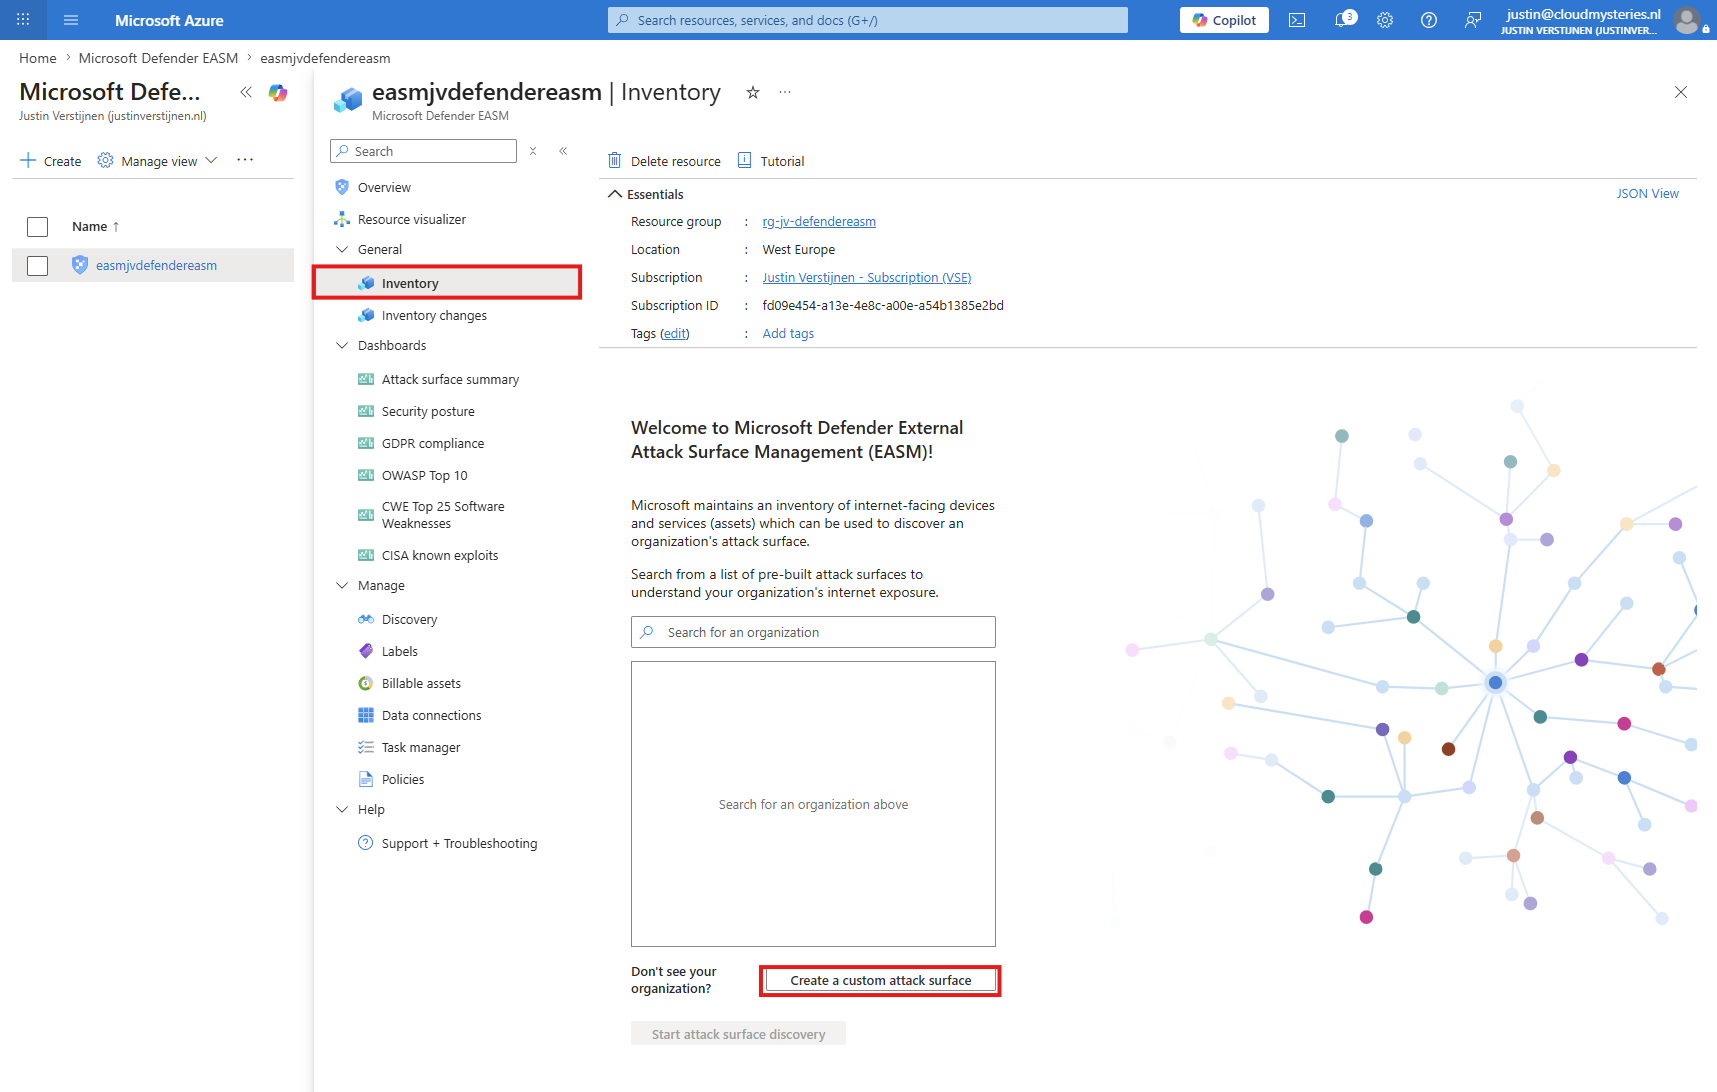
We can fill in our information here. As this unfortunately doesnt have any import-feature we have to type them all in by hand.
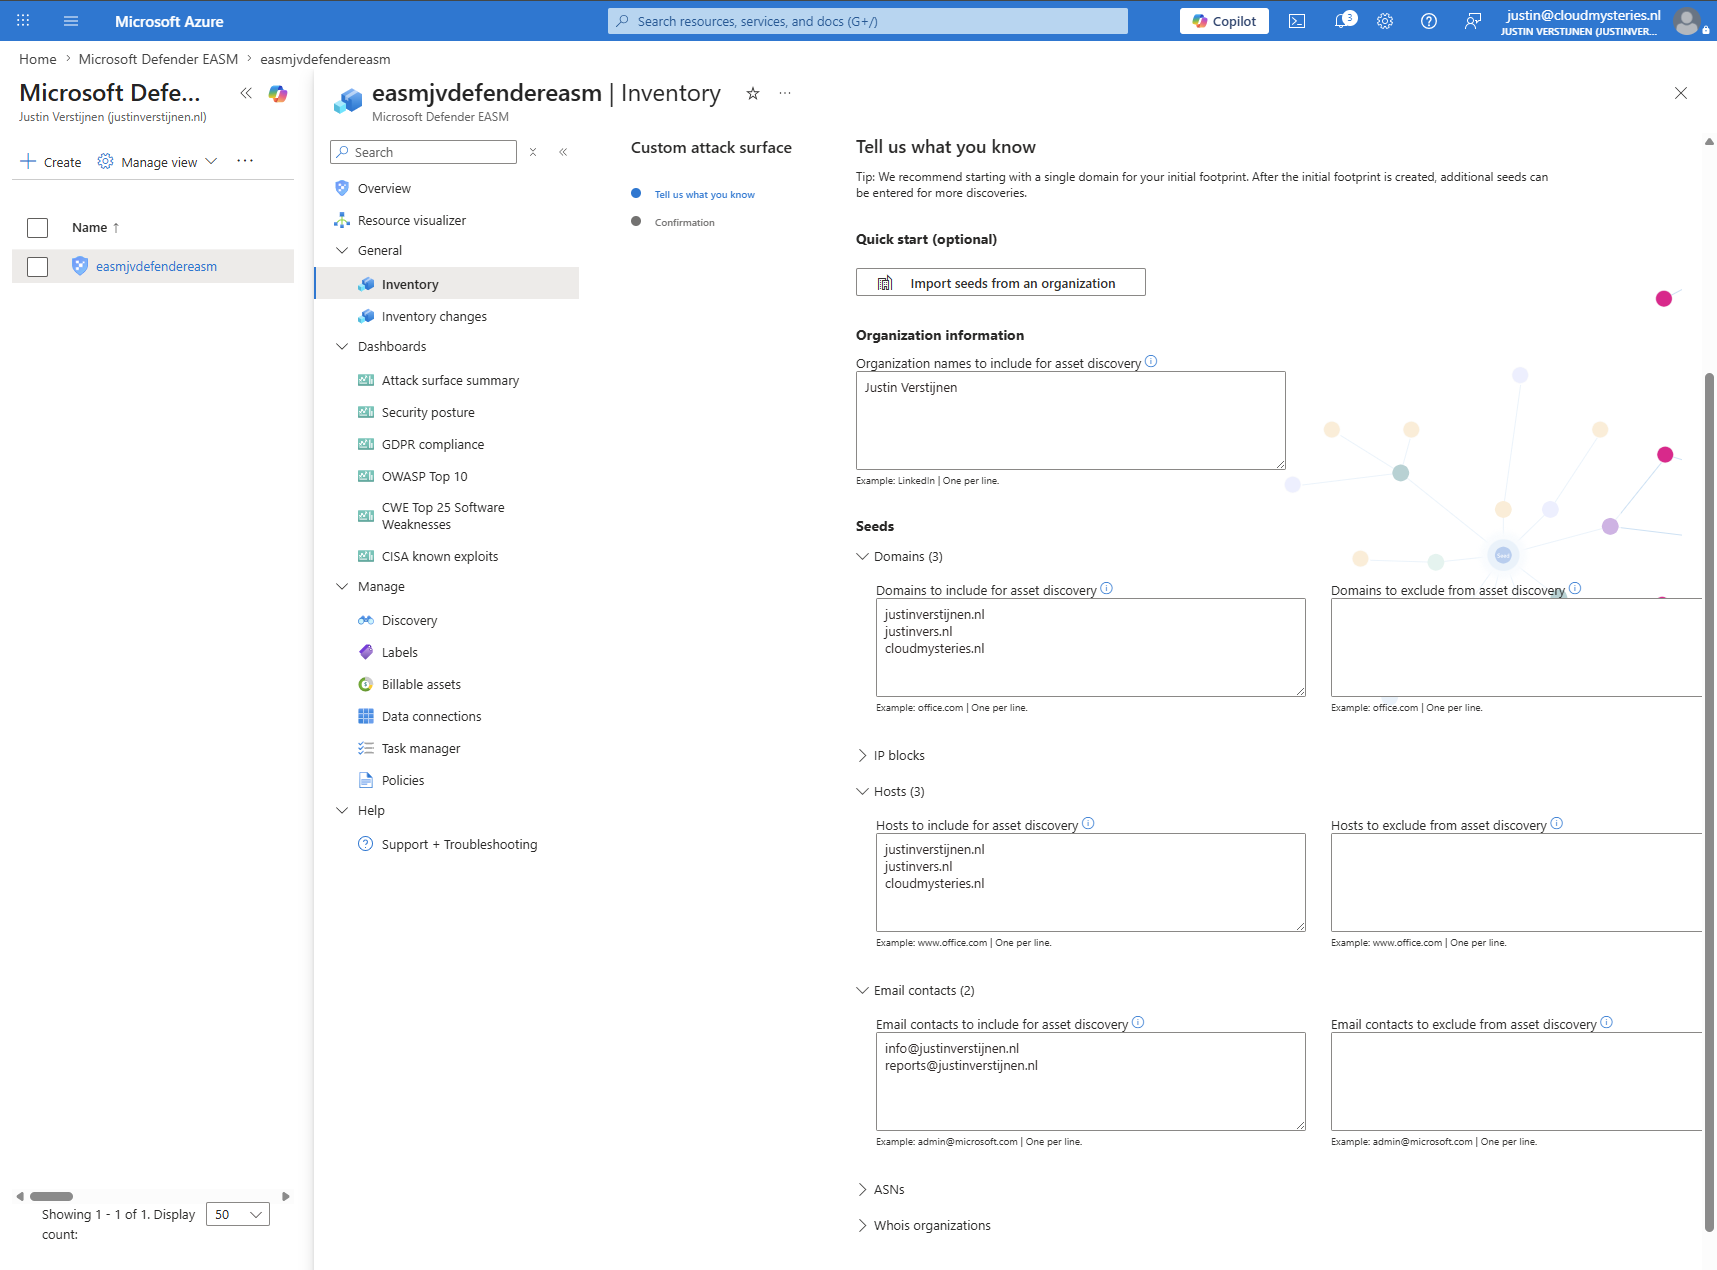
I have added some of my domains and emailaddresses for the purpose of this guide.
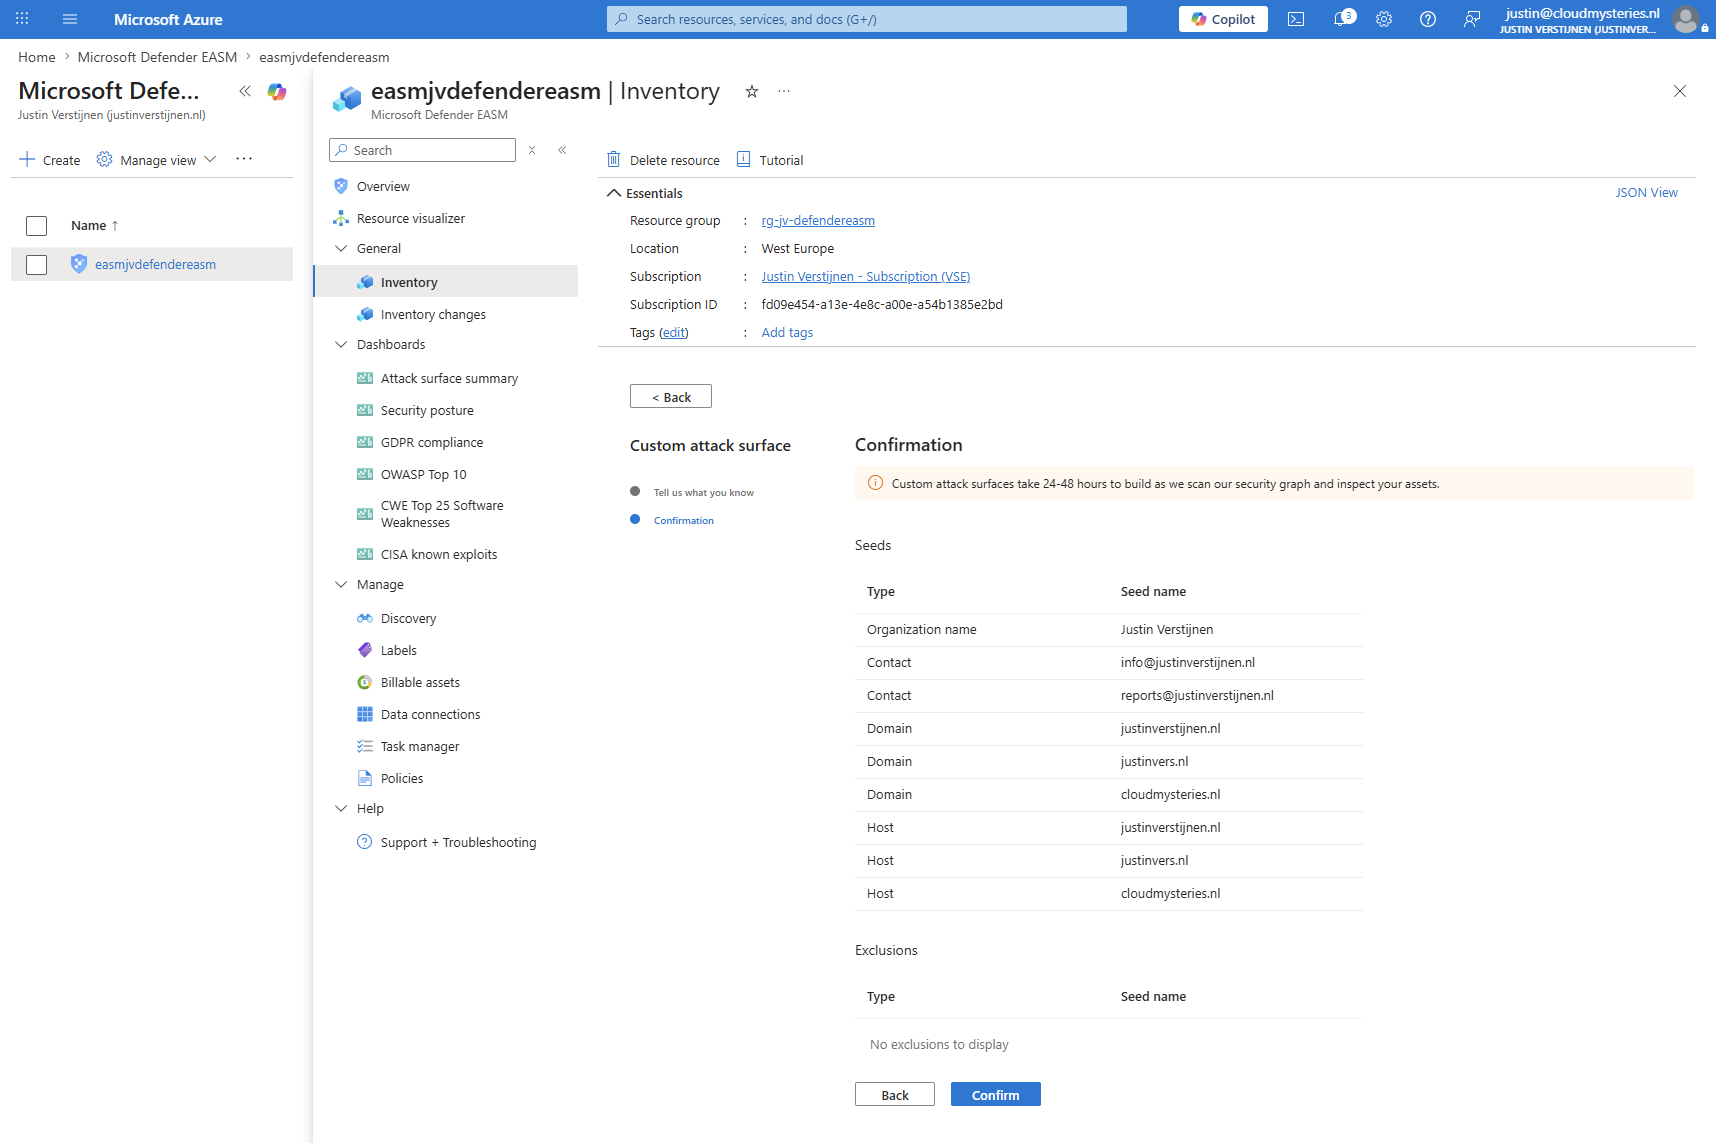
Now we can click confirm to add all the assets to the workspace. It will automatically start scanning your resources, but this initial scanning can take up to 48 hours. You can check the status on the EASM workspace, in my case the first numbers already arrived within 5 minutes.
Step 3: Checking the status of the assets
After the EASM workspace have scanned your domain names and hosts, it will present them on the workspace-homepage.
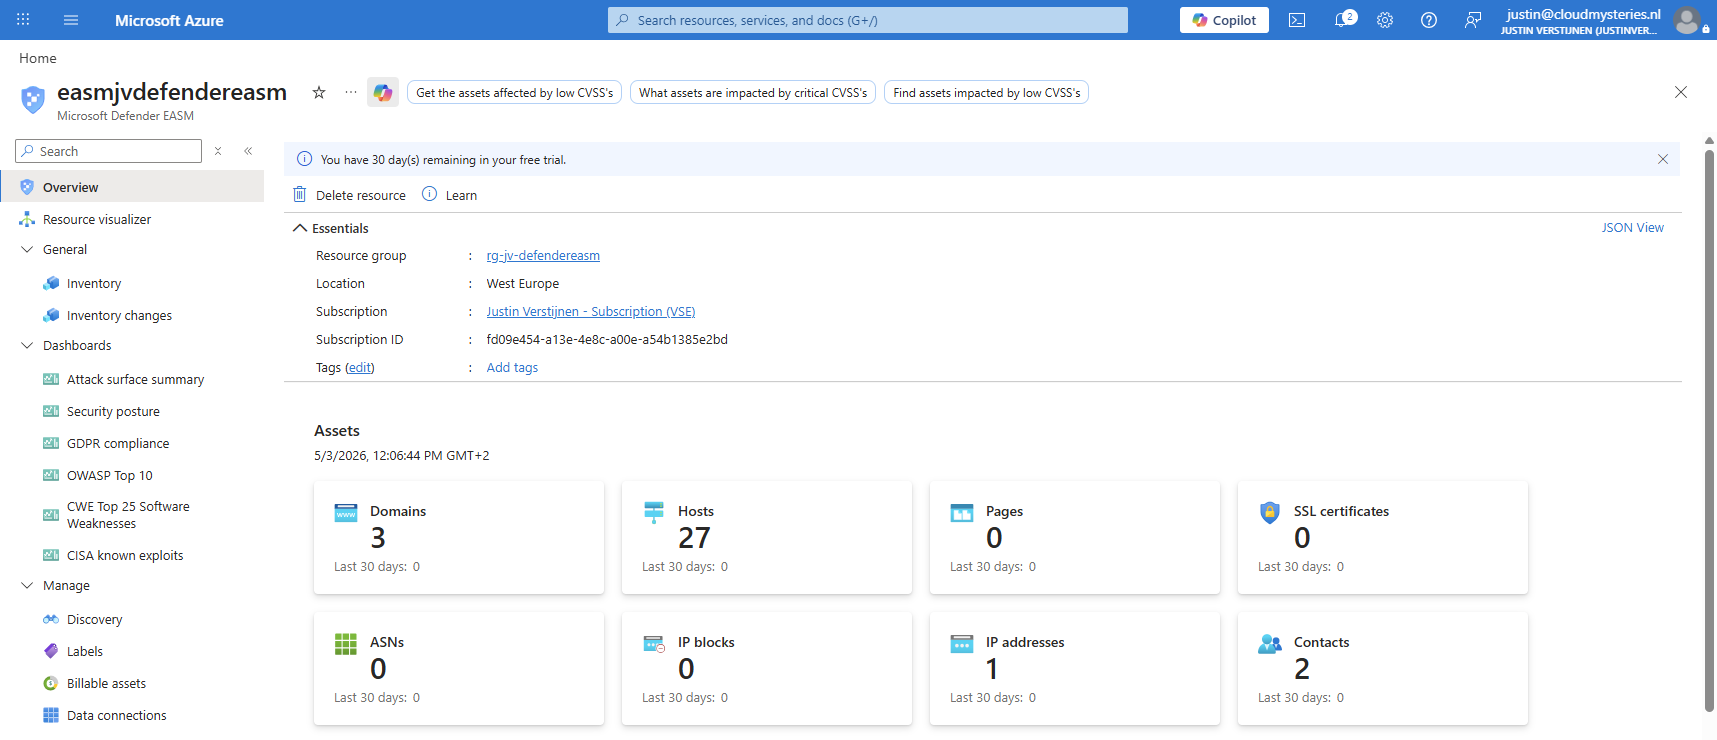
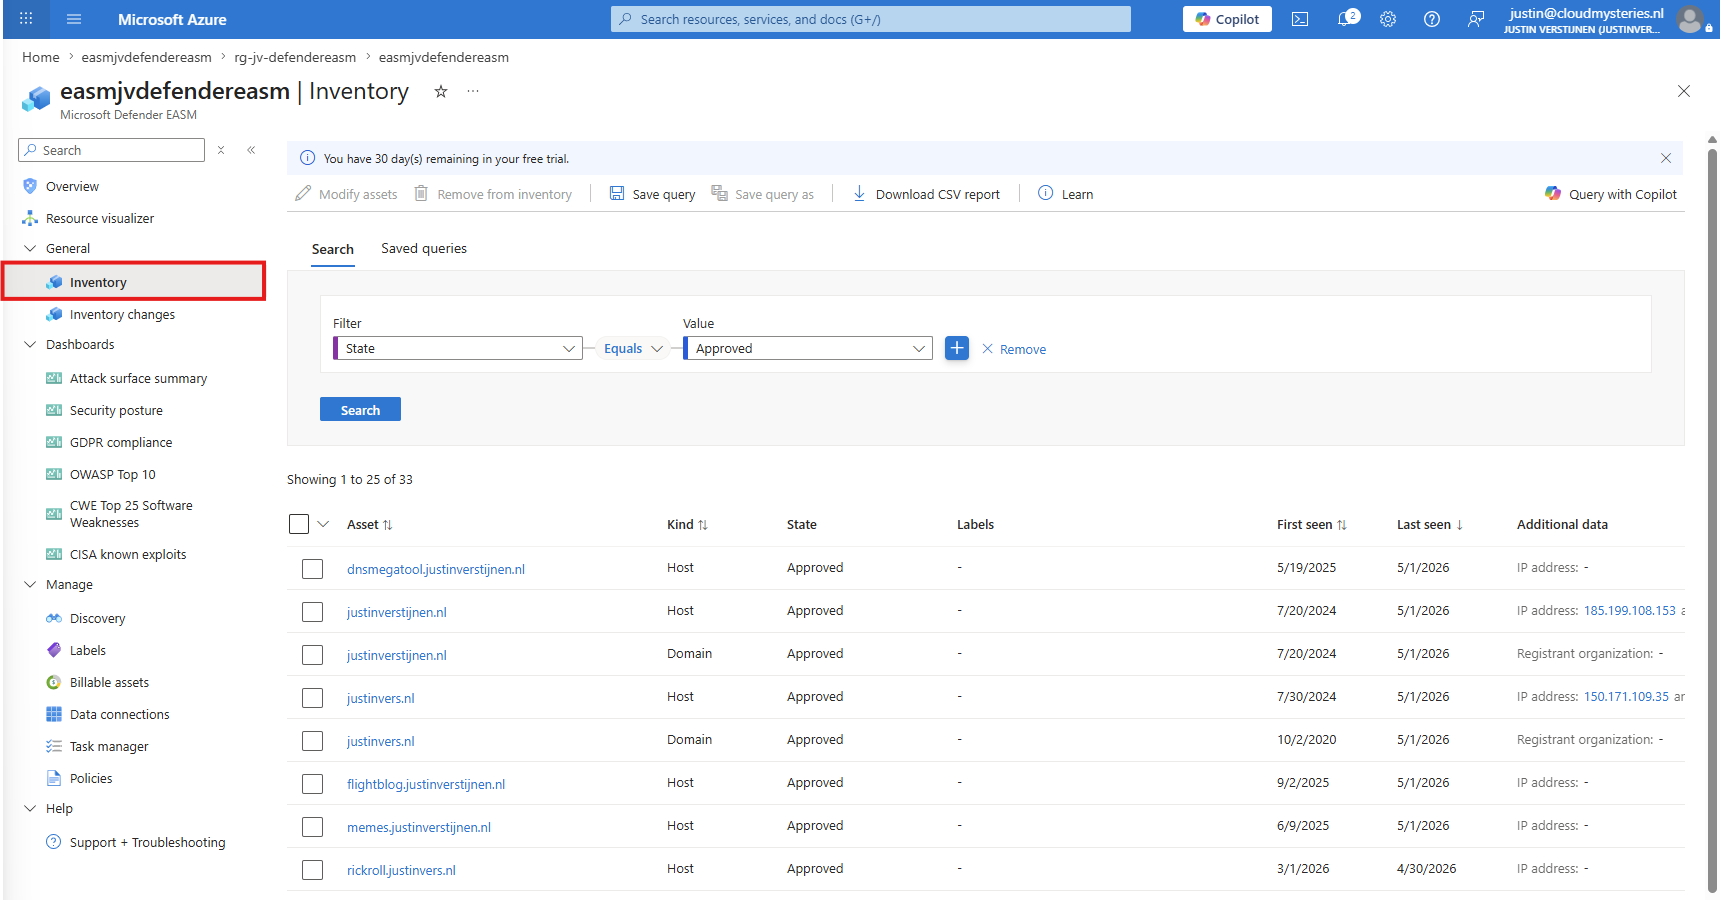
We can now click through all these blocks to view what the solution has found. It immediately starts searching for vulnerabilities and possible attack vectors. The inventory shows all the found assets:
Step 4: Check for possible vulnerabilities
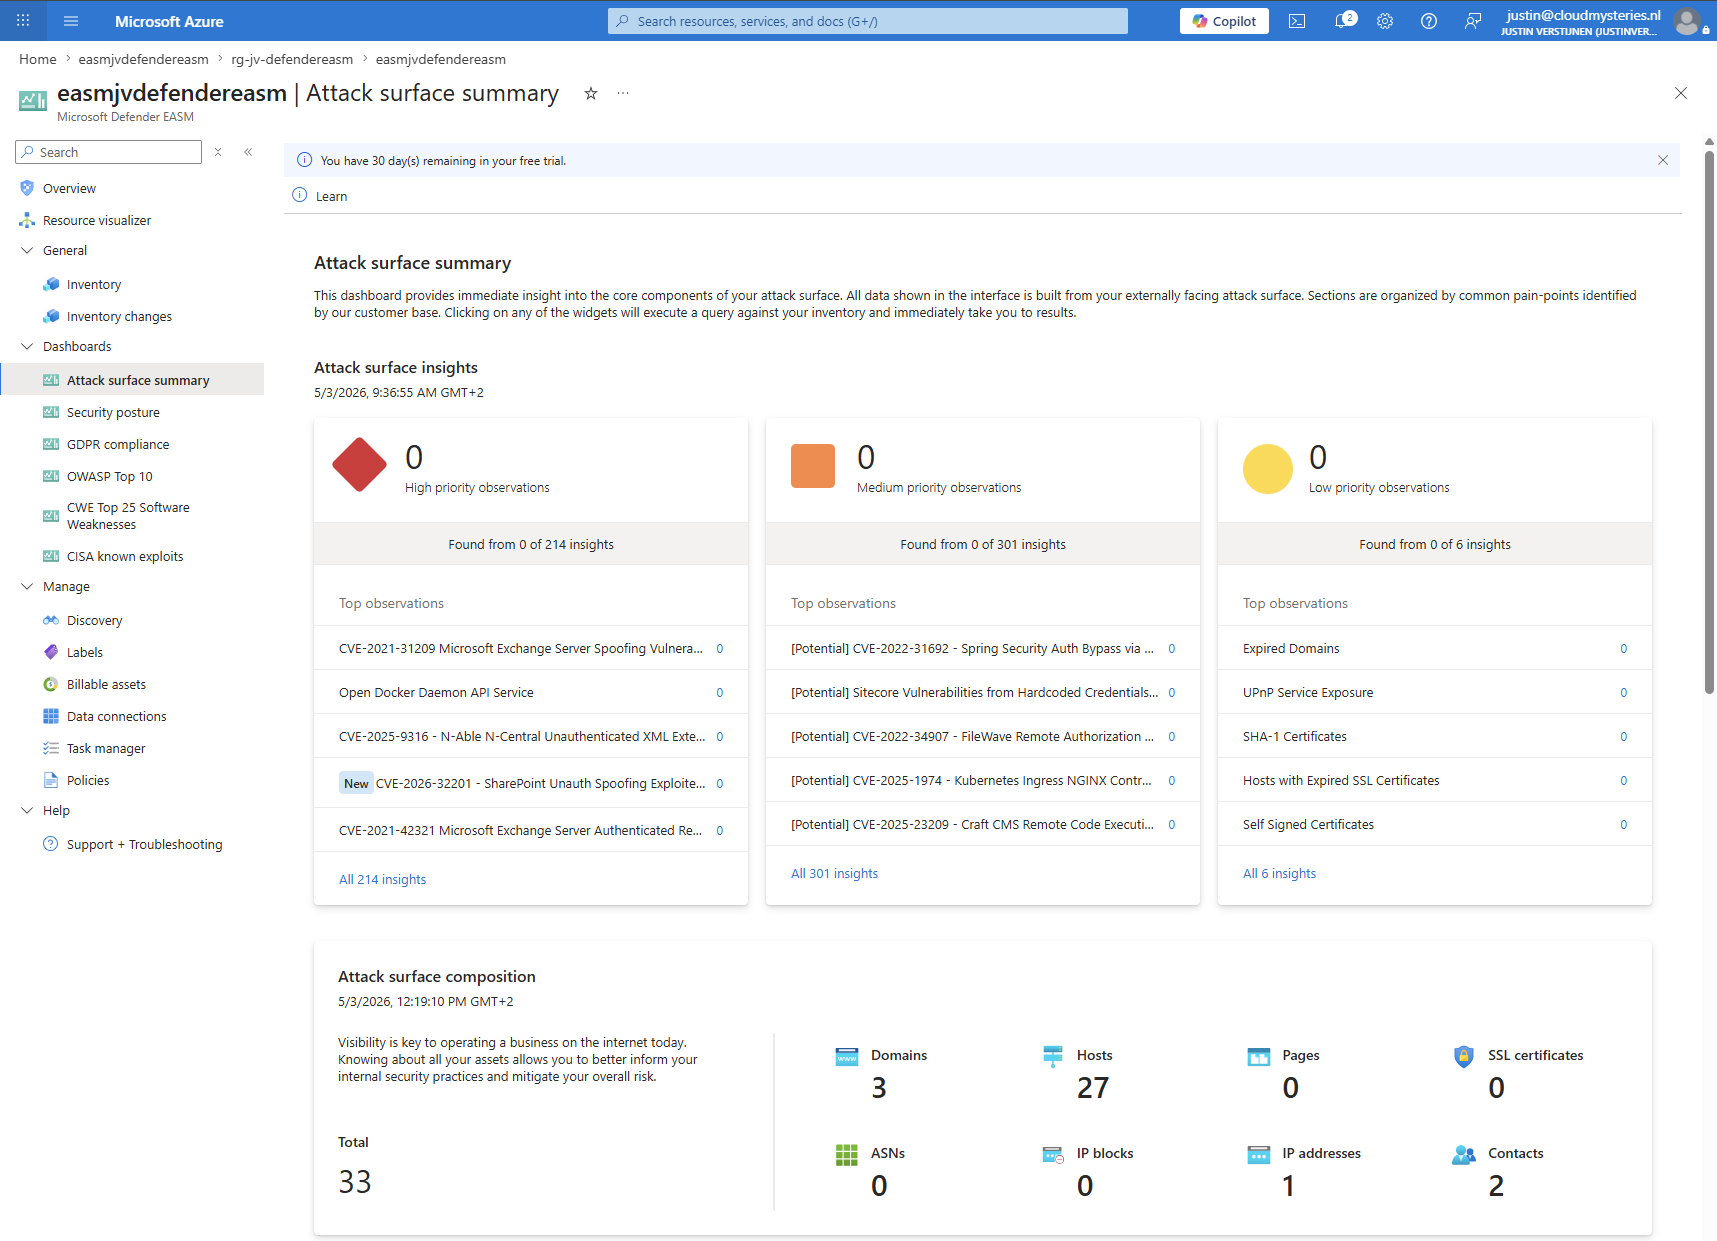
As we now have added our assets and the discovery process has been completed, we can now check if any of our assets is vulnerable to any known vulnerabilities and threats. You can find the exposure under the “Dashboards” category. The “Attack surface summary” shows the most information:
Step 5: Adding resources after discovery (optional)
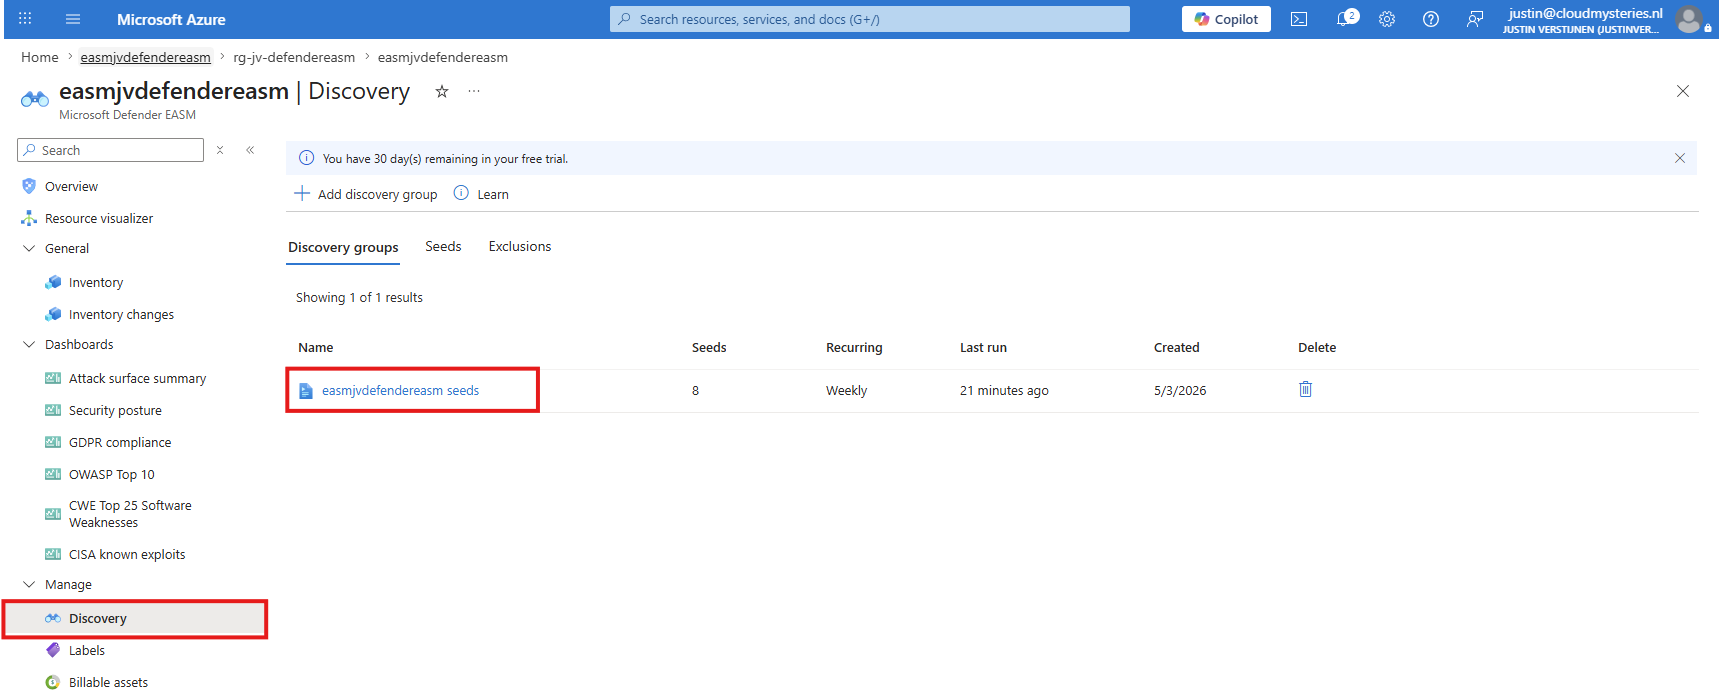
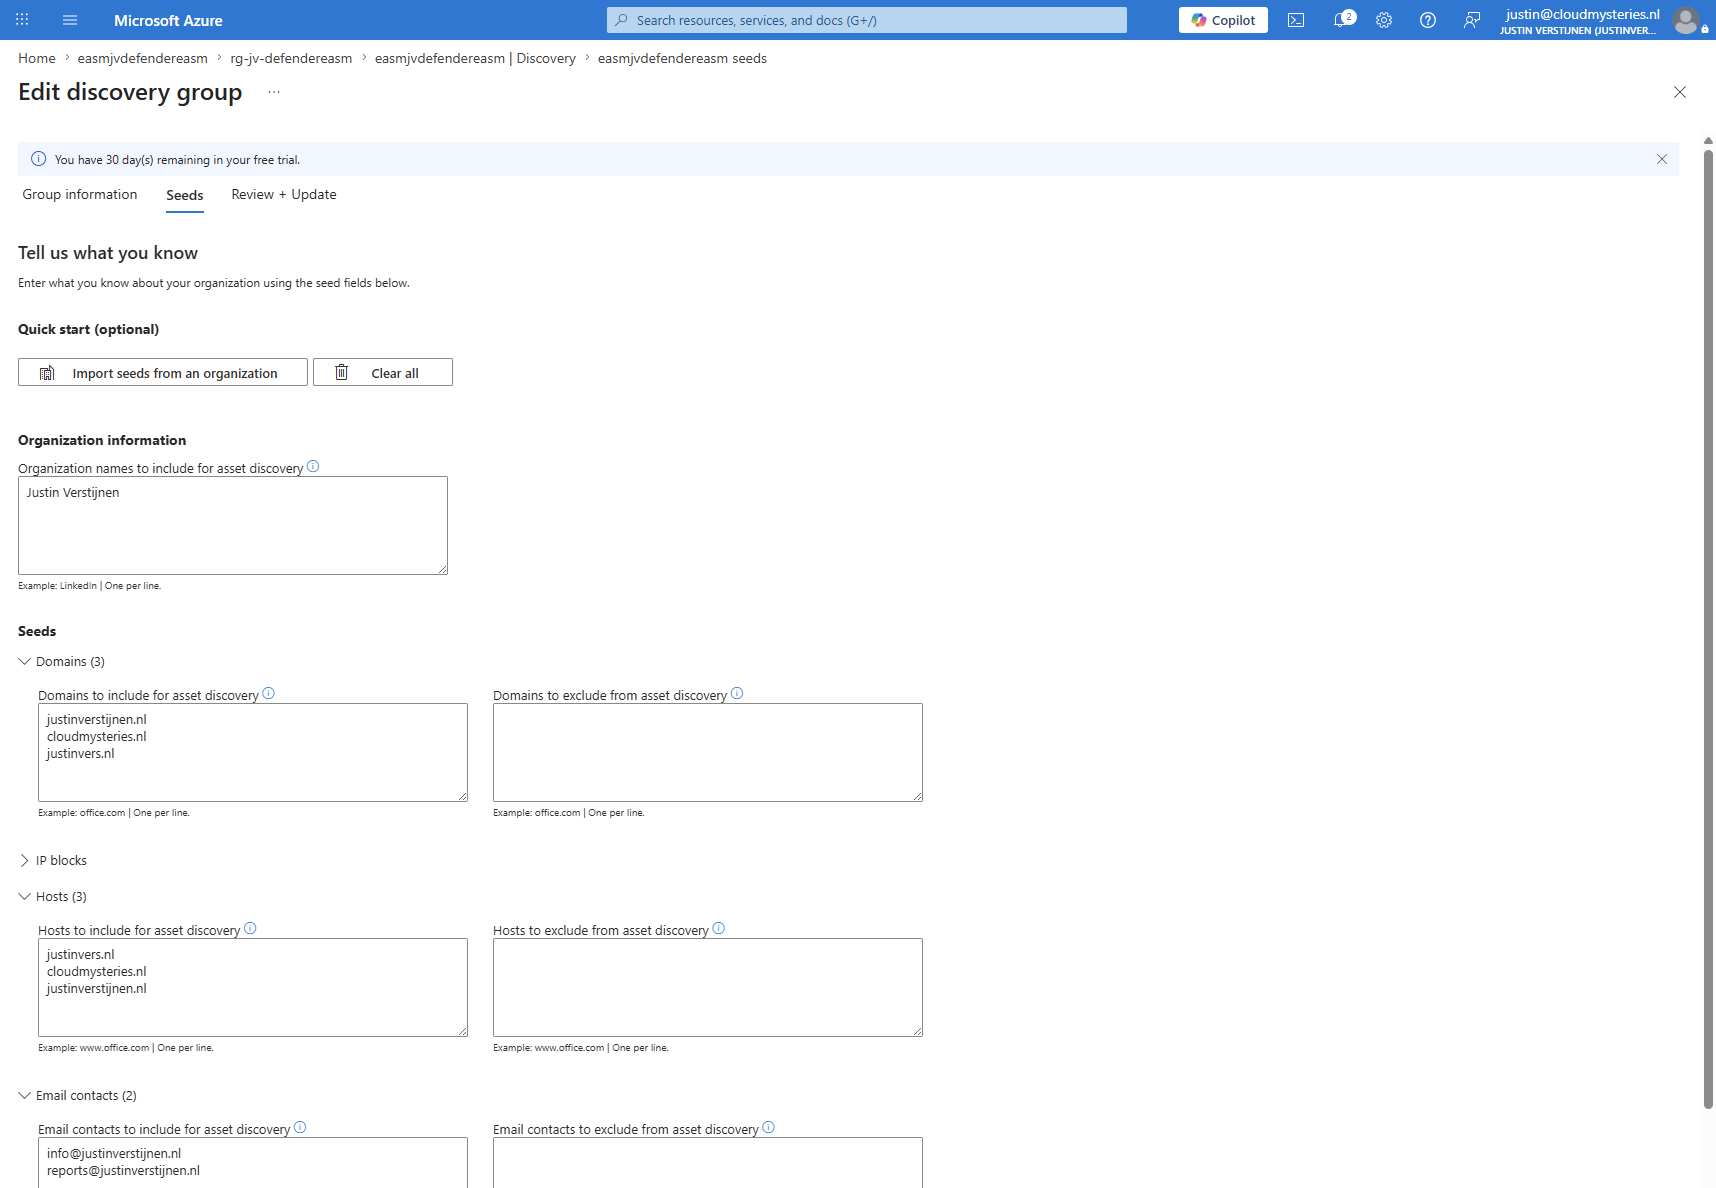
After the initial discovery it’s still possible to add more resources for scanning with Defender EASM. To add more assets, navigate to “Discovery” and open the Discovery group.
Then click the “Edit” button.
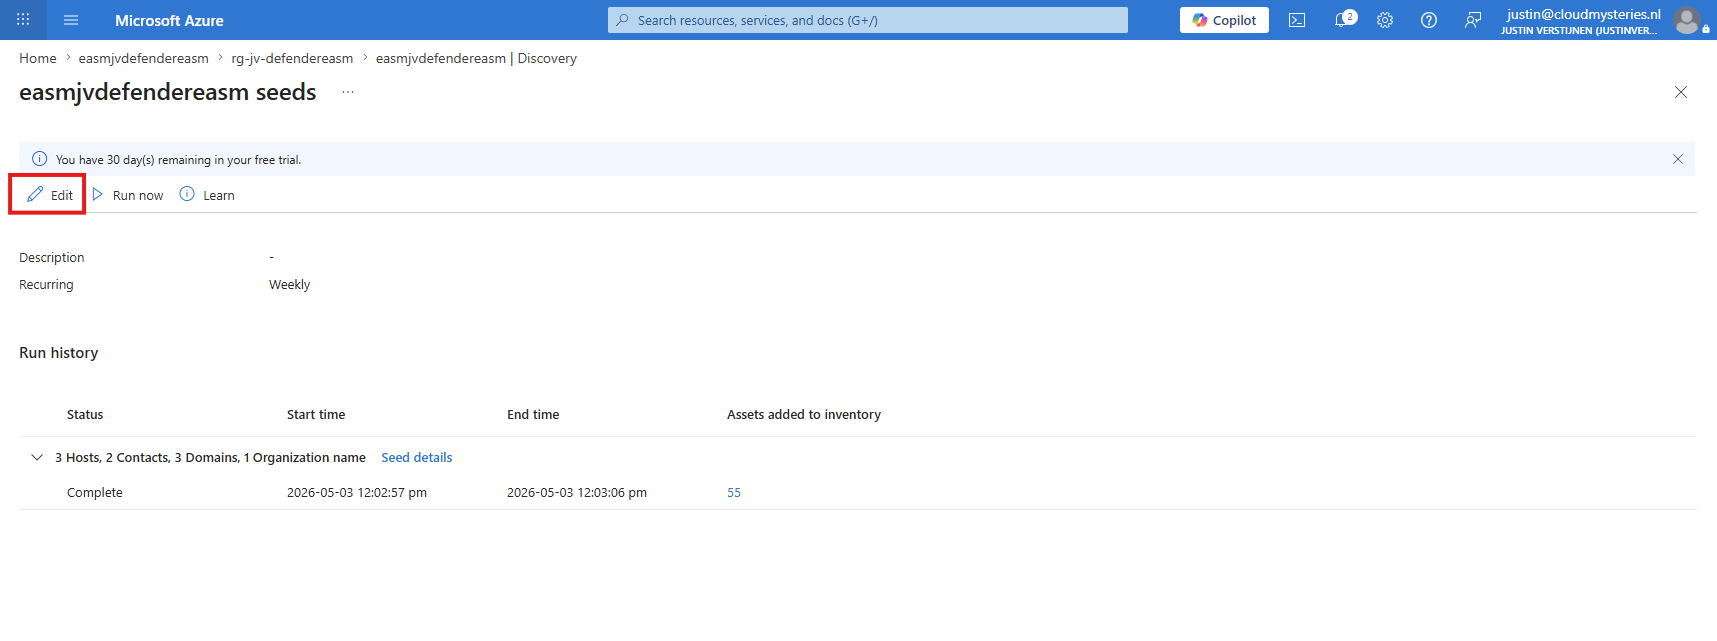
And there are the fields you also filled in earlier.
Testing the solution
To test the detections of Defender EASM, I have deployed a virtual machine with the “Damn Vulnerable Web App” image from the Azure Marketplace. This will become our Honeypot, an intended vulnerable attacking machine. We will then add this to the Defender EASM configuration and scan the host. We are certainly sure that it must find “some” vulnerabilities.
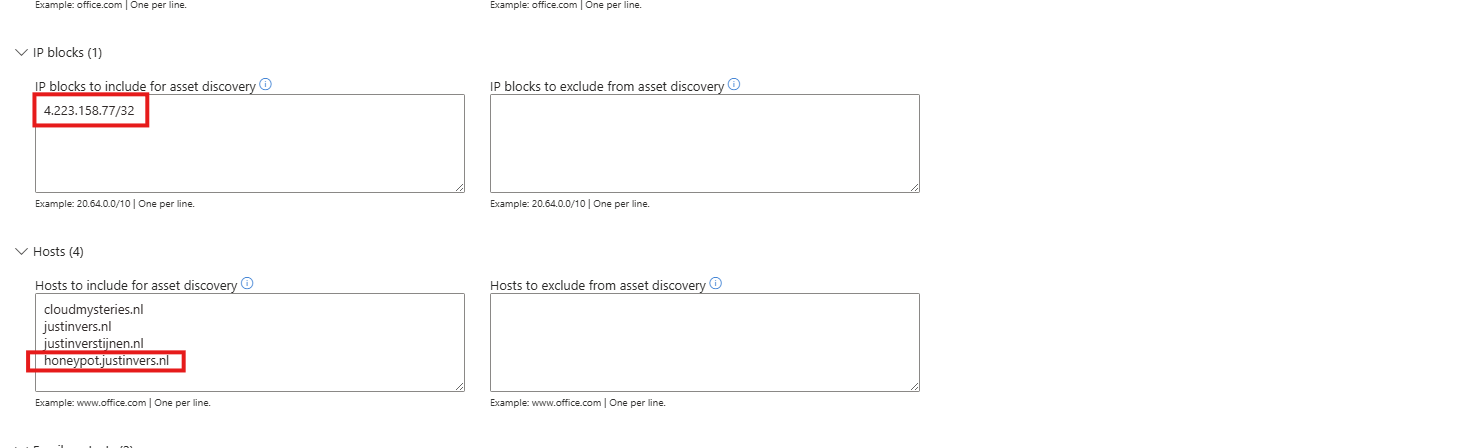
I have added the IP address of the newly created virtual machine and created an A record to point to the VM, to scan on two hosts: both on the IP and on the application level. Now let’s wait on the results of Defender EASM. The machine itself is online during the scanning:
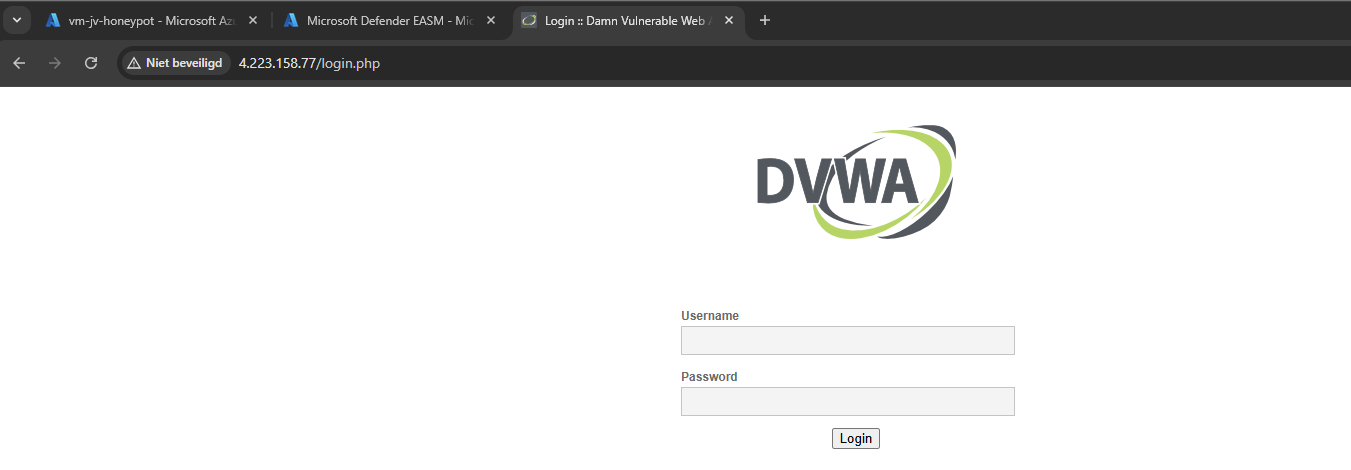
The web-login of the intended vulnerable Web-app.
The overview of the vulnerable server looks like this:
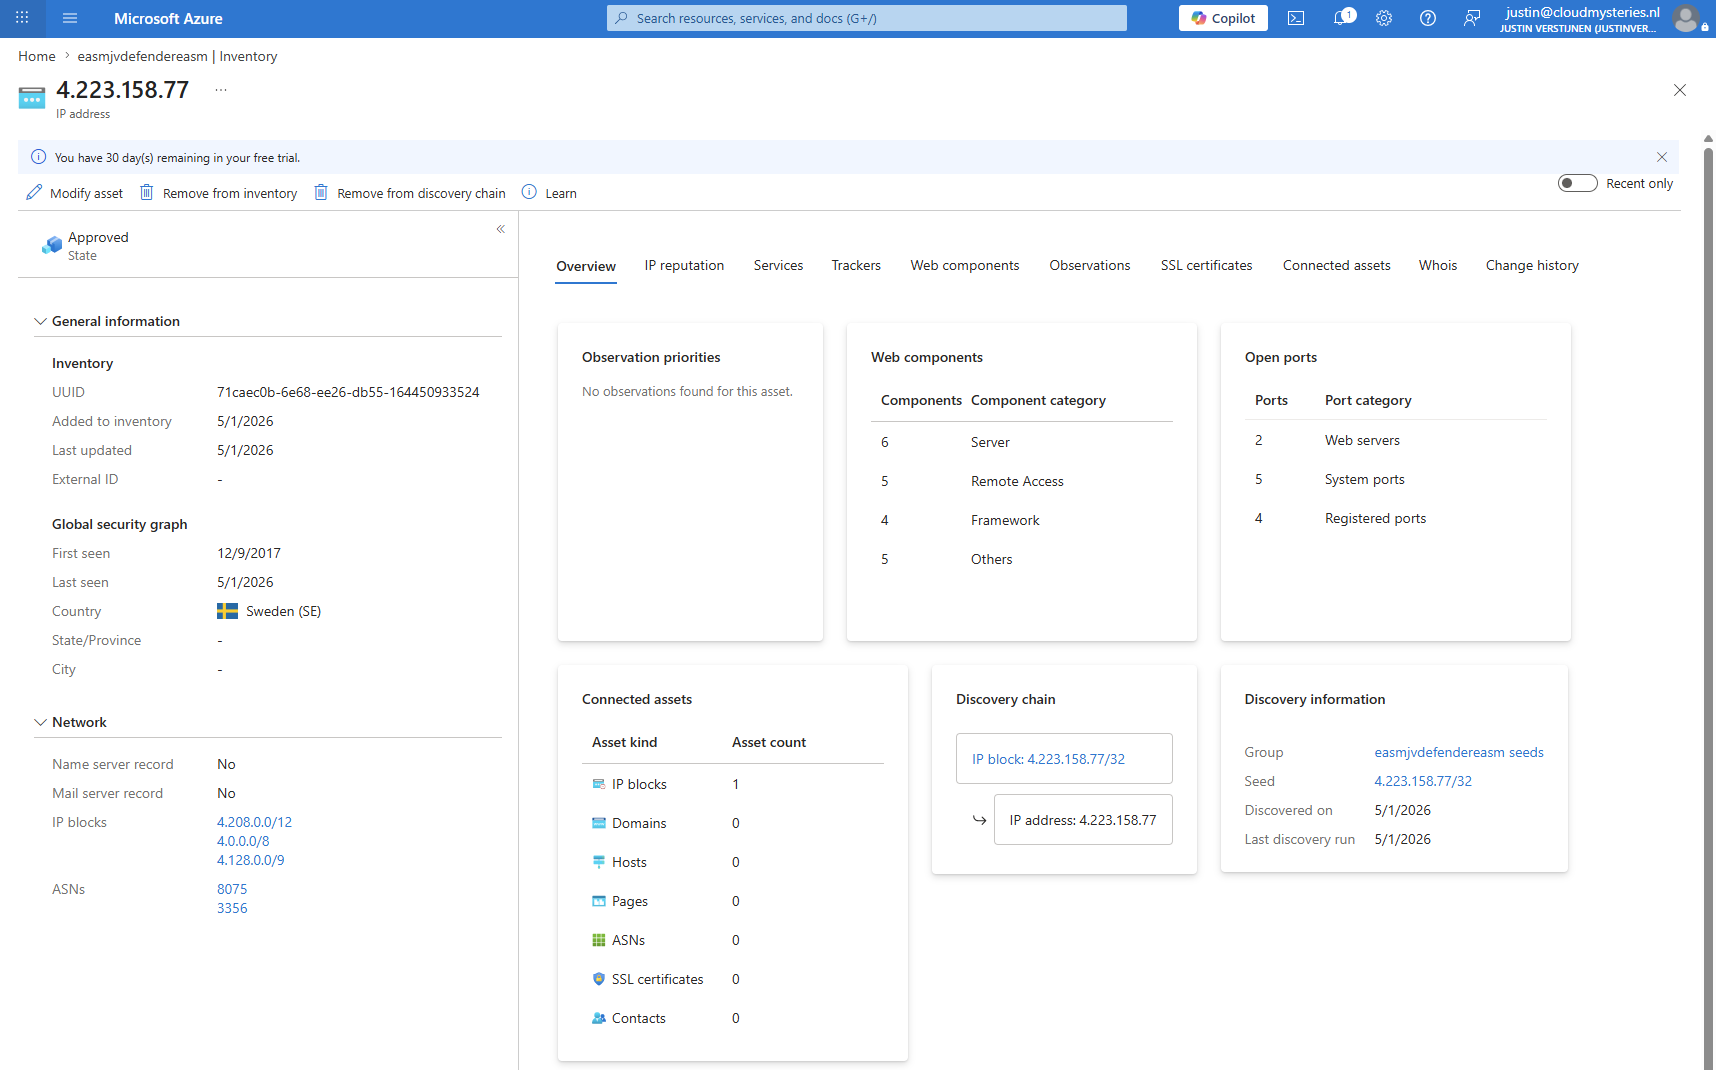
The open ports/services of the server:
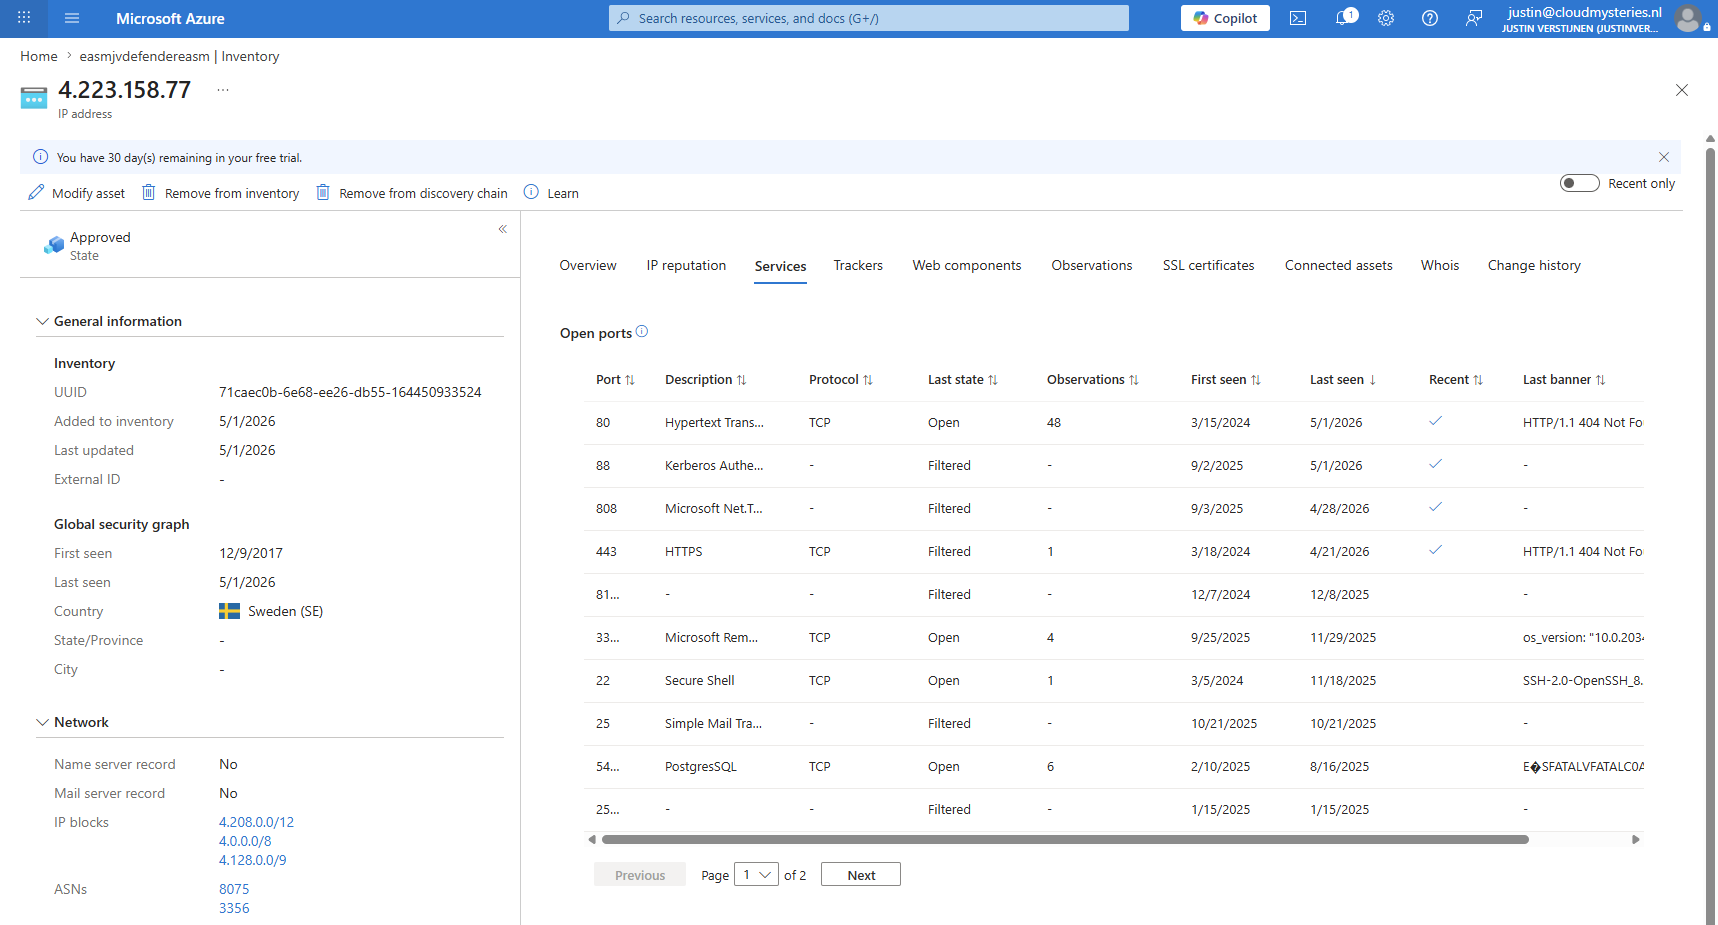
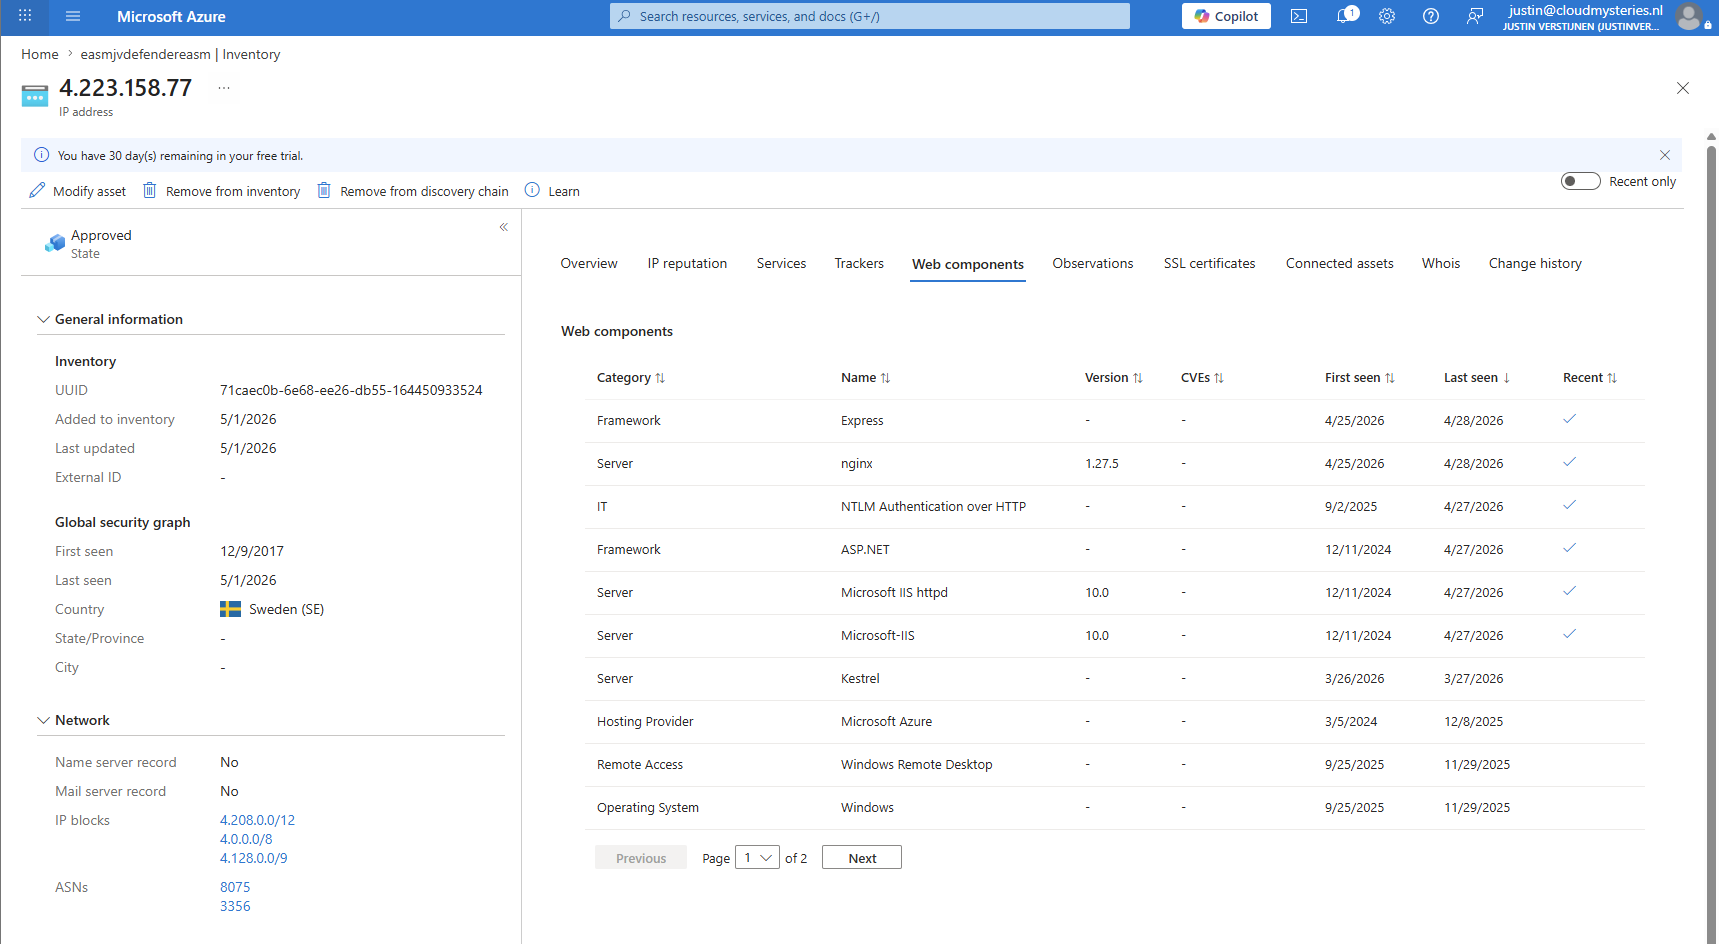
And after scanning, the solution has scanned all vulnerabilities in terms of open ports and services and vulnerabilities to be scanned:
Knowledge check
This quiz needs JavaScript to show the questions and feedback.
Summary
Defender EASM is a nice solution for actively scanning your asset inventory for known vulnerabilities. This can be used as an extra control plane for overviewing those and be informed about the exposure. Limiting this exposure also decreases your attacking possibilities for hackers.
This solution is great to use and not that expensive for the additional security it can provide. However, you must use it as a tool to increase your security. Only enabling it and paying the money does nothing.
Thank you for visiting this page and I hope it was helpful!
End of the page 🎉
You have reached the end of the page. You can navigate through other blog posts as well, share this post on X, LinkedIn and Reddit or return to the blog posts collection page. Thank you for visiting this post.
Support the blog
