Pooled Azure Virtual Desktop with Azure AD cloud users only
Categories:
11 minute read
This deployment option is superseded by the more easy and secure Entra Kerberos option, check out the updated deployment guide here: https://justinverstijnen.nl/azure-virtual-desktop-fslogix-and-native-kerberos-authentication/
Since the beginning of Azure Virtual Desktop, it is mandatory to run it with an Active Directory. This because when using pooled session hosts, there has to be some sort of NTFS permission for FSLogix to reach the users’ profile disks. This permission is done using NTFS with Kerberos authentication. Something Azure AD doesn’t support.
But what if I tell you this is technically possible to do now? We can use Azure Virtual Desktop in a complete cloud-only setup, where we use Azure for our session hosts, a storage account for the storage of the disks, Intune for our centralized configurations and Azure AD/Entra ID for our authentication! All of this without Active Directory, Entra Domain Services of any sort of Entra Connect Sync. Let’s follow this guide to find out.
Requirements
- Basic understanding of Azure
- Basic understanding of Entra ID
- Basic understanding of Azure Virtual Desktop and FSLogix
- Licenses for Intune and Azure Virtual Desktop (365 Business Premium and up)
- An Pay as you go (PAYG) Azure subscription to follow the step by step guide
- Around 60 minutes of your time
How does the traditional setup work?
In traditional environments we built or used an existing Active Directory and we joined the Azure storage account to it with Powershell. This makes Kerberos authentication possible to the fileshare of the storage account and for NTFS as well:
Topology
This means we have to host an Active Directory domain ourselves, and mean we have to patch and maintain those servers as well. Also, in bigger environments we are not done with only one server because of availability reasons.
A good point to remember is that this all works in one flow. The user is authenticated in Active Directory and then authorized with that credential/ticket for the NTFS permissions. Basically how Kerberos works.
How does the cloud only setup work?
In the cloud only setup there are 2 seperate authentication flows. The user will first be authenticated to Entra ID. When the user is authenticated there will be checked if it has the required Azure roles to login into a Entra joined machine.
After that is completed, there will be another authentication flow from the session host to the storage account to verify if the storage access key the session host knows is correct. The session host has the FSLogix setting enabled to access the network as computer account.
Topology
As you might think, there are indeed some security risks with this setup;
As you might think, there are indeed some security risks with this setup;
- The session host has full control over all user disks, not locked down to user1 only access to disk of user1 etc.
- The storage account access key is saved in the machine and does not rotate periodically
However, we want to learn something so we are still going to configure this cloud only setup. But take great care when bringing this into production.
Step 1: Resources and Hostpool
My environment looks like this before the guide. I already have created the needed resources to perform the tasks:
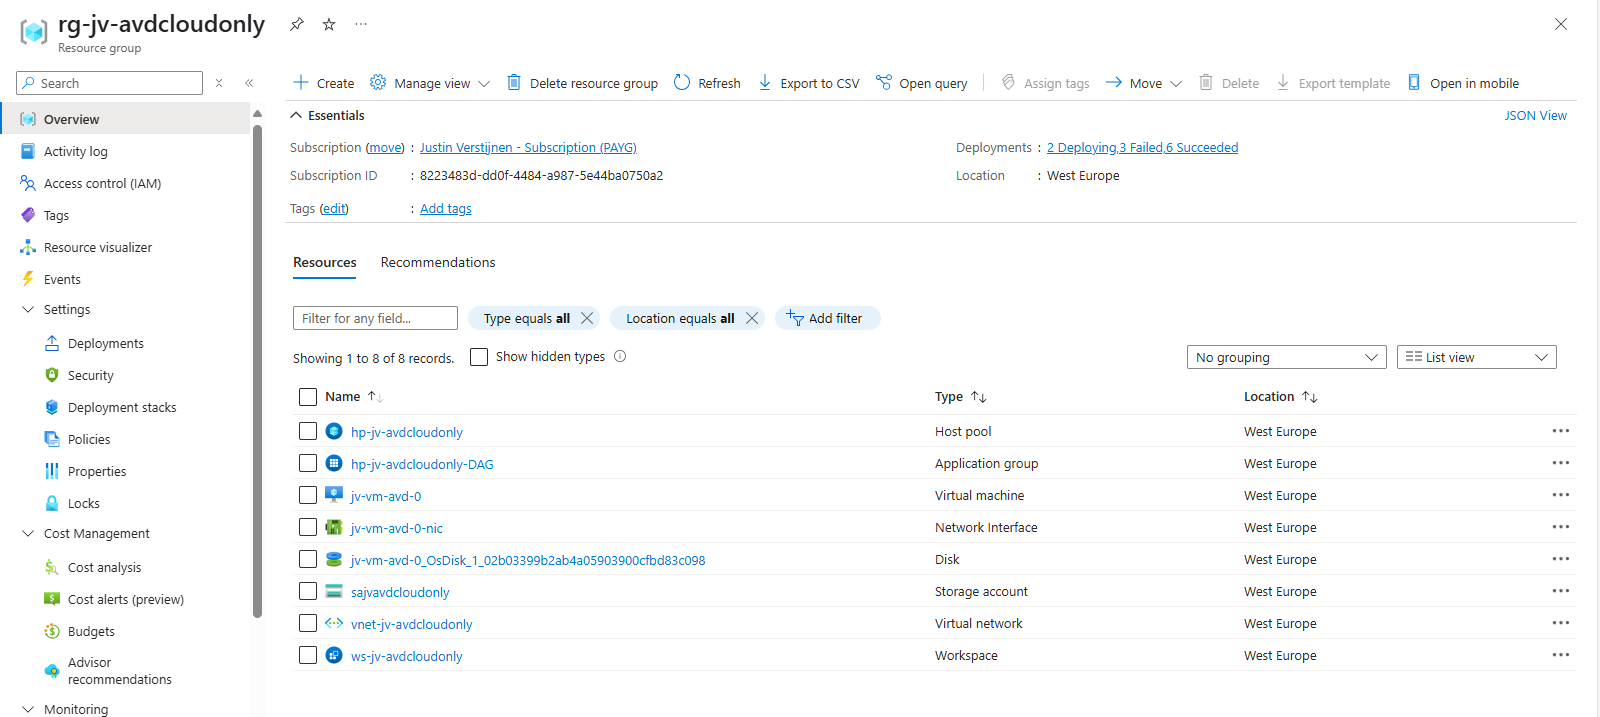
So I created the hostpool, a network, the workspace and a demo VM to test this configuration with.
The hostpool must be an Entra ID joined hostpool, which you can configure at the creation wizard of the hostpool:
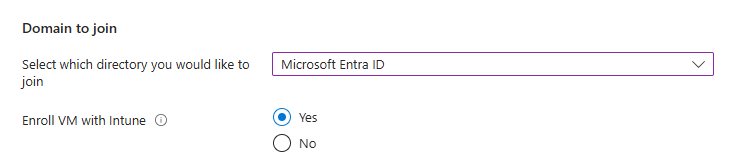
I also highly recommend using the “Enroll VM with Intune” option so we can manage the session hosts with Intune, as we don’t have Group Policies in this cloud only setup.
Step 2: Create a test user and assign roles
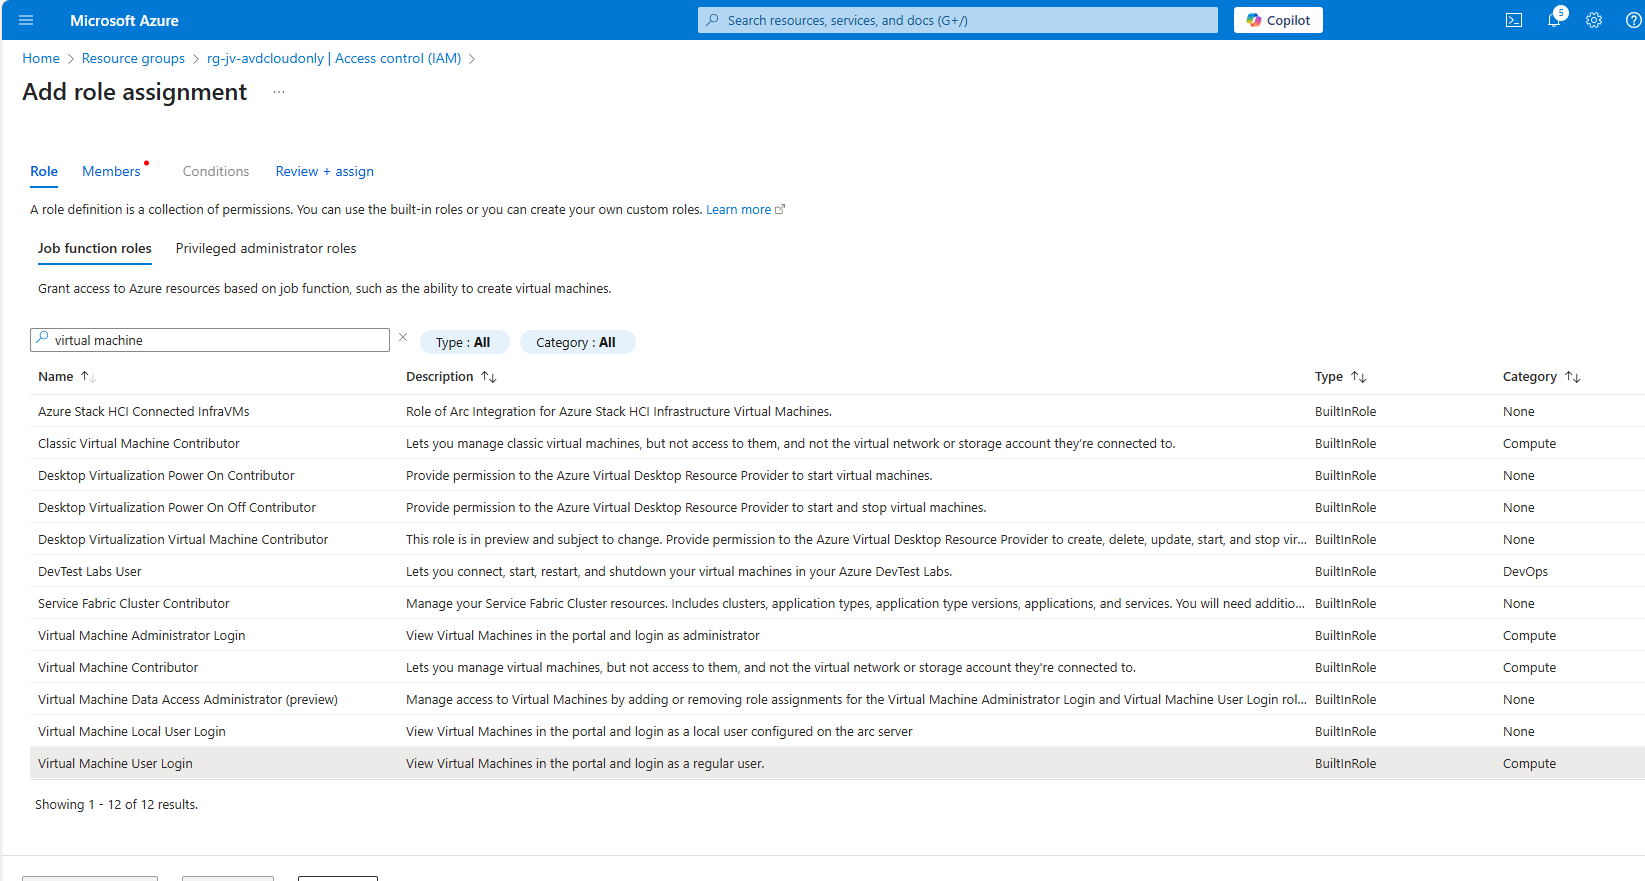
The cloud only setup need different role assignments and we will create a test user and assign him one of these roles:
- Virtual Machine User Login on all session hosts -> Resource group
- For default, non administrative users
- Virtual Machine Administrator Login on all session hosts -> Resource group
- For administrative users
In addition, our test user must have access to the Desktop application group in the Azure Virtual Desktop hostpool.
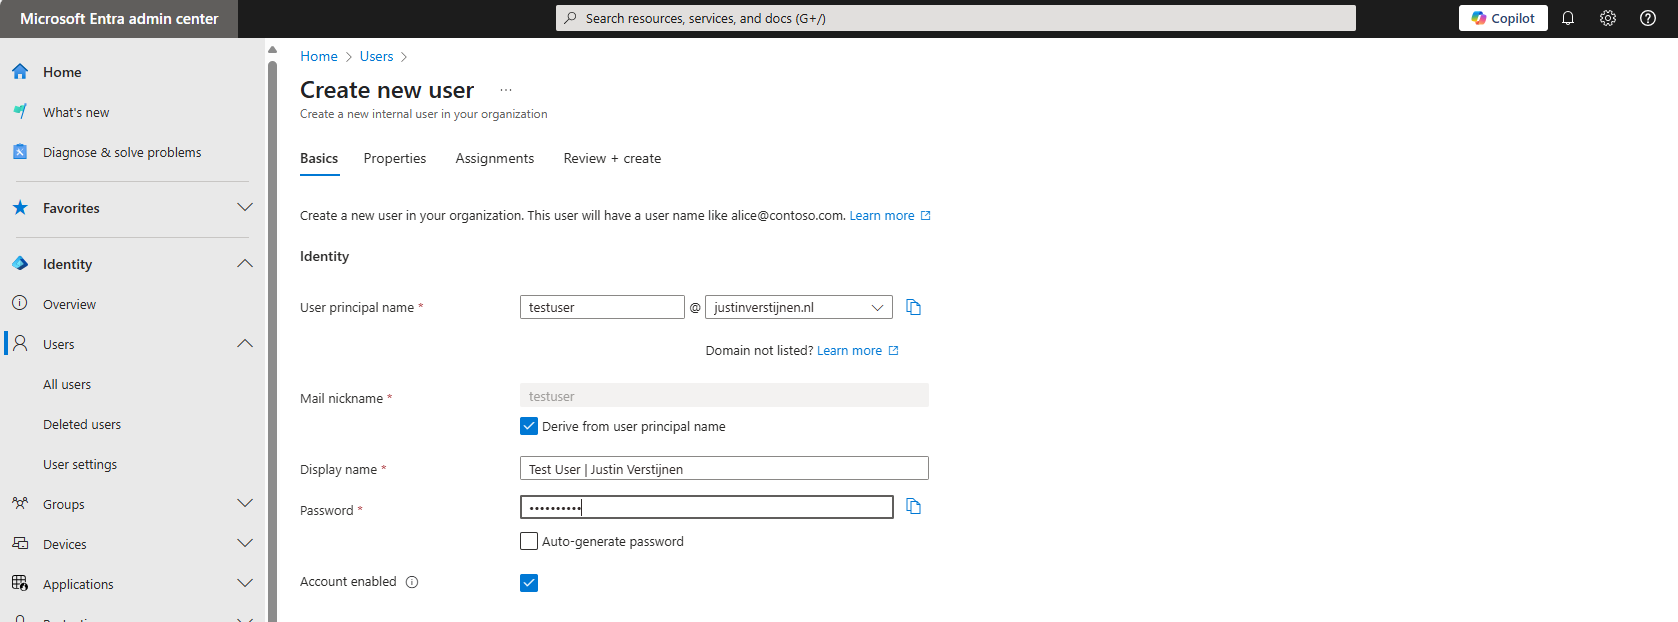
In this case, we are going to create our test user and assign him the default, non administrative role:
Now that the user is created, go to the Azure Portal, and then to the resource group where your session hosts lives:
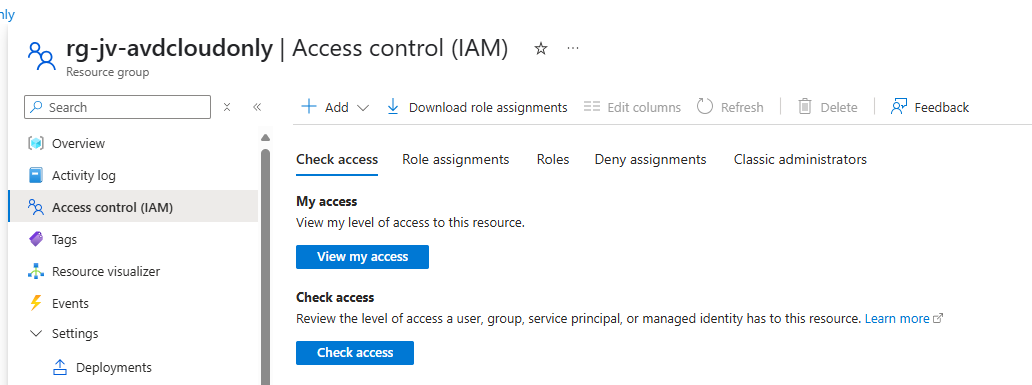
Click on “+ Add” and then on “add role assignment”:
Then click on “Next” and under “User, group or service principal” select your user or user group:
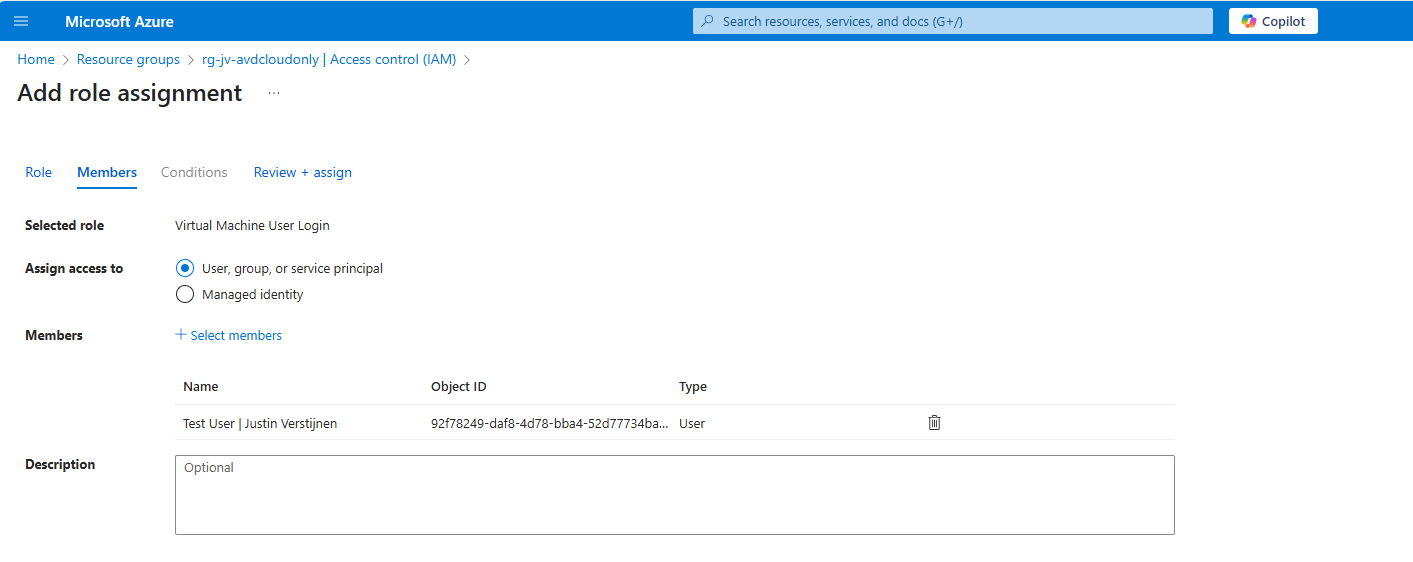
Click on “Review + assign” to assign the role to your users.
This is an great example of why we place our resources in different resource groups. These users can login into every virtual machine in this resource group. By placing only the correct virtual machines in this resource group, the access is limited.
Now we navigate to our Hostpool to give our user access to the desktops.
Go to “Application Groups”, and then to our Hostpool DAG:
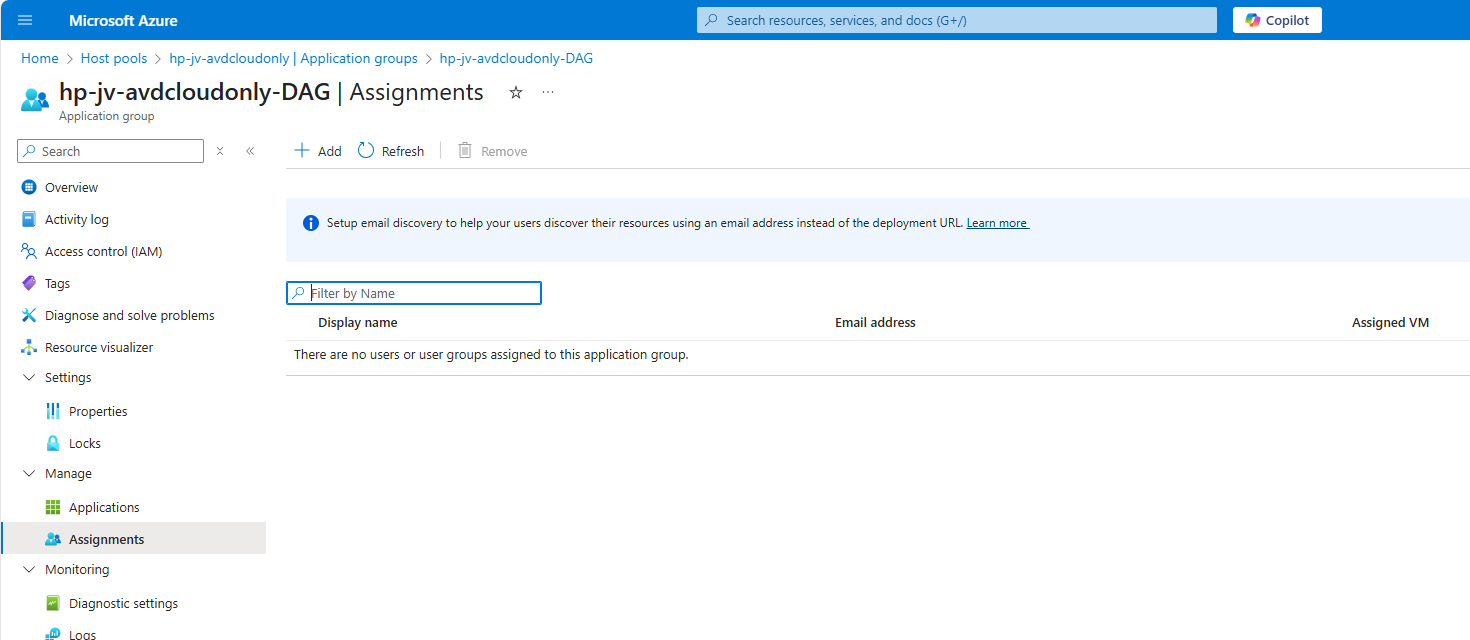
Click on “+ Add” to add our user or user group here:
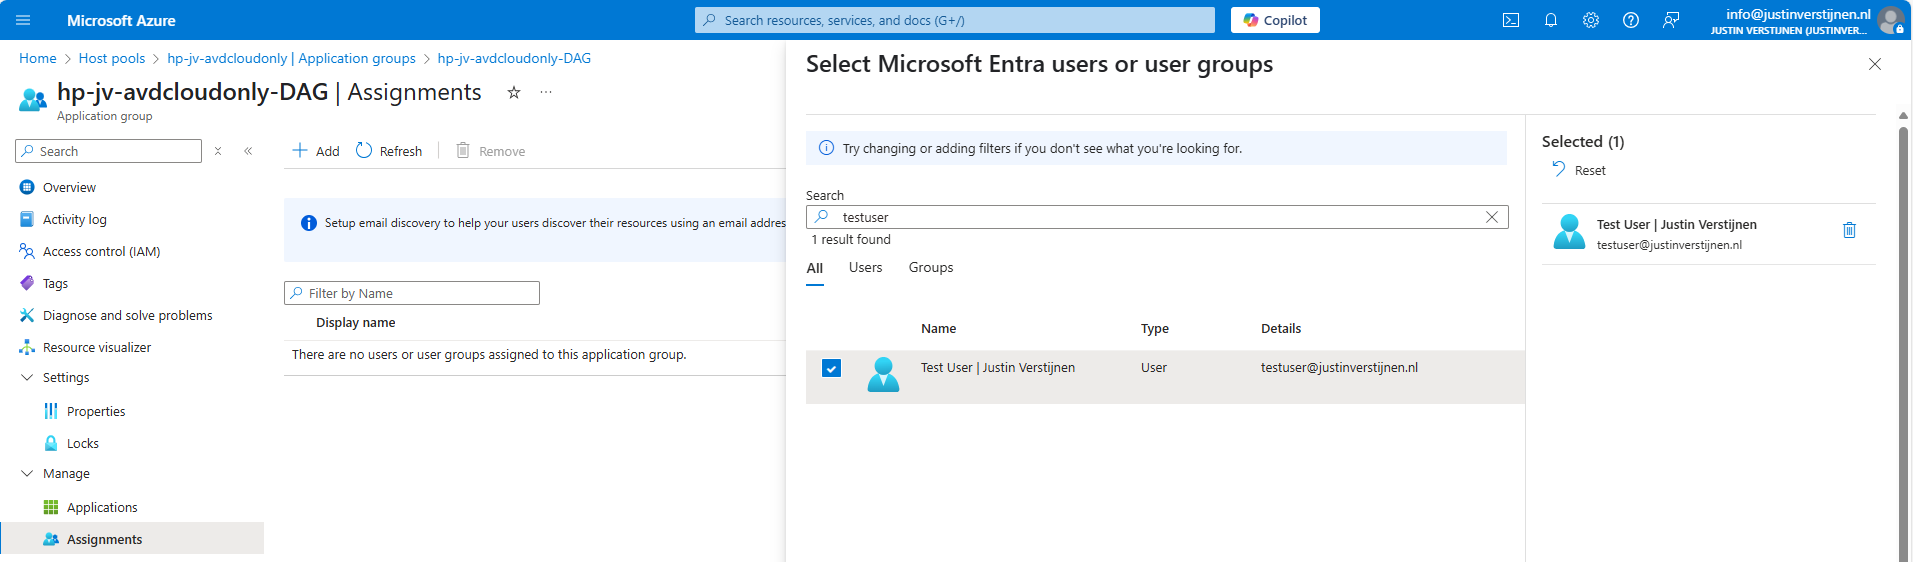
Select your user or group here and save. The user/group is now allowed to logon to the hostpool and get the workspace in the Windows App.
Step 3: Create a dynamic group for session hosts (optional)
Before we can configure the session hosts in Microsoft Intune, we need to have a group for all our session hosts. I really like the use of dynamic group for this sort of configurations, because the settings will be automatically done. Otherwise we configure a new session host in about 3 months later and forget about the group assignment.
Go to Microsoft Entra and then to groups:
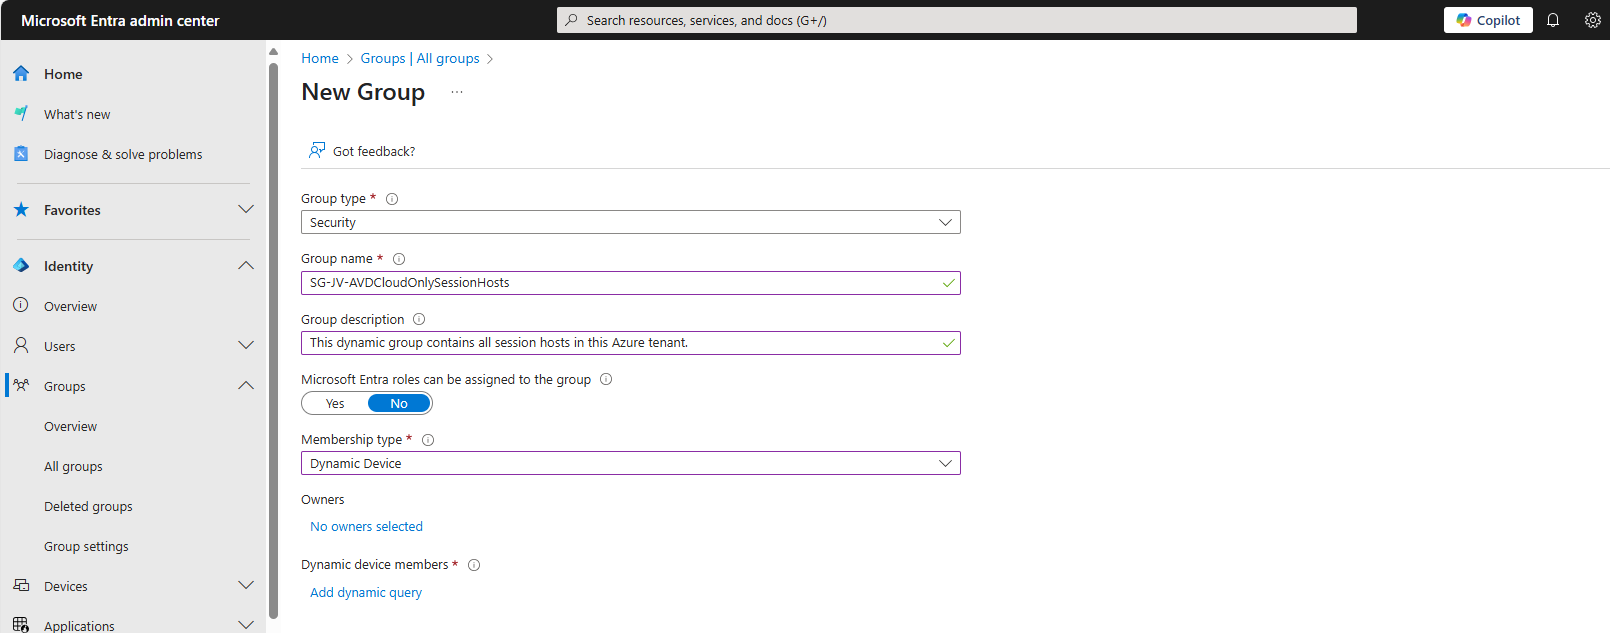
Create a new “Dynamic Device” security group and add the following query:
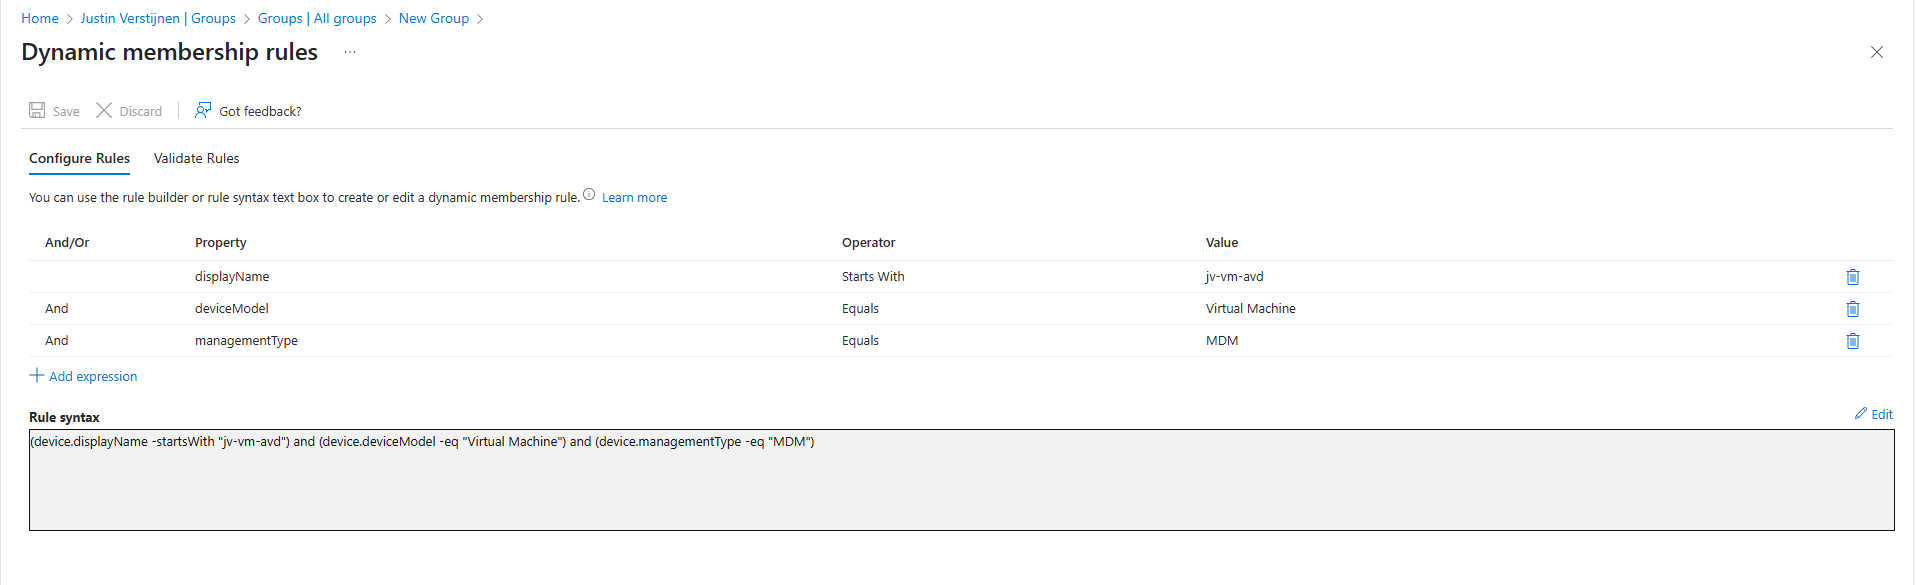
(device.displayName -startsWith "jv-vm-avd") and (device.deviceModel -eq "Virtual Machine") and (device.managementType -eq "MDM")This ensures no other device comes into the group by accident or by a wrong name. Only Virtual Machines starting with this name and managed by Intune will join the group.
This looks like this:
Validate your rule by testing these rules on the “Validate Rules” tab:
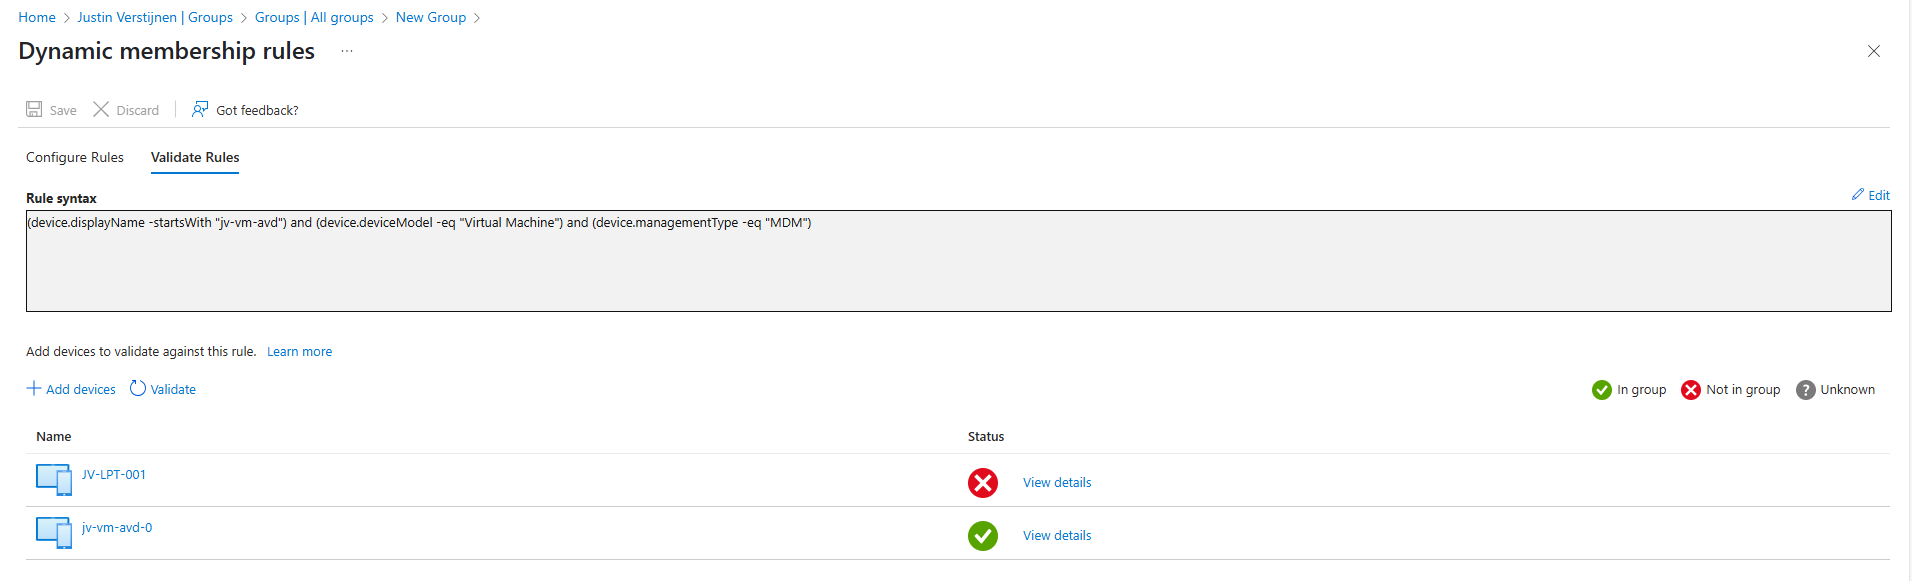
Now we are 100% sure our session host will join the group automatically but a Windows 11 laptop for example not.
Step 4: Configure FSLogix
We can now configure FSLogix in Intune. I do this by using configuration profiles from settings catalogs. These are easy to configure and can be imported and exported. Therefore I added a download link for you:
Download FSLogix configuration template
To configure this manually create a new configuration template from scratch for Windows 10 and higher and use the “Settings catalog”
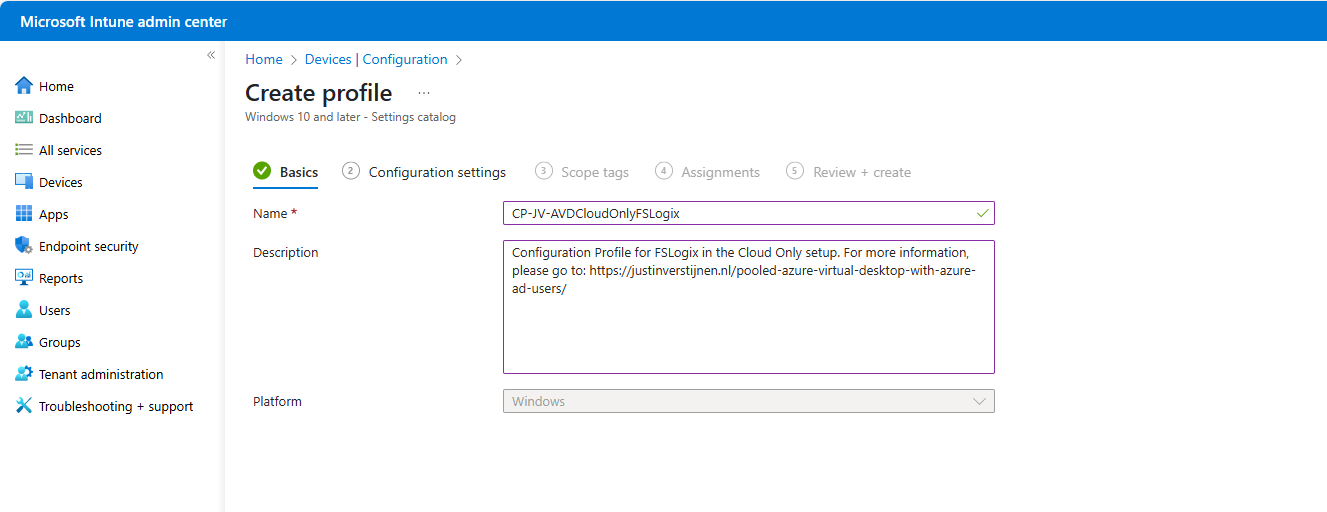
Give the profile a name and description and advance.
Click on “Add settings” and navigate to the FSLogix policy settings.
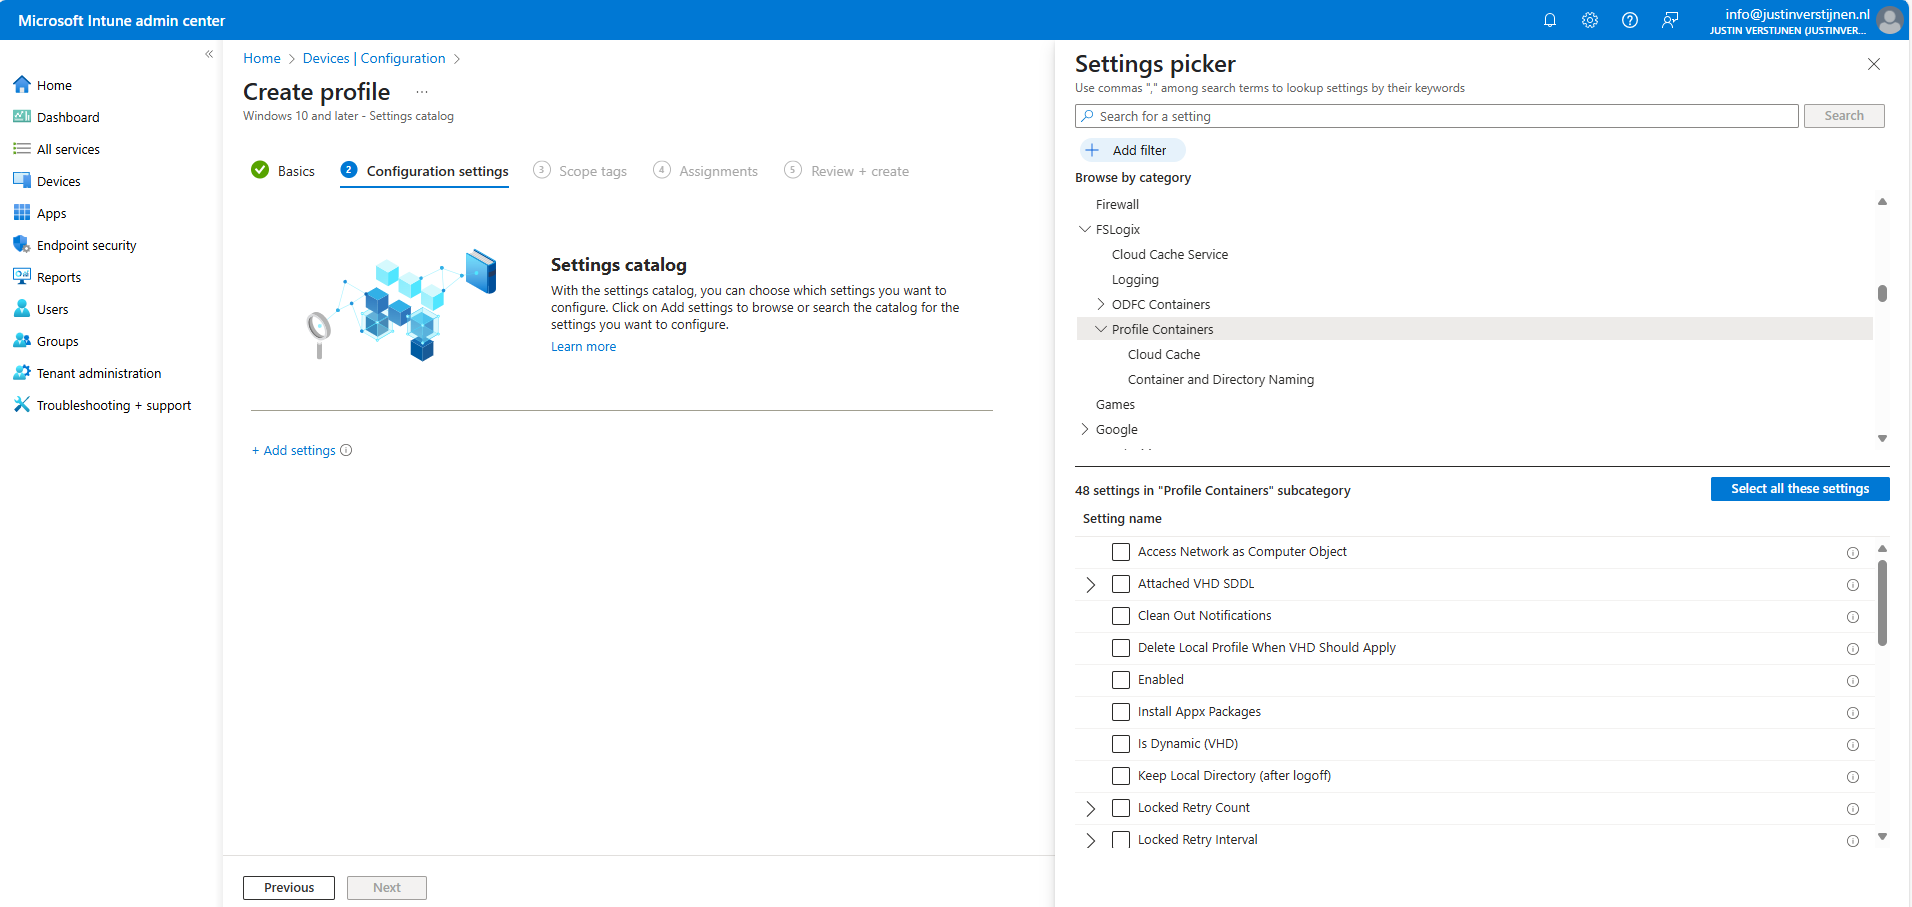
Profile Container settings
Under FSLogix -> Profile Containers, select the following settings, enable them and configure them:
| Setting name | Value |
|---|---|
| Access Network as Computer Object | Enabled |
| Delete Local Profile When VHD Should Apply | Enabled |
| Enabled | Enabled |
| Is Dynamic (VHD) | Enabled |
| Keep Local Directory (after logoff) | Enabled |
| Prevent Login With Failure | Enabled |
| Roam Identity | Enabled |
| Roam Search | Disabled |
| VHD Locations | Your storage account and share in UNC. Mine is here: \\sajvavdcloudonly.file.core.windows.net\fslogix-profiles |

Container naming settings
Under FSLogix -> Profile Containers -> Container and Directory Naming, select the following settings, enable them and configure them:
| Setting name | Value |
|---|---|
| No Profile Containing Folder | Enable |
| VHD Name Match | %username% |
| VHD Name Pattern | %username% |
| Volume Type (VHD or VHDX) | VHDX |
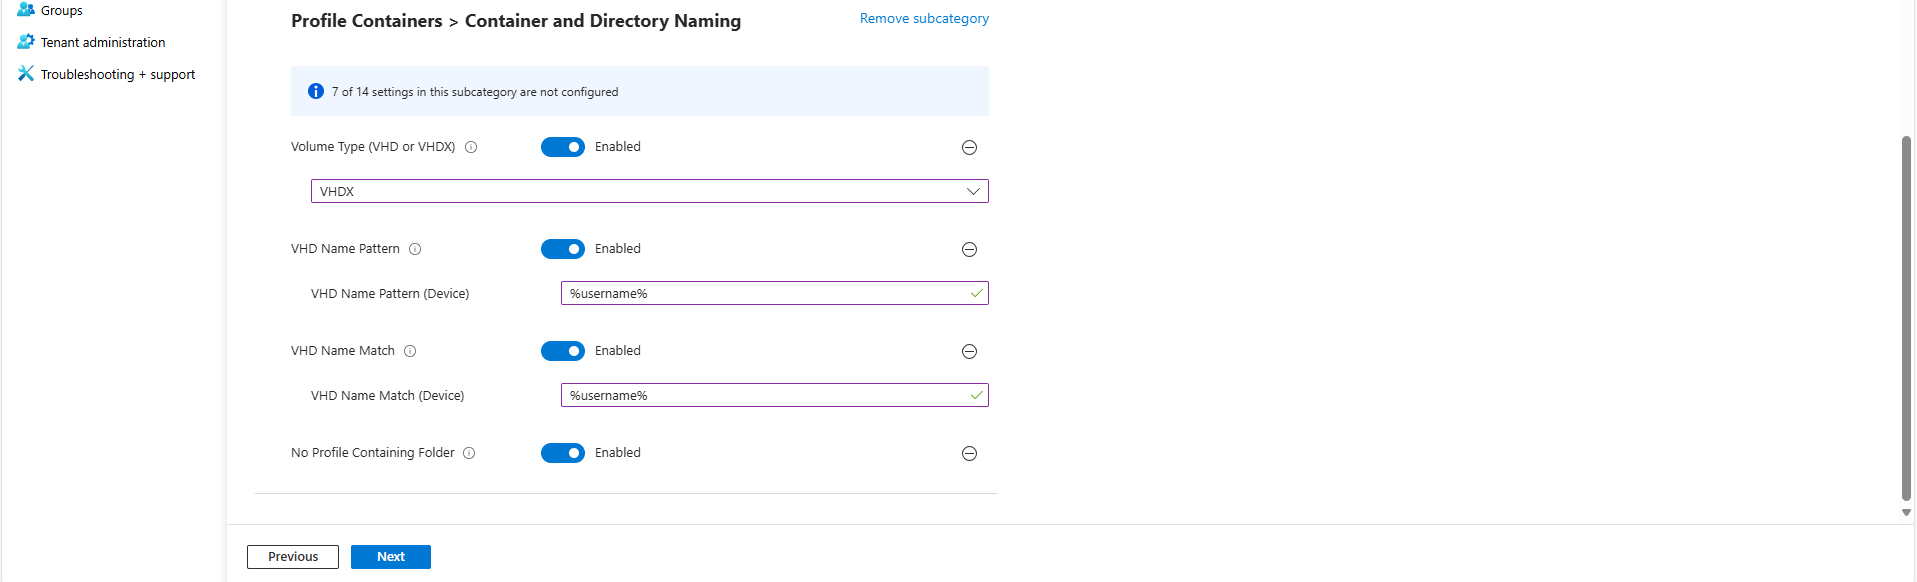
You can defer from this configuration to fit your needs, this is purely how I configured FSLogix.
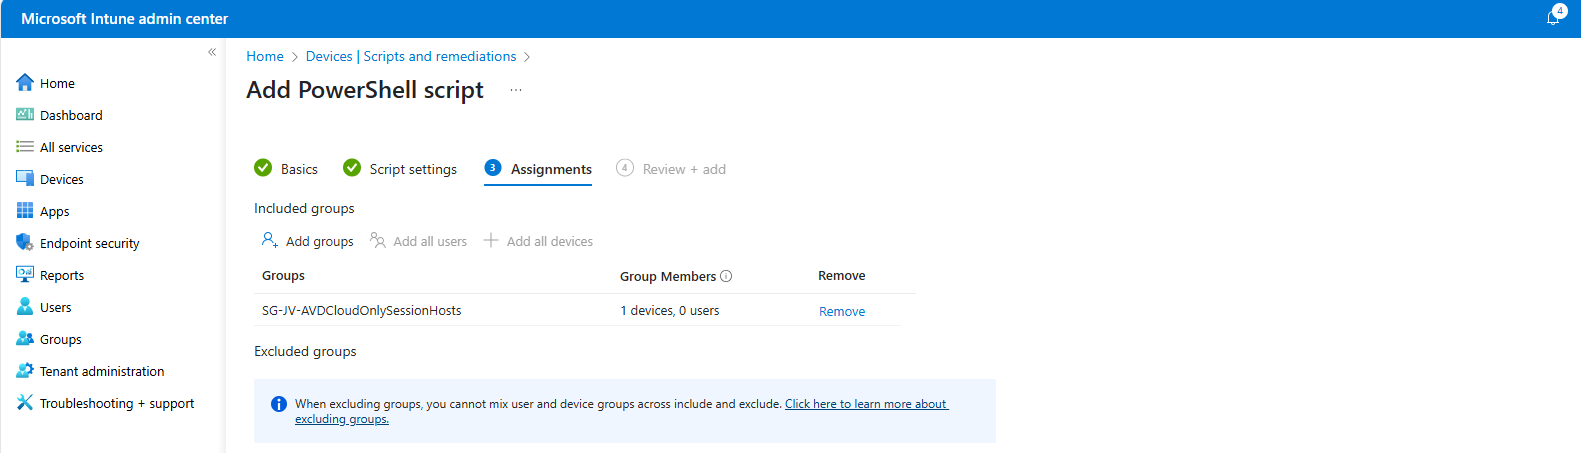
After configuring the settings, advance to the “Assignments” tab:
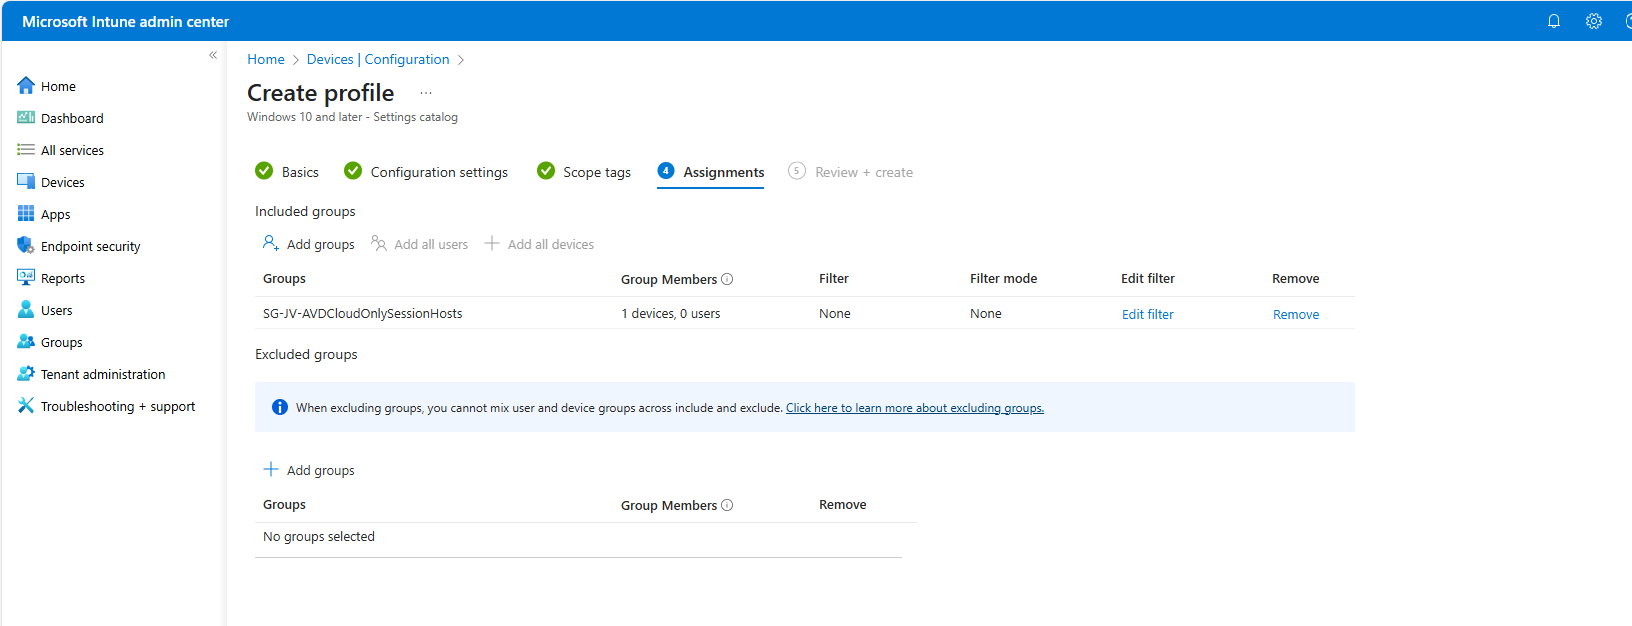
Select your group here as “Included group” and save.
Step 5: Create Powershell script for connection to Storage account
We now have to create a Powershell script to connect the session hosts to our storage account and share. This is to automate this task and for each session host in the future you add that it works right out of the box.
In this script, there is an credential created to access the storage account, an registery key to enable the credential in the profile and an additional registery key if you use Windows 11 22H2 to make it work.
# PARAMETERS
# Change these 3 settings to your own settings
# Storage account FQDN
$fileServer = "yourstorageaccounthere.file.core.windows.net"
# Share name
$profilesharename = "yoursharehere"
# Storage access key 1 or 2
$storageaccesskey = "yourkeyhere"
# END PARAMETERS
# Don't change anything under this line ---------------------------------
# Formatting user input to script
$profileShare="\\$($fileServer)\$profilesharename"
$fileServerShort = $fileServer.Split('.')[0]
$user="localhost\$fileServerShort"
# Insert credentials in profile
New-Item -Path "HKLM:\Software\Policies\Microsoft" -Name "AzureADAccount" -ErrorAction Ignore
New-ItemProperty -Path "HKLM:\Software\Policies\Microsoft\AzureADAccount" -Name "LoadCredKeyFromProfile" -Value 1 -force
# Create the credentials for the storage account
cmdkey.exe /add:$fileServer /user:$($user) /pass:$($storageaccesskey)
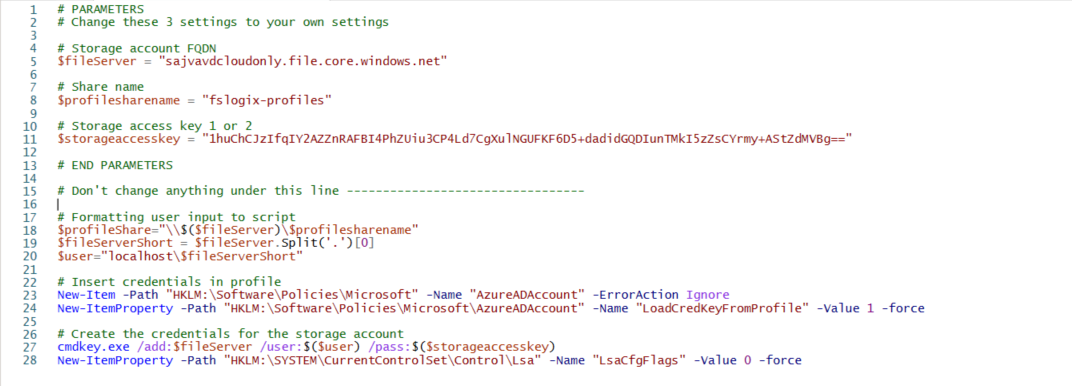
New-ItemProperty -Path "HKLM:\SYSTEM\CurrentControlSet\Control\Lsa" -Name "LsaCfgFlags" -Value 0 -forceChange the information on line 5, 8 and 11 and save the script as .ps1 file or download it here:
Download Cloud Only Powershell script
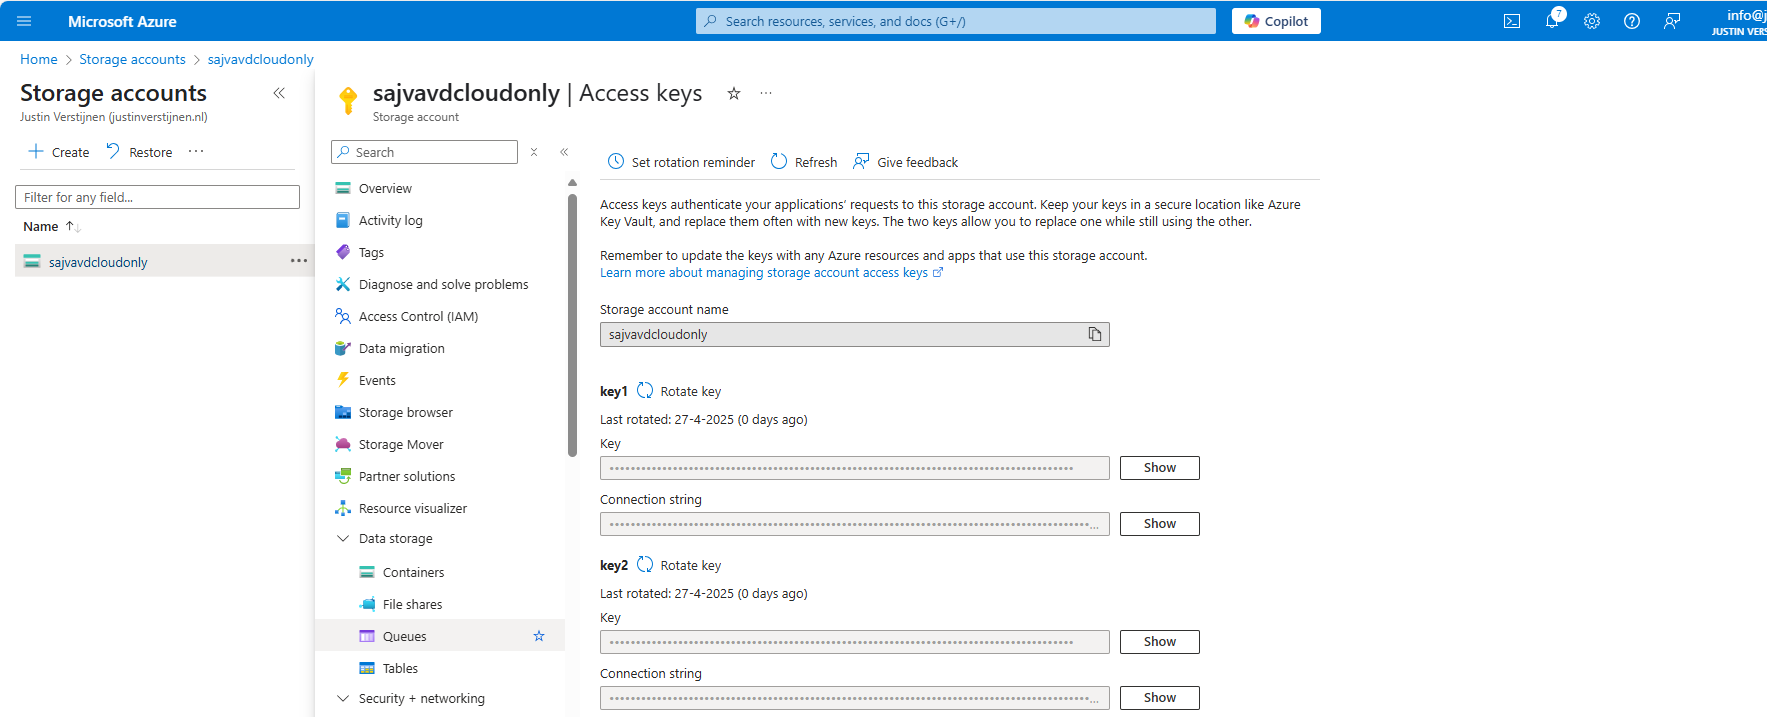
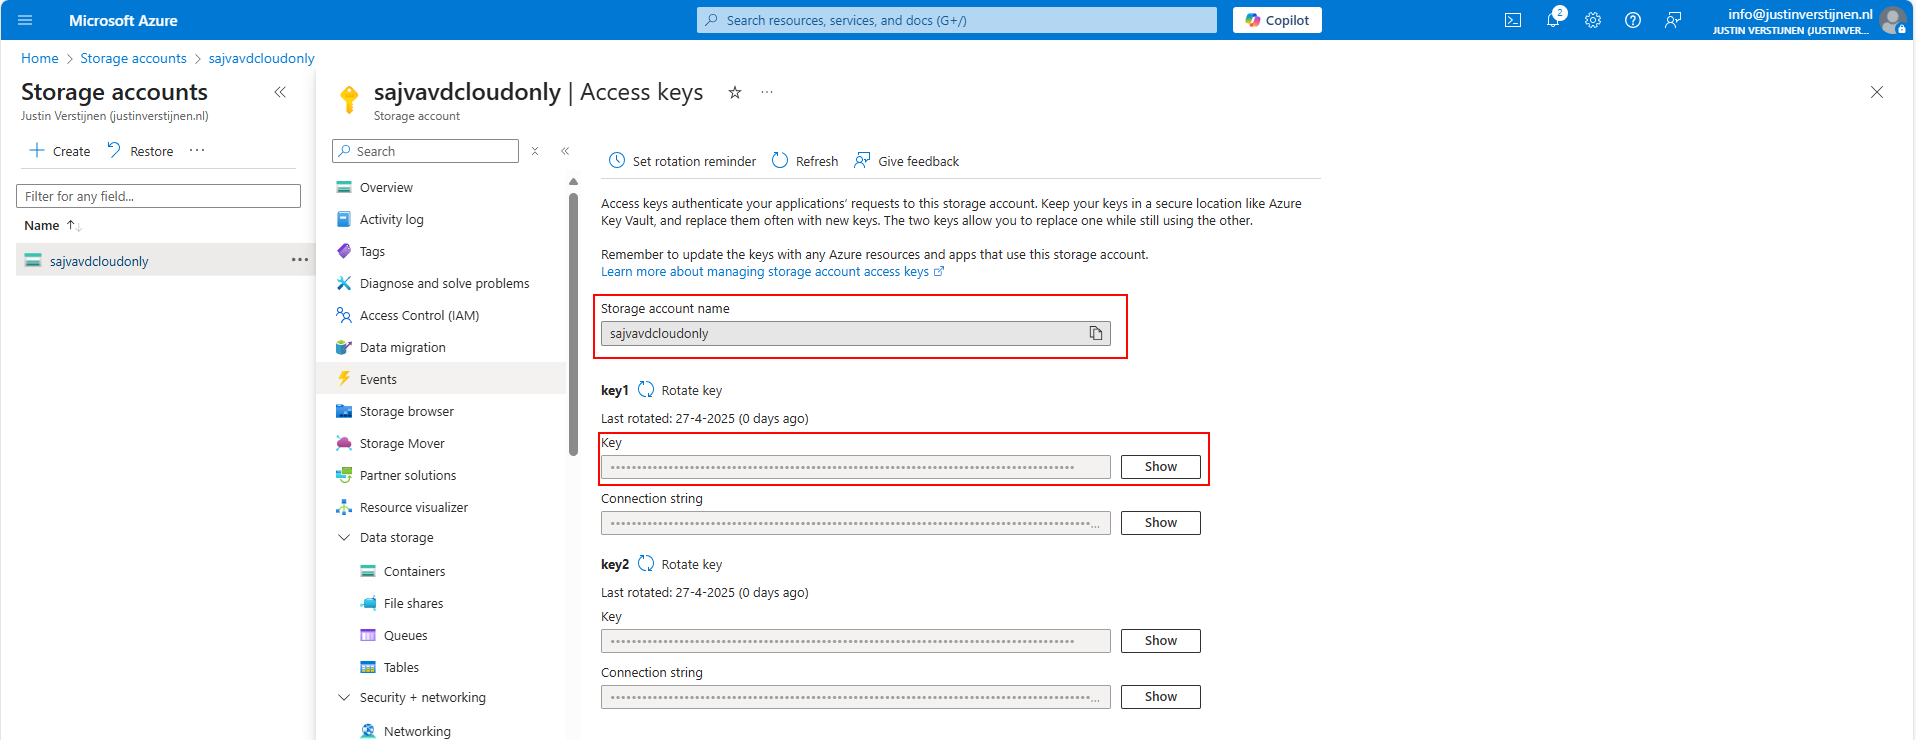
You can find the information for line 5 and 11 in the Azure Portal by going to your Storage Account, and then “Access Keys”:
For line 8, you can go to Data Storage -> File Shares:

If you don’t have a fileshare yet, this is the time to create one.
Paste this information in the script and save the script. It should look like this:
Go to Intune and navigate to the “Scripts and Remediations” and then to the tab “Platform scripts”. Then add a new script:
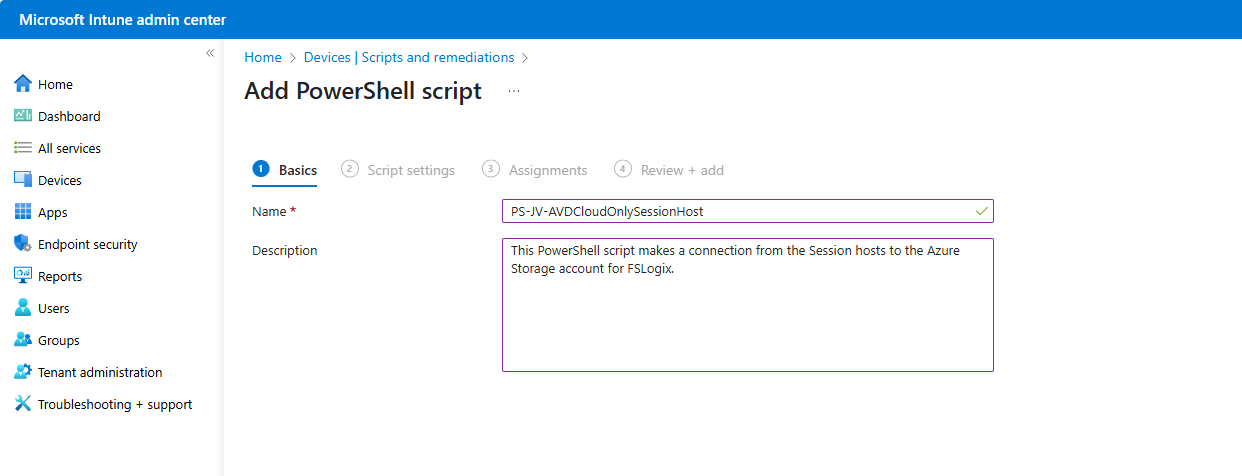
Give the script a name and description and advance.
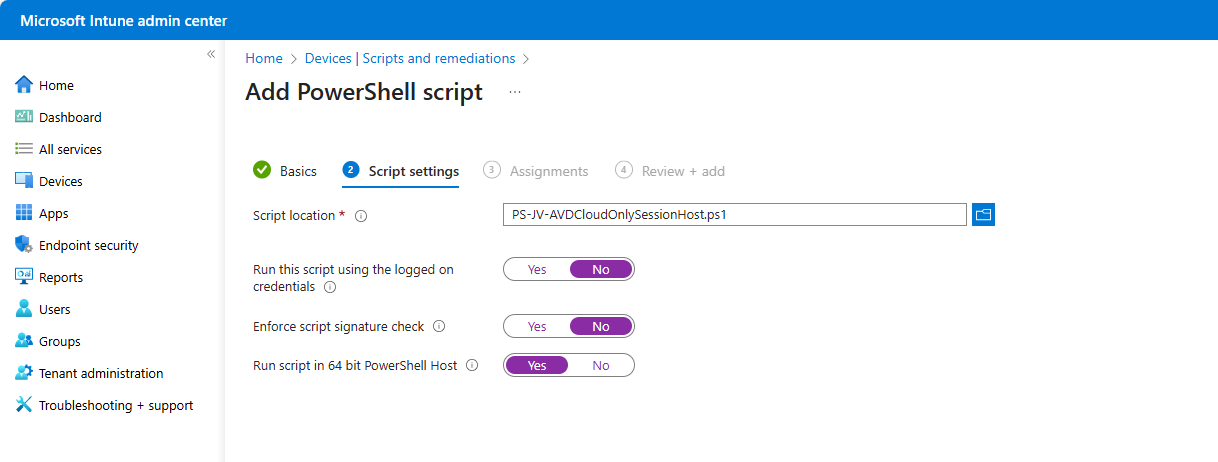
Select the script and change the options shown in the image and as follows:
- Run this script using the logged on credentials: No
- This runs the script as system account
- Enforce script signature check: No
- Run script in 64 bit PowerShell Host: Yes
Advance to the “Assignments” tab:
Select your session hosts dynamic group and save the script:
Step 6: Let’s test the result!
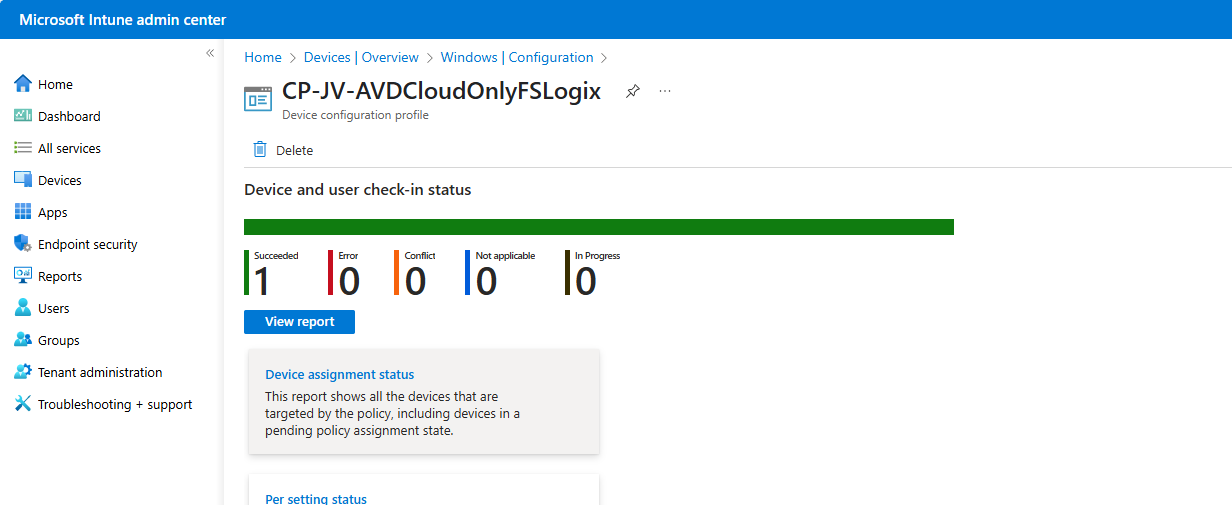
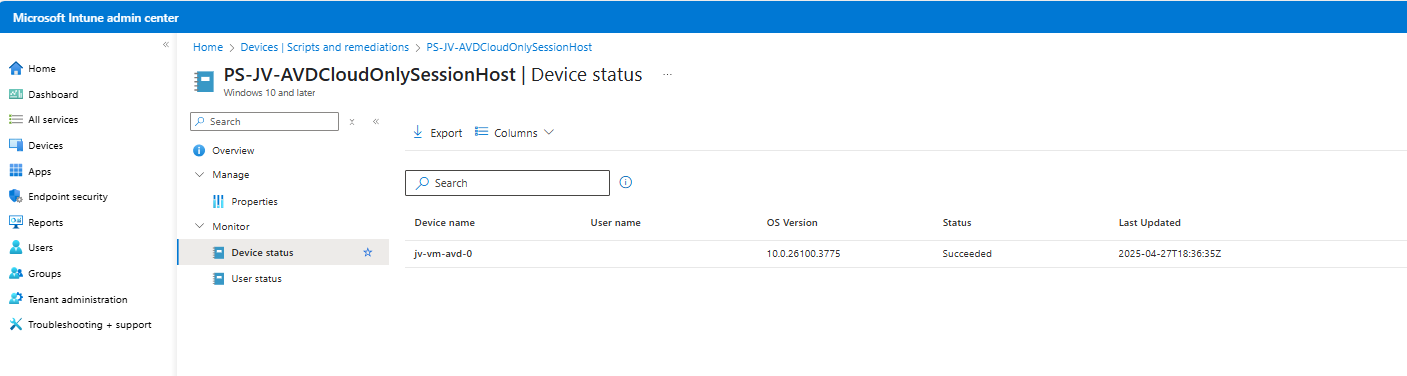
Now we are done with all of the setups and we can test our configuration. The session host must be restarted and fully synced before we can login. We can check the status in Intune under our Configuration Profile and Powershell Script.
Configuration Profile:
PowerShell script: (This took about 30 minutes to sync into the Intune portal)
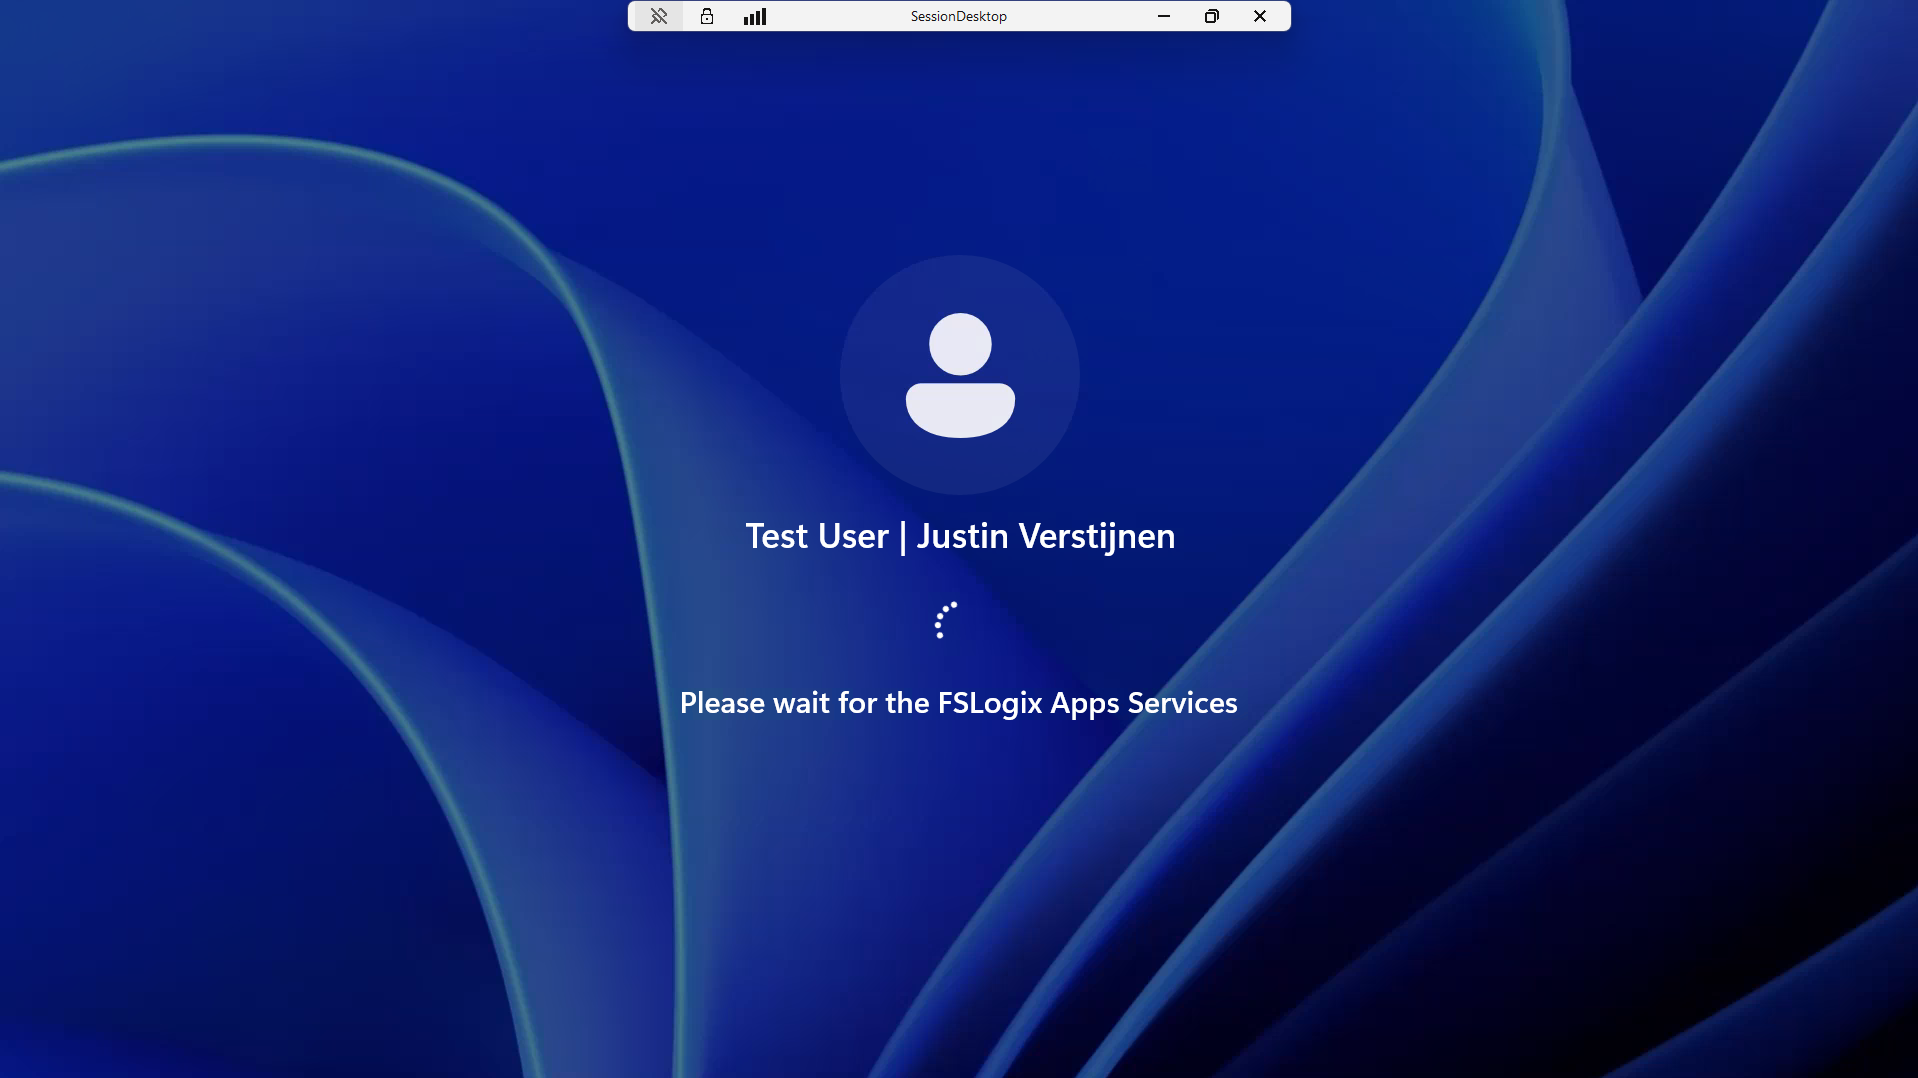
Now that we know for sure everything is fully synchronized and performed, let’s download the new Windows App to connect to our hostpool.
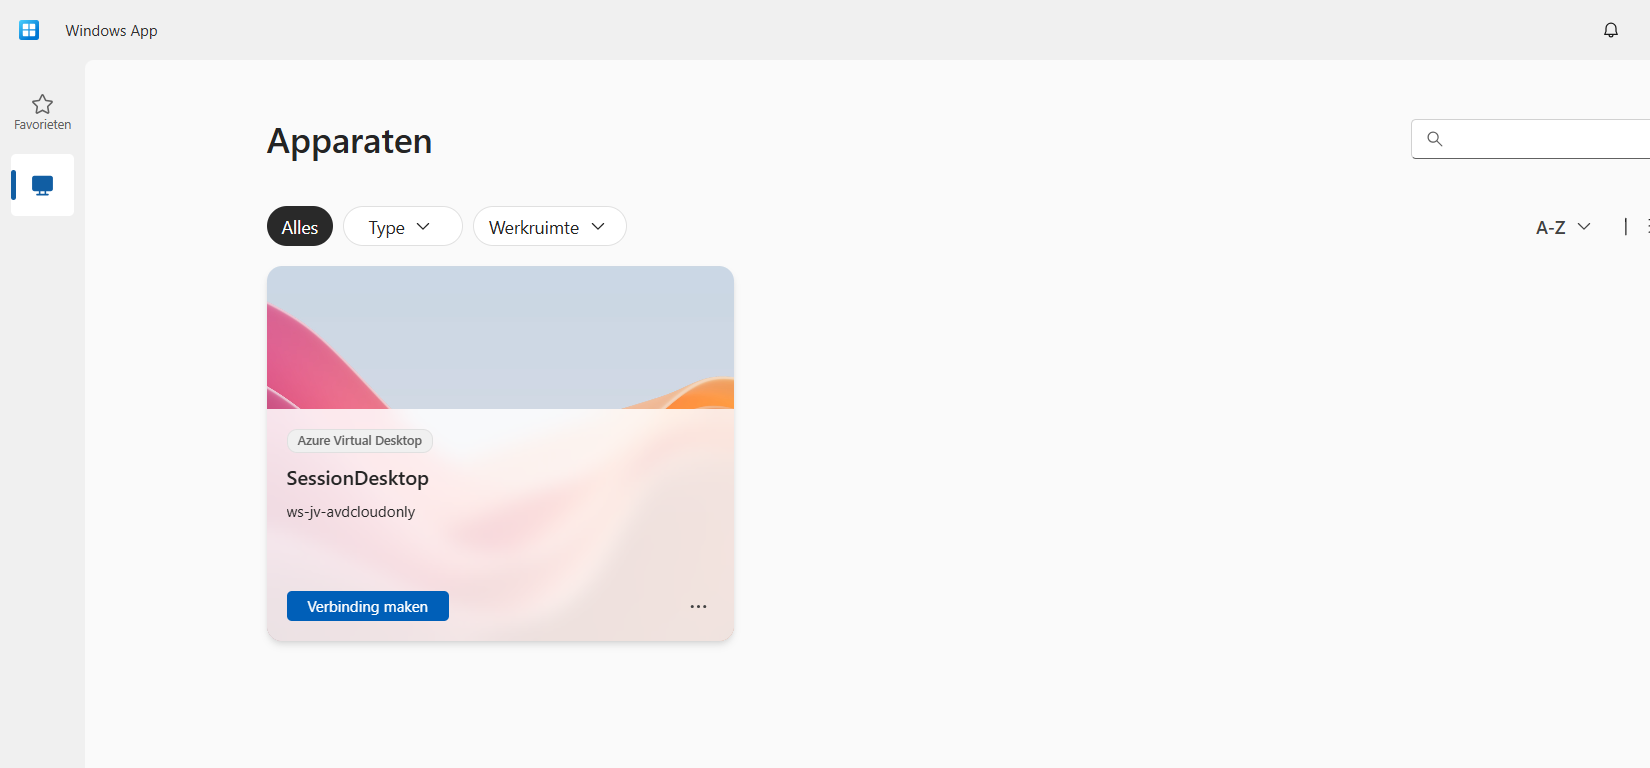
After connecting we can see the session host indeed uses FSLogix to mount the profile to Windows:
Also we can find a new file in the FSLogix folder on the Azure Storage Account:
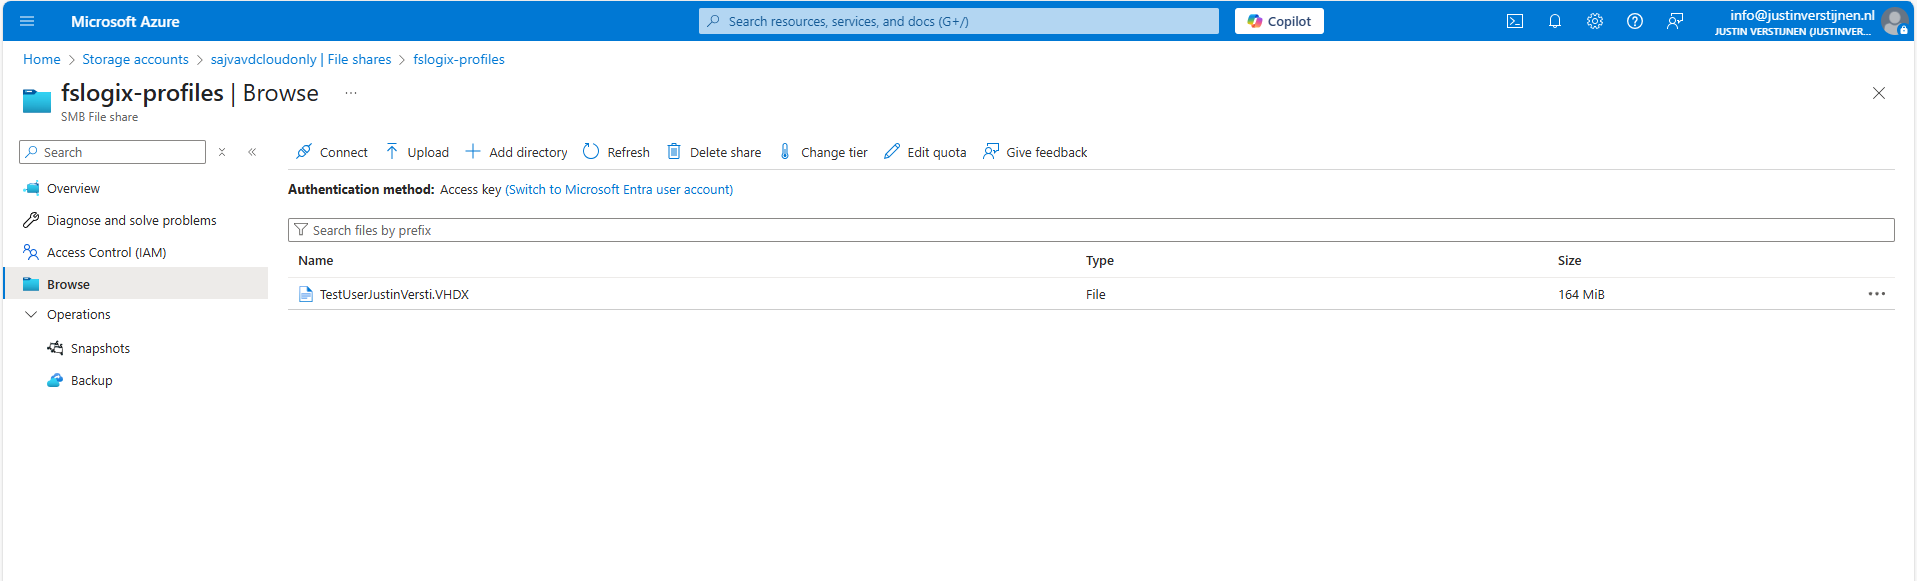
We have now successfully configured the Cloud only setup for Azure Virtual Desktop.
Testing the session host and security
We can test navigating to the Azure Storage account from the session host, we will get this error:
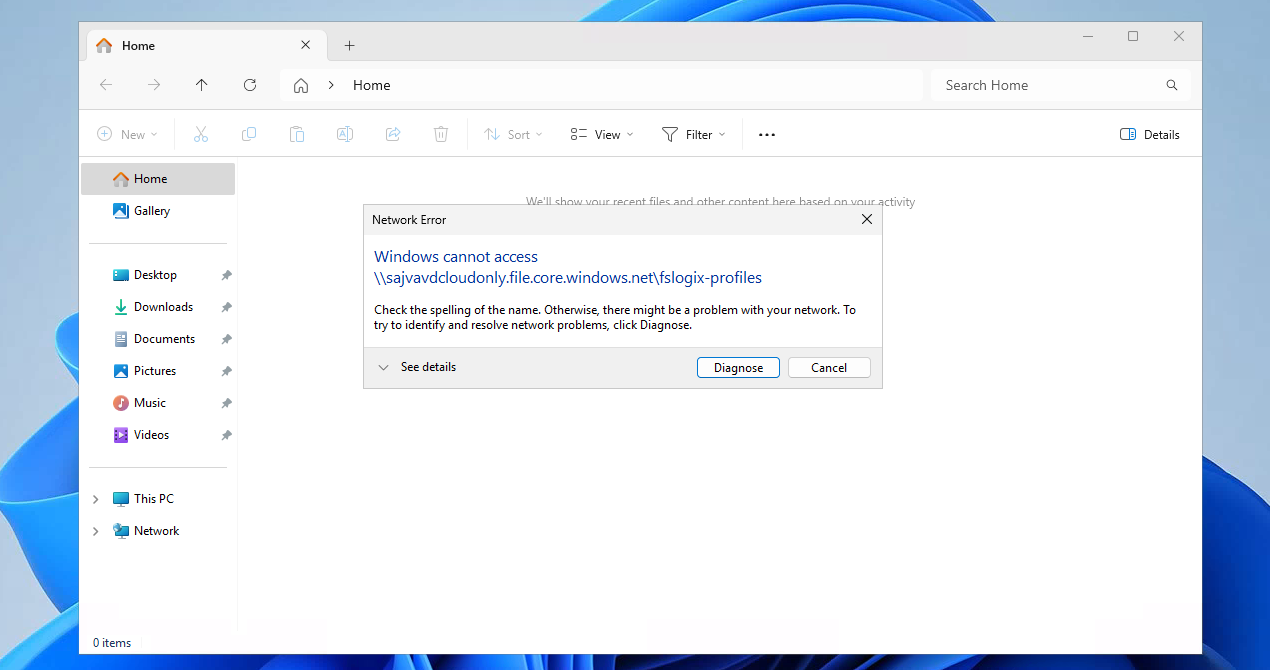
This is because we try it through the context of the user which doesn’t have access. So users cannot navigate to the fileshare of FSLogix because only our session host has access as system.
This means that you can only navigate to the fileshare on the PC when having local administrator permissions on the session host. This because a local administrator can traverse the SYSTEM account and navigate to the fileshare. However, local administrator permissions is something you don’t give to end users, so in this case it’s safe.
I tried several things to find the storage access key on the machine in registry and cmdkey commands but no success. It is secured enough but it is still a security concern.
Security recommendations for session hosts
I have some security recommendations for session hosts, not only for this cloud only setup but in general:
- Use Microsoft Defender for Endpoint
- Use the firewall on your Storage account so it can only be accessed from your session hosts’ subnet
- Block critical Windows tools like CMD/Powershell/Scripts/Control panel and access to power off/reboot in the VM
Summary
While this cloud only setup is very great, there are also some security risks that come with it. I really like to use as much serverless options as possible but for production environments, I still would recommend to use an Active Directory or take a look at personal desktop options. Also, Windows 365 might still be a great option if you want to eliminate Active Directory but still use modern desktops.
Please use the Powershell script very carefully, this contains the credentials to full controll access to the storage account. Upload to Intune and delete from your computer or save it and remove the key.
I hope this guide was very helpful and thank you for reading!
Sources
These sources helped me by writing and research for this post;
- https://learn.microsoft.com/en-us/azure/virtual-desktop/authentication
- https://learn.microsoft.com/en-us/azure/virtual-desktop/configure-single-sign-on
End of the page 🎉
You have reached the end of the page. You can navigate through other blog posts as well, share this post on X, LinkedIn and Reddit or return to the blog posts collection page. Thank you for visiting this post.
If you find this page and blog very useful and you want to leave a donation, you can use the button below to buy me a beer. Hosting and maintaining a website takes a lot of time and money. Thank you in advance and cheers :)

The terms and conditions apply to this post.