Setup a Minecraft server on Azure
Categories:
12 minute read
Requirements
- An Azure environment
- Basic knowledge of Azure
- Basic knowledge of Linux and SSH
- Basic knowledge of networking and TCP/UDP
- Experience with Minecraft to test the server
- Around 45 minutes of your time
System requirements of a Minecraft server
For a typical Minecraft server, without Mods, the guidelines and system requirements are as stated below:
| Processor cores | Ram | Player Slots | World Size |
| 2 | 8GB | Up to 10 | Up to 8GB |
| 4 | 16GB | Up to 20 | Up to 15GB |
| 8 | 32GB | Up to 50 | Up to 20GB |
| 16 | 64GB | Up to 100 | Up to 60GB |
Setup the Azure environment for a Minecraft server
Creating the Resource Group
First, we need to setup our Azure environment for a Minecraft server. I started with creating a Resource group named “rg-jv-minecraftserver”.

This resource group can we use to put all of the related resources in. We not only need to create a VM but also an virtual network, Public IP address, Network Security Group and disk for storage.
Creating the Server VM
After creating the Resource group, we can create the server and put it in the created Resource group.
For a single server-setup, we can use most of the default settings of the wizard. For an environment of multiple servers I advice you a more scalable approach.
Image and Size
Go to “Virtual Machines” and create a new virtual machine:
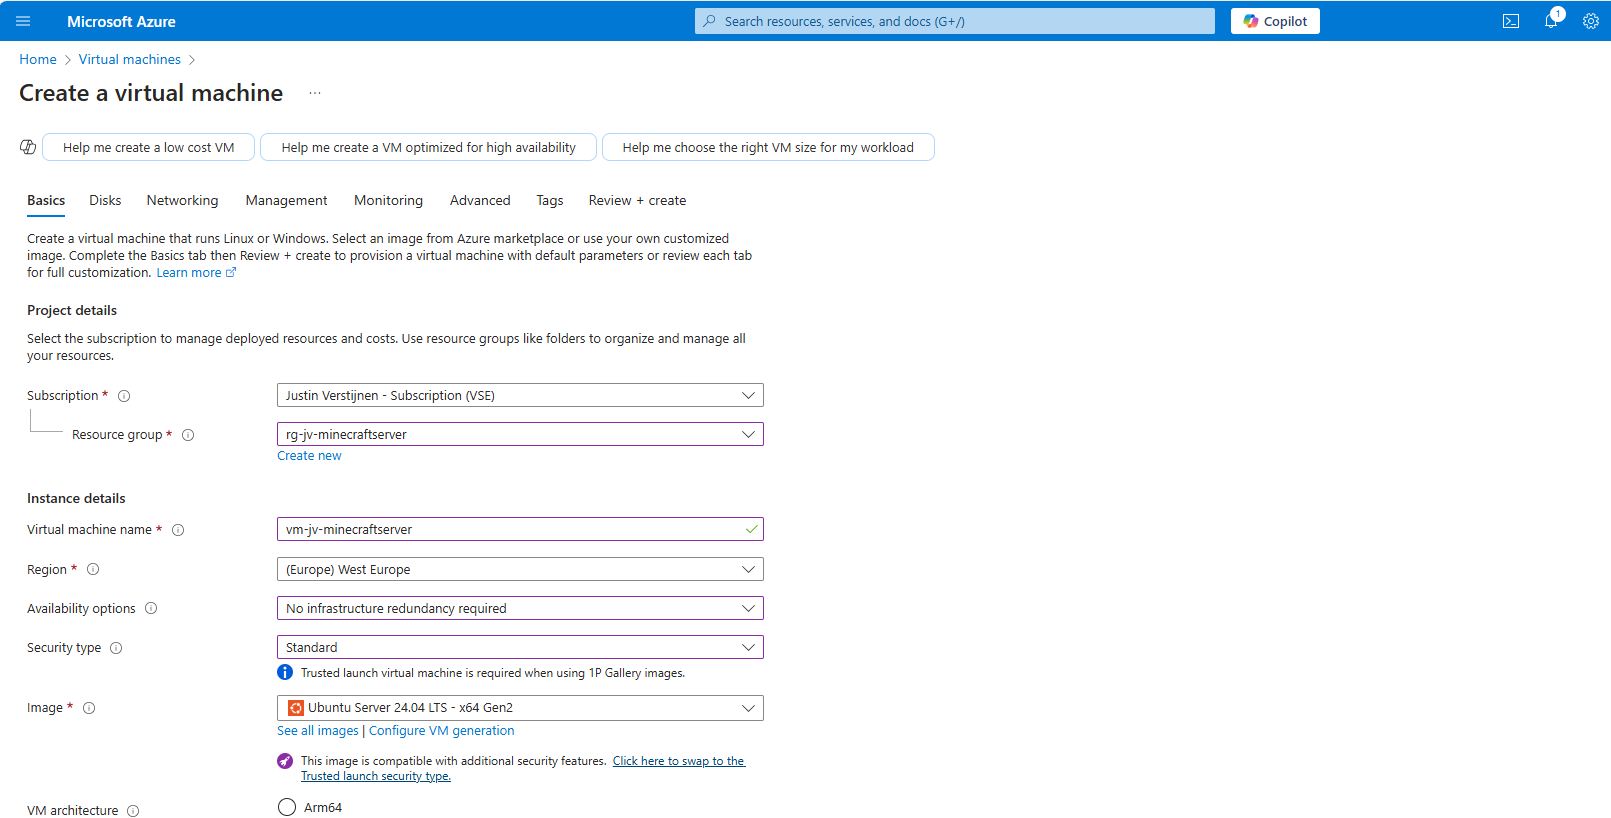
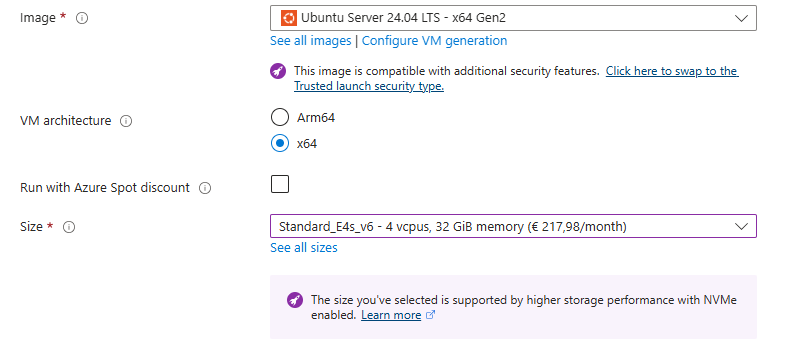
Put the server in the created resource group. I use the image Ubuntu Server 24.04 LTS - x64 Gen2 for this deployment. This is a “Long-Term Support” image, which are enterprise grade images with at least 5 years support.
For the specs, I used the size E4s_V6 which has 4vCPU’s and 32GB of RAM. Enough for 20 to 50 players and a big world so the game will not get boring.
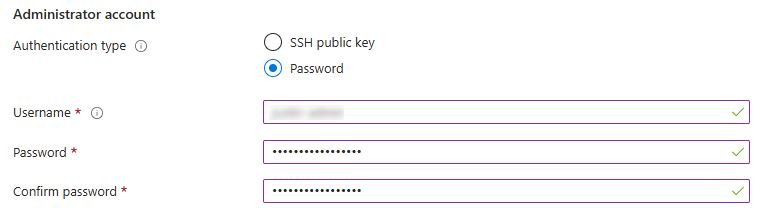
Authentication
For the Authentication type, use an SSH key if you are familiar with that or use a password. I used the password option:
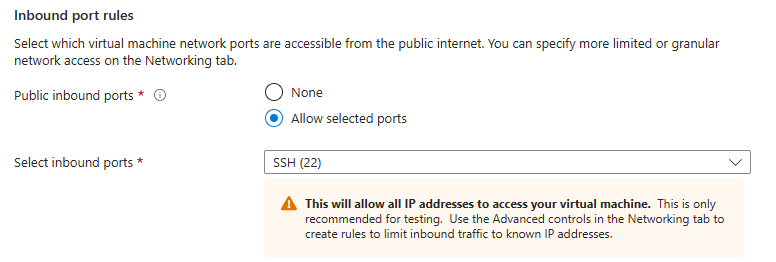
Inbound ports
For the inbound ports, use the default option to let port 22 open. We will change this in a bit for more security.
Disks and storage
For the disk settings, let this as default:

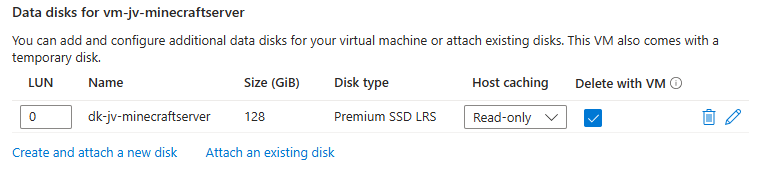
I chose a deployment with an extra disk where the server itself is stored on. This way we have a server with 2 disks:
- Disk 1: OS
- Disk 2: Minecraft world
This has some advantages like seperate upgrading, more resilience and more performance as the Minecraft world disk is not in use by the OS.
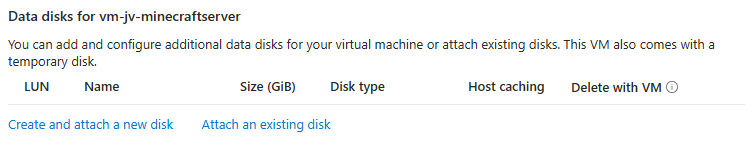
Select the option “Create and attach a new disk”. Then give the disk a name and select a proper size of your needs.
I chose 128GB as size and have the performance tier as default.
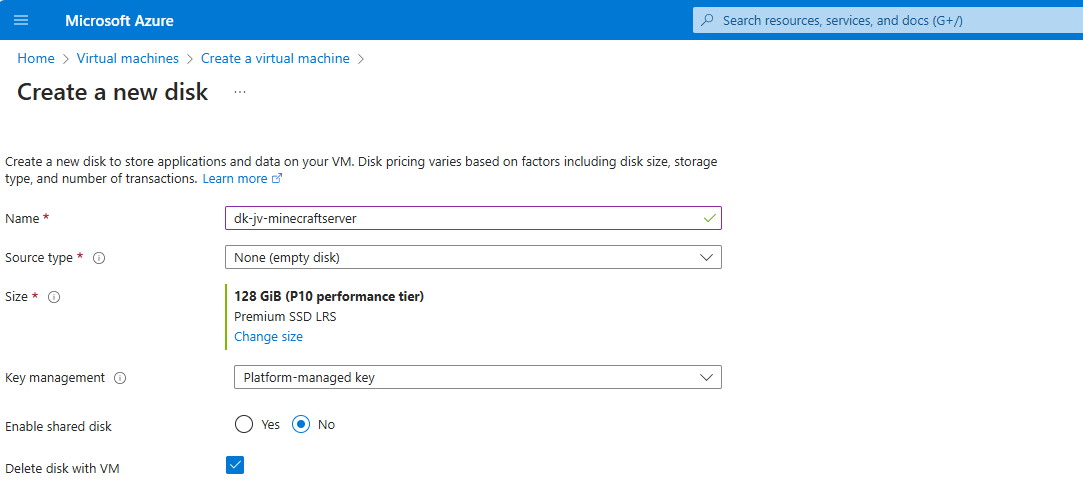
Click “OK” and review the settings:
Networking
Advance to the “Networking” tab.
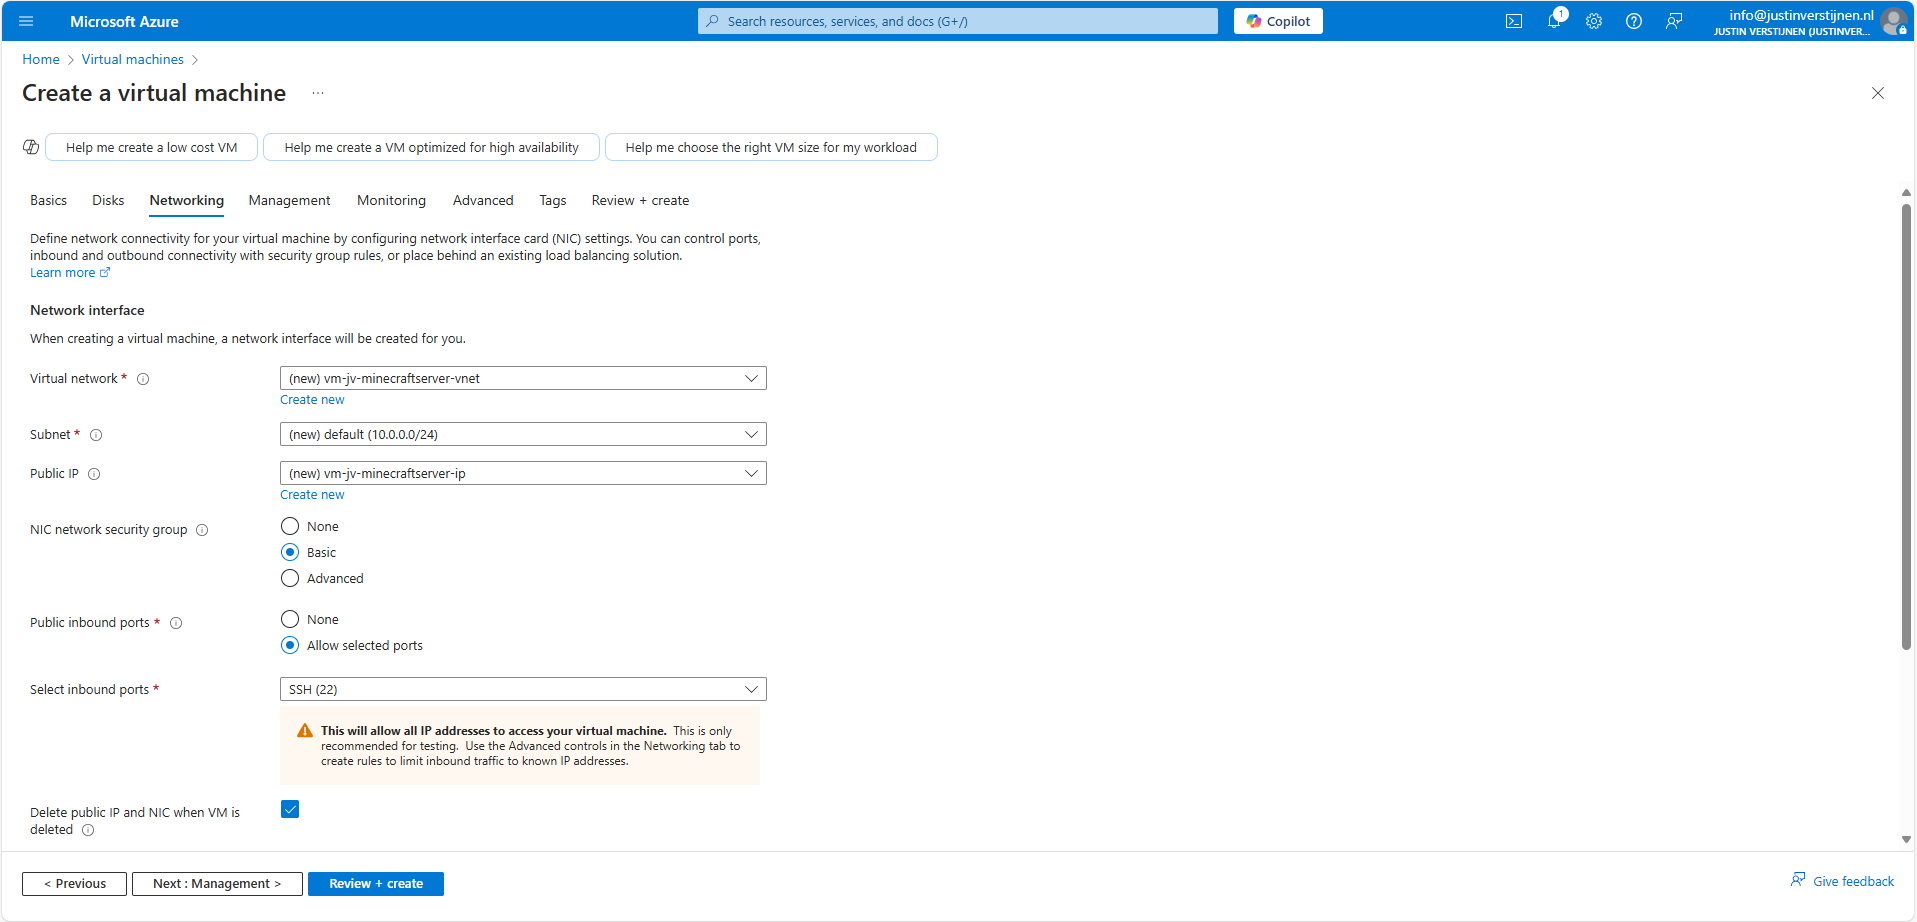
Azure automatically creates a virtual network and a subnet for you. These are needed for the server to have an outbound connection to the internet. This way we can download updates on the server.
Also, by default a Public IP and a Network Security Group are created. Those are for inbound connection from players and admins and to secure those connections.
I let all these settings as default and only checked “Delete Public IP and NIC when VM is deleted”.
Go to the next tab.
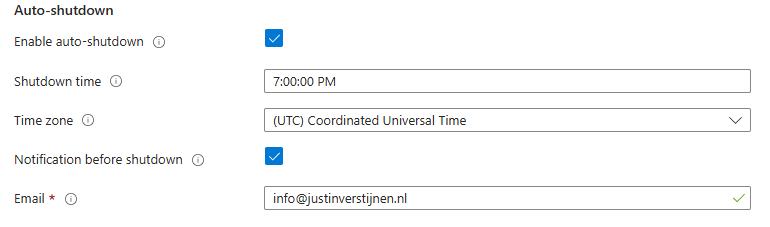
Automatic shutdown (if needed)
Here you have a setting for automatic shutdown if you want to. Can come in handy when you want to automatically shutdown your server to reduce costs. You have to manually enable the server after shutdown if you want to play again.
Review settings
After this go to the last tab and review your settings:
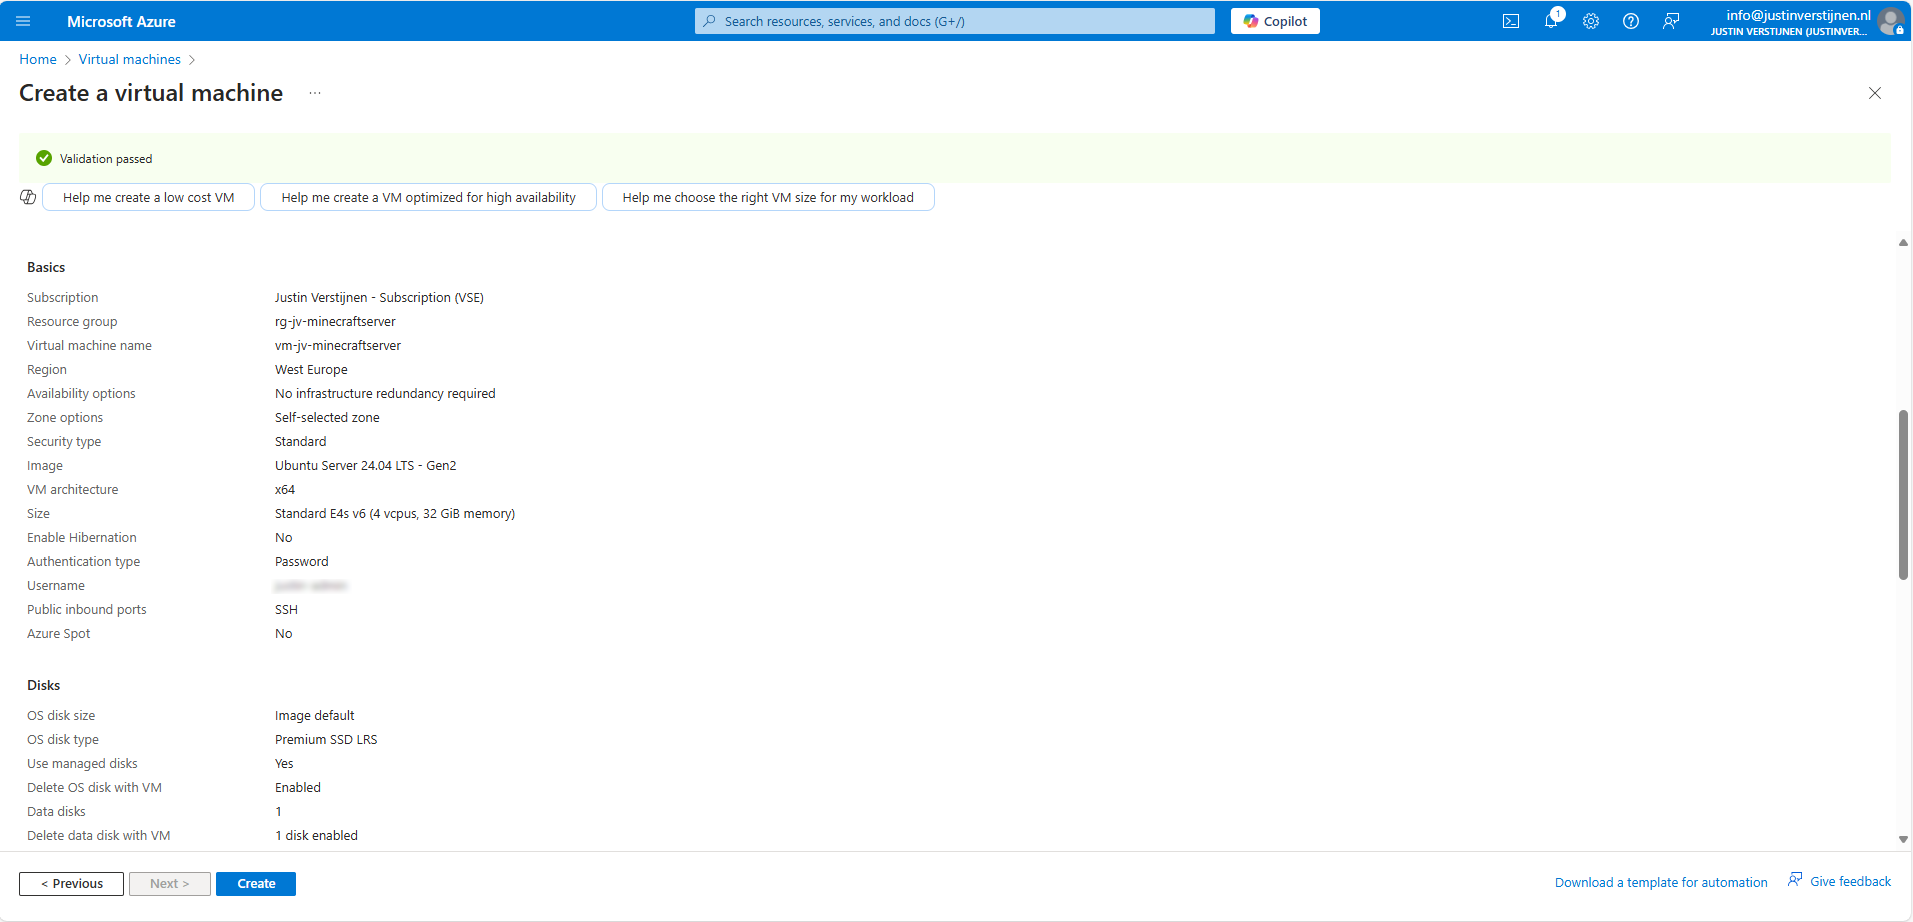
Then create the virtual machine and we are good to go! Create the virtual machine and advance to the next part of the guide.
Securing inbound connections
We want to secure inbound connections made to the server. Let’s go to “Network Security Groups” (NSG for short) in Azure:
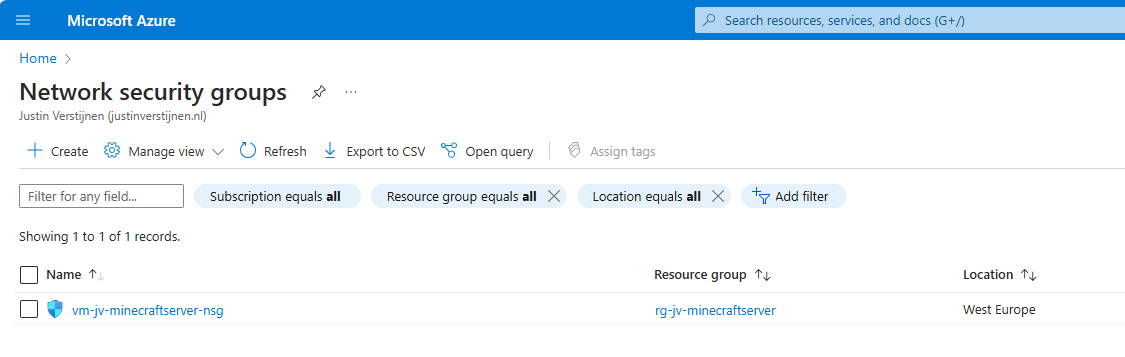
Open the related NSG and go to “Inbound Security rules”.
By default we have a rule applied for SSH access that allows the whole internet to the server. For security, the first thing we want to do is limit this access to only our own IP address. You can find your IP address by going to this page: https://whatismyipaddress.com/
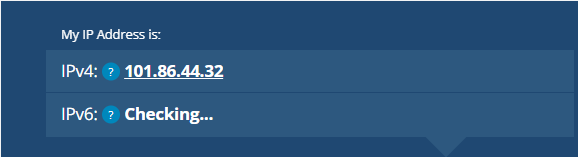
Note this IP address down and return to Azure.
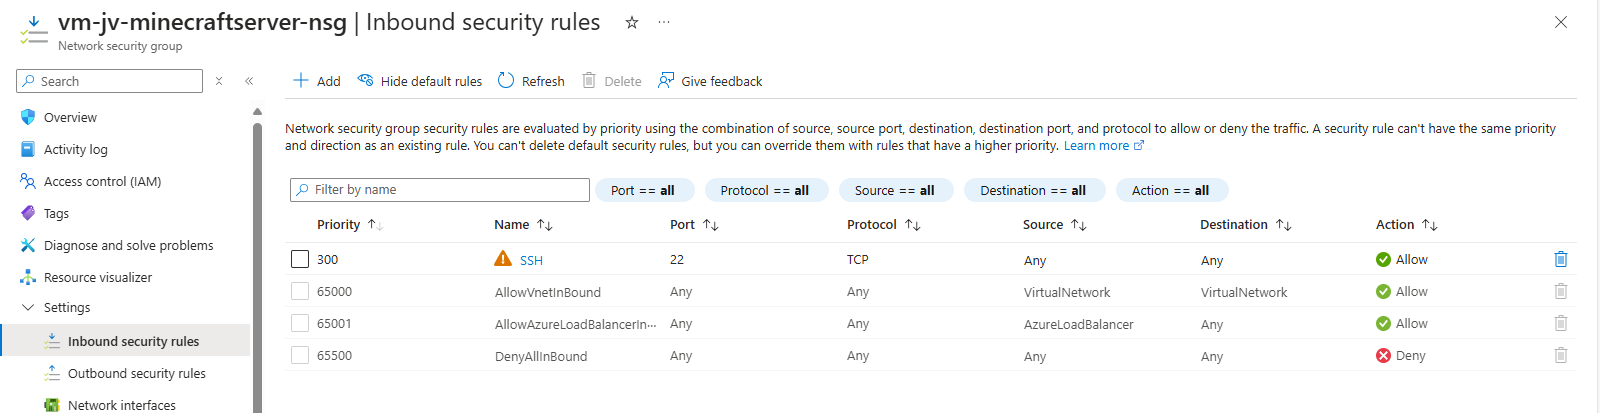
Click on the rule “SSH”.
Change the “Source” to “IP addresses” and paste in the IP address from the IP lookup website. This only allows SSH (admin) traffic from your own IP-address for security. This is a whitelist.
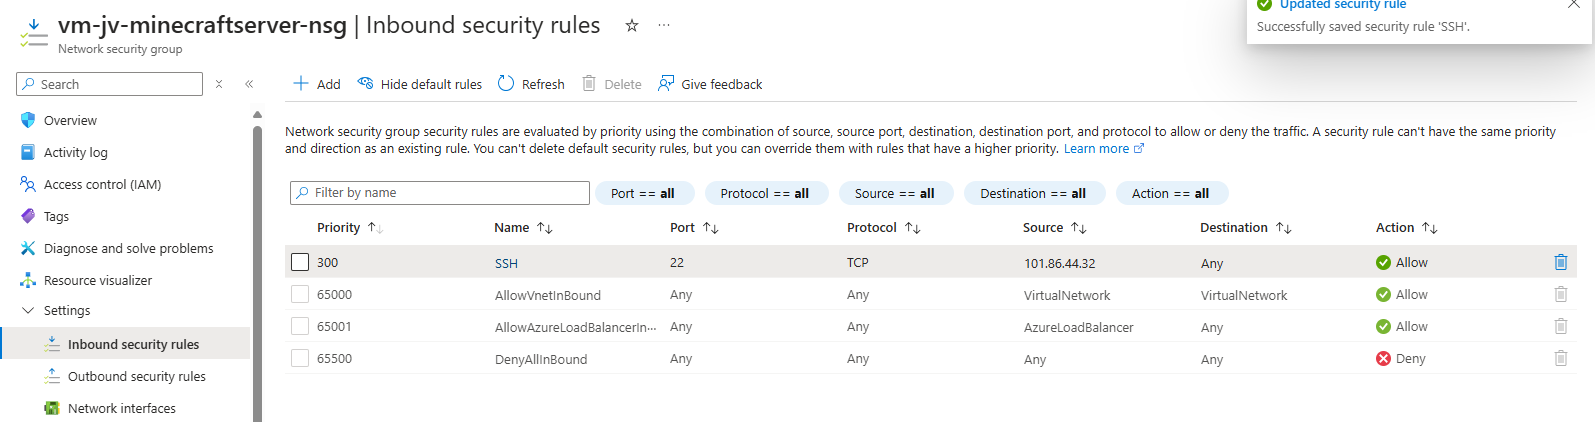
You see that the warning is now gone as we have blocked more than 99% of all worldwide IP addresses SSH access to our server.
Allow inbound player connections
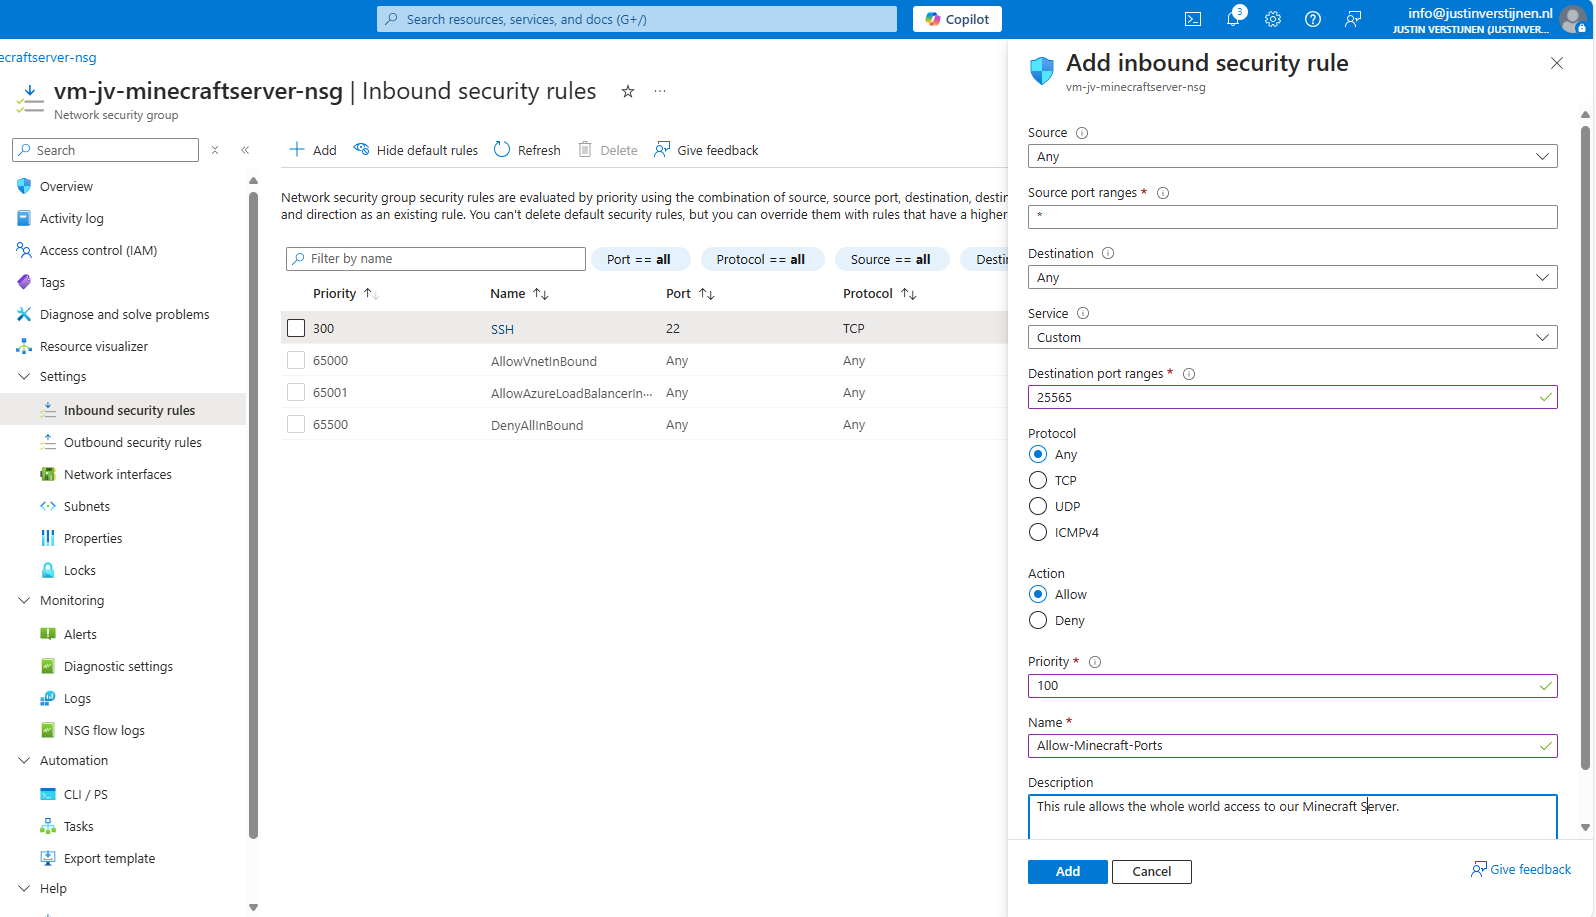
After limiting SSH connections to our server, we going to allow player connections to our server. We want to play with friends, dont we?
Again go to the Network Security Group of the Minecraft server.
Go to “Inbound Security rules”
Create a new rule with the following settings:
| Setting | Option |
| Source | Any* |
| Source port ranges | * (Any) |
| Destination | Any |
| Service | Custom |
| Destination port ranges | 25565 (the Minecraft port) |
| Protocol | Any |
| Action | Allow |
| Priority | 100 (top priority) |
| Name | You may choose an own name here |
*Here we do allow all inbound connections and use the Minecraft username whitelist.
My rule looks like this:
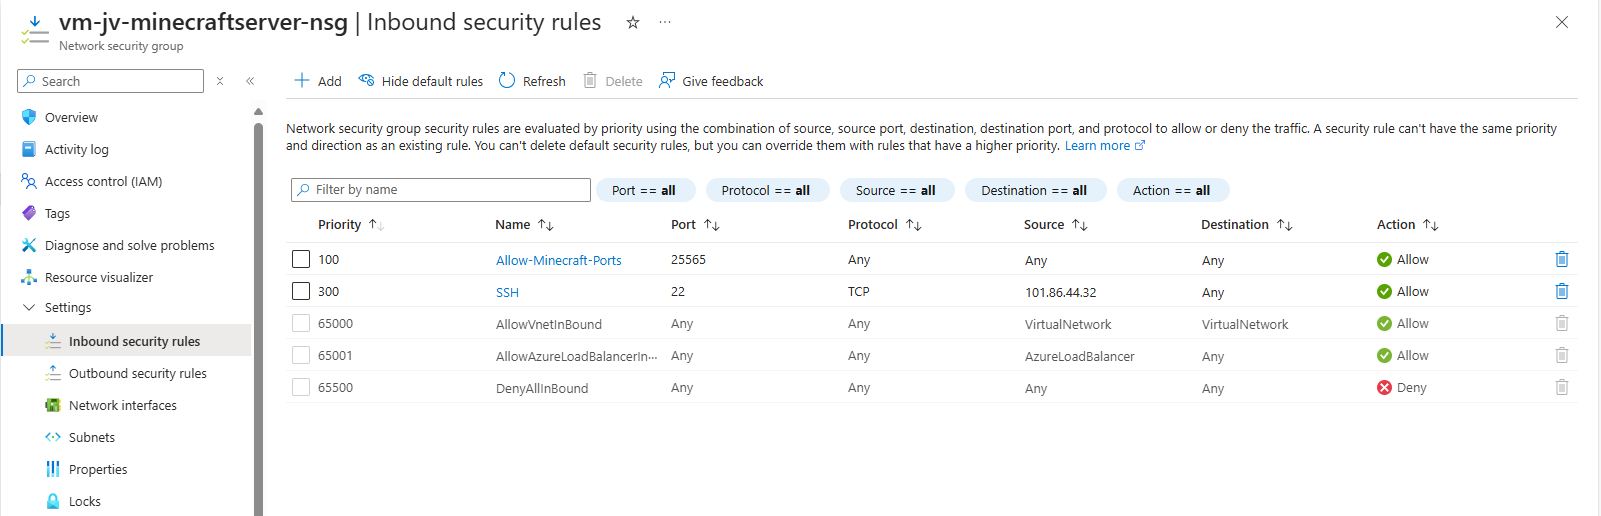
Now the network configuration in Azure is done. We will advance to the server configuration now.
Logging into the server with SSH
Now we can login into our server to do the configuration of the OS and the installation of the Minecraft server.
We need to make a SSH connection to our server. This can be done though your preferred client. I use Windows Powershell, as this has an built-in client for SSH. You can follow the guide:
Open Windows Powershell.
Type the following command to login to your server:
ssh username@ip-addressHere you need your username from the virtual machine wizard and server IP address. You can find the server IP address under the server details in Azure:
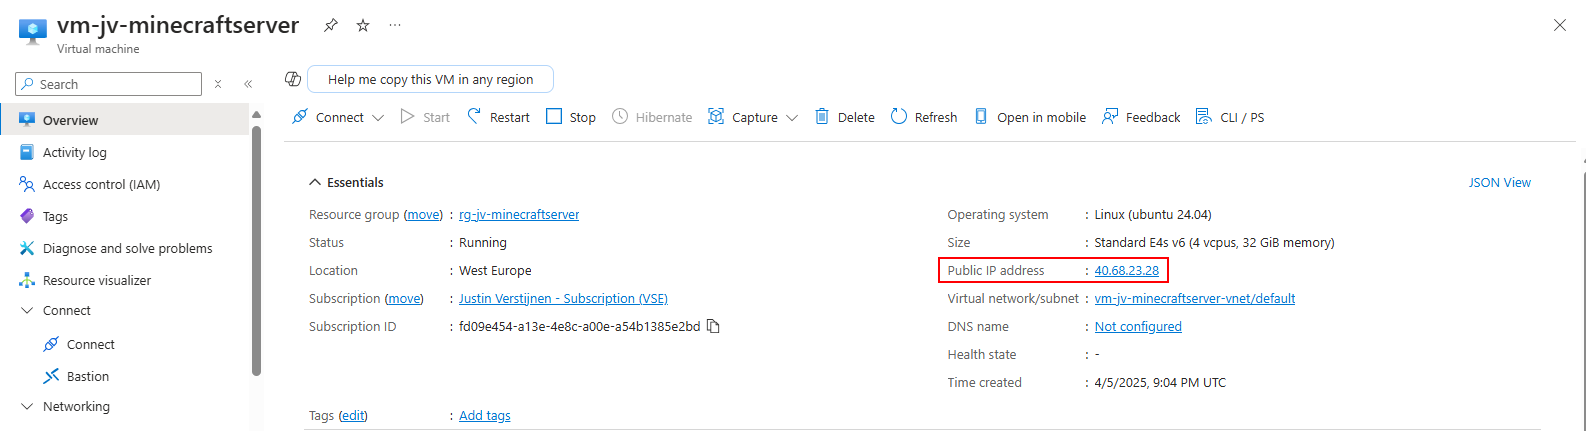
I used this in my command to connect to the server:
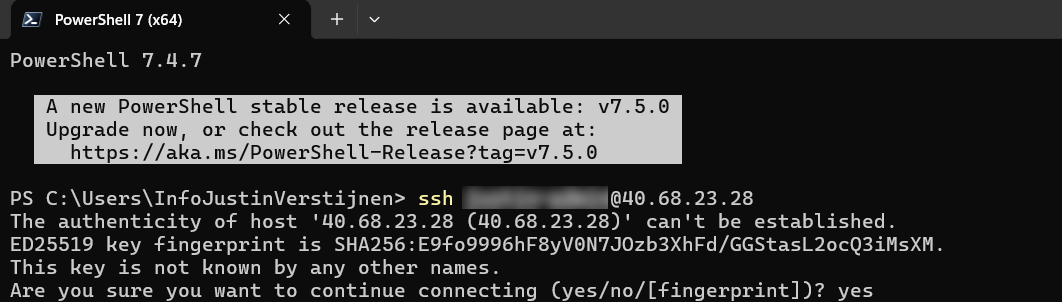
After the command, type “Yes” and fill in your password. Then hit enter to connect.
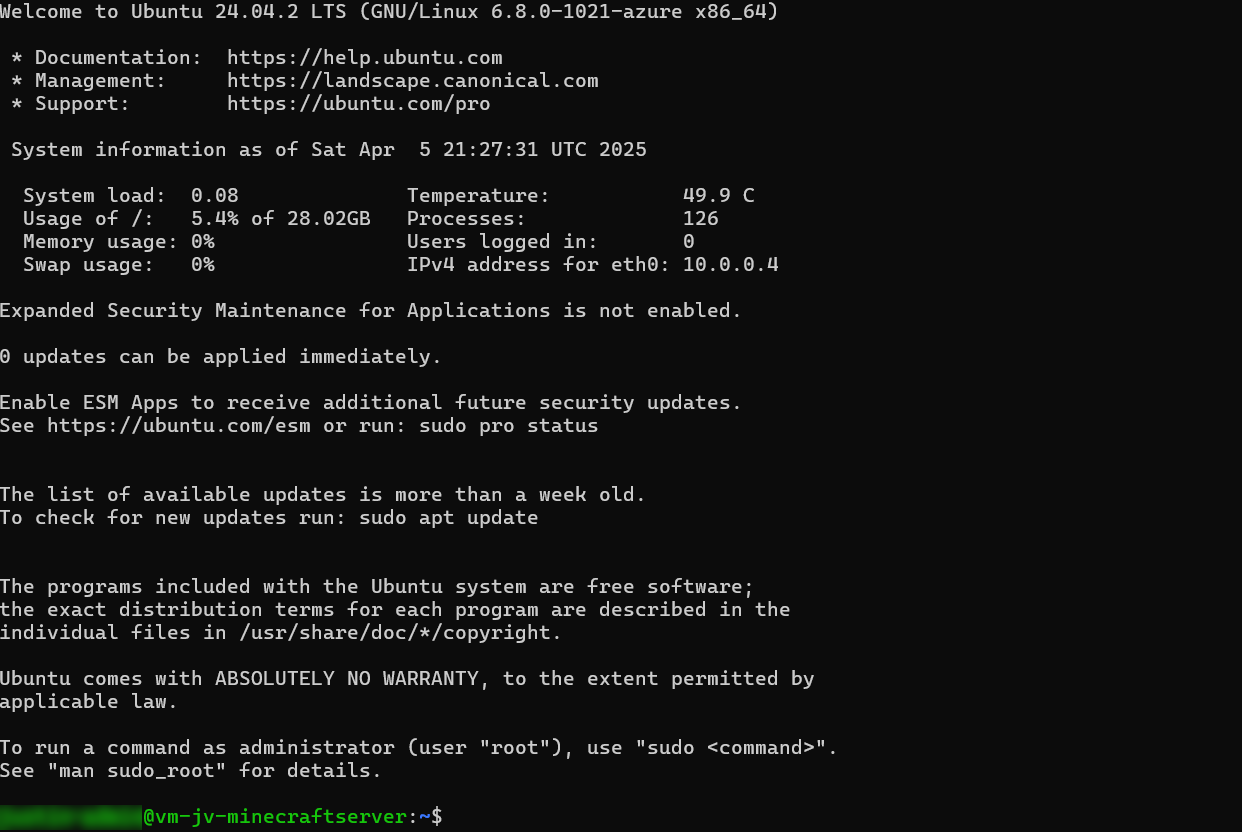
Now we are connected to the server with SSH:
Configuring the server and install Minecraft
Now that we are logged into the server we can finally install Minecraft Server. Follow the steps below:
Run the following command to get administrator/sudo access:
sudo -s
Now you see the line went from green to white and starts with “root”. This is the highest level of privileges on a Linux system.
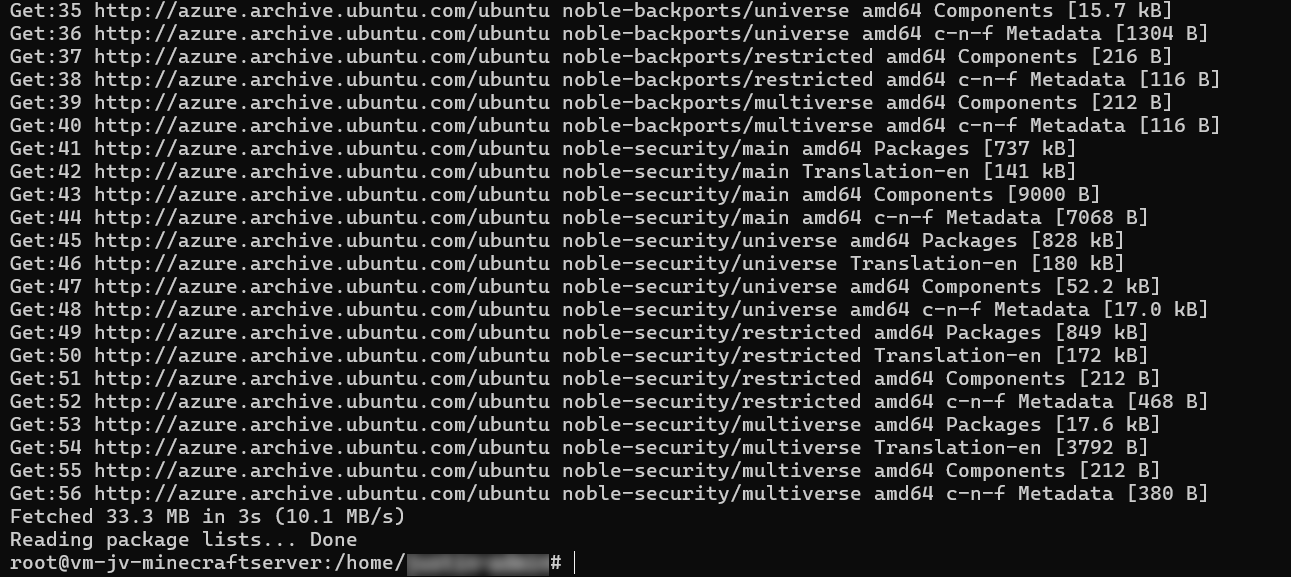
Now run the following command to install the latest updates on Ubuntu:
apt-get updateNow there will be a lot of activity, as the machine is updating all packages. This can take up to a minute.
Installing Dependencies
Now we have to install some dependencies for Minecraft Server to run properly. These must be installed first.
Run the following command to install Java version 21:
apt install openjdk-21-jdk-headless -yThis will take up to around a minute.
After this is done we have to install “unzip”. This is a tool to extract ZIP files.
apt-get install wget screen unzip -yThis will take around 5 seconds.
Configure secondary disk
Since we have a secondary disk for Minecraft itself, we have to also configure this. It is now a standalone not mounted (not accessible) disk without a filesystem.
Run the following command to get all disks in a nice overview:
lsblk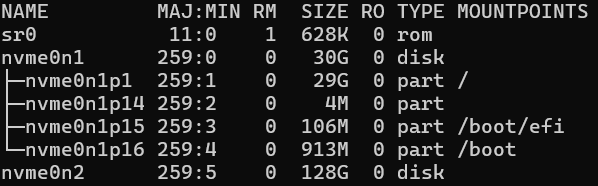
In my case, the nvme0n2 disk is the added disk. This can be different on your server, so take a good look at the size which is your disk.
Now we now our disk name, we can format the disk:
fdisk /dev/nvme0n2This will start an interactive wizard where it wants to know how to format the disk:
- Type n and press enter -> For a new partition
- Type p and press enter -> For a primary partition
- Hit enter twice to use the default setting for the sectors (full disk)
- Type w and press enter -> To quit the tool and save the settings
If we now again run the command to list our disk and partitions, we see the change we did:
lsblk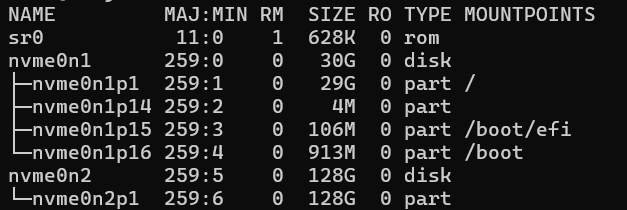
Under disk “nvme0n2” there is now an partition called “nvme0n2p1”.
We still need to assign a filesystem to the partition to make it readable. The filesystem is ext4 as this is the most used in Linux systems.
Run the following command and change the disk/partition to your own settings if needed.
sudo mkfs.ext4 /dev/nvme0n2p1After the command finishes, hit another “Enter” to finish the wizard.
Now we have to create a mount point, tell Linux what folder to access our disk. The folder is called “minecraft-data”.
mkdir /mnt/minecraft-dataAnd now we can finally mount the disk to this folder by running this command:
mount /dev/nvme0n2p1 /mnt/minecraft-dataLet’s try if this works :)
cd /mnt/minecraft-data
This works and our disks is now operational. Please note that this is non-persistent and gone after a reboot. We must add this to the systems disks of Linux to mount this at boot.
Automatically mount secondary disk at boot
To automatically mount the secondary disk at boot we have to perform a few steps.
Run the following command:
blkid /dev/nvme0n2p1You will get an output of this command what we need. Mine is:

We have to edit the fstab system file to tell the system part that it must make this mount at boot.
Run the following command to run a text editor to change that fstab file:
nano /etc/fstabNow we have to add a line of our secondary disk including its mount point and file system. I added the line as needed:
UUID=7401b251-e0a0-4121-a99f-f740c6c3ed47 /mnt/minecraft-data ext4 defaults,nofail,x-systemd.device-timeout=10 0 2This looks like this in my fstab file:

Now press the shortcut CTRL and X to exit the file and choose Yes to save the file.
I directly restarted the server to check if the secondary disk is mounted like expected. We don’t want this happening after all of our configuration work of course.

As you can see this works like a charm.
Configure the Minecraft Server itself
Now we have arrived at the fun part of configuring the server, configuring Minecraft server itself.
Go to the created minecraft data folder, if not already there.
cd /mnt/minecraft-dataWe have to download the required files and place them into this folder. The latest release can be found at the official website: https://www.minecraft.net/en-us/download/server
First, again acquire Sudo/administrator access:
sudo -sWe can now download the needed file on the server by running this command:
wget https://piston-data.mojang.com/v1/objects/e6ec2f64e6080b9b5d9b471b291c33cc7f509733/server.jarNow the file is at the right place and ready to start:
We now need to create a file to agree with the End User License Agreement (EULA), and can do this with the following command:
echo "eula=true" > eula.txtThis command creates the file and fills it with the right option.
We can now finally run the server with 28GBs of RAM with the following command:
java -Xmx28672M -Xms28672M -jar server.jar nogui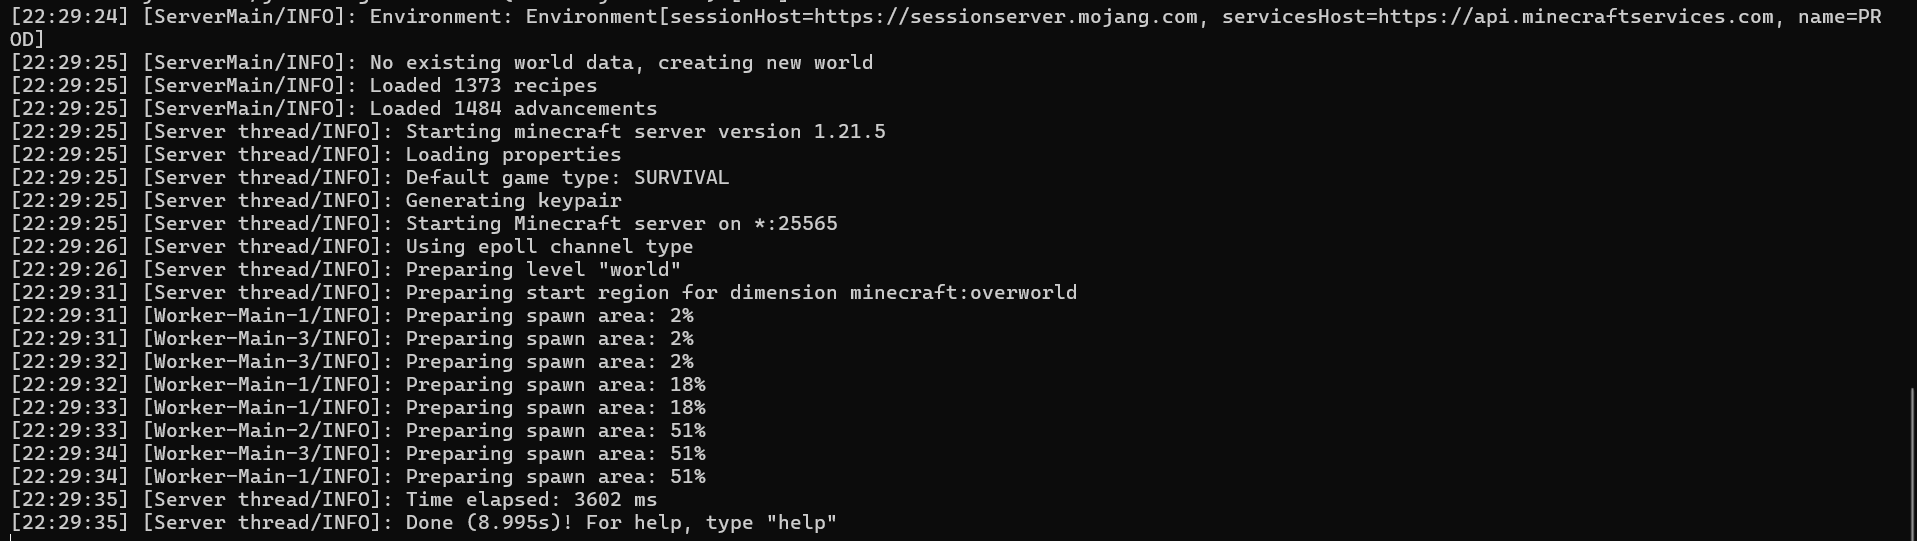
Now our server has been fully initialized and we are ready to play.
Connecting to the server
The moment we have been waiting for, finally playing on our own Minecraft server. Download the game and login to your account.
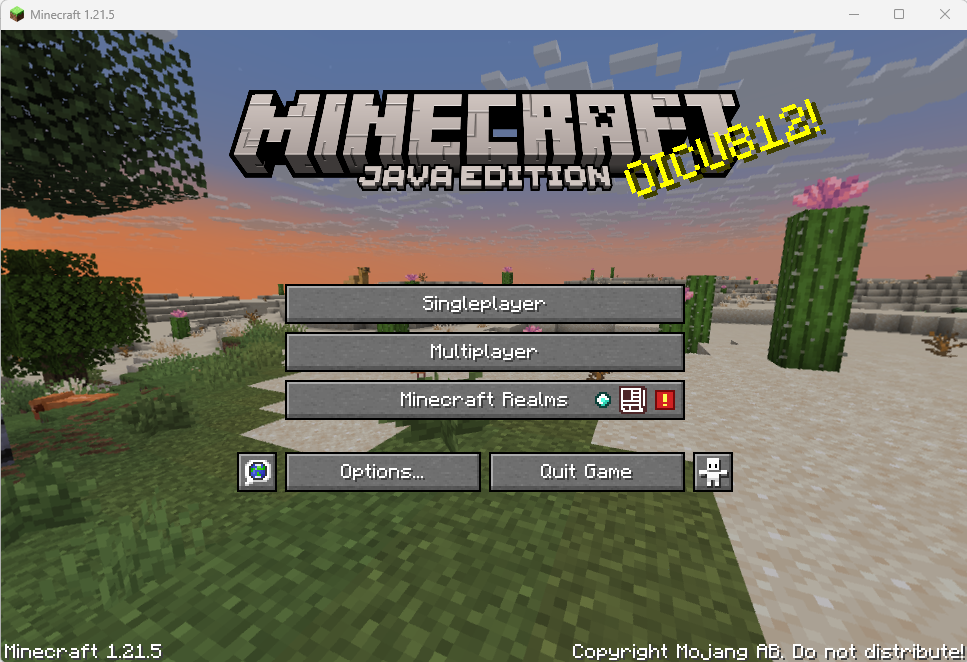
Open “Multiplayer”.
Click on “Add Server” and fill in the details of your server to connect:
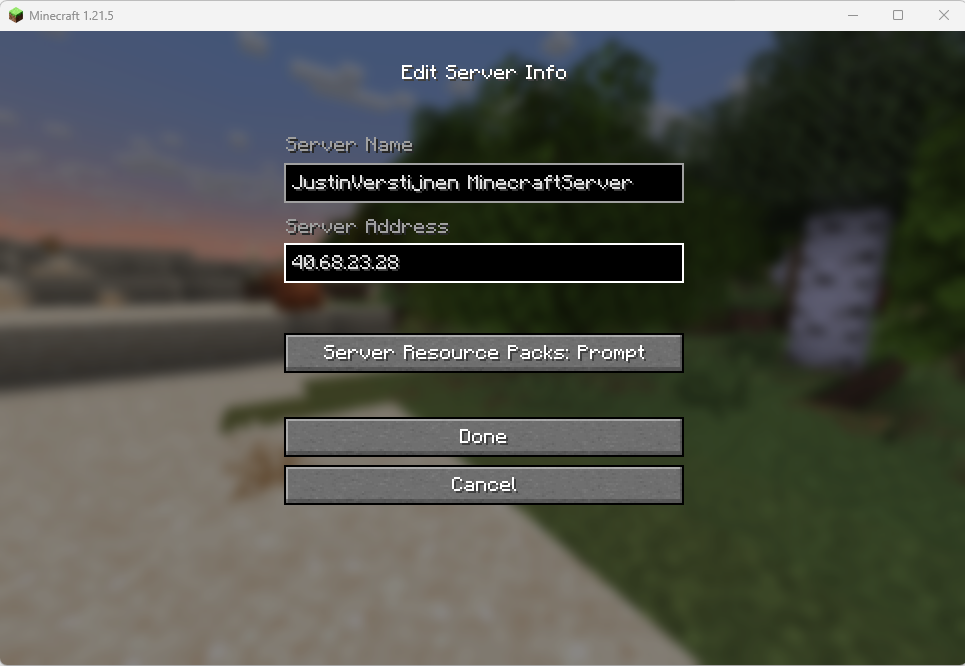
Click on “Done” and we are ready to connect:
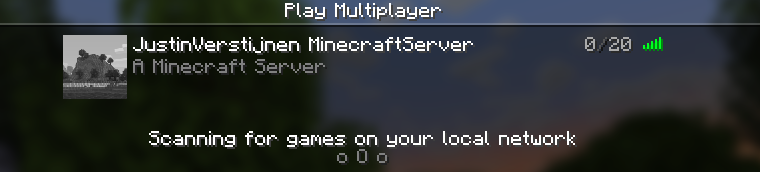
Connect and this will open the server:
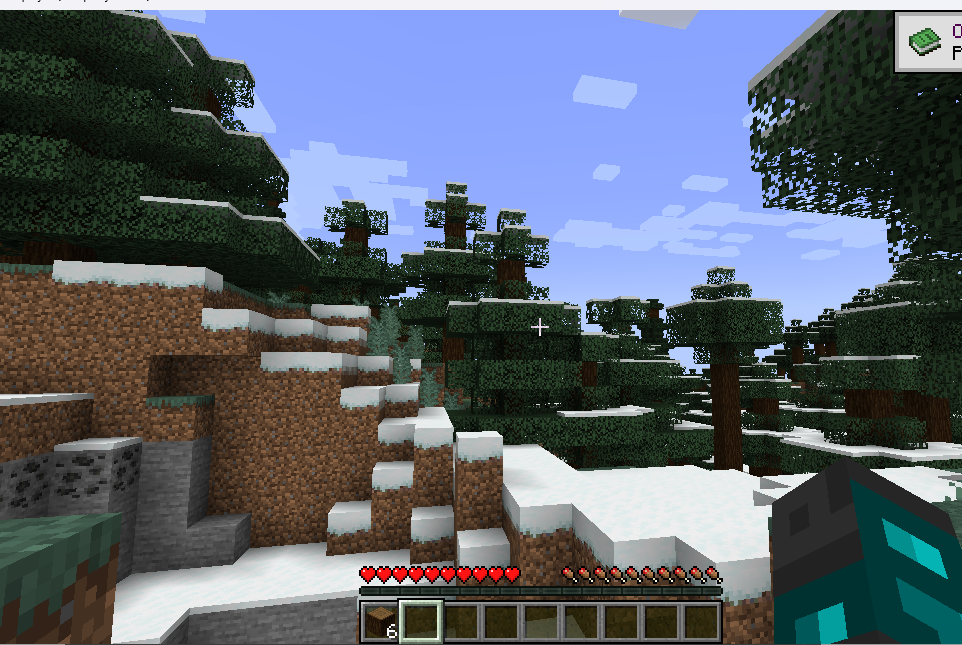
I already cut some wood for my first house. Haha.
Connecting also generated some logs:
Running the Minecraft server on startup
Now we ran Minecraft server manually at startup, but what we want is that the service automatically starts with the server as this is an dedicated server for it. We want to automate such things.
We are going to create a Linux system service for this. Start with running this command:
nano /etc/systemd/system/minecraft.serviceThis again opens a text editor where we have to paste in some information.
[Unit]
Description=Minecraft Server
After=network.target

[Service]
WorkingDirectory=/mnt/minecraft-data
ExecStart=/usr/bin/java -Xmx28672M -Xms28672M -jar server.jar nogui
User=root
Restart=on-failure
RestartSec=10

[Install]
WantedBy=multi-user.target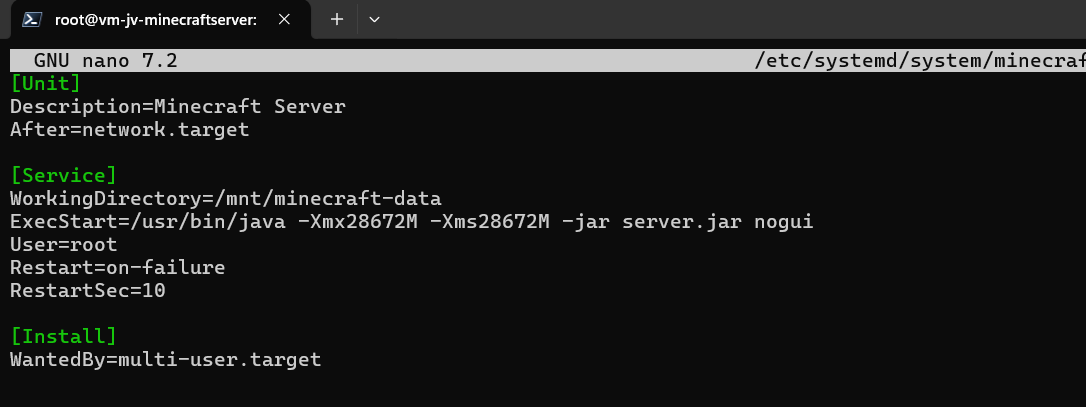
Then use the shortcut CTRL and X to exit and select Yes to save.
Now run this commands (can be run at once) to refresh the services list and to enable our newly created Minecraft-service:
sudo systemctl daemon-reexec
sudo systemctl daemon-reload
sudo systemctl enable minecraft.service
Now run this command to start Minecraft:
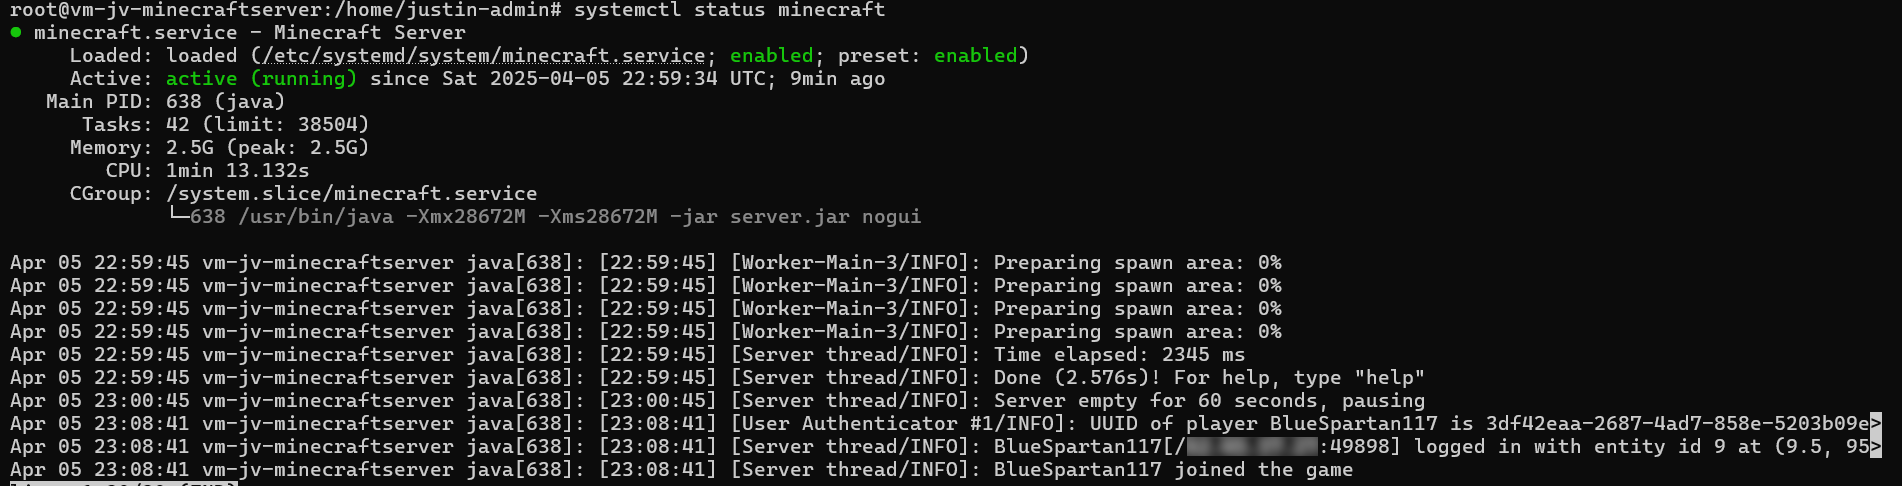
sudo systemctl start minecraftWe can view the status of the service by running this command:
sudo systemctl status minecraft
We made a separate service of Minecraft which allows it to automatically run at boot. We can easily restart and stop it when needed without using the complex commands of Minecraft.
With the systemctl status minecraft command you can see the last 10 lines for troubleshooting purposes.
Changing some Server/game settings
We can change some server settings and properties on the SSH, like:
- Gamemode
- Player limit
- Status/MOTD
- Whitelist on/off
- Whitelisted players
All of these settings are in files of the minecraft directory. You can navigate to the minecraft directory by using this command:
cd /mnt/minecraft-data
Open the file server.properties
nano server.propertiesIn this file all settings of the server are present. Lets change the status/MOTD message for example:
motd=[§6Justin Verstijnen§f] §aOnlineThis makes the text in colors and all fancy and stuff. You can find this in the internet.
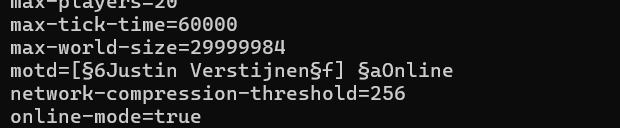
Now save the file by using CTRL + X and select Yes and hit enter. This saved the file.
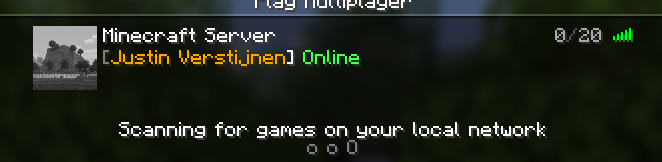
After each change to those files, the service has to be restarted. You can do this with this command:
systemctl restart minecraftAfter restarting, the server shows up like this:
Summary
While hosting a Minecraft server setup on Azure is a possibility, it’s not that cost-efficiënt. It is alot more expensive than hosting your own server or other 3rd party cloud providers who do this. What is true is that the uptime in terms of SLA is maybe the highest possible on Azure, especially when using redundancy with Availability Zones.
However I had a lot of fun testing this solutionand bringing Minecraft, Azure and Linux knowledge together and build a Minecraft server and write a tutorial for it.
Thank you for reading this guide and I hope it was helpful.
End of the page 🎉
You have reached the end of the page. You can navigate through other blog posts as well, share this post on X, LinkedIn and Reddit or return to the blog posts collection page. Thank you for visiting this post.
If you think something is wrong with this post or you want to know more, you can send me a message to one of my social profiles at: https://justinverstijnen.nl/about/
If you find this page and blog very useful and you want to leave a donation, you can use the button below to buy me a beer. Hosting and maintaining a website takes a lot of time and money. Thank you in advance and cheers :)

The terms and conditions apply to this post.