Setup a Public Image storage with Azure Blob
The setup described
The setup I will build today consists of these resources and items:
- Storage account : This is what we can call the “file server” in Azure
- Container : This is the folder inside of the storage account which can be private or publicly available
- Blobs : The actual files inside the container (your images)
After configuration the files can be reached through a URL. For example this is what the URL can look like:

To separate the URL more clearly:
| Protocol | Storage account name | Azure Blob suffix | Container | Folder | File (Blob) |
|---|---|---|---|---|---|
| https:// | sajvwebsiteblobstorage | blob.core.windows.net | blog | header-photo-200 | jv-media-200-5280d899415e.jpg |
This blob looks like this in the Azure Portal:
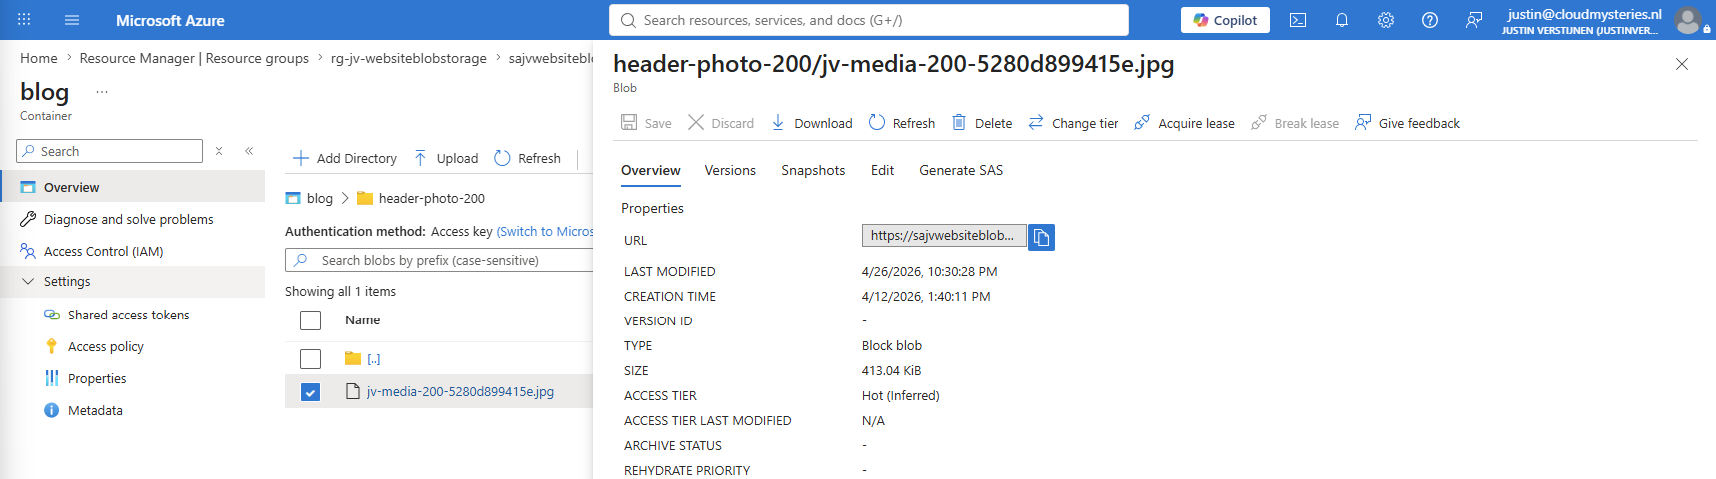
You can use a custom domain, but this also requires Azure Front Door. In this guide, I will use the service without a custom domain.
Step 1: Create a container for your images
Open the Azure Portal at https://portal.azure.com and go to “Storage accounts”. Create a new storage account at this page:
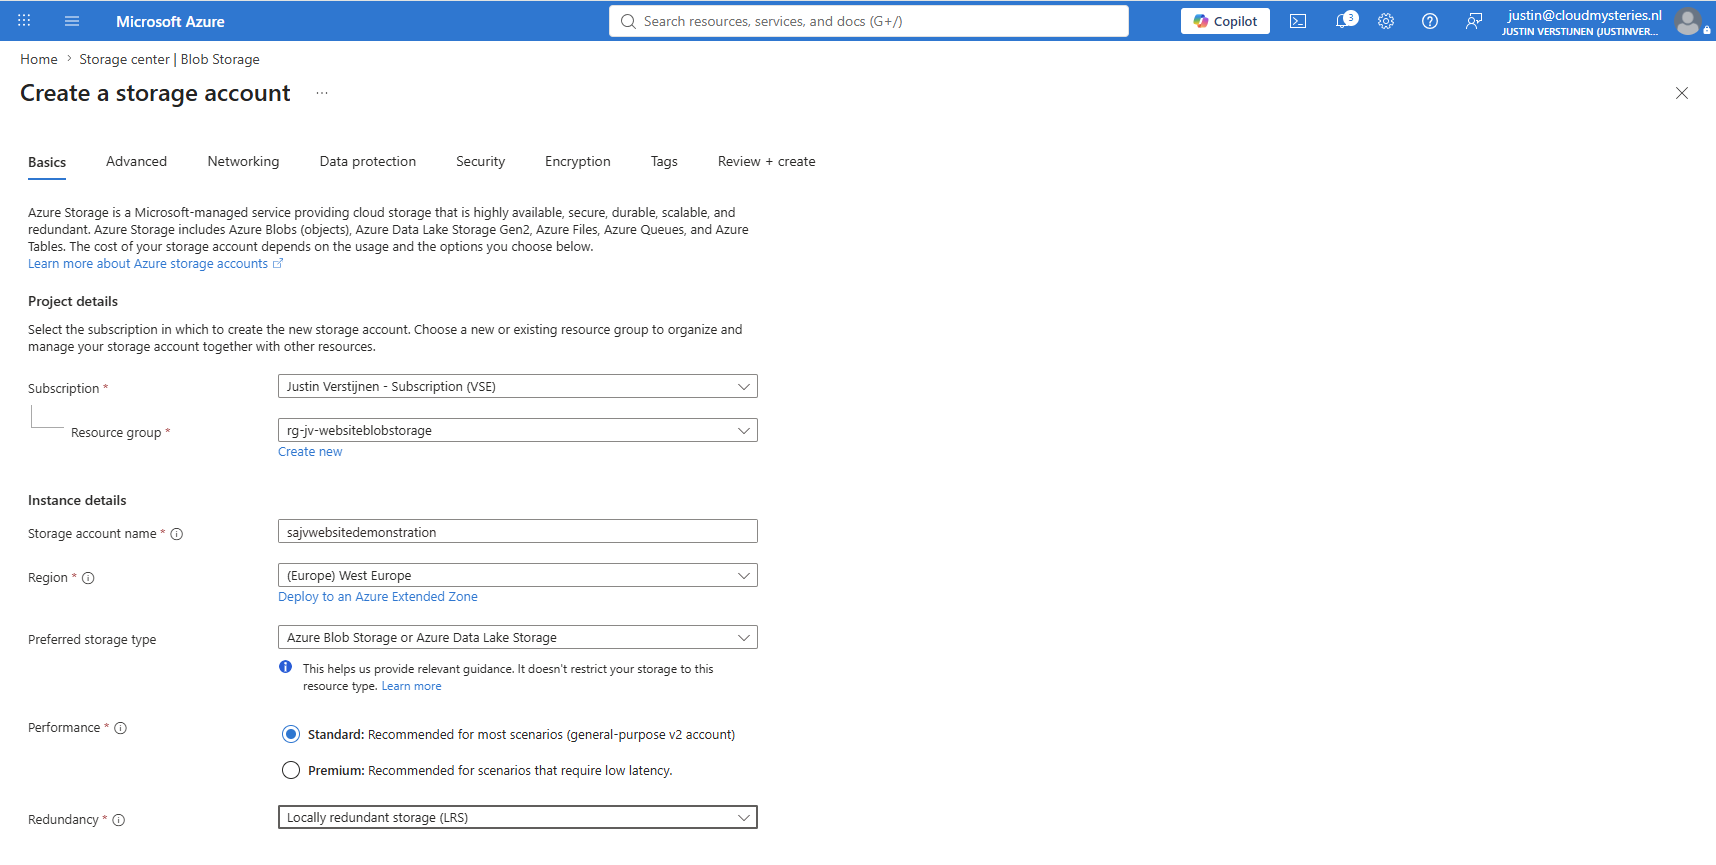
Fill in the details and use the preferred storage option “Azure Blob Storage”. Then go to the next page:
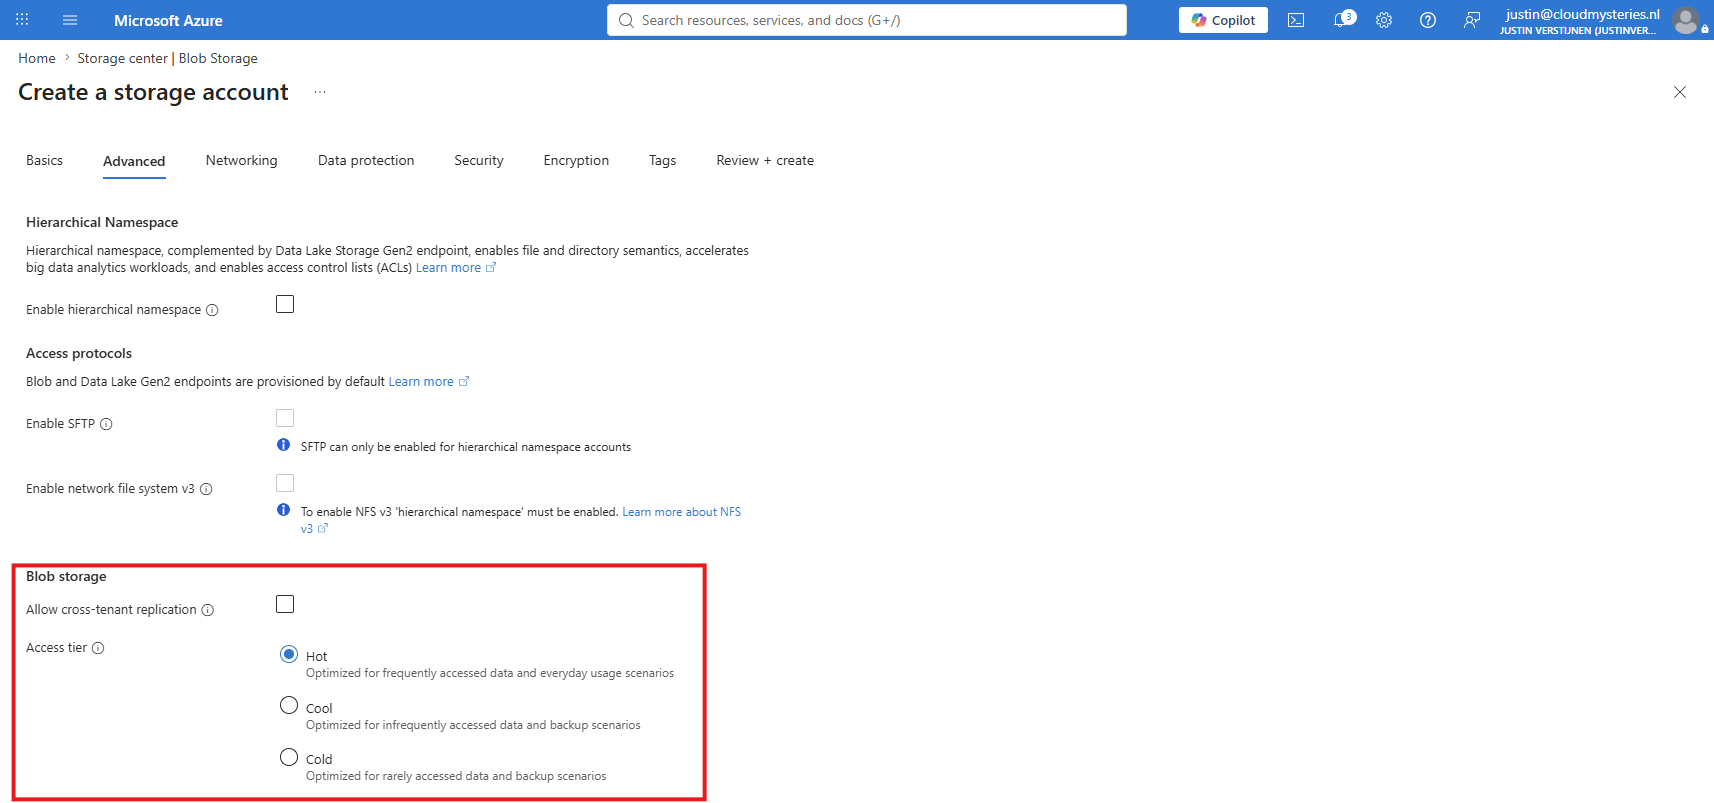
I use the Hot tier, as this is the most cost-effective option. The images will be accessed regularly, so the access costs are very important. Especially on public websites where bots and scrapers are active.
Then finish the Storage Account creation.
Step 2: RBAC roles for Azure Blobs administration
Before we can manage the Storage account and Blobs using our user accounts, we need to assign the required roles to the accounts. By default in this setup, we need to assign different roles as we will use Microsoft Entra authentication only. Already having subscription or resource group Owner permissions is not enough as we also need a role to access the data (DataRole).
Navigate to the created Storage Account and open the “Access Control (IAM)” blade.
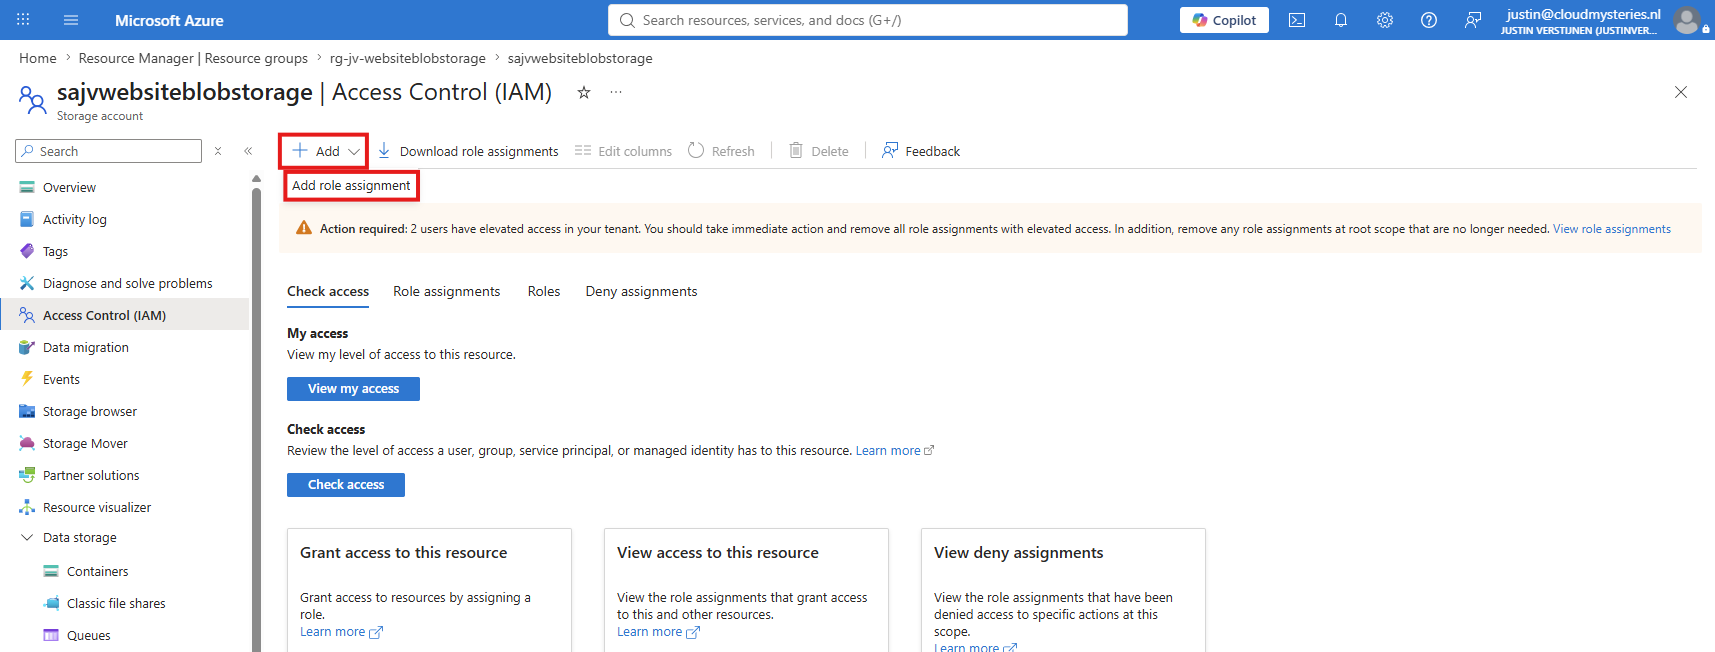
Click on “+ Add” and then choose “Add role assignment”.
Then search for this role:
- Storage Blob Data Contributor
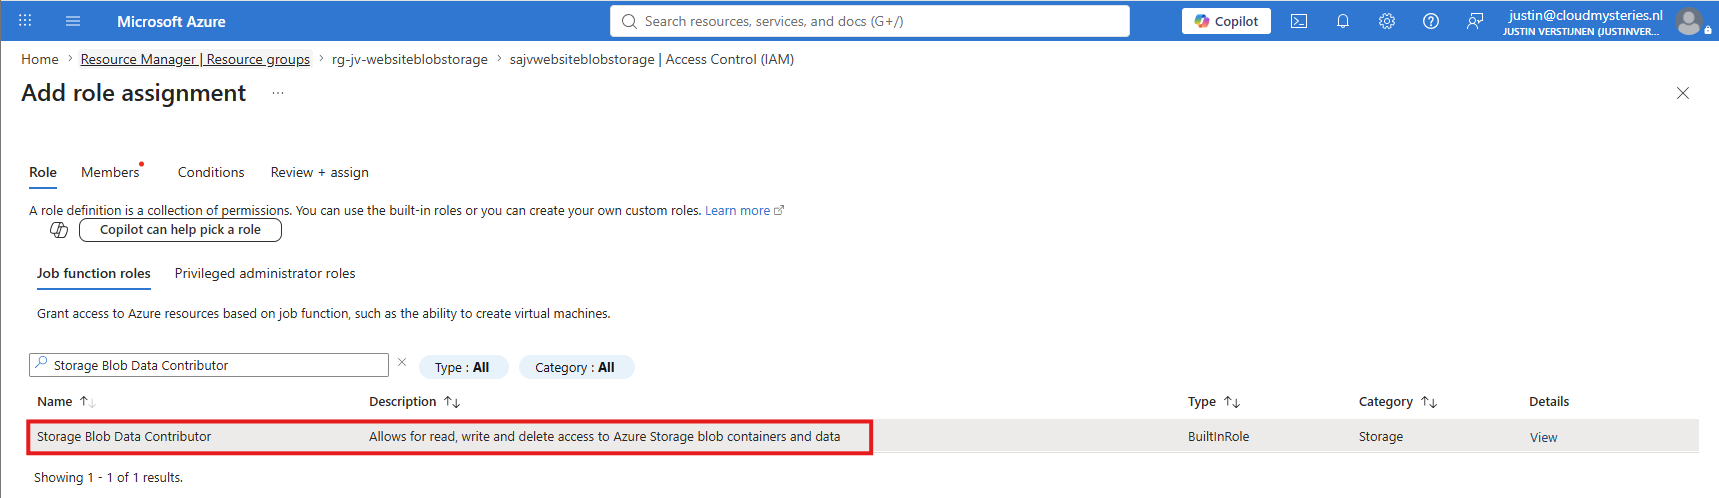
Select the role and click “Next”. Now select the required user:
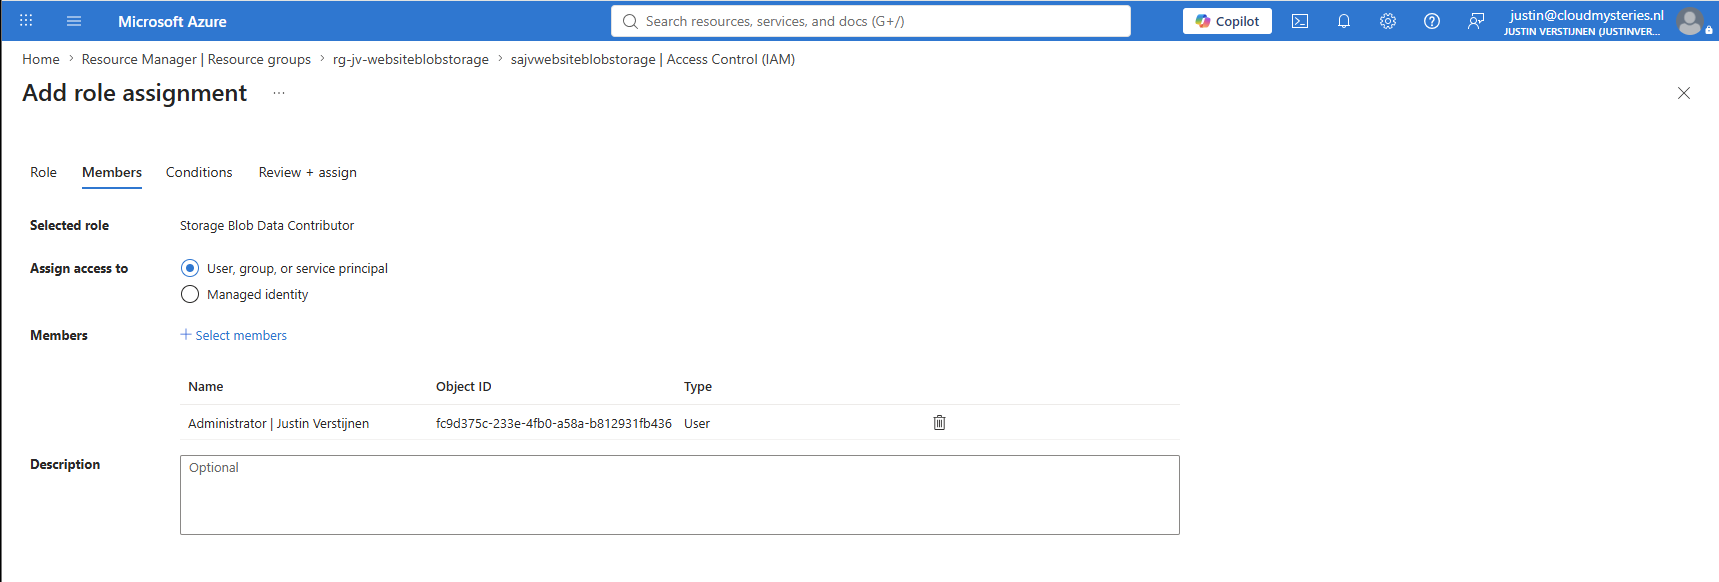
After this step complete the wizard to finish assigning the role.
Step 3: Storage Account Security
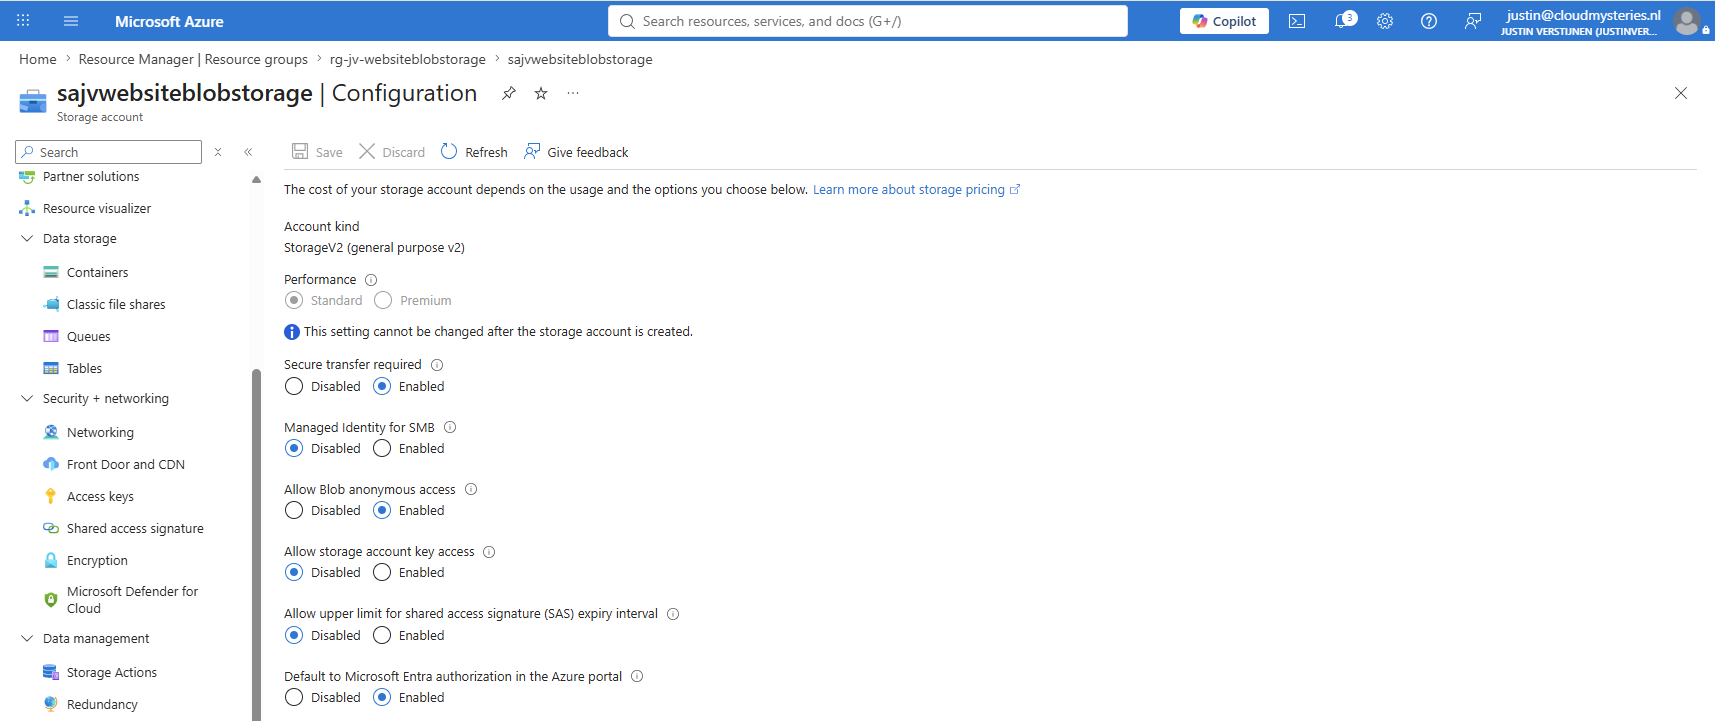
Now we will apply some storage account security which I highly recommend to perform. As this blob storage must be publicly available, we will not set anything in the Firewall but we will set these settings:
| Setting | Status | Explanation |
|---|---|---|
| Secure transfer required | Enabled | This requires a high level of security in the transfer to Blobs, basically requiring HTTPS |
| Allow Blob anonymous access | Enabled | Enables public access for anonymous users, for users without authentication |
| Allow storage account key access | Disabled | Disables the storage access key to be used on the storage account, making the Entra ID authentication the primary and only authentication method |
| Default to Microsoft Entra authorization in the Azure portal | Enabled | Makes Microsoft Entra the default method in the portal, prevents errors that your storage account access key doesn’t work |
This should look like this:
Step 4: Create a container
Now we can create a container to store the blobs in. This is like creating a folder on your computer in simple terms. Navigate to your storage account, and open “Containers” and click “+ Add container”.
Give the container a URL-friendly name, so lowercase, no spaces or special characters and select the “Blob” option for the anonymous access level. This is the most restrictive option, only giving read access on the blobs in the containers, not to the container itself.
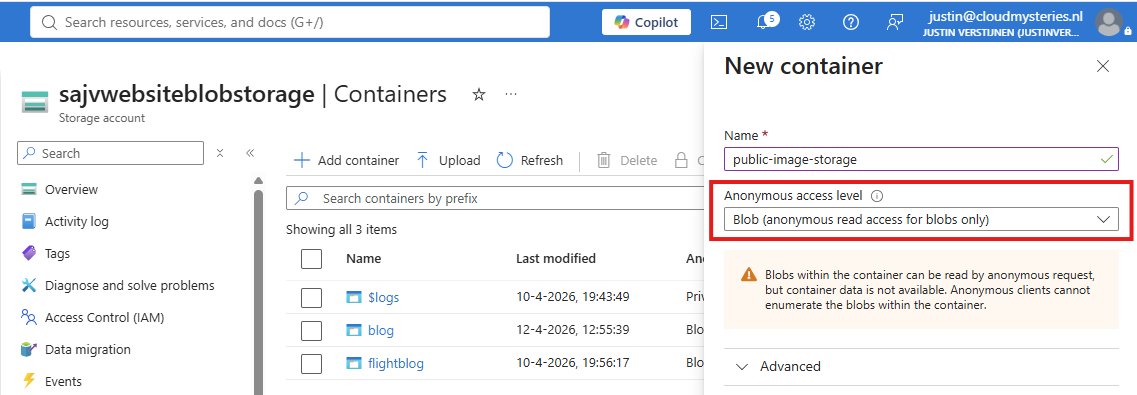
Finish the creation of the container. Now you can upload a file and check if you can view this file in your browser. If this works, your setup is completed.
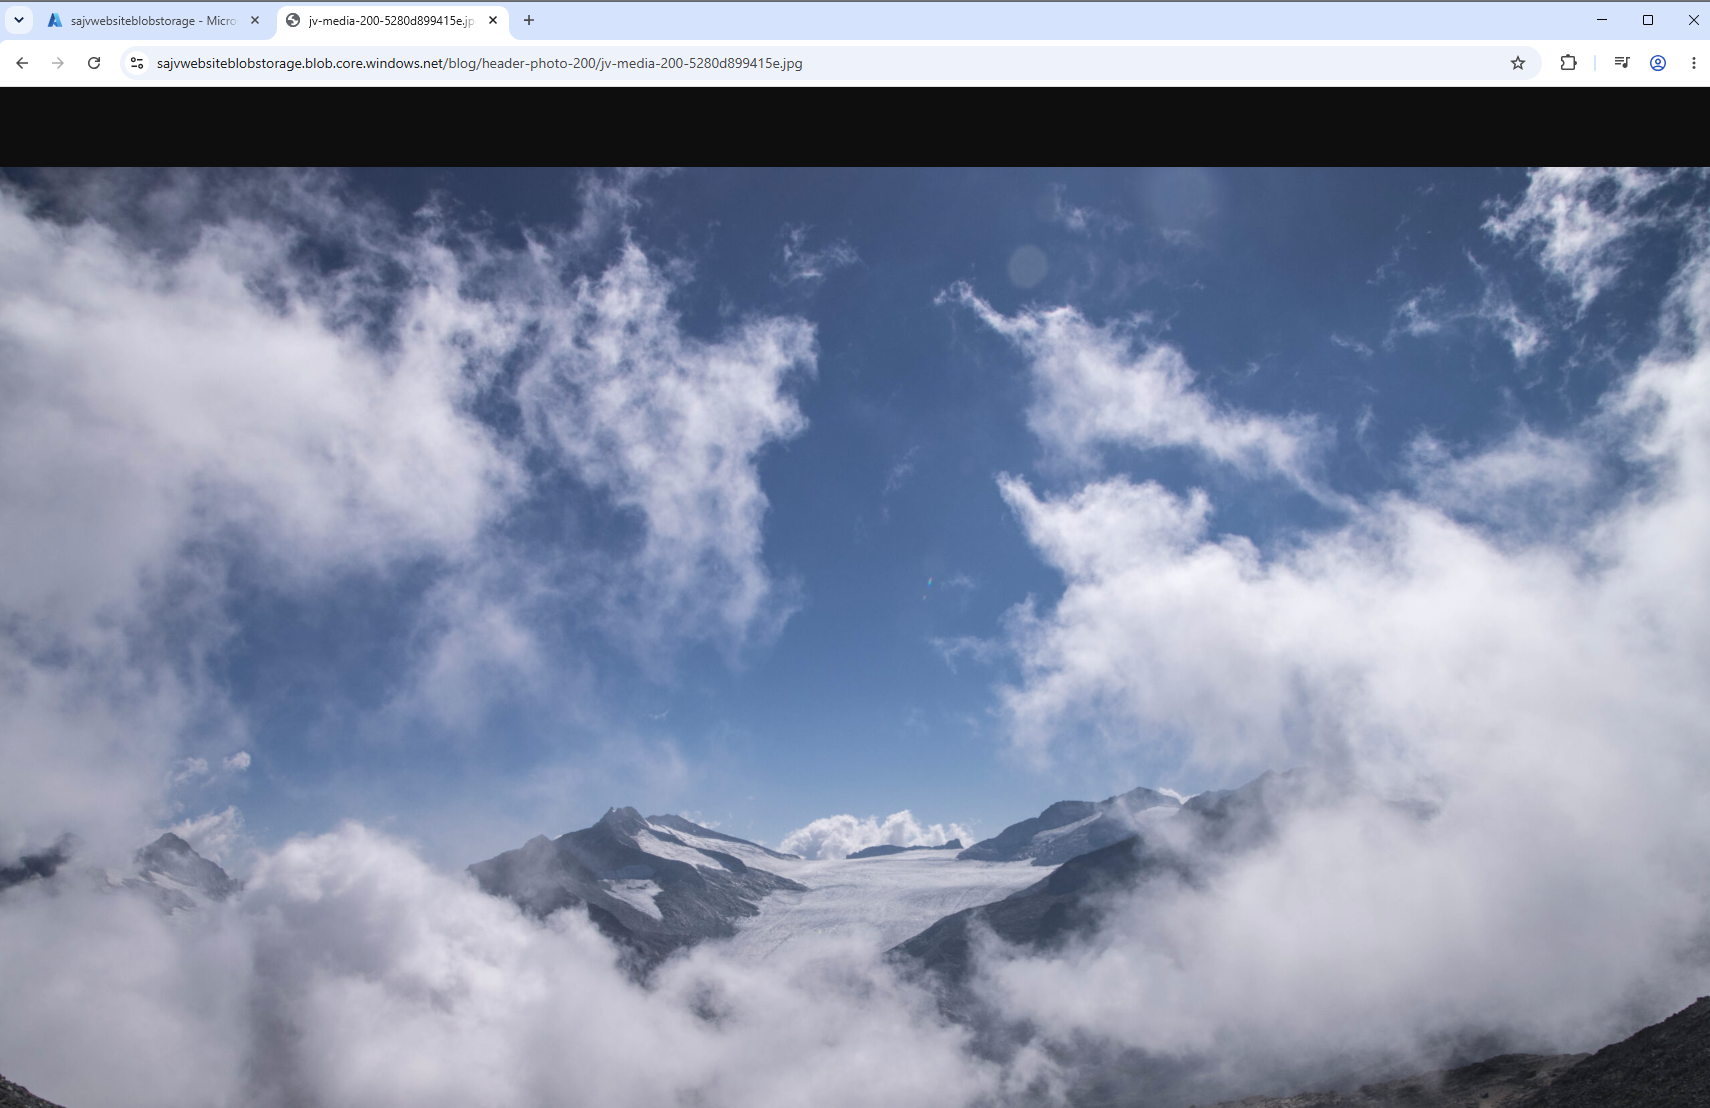
It works, but also check other browsers and devices to be sure of the public access.
Now you can create files and folders in the blob storage. This is so easy, where I think if you made it this far into the guide, this should not need a step-by-step description.
Step 5: Check storage account usage (optional)
You can check the current storage usage in the Azure Portal. Go to the storage account, and open the “Insights” blade from the left. Then open the “Capacity” tab.
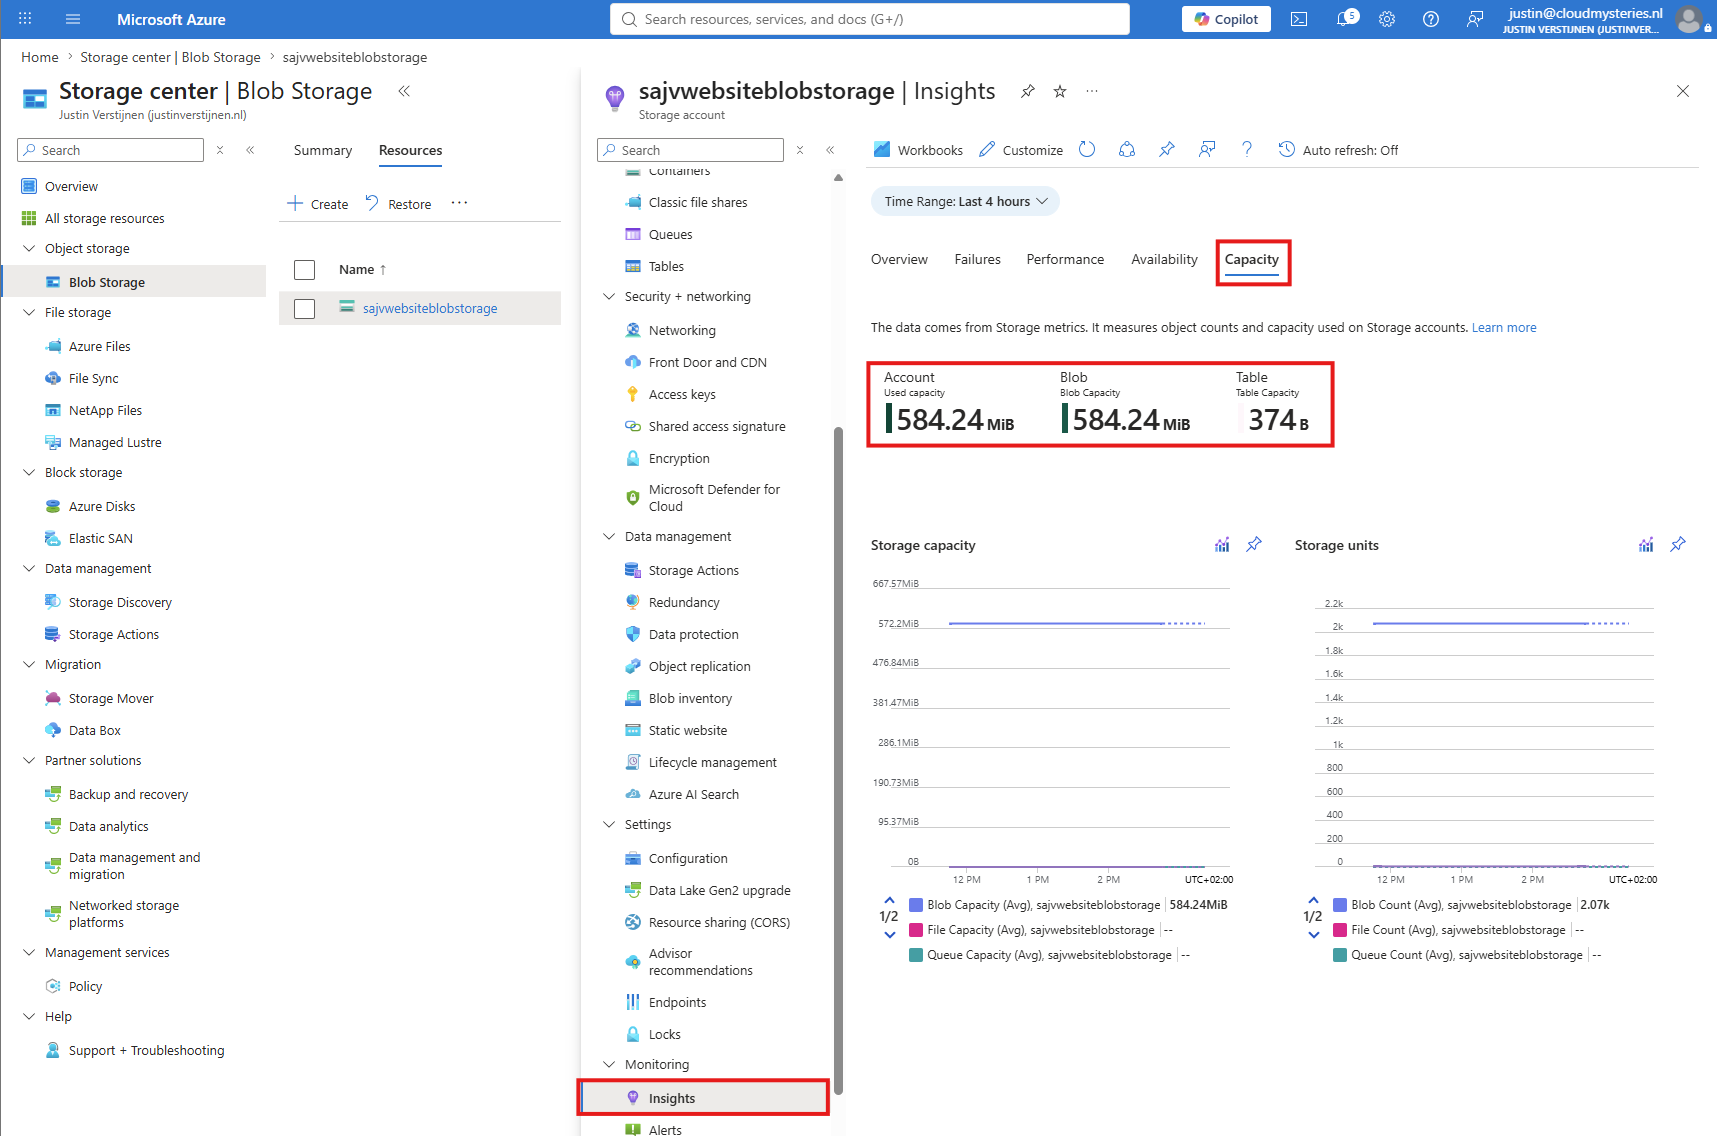
This shows the actual usage of the storage account. You can also use your own workbooks to measure the capacity or the amount of files.
Summary
To build a public image repository with Azure Blob Storage, create a container, change anonymous access from Private to Blob so browsers can read your images, and keep uploads and administration restricted using Access Key, SAS, or Entra ID (RBAC).
Thank you for reading this post and I hope it was helpful!
These sources helped me by writing and research for this post;
End of the page 🎉
You have reached the end of the page. You can navigate through other blog posts as well, share this post on X, LinkedIn and Reddit or return to the blog posts collection page. Thank you for visiting this post.
Support the blog
