Session Shadowing with Entra ID on Azure Virtual Desktop
We can use Session Shadowing to help a user by taking over their Azure Virtual Desktop session without the use of third-party software. This is disabled by default for security reasons, but in this post, I will show you how to configure Session Shadowing and how we can use it.
Session Shadowing works perfectly fine from an AD-joined management server and an AD-joined Azure Virtual Desktop environment, but I thought about how to bring this to our Entra ID-only AVD environment, so we can accelerate our move toward using AVD without any form of legacy AD DS.
In my research, I tested a separate, standalone management server to make this work, but quickly stopped due to the lack of authentication mechanisms, such as Kerberos, and the trusts we have with AD DS. The best and most cost-effective way I got this to work was by running it on the local session host.
In this post, I will describe how I got this to work.
Requirements
- Around 30 minutes of your time
- An Entra ID-only AVD environment like described in this post
- AVD host configuration management with Microsoft Intune
Step 1: Create a security group for users allowed to use Shadowing
We must first create a security group whose members are allowed to use Shadowing. In my case, I have an AVD Admins group that I will use, but you can also be more granular by creating a group specifically for this purpose.
I created a group in Entra ID with all the AVD admins in it. We can use this group for the permissions to be able to start Shadow Sessions.
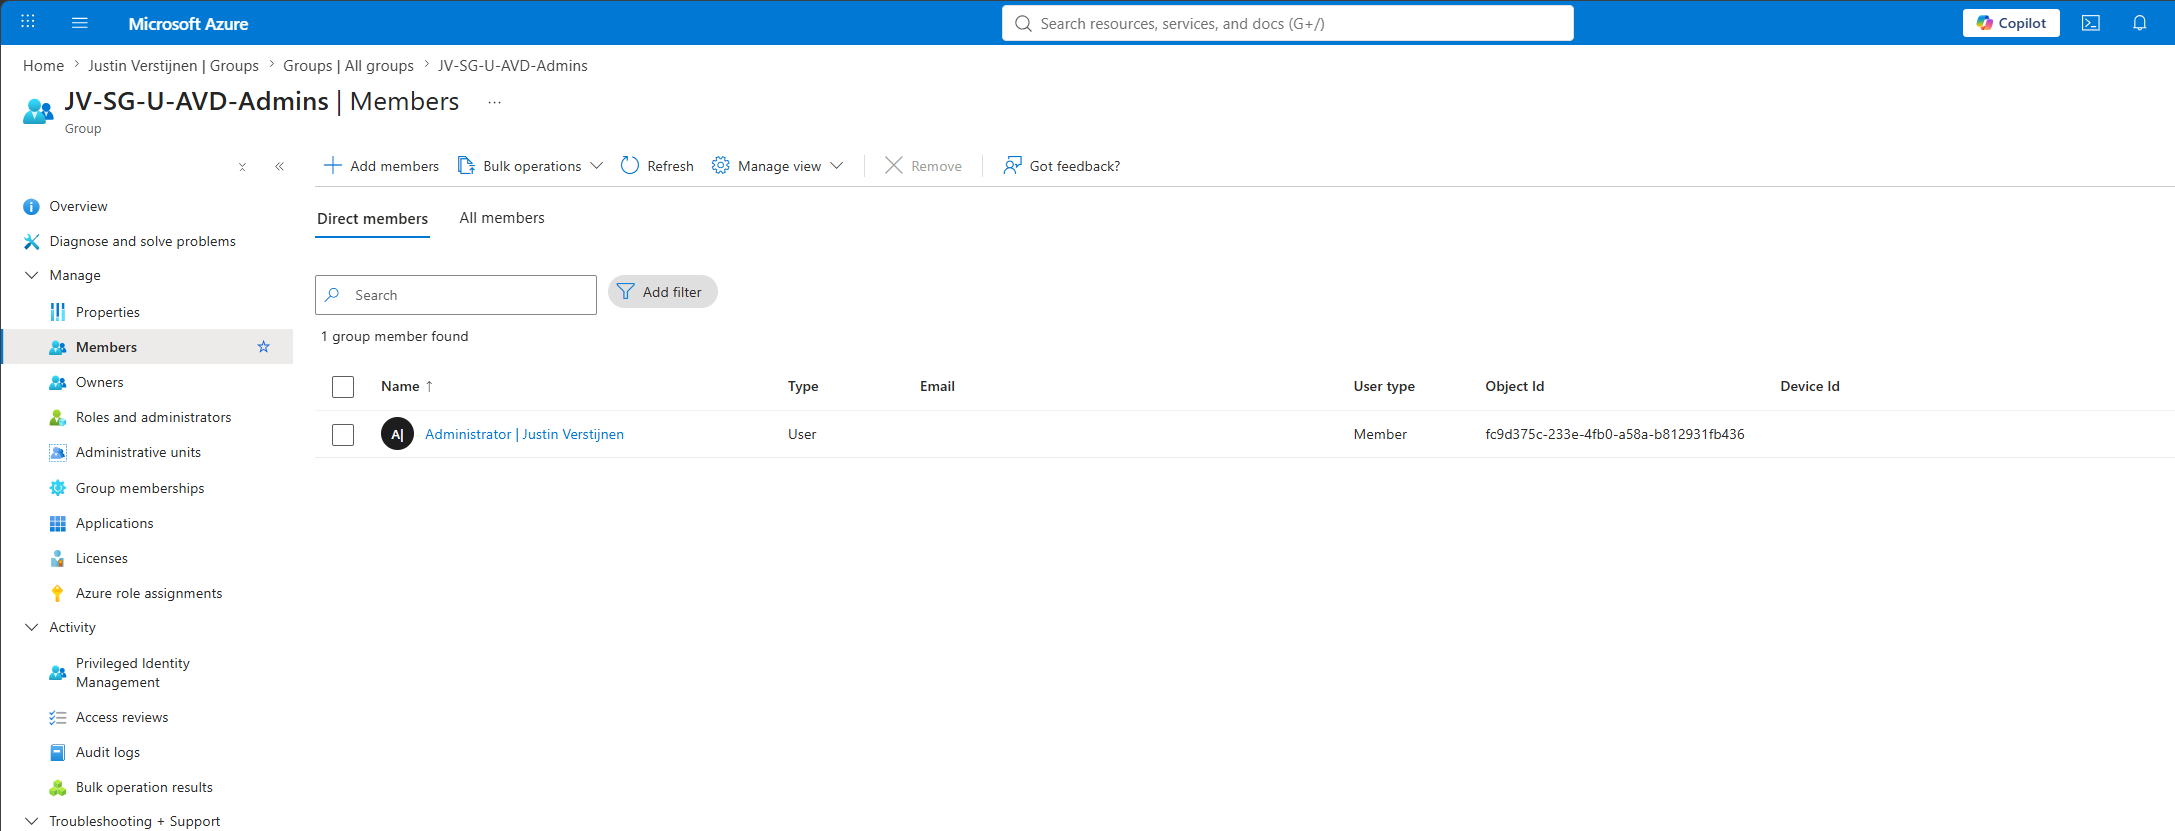
The group can be either assigned or dynamic. It must be a security group, not a Microsoft 365 group.
Step 2: Configure the Session Shadow policy
We must then enable Session Shadowing in the policies of the session hosts. In this policy, you can also specify which shadow permissions are available:
- View only
- View and control
- Whether user permission is required (recommended in organizations where sensitive information is processed)
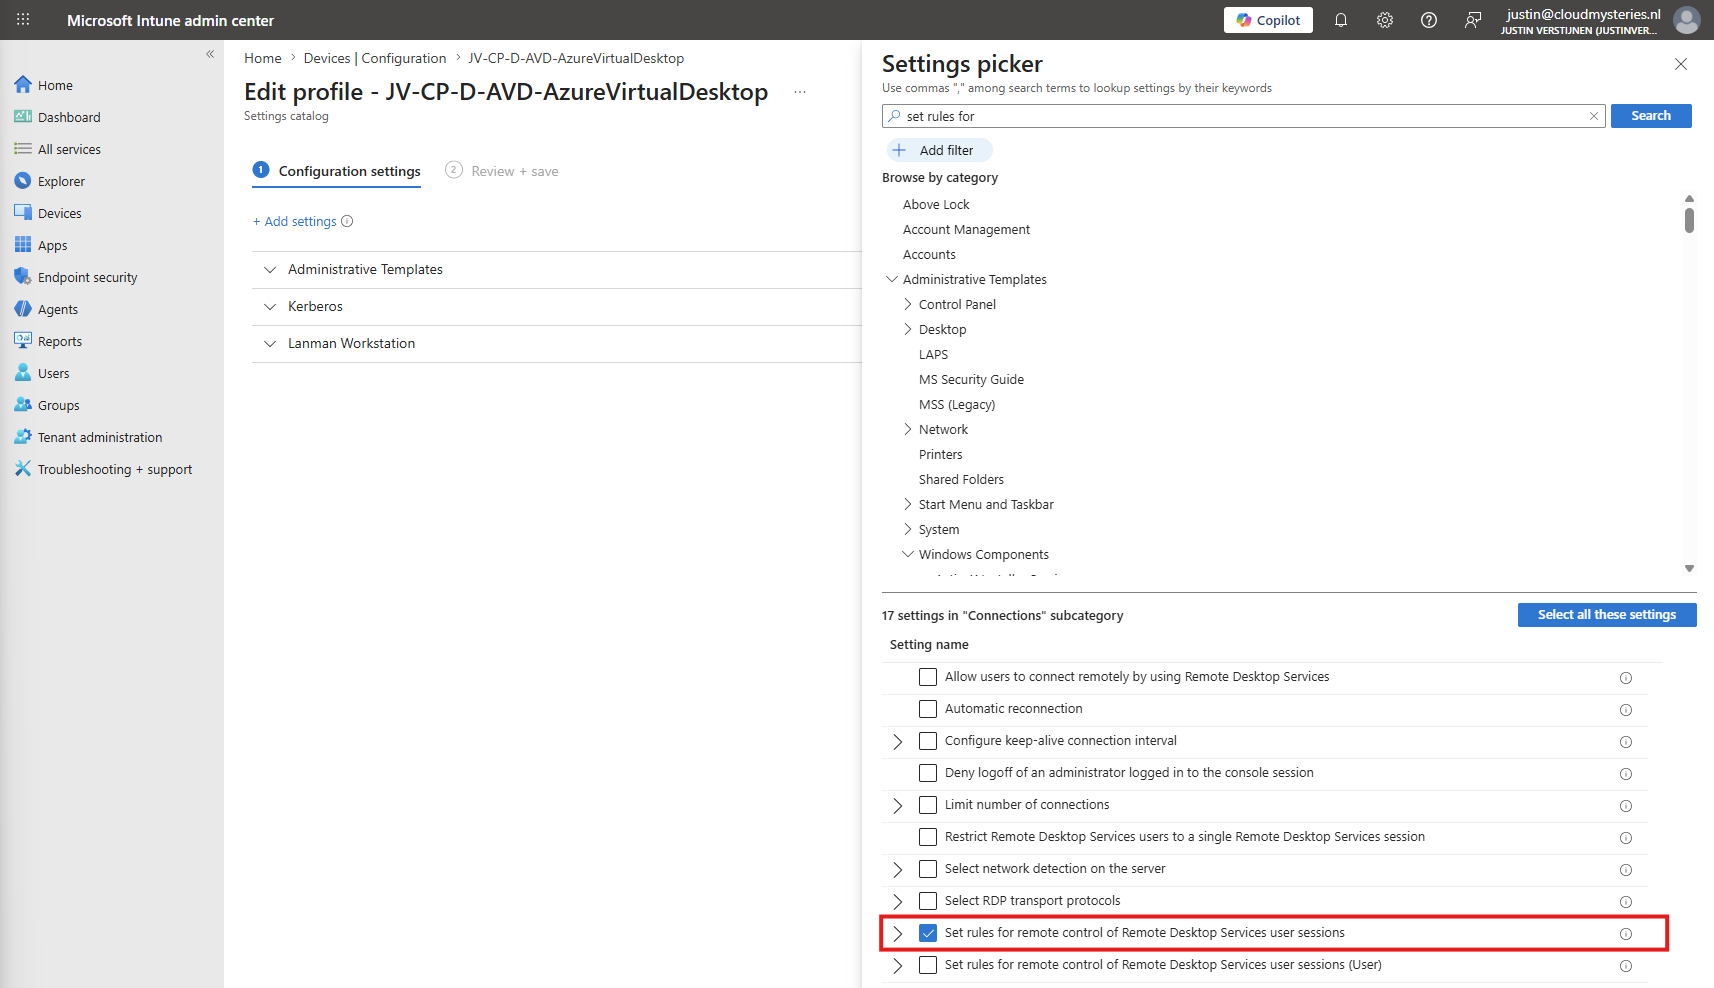
In Microsoft Intune, we can configure this setting by creating a new policy or using an existing one. Then navigate to the correct folder (or simply search for the setting):
Administrative Templates - Windows Components - Remote Desktop Services - Remote Desktop Session Hosts - Connections
Here, select the setting “Set rules for remote control of Remote Desktop Services user sessions”:
Here, we can enable the setting and select which permissions are linked to it. I will choose “Full Control without user’s permission” for the demonstration in this guide.
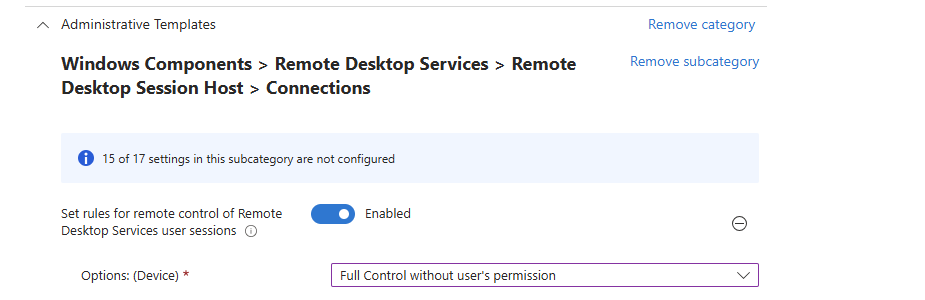
All the options are:
- No remote control allowed: Disallows an administrator to use remote control or view a remote user session.
- Full Control with user’s permission: Allows the administrator to interact with the session, with the user’s consent.
- Full Control without user’s permission: Allows the administrator to interact with the session, without the user’s consent.
- View Session with user’s permission: Allows the administrator to watch the session of a remote user with the user’s consent.
- View Session without user’s permission: Allows the administrator to watch the session of a remote user without the user’s consent.
You can also set this in the registry with this command:
reg add "HKLM\SOFTWARE\Policies\Microsoft\Windows NT\Terminal Services" /v Shadow /t REG_DWORD /d 2 /fSave the policy and apply it to the group containing your Azure Virtual Desktop session hosts.
Step 3: Add group membership to the Administrators group
As the hosts are joined to Microsoft Entra, we cannot use an Entra ID group directly for this permission. We need to add the users from an Entra ID group to a local group on the session host so the local group’s permissions apply to them. I will use the Administrators group for this because users who can shadow sessions already have relatively high privileges.
In Microsoft Intune, go to “Endpoint security”, then to “Account protection”, and create a new policy.
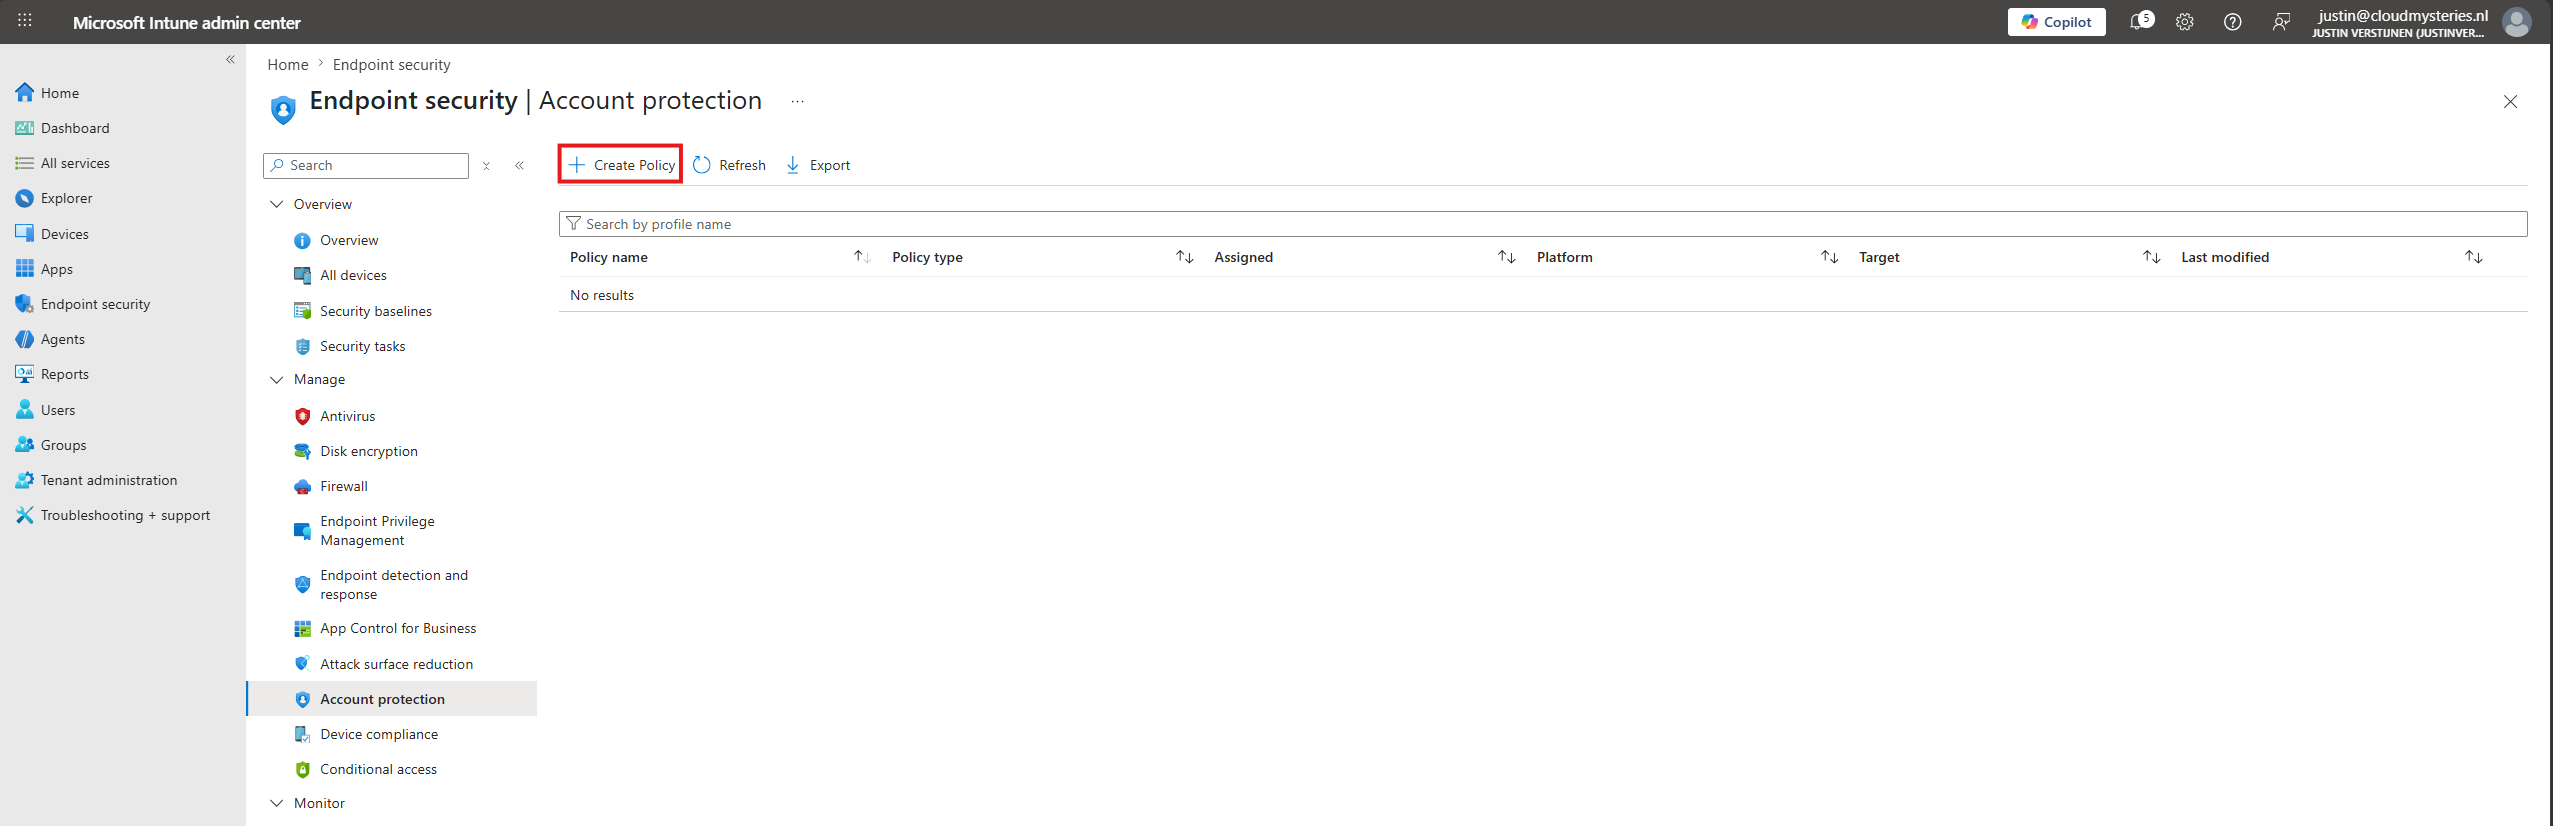
Select “Windows” and then “Local user group membership” as the profile. Then give the policy a descriptive name and description.
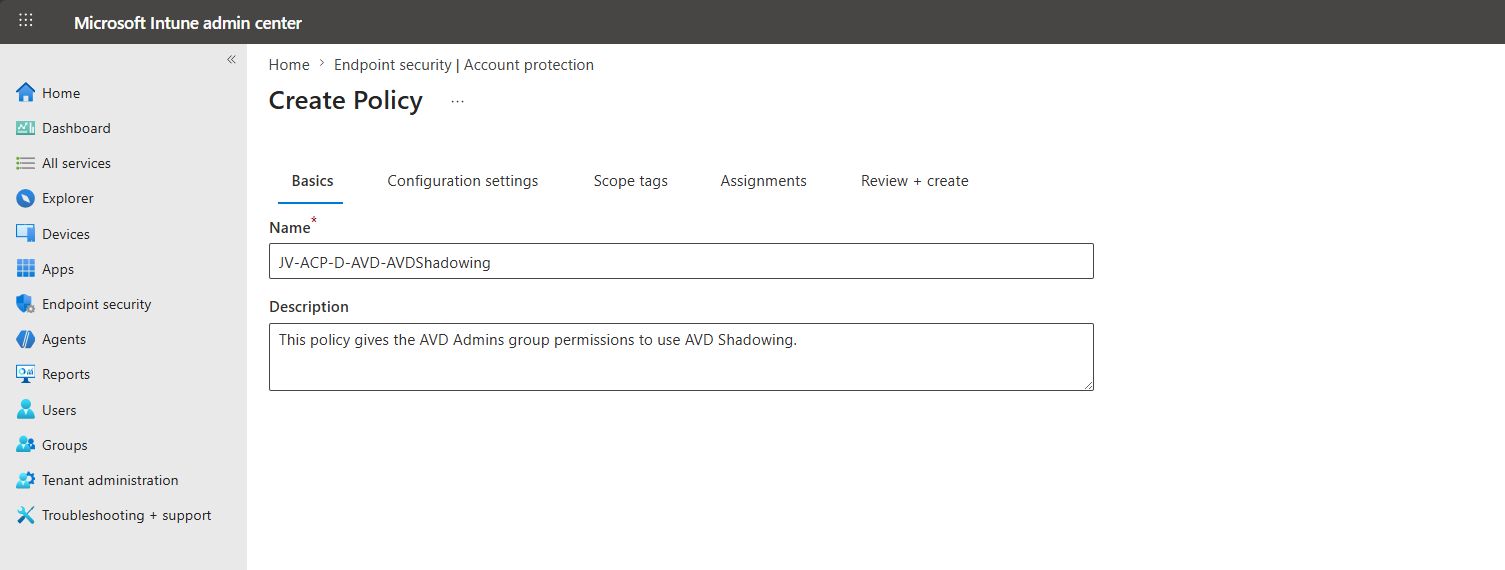
Then go to the tab “Configuration settings” and copy this configuration:
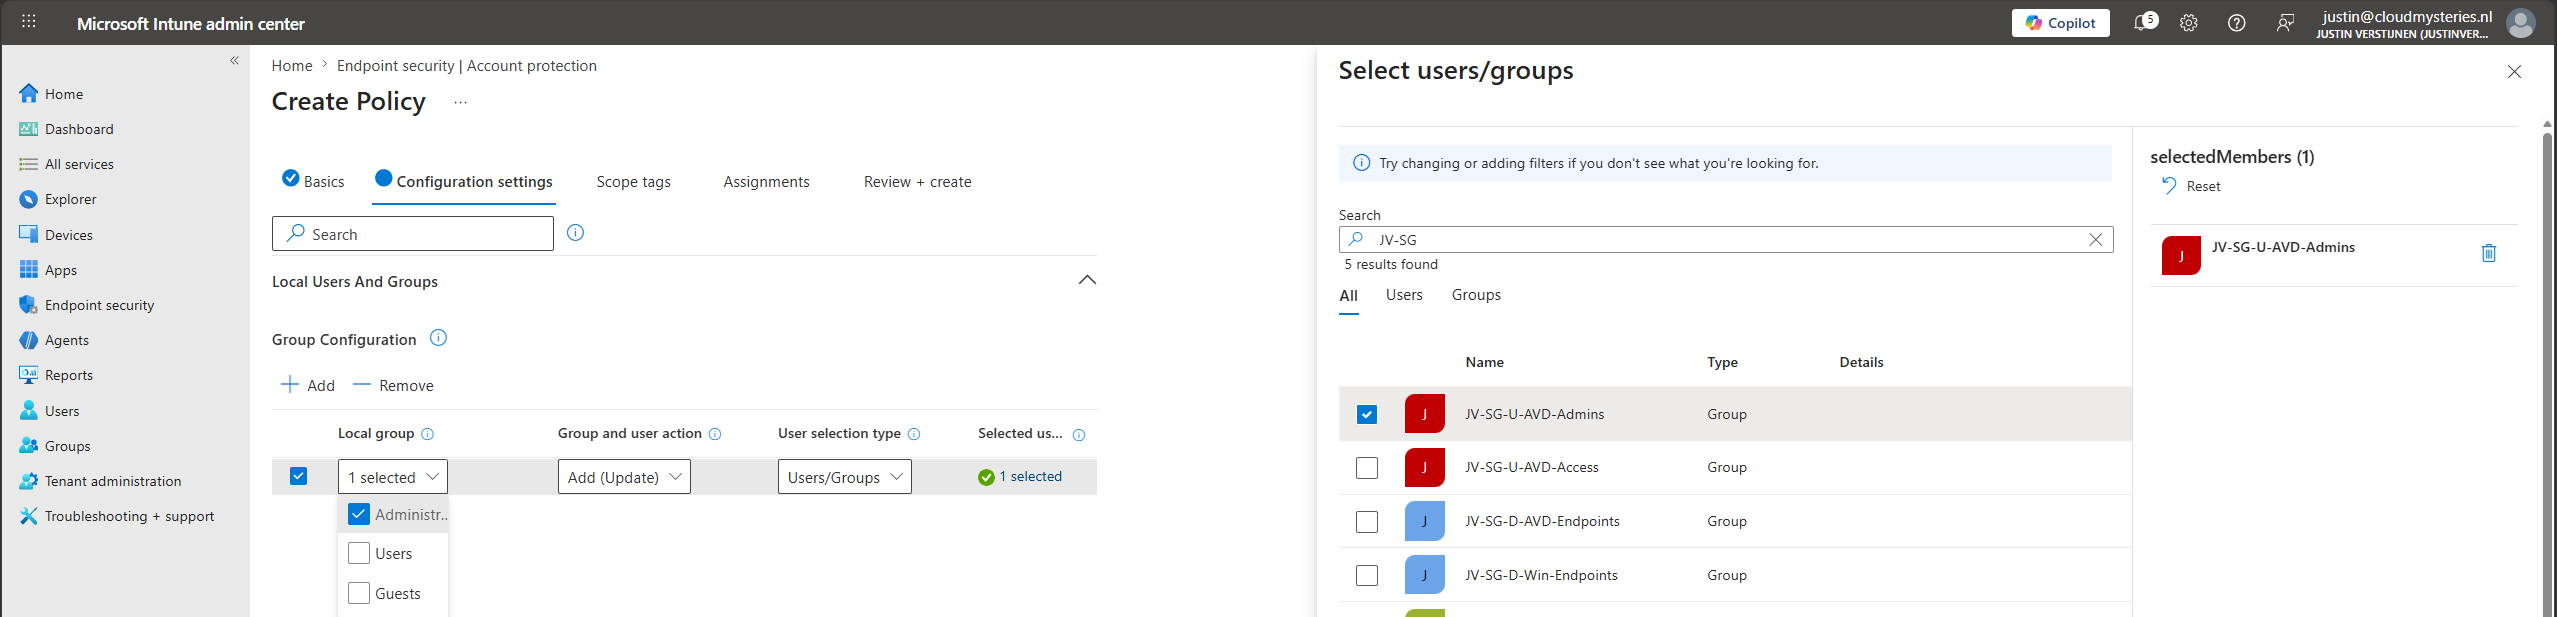
- Local group: Administrators
- Group and user action: Add (update)
- Selected users/groups: Your AVD admins group
This will add the users in the Entra ID group JV-SG-U-AVD-Admins to the local group Administrators on the session hosts, making them local administrators and preparing them for step 4: the actual shadow permissions.
Assign the policy to your group containing the AVD session hosts:
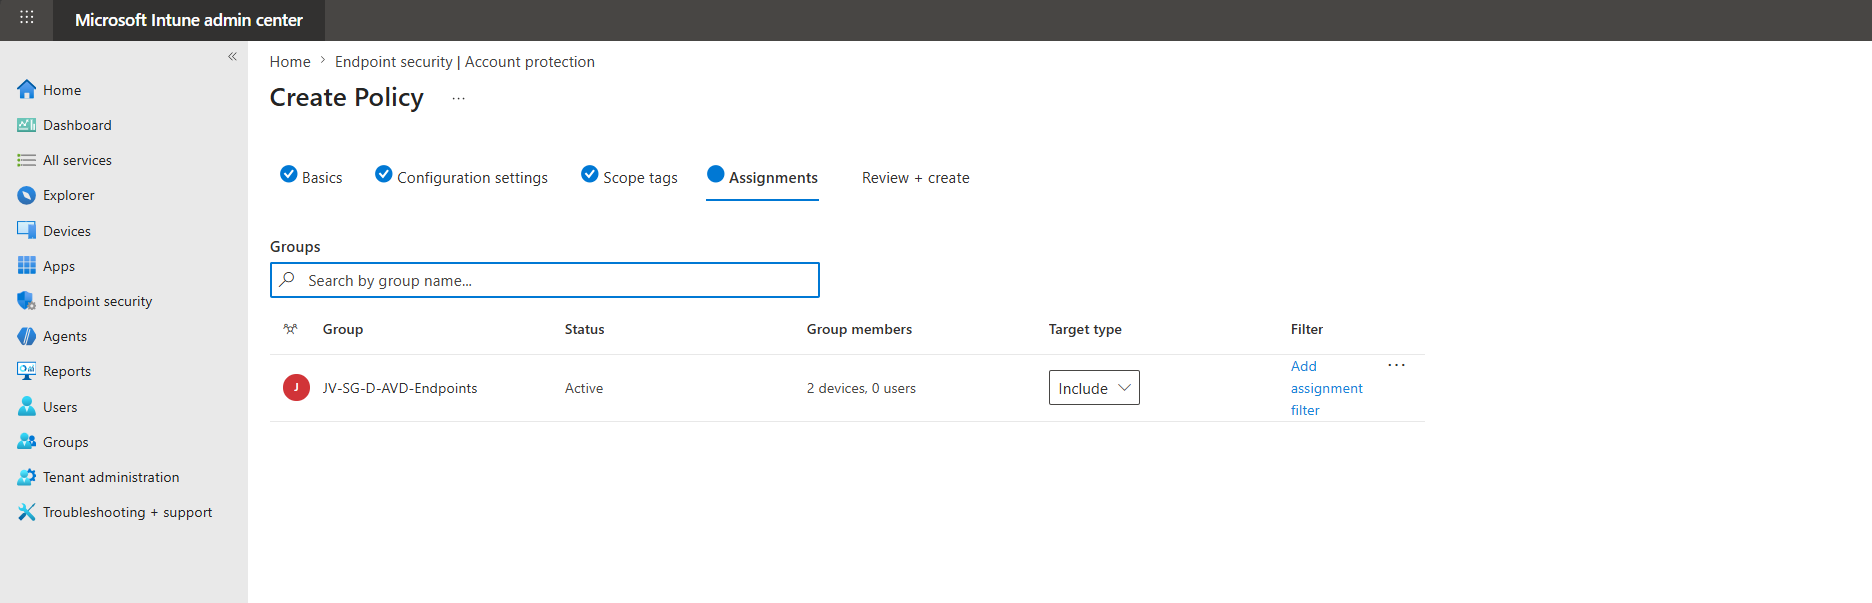
Then save the policy to apply it to the session hosts.
Step 4: Execute a script for Shadow permissions
Now we have to give the user group permission to use Shadow on the AVD session hosts. Unfortunately, we do not have a policy for this, so it must be done with a PowerShell script.
The script we need to deploy looks like this:
$GroupName = "Administrators"
$PermissionPreSet = [uint32]2

Get-CimInstance `
    -Namespace "root\CIMV2\TerminalServices" `
    -ClassName "Win32_TSPermissionsSetting" `
    -Filter "TerminalName LIKE 'RDP-sxs%'" |
Invoke-CimMethod `
    -MethodName "AddAccount" `
    -Arguments @{
        AccountName      = $GroupName
        PermissionPreSet = $PermissionPreSet
    }
Open Microsoft Intune at https://intune.microsoft.com, go to “Devices” and then “Windows”, and click “Scripts and remediations”. Here, select the “Platform scripts” tab.
Add a new script here by clicking “+ Add”:
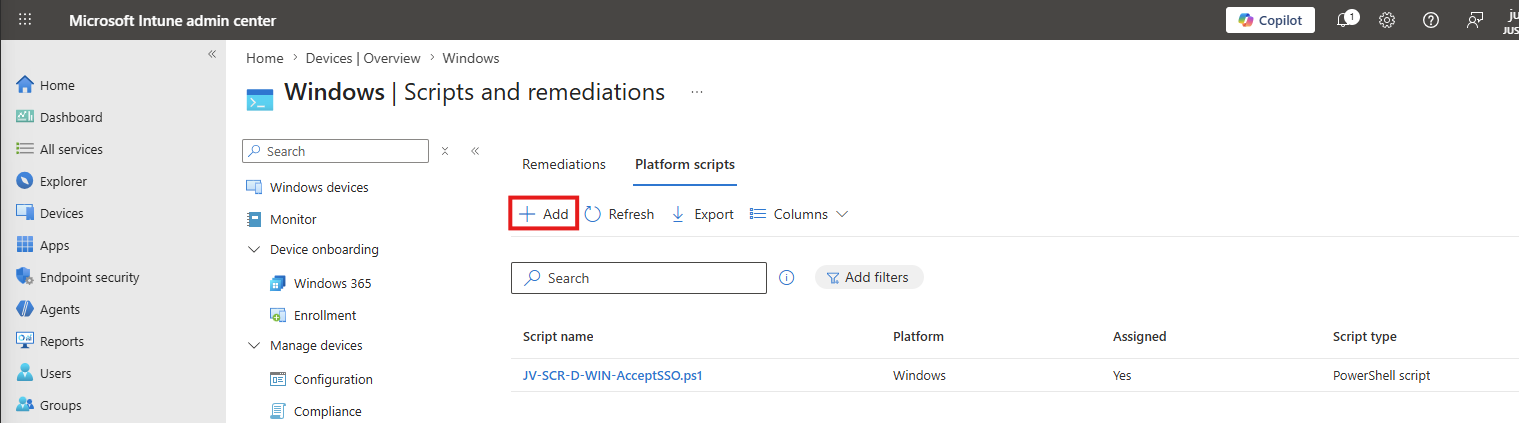
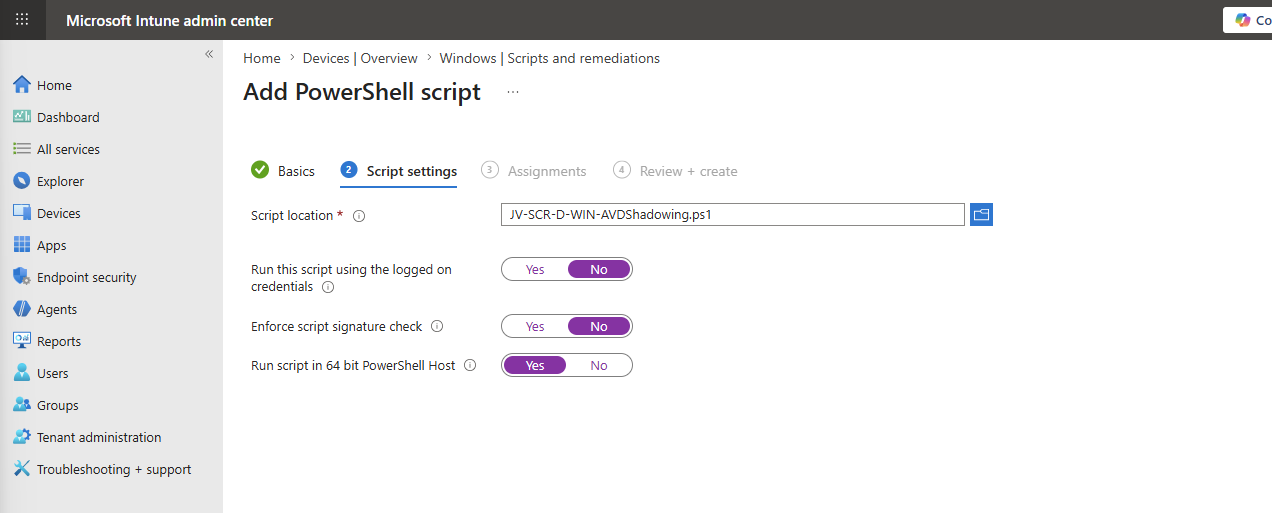
Give the script a name and description, and go to the “Script settings” tab. Then download the ready-to-use script from my GitHub page:
Use these script settings:
- Run this script using the logged on credentials: No
- Enforce script signature check: No
- Run script in 64 bit PowerShell Host: Yes
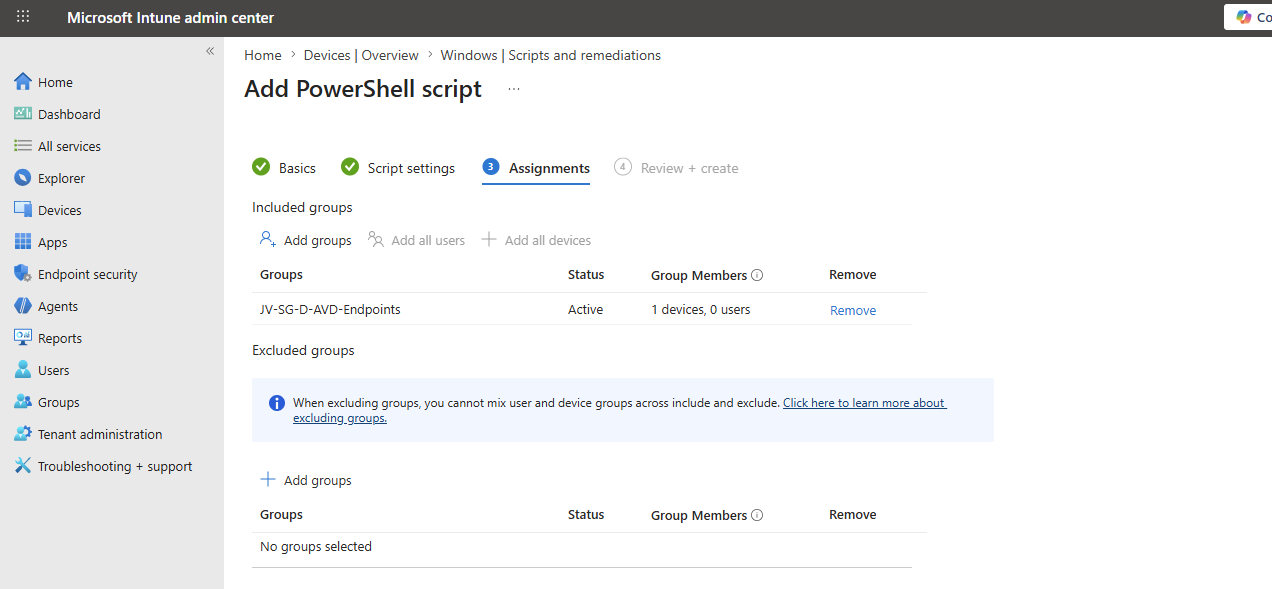
Assign the script to your AVD Session Hosts group and then save the script to apply it.
Now the AVD session hosts must be rebooted to apply this script and the other changes we made in Microsoft Intune.
Step 5: Using Shadowing with AVD
Now you can set up a shadow session by logging in with your administrator account through the Windows app or the web client at https://windows.cloud.microsoft
Here, you can log in with your administrator account and then set up a shadow session by running this command:
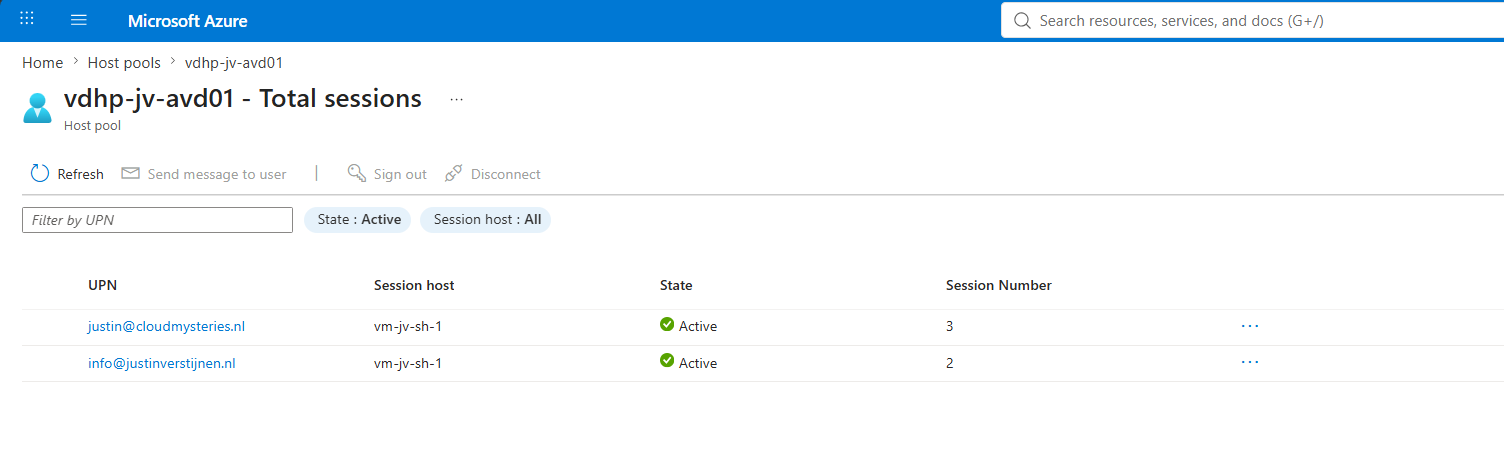
mstsc /v:vm-jv-sh-1 /control /shadow:2 /noconsentpromptFirst, we need to know which session ID is assigned to the user we want to take over. This can be done through the Azure Portal:
Or by simply entering this in the same CMD window:
qwinsta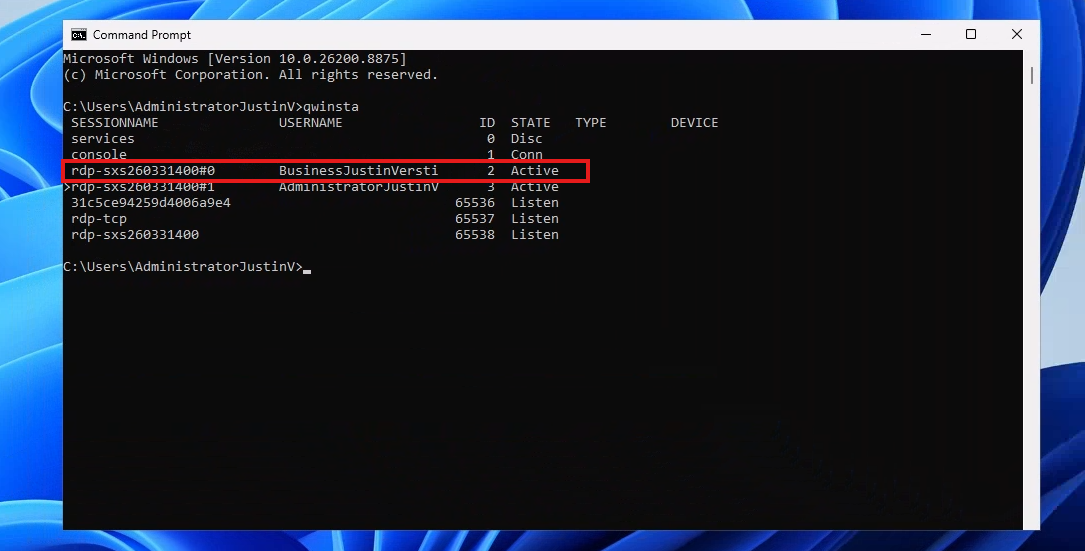
The session ID is 2, so we can use it in our command. Run this command from an elevated Command Prompt or PowerShell window:
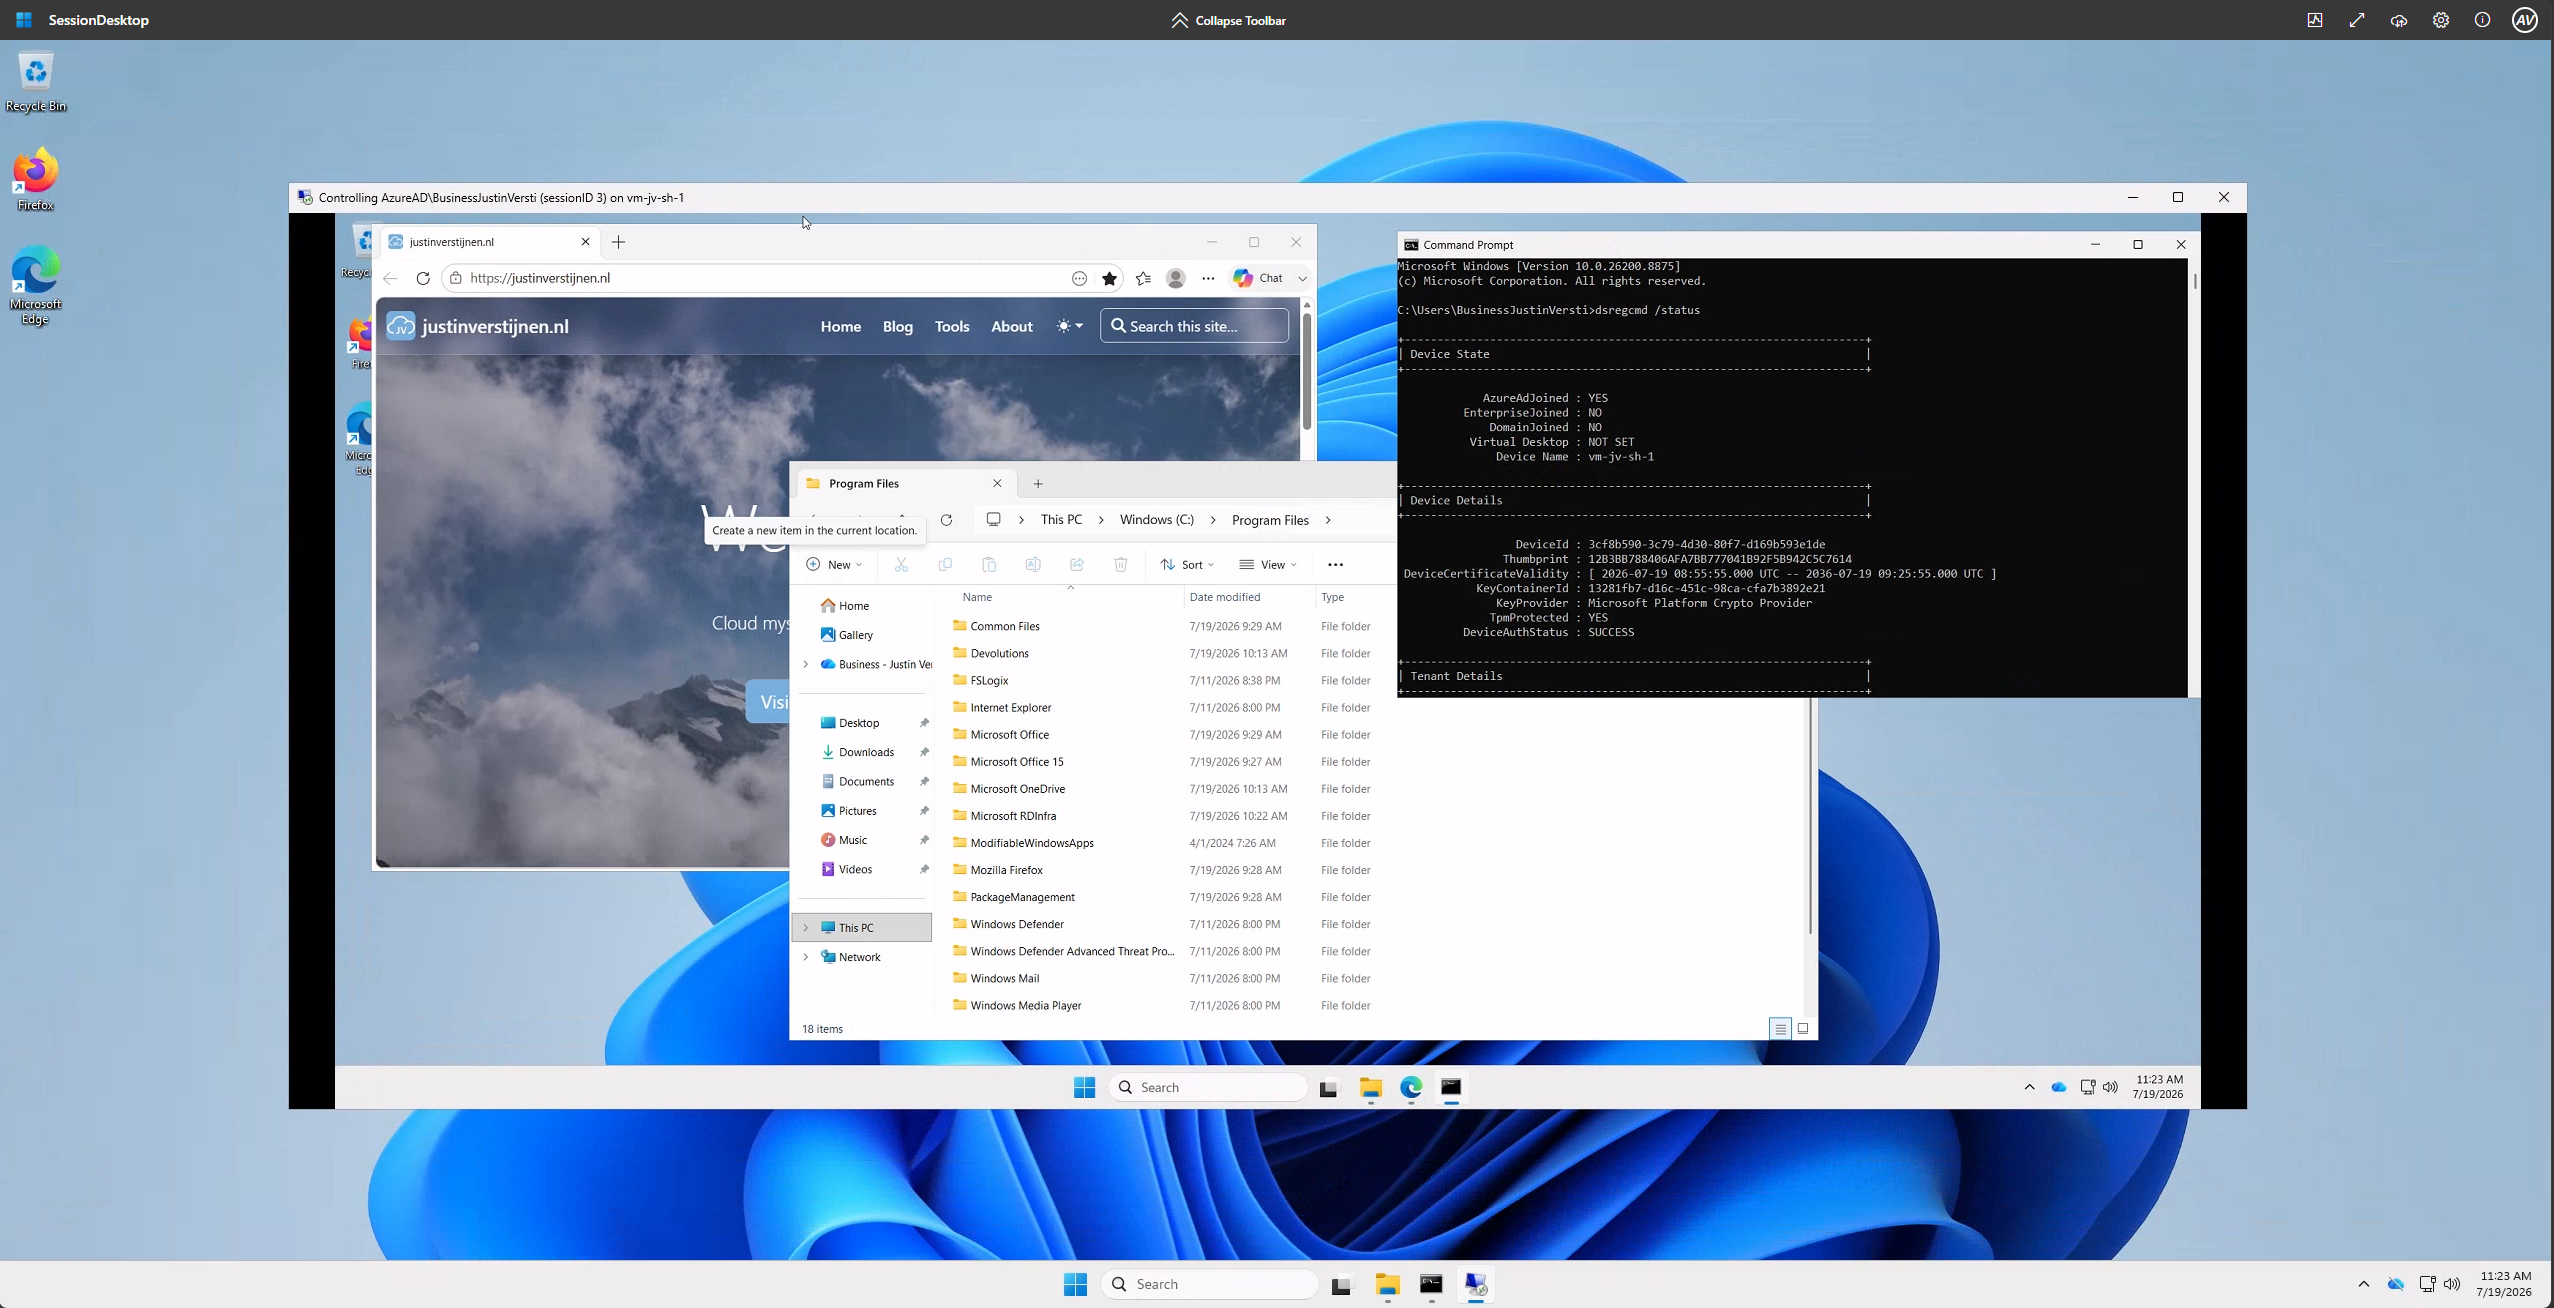
mstsc /v:vm-jv-sh-1 /control /shadow:2 /noconsentpromptAfter connecting for a few seconds, we have successfully set up a Shadow session for the user account, and we can control the session and help the user with possible problems.
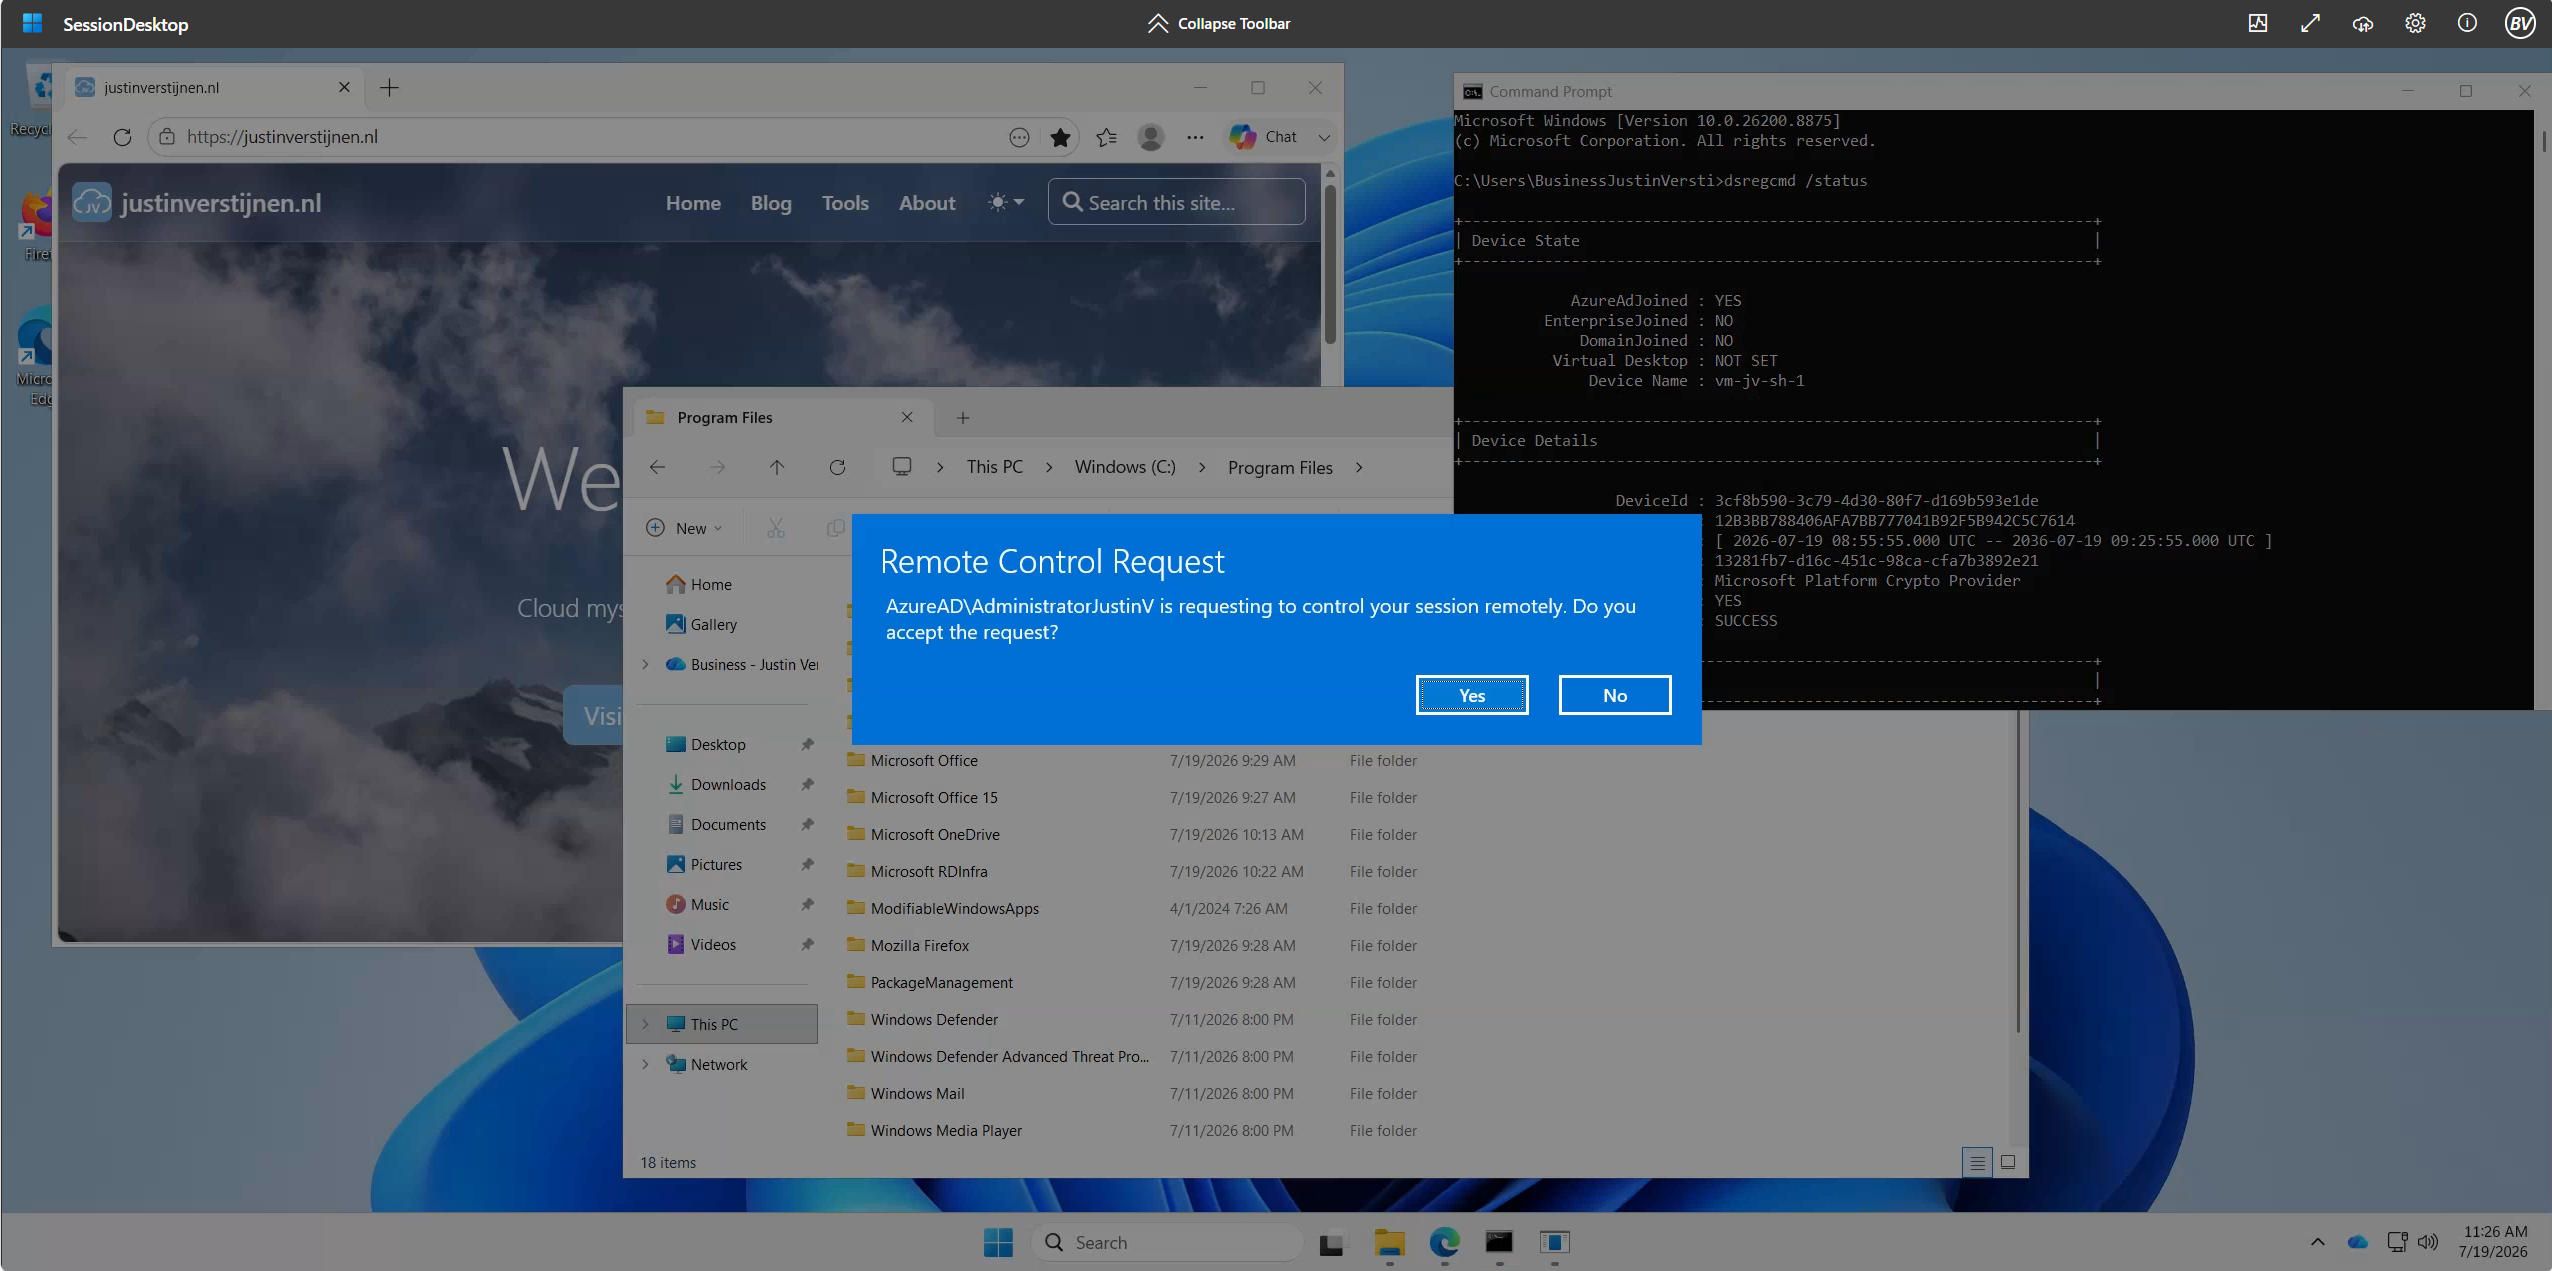
You can also leave out the /noconsentprompt parameter to ask the user for permission to take over the session. This is what it looks like to the user:
Summary
Using Shadow can help you a lot when assisting users with possible problems in their AVD sessions without using third-party software. You are completely in control of who can control the AVD session hosts and user sessions by assigning users to the group. The great thing is that we have adapted this existing technique for our Entra ID-joined session hosts, so we can still leverage this feature while ditching our old, traditional Active Directory.
I hope we get this option in the Azure Portal in the future, as we can already sign off and message users from the host pool sessions. It would be really nice to have an option there for shadowing, including a requirement for a specific Azure role, which could eliminate the configuration steps described in this post.
Thank you for reading this post, and I hope it was helpful!
These sources helped me by writing and research for this post;
End of the page 🎉
You have reached the end of the page. You can navigate through other blog posts as well, share this post on X, LinkedIn and Reddit or return to the blog posts collection page. Thank you for visiting this post.
Support the blog
