Migrate servers with Azure Migrate in 7 steps
Categories:
8 minute read
Requirements
- A server to migrate to Microsoft Azure
- Ability to install 1 or 2 additional servers
- Must be in the same network
- Around 60 minutes of your time
- Administrator access to all source servers
- RDP access to all source servers is useful
- Secure Boot must be disabled on the source servers
- A target Azure Subscription with Owner access
- 1 server dedicated to Migration based on Windows Server 2016*
- 2 servers for Discovery and Migration based on Windows Server 2016*
*Windows Server 2016 is the only supported OS, please do not install other versions as this will not work.
Evaluation versions may be used.
Officially, it is not supported to combine the Discovery Server and the Migration Server. These must be separate servers according to the official documentation. However, I was able to successfully combine them in a testing environment.
The process described
The migration of servers to Microsoft Azure consists of 3 phases: Discovery, Replicate and then Migrate.
- Azure Migrate begins with a Discovery once a Discovery Server has been set up. This server inventories all machines, including dependencies, and reports them to Azure. You can find this information in the Azure Migrate project within the Azure Portal
- It is not mandatory to set-up the Discovery server, in this case you have to document all risks and information yourself
- When you’re ready, you can choose to replicate the machines to Azure. This process is handled by the Configuration/Process server. Azure Migrate starts a job to completely copy the server to Azure in small portions till both sides are synchronized. This can take days or weeks to complete
- Once the migration is fully prepared and both sides are synchronized, you can initiate the final migration. Azure Migrate will transfer all changes made since the initial replication and ensure that the machines in Azure become the primary instances
Step 1: Preparations
Every migration starts with some sort of preparations. This can consist of:
- Describing the scope of the migration; which machines do I want to migrate?
- Method of migrating; 1 to 1 migration or a complete rebuild?
- Assess possible risks and sensitive data/applications
Make sure that this information is described in a migration plan.
Step 2: Creating a new Azure Migrate-project
Go to the Azure Portal, navigate to Azure Migrate:

Open the “Servers, databases, and web apps” blade on the left:
On this page, create a new Azure Migrate project.
When this is set-up, we go to our migration project:
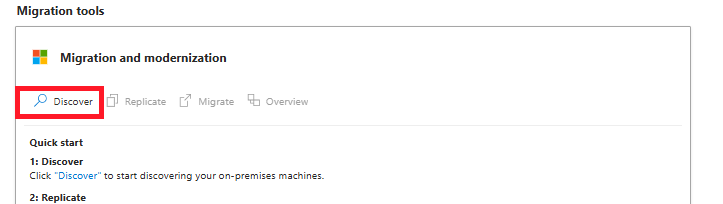
Under “Migration Tools”, click “Discover”.
On the next page, we have to select the source and target for our migration. In my case, the target is “Azure VM”.
The source can be a little confusing, but hopefully this makes it clear:
- VMWare vSphere Hypervisor: Only for Enterprise VMware solutions which uses vSphere to manage virtual machines (no ESXi)
- Hyper-V: When using Hyper-V as virtualization platform
- Physical: Every other source, like VMware ESXi, actually Physical or other public/private clouds
In my case, I used VMware ESXi to host a migration testing machine, so I selected “Physical”.
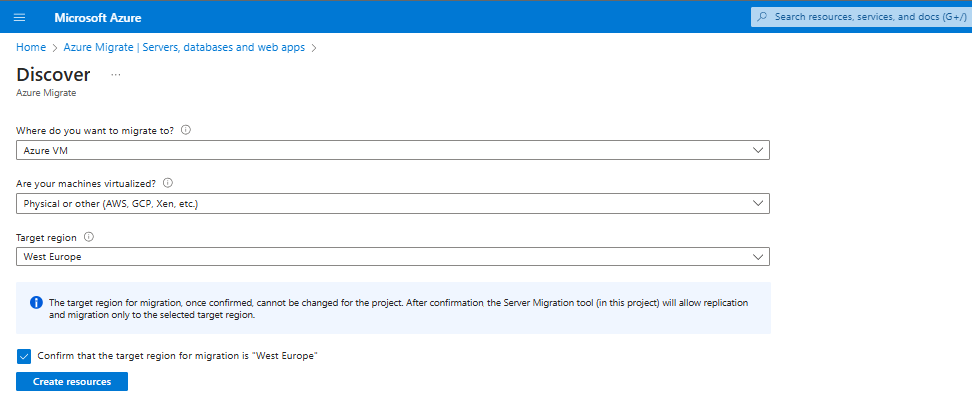
Hit “Create resources” to let Azure Migrate prepare the rest of the process.
Now we can download the required registration key to register our migration/processing machine.
Save the VaultCredentials file to a location, we will need this in a further step to register the agents to the Migration project.
Step 3: Installing the Configuration/Processing server
In step 3 we have to configure our processing server which replicates the other servers to Microsoft Azure. This is a complete standalone machine on the same VMware host in my case and is a Windows Server 2016 Datacenter Evaluation installation.
Now, we have to install the configuration server:
- Minimum system requirements:
- 2 vCPUs or 2 CPU cores
- 8GB RAM
- At least 600GB storage (caching of the other servers)
- Network and internet access
- Windows Server 2016
After the initial installation of this server, we have to do some tasks:
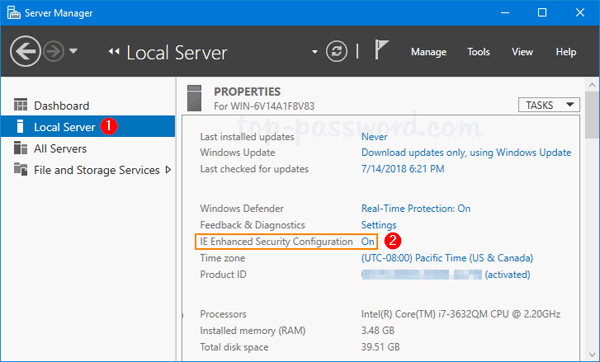
- Disable Internet Explorer Enhanced Security settings in the Server Manager
- Open Server Manager, then Local Server (1) and then the IE Enhanced Security Configuration (2)
- Disable this for “Administrators” and click OK.
Now we have to install the Replication appliance software from the last part of Step 2. You can find this in the Azure Portal under the project or by clicking this link: https://aka.ms/unifiedinstaller_we
Install this software and import the .VaultCredentials file.
Document all settings and complete the installation process, because we will need it in step 5.
After these steps, the wizard asks us to generate a passphrase. This will be used as encryption key. We don’t want to transfer our servers unencrypted over the internet right?
Generate a passphrase of a minimum of 12 characters and store it in a safe place like a Password vault.
Step 4: Configuring the Configuration/Processing server
In step 4 we have to configure our Configuration/Processing server and prepare it to perform the initial replication and migration itself.
After installing the software in step 3, there will be some icons on the desktop:
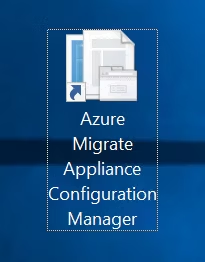
We have to create a shared credential which can be used on all servers to remote access them. We can do this with the “Cspsconfigtool”. Open this and create a new credential.
You can use all sorts of credentials (local/domain), as long as they have local administrator permissions on the target machines.
In my case, the migration machine had the default “Administrator” logon so I added this credential to the tool.
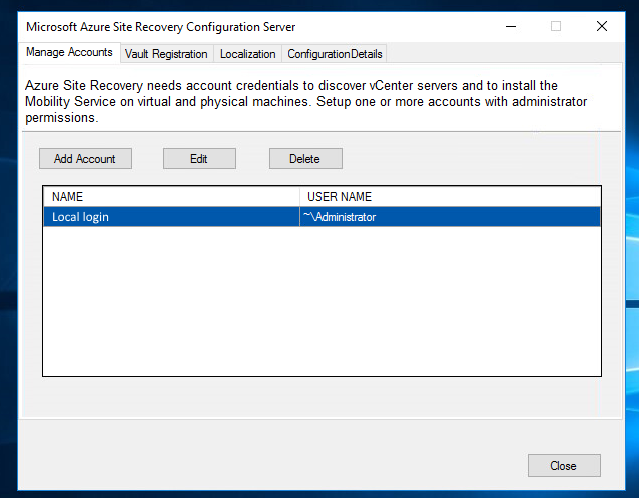
You have to create a credential for every server. This can be a “one-fits-all” domain logon, or when all logins for servers are unique add them all.
Step 5: Preparing the servers for Migration
To successfully migrate machines to Microsoft Azure, each machine must have the Mobility Agent installed. This agent establishes a connection with the Configuration/Process Server, enabling data replication.
The agent can found at two different places:
- On the Configuration/Process Server (if using the official appliance)
- %ProgramData%\ASR\home\svsystems\pushinstallsvc\repository
- By downloading it here: https://learn.microsoft.com/en-us/azure/site-recovery/vmware-physical-mobility-service-overview
On each machine you must install this agent from the Configuration/Process Server. You can easily access the folder via the network:
- \IP address\c$\ProgramData\ASR\home\svsystems\pushinstallsvc\repository
Open the installation (.exe file) on one of the servers and choose to install the Mobility service. Then click “Next” to start the installation.
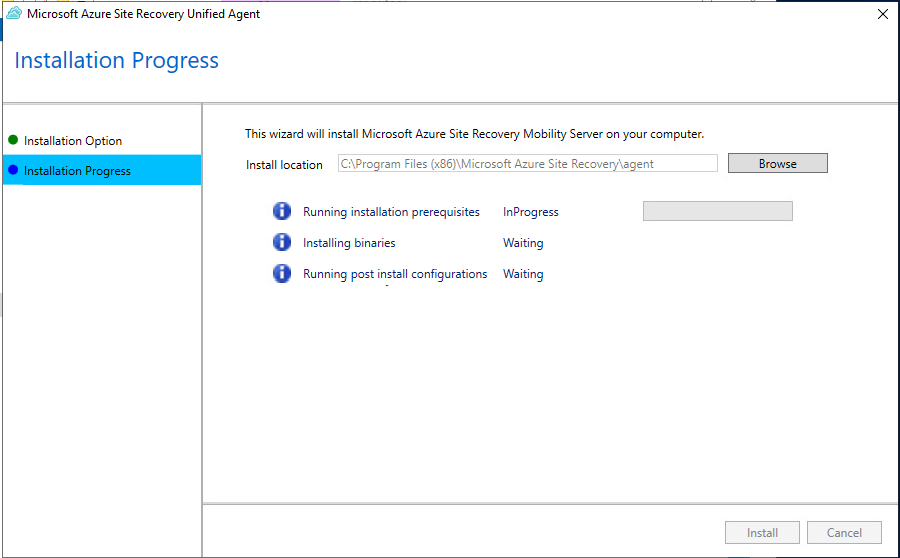
After the installation is complete (approximately 5 to 10 minutes), the setup will prompt for an IP address, passphrase, and port of the configuration server. Enter these details from step 3 and the port 443.
Once the agent is installed, the server appears in the Azure Portal. This may take 15 minutes and may require a manual refresh.
When the server is visible like in the picture above, you can proceed to step 6.
Step 6: Perform the initial replication
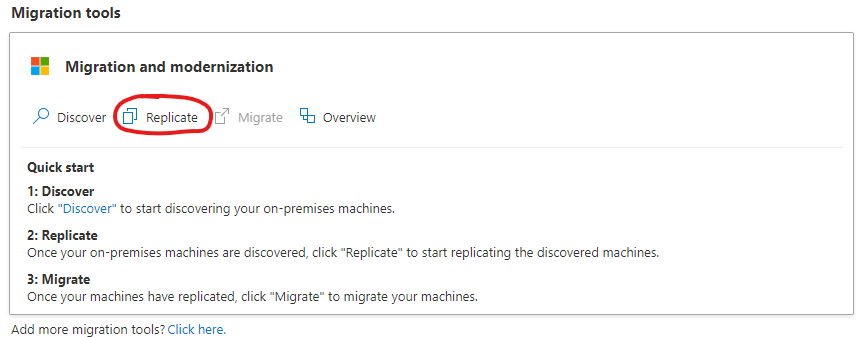
Now we can perform the initial replication (Phase 2) of the servers to Azure. To perform the replication of the virtual servers, open the Azure Portal and then navigate to Azure Migrate.
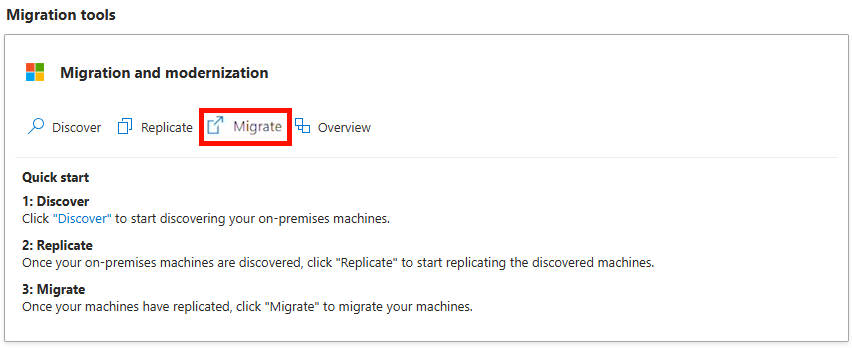
Under “Migration tools”, click on “Replicate”.
Select your option again and click Next. In my case, it is “Physical” because of using a free version of VMware ESXi.
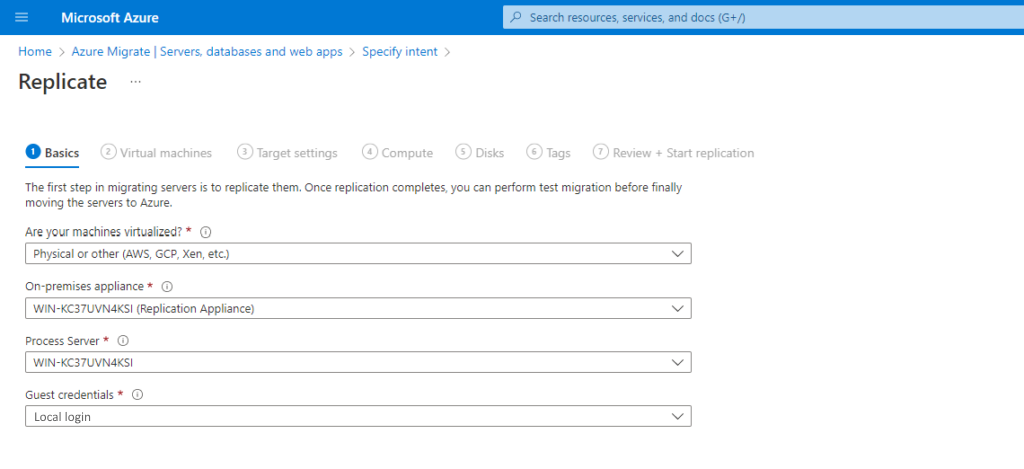
Select the machine to replicate, the processing server and the credentials you created in step 4.
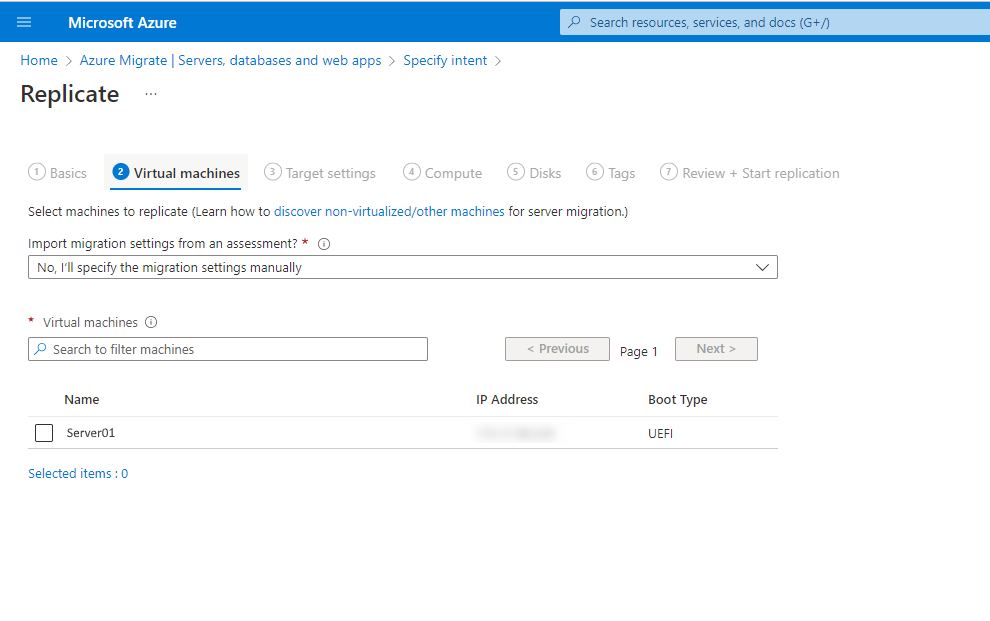
Now we have to select the machines to replicate. If all servers use the same processing server and credentials, we can select all servers here.
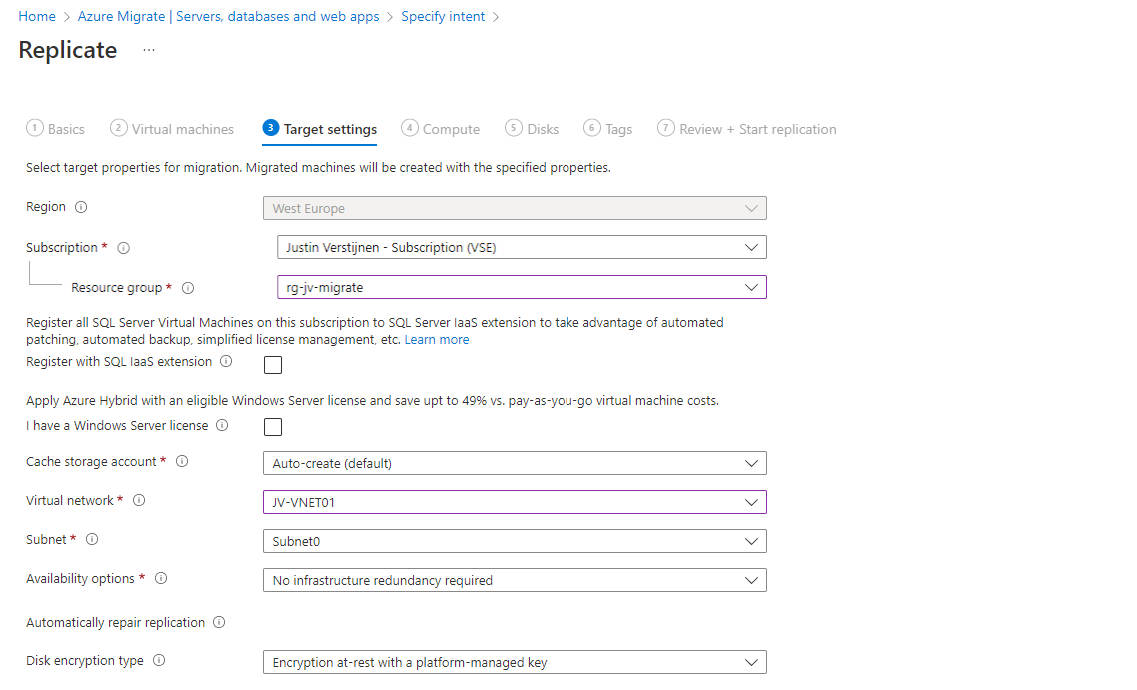
At the next page, we have to configure our target VM in Azure. Configure it to fit your needs and click “Next”.
After this wizard, the server is being synchronized at a low speed with a temporary Azure Storage account, which can take anywhere from a few hours to a few days. Once this replication is complete, the migration will be ready, and the actual final migration can be performed.
Wait for this replication to be complete and be 100% synchronized with Microsoft Azure before advancing to Step 7/Phase 3.
Step 7: The final migration
We arrived at the final step of the migration. Le Moment Suprême as they say in France.
Ensure that this migration is planned in a sort of maintenance window or when no end-users are working to minimize disruptions or data loss.
Now the source server must be shut down to prevent data loss. This also allows the new instance in Azure to take over its tasks. Shut it down properly via Windows and wait until it is fully powered off.
Then, go to the Azure Portal, navigate to Azure Migrate, and under “Migration tools”, click on “Migrate”.
Go through the wizard and monitor the status. In my case, this process took approximately 5 minutes, after which the server was online in Microsoft Azure.
And now it’s finished.
Summary
Migrating a server or multiple servers with the Azure Migrate tool is not overly difficult. Most of the time is planning and configuring. Additionally, I encountered some issues here and there which I have described on this page along with how to prevent them.
I have also done some migration in production from on-premises to Azure with Azure Migrate and when it’s completely set-up, its a really reliable tool to perform so called “Lift-and-shift” migrations.
Thank you for reading this guide!
End of the page 🎉
You have reached the end of the page. You can navigate through other blog posts as well, share this post on X, LinkedIn and Reddit or return to the blog posts collection page. Thank you for visiting this post.
If you find this page and blog very useful and you want to leave a donation, you can use the button below to buy me a beer. Hosting and maintaining a website takes a lot of time and money. Thank you in advance and cheers :)

The terms and conditions apply to this post.