Using FSLogix App Masking to hide applications on Virtual Desktops
Categories:
9 minute read
Requirements
- Around 45 minutes of your time
- An environment with Active Directory and separate client machine with FSLogix pre-installed
- Basic knowledge of Active Directory
- Basic knowledge of Windows and FSLogix
What is FSLogix App Masking?
FSLogix App Masking is an extra feature of the FSLogix solution. FSLogix itself is a profile container solution which is widely used in virtual desktop environments where users can login on any computer and the profile is fetched of a shared location. This eliminates local profiles and a universal experience on any host.
Using FSLogix App Masking enables you to hide applications from a system. This can come in very handy when using Azure Virtual Desktop for multiple departments in your company. We must install certain applications, but we don’t want to expose too much applications.
- Without FSLogix App Masking, we have to create a golden image for every department with their own set of applications.
- Using FSLogix App Masking, we can create a single golden image and hide every application users don’t need
Configuration example
To give a visual perspective of what we can do with FSLogix App Masking:
In this picture, we have a table that gives an example with 3 applications that we installed on our golden image:
- Google Chrome
- Firefox
- Adobe Reader
In my environment, I created 3 departments/user groups and we will use those groups to adjust the app masking rules.
We have a Front Office department that only needs basic web browsing, we have a department Sales that also need Firefox for some shitty application they use that does not work properly in Chrome and we have a finance department that we only want to use Firefox and Adobe Reader for some PDF reading.
Let’s find out how to create the rules.
How to configure the FSLogix App Masking hiding rules
Now we must configure rules to hide the applications. App Masking is designed as hiding applications, not particularly showing them. We must create rules to hide the applications if the requirements are not met. We do this based on a application.
Assuming you already have the FSLogix Rule Editor installed, Let’s follow these steps:
- Open up the “FSLogix Apps Rule Editor” on your testing machine.
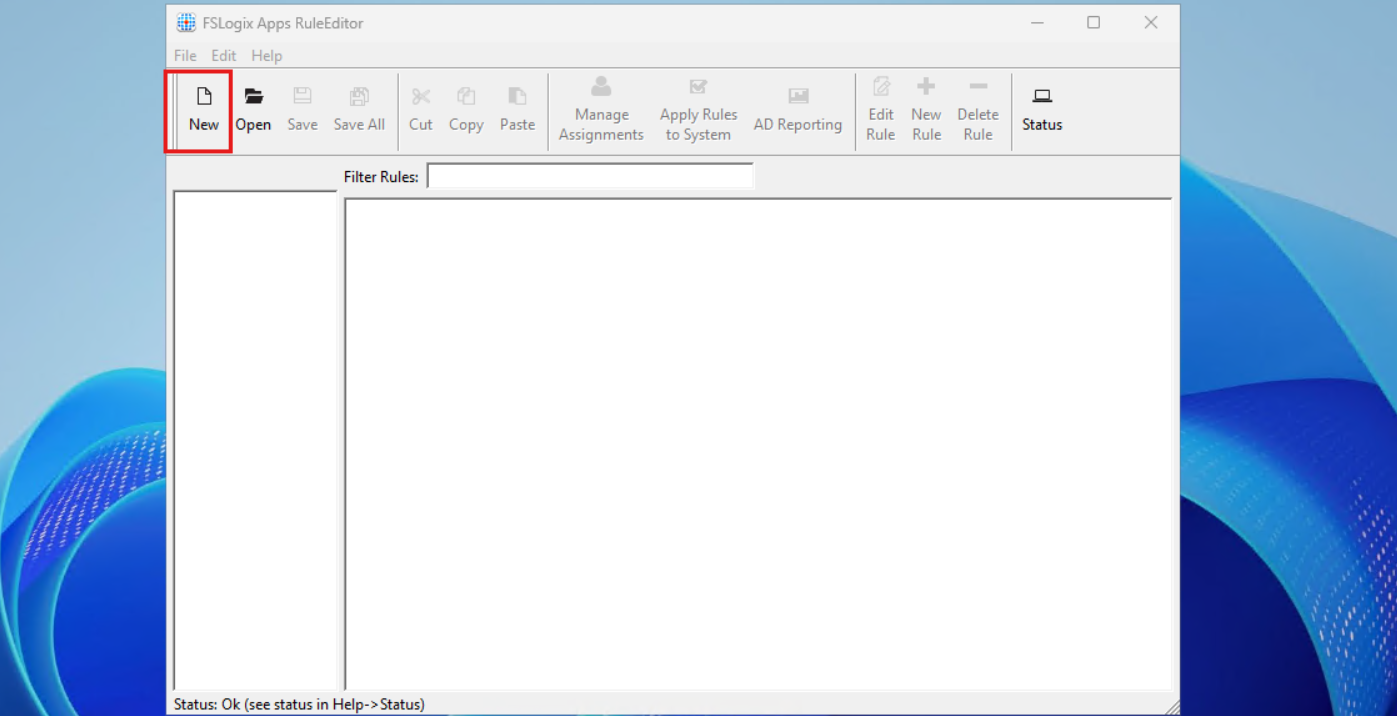
As this is a completely new instance, we must create a new rule by clicking the “New” button. Choose a place to save the rule and give it a name. I start with hiding Google Chrome according to the table.
After saving your rule, we get the following window:
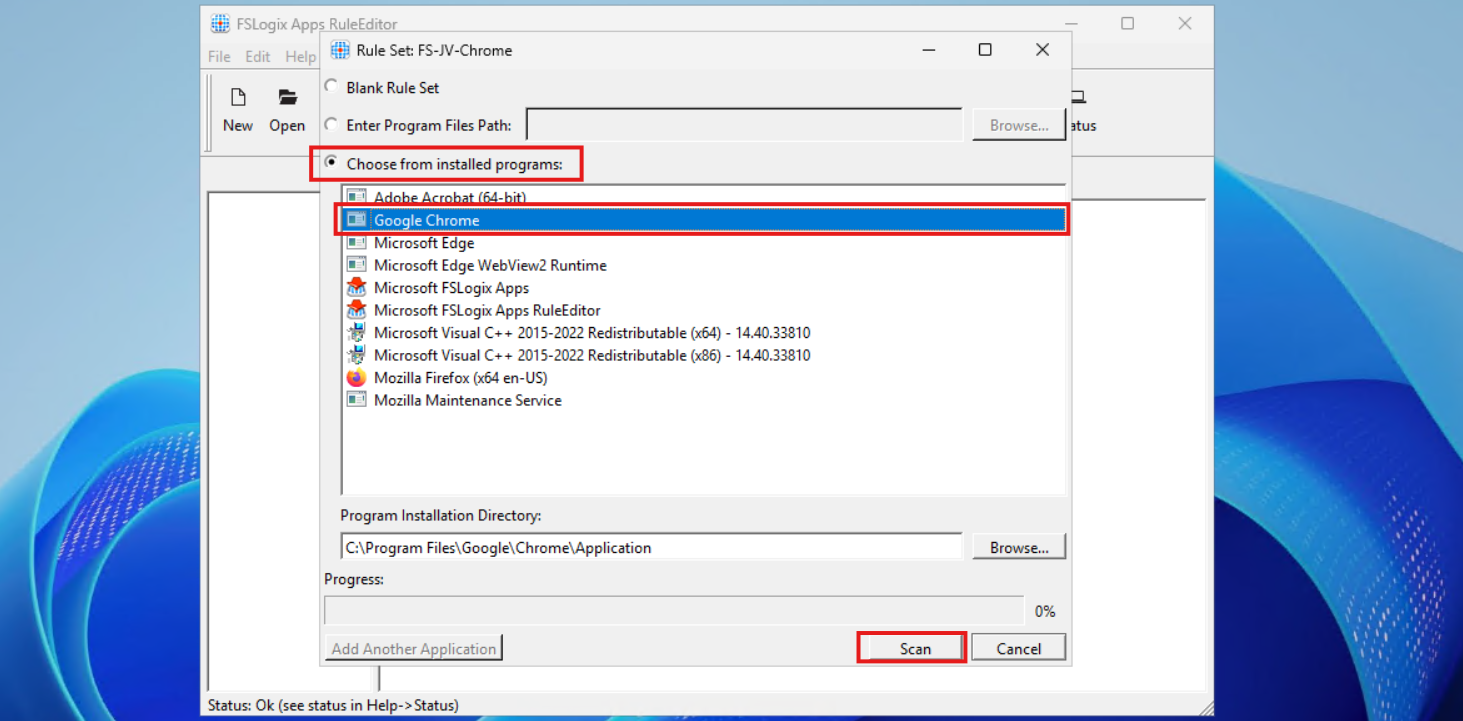
Select the option “Choose from installed programs”, then select Google Chrome and then click on Scan. Now something very interesting happens, the program scans for the whole application and comes up with all information, from installation directory to shortcuts and registry keys:
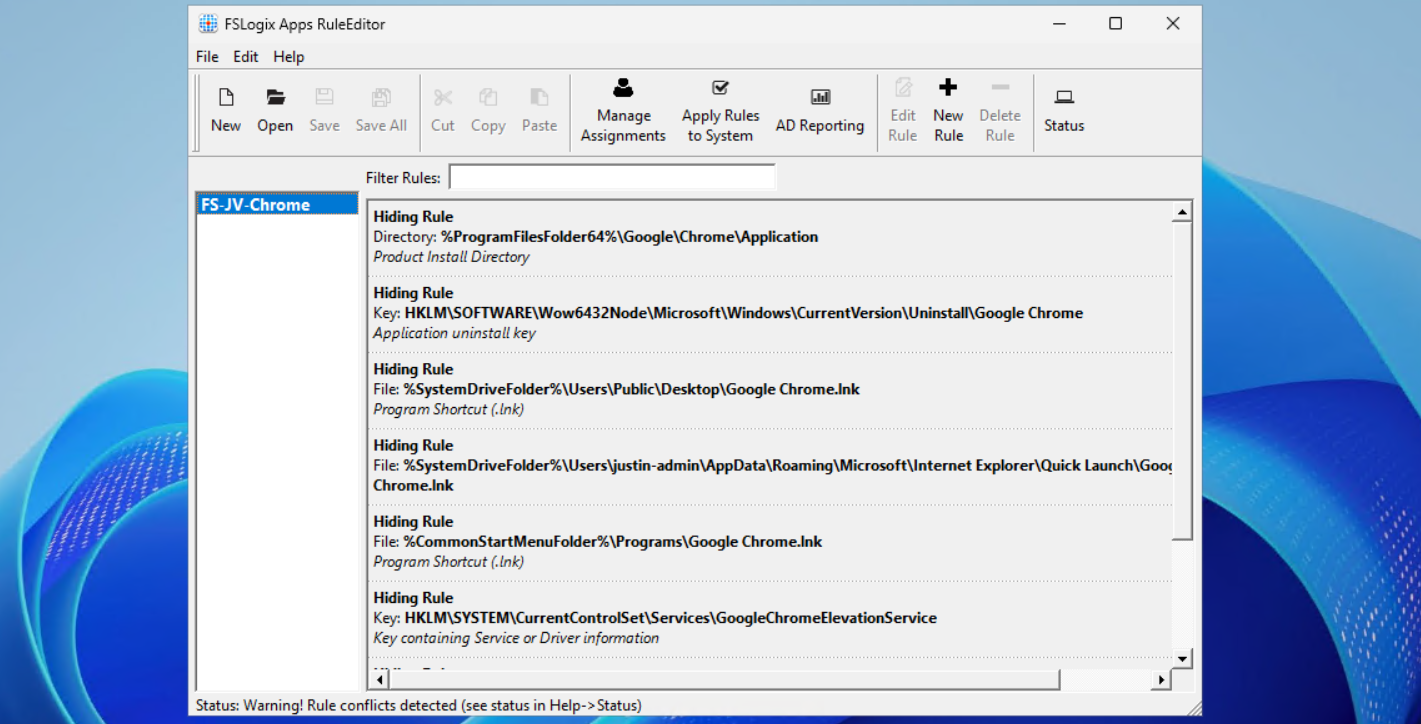
This means we use a very robust way of hiding everything for a user, even for non-authorized users like a hacker.
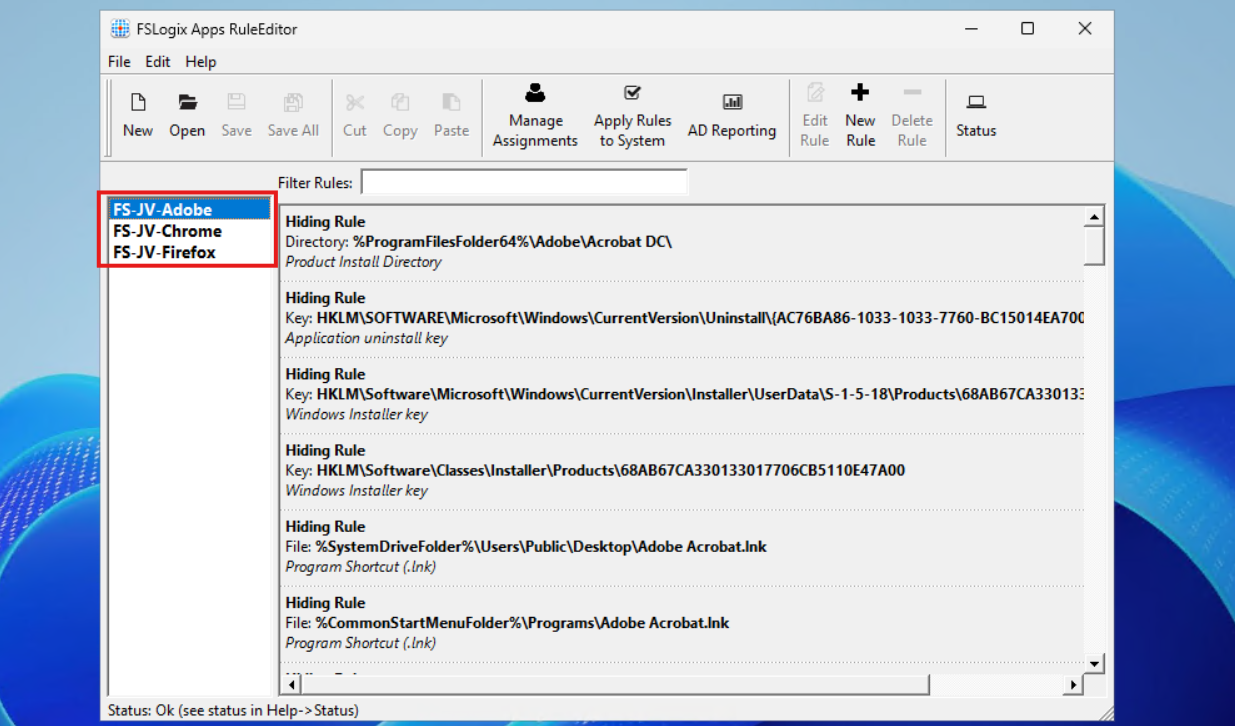
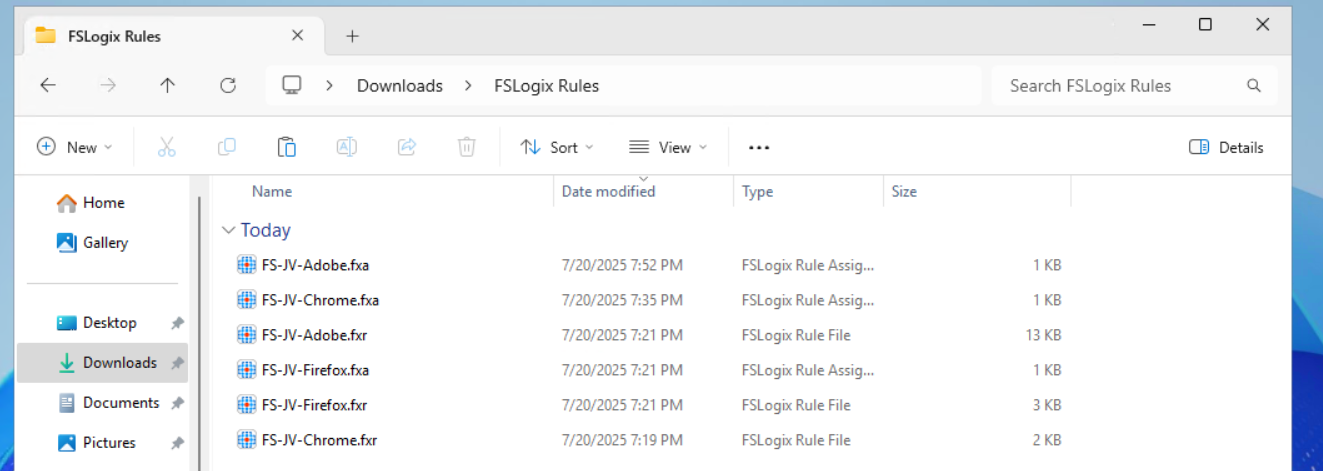
Now repeat those steps for the other applications, by creating a rule for every application like I did:
In the next step we will apply the security to those rules to make them effective.
Assign the security groups to the hiding rules
Now that we have the rules themselves in place, we now must decide when users are able to use the applications. We use a “hide by default” strategy here, so user not in the right group = hide application. This is the most straight forward way of using those rules.
When still in the FSLogix Rule Editor application, select the first rule (in my case Chrome) and click on “Manage Assignments”.
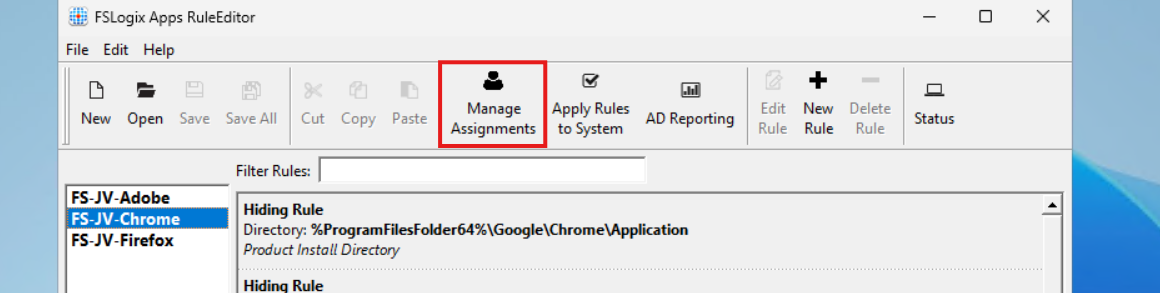
In this window we must do several steps:
- Delete the “Everyone” entry
- Click add and add the right security groups for this application
- Select Rule Set does not apply to user/group
Let’s do this step by step:
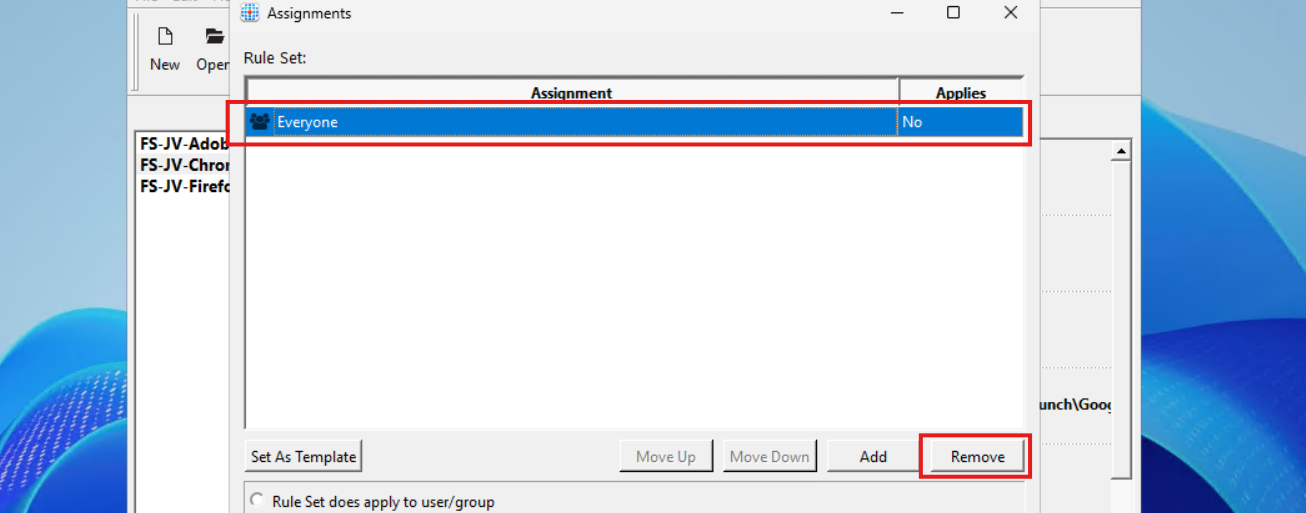
Select “Everyone” and click on remove.
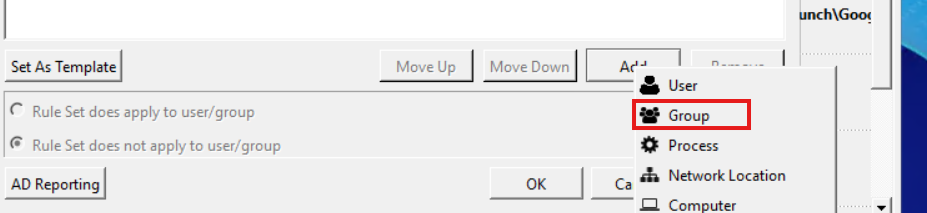
Then click on “Add” and select “Group”.
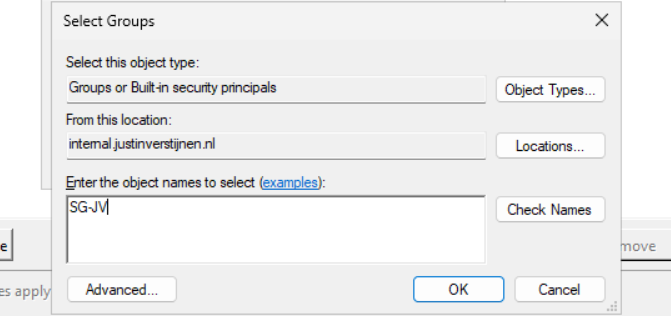
Then search for the group that must get access to the Google Chrome applicastion. In my example, these are the “Front Office” and “Sales” groups. Click the “User” icon to search the Active Directory.
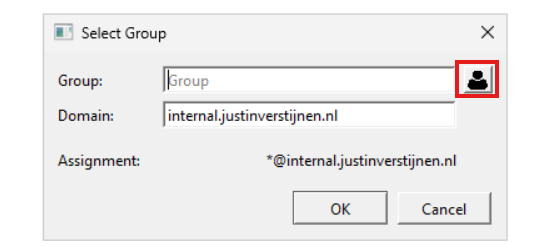
Then type in a part of your security group name and click on “OK”:
Add all your security groups in this way will they are all on the FSLogix Assignments page:
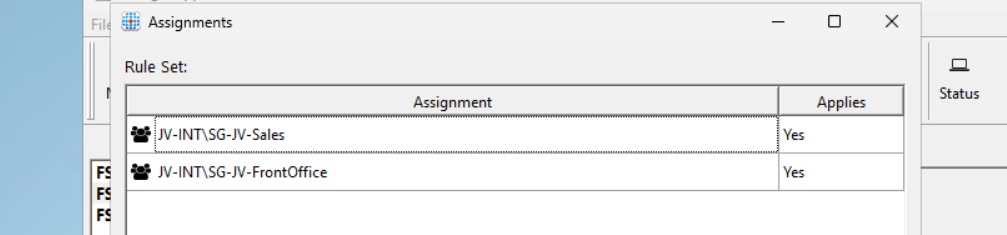
Now we must configure that the hiding rules does NOT apply to these groups. We do this by selecting both groups and then click “Rule Set does not apply to user/group”.
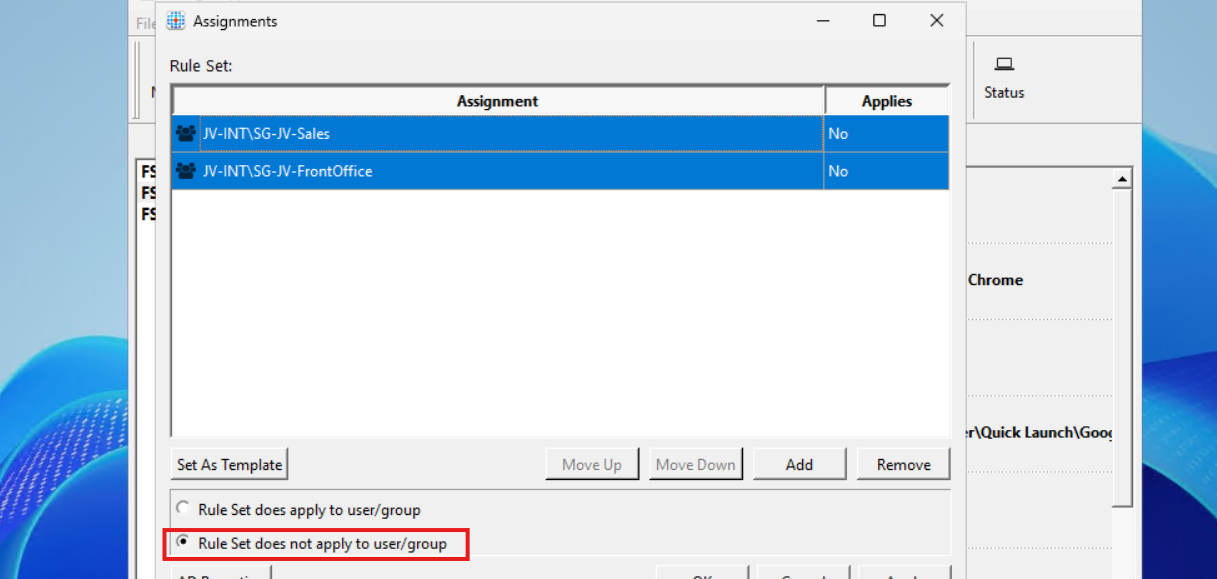
Then click “Apply” and then “OK”.
Repeat those steps for Firefox and Adobe Reader while keeping in mind to select the right security groups.
Testing the hiding rules live in action
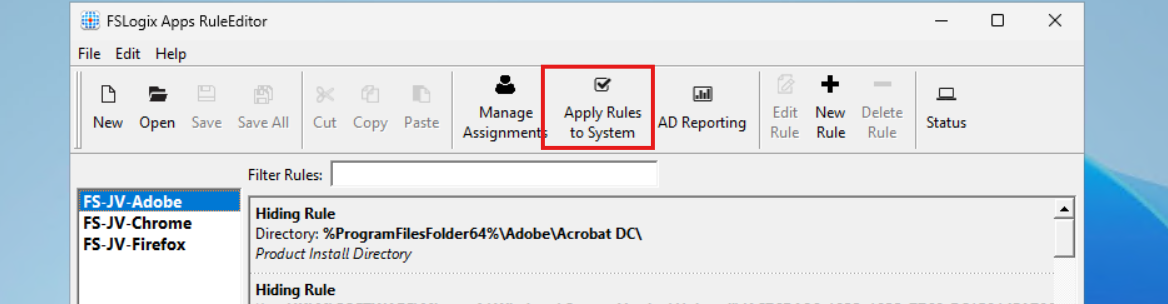
We can test the hiding rules directly and easily on the configuration machine, which is really cool. In the FSLogix Apps Rule Editor, click on the “Apply Rules to system” button:
Testing - System
I will show you what happens if we activate all 3 rules on the testing machine. We don’t test the group assignments with this function. This function only tests if the hiding rules work.
You see that the applications disappear immediately. We are left with Microsoft Edge as only usable application on the machine. The button is a temporary testing button, clicking again gives the applications back.
Testing - Application folder and registry
Now an example where I show you what happens to the application folder and the registry key for uninstalling the application:
Deploying FSLogix App Masking rules to machines
We now must deploy the rules to the workstations where our end users work on. We have 2 files per hiding rule:
- .fxr file containing the hiding rules/actions
- .fxa file containing the group assignments (for who to or not to hide)
The best way is to host those files on a fileshare on or an Azure Storage account, and deploy them with Group Policy Files.
The files must go into this folder on the session hosts:
- C:\Program Files\FSLogix\Apps\Rules
If you place the rules there, they will become active immediately.
Creating a SMB share to host the rules in the network
We will now create a fileshare on our server and place the hiding rules there. We share this to the network so the session host in our Azure Virtual Desktop hostpool can pick the rules from there. Placing them centrally and deploying them from there to the session hosts is highly recommended as we might have to change stuff over time. We don’t want to manually edit those rules on every host.
I created a folder in C:\ named Shares, then created a folder “Systems Management” and then “FSLogix Rules”. The location doesn’t matter, it must be shared and authenticated users must have read access.
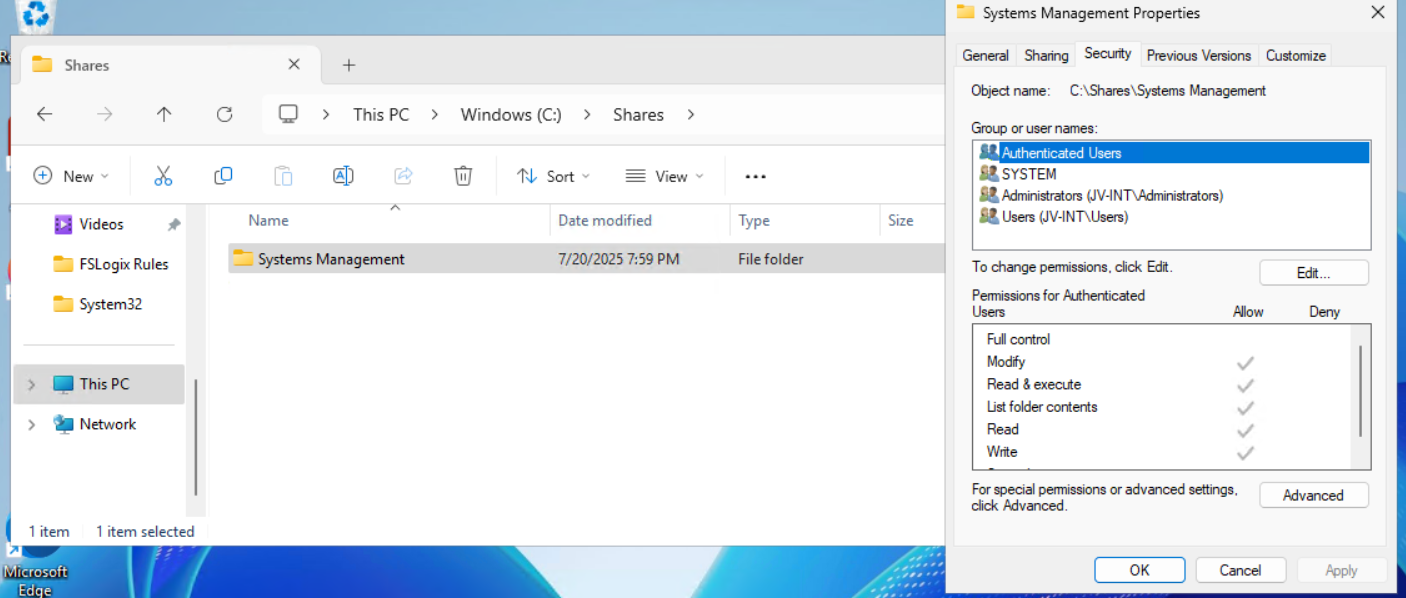
Then I shared the folder “Systems Management”, set Full Control to everyone on the SMB permissions and then gave “Authenticated Users” read access on the NTFS permissions.
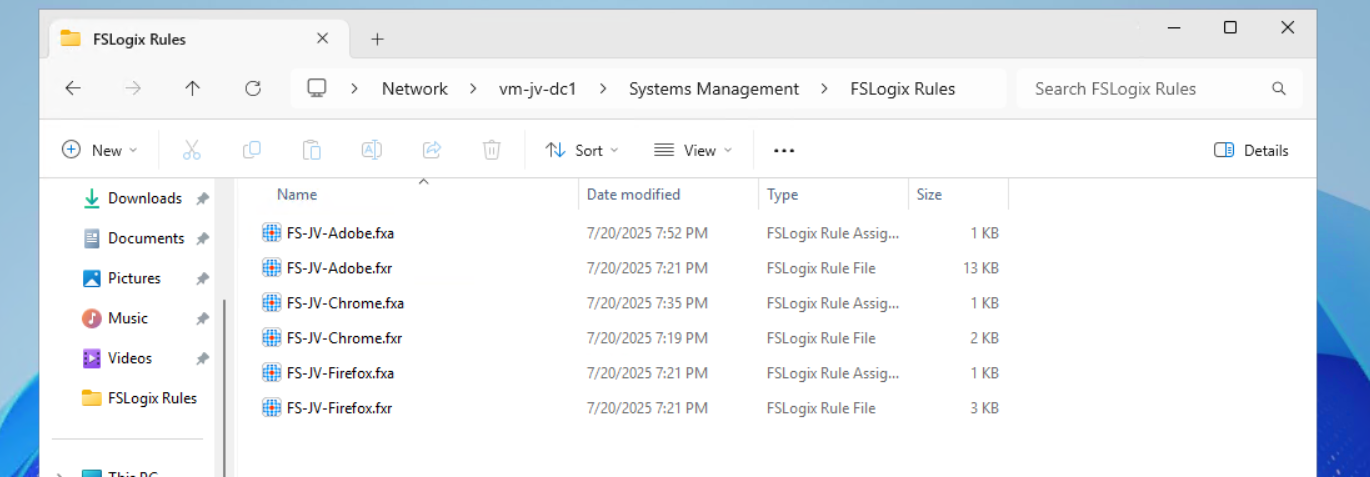
Then I placed the files on the shared folder to make them accessible for the Azure Virtual Desktop hosts.
Let’s create the rule deployment Group Policy.
Creating the Group Policy to deploy the rules to session hosts
Now we can open the Group Policy Management console (gpmc.msc) on our management server. We can create a new GPO for this purpose. I do this on the OU Azure Virtual Desktop, thats where my hosts reside.

Give it a good and describing name:

Then edit the Group Policy by right clicking and then click “Edit”. Navigate to:
- Computer Configuration \ Preferences \ Windows Settings \ Files
Create a new file here:
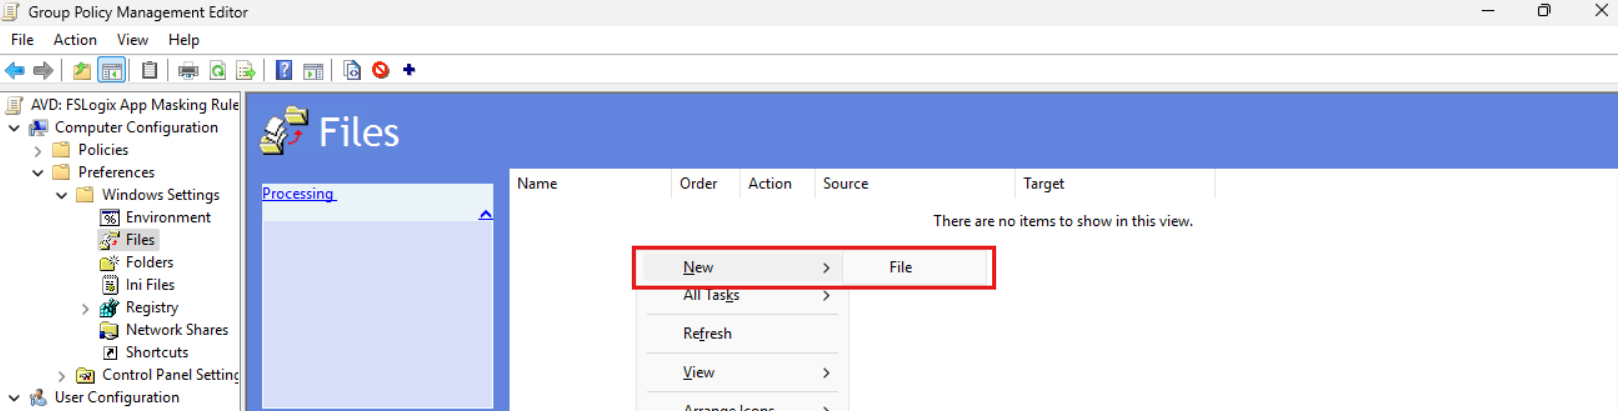
Now we must do this 6 times as we have 6 files. We have to tell Windows where to fetch the file and where the destination must be on the local machine/session host.
We now must configure the sources and destinations in this format:
| Source | Destination |
| \server\share\file.fxa | C:\Program Files\FSLogix\Apps\Rules\file.fxa |
So in my case this must be:
| Source | Destination |
| \vm-jv-dc1\Systems Management\FSLogix Rules\FS-JV-Adobe.fxa | C:\Program Files\FSLogix\Apps\Rules\FS-JV-Adobe.fxa |
| \vm-jv-dc1\Systems Management\FSLogix Rules\FS-JV-Adobe.fxr | C:\Program Files\FSLogix\Apps\Rules\FS-JV-Adobe.fxr |
| \vm-jv-dc1\Systems Management\FSLogix Rules\FS-JV-Chrome.fxa | C:\Program Files\FSLogix\Apps\Rules\FS-JV-Chrome.fxa |
| \vm-jv-dc1\Systems Management\FSLogix Rules\FS-JV-Chrome.fxr | C:\Program Files\FSLogix\Apps\Rules\FS-JV-Chrome.fxr |
| \vm-jv-dc1\Systems Management\FSLogix Rules\FS-JV-Firefox.fxa | C:\Program Files\FSLogix\Apps\Rules\FS-JV-Firefox.fxa |
| \vm-jv-dc1\Systems Management\FSLogix Rules\FS-JV-Firefox.fxr | C:\Program Files\FSLogix\Apps\Rules\FS-JV-Firefox.fxr |
Now paste in the source and destination paths both including the file name as I did for all 6 files. It should look like this:

We are done and the files will be deployed the first time Group Policy is updated.
Testing Rules deployment and the rules in action
Now I will do a manual Group Policy Update to force the files coming on my session host. Normally, this happens automatically every 90 to 120 minutes.
gpupdate /forceI made my account member of the Finance group that must be showing Adobe Reader and Firefox only. Let’s find out what happens:
After refreshing the Group Policies, everything we have prepared in this guide falls into place. The group policy ensures the files are placed in the correct location, the files contains the rules that we have configured earlier and FSLogix processes them live so we can see immediately what happens on the session hosts.
Google Chrome is hided, but Firefox and Adobe Reader are still available to me as temporary worker of the Finance department.
Appendix: Installing the FSLogix Rule Editor tool
In the official FSLogix package, the FSLogix rule editor tool is included as separate installation. You can find it here: https://aka.ms/fslogix-latest
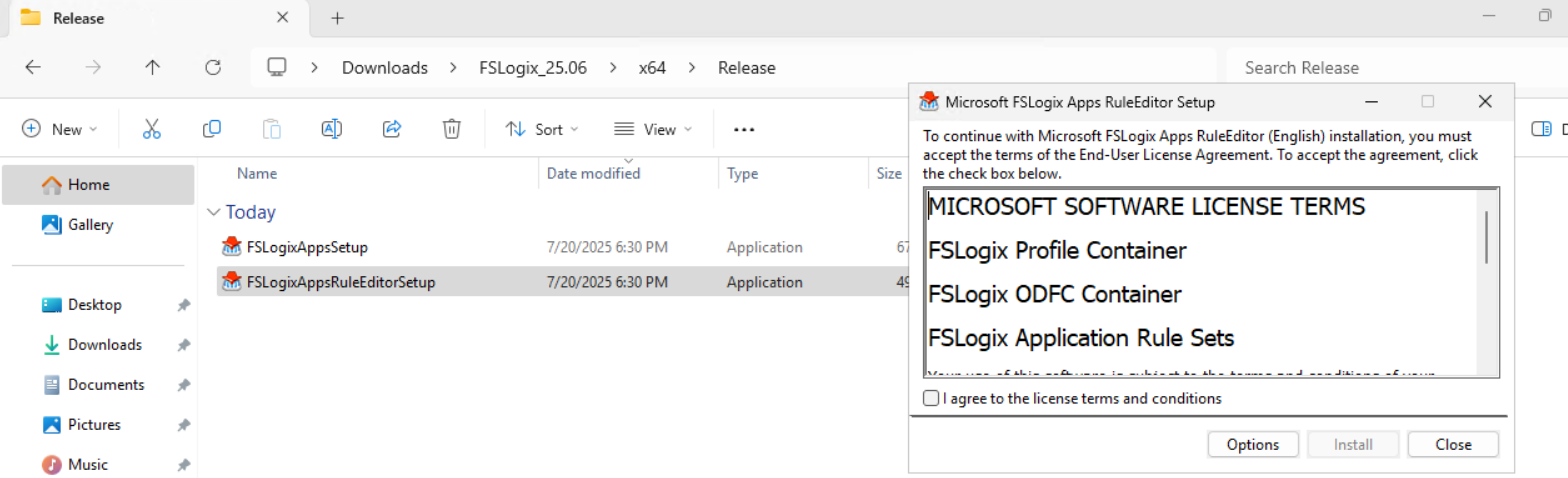
You need to install this on a testing machine which contains the same applications as your session host. In my work, we deploy session hosts first to a testing environment before deploying into production. I do the rule configuration there and installed the tool on the first testing session host.
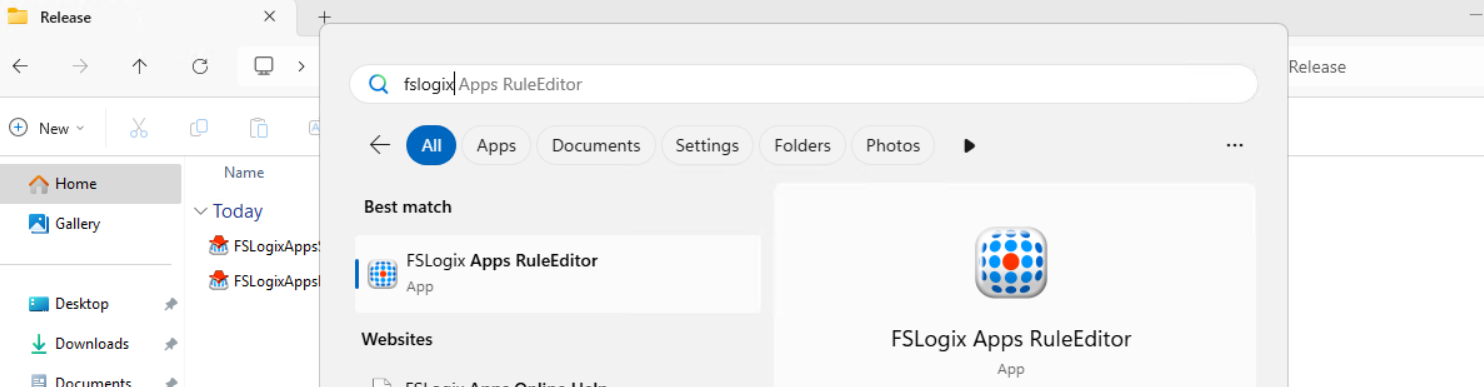
After installing, the tool is available on your machine:
Summary
FSLogix App Masking is a great tool for an extra “cherry on the pie” (as we call this in Dutch haha) image and application management. It enables us creating one golden image and use this throughout the whole company. It also helps securing sensitive info, unpermitted application access and therefore possible better performance as users cannot open the applications.
I hope I give you a good understanding of how the FSLogix App Masking solution works and how we can design and configure the right rules without too much effort.
Thank you for reading this guide and I hope I helped you out.
Sources
These sources helped me by writing and research for this post;
- https://learn.microsoft.com/en-us/fslogix/overview-what-is-fslogix
- https://learn.microsoft.com/en-us/fslogix/tutorial-application-rule-sets
- https://learn.microsoft.com/en-us/windows-server/identity/ad-ds/manage/group-policy/group-policy-processing
End of the page 🎉
You have reached the end of the page. You can navigate through other blog posts as well, share this post on X, LinkedIn and Reddit or return to the blog posts collection page. Thank you for visiting this post.
If you think something is wrong with this post or you want to know more, you can send me a message to one of my social profiles at: https://justinverstijnen.nl/about/
If you find this page and blog very useful and you want to leave a donation, you can use the button below to buy me a beer. Hosting and maintaining a website takes a lot of time and money. Thank you in advance and cheers :)

The terms and conditions apply to this post.