What is MTA-STS and how to use it to protect your email flow
Categories:
15 minute read
Requirements
- Around 30 minutes of your time
- Access to your domains’ DNS hosting to create DNS records
- An Azure Subscription if you want to publish your policy with a Static Web App
- A Github account if you use this option
- An Azure Subscription if you want to publish your policy with a Function App
- Basic knowledge of DNS records
- Basic knowledge of Email security
MTA-STS versus SMTP DANE
MTA-STS overlaps with the newer SMTP DANE option, and they both help securing your email flow but each in its own manner. Some differences:
| MTA-STS | SMTP DANE | |
| Requires DNSSEC at DNS hosting | No | Yes |
| Requires hosting a TXT file | Yes | No |
| Secures inbound and outbound | Yes | Yes |
| Fallback option if DANE is not supported | Yes | No |
The conclusion is;
- If you want to secure your email flow at all times: Configure both
- If you want to secure your email flow but your DNS hosting doesnt support DNSSEC: Configure MTA-STS
- If you want to secure your email flow without too much configuration and dependencies: Configure SMTP DANE
My advice is to configure both when possible, because not every email service does support SMTP DANE and MTA-STS is much more broadly supported. This will be used then as fallback. If the sender does not support MTA-STS, email will not be delivered and the sender gets an error message.
Deep dive into how MTA-STS works
MTA-STS (Mail Transfer Agent Strict Transport Security) is a standard that improves email security by always using SMTP TLS encryption and validating certificates during email transmission. It’s designed to prevent man-in-the-middle (MitM) attacks, ensuring email servers cannot be tricked into falling back to insecure delivery. This increases security and protects your data.
MTA-STS works very similar to how HSTS works for webservers.
MTA-STS consists of the following components:
- Policy publication : A domain publishes its MTA-STS policy by using a DNS record and a TXT file which is publicly accessable to publish its policy
- Policy fetching : A mailserver that sends to our protected domain checks our DNS record and then our policy from the published TXT file
- Policy enforcement : A mailserver that sends to our protected domain ensures that it matches our policy.
- If it doesn’t match, we can reject the mail based on the policy settings
Steps to configure MTA-STS
Like described in the previous section, we must configure 2 things for MTA-STS to work:
- A DNS record
- A policy/TXT file
For the policy we can use Azure Static Web Apps or Azure Functions to publish the policy, but you can use any webhosting/HTTP service of choice. The steps will be different of course.
Configure the DNS record
We log into our DNS hosting environment and we have to create a TXT record there. This must look like this:
_mta-sts.yourdomain.com. 3600 IN TXT v=STSv1; id=20250101000000Z;The first part must contain your domain instead of yourdomain.com and the last part after the ID contains the timestamp of the record being published.
Tip: you can use my (Microsoft 365) DNS Record Generator tool for customizing your MTA-STS record: https://tools.justinverstijnen.nl/365recordsgenerator
I have logged in into the DNS hosting and added my TXT record there. My record looks like this:
_mta-sts.justinverstijnen.nl. 3600 IN TXT v=STSv1; id=20250511000000Z;After filling the form, it looks like this:

The domain is automatically added by the DNS protocol and from v=STSv1 to the 0’s and the Z; is the value part.
Configure the Policy
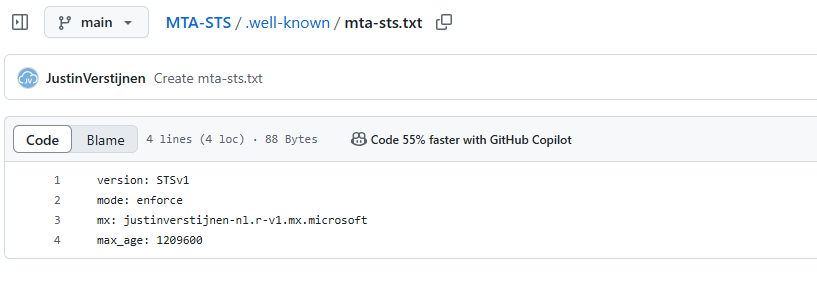
Now we must configure the policy for MTA-STS. We start by creating the TXT file and defining our policy. The TXT file must contain the information below:
version: STSv1
mode: enforce
mx: justinverstijnen-nl.r-v1.mx.microsoft
max_age: 1209600- The version must be v1 and exactly the same
- The mode can be enforce , testing or none . Use enforce to get the most out of the configuration and we will use it for the purpose of this guide
- MX record : this is the MX record for your domain. You can copy and paste this from your DNS hosting panel. Make sure you dont copy the “priority” part
- You can find your MX record in Microsoft 365 or look it up with: https://tools.justinverstijnen.nl/dnsmegatool
- Max_age: This is the time in seconds a sender may cache your MTA-STS in their policy. Best practice is to use between 7 and 30 days. I use 14 days here (3600 seconds x 24 hours x 14 days)
Save this information to a TXT file named “mta-sts.txt” and now we must publish this on a webserver, so when a visitor goes to https://mta-sts.yourdomain.com/.well-known/mta-sts.txt, they will see this TXT file.
MTA-STS Policy hosting options
As we must host our MTA-STS .txt file in a public place, we can host it in several ways. I will give a step-by-step guide for 3 hosting options which are GitHub and Azure minded. You can also host this on your own public web server, as long as it complies with the DNS and policy requirements and is publicly available. The whole world must know what your domains policy is of course.
- GitHub Pages (recommended option)
- Azure Static Web Apps (Or Azure App Service)
- Azure Functions
Hosting option 1: GitHub Pages
The most easiest way to host an MTA-STS policy is to host it on GitHub Pages. This is a very easy way to host static websites directly from your repository. To learn more about GitHub Pages, check out this guide.
For now, I will give you the steps to place and host your MTA-STS policy from GitHub, assuming you already have an account.
Creating the repository on GitHub
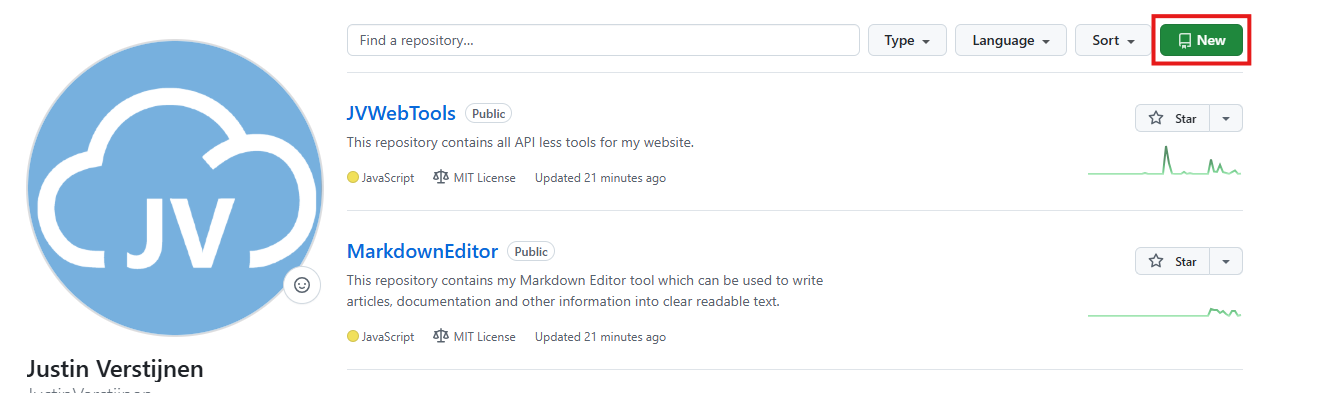
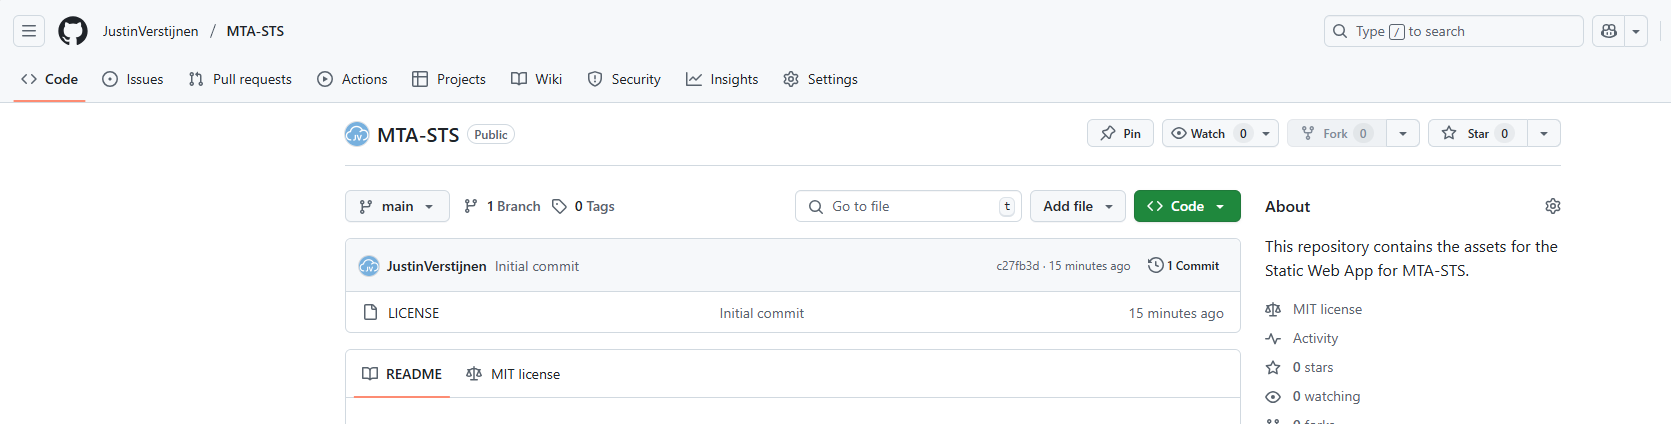
Login to GitHub at https://github.com. Then create a new repository for your MTA-STS policy if not already have one. Navigate to “Repositories” and click “New”.
Give it a clear name, which is not relevant but must be something you can recognize yourself. The visibility must be public, as free GitHub Pages instances must be public. Sharing is caring :)
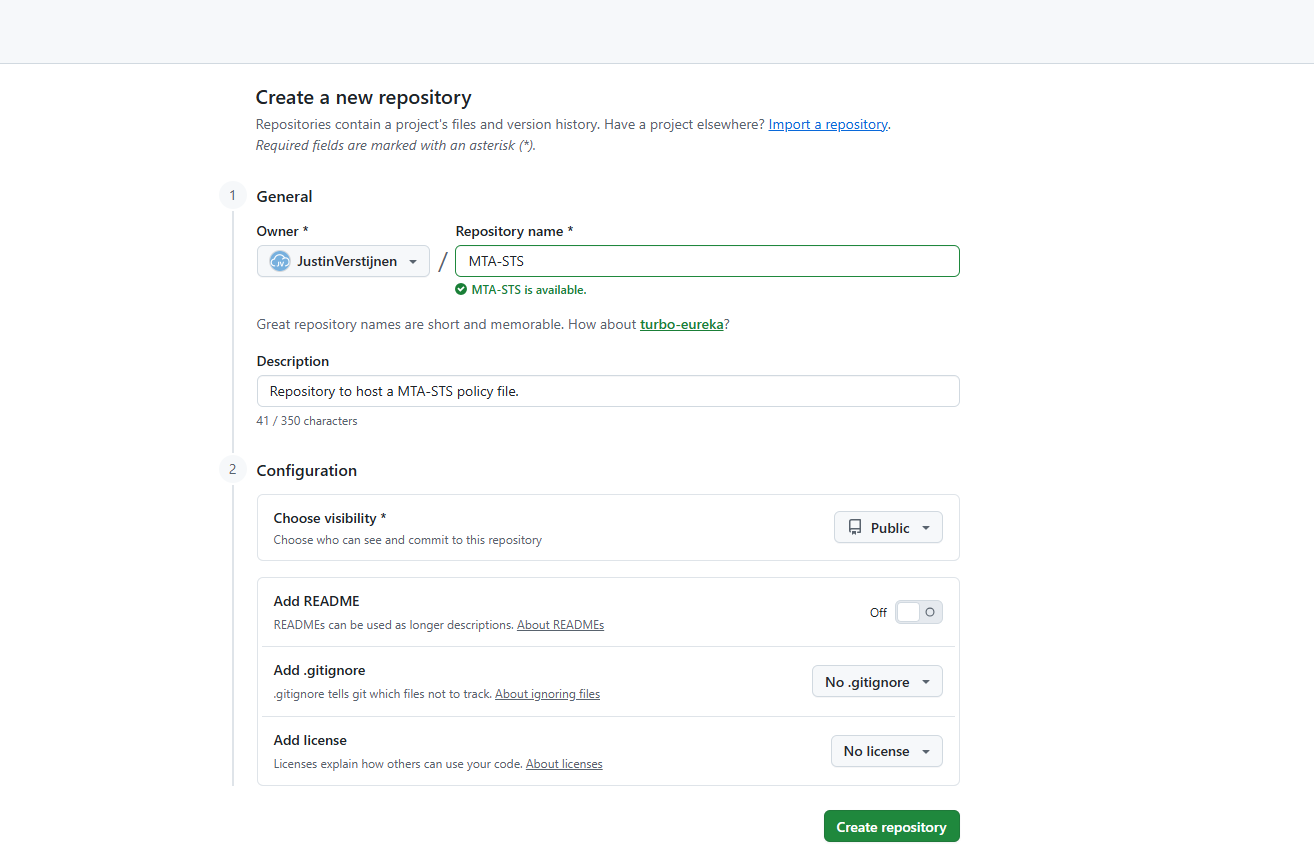
Then create the repository and navigate to it.
Preparing the repository
We must now create te required files for the instance to work, but as it is a web server, it also needs at least one web-file.
You can download my example code to easily prepare your repository. The web files in my repository automatically redirect any request to the domain to the correct file. Download my repository from here:
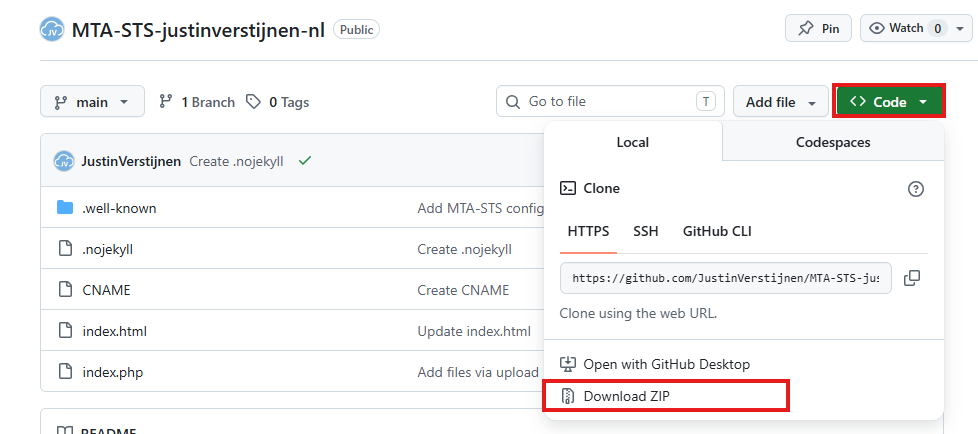
On my repository, click on “<> Code” and then on “Download ZIP”. This downloads my whole example repository which is ready to use after some minor changes.
Unzip the file and change these file: Index.html: change the domain-name on line 5 and 7

After that, we can upload the files in your goal-repository:
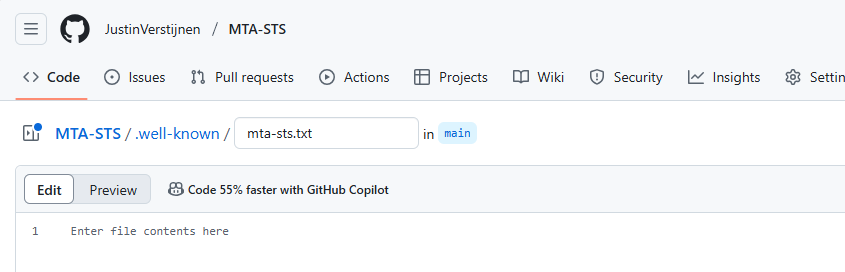
You now need to create another file, which is the policy file itself. Create a new file:
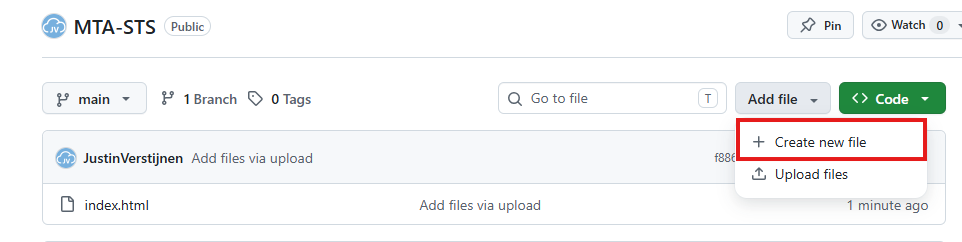
Name it: .well-known/mta-sts.txt where GitHub will automatically create a folder and the file. Paste the MTA-STS policy there as text. Now commit the changes which is “saving” the file.
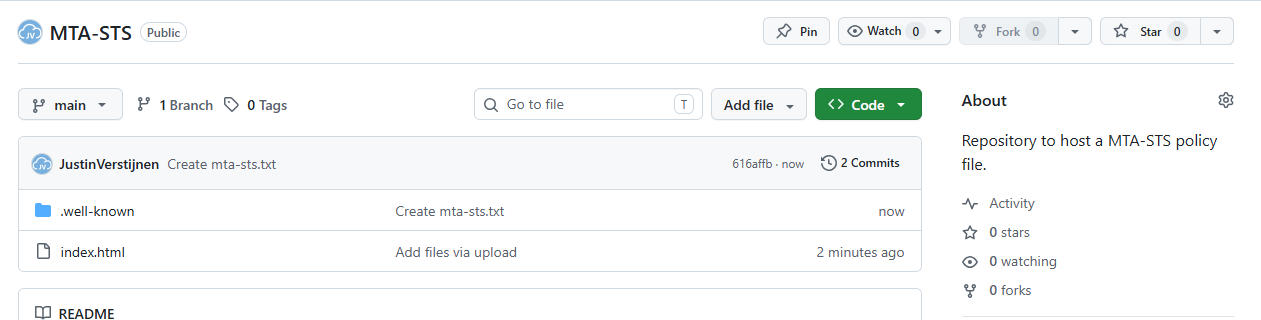
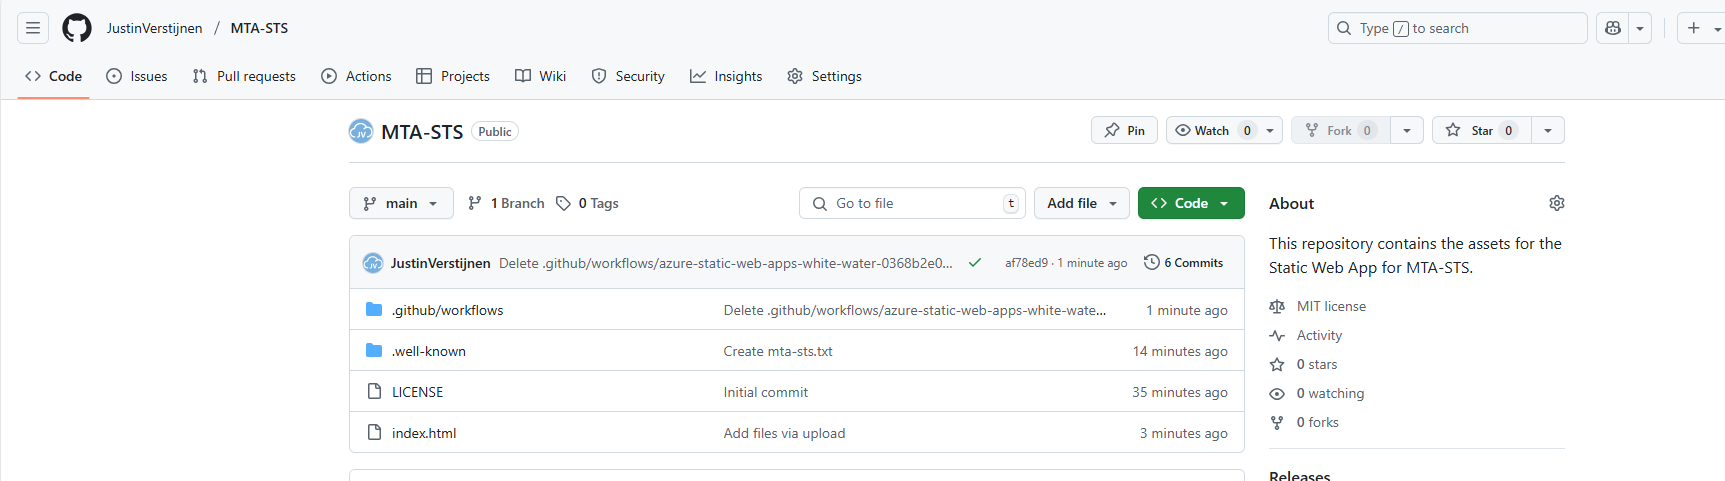
The repo must now look like this, having a index.html and a folder .well-known and a file called mta-sts.txt in that folder.
Creating the GitHub Pages website
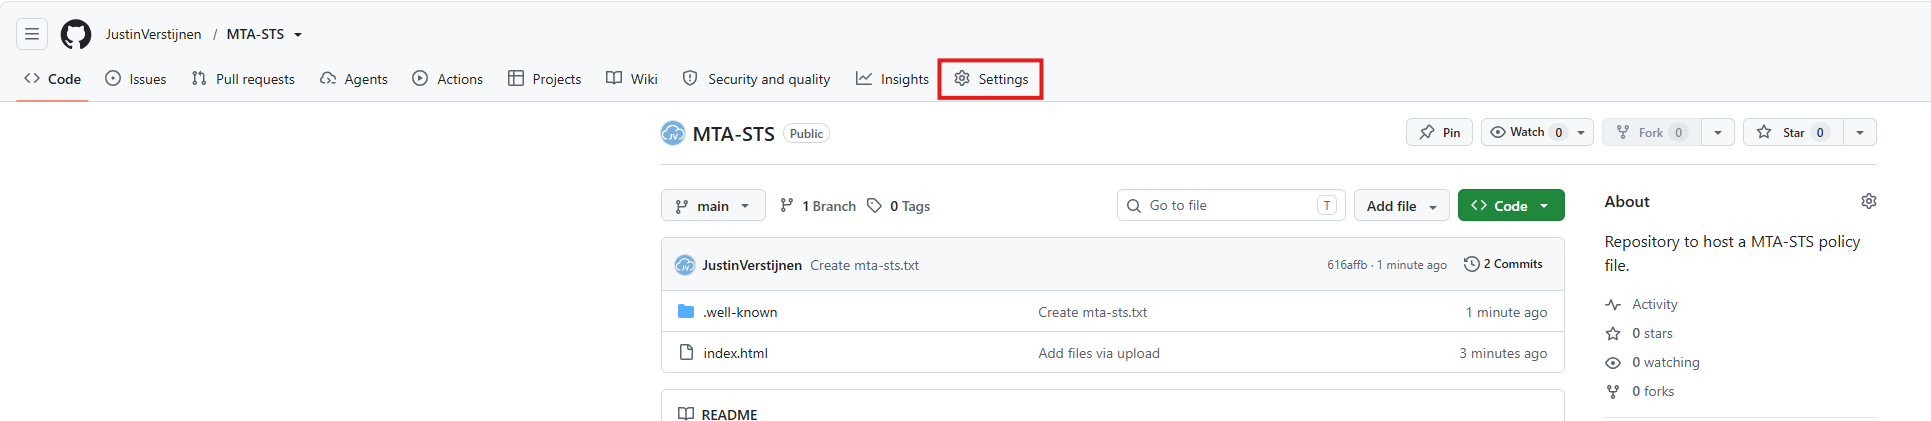
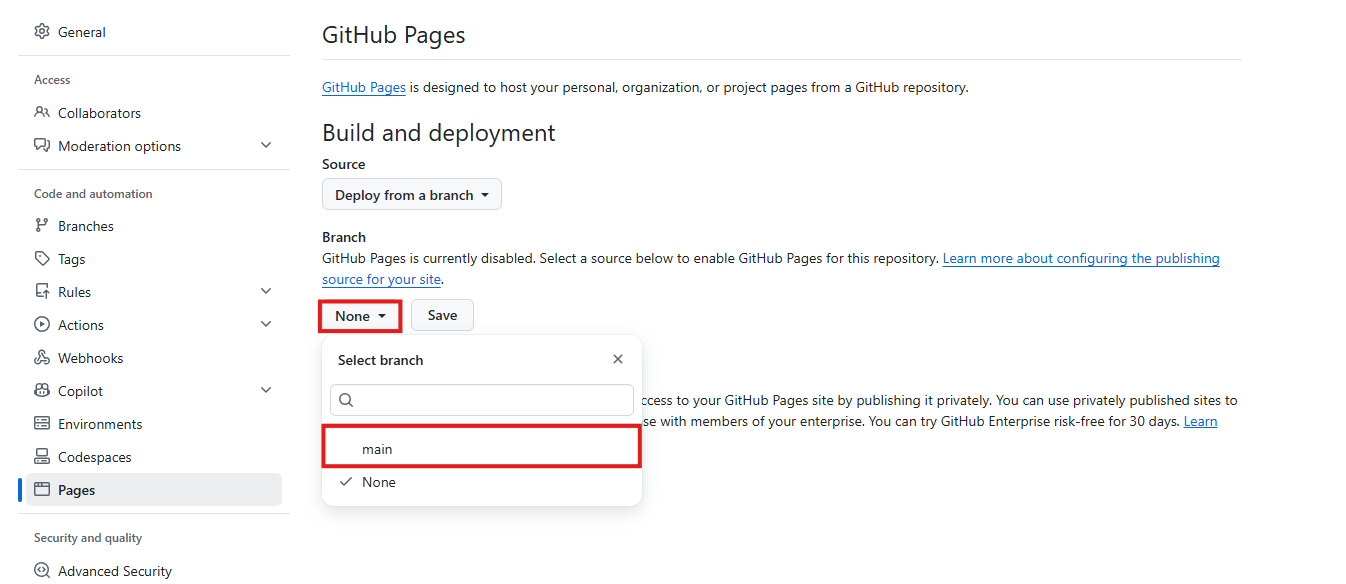
Now that our repository is ready, let’s create the GitHub Pages instance to host the policy file. Go to the “Settings” tab on the repository:
From the left, click on “Pages”.
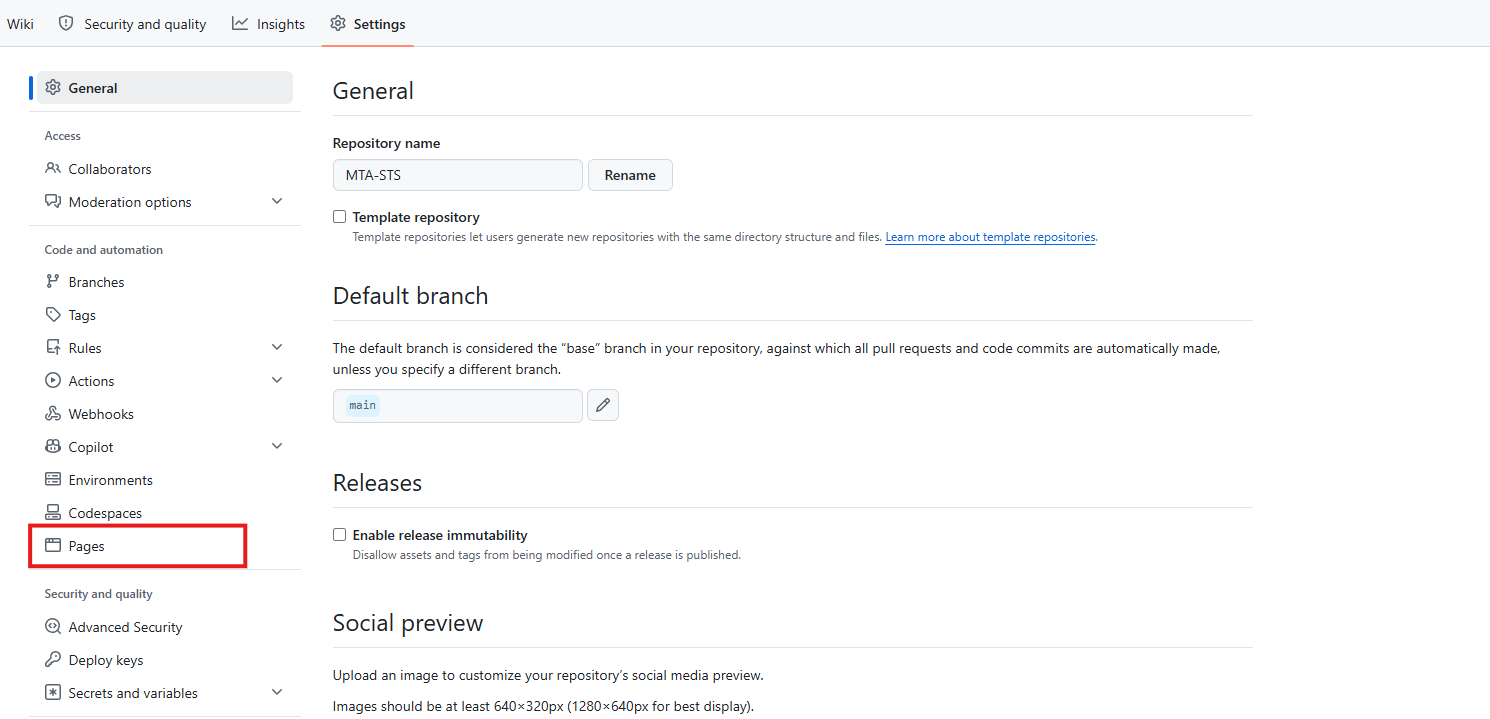
On the “Pages” section, click on the branch to deploy the website from which should be the “main” branch. Then save the configuration which automatically creates the website.
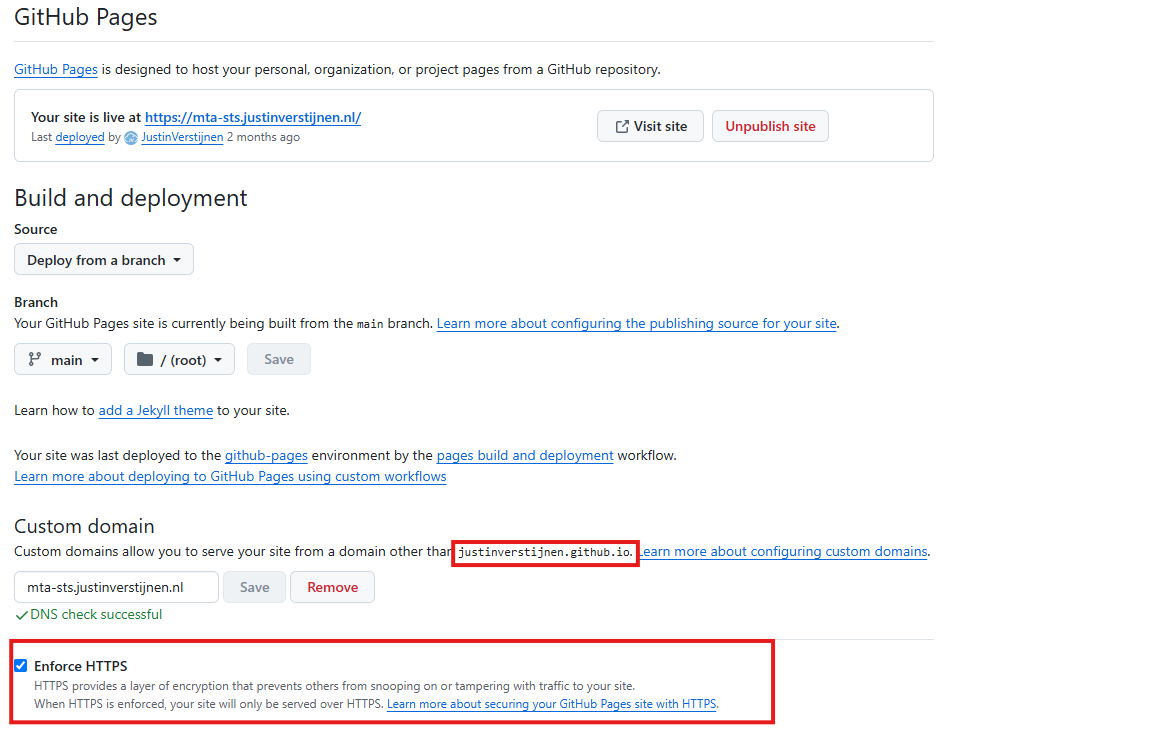
Now we are able to connect our custom domain name to the GitHub Pages instance, which should be mta-sts.yourdomain.com, or mta-sts.justinverstijnen.nl in my case. Then we need to create another DNS record to point the mta-sts host to Github Pages.
| Record name | Type | Value |
|---|---|---|
| mta-sts | CNAME | justinverstijnen.github.io. |
It will show on your end what the GitHub.io domain exactly is, but in most cases its your username added with github.io.
Here I have created the DNS record at my DNS hosting service:

As this is an external CNAME, you may have to end the value with a trailing dot as I already done.
Now go back to GitHub and verify the domain. After around 15-30 minutes it should be validated and we can set “Enforce HTTPS”.
After the MTA-STS policy is up, you can check this by going to your domain name, and then navigating to the .txt file you just created.
This should show your policy directly in your browser:

Hosting option 2: Azure Static Web Apps
Another option to host your TXT file for your MTA-STS policy is through Azure Static Web Apps. We will do this with GitHub, where we create a repository with our file and then connect the Static Web App instance to our repository. Then any change to your repository will also be pushed to Azure.
Creating the repository on GitHub
Before we dive into Azure, we will start by creating a reposiroty on GitHub. This is a space where all files of your application resides. In this case, this will only be the TXT file.
Create an account on Github or login to proceed.
Create a new repository:
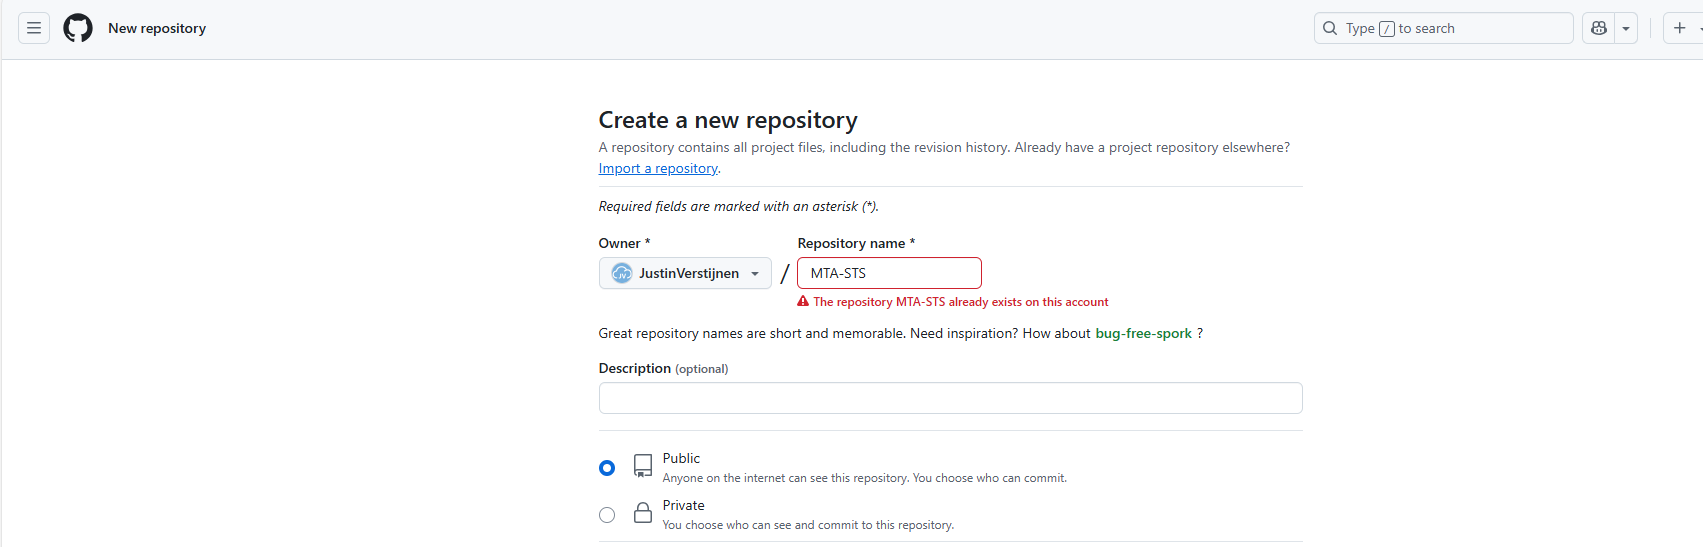
Give it a name and description and decide if you want the repository to be public. Note that the TXT will be public in any case.
Create the repository.
Prepare the repository
I have my repository public, and you can check out that to have an example of the correct configuration. We must download the index.html file from here: https://github.com/JustinVerstijnen/MTA-STS
Click on the index.html file and download this. You can also copy the content and create the file with this content in your own repository.
Now go back to your own, newly created repository on Github.
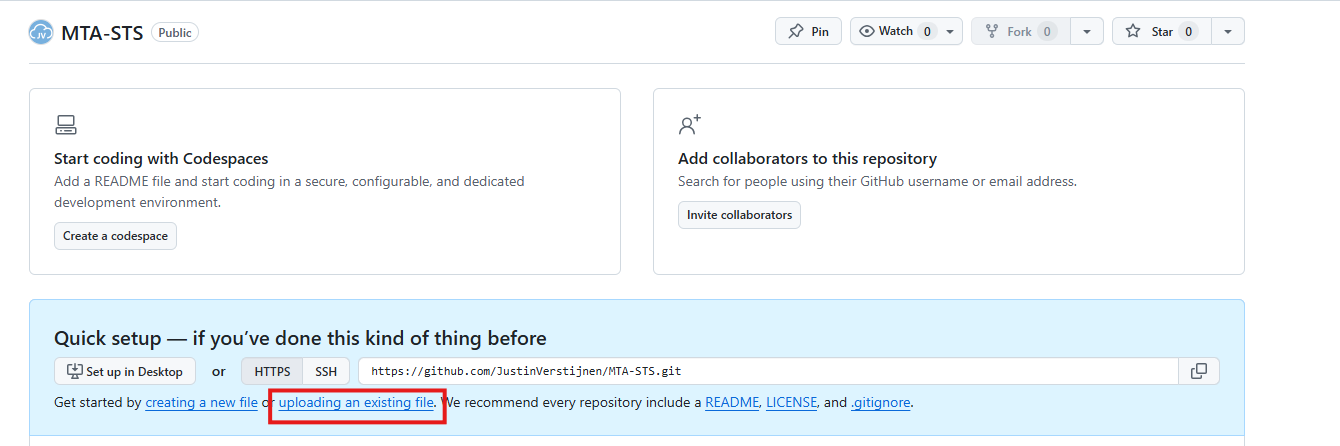
Click on the “Add file” button and then on “Create a new file”.
Now we must create the folder and the TXT file. First type in: “.well-known”, then press “/” and then enter “mta-sts.txt”. This creates the folder and then the file.
Now we can paste in the information of our defined policy:
Now commit the changes, which is basically saving the file.
Upload simple redirect page
Now because a Static Web App requires you to have a Index.html at all time (because it is a website), we need to upload the prepared Index.html from my repository you downloaded earlier.
Click on “Add file” and then on “Upload files”. Then click on “Select your files” and select the downloaded Index.html file.
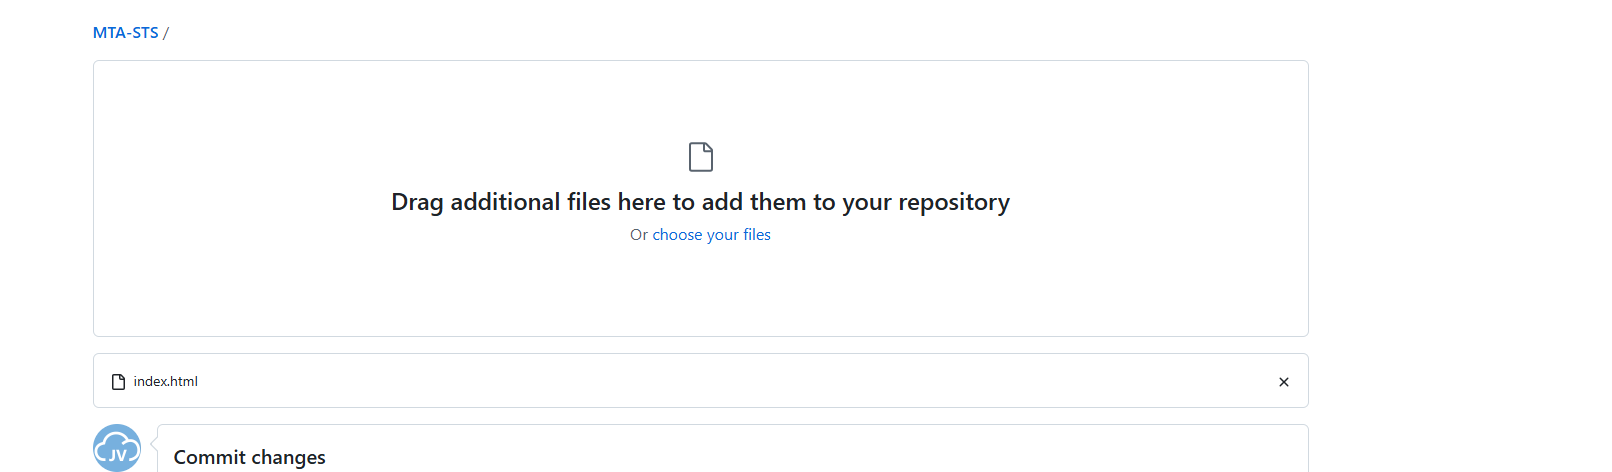
Commit the change. After committing the change, click on the Index.html file. We must make some changes to this file to change it to your own website:
Change the URLs on line 5 and 7 to your own domain. the mta-sts part on the beginning must stay intact and the part from .well-known too.
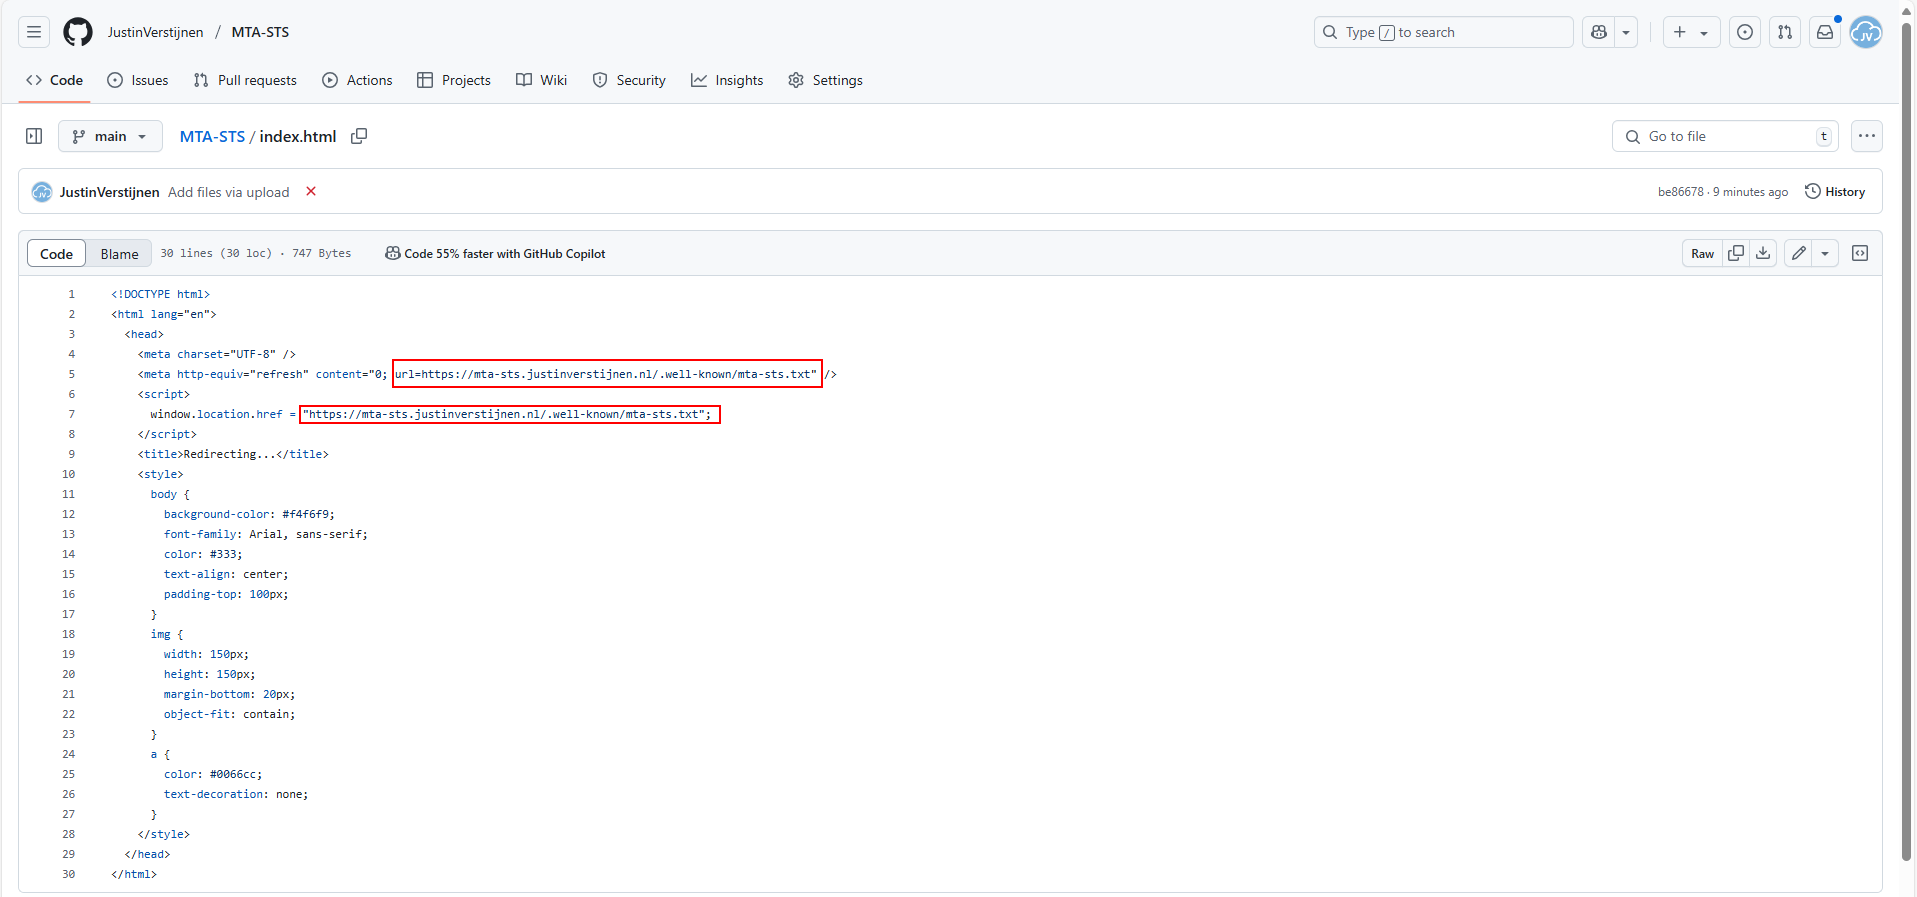
As you can see, its a simple HTML file that redirects every visitor directly to the correct file in the .well-known folder. This is purely for Azure which always must have a index.html but it makes your life a bit easier too.
Proceed to the next steps in Azure.
Create the Azure Static Web App
Now we must create the Azure Static Web App in Azure to host this file. Search for “Static Web Apps” in the Azure Portal and create a new app:
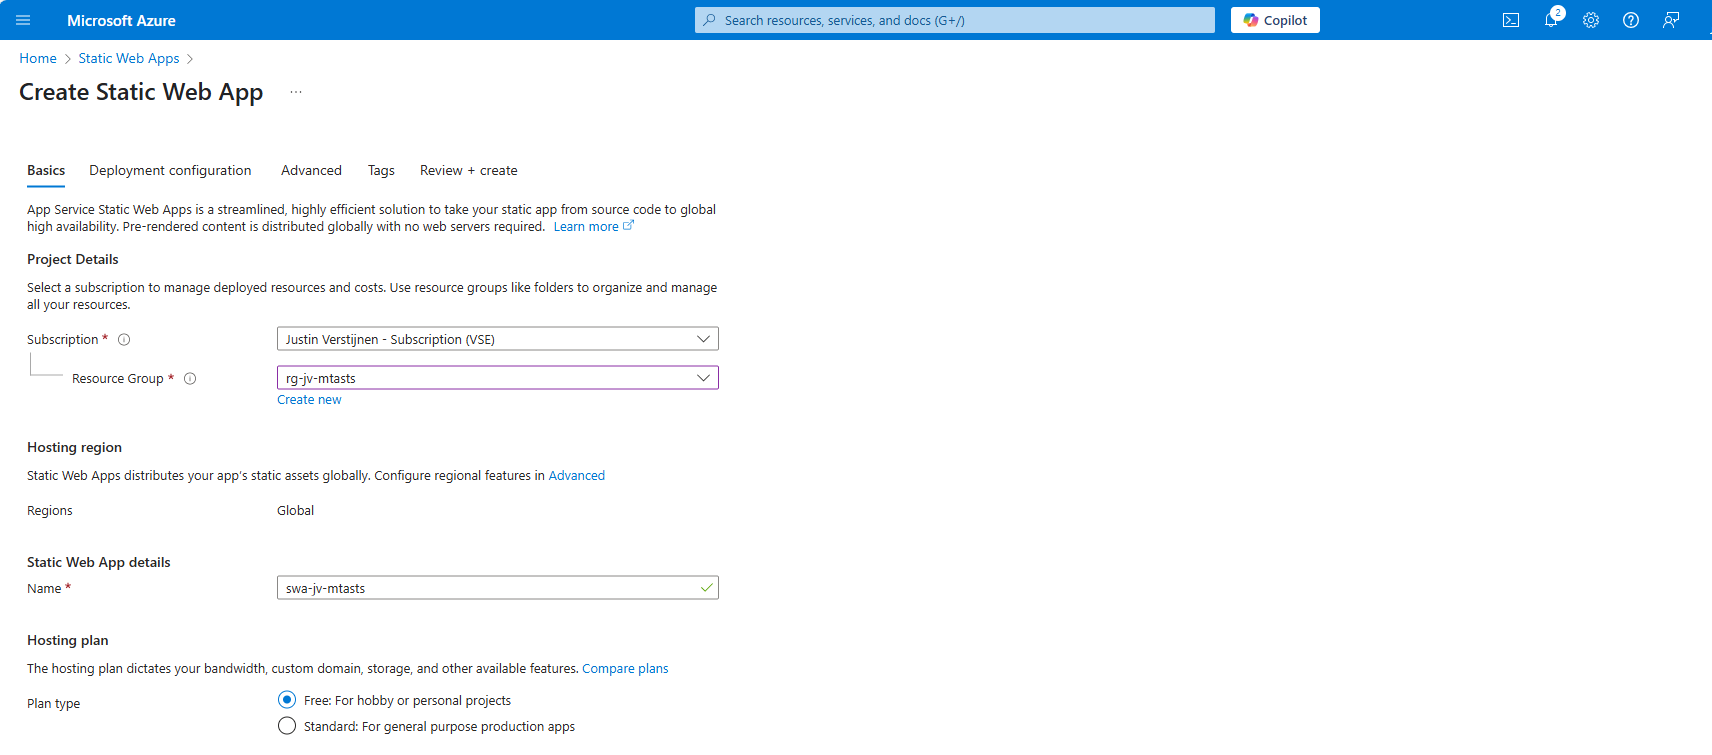
Place it in the desired resource group, give it a name (cannot be changed) and select a plan. You can use a free plan for this. The only limit is the custom domains you can link, which is 2 custom domain names per app.
Then scroll down on the page till you see the Deployment type:
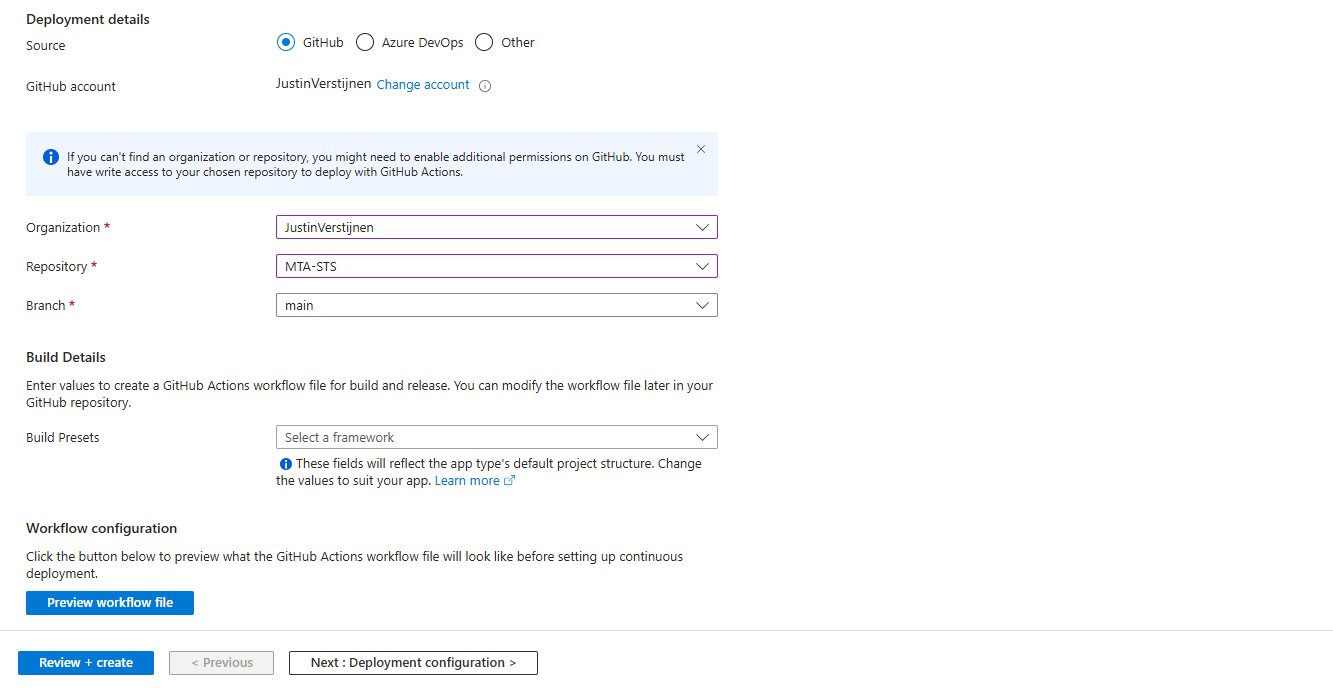
Link your Github account to Azure so Azure can get the information from your repository and put it in the Static Web App. Select your Repository after linking and complete the wizard. There is no need to change anything else in this wizard to make it work.
After completing the wizard, the app will be created and then your repository files will be placed onto the Static Web App Host. This process completes in about 3 minutes.
After around 3 minutes, your website is uploaded into Azure and it will show:

If you now click on “visit your site”, it will redirect you to the file. However, we didn’t link our custom domain yet, so it will not show our policy yet. The redirection will work fine.
Linking our custom domain to Azure Static Web App
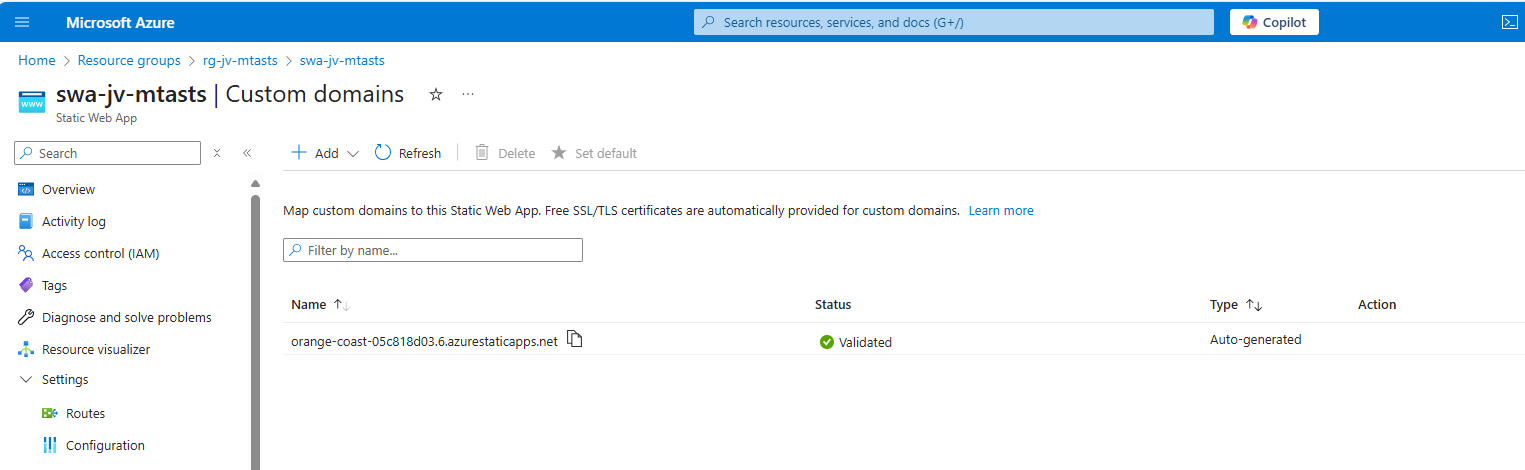
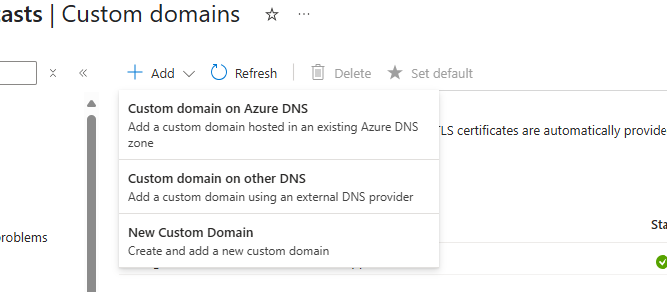
Now we can link our custom domain to our created Azure Static Web App in the Azure portal. Go to “Custom domains” in the settings of the Static Web App and click on “+ Add”.
Select the option “Custom domain on other DNS”, the middle option.
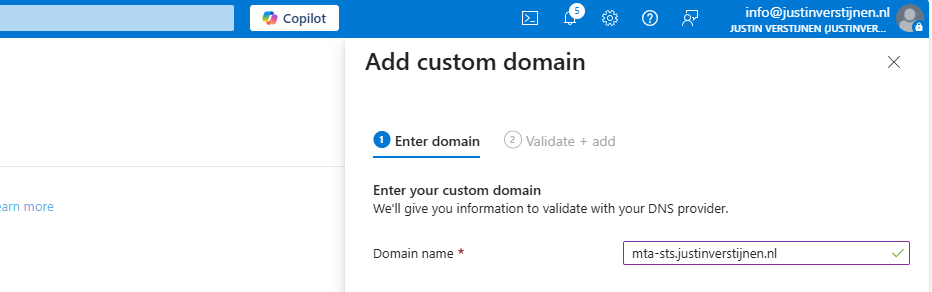
Now fill in mta-sts.yourdomain.com, for my environment this will be:
Click on “Next”. Now we have to validate that we are the owner of the domain. I recommend the default CNAME option, as this is a validation and alias/redirection in one record.
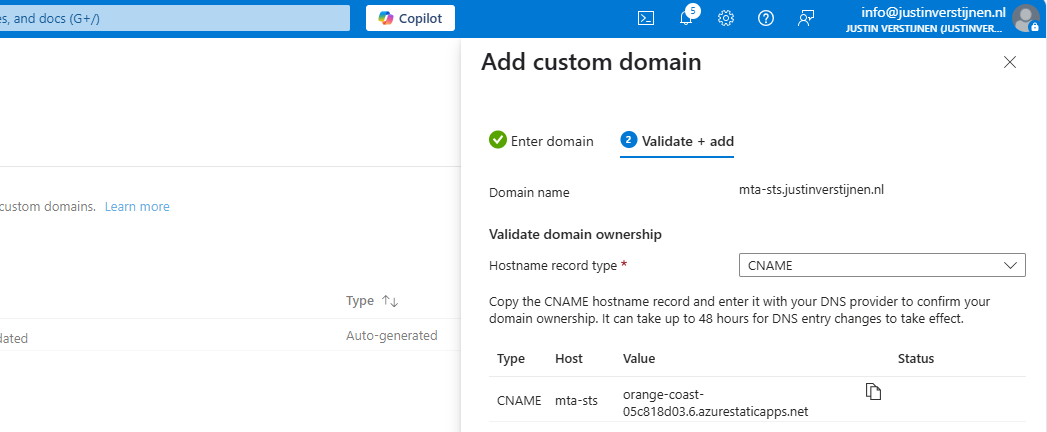
Copy the Value of the CNAME record which is the project-name of the Static Web App and we now have to create a DNS record for our domain.
Go to your DNS hosting service and login. Then go to your DNS records overview.
Create a new CNAME record with the name “mta-sts” and paste the value you copied from the Azure Portal. Add a dot “.” to the value of the record because it is a external domain. In my case, the value is:
orange-coast-05c818d03.6.azurestaticapps.net.Save the DNS record and go back to Azure, and click “Add” to validate the record. This process will be done automatically and ready after 5 minutes most of the time.

Now we can test our site in the Azure Portal by again using the “Visit your site” button:
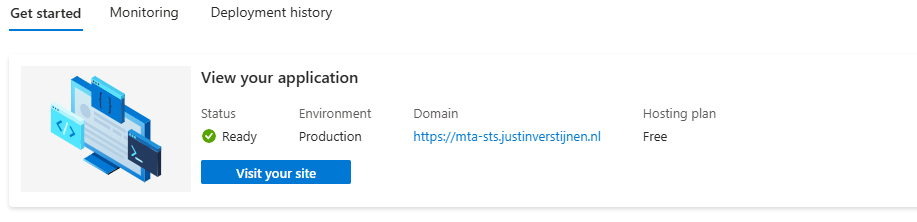
Now the website will show your MTA-STS policy:
We are now succesfully hosting our MTA-STS policy on a Azure Static Web App instance. We also using a mandatory index.html to redirect to the correct sub-location. If your repository doesn’t have a index.html file in the root, the upload to Azure action will fail.
You can skip option 2 and proceed to “Testing the MTA-STS configuration”
Hosting option 3: Azure Functions
My third and hardest option is to host the TXT file with an Azure Function. This is a bit more complicated than the other options, but I will guide you through.
Creating the Azure Function
In this guide I will use an Azure Function to publish the MTA-STS policy to the internet.
Let’s go to the Azure Portal and create a new Function App:
Here you can select:
- Operating system: Windows
- Runtime stack: .NET
- Version: 10 LTS (Or newer, this enables editing in the portal for easy access)
- Region: Of your choice
Create the app by finishing the wizard.
After creating the app, we must do a change to the host.json file in the Azure Function. Paste the code below on the first part of the json file:
{
  "version": "2.0",
  "extensions": {
  "http": {
    "routePrefix": ""
  }
},
It should look like this:
Save the file, and now it is prepared to host a MTA-STS policy for us.
Publishing the MTA-STS policy
Create a new Function in the function app:
Select the HTTP trigger, give it a name and select the “Anonymous” authorization level.
Now we can paste some code into the function. We have to wrap this into a .NET website:
#r "Newtonsoft.Json"

using System.Net;
using Microsoft.AspNetCore.Mvc;
using Microsoft.Extensions.Primitives;
using Newtonsoft.Json;

public static async Task<IActionResult> Run(HttpRequest req, ILogger log)
{
    log.LogInformation("C# HTTP trigger function processed a request.");

    string responseMessage = "version: STSv1\nmode: enforce\nmx: justinverstijnen-nl.r-v1.mx.microsoft.\nmax_age: 1209600";

    return new OkObjectResult(responseMessage);
}
On line 12 there is the policy where you need to paste your settings in. Paste the final code into the Azure Portal and save/publish the function.
Now go to the “Integration” tab:
Click in the “Trigger” section on “HTTP(req)”.
Here we can define how the HTTP trigger is and the file/path of the MTA-STS policy:
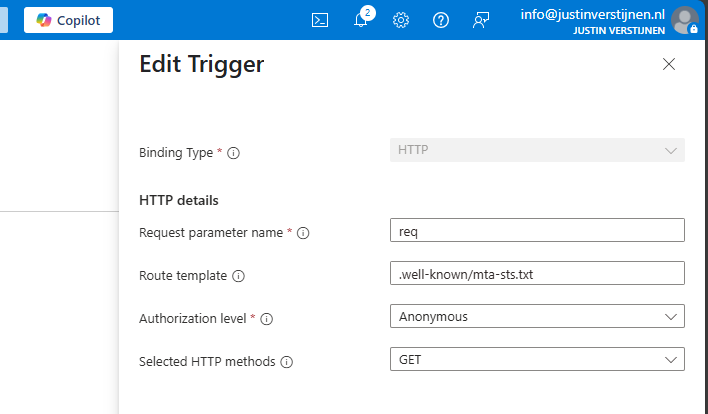
Change the values as below:
- req (Dont change this)
- Route template: .well-known/mta-sts.txt
- Authorization level: Anonymous
- Selected HTTP methods: GET
We are have bound the URL WEBSITE/.well-known/mta-sts.txt to our function and that kicks off our code which contains the policy. Very creative solution for this use case.
We can now test if this works by forming the URL with the function app and the added route:
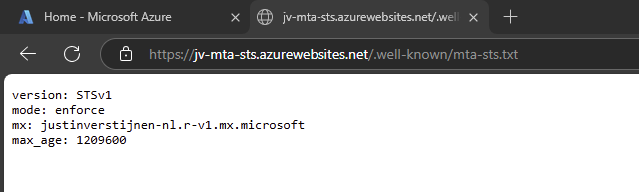
It works not by going to the Function App URL but we now need to add our custom domain.
Redirect your custom domain to Function App
Now we need to link our domain to the function app. Go to “Custom domains” and add your custom domain:
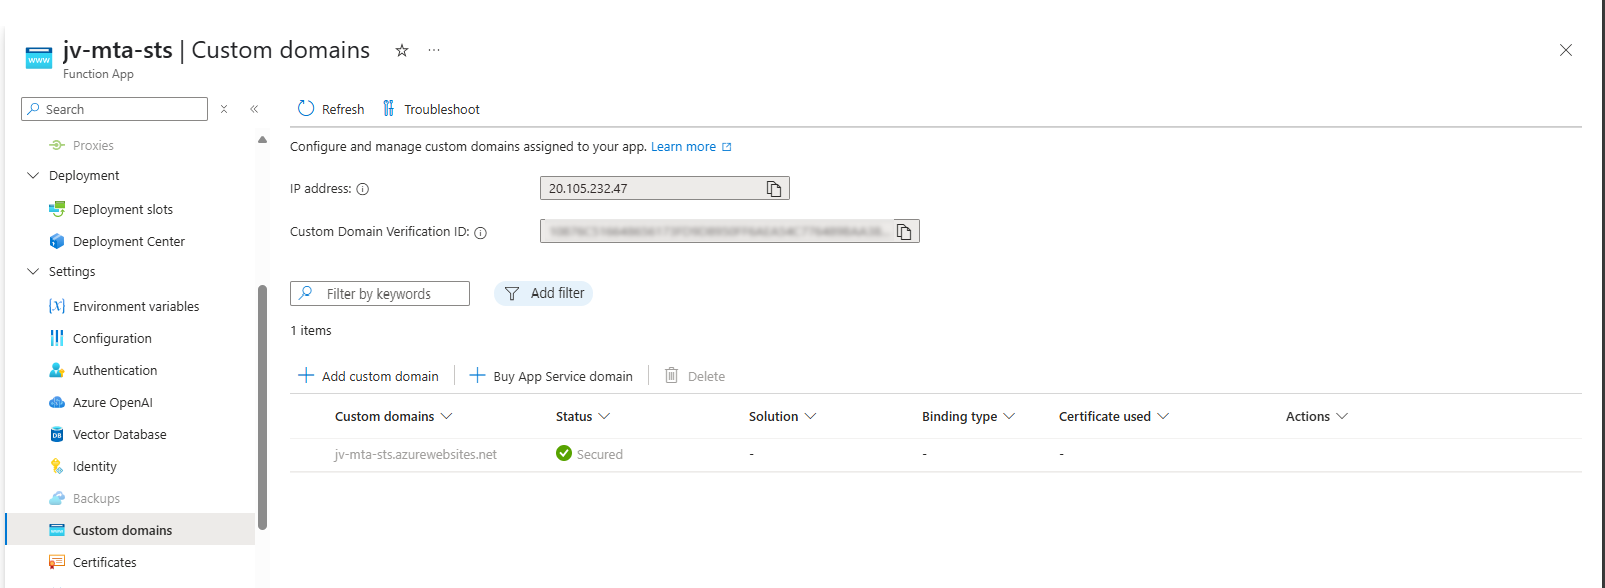
Choose “All other domain services” at the Domain provider part.
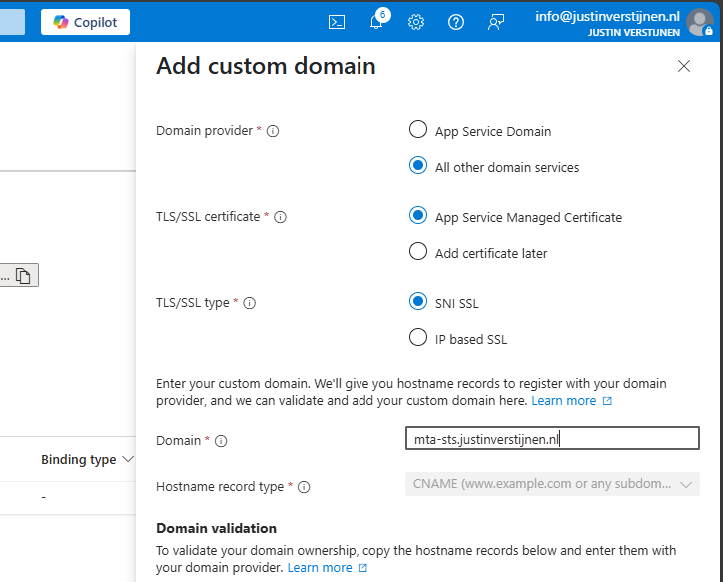
Fill in your custom domain, this must start with mta-sts because of the hard URL requirement for MTA-STS to work.
We now get 2 validation records, these must be created at your DNS hosting provider.
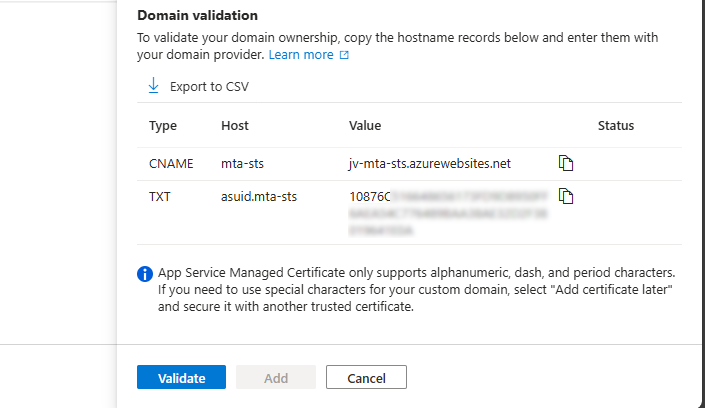
Here I created them:


Now hit “Validate” and let Azure check the records. This can take up to 1 hour before Azure knows your records due to DNS propagation processes. In my case, this worked after 3 minutes.
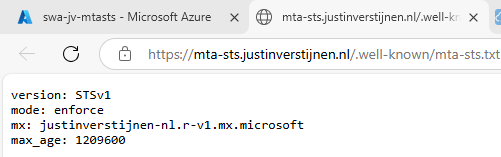
Now we can check if the full URL works like expected: https://mta-sts.justinverstijnen.nl/.well-known/mta-sts.txt
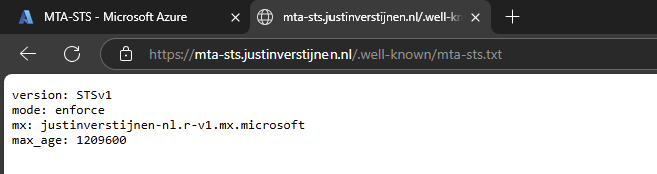
As you can see, our policy is succesfully published.
Testing the MTA-STS configuration
From here, you can test with all sorts of hosting the policy, like the 2 options I described and your custom hosting.
You can test your current MTA-STS configuration with my DNS MEGAtool:
This tests our configuration of MTA-STS and tells us exactly what is wrong in case of an error:

The tool checks MTA-STS for both the TXT record value and the website. In my case, everything is green so good to go and this means you did the configuration correctly.
After configuring everything, it can take up to 60 minutes before everything shows green, please have a little patience.
Knowledge check
This quiz needs JavaScript to show the questions and feedback.
Summary
MTA-STS is a great way to enhance our email security and protect them from being stolen or read in transit. It also offers a great way of protection when DNSSEC/SMTP DANE is no option in your domain.
Thank you for reading this guide and I hope it was helpful.
End of the page 🎉
You have reached the end of the page. You can navigate through other blog posts as well, share this post on X, LinkedIn and Reddit or return to the blog posts collection page. Thank you for visiting this post.
If you think something is wrong with this post or you want to know more, you can send me a message to one of my social profiles at: https://justinverstijnen.nl/about/
If you find this page and blog very useful and you want to leave a donation, you can use the button below to buy me a beer. Hosting and maintaining a website takes a lot of time and money. Thank you in advance and cheers :)

The terms and conditions apply to this post.