When deploying Google Chrome with Microsoft Intune, users still have to manually login with their credentials into Microsoft Online websites. Microsoft Edge has built-in Single Sign On (SSO) for users who already logged in with their Microsoft account to their computer.
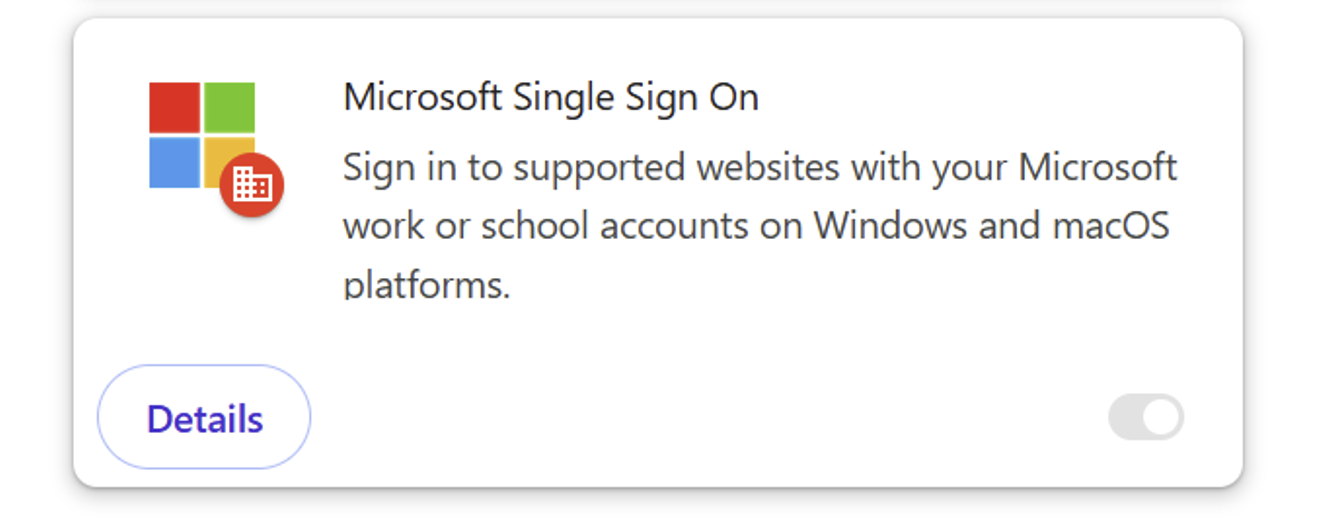
However, there is a Chrome extension published by Microsoft themselves which allows users to also have this Single Sign On experience into Google Chrome.
On this page I will show how this extension works, what the advantages are and how we can deploy this with Microsoft Intune. I will share both a Configuration Policy and a PowerShell script option where you may choose which one to use.
Table of Contents
- How the extension works
- The fast pass
- How to deploy the extension with Intune Configuration Policies
- How to deploy the extension with Intune Platform Scripts
- The results on the client machine
- Summary
📖 Estimated read time: 6 minutes
🔄 Page last updated on: December 13, 2025 🆔 Post ID: 5787How the extension works
The Microsoft SSO extension for Google Chrome uses the same token/session you already have when you have your device Entra ID joined. It will send that to every Microsoft Online webpage to show you are already authenticated and have a valid token. This makes the user experience a lot better as they don’t have to authenticate first before starting to use the web applications.
The extension can be manually downloaded from here: https://chromewebstore.google.com/detail/microsoft-single-sign-on/ppnbnpeolgkicgegkbkbjmhlideopiji?pli=1
The fast pass
I have both the Configuration Profile and PowerShell script for you to download and implement easily on my Github page. You can download them there:
How to deploy the extension with Intune Configuration Policies
To deploy the extension with Intune, login to the Microsoft Intune Admin Center: https://intune.microsoft.com
From there, navigate to Devices -> Windows -> Configuration and create a new policy.

Select Windows 10 and later for “Platform” and use the “Settings catalog” profile type. Then click on “Create”.
Now define a name and description for this new policy, defining what this actually does.
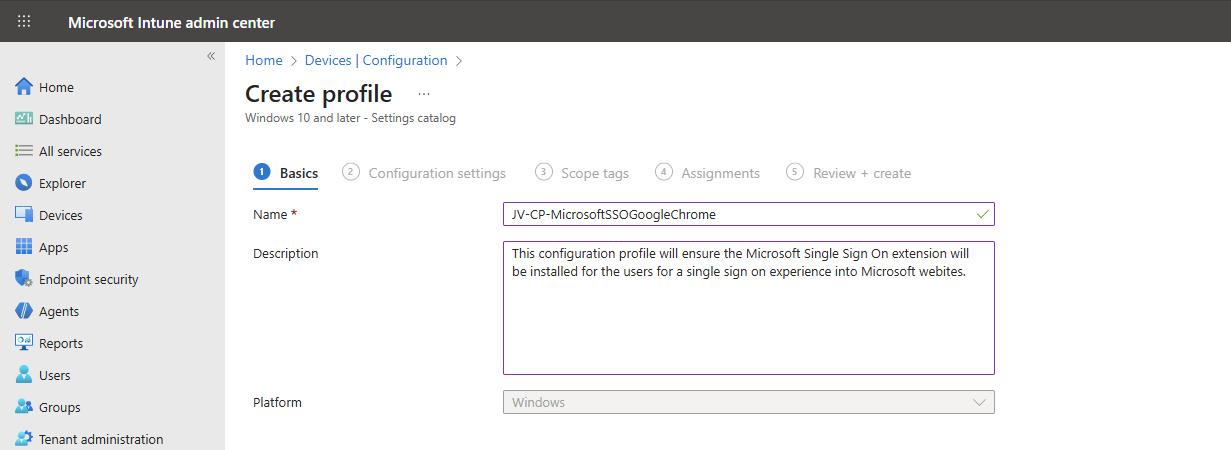
Then click on “Next”.
Now click on “+ Add settings”, search for Google. Click it open to go down to “Google Chrome” and then “Extensions”.
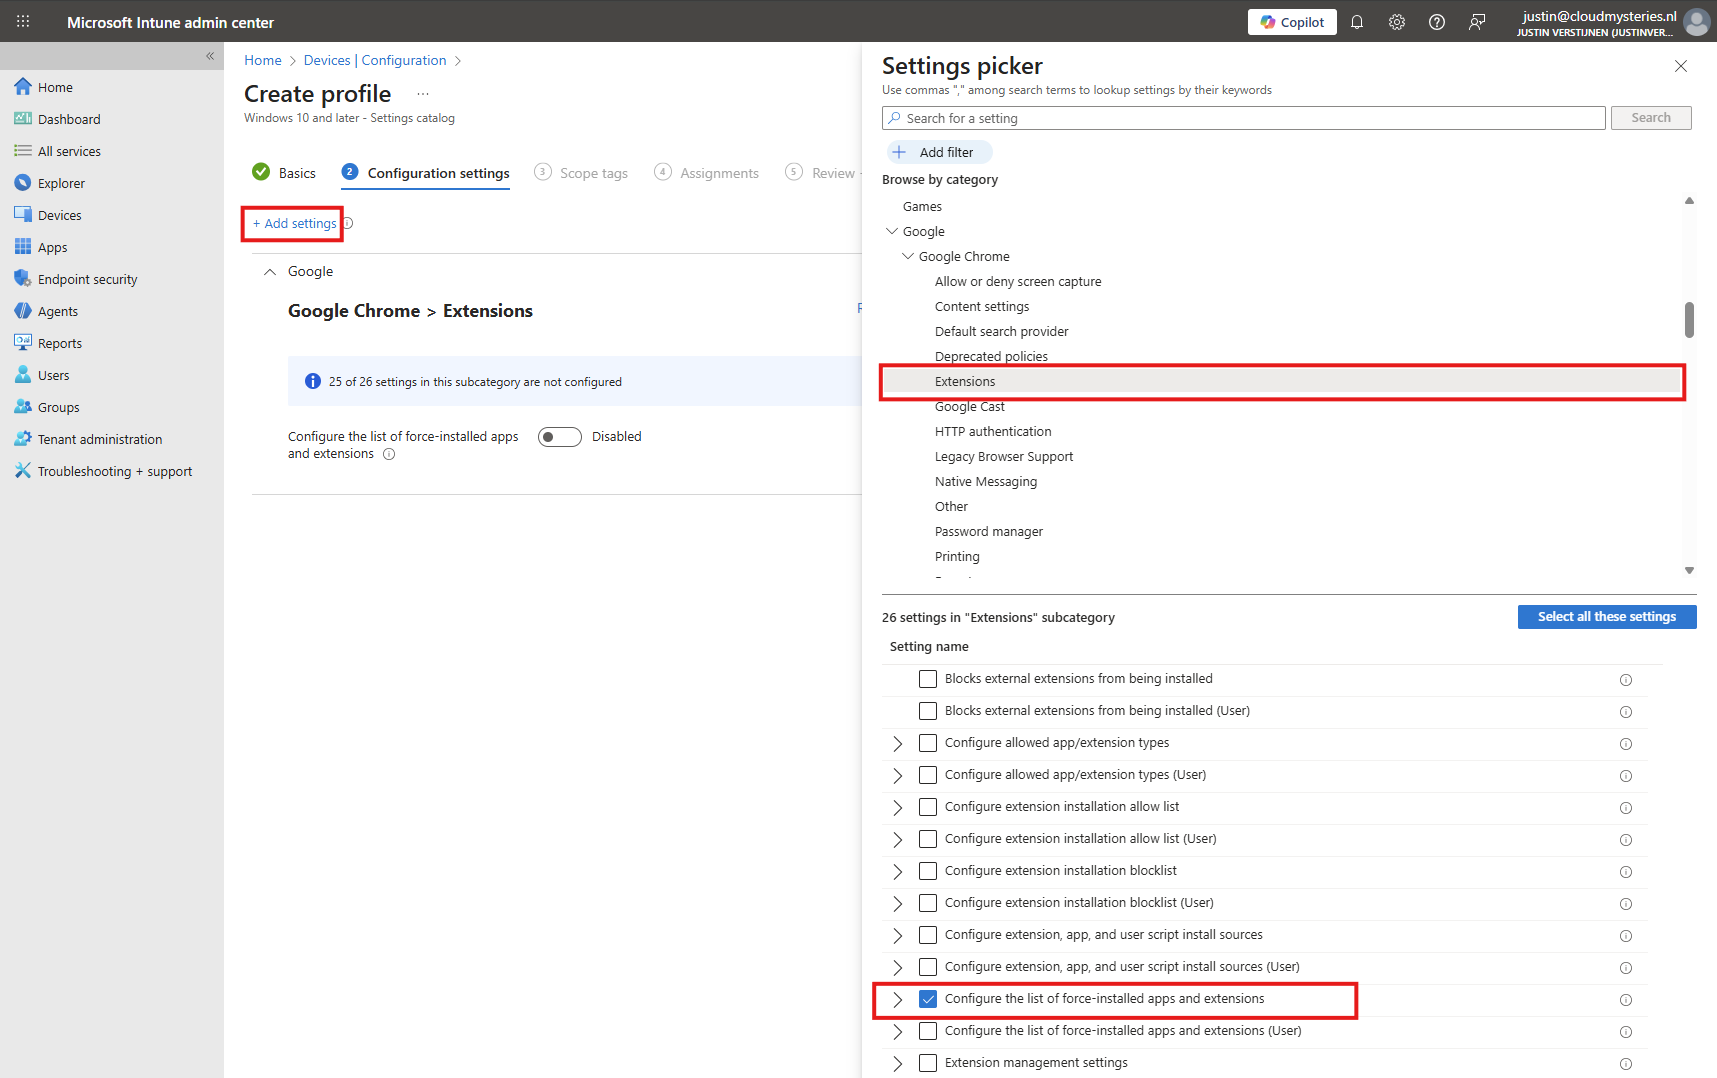
Select the option “Configure the list of force-installed apps and extensions”.
The same option exists with (User) attached, using that option means a user is able to delete the extension.
Now we can configure that option by setting the switch to “Enabled”.
We have to paste the Extension IDs here. You can find this in the Chrome Web Store in the URL (the part after the last /):
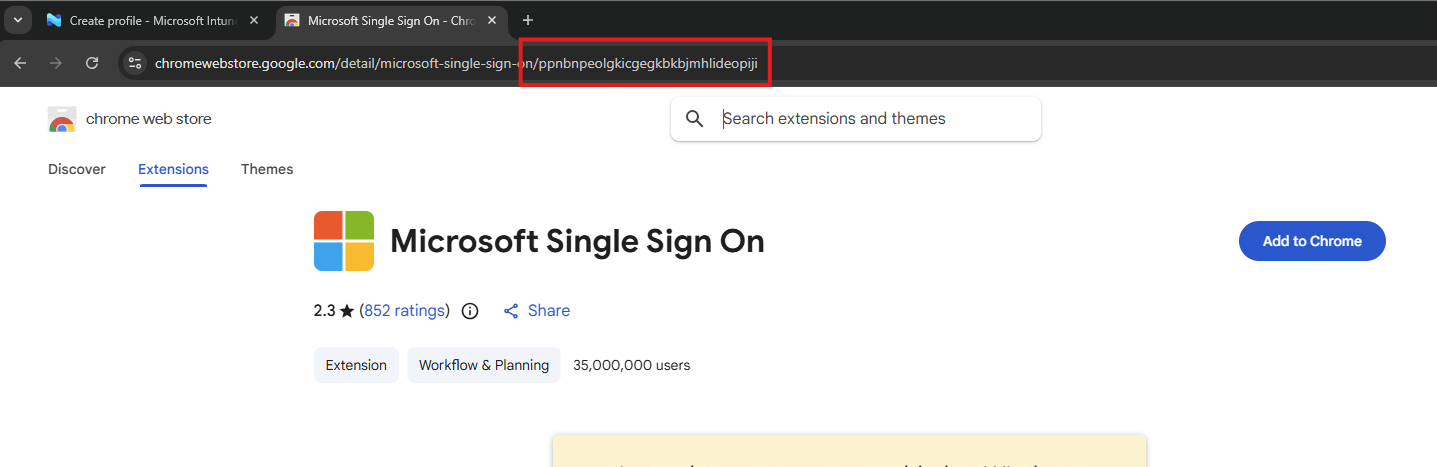
So we paste this value in the field, but you can add any extension, like ad blockers, password managers or others.
ppnbnpeolgkicgegkbkbjmhlideopiji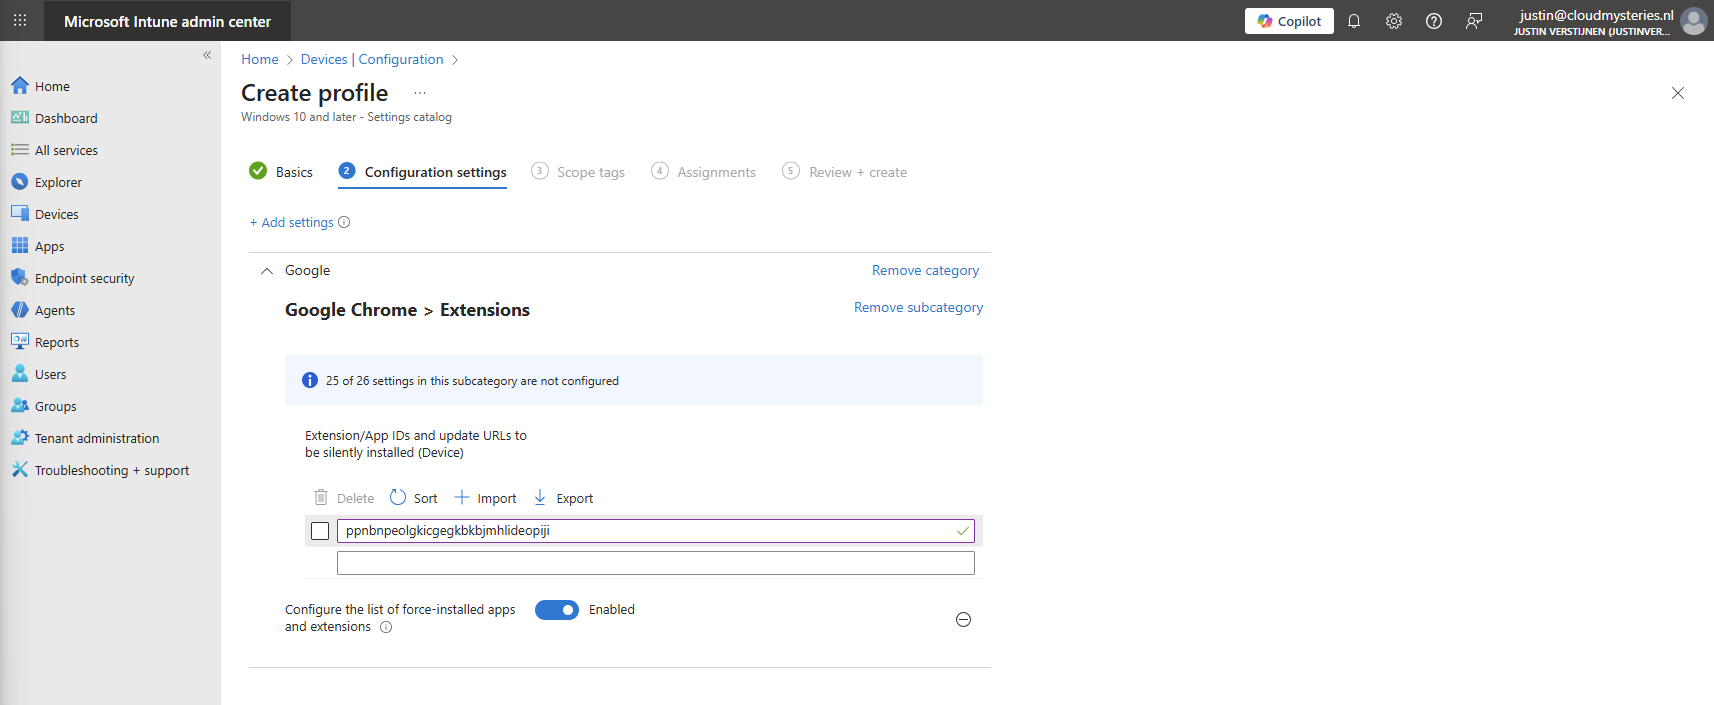
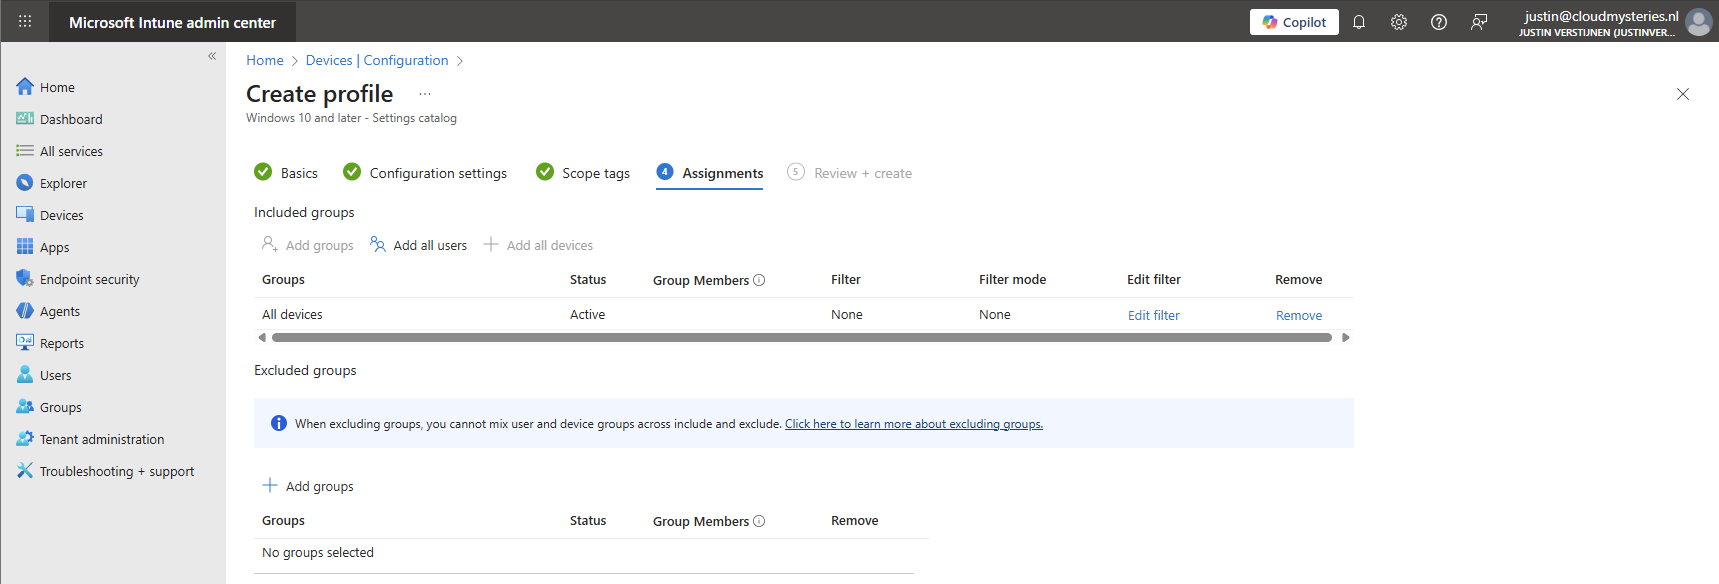
Click on “Next” twice. We can now assign this new policy to our devices. I picked the All Devices option here as I want this extension to be installed on all Windows devices.
Create the policy by finishing the wizard. Let’s check the results here.
How to deploy the extension with Intune Platform Scripts
We can also deploy the extension through a PowerShell script. This is recommended if using other MDM solutions than Microsoft Intune. However, we can also deploy it in Intune as script by going to the Microsoft Intune Admin Center: https://intune.microsoft.com
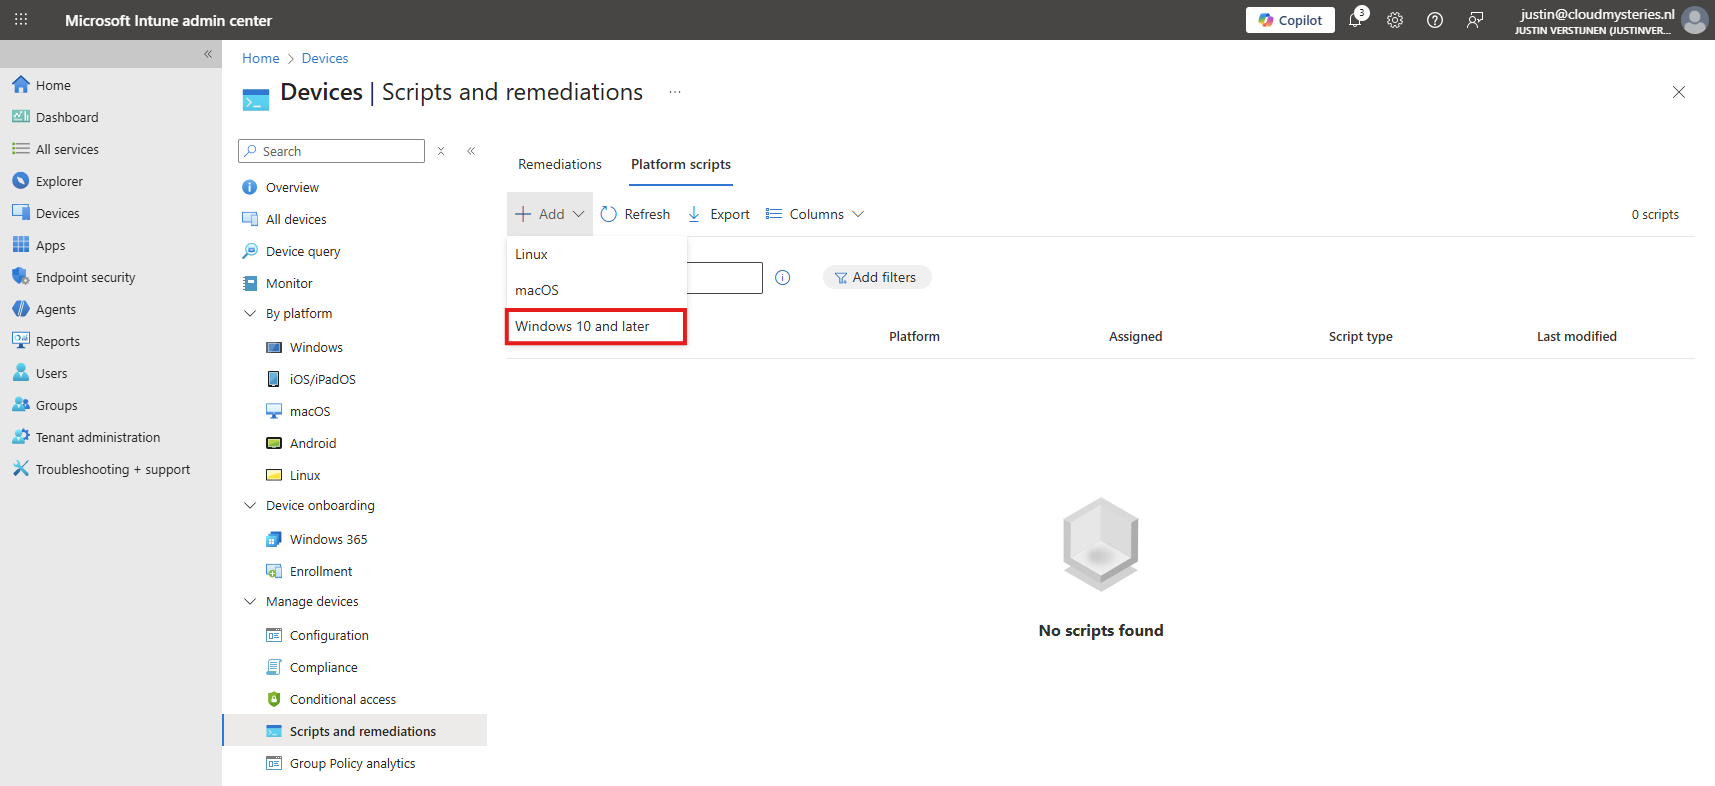
From there, go to Devices -> Windows ->Scripts and remediations and then the tab “Platform scripts”. These are scripts that are automatically run once.
Create a new script for Windows 10 and later here.
Give it a name and description of the script:

Click “Next” to open the script settings. To download my script, go to https://github.com/JustinVerstijnen/JV-CP-MicrosoftSSOGoogleChrome and download the .ps1 file.
Here import the script you just downloaded from my Github page.

Then set the script options as this:
- Run this script using the logged on credentials: No
- Enforce script signature check: No
- Run script in 64 bit PowerShell Host: Yes
The script targets the whole machine by creating a registry key in the HKEY_LOCAL_MACHINE hive.
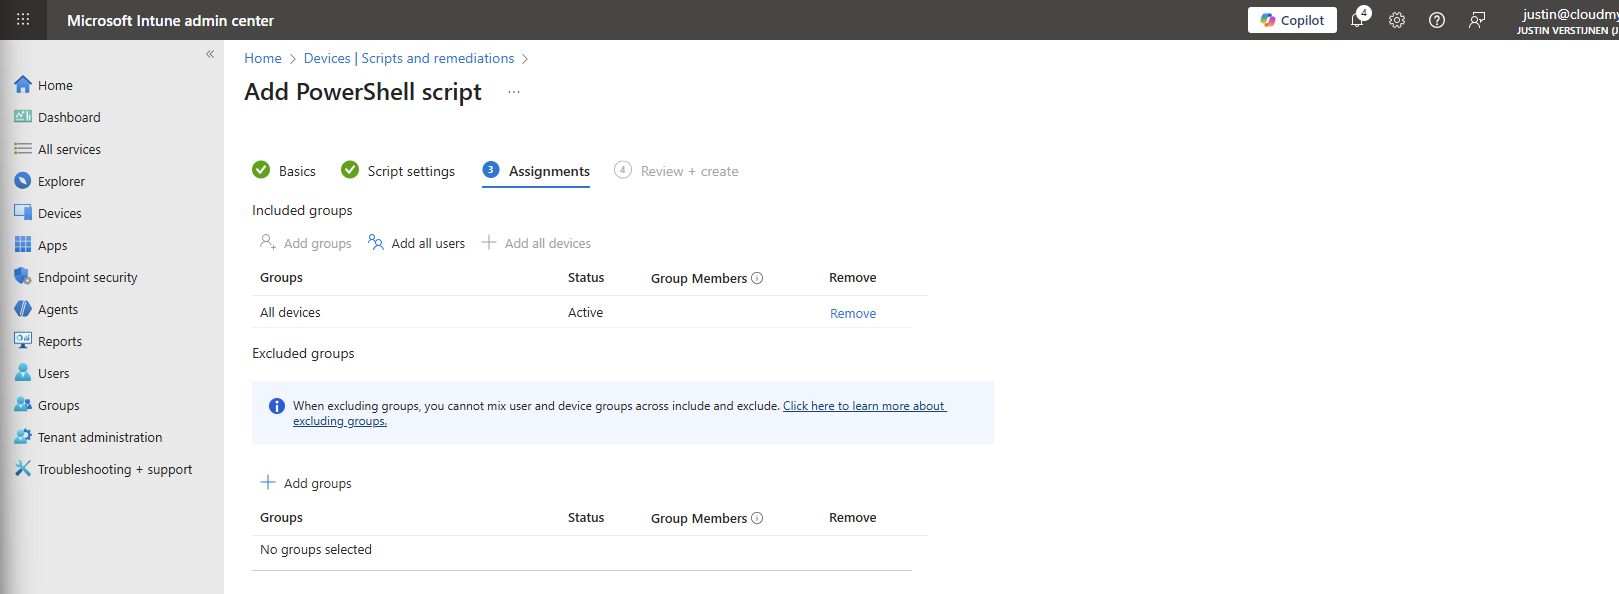
Then click “Next” and assign it to your devices. In my case, I selected “All devices”.
Click “Next” and then “Create” to deploy the script that will install the extension.
The results on the client machine
After assigning the configuration profile or PowerShell script to the machine, this will automatically be installed silently. After the processing is done, the extension will be available on the client machine:

This doesn’t have to do much. We don’t need to configure it either, its only a pass of the token to certain Microsoft websites.
When going to the extensions, you see that it also cannot be deleted by the user:

Summary
The Google Chrome Microsoft SSO extension is a great way to enhance the user experience for end users. They now can login to Microsoft websites using their already received token and don’t need to get a new one by having to login again and doing MFA. We want to keep our systems secure, but too many authentication requests is annoying for the user.
Also the guide can be used to deploy other extensions for Google Chrome and Edge.
Thank you for reading this guide and I hope it was helpful.
Sources
These sources helped me by writing and research for this post;
End of the page 🎉
You have reached the end of the page. You can select a category, share this post on X, LinkedIn and Reddit or return to the blog posts collection page. Thank you for visiting this post.
- Azure Master Class (12)
- Azure Virtual Desktop (20)
- Flying (16)
- Intune (6)
- Microsoft 365 (13)
- Microsoft Azure (30)
- Microsoft Defender XDR (4)
- Microsoft Entra (10)
- Networking (5)
- Powershell (20)
- Uncategorized (1)
- Windows 365 (3)
- Windows Server (14)
If you think something is wrong with this post or you want to know more, you can send me a message to one of my social profiles at: https://justinverstijnen.nl/about/
If you find this page and blog very useful and you want to leave a donation, you can use the button below to buy me a beer. Thank you in advance and cheers 🙂


The terms and conditions apply to this post.
Page visitors: No page-counter data available yet.